Embed Size (px)
Citation preview


The Warriors Guide To Buying And Building Your Own Home Gym
By Tyler Bramlett INTRODUCTION I created this guide for those of you who have decided to break the mold of training at your local gym and want to create an awesome environment you can train yourself, your friends or even eventually your own private clients from just like I do. Here’s a little background on myself just so you know who I am. My name is Tyler and I am a Personal Coach. I help people from many different walks of life improve themselves. This can be anything from basic nutrition and exercise to competitive athletics or building a better business. I love helping people improve and am constantly focused on improving my life in all areas (Mental, Physical And Spiritual). I work mostly out of my home gym in Santa Cruz CA and I love every minute of it. I am blessed to know for certain that I am put here on this earth to help people just like you achieve their goals. I want to make you look better, feel better, perform better and have the life of your dreams! This is why I named the site garage warrior. I want to build a community of strong individuals who have the same goals I do and have the desire to live an awesome life! I sincerely hope that’s you!! All right, let’s get you back to the action steps you need to take in order for you to build your own badass home gym! The warriors guide to buying and building your own home gym is broken down into 2 different sections. Section 1 will highlight the 9 essential pieces of equipment you need to get so you can have an awesome home gym. Section 2 highlights several other pieces of equipment that you may want to get after you acquire the 9 essentials. The process of building your own home gym will take a little time. That’s why I want you to focus on one piece of equipment at a time. One of my favorite quotes is, “by the inch it’s a cinch and by the yard it is hard”. So don’t focus on making huge progress all at once (unless you really want a badass home gym and you have the $) but rather on getting one thing at a time. This is good advice for your training and life as well. I know when I want to accomplish to many things at once I end up completing none of them, but if I focus my efforts I end up doing everything I set out do and more. Keep that in your mind as you build your home gym. Before having the awesome home gym that I have now (which took me 10 years to build and acquire equipment) I trained on a covered porch 2003-‐2006, then in a 50sqft shed where I had to pull all of my equipment out before using it 2006-‐2009, then in a back yard with no cover (that was a fun winter) and finally in a garage 2009 – Present. My point is… Take your time and focus on acquiring one thing at a time and before you know it you will have an awesome home gym!
SECTION 1 THE 9 ESSENTIAL PIECES OF EQUIPMENT YOU NEED TO
GET AWESOME RESULTS
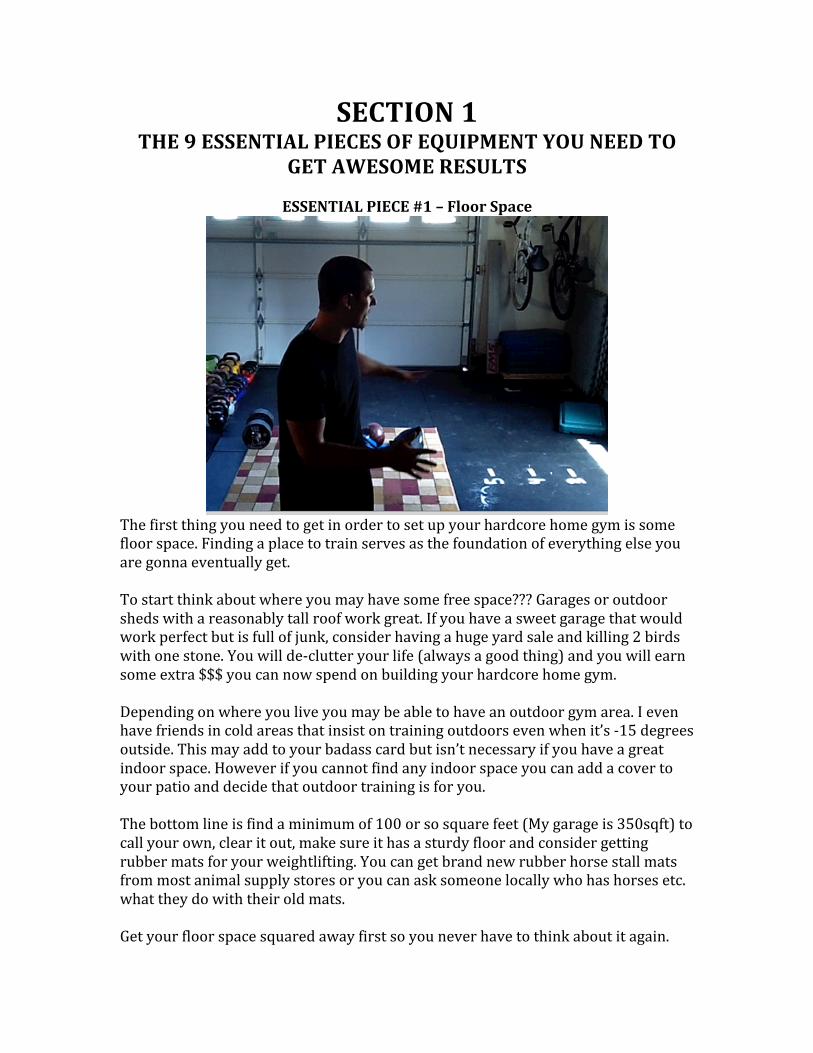
ESSENTIAL PIECE #1 – Floor Space
The first thing you need to get in order to set up your hardcore home gym is some floor space. Finding a place to train serves as the foundation of everything else you are gonna eventually get. To start think about where you may have some free space??? Garages or outdoor sheds with a reasonably tall roof work great. If you have a sweet garage that would work perfect but is full of junk, consider having a huge yard sale and killing 2 birds with one stone. You will de-‐clutter your life (always a good thing) and you will earn some extra $$$ you can now spend on building your hardcore home gym. Depending on where you live you may be able to have an outdoor gym area. I even have friends in cold areas that insist on training outdoors even when it’s -‐15 degrees outside. This may add to your badass card but isn’t necessary if you have a great indoor space. However if you cannot find any indoor space you can add a cover to your patio and decide that outdoor training is for you. The bottom line is find a minimum of 100 or so square feet (My garage is 350sqft) to call your own, clear it out, make sure it has a sturdy floor and consider getting rubber mats for your weightlifting. You can get brand new rubber horse stall mats from most animal supply stores or you can ask someone locally who has horses etc. what they do with their old mats. Get your floor space squared away first so you never have to think about it again.

ESSENTIAL PIECE #2 – Barbell
The second thing you are gonna need is a barbell. A barbell is essential for anyone who want’s to get strong period! You can do some awesome things with your bodyweight but lifting heavy shit off the ground is still a must for anyone who want’s to get really strong. Here’s what you need to consider when looking for a barbell. Generally any bar will do, however I always recommend getting the sturdiest bar you can afford. I have literally seen barbells break at the collars and have even herd a story of a up and coming Russian weightlifter coming up from powerful front squat only to have the bar snap in half in the middle and slice through his neck. He bled out and died right there on the weightlifting floor. I don’t know about you but I personally want to avoid injury at all costs!! The bar that I currently use was $700 and has been tested to over 1500lbs. This makes me feel safe and I love my bar. Now, you don’t need to spend $700 to get a great bar (I just love nice shit) for less than $300 you can have a high quality bar that you can be certain won’t break on you and you will most likely never have to buy a new bar as long as you live. As for plates, try to start with 3-‐400lbs of either iron plates, which are cheaper but still work great or rubber bumper plates which are more expensive, but super fun and crucial for Olympic Lifting I highly recommend having a set of bumper plates. I personally have about 700lbs of steel plates and about 250lb of bumper plates. This is plenty for me right now and I can powerlift, Olympic lift or do heavy partials with most of my available weights. You will also need a pair of good collars for your bar. The last thing anyone wants is his or her weights slipping off ½ way though a lift. A good set of collars will meet the following criteria. They slide on and off fast, they lock tight enough that you can drop the bar from overhead and they don’t go loose and they are the right price for you. There you have it the basics on getting your barbell.

ESSENTIAL PIECE #3 – Pullup Bar Or Rings
The third most important piece of equipment you need for your home gym is a pullup bar and/or a set of gymnastic rings. The practice of learning to do proper “bar work” or “ring training” has led to piles of awesome physiques. After all even a super “strong” overweight power lifter is going to find it impossible to do some of the basic skills on the bar or rings. Do yourself a favor right now and go type in “Olympic gymnastic rings” in youtube and see for yourself how buff, lean and epically strong these guys are. If you can get ½ as good as they are at the rings you will be well on your way to an Olympic physique! So, first and foremost a set of gymnastic rings is critical if you want a ridiculously strong and lean body. Gymnastic rings are bar none the most challenging piece of equipment you will ever use and getting a pair is mandatory!! Rings can serve as your pullup bar for the time being and can be mounted by throwing the straps over any ceiling joist in your home gym. For the pullup bar if you have any carpentry experience you can build your own. If you are outside you can dig 2 holes about 3-‐4ft apart with a posthole digger and put 2-‐8 or 10’ 4x4’s in them and fill with concrete. From there you can have someone at the hardware store cut you a pipe and put thread on either end that you can then fix to a floor flange and screw it to the top of the 4x4’s. If your inside you can do the same thing only having the 4x4’s attached to the rafters and ceiling joists. If you don’t feel comfortable building you own pullup bar, the company I get most of my equipment from has an awesome set of pullup bar brackets that I have in my home gym. They install easy, work great and look pretty slick as well. Find a way for you to install a pair of rings or a pullup bar in your workout area so you can get an awesome upper body workout!

ESSENTIAL PIECE #4 – Jump Rope
This is the most inexpensive piece of equipment you will have in your home gym. I always end up giving jump ropes away to my clients so I end up buying them by the dozen. Here is what you want from a jump rope. Your jump rope should be first and foremost fast! It should feel good when you are using it. Everyone is different when it comes to what they like in a jump rope so you should find a sporting goods store that will let you try it out before buying. One of the best places I have found to purchase high quality speed ropes is ROSS or Marshalls or another store like that. They tend to have awesome feeling fast ropes for just $3.99. The best rope I have ever found is called the buddy lee rope it moves extremely fast, feels good and looks great as well. Don’t expect to pick up a buddy lee rope for cheap but if you want to take your rope skipping to the next level it may be a good investment.

ESSENTIAL PIECE #5 – Dumbbell
A dumbbell like a barbell is an awesomely useful tool for getting super strong. Now, I’m not talking about going out and purchasing a huge rack of dumbbells from 5-‐100lbs that you see at your local gym, as this would cost you $1,000’s. Instead I have always been a fan of plate loadable dumbbells just like your barbell. This way you can use the weights you already have with your new dumbbell. Most sporting goods stores sell a pair of plate loadable dumbbells for around $50-‐$100. From there depending on how many plates you already have you may need to invest in a few more 5lb and 10lb weights. I will share with you a great way to build an awesome dumbbell in a minute. Remember that you don’t really need 2 dumbbell handles, in fact less than 10% of the dumbbell lifting that I do requires you have 2 dumbbells. So really focus on getting just 1 dumbbell handle that you can use with your existing weights. You should have enough weights to make your dumbbell weigh up to 100lbs or more (mine goes up to 85k or 187lbs) and you wont want to put any weights over 25lbs on your dumbbell handle as they become to wide and cumbersome. My favorite dumbbells are thick handled dumbbells. In fact I only have thick handled dumbbells in my garage gym because I want to avoid the choice of being able to make it easier with thin handled dumbbells. Here’s an easy way to make yourself a thick handled dumbbell for super cheap. Get 18” of 1 ¾ steel pipe and a roll of duct tape from your local hardware store. It is helpful to bring your barbell collar and a small plate with you to make sure it is the right size. Mark out the center of the dumbbell and measure 2 ½-‐3” from either side of your center line (make sue that is enough room for your hand) and draw a line around the pipe at that point. From there tear the duct tape in ½ long ways and wrap around the pipe on the outside of the line that you just created. Continue wrapping the duct tape around the pipe tightly until there is at least 1/4” sticking out from the pipe. That’s it now you have your very own thick handled dumbbell for super cheap!!

ESSENTIAL PIECE #6 – Kettlebell
Kettlebells are an awesome piece of equipment especially because they are ideally designed for you to perform higher rep explosive movements. I have been using kettlebells since 2003 and I highly encourage everyone to get their hands on at least one kettlebell. Here are my suggestions for what kettlebell you should purchase. Take out your dumbbell and test your 1 rep max in the strict (no leg help or side bending) one arm military press. Get the kettlebell that corresponds to your 1 rep max of your 1 arm press. This may seem a little heavy at first however you will want a kettlebell that you can grow into. If your 1 rep max is… Then you should consider getting this… 5-‐15lbs 15lb or 8kilo Kettlebell 15-‐30lbs 25lb or 12kilo Kettlebell 30-‐45lbs 35lb or 16kilo Kettlebell 45-‐60lbs 50lb or 24kilo Kettlebell 60-‐80lbs 70lb or 32kilo Kettlebell 80-‐100lbs 85lb or 40kilo Kettlebell 100+lbs 105lb or 48kilo Kettlebell From there I like to always have a light medium and heavy kettlebell for my training. For me this means a 35lb or 16kilo kettlebell for things like advanced and complex kettlebell juggling a 70lb or 32kilo kettlebell for strength endurance and I have a loadable tool for kettlebell swings that I like to load to 135lbs or 60kilos or more for my heavy kettlebell swings. Get a medium sized kettlebell first for strength and endurance and then a light one for kettlebell juggling practice then worry about going super heavy.
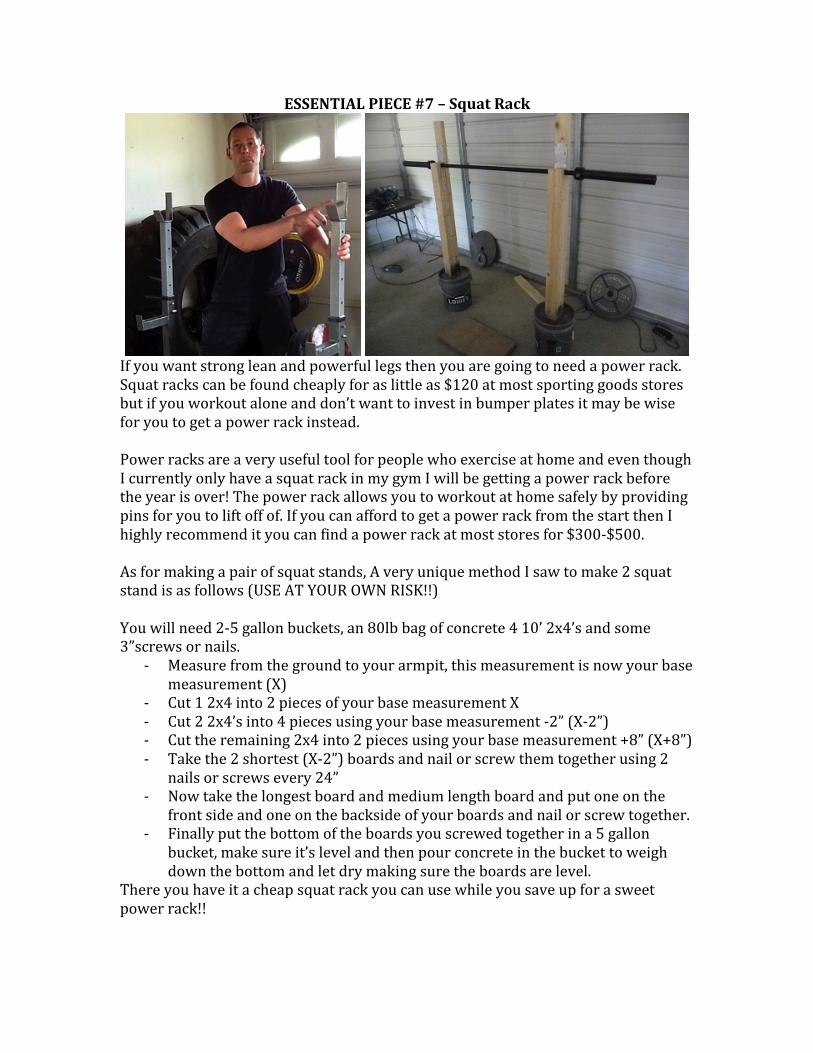
ESSENTIAL PIECE #7 – Squat Rack
If you want strong lean and powerful legs then you are going to need a power rack. Squat racks can be found cheaply for as little as $120 at most sporting goods stores but if you workout alone and don’t want to invest in bumper plates it may be wise for you to get a power rack instead. Power racks are a very useful tool for people who exercise at home and even though I currently only have a squat rack in my gym I will be getting a power rack before the year is over! The power rack allows you to workout at home safely by providing pins for you to lift off of. If you can afford to get a power rack from the start then I highly recommend it you can find a power rack at most stores for $300-‐$500. As for making a pair of squat stands, A very unique method I saw to make 2 squat stand is as follows (USE AT YOUR OWN RISK!!) You will need 2-‐5 gallon buckets, an 80lb bag of concrete 4 10’ 2x4’s and some 3”screws or nails.
-‐ Measure from the ground to your armpit, this measurement is now your base measurement (X)
-‐ Cut 1 2x4 into 2 pieces of your base measurement X -‐ Cut 2 2x4’s into 4 pieces using your base measurement -‐2” (X-‐2”) -‐ Cut the remaining 2x4 into 2 pieces using your base measurement +8” (X+8”) -‐ Take the 2 shortest (X-‐2”) boards and nail or screw them together using 2
nails or screws every 24” -‐ Now take the longest board and medium length board and put one on the
front side and one on the backside of your boards and nail or screw together. -‐ Finally put the bottom of the boards you screwed together in a 5 gallon
bucket, make sure it’s level and then pour concrete in the bucket to weigh down the bottom and let dry making sure the boards are level.
There you have it a cheap squat rack you can use while you save up for a sweet power rack!!

ESSENTIAL PIECE #8 – Medicine Ball
Medicine balls are awesome tool for warming up, building explosive power, powerful conditioning and for developing high-‐level dynamic core strength. My favorite medicine balls for most activities are called dynamax medicine balls. These balls are unique in that they are the same size no matter what weight they are. You can get a dynamzx ball for $80-‐$120 online. The other type of medicine ball I like is the old style rubber medicine ball. These are much cheaper than the dynamax balls and the best part is that most of them are designed to bounce. One of my favorite ways to warm up my private clients is through throwing and bouncing a medicine ball. For those of you who love building your own equipment here’s what you will need. A basketball, a knife, duct tape and filler like sand, gravel or even dirt. -‐Cut the basketball ½ way open so you can fill it with your chosen filler. Fill it up to the weight you desire (usually 10-‐30lbs). Securely wrap the ball in duct tape and viola you have an instant medicine ball. Have fun!

ESSENTIAL PIECE #9 – Battling Rope
I can honestly say that battling ropes are one of the most unique and innovative exercise methods I have seen come out in the last 10 years. The creator, John Brookfield is a world-‐class strength coach and a multiple world record holder in all things grip and strength endurance. When you first start using the battling ropes in your training you will be humbled to find out how challenging it is to make waves for more than 60 seconds. Your forearms will be umped to the max and your heart rate will be through the roof! That’s why I have come to love them so much. What you will need for using battling ropes is a rope that is 50’ long and is between 1 ½” thick to 2” thick (the 2” is a monster!) You can find this at most boating stores or online. Manila ropes are the gold standard but I have a poly rope that I got online that doesn’t shed as much as a manila rope and is lasting very well. The battling ropes are seriously one of the best pieces of equipment you need for generating awesome power and getting some mean cardio! Good luck on your first bout with them.

SECTION 2 THE OTHER PIECES OF EQUIPMENT YOU CAN UST TO GET
EVEN MORE AWESOME RESULTS
Clubbells Clubbells are an awesome piece of equipment that you can use to build phenomenal grip strength and extremely mobile and strong shoulders, A strong man should start with a pair of 15lb clubbells and work up to using a pair of 25lb clubbells for most exercises. Blockweights Blockweights are the cutoff ends of a hex or regular dumbbell. These are literally one of the best pieces of equipment you can use to build strong wrists and thumbs. Go to your local used gym equipment store and start collecting blockweights of various sizes and before you know it you will have a whole set to use. Chinup/Dip Belt A chin/dip belt is required if you expect to develop a super strong back, arms or chest with bodyweight exercises. My favorite comes from Ironmind.com but you can use a chain a carabigner and an old weight belt and you will be fine. Just make sure the belt can reliably hold your bodyweight so you never have to worry when going up for a max weight chin.

Heavy Hand Grippers Heavy Hand Grippers are awesome for testing and strengthening your hands. The best grippers in the world come from Ironmind.com and if you can work your way up to closing a #3 gripper you will know for certain you have a world class grip!! Climbing Rope A climbing rope is one of the best ways to build massive strength in your arms and forearms. You can start by climbing the rope with your feet and hands and then progress to hands only, then finally to climbing with your legs in an L position! This exercise is awesome, I don’t need to say anymore, just get a rope to climb and you will see what I’m talking about. A Swiss Ball Although you usually see these in commercial gyms, if used right a swiss ball can be an awesome tool to get your midsection into ripped shape. The good news is you should be able to find a high quality ball for under $10 and then you can start cranking on your core!

A Loading Pin Loading pins are very useful for anyone who wants to use grip tools, do pulley exercises or for doing a V bar lift. You can make your own using a 2” pipe with a 2” floor flange screwed onto the bottom, or you can get one cheap online. Grip Tools A common theme you will be seeing is that I really like grip tools. Any strong man knows you need a strong grip. Some of my favorite tools include a pinch block, the rolling thunder handle, the formulator, the wrist roller, a pinch curl block, the wrist reinforce and the o ring. Power Wheel The Power Wheel is an awesome tool you can use to get your core in badass shape!! You can also put it on your feet and use it for upper body plyometric conditioning. This tool looks simple but it is brutally effective! Steps Adjustable steps are useful for a variety of reasons. They can help you progress through range of motion exercises, you can use them for box jumps and they are extremely helpful in getting your first kickover or one leg squat.

A Practice Stick A practice stick is simply a 1 1/2” dowell that is roughly 5-‐6’ in length that you can use to practice movements and increase mobility. I like to put marks every 2” on the stick so I can quantify any gains in mobility that myself or my clients have. These are especially useful when teaching or practicing the Olympic lifts. Foam Roller A foam roller is an awesome tool to use on achy muscles or before your workouts as a way of loosening up your tissues. Think of a foam roller as a self-‐massage which helps to relax muscle tissue, lengthen fascia and improve blood/lymph flow. For those of you who are extremely tight make best friends with your roller!! Pushup Handles Pushup handles can be very useful, especially when starting out on the basic gymnastic drills. They are particularly useful for people with tight wrists. Fatgripz The fatgripz are one of those tools you wish you had invented. This little piece of rubber fits over most barbell and dumbbell handles making any piece of equipment into a thick handle tool. AWESOME!!

Sledgehammer A sledge hammer is a multi useful tool. You can use it for developing world class grip and wrist strength or you can use it to develop world class conditioning. In either case get a hammer and use it for both! The Plateau Buster This badass tool made by my friend Ryan Pitts over at strongergrip.com is seriously sick! When I first got it I thought maybe this will be cool but now I know why it’s called the plateau buster. I used to think swings with a 100lb kettlebell were brutal but now those are baby’s play thanks to the plateau buster! (200lb swings anyone?) A Big Fu*%#ng Tire Having a big tire is awesome. Tire flipping has become one of my favorite conditioners over the years and for good reason, it gets you winded! Go to your local tire shop or junkyard and tell them you are on the lookout for a 48” + tire that weighs 200lbs or more (mine is 350lb) You won’t regret it J

Conclusion WHAT YOU NEED TO KNOW TO MOVE FORWARD IN
BUILDING YOUR OWN BADASS HOME GYM!
Focus on acquiring the 9 essential pieces of equipment first, from there you can expand out and get more equipment to have fun with. However I want to leave you with some parting thoughts and a few recourses for getting your hands on quality equipment.
1) It doesn’t matter how much space you have or how much equipment you have. What matters is that you are training for a reason and have the end goal in mind.
2) You can get results with nothing other than your bodyweight. If you can’t get any equipment right now then make your goals around bodyweight training.
3) Rome wasn’t built in a day and neither will your gym or your body. Take your time and be patient and you will be rewarded for your persistence and determination.
Finally if you are ready to commit to becoming better, to being different then everyone else you see in the commercial gyms then I want you to use this statement daily and decide to become a garage warrior!
The Creed Of the Garage Warrior
I am a garage warrior! I believe that contemporary fitness is BS. I hold myself against only the highest standards. I have the desire and discipline necessary to become world class and super strong. I maximize my time spent working out so I have more free time to enjoy with my family, friend and pursue my passions. I know exactly where I want to go, I have set specific performance based goals and I will achieve them. I have a passion for helping others reach their goals and I realize that everyone who I help reach their goals is someone who will support me in reaching my goals. I am open minded and always ready to learn, however I avoid chasing shiny objects and realize that the one true path to greatness is through hard work and determination. I eat the best quality foods and I listen very closely to what my body is telling me it needs. I always learn from the best coaches I can find no matter the cost. I always strive to be the best that I possibly can be, I am consistently improving my body, mind and spirit. I am hellbent on achieving mastery! I am a Garage Warriors and I work hard, play hard, love hard and live hard!!!