Embed Size (px)
Citation preview
In-house Training Manual
This manual is a basic guide to operating First Freight’s Parcel Perfect software package. The software will facilitate the creation
of waybills, quotations, and manifests.
Compiled By:T. Copeland
084 603-894728 November 2007
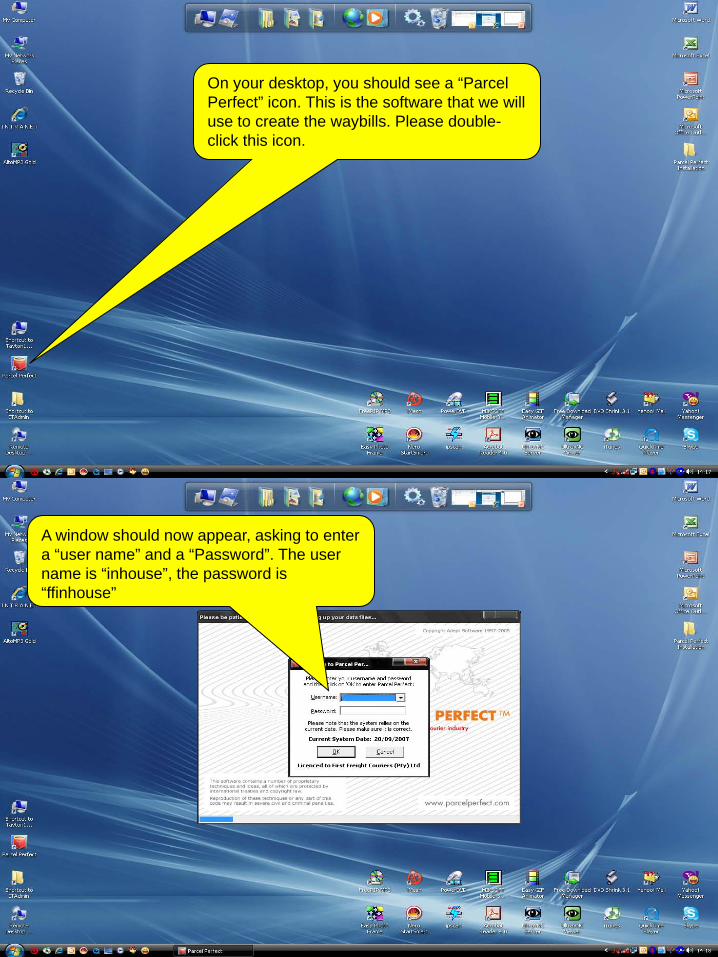
On your desktop, you should see a “Parcel Perfect” icon. This is the software that we will use to create the waybills. Please double-click this icon.
A window should now appear, asking to enter a “user name” and a “Password”. The user name is “inhouse”, the password is “ffinhouse”

Please note that the password is case sensitive and must be entered in lower case characters.
This is the screen which appears after you log on to Parcel Perfect. All the commands are
done from this screen. We will start by creating a waybill.

Firstly, click on “Process”. Then select “Waybills”. Then left click on “Full Details Capture”.
This is the waybill capture screen. All the details pertaining to the waybill, will be entered in this screen.
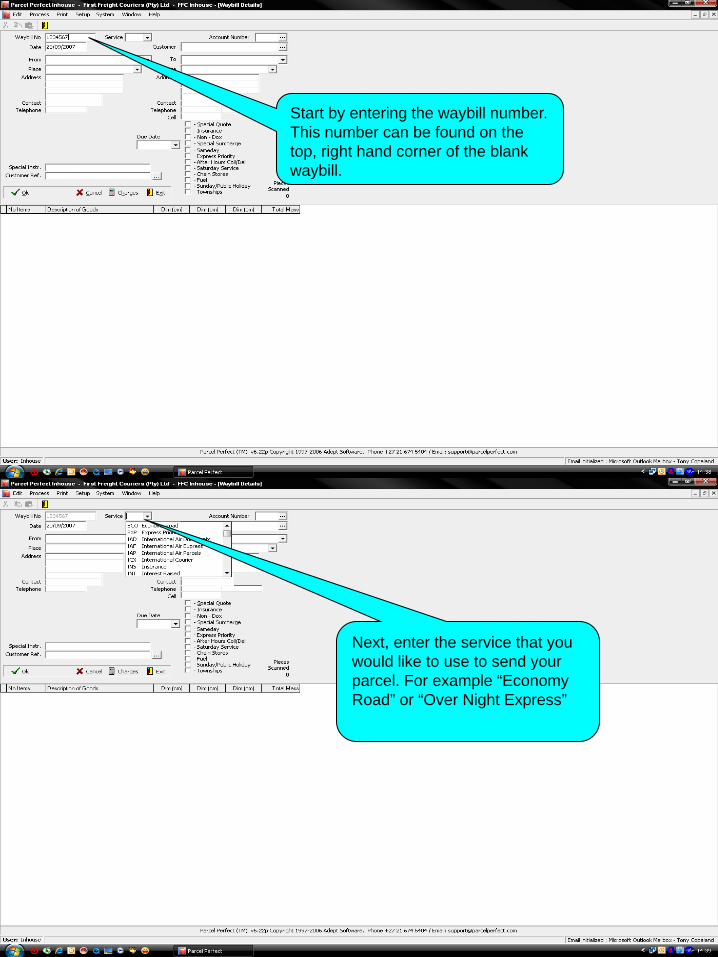
Start by entering the waybill number. This number can be found on the top, right hand corner of the blank waybill.
Next, enter the service that you would like to use to send your parcel. For example “Economy Road” or “Over Night Express”

The next step is to enter your account number with First Freight Couriers (Pty) Ltd. Click on the button with the 3 dots, a screen will appear with the account numbers available.
Please select the account number that reflects your company details.
Once the account number has been selected, double click on the “to” drop down arrow. You will notice that the “from” address appears automatically. Enter or select the destination name.
Click ok

Now enter the address details. You will have to enter the entire address in this field, the first time you use that specific destination. You will then be given an option to save these details “for future use” after entering the last field. Select yes. The next time you send a parcel to the same destination, just enter the clients name and the address will appear automatically. In other words, a database is being created with all of your customers details.
Now enter the special instructions that you would like the couriers and anybody else handling the parcel to see. These instructions will be printed on the waybill.
Your customer reference is normally entered as your invoice number. This is done because it makes it easier to track a parcel, either using the waybill number or your invoice number.
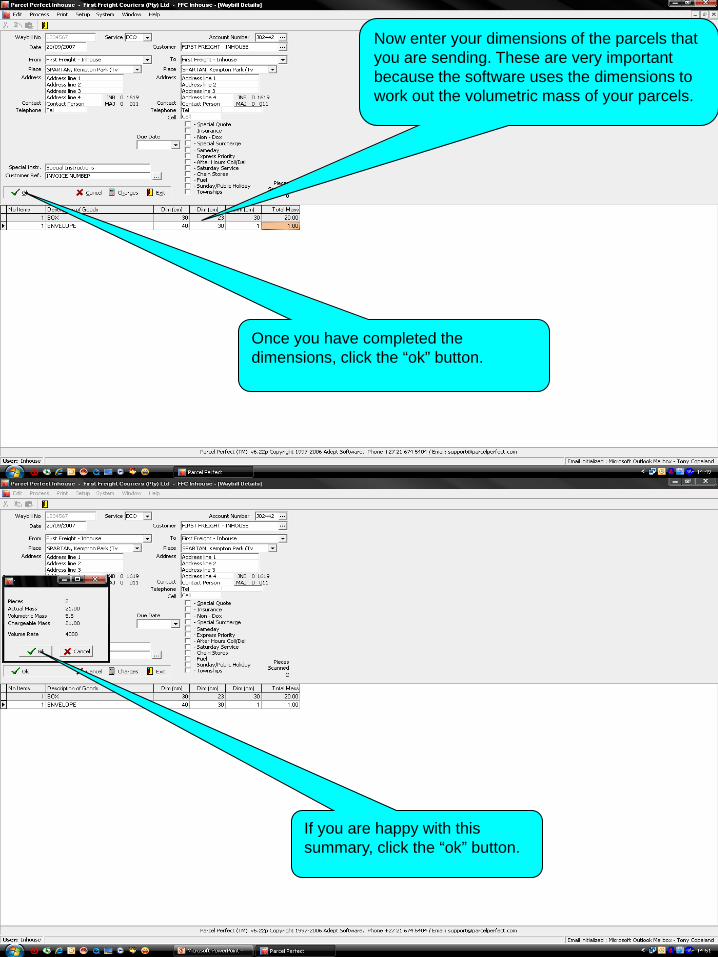
Now enter your dimensions of the parcels that you are sending. These are very important because the software uses the dimensions to work out the volumetric mass of your parcels.
Once you have completed the dimensions, click the “ok” button.
If you are happy with this summary, click the “ok” button.

The screen that you now see is your printing screen. You will now select the “waybill” option so that the waybill can print.
Now click “OK.” Your waybill will now print to the printer.
Now the waybill is created. To view that waybill again or to make changes to that waybill, click on edit, then click “waybills”.

A screen will now appear, displaying the waybills created. Click on the corresponding waybill.
To view the waybill, click the “view” button.
This screen now shows all the waybill details. The costing etc…
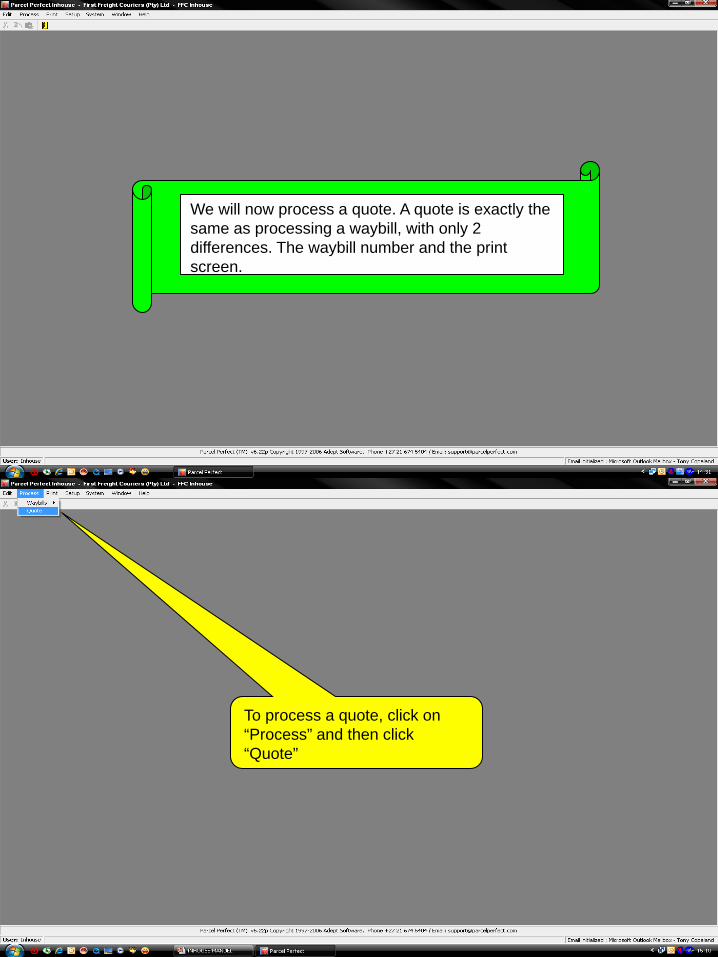
We will now process a quote. A quote is exactly the same as processing a waybill, with only 2 differences. The waybill number and the print screen.
To process a quote, click on “Process” and then click “Quote”
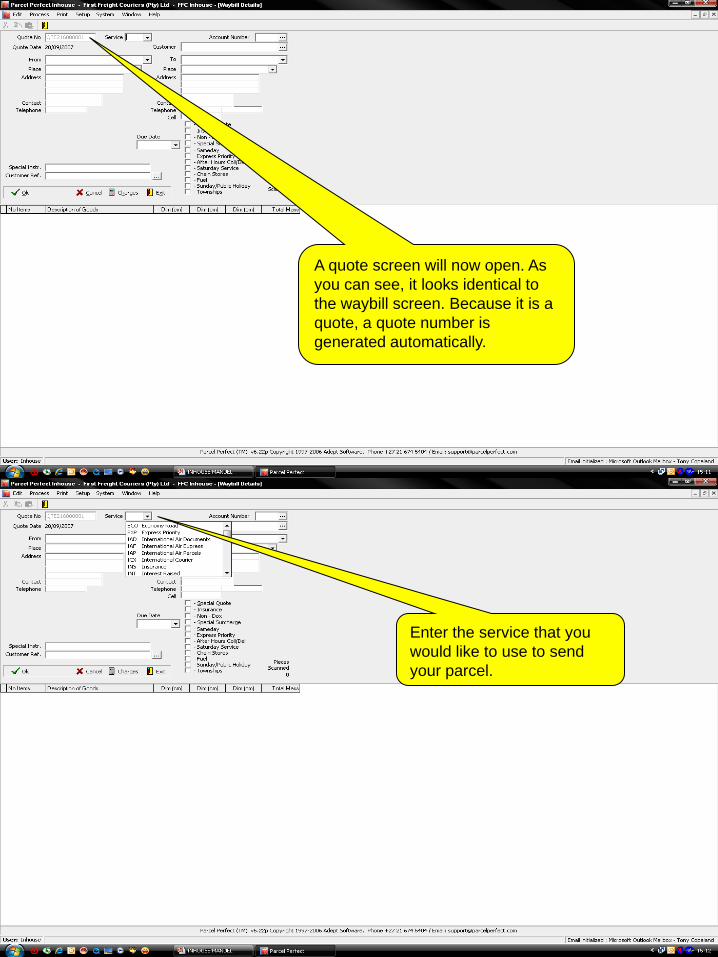
A quote screen will now open. As you can see, it looks identical to the waybill screen. Because it is a quote, a quote number is generated automatically.
Enter the service that you would like to use to send your parcel.

Enter your account number with First Freight Couriers (Pty) Ltd.
Or select the account number from the pop-up screen.
The same as the waybill, if you press the “tab” key on your keyboard, the “from” address will appear automatically.
Another option is to double-click the “to” address and the” from” address will also appear automatically.

Now enter the customer details that you are sending the parcels to. Please note that this is a quote so the place (area) that you are sending to is very important. This is used to calculate the rates (price) of the parcels been sent.
The special instructions and customer reference are not important at this stage, because this is a quote and not a waybill.

Enter your dimensions of the parcels that you are quoting on. These are also very important in a quote because the software calculates the rates using the dimensions.
You can add as many lines as you please. Once all of the parcels, dimensions have been entered, select “No” on the “add another line” screen.
If you are happy with these details, click the “ok” button.
Click in the white area under “No Items”

Again a summary screen will appear. If you are happy with the summary, click the “ok” button.
You will now notice that the quote disappears. Do not worry. This is normal.

To view the quote that was just created, click on “edit”, click “waybills”.
Enter “QTE” or the quote number that was generated automatically in the waybill number field. This will then show you that quote or all the quotes that you have created in that date range.
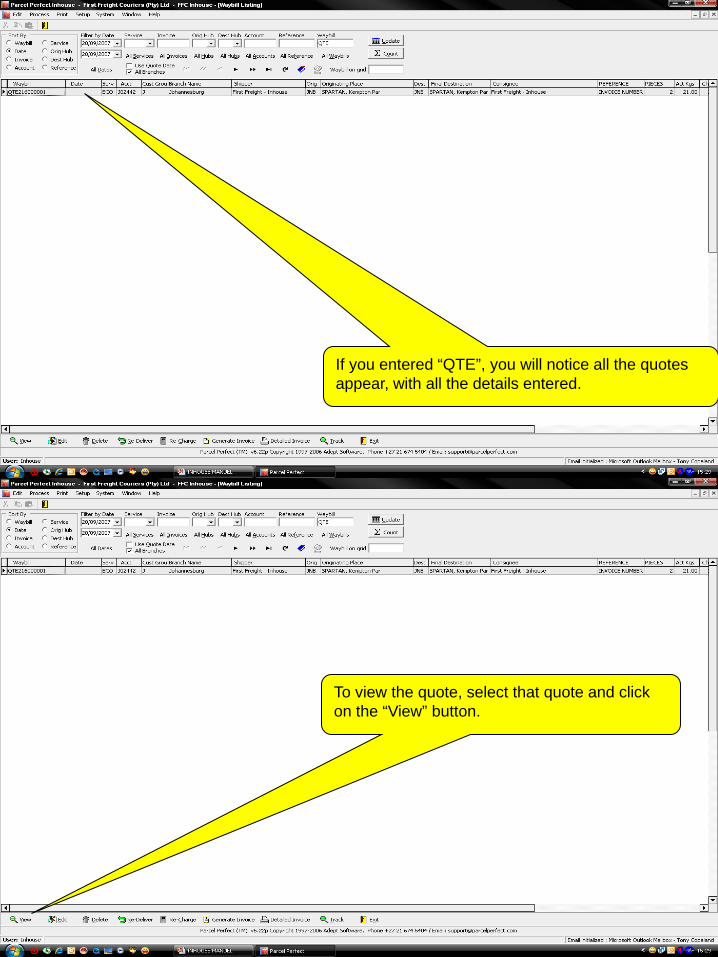
If you entered “QTE”, you will notice all the quotes appear, with all the details entered.
To view the quote, select that quote and click on the “View” button.

This is where you can view your quote. All of the details for the quote appear on this screen.
If you have made a mistake on your quote and need to make changes to it, All you do is, select that quote and click on “Edit” button.

You will then be brought back into that quote where you can now make the changes.
At the end of the day, when all waybills have been created, a manifest (summary) can be printed for all of the waybills created for that day.

To print the manifest, click “Print”. Click “Waybills”. Click “Check List”
A screen will appear to create the “checklist” report.

The software was written in a way that you need to delete the “Branch” field. If you do not delete this field, the check list will appear blank.
Now select the date range of the check list.
Now click on “Waybill Date”
If you are happy with the selection made, Click the “View Report” button.
This is the screen that will appear, showing all of the waybills created on that specific day. This screen can be printed and stored for later usage.