Embed Size (px)
Citation preview
Tilt Shift in Photoshop Photoshop Tutorial
What is Tilt Shift?
Tilt shift photography is a special way of selectively focusing and defocusing parts of an image by manually tilting and shifting the position of a camera lens relative to the image capture area.
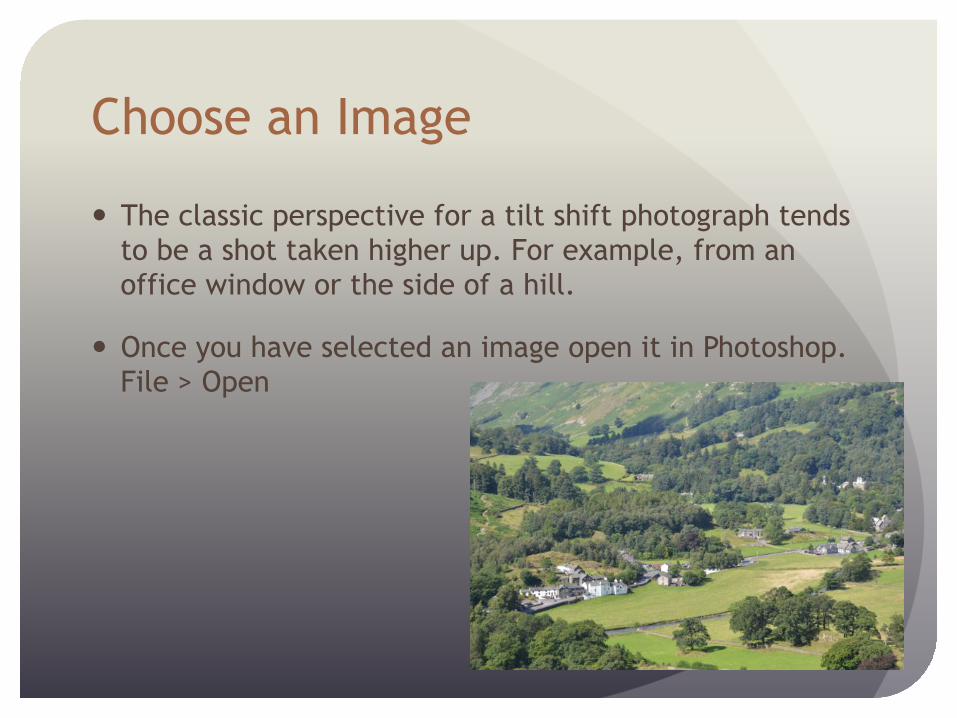
Choose an Image
The classic perspective for a tilt shift photograph tends to be a shot taken higher up. For example, from an office window or the side of a hill.
Once you have selected an image open it in Photoshop. File > Open
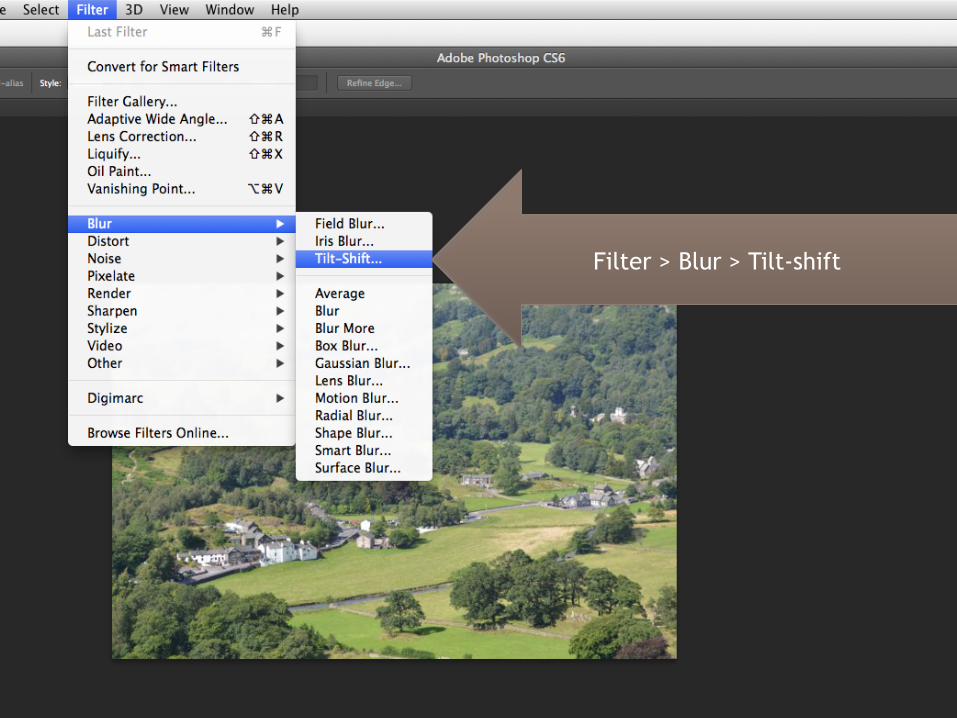
Filter > Blur > Tilt-shift

You are presented with a circle in the middle which represents the focal point. The horizontal bars represent the strip that is to stay in focus. The dotted line area is where the blur fades in.
Set the blur to 25% or to your liking.
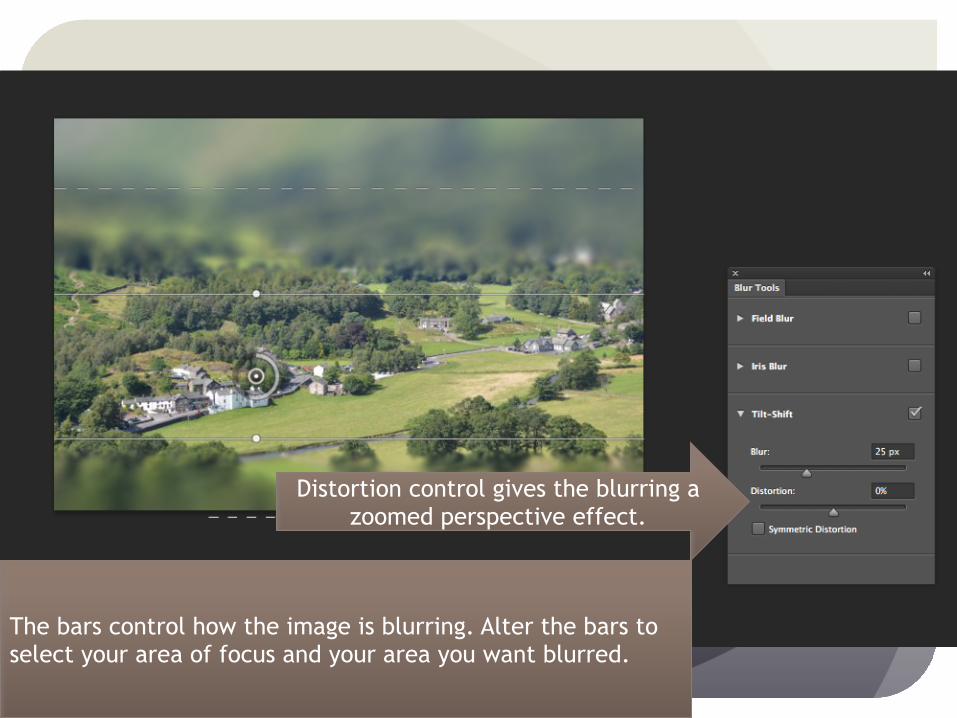
The bars control how the image is blurring. Alter the bars to select your area of focus and your area you want blurred.
Distortion control gives the blurring a zoomed perspective effect.
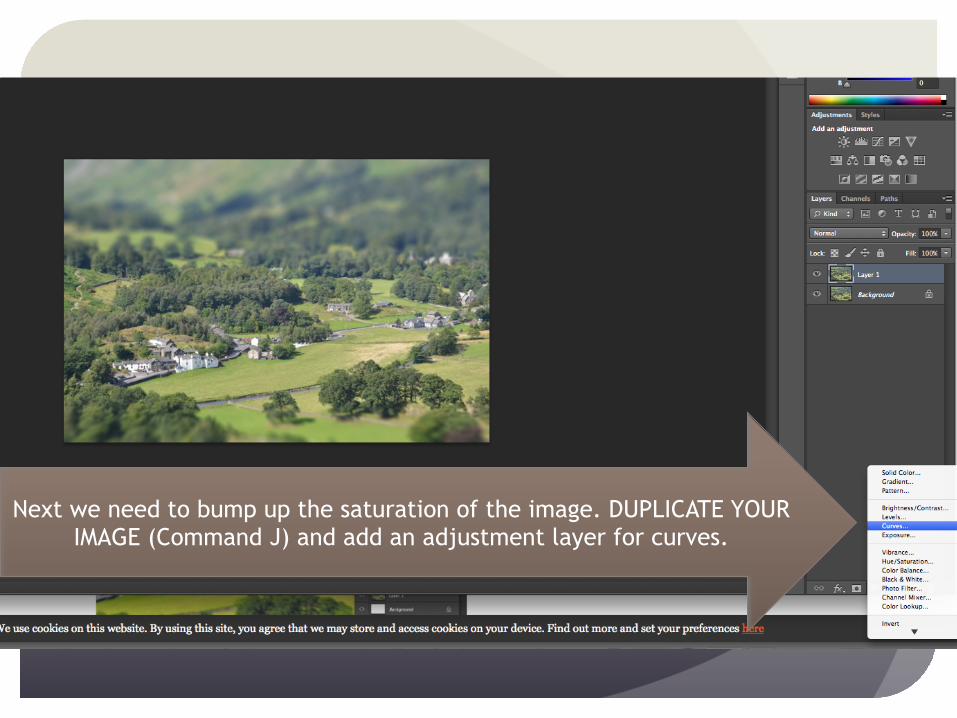
Next we need to bump up the saturation of the image. DUPLICATE YOUR IMAGE (Command J) and add an adjustment layer for curves.
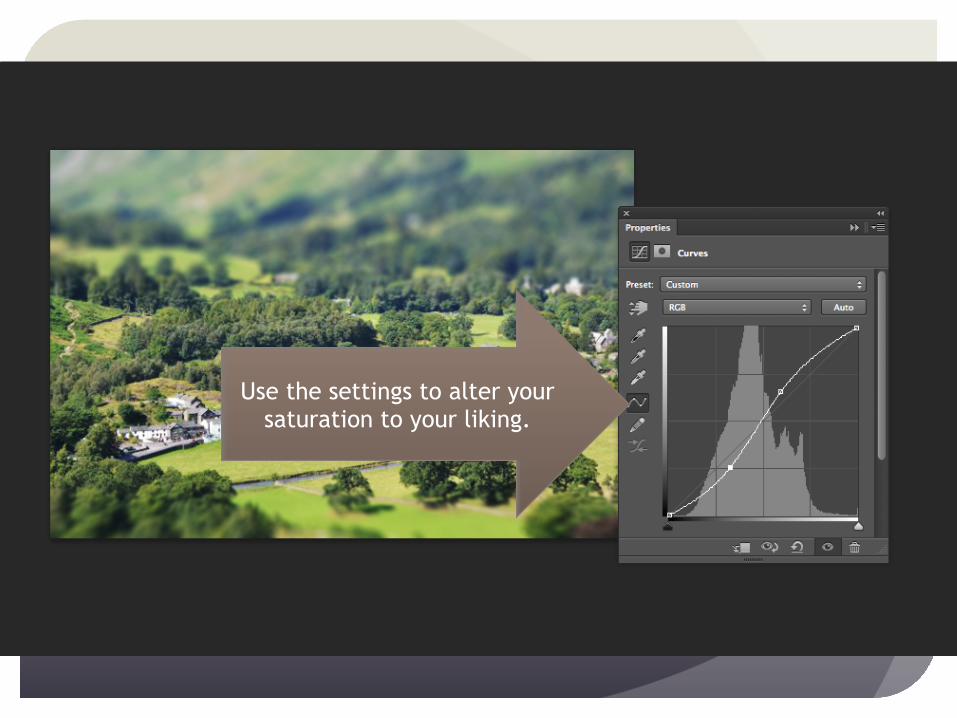
Use the settings to alter your saturation to your liking.
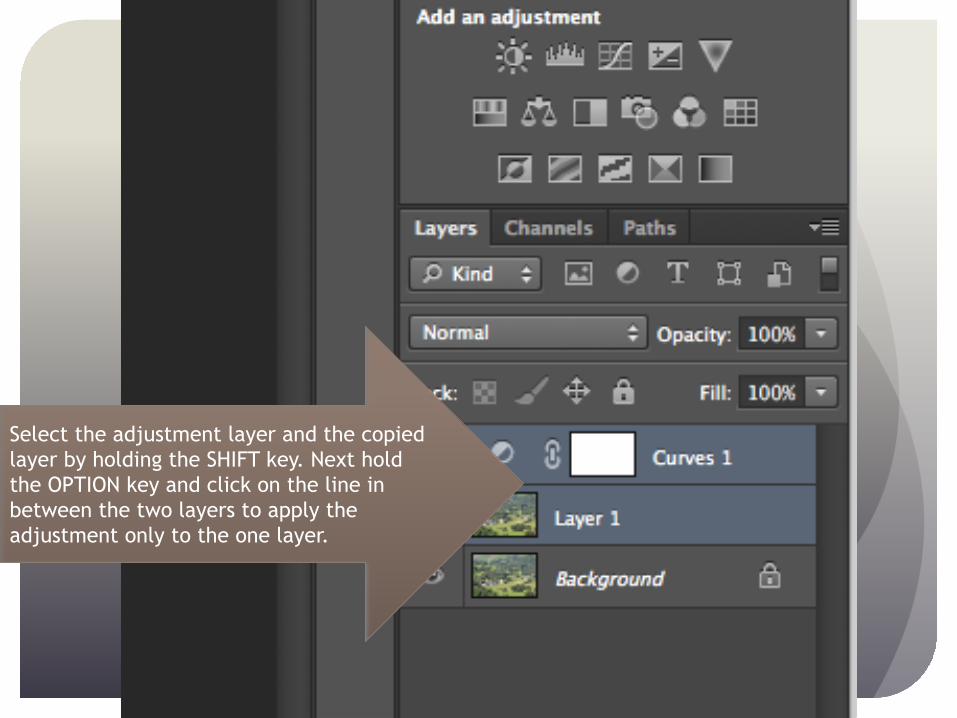
Select the adjustment layer and the copied layer by holding the SHIFT key. Next hold the OPTION key and click on the line in between the two layers to apply the adjustment only to the one layer.
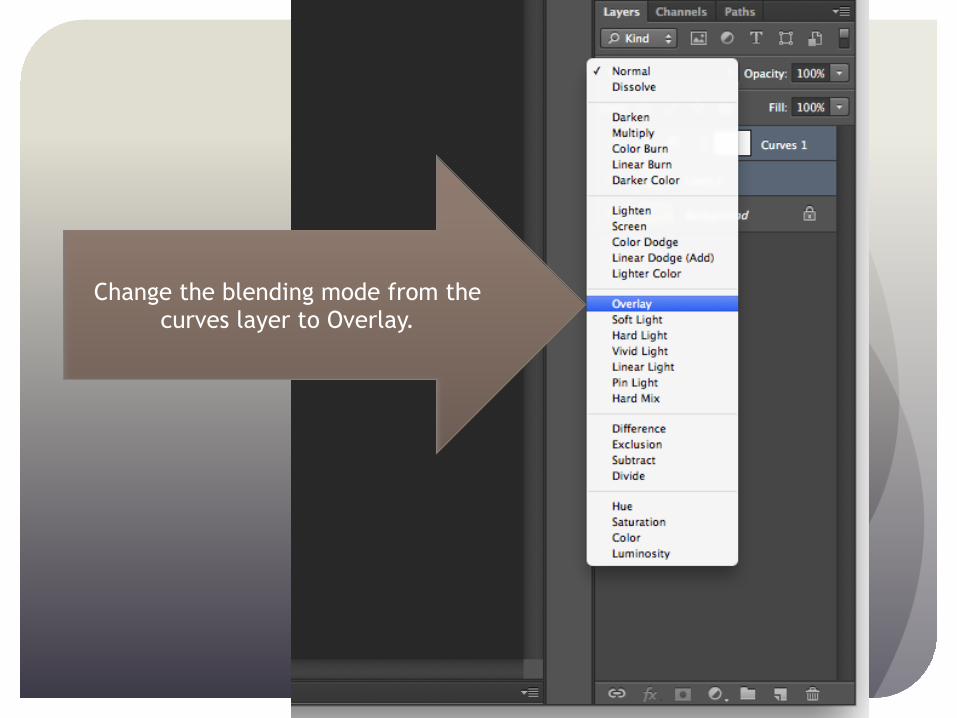
Change the blending mode from the curves layer to Overlay.

Change the opacity until it looks natural.

You Are Finished!
Save your file and upload it to Dropbox: lastname_firstname_tilt.jpg