Embed Size (px)
Citation preview

Grades 2-8
A Journey Through Learning www.ajourneythroughlearning.com
A
JT
L
Gulliver’s Guide
to Italy
Lapbook
Copyright 2012 A Journey Through Learning 1
SAMPLE P
AGE

This lapbook is especially made to go along with
Gulliver’s Guide to Italy by Loree’ Pettit, co-author of
Cantering the Country Geography Unit and Galloping
the Globe Geography Unit. (Lapbooks available for both
of these units.)
Authors: Nancy Fileccia and Paula WingetCopyright © 2012Published by A Journey Through Learning, L.L.C.
All rights reserved. No part of this book may be reproduced in any form without written permission from A Journey Through Learning. Permission is granted to print for one family use only. Purchase of this lapbook does not entitle reproduction of any part of this lapbook for any entire school, district, system. Such use is strictly prohibited.
Printed in the United States of America
Please check our website at:www.ajourneythroughlearning.com
While there, sign up for our email newsletters and receive a FREE lapbook! You’ll also receive great discount codes, special offers, and find out
what’s new and what’s to come!Join us on Facebook and Twitter!
Clip art is from Art Explosion 800,000 andwww.clipart.com with permission
Copyright 2012 A Journey Through Learning 2
SAMPLE P
AGE
A booklet placement key is at the top of every booklet page. This key shows where that particular booklet will go in that folder.
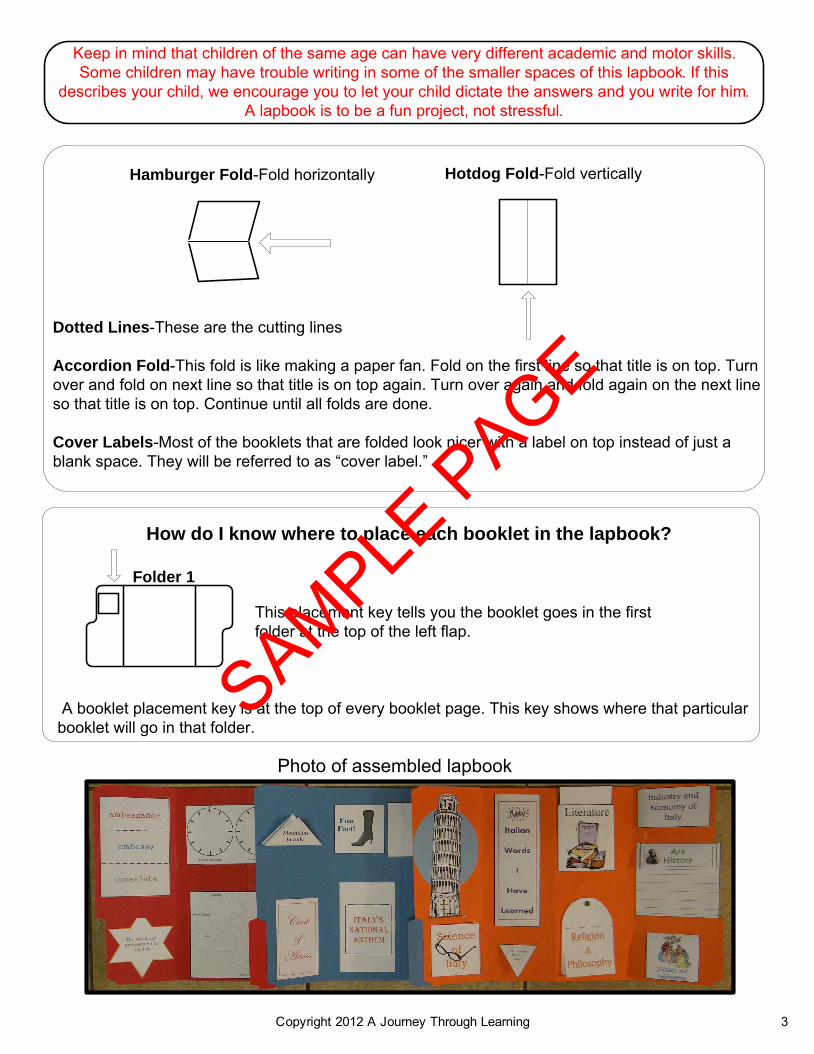
Hamburger Fold-Fold horizontally Hotdog Fold-Fold vertically
Dotted Lines-These are the cutting lines
Accordion Fold-This fold is like making a paper fan. Fold on the first line so that title is on top. Turn over and fold on next line so that title is on top again. Turn over again and fold again on the next line so that title is on top. Continue until all folds are done.
Cover Labels-Most of the booklets that are folded look nicer with a label on top instead of just a blank space. They will be referred to as “cover label.”
Folder 1
This placement key tells you the booklet goes in the first folder at the top of the left flap.
How do I know where to place each booklet in the lapbook?
Photo of assembled lapbook
Keep in mind that children of the same age can have very different academic and motor skills. Some children may have trouble writing in some of the smaller spaces of this lapbook. If this
describes your child, we encourage you to let your child dictate the answers and you write for him. A lapbook is to be a fun project, not stressful.
Copyright 2012 A Journey Through Learning 3
SAMPLE P
AGE
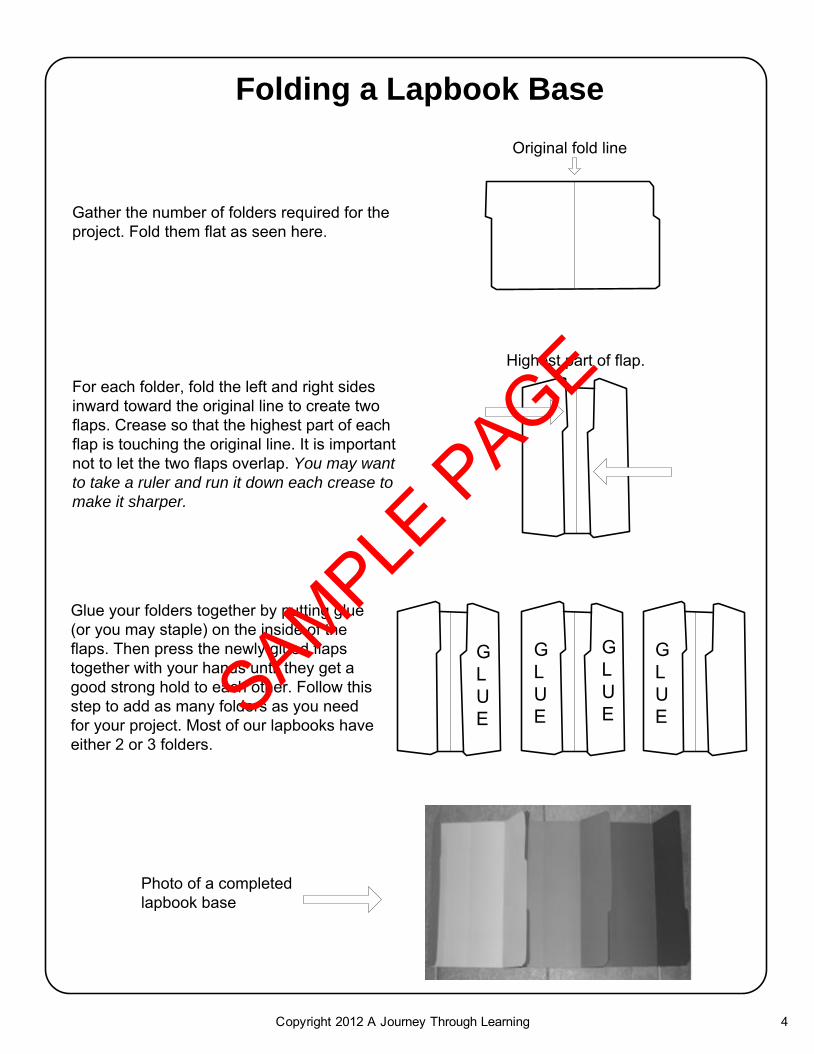
Folding a Lapbook Base
Gather the number of folders required for the project. Fold them flat as seen here.
Original fold line
For each folder, fold the left and right sides inward toward the original line to create two flaps. Crease so that the highest part of each flap is touching the original line. It is important not to let the two flaps overlap. You may want
to take a ruler and run it down each crease to
make it sharper.
Highest part of flap.
GLUE
GLUE
Glue your folders together by putting glue (or you may staple) on the inside of the flaps. Then press the newly glued flaps together with your hands until they get a good strong hold to each other. Follow this step to add as many folders as you need for your project. Most of our lapbooks have either 2 or 3 folders.
GLUE
GLUE
Photo of a completedlapbook base
Copyright 2012 A Journey Through Learning 4
SAMPLE P
AGE
*Lapbook Pages*3 Colored File Folders*Scissors*Glue*Stapler*Brads (not needed for every lapbook. If brads are not available, a stapler will do.)*Hole Puncher (again, not needed for every lapbook.)
To make the storage system (optional)
See details below about the use of a storage system.
*Duct tape (any color)*One 3-ring binder*Hole Puncher
My child has made several lapbooks. Can I store all of the lapbooks together in one place?
Yes! A three-ring binder serves as a great place to keep your lapbooks. This method of storage not only keeps your lapbooks from getting lost but also keeps them neat and readily available to share with dad, grandparents, friends, etc. When you are through sharing your lapbooks, just place the three-ring binder back on your bookshelf! Below are step-by-step directions of how to prepare each lapbook to be placed a in a three-ring binder.
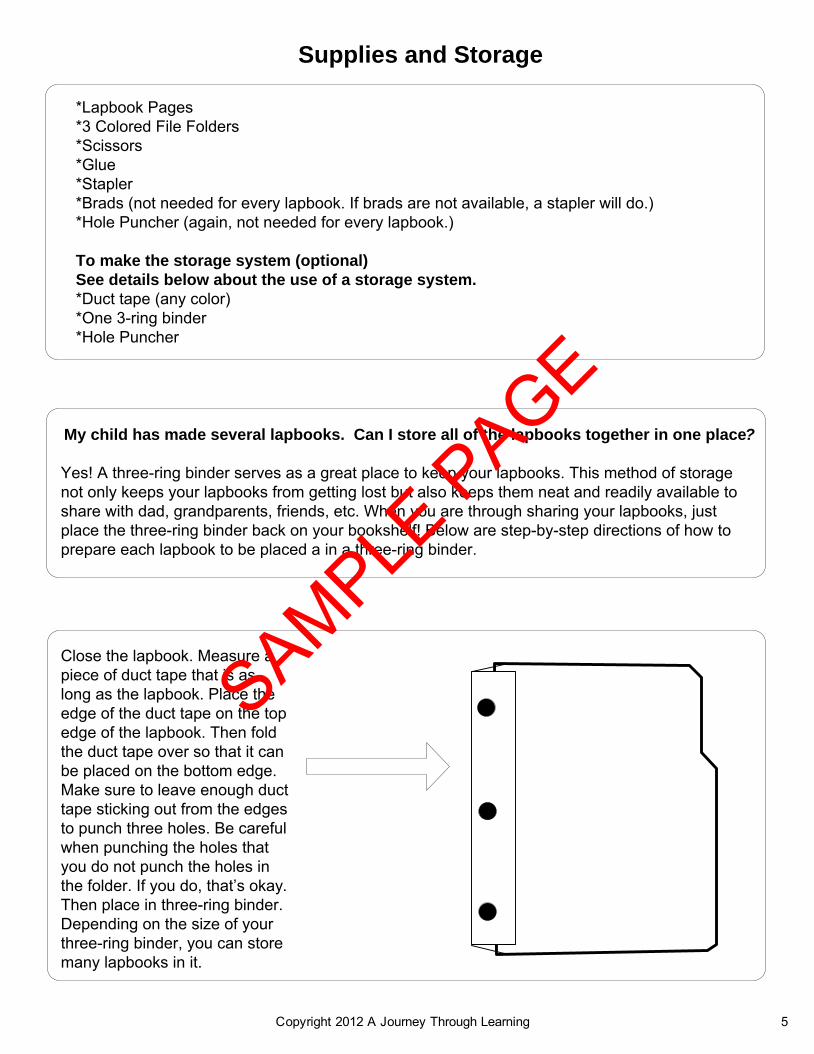
Supplies and Storage
Close the lapbook. Measure a piece of duct tape that is as long as the lapbook. Place the edge of the duct tape on the top edge of the lapbook. Then fold the duct tape over so that it can be placed on the bottom edge. Make sure to leave enough duct tape sticking out from the edges to punch three holes. Be careful when punching the holes that you do not punch the holes in the folder. If you do, that’s okay. Then place in three-ring binder. Depending on the size of your three-ring binder, you can store many lapbooks in it.
Copyright 2012 A Journey Through Learning 5
SAMPLE P
AGE

Folder 1
Time
FunFact
Folder 2
Literature
Science
Folder 3
Vocabulary
Ambassador
Weather
Capital
Geography
Government
Mountains
CoatOf
Arms
NationalAnthem
History
Religion&
Philosophy
New
Ital
ian
Wor
ds
Music
RomanEmpire
HolidaysAnd
Celebrations
Flag
ArtHistory
Industry&
Economy
Copyright 2012 A Journey Through Learning 6
SAMPLE P
AGE
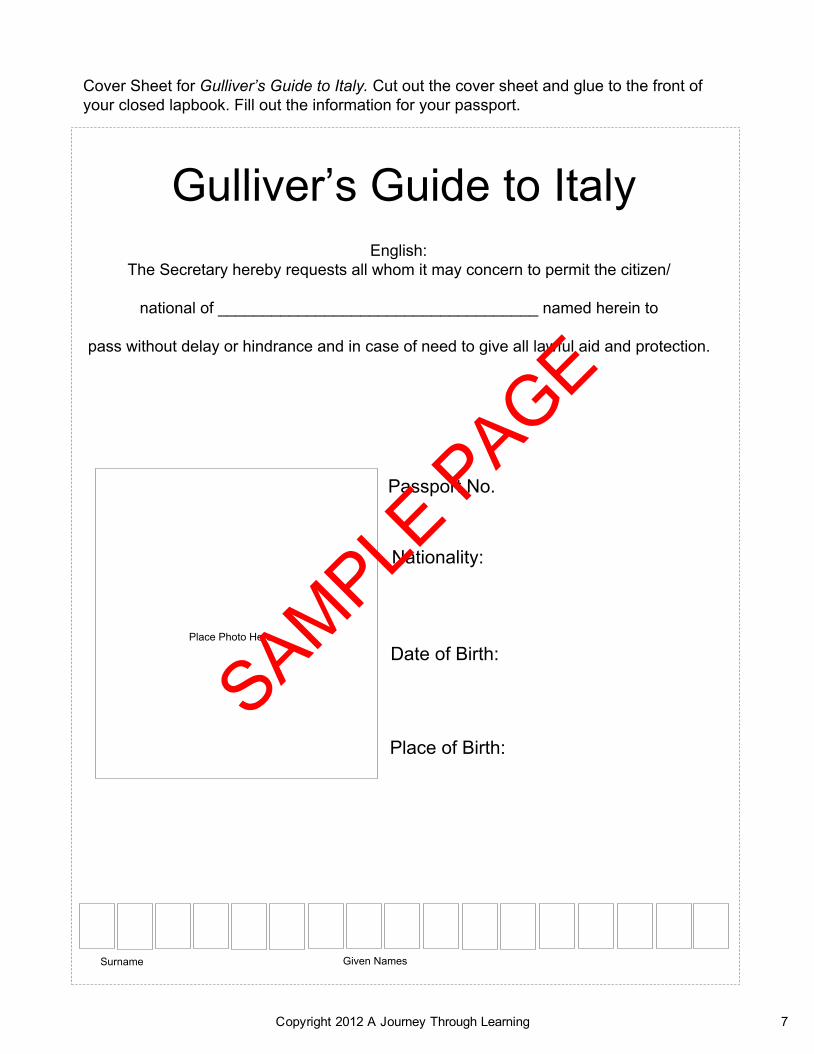
Gulliver’s Guide to Italy
Cover Sheet for Gulliver’s Guide to Italy. Cut out the cover sheet and glue to the front of your closed lapbook. Fill out the information for your passport.
Place Photo Here
English:The Secretary hereby requests all whom it may concern to permit the citizen/
national of ____________________________________ named herein to
pass without delay or hindrance and in case of need to give all lawful aid and protection.
Passport No.
Nationality:
Date of Birth:
Place of Birth:
Surname Given Names
Copyright 2012 A Journey Through Learning 7
SAMPLE P
AGE

Cut book out as one piece. Cut on dotted lines to form 3 flaps. Fold flaps over to the right and crease on the line so that words on top. Glue booklet into lapbook. Directions: Under each flap, write the definition.
Folder 1
Hotdog fold
ambassador
embassy
consulate
Copyright 2012 A Journey Through Learning 8
SAMPLE P
AGE
My Favorite Christmas Memory
fold
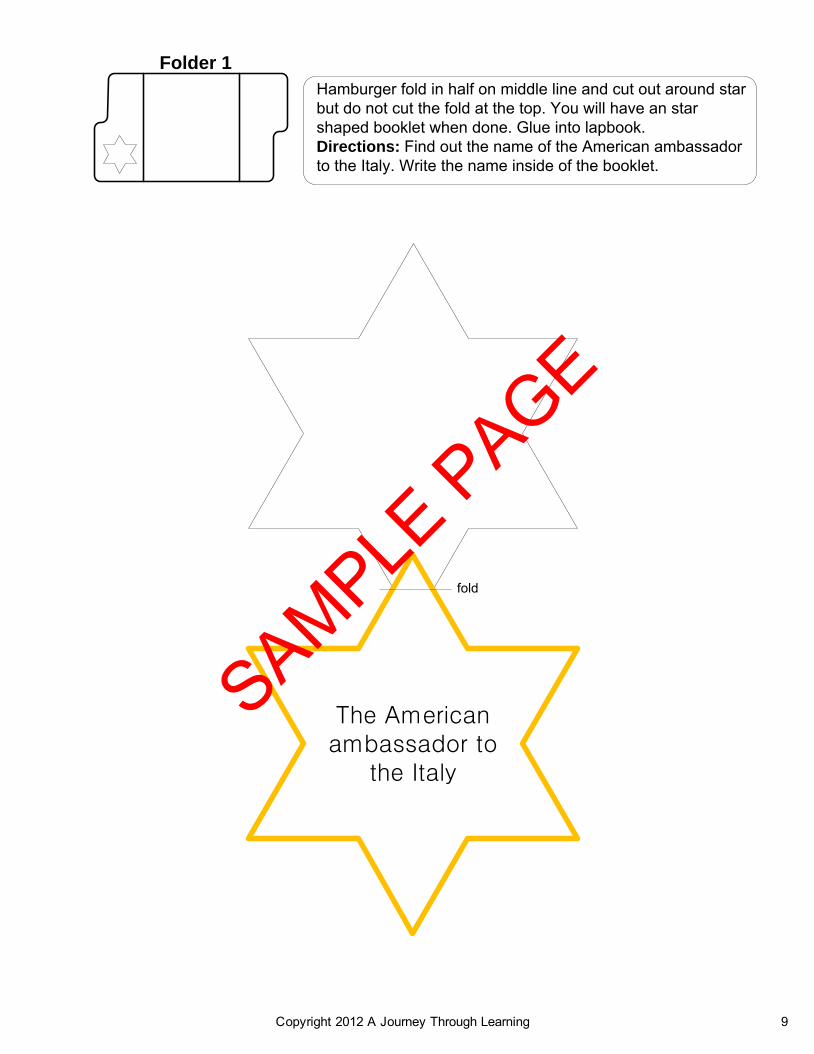
Hamburger fold in half on middle line and cut out around star but do not cut the fold at the top. You will have an star shaped booklet when done. Glue into lapbook. Directions: Find out the name of the American ambassador to the Italy. Write the name inside of the booklet.
The American ambassador to
the Italy
Folder 1
Copyright 2012 A Journey Through Learning 9
SAMPLE P
AGE
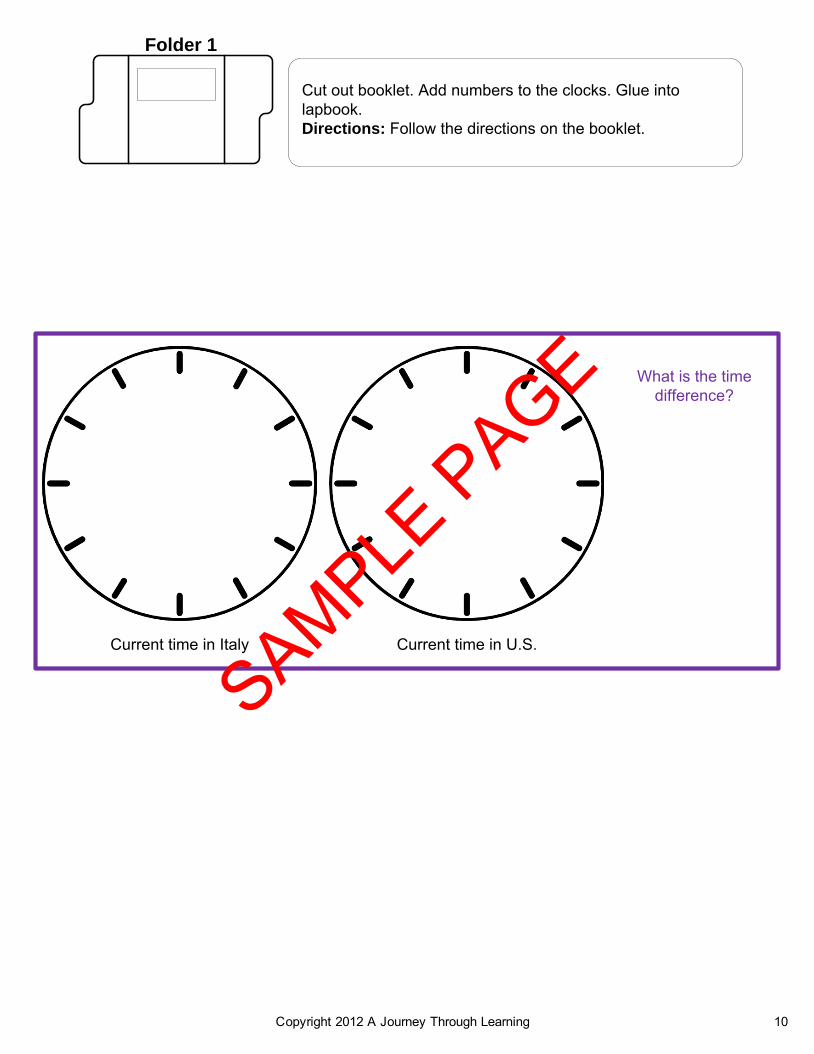
Current time in Italy Current time in U.S.
What is the time difference?
Cut out booklet. Add numbers to the clocks. Glue into lapbook.Directions: Follow the directions on the booklet.
Folder 1
Copyright 2012 A Journey Through Learning 10
SAMPLE P
AGE

Cut out the booklet as one piece. Glue into the lapbook.Directions: Locate and label any or all: Italy, France, Switzerland, Austria, Slovenia, Rome, Florence, Venice, Milan, Genoa, Turin, Naples, Sicily, Sardinia, Adriatic Sea, Ionian Sea, Tyrrhenian Sea, Ligurian Sea, Mont Blanc, Alps, Apennine Mountains, and Po Valley. If you can not fit them all on the map, that is okay.
Folder 1
North Africa
Mediterranean Sea
Spain
Atlantic Ocean
England
Russia
Black Sea
Copyright 2012 A Journey Through Learning 11
SAMPLE P
AGE

Cut out the booklet as one piece. Fold on the dotted lines like an accordion. Glue into the lapbook.Directions: Write and draw about the weather in Italy.
Folder 1
The
Wea
ther
in
Italy
Copyright 2012 A Journey Through Learning 12
SAMPLE P
AGE