Embed Size (px)
Citation preview

Version 12/20/2010, from SW 2.0.04 Tooki-BMW
pag
e1
Tooki hands-free kit for BMW with fiber optics (MOST®)
Fully integrated Bluetooth® hands-free phone kit for the BMW infotainment package.

Version 12/20/2010, from SW 2.0.04 Tooki-BMW
pag
e2
Contents
1. Prior to installation
1.1. Package contents 1.2. Checking the compatibility of vehicle and accessories
2. Installation
2.1. Removal of the navigation computer/radio 2.1.1. Removal of navigation computer from BMW E60/E61/63/64 with Professional
Navigation 2.1.2. Removal of navigation computer from BMW E70/71 with Professional Navigation 2.1.3. Removal of navigation computer from BMW E90/91/92/93 with Professional
Navigation 2.2. Connections 2.3. Activation of the interface
3. Interface operation
3.1. Pairing the Tooki Interface with a mobile phone 3.2. Loading of phone book 3.3. Setup, factory defaults, update 3.4. A2DP audio streaming through CD-changer emulation
4. Specifications
5. Technical support
Information
Changes/updates of the vehicle software can cause malfunctions of the interface. We offer free software updates for interfaces for one year after purchase. To receive a free update, the interface must be sent in to us. Labor cost for and other expenses involved with the software updates will not be reimbursed.
Version 12/20/2010, from SW 2.0.04 Tooki-BMW
pag
e3
Product features
Integration in and controls through the telephone port of the factory infotainment package
Updatable Parrot chipset with best audio quality and high phone compatibility
Automatic radio mute
Caller audio through vehicle sound-system
External microphone with amplification adjustment through infotainment package
A2DP audio streaming through CD-changer emulation (requirement: mobile phone supports function, factory CD-changer coded but no factory CD/DVD-changer installed)
Up to 5 mobile phones can be paired simultaneously
Use of factory/vehicle buttons to control phone functions
Mobile phone book integration (about 1000 phone numbers)
Audio adjustment and settings through vehicle infotainment package
SMS reading and writing if supported by mobile phone
1. Prior to installation
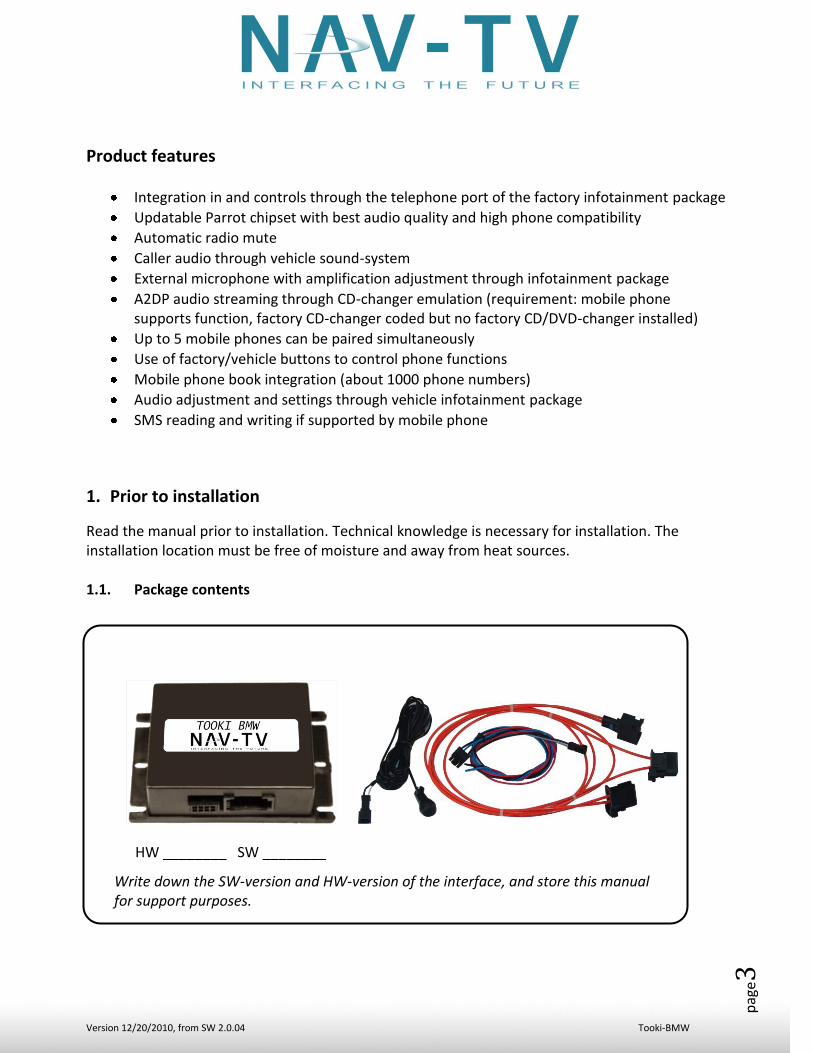
Read the manual prior to installation. Technical knowledge is necessary for installation. The installation location must be free of moisture and away from heat sources. 1.1. Package contents
HW ________ SW ________
Write down the SW-version and HW-version of the interface, and store this manual for support purposes.

Version 12/20/2010, from SW 2.0.04 Tooki-BMW
pag
e4
Requirements
Vehicle BMW with fiber optics 1-Series (E87), 3-Series (E90/91/92), 5-Series (E60/61), 6-Series (E63/64), X5 (E70), and X6 (E71)
Navigation/Radio Professional Navigation CCC or CIC Business Navigation M-ASK Professional Radio Champ MP3 Radio Limitations
Vehicle NOT 7-Series (E65/66) and (F01/02) Factory telephone kit must be removed if installed Factory-CD/DVD-changer must be coded but not installed if A2DP will be used
1.2. Checking the compatibility of vehicle and accessories
2. Installation
The interface needs a permanent 12V source. Switch off ignition and disconnect the vehicle’s battery! However, if disconnecting the battery is to be avoided, it is usually sufficient to put the vehicle in sleep-mode. In case the sleep-mode does not work, disconnect the battery with a resistor lead. If power source is not taken directly from the battery, the connection has to be checked for constant power, even during start.
2.1. Removal of the navigation computer/radio The interface is installed at the rear of the navigation computer or radio unit. The following chapters show some removal examples of various navigation computers.

Version 12/20/2010, from SW 2.0.04 Tooki-BMW
pag
e5
2.1.1. Removal of navigation computer in BMW E60/E61/63/64 with Professional Navigation
Remove the cover with the middle air vents; it is only fitted, not fixed into place. Unscrew the two screws at the side ends of air condition control panel and remove the panel; the lower part is, also, only fitted. Remove lower plastic cover; it is, only fitted, as well. Unscrew the 4 screws and pull out the navigation computer.
Continue from chapter 2.2. Connections.

Version 12/20/2010, from SW 2.0.04 Tooki-BMW
pag
e6
2.1.2. Removal of navigation computer in BMW E70/71 with Professional Navigation
Remove the cover with the middle air vents; it is only fitted, not fixed into place. Unscrew the two screws at the side ends of air condition control panel and remove the panel; the lower part is, also, only fitted. Unscrew the 4 Torx screws and pull out the navigation computer.
Continue from chapter 2.2. Connections.

Version 12/20/2010, from SW 2.0.04 Tooki-BMW
pag
e7
2.1.3. Removal of navigation computer in BMW E90/91/92/93 with Professional Navigation Remove the air condition control panel; it is only fitted, not fixed into place. Remove the cover of the navigation computer; it too, is only fitted. Unscrew the 6 screws and pull out the navigation computer.

Version 12/20/2010, from SW 2.0.04 Tooki-BMW
pag
e8
2.2. Connections
Unplug the Quadlock socket from the rear of the navigation computer. Unplug the connector with the fiber optics from the Quadlock socket. Exchange the shells of the vehicle harness’ fiber optical connector and interface harness’ fiber optical connector with each other. Connect the vehicle harness’ fiber optical connector to the female fiber optical socket of the interface harness. Connect the interface harness’ fiber optical connector to the Quadlock socket of the vehicle harness. Plug the Quadlock socket back into the navigation computer. Vehicles without active fiber optics; which means without CDC, without phone or any other fiber optical components have optical wires at the navigation computer, but it is possible that the ring is not connected to the diagnostic connector in the glove compartment. In this case a connector bridge for optical wires is necessary. Connect Red wire to permanent +12V source and Black wire to Ground. Connect Blue wire to +12V to enable CD-changer emulation for A2DP. A2DP requirement is that the navigation system is coded for CD-changer but factory CD-changer must NOT be installed.
Wire color Definition
● Black Ground
● Red +12V DC (permanent)
● Blue to +12V = CDC-emulation On
Interface Connector
Vehicle Connector

Version 12/20/2010, from SW 2.0.04 Tooki-BMW
pag
e9
Install the microphone close to the driver. Connect the microphone’s 2-Pin AMP jack to the 2-Pin AMP plug of the Tooki harness. 2.3. Activation of the interface
After initial installation, the vehicle must go into sleep-mode in order to recognize the newly attached hardware. After re-connecting the battery, lock the vehicle and wait for 5 -10 minutes.
On some vehicles, the Tooki interface may not be recognized by the head unit. If the phone option is not available after the activation sequence described above, take the following steps:
1. Switch on ignition. 2. After system start, connect Pin 7 to +12V for 2 seconds. 3. Switch off ignition, lock the vehicle and wait for 5-10 minutes.
3. Interface operation The interface enables the telephone function of the factory navigation/radio system. Therefore, the operation of the telephone is as described in the manual of the corresponding navigation/radio system. 3.1. Pairing the Tooki interface with a mobile phone Up to 5 mobile phones can simultaneously be paired with the Tooki interface. If a 6th phone is paired, the oldest entry is automatically deleted. In some cases, it becomes necessary to put the vehicle in sleep mode to enable correct function of the 6th phone. For pairing, enable the pairing mode of the mobile phone (see manual of the mobile phone.) Search with the mobile phone for “Tooki” or “CK5050N” and connect with the PIN code “1234.” Some mobile phones may try to connect to the Tooki interface with a different profile from “hands free.” Check for this behavior and switch the profile to “hands free” if necessary (see manual of the mobile phone.)
Navigation Professional (CCC) Navigation Professional (CIC) Business Navigation
+12V for 2 sec.

Version 12/20/2010, from SW 2.0.04 Tooki-BMW
pag
e1
0
After a mobile phone has been successfully paired to the Tooki interface (see above,) a connection will be automatically established as soon as the mobile phone is in range. If multiple paired mobile phones are simultaneously in range, the Tooki interface will connect to the first phone. If you have connection problems between the mobile phone and the Tooki, first check at the Parrot website whether an update for the Parrot chip is available. The part number of the Parrot chip can be found in the specifications at the end of the manual. 3.2. Loading of phone book After each connection to the mobile phone, the phone book of the mobile phone will be loaded into the vehicle infotainment system. Depending on the mobile phone, either it will be loaded from the phone’s memory or the SIM card. This process can take a few minutes or more, depending on the number of contacts in the phone. If the phone book is not loaded or not completely loaded, it might be necessary to copy the contacts from the SIM-card to the mobile phone memory! Some mobile phones do not automatically load the phone book, so the sending must be manually initiated (the procedure varies depending on the phone, i.e. “Send phone book to Bluetooth.”) The manual procedure must be repeated if the mobile phone’s contacts have been edited. The memory of the Tooki interface can save about 1000 contact numbers. 3.3. Setup, factory defaults, update Settings of the Tooki interface can also be changed by dialing special codes in the vehicle’s telephone mode. In vehicles with a navigation system, it is possible to change it in the vehicle infotainment’s menu under “Top 8,” too. Caller audio volume, ring tone volume and microphone sensitivity can be adjusted separately. The interface can be reset to factory defaults and updates of the Parrot chip can be initiated. To execute a function, dial the corresponding code from the table below like a phone number, and confirm with pick-up/dial.
Function Code no. Min Max
Microphone sensitivity +001xx 01 15
Caller audio volume +0021xx 01 15
Ring tone volume +0022xx 01 15
Factory defaults +009
Parrot Update Mode +000

Version 12/20/2010, from SW 2.0.04 Tooki-BMW
pag
e1
1
For the codes for volume and sensitivity, the last two digits are the desired value (01 Min. to 15 Max.) For example, dial “+002112” to set the caller audio volume to level 12. After dialing a code, the navigation will confirm with “call failed.” System updates of the Parrot chip are possible through Bluetooth® via PC. 3.4. A2DP audio streaming through CD-changer emulation When the CD-changer emulation of the Tooki interface is entered, it is possible to listen to music files on the factory sound system which are played by the mobile phone. The available options to control the play functions of the mobile phone depend very much on the mobile phone. Some phones do not support all of the functions described below; for example, iPhones® do not support any track skipping. Full functions are: starting and stopping the playback, next track and previous track. If the vehicle CD-changer mode of the vehicle’s navigation/radio system is activated, the A2DP playback is automatically started (while a virtual CD 1 is shown.) When the CD-changer mode is exited, the A2DP playback is stopped. The playback is paused during phone call activity. Track skipping is possible with the “next” and “back” keys of the head-unit or the steering wheel. If during playback, Track 1 of the virtual CD is selected, a menu opens. Use the option random of this menu to stop playback or SCAN to start playback. The volume level of the A2DP can be adjusted in the mobile phone’s settings.

Version 12/20/2010, from SW 2.0.04 Tooki-BMW
pag
e1
2
4. Specifications Integrated Bluetooth® Chip Parrot CK5050 Operation voltage 10.5 – 14.8V DC Stand-by power drain <1mA Operation power drain 120mA Power consumption 1.8W Temperature range -22°F to +176°F Weight 3.35 oz Dimensions (box only) L x H x W 4.2” x 1.2” x 2.8”
5. Technical Support and Sales Nav-TV Corp. 100 NW 11th Street Boca Raton, FL 33432 Phone: (866) 477-3336 Email: [email protected] Legal disclaimer: Mentioned company and trademarks, as well as product names/codes are registered trademarks ® of their corresponding legal owners.