Embed Size (px)
Citation preview
August 2016
Today, authentication methods that use passwords alone are not sufficient to safeguard users and their vital data. Windows Hello creates a certificate-based credential that is uniquely tied to a user and their device, which is unlocked by a PIN or biometric (fingerprint or facial recognition). Using this credential affords a greater level of security because no passwords are required, which helps prevent a device from being compromised by phishing and brute force attacks.A PIN lets users authenticate with either a Microsoft account or a Microsoft Azure Active Directory account. After enrolling a device with either type of account, a user provides their PIN or biometric authentication to verify their identity; and Windows uses the PIN to authenticate and provide appropriate access.Topics in this guide include:
Productivity
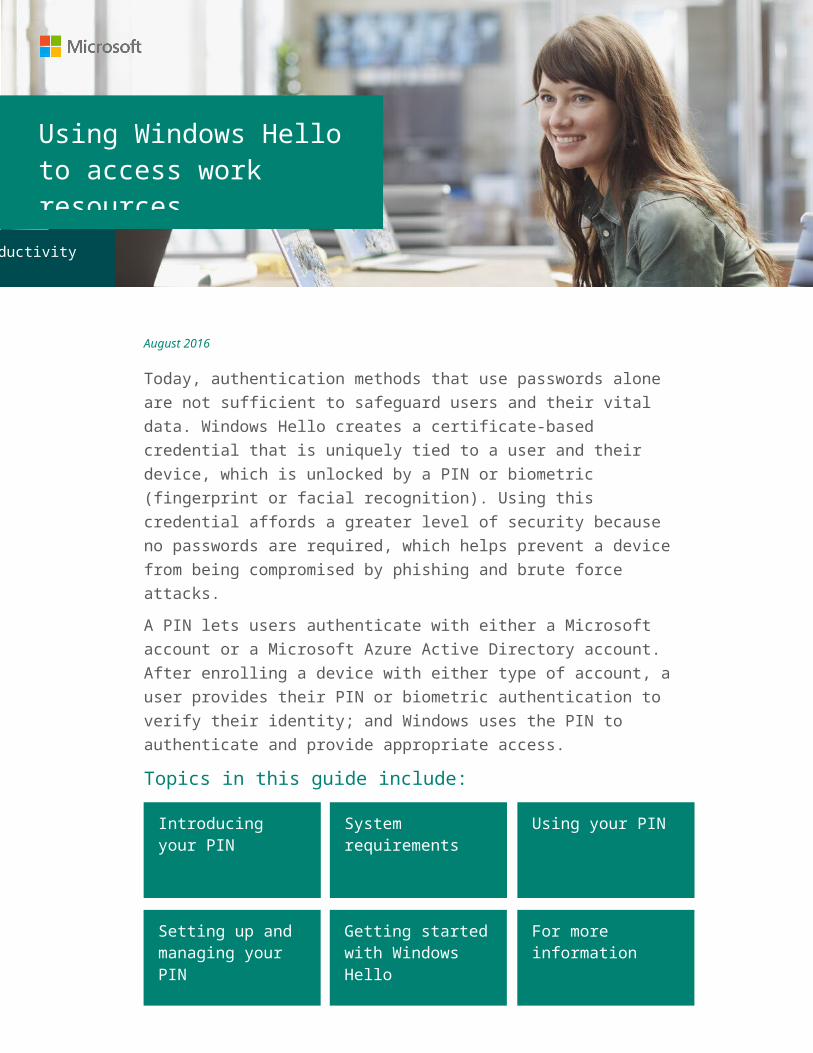
Using Windows Hello to access work resources
Introducing your PIN
System requirements
Using your PIN
Setting up and managing your PIN
Getting started with Windows Hello
For more information
Page 2 | Using Your PIN to access work resources
Introducing your PINA PIN lets users authenticate to their Microsoft or Microsoft Azure Active Directory account. After an initial two-step verification during enrollment, a user creates a PIN. Then, on that device, the user provides the PIN to verify identity, and Windows uses this information to authenticate and access resources and services.
System requirementsUsing your PIN for work access requires Windows 10 in an enterprise, and one of the following: A PC connected to an on-premises domain (Microsoft Active Directory) A PC connected to Azure Active Directory An Intune-managed device (workplace joined devices)
Using your PINPIN for work access is available when Active Directory Federation Service is used for authentication and access to on-premises resources such as file servers, Microsoft Office 365, Microsoft SharePoint, or other sites. You can also use your PIN to connect via remote access.
Setting up and managing your PINIf your enterprise requires that you sign in using a PIN, use one of the following procedures to create a PIN for work access. The procedure you choose depends on whether your device is domain-joined, Azure Active Directory-joined, or Intune-managed.On-premises, domain-joined device1. Sign in to your network domain account with your username and password.
IMPORTANT: Be sure to use your domain\username and password. You will not be able to create your PIN if you initially sign in with a physical or virtual smart card. However, you can use a physical smart card for the second authentication step.
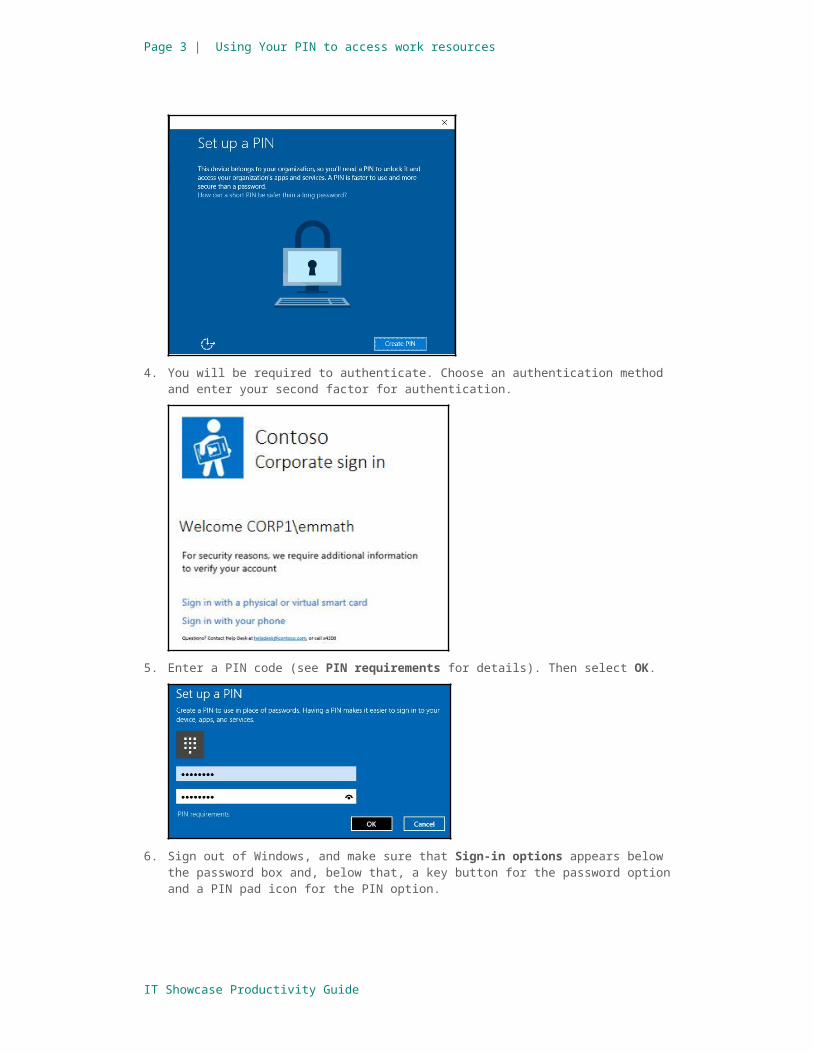
2. Windows Hello setup starts.3. Select Create PIN.
4. You will be required to authenticate. Choose an authentication method and enter your second factor for authentication.
IT Showcase Productivity Guide
Page 3 | Using Your PIN to access work resources
5. Enter a PIN code (see PIN requirements for details). Then select OK.
6. Sign out of Windows, and make sure that Sign-in options appears below the password box and, below that, a key button for the password option and a PIN pad icon for the PIN option.
IT Showcase Productivity Guide

Page 4 | Using Your PIN to access work resources
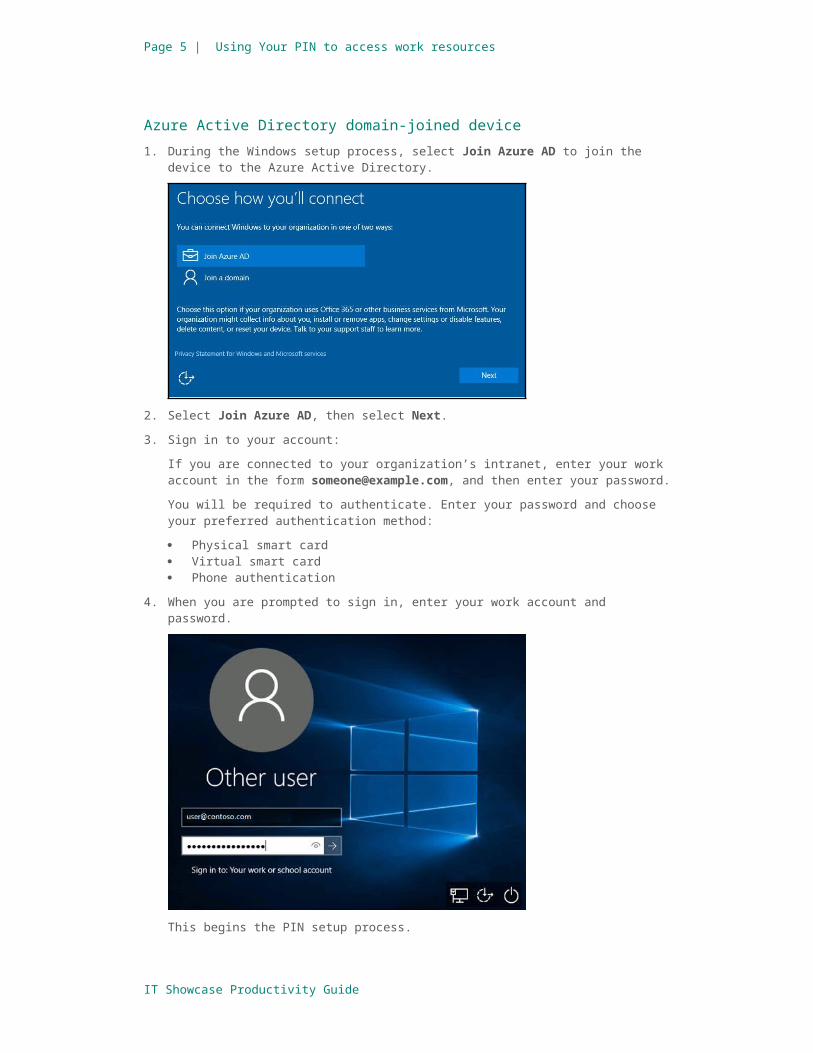
Azure Active Directory domain-joined device1. During the Windows setup process, select Join Azure AD to join the device to the
Azure Active Directory.
2. Select Join Azure AD, then select Next.3. Sign in to your account:
If you are connected to your organization’s intranet, enter your work account in the form [email protected], and then enter your password.You will be required to authenticate. Enter your password and choose your preferred authentication method: Physical smart card Virtual smart card Phone authentication
4. When you are prompted to sign in, enter your work account and password.
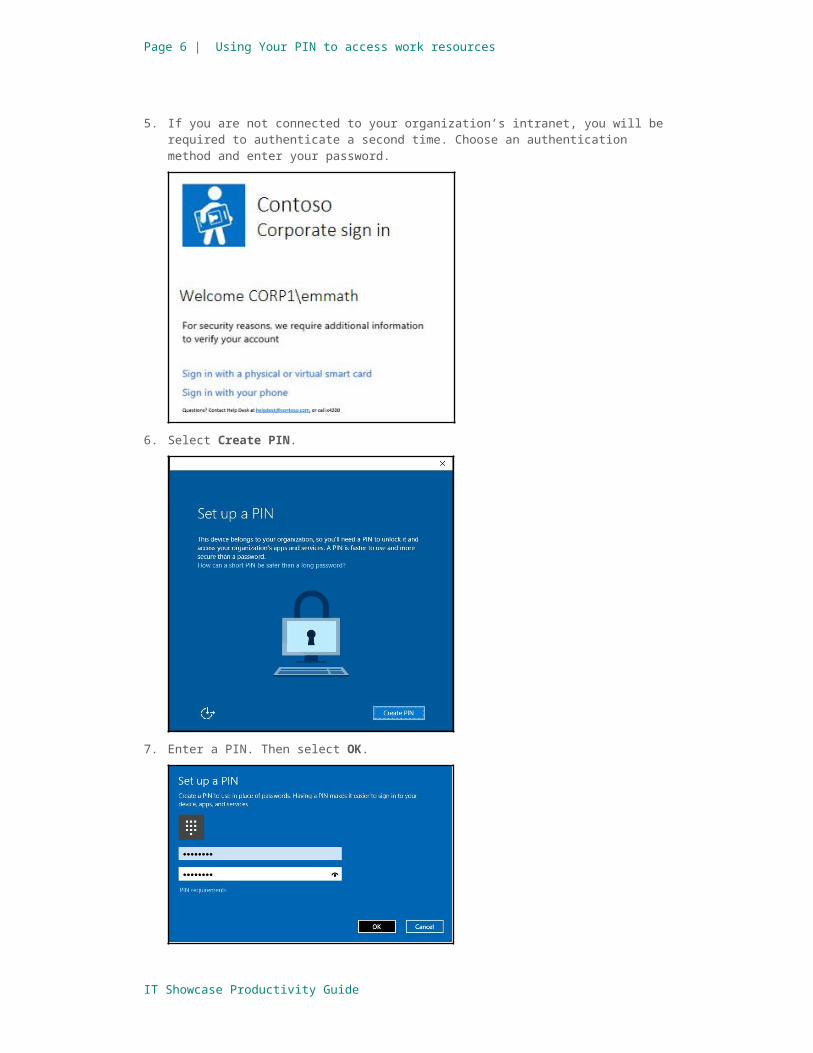
This begins the PIN setup process.5. If you are not connected to your organization’s intranet, you will be required to
authenticate a second time. Choose an authentication method and enter your password.
IT Showcase Productivity Guide
Page 5 | Using Your PIN to access work resources
6. Select Create PIN.
7. Enter a PIN. Then select OK.
8. You may be prompted to re-enter your PIN to complete the setup process.
IT Showcase Productivity Guide
Page 6 | Using Your PIN to access work resources
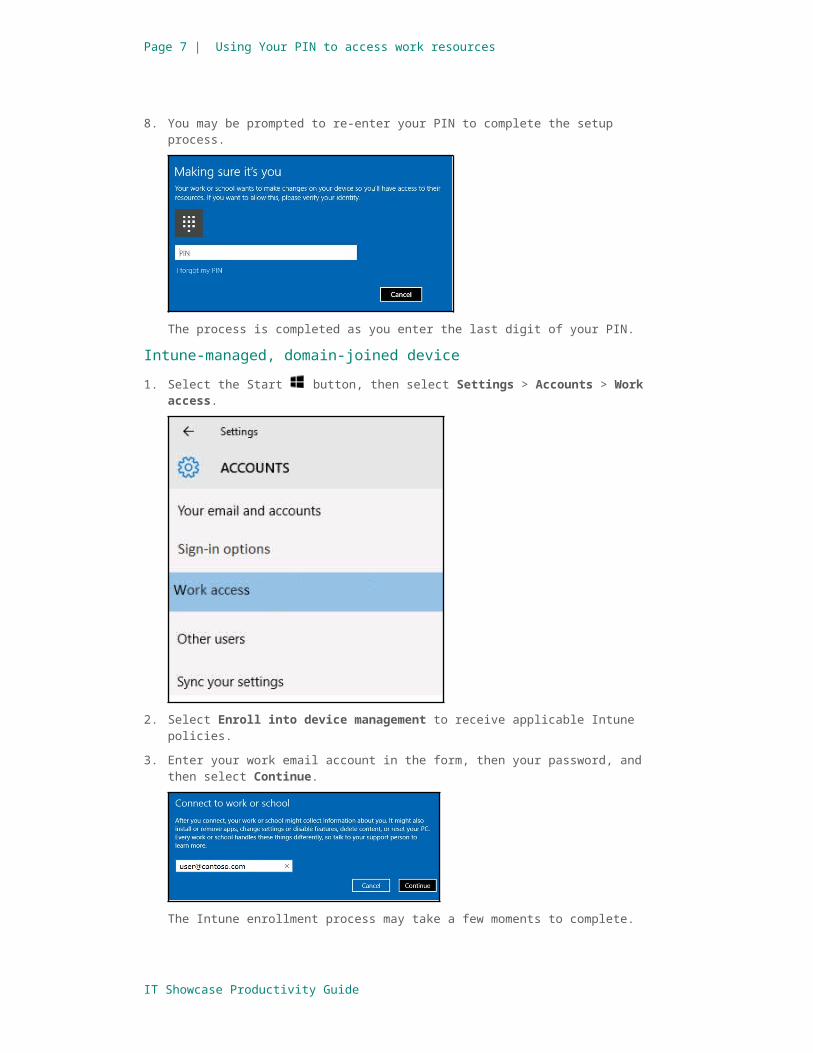
The process is completed as you enter the last digit of your PIN.Intune-managed, domain-joined device1. Select the Start button, then select Settings > Accounts > Work access.
2. Select Enroll into device management to receive applicable Intune policies.3. Enter your work email account in the form, then your password, and then select
Continue.
The Intune enrollment process may take a few moments to complete.
IT Showcase Productivity Guide
Page 7 | Using Your PIN to access work resources
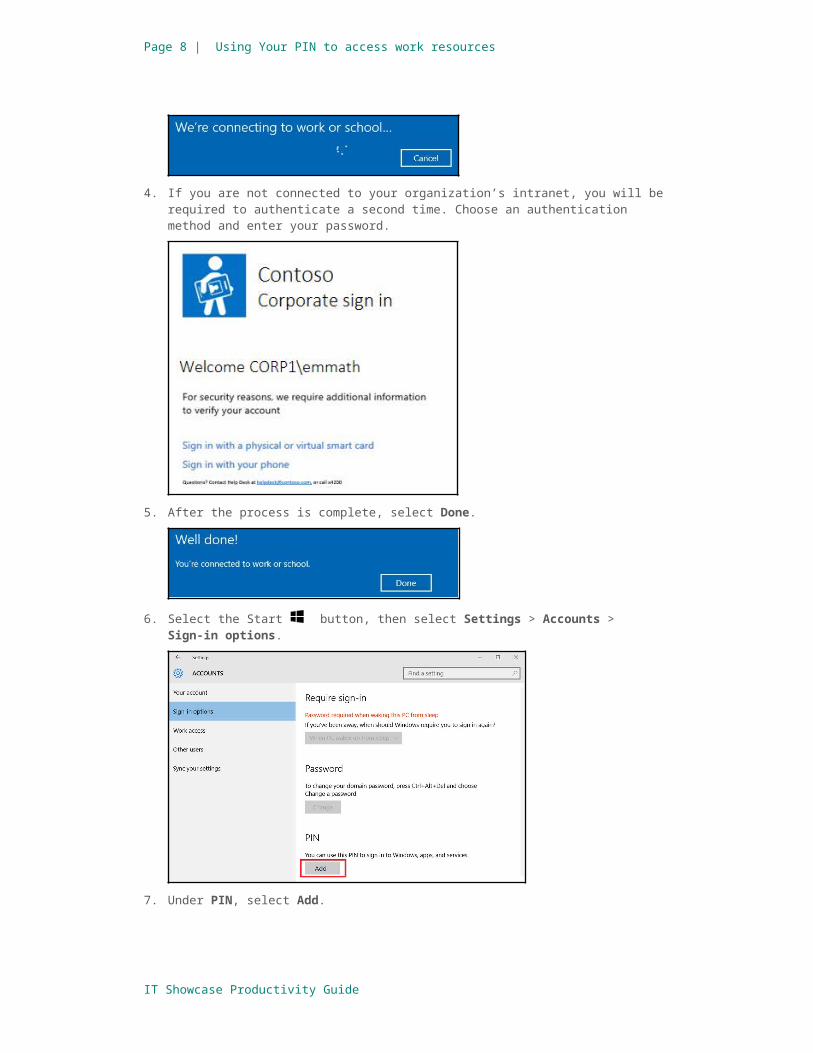
4. If you are not connected to your organization’s intranet, you will be required to authenticate a second time. Choose an authentication method and enter your password.
5. After the process is complete, select Done.
6. Select the Start button, then select Settings > Accounts > Sign-in options.
7. Under PIN, select Add.
IT Showcase Productivity Guide
Page 8 | Using Your PIN to access work resources
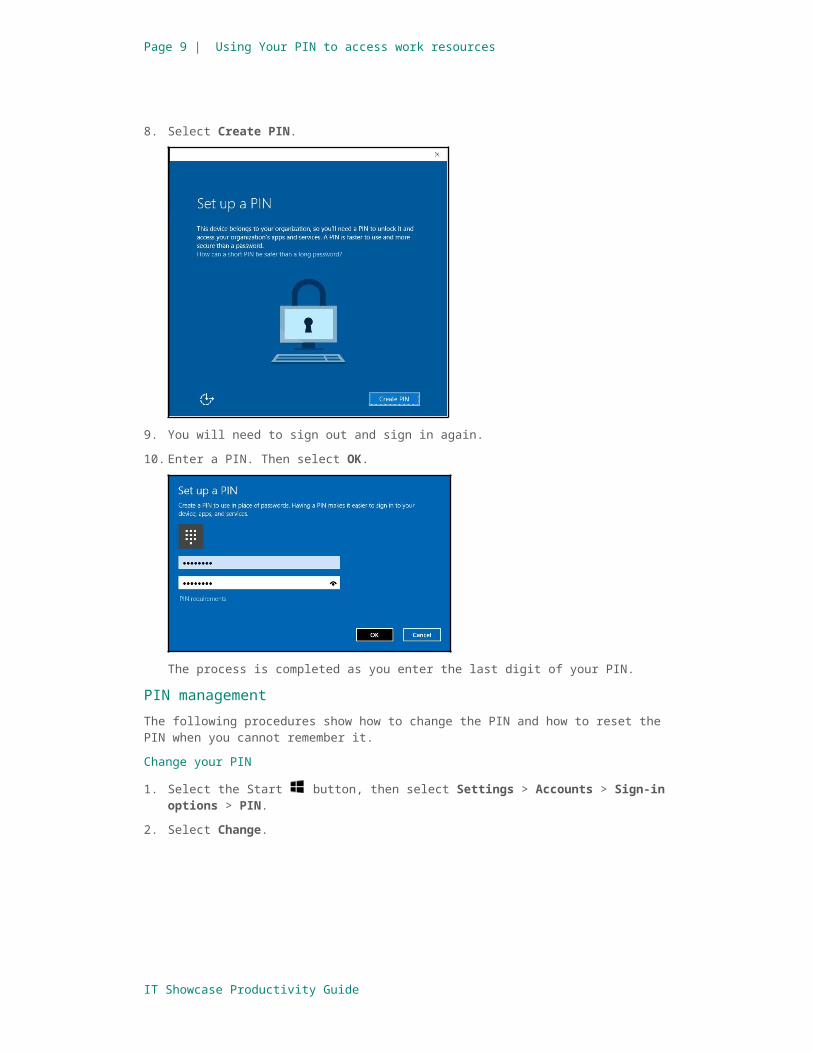
8. Select Create PIN.
9. You will need to sign out and sign in again.10. Enter a PIN. Then select OK.
The process is completed as you enter the last digit of your PIN.PIN managementThe following procedures show how to change the PIN and how to reset the PIN when you cannot remember it.Change your PIN
1. Select the Start button, then select Settings > Accounts > Sign-in options > PIN.
2. Select Change.
IT Showcase Productivity Guide
Page 9 | Using Your PIN to access work resources
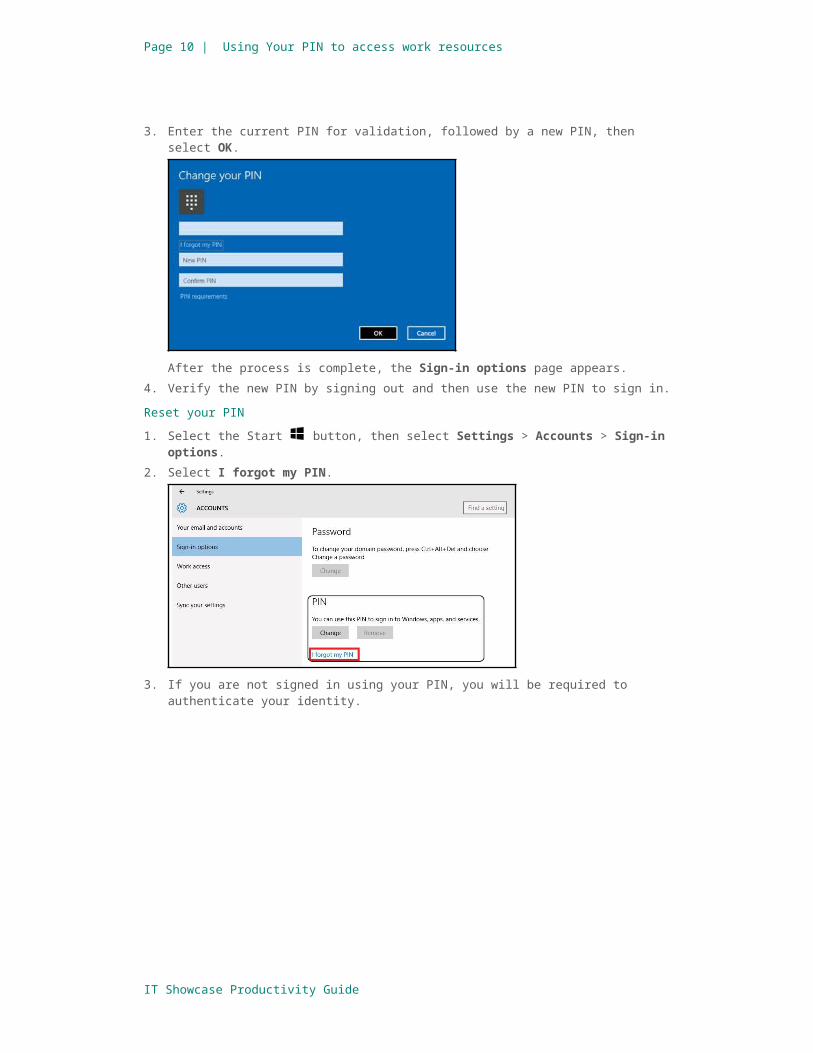
3. Enter the current PIN for validation, followed by a new PIN, then select OK.
After the process is complete, the Sign-in options page appears.4. Verify the new PIN by signing out and then use the new PIN to sign in.Reset your PIN1. Select the Start button, then select Settings > Accounts > Sign-in options.2. Select I forgot my PIN.
3. If you are not signed in using your PIN, you will be required to authenticate your identity.
IT Showcase Productivity Guide
Page 10 | Using Your PIN to access work resources
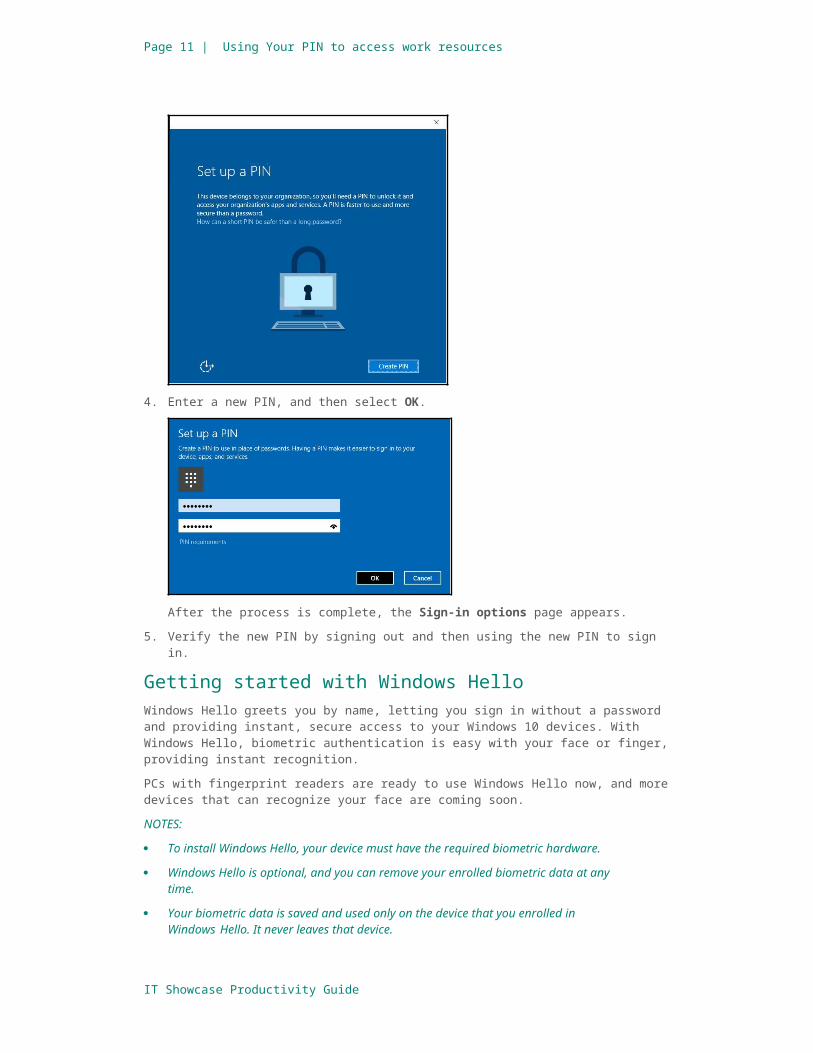
4. Enter a new PIN, and then select OK.
After the process is complete, the Sign-in options page appears.5. Verify the new PIN by signing out and then using the new PIN to sign in.
Getting started with Windows HelloWindows Hello greets you by name, letting you sign in without a password and providing instant, secure access to your Windows 10 devices. With Windows Hello, biometric authentication is easy with your face or finger, providing instant recognition.PCs with fingerprint readers are ready to use Windows Hello now, and more devices that can recognize your face are coming soon.NOTES:
To install Windows Hello, your device must have the required biometric hardware.
Windows Hello is optional, and you can remove your enrolled biometric data at any time.
Your biometric data is saved and used only on the device that you enrolled in Windows Hello. It never leaves that device.
Some of the screens shown in these procedures may differ from what you see in Windows Hello.
Set up facial recognitionTo use the facial recognition feature, you need an infrared camera that is supported by Windows Hello. Also, you need to have a PIN already configured for your device.
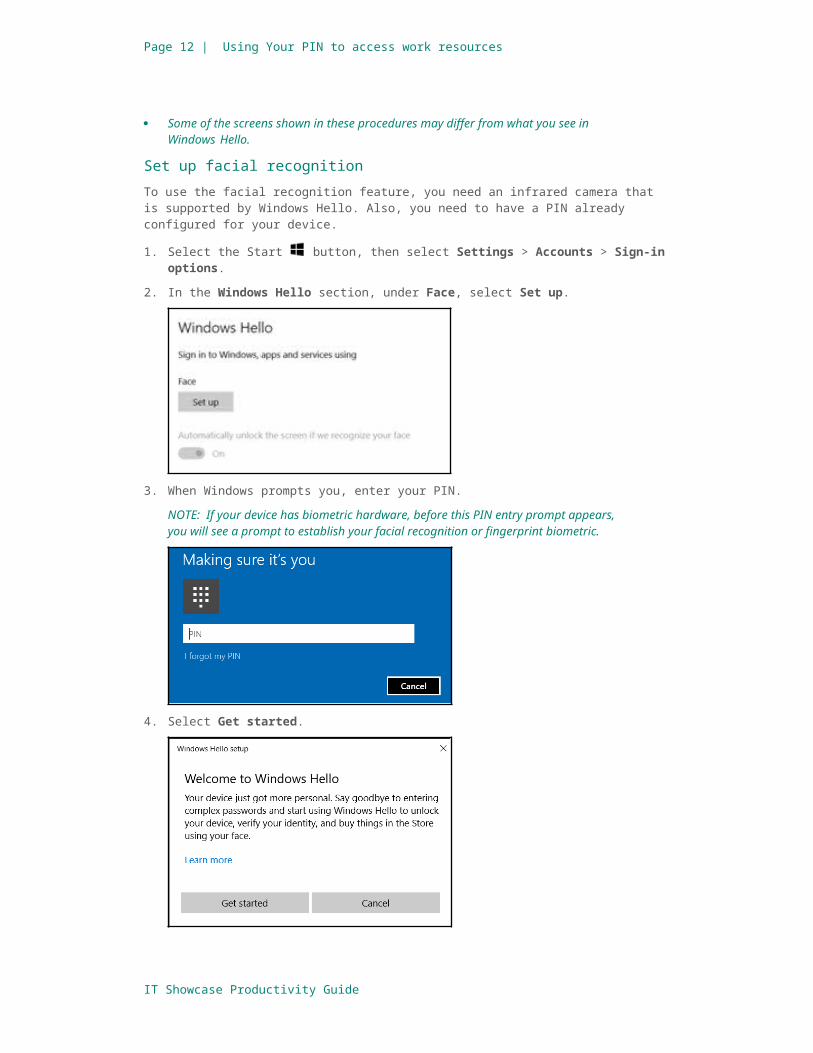
1. Select the Start button, then select Settings > Accounts > Sign-in options.2. In the Windows Hello section, under Face, select Set up.
3. When Windows prompts you, enter your PIN.
IT Showcase Productivity Guide
Page 11 | Using Your PIN to access work resources
NOTE: If your device has biometric hardware, before this PIN entry prompt appears, you will see a prompt to establish your facial recognition or fingerprint biometric.
4. Select Get started.
IT Showcase Productivity Guide
Page 12 | Using Your PIN to access work resources
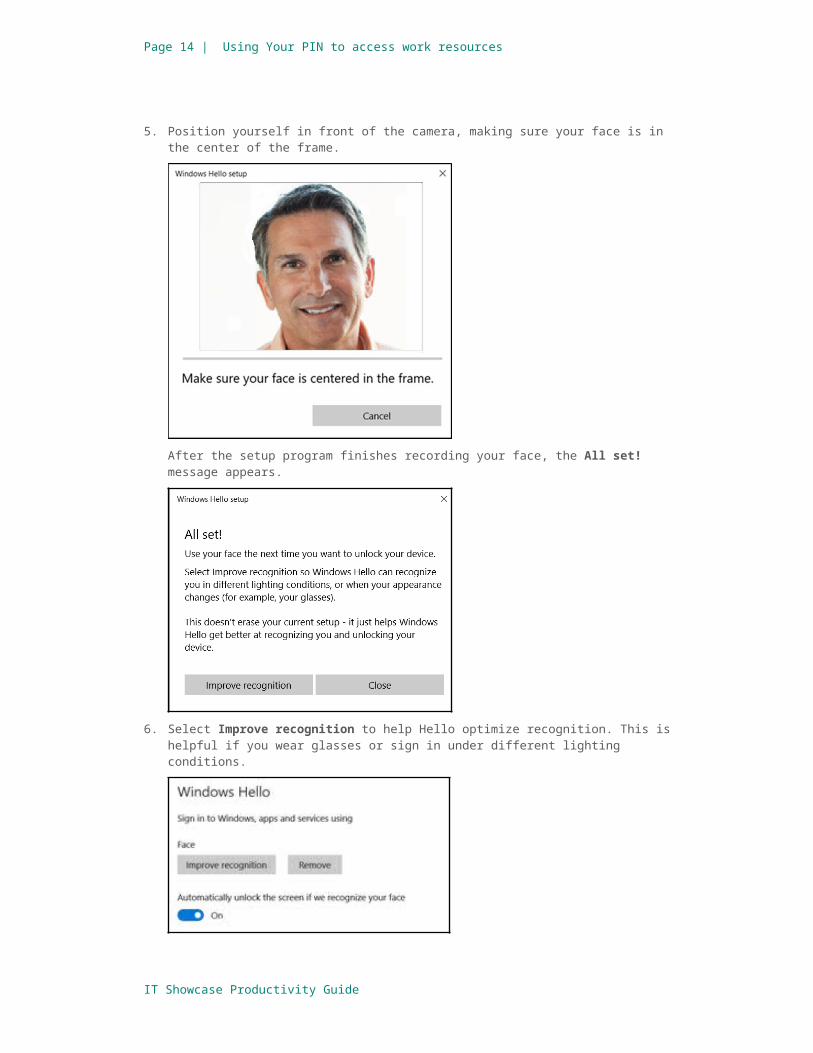
5. Position yourself in front of the camera, making sure your face is in the center of the frame.
After the setup program finishes recording your face, the All set! message appears.
6. Select Improve recognition to help Hello optimize recognition. This is helpful if you wear glasses or sign in under different lighting conditions.
IT Showcase Productivity Guide

Page 13 | Using Your PIN to access work resources
After the Windows Hello setup program finishes, your face is registered on your device.
Figure 1: Sign-on page using face recognition.
Set up fingerprint recognitionTo use the fingerprint recognition feature, you will either need a device with a fingerprint reader, or a USB fingerprint reader that you can connect to your device.
1. Select the Start button, then select Settings > Accounts > Sign-in options.2. In the Windows Hello section, under Fingerprint, select Set up.
IT Showcase Productivity Guide
Page 14 | Using Your PIN to access work resources
3. Depending on the type of reader you are using, you will be asked to either swipe or touch your finger several times.
4. Touch a finger to the fingerprint reader to scan your fingerprint.NOTE: If you want, you can register multiple fingers.
After your fingerprints have been scanned, the All set! message appears.
The next time you sign in or need to unlock the screen, you can use a fingerprint.
IT Showcase Productivity Guide

Page 15 | Using Your PIN to access work resources
After you’re set up with Hello, you’ll be able to sign in with a quick swipe or glance.
For more informationFor more great productivity guidance, visit…http://microsoft.com/ITShowcase/Productivity
Microsoft IT Showcasehttp://www.microsoft.com/ITShowcase
For more information about Microsoft products or services in the United States, call the Microsoft Sales Information Center at (800) 426-9400. In Canada, call the Microsoft Canada Order Centre at (800) 933-4750. Outside the 50 United States and Canada, please contact your local Microsoft subsidiary. To access information via the web, go to:http://www.microsoft.comWindows Hello on the Windows bloghttp://blogs.windows.com/windowsexperience/2015/07/25/say-hello-to-windows-hello-on-windows-10/For IT Administrators: Information on setting up PIN in your enterprisehttps://technet.microsoft.com/en-us/library/mt589441(v=vs.85).aspx© 2016 Microsoft Corporation. All rights reserved. Microsoft and Windows are either registered trademarks or trademarks of Microsoft Corporation in the United States and/or other countries. The names of actual companies and products mentioned herein may be the trademarks of their respective owners. This document is for informational purposes only. MICROSOFT MAKES NO WARRANTIES, EXPRESS OR IMPLIED, IN THIS SUMMARY.
IT Showcase Productivity Guide