Embed Size (px)
Citation preview
Tracker Electronic I-9
Tips for completing for an employee on F-1 Visa
Prepared by Cathy MenacherUniversity of Illinois at Urbana-Champaign
June 2011
1
F1 Visa Holder- Section 1
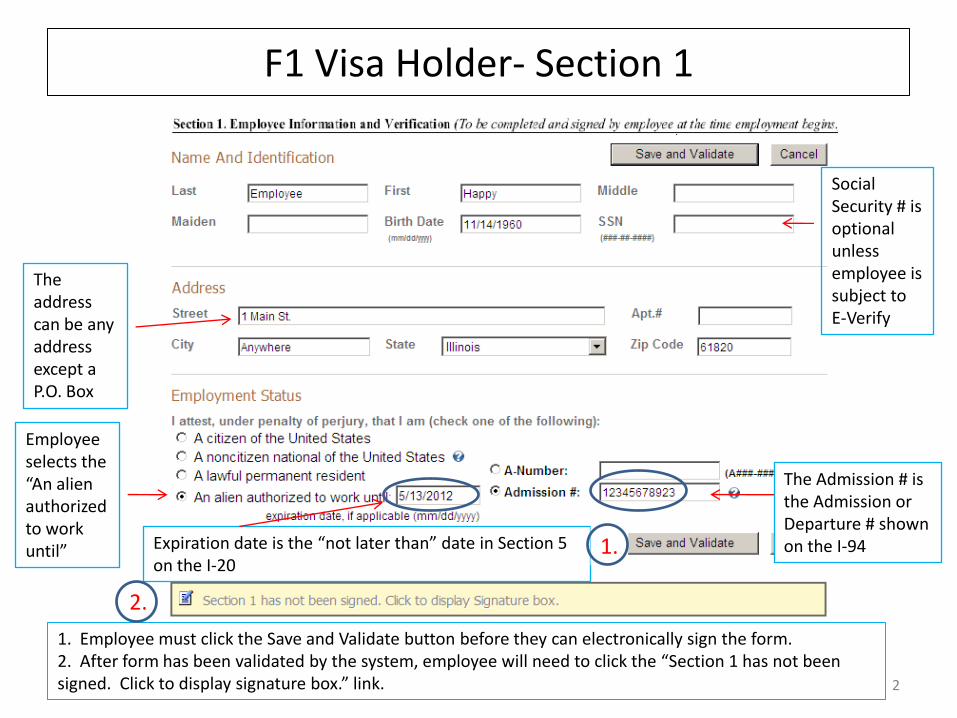
1. Employee must click the Save and Validate button before they can electronically sign the form.2. After form has been validated by the system, employee will need to click the “Section 1 has not been signed. Click to display signature box.” link.
The address can be any address except a P.O. Box
Social Security # is optional unless employee is subject to E-Verify
Employee selects the “An alien authorized to work until” Expiration date is the “not later than” date in Section 5
on the I-20
The Admission # is the Admission or Departure # shown on the I-941.
2.
2
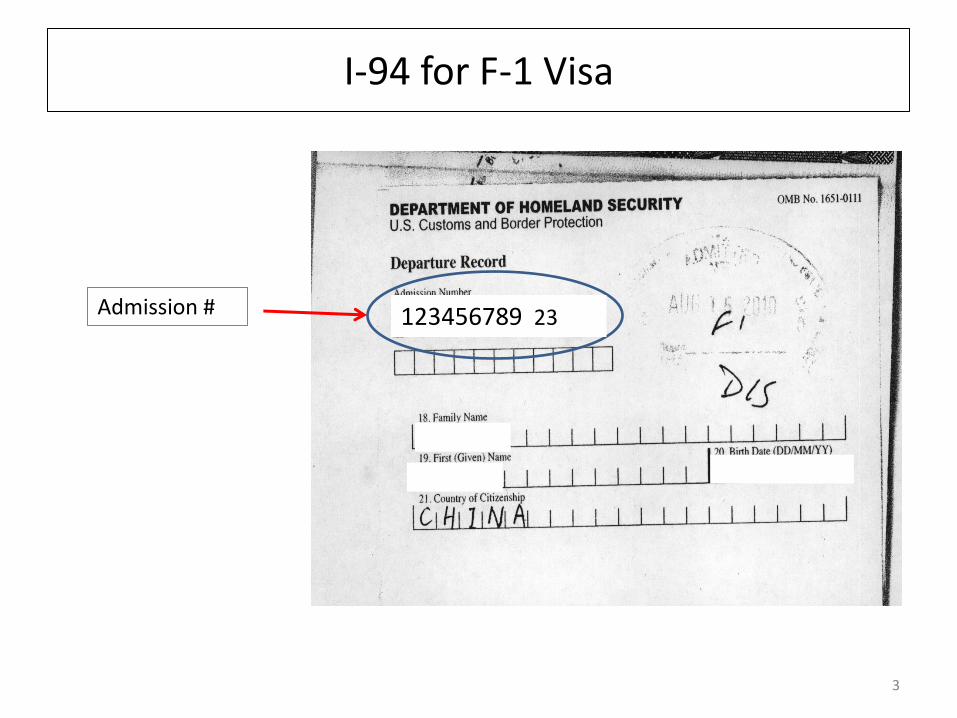
I-94 for F-1 Visa
3
Admission # 123456789 23
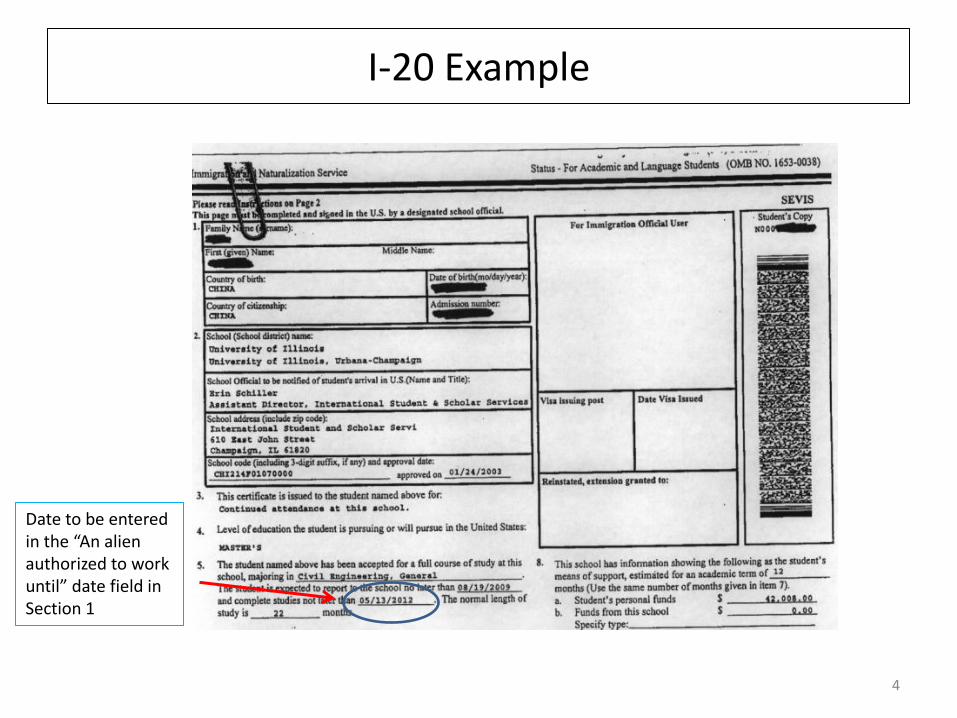
I-20 Example
Date to be entered in the “An alien authorized to work until” date field in Section 1
4
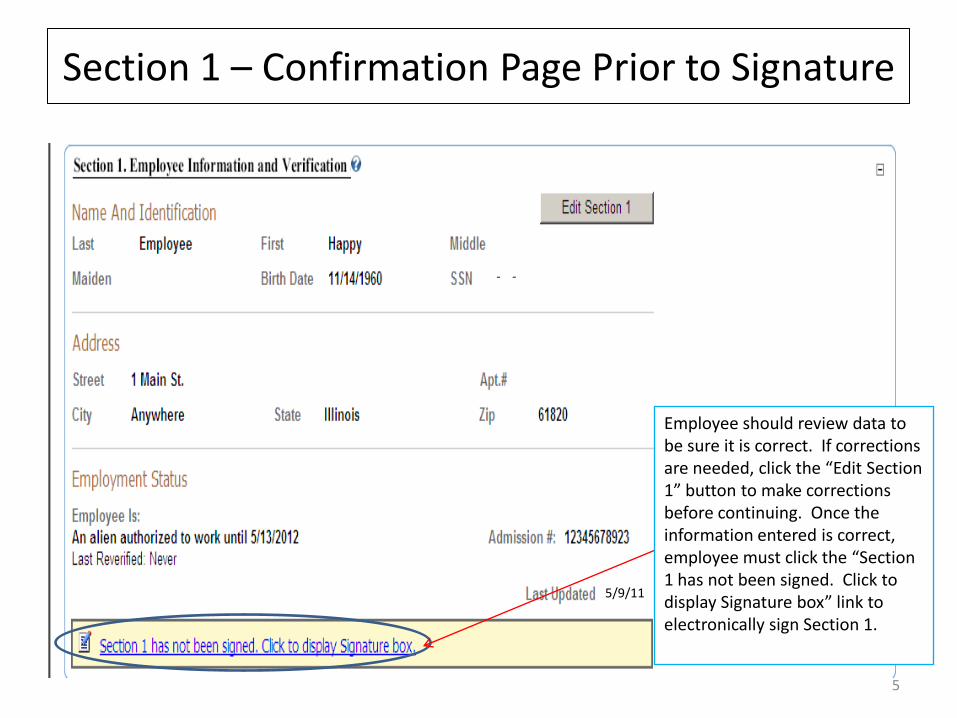
Section 1 – Confirmation Page Prior to Signature
5
5/9/11
Employee should review data to be sure it is correct. If corrections are needed, click the “Edit Section 1” button to make corrections before continuing. Once the information entered is correct, employee must click the “Section 1 has not been signed. Click to display Signature box” link to electronically sign Section 1.
- -
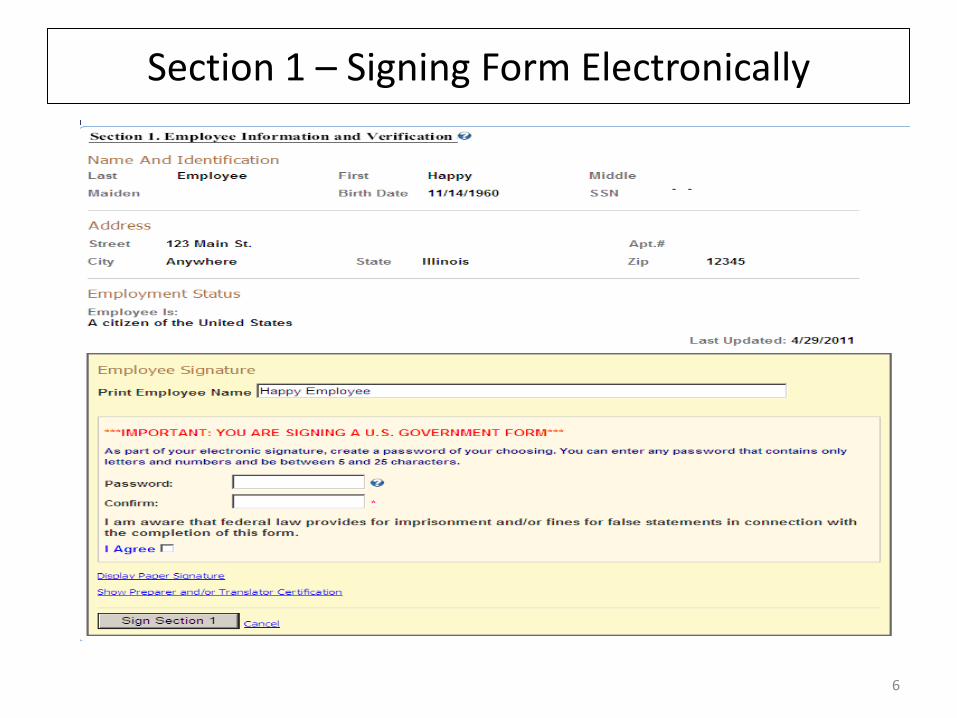
Section 1 – Signing Form Electronically
6
- -

Section 1 – Signing Form Electronically
7
Employee must:
1. Enter a password of choice following the requirements listed2. Confirm the password by re-entering the password3. Read the Attestation Statement and click the “I Agree” box 4. Click the Sign Section 1 button
1.2.
3.
4.

Section 1 – Form I-9 Electronically Signed by Employee
8
5/9/2011
5/9/2011
- -
The “Signed on” date is system populated and cannot be changed

Section 2 – Unit I-9 Manager to Complete
9
Click on the “Edit Section 2” button to begin completion of Section 2
This section reflects what steps still need to be completed
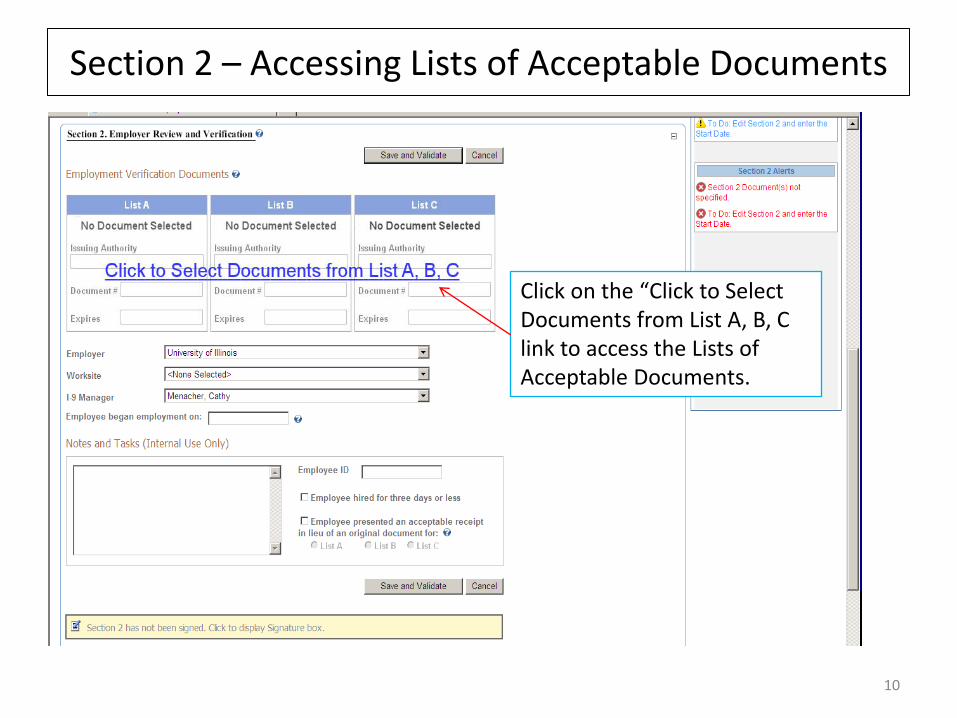
Section 2 – Accessing Lists of Acceptable Documents
10
Click on the “Click to Select Documents from List A, B, C link to access the Lists of Acceptable Documents.

Choosing Document Type
11
Lists of Acceptable Documents displays. Click on the appropriate document in List A, or one document from both List B and List C, and click OK. NOTE: Only those documents that an employee can present based on their citizenship will appear.
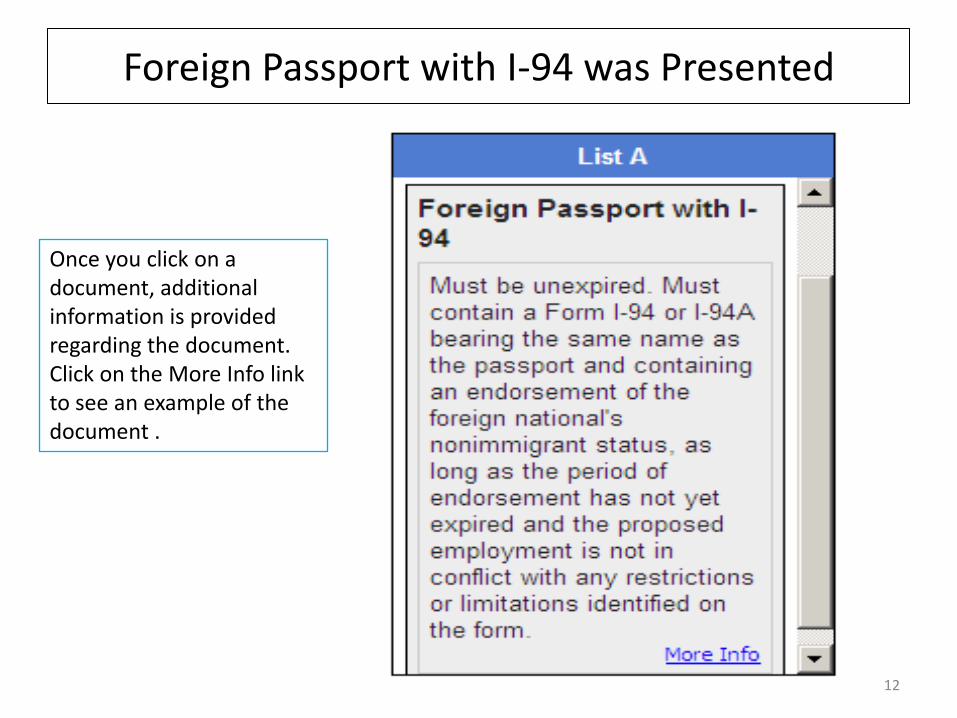
Foreign Passport with I-94 was Presented
Once you click on a document, additional information is provided regarding the document. Click on the More Info link to see an example of the document .
12
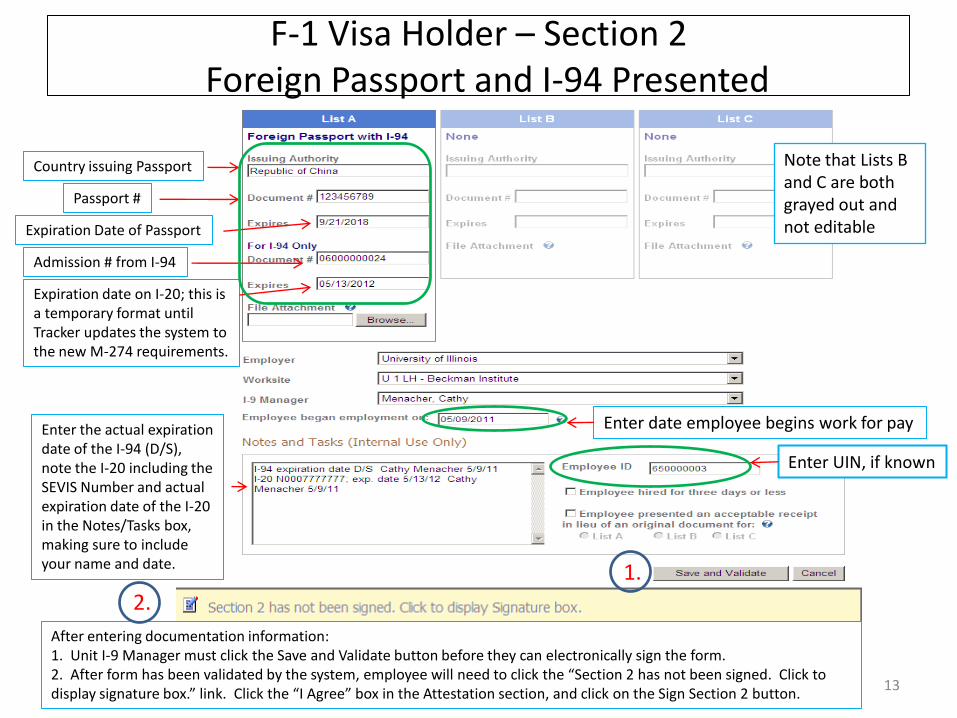
F-1 Visa Holder – Section 2Foreign Passport and I-94 Presented
Note that Lists B and C are both grayed out and not editable
Country issuing Passport
Passport #
Expiration Date of Passport
Admission # from I-94
Expiration date on I-20; this isa temporary format until Tracker updates the system to the new M-274 requirements.
Enter the actual expiration date of the I-94 (D/S), note the I-20 including the SEVIS Number and actual expiration date of the I-20 in the Notes/Tasks box, making sure to include your name and date.
Enter UIN, if known
After entering documentation information:1. Unit I-9 Manager must click the Save and Validate button before they can electronically sign the form.2. After form has been validated by the system, employee will need to click the “Section 2 has not been signed. Click to display signature box.” link. Click the “I Agree” box in the Attestation section, and click on the Sign Section 2 button.
1.
2.
Enter date employee begins work for pay
13

Unexpired Foreign Passport
123456789
1960
Issuing Authority = Country in which passport was issued (will not be the United States)
Enter passport # in the first “Document #” field under List A
Enter expiration date (Date of expiry) in the first “Expires” field under List A
Note: Because passports are produced differently per country, the information you need to enter may be found in a different location on the document
14
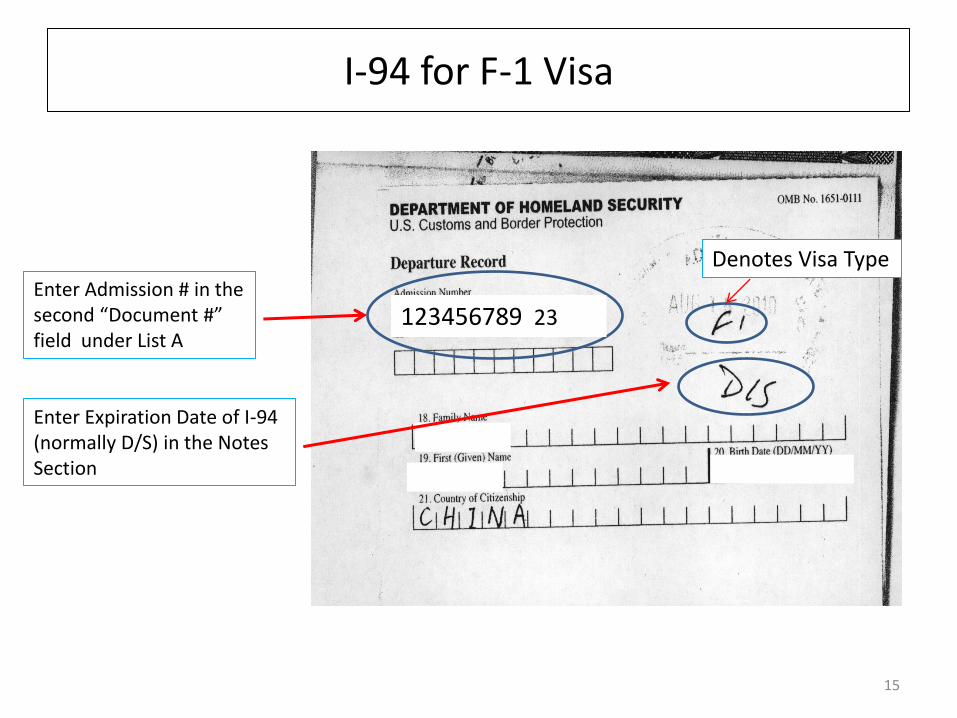
I-94 for F-1 Visa
15
Enter Admission # in the second “Document #” field under List A
123456789 23
Enter Expiration Date of I-94 (normally D/S) in the Notes Section
Denotes Visa Type
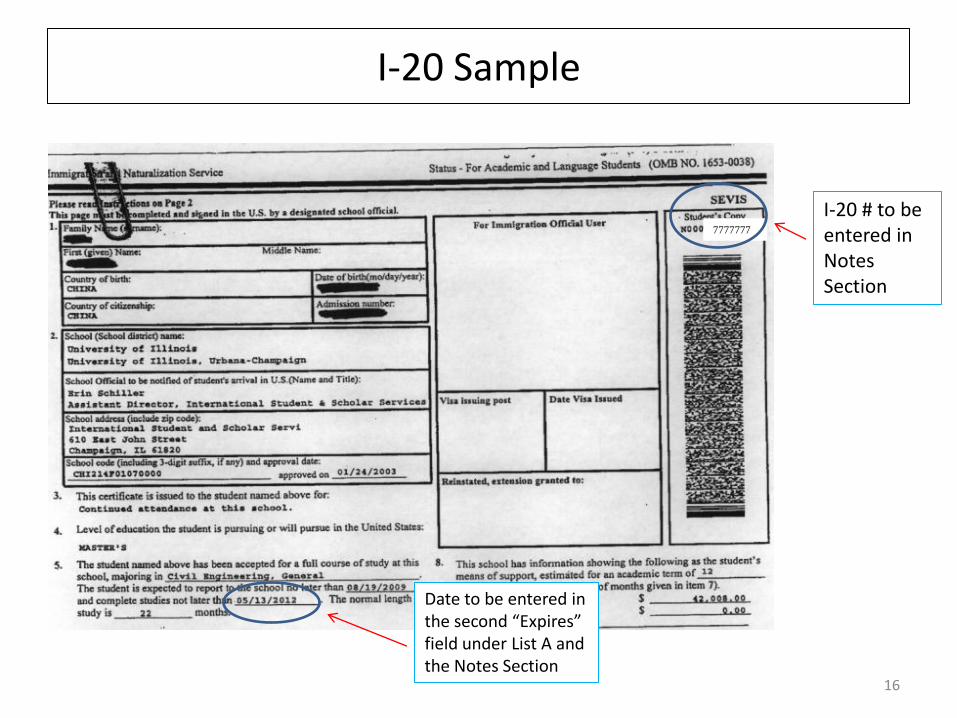
I-20 Sample
7777777
I-20 # to be entered in Notes Section
Date to be entered in the second “Expires” field under List A and the Notes Section
16
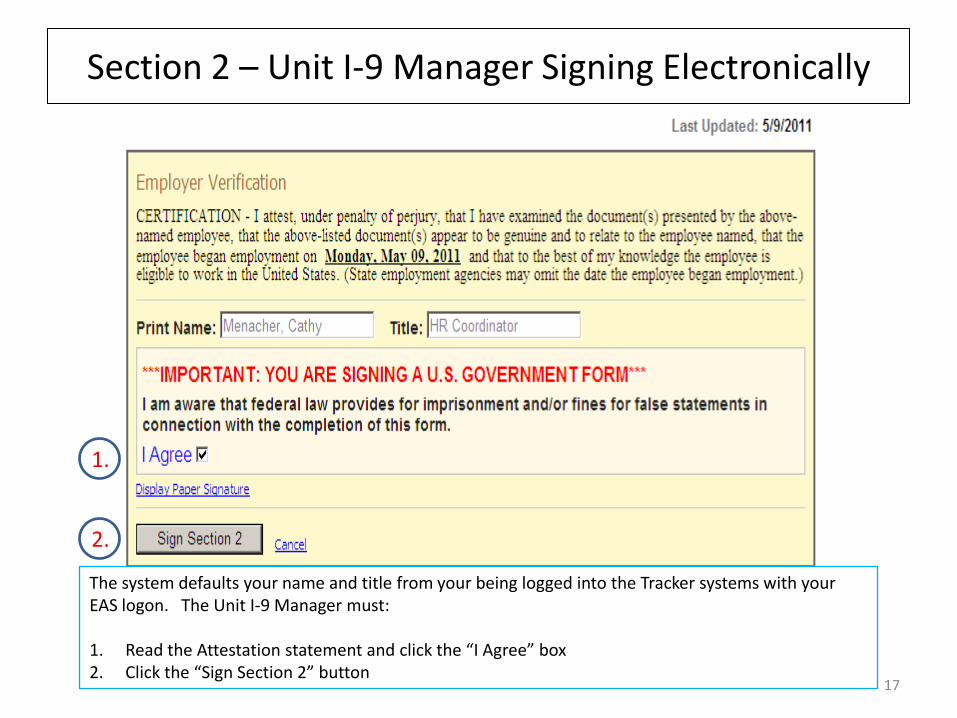
Section 2 – Unit I-9 Manager Signing Electronically
17
The system defaults your name and title from your being logged into the Tracker systems with your EAS logon. The Unit I-9 Manager must:
1. Read the Attestation statement and click the “I Agree” box2. Click the “Sign Section 2” button
1.
2.
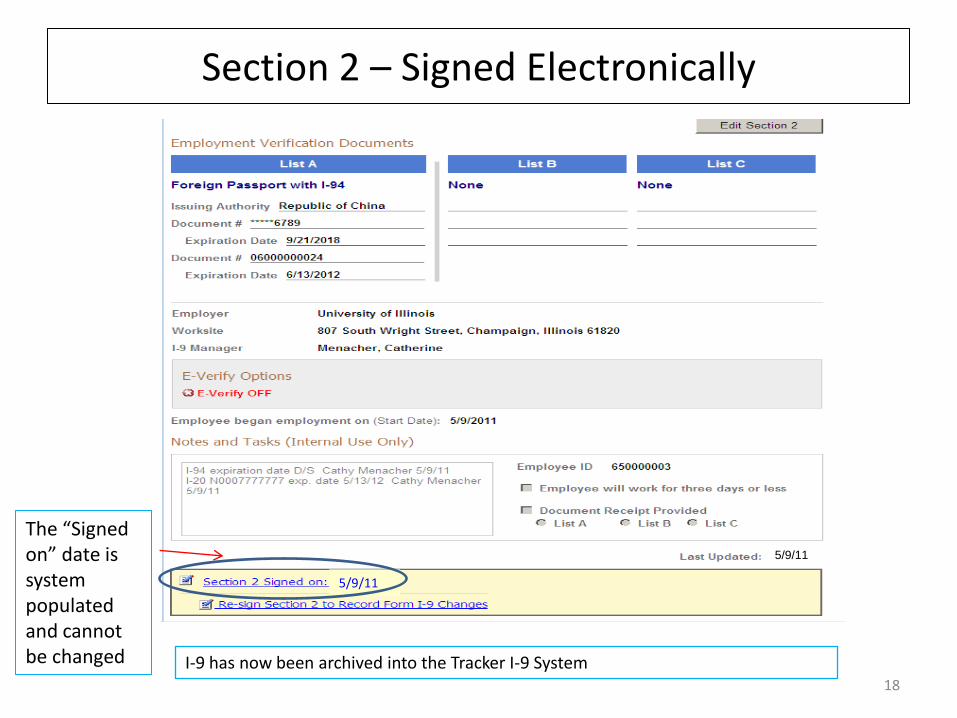
Section 2 – Signed Electronically
5/9/11
5/9/11
The “Signed on” date is system populated and cannot be changed I-9 has now been archived into the Tracker I-9 System
18