Embed Size (px)
Citation preview
Tutorial: Compiling the Engine, Editor, and Game This tutorial walks you through the steps to build the lumberyard engine, editor, plugins
and tools, including how to build a game project. At the end of the tutorial you will have
game project that runs in the editor and standalone.
You will learn how to do the following:
• Configure your project
• Build with lmbr_waf from the command line
• Build and run the editor with Visual Studio
• Run the standalone game
Prerequisites This tutorial assumes you have installed Lumberyard and set up your development
environment and that you are familiar with programming concepts in general.
You must have the following before starting this tutorial:
• Windows 7 or higher (64bit)
• Processor – Intel Quad-Core (I 2300), AMD Octo-Core (FX810), or better
• Memory – 8 GM RAM or higher
• Graphics card – NVIDIA GeForce 660Ti, Radeon HD790, or better
• Disk space – 8 GB minimum
• Visual C++ Redistributable Packages for Visual Studio 2013
• Visual Studio 2013 [Community/Pro/Ultimate] with update 4
Step 1: Configure Your Project The first step in the tutorial is to configure your project using lmbr_waf (pronounced
“Lumber Waf”). The configure command will ensure that all the paths to the required 3rd
party libraries exist and will also generate a Visual Studio solution.
To configure your project
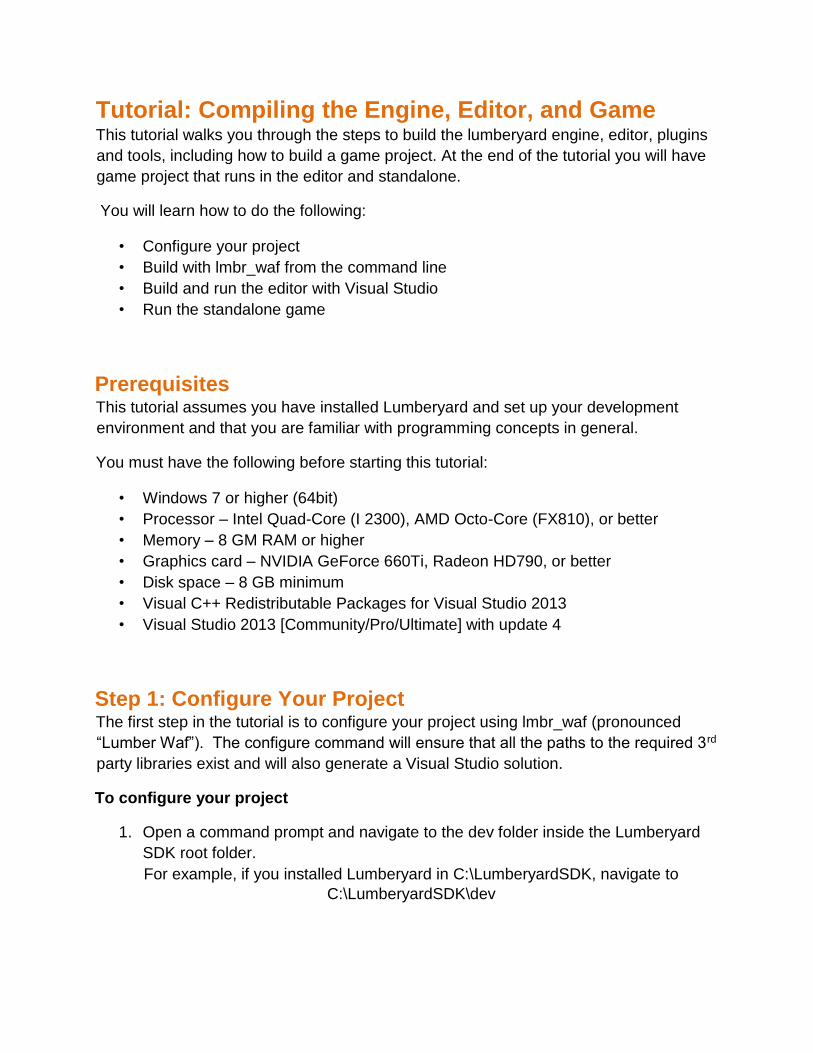
1. Open a command prompt and navigate to the dev folder inside the Lumberyard
SDK root folder.
For example, if you installed Lumberyard in C:\LumberyardSDK, navigate to
C:\LumberyardSDK\dev
2. Type the following at the command prompt and press ENTER.
lmbr_waf configure
The configure command instructs the Waf build system to do some essential
tasks like running SetupAssistant in batch mode to ensure the correct 3rdParty
libraries are accessible from dev/Code/SDKs. It also generates the
LumberyardSDK.sln Visual Studio solution in the dev/Solutions folder.
3. After the command completes, check the output for any errors and address those
before continuing. Errors in the configure command output are usually from
missing 3rd party libraries. Run SetupAssistant again if you see any of these
errors and install those missing libraries.
After the configure command completes successfully you have the correct 3rd party
libraries and a Visual Studio solution.
Step 2: Building with lmbr_waf After you configure the Lumberyard SDK, you’re ready to build. The first method of
building is the simplest and is also suitable for automated building. It uses the same
lmbr_waf tool that configured the Lumberyard SDK in step 1.
To build with lmbr_waf
1. Open a command prompt and navigate to the dev folder inside the Lumberyard
root folder.
For example, if you installed Lumberyard in C:\LumberyardSDK, navigate to
C:\LumberayrdSDK\dev
2. Type the following at the command prompt and press ENTER.
lmbr_waf build_win_x64_profile -p all --progress
The parameters passed to lmbr_waf tell it to build the Windows x64 profile
specification. The “all” parameter instructs lmbr_waf to build everything (engine,
editor, game etc.) and the “progress” parameter adds a nice little visual indicator
that shows the percent complete.
3. Go make some coffee. Seriously, this could take a while.
4. When the build process completes, check the output for errors and address those
before continuing. Again, errors typically arise from missing or incorrect 3rd party
libraries.
You have now built the engine, editor, plugins, tools and sample game project. If you
navigate to the dev/bin64 folder you will see all the binaries have been updated.
Step 3: Build with Visual Studio If you intend to actively work on the code for a project or debug a project you’ll want to
build and run using Visual Studio. This step in the tutorial will show you how to build and
run your project with Visual Studio.
To build with Visual Studio
1. Navigate to the dev/Solutions folder and open LumberyardSDK.sln in Visual
Studio.
After the solution opens take a look at the Solution Explorer panel. The various
projects are organized into the following folders:
FOLDER DESCRIPTION
AZ Framework Amazon Framework projects which provide common core
utility, tools, API and application base classes.
Common Common engine interfaces used by games, the editor,
plugins and the resource compiler.
CryEngine Core engine projects including the renderer, audio,
physics, scripting and other related projects.
EngineModules Engine modules like the LySystemModule used by the
LyShine User Interface system.
Game All game projects live here, including the GameCore
framework and CryAction.
Gems All enabled Gems with code will appear here.
Network Network related modules like GridMate and
GridMateGameLift appear here, if networking is enabled.
Pipeline Various DCC pipeline projects including the Maya
exporter.
RC The Resource Compiler project and related projects.
Sandbox All editor and editor plugin related projects live here.
Tools The GemRegistry, PRT, Shader Cache Generator and
other similiar tools.
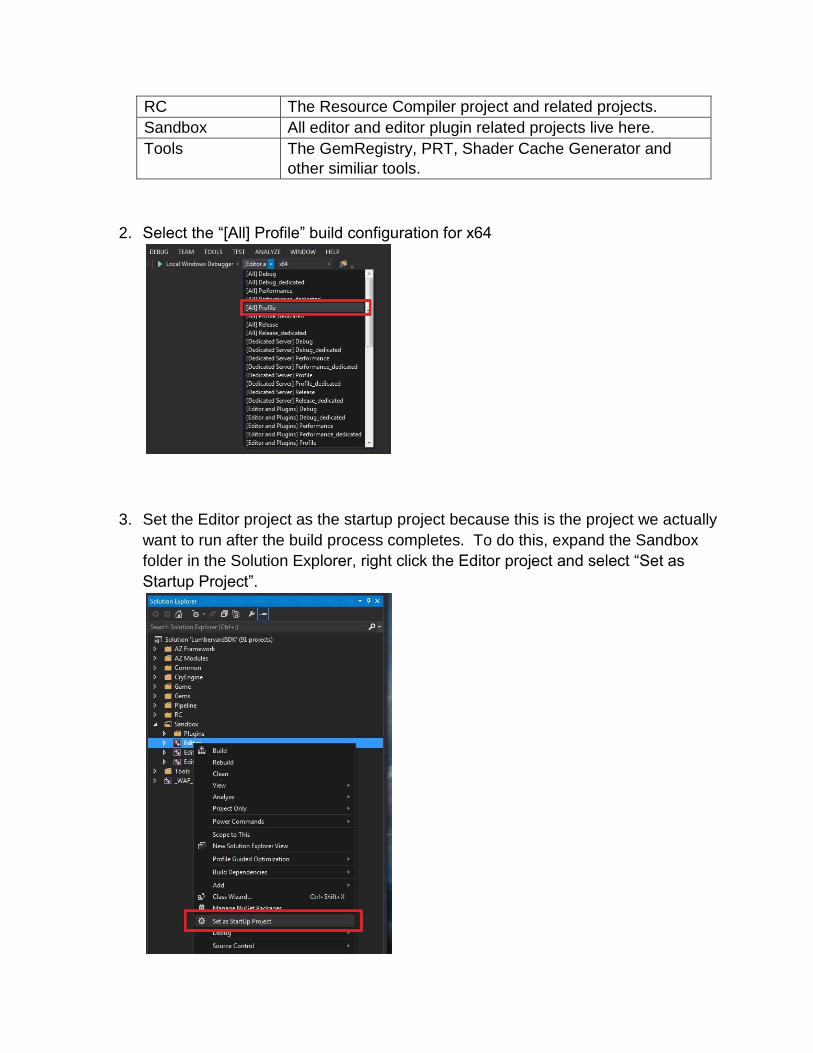
2. Select the “[All] Profile” build configuration for x64
3. Set the Editor project as the startup project because this is the project we actually
want to run after the build process completes. To do this, expand the Sandbox
folder in the Solution Explorer, right click the Editor project and select “Set as
Startup Project”.

4. Press BUILD > Build Solution (CTRL + SHIFT + B for you wizards) and go make
some coffee.
After the build is complete you are ready to run the editor from Visual Studio.
Step 5: Run Your Game in the Editor This step in the tutorial will show you how to run your game in the editor. The
dev/bootstrap.cfg configuration file contains a setting named sys_game_folder that tells
the engine which folder is the active game folder. If you created a new game project
with the Project Configurator, a new folder was created with the same name as your
project and the system.cfg was modified to point to that new folder. When you run the
editor from Visual Studio, the Editor will use the bootstrap.cfg file to determine which
game folder to use for all your game-related content.
To Run Your Game in the Editor
1. In Visual Studio, press the “Local Windows Debugger” button (F5) to run the
editor.
2. The editor will launch and prompt you to sign in with your Amazon.com account.
If you haven’t already created an Amazon.com account, now would be a good
time to do so.
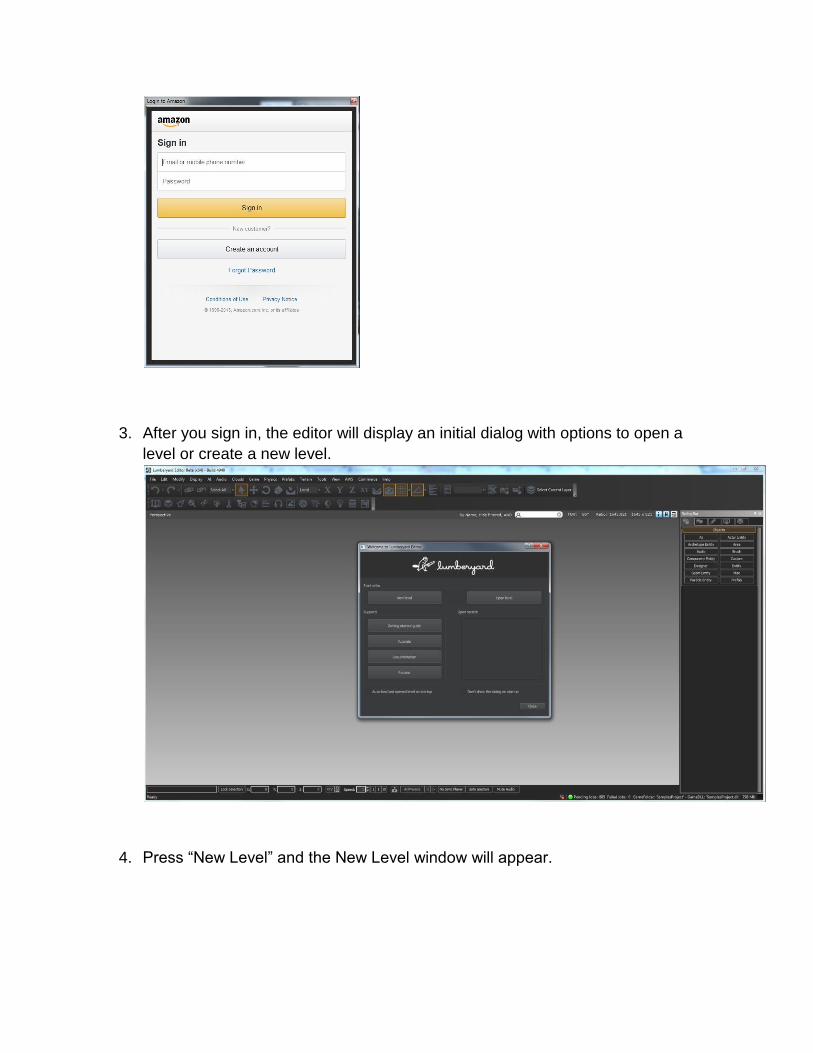
3. After you sign in, the editor will display an initial dialog with options to open a
level or create a new level.
4. Press “New Level” and the New Level window will appear.
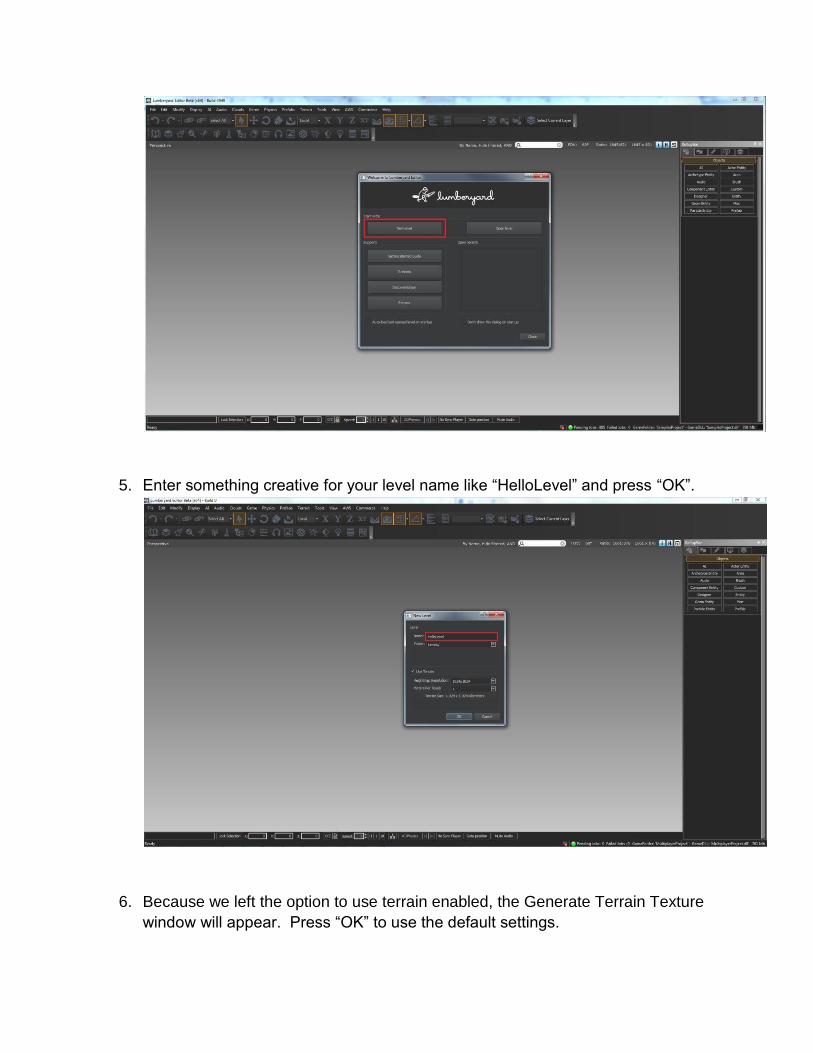
5. Enter something creative for your level name like “HelloLevel” and press “OK”.
6. Because we left the option to use terrain enabled, the Generate Terrain Texture
window will appear. Press “OK” to use the default settings.
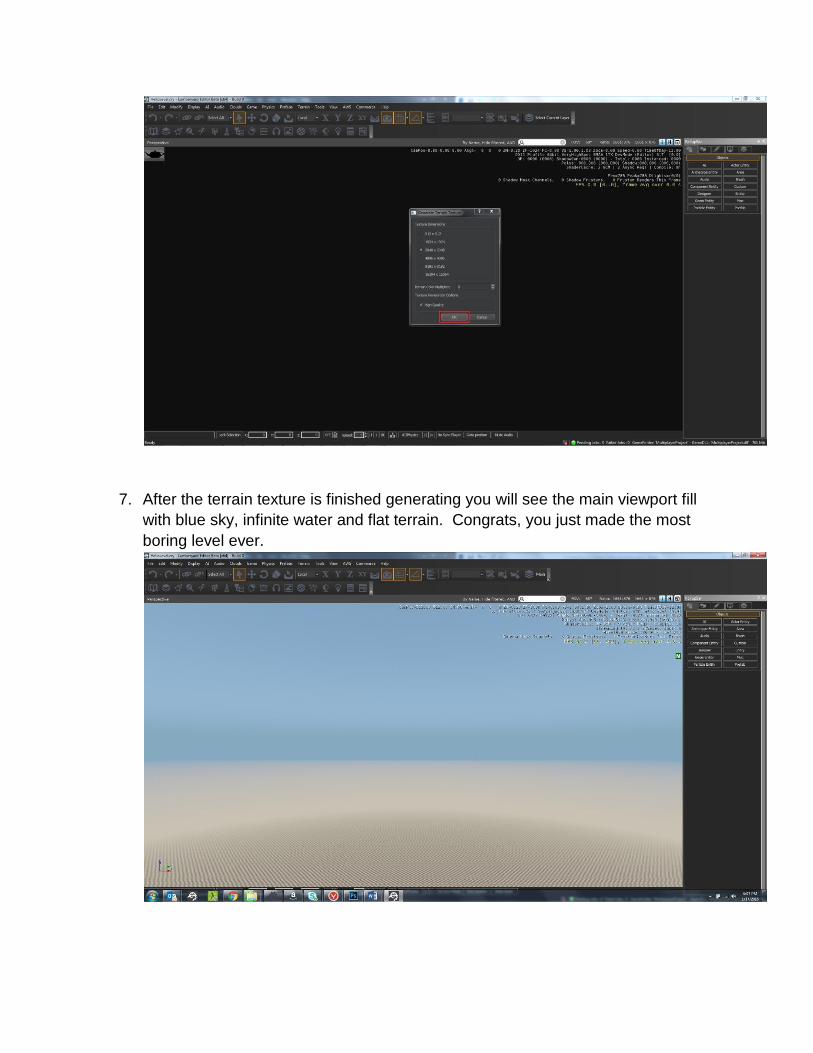
7. After the terrain texture is finished generating you will see the main viewport fill
with blue sky, infinite water and flat terrain. Congrats, you just made the most
boring level ever.
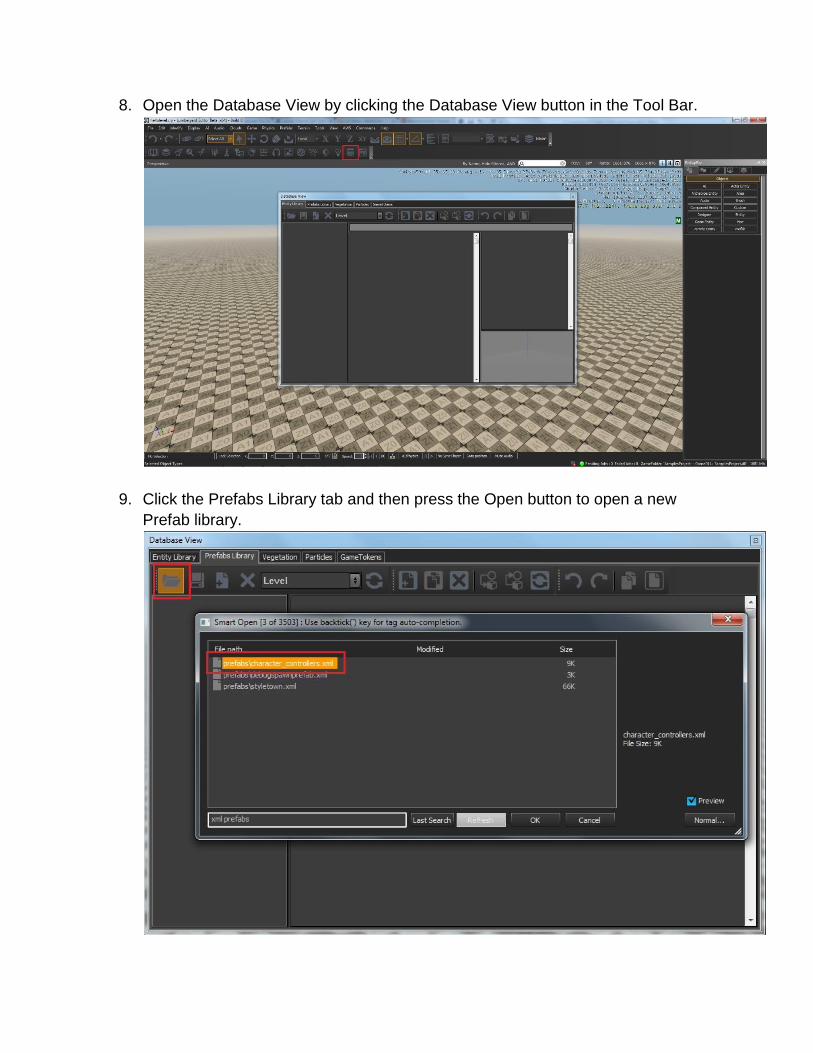
8. Open the Database View by clicking the Database View button in the Tool Bar.
9. Click the Prefabs Library tab and then press the Open button to open a new
Prefab library.
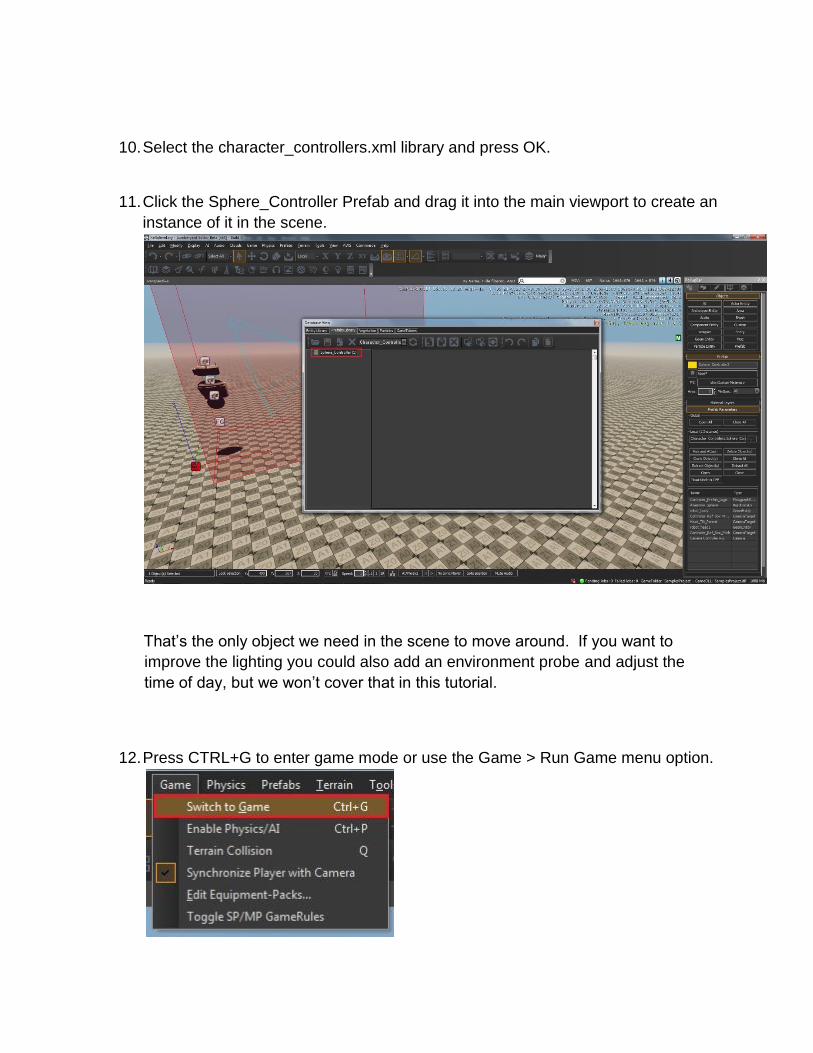
10. Select the character_controllers.xml library and press OK.
11. Click the Sphere_Controller Prefab and drag it into the main viewport to create an
instance of it in the scene.
That’s the only object we need in the scene to move around. If you want to
improve the lighting you could also add an environment probe and adjust the
time of day, but we won’t cover that in this tutorial.
12. Press CTRL+G to enter game mode or use the Game > Run Game menu option.

13. You’re now running your game in the editor. After your senses recover, press
ESC to leave game mode and return to regular editor mode.
You may be tempted to ship your game with the editor and have everyone run your
game in the editor, but that would be a BAD IDEA.
Step 6: Run the game outside the editor This step in the tutorial will show you how to run the standalone version of your game.
To run the game outside the editor
1. Before running the game outside the editor you must export the level so it is
optimized. Select File > Export to Engine (or CTRL + E if can’t reach your
mouse)
This will prepare the level to be run by the standalone version of your game.
2. Navigate to dev/Bin64 and run SamplesProjectLauncher.exe.
An empty black window will appear. Don’t panic. The window is black because your
game doesn’t have a level loaded.
To load a level
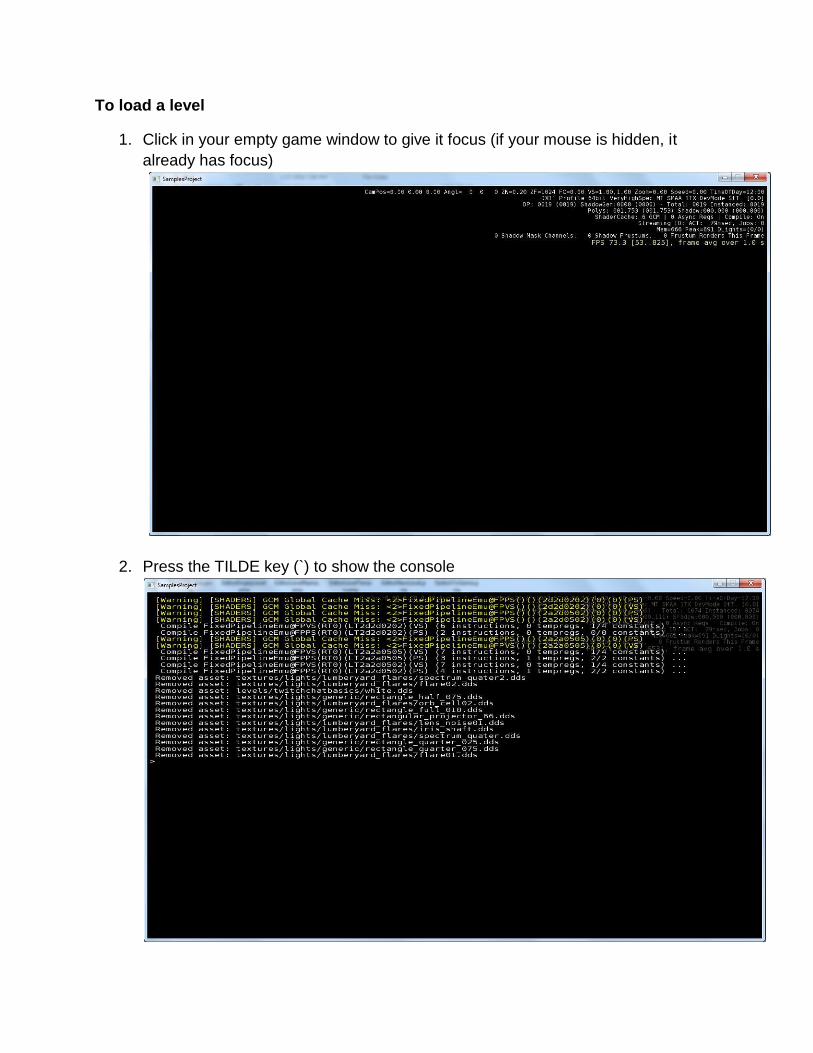
1. Click in your empty game window to give it focus (if your mouse is hidden, it
already has focus)
2. Press the TILDE key (`) to show the console
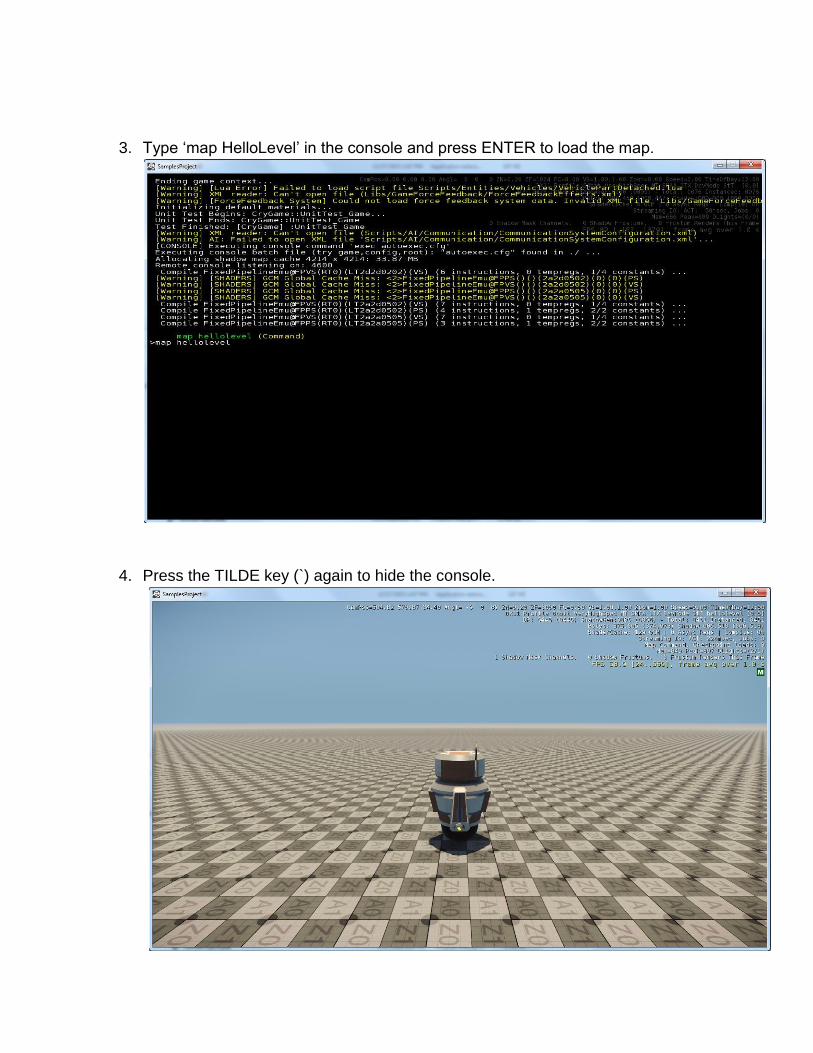
3. Type ‘map HelloLevel’ in the console and press ENTER to load the map.
4. Press the TILDE key (`) again to hide the console.
Drive around your map with the A, W, S and D keys. Revel in its’ Spartan environment.
Count the squares in the terrain texture. Stare at the sun.
To quit the game
1. Press the TILDE key (`) to show the console
2. Type “quit” in the console and press the ENTER key.
Related tasks and tutorials Now that you have achieved Lumberyard developer Nirvana, here are a few related
tutorials and links to relevant documentation:
• Tutorial: Creating a gem with code
• Tutorial: Creating a new project
We’d love to hear from you! Head to our Tutorial Discussion forum to share any
feedback you have, including what you do or don’t like about our tutorials or new
content you’d like to see in the near future.


![proudly presents TrackMania Editor Tutorial ² - Home - [SRC] · PDF file2 In diesem Tutorial will ich den Editor des Spiels Trackmania United/Nations Forever erklären. Das Tutorial](https://img.pdfslide.net/doc/110x75/5a9e13567f8b9ad2298cec48/proudly-presents-trackmania-editor-tutorial-home-src-in-diesem-tutorial-will.jpg)