Embed Size (px)
Citation preview

Two-Dimensional Design
ELEMENTS OF DESIGN
Learning to See like an ArtistLearning to see like an artist isn’t as easy as it sounds. Welive in a visual culture where we’re constantly bombardedwith images. Television, movies, videos, magazines, billboards,and the like are part of our daily experiences. We spend much ofour time looking, watching, or viewing—but we spend verylittle time seeing. Watching is a passive activity that requireslittle or nothing from the viewer. Seeing, however, requires anenormous amount of focused concentration.
Let’s take an apple as an example. When you look at an apple,your brain tells you, “That’s an apple.” If you wanted to eatthe apple, you might examine it a bit further. You might say,“That’s a bruised apple” or “That’s a shiny red apple.” To eatthe apple, that’s all you have to know. Your brain tells youwhat you need to know about an object and then dismissesany further investigation as unimportant.
A basic knowledge about an apple may be enough if you’rejust going to eat it. However, it’s not nearly enough if youplan to draw or paint the apple. You must begin to see theapple—and seeing is a process of discovery. To remain opento the truth of what you observe, you must first unlearn whatyou already know about a subject. Your prior knowledge aboutan object (in this case, an apple) keeps you from examiningits visual essence—and finding the visual essence of things isthe realm of artists.
As an artist, you must look at the apple as though you’venever seen an apple before (Figure 1). Take nothing for granted.As you examine this new object, ask yourself all sorts ofquestions: “Is it truly round, or is it taller than it is wide?”
1
Two-Dimensional Design

“Is it red, or is it more of a burgundy or a deep violet?” “Is thestem at the top, or is it slightly off center?”
Learning to see the truth is probably the most important step to becoming an artist. Through practice, you can acquire thehand skills you need as an artist. But your hand can’t see.No matter how skilled your hand becomes, it needs youreyes—and brain—to tell it what to do.
As an artist, you’re going to take information you discoverthrough observation and translate it into lines and shapesand colors. In doing so, you’re making an abstraction. Theverb abstract means to remove. When used in reference toart, an abstraction is something that’s been removed (orabstracted) from the actual subject. For example, Figure 1 is
Two-Dimensional Design2
FIGURE 1—When you examine a subject you intend to draw or paint, look at it as if you were seeing itfor the first time. Don’t rely on your previous knowledge of the subject. Instead, look for the ways inwhich the subject isn’t what you expect. Search for surprises within the subject. What do you noticeabout its size, shape, and texture? What kind of detail strikes you? (See Color Cards.)

Two-Dimensional Design
an abstraction of an apple. No real apple is present—only the symbol of an apple. All artists create images that areabstractions of an actual object. All art is an abstraction ofreality. (Don’t confuse abstraction with abstract art, a particularstyle of art.)
In order to take objects in the real world and translate theminto a flat, two-dimensional surface, you’re going to use somebasic tools:
● Elements of design. All drawings and paintings are composed of the basic design elements—line, shape,color, texture, and pattern.
● Principles of design. The principles of good design aren’trules or goals; they’re a means of guiding an artisttoward the creation of an aesthetically pleasing work ofart—that is, a work of art that’s pleasing in appearance.These principles are unity, balance, rhythm, harmony,emphasis, and contrast.
● Composition. Composition refers to the arrangements ofobjects in a piece of art. You can’t produce an effectiveoverall drawing if you haphazardly scatter the objectsyou’re depicting across the page. In addition to arrange-ments, composition depends on the relationships of size,tonal values, and color.
In this study unit, you’ll study these three items—elementsof design, principles of design, and composition. When youreach the end of this unit, you’ll be able to combine all of theinformation you’ve learned to produce effective, interesting,and visually dynamic compositions.
LineThe simple line is a powerful element that’s often overlooked.Lines can be used to define edges, create a sense of weightand volume, define space, or even convey a sense of energyand motion. Lines can be straight or curved, thick or thin,formal or playful, continuous or broken (Figure 2). Sometimeslines can even be implied without actually being drawn(Figure 3).
3

The placement and direction of a line on a two-dimensionalsurface can lead the eye from one point to another. It candefine a shape or an area. A line can even be used to conveyan idea or give a sense of energy. For example, a flat horizon-tal line creates a sense of stability or restfulness. A vertical linemight suggest strength and dignity. Diagonal lines, whichseem to have a feeling of motion, are more dynamic andenergized. Curved lines have a softer, more sensual quality(Figure 4).
Two-Dimensional Design4
FIGURE 2—Lines are surprisingly diverse. They can be heavy or thin, or they may vary in thickness.Look closely at the lines in this illustration. Each has a different “feel.” Imagine how you would useeach of them in a composition.
FIGURE 3—The arrangement of dots in thisillustration creates a square, but the squaredoesn’t really exist. The viewer’s brain con-nects the dots, thereby creating invisible orimplied lines that form a square.

Directional lines exist in nature and in man-made objects aswell. Consider these examples:
● Flat, horizontal line—the horizon at the ocean, tabletops,shelves, mattresses, and other flat surfaces
● Vertical lines—tall trees and buildings
● Diagonal lines—mountains, staircases, and roofs
● Curved lines—rolling hills, fruits, animals, and people
Two-Dimensional Design 5
FIGURE 4—Each of the directional lines in these drawings conveys a different mood, just as directionallines do in nature. (See Color Cards.)

If you think about the directional lines you see in nature andhow you respond to them, you should begin to see how—and,more importantly, why—you respond to the lines themselves.Then you’ll be able to use the lines in your artwork to createthe same responses from the people who look at it.
ShapeShapes are enclosed two-dimensional spaces. Shape is closelyassociated with line because lines are often used to encloseshapes. But shapes can also be defined without lines. Forexample, a space may be defined with a color or tonal valuedifferent from the background. The edges of this shape don’tneed lines.
The basic outline of a shape may consist of straight lines,curved lines, or a combination of both. Think about some ofthe familiar geometric forms, like cubes, spheres, and cylinders.To “figure out” how to approach drawing these objects, youmight be tempted to analyze the properties of their form. Butremember, being able to truly see the shape of an object oftenrequires you to forget about what it is and concentrate onwhat it looks like.
For example, take a cylinder. Because you know its ends areround, you might be tempted to draw the ends as circles.However, if you observe the ends of a cylinder from differentangles, you may see the circle is foreshortened so it appearsto be an ellipse (Figure 5).
Shapes can have asense of harmony.Shapes are consideredto be harmonious ifthey’re composed oflines that are the sameor similar. For exam-ple, the shapes in abowl of fruit are har-
monious. Even thoughthe shapes of the fruitare somewhat
different, harmony
Two-Dimensional Design6
FIGURE 5—Becauseyou’re looking at thiscylinder from an angle,the circular end appearsto be an ellipse, not acircle.

exists because the shapes of the fruit and of the bowl aremade of curved lines. A box of fruit, on the other hand, does-n’t have the same sense of harmonious shapes because thebox has straight edges while the fruit is curved. (Don’t worry,this doesn’t mean you can’t draw a box of fruit. Artists cancreate a sense of harmony in other ways, as you’ll soon see.)
Right now, at the start of your studies, begin to concentrateon your ability to observe shapes. You must be able to findthe basic shape of an object, and the shapes within thatobject, and the shapes within those shapes, and so on—with-out any regard for what the object is and without any pre-conceived notion as to what it should look like. This observa-tional skill is more important than the ability to see color ortexture. Seeing pure shape is never easy, however, because itrequires you to forget what you’re looking at and to seebeyond your knowledge to the visual truth.
Two-Dimensional Design 7
Back to the Drawing Board 1: Energy and MotionThroughout Two-Dimensional Design, you’ll find “Back to the Drawing Board” exercises thatprovide you with hands-on experience in applying the key concepts you’re learning. Youmay complete the exercises now, or you may wait until after you’ve finished the unit.
Tools and Materials
● Drawing paper
● Graphite pencil
● Scissors
● Sheet of black paper
Objective
To use a simple shape to create energy and motion in a composition
(Continued)

Two-Dimensional Design8
Back to the Drawing Board 1—Continued
Procedure
1. In the center of your sheet of paper, outline a square 8 in. (inches) by 8 in.
2. From your sheet of black paper, cut out a group of 1-in. squares.
3. Arrange the squares inside your 8-in. outline to create a dynamic composition thatsuggests energy and motion. Study Figures A and B for ways in which you can producethis idea.
FIGURE B—In this illustration, the squares seem to be explodingfrom the bottom corner, or theymay be falling down into that corner.
FIGURE A—The closeness of thesquares seems to suggest thatthey’re moving from left to rightand then falling.

ColorColor is fun. As an element of art, it stimulates both psychological (mental) and physiological (physical) responsesin the observer. Warm colors (red, yellow, and orange) tend tocreate active, exciting responses. Cool colors (blue, purple,and green) tend to create passive and calming responses.Here are some of the emotions and responses associatedwith the basic colors.
Warm colors
● Red creates energy, determination, passion, excitement,courage, self-esteem, and mental clarity.
● Yellow stimulates the nerves and mind, resolves conflicts,and contributes to feelings of harmony.
● Orange brightens the emotions, stimulates the nerves,soothes anxiety, and reveals emotions.
Cool colors
● Blue creates a tranquil feeling, is associated with intu-ition and trustworthiness, and helps self-acceptance.
● Purple relaxes and soothes fears and encourages acceptance of responsibility.
● Green serves as a pacifier, eases stress, and soothes anger.
Value, an important component of color, describes theamount of lightness or darkness a color possesses. When wedescribe things according to their color (for example, a reddress), we often clarify that description by defining the color:
● He drove a dark blue car.
● I dream of Jeannie with the light brown hair.
Values progress from white (the lightest value) to black (thedarkest value). Between these two colors is a wide range ofshades of gray. A value about halfway between the lightestand darkest values is called a middle value, or middle tone.
The use of value is absolutely essential to developing oravoiding contrast in your work. Contrast refers to differences.In your work, you can create contrast by placing items thataren’t alike next to each other. You can accentuate contrastby placing a dark object on a light background or vice versa.
Two-Dimensional Design 9

You can diminish contrast by placing an object on a back-ground that’s similar in value—for example, a polar bear ona snow-covered landscape (Figure 6).
Various factors can make it difficult to see the values in anobject. The presence of color may make values less apparent.The way light falls onto an object may create unexpectedvalues. For example, a black object in direct sunlight mayhave a value lighter than a red object in the shadows. Evensquinting while looking at an object may make the valuesmore apparent.
Two-Dimensional Design10
FIGURE 6—In this photo-graph, the contrastbetween the polar bearand its surroundings isvery subtle.

Two-Dimensional Design 11
Back to the Drawing Board 2: Tonal ValuesTools and Materials
● Drawing paper
● Ruler
● Black and white acrylic or tempera paint
● Mixing palette
● Brush
● Graphite pencil
Objectives
● To train your eye to recognize the relationship among tonal values
● To create a range of values using different techniques
Procedure
For this exercise, you’re going to create three scales that go from white to black, with vary-ing degrees of gray in between. For each scale, you’ll use a different technique as outlinedbelow. You may find that this exercise challenges your patience because it will force you toslow down and take a patient, methodical approach to your work. This is completely inten-tional, since one of the artist’s greatest challenges is learning patience. Effective composi-tions require time and effort to fully develop. Don’t shortchange your work by hurryingthrough it.
Painted Gray Scale
1. Draw a rectangle 8 in. by 1 in.
2. Divide the rectangle into 1-in. squares.
3. Paint the top square pure white and the bottom square pure black.
4. Mix the black and white paint together to make six shades of gray that vary in valuefrom very light to almost black. Try to make each “step” in the scale equal so thereare no visual jumps. See Figure A.
Tip: Black paint is much more powerful than white paint. A little black will goa long way in creating your grays. Remember this as you add black paint to create darker values.
(Continued)

Two-Dimensional Design12
Back to the Drawing Board 2—Continued
Variable Line Weight Gray Scale
1. Draw a rectangle 8 in. by 1 in.
2. Divide the rectangle into 1-in. squares.
3. Make the top square pure white and the bottom square pure black.
4. Develop a gray scale by creating a sense of “grayness.” To do this, draw straight lineswith your pencil. Draw the same number of lines on each square, increasing the thick-ness of the lines as you proceed up the scale. As the lines get thicker, the squares willappear darker. See Figure B. The result should be a gray scale with even steps, simi-lar in overall value to the painted gray scale you just created.
Random Dot (Stippling) Gray Scale
1. Draw another rectangle 8 in. by 1 in.
2. Divide the rectangle into 1-in. squares.
3. Make the top square pure white and the bottom square pure black.
4. Create an eight-step gray scale by using your pencil to make little dots in a randompattern. Increase the density of dots as you proceed from white to black, but keep theoverall gray in each square even, not blotchy. See Figure C.
Hint: Remember to have patience. Take your time with these exercises and produce qualityresults. As an artist, you must discipline yourself to do your best on every project.
(Continued)

Two-Dimensional Design 13
Back to the Drawing Board 2—Continued

TextureTexture refers to the feeling or appearance of the surface ofan object (Figure 7). Texture can appeal to the sense oftouch, the sense of sight, or both. The texture of an objectcan take many forms—rough or smooth, prickly or pebbly,shiny or dull, soft or hard.
In a drawing or painting, texture can mean two differentthings. First, consider the texture of the subject itself. Anartist can depict the bumpy surface of an orange or thesmooth surface of an apple so it looks the way it feels. Second,texture in a work of art can also refer to the texture of themedium used to create it. For example, oil paint is veryrough and bumpy, while watercolor is smooth (Figure 8).
People respond to texture instinctively. Visual cues and pastexperiences provide hints as to what you can expect from asurface. The way in which light reflects off a surface and thesmall shadows it casts onto a surface also reveal the “feel” ofan object before you ever touch it.
Although texture is an important element of design, don’toveremphasize it in your drawings. Texture should usuallybe a subtle visual property. Of the visual elements in art,shape, value, and color should take priority over texture.If you overstate texture, it can create a distraction to theviewer and possibly even misrepresent the surface you’retrying to define. For example, instead of creating the softbumpy surface of an orange skin, you may end up withsomething that looks like an orange frisbee with polka dotsor an object that has been riddled with machine-gun fire.
In most lighting situations, you’ll find texture shows best inthe middle values of an object—not in very dark or light val-ues. As you begin to work with creating compositions, you’llalso discover that texture in an object can be enhanced whenthe object is lit from the side. As an artist, you’ll probablyfind yourself constantly experiment with techniques forrepresenting texture.
Two-Dimensional Design14

Two-Dimensional Design 15
FIGURE 7—This assortment of fruit gives you an idea of the variety of different textures an artistdeals with. (See Color Cards.)
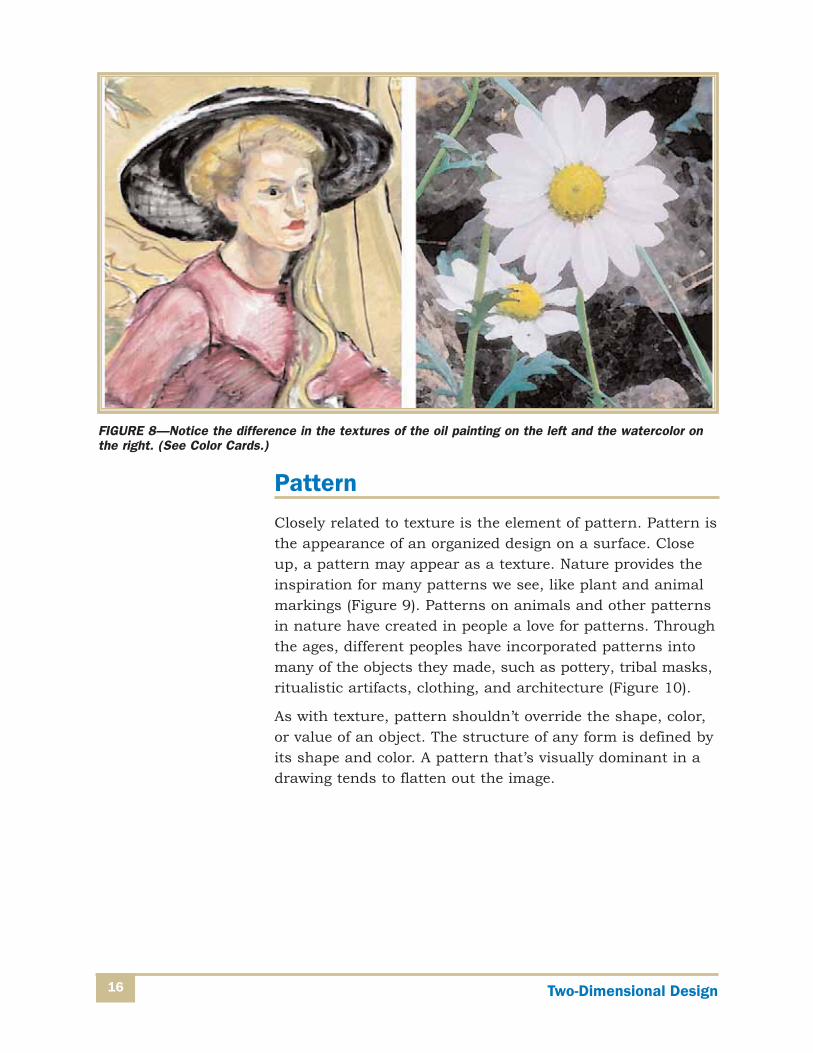
PatternClosely related to texture is the element of pattern. Pattern isthe appearance of an organized design on a surface. Closeup, a pattern may appear as a texture. Nature provides theinspiration for many patterns we see, like plant and animalmarkings (Figure 9). Patterns on animals and other patternsin nature have created in people a love for patterns. Throughthe ages, different peoples have incorporated patterns intomany of the objects they made, such as pottery, tribal masks,ritualistic artifacts, clothing, and architecture (Figure 10).
As with texture, pattern shouldn’t override the shape, color,or value of an object. The structure of any form is defined byits shape and color. A pattern that’s visually dominant in adrawing tends to flatten out the image.
Two-Dimensional Design16
FIGURE 8—Notice the difference in the textures of the oil painting on the left and the watercolor onthe right. (See Color Cards.)

Two-Dimensional Design 17
FIGURE 9—Study the patterns in these photographs of plants and animals. These and other similarpatterns in nature have inspired artists of all kinds. (See Color Cards.)

Before going on to study the principles of good design in art,take time to review what you’ve just studied by completingBack to the Drawing Board 3 and Self-Check 1.
Two-Dimensional Design18
FIGURE 10—The roof of this building in France provides a perfect example ofpattern in architecture. (See Color Cards.)

Two-Dimensional Design 19
Back to the Drawing Board 3: Energy and Motion
Tools and Materials
● Drawing paper
● Bristol board (10 in. by 17 in.) or paper
● Graphite pencil
Objective
To use a simple shape to create a pattern
Procedure
Five-Block Design
1. On your sheet of paper, draw a 2-in. square. Inside the square, use ink to draw a sim-ple black geometric shape. (For our example, we used a triangle.)
2. On a second sheet of paper, make a row of five 1-in. squares.
3. Copy your shape to the middle square of the row so the black area occupies approximately half of the white space. See block 3 in Figure A.
4. Repeat this procedure in the other four blocks as follows:
a. On one side of the middle square, copy the shape in the squares so that itoccupies progressively less of the white space.
b. On the other side, copy the shape so it occupies progressively more of the white space. Don’t position your shape so it covers the entire square.
(Continued)
FIGURE A—Here’s one example of a pattern created by a simple triangle.

Two-Dimensional Design20
Back to the Drawing Board 3—Continued
100-Block Design
5. Number your five squares from left to right or right to left, as shown in Figure A.
6. On your Bristol board or paper, lightly draw a 10-in. square in the center of the board.
7. Lightly draw a 1-in. grid within the 10-in. square, creating 100 squares.
8. Trace the #1 design in the center four squares of your grid (the squares numbered 1in Figure B.
(Continued)
FIGURE B—This grid outlines the placement of your designs.

Two-Dimensional Design 21
Back to the Drawing Board 3—Continued
9. Trace the #2 design in the 12 squares that surround these four center squares (thesquares numbered 2 in Figure B).
10. Fill in the remaining squares with designs #3, #4, and #5, following the chart inFigure B. Our completed design using the triangle is shown in Figure C.
FIGURE C—The repetition of a pattern with gradual variations creates overalltonal variation and an area of emphasis.

Two-Dimensional Design22
PRINCIPLES OF DESIGN
The elements of design you just studied represent “what” theartist uses to achieve good design. The principles of designdescribe “how” the artist uses these elements. The principlesyou’ll be examining in this section are unity, balance, rhythm,harmony, emphasis, and contrast.
UnityEvery once in a while, you encounter something that seemsjust right to you. It could be a movie, a meal, a concert, abook, a vacation, or anything else. For example think about
Self-Check 1At the end of each section in Two-Dimensional Design, you’ll beasked to pause and check your understanding of what you’ve justread by completing a “Self-Check.” Writing the answers to thesequestions will help you review what you’ve studied so far. Pleasecomplete Self-Check 1 now.
1. True or False? Learning to see like an artist requires you to forgetwhat you know about a subject.
2. A flat horizontal line in a drawing suggests _______ and _______.
3. True or False? A ball and a hula hoop are harmonious shapes.
4. The warm colors are _______, _______, and _______. The cool col-ors are _______, _______, and _______.
5. In the sentence “I like dark green clothes,” the word dark definesthe _______ of the color green.
6. True or False? In drawing, pattern and texture should take prece-dence over shape and color.
Check your answers with those on page 69.