Embed Size (px)
Citation preview
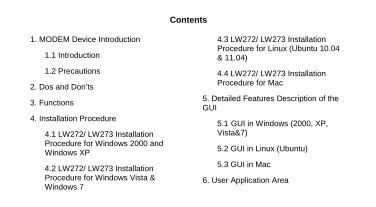
Contents 1. MODEM Device Introduction
1.1 Introduction
1.2 Precautions
2. Dos and Don’ts
3. Functions
4. Installation Procedure
4.1 LW272/ LW273 Installation Procedure for Windows 2000 and Windows XP
4.2 LW272/ LW273 Installation Procedure for Windows Vista & Windows 7
4.3 LW272/ LW273 Installation Procedure for Linux (Ubuntu 10.04 & 11.04)
4.4 LW272/ LW273 Installation Procedure for Mac
5. Detailed Features Description of the GUI
5.1 GUI in Windows (2000, XP, Vista&7)
5.2 GUI in Linux (Ubuntu)
5.3 GUI in Mac
6. User Application Area
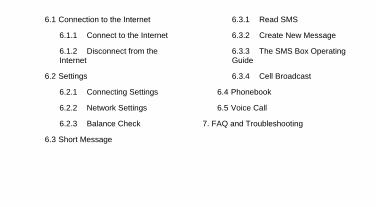
6.1 Connection to the Internet
6.1.1 Connect to the Internet
6.1.2 Disconnect from the Internet
6.2 Settings
6.2.1 Connecting Settings
6.2.2 Network Settings
6.2.3 Balance Check
6.3 Short Message
6.3.1 Read SMS
6.3.2 Create New Message
6.3.3 The SMS Box Operating Guide
6.3.4 Cell Broadcast
6.4 Phonebook
6.5 Voice Call
7. FAQ and Troubleshooting
1. MODEM Device Introduction 1.1 Introduction Thank you for choosing the MODEM device. To guarantee the device always in its best condition, please read this manual carefully and refer to it for general operational information. The MODEM device is a type of multi-mode, 3G Modem or card, applicable to 2G/3G networks. The interface connects most PCs to the internet, integrating functions of the MODEM device and mobile phone, into a mobile communication device via 2G/3G mobile networks, it supports data services, Voice and SMS services, helping you break away from the limitations of time and zone and communicate wirelessly anytime and anywhere. Note: The pictures, symbols and contents in this manual are just for your reference. They might not be completely identical with your device. We operate a policy of continuous development and reserve the right to update and modify the technical specifications in this document at any time without prior notice. 1.2 Precautions To the owner • When we use the product, maintain a safe distance greater than or equal to 0.5cm

from human body. • Some electronic devices are susceptible to electromagnetic interference sent by the
MODEM device if inadequately shielded, such as electronic systems of vehicles. Please consult the device manufacturer before using MODEM device if necessary.
• Operation of your PC and MODEM device may interfere with medical devices like hearing aids and pacemakers. Please always keep MODEM device more than 20 centimeters away from such medical devices when they are in use. Pull out the MODEM device if necessary. Consult a physician or the manufacturer of the medical device before using MODEM device.
• Be aware of the usage limitation when using a MODEM device at places such as petrol stations or chemical factories, where there may be explosive gases or explosive products being processed. Do not use MODEM device if unsure.
• Store the MODEM device out of the reach of small children, it may cause injury if used as a toy.
2. Dos and Don’ts: • Please use original accessories only or those that are authorized by the manufacturer.
Using any unauthorized accessories may affect your device's performance, and violate related national regulations regarding telecom terminals.
• Avoid using the MODEM device near metallic structures, devices or establishments that can emit electromagnet waves. This may adversely affect signal reception.
• The MODEM device is not waterproof. Please keep it dry and store in shady and cool place.
• Do not use the MODEM device immediately after sudden temperature change. In such case, condensation may form inside the device, potentially causing irreversible damage to it. Please allow adequate time to dry.
• Treat the MODEM device carefully and avoid destructive damage. Do not drop, twist, strike, tamper or otherwise harshly treat it.
• Only a qualified maintenance agent should be permitted to undertake repair work. Please refer to your operator user guide to find the relevant contact information.
• Close GUI software before you remove the device from PC/laptop. • In Aircraft - Please power off the MODEM device before take-off. In order to protect
in-flight communication systems from interference, do not use the MODEM device in
flight. Use before takeoff is subject to the usual aviation laws and the particular airline’s policy. If in doubt seek advice from the cabin crew.
3. Functions Functional support includes: • Data service • Device Settings • Voice Calling • SMS • Phone book • Balance check • Call Broadcast Service (CBS)
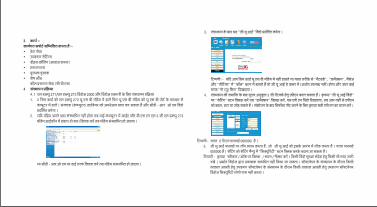
4. Installation Procedure 4.1 LW272/ LW273 Installation Procedure for Windows 2000 and Windows XP 1. Insert SIM card into LW273 USB Modem, then insert USB Modem into computer
through USB port, the computer can find the hardware automatically and will display CD-ROM window.

2. If modem doesn’t install automatically, then go to My computer and Double click on BSNL 3G LW273 modem icon then modem will installed.
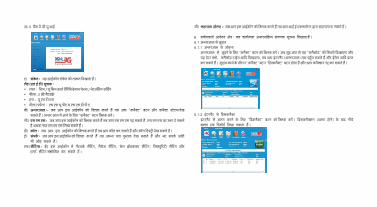
OR, right Click on the CD-ROM, click open and then run “Setup.exe”, it will install the modem. 3. After finishing installation, it will display the “GUI” window as below.
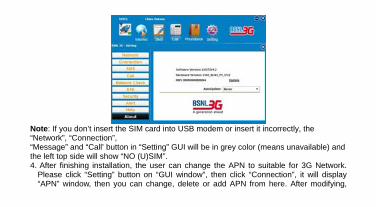
Note: If you don’t insert the SIM card into USB modem or insert it incorrectly, the “Network”, “Connection”, “Message” and “Call’ button in “Setting” GUI will be in grey color (means unavailable) and the left top side will show “NO (U)SIM”. 4. After finishing installation, the user can change the APN to suitable for 3G Network.
Please click “Setting” button on “GUI window”, then click “Connection”, it will display “APN” window, then you can change, delete or add APN from here. After modifying,

please select correct APN to Set Default, as below picture.
Note: Default APN password is 000000. 5. GUI also provides a Log on password, which locks the GUI at its starting. Default
password is 000000. The setting can be changed by clicking ‘Security’ button in setting menu.
Note: Please accept / click on Ok / Select / Next / “continue any way “for any windows security message (i.e. Publisher can’t be verified by Windows / Device Software Doesn’t Pass Windows Security Logo) for any prompt coming during the installation of the Software.
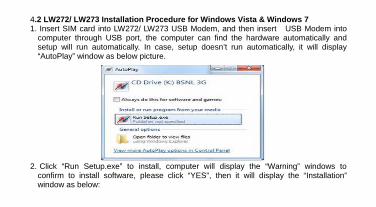
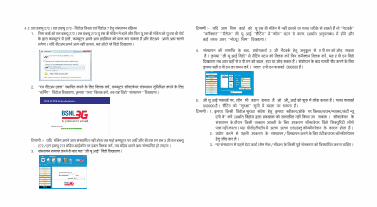
4.2 LW272/ LW273 Installation Procedure for Windows Vista & Windows 7 1. Insert SIM card into LW272/ LW273 USB Modem, and then insert USB Modem into
computer through USB port, the computer can find the hardware automatically and setup will run automatically. In case, setup doesn’t run automatically, it will display “AutoPlay” window as below picture.
2. Click “Run Setup.exe” to install, computer will display the “Warning” windows to
confirm to install software, please click “YES”, then it will display the “Installation” window as below:
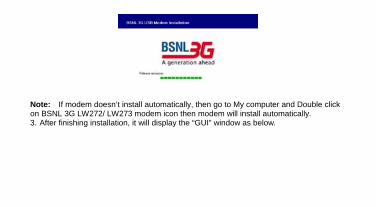
Note: If modem doesn’t install automatically, then go to My computer and Double click on BSNL 3G LW272/ LW273 modem icon then modem will install automatically. 3. After finishing installation, it will display the “GUI” window as below.
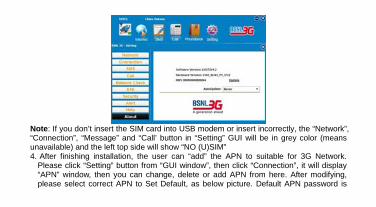
Note: If you don’t insert the SIM card into USB modem or insert incorrectly, the “Network”, “Connection”, “Message” and “Call’ button in “Setting” GUI will be in grey color (means unavailable) and the left top side will show “NO (U)SIM” 4. After finishing installation, the user can “add” the APN to suitable for 3G Network.
Please click “Setting” button from “GUI window”, then click “Connection”, it will display “APN” window, then you can change, delete or add APN from here. After modifying, please select correct APN to Set Default, as below picture. Default APN password is
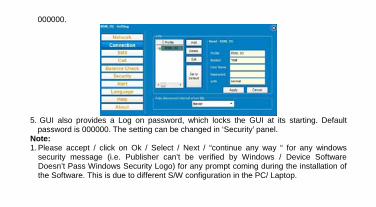
000000.
5. GUI also provides a Log on password, which locks the GUI at its starting. Default
password is 000000. The setting can be changed in ‘Security’ panel. Note: 1. Please accept / click on Ok / Select / Next / “continue any way “ for any windows
security message (i.e. Publisher can’t be verified by Windows / Device Software Doesn’t Pass Windows Security Logo) for any prompt coming during the installation of the Software. This is due to different S/W configuration in the PC/ Laptop.
2. Check for antivirus configuration to allow installation/ uninstallation of the device before use. In case device is not recognized, please eject the device and disable the antivirus for installation.
3. It is advisable to uninstall any previous version of data card (same make/ model) before fresh installation.
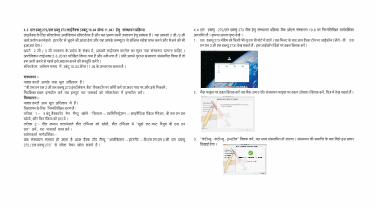
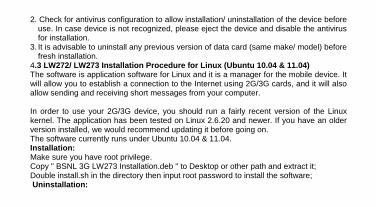
4.3 LW272/ LW273 Installation Procedure for Linux (Ubuntu 10.04 & 11.04) The software is application software for Linux and it is a manager for the mobile device. It will allow you to establish a connection to the Internet using 2G/3G cards, and it will also allow sending and receiving short messages from your computer. In order to use your 2G/3G device, you should run a fairly recent version of the Linux kernel. The application has been tested on Linux 2.6.20 and newer. If you have an older version installed, we would recommend updating it before going on. The software currently runs under Ubuntu 10.04 & 11.04. Installation: Make sure you have root privilege. Copy " BSNL 3G LW273 Installation.deb " to Desktop or other path and extract it; Double install.sh in the directory then input root password to install the software; Uninstallation:

Make sure you are in root privilege. The steps for Uninstallation are as following: Way 1: open Ubuntu desktop main menu ‘System->Administration->synaptic package manager’, search ‘bsnl’, and then remove the package. Way 2: Open a shell-terminal run a shell-command "sudo apt-get remove bsnl" in the shell-terminal, require root password. User guide: When install finished, you can open the software from desktop menu “Applications->Internet->BSNL 3G LW272/ LW273”. 4.4 LW272/ LW273 Installation Procedure for Mac The below guide is based on MAC OS version 10.6. Please see the next steps. 1. Insert LW273 modem to any usb port. After a minute, you can see an icon (Such as BSNL 3G LW273) on desktop. Double click this icon the window as below:
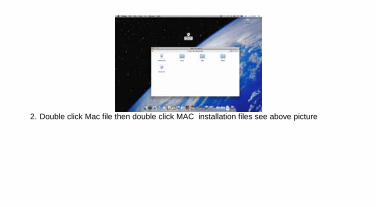
2. Double click Mac file then double click MAC installation files see above picture
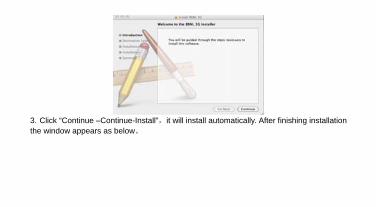
3. Click “Continue –Continue-Install”,it will install automatically. After finishing installation the window appears as below。
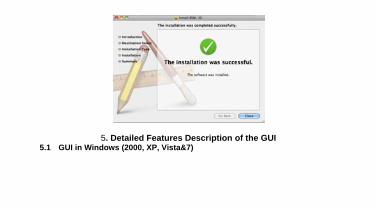
5. Detailed Features Description of the GUI 5.1 GUI in Windows (2000, XP, Vista&7)

Signal: This icon shows the strength of the signal. LED indicator: • Red: SIM/USIM card verification fails/ Network searching • Blue: 2G network • Green: UMTS • Purple: HSUPA/ HSDPA a) Internet: When you click this icon, you can see a “connect” button and connect status.
Click “Connect” button to connect to the internet. b) Message: You can read SMS, reply SMS or write new SMS when you click this icon. c) Call: You can make a call and see call history when you click this icon. d) Phone Book: When you click this icon, you can look up your address book, add new contacts, etc. e) Settings: You can modify network setting, connection setting, standby option, message setting, cell broadcast setting, call setting, security setting, alert setting and look up help file in this icon. f) Delivery Report: To activate SMS delivery report, please open ‘Setting’, ‘Message’, and select ‘On’ in ‘Delivery Report’ panel. Then click Apply to save.
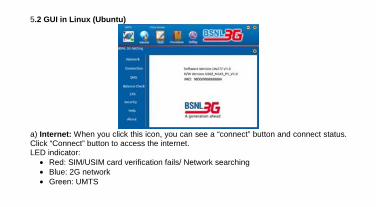
5.2 GUI in Linux (Ubuntu)
a) Internet: When you click this icon, you can see a “connect” button and connect status. Click “Connect” button to access the internet. LED indicator:
• Red: SIM/USIM card verification fails/ Network searching • Blue: 2G network • Green: UMTS
• Purple: HSUPA/ HSDPA b) SMS: You can read SMS, reply SMS or write new SMS when you click this icon. c) Contacts: When you click this icon, you can look up your address book, add new contacts, etc. d) Settings: You can modify network setting, connection setting, message setting, cell broadcast setting, security setting and alert setting in this icon. e) Help: When you click this icon, you can find help file by IE explorer.
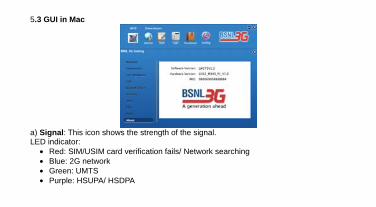
5.3 GUI in Mac
a) Signal: This icon shows the strength of the signal. LED indicator:
• Red: SIM/USIM card verification fails/ Network searching • Blue: 2G network • Green: UMTS • Purple: HSUPA/ HSDPA
b) Internet: When you click this icon, you can see a “connect” button and connect status. Click “Connect” button to access the internet. c) SMS: You can read SMS, reply SMS or write new SMS when you click this icon. d) Call: You can make a call and see call history when you click this icon. e) Contacts: When you click this icon, you can look up your address book, add new contacts, etc. f) Settings: You can modify network setting, message setting, cell broadcast setting, security setting and alert setting in this icon. g) Help: When you click this icon, you can find help file by IE explorer.
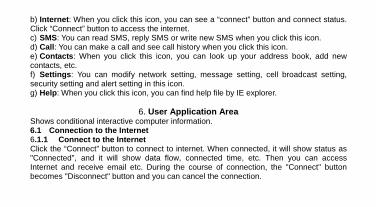
6. User Application Area Shows conditional interactive computer information. 6.1 Connection to the Internet 6.1.1 Connect to the Internet Click the “Connect” button to connect to internet. When connected, it will show status as "Connected", and it will show data flow, connected time, etc. Then you can access Internet and receive email etc. During the course of connection, the "Connect" button becomes "Disconnect" button and you can cancel the connection.
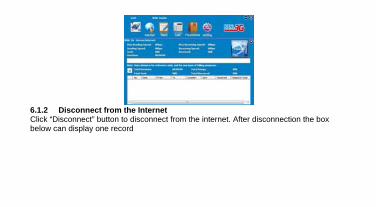
6.1.2 Disconnect from the Internet Click “Disconnect” button to disconnect from the internet. After disconnection the box below can display one record
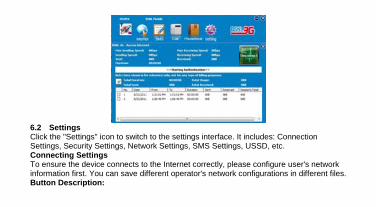
6.2 Settings Click the "Settings" icon to switch to the settings interface. It includes: Connection Settings, Security Settings, Network Settings, SMS Settings, USSD, etc. Connecting Settings To ensure the device connects to the Internet correctly, please configure user's network information first. You can save different operator's network configurations in different files. Button Description:
• Add: Add new configuration files. • Delete: Delete the selected configuration files. • Edit: Edit the selected configuration files. • Set default: Select one file from filename list, and set it as the current file. The idle time before standby Default Timer is set as “Never”. To Set Time for Standby mode Please Click on “Setting”, then “Connection” Button, go to “The Idle time before Standby” List and Change time as desired. Idle time before Standby varies from 1minute to 2 Hours. Data card will disconnect as per desired time selection. Security Settings Enable the PIN: When the "PIN enable" item is selected, you will be asked to enter your PIN code to use the device. By default PIN number is “0000” and is editable . Note: This function requires network support. Enable the APN Lock: When the "APN lock enable" item is selected, you will be asked to enter the password to use the “Connection” menu. You can click "Change APN" to modify the number. Default APN Lock number is “000000”. Enable the Log on Lock Code: When the "Log on lock enable" item is selected, you will be asked to enter the password to open the GUI. You can click "Change Security code" to modify the number. Default Logo on Lock number is “000000”.
6.2.2 Network Settings • Automatic: The system selects the network automatically according to user configuration rules and network status. • Manual: User selects network settings. Select network "Manual", click "Apply". After a short while, the network operator list appears. Select the network you wish to connect to. Then Click "Select", to finish network settings. Select Mode "Automatic"/"GSM/GPRS/EDGE" /"UMTS/HSDPA", click "Apply", the system will indicate when completed successfully. 6.2.3 Balance Check • Select *123# and click on submit button to know balance and validity • Select *112# and click on submit button to know data facilities like data usage, new data pack etc. for different bundles. 6.3 Short Message Read SMS Click the "Inbox" button to read the SMS saved in the Inbox. Make use of the bottom menu buttons to read, reply, forward, copy, move, delete or save numbers. 6.3.2 Create New Message • Click "New SMS" button to input the recipient's number and content. Input the
recipient's number directly or select one/more records from the Phonebook (The
recipient's number(s) can be one or more, using ";" to separate). Provision exists for group SMS, recipients can be selected from Phonebook. The single SMS text can’t exceed 160 English characters (including English symbols).
• Click "Send", to send the short message. During send the message, you can click “cancel” to stop send.
• After sending successfully, this SMS will be saved into sent box automatically. If sending fails, the short message will be saved into outbox; click "Cancel" to return to "Short Message", click save to return to Draft box and the message will be saved on PC.
• Send SMS while browsing the web: You can send short messages when surfing on the Internet. Enter the short message interface and send short messages in normal way.
6.3.3 The SMS Box Operating Guide Enter any of Inbox/Outbox/Sent box/Draft box functions to execute the following: • Read: Read short message. (The content of short messages, sender's phone number,
sending time and date) • Reply: Reply to the sender of the short messages. • Forward: Forward short message to other recipients. • Move: Move the saving location of short messages between PC, USIM or Data card.
• Copy: Copy the saving location of short messages between PC, USIM or Data card. • Delete: Delete short messages selected. • Save: Save the sender's number into the phonebook. • Make use of "Ctrl" or "Shift" key and left click to choose several messages and execute
a function simultaneously. • The system indicates when USI • M/card is full. When the USIM is full, a new message can only be received and saved if
the user deletes short messages in the USIM card inbox. • Select: Use Shift key can realize continuous selection, use command key realize
random selection. 6.3.4 Cell Broadcast To start CBS services please click on “Setting” icon on top of GUI ---> click on “SMS” button set ‘info service” setting to ON in Cell Broad Cast menu. Click the “Cell Broadcast” button to read the cell broadcast message saved in the cell broadcast inbox in SMS. 6.4 Phonebook • Click the "Phonebook" icon to switch to the phonebook interface. Phonebook
information can be saved in the PC, USIM or Data card. • All contacts are managed using the standard application. Make use of the bottom
menu buttons to edit, copy, move, delete or send SMS or call. 6.5 Voice Call User can make a voice call by selecting “call” icon. User also has a provision of following services: • Call Forward Setting • Call Waiting Setting • Call Barring Setting
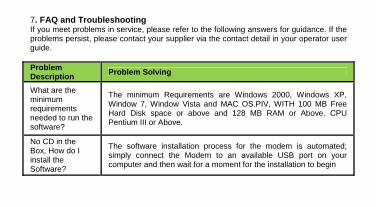
7. FAQ and Troubleshooting If you meet problems in service, please refer to the following answers for guidance. If the problems persist, please contact your supplier via the contact detail in your operator user guide. Problem Description Problem Solving
What are the minimum requirements needed to run the software?
The minimum Requirements are Windows 2000, Windows XP, Window 7, Window Vista and MAC OS.PIV, WITH 100 MB Free Hard Disk space or above and 128 MB RAM or Above. CPU Pentium III or Above.
No CD in the Box, How do I install the Software?
The software installation process for the modem is automated; simply connect the Modem to an available USB port on your computer and then wait for a moment for the installation to begin
Problem Description Problem Solving
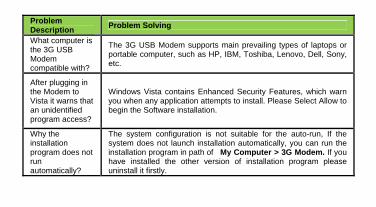
What computer is the 3G USB Modem compatible with?
The 3G USB Modem supports main prevailing types of laptops or portable computer, such as HP, IBM, Toshiba, Lenovo, Dell, Sony, etc.
After plugging in the Modem to Vista it warns that an unidentified program access?
Windows Vista contains Enhanced Security Features, which warn you when any application attempts to install. Please Select Allow to begin the Software installation.
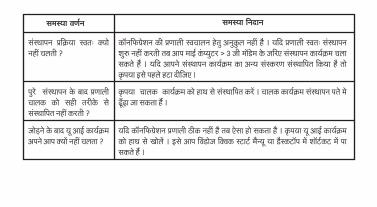
Why the installation program does not run automatically?
The system configuration is not suitable for the auto-run, If the system does not launch installation automatically, you can run the installation program in path of My Computer > 3G Modem. If you have installed the other version of installation program please uninstall it firstly.
Problem Description Problem Solving
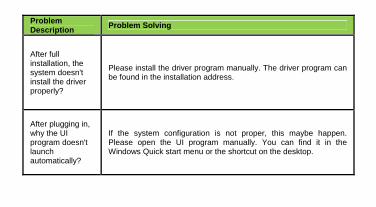
After full installation, the system doesn't install the driver properly?
Please install the driver program manually. The driver program can be found in the installation address.
After plugging in, why the UI program doesn't launch automatically?
If the system configuration is not proper, this maybe happen. Please open the UI program manually. You can find it in the Windows Quick start menu or the shortcut on the desktop.
Problem Description Problem Solving
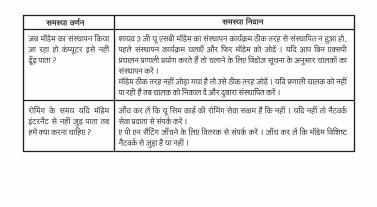
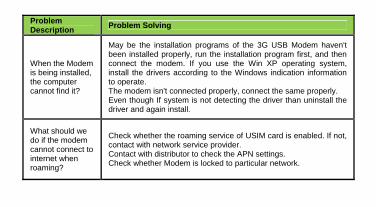
When the Modem is being installed, the computer cannot find it?
May be the installation programs of the 3G USB Modem haven't been installed properly, run the installation program first, and then connect the modem. If you use the Win XP operating system, install the drivers according to the Windows indication information to operate. The modem isn't connected properly, connect the same properly. Even though If system is not detecting the driver than uninstall the driver and again install.
What should we do if the modem cannot connect to internet when roaming?
Check whether the roaming service of USIM card is enabled. If not, contact with network service provider. Contact with distributor to check the APN settings. Check whether Modem is locked to particular network.
Problem Description Problem Solving
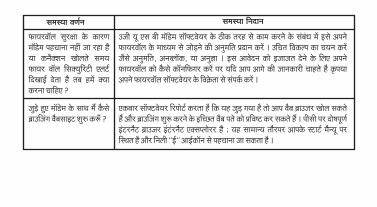
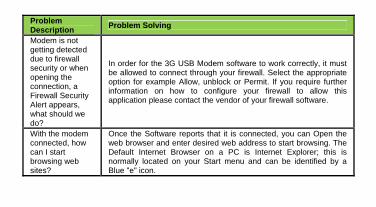
Modem is not getting detected due to firewall security or when opening the connection, a Firewall Security Alert appears, what should we do?
In order for the 3G USB Modem software to work correctly, it must be allowed to connect through your firewall. Select the appropriate option for example Allow, unblock or Permit. If you require further information on how to configure your firewall to allow this application please contact the vendor of your firewall software.
With the modem connected, how can I start browsing web sites?
Once the Software reports that it is connected, you can Open the web browser and enter desired web address to start browsing. The Default Internet Browser on a PC is Internet Explorer; this is normally located on your Start menu and can be identified by a Blue "e" icon.
Problem Description Problem Solving
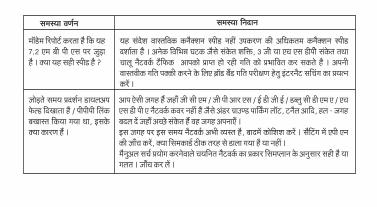
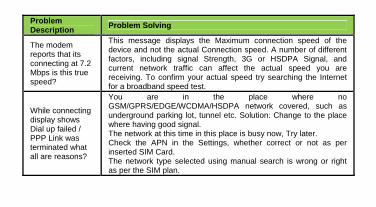
The modem reports that its connecting at 7.2 Mbps is this true speed?
This message displays the Maximum connection speed of the device and not the actual Connection speed. A number of different factors, including signal Strength, 3G or HSDPA Signal, and current network traffic can affect the actual speed you are receiving. To confirm your actual speed try searching the Internet for a broadband speed test.
While connecting display shows Dial up failed / PPP Link was terminated what all are reasons?
You are in the place where no GSM/GPRS/EDGE/WCDMA/HSDPA network covered, such as underground parking lot, tunnel etc. Solution: Change to the place where having good signal. The network at this time in this place is busy now, Try later. Check the APN in the Settings, whether correct or not as per inserted SIM Card. The network type selected using manual search is wrong or right as per the SIM plan.
Problem Description Problem Solving
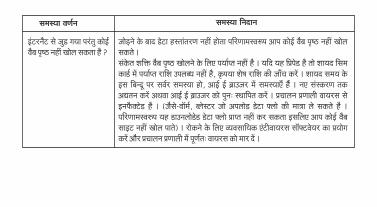
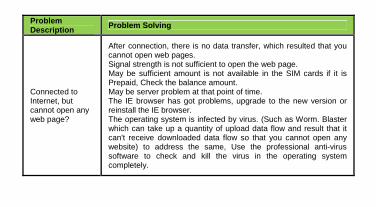
Connected to Internet, but cannot open any web page?
After connection, there is no data transfer, which resulted that you cannot open web pages. Signal strength is not sufficient to open the web page. May be sufficient amount is not available in the SIM cards if it is Prepaid, Check the balance amount. May be server problem at that point of time. The IE browser has got problems, upgrade to the new version or reinstall the IE browser. The operating system is infected by virus. (Such as Worm. Blaster which can take up a quantity of upload data flow and result that it can't receive downloaded data flow so that you cannot open any website) to address the same, Use the professional anti-virus software to check and kill the virus in the operating system completely.
Problem Description Problem Solving
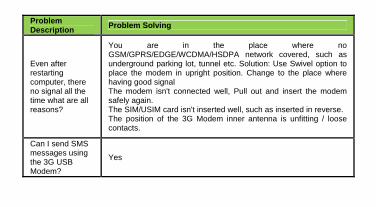
Even after restarting computer, there no signal all the time what are all reasons?
You are in the place where no GSM/GPRS/EDGE/WCDMA/HSDPA network covered, such as underground parking lot, tunnel etc. Solution: Use Swivel option to place the modem in upright position. Change to the place where having good signal The modem isn't connected well, Pull out and insert the modem safely again. The SIM/USIM card isn't inserted well, such as inserted in reverse. The position of the 3G Modem inner antenna is unfitting / loose contacts.
Can I send SMS messages using the 3G USB Modem?
Yes
Problem Description Problem Solving
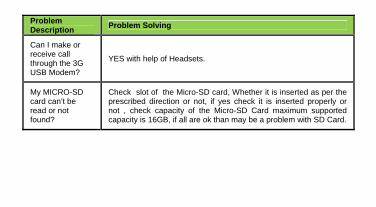
Can I make or receive call through the 3G USB Modem?
YES with help of Headsets.
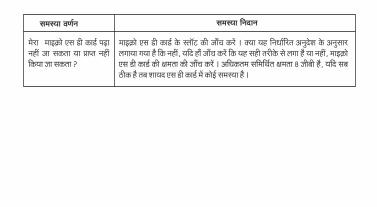
My MICRO-SD card can’t be read or not found?
Check slot of the Micro-SD card, Whether it is inserted as per the prescribed direction or not, if yes check it is inserted properly or not , check capacity of the Micro-SD Card maximum supported capacity is 16GB, if all are ok than may be a problem with SD Card.