Embed Size (px)
Citation preview

www.ondisc.org
UltimateUnit
Grade 7 & 8Lesson units written by Steve Soroko
Design and Layout by Christopher Lowcock

Overview of Unit
Health and Physical Education Curriculum Expectations:Grade 7 o combine a variety of movement skills (locomotion/travelling, manipulation, and
stability) in games, gymnastics, dance, and outdoor pursuits (e.g., basketball, flagfootball, gymnastics floor routines, novelty dances like the Alley Cat, orienteering);
o apply the principles of movement while refining movement skills (e.g., running intoan open space to elude an opponent in soccer).
• perform a variety of throws, passes, and shots after a faking motion;• intercept objects (e.g., balls, Frisbees) while moving in various directions and at
different speeds;• pass an object to a moving partner (e.g., using a chest pass, bounce pass, two-
hand overhead pass, one-hand overhead pass) for distance and accuracy;• participate vigorously in all aspects of the program (e.g., three-on-three basketball,
aerobics);• participate fairly in games or activities (e.g., accepting and respecting decisions
made by officials, whether they are students, teachers, or coaches).Grade 8 o apply a variety of movement skills in combination and in sequence (locomotion/
travelling, manipulation, and stability) in physical activities (e.g., dance) and formalgames (e.g., badminton, soccer);
o apply the principles of movement while refining movement skills (e.g., dribbling aball quickly and slowly in basketball).
• throw, pass, or shoot an object (e.g., a ball) to a partner or a target while beingdefended;
• perform movement skills in sequence (e.g., shoot or pass a ball from a dribble);• participate vigorously in all aspects of the program (e.g., indoor soccer, cricket);• follow the rules of fair play and sports etiquette in games and activities (e.g.,
maintaining self-control whether winning or losing).
Safety:Safety is an essential component in all areas taught in the Health and PhysicalEducation curriculum. All physical activities have an element or risk and to minimizethese risks it is essential that before teaching any of the lessons in this unit that safetyguidelines that are both generic to all physical activities and specific to the nature of thegame of Ultimate. Ontario Provincial Safety guidelines are available for Ultimate throughthe Ontario Physical and Health Education Association (Ophea).

Unit Overview
Scope and Sequence of the UnitSkill Strategy Rules Activity
Lesson 1 Throwing I –TraditionalThrowCatching I -
Moving to Catchthe Disc
Philosophy of theGame – TeamSpirit
Partner Pass andMove
Grips Section 2 - BackhandLesson 2 Running (to get
open)Catching II
Moving withoutthe disc (GettingOpen)
Change ofPossession
Monkey in theMiddle
Lesson 3 Throwing II –The FlickCatching II -
Moving to closespace
Moving the Disc 4 on 4 Keep Away
Grips Section 3 – Forehand & Section 4 – Hammer(overhead)Lesson 4 Throwing III –
The PullRunning I -
The Pivot andFake & Give andGo
Time andScoring
3 Pass
Lesson 5 Throwing IV –The Hammer
Interceptions &Knocking Downthe disc & Giveand Go
Self RefereeingSwitching EndsSportspersonship
Mini Game
Lesson 6 The GameExtension Starting an Intramural Program
Ultimate Talk - GlossaryChapter 7 Ultimate: The GameChapter 8 Introduction to Disc Golf – From Teaching the Basics: Disc Sports – © P.S.A.P
Chapter 9 Provincial - Ultimate and Disc Golf Contact lists
Spirit of the Game:Ultimate is a fast-moving, action-packed game that combines the passing of football, thecutting and guarding of basketball, and the non-stop field movement of soccer. Anultimate game is filled with leaping one-handed catches, short give and go passes, field-length bombs and diving blocks and catches. Action is intense, exciting and continuous.
With players being responsible for their own foul and line calls, Ultimate encourages anetiquette and camaraderie based on mutual respect, not typically found in other sports.The unique element is known in the ultimate circle as the “Spirit of the Game”.

Basic Rules of Ultimate:Ultimate in Ten Simple RulesSteve Courlang, UPA Juniors Director Copyright (c) Ultimate Players Association, 1993
1. The Field -- A rectangular shape with end zones at each end. A regulation field is 70yards by 40 yards, with end zones 25 yards deep. In metric this would be 64 meters by37 meters, with end zones 23 meters deep.
2. Initiate Play -- Each point begins with both teams lining up on the front of their respectiveend-zone line. The defense throws ("pulls") the disc to the offense. A regulation gamehas seven players per team.
3. Scoring -- Each time the offense completes a pass in the defense's end zone, theoffense scores a point. Play is initiated after each score.
4. Movement of the Disc -- The disc may be advanced in any direction by completing apass to a teammate. Players may not run with the disc. The person with the disc("thrower") has ten seconds to throw the disc. The defender guarding the thrower("marker") counts out the stall count.
5. Change of possession -- When a pass in not completed (e.g. out of bounds, drop,block, interception), the defense immediately takes possession of the disc and becomesthe offense.
6. Substitutions -- Players not in the game may replace players in the game after a scoreand during an injury timeout.
7. Non-contact -- No physical contact is allowed between players. Picks and screens arealso prohibited. A foul occurs when contact is made.
8. Fouls -- When a player initiates contact on another player a foul occurs. When a fouldisrupts possession, the play resumes as if the possession was retained. If the playercommitting the foul disagrees with the foul call, the play is redone.
9. Self-Refereeing -- Players are responsible for their own foul and line calls. Playersresolve their own disputes.
10. Spirit of the Game -- Ultimate stresses sportsmanship and fair play. Competitive play isencouraged, but never at the expense of respect between players, adherence to therules, and the basic joy of play.
Prior to starting the Unit:Prior to beginning the unit place students in groups of 5-7. The students will staywith this group of students throughout the unit.Teach students that when passing the discs to stand across the field and throwthe discs in the same direction.
Assessment Tools:Skill ChecklistStrategy ChecklistParticipation Rubric

Lesson 1 – Introduction to UltimateLesson Length: 40-60 minutes Location: OutdoorsEquipment: 1 disc for every 2 students, Pylons
Expectations:Grade 7 Grade 8• pass an object to a moving partner (e.g., using a
chest pass, bounce pass, two-hand overheadpass, one-hand overhead pass) for distance andaccuracy;
• perform movement skills in sequence (e.g., shootor pass a ball from a dribble);
Assessment Opportunities:During the Skill Application, have students self-and peer-assess themselves throwingthe disc. After each complete trip down the field, have students provide feedback basedon the Skill Check for the Backhand throw.
Lesson:Warm UpHave students work with a partner throwing the disc back and forth as they move downthe field together in a clockwise direction.Have students stretch the whole body prior to practicing.Focus on the areas of arms, legs and ankles.
Skill Development1. Allow students an opportunity to play a game of
catch with a partner throwing the disc back andforth.
2. Discuss with students the proper way to throwthe disc backhand.
3. Have students go back and throw the disc withtheir partner, practicing the Skill Check itemsdiscussed.
4. Discuss with students the proper way to catch the disc.5. Have students go back and play the game of catch with the disc practicing theskills check items discussed.
Skill ApplicationThe development of spirit is a key component of ultimate. So, prior to the skill applicationpart of the first lesson, divide students into equal groups of 5-7 that they will work withthroughout the unit.
1. Have students work in groups of 3 – 5 and travel back and forth down the fieldthrowing and catching the disc.
2. Discuss with students the difference between throwing to a stationary partnerand one that is moving, as well as how to communicate to a teammate that youare going to throw them the disc (verbal and non verbal) and when you are opento receive a disc.
3. Have students work with their group and use the strategies developed tocommunicate to a partner who is going to receive the disc and how to call for thedisc.
Skill Check – Backhand throw• Throwing shoulder facing the
target/partner• Flex knees slightly• Grip the edge of the disc with
your fingers• Bring your arm forward• Take a small step forward• Continue the arm motion and let
go of the disc• See Grips Section 2 next page

Cool DownHave students walk around the field with their team and discuss and decide on a teamname and cheer during this time.Have each group develop a cool down routine, choosing a different student to lead iteach day of the unit.
Grips1. IntroductionThe topic of grips is one often overlooked in ultimate, apart from when a new player is firstlearning. Even if it is noticed, it may be derided, spoken in the same way as many ultimateplayers say "disc golf". Despite this, very few players actually think about what grip they use forvarious throws, and even less about why they use a particular grip. This is surprising, as gripplays a significant part in whether a throw is a good one or not.
2. Backhand Grips2.1. Basic (Beginner's) Grip
Shown are a couple of different versions of this grip. It is characterised by the index finger of thethrowing hand being placed along the outside rim of the disc.
The first version has the middle finger ofthe throwing hand extended towards thecentre of the disc. This version gives ahigh degree of control and stability,since the index finger along the rimhelps with direction and the middlefinger supporting the disc suppliesstability. On the down side, there areonly two fingers gripping the rim, andthis leads to much less power than mostof the other grips. Most of the power in agrip comes from the ripping of the discoff the end of the index finger.

2.2. Power Grip
The second version is one rarelyseen. It has the index finger onthe rim but not the middle fingersupport. It gives a little morepower as more fingers aregripping the rim, but the powergain is fairly insignificantcompared to the loss of control.Bigger power gains are obtainedby having the index fingergripping the rim.
This is the most popular grip amongexperienced throwers, and is the one used byalmost all disc golfers. All fingers are grippingthe rim tightly, and there are no fingerssupporting the disc. This means there is aconsiderable loss of control, since the releasepoint is much harder to judge. A fair degree ofcontrol can be regained through practice, andthe loss is offset in some ways by the largepower gain produced by the disc ripping offthe end of the index finger. This grip doeshowever make it harder to throw the highbackhand, as there is no support for the sharpupward push on the disc just prior to release.
A certain amount of control also depends on the position of the thumb, and how tight the grip is on the disc. In general,the tighter the grip, the more spin which is able to be imparted to the disc, and hence better control in the wind. Thethumb can also be placed anywhere from along the rim of the disc to pointing towards the centre of the disc. The bestcontrol, particularly with respect to air bounces, is to have the thumb pointing towards the centre of the disc, and this alsoaids a tight grip. A tight grip also keeps the disc steady and makes high backhands easier to throw. On the down side, itseems a little harder to get as much distance with the thumb pointing toward the middle. This is because of the tendencyto drag the thumb across the back edge of the disc on release.

xxCatchers
ODefender
xPasser
Lesson 2 – Moving To Catch the DiscLesson Length: 40-60 minutes Location: OutdoorsEquipment: 1 disc for every 2 students, Pylons
Expectations:Grade 7 Grade 8• intercept objects (e.g., balls, Frisbees) while
moving in various directions and at differentspeeds;
• pass an object to a moving partner (e.g., using achest pass, bounce pass, two-hand overheadpass, one-hand overhead pass) for distance andaccuracy;
• throw, pass, or shoot an object (e.g., a ball) to apartner or a target while being defended;
Assessment Opportunities:Have students peer-and self-assess their ability to throw the disc to a partner whilemoving (grade 7) and while being defended (grade 8) accurately. Students should stillfocus on throwing and catching the disc based on the skill check criteria.
Lesson:Warm UpHave students walk around the field. Blow the whistle and the students should start tojog. The next time the whistle blows they should start to run. The third time the whistleblows the students sprint. The fourth time they start to walk again. Continue this patternfor approximately 3-4 minutes.Have students stretch the whole body prior to participating in activities. Focus on theareas of arms, legs and ankles.
Skill Development1. Review the backhand pass technique with the students.2. Have students work with a partner. Travel down the field in as few throws as
possible. Once a partner catches the disc, they must stop and wait for theirpartner to run past them and throw the disc to them on the run.
3. Discuss with students how they learned to catch the disc with two hands and howwhen they are running it is easier to catch with one hand.
4. Have students pass back and forth, practicing catching with their right and thenwith their left hand.
5. Discuss with the students the different types of runningto get open. Run slow, then use a quick burst of speedto get open.
6. Have students work with groups of 4 – 5. Have oneperson as the passer, one as the catcher and one asthe defender. Once the Passer has thrown the disc, theDefender goes to the end of the Catcher’s line and theCatcher becomes the Defender. Every 5 passes switch up the Passer so allstudents get a chance at each position.

Skill Application1. Have students work in their groups of 5-7 and play monkey in the middle.
Number the students so each student has a number (1, 2, 3, 4, 5, 6, 7). Start withonly one student in the middle (e.g., the student with number 1). Any time thedisc hits the ground or is intercepted, the next number is in the middle. Start withone person in the middle and three students passing together. Once the studentshave played this so everyone has had an opportunity to be in the middle at leastonce, have two people in the middle.
2. Remind students throughout the game to focus on changing speeds to get openand communicating with their partner.
Cool DownHave students walk around the field with their team and practice their team cheer.Have each group develop a cool down routine, choosing a different student to lead iteach day of the unit.

Lesson 3 – Staying in PositionLesson Length: 40-60 minutes Location: OutdoorsEquipment: 1 disc for every 2 students, Pylons
Expectations:Grade 7 Grade 8• pass an object to a moving partner (e.g., using a
chest pass, bounce pass, two-hand overheadpass, one-hand overhead pass) for distance andaccuracy;
• participate vigorously in all aspects of theprogram (e.g., three-on-three basketball,aerobics);
• throw, pass, or shoot an object (e.g., a ball) to apartner or a target while being defended;
• participate vigorously in all aspects of theprogram (e.g., indoor soccer, cricket);
Assessment Opportunities:Outline to students that Ultimate is a game where students should be moving at alltimes. During the Skill Application component, the students will self monitor their abilityto participate continuously without stopping and keep their heart at an acceptable levelthroughout the entire time.
Lesson:Warm Up
Have students stretch the whole body prior to participating in activities. Focus on theareas of arms, legs and ankles.
Skill Development1. Review with students the skills taught to throw the
disc backhand (Lesson 1). Introduce anddemonstrate the Flick Pass to the students.
2. Have students work with a partner and practice theFlick Pass learned.
3. Discuss with students the correct position whenguarding a student on the other team.
4. Have students work in groups of 4-6. Students formteams of 2 or 3 that will work together. Place a pylonat the end of each side. Each student is responsiblefor guarding one player on the other team. The firstgroup travels down the field passing the disc backand forth. The students on the second team traveldown the field making sure the student on the otherteam does not get between them and their pylon.The students do not try to intercept the disc butinstead each time the student they are guardingcatches the disc they should be in a position betweenthe pylon and the student they are guarding. If thedisc hits the ground, the team traveling down the fieldretains possession and the student picks it up andpasses to another student on the team.
Skill Application
Skill Check – Flick Pass• Stand with your opposite shoulder
facing the target/partner• Feet shoulder width apart and
knees slightly bent• Grip with two or three fingers
underneath the disc and the thumbon top
• Bring your arm back behind theleg and release the disc with awrist snap
• Step forward• Follow through with your arm• See Grips Section 3 below
Skill Check – DefensivePosition
• Knees bent with feet shoulderwidth apart.
• Body positioned so you are facingyour partner.
• Hands around waist facing upready to knock down the disc orintercept a pass
• Your body is in between theindividual you are defending andyour goal.

1. Students will work with their team and play a game of 3 on 3 or 4 on 4. Each studentwill guard a corresponding player on the other team. The object of the game is to passthe disc 5 consecutive times between one team. If the disc is knocked down orintercepted, it is automatically the other team’s disc. Remind the students to use differenttypes of passes (backhand and flick) and catches (one hand, two hand). If a student haspossession of the disc, they may not take any steps and have 3 seconds to get rid of thedisc.
Cool DownHave students walk around the field with their team and practice their team cheer anddiscussion strategies for the game of Ultimate.Have each group develop a cool down routine, choosing a different student to lead iteach day of the unit.
3. Forehand Grips3.1. Basic (Beginner's) Grip
3.2. Power Grip
There are a couple of different versions of this grip.
This grip is in principle very similar to thecorresponding backhand grip. The middlefinger of the throwing hand is inside the rimand the index finger is extended towards thecentre of the disc for support. The advantageof this method is control. The disadvantageis a corresponding loss of power, becausethe spreading of the fingers makes itimpossible to cock the wrist back as far justbefore release.
The first has the index finger next to the middle fingerand hard up against the rim. This grip increases powersince the wrist can now be cocked back further and moresnap imparted no the disc. As expected, there is a loss ofcontrol as there is no finger to support the disc. The dischas a tendency to wobble up and down, and this canreduce distance if the disc and the wrist are not at thesame angle at release.
The second is a slight improvement (not pictured), wherethe index and middle fingers are slightly curled, and thedisc can balance on these two fingers prior to the throw.This grip is more like the hybrid grip below in the way itprovides support. It also makes it easier to throw the highforehand.
Like the backhand, the thumb should be used to grip thedisc tightly. This will give better spin and more control inthe wind, since the disc has less tendency to wobbleduring the wind-up and throw.

3.3. Hybrid Grip
4. Hammer Grips
This grip is analogous to the hybridbackhand grip, although it does seem to bemore popular and widely used. Instead of theindex finger and middle fingers beingparallel, the index finger is slightly bent. Thisis exaggerated a little in the diagram. Thepad of the index finger is pressed firmly onthe rim, as is the pad of the middle finger.The bend in the index finger can then beused to support the disc, while the wrist canstill be cocked well back for a power throw.The disc can be held out flat and ready tothrow, which makes it a good grip forthrowing the high forehand.
The grip shown at right is an interesting way of helpingimprove forehand throws in weaker players. Instead of thepads of the fingers being against the rim, the side of themiddle finger is against the rim. This grip promotes a palm-up follow through, and helps stop people from turning theirforehands over on release. The down side of this grip isthat the snap puts lateral pressure on the finger joints, andpersistent hard throws using this grip can damage thejoints. It is therefore only recommended as a teaching aid,and not for use by experienced players.
Endless variety is possible, particularly with fine-tuning.Most people use one of the above basic grips, but with theirown minor adjustments. With regard to radical differences,few are of practical use. The only alternate grip to thoseabove which is sometimes seen is the use of one, three oreven four fingers inside the rim instead of two. Fewerfingers for some reason seems to give better control andaccuracy, but using only the index finger puts a lot ofpressure on just the one finger, and this is probably why itis not commonly used.
These are essentially the same as for the forehand, and so there are no separate diagrams forthem. The significant difference is that the hammer throw is released upside-down, so thatsupport underneath the disc is not as important as for the forehand. A tight grip with the thumb isimportant, since it is the digit which is doing the supporting. This makes the power and hybridgrips the better choices for the hammer.

Group 1 Group 2x x x x x x x x x xx x x x x x x x x x
x x
Lesson 4 – Pivot and FakeLesson Length: 40-60 minutes Location: OutdoorsEquipment: 1 disc for every 2 students, Pylons
Expectations:Grade 7 Grade 8• perform a variety of throws, passes, and shots
after a faking motion;• intercept objects (e.g., balls, Frisbees) while
moving in various directions and at differentspeeds;
• throw, pass, or shoot an object (e.g., a ball) to apartner or a target while being defended;
• perform movement skills in sequence (e.g., shootor pass a ball from a dribble);
Assessment Opportunities:Teacher can assess the student’s ability to throw using a variety of throws after a fakingmotion (Grade 7) and while being defended (Grade 8).
Lesson:Warm UpHave students work in groups of 2-3. One student starts with the disc and throws it as faras they can down the field. All the members move towards where the disc lands, and thesecond person in the group picks up the disc and throws it as far as they can down thefield. Each time a new person throws the disc, the group increases their speed slightly.Groups start by walking and should end with a slow jog.Have students stretch the whole body prior to the participating in activities. Focus on theareas of arms, legs and ankles.
Skill Development1. Review with students the backhand throw introduced in Lesson #1. Tell the
students that this is the type of throw that starts a game of Ultimate. The gamestarts with one team throwing the disc down the field to the other team. This iscalled the Pull.
2. Have students work with a partner to practice throwing the disc. Each groupshould start approximately 4 metres apart and every 30 – 45 seconds eachpartner should move back a step until they are outside of range.
3. Discuss with students the difference between throwing the disc to a partner andthe throw used in a Pull. What do they have to do differently?
4. Discuss with students that in order to score in Ultimate, the disc must be thrownover the end line.
5. Have students line up in 5 lines across the end line at oneend of the field. The five students work as a team to travelthe disc down the field. Have one student stand at theother end of the field and throw the disc down the field(Pull). All 5 students work together to get the disc down tothe other end of the field without it hitting the ground. All 5students must touch the disc and the final pass must beover the end line.
6. Discuss with students what to do after they have caught the disc and they areguarded. Demonstrate to students the skills of the pivot and of the fake.

7. Have students work in groups of 3-4. Have one student be the defender and theother 2-3 the passers. Each time the student catches the disc, the defendershould move to a good defensive position. The student who catches the discwaits for the defender to get to them to play defense and then practices pivotingto see who is open and get a clear pass to one of the other students. Switch thedefender frequently so all students get a chance to be defender. Remindstudents that once they pass the disc they should move to an open spot toreceive the disc again.
Skill Application1. Review and discuss with students the pivot and fake when a student has the
disc. Remind them that they only have 3 – 5 seconds to pass the disc.2. In their groups, students will play a game where one team travels down the field
with their group trying to get all the way down the field without the disc hitting theground or being intercepted. When a student catches the disc they will work onpivoting to see students around them. Make sure all students on the team touchthe disc each time they go down the field.
3. Have the first team travel down the field with the second team trying to defend byintercepting or knocking down the disc. Once the disc is knocked down the firstteam becomes the defending team and the second team then plays offence.
Cool DownStudents walk around the field with their team, discussing the strategies used inUltimate.Have each group develop a cool down routine, choosing a different student to lead iteach day of the unit.

Lesson 5 – Getting Ready to PlayLesson Length: 40-60 minutes Location: OutdoorsEquipment: 1 disc for every 2 students, Pylons
Expectations:Grade 7 Grade 8• participate vigorously in all aspects of the
program (e.g., three-on-three basketball,aerobics);
• participate fairly in games or activities (e.g.,accepting and respecting decisions made byofficials, whether they are students, teachers,or coaches).
• participate vigorously in all aspects of theprogram (e.g., indoor soccer, cricket);
• follow the rules of fair play and sports etiquettein games and activities (e.g., maintaining self-control whether winning or losing).
Assessment Opportunities:Students will be assessed on their level of participation and their ability to maintain theparticipation throughout the activity. Students will also be assessed on theirsportspersonship and observing the spirit of the game.
Lesson:Warm UpHave students line up in groups of 3-4 and form 2 lines on either side of the field. Havethe first person in one line start with the disc, and pass it to the first person in the otherline. Once the first person throws the disc they move to the end of the line they justpassed to. This pattern continues. The students start the drill moving at a slow pace andfinish the drill at a light jog.Have students stretch the whole body prior to participating in activities. Focus on theareas of arms, legs and ankles.
Skill Development1. Explain to students that Ultimate is a game that is
self-refereed and that the game is based onhonesty. The focus of the game is having fun andplaying the game and not about winning andlosing. Discuss how this may be different fromother games they have seen and what potentialbenefits and challenges there are to thisapproach.
2. Review with students the different types of throwslearned (e.g., backhand, flick) and different waysto catch (e.g., two hand, one hand). Introduce anddemonstrate the hammer throw. Discuss withstudents why this could be an important throw inthe game of Ultimate.
3. Have students work in partners and throw the disc back and forth practicing thehammer throw.
4. Discuss with students different ways to get open when moving down the field.(e.g., V-Cut, L-Cut, Change of Speed).
5. Have students work in groups of 6-8. Have them form two lines on either side ofthe passer and one at a time move down the field and practice the different ways
Skill Check: Hammer Throw• Stand with your opposite shoulder
facing the target/partner• Feet shoulder width apart and
knees slightly bent• Grip with two or three fingers
underneath the disc and the thumbon top
• Bring your arm back over yourhead and release the disc with awrist snap (similar to an overheadserve in tennis)
• Step forward• Follow through with your arm• See Grips Section 4 earlier

to get open. Have one student play defense in front of the passer and have thepasser practice pivoting and faking to pass to the open student. Have studentsswitch passers and defenders often so all students get a chance to practice allpositions.
Skill Application1. Students will play a mini game of Ultimate with their team. Remind the students
that each time a team scores, the teams switch sides and the team that scoredmust throw the disc (pull) from the side they scored on and the other team mustgo all the way back to the other side to receive the disc. Remind students thatwhen playing the game the rules are called by the players playing the game andthe focus is on having fun first.
2. Have students play for 4-5 minutes and stop and discuss strategies and discussand clarify any questions about how the game is played.
Cool DownThe students will walk around the field and discuss the different positions and strategiesused for the game of ultimate. They will also practice their team cheer for the nextclasses games.Have each group develop a cool down routine, choosing a different student to lead iteach day of the unit.

Lesson 6 – Playing the GameLesson Length: 40-60 minutes Location: OutdoorsEquipment: 1 disc for every 2 students, Pylons
Expectations:Grade 7 Grade 8• perform a variety of throws, passes, and shots
after a faking motion;• participate vigorously in all aspects of the
program (e.g., three-on-three basketball,aerobics);
• participate fairly in games or activities (e.g.,accepting and respecting decisions made byofficials, whether they are students, teachers,or coaches).
• throw, pass, or shoot an object (e.g., a ball) to apartner or a target while being defended;
• participate vigorously in all aspects of theprogram (e.g., indoor soccer, cricket);
• follow the rules of fair play and sports etiquettein games and activities (e.g., maintaining self-control whether winning or losing).
Assessment Opportunities:Throughout the game students can be assessed on their ability to throw a variety ofpasses (e.g., backhand, flick, hammer) after a faking motion (grade 7) and while beingdefended (grade 8). Students will also be assessed on their ability to play the gamecontinuously for the entire time. Finally, students will be assessed on their ability tofollow the rules of Ultimate and observe the spirit of the game.
Lesson:Warm UpHave each team work together walking around the field and slowly increasing theirspeed moving around the field.Have students stretch the whole body prior to participating in activities. Focus on theareas of arms, legs and ankles.
Skill Development1. Have students work with their teams and practice the skills and strategies they
have worked on throughout the Ultimate unit (e.g., passing, catching, faking,pivoting, running, participation).
2. Provide students with an opportunity to discuss and practice strategies related toplaying the game of Ultimate.
3. Have students start the class by presenting their team cheer.
Skill Application1. Set up a schedule of games that will take place throughout the period. Each team
will play each other team once for approximately 5 minutes.2. The schedule for a four team tournament will be:
a. Game 1 – 1 vs 2 and 3 vs 4b. Game 2 – 1 vs 3 and 2 vs 4c. Game 3 – 1 vs 4 and 2 vs 3
Cool DownHave each group develop a cool down routine, choosing a different student to lead iteach day of the unit.

Extension – 11 Steps to Starting an Intramural Program
1. Communicate to staff, parents, and community partners and see if thereare any individuals interested in assisting with the intramural program.
2. Find a safe and appropriate place to play and purchase the necessaryequipment to play.
3. Host an information session for students. Communicate information aboutthe game of Ultimate, the philosophy of the intramural program and thetime and dates of the games. (e.g., Monday and Wednesday at lunch for30 minutes).
4. Publicize the intramural program through school newsletters, web pages,PA announcements, posters and have students sign up in a central signup area or within their classroom.
5. Send information letters home to parents about the intramural program.Include expectations, safety, times, dates, and philosophy.
6. Encourage students to be a part of the organization of the intramuralprograms. Students could take on the leadership role of setting up theteams, schedules and making sure the equipment and fields are bookedand ready for the teams to play each day.
7. Organize balanced teams and communicate the teams to the students.Provide an opportunity for the teams to meet and/or participate in anintroductory lesson about Ultimate prior to the start of the intramuralgames. The lesson should provide information about safety, rules,expectations and consequences.
8. Depending on the number of students who are interested in participating,make a schedule of games and playoff structure (if needed) with the datesand times and distribute to students or post in a central location.
9. Communicate to the students who are playing each day, about the timeand location of the games. Keep track of standings and take pictures ofthe students playing Ultimate to post on a bulletin board in the school.
10. Track successes and any concerns. Give students and volunteers with anopportunity to provide feedback about the intramural program and makeadjustments for next years league.
11. Provide students with information about community programs available forstudents to play Ultimate outside of school.

!(descriptions presuppose a right-handed thrower)
Air bounce: a backhand or forehand throw thatis aimed slightly downward, but is buoyed by acushion of air.
Backhand: a standard throw; right-handedplayer places thumb on top of disc, curls fingersunderneath, extends arm to left side of body.
Bid: an impressive (but failing) diving attempt tocatch the Frisbee. Often used in a positive way,ex. "Nice bid"
Blade: a forehand throw that goes high in the airand curves left; an extreme version of thereverse curve.
Check the disc in: during stoppage in play, adefender must touch the disc before the throwercan initiate play.
Chilly: slow it down, be patient, wait a momentfor the game to get reorganized again.
Clog: to prevent good cuts by standing in theway of your teammates.
Corkscrew: (see "hammer") like a hammerthrow but the Frisbee is held in a backhand griprather than a forehand grip, so the Frisbeeflattens out and curves the opposite way fromthe hammer.
Cut: a run by a receiver to shake his defender.
D: defense
Deep: a receiver who cuts for hucks.
Disc in: signals that the disc is in play.
Faking: an offensive player pretends to move orcut suddenly to deceive the defensive player asto the direction he/she is moving or throwing.
Force: guarding on only on one side of thethrower to make them throw to the other side.The direction you want them to throw is thedirection of the force.
Types of Force:
Force In: force to the middle of the fieldForce Out: force to the outside of the fieldForce Sidelines: force to the near sidelinesForce Home/Away: force to the home or awaysideForce Forehand: force the thrower to use aforehand throwForce Backhand: force the thrower to use abackhand throw
Forehand: a difficult but useful throw; throwerleads with middle finger along rim, with indexfinger supporting disc; looks similar to a sidearmpitch in baseball; also called a flick.
Foul: the result of physical contact betweenopposing players. Players call their own fouls(see Ultimate in Ten Simple Rules).
Hack: a foul.
Hammer: an overhead throw with a forehandgrip in which the Frisbee is released at an angleso that it flattens out and flies upside down.
Handler: one of a team's primary throwers.
High release: a backhand throw held andreleased over the thrower's head; very difficult toblock.
Huck: a long throw; equivalent to a bomb infootball.
Inside out: as a backhand, a throw to the rightthat curves left; as a forehand, a throw to the leftthat curves right.
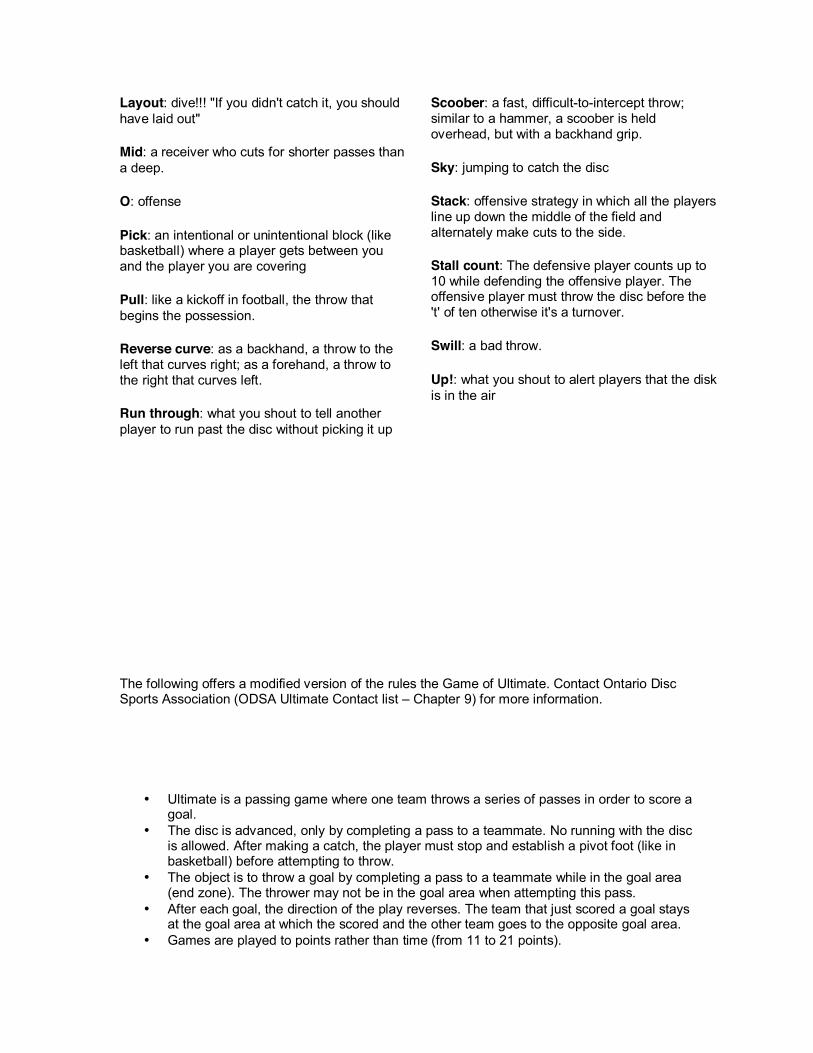
Layout: dive!!! "If you didn't catch it, you shouldhave laid out"
Mid: a receiver who cuts for shorter passes thana deep.
O: offense
Pick: an intentional or unintentional block (likebasketball) where a player gets between youand the player you are covering
Pull: like a kickoff in football, the throw thatbegins the possession.
Reverse curve: as a backhand, a throw to theleft that curves right; as a forehand, a throw tothe right that curves left.
Run through: what you shout to tell anotherplayer to run past the disc without picking it up
Scoober: a fast, difficult-to-intercept throw;similar to a hammer, a scoober is heldoverhead, but with a backhand grip.
Sky: jumping to catch the disc
Stack: offensive strategy in which all the playersline up down the middle of the field andalternately make cuts to the side.
Stall count: The defensive player counts up to10 while defending the offensive player. Theoffensive player must throw the disc before the't' of ten otherwise it's a turnover.
Swill: a bad throw.
Up!: what you shout to alert players that the diskis in the air
The following offers a modified version of the rules the Game of Ultimate. Contact Ontario DiscSports Association (ODSA Ultimate Contact list – Chapter 9) for more information.
• Ultimate is a passing game where one team throws a series of passes in order to score agoal.
• The disc is advanced, only by completing a pass to a teammate. No running with the discis allowed. After making a catch, the player must stop and establish a pivot foot (like inbasketball) before attempting to throw.
• The object is to throw a goal by completing a pass to a teammate while in the goal area(end zone). The thrower may not be in the goal area when attempting this pass.
• After each goal, the direction of the play reverses. The team that just scored a goal staysat the goal area at which the scored and the other team goes to the opposite goal area.
• Games are played to points rather than time (from 11 to 21 points).

Ultimate has traditionally relied upon a spirit that places the responsibility for fair play on eachparticipant. Competitive play is encouraged, but never at the expense of mutual respect betweenplayers, adherence to the agreed upon rules of the game, or the basic joy of play.
The purpose of the rules of Ultimate is to provide a guideline, which describes the way the gameis played. It is assumed that no player will intentionally violate the rules; there is no penal system.An intentional foul would be considered cheating and a gross offense against the “Spirit of theGame”. Instead there is a method for resuming play in a manner, which simulates what wouldmost likely have occurred had there been no violation.
2. Initiate Play -- Each point begins withboth teams lining up on the front of theirrespective end zone line. The defensethrows ("pulls") the disc to the offense. Aregulation game has seven players perteam.
3. Scoring -- Each time the offensecompletes a pass in the defense's end zone,the offense scores a point. Play is initiatedafter each score.
4. Movement of the Disc -- The disc maybe advanced in any direction by completinga pass to a teammate. Players may not runwith the disc. The person with the disc("thrower") has ten seconds to throw thedisc. The defender guarding the thrower("marker") counts out the stall count.
5. Change of possession -- When a passin not completed (e.g. out of bounds, drop,block, interception), the defense immediatelytakes possession of the disc and becomesthe offense.
6. Substitutions -- Players not in the gamemay replace players in the game after ascore and during an injury timeout.
7. Non-contact -- No physical contact isallowed between players. Picks and screensare also prohibited. A foul occurs whencontact is made.
8. Fouls -- When a player initiates contacton another player, a foul occurs. When afoul disrupts possession, the play resumesas if the possession was retained. If theplayer committing the foul disagrees with thefoul call, the play is redone.
9. Self-Refereeing -- Players areresponsible for their own foul and line calls.Players resolve their own disputes.
10. Spirit of the Game -- Ultimate stressessportsmanship and fair play. Competitiveplay is encouraged, but never at theexpense of respect between players,adherence to the rules, and the basic joy ofplay.
Referenceshttp://www.cs.rochester.edu/u/ferguson/ultimate/ultimate-simple.html
1. The Field -- A rectangularshape with end zones at eachend. A regulation field is 70yards (64m) by 40 yards(37m), with end zones 25yards (23m) deep.