Embed Size (px)
Citation preview
Unified Utility Manual
Label Printer
Rev. 2.08 SRP-770 / 770II / 770IIE SLP-T400 / T400E SLP-T403 / T403E SLP-D420 / D420E SLP-D423 / D423E SLP-D220 / D220E SLP-D223 / D223E SLP-T400R / T403R
http://www.bixolon.com
Label Printer
Rev. 2.08 - 2 -
■ Table of Contents 1. Foreword ........................................................................................................................ 3
2. Usage Preparation ......................................................................................................... 4
3. Unified Label Printer Utility Usage ............................................................................... 5
3-1 PCX File Downloader ................................................................................................. 5
3-2 Memory Switch Downloader ....................................................................................... 7
3-3 File Transfer .............................................................................................................. 12
3-4 SLCS Tester.............................................................................................................. 13
3-5 Manual Calibration .................................................................................................... 15
Label Printer
Rev. 2.08 - 3 -
1. Foreword
The Unified Label Printer Utility can be used for various purposes. Details on the usage of each function are described as follows. 1) PCX File Downloader
This function is used when saving a black-and-white PCX-format image to flash memory. 2) User Setting Manager
This function is used to change default settings of the printer, including code pages, serial settings, paper size, and print density, to values suited to the user environment.
3) File Transfer Manager
This function is used when sending test files, such as command scripts, to the printer. 4) SLCS Tester
This function is used to test printing-related commands of the SLCS (Bixolon Label Command Set) and create a brief label sample for test printing.
We at BIXOLON maintain ongoing efforts to enhance and upgrade the functions and quality of all our products. In following, product specifications and/or user manual content may be changed without prior notice.
Label Printer
Rev. 2.08 - 4 -
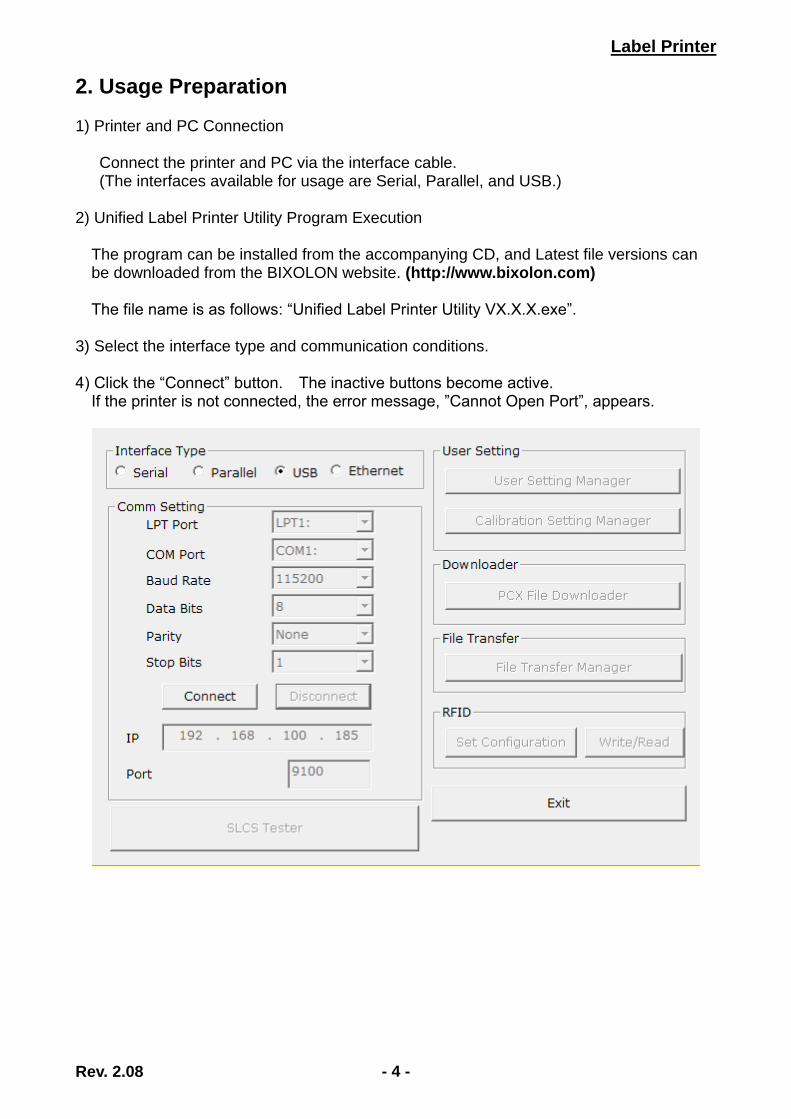
2. Usage Preparation 1) Printer and PC Connection Connect the printer and PC via the interface cable. (The interfaces available for usage are Serial, Parallel, and USB.) 2) Unified Label Printer Utility Program Execution
The program can be installed from the accompanying CD, and Latest file versions can be downloaded from the BIXOLON website. (http://www.bixolon.com) The file name is as follows: “Unified Label Printer Utility VX.X.X.exe”.
3) Select the interface type and communication conditions. 4) Click the “Connect” button. The inactive buttons become active.
If the printer is not connected, the error message, ”Cannot Open Port”, appears.
Label Printer
Rev. 2.08 - 5 -
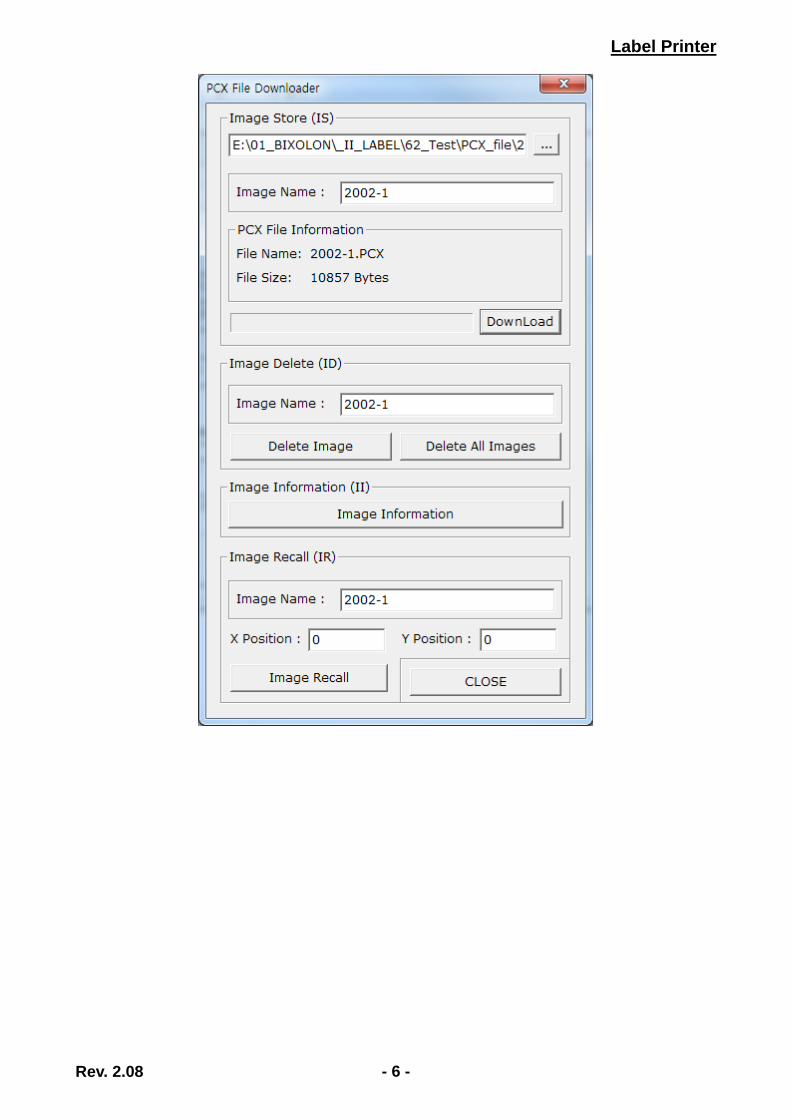
3. Unified Label Printer Utility Usage 3-1 PCX File Downloader This function is used when saving a black-and-white PCX-format image to flash memory. Saved images can be recalled at any time for printing. PCX File Downloader usage is described as follows. The image file must be prepared prior to using this function. Click the “PCX File Downloader” button.
3-1-1 Image Store (IS) 1) Open the PCX file (*.pcx). 2) Enter the image name and click the Download button. The image name is used to
recall or delete images 3-1-2 Image Delete (ID) 1) Check the list of stored images by clicking the Image Information button. 2) Enter the name of the image to be deleted and click the Delete Image button. 3) To delete all images stored in the printer memory, click the Delete All Images button
without entering an image name. 3-1-3 Image Information (II) Information for the saved image is displayed. 3-1-4 Image Recall (IR) Downloaded images can be recalled and printed using the IR command.
Label Printer
Rev. 2.08 - 6 -
Label Printer
Rev. 2.08 - 7 -
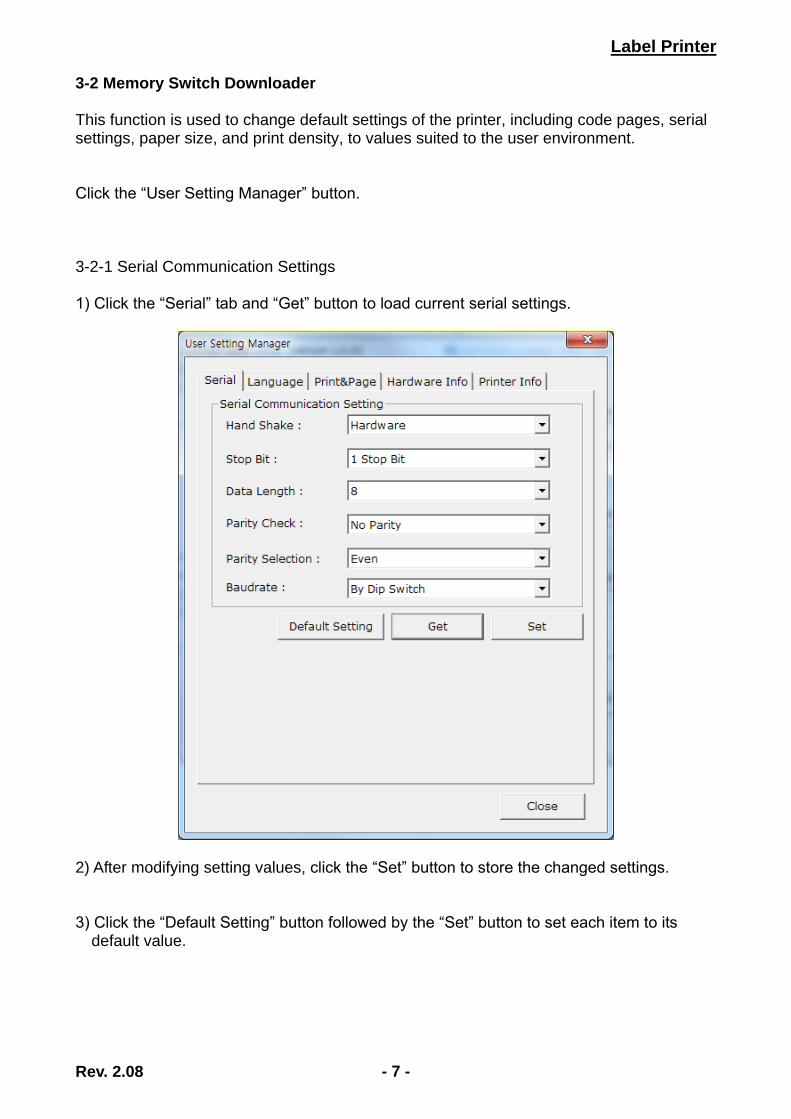
3-2 Memory Switch Downloader This function is used to change default settings of the printer, including code pages, serial settings, paper size, and print density, to values suited to the user environment. Click the “User Setting Manager” button. 3-2-1 Serial Communication Settings 1) Click the “Serial” tab and “Get” button to load current serial settings.
2) After modifying setting values, click the “Set” button to store the changed settings. 3) Click the “Default Setting” button followed by the “Set” button to set each item to its
default value.
Label Printer
Rev. 2.08 - 8 -
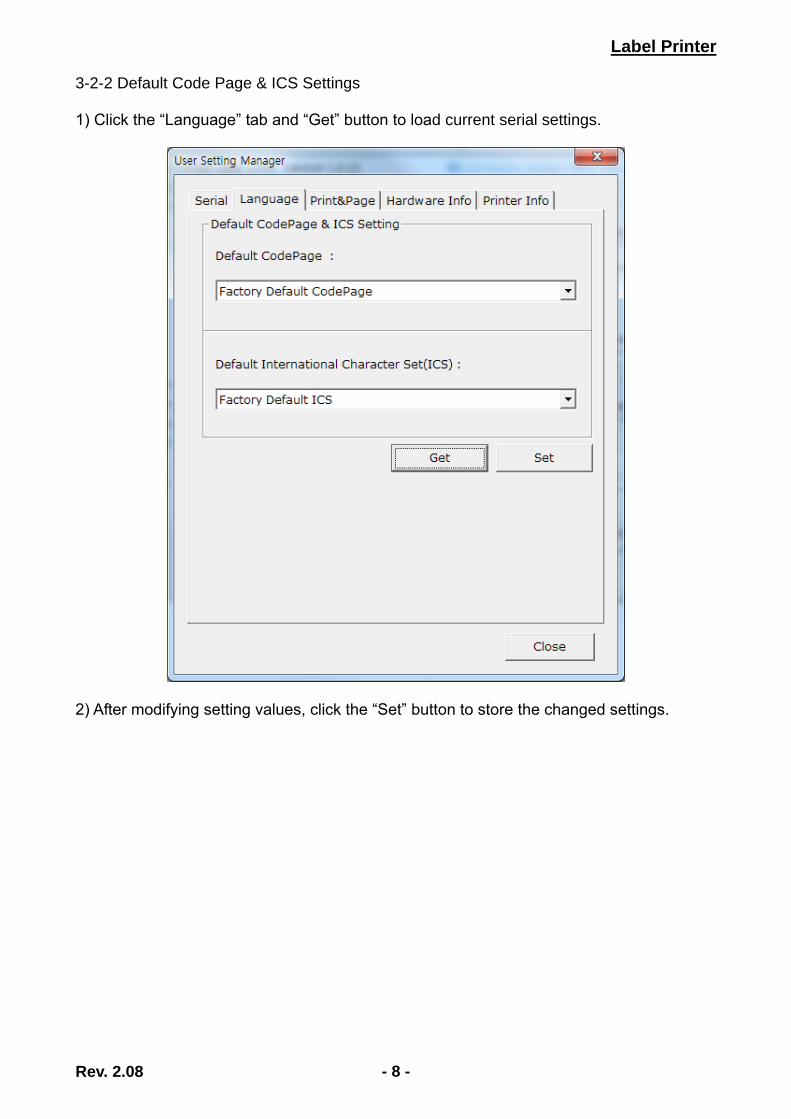
3-2-2 Default Code Page & ICS Settings 1) Click the “Language” tab and “Get” button to load current serial settings.
2) After modifying setting values, click the “Set” button to store the changed settings.
Label Printer
Rev. 2.08 - 9 -
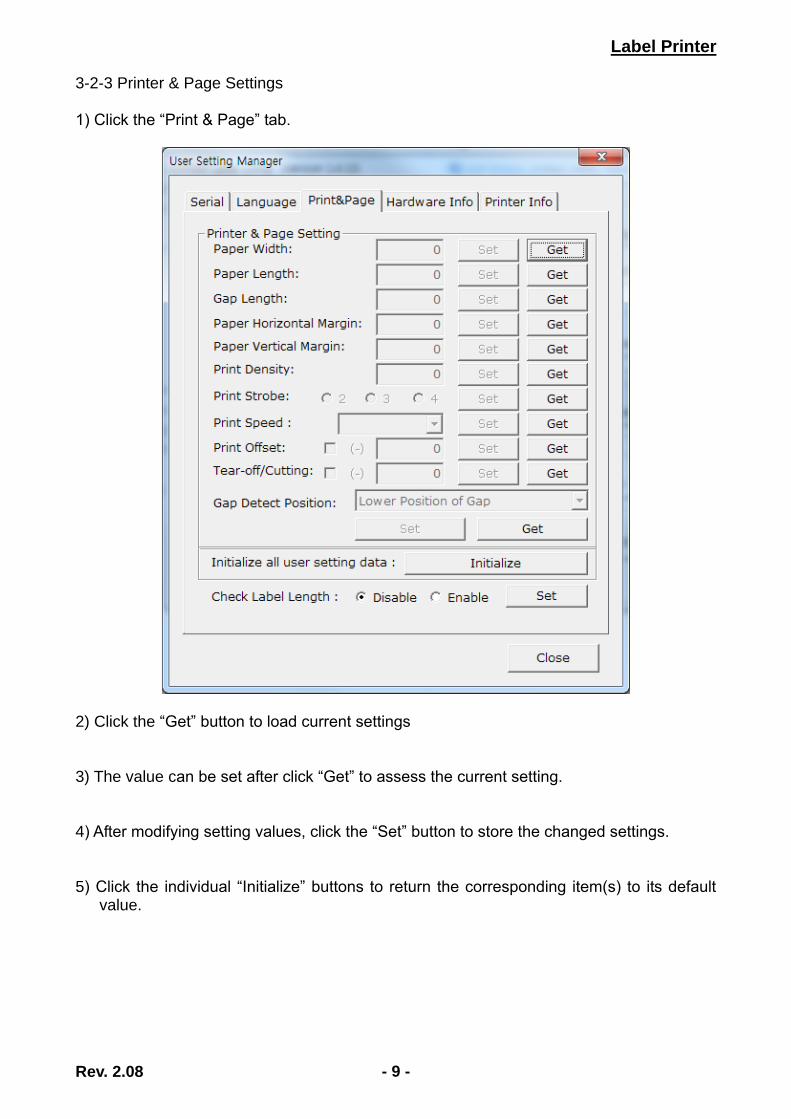
3-2-3 Printer & Page Settings 1) Click the “Print & Page” tab.
2) Click the “Get” button to load current settings 3) The value can be set after click “Get” to assess the current setting. 4) After modifying setting values, click the “Set” button to store the changed settings. 5) Click the individual “Initialize” buttons to return the corresponding item(s) to its default
value.
Label Printer
Rev. 2.08 - 10 -
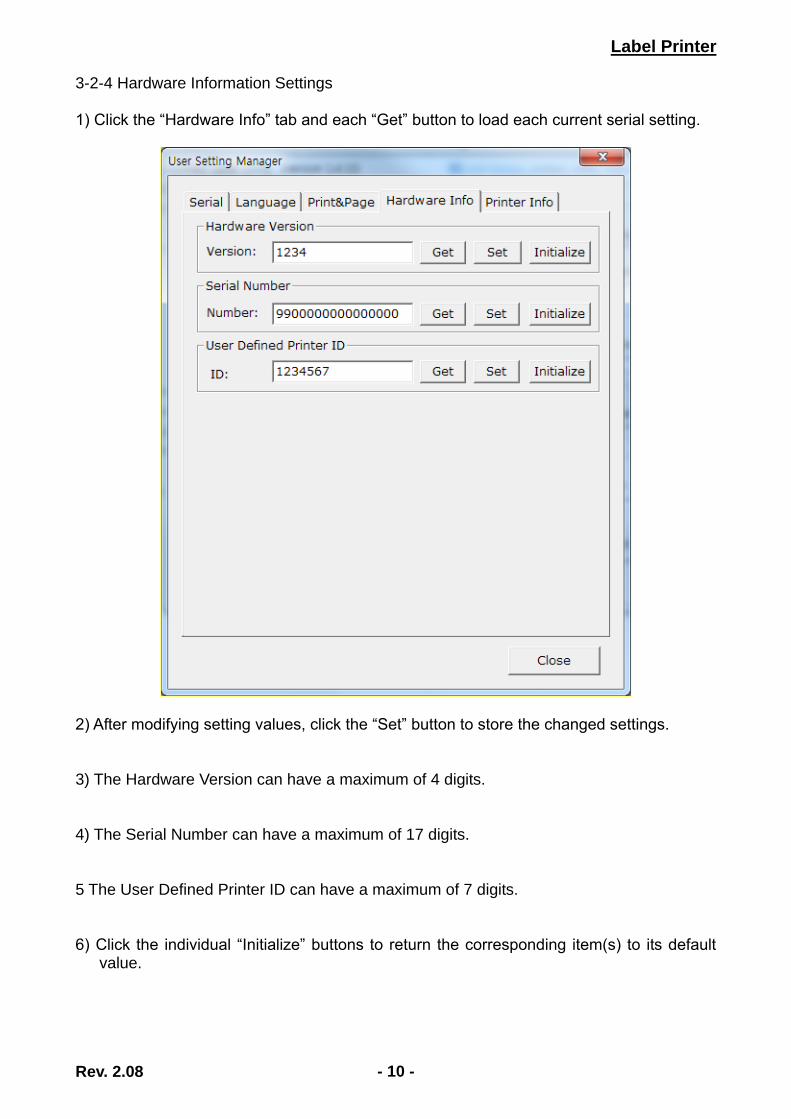
3-2-4 Hardware Information Settings 1) Click the “Hardware Info” tab and each “Get” button to load each current serial setting.
2) After modifying setting values, click the “Set” button to store the changed settings. 3) The Hardware Version can have a maximum of 4 digits. 4) The Serial Number can have a maximum of 17 digits. 5 The User Defined Printer ID can have a maximum of 7 digits. 6) Click the individual “Initialize” buttons to return the corresponding item(s) to its default
value.
Label Printer
Rev. 2.08 - 11 -
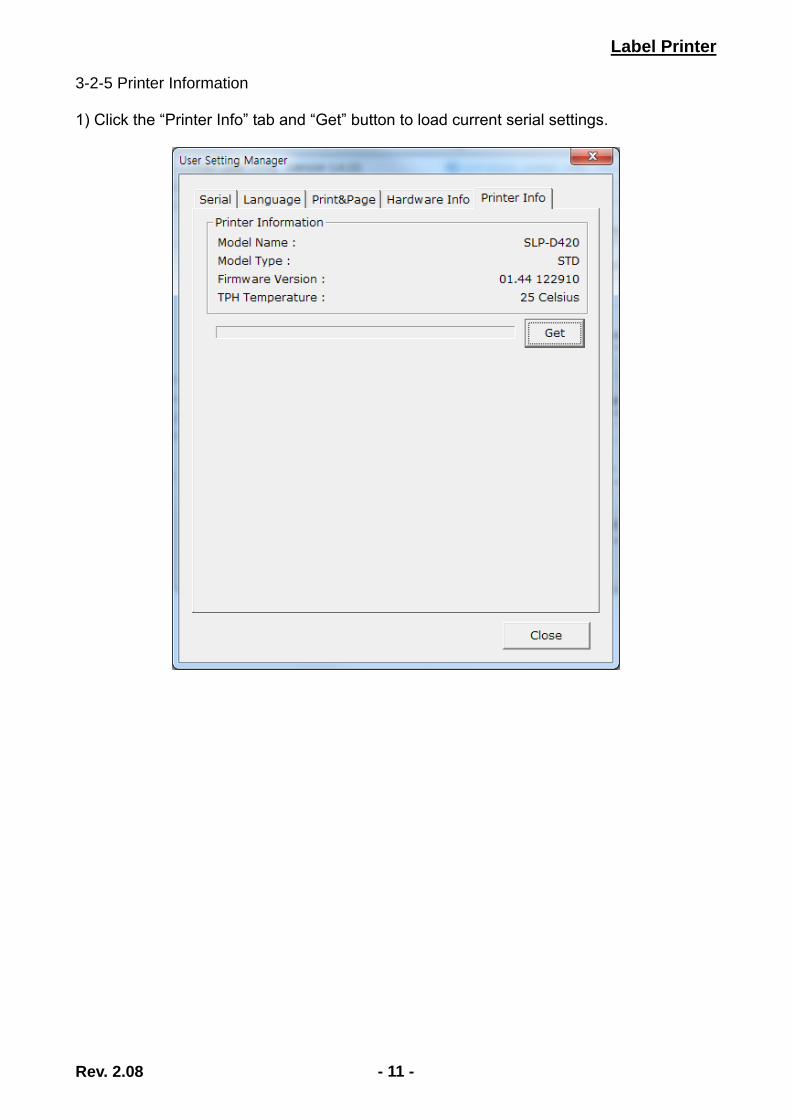
3-2-5 Printer Information 1) Click the “Printer Info” tab and “Get” button to load current serial settings.
Label Printer
Rev. 2.08 - 12 -
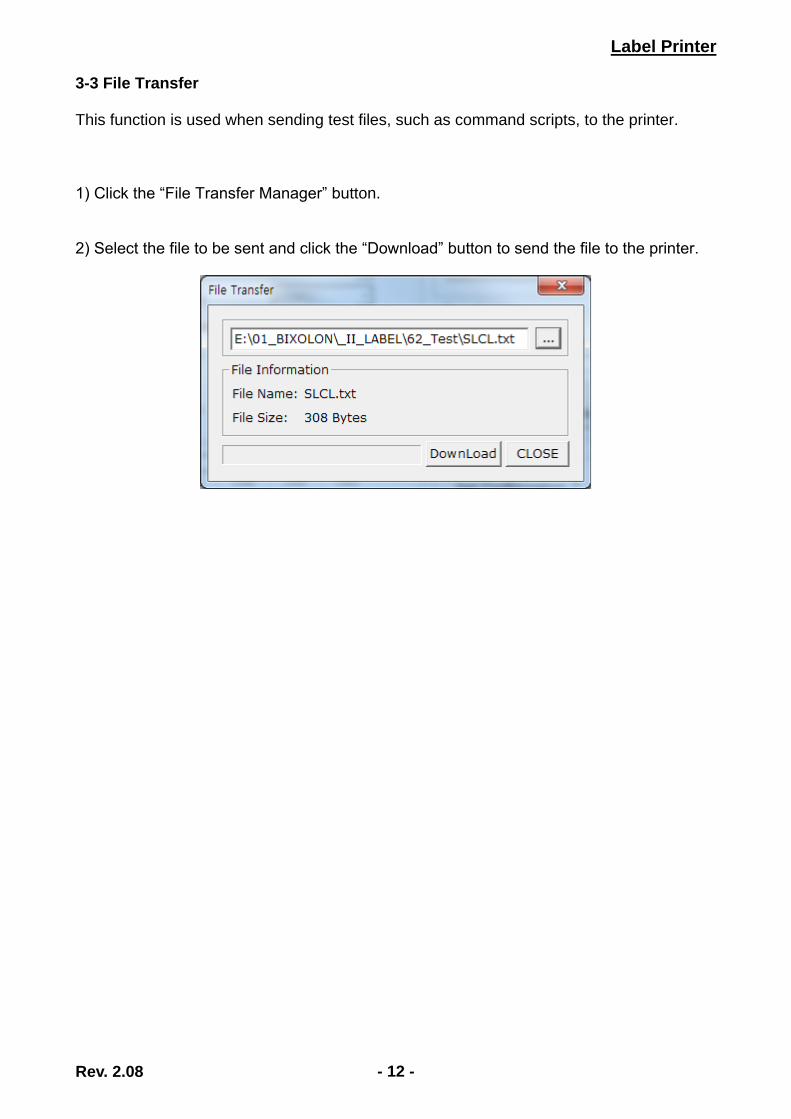
3-3 File Transfer This function is used when sending test files, such as command scripts, to the printer. 1) Click the “File Transfer Manager” button. 2) Select the file to be sent and click the “Download” button to send the file to the printer.
Label Printer
Rev. 2.08 - 13 -
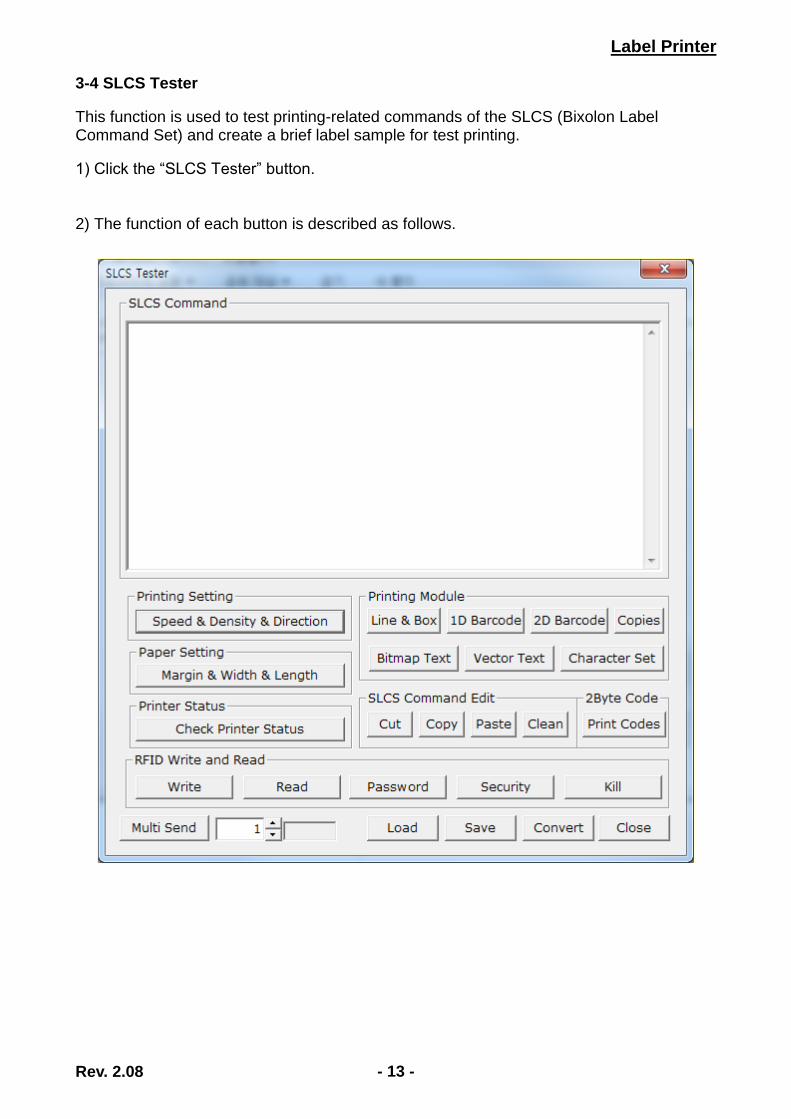
3-4 SLCS Tester
This function is used to test printing-related commands of the SLCS (Bixolon Label Command Set) and create a brief label sample for test printing.
1) Click the “SLCS Tester” button. 2) The function of each button is described as follows.
Label Printer
Rev. 2.08 - 14 -
a) Line & Box: creates a command for line and box drawing b) 1D Barcode: creates a command for a 1-dimensional barcode c) 2D Barcode: creates a command for a 2-dimensional barcode d) Copies: printing counts e) Bitmap Text: creates a command for bitmap image string recognition f) Vector Text: creates a command for vector image string recognition
g) Character Set: creates a command for code page and ICS setting h) Speed & Density & Direction: creates a command for speed, print density, and print
direction setting i) Margin & Width & Length: creates a command for margin and width and length of
print paper setting j) Check Printer Status: check cover, paper, and error status of printer
k) Write: write data to RFID tag l) Read: read data from RFID tag m) Password: set password to RFID tag n) Security: set security code to RFID tag o) Kill: set disable to RFID tag
p) Multi Send: creates a command for number of pages to print setting q) SLCS Command Edit: function for command cutting, copying, pasting, and erasing r) Print Codes: print 2byte codes
s) Load: recalls a file with a saved command t) Save: saves a created command to a file u) Convert: converts measurement units (inch, mm, cm) v) Close: closes the SCLC test program
Label Printer
Rev. 2.08 - 15 -
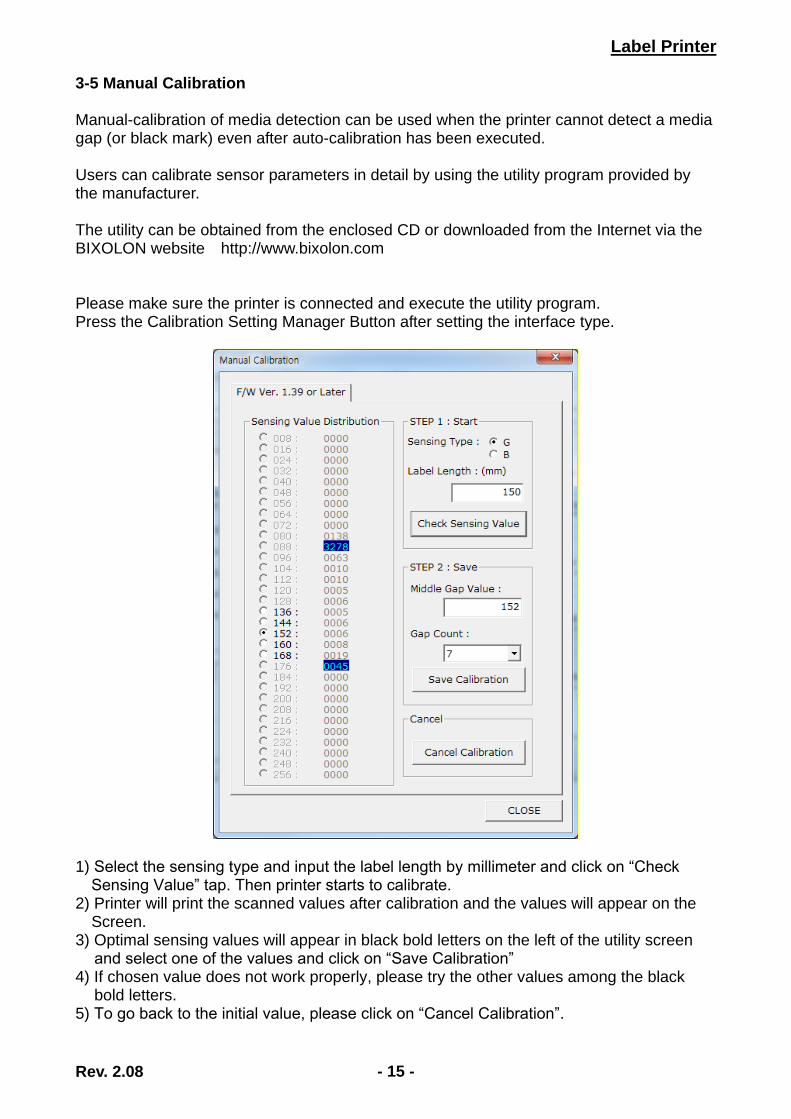
3-5 Manual Calibration Manual-calibration of media detection can be used when the printer cannot detect a media gap (or black mark) even after auto-calibration has been executed. Users can calibrate sensor parameters in detail by using the utility program provided by the manufacturer. The utility can be obtained from the enclosed CD or downloaded from the Internet via the BIXOLON website http://www.bixolon.com Please make sure the printer is connected and execute the utility program. Press the Calibration Setting Manager Button after setting the interface type.
1) Select the sensing type and input the label length by millimeter and click on “Check
Sensing Value” tap. Then printer starts to calibrate. 2) Printer will print the scanned values after calibration and the values will appear on the
Screen. 3) Optimal sensing values will appear in black bold letters on the left of the utility screen
and select one of the values and click on “Save Calibration” 4) If chosen value does not work properly, please try the other values among the black
bold letters. 5) To go back to the initial value, please click on “Cancel Calibration”.