Embed Size (px)
Citation preview

University of Minnesota Oral Pathology Laboratory
Introduction to Outreach Features &
Instructions for Submitting a Biopsy and Getting Results
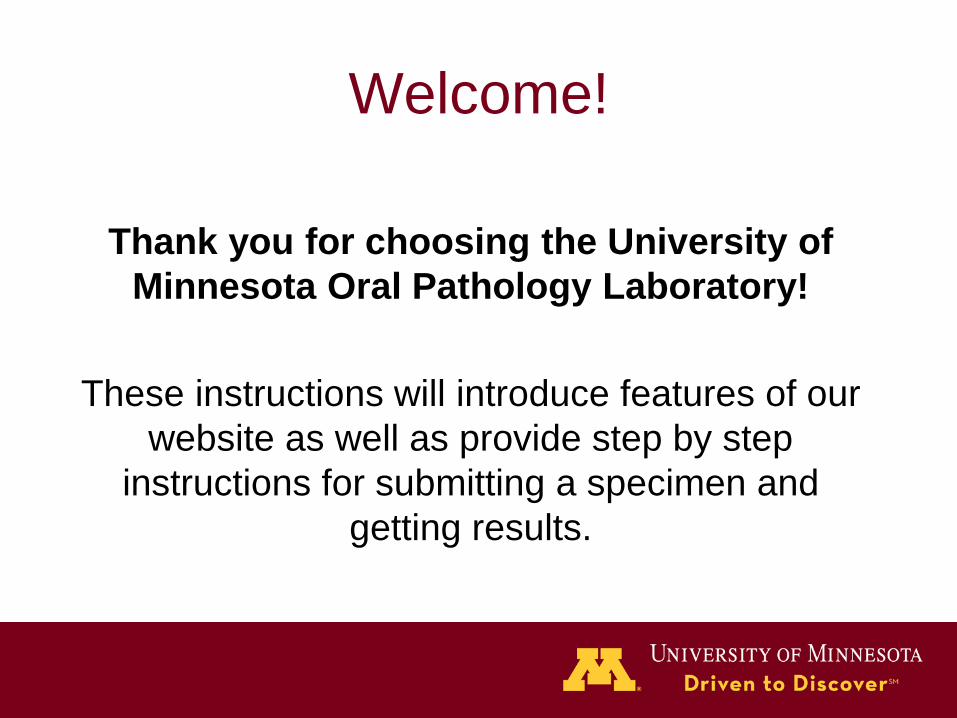
Welcome!
Thank you for choosing the University of Minnesota Oral Pathology Laboratory!
These instructions will introduce features of our website as well as provide step by step
instructions for submitting a specimen and getting results.
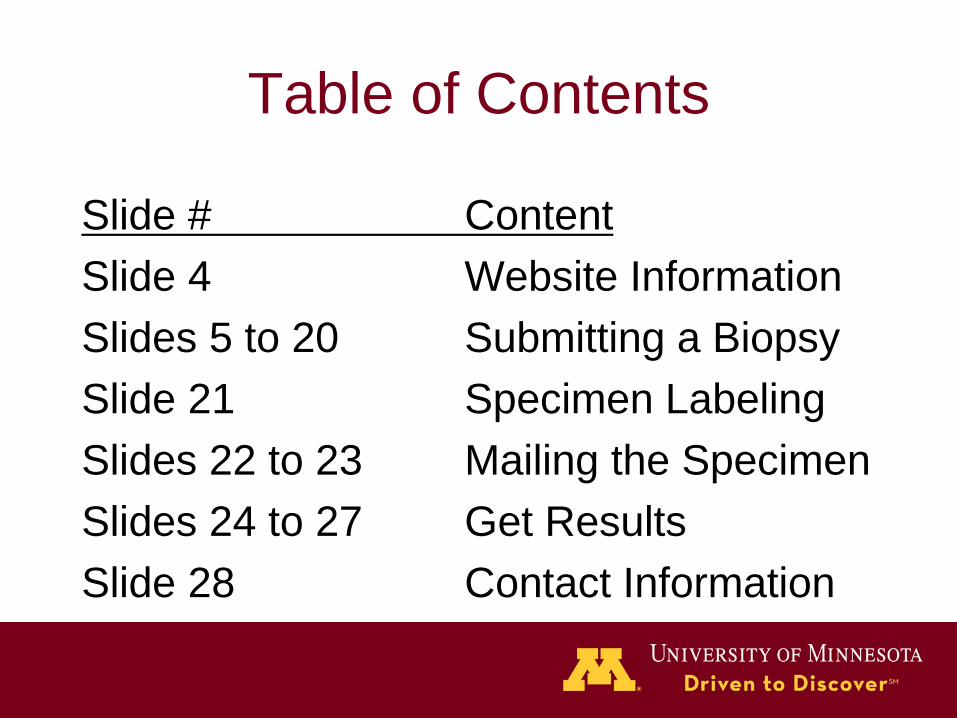
Table of Contents
Slide # ContentSlide 4 Website InformationSlides 5 to 20 Submitting a Biopsy Slide 21 Specimen LabelingSlides 22 to 23 Mailing the SpecimenSlides 24 to 27 Get ResultsSlide 28 Contact Information
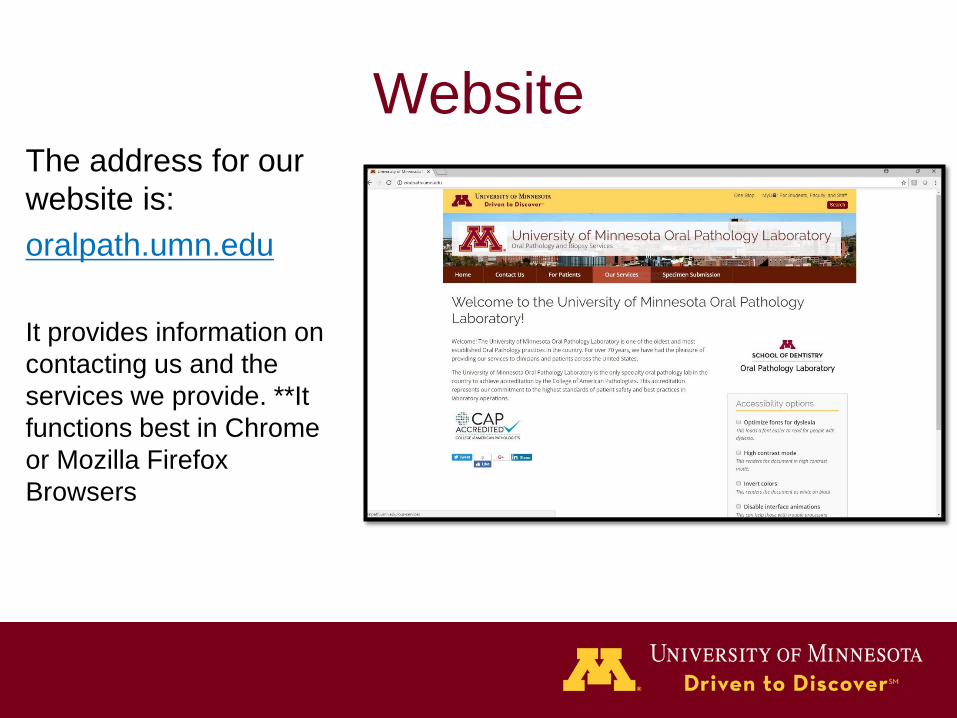
WebsiteThe address for our website is:oralpath.umn.edu
It provides information on contacting us and the services we provide. **It functions best in Chrome or Mozilla Firefox Browsers
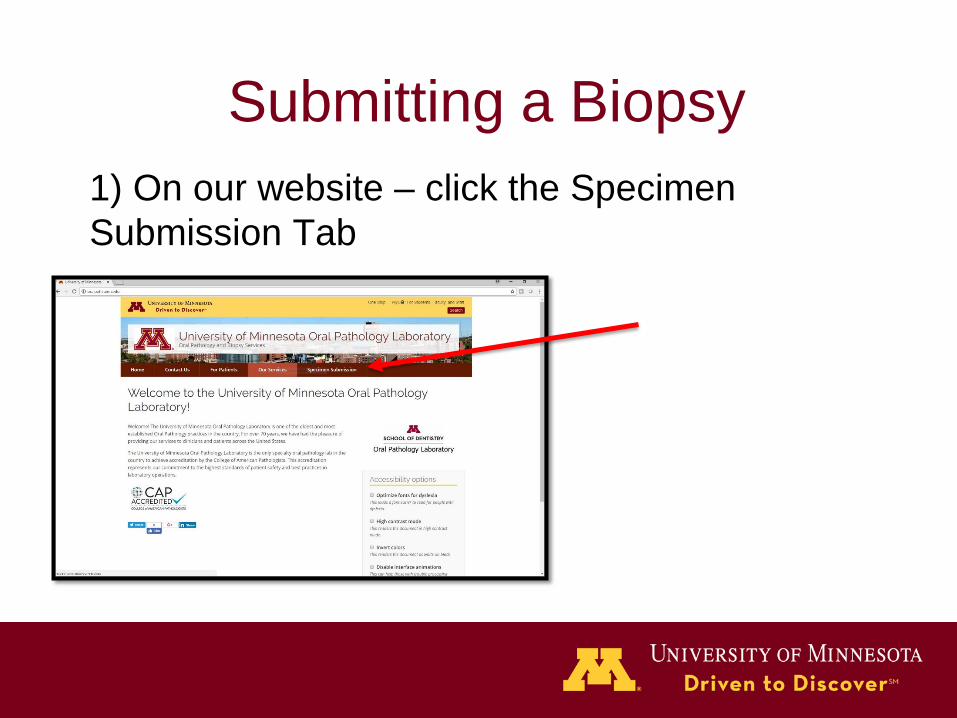
Submitting a Biopsy1) On our website – click the Specimen Submission Tab
Submitting a Biopsy
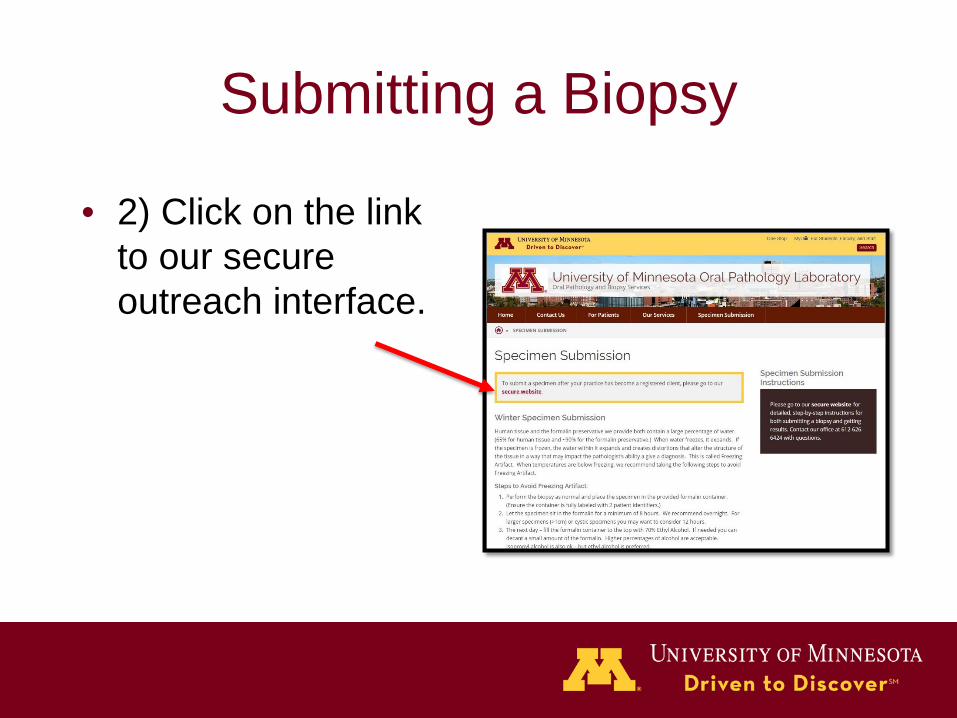
• 2) Click on the link to our secure outreach interface.
Submitting a Biopsy
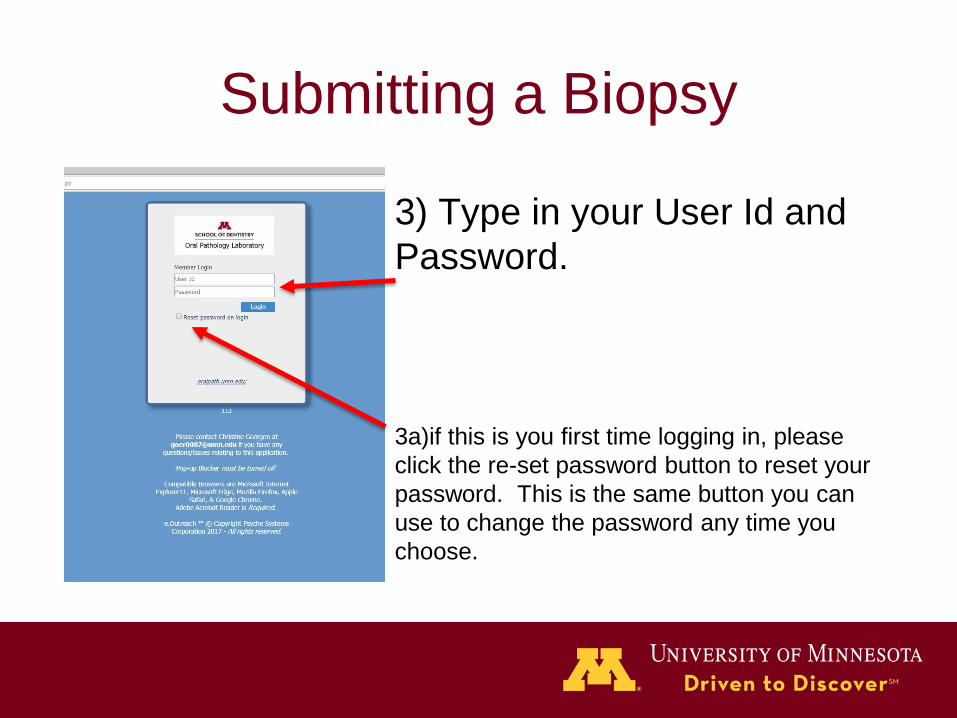
3) Type in your User Id and Password.
3a)if this is you first time logging in, please click the re-set password button to reset your password. This is the same button you can use to change the password any time you choose.
Submitting a Biopsy
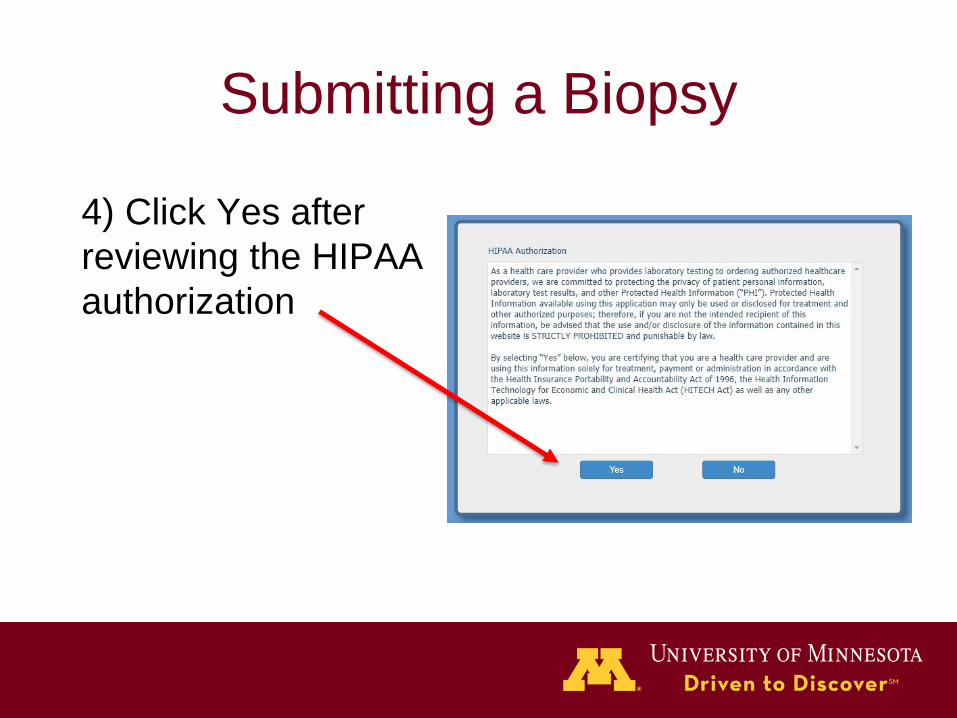
4) Click Yes after reviewing the HIPAA authorization
Submitting a Biopsy
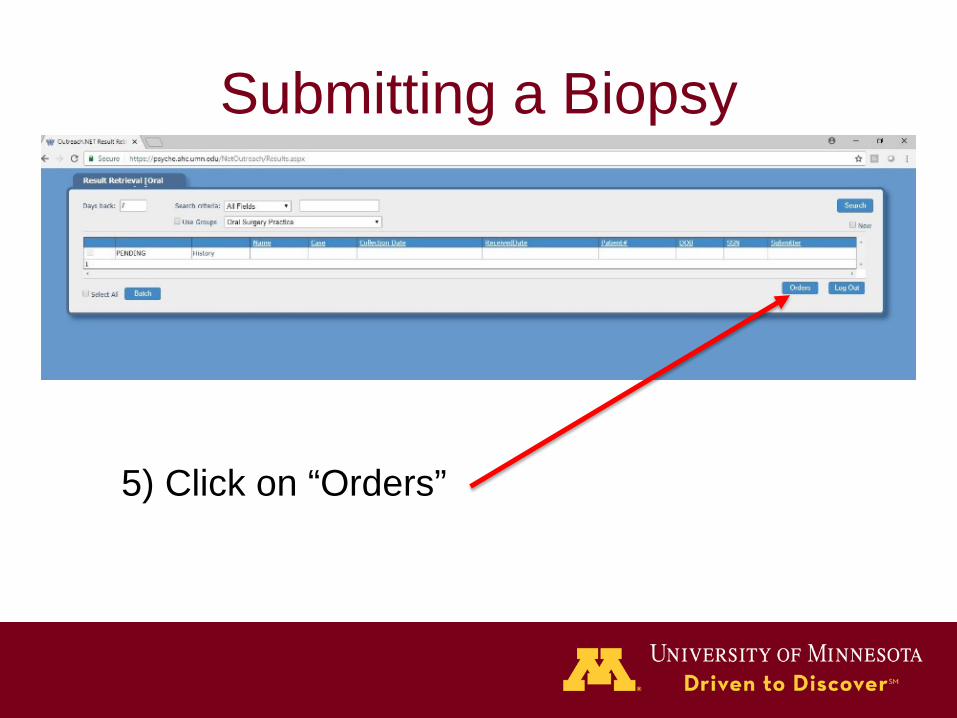
5) Click on “Orders”
Submitting a Biopsy
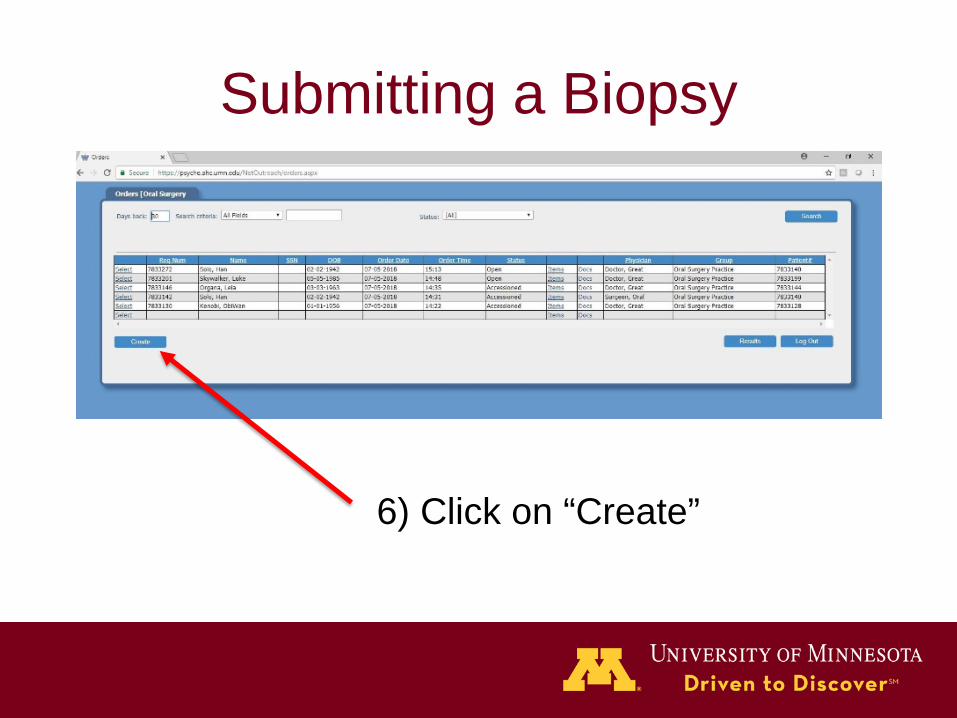
6) Click on “Create”
Submitting a Biopsy
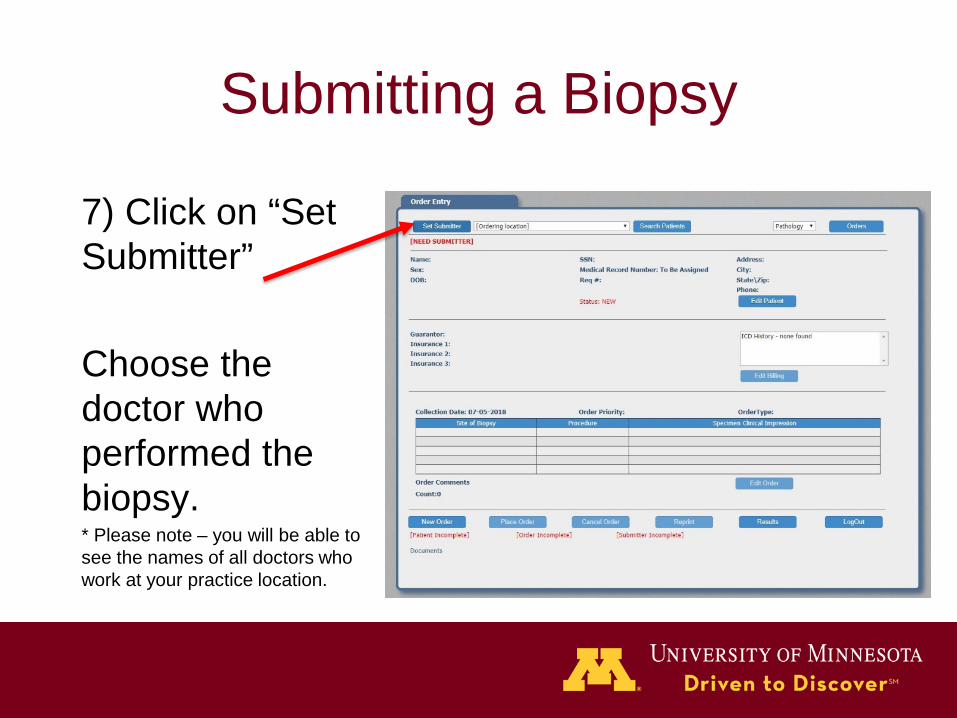
7) Click on “Set Submitter”
Choose the doctor who performed the biopsy. * Please note – you will be able to see the names of all doctors who work at your practice location.
Submitting a Biopsy
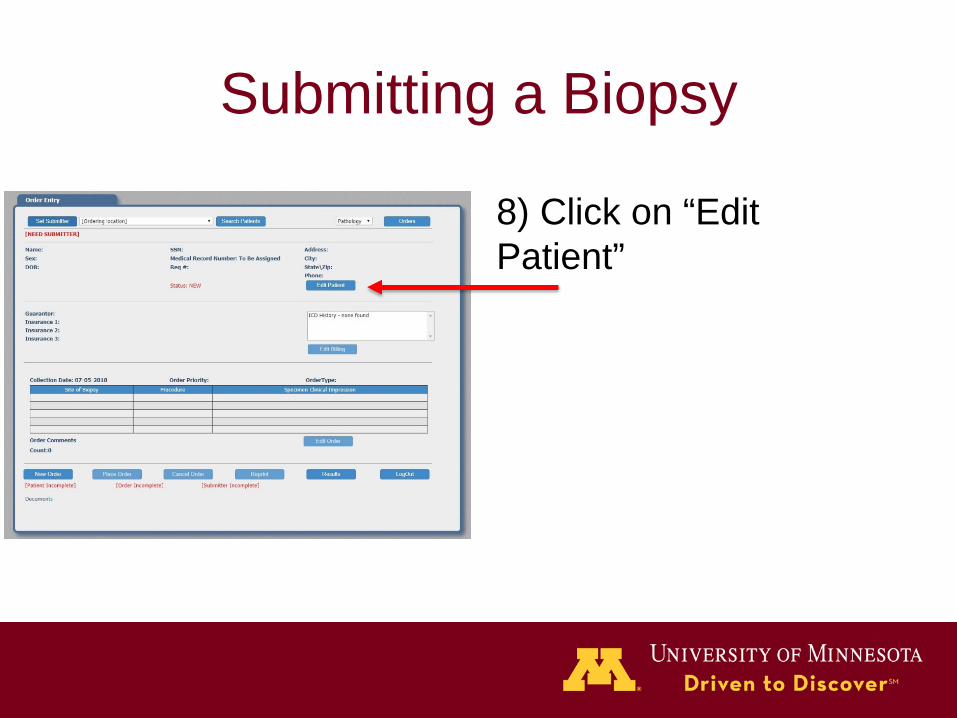
8) Click on “Edit Patient”
Submitting a Biopsy
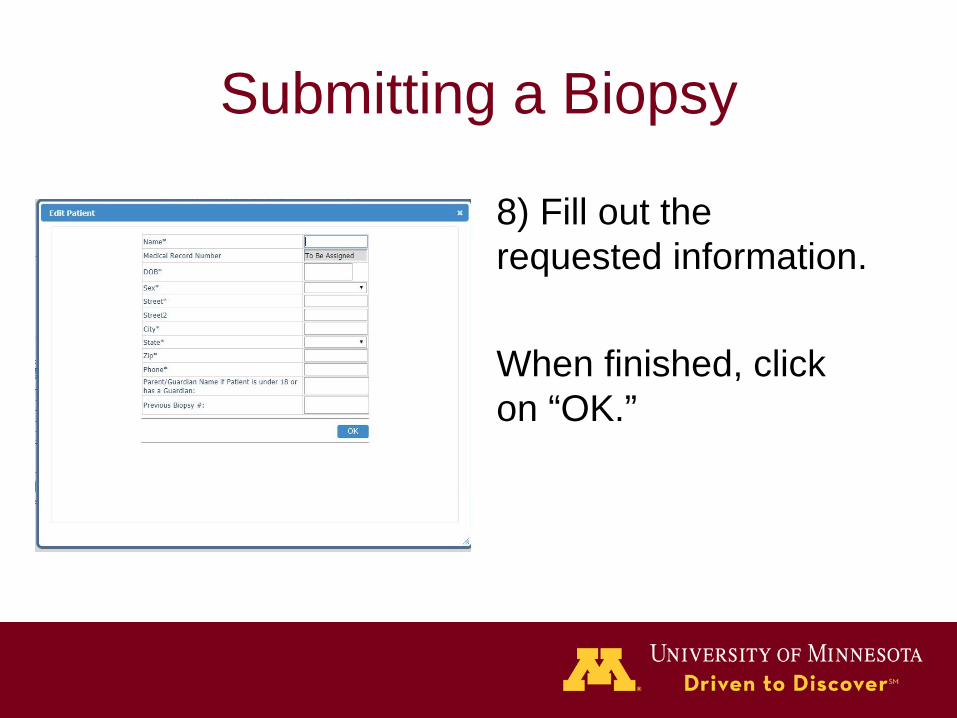
8) Fill out the requested information.
When finished, click on “OK.”
Submit a Biopsy
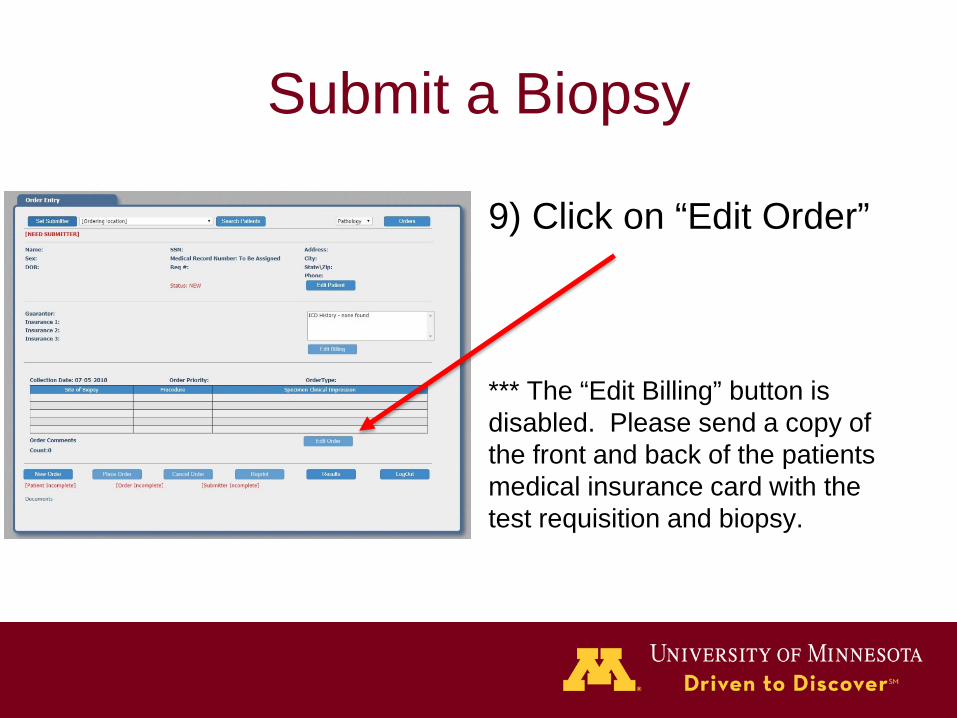
9) Click on “Edit Order”
*** The “Edit Billing” button is disabled. Please send a copy of the front and back of the patients medical insurance card with the test requisition and biopsy.
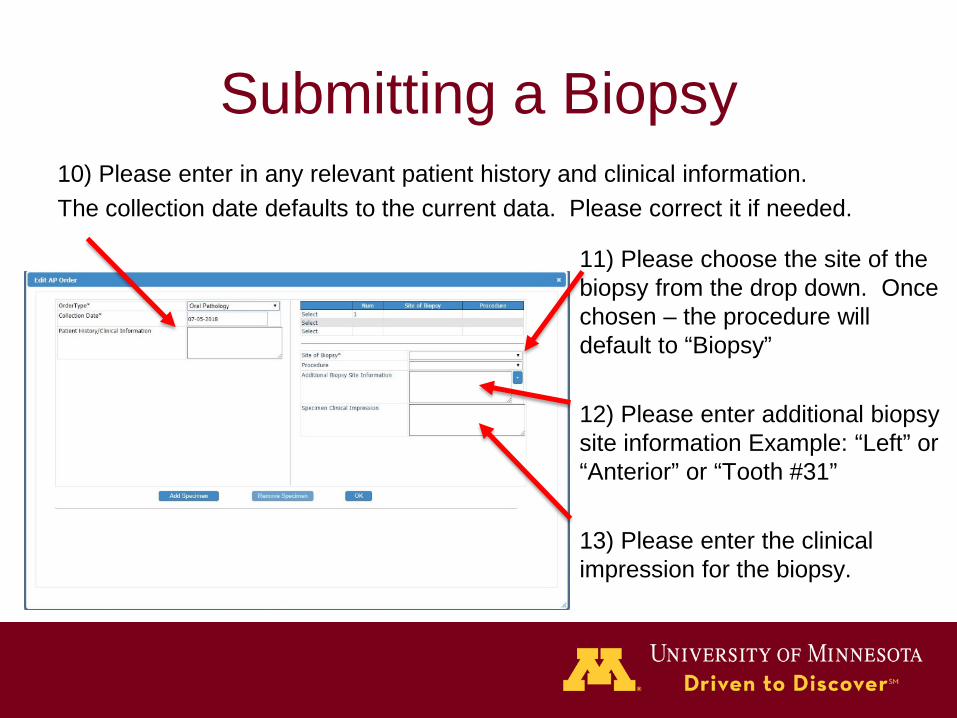
Submitting a Biopsy10) Please enter in any relevant patient history and clinical information.The collection date defaults to the current data. Please correct it if needed.
11) Please choose the site of the biopsy from the drop down. Once chosen – the procedure will default to “Biopsy”
12) Please enter additional biopsy site information Example: “Left” or “Anterior” or “Tooth #31”
13) Please enter the clinical impression for the biopsy.
Submitting a Biopsy
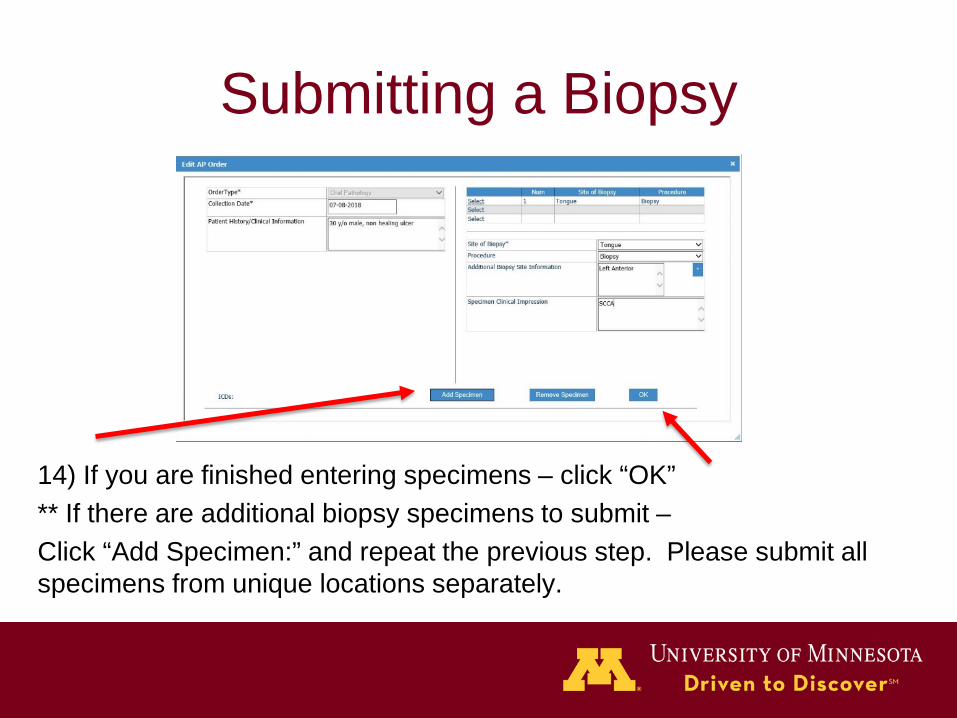
14) If you are finished entering specimens – click “OK”** If there are additional biopsy specimens to submit –Click “Add Specimen:” and repeat the previous step. Please submit all specimens from unique locations separately.
Submitting a Biopsy
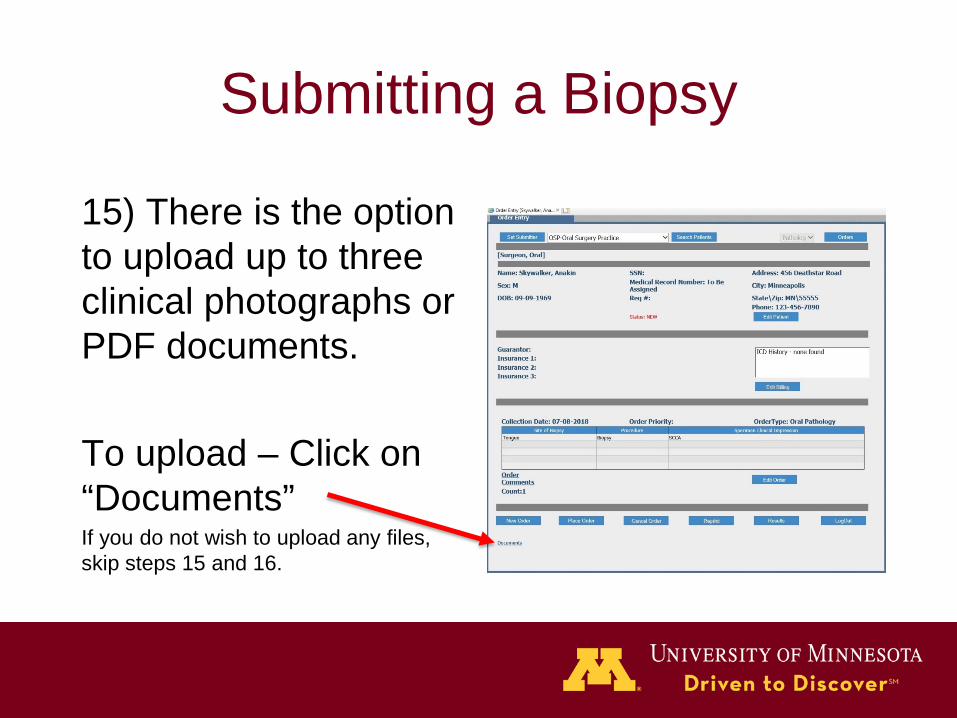
15) There is the option to upload up to three clinical photographs or PDF documents.
To upload – Click on “Documents”If you do not wish to upload any files, skip steps 15 and 16.
Submitting a Biopsy
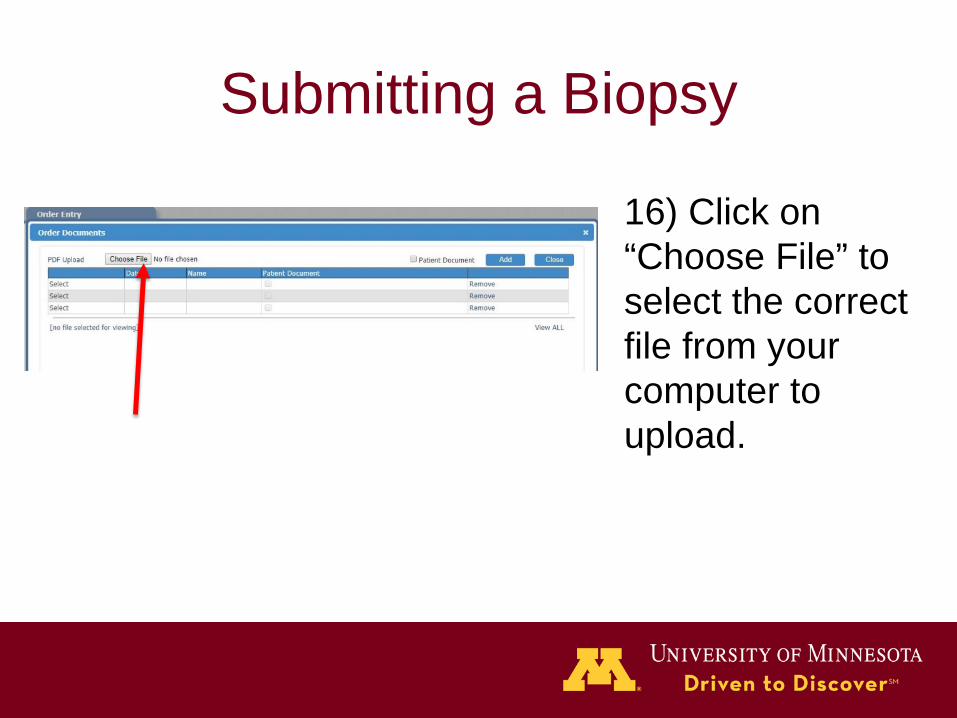
16) Click on “Choose File” to select the correct file from your computer to upload.
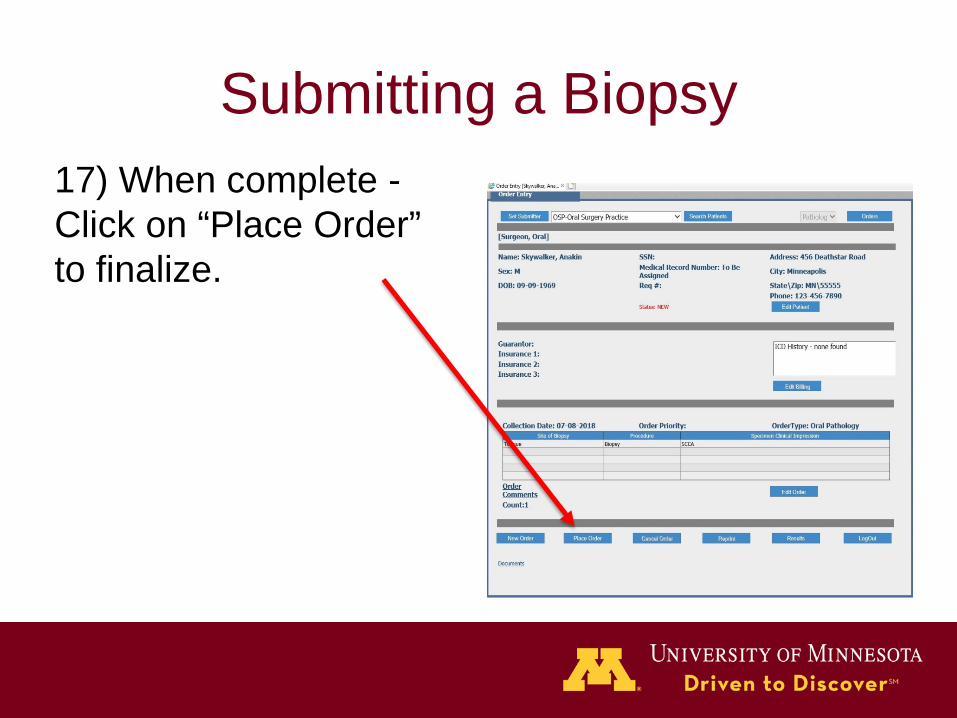
Submitting a Biopsy17) When complete -Click on “Place Order” to finalize.
Submitting a Biopsy
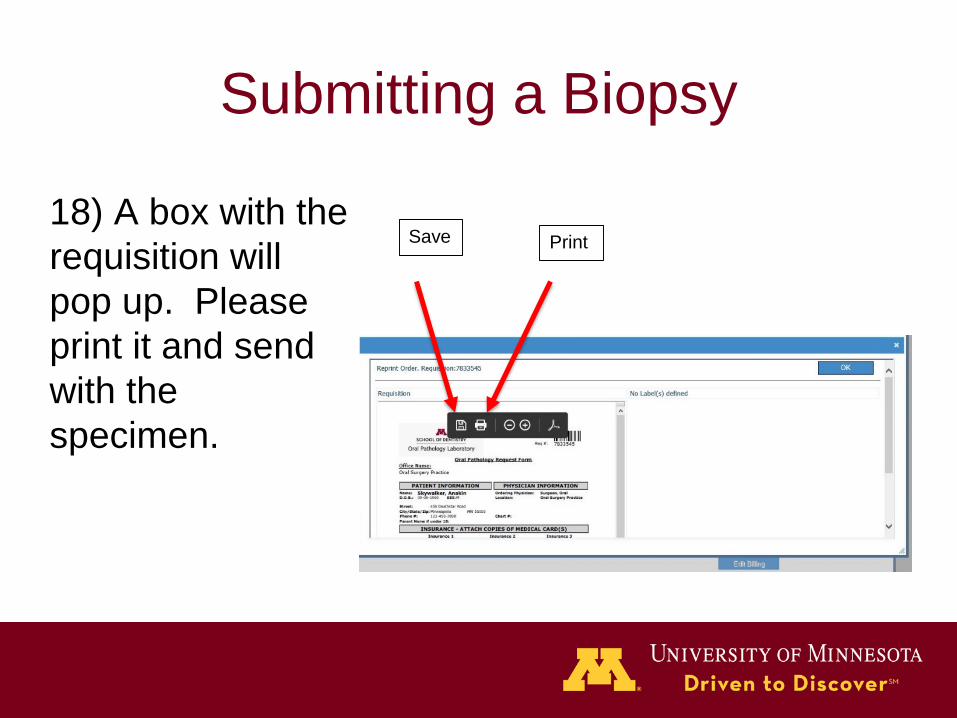
18) A box with the requisition will pop up. Please print it and send with the specimen.
Save Print
Specimen LabelingIt is extremely important for patient safety that the formalin container that contains the specimen is labeled with at least TWO patient identifiers. In addition to being best practice, it is required by the organization that accredits our laboratory. (CAP)
Our laboratory accepts three pieces of information for this purpose: – The patient’s full name (no nicknames please!)– Date of birth.– The unique medical record number generated by our system. This
number is found on the printed requisition. **Incomplete or incorrectly labeled specimen bottles may result in delays in processing and reporting. The name and date of birth on the specimen bottle MUST match the name and date of birth on the requisition form.
Sending the Specimen
• We supply everything you need to submit a biopsy! When you mail the specimen to us be sure to include:
– The requisition form (printed from our secure website).
– A copy of the patient’s medical insurance card (front and back; on one or two full sheets of paper.) If received without medical insurance, the patient will be billed directly.
– The properly labeled specimen!
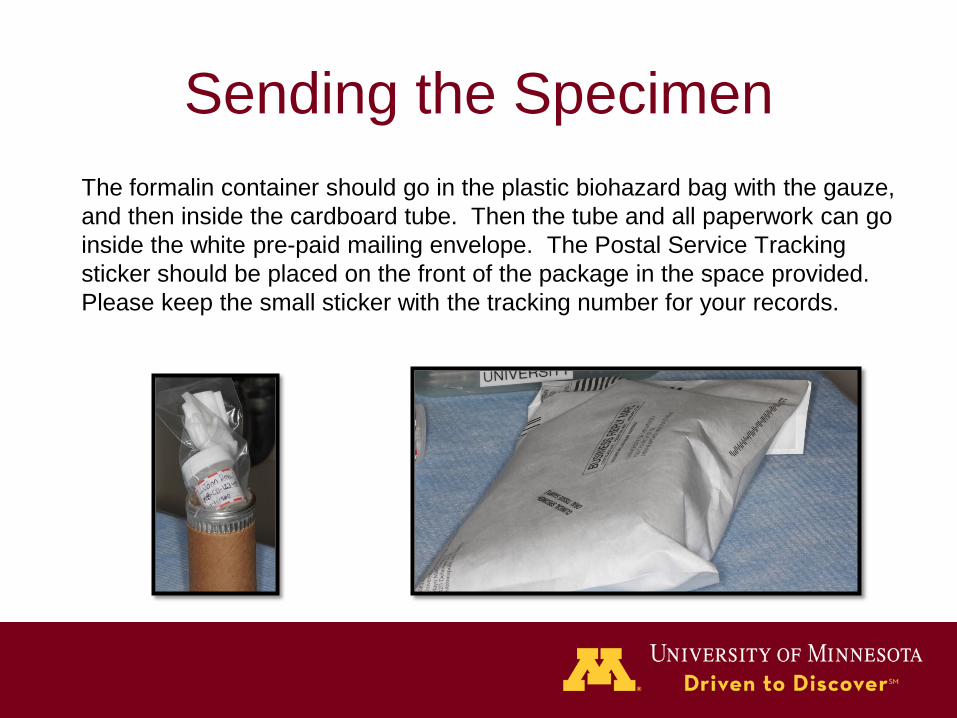
Sending the SpecimenThe formalin container should go in the plastic biohazard bag with the gauze, and then inside the cardboard tube. Then the tube and all paperwork can go inside the white pre-paid mailing envelope. The Postal Service Tracking sticker should be placed on the front of the package in the space provided. Please keep the small sticker with the tracking number for your records.
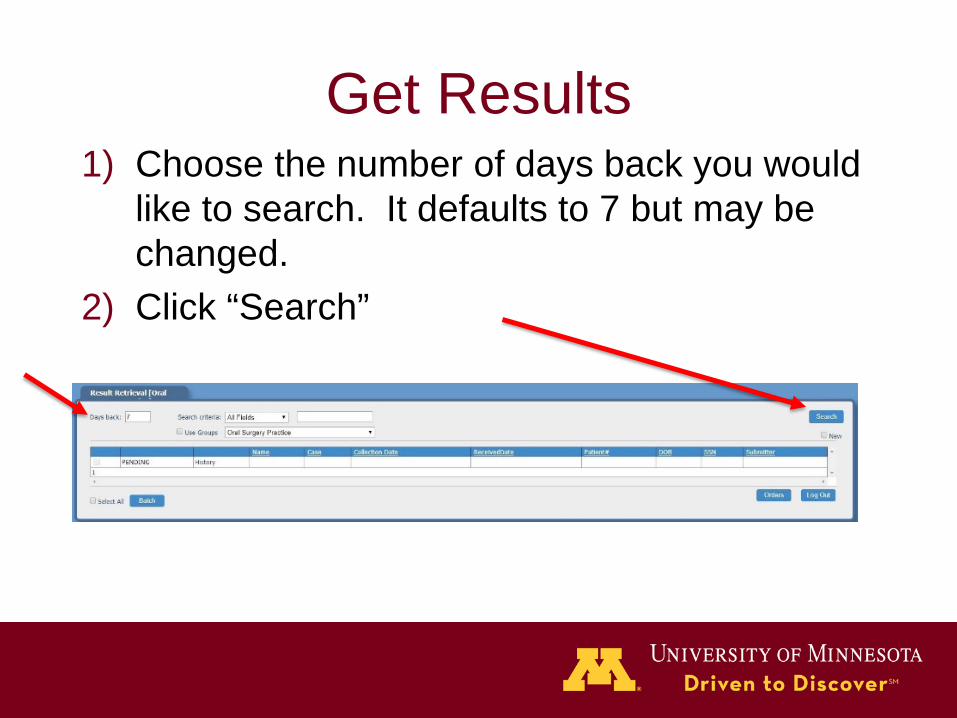
Get Results1) Choose the number of days back you would
like to search. It defaults to 7 but may be changed.
2) Click “Search”
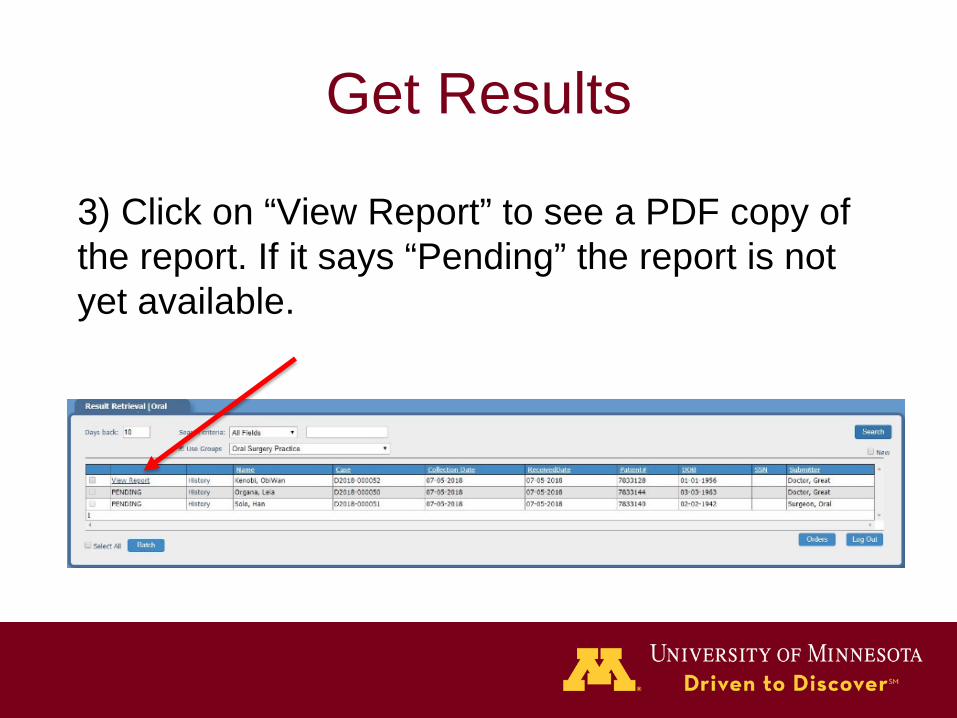
Get Results
3) Click on “View Report” to see a PDF copy of the report. If it says “Pending” the report is not yet available.
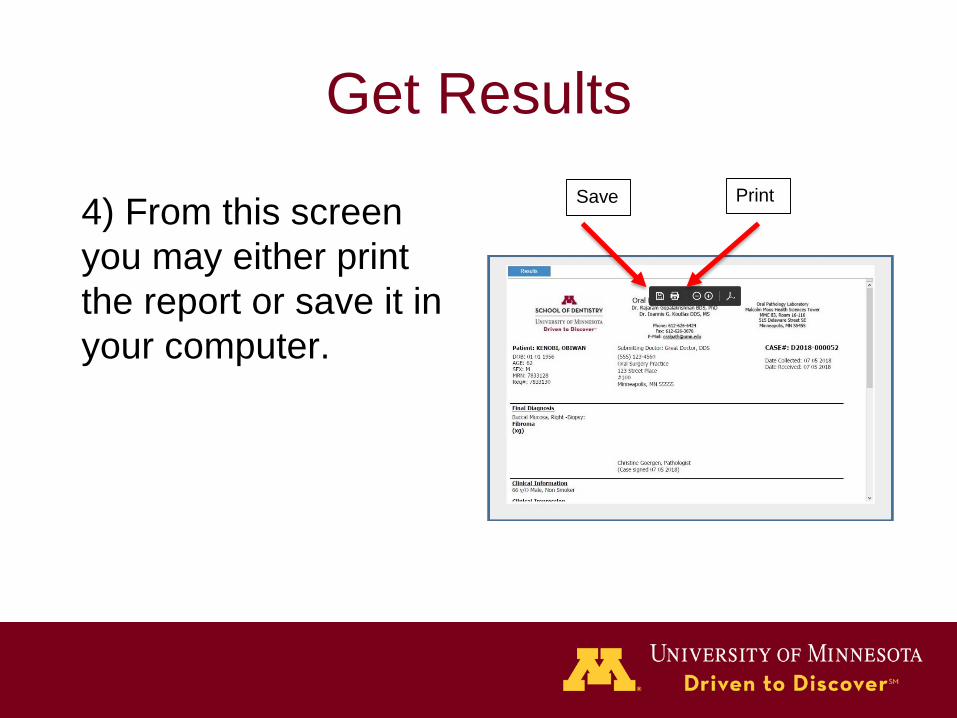
Get Results
4) From this screen you may either print the report or save it in your computer.
PrintSave
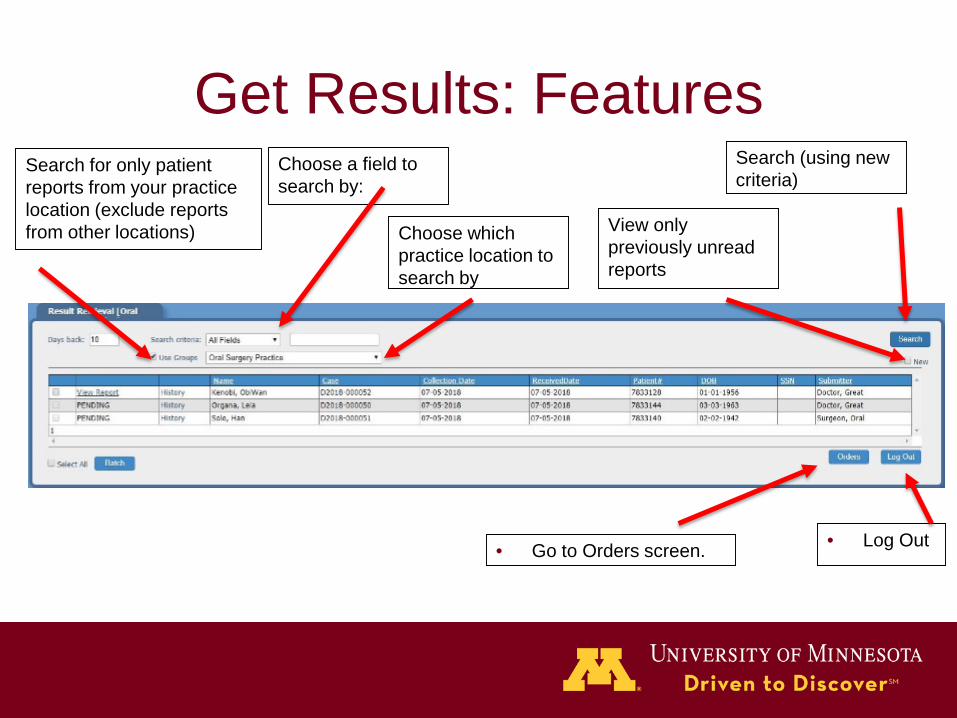
Get Results: FeaturesChoose a field to search by:
Search for only patient reports from your practice location (exclude reports from other locations) Choose which
practice location to search by
View only previously unread reports
Search (using new criteria)
• Go to Orders screen. • Log Out
Contact Information
If you have any questions – Please do not hesitate to contact us at [email protected] or 612-626-6424