Embed Size (px)
Citation preview
RELEVANT TO
THE NATIONAL
LITERACY AND
NUMERACY
FRAMEWORK
Urban Meadow Learning Resource
National Museum Cardiff
CEMEX Community Fund
ww
w.m
use
um
wal
es.a
c.u
k/ca
rdif
f/le
arn
ing
2
Content
Background information for teachers
Our Urban Meadow
Creating your own green space
Changing seasons
Urban wildlife
Bees
KWL Chart
Worksheets and activities
Page
3-9
10-12
13-14
15
16-19
20-27
28
29-49
ww
w.m
use
um
wal
es.a
c.u
k/ca
rdif
f/le
arn
ing
3
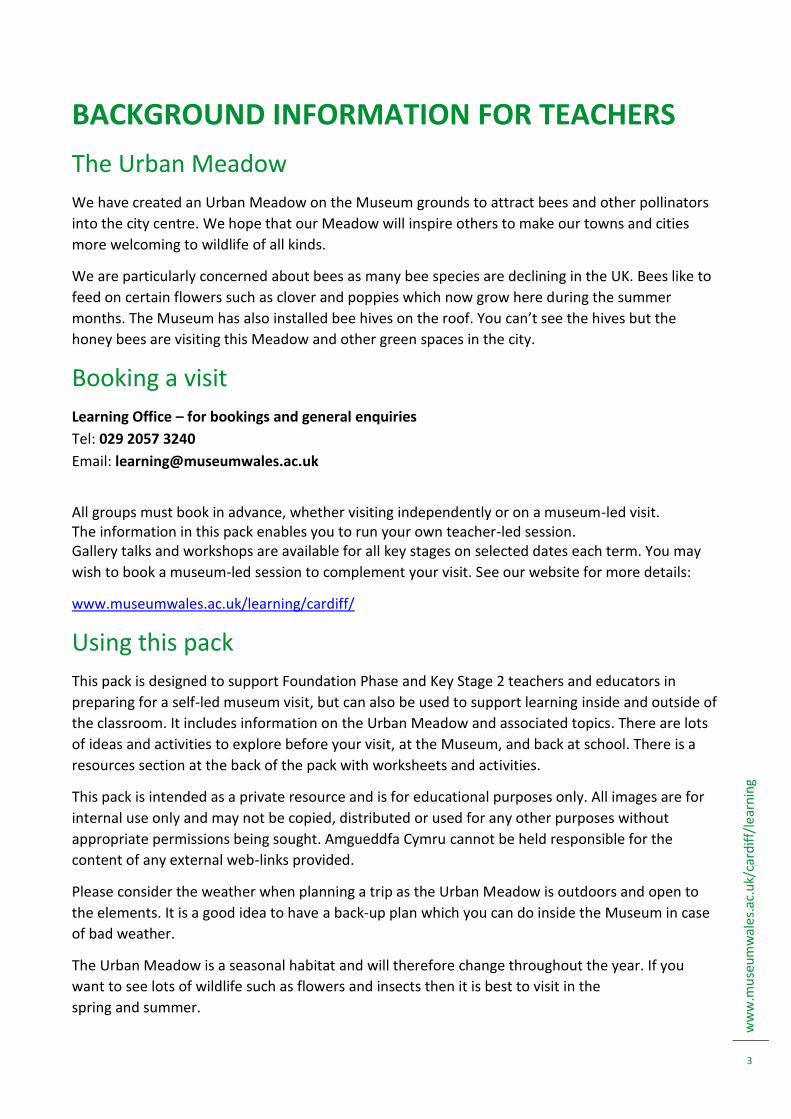
BACKGROUND INFORMATION FOR TEACHERS
The Urban Meadow
We have created an Urban Meadow on the Museum grounds to attract bees and other pollinators
into the city centre. We hope that our Meadow will inspire others to make our towns and cities
more welcoming to wildlife of all kinds.
We are particularly concerned about bees as many bee species are declining in the UK. Bees like to
feed on certain flowers such as clover and poppies which now grow here during the summer
months. The Museum has also installed bee hives on the roof. You can’t see the hives but the
honey bees are visiting this Meadow and other green spaces in the city.
Booking a visit
Learning Office – for bookings and general enquiries
Tel: 029 2057 3240
Email: [email protected]
All groups must book in advance, whether visiting independently or on a museum-led visit. The information in this pack enables you to run your own teacher-led session. Gallery talks and workshops are available for all key stages on selected dates each term. You may
wish to book a museum-led session to complement your visit. See our website for more details:
www.museumwales.ac.uk/learning/cardiff/
Using this pack
This pack is designed to support Foundation Phase and Key Stage 2 teachers and educators in
preparing for a self-led museum visit, but can also be used to support learning inside and outside of
the classroom. It includes information on the Urban Meadow and associated topics. There are lots
of ideas and activities to explore before your visit, at the Museum, and back at school. There is a
resources section at the back of the pack with worksheets and activities.
This pack is intended as a private resource and is for educational purposes only. All images are for
internal use only and may not be copied, distributed or used for any other purposes without
appropriate permissions being sought. Amgueddfa Cymru cannot be held responsible for the
content of any external web-links provided.
Please consider the weather when planning a trip as the Urban Meadow is outdoors and open to
the elements. It is a good idea to have a back-up plan which you can do inside the Museum in case
of bad weather.
The Urban Meadow is a seasonal habitat and will therefore change throughout the year. If you
want to see lots of wildlife such as flowers and insects then it is best to visit in the
spring and summer.
ww
w.m
use
um
wal
es.a
c.u
k/ca
rdif
f/le
arn
ing
4
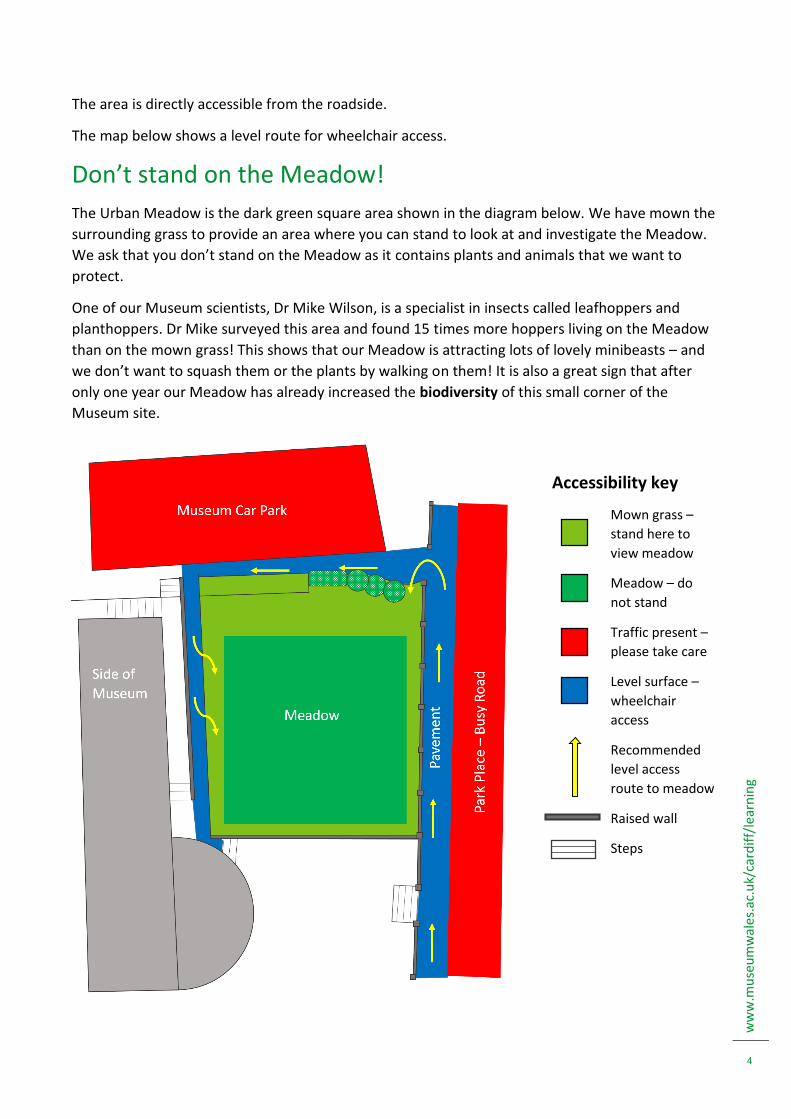
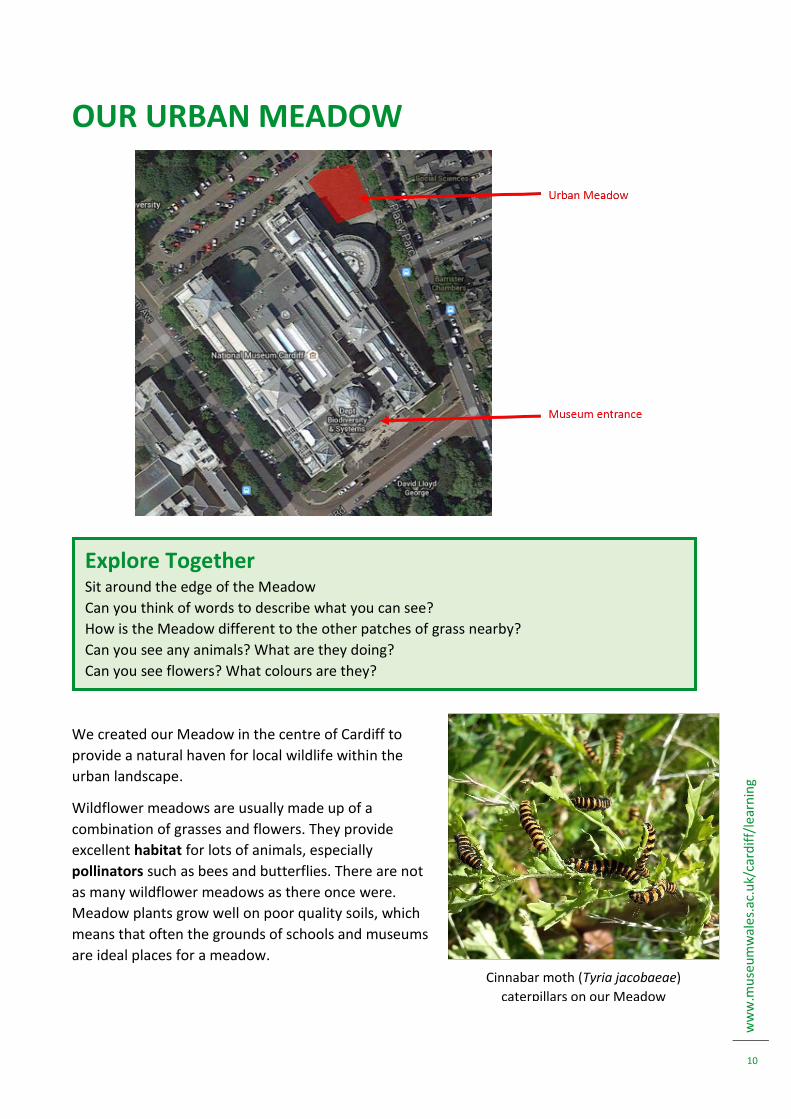
The area is directly accessible from the roadside.
The map below shows a level route for wheelchair access.
Don’t stand on the Meadow!
The Urban Meadow is the dark green square area shown in the diagram below. We have mown the
surrounding grass to provide an area where you can stand to look at and investigate the Meadow.
We ask that you don’t stand on the Meadow as it contains plants and animals that we want to
protect.
One of our Museum scientists, Dr Mike Wilson, is a specialist in insects called leafhoppers and
planthoppers. Dr Mike surveyed this area and found 15 times more hoppers living on the Meadow
than on the mown grass! This shows that our Meadow is attracting lots of lovely minibeasts – and
we don’t want to squash them or the plants by walking on them! It is also a great sign that after
only one year our Meadow has already increased the biodiversity of this small corner of the
Museum site.
Accessibility key
Mown grass –
stand here to
view meadow
Meadow – do
not stand
Traffic present –
please take care
Level surface –
wheelchair
access
Recommended
level access
route to meadow
Raised wall
Steps
ww
w.m
use
um
wal
es.a
c.u
k/ca
rdif
f/le
arn
ing
5
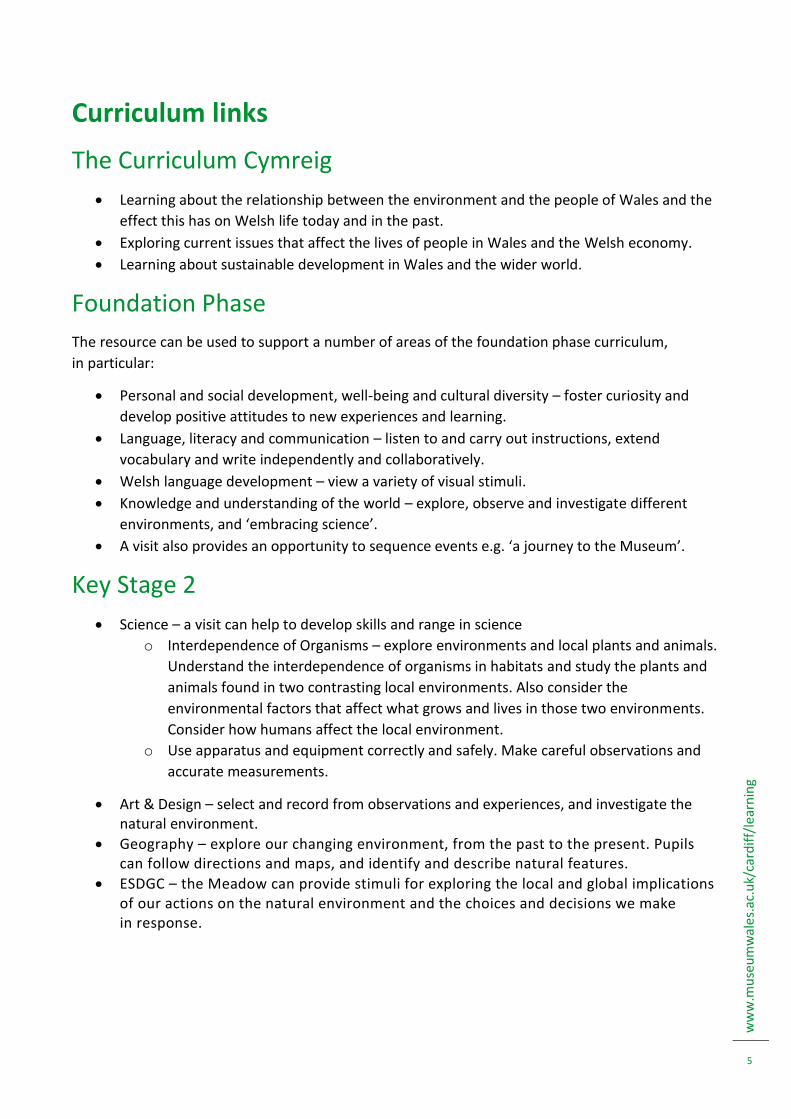
Curriculum links
The Curriculum Cymreig
Learning about the relationship between the environment and the people of Wales and the
effect this has on Welsh life today and in the past.
Exploring current issues that affect the lives of people in Wales and the Welsh economy.
Learning about sustainable development in Wales and the wider world.
Foundation Phase
The resource can be used to support a number of areas of the foundation phase curriculum,
in particular:
Personal and social development, well-being and cultural diversity – foster curiosity and
develop positive attitudes to new experiences and learning.
Language, literacy and communication – listen to and carry out instructions, extend
vocabulary and write independently and collaboratively.
Welsh language development – view a variety of visual stimuli.
Knowledge and understanding of the world – explore, observe and investigate different
environments, and ‘embracing science’.
A visit also provides an opportunity to sequence events e.g. ‘a journey to the Museum’.
Key Stage 2
Science – a visit can help to develop skills and range in science
o Interdependence of Organisms – explore environments and local plants and animals.
Understand the interdependence of organisms in habitats and study the plants and
animals found in two contrasting local environments. Also consider the
environmental factors that affect what grows and lives in those two environments.
Consider how humans affect the local environment.
o Use apparatus and equipment correctly and safely. Make careful observations and
accurate measurements.
Art & Design – select and record from observations and experiences, and investigate the natural environment.
Geography – explore our changing environment, from the past to the present. Pupils can follow directions and maps, and identify and describe natural features.
ESDGC – the Meadow can provide stimuli for exploring the local and global implications of our actions on the natural environment and the choices and decisions we make in response.
ww
w.m
use
um
wal
es.a
c.u
k/ca
rdif
f/le
arn
ing
6
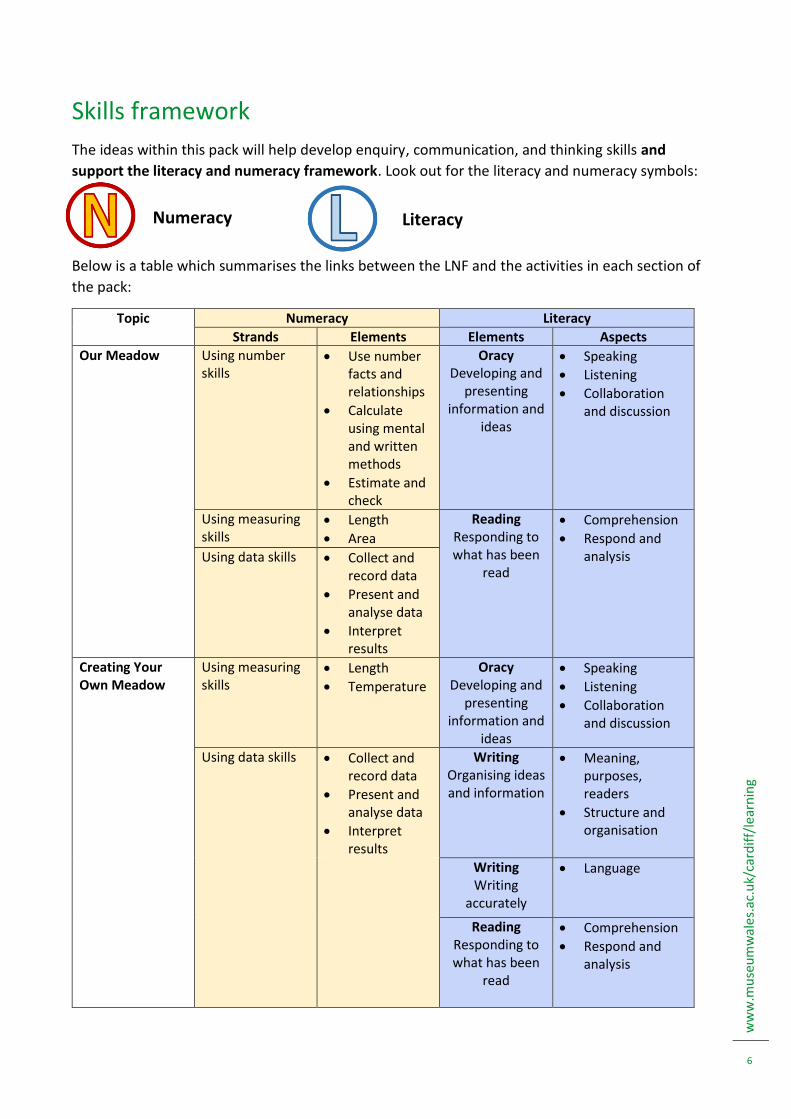
Skills framework
The ideas within this pack will help develop enquiry, communication, and thinking skills and
support the literacy and numeracy framework. Look out for the literacy and numeracy symbols:
Below is a table which summarises the links between the LNF and the activities in each section of
the pack:
Topic Numeracy Literacy
Strands Elements Elements Aspects
Our Meadow Using number skills
Use number facts and relationships
Calculate using mental and written methods
Estimate and check
Oracy Developing and
presenting information and
ideas
Speaking
Listening
Collaboration and discussion
Using measuring skills
Length
Area
Reading Responding to what has been
read
Comprehension
Respond and analysis Using data skills Collect and
record data
Present and analyse data
Interpret results
Creating Your Own Meadow
Using measuring skills
Length
Temperature
Oracy Developing and
presenting information and
ideas
Speaking
Listening
Collaboration and discussion
Using data skills Collect and record data
Present and analyse data
Interpret results
Writing Organising ideas and information
Meaning, purposes, readers
Structure and organisation
Writing Writing
accurately
Language
Reading Responding to what has been
read
Comprehension
Respond and analysis
Numeracy Literacy
ww
w.m
use
um
wal
es.a
c.u
k/ca
rdif
f/le
arn
ing
7
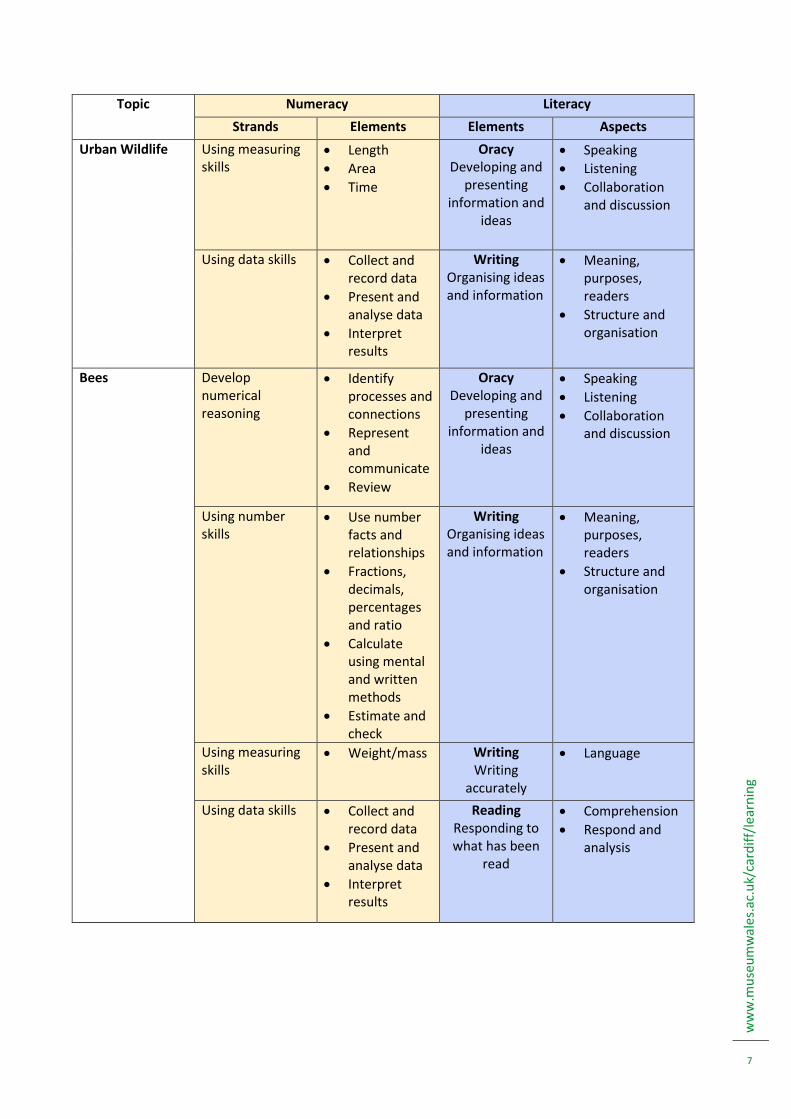
Topic Numeracy Literacy
Strands Elements Elements Aspects
Urban Wildlife Using measuring skills
Length
Area
Time
Oracy Developing and
presenting information and
ideas
Speaking
Listening
Collaboration and discussion
Using data skills Collect and record data
Present and analyse data
Interpret results
Writing Organising ideas and information
Meaning, purposes, readers
Structure and organisation
Bees Develop numerical reasoning
Identify processes and connections
Represent and communicate
Review
Oracy Developing and
presenting information and
ideas
Speaking
Listening
Collaboration and discussion
Using number skills
Use number facts and relationships
Fractions, decimals, percentages and ratio
Calculate using mental and written methods
Estimate and check
Writing Organising ideas and information
Meaning, purposes, readers
Structure and organisation
Using measuring skills
Weight/mass Writing Writing
accurately
Language
Using data skills Collect and record data
Present and analyse data
Interpret results
Reading Responding to what has been
read
Comprehension
Respond and analysis
ww
w.m
use
um
wal
es.a
c.u
k/ca
rdif
f/le
arn
ing
8
Preparing for your visit
Be advised that some of the suggested activities will require specific equipment that you will need
to bring with you to the Museum.
Why not write a class list of things you’d like to find out on your visit (you could use the ‘KWL’ chart
in the resources section at the back of the pack).
Before your visit it would be helpful to talk to your class about habitats, the life cycle of a plant and
the things animals and plants need to survive. The following words will help you in this discussion.
Some words you may use on your visit
We have highlighted these words where they are found in this resource pack
Habitat – A habitat is the place where a living thing (such as a plant or animal) lives. Every living
thing has adapted to live in its specific habitat.
Diversity – Diversity simply refers to all of the different living things in a certain area. Sometimes
you will see the word biodiversity used instead.
Pollination – Pollination is an important step in the life-cycle of flowering plants. During pollination,
pollen from one flower must get to a different flower. Without this step, the plant could not make
seeds (and therefore baby plants).
Pollinator – Some plants rely on animals to carry their pollen between flowers. A pollinator is any
animal that carries pollen between flowers. Lots of pollinators are insects such as bees and
butterflies, but other animals can be pollinators too, including some types of bat and hummingbird.
Insect – Insects are a group of animals which all have six legs and three parts to their bodies – a
head, a thorax and an abdomen. There are more types of insect than of any other type of animal.
Examples of insects include bees, butterflies, beetles and grasshoppers.
Pest – A pest is living thing which is considered a nuisance by humans. Examples include slugs and
snails which eat garden plants and the Varroa mite which is a parasite in honey bee hives.
Weed – A weed is a plant growing in a place in which it is not wanted.
Pesticide – A pesticide is a poisonous chemical that some people use to kill pests that they don’t
want on their land. An example is slug pellets.
Herbicide – A herbicide is a pesticide that kills plants. It is also known as weedkiller.
Insecticide – An insecticide is a pesticide that kills insect pests. Pesticides can be harmful to insects
which are not pests too.
Dormant – We say a plant is dormant when it is alive but not growing. Many plants remain dormant
throughout the cold winter, waiting for the warmth and light of spring before they start to grow.
ww
w.m
use
um
wal
es.a
c.u
k/ca
rdif
f/le
arn
ing
9
Urban – An urban area is anywhere where there is a town or city. Urban areas tend to have lots of
people living in them and so have lots of man-made structures like buildings and roads.
Rural – A rural area is anywhere that isn’t a town or a city. There tend to be fewer people living in
rural areas and so fewer man-made structures.
Agricultural – An agricultural area is anywhere there is farmland. These areas may be used to grow
crops or to rear animals.
Twitter The Museum has several Twitter accounts which you can follow for information and updates:
Follow @MuseumCdf_Learn for all the news from our Learning department, including information
on upcoming activities and events.
@CardiffCurator is run by museum scientists. They tweet about the work they are doing and post
sneak-peak, behind the scenes photographs of our collections.
Stay tuned to both of these accounts for updates on our Urban Meadow.
Why not tweet about your meadow or wild space, or your visit to the Museum? We would love to
hear how you got on! We would also love to see your photos, so if you’re visiting the Museum’s
Meadow, planting flowers of your own, or doing one of the activities from this pack, please take
lots of pictures and send them to us! Use the hashtag #urbanmeadow and tag the museum
accounts mentioned above.
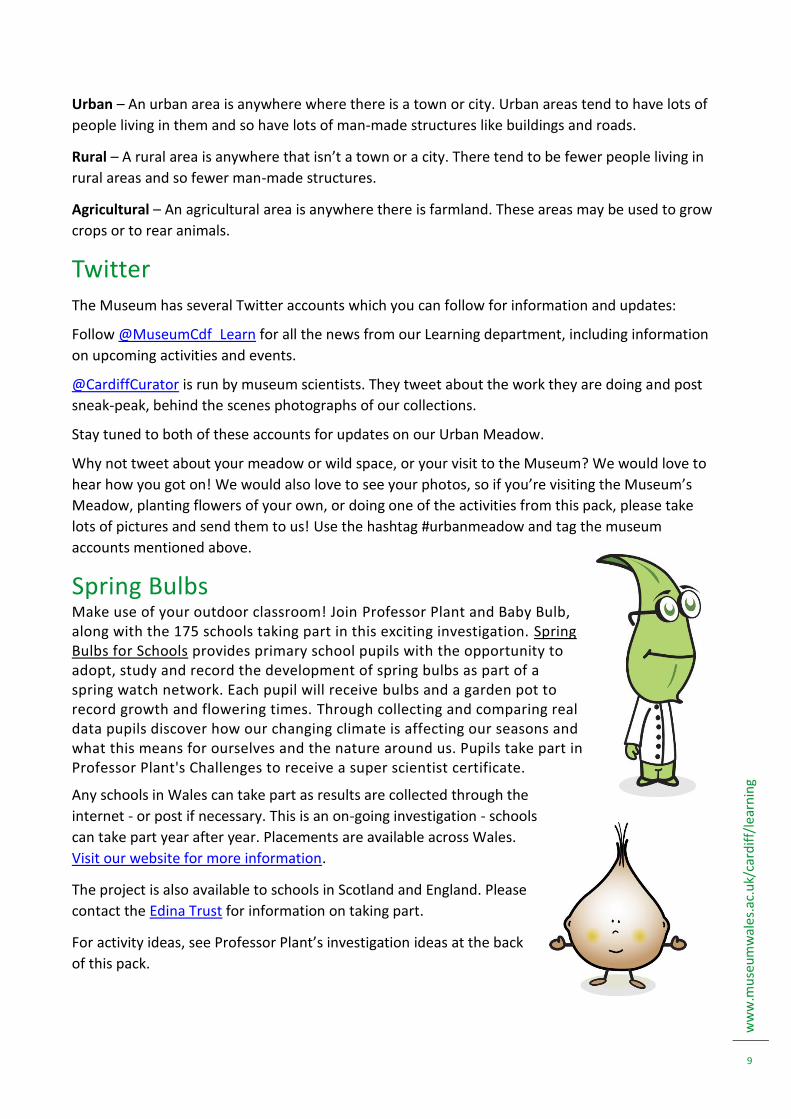
Spring Bulbs Make use of your outdoor classroom! Join Professor Plant and Baby Bulb, along with the 175 schools taking part in this exciting investigation. Spring Bulbs for Schools provides primary school pupils with the opportunity to adopt, study and record the development of spring bulbs as part of a spring watch network. Each pupil will receive bulbs and a garden pot to record growth and flowering times. Through collecting and comparing real data pupils discover how our changing climate is affecting our seasons and what this means for ourselves and the nature around us. Pupils take part in Professor Plant's Challenges to receive a super scientist certificate. Any schools in Wales can take part as results are collected through the
internet - or post if necessary. This is an on-going investigation - schools
can take part year after year. Placements are available across Wales.
Visit our website for more information.
The project is also available to schools in Scotland and England. Please
contact the Edina Trust for information on taking part.
For activity ideas, see Professor Plant’s investigation ideas at the back
of this pack.
ww
w.m
use
um
wal
es.a
c.u
k/ca
rdif
f/le
arn
ing
10
OUR URBAN MEADOW
We created our Meadow in the centre of Cardiff to
provide a natural haven for local wildlife within the
urban landscape.
Wildflower meadows are usually made up of a
combination of grasses and flowers. They provide
excellent habitat for lots of animals, especially
pollinators such as bees and butterflies. There are not
as many wildflower meadows as there once were.
Meadow plants grow well on poor quality soils, which
means that often the grounds of schools and museums
are ideal places for a meadow.
Cinnabar moth (Tyria jacobaeae)
caterpillars on our Meadow
Explore Together
Sit around the edge of the Meadow
Can you think of words to describe what you can see?
How is the Meadow different to the other patches of grass nearby?
Can you see any animals? What are they doing?
Can you see flowers? What colours are they?
ww
w.m
use
um
wal
es.a
c.u
k/ca
rdif
f/le
arn
ing
11
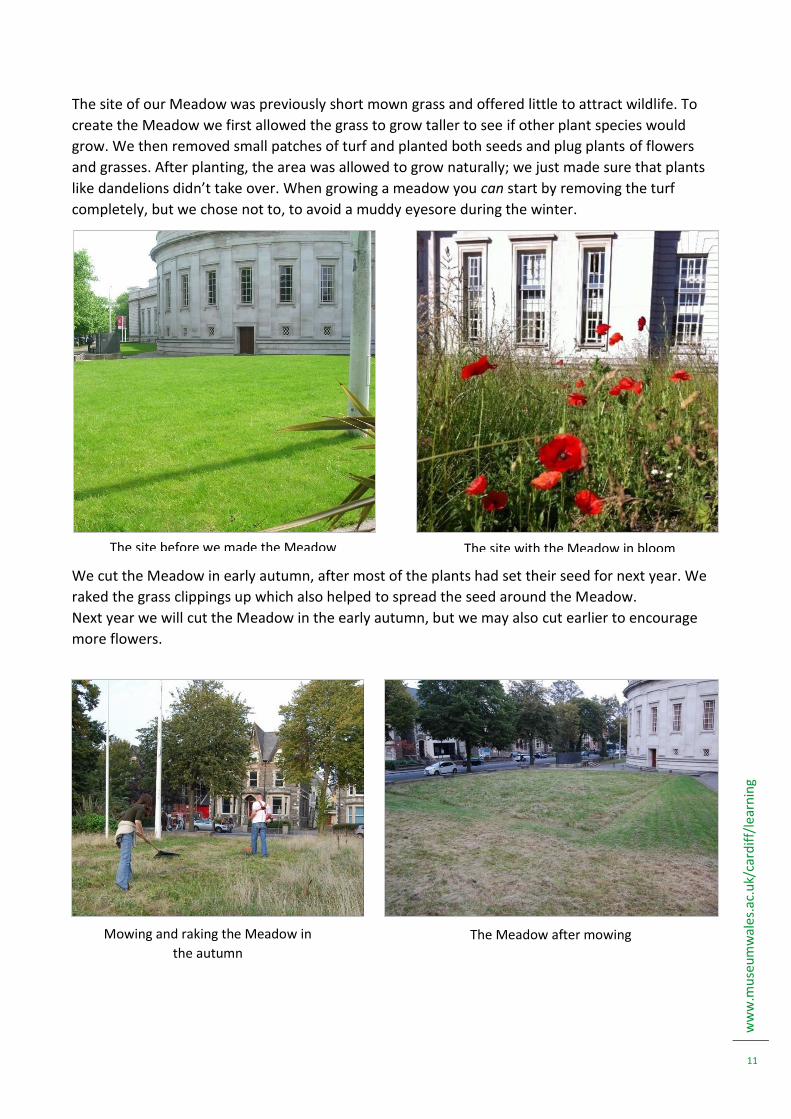
The site of our Meadow was previously short mown grass and offered little to attract wildlife. To
create the Meadow we first allowed the grass to grow taller to see if other plant species would
grow. We then removed small patches of turf and planted both seeds and plug plants of flowers
and grasses. After planting, the area was allowed to grow naturally; we just made sure that plants
like dandelions didn’t take over. When growing a meadow you can start by removing the turf
completely, but we chose not to, to avoid a muddy eyesore during the winter.
We cut the Meadow in early autumn, after most of the plants had set their seed for next year. We
raked the grass clippings up which also helped to spread the seed around the Meadow.
Next year we will cut the Meadow in the early autumn, but we may also cut earlier to encourage
more flowers.
The site before we made the Meadow The site with the Meadow in bloom
Mowing and raking the Meadow in
the autumn
The Meadow after mowing
ww
w.m
use
um
wal
es.a
c.u
k/ca
rdif
f/le
arn
ing
12
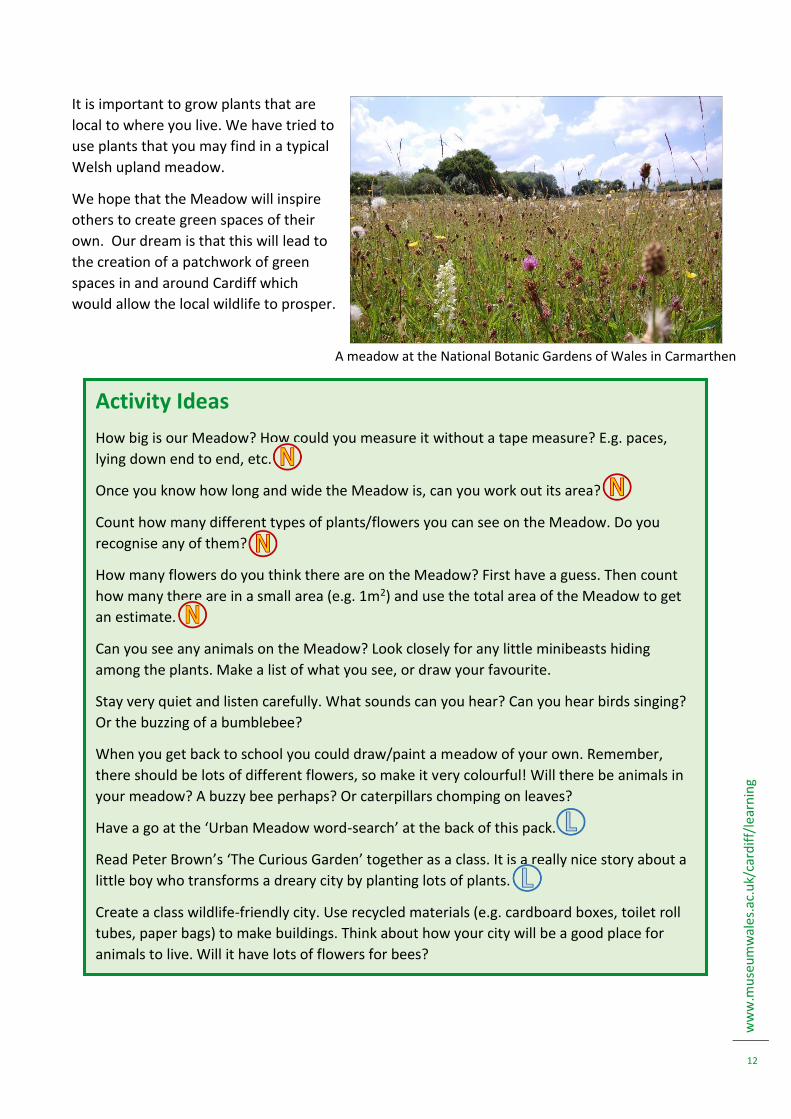
It is important to grow plants that are
local to where you live. We have tried to
use plants that you may find in a typical
Welsh upland meadow.
We hope that the Meadow will inspire
others to create green spaces of their
own. Our dream is that this will lead to
the creation of a patchwork of green
spaces in and around Cardiff which
would allow the local wildlife to prosper.
Activity Ideas
How big is our Meadow? How could you measure it without a tape measure? E.g. paces,
lying down end to end, etc.
Once you know how long and wide the Meadow is, can you work out its area?
Count how many different types of plants/flowers you can see on the Meadow. Do you
recognise any of them?
How many flowers do you think there are on the Meadow? First have a guess. Then count
how many there are in a small area (e.g. 1m2) and use the total area of the Meadow to get
an estimate.
Can you see any animals on the Meadow? Look closely for any little minibeasts hiding
among the plants. Make a list of what you see, or draw your favourite.
Stay very quiet and listen carefully. What sounds can you hear? Can you hear birds singing?
Or the buzzing of a bumblebee?
When you get back to school you could draw/paint a meadow of your own. Remember,
there should be lots of different flowers, so make it very colourful! Will there be animals in
your meadow? A buzzy bee perhaps? Or caterpillars chomping on leaves?
Have a go at the ‘Urban Meadow word-search’ at the back of this pack.
Read Peter Brown’s ‘The Curious Garden’ together as a class. It is a really nice story about a
little boy who transforms a dreary city by planting lots of plants.
Create a class wildlife-friendly city. Use recycled materials (e.g. cardboard boxes, toilet roll
tubes, paper bags) to make buildings. Think about how your city will be a good place for
animals to live. Will it have lots of flowers for bees?
A meadow at the National Botanic Gardens of Wales in Carmarthen
ww
w.m
use
um
wal
es.a
c.u
k/ca
rdif
f/le
arn
ing
13
CREATING YOUR OWN MEADOW OR GREEN
SPACE Anybody can create a natural space, whether in a big garden or a simple window box. Spaces such
as allotments and community gardens are also great for attracting wildlife.
Why not have a go yourself?
There are lots of ways you can attract wildlife to your school or garden. You could:
- Create log piles which make great homes for lots of minibeasts such as insects, spiders,
centipedes and woodlice.
- Install a bird feeder or bird bath – This should encourage a range of species including tits, finches
and robins.
- Install a bee hotel for solitary bees to sleep in (look at the back of this pack for instructions on
how to ‘Make your own bee hotel’).
- Take inspiration from our Meadow and plant flowers to attract pollinators such as bees and
butterflies. Why not use our ‘Easy-peasy step-by-step guide to creating a mini-meadow’ at the
back of this pack?
If you want to attract pollinators you need to choose
plants that these insects like. The plants should flower
from early spring to late autumn, which is when the
pollinators are most active. For some ideas of plants
you could grow, look at our ‘Twelve pollinator-friendly
plants’ worksheet at the back of this pack.
If you want more ideas, The British Beekeepers
Association have compiled a huge list of pollinator-
friendly plants. The Royal Horticultural Society have
also made a list of plants called ‘Perfect For Pollinators’.
Download it for free here.
Try not to use pesticides or herbicides on your meadow
or in your garden as many are toxic to pollinators.
Pesticides and herbicides are poisonous chemicals that
some gardeners and farmers use to kill plants and animals that they don’t want on their land. We
call these plants and animals weeds and pests. Unfortunately these chemicals can kill meadow
plants and the pollinators that visit the meadow. They can also kill other animals in the food chain,
for example birds, frogs and hedgehogs that eat slugs that have been poisoned by slug pellets.
If you do not live in a town or city you can still do your bit to help local wildlife. Much of the British
countryside is agricultural (farm) land. Some farms are made up of huge fields of a single crop.
Planting more pollinator friendly plants in your garden or school means that rural areas will be
more welcoming to wildlife too.
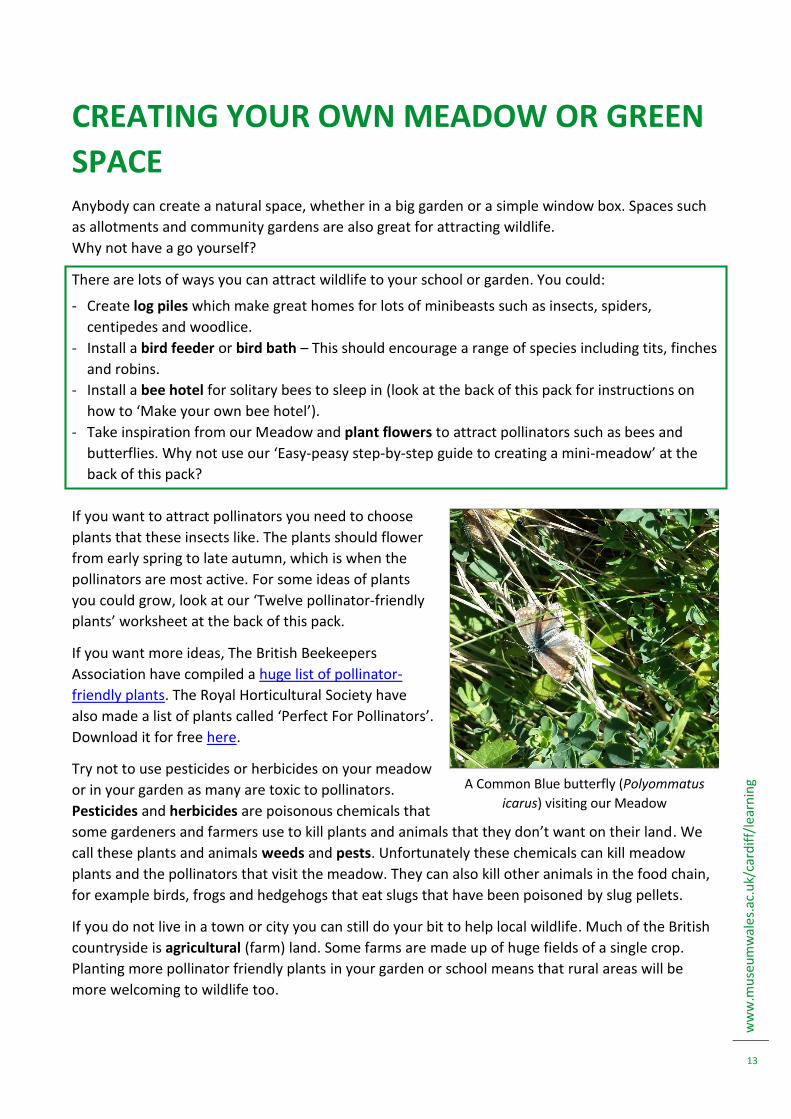
A Common Blue butterfly (Polyommatus
icarus) visiting our Meadow
ww
w.m
use
um
wal
es.a
c.u
k/ca
rdif
f/le
arn
ing
14
Activity Ideas
Why not have a go at creating a natural space of your own? Look at the ‘Twelve pollinator-
friendly plants’ list in the resources at the back of this pack for ideas on what to grow. You
could also follow our ‘Easy-peasy step-by-step guide to creating a mini-meadow’.
Everyone in the class could adopt a plant and be responsible for looking after it. Can you
remember what a plant needs to survive? Do plants eat food like animals do? What do they
need instead? Discuss these topics as a class or in small groups.
Who can grow the biggest plant? Or the plant with the most flowers? Use a tape measure to
record growth each week.
What factors influence the growth of a plant? Design an experiment to test how
temperature, water and sunlight affect plants.
You could even try growing fruit or vegetables which pollinators will love and can be used to
explore diet and healthy eating.
Make seed bombs which the children could take home to plant. Look at the resources at the
back of this pack for instructions.
Where do plants come from? Read Eric Carle’s The Tiny Seed and then write a story about a
plant of your own.
For some plant science activities, have a look at Professor Plant’s investigation ideas at the
back of this pack.
Read Insect Detective by Steve Voake and hunt for some of the minibeasts in your own
green space. Keep a wildlife diary describing all of the animals that you see.
ww
w.m
use
um
wal
es.a
c.u
k/ca
rdif
f/le
arn
ing
15
CHANGING SEASONS
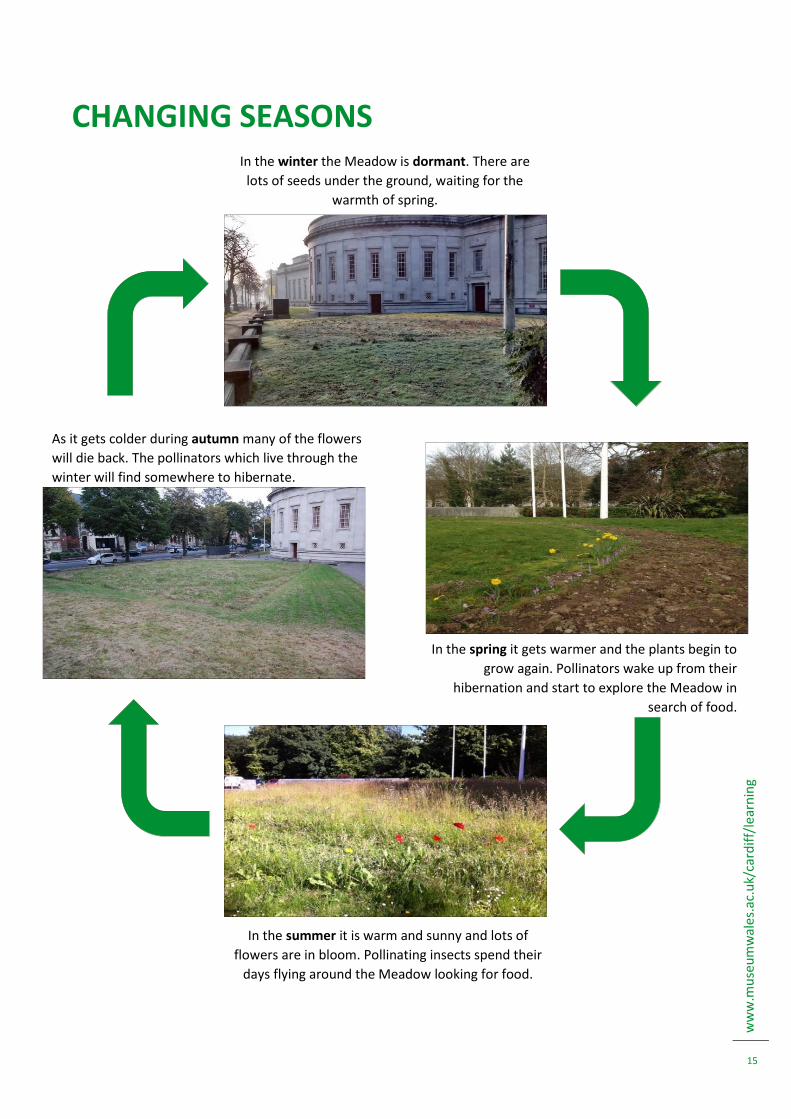
In the winter the Meadow is dormant. There are
lots of seeds under the ground, waiting for the
warmth of spring.
In the spring it gets warmer and the plants begin to
grow again. Pollinators wake up from their
hibernation and start to explore the Meadow in
search of food.
As it gets colder during autumn many of the flowers
will die back. The pollinators which live through the
winter will find somewhere to hibernate.
In the summer it is warm and sunny and lots of
flowers are in bloom. Pollinating insects spend their
days flying around the Meadow looking for food.
ww
w.m
use
um
wal
es.a
c.u
k/ca
rdif
f/le
arn
ing
16
URBAN WILDLIFE
All living organisms are adapted to live in a certain place. We call this place a habitat. A habitat
provides the things that an organism needs to survive, such as food, water and shelter. Without its
preferred habitat, an organism is often unable to survive.
Unfortunately, as the number of people in the world increases, lots of natural areas are being
destroyed to make room for people to live in. Urban areas such as towns and cities often have very
few natural spaces left. This means there is nowhere for plants and animals to live. Some plants and
animals have been able to adapt quickly to life in cities, such as rats, pigeons and foxes. But many
have not adapted and their numbers are decreasing. As towns and cities continue to grow, this
problem is only going to get worse.
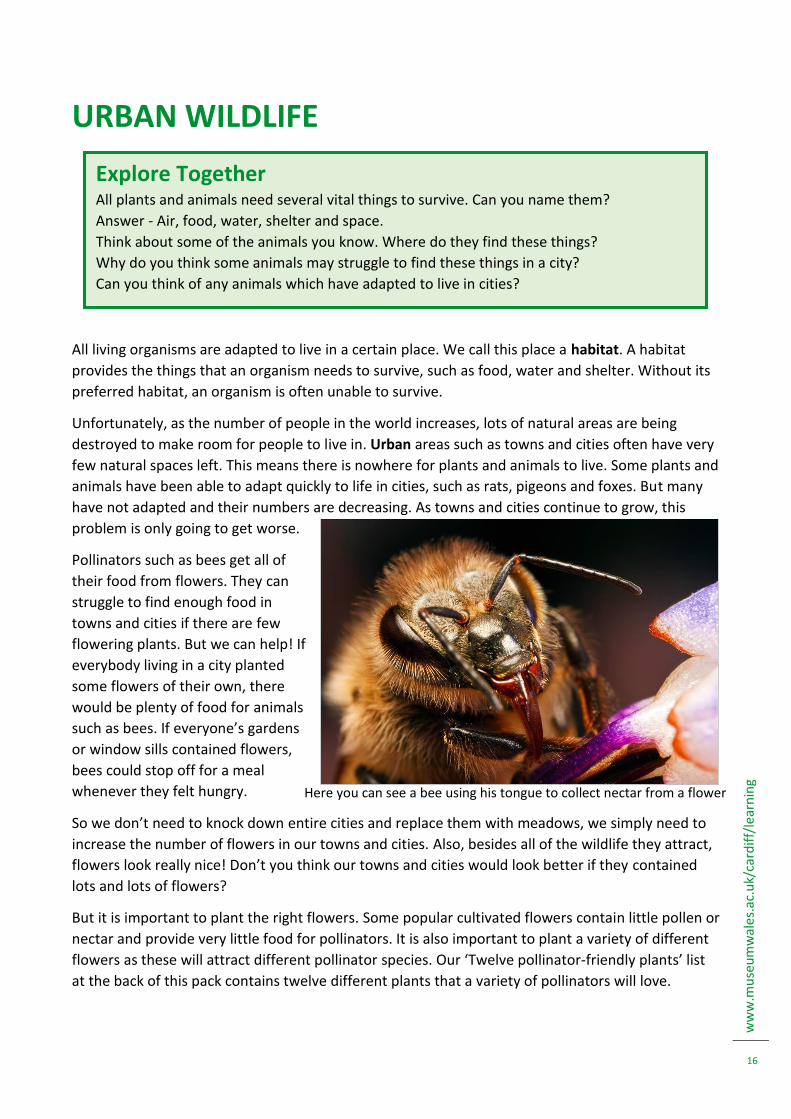
Pollinators such as bees get all of
their food from flowers. They can
struggle to find enough food in
towns and cities if there are few
flowering plants. But we can help! If
everybody living in a city planted
some flowers of their own, there
would be plenty of food for animals
such as bees. If everyone’s gardens
or window sills contained flowers,
bees could stop off for a meal
whenever they felt hungry.
So we don’t need to knock down entire cities and replace them with meadows, we simply need to
increase the number of flowers in our towns and cities. Also, besides all of the wildlife they attract,
flowers look really nice! Don’t you think our towns and cities would look better if they contained
lots and lots of flowers? But it is important to plant the right flowers. Some popular cultivated flowers contain little pollen or
nectar and provide very little food for pollinators. It is also important to plant a variety of different
flowers as these will attract different pollinator species. Our ‘Twelve pollinator-friendly plants’ list
at the back of this pack contains twelve different plants that a variety of pollinators will love.
Explore Together
All plants and animals need several vital things to survive. Can you name them?
Answer - Air, food, water, shelter and space.
Think about some of the animals you know. Where do they find these things?
Why do you think some animals may struggle to find these things in a city?
Can you think of any animals which have adapted to live in cities?
Here you can see a bee using his tongue to collect nectar from a flower
ww
w.m
use
um
wal
es.a
c.u
k/ca
rdif
f/le
arn
ing
17
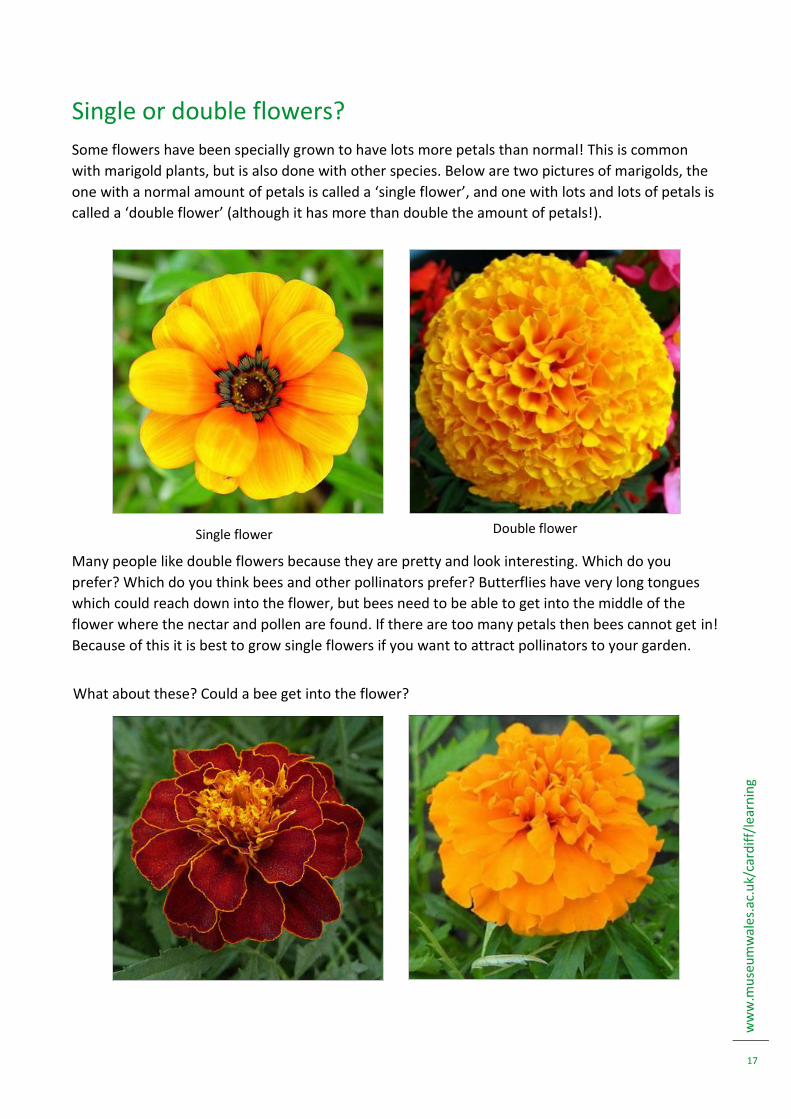
Single or double flowers?
Some flowers have been specially grown to have lots more petals than normal! This is common
with marigold plants, but is also done with other species. Below are two pictures of marigolds, the
one with a normal amount of petals is called a ‘single flower’, and one with lots and lots of petals is
called a ‘double flower’ (although it has more than double the amount of petals!).
Many people like double flowers because they are pretty and look interesting. Which do you
prefer? Which do you think bees and other pollinators prefer? Butterflies have very long tongues
which could reach down into the flower, but bees need to be able to get into the middle of the
flower where the nectar and pollen are found. If there are too many petals then bees cannot get in!
Because of this it is best to grow single flowers if you want to attract pollinators to your garden.
Single flower Double flower
What about these? Could a bee get into the flower?
ww
w.m
use
um
wal
es.a
c.u
k/ca
rdif
f/le
arn
ing
18
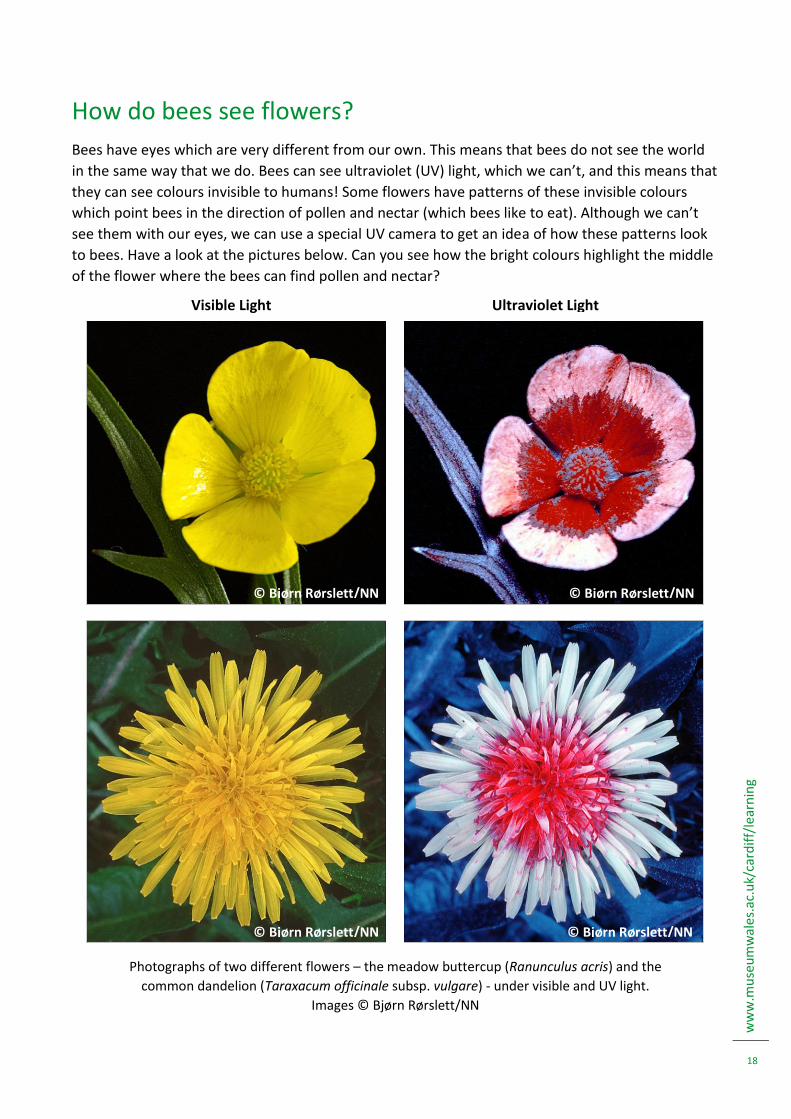
How do bees see flowers?
Bees have eyes which are very different from our own. This means that bees do not see the world
in the same way that we do. Bees can see ultraviolet (UV) light, which we can’t, and this means that
they can see colours invisible to humans! Some flowers have patterns of these invisible colours
which point bees in the direction of pollen and nectar (which bees like to eat). Although we can’t
see them with our eyes, we can use a special UV camera to get an idea of how these patterns look
to bees. Have a look at the pictures below. Can you see how the bright colours highlight the middle
of the flower where the bees can find pollen and nectar?
Photographs of two different flowers – the meadow buttercup (Ranunculus acris) and the
common dandelion (Taraxacum officinale subsp. vulgare) - under visible and UV light.
Images © Bjørn Rørslett/NN
Visible Light Ultraviolet Light
Light
© Bjørn Rørslett/NN
© Bjørn Rørslett/NN
© Bjørn Rørslett/NN
© Bjørn Rørslett/NN
ww
w.m
use
um
wal
es.a
c.u
k/ca
rdif
f/le
arn
ing
19
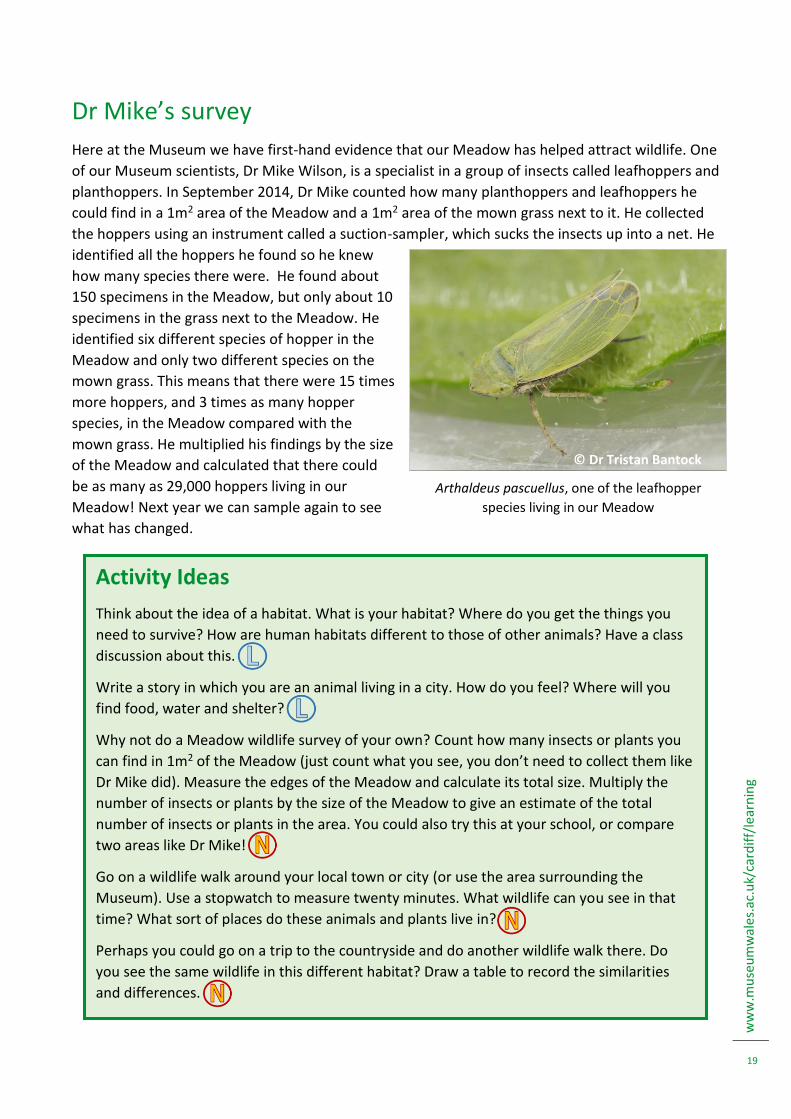
Dr Mike’s survey
Here at the Museum we have first-hand evidence that our Meadow has helped attract wildlife. One
of our Museum scientists, Dr Mike Wilson, is a specialist in a group of insects called leafhoppers and
planthoppers. In September 2014, Dr Mike counted how many planthoppers and leafhoppers he
could find in a 1m2 area of the Meadow and a 1m2 area of the mown grass next to it. He collected
the hoppers using an instrument called a suction-sampler, which sucks the insects up into a net. He
identified all the hoppers he found so he knew
how many species there were. He found about
150 specimens in the Meadow, but only about 10
specimens in the grass next to the Meadow. He
identified six different species of hopper in the
Meadow and only two different species on the
mown grass. This means that there were 15 times
more hoppers, and 3 times as many hopper
species, in the Meadow compared with the
mown grass. He multiplied his findings by the size
of the Meadow and calculated that there could
be as many as 29,000 hoppers living in our
Meadow! Next year we can sample again to see
what has changed.
Activity Ideas
Think about the idea of a habitat. What is your habitat? Where do you get the things you
need to survive? How are human habitats different to those of other animals? Have a class
discussion about this.
Write a story in which you are an animal living in a city. How do you feel? Where will you
find food, water and shelter?
Why not do a Meadow wildlife survey of your own? Count how many insects or plants you
can find in 1m2 of the Meadow (just count what you see, you don’t need to collect them like
Dr Mike did). Measure the edges of the Meadow and calculate its total size. Multiply the
number of insects or plants by the size of the Meadow to give an estimate of the total
number of insects or plants in the area. You could also try this at your school, or compare
two areas like Dr Mike!
Go on a wildlife walk around your local town or city (or use the area surrounding the
Museum). Use a stopwatch to measure twenty minutes. What wildlife can you see in that
time? What sort of places do these animals and plants live in?
Perhaps you could go on a trip to the countryside and do another wildlife walk there. Do
you see the same wildlife in this different habitat? Draw a table to record the similarities
and differences.
Arthaldeus pascuellus, one of the leafhopper
species living in our Meadow
© Dr Tristan Bantock
ww
w.m
use
um
wal
es.a
c.u
k/ca
rdif
f/le
arn
ing
20
BEES
What type of animals are bees?
Bees are insects. They have six legs, a pair of antennae and three parts to their body - a head, a
thorax and an abdomen.
Bees belong to an order of insects called Hymenoptera, along with wasps, ants and sawflies.
Did you know that there are over 250 different species of bee in the UK? We can divide these into
three groups:
- Bumblebees – 24 species in the UK.
- Solitary bees - around 225 species in the UK.
- Honey bees – just one species in the UK, Apis mellifera.
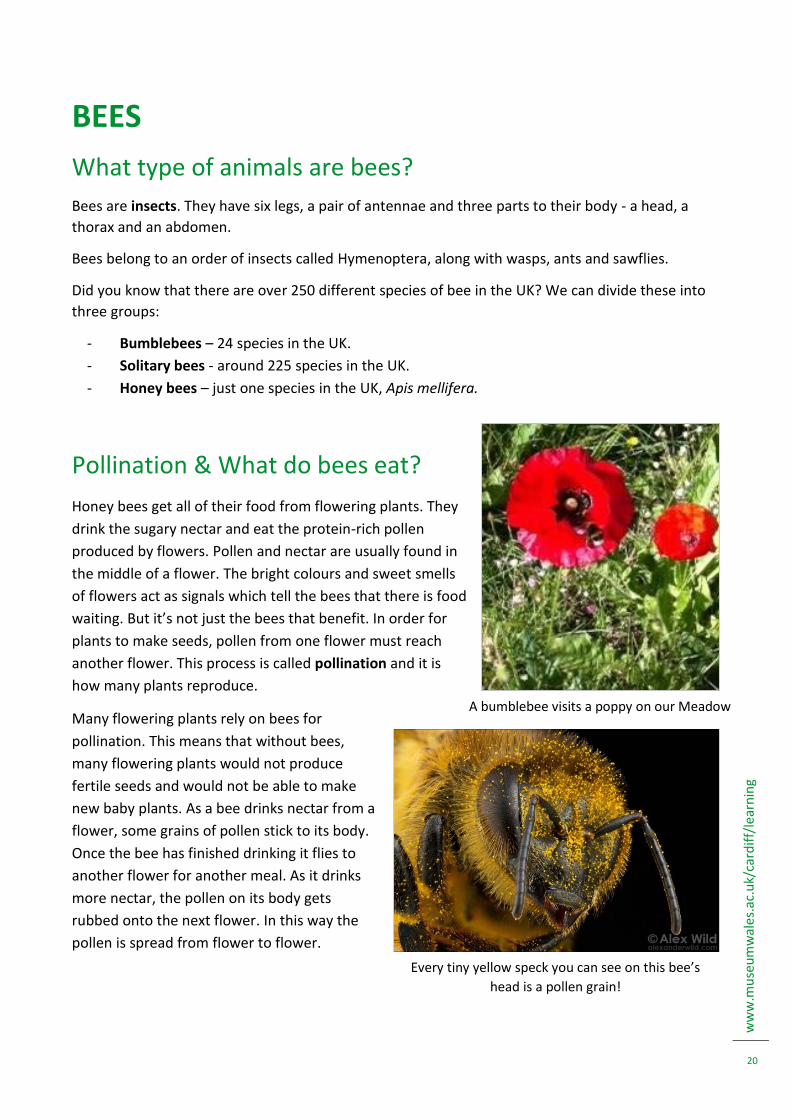
Pollination & What do bees eat?
Honey bees get all of their food from flowering plants. They
drink the sugary nectar and eat the protein-rich pollen
produced by flowers. Pollen and nectar are usually found in
the middle of a flower. The bright colours and sweet smells
of flowers act as signals which tell the bees that there is food
waiting. But it’s not just the bees that benefit. In order for
plants to make seeds, pollen from one flower must reach
another flower. This process is called pollination and it is
how many plants reproduce.
Many flowering plants rely on bees for
pollination. This means that without bees,
many flowering plants would not produce
fertile seeds and would not be able to make
new baby plants. As a bee drinks nectar from a
flower, some grains of pollen stick to its body.
Once the bee has finished drinking it flies to
another flower for another meal. As it drinks
more nectar, the pollen on its body gets
rubbed onto the next flower. In this way the
pollen is spread from flower to flower.
A bumblebee visits a poppy on our Meadow
Every tiny yellow speck you can see on this bee’s
head is a pollen grain!
ww
w.m
use
um
wal
es.a
c.u
k/ca
rdif
f/le
arn
ing
21
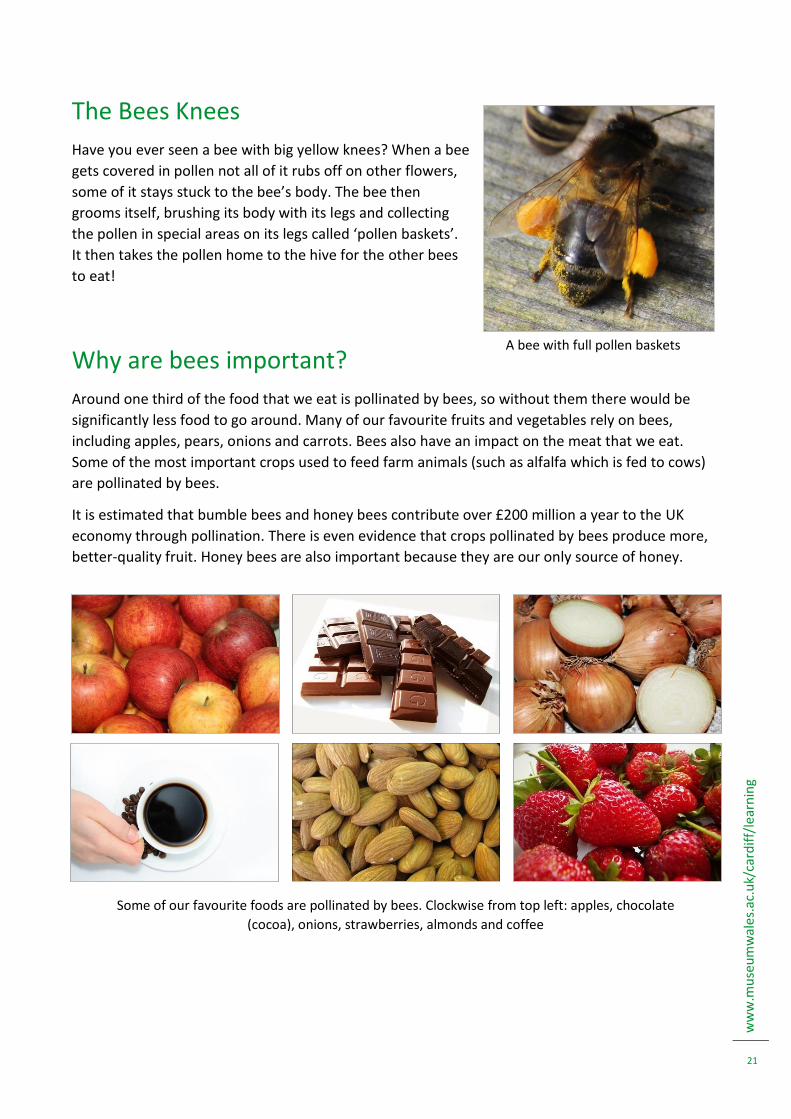
The Bees Knees
Have you ever seen a bee with big yellow knees? When a bee
gets covered in pollen not all of it rubs off on other flowers,
some of it stays stuck to the bee’s body. The bee then
grooms itself, brushing its body with its legs and collecting
the pollen in special areas on its legs called ‘pollen baskets’.
It then takes the pollen home to the hive for the other bees
to eat!
Why are bees important?
Around one third of the food that we eat is pollinated by bees, so without them there would be
significantly less food to go around. Many of our favourite fruits and vegetables rely on bees,
including apples, pears, onions and carrots. Bees also have an impact on the meat that we eat.
Some of the most important crops used to feed farm animals (such as alfalfa which is fed to cows)
are pollinated by bees.
It is estimated that bumble bees and honey bees contribute over £200 million a year to the UK
economy through pollination. There is even evidence that crops pollinated by bees produce more,
better-quality fruit. Honey bees are also important because they are our only source of honey.
A bee with full pollen baskets
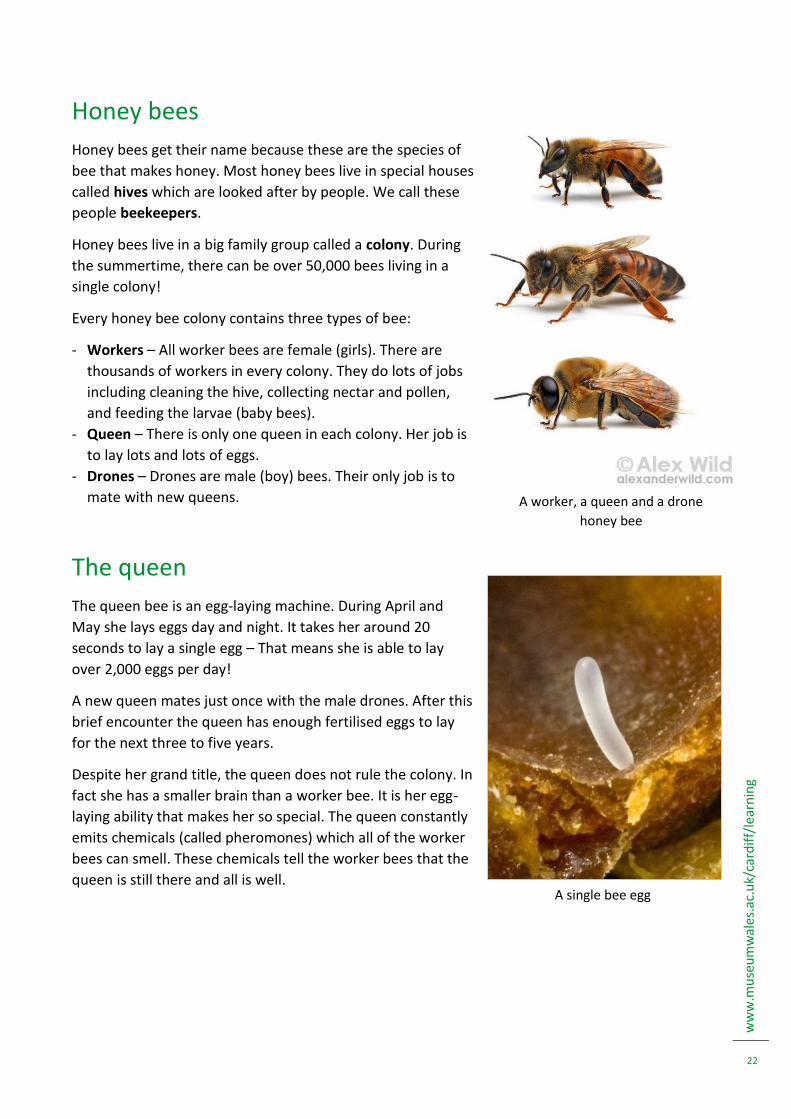
Some of our favourite foods are pollinated by bees. Clockwise from top left: apples, chocolate
(cocoa), onions, strawberries, almonds and coffee
ww
w.m
use
um
wal
es.a
c.u
k/ca
rdif
f/le
arn
ing
22
Honey bees
Honey bees get their name because these are the species of
bee that makes honey. Most honey bees live in special houses
called hives which are looked after by people. We call these
people beekeepers.
Honey bees live in a big family group called a colony. During
the summertime, there can be over 50,000 bees living in a
single colony!
Every honey bee colony contains three types of bee:
- Workers – All worker bees are female (girls). There are
thousands of workers in every colony. They do lots of jobs
including cleaning the hive, collecting nectar and pollen,
and feeding the larvae (baby bees).
- Queen – There is only one queen in each colony. Her job is
to lay lots and lots of eggs.
- Drones – Drones are male (boy) bees. Their only job is to
mate with new queens.
The queen
The queen bee is an egg-laying machine. During April and
May she lays eggs day and night. It takes her around 20
seconds to lay a single egg – That means she is able to lay
over 2,000 eggs per day!
A new queen mates just once with the male drones. After this
brief encounter the queen has enough fertilised eggs to lay
for the next three to five years.
Despite her grand title, the queen does not rule the colony. In
fact she has a smaller brain than a worker bee. It is her egg-
laying ability that makes her so special. The queen constantly
emits chemicals (called pheromones) which all of the worker
bees can smell. These chemicals tell the worker bees that the
queen is still there and all is well.
A single bee egg
A worker, a queen and a drone
honey bee

ww
w.m
use
um
wal
es.a
c.u
k/ca
rdif
f/le
arn
ing
23
Worker bees
Worker bees usually live for up to 40 days during the summer. Any workers born in the autumn will
survive in the hive until the next spring. The job that a worker does is decided by its age.
When a bee is born it must first clean out its own cell
1-2 days – Cleans cells and keeps brood warm
3-5 days – Feeds older larvae
6-11 days – Feeds youngest larvae
12-17 days – Produces wax, builds comb,
carries food and performs undertaker duties
18-21 days – Guards hive entrance
22+ days – Begins flying from hive. Collects
pollen, nectar and water
Dancing bees
Worker bees have developed a way of communicating with each other using a special dance called
a “waggle dance”. A worker returning from a place with lots of flowers (and therefore food) will
“dance” on the vertical surface of the comb. During the dance, the bee runs around in a circle. On
every rotation the bee will cut across the circle at a specific angle. This angle represents the angle in
which the others should fly relative to the position of the sun. For example, a bee running straight
down (i.e. 12 o’clock to 6 o’clock) is telling the others to fly directly away from the sun, and a bee
running straight up (i.e. 6 o’clock to 12 o’clock) is telling the others to fly directly towards the sun.
The dancing bee also tells the others how far they need to fly to reach the food source. He does this
by waggling his abdomen. The more waggles, the further the other bees have to fly.
Worker bees leaving the hive to find food

ww
w.m
use
um
wal
es.a
c.u
k/ca
rdif
f/le
arn
ing
24
Our honey bees
We have our very own beehives on the roof of
the Museum! Our two hives contain
approximately 60,000 bees between them. A
small group of Museum staff have been trained
to care for the bees and check on the hive once a
week from spring through until autumn. In the
spring and summer they check that the queen is
laying eggs and that the hive is “happy”. In the
autumn it is important to ensure the hive has
enough food. We provide the hive with inverted
sugar syrup (a mixture of glucose and fructose)
to ensure they are well-fed. Autumn would
usually be the time to harvest honey, but
because our bees are relatively new, we won’t
take any honey this year.
The last check of 2014 was performed on the 5th of November – where we made sure the bees had
enough honey to last the winter. We then closed the hive and will not open it again until the spring.
If everything goes to plan, we aim to start harvesting honey next autumn. With the help of local
company Nature’s Little Helpers, we hope to produce a range of honey-based products which we
can sell in the Museum shop.
Our hives add to a collection of beehives in the centre of Cardiff. There are also hives in Cardiff
University, The Royal Hotel and St David’s shopping centre.
Here are some of the Museum’s friendly
beekeeping team
One of our beekeepers opening a hive to
check on the bees
Our beekeeping team being trained to look
after the bees
ww
w.m
use
um
wal
es.a
c.u
k/ca
rdif
f/le
arn
ing
25
Honey Bee Decline
The number of honey bees is falling all around the world. We call this decrease a decline. Scientists
have found a number of possible reasons for the honey bee decline.
One big reason is that there are less flowers than there used to be. Natural habitats that have lots
of flowers have been replaced by towns and cities in urban areas and farmland in agricultural areas.
Remember that bees rely on flowers for food, so if there are no flowers then the bees will starve.
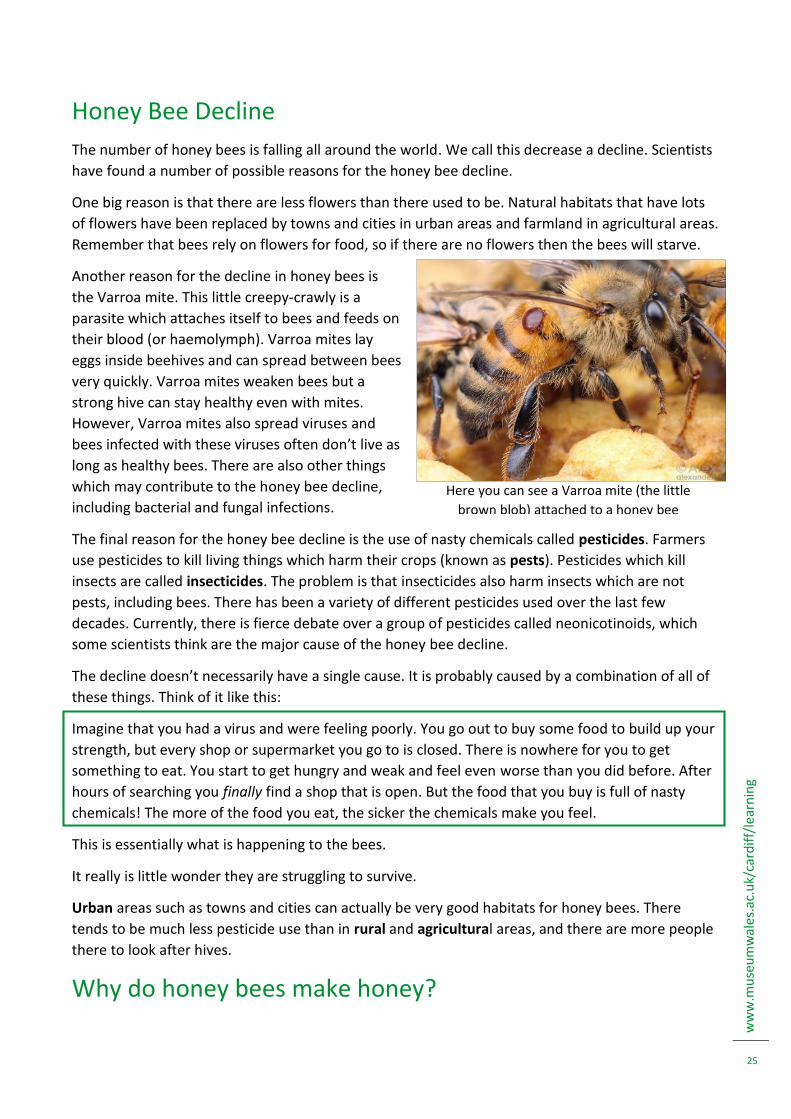
Another reason for the decline in honey bees is
the Varroa mite. This little creepy-crawly is a
parasite which attaches itself to bees and feeds on
their blood (or haemolymph). Varroa mites lay
eggs inside beehives and can spread between bees
very quickly. Varroa mites weaken bees but a
strong hive can stay healthy even with mites.
However, Varroa mites also spread viruses and
bees infected with these viruses often don’t live as
long as healthy bees. There are also other things
which may contribute to the honey bee decline,
including bacterial and fungal infections.
The final reason for the honey bee decline is the use of nasty chemicals called pesticides. Farmers
use pesticides to kill living things which harm their crops (known as pests). Pesticides which kill
insects are called insecticides. The problem is that insecticides also harm insects which are not
pests, including bees. There has been a variety of different pesticides used over the last few
decades. Currently, there is fierce debate over a group of pesticides called neonicotinoids, which
some scientists think are the major cause of the honey bee decline.
The decline doesn’t necessarily have a single cause. It is probably caused by a combination of all of
these things. Think of it like this:
Imagine that you had a virus and were feeling poorly. You go out to buy some food to build up your
strength, but every shop or supermarket you go to is closed. There is nowhere for you to get
something to eat. You start to get hungry and weak and feel even worse than you did before. After
hours of searching you finally find a shop that is open. But the food that you buy is full of nasty
chemicals! The more of the food you eat, the sicker the chemicals make you feel.
This is essentially what is happening to the bees.
It really is little wonder they are struggling to survive.
Urban areas such as towns and cities can actually be very good habitats for honey bees. There
tends to be much less pesticide use than in rural and agricultural areas, and there are more people
there to look after hives.
Why do honey bees make honey?
Here you can see a Varroa mite (the little
brown blob) attached to a honey bee
ww
w.m
use
um
wal
es.a
c.u
k/ca
rdif
f/le
arn
ing
26
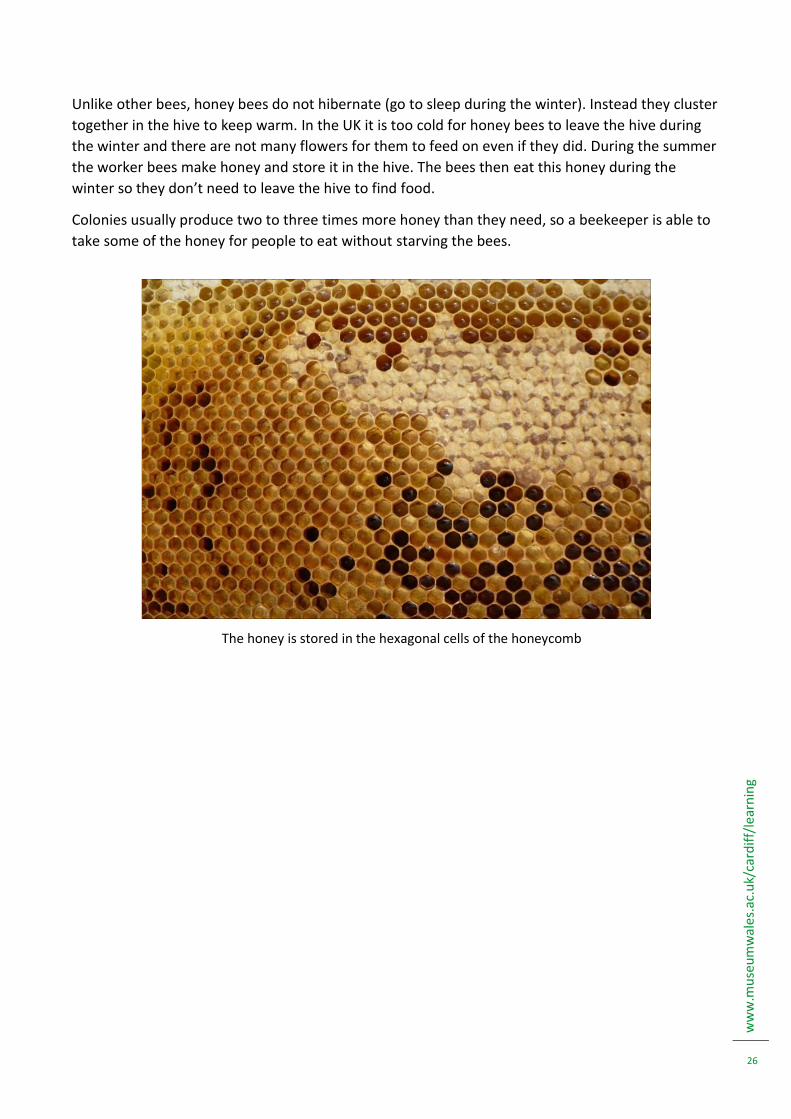
Unlike other bees, honey bees do not hibernate (go to sleep during the winter). Instead they cluster
together in the hive to keep warm. In the UK it is too cold for honey bees to leave the hive during
the winter and there are not many flowers for them to feed on even if they did. During the summer
the worker bees make honey and store it in the hive. The bees then eat this honey during the
winter so they don’t need to leave the hive to find food.
Colonies usually produce two to three times more honey than they need, so a beekeeper is able to
take some of the honey for people to eat without starving the bees.
The honey is stored in the hexagonal cells of the honeycomb
ww
w.m
use
um
wal
es.a
c.u
k/ca
rdif
f/le
arn
ing
27
Activity Ideas
Read The Beeman by Laurie Krebs to learn more about honey bees and beekeepers.
Write a story in which you are a honey bee living in a hive. Will you be the queen or a
worker? What sort of jobs will you do?
Do a bee survey, either in your own green space at school or at a nearby garden or park.
How many bees can you spot? Are they all the same type? Use a guide book to help you
identify the species. You could even take part in BeeWatch with the Bumblebee
Conservation Trust.
Build a hotel for solitary bees. Look at the resources at the back of this pack for instructions.
Make a class beehive art work. Draw a big beehive and have each pupil add a bee. Put your
names underneath so you remember which bee is whose. Can be done using coloured
pencils, paints, or fingerprint art.
During the spring, the queen bee lays an egg every 20 seconds. How many eggs would she
lay in a minute? What about in an hour?
An average beehive can produce around 15kg of honey a year. We have two beehives at the
Museum, so how much honey should we expect to make? What if we had four hives? Or
ten?
The number of honey bees in a hive decreases during the winter. In the summer we have
approximately 60,000 bees between our two hives. If we were to say that the number
dropped to 6,000 during the winter, what percentage of the summer bees live in the hive in
winter?
Honey bees use the waggle dance to communicate with each other. How easy is it to talk to
each other using only dance moves? Make up a dance that tells your friends something.
Remember, no talking!
Make and decorate a bee plane (template at back of this pack).
Bees are a type of insect. Can you think of other types of insect? What do all insects have in
common? How are insects different from other minibeasts?
Learn the insect body parts by singing the ‘Head, Thorax, Abdomen” song (lyrics at back of
this pack).
Design a poster to inform people about the decline in bees. What information will you
include? Who do you want to look at it? What pictures should it have?
Record a food diary of everything you eat in a day (or week). Research foods that come from
bee-pollinated plants and erase all of these items from your menu. What would be left for
you to eat without bees? Discuss this as a class.
Bees are in decline because of the actions of humans. Research other animals that are in
decline and discuss the reasons.

ww
w.m
use
um
wal
es.a
c.u
k/ca
rdif
f/le
arn
ing
28
ww
w.m
use
um
wal
es.a
c.u
k/ca
rdif
f/le
arn
ing
29
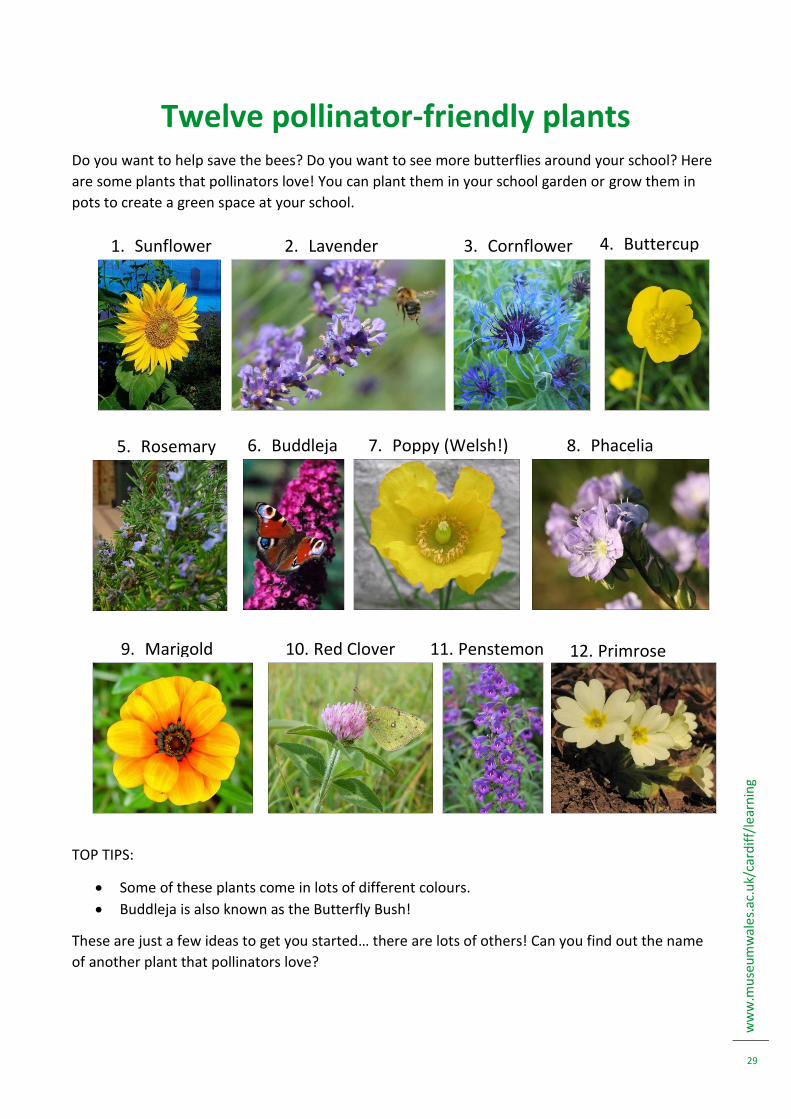
Twelve pollinator-friendly plants Do you want to help save the bees? Do you want to see more butterflies around your school? Here
are some plants that pollinators love! You can plant them in your school garden or grow them in
pots to create a green space at your school.
TOP TIPS:
Some of these plants come in lots of different colours.
Buddleja is also known as the Butterfly Bush!
These are just a few ideas to get you started… there are lots of others! Can you find out the name
of another plant that pollinators love?
1. Sunflower 2. Lavender 3. Cornflower 4. Buttercup
5. Rosemary 6. Buddleja 7. Poppy (Welsh!) 8. Phacelia
9. Marigold 10. Red Clover 11. Penstemon 12. Primrose
ww
w.m
use
um
wal
es.a
c.u
k/ca
rdif
f/le
arn
ing
30
The easy-peasy step-by-step guide to
creating a mini-meadow!
Step 1: In the spring, find a small patch of ground (better check you are allowed
to grow a meadow there!).
Step 2: If it is grassy, dig up the grass!
Step 3: Rake the soil or use a spade to turn it over.
Step 4: Get some seed of different kinds of plants (see the next page for some
ideas). You could buy some seeds, ask your family and friends if they have any
from their garden, or come to one of the Museum’s ‘Seed Swap’ days.
Step 5: Scatter the seed all over your meadow area and rake lightly.
Step 6: Water regularly (especially if there is no rain).
Step 7: See what grows!
Step 8: In October, cut the meadow and leave the cuttings lying on
the meadow.
Next Spring: Start again at Step 4!
TOP TIPS:
Keep you mini-meadow mini! Around 2 metre2 is fine. If it is too big it may be a lot of work
and expense. Keep it cheap and fun! (You can always expand if you get the bug!)
Most wildflowers grow in nutrient poor soil, so do not add fertilizer.
Do not use pesticides or herbicides, this includes slug pellets and weed killer. These
chemicals will harm your flowers and visiting minibeasts.
Think of your mini-meadow as an experiment. Not everything you plant will grow, and some
things may grow faster than others, so don’t be disappointed! Keep a record of what you
planted and what grew the best.
ww
w.m
use
um
wal
es.a
c.u
k/ca
rdif
f/le
arn
ing
31
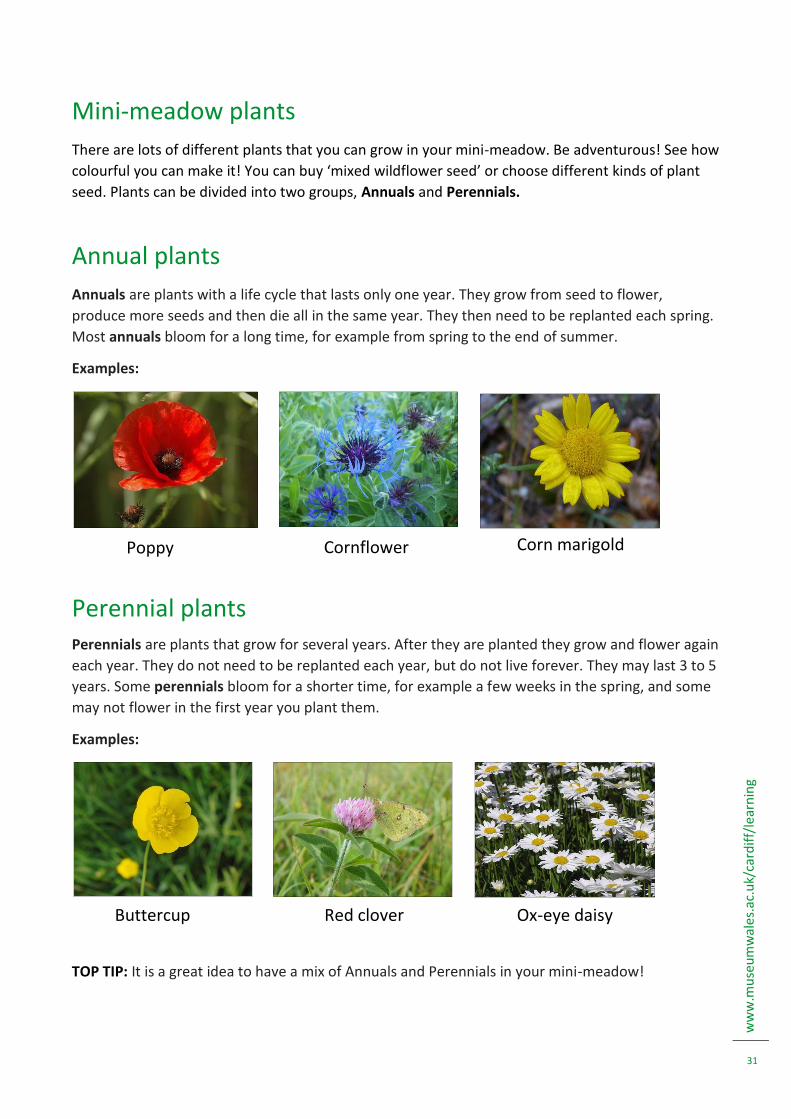
Mini-meadow plants
There are lots of different plants that you can grow in your mini-meadow. Be adventurous! See how
colourful you can make it! You can buy ‘mixed wildflower seed’ or choose different kinds of plant
seed. Plants can be divided into two groups, Annuals and Perennials.
Annual plants
Annuals are plants with a life cycle that lasts only one year. They grow from seed to flower,
produce more seeds and then die all in the same year. They then need to be replanted each spring.
Most annuals bloom for a long time, for example from spring to the end of summer.
Examples:
Perennial plants Perennials are plants that grow for several years. After they are planted they grow and flower again
each year. They do not need to be replanted each year, but do not live forever. They may last 3 to 5
years. Some perennials bloom for a shorter time, for example a few weeks in the spring, and some
may not flower in the first year you plant them.
Examples:
TOP TIP: It is a great idea to have a mix of Annuals and Perennials in your mini-meadow!
Poppy Corn marigold Cornflower
Ox-eye daisy Red clover Buttercup
ww
w.m
use
um
wal
es.a
c.u
k/ca
rdif
f/le
arn
ing
32
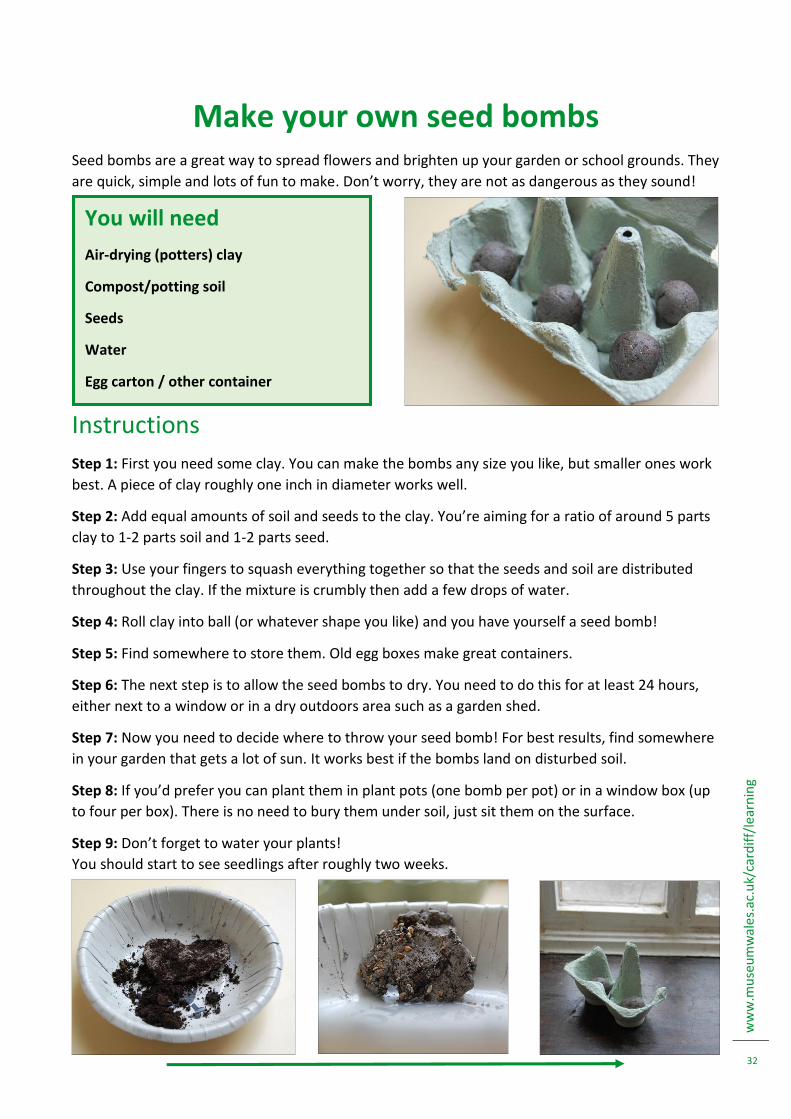
Make your own seed bombs Seed bombs are a great way to spread flowers and brighten up your garden or school grounds. They
are quick, simple and lots of fun to make. Don’t worry, they are not as dangerous as they sound!
Instructions
Step 1: First you need some clay. You can make the bombs any size you like, but smaller ones work
best. A piece of clay roughly one inch in diameter works well. Step 2: Add equal amounts of soil and seeds to the clay. You’re aiming for a ratio of around 5 parts
clay to 1-2 parts soil and 1-2 parts seed.
Step 3: Use your fingers to squash everything together so that the seeds and soil are distributed
throughout the clay. If the mixture is crumbly then add a few drops of water.
Step 4: Roll clay into ball (or whatever shape you like) and you have yourself a seed bomb!
Step 5: Find somewhere to store them. Old egg boxes make great containers.
Step 6: The next step is to allow the seed bombs to dry. You need to do this for at least 24 hours,
either next to a window or in a dry outdoors area such as a garden shed.
Step 7: Now you need to decide where to throw your seed bomb! For best results, find somewhere
in your garden that gets a lot of sun. It works best if the bombs land on disturbed soil.
Step 8: If you’d prefer you can plant them in plant pots (one bomb per pot) or in a window box (up
to four per box). There is no need to bury them under soil, just sit them on the surface.
Step 9: Don’t forget to water your plants!
You should start to see seedlings after roughly two weeks.
You will need
Air-drying (potters) clay
Compost/potting soil
Seeds
Water
Egg carton / other container
ww
w.m
use
um
wal
es.a
c.u
k/ca
rdif
f/le
arn
ing
33
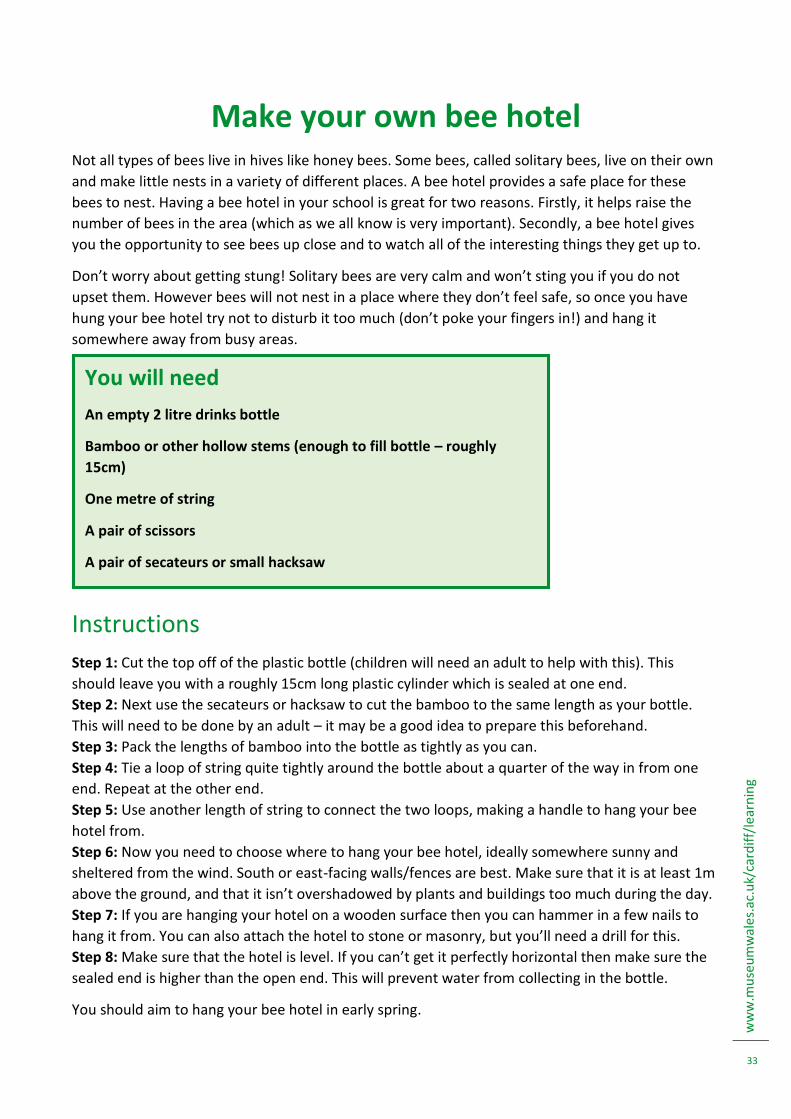
Make your own bee hotel Not all types of bees live in hives like honey bees. Some bees, called solitary bees, live on their own
and make little nests in a variety of different places. A bee hotel provides a safe place for these
bees to nest. Having a bee hotel in your school is great for two reasons. Firstly, it helps raise the
number of bees in the area (which as we all know is very important). Secondly, a bee hotel gives
you the opportunity to see bees up close and to watch all of the interesting things they get up to.
Don’t worry about getting stung! Solitary bees are very calm and won’t sting you if you do not
upset them. However bees will not nest in a place where they don’t feel safe, so once you have
hung your bee hotel try not to disturb it too much (don’t poke your fingers in!) and hang it
somewhere away from busy areas.
Instructions
Step 1: Cut the top off of the plastic bottle (children will need an adult to help with this). This
should leave you with a roughly 15cm long plastic cylinder which is sealed at one end.
Step 2: Next use the secateurs or hacksaw to cut the bamboo to the same length as your bottle.
This will need to be done by an adult – it may be a good idea to prepare this beforehand.
Step 3: Pack the lengths of bamboo into the bottle as tightly as you can.
Step 4: Tie a loop of string quite tightly around the bottle about a quarter of the way in from one
end. Repeat at the other end.
Step 5: Use another length of string to connect the two loops, making a handle to hang your bee
hotel from.
Step 6: Now you need to choose where to hang your bee hotel, ideally somewhere sunny and
sheltered from the wind. South or east-facing walls/fences are best. Make sure that it is at least 1m
above the ground, and that it isn’t overshadowed by plants and buildings too much during the day.
Step 7: If you are hanging your hotel on a wooden surface then you can hammer in a few nails to
hang it from. You can also attach the hotel to stone or masonry, but you’ll need a drill for this.
Step 8: Make sure that the hotel is level. If you can’t get it perfectly horizontal then make sure the
sealed end is higher than the open end. This will prevent water from collecting in the bottle.
You should aim to hang your bee hotel in early spring.
You will need
An empty 2 litre drinks bottle
Bamboo or other hollow stems (enough to fill bottle – roughly
15cm)
One metre of string
A pair of scissors
A pair of secateurs or small hacksaw
A hammer and nails
ww
w.m
use
um
wal
es.a
c.u
k/ca
rdif
f/le
arn
ing
34
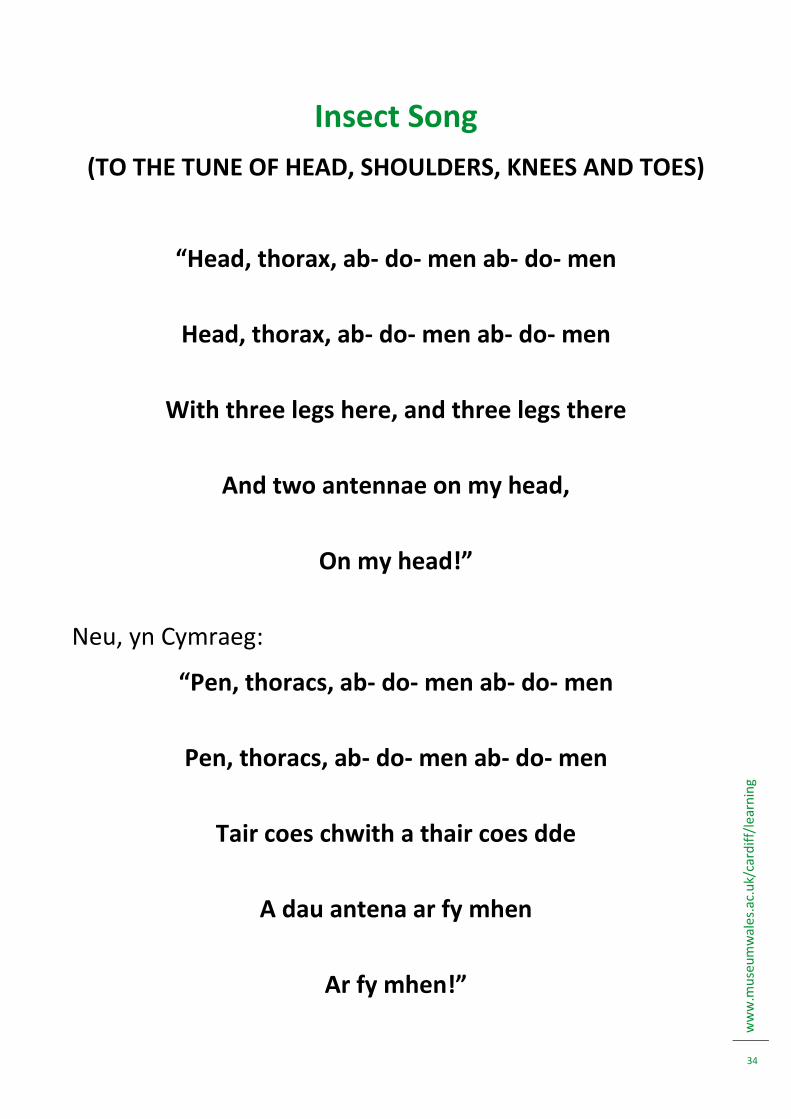
Insect Song
(TO THE TUNE OF HEAD, SHOULDERS, KNEES AND TOES)
“Head, thorax, ab- do- men ab- do- men
Head, thorax, ab- do- men ab- do- men
With three legs here, and three legs there
And two antennae on my head,
On my head!”
Neu, yn Cymraeg:
“Pen, thoracs, ab- do- men ab- do- men
Pen, thoracs, ab- do- men ab- do- men
Tair coes chwith a thair coes dde
A dau antena ar fy mhen
Ar fy mhen!”
ww
w.m
use
um
wal
es.a
c.u
k/ca
rdif
f/le
arn
ing
35
ww
w.m
use
um
wal
es.a
c.u
k/ca
rdif
f/le
arn
ing
36
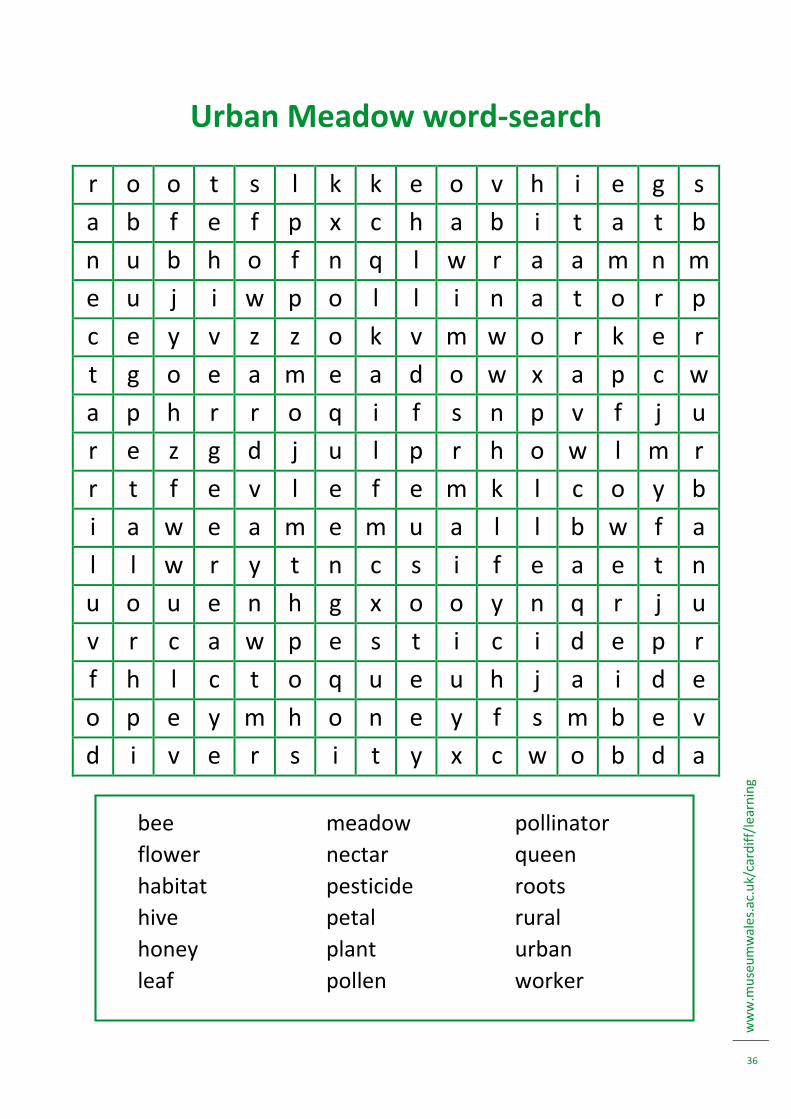
Urban Meadow word-search
r o o t s l k k e o v h i e g s
a b f e f p x c h a b i t a t b
n u b h o f n q l w r a a m n m
e u j i w p o l l i n a t o r p
c e y v z z o k v m w o r k e r
t g o e a m e a d o w x a p c w
a p h r r o q i f s n p v f j u
r e z g d j u l p r h o w l m r
r t f e v l e f e m k l c o y b
i a w e a m e m u a l l b w f a
l l w r y t n c s i f e a e t n
u o u e n h g x o o y n q r j u
v r c a w p e s t i c i d e p r
f h l c t o q u e u h j a i d e
o p e y m h o n e y f s m b e v
d i v e r s i t y x c w o b d a
bee
flower
habitat
hive
honey
leaf
meadow
nectar
pesticide
petal
plant
pollen
pollinator
queen
roots
rural
urban
worker
ww
w.m
use
um
wal
es.a
c.u
k/ca
rdif
f/le
arn
ing
37
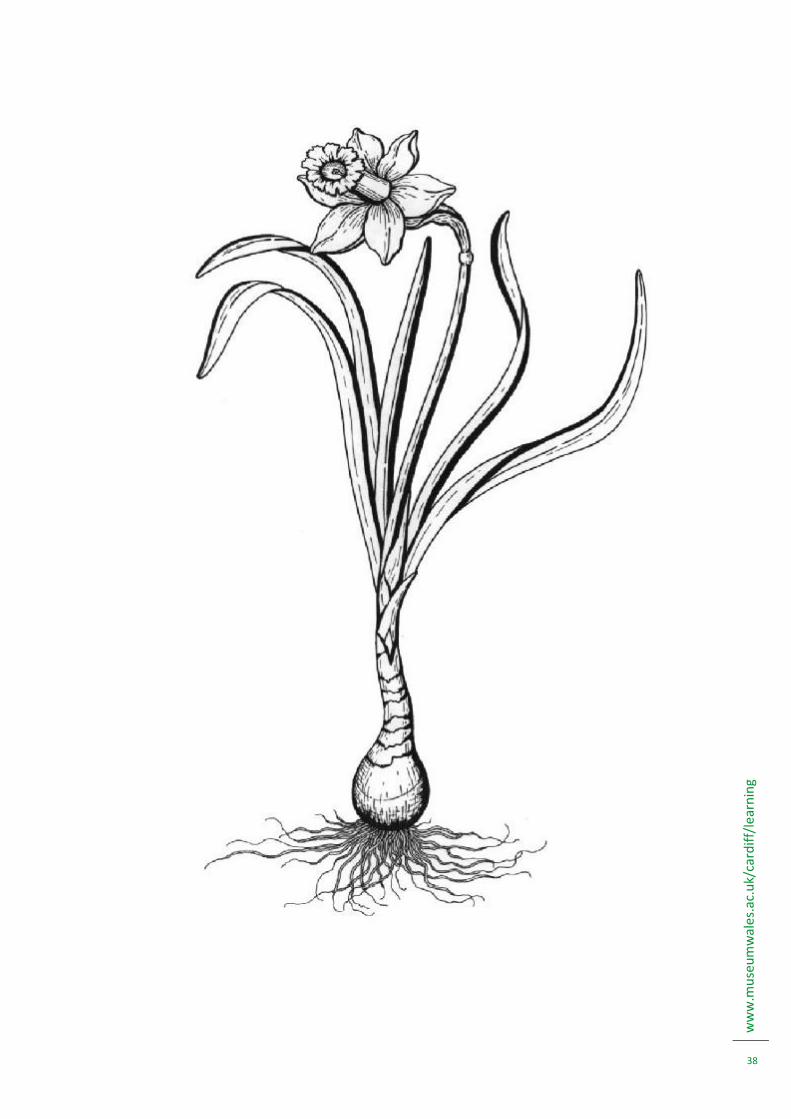
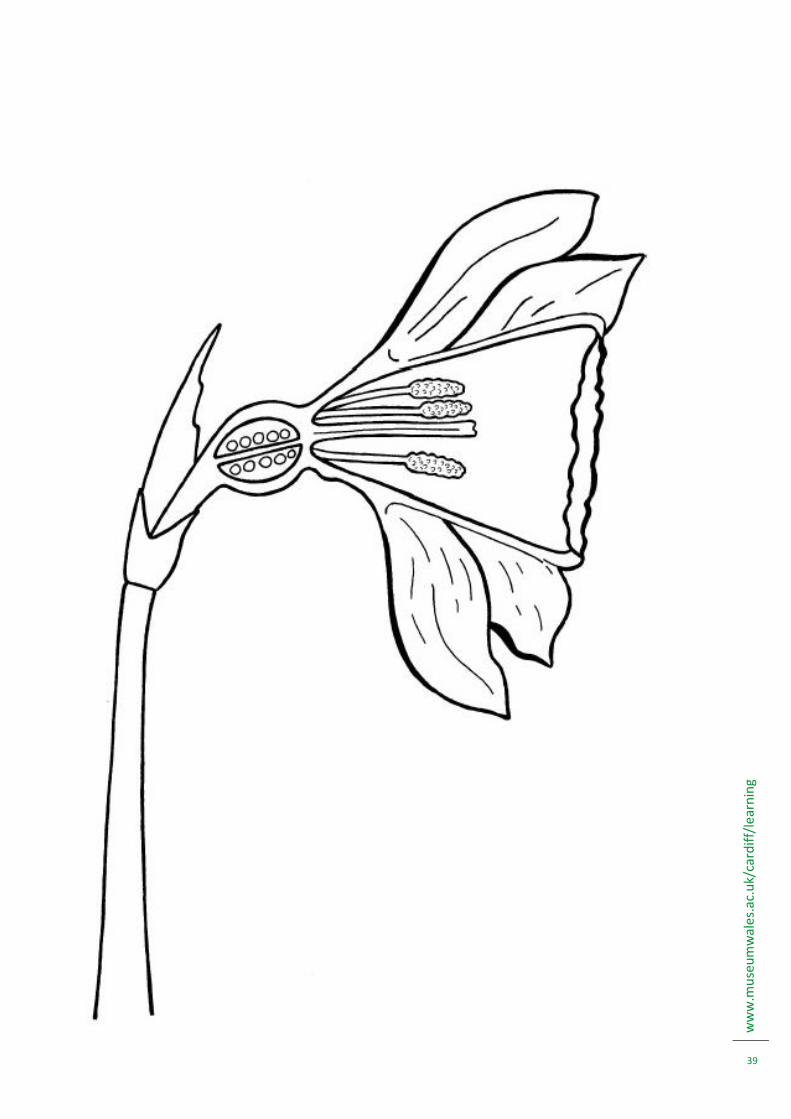
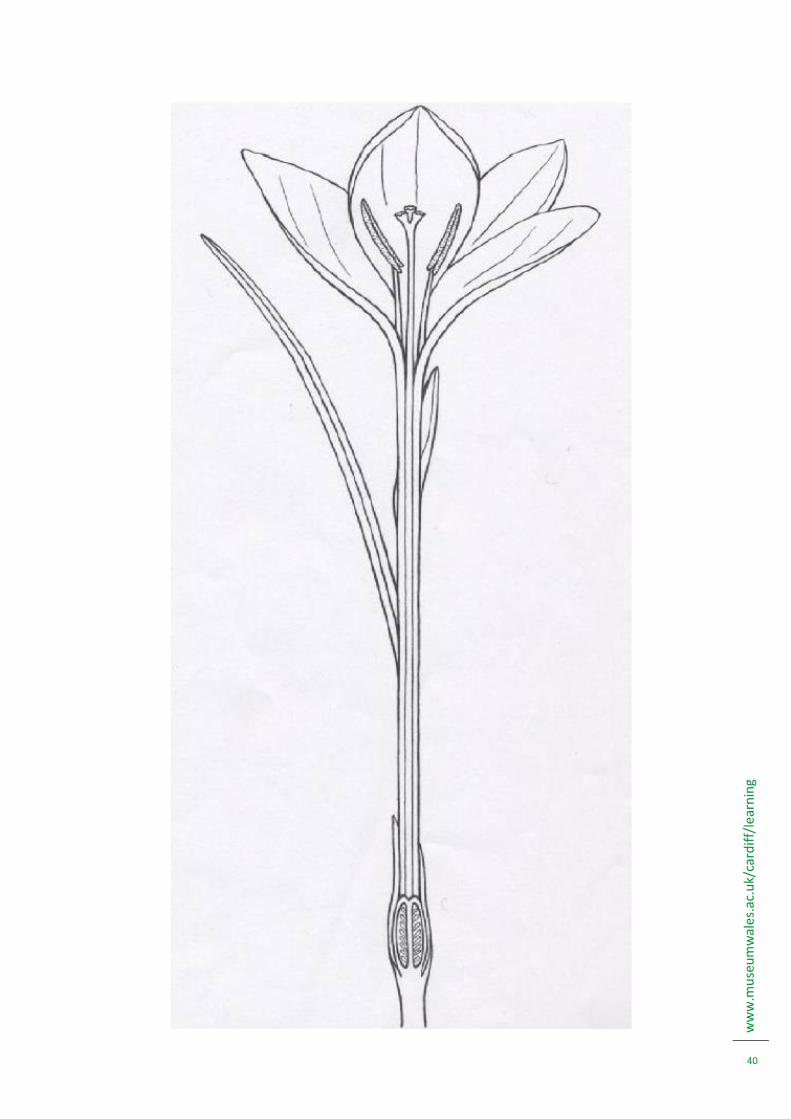
Botanical Illustration
Botanical Illustration means making accurate lifelike drawings of plants. Illustrations are still used in many books instead of photos because an illustration can show what can be seen with the naked eye (like the correct number of petals and stamens in a flower) as well as what we cannot easily see (like the root structure, or different stages of development). Botanical illustration has been practiced for centuries, even the Romans did it, and by the medieval period we find some wonderful, lifelike pictures of plants in illuminated manuscripts. It began because people used the plants for medicine and needed to recognise the correct plant. This art form really came into its own when people started exploring and wanted to record details of plants that would not survive a long voyage home. STUDY: Choose a flower and look at it closely. Is it easy to see how the petals join the base of the flower or what shape the stem is? Are any of the parts more than one colour? Keep these details in mind as you make your drawing. PRACTICE: Make a rough sketch of your plant at life size and at the angle at which you want to draw it. This is a quick practice to help you get the size and shape right and should only take a minute or two to do. If you are lucky you might even be able to trace roughly round your plant. This just gives you something to refer to if you get confused later on. SKETCH: On a fresh sheet of paper, make a very light sketch of your plant at life size to get the flower, leaves and stem in exactly the right position. Don’t worry about detail yet. DETAILS: When you think the sketch is right, you can start drawing in the detail of your plant. Make sure you get all the petals that you can see in the flower, and show if they bend or curl at all. Look at the shape of the stem, is it round or square? Does it have hairs or lumps that you can add to your drawing? (Keep your pencil sharp for fine details!) Are the leaves smooth or frilly, and are there veins or any damaged parts that you want to record. Rub out lines that are no longer needed as you go. LABEL: It is very important to label your drawing so that other people can see what each part of the plant is. Labelling drawings is also a really good way of learning new scientific words. Here are some things you could label on your plant: stem, leaf, petal, root, stamen, anther, filament, pistil, stigma, style, and ovary. COLOUR: Once you have a pencil drawing that looks just like the plant you are looking at, you can decide whether to colour it or not. Coloured pencils work really well for this, and paint is fine but you will need to use very delicate layers of paint to get all the detail. Colour can help you show details that your pencil can’t easily record, like shiny areas or different colours in the same leaf. Don’t forget to sign your work! On the next few pages there are diagrams of some plants for you to colour in and label, or you can draw and label your own flower
ww
w.m
use
um
wal
es.a
c.u
k/ca
rdif
f/le
arn
ing
38
ww
w.m
use
um
wal
es.a
c.u
k/ca
rdif
f/le
arn
ing
39
ww
w.m
use
um
wal
es.a
c.u
k/ca
rdif
f/le
arn
ing
40
ww
w.m
use
um
wal
es.a
c.u
k/ca
rdif
f/le
arn
ing
41
ww
w.m
use
um
wal
es.a
c.u
k/ca
rdif
f/le
arn
ing
42
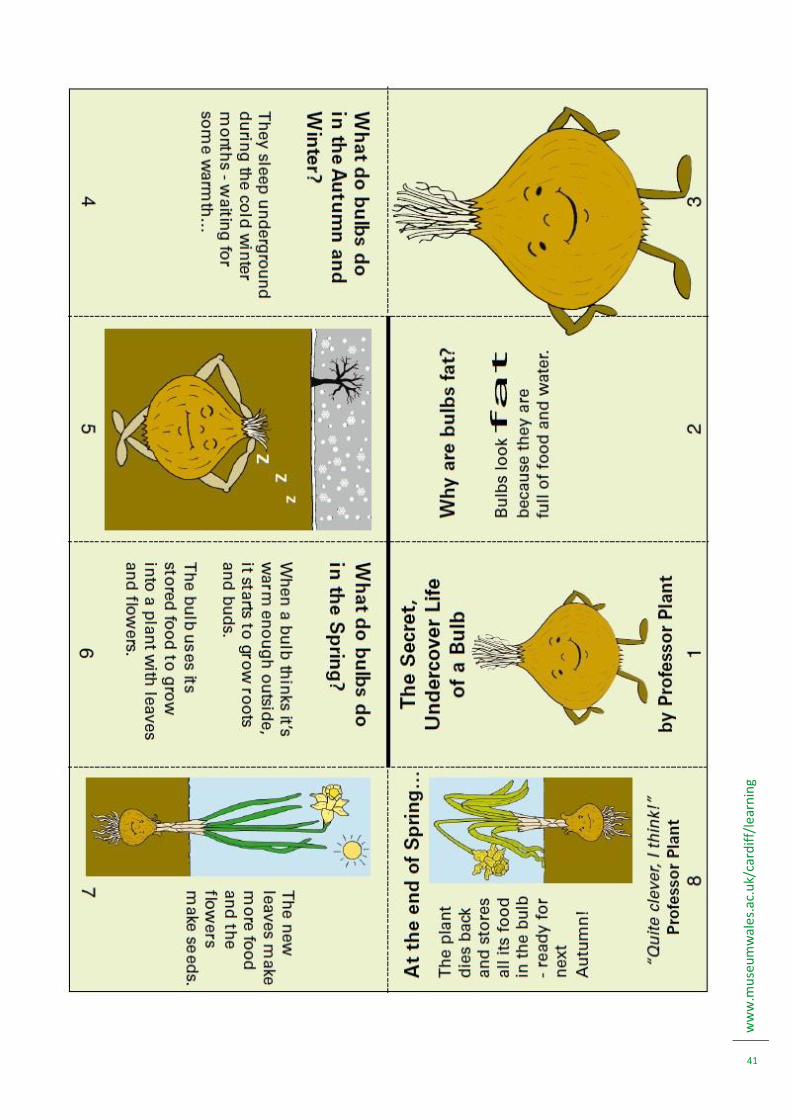
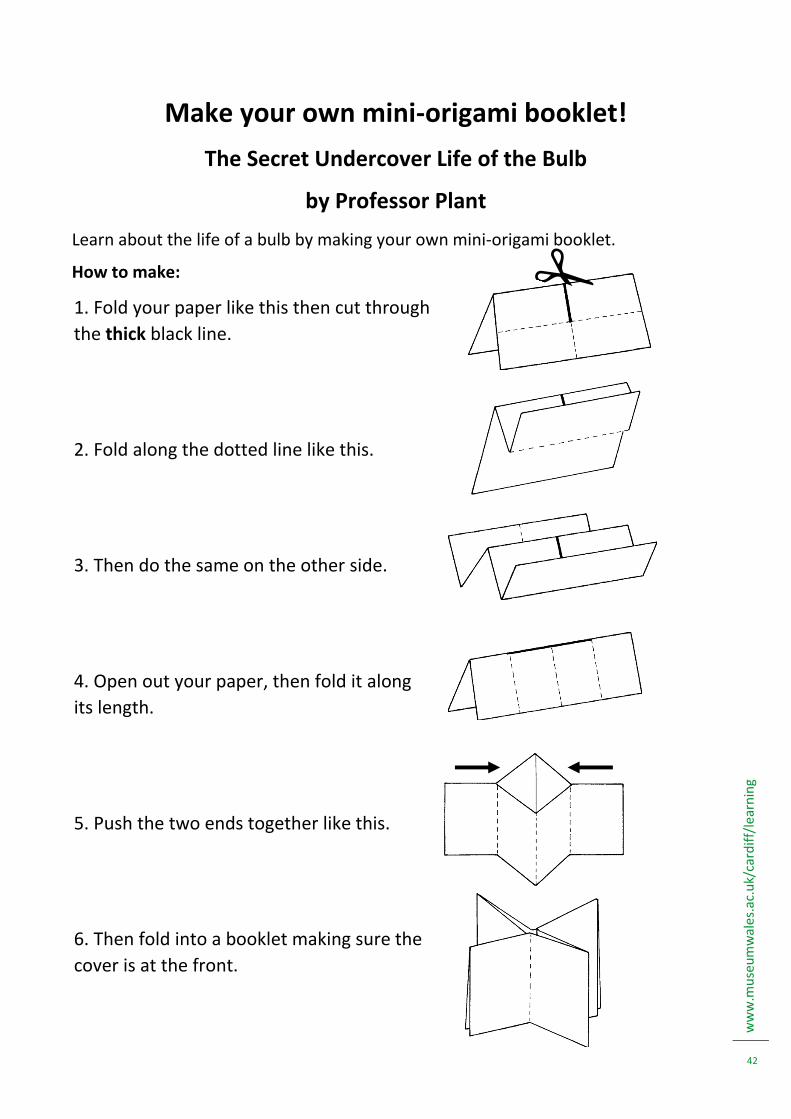
Make your own mini-origami booklet!
The Secret Undercover Life of the Bulb
by Professor Plant
Learn about the life of a bulb by making your own mini-origami booklet.
How to make:
1. Fold your paper like this then cut through
the thick black line.
2. Fold along the dotted line like this.
3. Then do the same on the other side.
4. Open out your paper, then fold it along
its length.
5. Push the two ends together like this.
6. Then fold into a booklet making sure the
cover is at the front.
ww
w.m
use
um
wal
es.a
c.u
k/ca
rdif
f/le
arn
ing
43
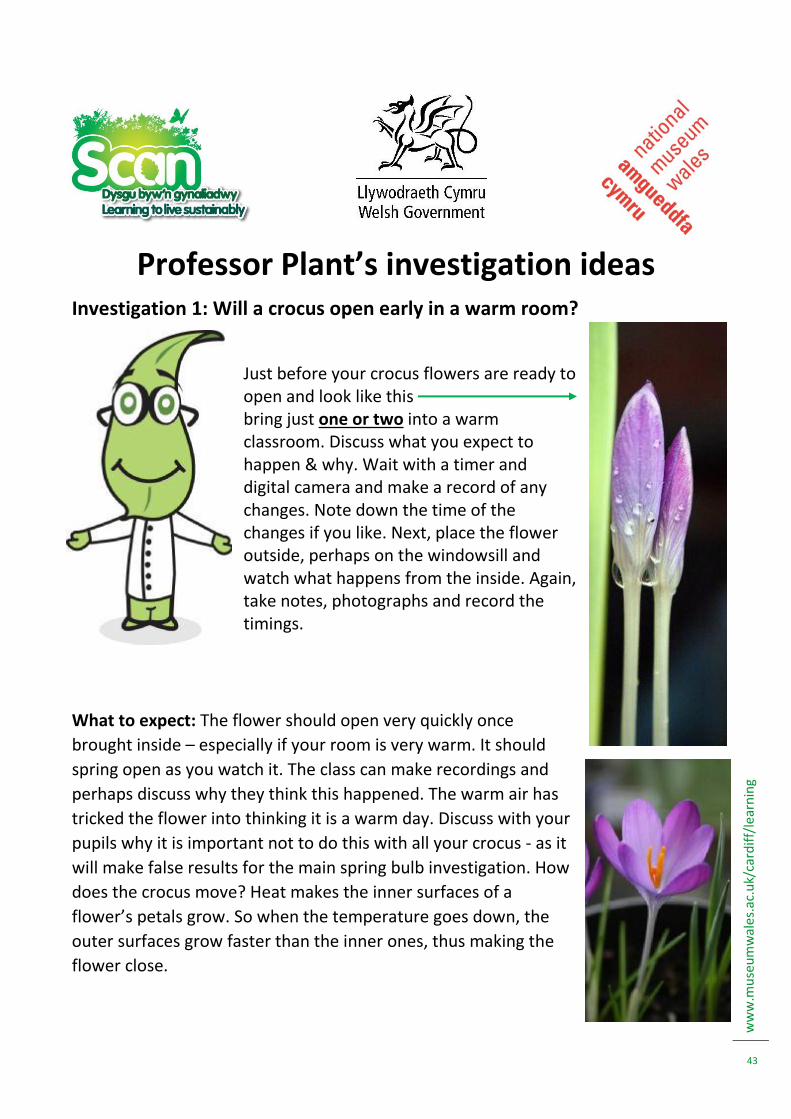
Professor Plant’s investigation ideas Investigation 1: Will a crocus open early in a warm room?
Just before your crocus flowers are ready to open and look like this bring just one or two into a warm classroom. Discuss what you expect to happen & why. Wait with a timer and digital camera and make a record of any changes. Note down the time of the changes if you like. Next, place the flower outside, perhaps on the windowsill and watch what happens from the inside. Again, take notes, photographs and record the timings.
What to expect: The flower should open very quickly once
brought inside – especially if your room is very warm. It should
spring open as you watch it. The class can make recordings and
perhaps discuss why they think this happened. The warm air has
tricked the flower into thinking it is a warm day. Discuss with your
pupils why it is important not to do this with all your crocus - as it
will make false results for the main spring bulb investigation. How
does the crocus move? Heat makes the inner surfaces of a
flower’s petals grow. So when the temperature goes down, the
outer surfaces grow faster than the inner ones, thus making the
flower close.
ww
w.m
use
um
wal
es.a
c.u
k/ca
rdif
f/le
arn
ing
44
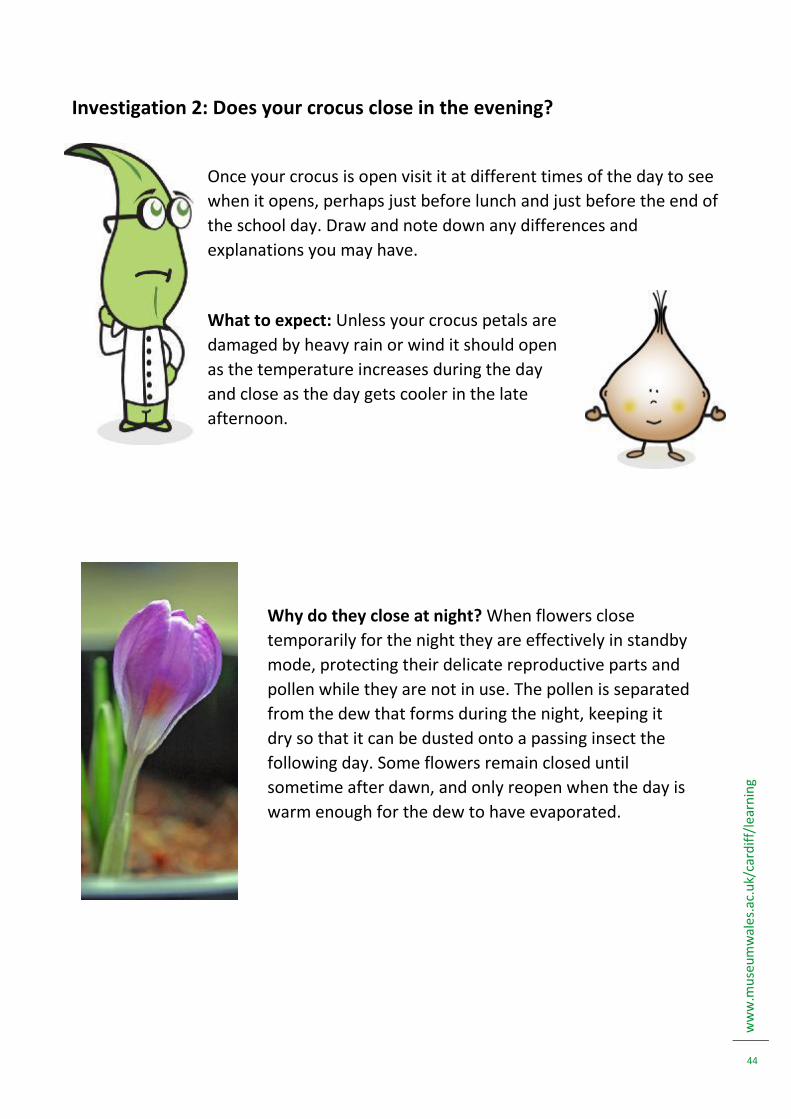
Investigation 2: Does your crocus close in the evening?
Once your crocus is open visit it at different times of the day to see
when it opens, perhaps just before lunch and just before the end of
the school day. Draw and note down any differences and
explanations you may have.
What to expect: Unless your crocus petals are
damaged by heavy rain or wind it should open
as the temperature increases during the day
and close as the day gets cooler in the late
afternoon.
Why do they close at night? When flowers close
temporarily for the night they are effectively in standby
mode, protecting their delicate reproductive parts and
pollen while they are not in use. The pollen is separated
from the dew that forms during the night, keeping it
dry so that it can be dusted onto a passing insect the
following day. Some flowers remain closed until
sometime after dawn, and only reopen when the day is
warm enough for the dew to have evaporated.
ww
w.m
use
um
wal
es.a
c.u
k/ca
rdif
f/le
arn
ing
45
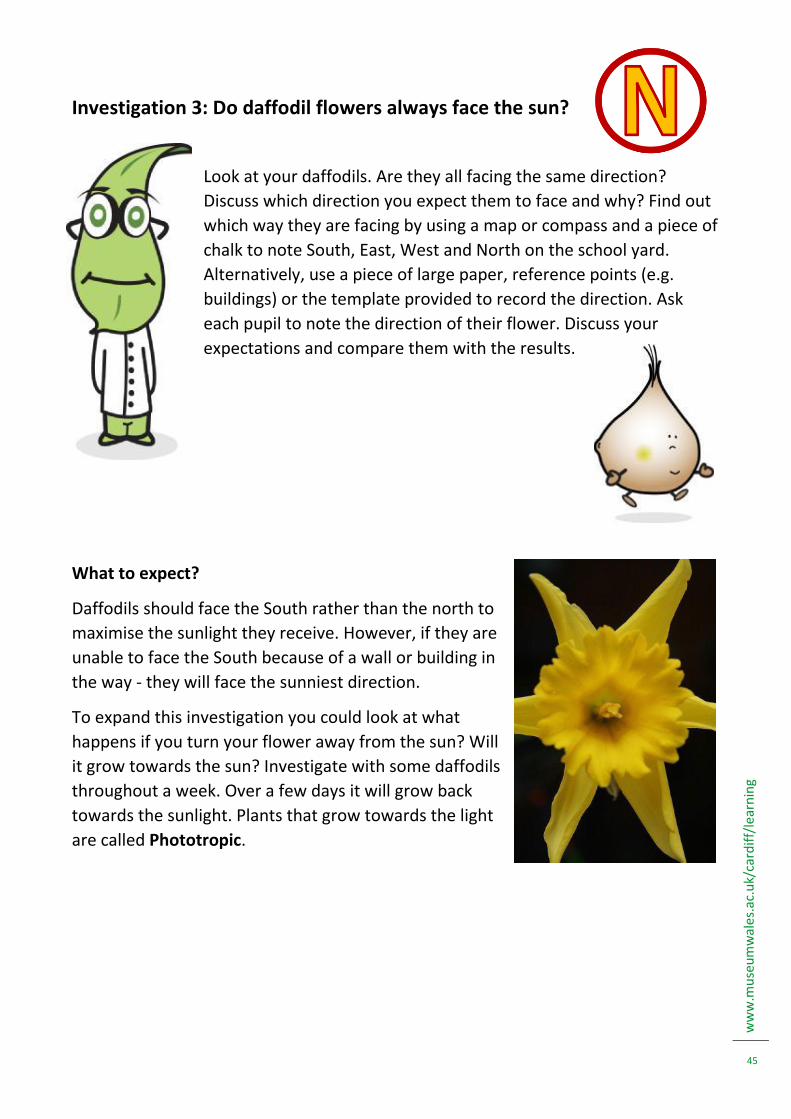
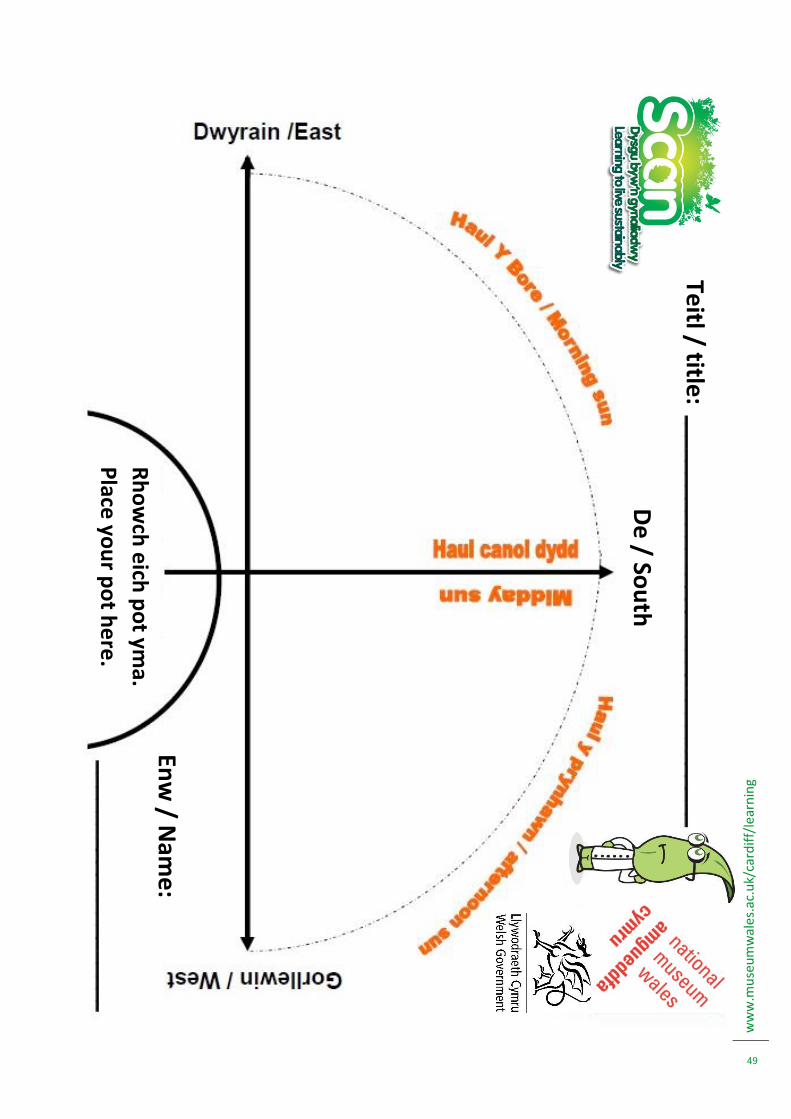
Investigation 3: Do daffodil flowers always face the sun?
Look at your daffodils. Are they all facing the same direction?
Discuss which direction you expect them to face and why? Find out
which way they are facing by using a map or compass and a piece of
chalk to note South, East, West and North on the school yard.
Alternatively, use a piece of large paper, reference points (e.g.
buildings) or the template provided to record the direction. Ask
each pupil to note the direction of their flower. Discuss your
expectations and compare them with the results.
What to expect?
Daffodils should face the South rather than the north to
maximise the sunlight they receive. However, if they are
unable to face the South because of a wall or building in
the way - they will face the sunniest direction.
To expand this investigation you could look at what
happens if you turn your flower away from the sun? Will
it grow towards the sun? Investigate with some daffodils
throughout a week. Over a few days it will grow back
towards the sunlight. Plants that grow towards the light
are called Phototropic.
ww
w.m
use
um
wal
es.a
c.u
k/ca
rdif
f/le
arn
ing
46
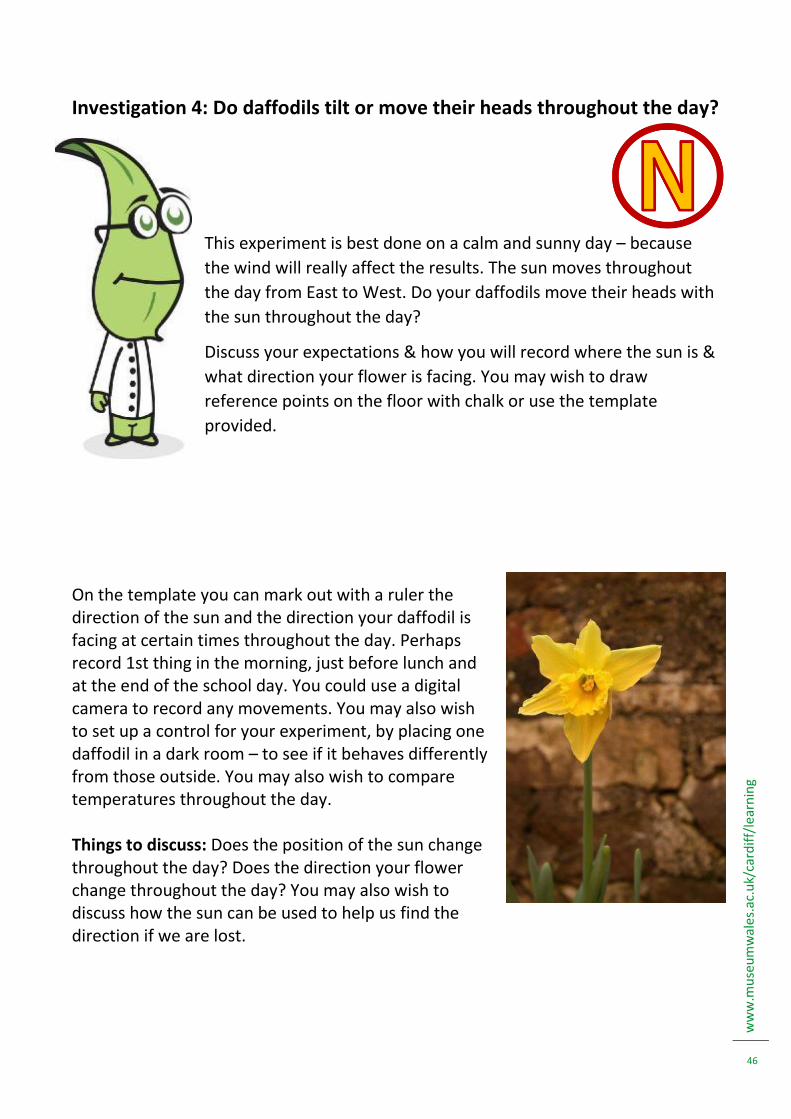
Investigation 4: Do daffodils tilt or move their heads throughout the day?
This experiment is best done on a calm and sunny day – because
the wind will really affect the results. The sun moves throughout
the day from East to West. Do your daffodils move their heads with
the sun throughout the day?
Discuss your expectations & how you will record where the sun is &
what direction your flower is facing. You may wish to draw
reference points on the floor with chalk or use the template
provided.
On the template you can mark out with a ruler the direction of the sun and the direction your daffodil is facing at certain times throughout the day. Perhaps record 1st thing in the morning, just before lunch and at the end of the school day. You could use a digital camera to record any movements. You may also wish to set up a control for your experiment, by placing one daffodil in a dark room – to see if it behaves differently from those outside. You may also wish to compare temperatures throughout the day. Things to discuss: Does the position of the sun change throughout the day? Does the direction your flower change throughout the day? You may also wish to discuss how the sun can be used to help us find the direction if we are lost.
ww
w.m
use
um
wal
es.a
c.u
k/ca
rdif
f/le
arn
ing
47
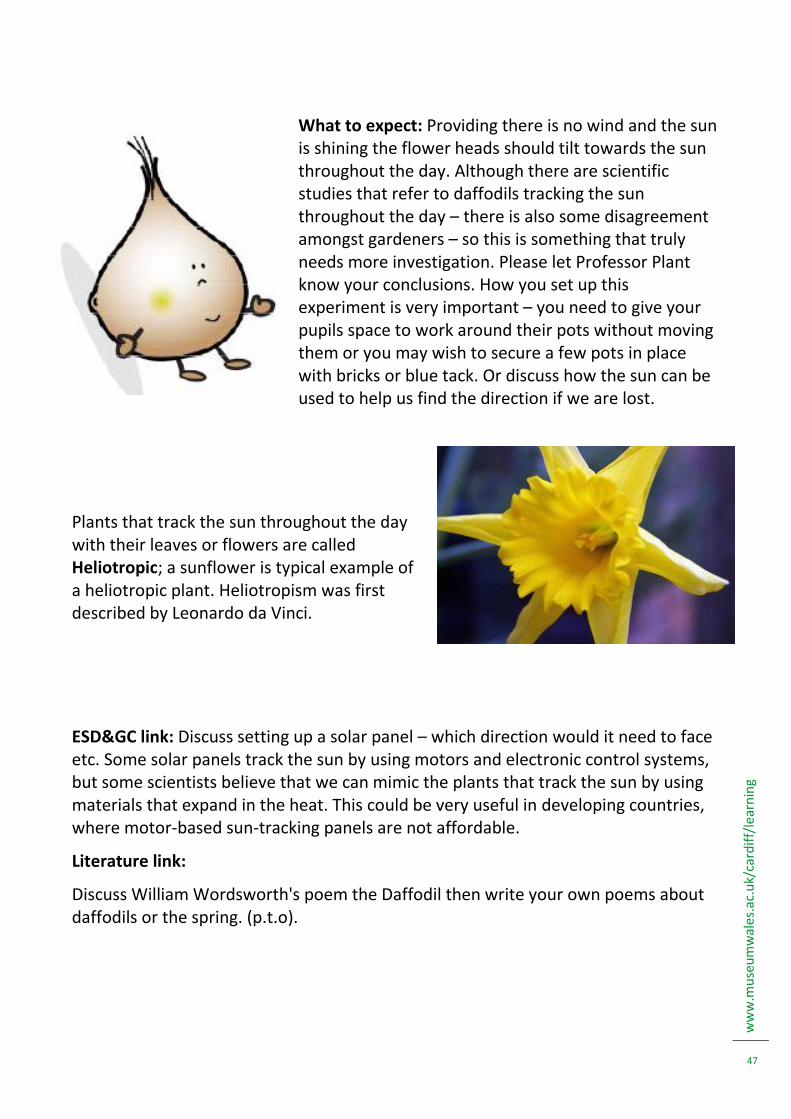
What to expect: Providing there is no wind and the sun is shining the flower heads should tilt towards the sun throughout the day. Although there are scientific studies that refer to daffodils tracking the sun throughout the day – there is also some disagreement amongst gardeners – so this is something that truly needs more investigation. Please let Professor Plant know your conclusions. How you set up this experiment is very important – you need to give your pupils space to work around their pots without moving them or you may wish to secure a few pots in place with bricks or blue tack. Or discuss how the sun can be used to help us find the direction if we are lost.
Plants that track the sun throughout the day with their leaves or flowers are called Heliotropic; a sunflower is typical example of a heliotropic plant. Heliotropism was first described by Leonardo da Vinci.
ESD&GC link: Discuss setting up a solar panel – which direction would it need to face etc. Some solar panels track the sun by using motors and electronic control systems, but some scientists believe that we can mimic the plants that track the sun by using materials that expand in the heat. This could be very useful in developing countries, where motor-based sun-tracking panels are not affordable.
Literature link:
Discuss William Wordsworth's poem the Daffodil then write your own poems about daffodils or the spring. (p.t.o).
ww
w.m
use
um
wal
es.a
c.u
k/ca
rdif
f/le
arn
ing
48
Daffodils (1804)
I wander’d lonely as a cloud
That floats on high o'er vales and hills,
When all at once I saw a crowd,
A host, of golden daffodils;
Beside the lake, beneath the trees,
Fluttering and dancing in the breeze.
Continuous as the stars that shine
And twinkle on the Milky Way,
They stretch'd in never-ending line
Along the margin of a bay:
Ten thousand saw I at a glance,
Tossing their heads in sprightly dance.
The waves beside them danced; but they
Out-did the sparkling waves in glee:
A poet could not but be gay,
In such a jocund company:
I gazed -- and gazed -- but little thought
What wealth the show to me had brought:
For oft, when on my couch I lie
In vacant or in pensive mood,
They flash upon that inward eye
Which is the bliss of solitude;
And then my heart with pleasure fills,
And dances with the daffodils.
By William Wordsworth (1770-1850).
ww
w.m
use
um
wal
es.a
c.u
k/ca
rdif
f/le
arn
ing
49
Te
itl / title:
De
/ Sou
th
Rh
ow
ch e
ich p
ot ym
a.
Place
you
r po
t he
re.
Enw
/ Nam
e: