Embed Size (px)
Citation preview

1
US Department of Commerce
Automated Commerce Employment System
ACES
US Department of CommerceHiring Managers TrainingHiring Management( Version Xi 4.0)
ACES Integration to Recruitment One-Stop

2
IntroductionWelcome!
This Manager User Guide was prepared to assist you when working in the Department’s Automated Hiring system. Our system is integrated with the USAJOBS Recruitment One-Stop initiative, which allows positions to be posted and applicants to apply for all government jobs in one central location.

3
Introduction Continued
If you are reviewing this presentation, that means you have a position to fill. This guide, coupled with advice and counsel from your HR Specialist should result in successfully recruiting for and selecting the best qualified candidate for your vacancy.

4
Purpose
This Manager User Guide was developed to provide guidance on the use of various components of our automated hiring system (i.e., Question Library, Vacancy Review, Certificate Review).

5
Hiring Management Log-inYour HR Specialist will provide you with the web address,
User ID and Password.

6
Welcome PageFrom this point, the user may choose to select questions to be used in the vacancy,
review a vacancy or review any certificates that he/she has access to.

7
Question SelectionThis section allows you to electronically search and select
questions for submission to HR. From your Welcome Page select the “Question Selection” tab.

8
Clicking on the Organizational Name “U.S. Department of Commerce” will open the question library and selection can
begin.

9
After clicking on the “U.S. Department of Commerce,” this screen appears:

10
You should now be able to see all of the occupational series (now referred to as Categories) which have been entered into
the question library. Within these categories are subcategories.
To see the questions, available, the user will check the category name and hit the “next”button at the bottom of the screen.

11
Click the “Expand All” button to see a listing of subcategories.

12
To see the question responses, click the “?” to the right of the questions”. When finished, select “Next”. Additionally,
the user may choose to “Save” to save the question list.

13
If you choose to save the question list, this screen will appear. You must enter in a list name and click “Save”. This will save the list for use again in the future.

14
You’ll see your List Name and the selected questions. Click “Next”.

15
Your questions are presented with leading numbers. These numbers can be used when “filtering” (more on filtering to come) for specific questions. Click “next” to send your selection to HR.

16
On this screen, you can request that the HR office add a Title, KSAs, and additional questions not found in the library. Check with your HR Specialist to make sure that your request is consistent with internal office policies (i.e., Position Description, Job Analysis, Vacancy Templates). Complete then click “Next”.

17
Now you should see your questions (with filtering numbers), the List Name and date it was saved. Click “Next”.

18
Select your HR Specialist’s name. If you want to retain a copy of the Email Question Selection sent to HR for your records, in the “cc” box, type in your complete e:mailaddress. In the “FROM” box, YOU MUST TYPE IN YOUR COMPLETE E:MAIL ADDRESS for the system to send the listing to HR. Click “send” to forward the questions. This completes your submission to HR.

19
To later access your list, from the screen below, click the “Load List” drop down and select your saved list name. Click on “Next” and you can now resume the question selection process and submit to HR.

20
Additional Functionality within the Question Library
Selecting questions from multiple series –referred to as categories.
Using the Filtering option.

21
Multiple CategoriesIn some instances you may need questions from more than one category, e.g. Budget and HR. From this screen select instead of selecting one category, select multiple categories, then click “Next”.

22
This screen allows you to expand the questions in each category by either a) clicking on the plus sign on the left of the category or b) clicking on “expand all.”
“Expand All” opens up the subcategories and makes all questions in the category available

23
The category/subcategory is listed at the top followed by the questions. Select the questions you would like to use in your vacancy, then click “Next”.

24
You’ll see your questions presented with leading numbers. These numbers can be used when “filtering” for specific questions. Click “Next”– you’ll be back to the e-mail screens.

25
Using the Filter Function This is a new function for managers. It is a powerful search tool and will help avoid repetition in the question library.
To clear any previous filters, leave “Please Select List Name”in the Load List block. Select the categories you wish to search then click “Next”.

26
A screen showing your selections will appear. Now click “filter questions.” You could click “expand, but you don’t have to. The filter will search for you. Click “next.”

27
To begin identifying your filter criteria, click “select field.”
28
Your options are listed. “Question Text” is recommended. You can then search for questions with specific words.

29
Under “Operator”, pick “Contains the text” and put your term in “Filter Value (s).” For this example we used the word “security”. In some cases, you may need different forms of a word such as “Budget” and “Budgetary”. Click “Apply”.

30
You’ll see that only questions with your key word (security) appear. Make your selections, click “Next” and you’ll be back to the question selection/submission process.
You also have the option to save these questions as previously described.
31
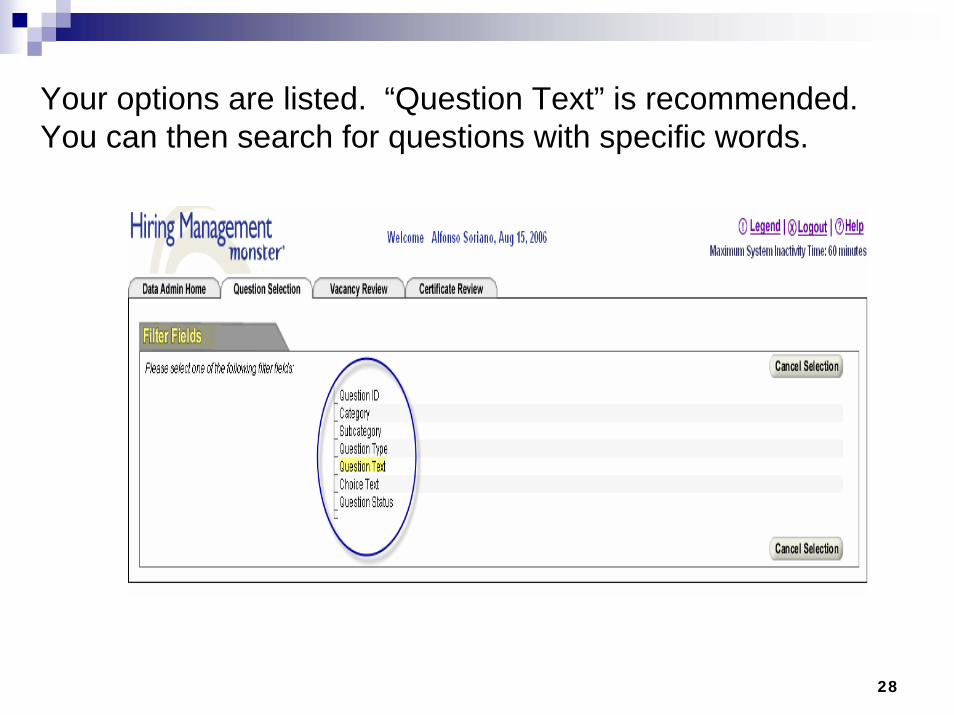
If you’re familiar with your “favorite” questions, this is where you can use the question number to search for specific questions. Select field “Question ID”, then “Equals” then insert the number. Resume the question selection process.

32
Now that you are familiar with the Filter option, you can add Multiple Filter Terms: Refer to the above screen, but now click on “insert row.” You identify “select field”, “operator”, and “filter” values for each additional row.
You’ll have the options of either a) clicking “apply”(you’ll get a list of questions properly filtered) or clicking “save filter” (a copy of your filtered questions will be saved: you can go back and add other filtered values to the list).
33
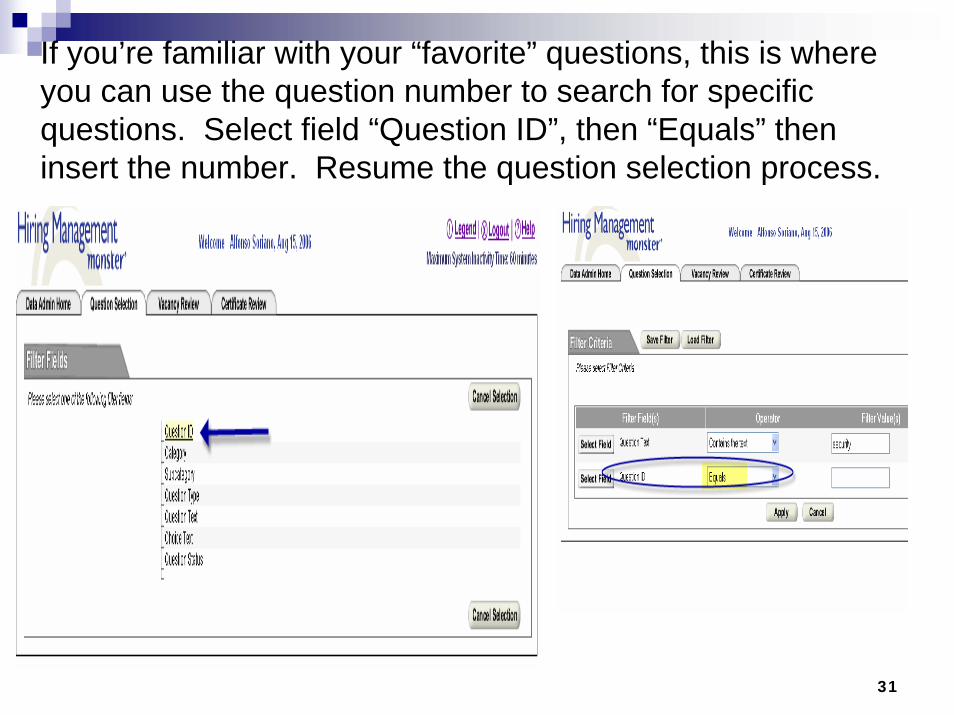
Vacancy ReviewThis section allows you to review the announcement and
authorize your HR Specialist to release the posting to USAJOBS. From the welcome page select the Vacancy
Review tab.

34
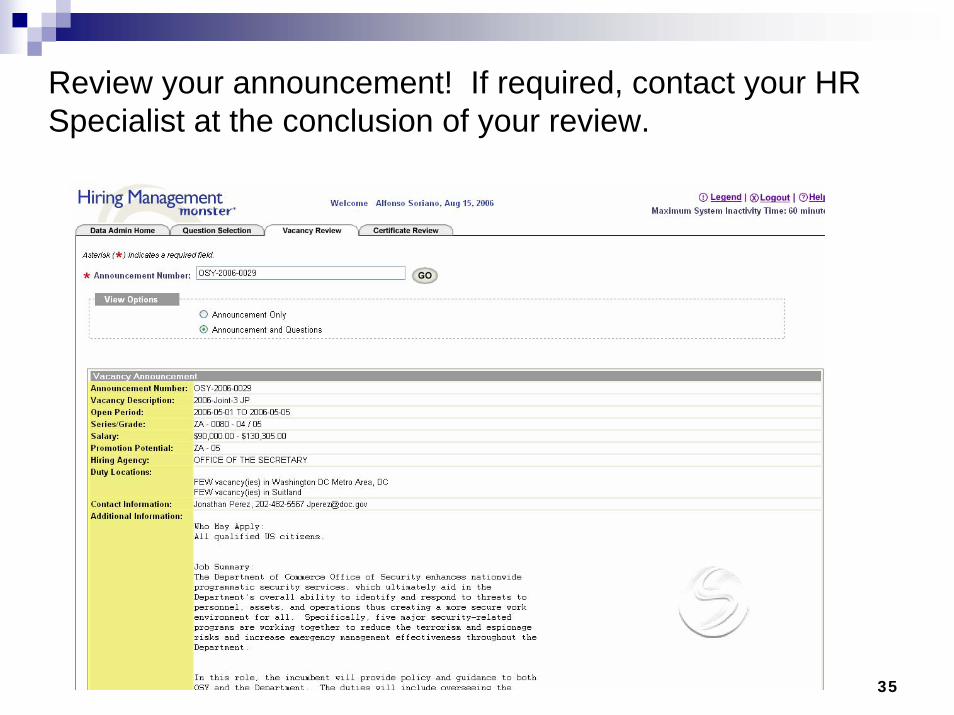
Your HR Specialist will provide you the announcement number. Enter it, select your view options, and click “go”.
35
Review your announcement! If required, contact your HR Specialist at the conclusion of your review.

36
Certificate Review
This section allows you to electronically review and make a selection from your certificate of eligibles.
From the welcome page select the Certificate Review tab.

37
Your HR Specialist will provide you the announcement number and password. Enter them, and click “go”.

38
Your certificates will be listed. Click on the certificate number you would like to view.

39
From here, you can click on the applicant name to see the entire application, or the “view” under a specific column.

40
Depending on what you selected, you’ll see the entire application or the specific area you chose to view. Click “Return to Applicant Listing” when you complete your reviews.

41
Then make your selections: using the drop down to get your codes (Disposition). Use numerical ranking (i.e., first choice is “1”) to identify a second applicant if the first declines.
Click “Save” to keep your work and return to it later, or click “Submit to HR”to send it to HR now.
42
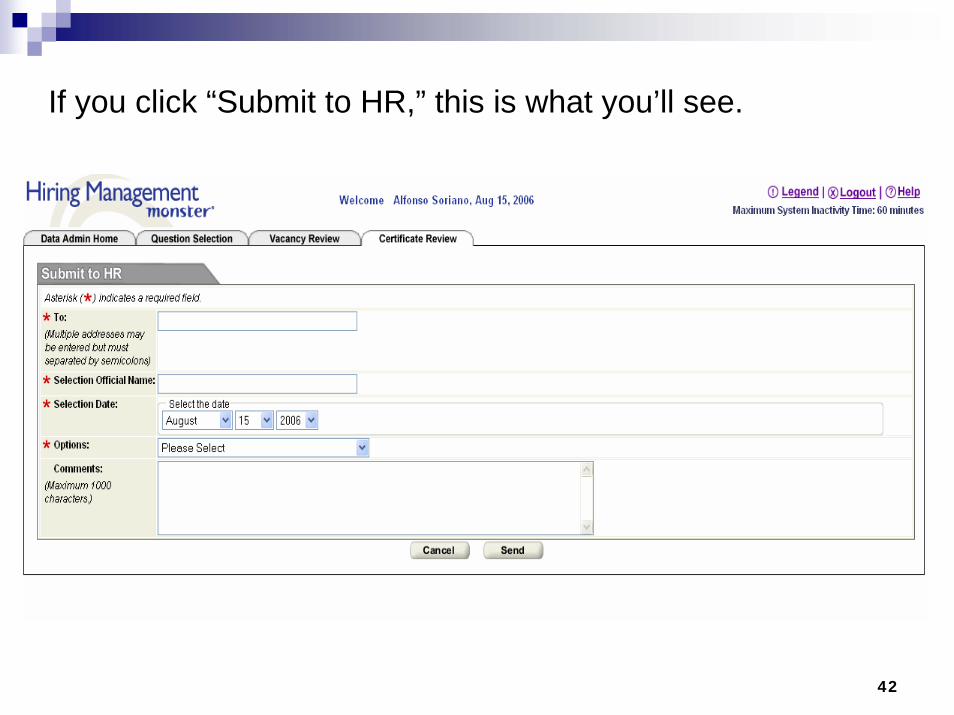
If you click “Submit to HR,” this is what you’ll see.

43
Complete this form – making sure the e-mail address is correct -- click “Send”. To retain a copy for your records, insert your email address. Your HR office may also require you to sign a hard copy of your selection certificate.

44
Once you send it to us, this is what we will see. Your HR Specialist will proceed according to their office policy.

45
Questions? Please contact your servicing HR specialist for more detail on any of the information provided.We thank you for your consideration and look forward to working with you to ensure that this new upgrade of ACES is a resounding success!