Embed Size (px)
Citation preview
1. Introduction
1.1 Minimum Requirements
• Microsoft Windows 2000 / XP / Vista 32bit.
• Pentium-class processor (200MHz CPU or above)
• 32MB RAM or above
• Minimum 10 MB Hard Disk Drive Space • Free USB port
1.2 Package Content
• USB ADSL modem
• Installation Software CD-Rom
• USB Cable
• RJ-11 Cable
1.3 Features
• Compliant with Universal Serial Bus Specification Revision 1.1
• USB bus-powered; an external power supply is not required
• Supports two device drivers: Microsoft NDIS 4.0 WAN Miniport or NDIS 4.0
LAN Miniport.
• Compatible with T1.413 i2, G.DMT, and G.lite compliant CO DSLAM equipment.
• Software upgradeable.
• Includes monitoring programs for configuring the adapter and checking the
status of the connection.
• Provides an RJ-11 connector for connection to the telephone line.
• Supports DSL downsteam data rates up to 9 Mbps (150 times faster than
standard 56K modems)
• Supports DSL upstream data rates up to 1024 kbps.
• Support for PPP over Ethernet (PPPoE)
2. Using the USB ADSL Modem
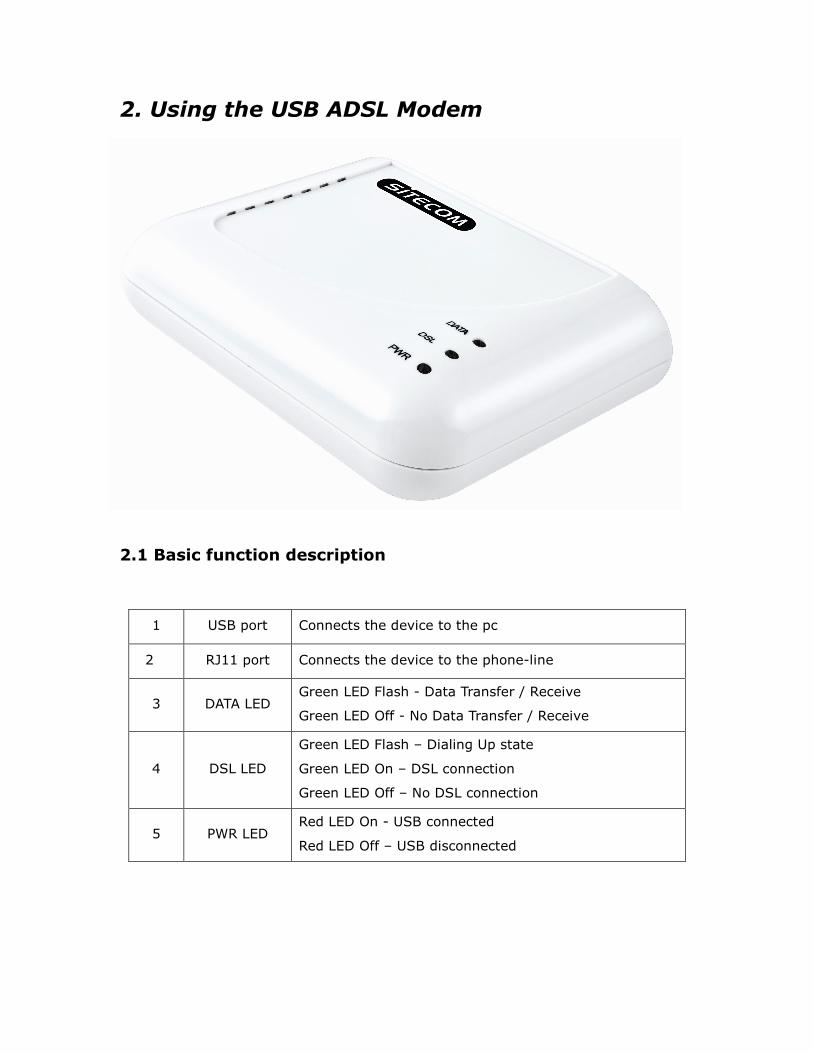
2.1 Basic function description
1 USB port Connects the device to the pc
2 RJ11 port Connects the device to the phone-line
3 DATA LED Green LED Flash - Data Transfer / Receive
Green LED Off - No Data Transfer / Receive
4 DSL LED
Green LED Flash – Dialing Up state
Green LED On – DSL connection
Green LED Off – No DSL connection
5 PWR LED Red LED On - USB connected
Red LED Off – USB disconnected
2.2 Hardware and Software installation
Hardware Installation
Connect the USB-cable to the USB-Modem.
Please connect the ADSL line to the RJ11 jack of the USB ADSL modem and
the other end to the wall-outlet.
Do not connect the USB-Modem to your computer yet, wait until the
software asks you to.
Note::::
Before you start installing this device, you have to check with your ISP what
kind of service (connection method) is used such as; PPPoE, PPPoA, RFC
2684 bridged or routed, IpoA.
This information can be found in the ISP-List Addendum.
If your ISP uses PPPoE or PPPoA, please select “Wan PPPoE” or “Wan
PPPoA” to install the correct driver. If your ISP uses RFC 2684 Bridged or
Routed over IPoA please select “LAN” to install the correct driver.
If your ISP uses PPPoA VC-Mux then during the configuration of the modem
you will have to select: RFC2364 PPPoATM Null Encapsulation.
Software Installation
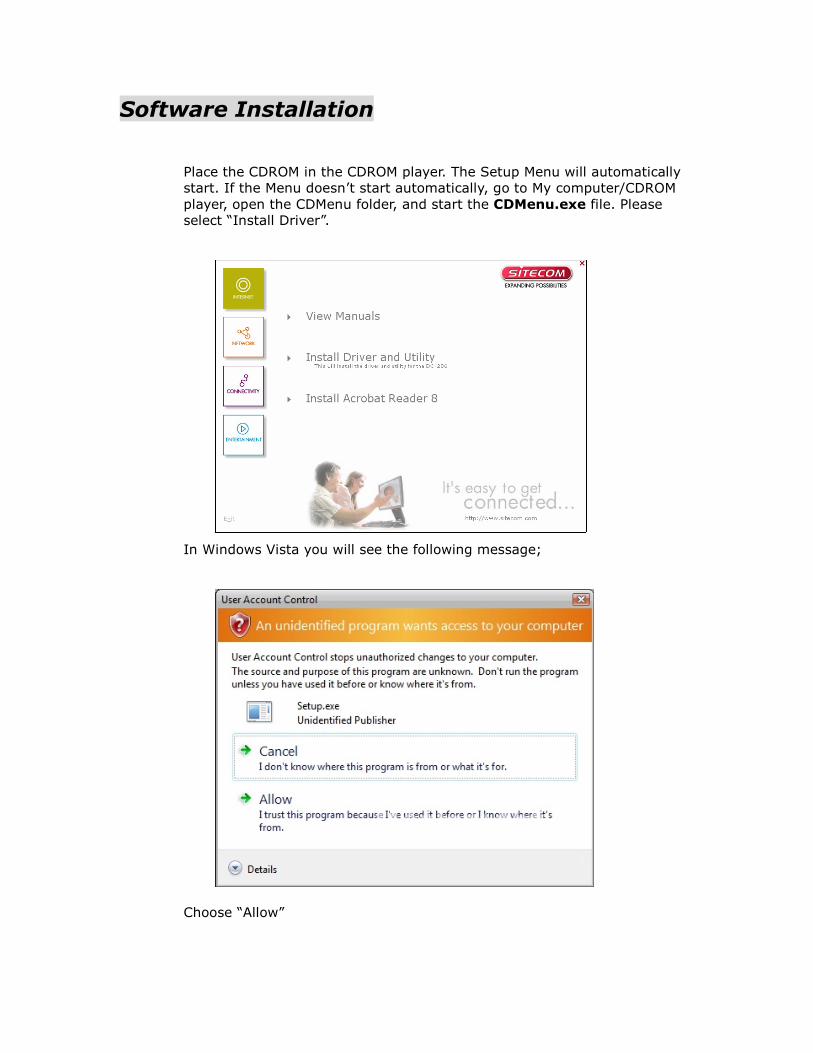
Place the CDROM in the CDROM player. The Setup Menu will automatically
start. If the Menu doesn’t start automatically, go to My computer/CDROM
player, open the CDMenu folder, and start the CDMenu.exe file. Please
select “Install Driver”.
In Windows Vista you will see the following message;
Choose “Allow”
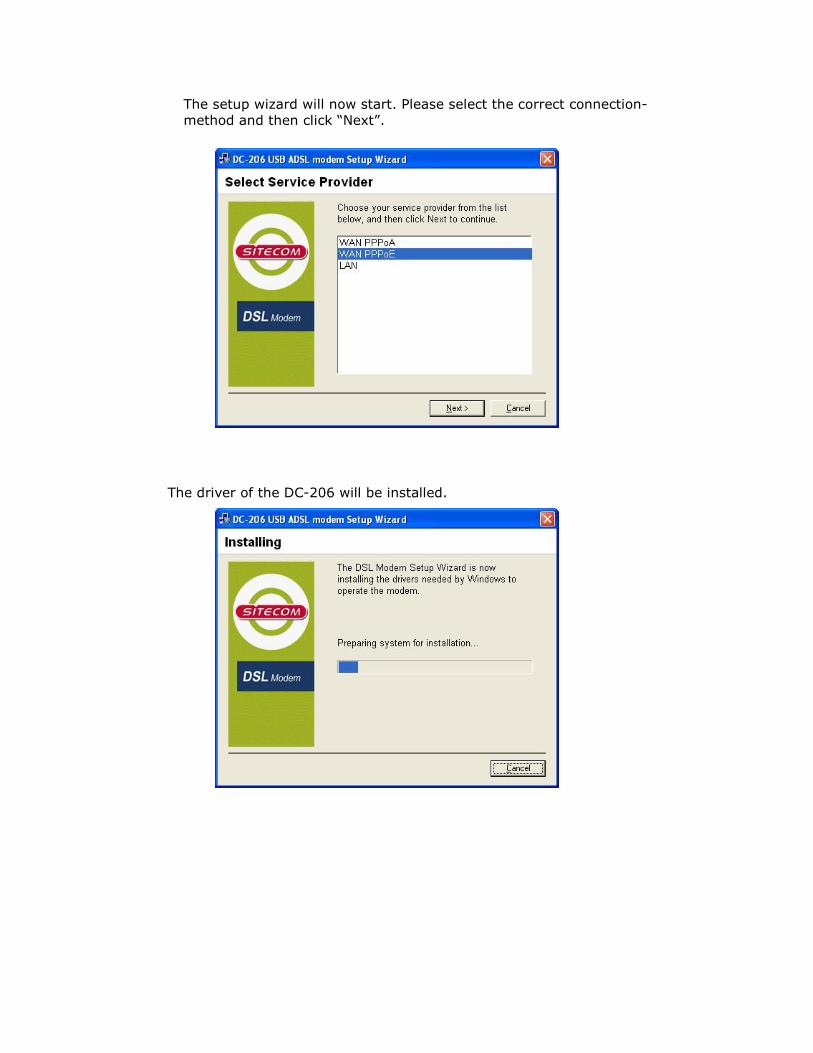
The setup wizard will now start. Please select the correct connection-
method and then click “Next”.
The driver of the DC-206 will be installed.
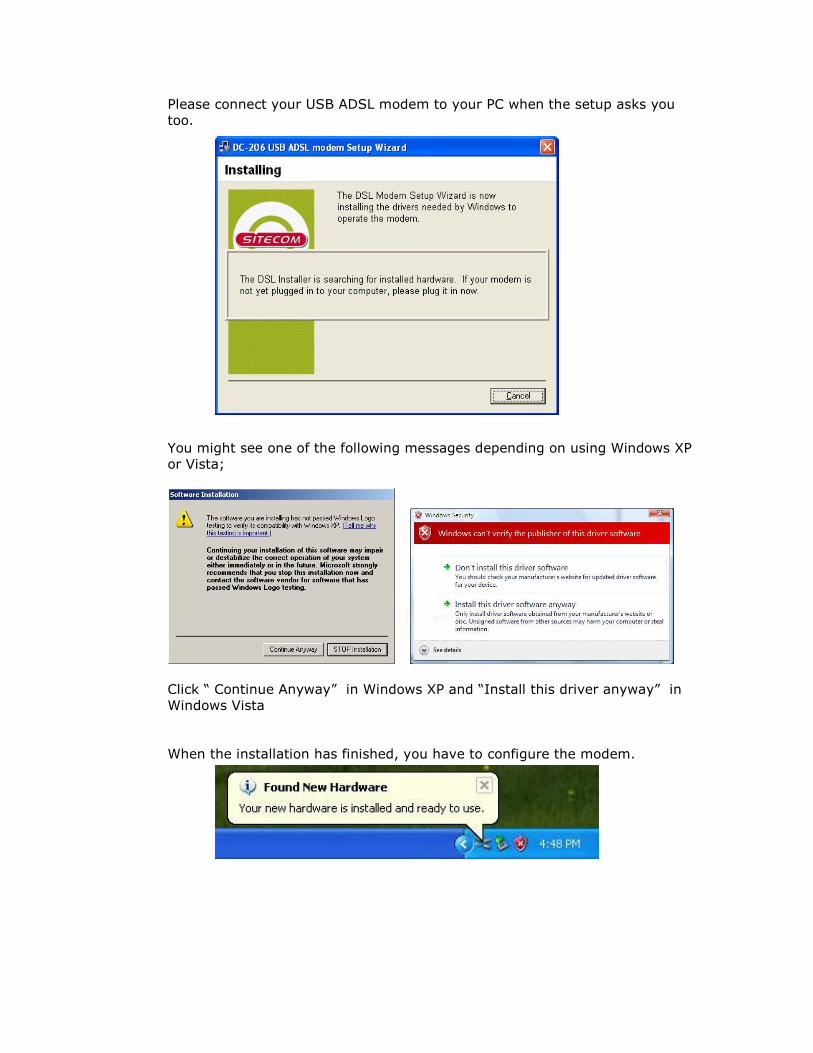
Please connect your USB ADSL modem to your PC when the setup asks you
too.
You might see one of the following messages depending on using Windows XP
or Vista;
Click “ Continue Anyway” in Windows XP and “Install this driver anyway” in
Windows Vista
When the installation has finished, you have to configure the modem.
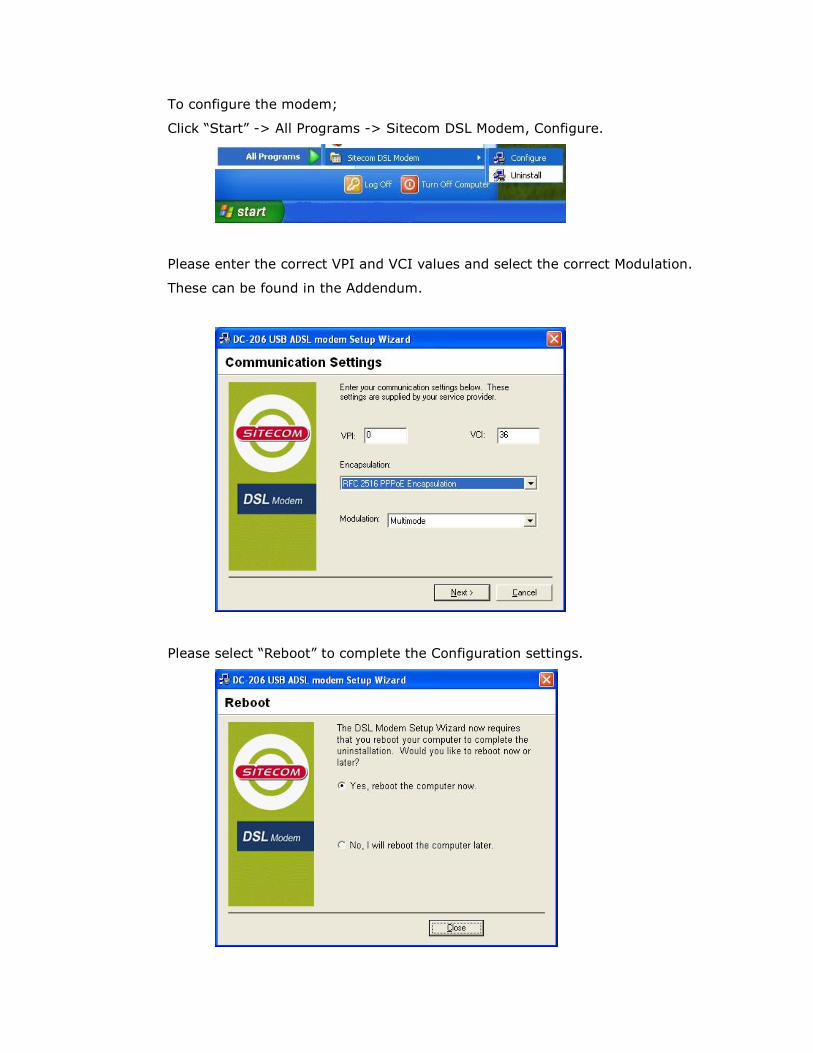
To configure the modem;
Click “Start” -> All Programs -> Sitecom DSL Modem, Configure.
Please enter the correct VPI and VCI values and select the correct Modulation.
These can be found in the Addendum.
Please select “Reboot” to complete the Configuration settings.
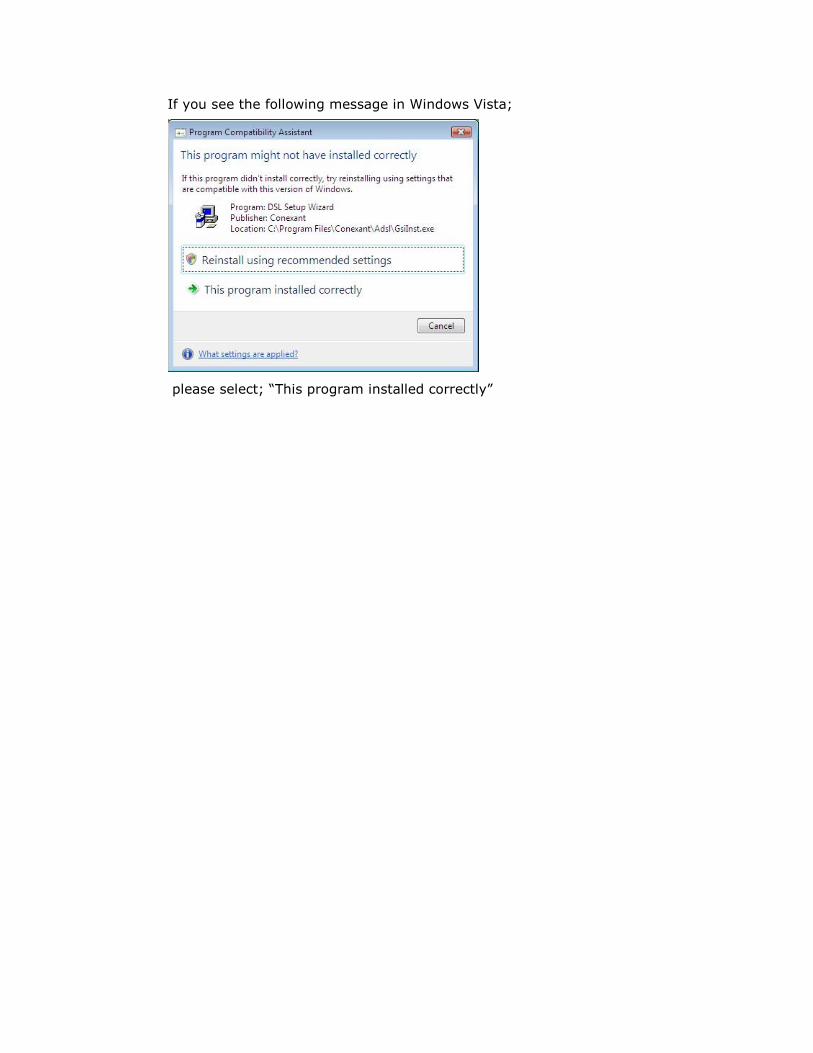
If you see the following message in Windows Vista;
please select; “This program installed correctly”
If you selected WAN PPPoE or PPPoA please follow step 1a
If you selected LAN please follow step 1b
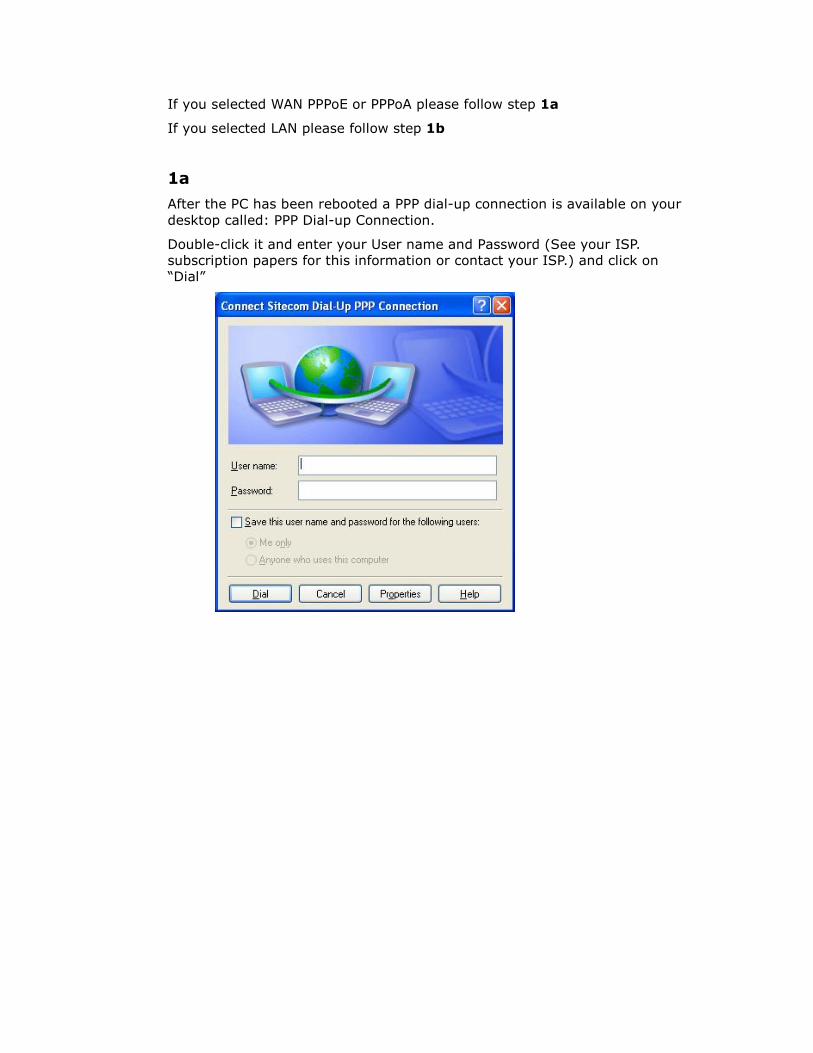
1a
After the PC has been rebooted a PPP dial-up connection is available on your
desktop called: PPP Dial-up Connection.
Double-click it and enter your User name and Password (See your ISP.
subscription papers for this information or contact your ISP.) and click on
“Dial”
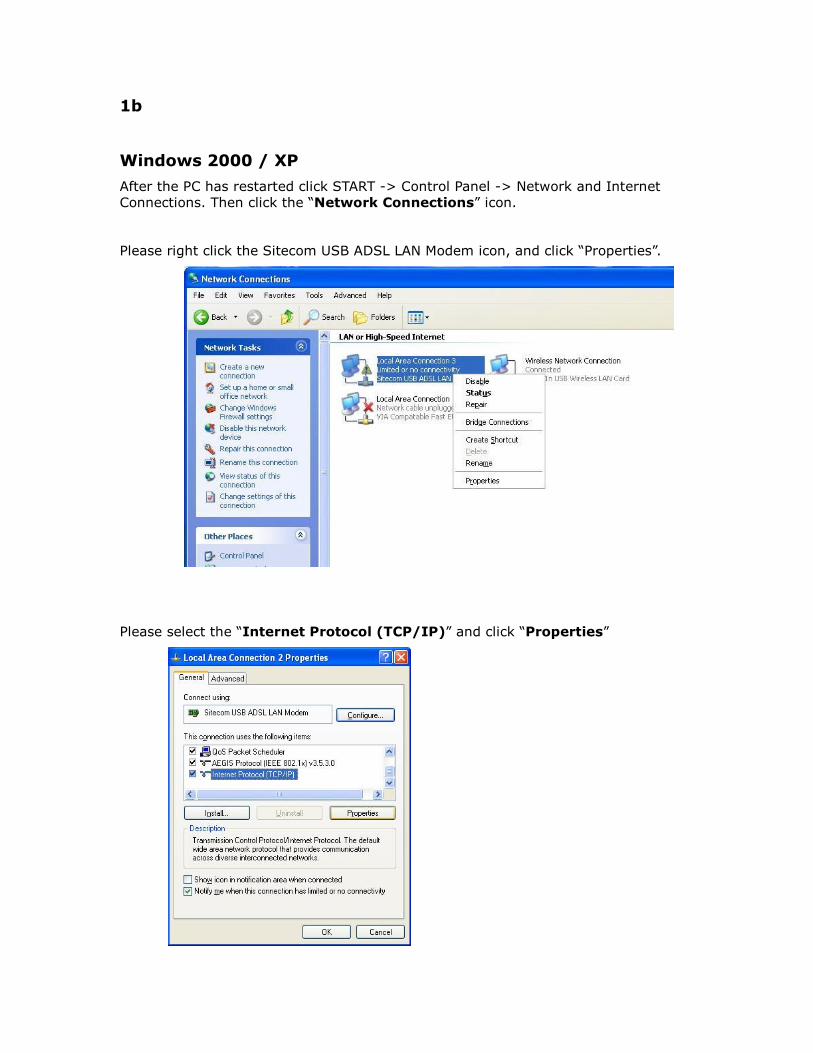
1b
Windows 2000 / XP
After the PC has restarted click START -> Control Panel -> Network and Internet
Connections. Then click the “Network Connections” icon.
Please right click the Sitecom USB ADSL LAN Modem icon, and click “Properties”.
Please select the “Internet Protocol (TCP/IP)” and click “Properties”
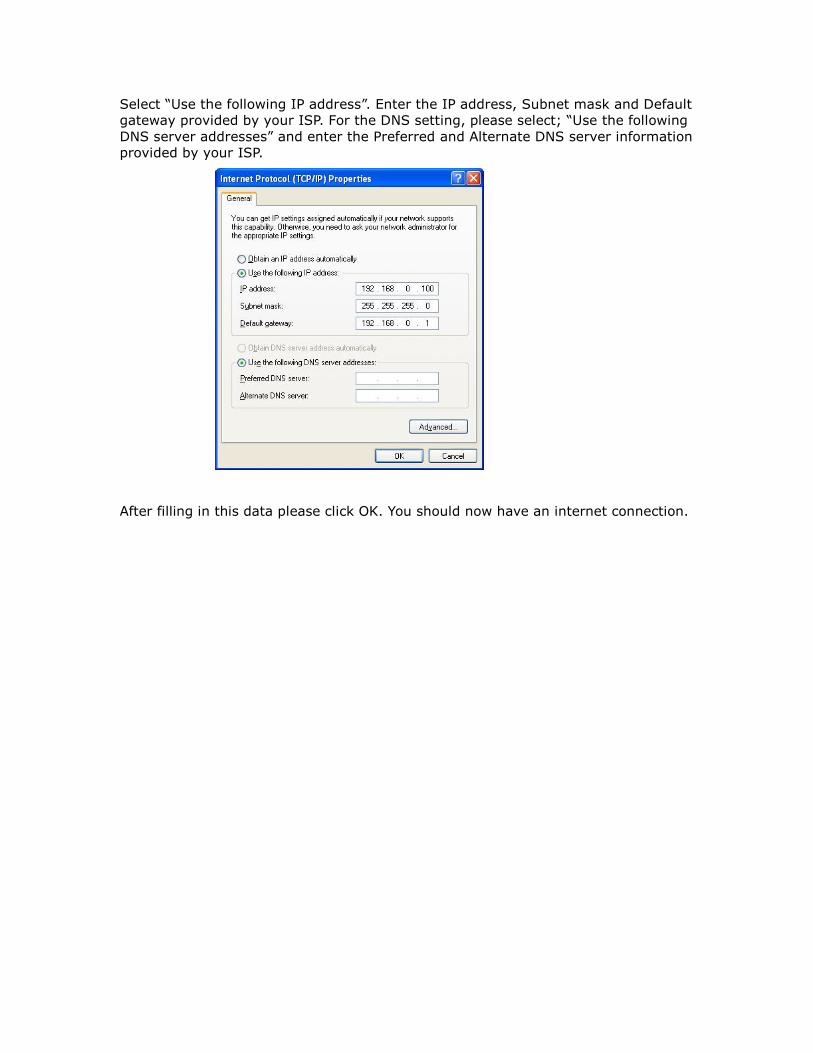
Select “Use the following IP address”. Enter the IP address, Subnet mask and Default
gateway provided by your ISP. For the DNS setting, please select; “Use the following
DNS server addresses” and enter the Preferred and Alternate DNS server information
provided by your ISP.
After filling in this data please click OK. You should now have an internet connection.
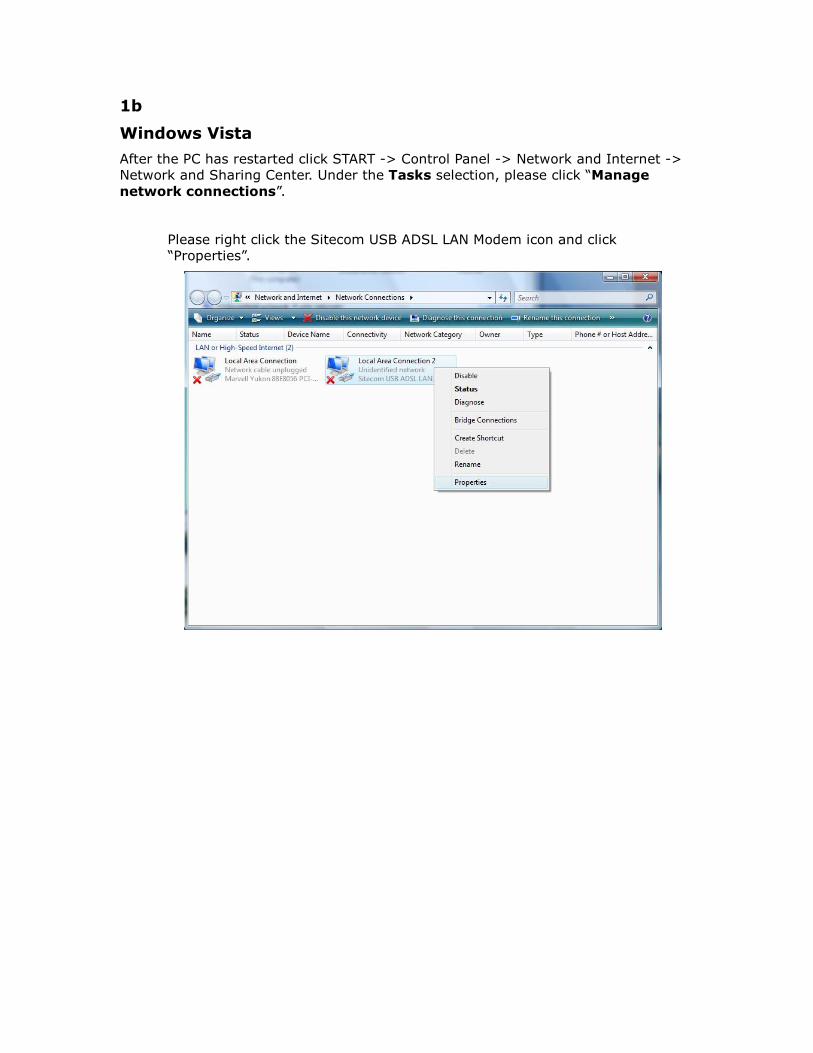
1b
Windows Vista
After the PC has restarted click START -> Control Panel -> Network and Internet ->
Network and Sharing Center. Under the Tasks selection, please click “Manage
network connections”.
Please right click the Sitecom USB ADSL LAN Modem icon and click
“Properties”.
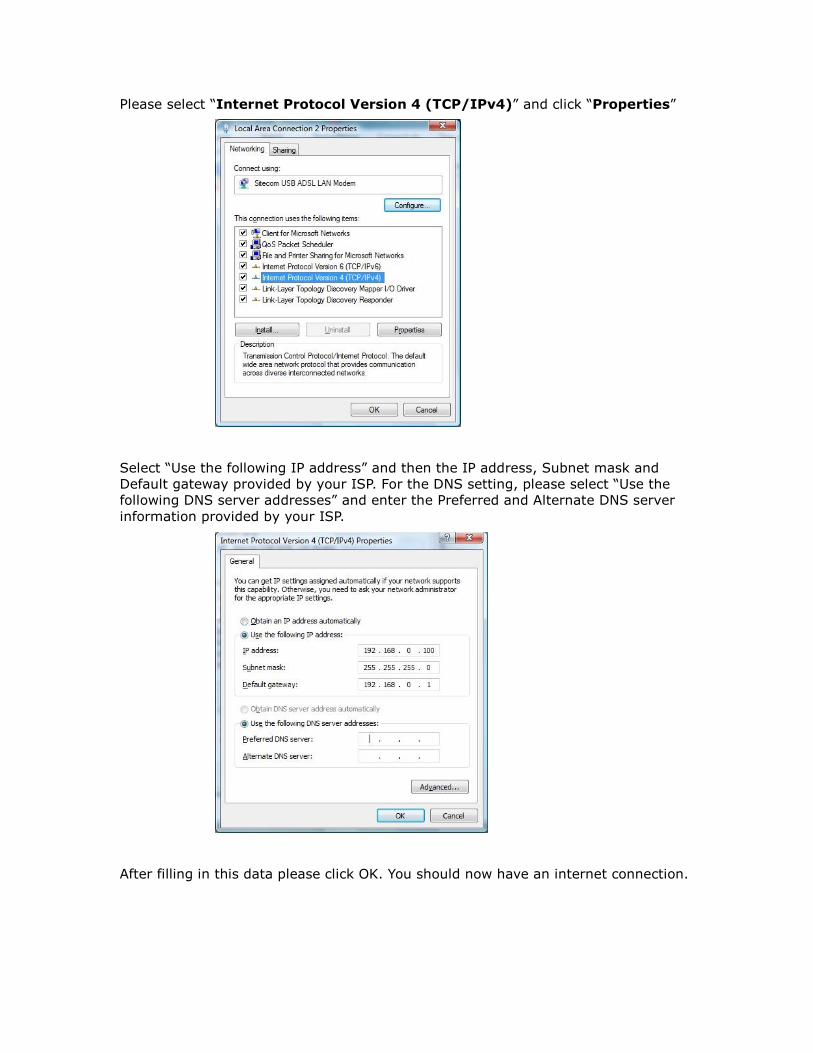
Please select “Internet Protocol Version 4 (TCP/IPv4)” and click “Properties”
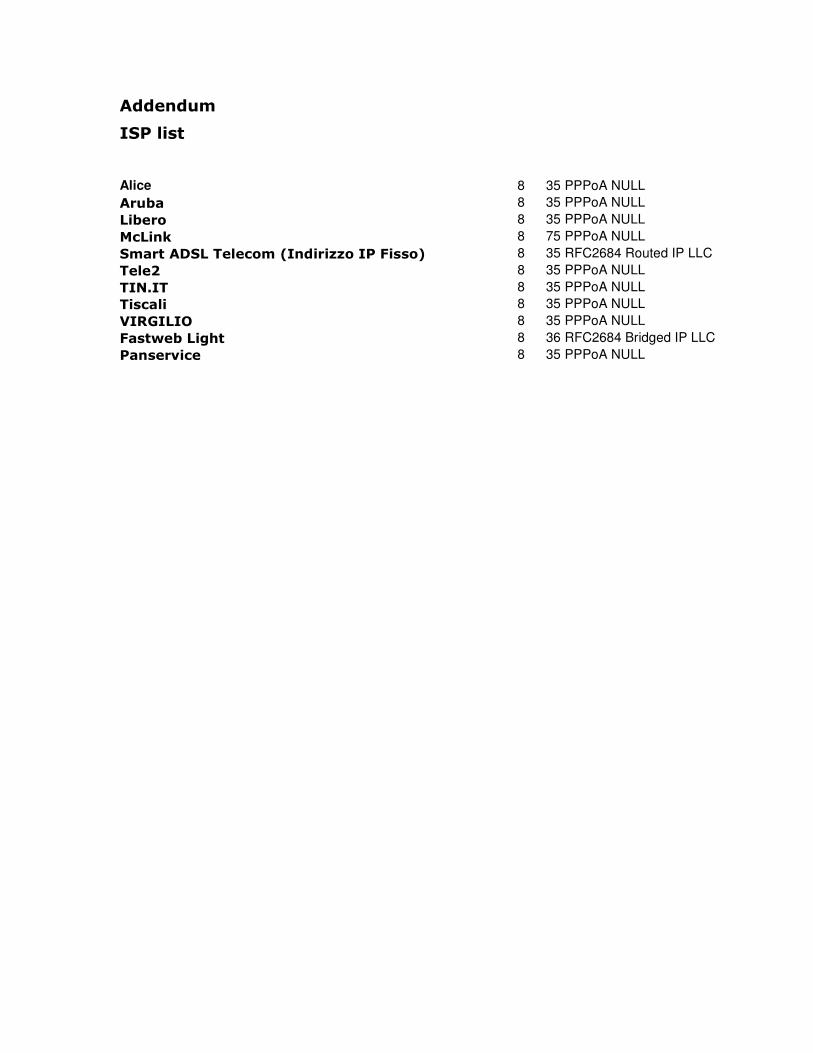
Select “Use the following IP address” and then the IP address, Subnet mask and
Default gateway provided by your ISP. For the DNS setting, please select “Use the
following DNS server addresses” and enter the Preferred and Alternate DNS server
information provided by your ISP.
After filling in this data please click OK. You should now have an internet connection.
Addendum
ISP list
Alice 8 35 PPPoA NULL
Aruba 8 35 PPPoA NULL
Libero 8 35 PPPoA NULL
McLink 8 75 PPPoA NULL
Smart ADSL Telecom (Indirizzo IP Fisso) 8 35 RFC2684 Routed IP LLC
Tele2 8 35 PPPoA NULL
TIN.IT 8 35 PPPoA NULL
Tiscali 8 35 PPPoA NULL
VIRGILIO 8 35 PPPoA NULL
Fastweb Light 8 36 RFC2684 Bridged IP LLC
Panservice 8 35 PPPoA NULL


![SAGEM [email protected]â„¢ 908 / 948 Ethernet/USB Combo ADSL Modem](https://img.pdfslide.net/doc/110x75/62074fa849d709492c3028ca/sagem-emailprotected-908-948-ethernetusb-combo-adsl.jpg)
