Embed Size (px)
Citation preview

Page 1 of 21
A Supposedly “User-Friendly” User’s Guide to Many Things
Tech within OPSB: A Brief Description of Applications, How to Access Them and Some Other Stuff Too
Version 1.8
Table of Contents
To navigate this document, hold “Ctrl” and left click on the hyperlinks in the Table of Contents. That will take you to the
corresponding page. To return to the Table of Contents, hold “Ctrl” and left click on the Title of the page you are on.
Active Instructional Applications:
1) Achieve3000
2) Blackboard Connect
3) Blackboard Learn
4) Compass Odyssey
5) Coursewhere
6) Discovery Education
7) Global Scholar/Scantron
8) Learning.com
Online Safety
Keyboarding
Create a Class
Online Safety Roster Update
9) NBC Learn
Embed Videos
10) OnCourse
Lesson Planner
Student Stats
11) TeachingBooks.net
Some Other How To Guides:
1) How to find you “Computer Name” 2) How to log on to your computer/device
3) How to Put in a HelpDesk Ticket
4) How to Connect to Share Drive
5) How to Find a MAC Address
Footnote: It is our plan to implement a new password schema. You will be notified when this occurs.
Network and Office 365 will share the same user ID and the user can decide whether or not to use the
same password for each. All Instructional Applications are going to be arranged to use the Power School
user ID and again the password decision will be on the user.

Page 2 of 21
Achieve3000
Achieve3000 is a web-based differentiated K-12 reading program that utilizes technology, and current events
through non-fiction articles to strengthen students’ literacy skills. Based on scientific research on how children
learn to read effectively, Achieve3000 is a wonderful tool for teachers to use to construct and supplement their
lesson plans. It is not a solution all on its own. By tailoring lessons to match each student’s own reading level,
all students can read the same article and participate in class discussions together. Achieve3000 articles are
correlated to Common Core State Standards & are appropriate for grade-level instruction.
How to access Achieve3000
1. Go to, http://www.achieve3000.com/ 2. Click “User Login” 3. You should now see a screen similar to what is below
4. Enter your username. The format is usually firstname.lastname (ex. john.smith )
5. Enter your password. Achieve3000 assigns your first password. It is usually a color or a fruit. (ex-
banana or green)
6. If you cannot remember your username or password, please submit a HelpDesk ticket.
7. Achieve3000 provides teacher support every year to assist teachers who are new to the program or are
just hoping to get deeper into its capacity. Check with your staff professional development support to
learn more about how to access this help.
8. Even better, the site includes just in time training via video vignettes. Login, poke around, grow and fall
in love with this powerful application.
Page 3 of 21
Blackboard Connect
Blackboard Connect is a system for mass communication. It provides administrators and teachers the power to
send information to specific, large groups of people. It allows the messages to be sent to the devices that each
individual prefers, up to five devices per person. The information used in Blackboard Connect comes from
Power School, so it is important for the parents and staffers desiring to be notified via this application have their
correct information in Power School. Individuals may receive messages via email, text message, and/or
voicemail in any combination preferred.
Within the district it can be used for large scale messaging. It can be utilized in case of emergencies. For each
school, it can be used as a Parent Involvement System. A Principal or Teacher can send messages to specific
groups. The whole school can be sent a message, or a specific grade, class or sports team/club can be targeted
instead.
Each site administrator makes the choice as to whether or not the entire staff will have access to the application.
To get a set of credentials to login, a user must complete the application training which is offered weekly on
Wednesday afternoons via a webinar.
https://www.blackboardconnect.com/signin/default.aspx

Page 4 of 21
Blackboard Learn
Blackboard Learn is an LMS(Learning Management System). It allows teachers to create classes and supply
information to their classes via Blackboard. One can create blogs, discussions, or post documents on
Blackboard. The power of the tool is vast. It can also be used by Administrators to create online Professional
Development “classes” which can use the power of virtual presence to construct ongoing conversations around
any topic and/or content.
How to access Blackboard Learn
1. Go to, https://Nops.blackboard.com
2. You should see the screen below
3. Enter your username. The format is usually first initial and last name (ex- jsmith )
4. Enter your password. The format starts as the same as your username (ex- jsmith )
5. If you cannot remember your username or password, please submit a HelpDesk ticket.
6. AND… the site includes just in time training via video vignettes. Login, poke around, grow and fall in
love with this powerful application.
Page 5 of 21
Compass Odyssey
Compass Learning Odyssey includes lessons and activities that are based on current and confirmed research
about the way today’s students think and learn. It provides differentiated and personalized instruction, while
formative assessments and reporting tools enable data-driven decision making. Each student is tested and set on
a learning path based on their performance. The system changes the path based on the student’s immediate
performance. The questions will increase in difficulty if they are getting them all correct and vice versa.
Compass Odyssey is also linked with the Global Scholar/Scantron data. Therefore the way students perform on
their Scantron tests will affect their learning paths within Compass Odyssey.
How to access Compass Learning Odyssey
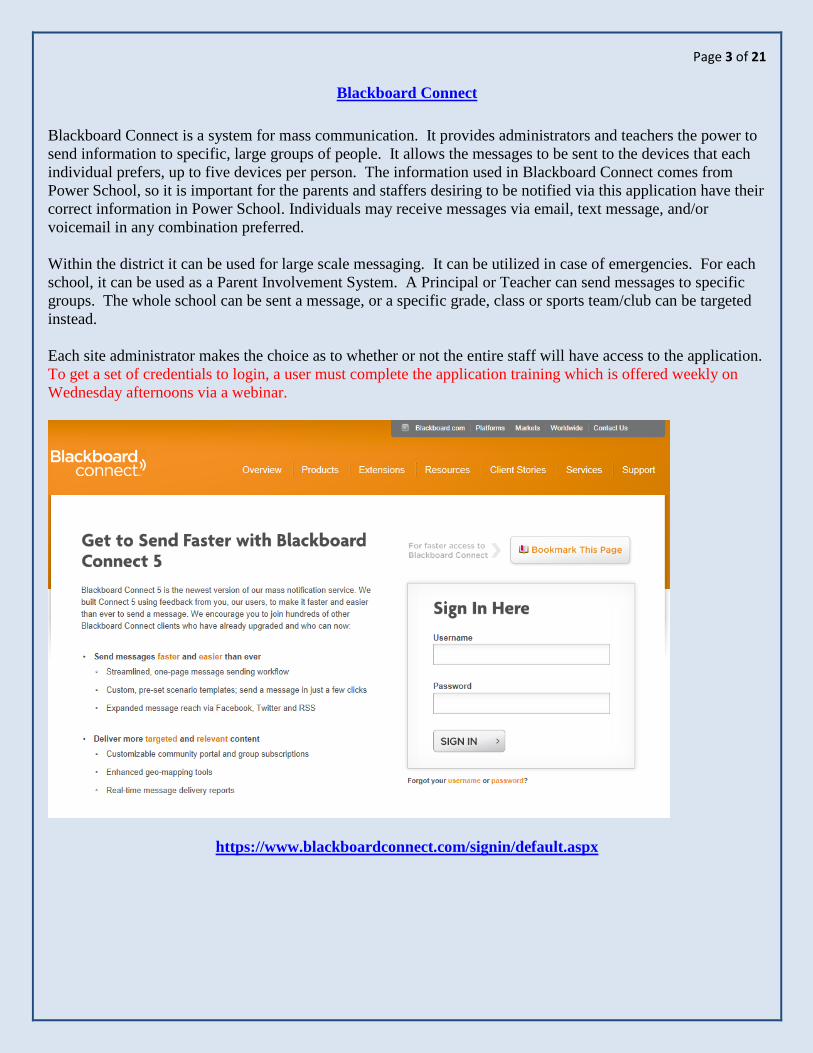
1. Go to, https://www.thelearningodyssey.com/
2. The screen should look like the one below
3. Enter your username. The format is usually the first two letters of the first name and the last name (ex-
josmith ) Sometimes it is the first initial and last name (ex- jsmith ) and sometimes it is the first three
letters of the first name and last name (ex- johsmith )
4. Enter your password. The original password was probably password10
5. For “School” be sure to select “Odyssey” from the drop down menu
6. If you cannot remember your username or password, please submit a HelpDesk ticket.

Page 6 of 21
Coursewhere
Coursewhere is the system used to schedule and sign up for Professional Development Courses.
How to access Coursewhere
1. Go to, https://www.solutionwhere.com/opsb/cw/main.asp
2. You should see the screen below
3. Enter your username. The format is usually first initial and last name (ex- jsmith )
4. Enter your password. The original password was probably password
5. If you cannot remember your username or password, click on the “Email My ID” button
6. Then enter your email address. You will be emailed your username and password within a couple of
minutes
7. If the above solution does not work, please submit a HelpDesk ticket.
For new users and employees:
If a user is a new employee or does not have a Coursewhere login, they must submit a Helpdesk ticket to
get it created.

Page 7 of 21
Discovery Education
Discovery Education is organized and run by Louisiana Public Broadcasting. It provides a platform for teachers
seeking video resources as well as lesson plans utilizing the resources are provided. Teachers may search for
Common Core Standards by subject and grade and videos will come up that are relevant to that standard. It also
allows teachers to create classes within the platform.
How to access Discovery Education
1. Go to, http://lpb.org/education
2. You should see the screen below
3. Enter your username. The format is probably first initial, last name and OPSB (ex- JSmithOPSB )
4. Enter you password. It was originally the same as your username (ex- jsmithopsb)
5. Enter your password. If you cannot remember your password please submit a HelpDesk ticket.

Page 8 of 21
Global Scholar/Scantron
Global Scholar was formerly known as Scantron. It is an assessment and data collection platform. It has two aspects;
Performance Series and Achievement Series. As they are both internet-based, all of the tests can be administered online
and that will provide immediate results/data. Its true power lies within the data that it provides. Teachers can use the data
to differentiate and focus instruction. It can also be used as a feedback system for teachers because they can see areas
where their classes are doing well and where they are struggling.
How to access Global Scholar
1. For the Performance Series go to, http://www.edperformance.com/
For the Achievement Series go to, http://www.achievementseries.com/
3. Click “Staff Login”
4. Enter your Site ID- the format is 12-3456-7890 and it is specific to each school site
1. Ben Franklin Elem- 51-9131-7032
2. Bethune- 97-5535-5575
3. Mahalia Jackson- 35-9810-8737
4. McD35- 80-2035-5158
5. McMain- 95-4214-7224
5. Enter your username. The format is probably first initial and last name (ex- jsmith )
6. Enter your password. The original password was probably password10
7. If you cannot remember your username or password, please submit a HelpDesk ticket.
8. Even better, the site includes just in time training via video vignettes. Login, poke around, grow and fall in love with
this powerful application.

Page 9 of 21
Learning.com
Learning.com is an LMS(Learning Management System). The system is designed to create classes and
administer courses. It has built in curriculum, lesson plans and grade books. It contains the Online Safety
Courses for all staff and students that are required by the e-rate grant. If we do not complete those we risk
losing funding. Starting the Fall of 2013, it will also contain a Keyboarding program. The keyboarding program
is for all grade levels and it is self-paced.
How to access Learning.com
1. Go to www.learning.com
2. Enter your username. Your username is your first initial and last name (ex- jsmith)
3. Enter your password. Your initial password was your first initial and last name (ex- jsmith) if it doesn’t
work with a lower case, try the first two letters capitalized (ex JSmith)
4. IMPORTANT: Enter the District. For district put the letters OPSB
5. If you cannot remember your username or password, please submit a HelpDesk ticket.
6. Even better, the site includes just in time training via video vignettes. Login, poke around, grow and fall
in love with this powerful application.
How to Create a Class in Learning.com
1. Log in, following the above directions.
2. Click the “My Classes” tab on the left side of the screen
3. Click the button on the left side of the screen.
4. You should now see this,
5. Enter a class name

Page 10 of 21
6. Click “Add”
7. You should now see
8. Select the Grade of the class that is taking the course
9. Be sure that “Student Tracking” is a YES
10. Select “Forced” if you want the assignments to be completed in order
11. If you select “Forced,” pick a minimum score that has to be reached before the student can move on to
the next assignment.
12. Click “Save Changes”
13. You should now see
14. To add your students, click “Enroll Students”
15. Select a Grade Range to search. Once you check a box, all the students from your school in that grade
will appear.
16. Check the boxes next to all of your students that are in that class. Be aware that there may be more than
one page of students in that grade level.
17. Then click “Enroll Selected” and it will enroll all of them at one time.
18. Click “Assign Curriculum”
19. For the Online Safety class click on the “Easy Tech Online Safety” button. For the Keyboarding class,
click the “Easy Tech Keyboarding” button

Page 11 of 21
20. Find the relevant grade level
21. Click “View” on the corresponding grade level
22. Click “Assign Unit”
23. Repeat for any other classes
24. All done
How to Put this Year’s Students into your Online Safety Course
Follow these steps in order to enroll this year’s students into your Online Safety Course.
1. Login to your Learning.com account
2. Click “My Classes”
3. Click the class with your name and Online Safety in the title ex- “Smith OnLine Safety”
4. On the left click the students tab a list of students should appear on the
left.
5. Click “Edit”
6. “X”s will appear next to each student’s name. Click on the “X” for each student to delete them from the
class.
7. Click “Done” once you have removed all appropriate students.

Page 12 of 21
8. Click “Enroll Students”
9. Put a check in the box next to the grade level you are teaching. A list of all of the students at your
school in that grade will appear.
10. Put a check mark in the box to the left of all of your students. Check them all at the same time to save
you time.
11. Click “Enroll Selected”
12. You should be all done.

Page 13 of 21
NBC Learn
NBC Learn K-12 is an online resource with thousands of videos from NBC News that our teachers, students
and parents can use in classwork, homework, presentations and instruction. You can search videos by subject,
keyword, standard, and grade level. Thanks to a donation by the W.K. Kellogg Foundation and NBC Learn,
Orleans Parish School Board will have free access to this rich resource through August, 2015! In addition to
historic primary-source newscasts from the NBC News archive, NBC Learn K-12 is updated daily with the
latest current events video from NBC News and original education video from NBC Learn. The high-quality
resources in NBC Learn K-12 are aligned to curriculum as well as correlated to Louisiana State Standards and
Common Core standards for ELA/Literacy and Math.
How to access NBC Learn
1. Go to, http://archives.nbclearn.com
2. Click “Sign In” in the upper right corner
3. Enter your username. Your username is your OPSB email address (i.e. [email protected])
4. Enter your password. Your initial password was nbclearn. On your initial log in you will be prompted
to change your password.
5. If you cannot remember your username or password, please submit a HelpDesk ticket.
For your students- Their username is their school email address that is listed on Powerschool (i.e.
[email protected]). The initial password will be, nbclearn, you will be prompted to change
the password as soon as you log in

Page 14 of 21
How to “Embed” NBC Learn Videos
Use the following steps to embed streaming videos from NBC Learn into PowerPoint presentations. When you
present the PowerPoint, playing streaming videos will require an Internet connection. Playing downloaded
videos will not.
1. Open NBC Learn from your web browser, login, and open the Cue Card that you would like to embed.
Click the SHARE tab on the bottom of the Cue Card. The share drawer will open up.
2. In section #2 of the share drawer, you can either click the COPY URL button to automatically copy the
link to your clipboard, or you can manually highlight the URL in the gray box with your mouse, right-
click and select Copy. The URL will be copied to your computer’s clipboard.
3. Go to a Microsoft PowerPoint slide. From the menu bar, select Insert, then Hyperlink.
4. Place cursor in the address bar. Hit CTRL+V (paste). Click OK.
5. Place cursor in Text to Display. Enter video title or reference to video. i.e. Video: After a Soldier’s
Death: Story of a Gold Star Family
6. Hit OK. You should see the text you entered with an underlined link.
7. Start the PowerPoint Slideshow. Click underlined link on the desired slide. The browser will open and
navigate to NBC Learn, where the Cue Card video will load.
Note: You may need to close the Cue Card and login first before the full length video will play.
Use the following steps to embed downloaded videos from the NBC Learn Offline Player into PowerPoint
presentations. Important: Embedding downloaded videos requires that you previously installed the NBC Learn
Offline Player and downloaded the specific video to your offline Library.
1. Open the NBC Learn Offline Player application from your desktop icon. From the NBC Learn Offline
Player, hover the mouse over the NBC peacock in the top left corner. The menu will slide out to the left.
2. Select the Library tab (first yellow button) from the menu. Your NBC Learn Library will open in the
player. Select a video and it will start playing.
3. Go back to the menu on the left and select Embed.
4. When the Embed Drawer slides open, click Copy Embed Code. You can now close the player.
5. Go to a Microsoft PowerPoint slide. From the menu bar, select Insert, then Hyperlink.
6. Place cursor in the address bar. Hit CTRL+V (paste) on your keyboard or right click on your mouse and
select paste.
7. Place cursor in Text to Display. Enter video title or reference to video. i.e. Video: After a Soldier’s
Death: Story of a Gold Star Family
8. Hit OK. You should see the text you entered with an underlined link.
9. Start the PowerPoint Slideshow as normal. When you get to the slide with the link you can click on it.
The video should load in the NBC Learn Offline Player on top of the slideshow.

Page 15 of 21
OnCourse
OnCourse is an online tool that is designed to make teachers and administrators lives easier. OPSB takes
advantage of two of its capabilities.
The Lesson Planner and as of Fall 2013 , Student Stats. The Lesson Planner allows for teachers to
create, edit and duplicate (for following school years) lesson plans. It also allows them to SHARE their
lesson plans with other teachers so that they can work on them collaboratively. Administrators can also
view the Lesson Plans of the teachers at their site. Documents, web links and other resources can be
inserted into the lesson plans. Common Core standards are loaded into the OnCourse system and they
can also be stamped to specific lessons.
Student Stats is a system into which all of the data from tests (LEAP, iLEAP, EOC, GEE, ITBS, LAA1,
LAA2, ELDA, etc) has already been uploaded and will continue to be kept current as new assessment
data becomes available. It is on a tab in the OnCourse application right next to the Lesson Planner and
is a user friendly tool for teachers and administrators. Both the Lesson Planner and Student Stats are
located within the same login account.
How to access OnCourse
Go to, https://www.oncoursesystems.com/
2. At the top of the page, enter your username. Your username is your email address (ex-
3. Enter your password. The password format is probably a word and a number (ex- orleans12 )
4. If you cannot remember your username or password, please submit a HelpDesk ticket.

Page 16 of 21
TeachingBooks.net
TeachingBooks.net is an easy-to-use website that adds a multimedia dimension to the reading experiences of
children's and young adult books. Their online database is developed and maintained to include thousands of
resources about fiction and nonfiction books used in the K–12 environment, with every resource selected to
encourage the integration of multimedia author and book materials into reading and library activities. You can
search for books by title, subject, or keyword. You can also search for books that are relevant to a certain grade
level and subject. Once you find a book that you want your students to read or they have already read you can
access supplementary materials for that book. Materials such as Author interviews, websites of the authors and
publishers, blogs and sometimes full-length book readings are available to aid classroom teachers.
How to access TeachingBooks.net
1. Go to, http://www.teachingbooks.net/home/
2. For username. Leave the field blank. Do not type anything.
3. Enter the password nops
4. This site is replete with recorded webinars for teachers who would like to see how the resources are used
by other teachers across the world to amp up the literature experiences of their students.

Page 17 of 21
How to Find the “Computer Name”
1.) Click on your start menu
2.) Right click on “Computer”
3.) Select “Properties”
4.) Scroll down until you see “Computer Name”- See below

Page 18 of 21
How to Log On to Your Computer/Device
1) Power on the machine
2) Enter your username (ex- johnsmith)
3) Enter your password, remember that this is case sensitive (check your CAPS lock key) (ex-sports123)
a. Please keep track of your usernames and password
b. Go to, http://OPSB-passwordreset:8080/ in order to create a way to reset your password on
your own.
How to Access the Internet Outside of the OPSB Network
Quick Version
1) In the bottom right of your screen, left click on the ascending bars
2) Highlight the network you would like to connect to
3) Press “Connect”
4) If necessary, enter the password needed to access the network
The Not-So Quick Version
1) Go to the Start Menu in the bottom left of the screen.
2) Select the “Control Panel”
3) Select “Network and Internet”
4) Under “Network and Sharing Center” select, “Connect to a Network”
5) Highlight the network you would like to connect to
6) Press “Connect”
7) If necessary, enter the password needed to access the network

Page 19 of 21
How to Put in a HelpDesk Ticket
NOTE: Students cannot submit help desk tickets. It must be done by a staff member.
1) Open up your web browser (i.e. Internet Explorer, Google Chrome, Firefox)
2) Go to, http://www.thinkhelpdesk.com/opsb
3) Enter the username you use to log on to your school computer (ex- jsmith)
4) Enter the password you use to log on to your school computer (ex- sports123)
5) Fill out your name, email, phone, and room number
6) Select the appropriate site from the drop down menu (ex- Bethune, McD35, etc.)
7) Select the most appropriate area of concern from the Department drop down menu. (The broad area of
the issue)
8) Select the most appropriate area of concern from the Category drop down menu. (The more specific area
of the issue)
9) For “Issue” type in a concise title for the problem you are encountering
10) For “Detail” type in details of the issue. The more details you provide the easier it will be for the
problem to be solved in a more timely fashion. Explain the problem you are having. Explain what you
did to get to where you are. Explain what you have tried to solve the problem.
11) For “Priority” select the appropriate level. Low, Normal or High.
12) Click “Submit Request” to complete the HelpDesk ticket.
How to Connect to the Share Drive
1. Click on the start menu
2. Right click on Computer
3. Select “Map network drive…”
4. Where it asks for Folder. Type \\admn-s-nas02\departments
5. Be sure that the box next to “Reconnect at logon” is checked
6. Then click Finish

Page 20 of 21
How to Find the MAC Address of a computer
1. Click on the “Start Menu” in the bottom left of your screen
2. In the “Search” text box type, “Command Prompt
3. Then hit “Enter” The following window should open
4. Click in the window and then type, “ipconfig/all” and then hit enter
5. You will now see something similar to this

Page 21 of 21
6. Scroll down until you see the heading, “Wireless LAN adapter Wireless Network Connection.” Be sure
you are looking at this specific heading.
7. Under “Wireless LAN adapter Wireless Network Connection” find the line that says “Physical Address”
8. The numbers and letters to the right are your MAC address.