Embed Size (px)
Citation preview

ENGLISH / ESPAÑOL
USER GUIDE
ICON HD™

ICON HD ANATOMY
POWER UP
FIND YOUR FIT
GET CONNECTED
START TALKING & MORE
GET APPS & UPDATES
SPECS & CHEAT SHEET
CONTENTS
123
PAGE 4
6
8
11
14
16
18
GET TIPS & HELP AT JAWBONE.COM/SUPPORT
4 5
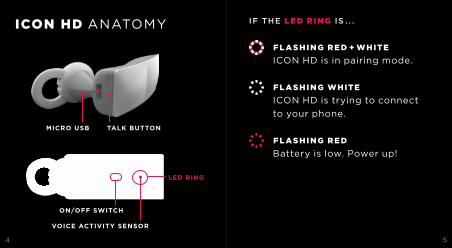
MICRO USB
LED RING
TALK BUTTON
VOICE ACTIVITY SENSOR
ON/OFF SWITCH
ICON HD ANATOMY IF THE LE D RING IS . . .
fL ASH ING RE D + WH ITEICON HD is in pairing mode.
fL ASH ING WH ITEICON HD is trying to connect to your phone.
fL ASH ING RE DBattery is low. Power up!
4 5
6 7
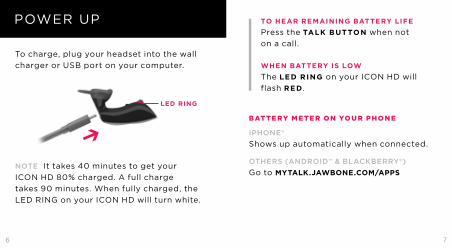
POWER UP TO HEAR REMAINING BATTERY LIFEPress the TALK BUTTON when noton a call.
WHEN BATTERY IS LOWThe LED RING on your ICON HD willflash RED .
BAT TE RY M ETE R ON YOU R PHON E
IPHONE®Shows up automatically when connected.
OTHERS (ANDROID™ & BLACKBERRY®) Go to MYTALK.JAWBONE.COM/APPS
To charge, plug your headset into the wall charger or USB port on your computer.
NOTE It takes 40 minutes to get yourICON HD 80% charged. A full charge takes 90 minutes. When fully charged, the LED RING on your ICON HD will turn white.
LED RING
8 9
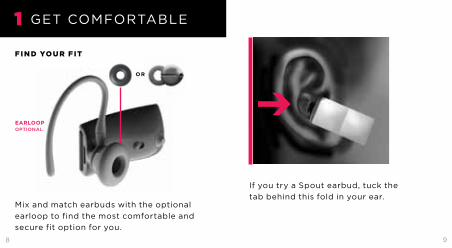
fIN D YOU R f IT
Mix and match earbuds with the optional earloop to find the most comfortable and secure fit option for you.
EARLOOPOPTIONAL
If you try a Spout earbud, tuck the tab behind this fold in your ear.
1 GET COMFORTABLE
10 11
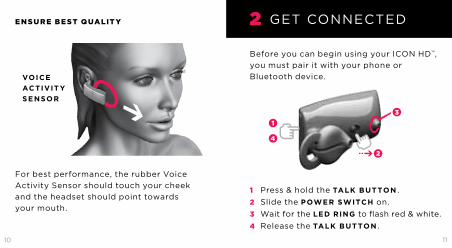
E N SU RE B E ST QUALIT Y
For best performance, the rubber Voice Activity Sensor should touch your cheek and the headset should point towards your mouth.
VOICEACTIVIT YSENSOR
Before you can begin using your ICON HD™,you must pair it with your phone or Bluetooth device.
1 Press & hold the TALK BUTTON .2 Slide the POWER SWITCH on.3 Wait for the LED RING to flash red & white.4 Release the TALK BUTTON .
2 GET CONNECTED
1
4
2
3
12 13
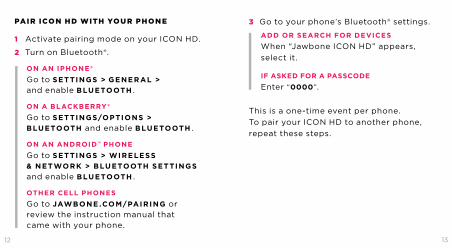
3 Go to your phone’s Bluetooth® settings.
ADD OR SEARCH FOR DEVICESWhen “Jawbone ICON HD” appears, select it.
IF ASKED FOR A PASSCODEEnter “0000”.
This is a one-time event per phone. To pair your ICON HD to another phone, repeat these steps.
PAIR ICON H D WITH YOU R PHON E
1 Activate pairing mode on your ICON HD.
2 Turn on Bluetooth®.
ON AN IPHONE®Go to SETTINGS > GENERAL >and enable BLUETOOTH .
ON A BLACKBERRY®Go to SETTINGS/OPTIONS >BLUETOOTH and enable BLUETOOTH .
ON AN ANDROID™ PHONEGo to SETTINGS > WIRELESS& NETWORK > BLUETOOTH SETTINGSand enable BLUETOOTH .
OTHER CELL PHONESGo to JAWBONE .COM/PAIRING orreview the instruction manual that came with your phone.
14 15
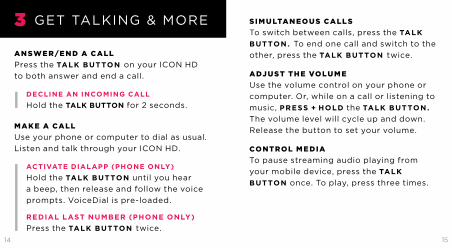
AN SWE R /E N D A CALLPress the TALK BUTTON on your ICON HDto both answer and end a call.
DECLINE AN INCOMING CALLHold the TALK BUTTON for 2 seconds.
MAKE A CALLUse your phone or computer to dial as usual. Listen and talk through your ICON HD.
ACTIVATE DIALAPP (PHONE ONLY)Hold the TALK BUTTON until you heara beep, then release and follow the voice prompts. VoiceDial is pre-loaded.
REDIAL LAST NUMBER (PHONE ONLY)Press the TALK BUTTON twice.
3 GET TALKING & MORE SIM U LTAN EOUS CALL STo switch between calls, press the TALK BUTTON. To end one call and switch to the other, press the TALK BUTTON twice.
ADJ UST TH E VOLU M EUse the volume control on your phone or computer. Or, while on a call or listening to music, PRESS + HOLD the TALK BUTTON.The volume level will cycle up and down. Release the button to set your volume.
CONTROL M E DIATo pause streaming audio playing from your mobile device, press the TALKBUTTON once. To play, press three times.
16 17
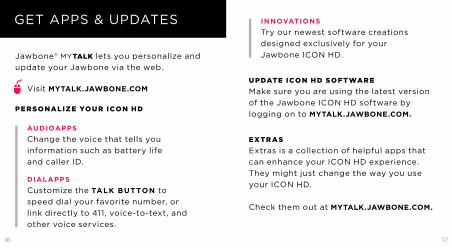
Jawbone® MYTALK lets you personalize and update your Jawbone via the web.
Visit MYTALK.JAWBONE.COM
PE RSONALIZ E YOU R ICON H D
AUDIOAPPSChange the voice that tells you information such as battery life and caller ID.
DIALAPPSCustomize the TALK BUTTON tospeed dial your favorite number, or link directly to 411, voice-to-text, and other voice services.
INNOVATIONSTry our newest software creations designed exclusively for your Jawbone ICON HD.
U PDATE ICON H D SOfT WAREMake sure you are using the latest version of the Jawbone ICON HD software by logging on to MYTALK.JAWBONE.COM.
EX TR ASExtras is a collection of helpful apps that can enhance your ICON HD experience. They might just change the way you use your ICON HD.
Check them out at MYTALK.JAWBONE.COM.
GET APPS & UPDATES
18 19
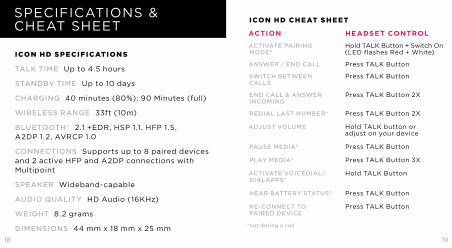
ICON H D SPECI f ICATION S
TALK TIME Up to 4.5 hours
STANDBY TIME Up to 10 days
CHARGING 40 minutes (80%); 90 Minutes (full)
WIRELESS RANGE 33ft (10m)
BLUETOOTH® 2.1 +EDR, HSP 1.1, HFP 1.5,A2DP 1.2, AVRCP 1.0
CONNECTIONS Supports up to 8 paired devicesand 2 active HFP and A2DP connections with Multipoint
SPEAKER Wideband-capable
AUDIO QUALITY HD Audio (16KHz)
WEIGHT 8.2 grams
DIMENSIONS 44 mm x 18 mm x 25 mm
SPECIFICATIONS & CHEAT SHEET ICON H D CH E AT SH E ET
ACTION
ACTIVATE PAIRING MODE*
ANSWER / END CALL
SWITCH BETWEEN CALLS
END CALL & ANSWER INCOMING
REDIAL LAST NUMBER*
ADJUST VOLUME
PAUSE MEDIA*
PLAY MEDIA*
ACTIVATE VOICEDIAL/ DIALAPPS*
HEAR BATTERY STATUS*
RE-CONNECT TO PAIRED DEVICE
*not during a call
HEADSET CONTROL
Hold TALK Button + Switch On (LED flashes Red + White)
Press TALK Button
Press TALK Button
Press TALK Button 2X
Press TALK Button 2X
Hold TALK button or adjust on your device
Press TALK Button
Press TALK Button 3X
Hold TALK Button
Press TALK Button
Press TALK Button
20 21
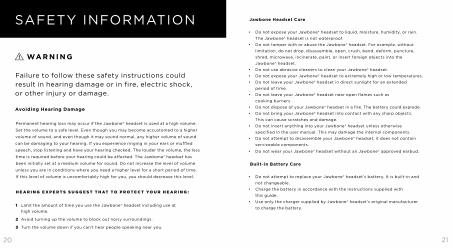
SAFETY INFORMATION
WA R N I N G
Failure to follow these safety instructions could result in hearing damage or in fire, electric shock, or other injury or damage.
Avoiding Hearing Damage
Permanent hearing loss may occur if the Jawbone® headset is used at a high volume.
Set the volume to a safe level. Even though you may become accustomed to a higher
volume of sound, and even though it may sound normal, any higher volume of sound
can be damaging to your hearing. If you experience ringing in your ears or muffled
speech, stop listening and have your hearing checked. The louder the volume, the less
time is required before your hearing could be affected. The Jawbone® headset has
been initially set at a medium volume for sound. Do not increase the level of volume
unless you are in conditions where you need a higher level for a short period of time.
If this level of volume is uncomfortably high for you, you should decrease this level.
H E A R I N G E X P E R T S S U G G E S T T H AT T O P R O T E C T Y O U R H E A R I N G :
1 Limit the amount of time you use the Jawbone® headset including use at high volume.
2 Avoid turning up the volume to block out noisy surroundings.
3 Turn the volume down if you can’t hear people speaking near you.
Jawbone Headset Care
• DonotexposeyourJawbone®headsettoliquid,moisture,humidity,orrain.
The Jawbone® headset is not waterproof.
• DonottamperwithorabusetheJawbone®headset.Forexample,without
limitation, do not drop, disassemble, open, crush, bend, deform, puncture,
shred, microwave, incinerate, paint, or insert foreign objects into the
Jawbone® headset.
• DonotuseabrasivecleanerstocleanyourJawbone®headset.
• DonotexposeyourJawbone®headsettoextremelyhighorlowtemperatures.
• DonotleaveyourJawbone®headsetindirectsunlightforanextended
period of time.
• DonotleaveyourJawbone®headsetnearopenflamessuchas
cooking burners.
• DonotdisposeofyourJawbone®headsetinafire.Thebatterycouldexplode.
• DonotbringyourJawbone®headsetintocontactwithanysharpobjects.
This can cause scratches and damage.
• DonotinsertanythingintoyourJawbone®headsetunlessotherwise
specified in the user manual. This may damage the internal components.
• DonotattempttodisassembleyourJawbone®headset,itdoesnotcontain
serviceable components.
• DonotwearyourJawbone®headsetwithoutanJawbone®approvedearbud.
Built-in Battery Care
• DonotattempttoreplaceyourJawbone®headset’sbattery.Itisbuilt-inand
not changeable.
• Chargethebatteryinaccordancewiththeinstructionssuppliedwith
this guide.
• UseonlythechargersuppliedbyJawbone®headset’soriginalmanufacturer
to charge the battery.
22 23
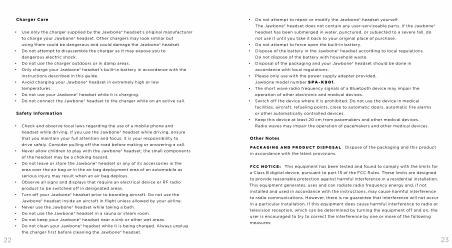
Charger Care
• UseonlythechargersuppliedbytheJawbone®headset’soriginalmanufacturer
to charge your Jawbone® headset. Other chargers may look similar but
using them could be dangerous and could damage the Jawbone® headset.
• Donotattempttodisassemblethechargerasitmayexposeyouto
dangerous electric shock.
• Donotusethechargeroutdoorsorindampareas.
• OnlychargeyourJawbone®headset’sbuilt-inbatteryinaccordancewiththe
instructions described in this guide.
• AvoidchargingyourJawbone®headsetinextremelyhighorlow
temperatures.
• DonotuseyourJawbone®headsetwhileitischarging.
• DonotconnecttheJawbone®headsettothechargerwhileonanactivecall.
Safety Information
• Checkandobservelocallawsregardingtheuseofamobilephoneand
headset while driving. If you use the Jawbone® headset while driving, ensure
that you maintain your full attention and focus; it is your responsibility to
drive safely. Consider pulling off the road before making or answering a call.
• NeverallowchildrentoplaywiththeJawbone®headset;thesmallcomponents
of the headset may be a choking hazard.
• DonotleaveorstoretheJawbone®headsetoranyofitsaccessoriesinthe
area over the air bag or in the air bag deployment area of an automobile as
serious injury may result when an air bag deploys.
• ObserveallsignsanddisplaysthatrequireanelectricaldeviceorRFradio
product to be switched off in designated areas.
• TurnoffyourJawbone®headsetpriortoboardingaircraft.Donotusethe
Jawbone® headset inside an aircraft in flight unless allowed by your airline.
• NeverusetheJawbone®headsetwhiletakingabath.
• DonotusetheJawbone®headsetinasaunaorsteamroom.
• DonotkeepyourJawbone®headsetnearasinkorotherwetareas.
• DonotcleanyourJawbone®headsetwhileitisbeingcharged.Alwaysunplug
the charger first before cleaning the Jawbone® headset.
• DonotattempttorepairormodifytheJawbone®headsetyourself.
The Jawbone® headset does not contain any user-serviceable parts. If the Jawbone®
headset has been submerged in water, punctured, or subjected to a severe fall, do
not use it until you take it back to your original place of purchase.
• Donotattempttoforceopenthebuilt-inbattery.
• DisposeofthebatteryintheJawbone®headsetaccordingtolocalregulations.
Do not dispose of the battery with household waste.
• DisposalofthepackagingandyourJawbone®headsetshouldbedonein
accordance with local regulations.
• Pleaseonlyusewiththepowersupplyadapterprovided,
Jawbone model number S P A - K 9 0 1 .
• TheshortwaveradiofrequencysignalsofaBluetoothdevicemayimpairthe
operation of other electronic and medical devices.
• Switchoffthedevicewhereitisprohibited.Donotusethedeviceinmedical
facilities, aircraft, refueling points, close to automatic doors, automatic fire alarms
or other automatically controlled devices.
• Keepthisdeviceatleast20cmfrompacemakersandothermedicaldevices.
Radio waves may impair the operation of pacemakers and other medical devices.
Other Notes
P A C K A G I N G A N D P R O D U C T D I S P O S A L Dispose of the packaging and this product
in accordance with the latest provisions.
f C C N O T I C E : This equipment has been tested and found to comply with the limits for
a Class B digital device, pursuant to part 15 of the FCC Rules. These limits are designed
to provide reasonable protection against harmful interference in a residential installation.
This equipment generates, uses and can radiate radio frequency energy and, if not
installed and used in accordance with the instructions, may cause harmful interference
to radio communications. However, there is no guarantee that interference will not occur
in a particular installation. If this equipment does cause harmful interference to radio or
television reception, which can be determined by turning the equipment off and on, the
user is encouraged to try to correct the interference by one or more of the following
measures:
24
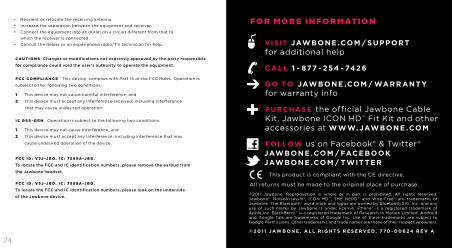
• Reorientorrelocatethereceivingantenna.
• Increasetheseparationbetweentheequipmentandreceiver.
• Connecttheequipmentintoanoutletonacircuitdifferentfromthatto
which the receiver is connected.
• Consultthedealeroranexperiencedradio/TVtechnicianforhelp.
C A U T I O N S Changes or modifications not expressly approved by the party responsible
for compliance could void the user’s authority to operate the equipment.
f C C C O M P L I A N C E This device complies with Part 15 of the FCC Rules. Operation is
subject to the following two conditions:
1 This device may not cause harmful interference, and
2 This device must accept any interference received, including interference
that may cause undesired operation.
I C R S S - G E N Operation is subject to the following two conditions:
1 This device may not cause interference, and
2 This device must accept any interference, including interference that may
cause undesired operation of the device.
f C C I D : V 3 J - J B G . I C : 7 5 8 9 A - J B G .
To locate the FCC and IC identification numbers, please remove the earbud from
the Jawbone headset.
f C C I D : V 3 J - J B D . I C : 7 5 8 9 A - J B D .
To locate the FCC and IC identification numbers, please look on the underside
of the Jawbone device.
fOR MORE IN fORMATION
VISIT JAWBONE .COM / SUPPORTfor additional help
CALL 1 - 877 - 254 - 7426
GO TO JAWBONE .COM / WARRANT Yfor warranty info
PURCHASE the official Jawbone Cable Kit, Jawbone ICON HD™ Fit Kit and other accessories at WWW. JAWBONE .COM
FOLLOW us on Facebook® & Twitter®JAWBONE .COM / FACEBOOKJAWBONE .COM / TWITTER
All returns must be made to the original place of purchase.
© 2 0 1 1 JAW B O N E . A L L R I G H T S R E S E R V E D . 7 70 - 0 0 6 2 4 R E V A
This product is compliant with the CE directive.
©2011 Jawbone. Reproduction in whole or in part is prohibited. All rights reserved. Jawbone®, NoiseAssassin®, ICON HD™, THE NERD™ and Wire-Free™ are trademarks of Jawbone. The Bluetooth® word mark and logos are owned by Bluetooth SIG, Inc. and anyuse of such marks by Jawbone is under license. iPhone® is a registered trademark of Apple Inc. BlackBerry® is a registered trademark of Research In Motion Limited. Android and Google Talk are trademarks of Google Inc. Use of these trademarks are subject to Google Permissions. Other trademarks and trade names are those of their respective owners.

26