Embed Size (px)
Citation preview
HART®
FIELD COMMUNICATION PROTOCOL
USER MANUALValveSight Diagnostics For Logix MD Positioners with HART®
FCD VSENSF0001-02-AQ 03/15
22
ValveSight Diagnostics for HART User Manual FCD VSENSF0001-02-AQ 03/15
Contents1 System Requirements 42 General Information 53 Installation and Setup Instructions 5
3.1 Installing the Frame COMM DTM & ValveSight DTM 53.2 Configuring the HART® Modem & COMM DTM 73.3 Configuring ValveSight DTM for LogixMD Devices 9
3.4 Launching the ValveSight DTM 11 3.5 Licensing the DTM for Advanced Diagnostics 114 Views 12
4.1 Status Area 124.2 Main View 12
4.3 Dashboard View 124.4 HART® Communication 134.5 Navigation Buttons 134.6 Command and Position 134.7 Command Source 13
4.8 Health Status 134.9 DIP Switch Configuration 134.10 Pressure 144.11 Temperature 144.12 Basic Dashboard View 14
5 Alarms 14 5.1 Alarm Status 15
5.2 Alarm Annunciators 15 5.3 Alarm Configuration 166 Health 16
6.1 Valve Health 176.2 Friction Tolerance Setting 186.3 Positioner Health 196.4 Actuator Health 206.5 Control Health 22
7 Diagnostics 227.1 Ramp Test 237.2 Step Test 257.2 HDRL 27
7.4 Data Logger 297.5 Trends 307.6 Partial Stroke 31

ValveSight Diagnostics for HART User Manual FCD VSENSF0001-02-AQ 03/15
3flowserve.com 3flowserve.com
8 Calibration 328.1 Actuator/Stroke/Friction Calibration 338.2 Stroke 348.3 Analog Output 358.4 Analog Input 36
9 Configuration 36 9.1 Licensing/Upgrade Management 37
9.2 Positioner Upgrades 38 9.3 Basic/Local Interface 39
9.4 Configuration Management 4010 Information 40
10.1 Actuator 4110.2 Valve Body 41
10.3 Valve Trim 42 10.4 HART® Information 4111 Alarms/Alerts 43
11.1 Counters 4311.2 Command Deviations 4411.3 Travel Alerts 45
12 Custom 45 12.1 Edit Variables 46 12.2 LED 47 12.3 Position Cutoff 47 12.4 Soft Limits 48 12.5 Stroke Characterization 49 12.6 Units 5113 Comprehensive Indicator Table 5214 FAQs 58
ValveSight Diagnostics for HART User Manual FCD VSENSF0001-02-AQ 03/15
4
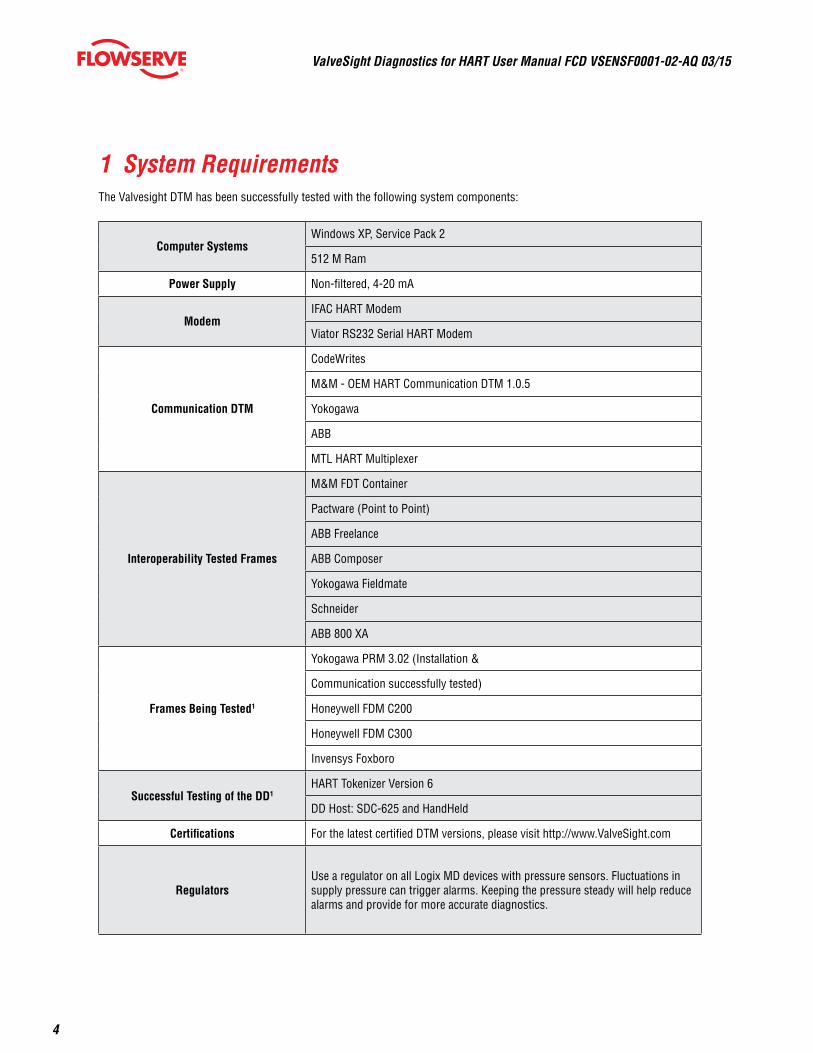
1 System RequirementsThe Valvesight DTM has been successfully tested with the following system components:
Computer SystemsWindows XP, Service Pack 2
512 M Ram
Power Supply Non-filtered, 4-20 mA
ModemIFAC HART Modem
Viator RS232 Serial HART Modem
Communication DTM
CodeWrites
M&M - OEM HART Communication DTM 1.0.5
Yokogawa
ABB
MTL HART Multiplexer
Interoperability Tested Frames
M&M FDT Container
Pactware (Point to Point)
ABB Freelance
ABB Composer
Yokogawa Fieldmate
Schneider
ABB 800 XA
Frames Being Tested1
Yokogawa PRM 3.02 (Installation &
Communication successfully tested)
Honeywell FDM C200
Honeywell FDM C300
Invensys Foxboro
Successful Testing of the DD1HART Tokenizer Version 6
DD Host: SDC-625 and HandHeld
Certifications For the latest certified DTM versions, please visit http://www.ValveSight.com
RegulatorsUse a regulator on all Logix MD devices with pressure sensors. Fluctuations in supply pressure can trigger alarms. Keeping the pressure steady will help reduce alarms and provide for more accurate diagnostics.
ValveSight Diagnostics for HART User Manual FCD VSENSF0001-02-AQ 03/15
5flowserve.com
2 General InformationThe following information is designed to assist in the installation and use of the ValveSight diagnostic solution. ValveSight diagnostics are compatible with the Flowserve LogixMD family of positioners. Modifying this product or using procedures other than those outlined in this document could drastically affect performance and be hazardous to personnel and equipment, and my void existing warranties.
Some older positioner models can be upgraded to become Logix MD positioners that will then be compatible with the ValveS-ight DTM. See your Flowserve representative to discuss upgrade options.
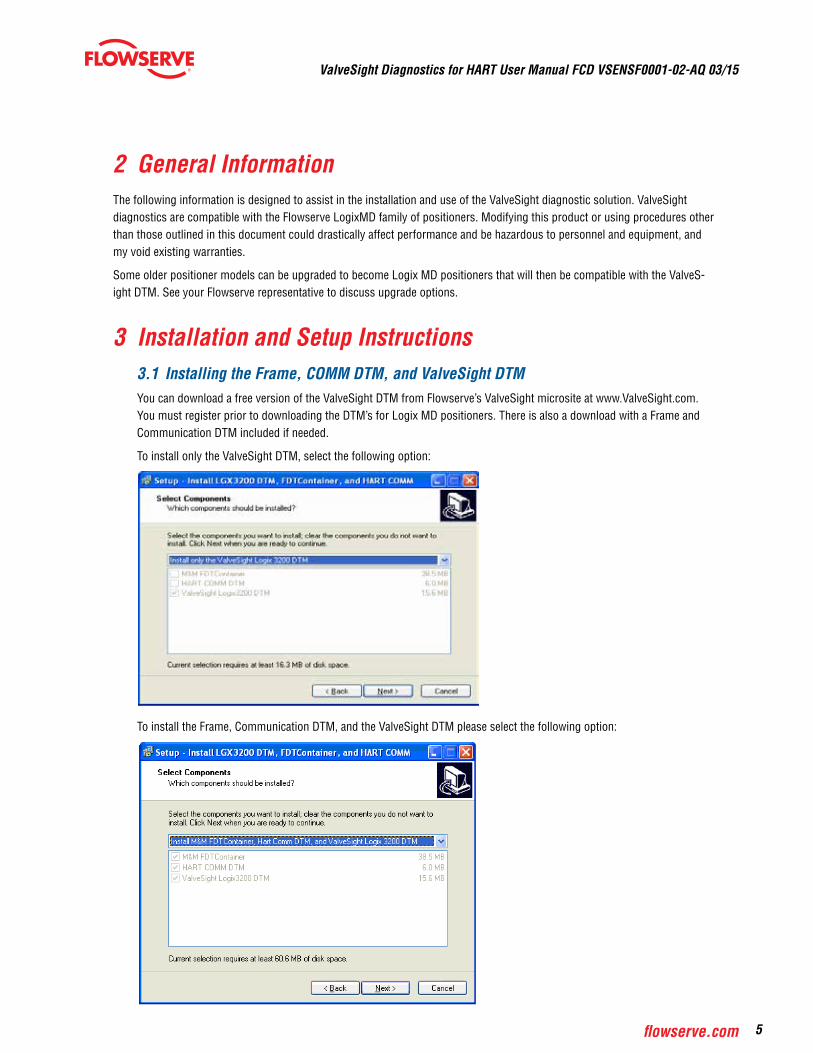
3 Installation and Setup Instructions3.1 Installing the Frame, COMM DTM, and ValveSight DTMYou can download a free version of the ValveSight DTM from Flowserve’s ValveSight microsite at www.ValveSight.com. You must register prior to downloading the DTM’s for Logix MD positioners. There is also a download with a Frame and Communication DTM included if needed.
To install only the ValveSight DTM, select the following option:
To install the Frame, Communication DTM, and the ValveSight DTM please select the following option:
ValveSight Diagnostics for HART User Manual FCD VSENSF0001-02-AQ 03/15
6
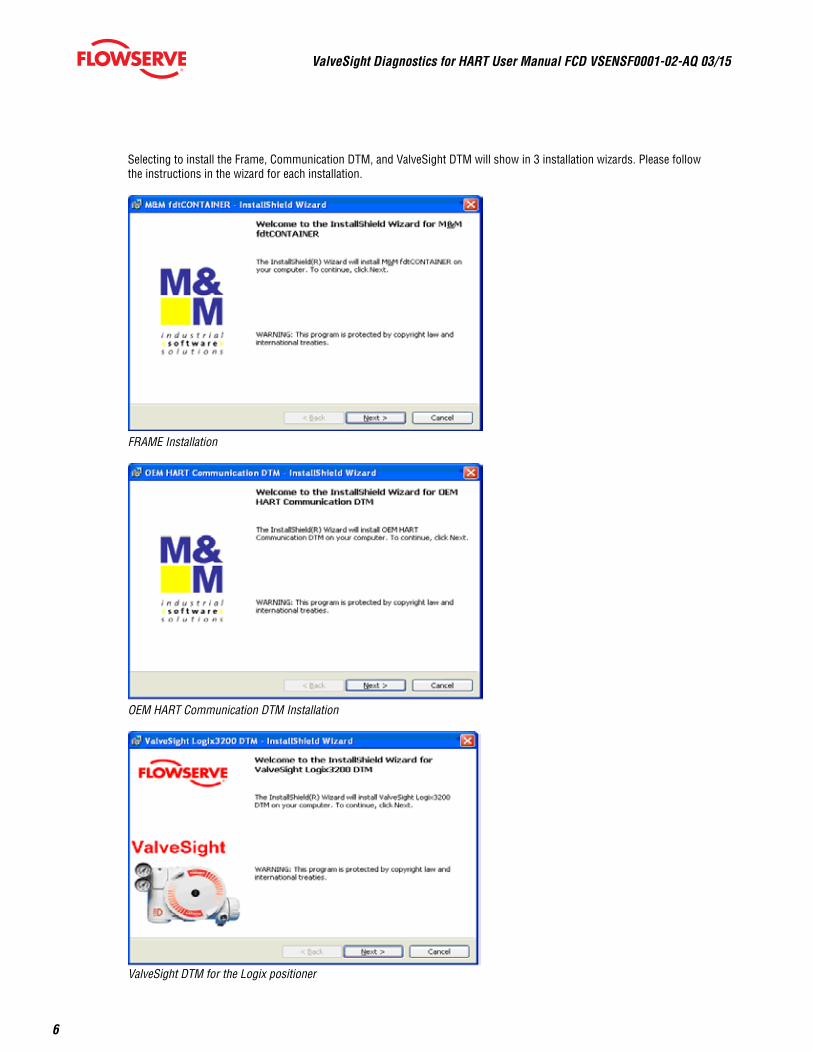
Selecting to install the Frame, Communication DTM, and ValveSight DTM will show in 3 installation wizards. Please follow the instructions in the wizard for each installation.
FRAME Installation
OEM HART Communication DTM Installation
ValveSight DTM for the Logix positioner
ValveSight Diagnostics for HART User Manual FCD VSENSF0001-02-AQ 03/15
7flowserve.com
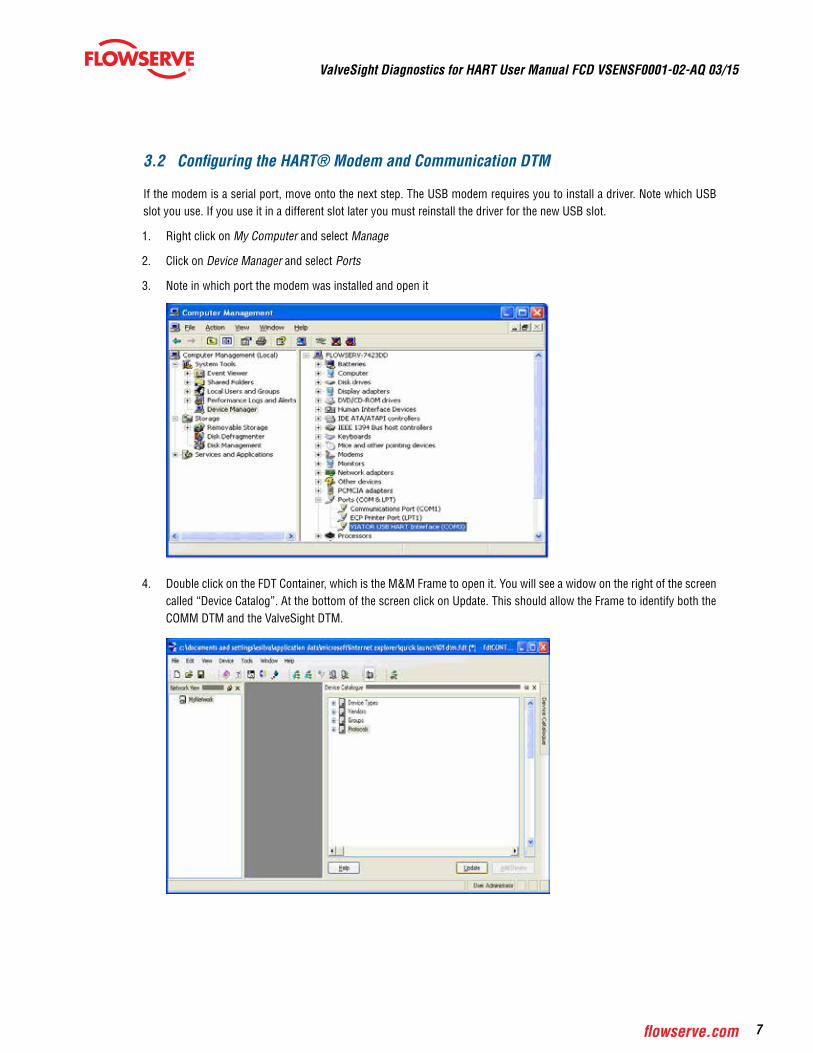
3.2 Configuring the HART® Modem and Communication DTM
If the modem is a serial port, move onto the next step. The USB modem requires you to install a driver. Note which USB slot you use. If you use it in a different slot later you must reinstall the driver for the new USB slot.
1. Right click on My Computer and select Manage
2. Click on Device Manager and select Ports
3. Note in which port the modem was installed and open it
4. Double click on the FDT Container, which is the M&M Frame to open it. You will see a widow on the right of the screen called “Device Catalog”. At the bottom of the screen click on Update. This should allow the Frame to identify both the COMM DTM and the ValveSight DTM.
ValveSight Diagnostics for HART User Manual FCD VSENSF0001-02-AQ 03/15
8
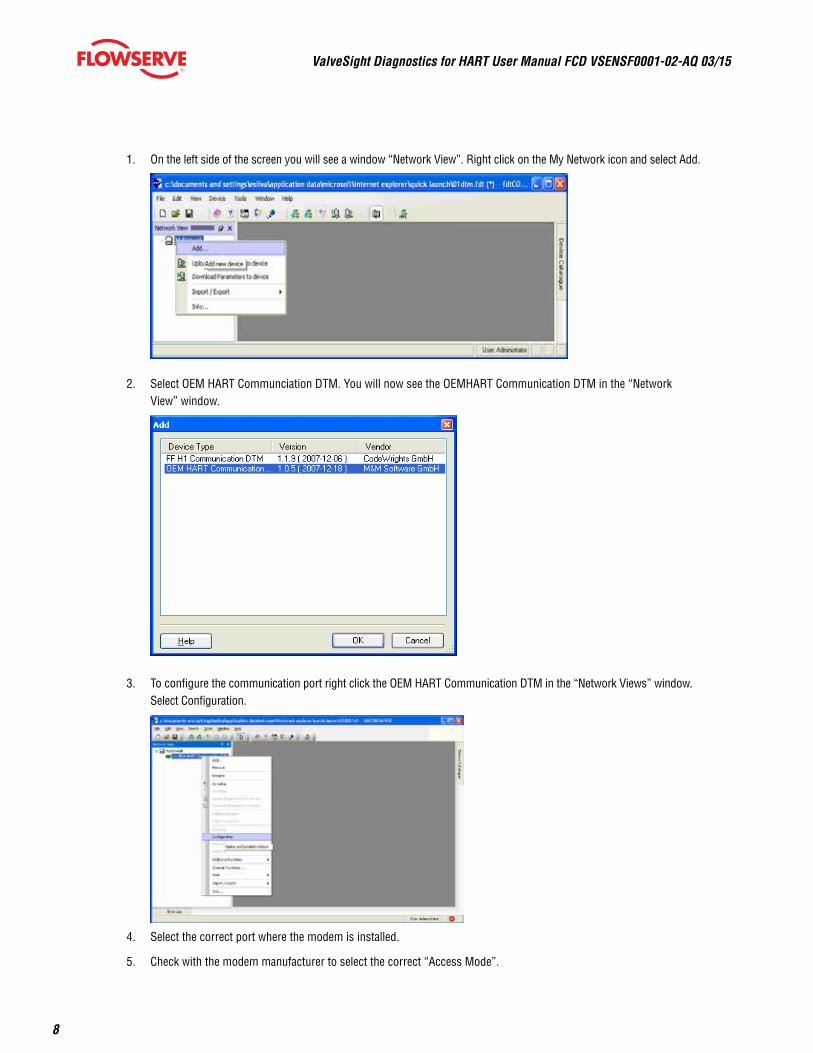
1. On the left side of the screen you will see a window “Network View”. Right click on the My Network icon and select Add.
2. Select OEM HART Communciation DTM. You will now see the OEMHART Communication DTM in the “Network View” window.
3. To configure the communication port right click the OEM HART Communication DTM in the “Network Views” window. Select Configuration.
4. Select the correct port where the modem is installed.
5. Check with the modem manufacturer to select the correct “Access Mode”.
ValveSight Diagnostics for HART User Manual FCD VSENSF0001-02-AQ 03/15
9flowserve.com
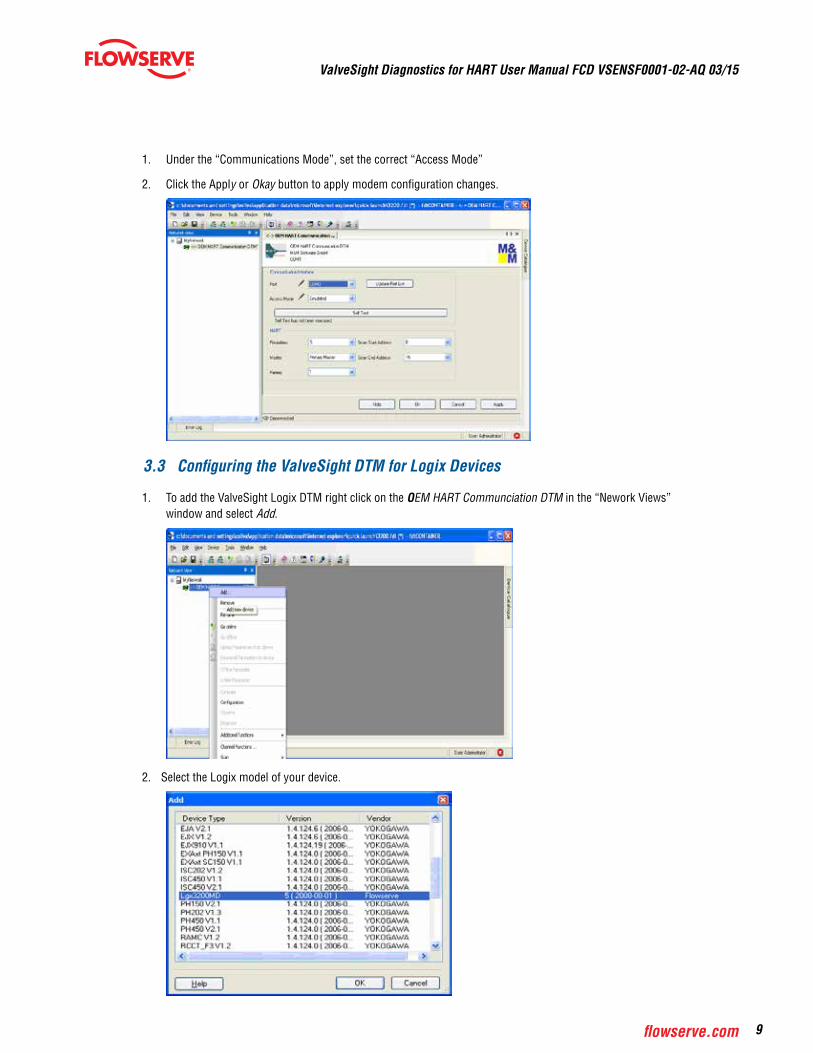
1. Under the “Communications Mode”, set the correct “Access Mode”
2. Click the Apply or Okay button to apply modem configuration changes.
3.3 Configuring the ValveSight DTM for Logix Devices
1. To add the ValveSight Logix DTM right click on the OEM HART Communciation DTM in the “Nework Views” window and select Add.
2. Select the Logix model of your device.
ValveSight Diagnostics for HART User Manual FCD VSENSF0001-02-AQ 03/15
10
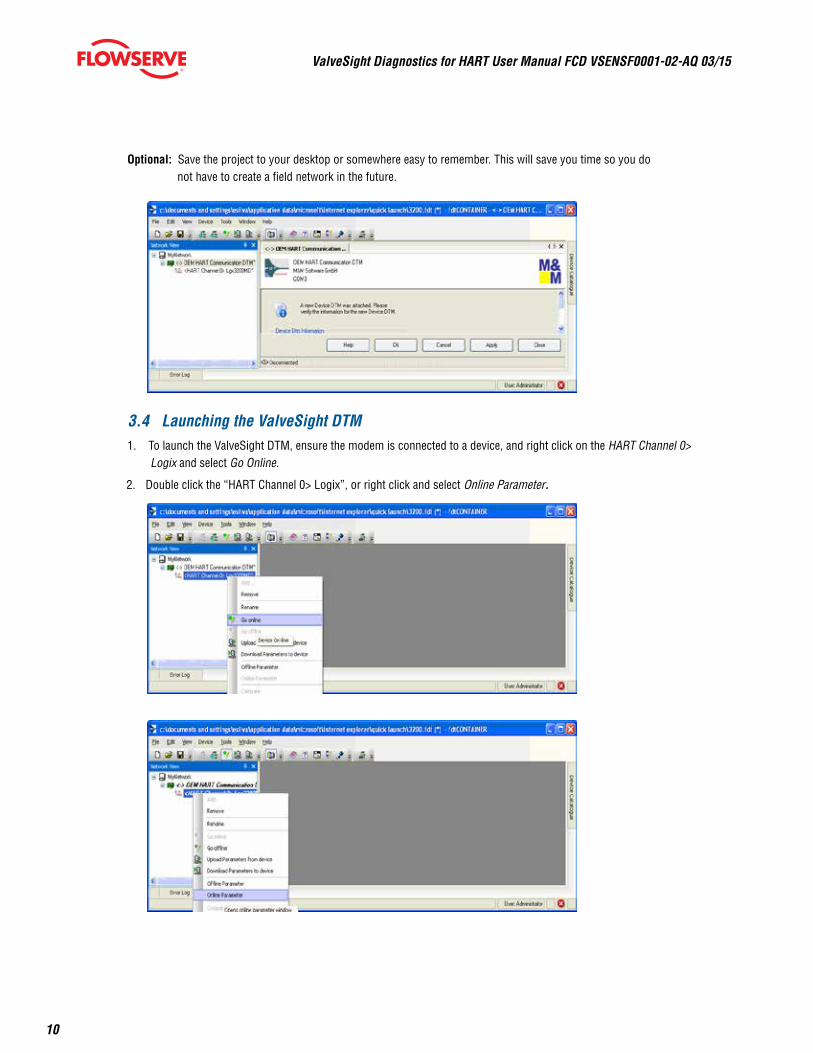
Optional: Save the project to your desktop or somewhere easy to remember. This will save you time so you do not have to create a field network in the future.
3.4 Launching the ValveSight DTM1. To launch the ValveSight DTM, ensure the modem is connected to a device, and right click on the HART Channel 0>
Logix and select Go Online.
2. Double click the “HART Channel 0> Logix”, or right click and select Online Parameter.
ValveSight Diagnostics for HART User Manual FCD VSENSF0001-02-AQ 03/15
11flowserve.com
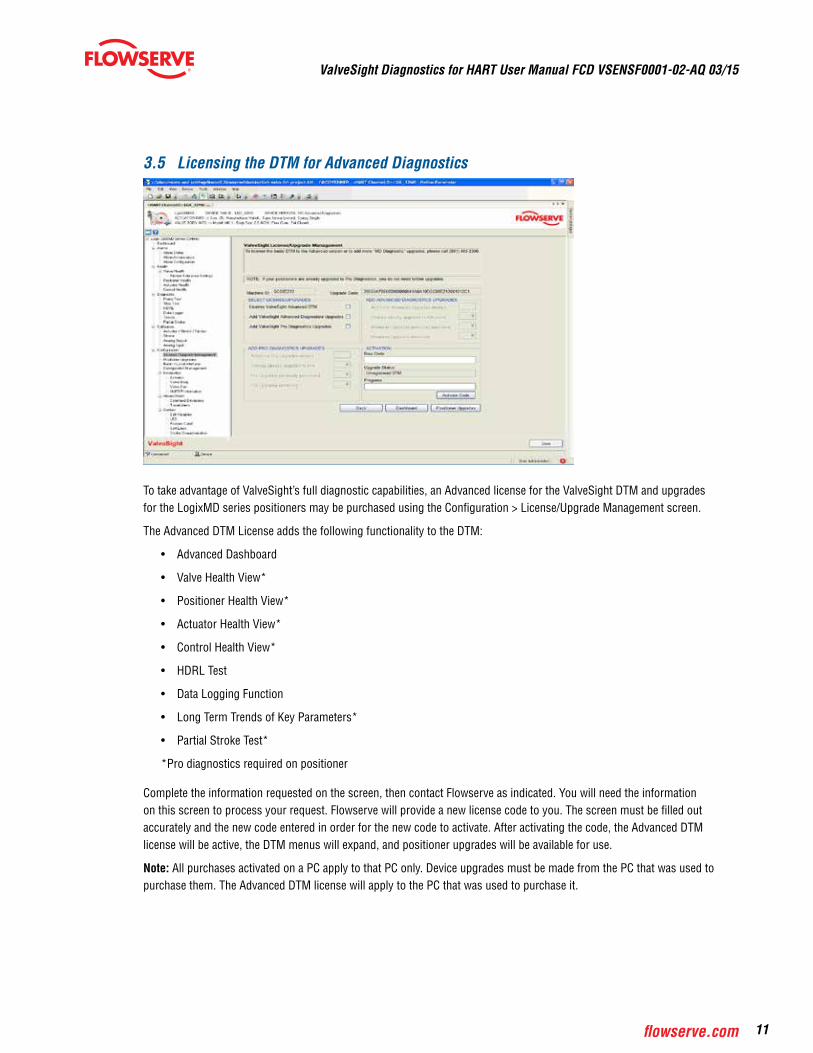
3.5 Licensing the DTM for Advanced Diagnostics
To take advantage of ValveSight’s full diagnostic capabilities, an Advanced license for the ValveSight DTM and upgrades for the LogixMD series positioners may be purchased using the Configuration > License/Upgrade Management screen.
The Advanced DTM License adds the following functionality to the DTM:
• Advanced Dashboard
• Valve Health View*
• Positioner Health View*
• Actuator Health View*
• Control Health View*
• HDRL Test
• Data Logging Function
• Long Term Trends of Key Parameters*
• Partial Stroke Test*
*Pro diagnostics required on positioner
Complete the information requested on the screen, then contact Flowserve as indicated. You will need the information on this screen to process your request. Flowserve will provide a new license code to you. The screen must be filled out accurately and the new code entered in order for the new code to activate. After activating the code, the Advanced DTM license will be active, the DTM menus will expand, and positioner upgrades will be available for use.
Note: All purchases activated on a PC apply to that PC only. Device upgrades must be made from the PC that was used to purchase them. The Advanced DTM license will apply to the PC that was used to purchase it.
ValveSight Diagnostics for HART User Manual FCD VSENSF0001-02-AQ 03/15
12
4 Views4.1 Status AreaThe Status area is displayed on most DTM screens. It displays the same indicator (alarm, warning, alert, or mode) that is currently displayed (with an LED blink code) on the device. The first color of the device blink code (green, yellow, or red) is also indicated. Generally green indicates no immediate issues. Yellow generally indicates a developing issue and red indicates a serious issue.
The command source (Analog or Digital) is also displayed. The command source can be changed from the Dashboard screen.
4.2 Main ViewThis view provides easy access to all major functions of the DTM.
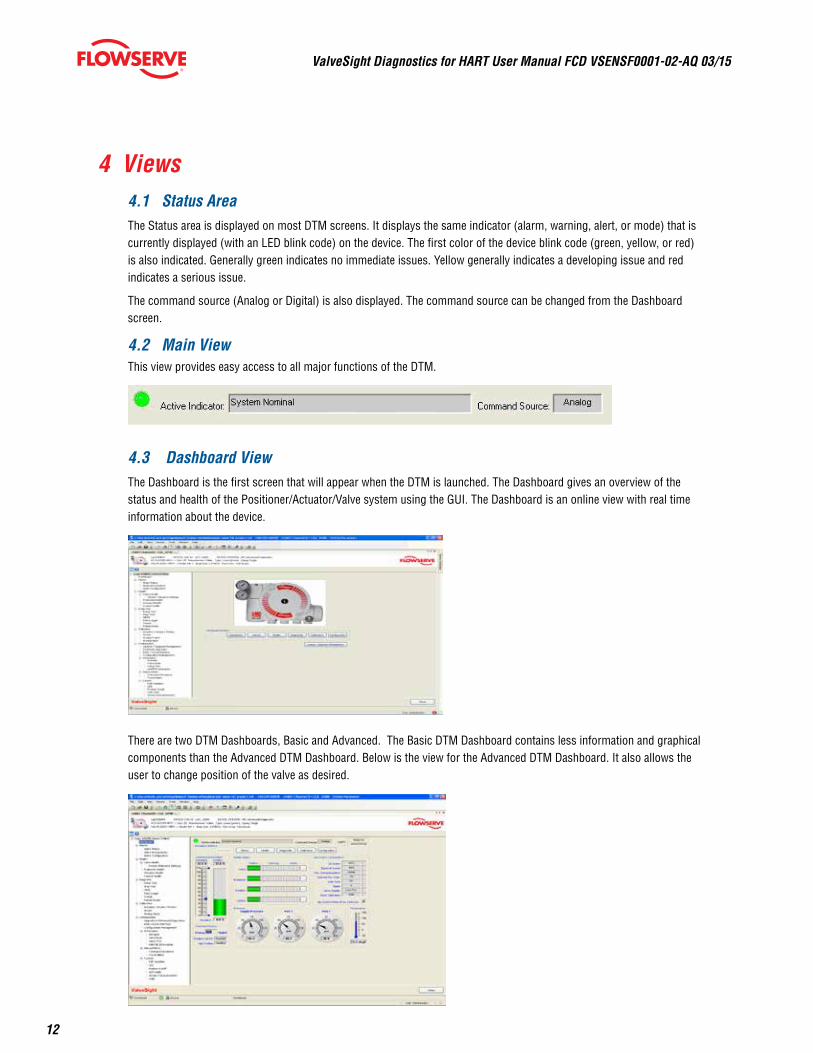
4.3 Dashboard ViewThe Dashboard is the first screen that will appear when the DTM is launched. The Dashboard gives an overview of the status and health of the Positioner/Actuator/Valve system using the GUI. The Dashboard is an online view with real time information about the device.
There are two DTM Dashboards, Basic and Advanced. The Basic DTM Dashboard contains less information and graphical components than the Advanced DTM Dashboard. Below is the view for the Advanced DTM Dashboard. It also allows the user to change position of the valve as desired.

ValveSight Diagnostics for HART User Manual FCD VSENSF0001-02-AQ 03/15
13flowserve.com
4.4 HART CommunicationTo the right of the alarm indicator area at the top of the screen is the HART communication display. It shows that status of information that is continually sent to and received from the device. Where no change is seen here, communication is either slow or has been interrupted.
4.5 Navigation ButtonsThe navigation buttons can be used to view other DTM screens. The menu structure to the left can also be used to navi-gate to the various DTM screens.
4.6 Command and PositionThe command is shown by the pointer on the command chart. The position is shown to the right in order to easily com-pare the two. The command chart also displays the settings for travel limits and position cutoff (MPC) limits.
4.7 Command SourceThe command source can be changed to analog or digital mode by clicking the switch here. After changing to digital mode, a new position command can be sent to the positioner by dragging the command pointer above.
4.8 Health StatusThe health of the system in 4 areas (valve, positioner, actuator, and control) is displayed in 4 bar graphs in the center of the dashboard. As the graphs turn color (from green to yellow to red) they indicate developing issues. Clicking on the link to the right of each graph will open a page containing additional information which will be discussed in a later section. These graphs represent a complete analysis of the system. When the DTM views a device that has not been upgraded with Advanced Diagnostics, the Health Status area is not active.
4.9 DIP Switch ConfigurationThe status of the 8 DIP switches is shown here. For a complete description of the function of each DIP switch please refer to the Installation, Operation, and Maintenance Instructions for your specific Logix 3000 series device. An “X” Shown next to any of the DIP switches indicates that the physical switch is different that what is actively used by the software. The software overrides the physical switch. DIP settings can be changed in the software using the Configuration Basic/Local Interface screen in the DTM. A quick calibration (performed at the device) makes the software use the physical DIP setting.
4.10 PressurePressure values are shown here. In order for the values to be accurate, a calibration must be completed from the Cali-bration-Actuator/Stroke/Friction screen. The units for pressure can be changed in the Custom > Units screen. Depending on the device configuration, some pressure data may not be available. Data from active sensors will be shown. Where pressure information is not available, the display will be inactive.
4.11 TemperatureThis gage shows the temperature on the circuit board inside the positioner. The units of measurement for the temperature can be changed in the Custom/Units screen.
ValveSight Diagnostics for HART User Manual FCD VSENSF0001-02-AQ 03/15
14
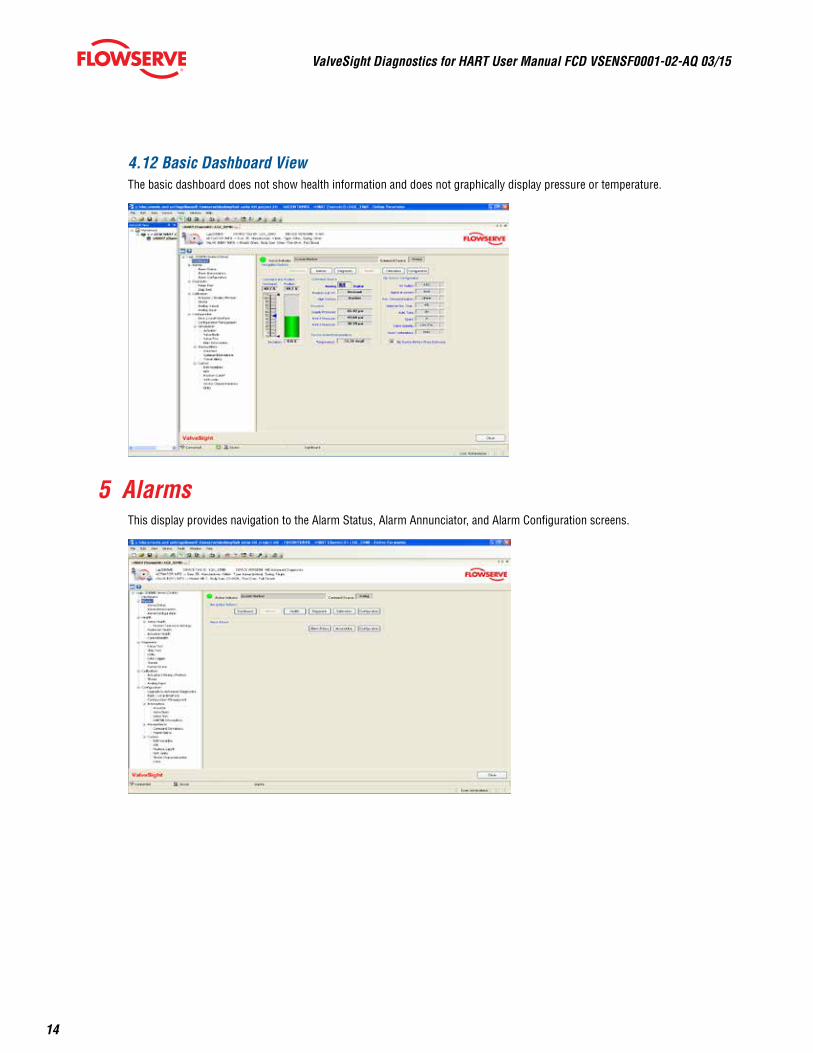
4.12 Basic Dashboard ViewThe basic dashboard does not show health information and does not graphically display pressure or temperature.
5 AlarmsThis display provides navigation to the Alarm Status, Alarm Annunciator, and Alarm Configuration screens.

ValveSight Diagnostics for HART User Manual FCD VSENSF0001-02-AQ 03/15
15flowserve.com
5.1 Alarm Status
Alarm History This area shows the last 8 indicators (alarms, warnings, alerts, or modes) that have been detected by the positioner. The top item is the most recent. The history can be cleared using the Reset History button. A more detailed description of each item can be displayed by clicking on a listed indicator.
Error Log (While Connected to Device) Any indicators that occur while this view is active will appear in the Error Log area. A time and date stamp will be applied. This information can be cleared by selecting the Clear Log button, or saved to disk by selecting the Save to Disk button.
5.2 Alarm AnnunciatorsThe Alarm Annunciator screen displays all indicators and their current status. The legend shows the color codes for the status of the indicators.
ValveSight Diagnostics for HART User Manual FCD VSENSF0001-02-AQ 03/15
16
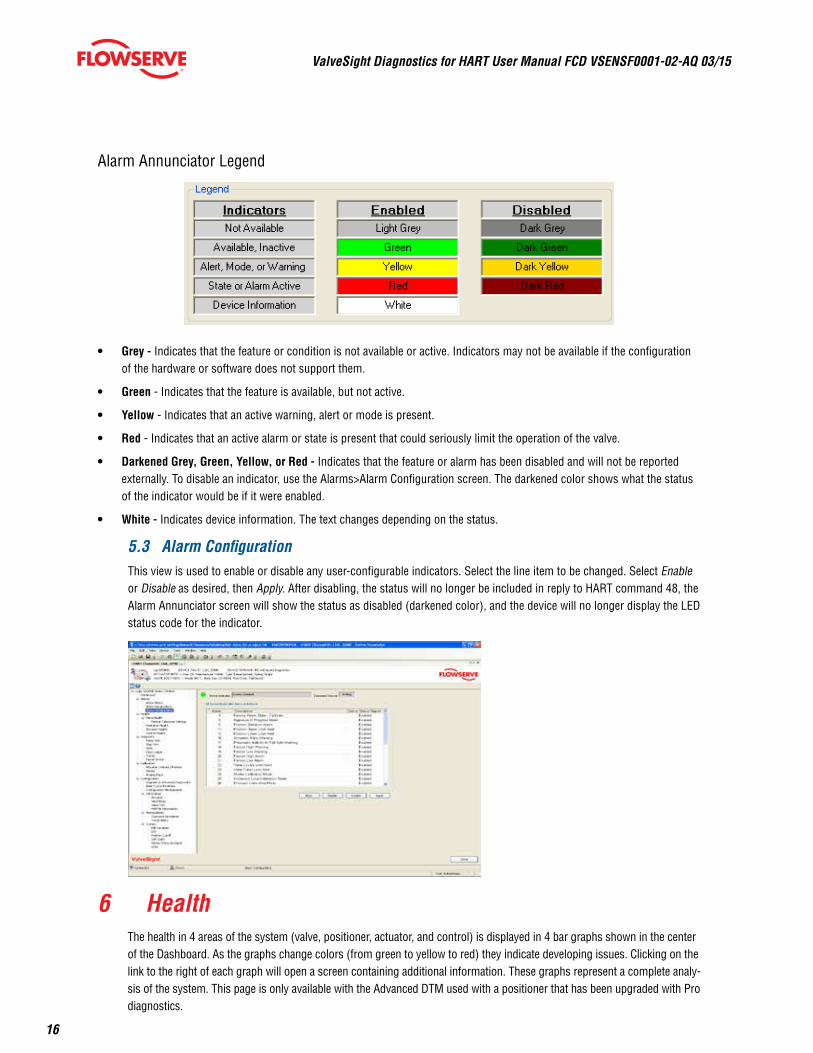
Alarm Annunciator Legend
• Grey - Indicates that the feature or condition is not available or active. Indicators may not be available if the configuration of the hardware or software does not support them.
• Green - Indicates that the feature is available, but not active.
• Yellow - Indicates that an active warning, alert or mode is present.
• Red - Indicates that an active alarm or state is present that could seriously limit the operation of the valve.
• Darkened Grey, Green, Yellow, or Red - Indicates that the feature or alarm has been disabled and will not be reported externally. To disable an indicator, use the Alarms>Alarm Configuration screen. The darkened color shows what the status of the indicator would be if it were enabled.
• White - Indicates device information. The text changes depending on the status.
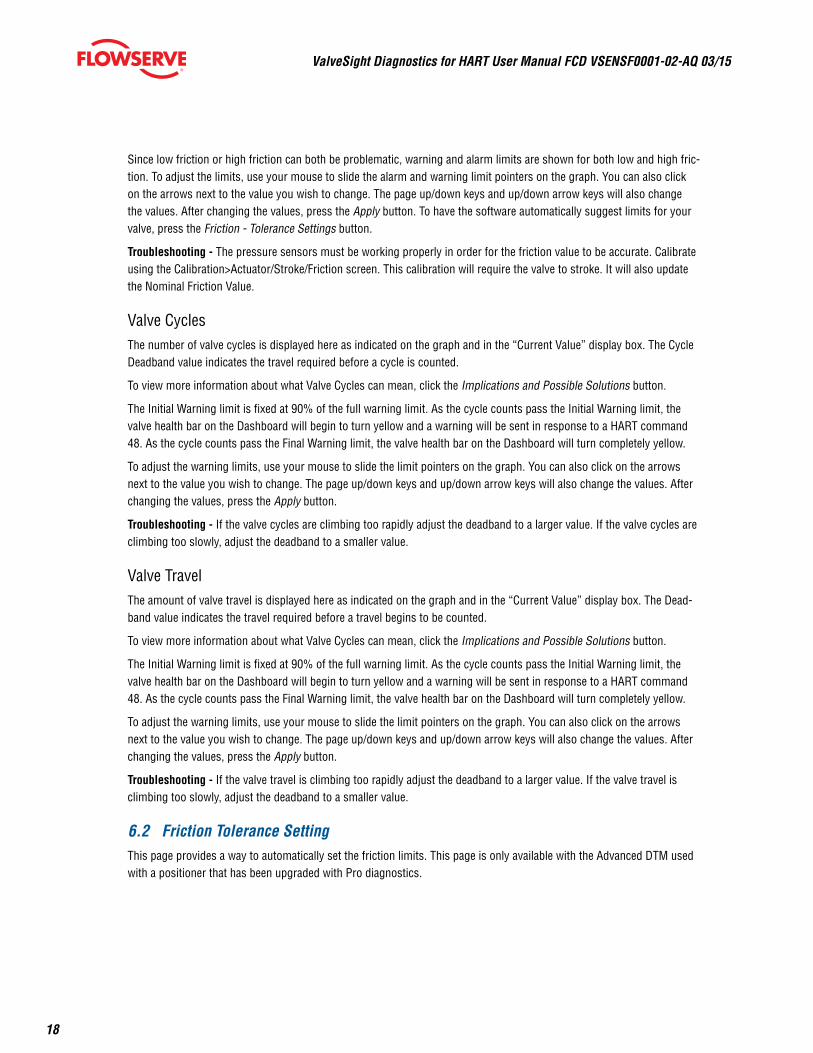
5.3 Alarm ConfigurationThis view is used to enable or disable any user-configurable indicators. Select the line item to be changed. Select Enable or Disable as desired, then Apply. After disabling, the status will no longer be included in reply to HART command 48, the Alarm Annunciator screen will show the status as disabled (darkened color), and the device will no longer display the LED status code for the indicator.
6 HealthThe health in 4 areas of the system (valve, positioner, actuator, and control) is displayed in 4 bar graphs shown in the center of the Dashboard. As the graphs change colors (from green to yellow to red) they indicate developing issues. Clicking on the link to the right of each graph will open a screen containing additional information. These graphs represent a complete analy-sis of the system. This page is only available with the Advanced DTM used with a positioner that has been upgraded with Pro diagnostics.

ValveSight Diagnostics for HART User Manual FCD VSENSF0001-02-AQ 03/15
17flowserve.com
6.1 Valve HealthThis screen shows the indicators of Valve Health. For each indicator, key parameters are shown including alarm limits. The user-adjustable alarm limits can be changed here. Clicking on the Implications and Possible Solutions button dis-plays a detailed description about what the indicator means and how it works. Also displayed are suggestions for making repairs. This page is only available with the Advanced DTM and a positioner that has been upgraded with Pro diagnostics.
Friction
The friction of the valve/actuator assembly is displayed here as indicated on the graph hand in the “Nominal Value” and “Current Value” display boxes. The Current Value is the most recently calculated friction value. A newly calculated friction value requires that the valve moves a small amount, typical in normal operation. The Nominal Value is the value stored in memory on the positioner and is updated every 10 minutes.
To view more information about what low or high friction can mean, click the Implications and Possible Solutions button.
ValveSight Diagnostics for HART User Manual FCD VSENSF0001-02-AQ 03/15
18
Since low friction or high friction can both be problematic, warning and alarm limits are shown for both low and high fric-tion. To adjust the limits, use your mouse to slide the alarm and warning limit pointers on the graph. You can also click on the arrows next to the value you wish to change. The page up/down keys and up/down arrow keys will also change the values. After changing the values, press the Apply button. To have the software automatically suggest limits for your valve, press the Friction - Tolerance Settings button.
Troubleshooting - The pressure sensors must be working properly in order for the friction value to be accurate. Calibrate using the Calibration>Actuator/Stroke/Friction screen. This calibration will require the valve to stroke. It will also update the Nominal Friction Value.
Valve CyclesThe number of valve cycles is displayed here as indicated on the graph and in the “Current Value” display box. The Cycle Deadband value indicates the travel required before a cycle is counted.
To view more information about what Valve Cycles can mean, click the Implications and Possible Solutions button.
The Initial Warning limit is fixed at 90% of the full warning limit. As the cycle counts pass the Initial Warning limit, the valve health bar on the Dashboard will begin to turn yellow and a warning will be sent in response to a HART command 48. As the cycle counts pass the Final Warning limit, the valve health bar on the Dashboard will turn completely yellow.
To adjust the warning limits, use your mouse to slide the limit pointers on the graph. You can also click on the arrows next to the value you wish to change. The page up/down keys and up/down arrow keys will also change the values. After changing the values, press the Apply button.
Troubleshooting - If the valve cycles are climbing too rapidly adjust the deadband to a larger value. If the valve cycles are climbing too slowly, adjust the deadband to a smaller value.
Valve TravelThe amount of valve travel is displayed here as indicated on the graph and in the “Current Value” display box. The Dead-band value indicates the travel required before a travel begins to be counted.
To view more information about what Valve Cycles can mean, click the Implications and Possible Solutions button.
The Initial Warning limit is fixed at 90% of the full warning limit. As the cycle counts pass the Initial Warning limit, the valve health bar on the Dashboard will begin to turn yellow and a warning will be sent in response to a HART command 48. As the cycle counts pass the Final Warning limit, the valve health bar on the Dashboard will turn completely yellow.
To adjust the warning limits, use your mouse to slide the limit pointers on the graph. You can also click on the arrows next to the value you wish to change. The page up/down keys and up/down arrow keys will also change the values. After changing the values, press the Apply button.
Troubleshooting - If the valve travel is climbing too rapidly adjust the deadband to a larger value. If the valve travel is climbing too slowly, adjust the deadband to a smaller value.
6.2 Friction Tolerance SettingThis page provides a way to automatically set the friction limits. This page is only available with the Advanced DTM used with a positioner that has been upgraded with Pro diagnostics.

ValveSight Diagnostics for HART User Manual FCD VSENSF0001-02-AQ 03/15
19flowserve.com
The friction of the valve/actuator assembly is displayed here as indicated on the graph and in the “Nominal Value” and “Current Value” display boxes. The Current Value is the most recently calculated friction value. A newly calculated friction value requires that the valve moves a small amount, typical in normal operation. The Nominal Value is the value stored in memory on the positioner and is updated every 10 minutes. Also shown are the Nominal Supply Pressure and the Actua-tor Size. The actuator size can be changed in the Configuration>Information>Actuator screen.
The limits can be set to “Tight Tolerance”, “Normal Tolerance”, “Loose Tolerance”, or “No Limits” depending on the appli-cation. Each option can be selected by clicking the corresponding button. As each option is selected the limits will change and text will be shown in the Implications box that tells about applications where those limits could be applied.
After selecting one of the 4 options, the limits can still be adjusted individually. Use your mouse to slide the alarm and warning limit pointers on the graph. You can also click on the arrows next to the value you wish to change. The page up/down keys and up/down arrow keys will also change the values. After changing the values, press the Apply button. Press the Retrieve button to get the limit values currently used in the positioner.
When the DTM views a device that has not been upgraded with Advanced Diagnostics or when the DTM has not been upgraded, this screen becomes unavailable.
6.3 Positioner Health
This screen displays all of the indicators that determine the positioner health. For each indicator, an Implications and Possible Solutions button is available. When the button is selected, information regarding that indicator will be displayed to the right. This page is only available with the Advanced DTM used with a positioner that has been upgraded with Pro diagnostics.
ValveSight Diagnostics for HART User Manual FCD VSENSF0001-02-AQ 03/15
20
Positioner TemperatureThe temperature inside the positioner is displayed on the first graph and in the “Temperature Value’ display box. An upper and lower limit are set. When the temperature moves beyond these limits, a warning is generated. These limits corre-spond with temperature capabilities of the positioner electronics.
Pilot Relay Response TimeThe pilot relay response time is displayed on the graph and in the “Current Value” display box. This represents the time (in milliseconds) for the pilot relay to respond to a command. Two limits are set and also adjustable. When the response time grows beyond these limits, a warning is generated, then an alarm. To adjust the limits, use the page up/down but-tons on your keyboard or use the mouse to click on and slide the limit indicators on the graph. Press the Apply button at the bottom of the screen to activate the new limits in the positioner.
Pilot Relay CyclesThe number of relay cycles is displayed on the graph and in the “Current Value” display box. It represents the number of pilot relay cycles since factory reset, or since the Counter Reset button was selected. Two limits are set and also adjust-able. The lower limit is fixed at 90% of the upper limit. As the cycle counts pass the Initial Warning limit the Positioner Health bar on the Dashboard will begin to turn yellow and a warning will be sent in response to a HART command 48. As the cycle counts pass the Final Warning limit the valve health bar on the Dashboard will turn completely yellow. To adjust the limits, use the page up/down buttons on your keyboard or use the mouse to click on and slide the alarm limit indica-tor on the graph. Press the Apply button at the bottom of the screen to activate the new limits in the positioner.
Pilot Relay TravelThe number of cycles is displayed on the graph and in the “Current Value” display box. It represents the travel of the relay (in% full scale) since factory reset, or since the Travel Reset button was selected. Two limits are set and also adjustable. The lower limit is fixed at 90% of the upper limit. As the cycle counts pass the Initial Warning limit the Positioner Health bar on the Dashboard will begin to turn yellow and a warning will be sent in response to a HART command 48. As the cycle counts pass the Final Warning limit the valve health bar on the Dashboard will turn completely yellow. To adjust the limits, use the page up/down buttons on your keyboard or use the mouse to click on and slide the alarm limit indicator on the graph. Press the Apply button at the bottom of the screen to activate the new limits in the positioner.
Binary IndicatorsThe status of diagnostic indicators is displayed at the bottom of this screen. These indicators also affect the health status bars on the Dashboard. Select the Implications and Possible Solutions buttons to view additional information about these positioner indicators.
6.4 Actuator HealthThis screen displays all of the indicators that determine the actuator health. For each indicator, an Implications and Pos-sible Solutions button is available. When the button is selected, information regarding that indicator will be displayed on the right. This page is only available with the Advanced DTM used with a positioner that has been upgraded with Pro diagnostics.
ValveSight Diagnostics for HART User Manual FCD VSENSF0001-02-AQ 03/15
21flowserve.com
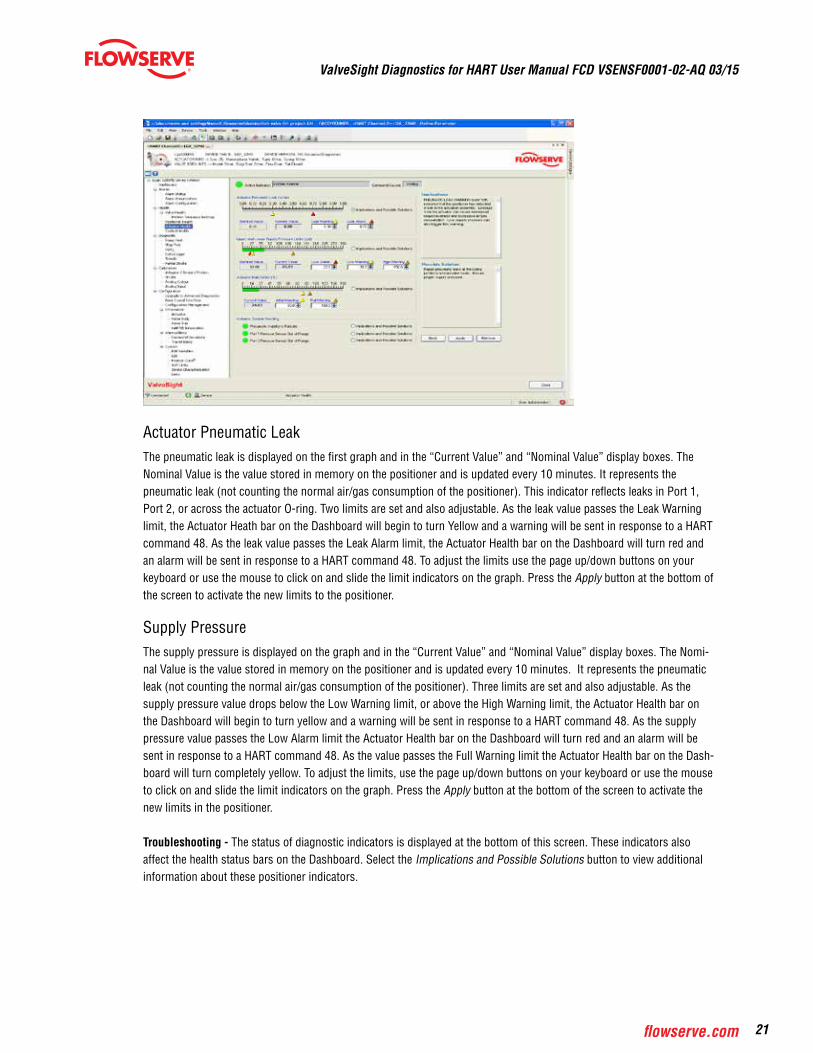
Actuator Pneumatic LeakThe pneumatic leak is displayed on the first graph and in the “Current Value” and “Nominal Value” display boxes. The Nominal Value is the value stored in memory on the positioner and is updated every 10 minutes. It represents the pneumatic leak (not counting the normal air/gas consumption of the positioner). This indicator reflects leaks in Port 1, Port 2, or across the actuator O-ring. Two limits are set and also adjustable. As the leak value passes the Leak Warning limit, the Actuator Heath bar on the Dashboard will begin to turn Yellow and a warning will be sent in response to a HART command 48. As the leak value passes the Leak Alarm limit, the Actuator Health bar on the Dashboard will turn red and an alarm will be sent in response to a HART command 48. To adjust the limits use the page up/down buttons on your keyboard or use the mouse to click on and slide the limit indicators on the graph. Press the Apply button at the bottom of the screen to activate the new limits to the positioner.
Supply PressureThe supply pressure is displayed on the graph and in the “Current Value” and “Nominal Value” display boxes. The Nomi-nal Value is the value stored in memory on the positioner and is updated every 10 minutes. It represents the pneumatic leak (not counting the normal air/gas consumption of the positioner). Three limits are set and also adjustable. As the supply pressure value drops below the Low Warning limit, or above the High Warning limit, the Actuator Health bar on the Dashboard will begin to turn yellow and a warning will be sent in response to a HART command 48. As the supply pressure value passes the Low Alarm limit the Actuator Health bar on the Dashboard will turn red and an alarm will be sent in response to a HART command 48. As the value passes the Full Warning limit the Actuator Health bar on the Dash-board will turn completely yellow. To adjust the limits, use the page up/down buttons on your keyboard or use the mouse to click on and slide the limit indicators on the graph. Press the Apply button at the bottom of the screen to activate the new limits in the positioner.
Troubleshooting - The status of diagnostic indicators is displayed at the bottom of this screen. These indicators also affect the health status bars on the Dashboard. Select the Implications and Possible Solutions button to view additional information about these positioner indicators.
ValveSight Diagnostics for HART User Manual FCD VSENSF0001-02-AQ 03/15
22
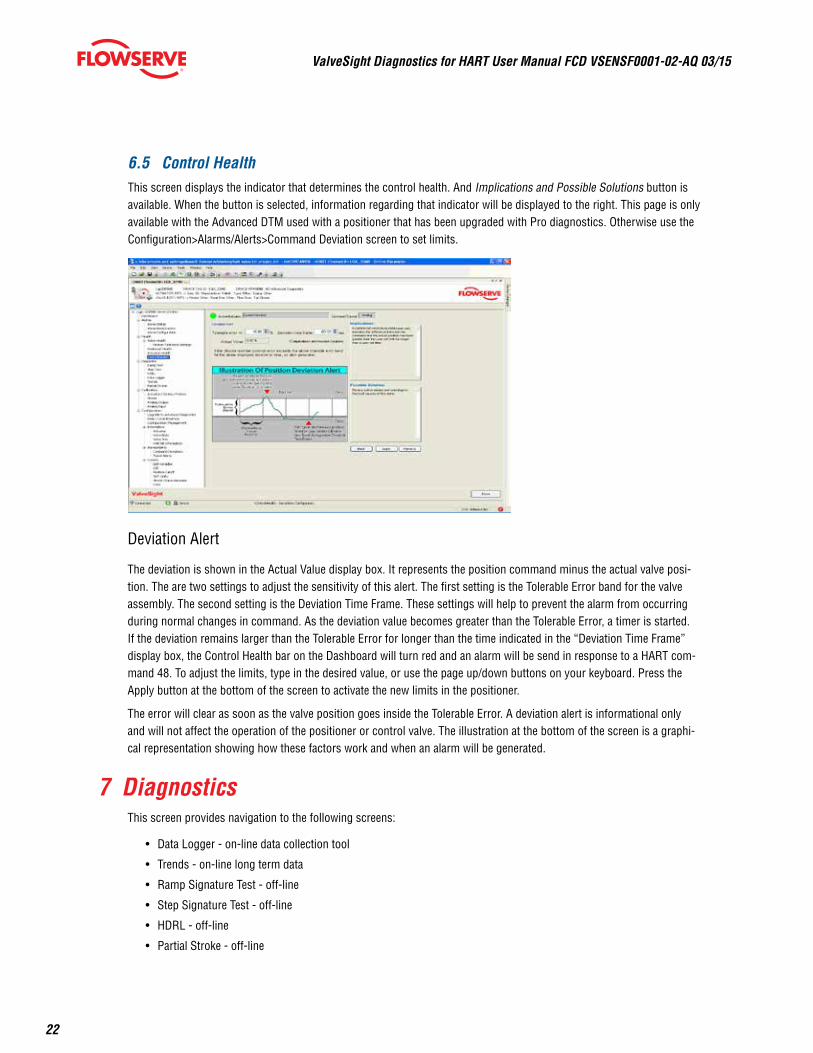
6.5 Control HealthThis screen displays the indicator that determines the control health. And Implications and Possible Solutions button is available. When the button is selected, information regarding that indicator will be displayed to the right. This page is only available with the Advanced DTM used with a positioner that has been upgraded with Pro diagnostics. Otherwise use the Configuration>Alarms/Alerts>Command Deviation screen to set limits.
Deviation Alert
The deviation is shown in the Actual Value display box. It represents the position command minus the actual valve posi-tion. The are two settings to adjust the sensitivity of this alert. The first setting is the Tolerable Error band for the valve assembly. The second setting is the Deviation Time Frame. These settings will help to prevent the alarm from occurring during normal changes in command. As the deviation value becomes greater than the Tolerable Error, a timer is started. If the deviation remains larger than the Tolerable Error for longer than the time indicated in the “Deviation Time Frame” display box, the Control Health bar on the Dashboard will turn red and an alarm will be send in response to a HART com-mand 48. To adjust the limits, type in the desired value, or use the page up/down buttons on your keyboard. Press the Apply button at the bottom of the screen to activate the new limits in the positioner.
The error will clear as soon as the valve position goes inside the Tolerable Error. A deviation alert is informational only and will not affect the operation of the positioner or control valve. The illustration at the bottom of the screen is a graphi-cal representation showing how these factors work and when an alarm will be generated.
7 DiagnosticsThis screen provides navigation to the following screens:
• Data Logger - on-line data collection tool
• Trends - on-line long term data
• Ramp Signature Test - off-line
• Step Signature Test - off-line
• HDRL - off-line
• Partial Stroke - off-line

ValveSight Diagnostics for HART User Manual FCD VSENSF0001-02-AQ 03/15
23flowserve.com
Adjusting the GraphsAt the top of each graph window there are several controls for viewing the graph.
• Resume - Returns the graph to the original scale
• Scroll - Allows you to use the cursor to scroll the axes, moving the location of the data on the chart.
• Zoom - Allows you to use the cursor to zoom the axes.
• Zoom In - Zooms in the whole graph.
• Zoom Out - Zooms the whole graph out.
• Zoom Box - Allows you to select any area of the graph. The selected area will be magnified to fit the chart.
• Cursor - Allows you to find precise values for the data displayed. Select the Cursor button, then select the data series you wish to examine from the legend at the right of the graph. It will have an indicator which shows precise values from the appropriate scale on the left. Use your mouse to drag the cursor to the desired position.
7.1 Ramp TestRamp Tests are a powerful tool for bench testing valves in a shop or installed valves that are not in service and can be fully or partially stroked. By ramping up the valve with a known input and monitoring the response, you can note changes over time and pinpoint problems that are developing or existing.
ValveSight Diagnostics for HART User Manual FCD VSENSF0001-02-AQ 03/15
24
Ramp Test SettingsBefore starting a ramp test, the values in the “Ramp Test Settings” box will need to be set. The Hold Time is additional settle time before the ramp begins. The Test Duration controls the speed of the ramp. Press Start at the bottom of the screen to begin the test.
Graph SettingsThe “Graph Settings” box allows the user to select the items that are displayed on the graph. Any items can be shown or
hidden after the data has been downloaded from the positioner.
MonitorsThe “Monitors” display box shows information regarding the status of the test. Test Status shows “complete” when the test is finished. Elapsed Time shows the real time that has passed since the test process started. The Data Acquisition Progress shows the progress of the test. The 4 buttons between the settings and the graph control how the data is shown.
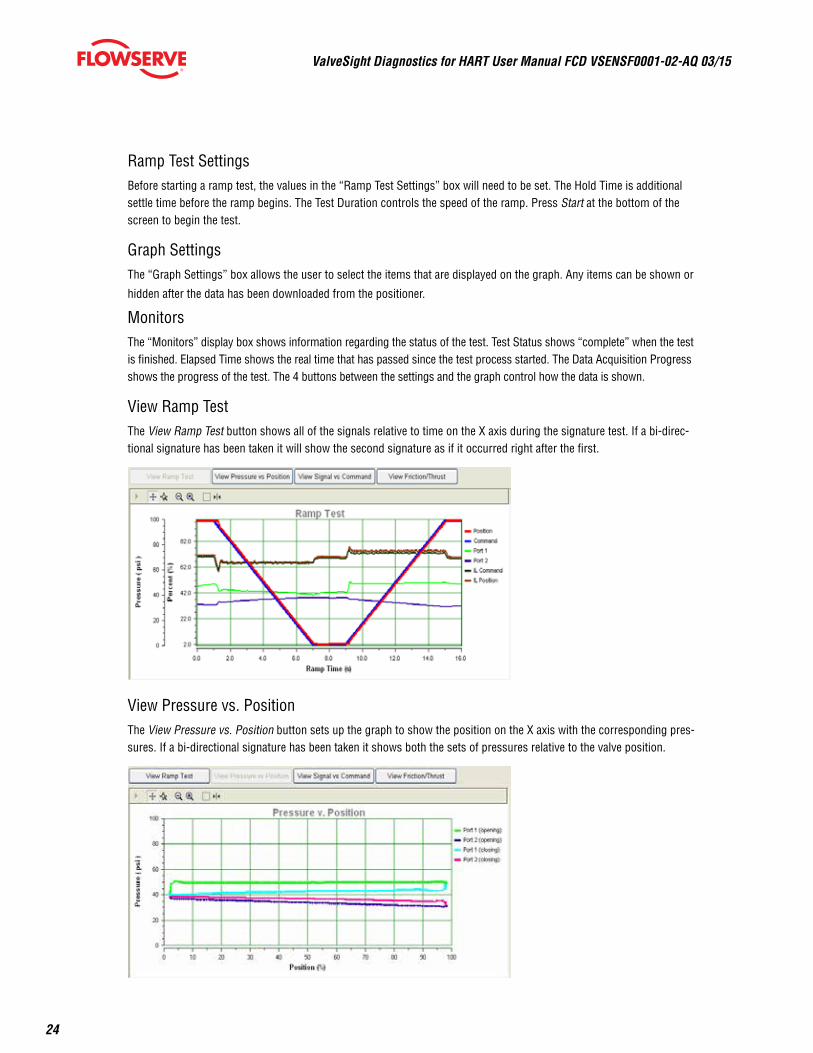
View Ramp TestThe View Ramp Test button shows all of the signals relative to time on the X axis during the signature test. If a bi-direc-tional signature has been taken it will show the second signature as if it occurred right after the first.
View Pressure vs. PositionThe View Pressure vs. Position button sets up the graph to show the position on the X axis with the corresponding pres-sures. If a bi-directional signature has been taken it shows both the sets of pressures relative to the valve position.
ValveSight Diagnostics for HART User Manual FCD VSENSF0001-02-AQ 03/15
25flowserve.com
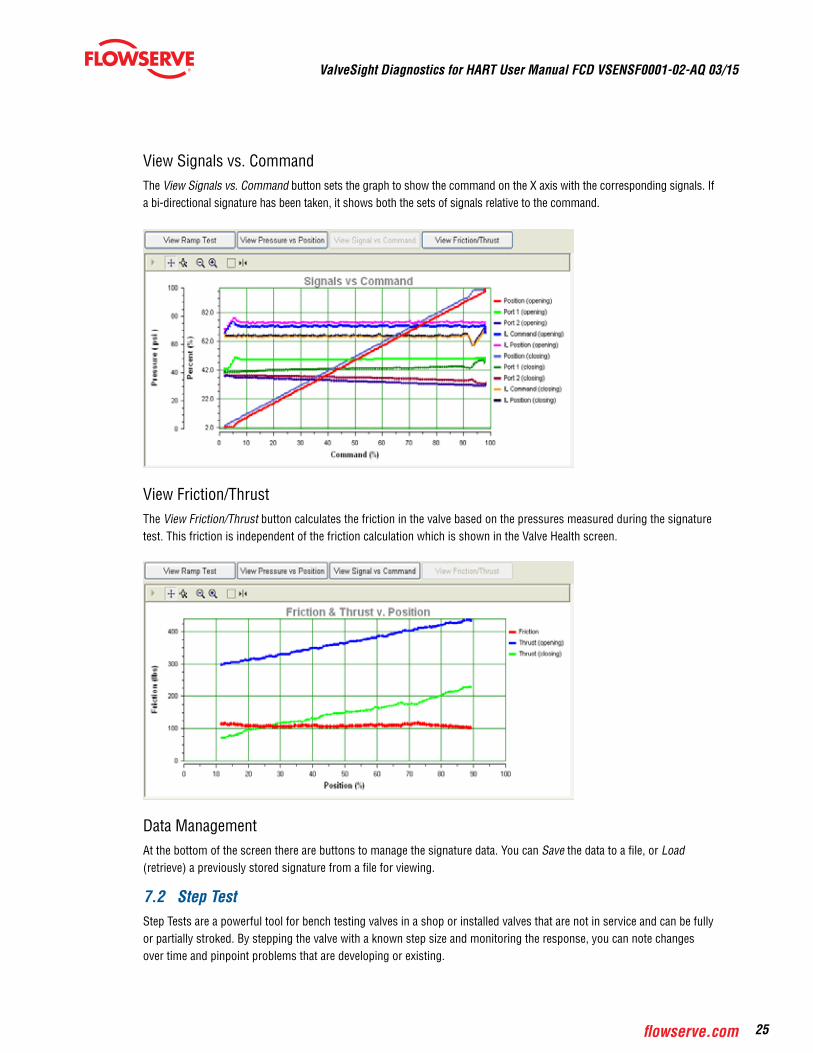
View Signals vs. CommandThe View Signals vs. Command button sets the graph to show the command on the X axis with the corresponding signals. If a bi-directional signature has been taken, it shows both the sets of signals relative to the command.
View Friction/ThrustThe View Friction/Thrust button calculates the friction in the valve based on the pressures measured during the signature test. This friction is independent of the friction calculation which is shown in the Valve Health screen.
Data ManagementAt the bottom of the screen there are buttons to manage the signature data. You can Save the data to a file, or Load (retrieve) a previously stored signature from a file for viewing.
7.2 Step TestStep Tests are a powerful tool for bench testing valves in a shop or installed valves that are not in service and can be fully or partially stroked. By stepping the valve with a known step size and monitoring the response, you can note changes over time and pinpoint problems that are developing or existing.
ValveSight Diagnostics for HART User Manual FCD VSENSF0001-02-AQ 03/15
26
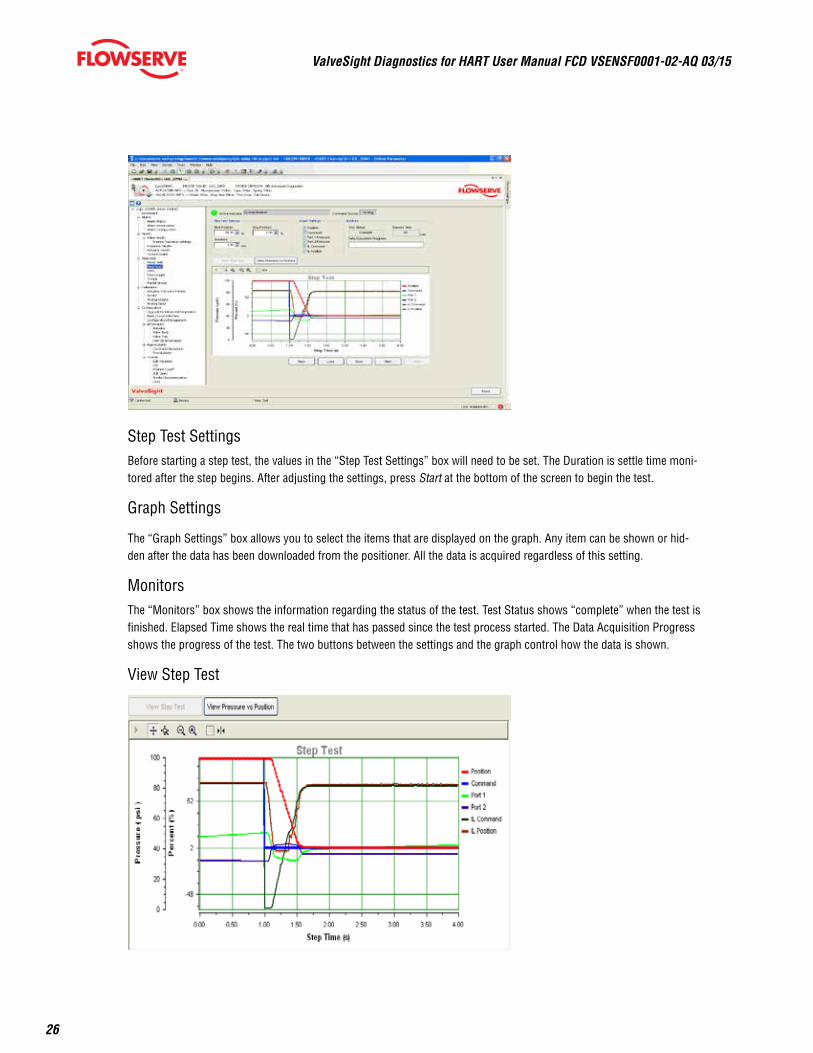
Step Test SettingsBefore starting a step test, the values in the “Step Test Settings” box will need to be set. The Duration is settle time moni-tored after the step begins. After adjusting the settings, press Start at the bottom of the screen to begin the test.
Graph Settings
The “Graph Settings” box allows you to select the items that are displayed on the graph. Any item can be shown or hid-den after the data has been downloaded from the positioner. All the data is acquired regardless of this setting.
MonitorsThe “Monitors” box shows the information regarding the status of the test. Test Status shows “complete” when the test is finished. Elapsed Time shows the real time that has passed since the test process started. The Data Acquisition Progress shows the progress of the test. The two buttons between the settings and the graph control how the data is shown.
View Step Test

ValveSight Diagnostics for HART User Manual FCD VSENSF0001-02-AQ 03/15
27flowserve.com
The View Step Test button shows all of the signals relative to time on the X axis during the signature test.
View Pressure vs. Position
The View Pressure vs. Position button sets up the graph to show the position on the X axis with the corresponding pres-sures on the Y axis. Declining pressures during the test can indicate that the unit is starved of air supply.
Data ManagementAt the bottom of the screen there are buttons to manage the signature data. You can Save the data to a file, or Load (retrieve) a previously stored signature from a file for viewing.
7.3 HDRLHDRL tests are a powerful tool for benchmarking valve performance in a shop or installed valves that are not in service. By stepping the valve up and down through these preset points and monitoring the response, a valve assembly can quickly be tested and verified whether it is operating to specification. This page is only available with the Advanced DTM.
ValveSight Diagnostics for HART User Manual FCD VSENSF0001-02-AQ 03/15
28
Hysteresis and DeadbandThe “Hysteresis and Deadband” display box shows the Average and Maximum values from the test for the combined hysteresis and deadband. The positioner does not separate the hysteresis from the deadband.
RepeatabilityThe “Repeatability” display box shows the Average and Maximum values from the test for the repeatability of the system.
+/- Linearity ErrorThe “+/- Linearity Error” display box shows how closely the system follows a best fit straight line to a response.
MonitorsThe “Monitors” box shows information regarding the status of the test. Start Time shows the time of day when the test was started. Elapsed Time shows the real time that has passed since the test process started. The Data Acquisition Prog-ress shows the progress of the test.
Position Settling Time The “Position Settling Time” box has a field to select the proper time settling between steps.
The three buttons between the settings and the graph control how the data is shown.
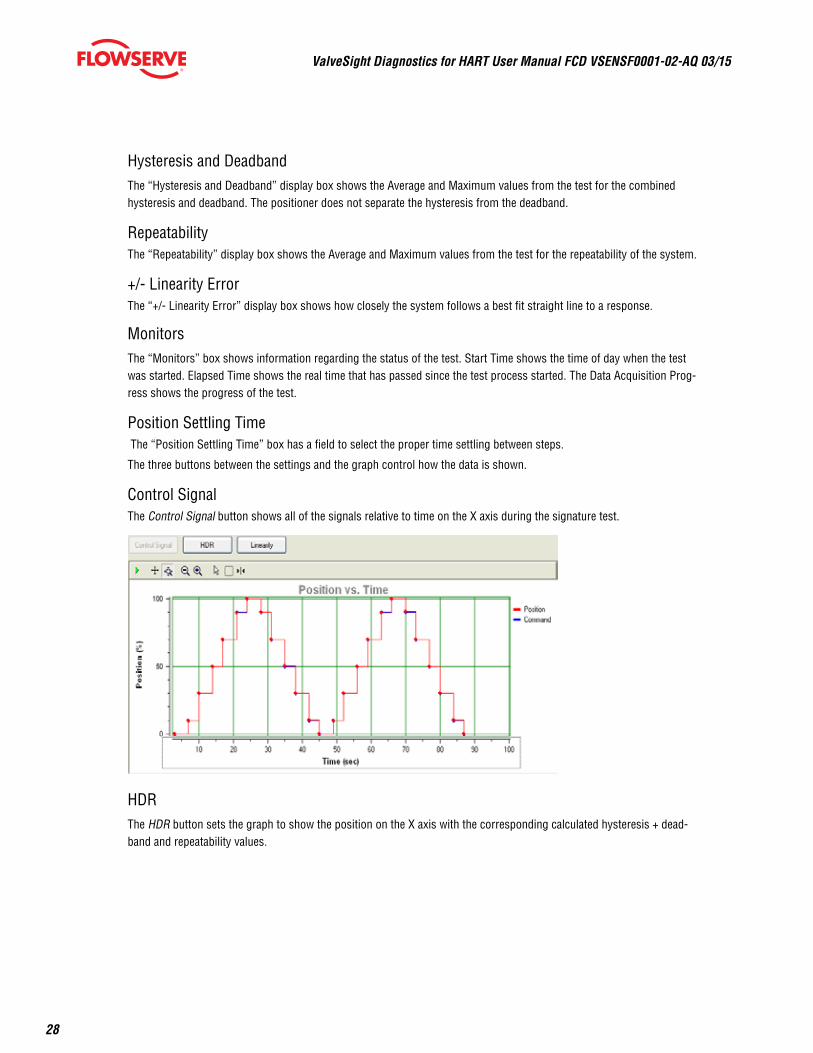
Control SignalThe Control Signal button shows all of the signals relative to time on the X axis during the signature test.
HDRThe HDR button sets the graph to show the position on the X axis with the corresponding calculated hysteresis + dead-band and repeatability values.

ValveSight Diagnostics for HART User Manual FCD VSENSF0001-02-AQ 03/15
29flowserve.com
LinearityThe Linearity button sets the graph to show the position on the X axis and graphs how closely the system follows a best fit straight line to a response. I.e.: for each of the up and down motions of the test.
Data ManagementAt the bottom of the screen, there are buttons to manage the signature data. You can Save the data to a file, or Load (retrieve) a previously stored signature from a file for viewing.
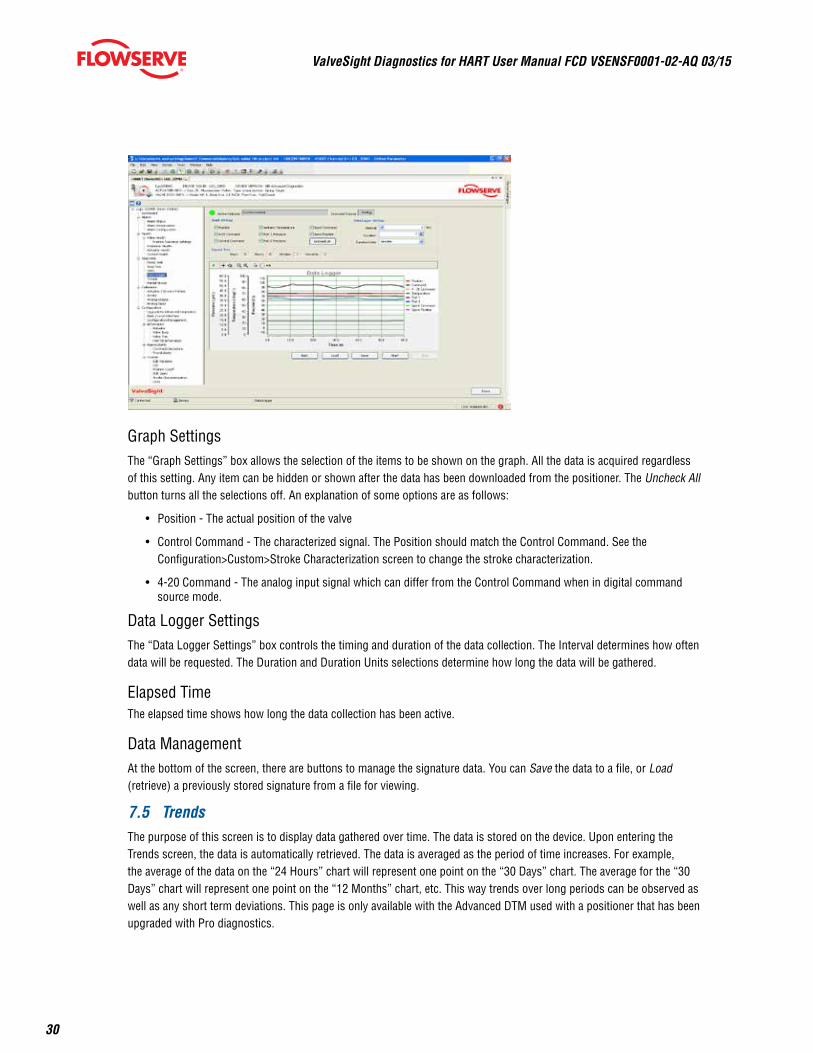
7.4 Data LoggerThe Data Logger provides a way to monitor real time data. As data is sent from the device it is plotted on a graph. This page is only available with the Advanced DTM.
ValveSight Diagnostics for HART User Manual FCD VSENSF0001-02-AQ 03/15
30
Graph SettingsThe “Graph Settings” box allows the selection of the items to be shown on the graph. All the data is acquired regardless of this setting. Any item can be hidden or shown after the data has been downloaded from the positioner. The Uncheck All button turns all the selections off. An explanation of some options are as follows:
• Position - The actual position of the valve
• Control Command - The characterized signal. The Position should match the Control Command. See the Configuration>Custom>Stroke Characterization screen to change the stroke characterization.
• 4-20 Command - The analog input signal which can differ from the Control Command when in digital command source mode.
Data Logger SettingsThe “Data Logger Settings” box controls the timing and duration of the data collection. The Interval determines how often data will be requested. The Duration and Duration Units selections determine how long the data will be gathered.
Elapsed TimeThe elapsed time shows how long the data collection has been active.
Data ManagementAt the bottom of the screen, there are buttons to manage the signature data. You can Save the data to a file, or Load (retrieve) a previously stored signature from a file for viewing.
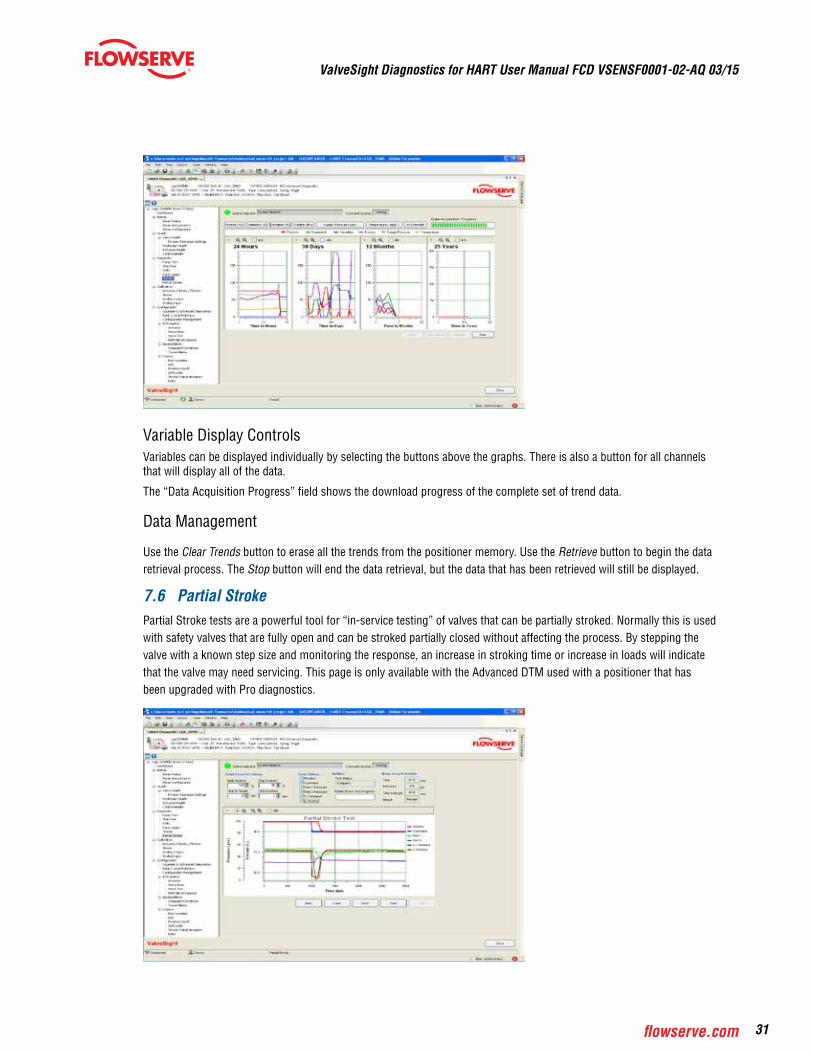
7.5 TrendsThe purpose of this screen is to display data gathered over time. The data is stored on the device. Upon entering the Trends screen, the data is automatically retrieved. The data is averaged as the period of time increases. For example, the average of the data on the “24 Hours” chart will represent one point on the “30 Days” chart. The average for the “30 Days” chart will represent one point on the “12 Months” chart, etc. This way trends over long periods can be observed as well as any short term deviations. This page is only available with the Advanced DTM used with a positioner that has been upgraded with Pro diagnostics.
ValveSight Diagnostics for HART User Manual FCD VSENSF0001-02-AQ 03/15
31flowserve.com
Variable Display ControlsVariables can be displayed individually by selecting the buttons above the graphs. There is also a button for all channels that will display all of the data.
The “Data Acquisition Progress” field shows the download progress of the complete set of trend data.
Data Management
Use the Clear Trends button to erase all the trends from the positioner memory. Use the Retrieve button to begin the data retrieval process. The Stop button will end the data retrieval, but the data that has been retrieved will still be displayed.
7.6 Partial StrokePartial Stroke tests are a powerful tool for “in-service testing” of valves that can be partially stroked. Normally this is used with safety valves that are fully open and can be stroked partially closed without affecting the process. By stepping the valve with a known step size and monitoring the response, an increase in stroking time or increase in loads will indicate that the valve may need servicing. This page is only available with the Advanced DTM used with a positioner that has been upgraded with Pro diagnostics.
ValveSight Diagnostics for HART User Manual FCD VSENSF0001-02-AQ 03/15
32
Partial Stroke Test SettingsThe “Time To Target” determines the acceptance criterion for the Pass/Fail result of the test. If the valve does not move to within 2% of the Stop Position before the Time to Target time has lapsed, the result of the test will be Fail. Test Duration determines the amount of time data collection will continue after the test has started.
Graph SettingsThe “Graph Settings” box allows for selection of the items (Position, Command, Port 1 Pressure, Port 2 Pressure, IL Command, and IL Position) to be displayed on the graph. All data is collected regardless of these settings.
MonitorsThe “Monitors” box shows information regarding the status of the test. Test Status shows Complete when the data has been collected. Partial Stroke Test Progress shows the progress of the test.
Break Away InformationThe “Break Away Information” box gives details about the test results. Time indicates the time for the valve to begin mov-ing after the command was sent. Pressure is the difference between the pressures in the two ports. The Time to Target is the actual time it requires for the valve to arrive within 2% of the final value. The Result gives a Pass/Fail indication of the test based on the reference time to target and the actual time to target.
Data ManagementAt the bottom of the screen, there are buttons to manage the signature data. You can Save the data to a file or Load (retrieve) a previously stored signature from a file for viewing. The Start button begins the partial stroke. Clicking the Stop button aborts a signature in process and returns the valve to normal operation.
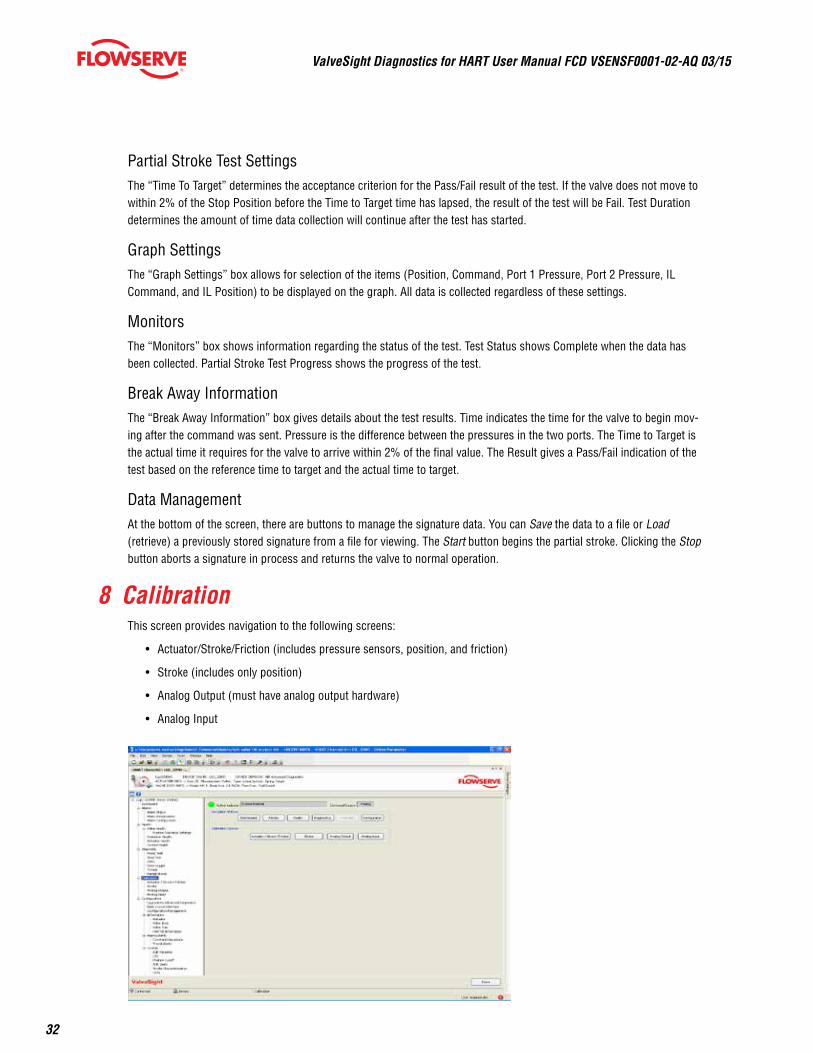
8 CalibrationThis screen provides navigation to the following screens:
• Actuator/Stroke/Friction (includes pressure sensors, position, and friction)
• Stroke (includes only position)
• Analog Output (must have analog output hardware)
• Analog Input
ValveSight Diagnostics for HART User Manual FCD VSENSF0001-02-AQ 03/15
33flowserve.com
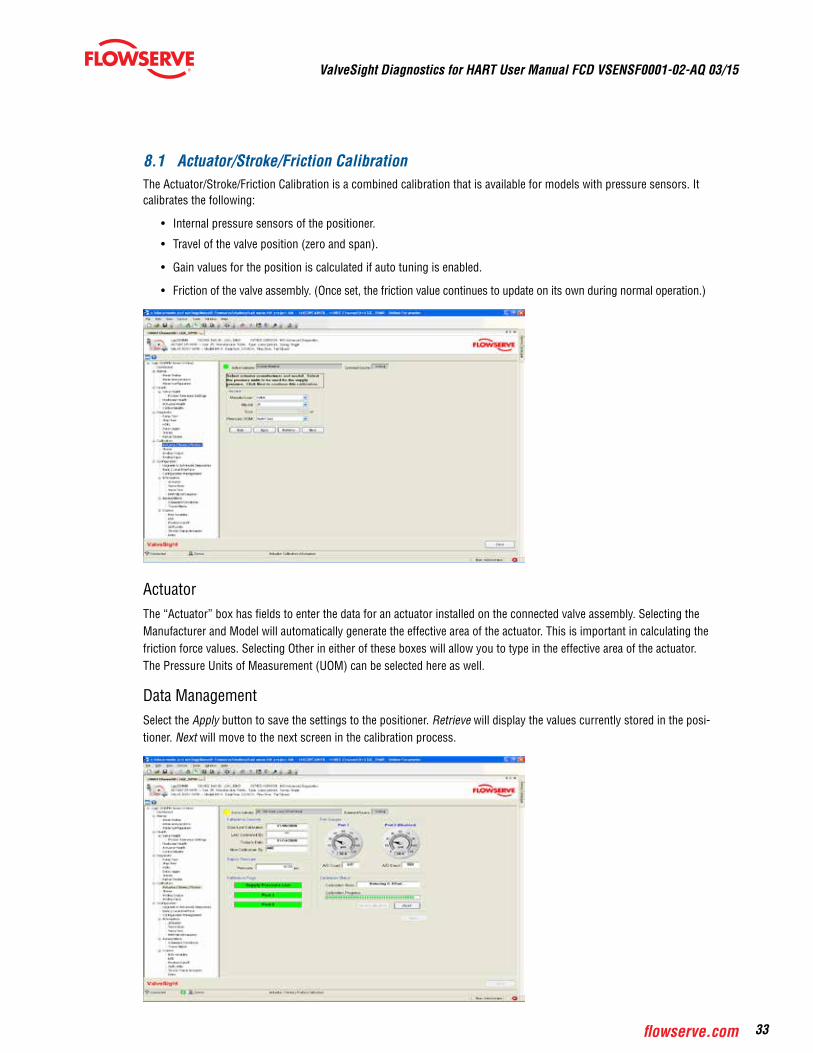
8.1 Actuator/Stroke/Friction CalibrationThe Actuator/Stroke/Friction Calibration is a combined calibration that is available for models with pressure sensors. It calibrates the following:
• Internal pressure sensors of the positioner.
• Travel of the valve position (zero and span).
• Gain values for the position is calculated if auto tuning is enabled.
• Friction of the valve assembly. (Once set, the friction value continues to update on its own during normal operation.)
ActuatorThe “Actuator” box has fields to enter the data for an actuator installed on the connected valve assembly. Selecting the Manufacturer and Model will automatically generate the effective area of the actuator. This is important in calculating the friction force values. Selecting Other in either of these boxes will allow you to type in the effective area of the actuator. The Pressure Units of Measurement (UOM) can be selected here as well.
Data ManagementSelect the Apply button to save the settings to the positioner. Retrieve will display the values currently stored in the posi-tioner. Next will move to the next screen in the calibration process.
ValveSight Diagnostics for HART User Manual FCD VSENSF0001-02-AQ 03/15
34
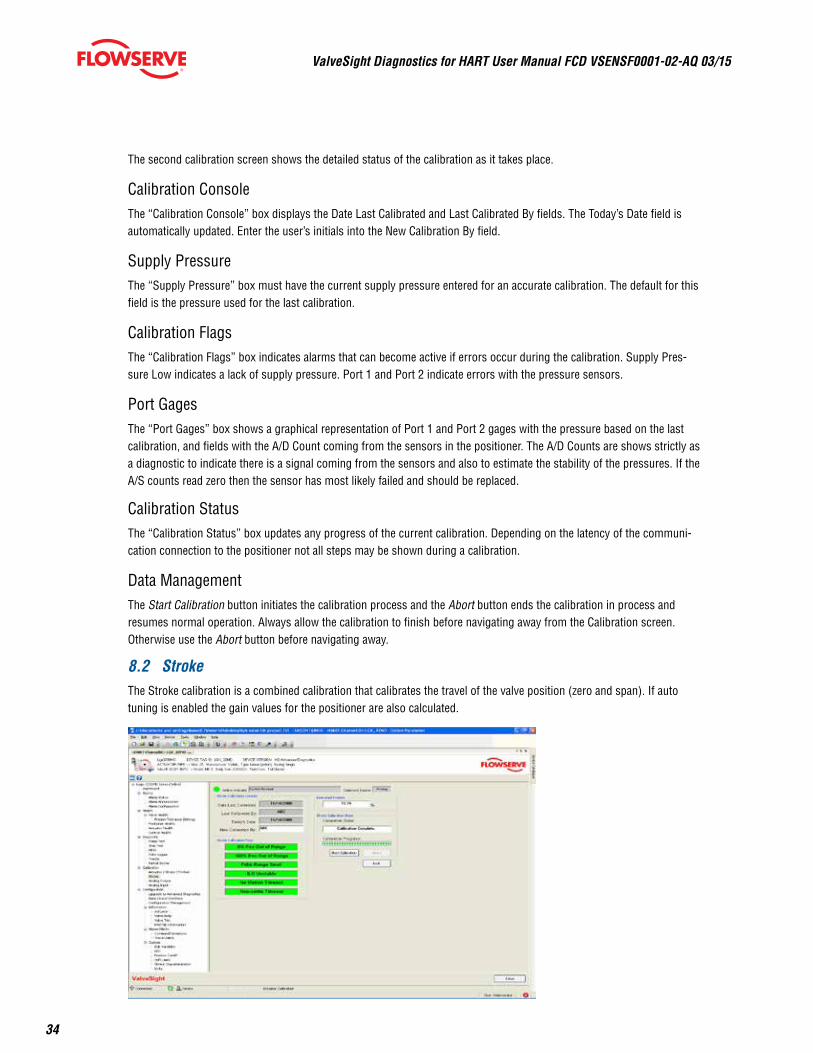
The second calibration screen shows the detailed status of the calibration as it takes place.
Calibration ConsoleThe “Calibration Console” box displays the Date Last Calibrated and Last Calibrated By fields. The Today’s Date field is automatically updated. Enter the user’s initials into the New Calibration By field.
Supply PressureThe “Supply Pressure” box must have the current supply pressure entered for an accurate calibration. The default for this field is the pressure used for the last calibration.
Calibration FlagsThe “Calibration Flags” box indicates alarms that can become active if errors occur during the calibration. Supply Pres-sure Low indicates a lack of supply pressure. Port 1 and Port 2 indicate errors with the pressure sensors.
Port GagesThe “Port Gages” box shows a graphical representation of Port 1 and Port 2 gages with the pressure based on the last calibration, and fields with the A/D Count coming from the sensors in the positioner. The A/D Counts are shows strictly as a diagnostic to indicate there is a signal coming from the sensors and also to estimate the stability of the pressures. If the A/S counts read zero then the sensor has most likely failed and should be replaced.
Calibration StatusThe “Calibration Status” box updates any progress of the current calibration. Depending on the latency of the communi-cation connection to the positioner not all steps may be shown during a calibration.
Data ManagementThe Start Calibration button initiates the calibration process and the Abort button ends the calibration in process and resumes normal operation. Always allow the calibration to finish before navigating away from the Calibration screen. Otherwise use the Abort button before navigating away.
8.2 StrokeThe Stroke calibration is a combined calibration that calibrates the travel of the valve position (zero and span). If auto tuning is enabled the gain values for the positioner are also calculated.
ValveSight Diagnostics for HART User Manual FCD VSENSF0001-02-AQ 03/15
35flowserve.com
Stroke Calibration ConsoleThe “Stroke Calibration Console” box has fields for the Date Last Calibrated and Last Calibrated By. The Today’s Date field is updated automatically. Enter the initials of the user in the New Calibration By field.
Stroke Calibration FlagsThe “Stroke Calibration Flags” box indicates alarms that can become active if errors occur during calibration. 0% Position Out of Range and 100% Out of Range errors indicate that the feedback arm has moved too far in one direction. Feedback Range Small indicates the feedback arm should be shortened. ILO Unstable indicates trouble with the inner loop system. No Motion Timeout indicates little or no feedback movement was detected. Non-settle Timeout indicates unstable feedback.
Estimated PositionThe “Estimated Position” box shows the current position of the valve. This may not be accurate if there is a lot of latency in the communication with the positioner.
Stroke Calibration StateThe “Stroke Calibration State” box shows the Calibration State and the Calibration Progress. Depending on the latency of the communication connection to the positioner not all steps may be shown during a calibration.
Data ManagementThe Start Calibration button initiates the calibration process and the Abort button ends the calibration in process and resumes normal operation. Always allow the calibration to finish before navigating away from the Calibration screen. Otherwise, use the Abort button before navigating away.
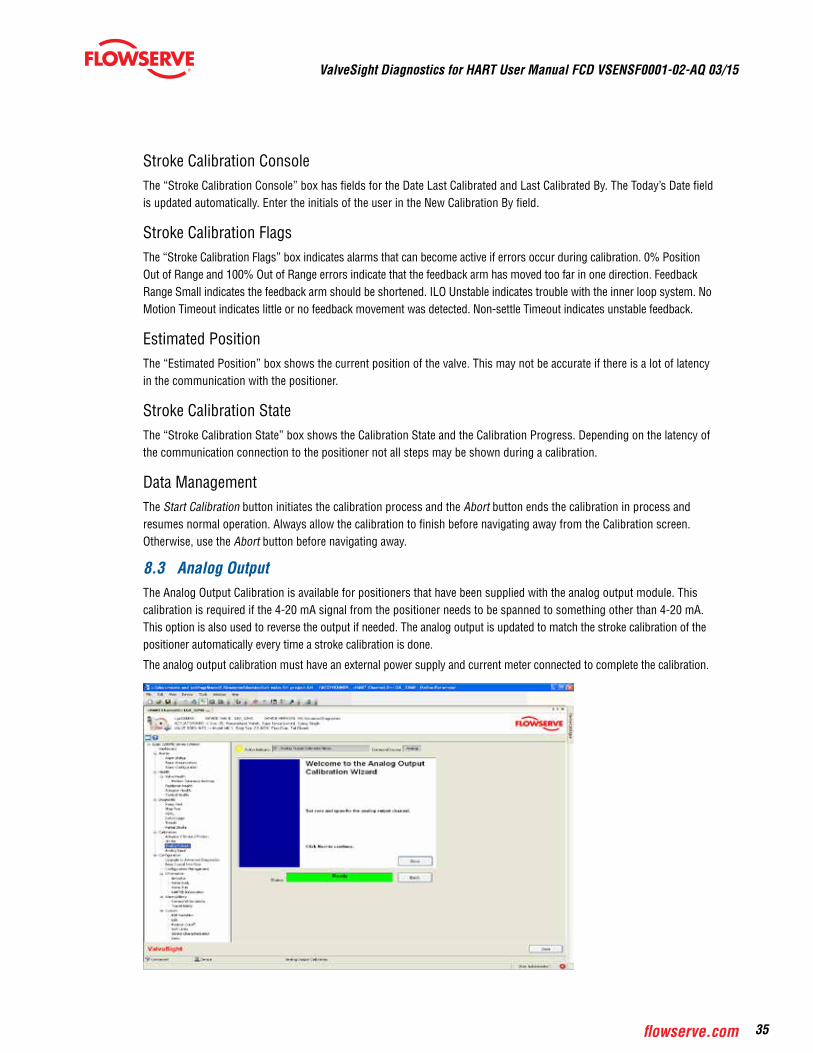
8.3 Analog OutputThe Analog Output Calibration is available for positioners that have been supplied with the analog output module. This calibration is required if the 4-20 mA signal from the positioner needs to be spanned to something other than 4-20 mA. This option is also used to reverse the output if needed. The analog output is updated to match the stroke calibration of the positioner automatically every time a stroke calibration is done.
The analog output calibration must have an external power supply and current meter connected to complete the calibration.

ValveSight Diagnostics for HART User Manual FCD VSENSF0001-02-AQ 03/15
36
At the bottom of each screen in the Analog Output Calibration is a Status field that indicates any actions required or if the
process is ready for the next step.
The first screen of the Analog Output Calibration Wizard requires no input. Click the Next button to start the wizard.
Instructions are provided on the screens that follow.
8.4 Analog InputThe Analog Input Calibration provides a way to change the relationship between the 4-20 mA input and the stroke of the valve. This calibration is required if the 4-20 mA signal to the positioner needs to be spanned to something other than 4-20 mA. The calibration values are updated to match the stroke calibration of the positioner automatically every time a stroke calibration is done.
The Analog Input calibration must have an external current source connected to complete the calibration.
MonitorThe “Monitor” box shows the Command A/D input value. This reflects the value of the command signal before it is con-verted to %. The Design Current shows the current detected by the positioner.
Calibration FlagsThe “Calibration Flags” display box indicates alarms that can become active if errors occur during calibration. The 0% Signal Out of Range error indicates that the current supplied for the 0% position is not correct. The 100% Signal Out of Range error indicates that the current supplied for the 100% position is not correct. The Range Too Small error indicates that a larger current span from 0% to 100% is required.
At the bottom of each screen in the Analog Input calibration is a Status field that indicates any actions required or if the process is ready for the next step.
The first screen of the Analog Input Calibration Wizard requires no input. Click the Next button to start the wizard. In-structions are provided on the screens that follow.
9 ConfigurationThe purpose of the Configuration screen is to redirect the user to the various Configuration screens or to any of the main navigation screens.
ValveSight Diagnostics for HART User Manual FCD VSENSF0001-02-AQ 03/15
37flowserve.com
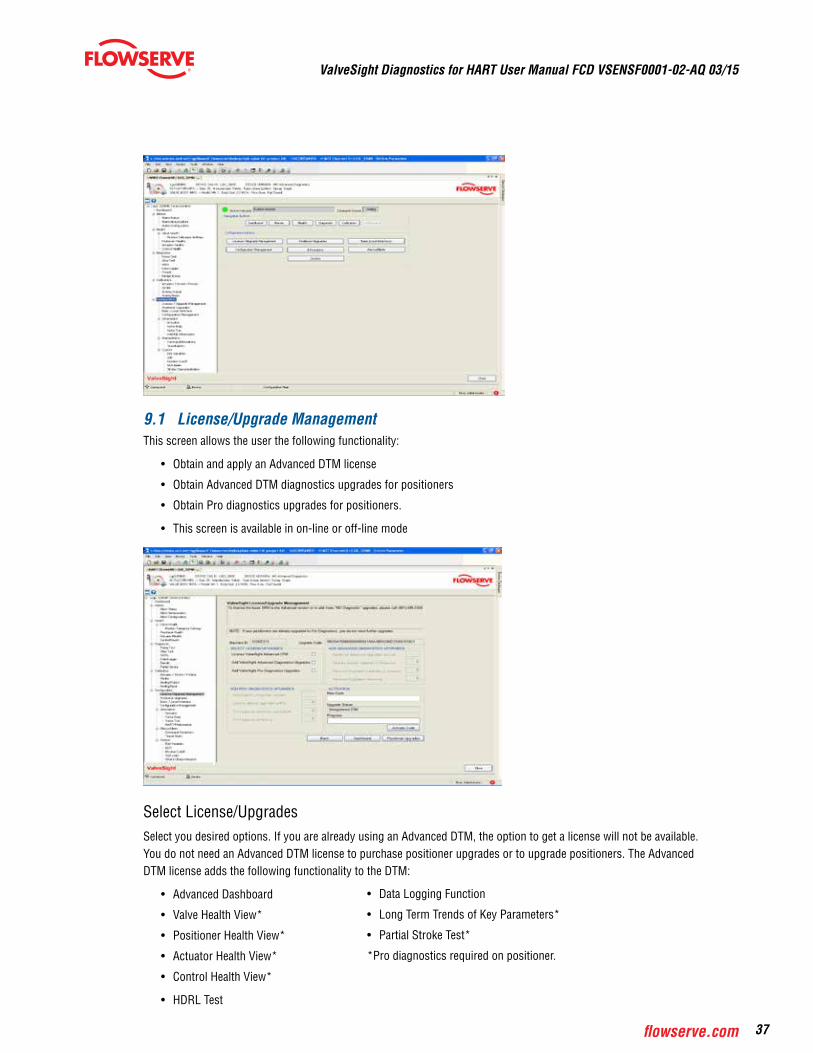
9.1 License/Upgrade ManagementThis screen allows the user the following functionality:
• Obtain and apply an Advanced DTM license
• Obtain Advanced DTM diagnostics upgrades for positioners
• Obtain Pro diagnostics upgrades for positioners.
• This screen is available in on-line or off-line mode
Select License/UpgradesSelect you desired options. If you are already using an Advanced DTM, the option to get a license will not be available. You do not need an Advanced DTM license to purchase positioner upgrades or to upgrade positioners. The Advanced DTM license adds the following functionality to the DTM:
• Advanced Dashboard
• Valve Health View*
• Positioner Health View*
• Actuator Health View*
• Control Health View*
• HDRL Test
• Data Logging Function
• Long Term Trends of Key Parameters*
• Partial Stroke Test*
*Pro diagnostics required on positioner.

ValveSight Diagnostics for HART User Manual FCD VSENSF0001-02-AQ 03/15
38
Add Advanced Diagnostics UpgradeAdvanced diagnostic upgrades are used to upgrade a positioner from Standard to Advanced diagnostics. All Logix 3000MD series positioners use pressure sensors in the positioner control algorithm to enhance valve stability. The positioner with Advanced diagnostics performs calculations such as detection of loss of pressure, diagnostic signatures, and logging.
This area shows the number of upgrades originally ordered, the total number used, and remaining upgrades that are still available. Type in the number of additional Advanced upgrades you desire. After activating the license key, go to the Configu-ration > Positioner Upgrade screen to upgrade a positioner that is on-line.
Add Pro Diagnostics UpgradesPro diagnostic upgrades are used to upgrade a positioner from Advanced diagnostics to Pro diagnostics. In addition to all of the functionality of Standard and Advanced positioners, the positioner with Pro diagnostics adds full diagnostic capabilities including continuous on-line friction, pneumatic leak and actuation ratio analyses. Pro diagnostics supports comprehensive health views in the ValveSight DTM. Partial stroke tests and long term trends of key parameters are also available with Pro diagnostics.
This area shows the number of upgrades originally ordered, the total number used, and remaining upgrades that are still available. Type the number of additional Pro upgrades you desire. After activating the license key, go to the Configuration > Positioner Upgrade screen to upgrade a positioner that is on-line.
ActivationAfter completing the desired inputs, contact Flowserve as directed on the screen. The information on this screen (such as ‘Machine ID’ and ‘Upgrade Code’) will be required to process your request. Flowserve will provide a New Code. Enter this code and select the Activate Code button. This will apply the Advanced DTM license and add your ability to use Advanced and Pro positioner upgrades. This will not apply Advanced or Pro positioner upgrades to an attached positioner. To upgrade a positioner, see the Positioner Upgrades screen.
Note: All purchases activated on a PC apply to that PC only. Device upgrades must be made from the PC that was used to purchase them. The Advanced DTM license will apply only to the PC that was used to purchase it. No additional upgrade is needed for devices that were purchased from the factory at the desired level. Only those devices which need additional functionality after purchase should be upgraded.
From this page, using the links at the bottom, you can go directly to the Apply Positioner Upgrades screen or the Dashboard.
9.2 Positioner UpgradesThis screen allows the user to Apply and advanced upgrade to a Standard positioner or Apply a Pro upgrade to an Advanced positioner.
ValveSight Diagnostics for HART User Manual FCD VSENSF0001-02-AQ 03/15
39flowserve.com
This screen shows the number of upgrades originally ordered, the total number used, and remaining upgrades that are still available from the computer in use. To obtain additional upgrades see the ValveSight License/Upgrade Management screen.
To upgrade a device, go on-line with the positioner that you desire to upgrade. Select the upgrade desired. This will upgrade the positioner and decrease the number of remaining upgrades by one. Only a Standard positioner may be upgraded to Advanced. Only an Advanced positioner may be upgraded to Pro.
Note: The ability to upgrade will not be available if pressure sensors are not detected by the positioner.
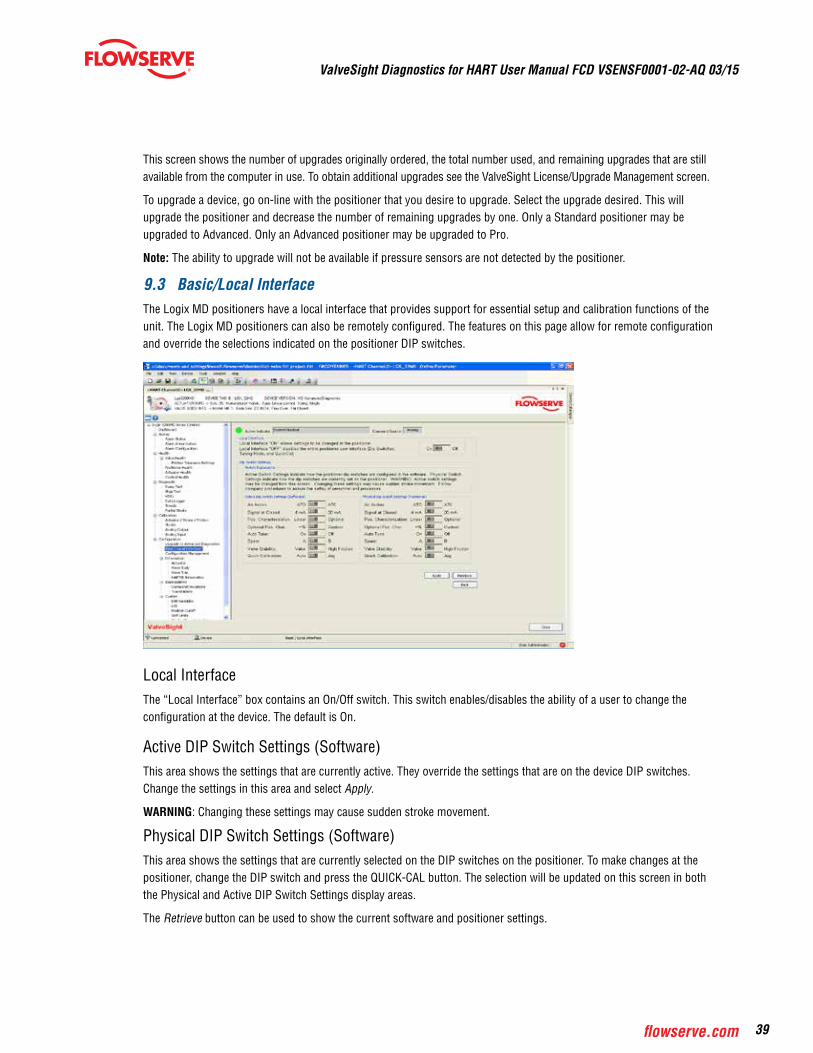
9.3 Basic/Local InterfaceThe Logix MD positioners have a local interface that provides support for essential setup and calibration functions of the unit. The Logix MD positioners can also be remotely configured. The features on this page allow for remote configuration and override the selections indicated on the positioner DIP switches.
Local InterfaceThe “Local Interface” box contains an On/Off switch. This switch enables/disables the ability of a user to change the configuration at the device. The default is On.
Active DIP Switch Settings (Software)This area shows the settings that are currently active. They override the settings that are on the device DIP switches. Change the settings in this area and select Apply.
WARNING: Changing these settings may cause sudden stroke movement.
Physical DIP Switch Settings (Software)This area shows the settings that are currently selected on the DIP switches on the positioner. To make changes at the positioner, change the DIP switch and press the QUICK-CAL button. The selection will be updated on this screen in both the Physical and Active DIP Switch Settings display areas.
The Retrieve button can be used to show the current software and positioner settings.
ValveSight Diagnostics for HART User Manual FCD VSENSF0001-02-AQ 03/15
40
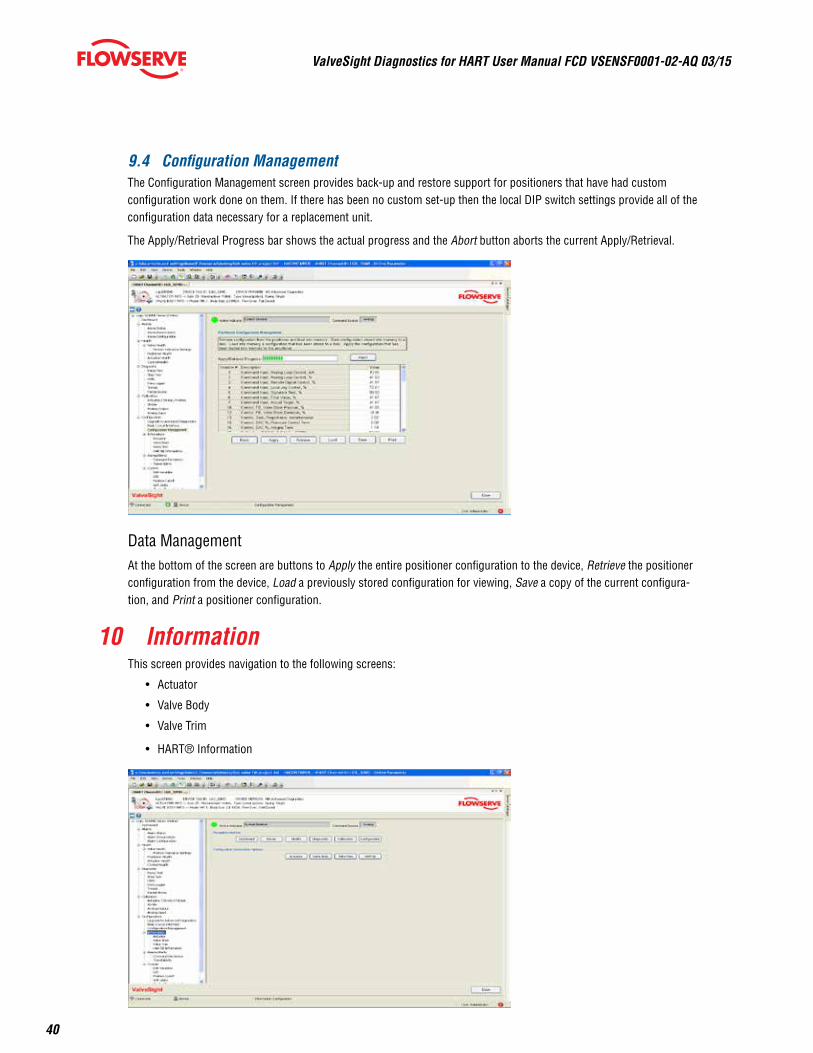
9.4 Configuration ManagementThe Configuration Management screen provides back-up and restore support for positioners that have had custom configuration work done on them. If there has been no custom set-up then the local DIP switch settings provide all of the configuration data necessary for a replacement unit.
The Apply/Retrieval Progress bar shows the actual progress and the Abort button aborts the current Apply/Retrieval.
Data ManagementAt the bottom of the screen are buttons to Apply the entire positioner configuration to the device, Retrieve the positioner configuration from the device, Load a previously stored configuration for viewing, Save a copy of the current configura-tion, and Print a positioner configuration.
10 InformationThis screen provides navigation to the following screens:
• Actuator
• Valve Body
• Valve Trim
• HART® Information
ValveSight Diagnostics for HART User Manual FCD VSENSF0001-02-AQ 03/15
41flowserve.com
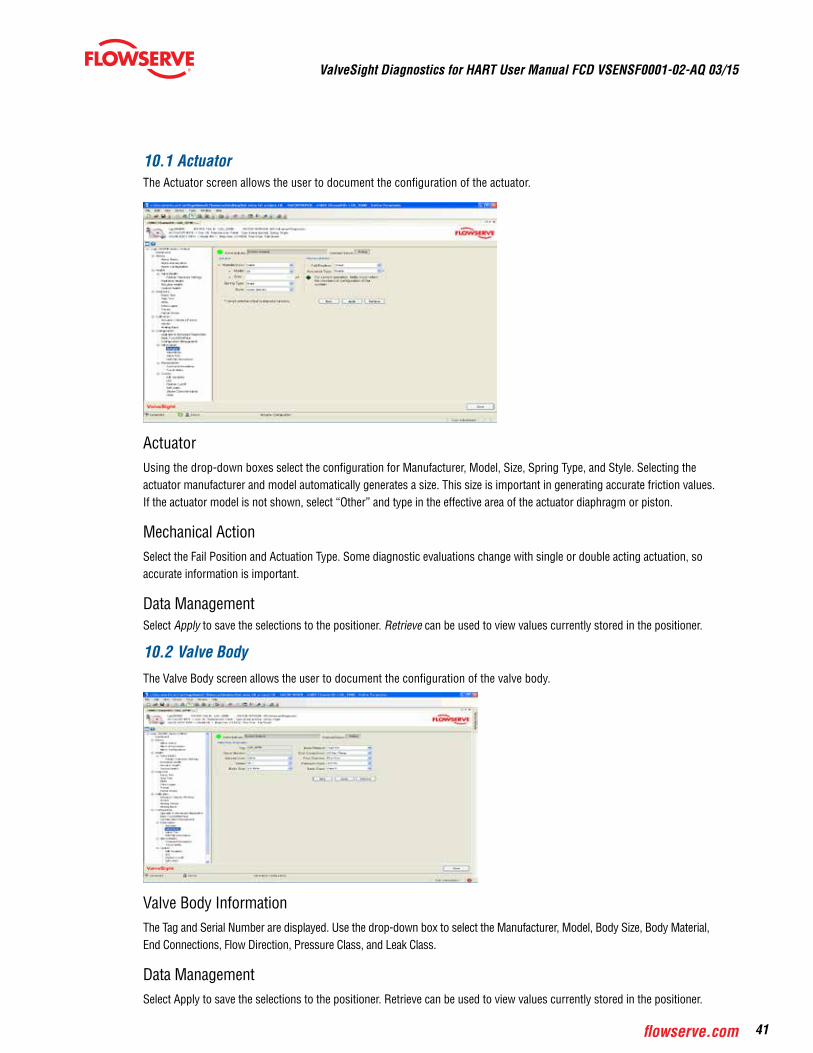
10.1 ActuatorThe Actuator screen allows the user to document the configuration of the actuator.
ActuatorUsing the drop-down boxes select the configuration for Manufacturer, Model, Size, Spring Type, and Style. Selecting the actuator manufacturer and model automatically generates a size. This size is important in generating accurate friction values. If the actuator model is not shown, select “Other” and type in the effective area of the actuator diaphragm or piston.
Mechanical ActionSelect the Fail Position and Actuation Type. Some diagnostic evaluations change with single or double acting actuation, so accurate information is important.
Data ManagementSelect Apply to save the selections to the positioner. Retrieve can be used to view values currently stored in the positioner.
10.2 Valve BodyThe Valve Body screen allows the user to document the configuration of the valve body.
Valve Body InformationThe Tag and Serial Number are displayed. Use the drop-down box to select the Manufacturer, Model, Body Size, Body Material, End Connections, Flow Direction, Pressure Class, and Leak Class.
Data ManagementSelect Apply to save the selections to the positioner. Retrieve can be used to view values currently stored in the positioner.
ValveSight Diagnostics for HART User Manual FCD VSENSF0001-02-AQ 03/15
42
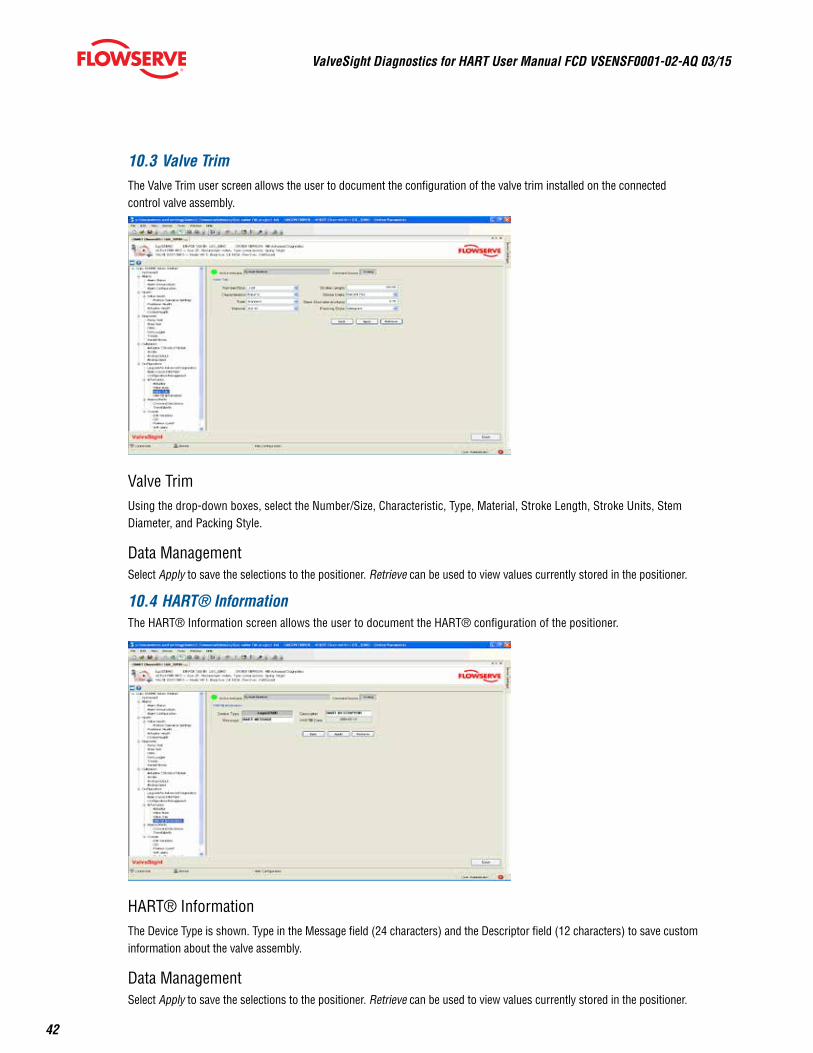
10.3 Valve TrimThe Valve Trim user screen allows the user to document the configuration of the valve trim installed on the connected control valve assembly.
Valve TrimUsing the drop-down boxes, select the Number/Size, Characteristic, Type, Material, Stroke Length, Stroke Units, Stem Diameter, and Packing Style.
Data ManagementSelect Apply to save the selections to the positioner. Retrieve can be used to view values currently stored in the positioner.
10.4 HART® InformationThe HART® Information screen allows the user to document the HART® configuration of the positioner.
HART® InformationThe Device Type is shown. Type in the Message field (24 characters) and the Descriptor field (12 characters) to save custom information about the valve assembly.
Data ManagementSelect Apply to save the selections to the positioner. Retrieve can be used to view values currently stored in the positioner.
ValveSight Diagnostics for HART User Manual FCD VSENSF0001-02-AQ 03/15
43flowserve.com
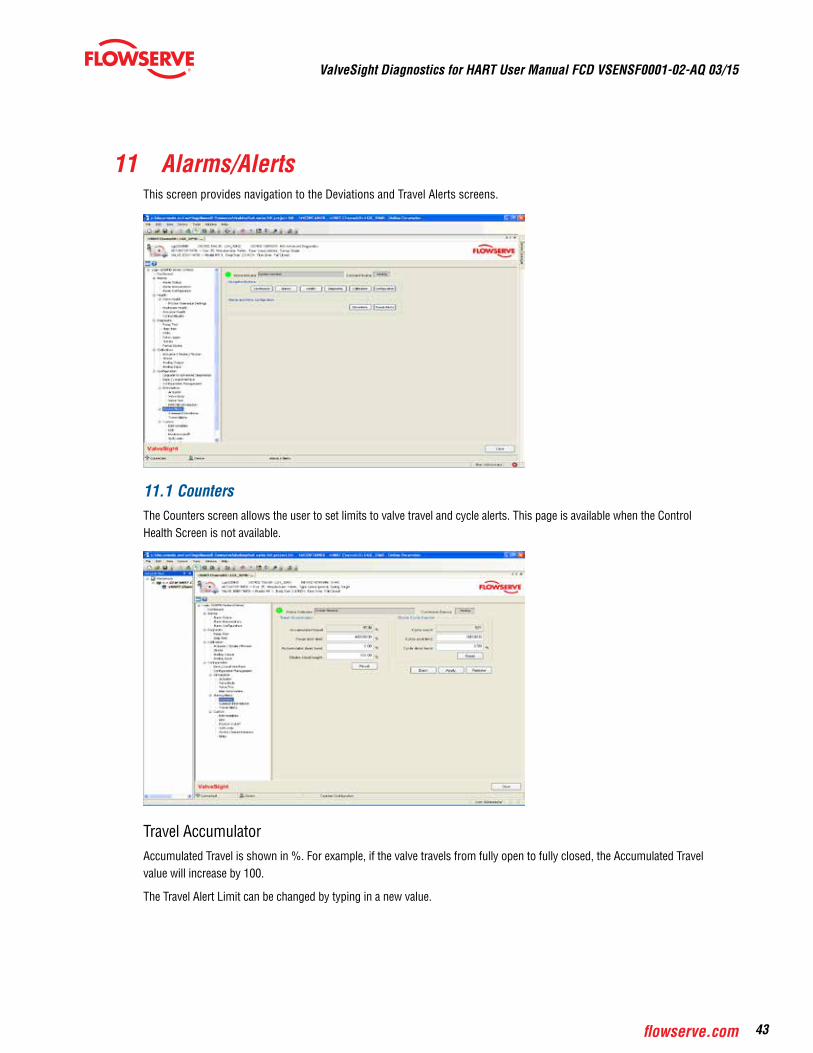
11 Alarms/AlertsThis screen provides navigation to the Deviations and Travel Alerts screens.
11.1 CountersThe Counters screen allows the user to set limits to valve travel and cycle alerts. This page is available when the Control Health Screen is not available.
Travel AccumulatorAccumulated Travel is shown in %. For example, if the valve travels from fully open to fully closed, the Accumulated Travel value will increase by 100.
The Travel Alert Limit can be changed by typing in a new value.
ValveSight Diagnostics for HART User Manual FCD VSENSF0001-02-AQ 03/15
44
The Accumulator Deadband is the distance which the valve must move before Accumulate Travel begins to increment. For example, if the position of the valve is at 0% and the Accumulator Deadband is set to 5.0%, the valve will have to move to 5.0% before an Accumulated Travel will start to show movement. As the valve reaches 10%, an increment of 10% will be shown in the Accumulated Travel box.
The Stroke Travel Length scales the Accumulated Travel. For example, if the Accumulated Travel shows 1000% and the Stroke Travel Length is adjusted from 100 to 50, the Accumulated Travel will then show 500%.
Stroke Cycle CounterCycle Count is shown. For example, if the valve travels toward the open position, then toward the closed position, the Cycle Count value will increase by 1.
The Cycle Alert Limit can be changed by typing in a new value.
The Cycle Dead Band is the distance which the valve must move before Cycle Count begins to increment. For example, if the position of the valve is at 50% and the Cycle Dead Band is set to 5.0%, the valve will have to move to at least 55.0% and back to 50% before the Cycle Count will show movement.
Data ManagementSelect Apply to save the selections to the positioner. Retrieve can be used to view values currently stored in the posi-tioner.
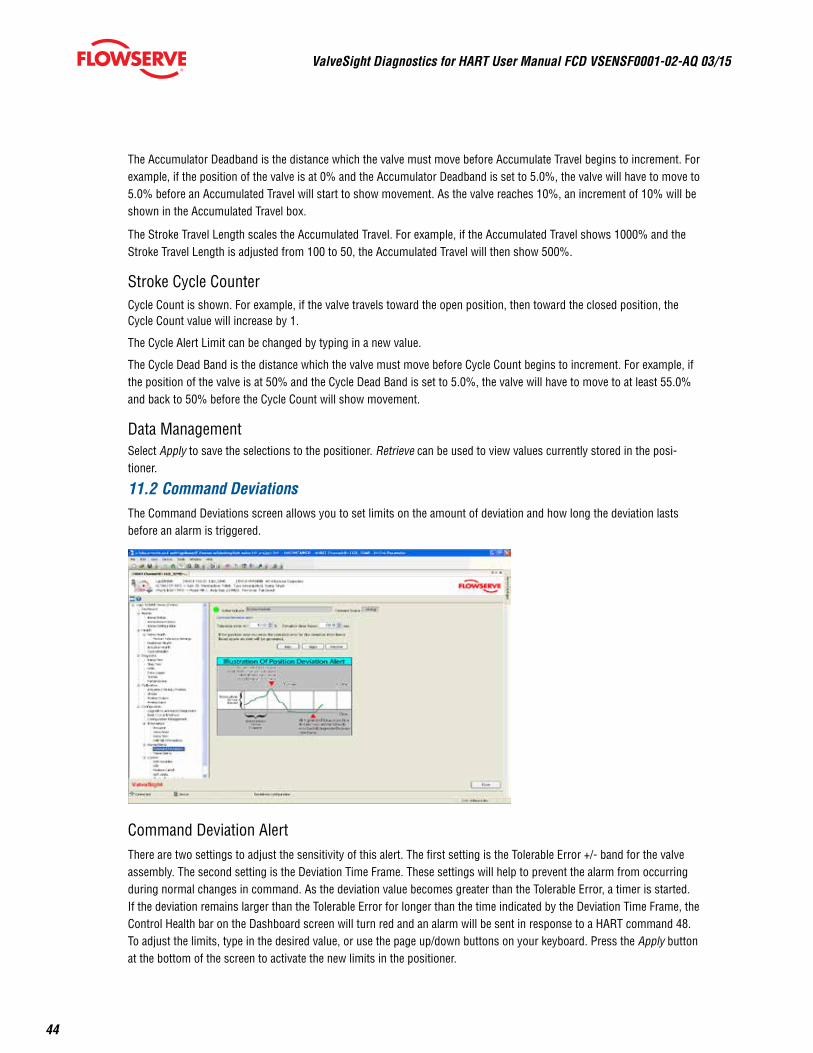
11.2 Command DeviationsThe Command Deviations screen allows you to set limits on the amount of deviation and how long the deviation lasts before an alarm is triggered.
Command Deviation AlertThere are two settings to adjust the sensitivity of this alert. The first setting is the Tolerable Error +/- band for the valve assembly. The second setting is the Deviation Time Frame. These settings will help to prevent the alarm from occurring during normal changes in command. As the deviation value becomes greater than the Tolerable Error, a timer is started. If the deviation remains larger than the Tolerable Error for longer than the time indicated by the Deviation Time Frame, the Control Health bar on the Dashboard screen will turn red and an alarm will be sent in response to a HART command 48. To adjust the limits, type in the desired value, or use the page up/down buttons on your keyboard. Press the Apply button at the bottom of the screen to activate the new limits in the positioner.
ValveSight Diagnostics for HART User Manual FCD VSENSF0001-02-AQ 03/15
45flowserve.com
This error will clear as soon as the valve position goes inside of the tolerable error. A deviation alert is informational only and will not affect the operation of the positioner or control valve.
The illustration at the bottom of the page is a graphical representation showing how these factors work and when an alarm will be generated.
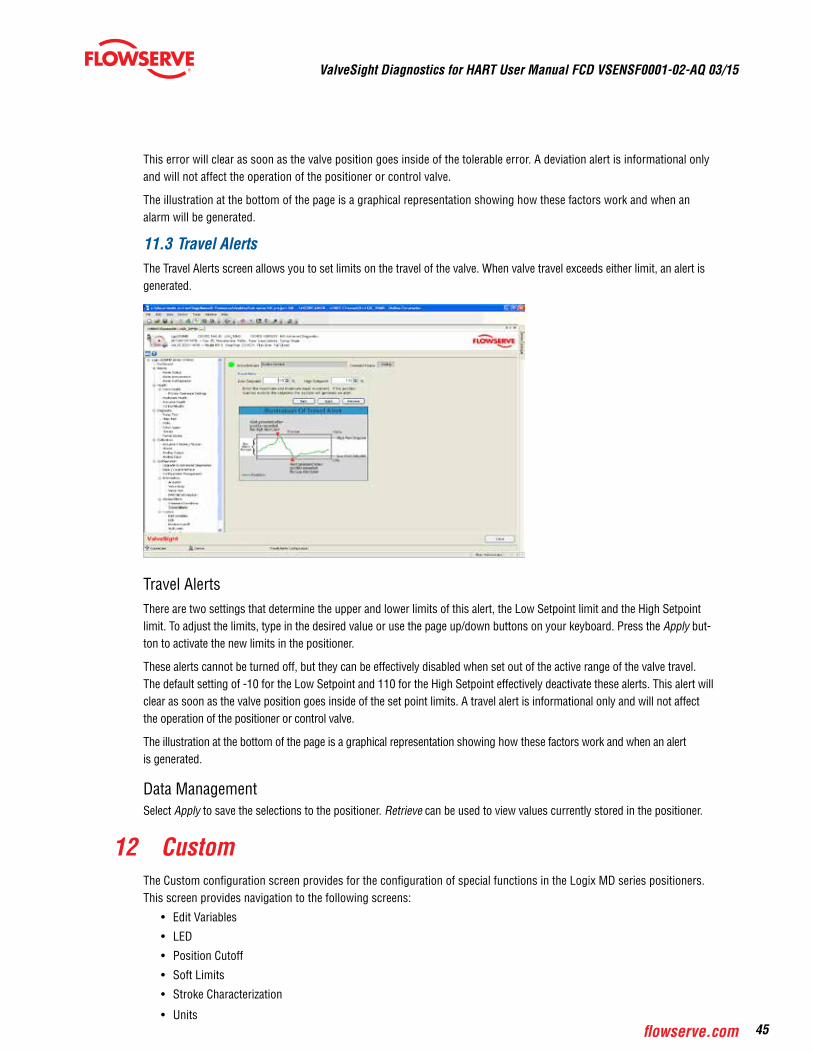
11.3 Travel AlertsThe Travel Alerts screen allows you to set limits on the travel of the valve. When valve travel exceeds either limit, an alert is generated.
Travel AlertsThere are two settings that determine the upper and lower limits of this alert, the Low Setpoint limit and the High Setpoint limit. To adjust the limits, type in the desired value or use the page up/down buttons on your keyboard. Press the Apply but-ton to activate the new limits in the positioner.
These alerts cannot be turned off, but they can be effectively disabled when set out of the active range of the valve travel. The default setting of -10 for the Low Setpoint and 110 for the High Setpoint effectively deactivate these alerts. This alert will clear as soon as the valve position goes inside of the set point limits. A travel alert is informational only and will not affect the operation of the positioner or control valve.
The illustration at the bottom of the page is a graphical representation showing how these factors work and when an alert is generated.
Data ManagementSelect Apply to save the selections to the positioner. Retrieve can be used to view values currently stored in the positioner.
12 CustomThe Custom configuration screen provides for the configuration of special functions in the Logix MD series positioners. This screen provides navigation to the following screens:
• Edit Variables
• LED
• Position Cutoff
• Soft Limits
• Stroke Characterization
• Units
ValveSight Diagnostics for HART User Manual FCD VSENSF0001-02-AQ 03/15
46
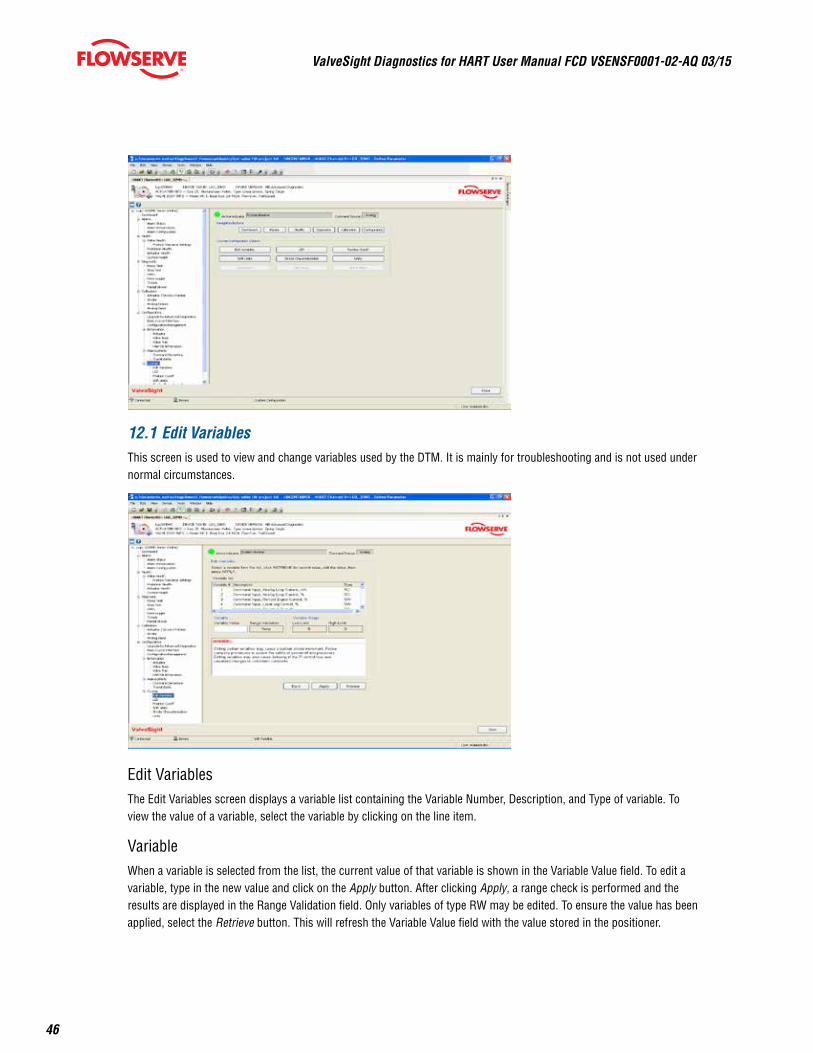
12.1 Edit VariablesThis screen is used to view and change variables used by the DTM. It is mainly for troubleshooting and is not used under normal circumstances.
Edit VariablesThe Edit Variables screen displays a variable list containing the Variable Number, Description, and Type of variable. To view the value of a variable, select the variable by clicking on the line item.
VariableWhen a variable is selected from the list, the current value of that variable is shown in the Variable Value field. To edit a variable, type in the new value and click on the Apply button. After clicking Apply, a range check is performed and the results are displayed in the Range Validation field. Only variables of type RW may be edited. To ensure the value has been applied, select the Retrieve button. This will refresh the Variable Value field with the value stored in the positioner.

ValveSight Diagnostics for HART User Manual FCD VSENSF0001-02-AQ 03/15
47flowserve.com
Variable RangeThe Low Limit and High Limit for a variable is shown in the respective fields. These show the criteria for the Range Validation test.
12.2 LEDThis screen is used to change the timing on the blink codes shown on the positioner. This can be useful to identify a particular positioner.
LED Flash Control VariablesThe LEDs blink in a sequence. The Time On box shows the time each LED will remain on. The Time Off shows the amount of time between blinks. The Sequence Interval shows the amount of time between the beginning of one sequence of blinks to the beginning of the next sequence of blinks. Select the Default button to change all three values back to the factory settings.
Data ManagementSelect Apply to save the selections to the positioner. Retrieve can be used to view values currently stored in the posi-tioner.
12.3 Position CutoffThis screen allows the user to change the position cutoff limits. Minimum Position Cutoff (MPC) mode is used to ensure a fully open or fully closed position. Under normal operation, the positioner is balancing the pressure in the actuator to maintain the position of the valve. When the commanded position moves past a position cutoff limit, the positioner will engage all available force to move the valve to a fully closed or open position. One side of the actuator will be saturated with full supply pressure while the other side will be left with no air/gas pressure. The status of this mode is displayed on the Dashboard.
ValveSight Diagnostics for HART User Manual FCD VSENSF0001-02-AQ 03/15
48
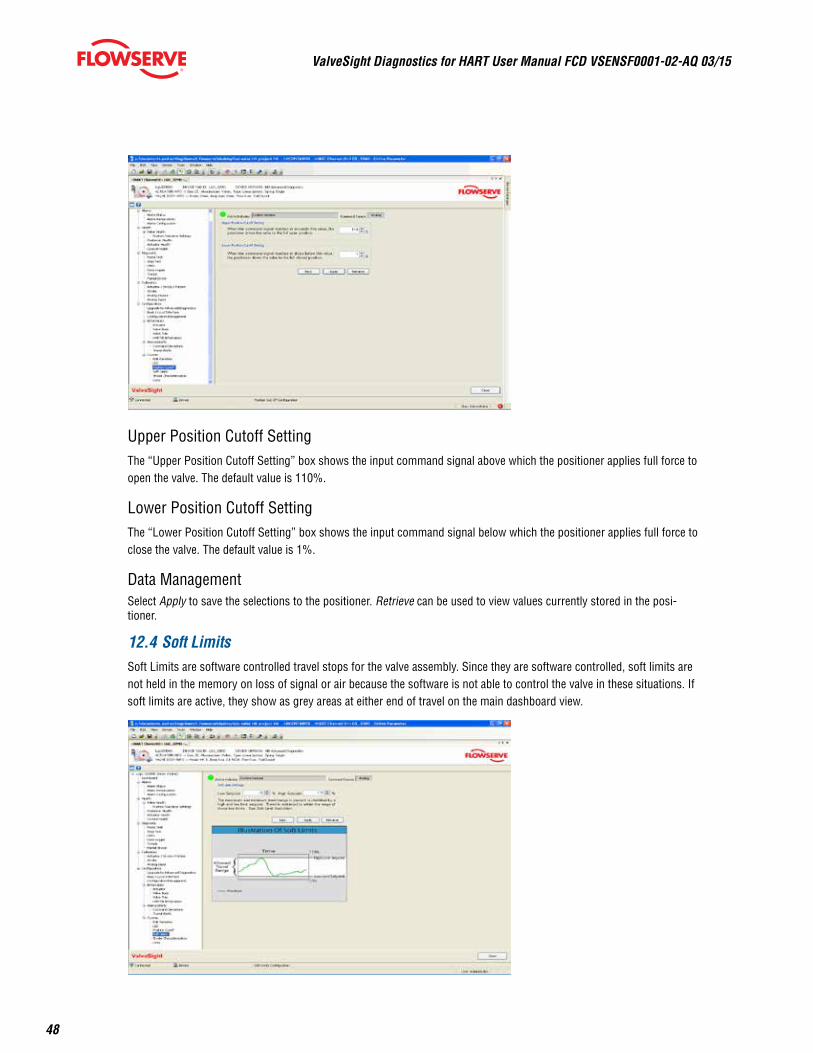
Upper Position Cutoff SettingThe “Upper Position Cutoff Setting” box shows the input command signal above which the positioner applies full force to open the valve. The default value is 110%.
Lower Position Cutoff SettingThe “Lower Position Cutoff Setting” box shows the input command signal below which the positioner applies full force to close the valve. The default value is 1%.
Data ManagementSelect Apply to save the selections to the positioner. Retrieve can be used to view values currently stored in the posi-tioner.
12.4 Soft LimitsSoft Limits are software controlled travel stops for the valve assembly. Since they are software controlled, soft limits are not held in the memory on loss of signal or air because the software is not able to control the valve in these situations. If soft limits are active, they show as grey areas at either end of travel on the main dashboard view.
ValveSight Diagnostics for HART User Manual FCD VSENSF0001-02-AQ 03/15
49flowserve.com
Soft Limit SettingsThe “Soft Limit Settings” box has two fields for setting the soft limits. The Low Setpoint field is the value below which the positioner stops following the command signal and holds the position at the specified limit. The High Setpoint field is the value above which the positioner stops following the command signal and holds the position at the specified limit.
Data ManagementSelect Apply to save the selections to the positioner. Retrieve can be used to view values currently stored in the positioner.
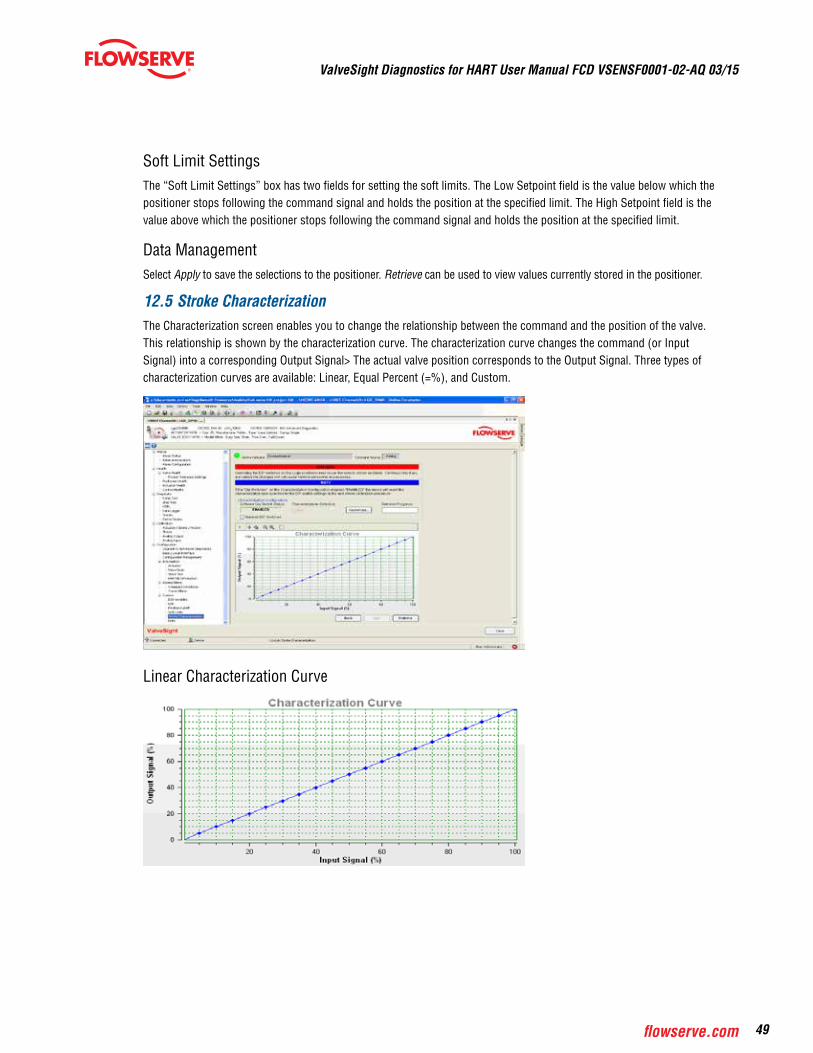
12.5 Stroke CharacterizationThe Characterization screen enables you to change the relationship between the command and the position of the valve. This relationship is shown by the characterization curve. The characterization curve changes the command (or Input Signal) into a corresponding Output Signal> The actual valve position corresponds to the Output Signal. Three types of characterization curves are available: Linear, Equal Percent (=%), and Custom.
Linear Characterization Curve
ValveSight Diagnostics for HART User Manual FCD VSENSF0001-02-AQ 03/15
50
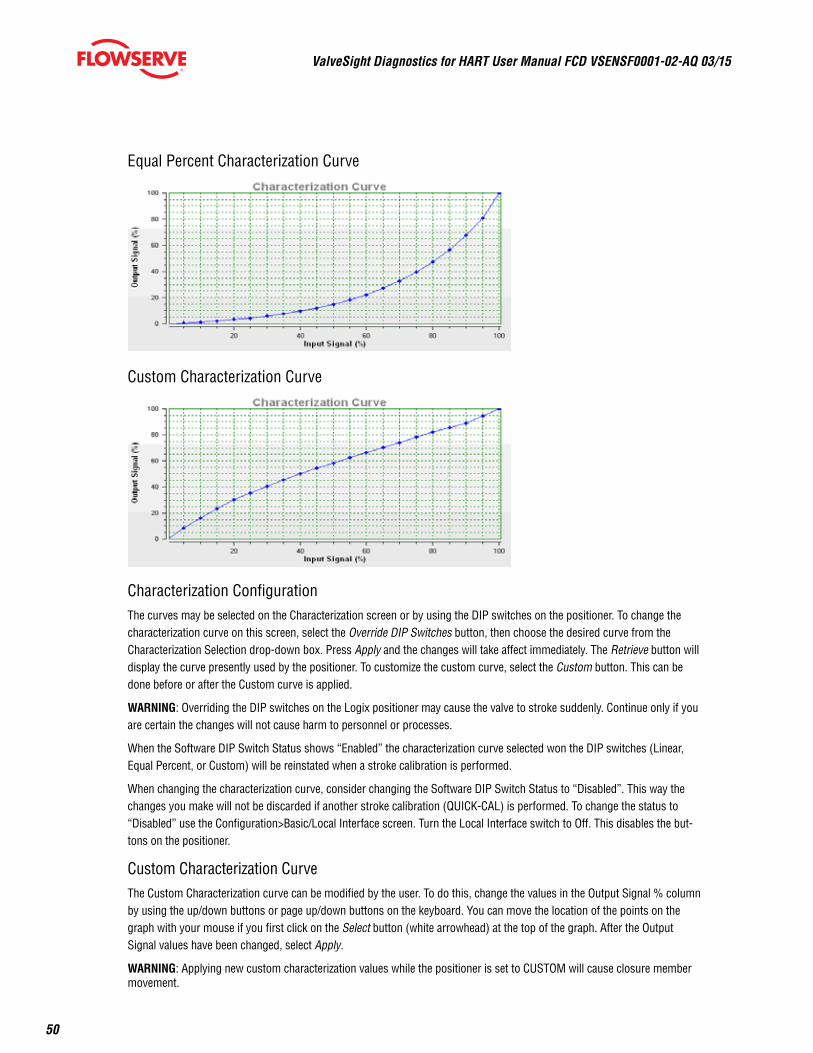
Equal Percent Characterization Curve
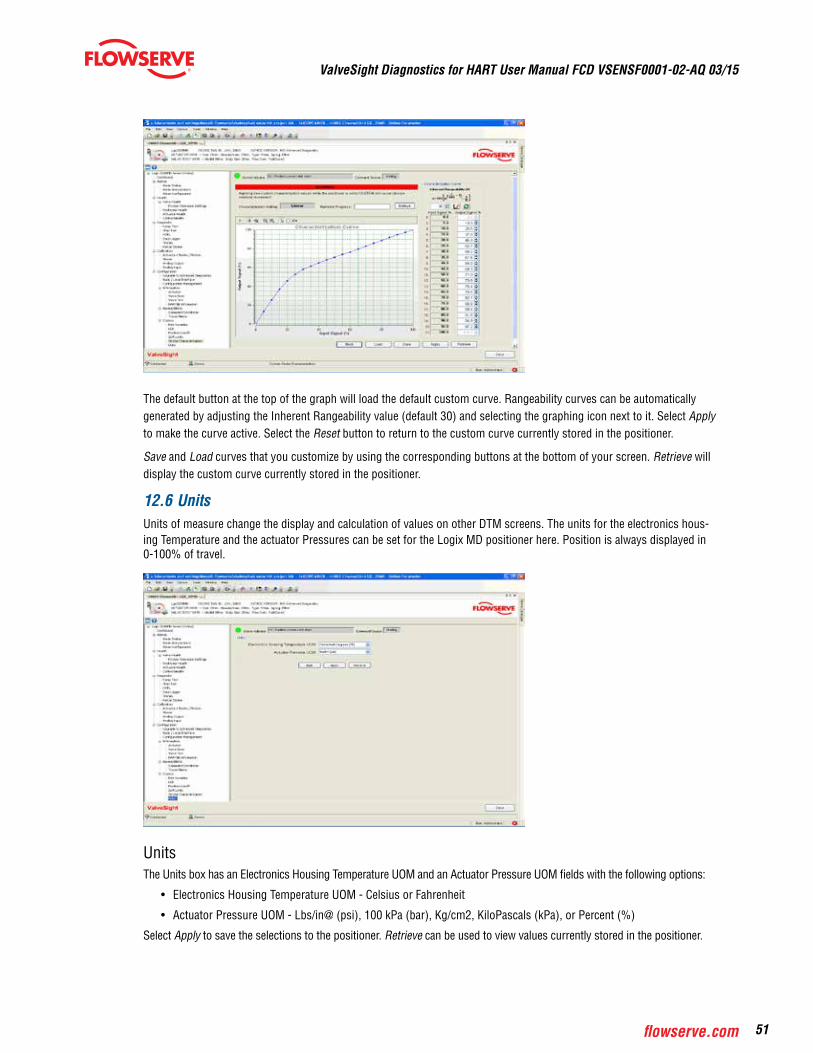
Custom Characterization Curve
Characterization ConfigurationThe curves may be selected on the Characterization screen or by using the DIP switches on the positioner. To change the characterization curve on this screen, select the Override DIP Switches button, then choose the desired curve from the Characterization Selection drop-down box. Press Apply and the changes will take affect immediately. The Retrieve button will display the curve presently used by the positioner. To customize the custom curve, select the Custom button. This can be done before or after the Custom curve is applied.
WARNING: Overriding the DIP switches on the Logix positioner may cause the valve to stroke suddenly. Continue only if you are certain the changes will not cause harm to personnel or processes.
When the Software DIP Switch Status shows “Enabled” the characterization curve selected won the DIP switches (Linear, Equal Percent, or Custom) will be reinstated when a stroke calibration is performed.
When changing the characterization curve, consider changing the Software DIP Switch Status to “Disabled”. This way the changes you make will not be discarded if another stroke calibration (QUICK-CAL) is performed. To change the status to “Disabled” use the Configuration>Basic/Local Interface screen. Turn the Local Interface switch to Off. This disables the but-tons on the positioner.
Custom Characterization CurveThe Custom Characterization curve can be modified by the user. To do this, change the values in the Output Signal % column by using the up/down buttons or page up/down buttons on the keyboard. You can move the location of the points on the graph with your mouse if you first click on the Select button (white arrowhead) at the top of the graph. After the Output Signal values have been changed, select Apply.
WARNING: Applying new custom characterization values while the positioner is set to CUSTOM will cause closure member movement.
ValveSight Diagnostics for HART User Manual FCD VSENSF0001-02-AQ 03/15
51flowserve.com
The default button at the top of the graph will load the default custom curve. Rangeability curves can be automatically generated by adjusting the Inherent Rangeability value (default 30) and selecting the graphing icon next to it. Select Apply to make the curve active. Select the Reset button to return to the custom curve currently stored in the positioner.
Save and Load curves that you customize by using the corresponding buttons at the bottom of your screen. Retrieve will display the custom curve currently stored in the positioner.
12.6 UnitsUnits of measure change the display and calculation of values on other DTM screens. The units for the electronics hous-ing Temperature and the actuator Pressures can be set for the Logix MD positioner here. Position is always displayed in 0-100% of travel.
UnitsThe Units box has an Electronics Housing Temperature UOM and an Actuator Pressure UOM fields with the following options:
• Electronics Housing Temperature UOM - Celsius or Fahrenheit
• Actuator Pressure UOM - Lbs/in@ (psi), 100 kPa (bar), Kg/cm2, KiloPascals (kPa), or Percent (%)
Select Apply to save the selections to the positioner. Retrieve can be used to view values currently stored in the positioner.

ValveSight Diagnostics for HART User Manual FCD VSENSF0001-02-AQ 03/15
52
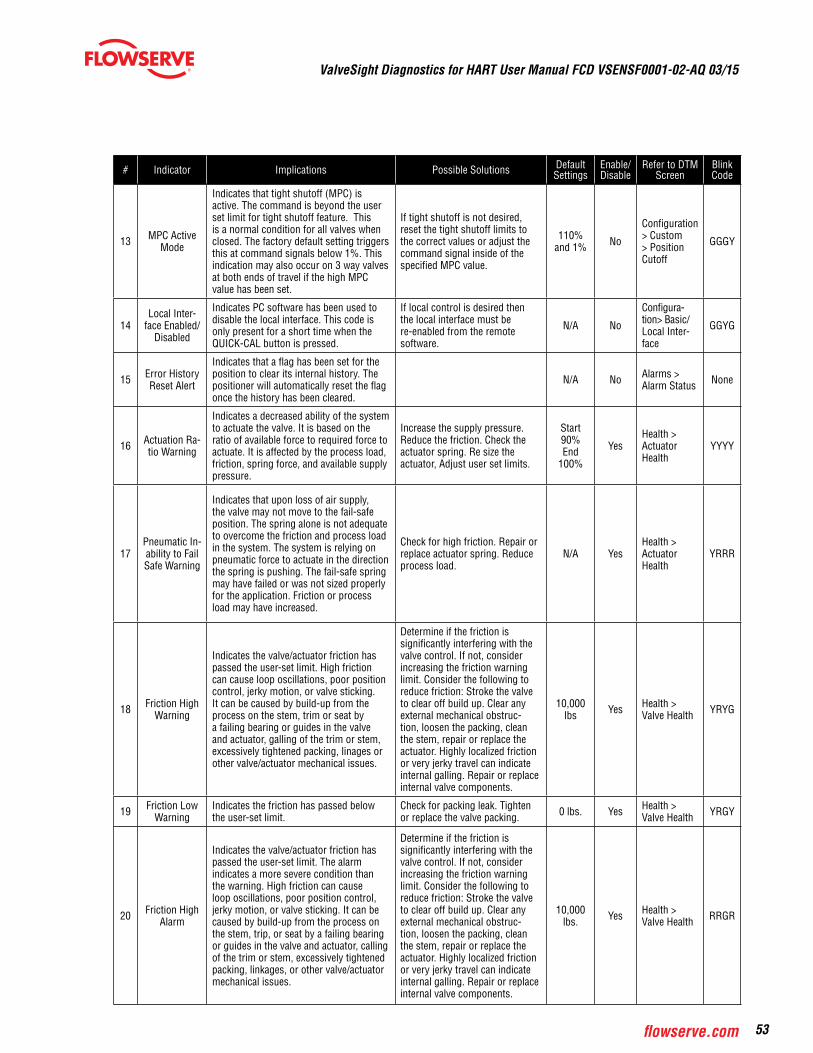
13 Comprehensive Indicator IndexThe following table contains a full listing of the possible Alarms, Alerts, Warnings, and Indicators available in the ValveSight Diagnostics tool.
# Indicator Implications Possible Solutions DefaultSettings
Enable/Disable
Refer to DTMScreen:
BlinkCode
0 Initializing Mode
Displays a blink sequence 3 times when the unit is powering up. Wait for power up to complete N/A No N/A YGGR
1 Factory Re-set State
Indicates the unit has had a factory reset and has not yet been calibrated. The unit will not respond to com-mands and will remain in the failsafe position until a calibration is complete.
Calibrate. Proper ValveSight opera-tion will require stroke, actuator, and friction calibration to be completed.
N/A Yes N/A RGRR
2Digital
Command Source
Indicates a HART® signal is needed to change the position command and the analog 4-20 mA input signal is ignored.
A manual Command Source Reset is provided to change the command back to analog control mode from the local interface if a PC or hand held configurator is not available. This is done while a QUICK-CAL is in progress by holding down both the Jog buttons (up and down) while briefly pressing the QUICK-CAL button. A new QUICK-CAL must be done after resetting.
N/A No Dashboard GGYY
3Squawk
Mode On/Off
When ON, indicates a user has set the positioner to flash a special sequence so that it can be visually located.
This mode is cancelled if the QUICK-CAL button is briefly pressed. The Squawk mode is selected again remotely or if more than one hour has passed since the command was issued.
OFF NoConfiguration > Custom > LED
GGRR
4Jog
Command State
Indicates the unit has been placed in a local override mode where the valve can only be stroked using the two local Jog buttons.
Control the valve using the Jog but-tons. This mode may be cancelled by briefly pushing the QUICK-CAL button.
N/A No N/A YGYY
5Signature
in Progress Mode
Indicates that a test has been initiated by Flowserve supplied software.
Signatures can only be cancelled by Flowserve supplied software. N/A Yes Diagnostics YGGY
6 N/A
7 N/A
8Position Deviation
Alarm
Indicates the difference between the command and the actual position has been greater than the user-set limit for longer than the user-set time.
Review active alarms and warnings to find root causes of this alarm.
De-viation: 110%
Time: 60 Seconds
Yes
Configuration > Alarms/Alerts > Command Deviation
RRRR
9Soft Stop
Upper Limit Alert
Indicates the unit is being commanded to exceed a user-set upper position limit and the internal software is holding the position at the limit. The function is similar to a mechanical limit stop except it is not active if the unit is un-powered.
Reset the limit if more travel is needed or adjust the command signal back in the specified range.
110% NOConfiguration > Custom > Soft Limits
GYGY
10Soft Stop
Lower Limit Alert
Indicates the unit is being commanded to exceed a user-set lower position limit and the internal software is holding the position at the limit. The function is similar to a mechanical limit stop except it is not active if the unit is unpowered.
Reset the limit if more travel is needed or adjust the command signal back in the specified range.
-10% NoConfiguration > Custom > Soft Limits
GYGY
11Position Upper
Limit Alert
The position has reached or is exceed-ing a user-set upper position indicator similar to a limit switch indicator.
Reset the indicator if more travel is needed or adjust the command signal back in the specified range.
110% Yes
Configuration > Alarms/Alerts > Travel Alerts
GYGG
12Position Lower
Limit Alert
The position has reached or is exceed-ing a user-set lower position indicator similar to a limit switch indicator.
Reset the indicator if more travel is needed or adjust the command signal back in the specified range.
-10% Yes
Configuration > Alarms/Alerts > Travel Alerts
GYGG
ValveSight Diagnostics for HART User Manual FCD VSENSF0001-02-AQ 03/15
53flowserve.com
# Indicator Implications Possible Solutions DefaultSettings
Enable/Disable
Refer to DTM Screen
BlinkCode
13 MPC Active Mode
Indicates that tight shutoff (MPC) is active. The command is beyond the user set limit for tight shutoff feature. This is a normal condition for all valves when closed. The factory default setting triggers this at command signals below 1%. This indication may also occur on 3 way valves at both ends of travel if the high MPC value has been set.
If tight shutoff is not desired, reset the tight shutoff limits to the correct values or adjust the command signal inside of the specified MPC value.
110% and 1% No
Configuration > Custom > Position Cutoff
GGGY
14Local Inter-
face Enabled/Disabled
Indicates PC software has been used to disable the local interface. This code is only present for a short time when the QUICK-CAL button is pressed.
If local control is desired then the local interface must be re-enabled from the remote software.
N/A No
Configura-tion> Basic/Local Inter-face
GGYG
15 Error History Reset Alert
Indicates that a flag has been set for the position to clear its internal history. The positioner will automatically reset the flag once the history has been cleared.
N/A No Alarms > Alarm Status None
16 Actuation Ra-tio Warning
Indicates a decreased ability of the system to actuate the valve. It is based on the ratio of available force to required force to actuate. It is affected by the process load, friction, spring force, and available supply pressure.
Increase the supply pressure. Reduce the friction. Check the actuator spring. Re size the actuator, Adjust user set limits.
Start 90%End
100%
YesHealth > Actuator Health
YYYY
17Pneumatic In-ability to Fail Safe Warning
Indicates that upon loss of air supply, the valve may not move to the fail-safe position. The spring alone is not adequate to overcome the friction and process load in the system. The system is relying on pneumatic force to actuate in the direction the spring is pushing. The fail-safe spring may have failed or was not sized properly for the application. Friction or process load may have increased.
Check for high friction. Repair or replace actuator spring. Reduce process load.
N/A YesHealth > Actuator Health
YRRR
18 Friction High Warning
Indicates the valve/actuator friction has passed the user-set limit. High friction can cause loop oscillations, poor position control, jerky motion, or valve sticking. It can be caused by build-up from the process on the stem, trim or seat by a failing bearing or guides in the valve and actuator, galling of the trim or stem, excessively tightened packing, linages or other valve/actuator mechanical issues.
Determine if the friction is significantly interfering with the valve control. If not, consider increasing the friction warning limit. Consider the following to reduce friction: Stroke the valve to clear off build up. Clear any external mechanical obstruc-tion, loosen the packing, clean the stem, repair or replace the actuator. Highly localized friction or very jerky travel can indicate internal galling. Repair or replace internal valve components.
10,000 lbs Yes Health >
Valve Health YRYG
19 Friction Low Warning
Indicates the friction has passed below the user-set limit.
Check for packing leak. Tighten or replace the valve packing. 0 lbs. Yes Health >
Valve Health YRGY
20 Friction High Alarm
Indicates the valve/actuator friction has passed the user-set limit. The alarm indicates a more severe condition than the warning. High friction can cause loop oscillations, poor position control, jerky motion, or valve sticking. It can be caused by build-up from the process on the stem, trip, or seat by a failing bearing or guides in the valve and actuator, calling of the trim or stem, excessively tightened packing, linkages, or other valve/actuator mechanical issues.
Determine if the friction is significantly interfering with the valve control. If not, consider increasing the friction warning limit. Consider the following to reduce friction: Stroke the valve to clear off build up. Clear any external mechanical obstruc-tion, loosen the packing, clean the stem, repair or replace the actuator. Highly localized friction or very jerky travel can indicate internal galling. Repair or replace internal valve components.
10,000 lbs. Yes Health >
Valve Health RRGR
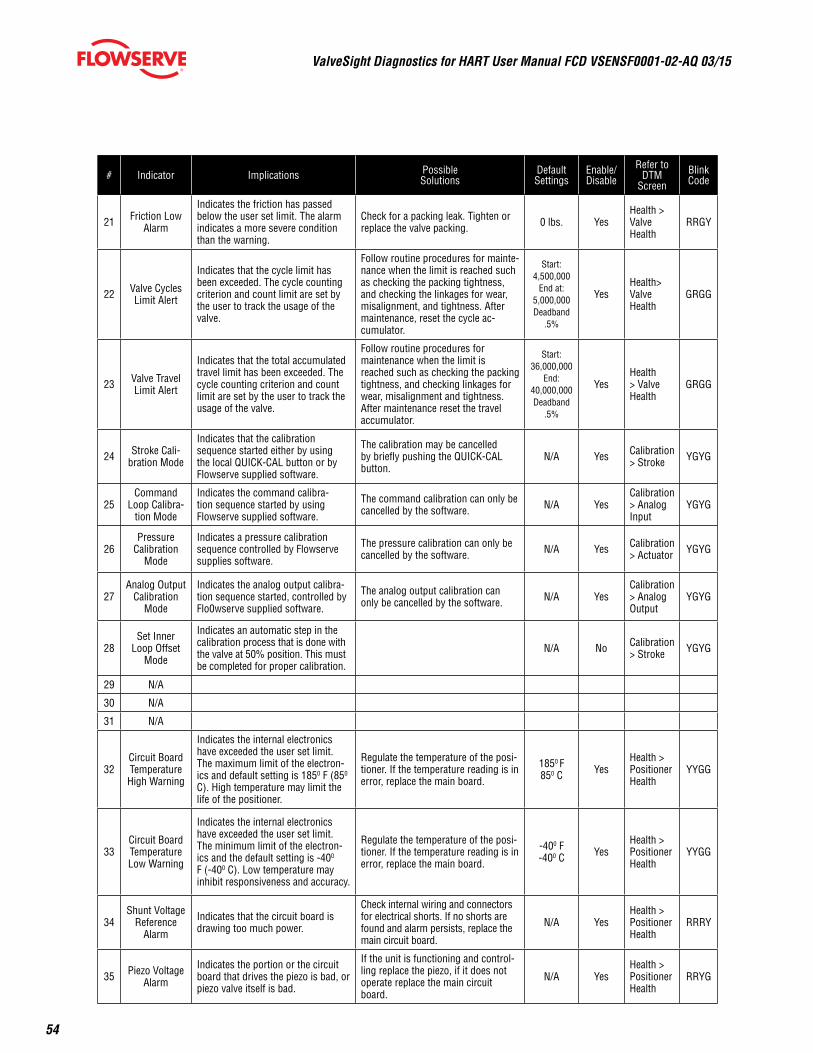
ValveSight Diagnostics for HART User Manual FCD VSENSF0001-02-AQ 03/15
54
# Indicator Implications Possible Solutions
DefaultSettings
Enable/Disable
Refer to DTM
ScreenBlinkCode
21 Friction Low Alarm
Indicates the friction has passed below the user set limit. The alarm indicates a more severe condition than the warning.
Check for a packing leak. Tighten or replace the valve packing. 0 lbs. Yes
Health > Valve Health
RRGY
22 Valve Cycles Limit Alert
Indicates that the cycle limit has been exceeded. The cycle counting criterion and count limit are set by the user to track the usage of the valve.
Follow routine procedures for mainte-nance when the limit is reached such as checking the packing tightness, and checking the linkages for wear, misalignment, and tightness. After maintenance, reset the cycle ac-cumulator.
Start: 4,500,000
End at:5,000,000Deadband
.5%
YesHealth> Valve Health
GRGG
23 Valve Travel Limit Alert
Indicates that the total accumulated travel limit has been exceeded. The cycle counting criterion and count limit are set by the user to track the usage of the valve.
Follow routine procedures for maintenance when the limit is reached such as checking the packing tightness, and checking linkages for wear, misalignment and tightness. After maintenance reset the travel accumulator.
Start:36,000,000
End:40,000,000Deadband
.5%
YesHealth > Valve Health
GRGG
24 Stroke Cali-bration Mode
Indicates that the calibration sequence started either by using the local QUICK-CAL button or by Flowserve supplied software.
The calibration may be cancelled by briefly pushing the QUICK-CAL button.
N/A Yes Calibration > Stroke YGYG
25Command
Loop Calibra-tion Mode
Indicates the command calibra-tion sequence started by using Flowserve supplied software.
The command calibration can only be cancelled by the software. N/A Yes
Calibration > Analog Input
YGYG
26Pressure
Calibration Mode
Indicates a pressure calibration sequence controlled by Flowserve supplies software.
The pressure calibration can only be cancelled by the software. N/A Yes Calibration
> Actuator YGYG
27Analog Output
Calibration Mode
Indicates the analog output calibra-tion sequence started, controlled by Flo0wserve supplied software.
The analog output calibration can only be cancelled by the software. N/A Yes
Calibration > Analog Output
YGYG
28Set Inner
Loop Offset Mode
Indicates an automatic step in the calibration process that is done with the valve at 50% position. This must be completed for proper calibration.
N/A No Calibration > Stroke YGYG
29 N/A
30 N/A
31 N/A
32Circuit Board Temperature High Warning
Indicates the internal electronics have exceeded the user set limit. The maximum limit of the electron-ics and default setting is 1850 F (850 C). High temperature may limit the life of the positioner.
Regulate the temperature of the posi-tioner. If the temperature reading is in error, replace the main board.
1850 F850 C Yes
Health > Positioner Health
YYGG
33Circuit Board Temperature Low Warning
Indicates the internal electronics have exceeded the user set limit. The minimum limit of the electron-ics and the default setting is -400 F (-400 C). Low temperature may inhibit responsiveness and accuracy.
Regulate the temperature of the posi-tioner. If the temperature reading is in error, replace the main board.
-400 F-400 C Yes
Health > Positioner Health
YYGG
34Shunt Voltage
Reference Alarm
Indicates that the circuit board is drawing too much power.
Check internal wiring and connectors for electrical shorts. If no shorts are found and alarm persists, replace the main circuit board.
N/A YesHealth > Positioner Health
RRRY
35 Piezo Voltage Alarm
Indicates the portion or the circuit board that drives the piezo is bad, or piezo valve itself is bad.
If the unit is functioning and control-ling replace the piezo, if it does not operate replace the main circuit board.
N/A YesHealth > Positioner Health
RRYG
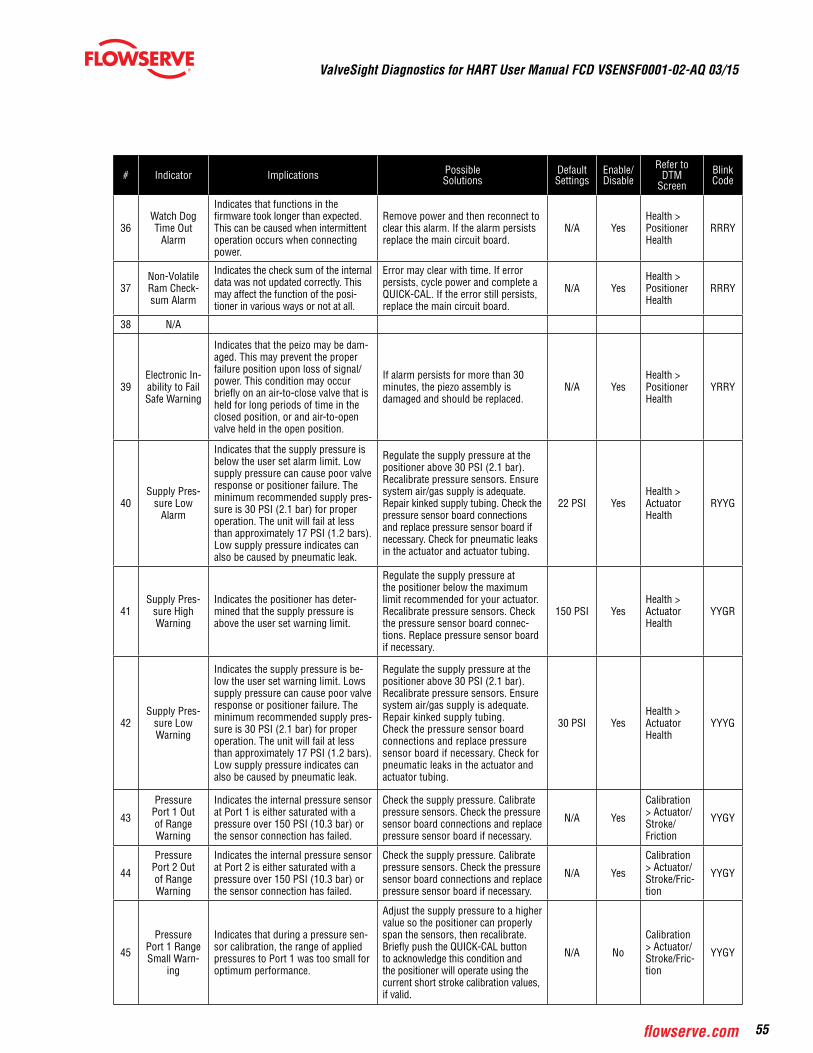
ValveSight Diagnostics for HART User Manual FCD VSENSF0001-02-AQ 03/15
55flowserve.com
# Indicator Implications Possible Solutions
DefaultSettings
Enable/Disable
Refer to DTM
ScreenBlinkCode
36Watch Dog Time Out
Alarm
Indicates that functions in the firmware took longer than expected. This can be caused when intermittent operation occurs when connecting power.
Remove power and then reconnect to clear this alarm. If the alarm persists replace the main circuit board.
N/A YesHealth > Positioner Health
RRRY
37Non-Volatile Ram Check-sum Alarm
Indicates the check sum of the internal data was not updated correctly. This may affect the function of the posi-tioner in various ways or not at all.
Error may clear with time. If error persists, cycle power and complete a QUICK-CAL. If the error still persists, replace the main circuit board.
N/A YesHealth > Positioner Health
RRRY
38 N/A
39Electronic In-ability to Fail Safe Warning
Indicates that the peizo may be dam-aged. This may prevent the proper failure position upon loss of signal/power. This condition may occur briefly on an air-to-close valve that is held for long periods of time in the closed position, or and air-to-open valve held in the open position.
If alarm persists for more than 30 minutes, the piezo assembly is damaged and should be replaced.
N/A YesHealth > Positioner Health
YRRY
40Supply Pres-
sure Low Alarm
Indicates that the supply pressure is below the user set alarm limit. Low supply pressure can cause poor valve response or positioner failure. The minimum recommended supply pres-sure is 30 PSI (2.1 bar) for proper operation. The unit will fail at less than approximately 17 PSI (1.2 bars). Low supply pressure indicates can also be caused by pneumatic leak.
Regulate the supply pressure at the positioner above 30 PSI (2.1 bar). Recalibrate pressure sensors. Ensure system air/gas supply is adequate. Repair kinked supply tubing. Check the pressure sensor board connections and replace pressure sensor board if necessary. Check for pneumatic leaks in the actuator and actuator tubing.
22 PSI YesHealth > Actuator Health
RYYG
41Supply Pres-
sure High Warning
Indicates the positioner has deter-mined that the supply pressure is above the user set warning limit.
Regulate the supply pressure at the positioner below the maximum limit recommended for your actuator. Recalibrate pressure sensors. Check the pressure sensor board connec-tions. Replace pressure sensor board if necessary.
150 PSI YesHealth > Actuator Health
YYGR
42Supply Pres-
sure Low Warning
Indicates the supply pressure is be-low the user set warning limit. Lows supply pressure can cause poor valve response or positioner failure. The minimum recommended supply pres-sure is 30 PSI (2.1 bar) for proper operation. The unit will fail at less than approximately 17 PSI (1.2 bars). Low supply pressure indicates can also be caused by pneumatic leak.
Regulate the supply pressure at the positioner above 30 PSI (2.1 bar). Recalibrate pressure sensors. Ensure system air/gas supply is adequate. Repair kinked supply tubing. Check the pressure sensor board connections and replace pressure sensor board if necessary. Check for pneumatic leaks in the actuator and actuator tubing.
30 PSI YesHealth > Actuator Health
YYYG
43
Pressure Port 1 Out of Range Warning
Indicates the internal pressure sensor at Port 1 is either saturated with a pressure over 150 PSI (10.3 bar) or the sensor connection has failed.
Check the supply pressure. Calibrate pressure sensors. Check the pressure sensor board connections and replace pressure sensor board if necessary.
N/A Yes
Calibration > Actuator/Stroke/ Friction
YYGY
44
Pressure Port 2 Out of Range Warning
Indicates the internal pressure sensor at Port 2 is either saturated with a pressure over 150 PSI (10.3 bar) or the sensor connection has failed.
Check the supply pressure. Calibrate pressure sensors. Check the pressure sensor board connections and replace pressure sensor board if necessary.
N/A Yes
Calibration > Actuator/Stroke/Fric-tion
YYGY
45
Pressure Port 1 Range Small Warn-
ing
Indicates that during a pressure sen-sor calibration, the range of applied pressures to Port 1 was too small for optimum performance.
Adjust the supply pressure to a higher value so the positioner can properly span the sensors, then recalibrate. Briefly push the QUICK-CAL button to acknowledge this condition and the positioner will operate using the current short stroke calibration values, if valid.
N/A No
Calibration > Actuator/Stroke/Fric-tion
YYGY
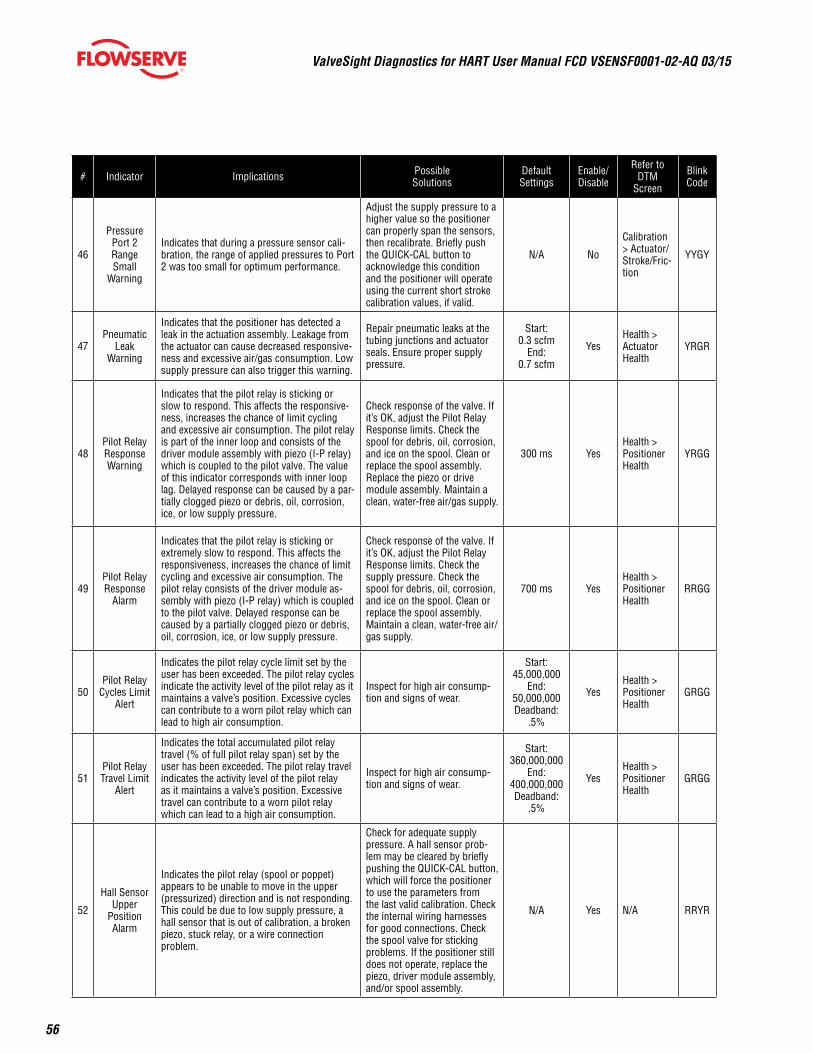
ValveSight Diagnostics for HART User Manual FCD VSENSF0001-02-AQ 03/15
56
# Indicator Implications Possible Solutions
DefaultSettings
Enable/Disable
Refer to DTM
Screen
BlinkCode
46
Pressure Port 2 Range Small
Warning
Indicates that during a pressure sensor cali-bration, the range of applied pressures to Port 2 was too small for optimum performance.
Adjust the supply pressure to a higher value so the positioner can properly span the sensors, then recalibrate. Briefly push the QUICK-CAL button to acknowledge this condition and the positioner will operate using the current short stroke calibration values, if valid.
N/A No
Calibration > Actuator/Stroke/Fric-tion
YYGY
47Pneumatic
Leak Warning
Indicates that the positioner has detected a leak in the actuation assembly. Leakage from the actuator can cause decreased responsive-ness and excessive air/gas consumption. Low supply pressure can also trigger this warning.
Repair pneumatic leaks at the tubing junctions and actuator seals. Ensure proper supply pressure.
Start: 0.3 scfm
End:0.7 scfm
YesHealth > Actuator Health
YRGR
48Pilot Relay Response Warning
Indicates that the pilot relay is sticking or slow to respond. This affects the responsive-ness, increases the chance of limit cycling and excessive air consumption. The pilot relay is part of the inner loop and consists of the driver module assembly with piezo (I-P relay) which is coupled to the pilot valve. The value of this indicator corresponds with inner loop lag. Delayed response can be caused by a par-tially clogged piezo or debris, oil, corrosion, ice, or low supply pressure.
Check response of the valve. If it’s OK, adjust the Pilot Relay Response limits. Check the spool for debris, oil, corrosion, and ice on the spool. Clean or replace the spool assembly. Replace the piezo or drive module assembly. Maintain a clean, water-free air/gas supply.
300 ms YesHealth > Positioner Health
YRGG
49Pilot Relay Response
Alarm
Indicates that the pilot relay is sticking or extremely slow to respond. This affects the responsiveness, increases the chance of limit cycling and excessive air consumption. The pilot relay consists of the driver module as-sembly with piezo (I-P relay) which is coupled to the pilot valve. Delayed response can be caused by a partially clogged piezo or debris, oil, corrosion, ice, or low supply pressure.
Check response of the valve. If it’s OK, adjust the Pilot Relay Response limits. Check the supply pressure. Check the spool for debris, oil, corrosion, and ice on the spool. Clean or replace the spool assembly. Maintain a clean, water-free air/gas supply.
700 ms YesHealth > Positioner Health
RRGG
50Pilot Relay
Cycles Limit Alert
Indicates the pilot relay cycle limit set by the user has been exceeded. The pilot relay cycles indicate the activity level of the pilot relay as it maintains a valve’s position. Excessive cycles can contribute to a worn pilot relay which can lead to high air consumption.
Inspect for high air consump-tion and signs of wear.
Start:45,000,000
End:50,000,000Deadband:
.5%
YesHealth > Positioner Health
GRGG
51Pilot Relay Travel Limit
Alert
Indicates the total accumulated pilot relay travel (% of full pilot relay span) set by the user has been exceeded. The pilot relay travel indicates the activity level of the pilot relay as it maintains a valve’s position. Excessive travel can contribute to a worn pilot relay which can lead to a high air consumption.
Inspect for high air consump-tion and signs of wear.
Start:360,000,000
End:400,000,000Deadband:
.5%
YesHealth > Positioner Health
GRGG
52
Hall Sensor Upper
Position Alarm
Indicates the pilot relay (spool or poppet) appears to be unable to move in the upper (pressurized) direction and is not responding. This could be due to low supply pressure, a hall sensor that is out of calibration, a broken piezo, stuck relay, or a wire connection problem.
Check for adequate supply pressure. A hall sensor prob-lem may be cleared by briefly pushing the QUICK-CAL button, which will force the positioner to use the parameters from the last valid calibration. Check the internal wiring harnesses for good connections. Check the spool valve for sticking problems. If the positioner still does not operate, replace the piezo, driver module assembly, and/or spool assembly.
N/A Yes N/A RRYR
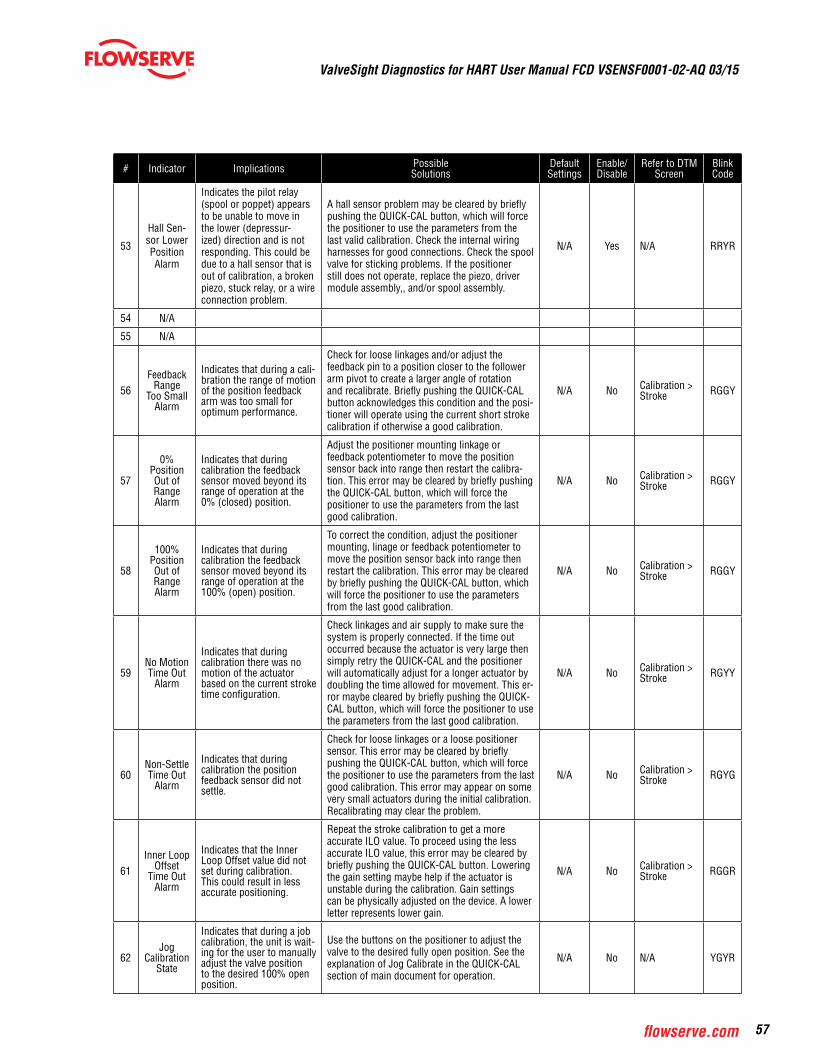
ValveSight Diagnostics for HART User Manual FCD VSENSF0001-02-AQ 03/15
57flowserve.com
# Indicator Implications Possible Solutions
DefaultSettings
Enable/Disable
Refer to DTM Screen
BlinkCode
53
Hall Sen-sor Lower Position Alarm
Indicates the pilot relay (spool or poppet) appears to be unable to move in the lower (depressur-ized) direction and is not responding. This could be due to a hall sensor that is out of calibration, a broken piezo, stuck relay, or a wire connection problem.
A hall sensor problem may be cleared by briefly pushing the QUICK-CAL button, which will force the positioner to use the parameters from the last valid calibration. Check the internal wiring harnesses for good connections. Check the spool valve for sticking problems. If the positioner still does not operate, replace the piezo, driver module assembly,, and/or spool assembly.
N/A Yes N/A RRYR
54 N/A
55 N/A
56Feedback
Range Too Small
Alarm
Indicates that during a cali-bration the range of motion of the position feedback arm was too small for optimum performance.
Check for loose linkages and/or adjust the feedback pin to a position closer to the follower arm pivot to create a larger angle of rotation and recalibrate. Briefly pushing the QUICK-CAL button acknowledges this condition and the posi-tioner will operate using the current short stroke calibration if otherwise a good calibration.
N/A No Calibration > Stroke RGGY
57
0% Position Out of Range Alarm
Indicates that during calibration the feedback sensor moved beyond its range of operation at the 0% (closed) position.
Adjust the positioner mounting linkage or feedback potentiometer to move the position sensor back into range then restart the calibra-tion. This error may be cleared by briefly pushing the QUICK-CAL button, which will force the positioner to use the parameters from the last good calibration.
N/A No Calibration > Stroke RGGY
58
100% Position Out of Range Alarm
Indicates that during calibration the feedback sensor moved beyond its range of operation at the 100% (open) position.
To correct the condition, adjust the positioner mounting, linage or feedback potentiometer to move the position sensor back into range then restart the calibration. This error may be cleared by briefly pushing the QUICK-CAL button, which will force the positioner to use the parameters from the last good calibration.
N/A No Calibration > Stroke RGGY
59No Motion Time Out
Alarm
Indicates that during calibration there was no motion of the actuator based on the current stroke time configuration.
Check linkages and air supply to make sure the system is properly connected. If the time out occurred because the actuator is very large then simply retry the QUICK-CAL and the positioner will automatically adjust for a longer actuator by doubling the time allowed for movement. This er-ror maybe cleared by briefly pushing the QUICK-CAL button, which will force the positioner to use the parameters from the last good calibration.
N/A No Calibration > Stroke RGYY
60Non-Settle Time Out
Alarm
Indicates that during calibration the position feedback sensor did not settle.
Check for loose linkages or a loose positioner sensor. This error may be cleared by briefly pushing the QUICK-CAL button, which will force the positioner to use the parameters from the last good calibration. This error may appear on some very small actuators during the initial calibration. Recalibrating may clear the problem.
N/A No Calibration > Stroke RGYG
61Inner Loop
Offset Time Out
Alarm
Indicates that the Inner Loop Offset value did not set during calibration. This could result in less accurate positioning.
Repeat the stroke calibration to get a more accurate ILO value. To proceed using the less accurate ILO value, this error may be cleared by briefly pushing the QUICK-CAL button. Lowering the gain setting maybe help if the actuator is unstable during the calibration. Gain settings can be physically adjusted on the device. A lower letter represents lower gain.
N/A No Calibration > Stroke RGGR
62Jog
Calibration State
Indicates that during a job calibration, the unit is wait-ing for the user to manually adjust the valve position to the desired 100% open position.
Use the buttons on the positioner to adjust the valve to the desired fully open position. See the explanation of Jog Calibrate in the QUICK-CAL section of main document for operation.
N/A No N/A YGYR
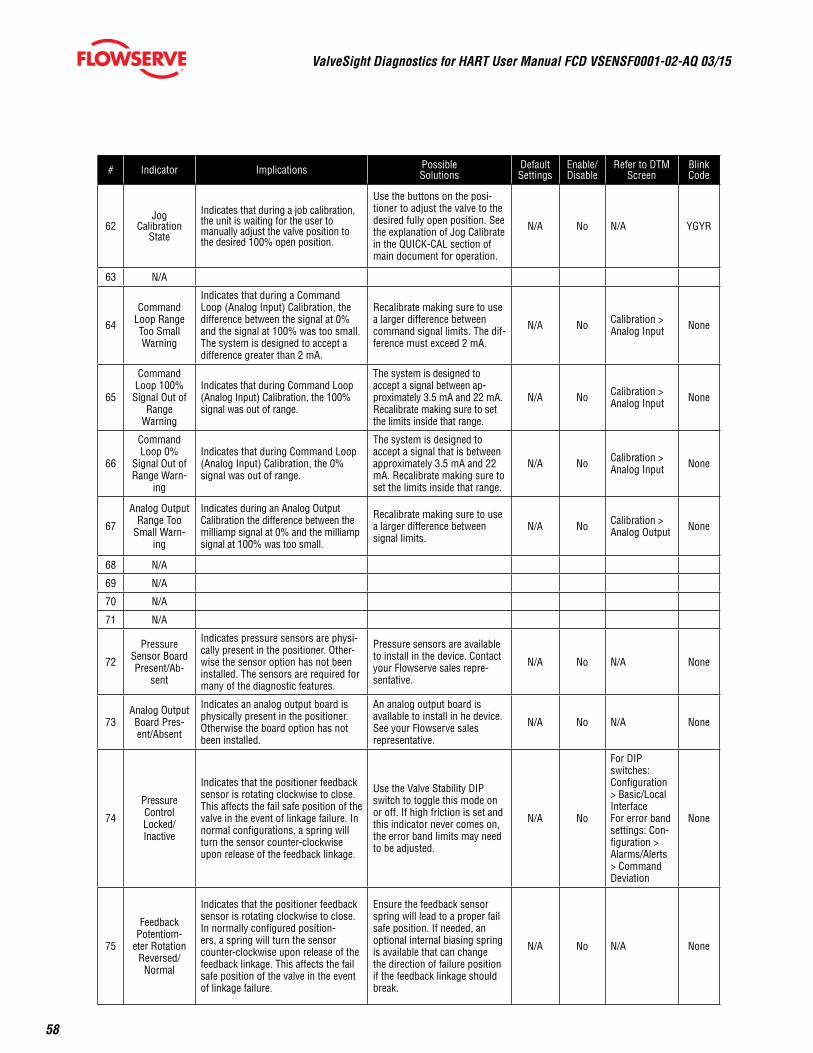
ValveSight Diagnostics for HART User Manual FCD VSENSF0001-02-AQ 03/15
58
# Indicator Implications Possible Solutions
DefaultSettings
Enable/Disable
Refer to DTM Screen
BlinkCode
62Jog
Calibration State
Indicates that during a job calibration, the unit is waiting for the user to manually adjust the valve position to the desired 100% open position.
Use the buttons on the posi-tioner to adjust the valve to the desired fully open position. See the explanation of Jog Calibrate in the QUICK-CAL section of main document for operation.
N/A No N/A YGYR
63 N/A
64
Command Loop Range Too Small Warning
Indicates that during a Command Loop (Analog Input) Calibration, the difference between the signal at 0% and the signal at 100% was too small. The system is designed to accept a difference greater than 2 mA.
Recalibrate making sure to use a larger difference between command signal limits. The dif-ference must exceed 2 mA.
N/A No Calibration > Analog Input None
65
Command Loop 100%
Signal Out of Range
Warning
Indicates that during Command Loop (Analog Input) Calibration, the 100% signal was out of range.
The system is designed to accept a signal between ap-proximately 3.5 mA and 22 mA. Recalibrate making sure to set the limits inside that range.
N/A No Calibration > Analog Input None
66
Command Loop 0%
Signal Out of Range Warn-
ing
Indicates that during Command Loop (Analog Input) Calibration, the 0% signal was out of range.
The system is designed to accept a signal that is between approximately 3.5 mA and 22 mA. Recalibrate making sure to set the limits inside that range.
N/A No Calibration > Analog Input None
67
Analog Output Range Too
Small Warn-ing
Indicates during an Analog Output Calibration the difference between the milliamp signal at 0% and the milliamp signal at 100% was too small.
Recalibrate making sure to use a larger difference between signal limits.
N/A No Calibration > Analog Output None
68 N/A
69 N/A
70 N/A
71 N/A
72
Pressure Sensor Board Present/Ab-
sent
Indicates pressure sensors are physi-cally present in the positioner. Other-wise the sensor option has not been installed. The sensors are required for many of the diagnostic features.
Pressure sensors are available to install in the device. Contact your Flowserve sales repre-sentative.
N/A No N/A None
73Analog Output Board Pres-ent/Absent
Indicates an analog output board is physically present in the positioner. Otherwise the board option has not been installed.
An analog output board is available to install in he device. See your Flowserve sales representative.
N/A No N/A None
74
Pressure Control Locked/Inactive
Indicates that the positioner feedback sensor is rotating clockwise to close. This affects the fail safe position of the valve in the event of linkage failure. In normal configurations, a spring will turn the sensor counter-clockwise upon release of the feedback linkage.
Use the Valve Stability DIP switch to toggle this mode on or off. If high friction is set and this indicator never comes on, the error band limits may need to be adjusted.
N/A No
For DIP switches: Configuration > Basic/Local InterfaceFor error band settings: Con-figuration > Alarms/Alerts > Command Deviation
None
75
Feedback Potentiom-
eter Rotation Reversed/
Normal
Indicates that the positioner feedback sensor is rotating clockwise to close. In normally configured position-ers, a spring will turn the sensor counter-clockwise upon release of the feedback linkage. This affects the fail safe position of the valve in the event of linkage failure.
Ensure the feedback sensor spring will lead to a proper fail safe position. If needed, an optional internal biasing spring is available that can change the direction of failure position if the feedback linkage should break.
N/A No N/A None
ValveSight Diagnostics for HART User Manual FCD VSENSF0001-02-AQ 03/15
59flowserve.com
14 Frequently Asked QuestionsThis section is designed to answer common questions you may have. If you still have questions please visit the ValveSight website at http://www.valvesight.com. We will continually add and update information on the website.
Q: What is the maximum number of field devices ValveSight will support?A: ValveSight will support an unlimited number of compatible Logix positioners.
Q: What computer operating systems does ValveSight work with (e.g. PC or Mac?)A: FDT/DTM standards are Windows based and require a compatible operating system from Microsoft on the computer running the frame.
Q: Will ValveSight work across multiple facilities?A: The ValveSight diagnostic solution is not limited by physical or geographic boundaries, only by the plant’s own network security architecture. Provided that the plant allows distributed access to its control network, ValveSight can be used for any remote location.
Q: What kind of training do plant managers need to undergo to use ValveSight?A: ValveSight is easy to use and has been specifically designed to require minimal training. It has an intuitive graphical user interface and extensive help file information. Flowserve will provide additional support and training as needed.
Q: Will the data be lost if power is lost to the plant/facility?A: Interruption of external power will not result in any loss of information.
Q: What kind of backup is needed for ValveSight?A: All configuration, alarm, and diagnostic information displayed on ValveSight is stored locally in non-volatile memory within the device, and require no external backup. Signatures of device performance can be saved in local files that can be read at any time using the DTM. Configuration files can be saved in a similar way. In the event of catastrophic failure of a single device, loss of any information is limited only to the affected unit. Configuration information can be loaded onto a new device.
Q: What monitoring devices can connect to ValveSight (e.g. Can I get updates on my wireless phone, Blackberry, home computer, etc.)?
A: At this time ValveSight is not supported by any of these monitoring devices.
Q: Can ValveSight work on existing devices?A: For existing devices ValveSight compatible firmware must be installed on each desired device. This requires a field service technician and takes only a few minutes per device. Please contact your sales representative for details.
Q: How long does ValveSight installation take?A: ValveSight is installed in a point-to point frame environment by a simple routine that is similar to installing application software onto a personal computer. Typically install time is less than 10 minutes. This may vary for integrated frame applications.
To find your local Flowserve representative:
For more information about Flowserve Corporation, visit www.flowserve.com or call USA 1 800 225 6989 or International +1 972 910 0774
FCD VSENSF0001-02-AQ Printed in USA. March 2015. © 2015 Flowserve Corporation
Flowserve Headquarters5215 N. O’Connor Blvd., Suite 2300 Irving, TX 75039Telephone: 972 443 6500
Flowserve America1350 Mountain Springs ParkwaySpringville, UT 84663-3004 USATelephone: +1 801 489 8611
Flowserve (Austria) GmbHKasernengasse 6Villach Austria 9500Telephone: +43 0 4242 41181 0
Flowserve India Controls Pvy. LtdPlot #4, 1A, E.P.I.P., WhitefieldBangalore KamatakaIndia 560 066Telephone: +91 80 284 10 289
The ValveSight system can be used on any control valve.