Embed Size (px)
Citation preview

First Printing — November 1997
Copyright 1997NEC Computer Systems Division
Packard Bell NEC, Inc.339 North Bernardo Avenue
Mountain View, CA 94043-5223All Rights Reserved
Proprietary Notice and Liability Disclaimer
The information disclosed in this document, including all designs and related materials, is thevaluable property of NEC Computer Systems Division, Packard Bell NEC (NECCSD, PBNEC)and/or its licensors. NECCSD and/or its licensors, as appropriate, reserve all patent, copyrightand other proprietary rights to this document, including all design, manufacturing,reproduction, use, and sales rights thereto, except to the extent said rights are expressly grantedto others.
The NECCSD product(s) discussed in this document are warranted in accordance with theterms of the Warranty Statement accompanying each product. However, actual performance ofeach such product is dependent upon factors such as system configuration, customer data, andoperator control. Since implementation by customers of each product may vary, the suitabilityof specific product configurations and applications must be determined by the customer and isnot warranted by NECCSD.
To allow for design and specification improvements, the information in this document issubject to change at any time, without notice. Reproduction of this document or portionsthereof without prior written approval of NECCSD is prohibited.
NEC and PowerMate are registered trademarks of NEC Corporation, used under license; C400 and C500 are trademarks ofNEC Technologies, Inc.
All other product, brand, or trade names used in this publication are the trademarks or registered trademarks of theirrespective trademark owners.

Contents iii
Contents
About this guide .......................................................................... v Who should use this guide?...............................................................v
How should I use this guide?............................................................v
What about text conventions?..........................................................vi
Setting up your monitor.............................................................. 1 Check the carton contents.................................................................2
Attach the stand................................................................................2
Get acquainted..................................................................................4
Connect the monitor.........................................................................6
Looking at features ..................................................................... 9 Plug and Play..................................................................................10
Ergonomic design...........................................................................10
Optimized power management........................................................11
Reduced emissions..........................................................................11
Multiple frequency technology........................................................12
Adjusting the monitor ............................................................... 13 Access the On-Screen Display.........................................................14
Control panel buttons................................................................15
On-Screen Display....................................................................16
Use the On-Screen Display.............................................................17
The status display......................................................................17
The control menu......................................................................18
iv Contents
How to adjust your monitor ........................................................... 19
Contrast control ....................................................................... 19
Brightness control.................................................................... 19
Horizontal size control............................................................. 20
Vertical size control................................................................. 21
Horizontal position control....................................................... 22
Vertical position control........................................................... 23
Pincushion control.................................................................... 24
Trapezoid control..................................................................... 25
Red gain control....................................................................... 26
Green gain control.................................................................... 27
Color switch control................................................................. 28
Degauss................................................................................... 29
Reset........................................................................................ 30
Solving problems .......................................................................31 Solving common problems............................................................. 32
Getting help................................................................................... 34
Working safely............................................................................35 Safety precautions.......................................................................... 36
Setting up a healthy work environment........................................... 38
Monitor specifications ...............................................................39
Index
About this guide v
About this guide This guide describes how to set up and use your new NEC C Seriesmonitor.
Who should use this guide? We’ve written this guide for anyone who wants to learn about usingthe NEC C Series monitor.
How should I use this guide? We suggest that you read:
� “Setting up your monitor” for a list of what comes in thecarton with your monitor and for directions on connecting themonitor.
� “Looking at features” for descriptions of the special featuresthat are built into your monitor.
� “Adjusting the monitor” for directions on using the monitor’scontrol buttons and the On-Screen Display.
� “Solving problems” to find the likely solution if you encountera problem.
� “Working safely” for the precautions you should take whenusing any equipment, and for tips on setting up a healthy andcomfortable environment.
� “Monitor specifications” for details about the characteristicsand capabilities of your monitor.
vi About this guide
What about text conventions? This guide uses the following text conventions.
� Warnings, cautions, and notes have the following meanings:
! WARNING Warnings alert you to situations that could result in seriouspersonal injury or loss of life.
! CAUTION Cautions indicate situations that can damage the hardwareor software.
Note: Notes give important information about thematerial being described.
� Names of keyboard keys are printed as they appear on thekeyboard, for example, Ctrl, Alt, or Enter .
� Text or keystrokes that you enter appear in boldface type. Forexample, type return and press Enter .
� Mouse input is a single click of the left mouse button unlessindicated otherwise.

Setting up your monitor 1
Setting up your monitor Your NEC C Series color monitor is easy to set up. See the followingsections to:
� check out the items that come in the carton
� attach the monitor stand to the monitor
� get acquainted with the features on the front and rear of themonitor
� connect the monitor to your computer.
2 Setting up your monitor
Check the carton contents In addition to this guide, the carton contains the following items:
� NEC C Series color monitor
� monitor stand
� power cable
� signal cable
� registration card (please fill out and return as soon aspossible).
Make sure you have these items before you attach the monitor standand set up the monitor. Please save the original box and packingmaterials in case you ever need to transport or ship the monitor.
Attach the stand Your NEC C Series monitor comes with a stand that allows you toadjust the monitor horizontally and vertically for optimum viewing.
Use the following steps to attach the stand to the monitor.
1. Make sure your monitor is powered off and all cables aredisconnected.
2. Place the monitor face down on a flat, smooth, clean, andstable surface.
� Use care to avoid scratching the monitor screen.
� Position the monitor with the base facing towards you.
Setting up your monitor 3
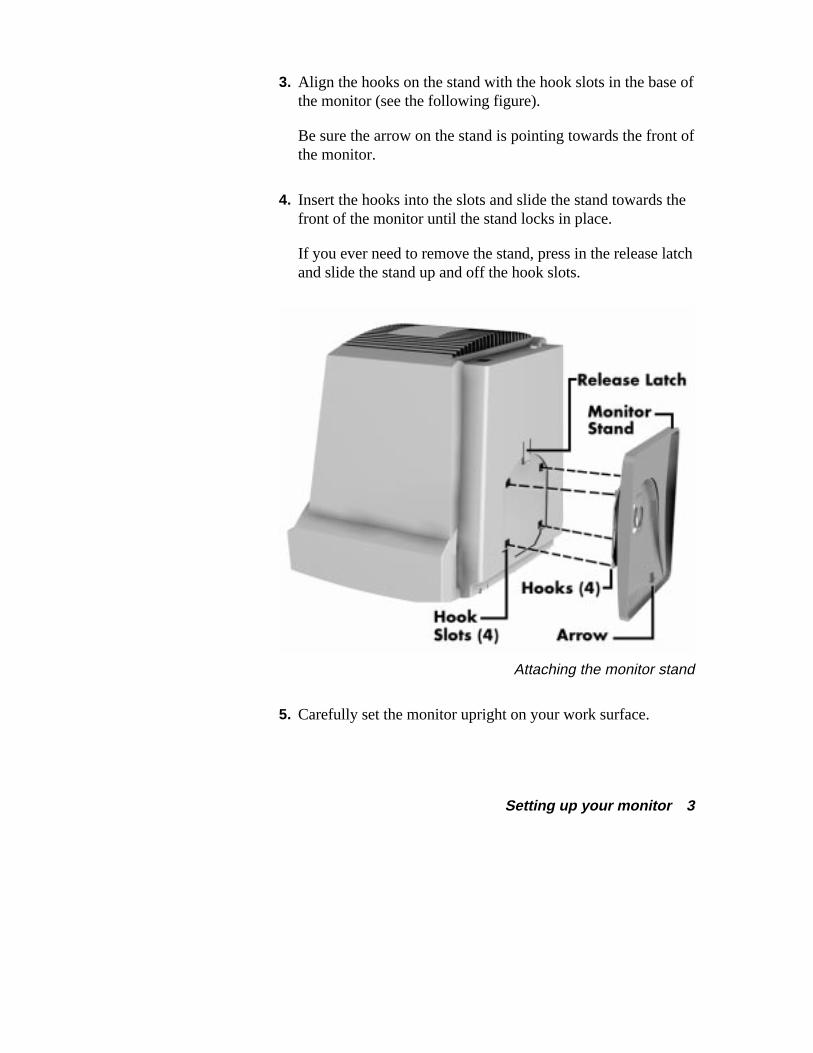
3. Align the hooks on the stand with the hook slots in the base ofthe monitor (see the following figure).
Be sure the arrow on the stand is pointing towards the front ofthe monitor.
4. Insert the hooks into the slots and slide the stand towards thefront of the monitor until the stand locks in place.
If you ever need to remove the stand, press in the release latchand slide the stand up and off the hook slots.
Attaching the monitor stand
5. Carefully set the monitor upright on your work surface.
4 Setting up your monitor
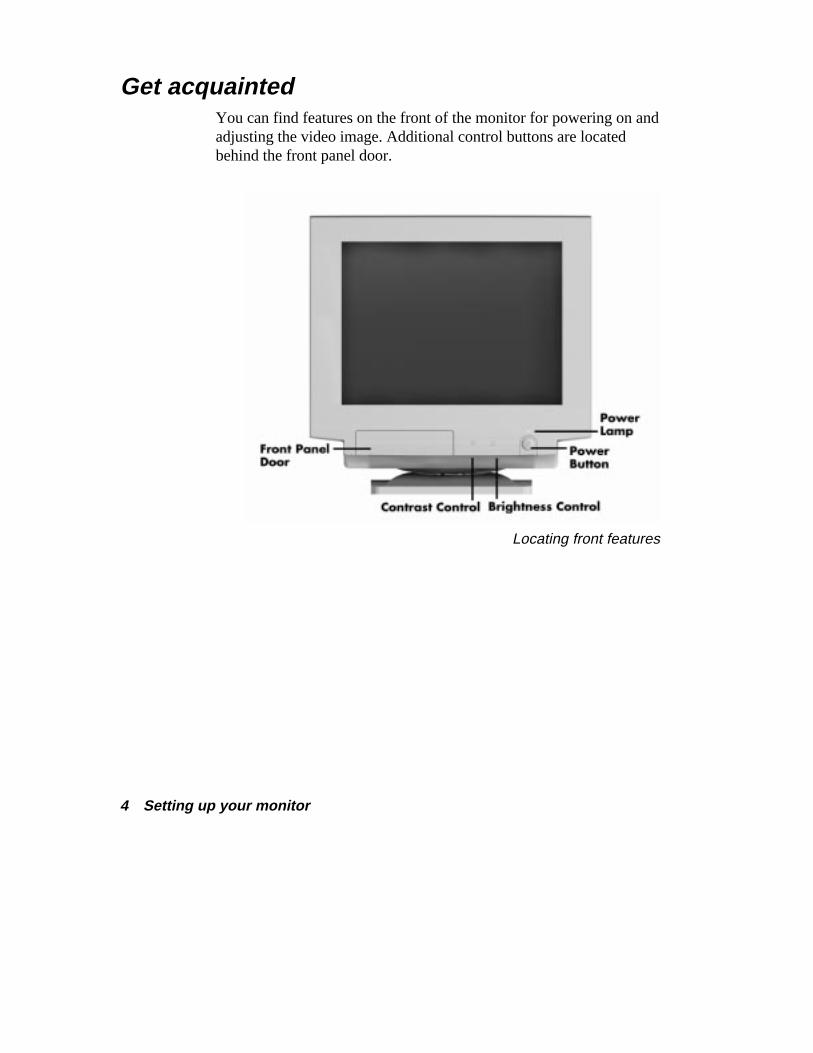
Get acquainted You can find features on the front of the monitor for powering on andadjusting the video image. Additional control buttons are locatedbehind the front panel door.
Locating front features
Setting up your monitor 5
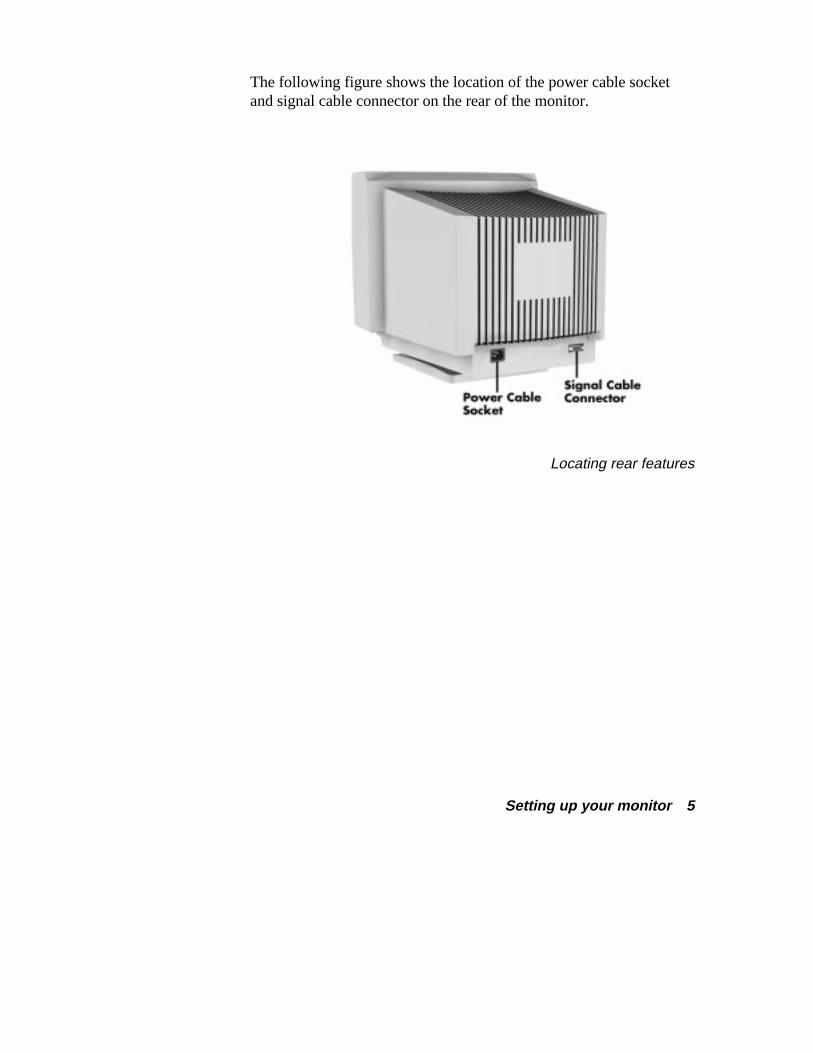
The following figure shows the location of the power cable socketand signal cable connector on the rear of the monitor.
Locating rear features
6 Setting up your monitor
Connect the monitor Your NEC C Series monitor has a signal cable and a power cable thatneed to be connected to your computer and a power source.
Use the following steps to connect the signal and power cables.
Note: See the documentation that comes with yourcomputer to locate the monitor connector on the computer.
1. Make sure your computer is powered off.
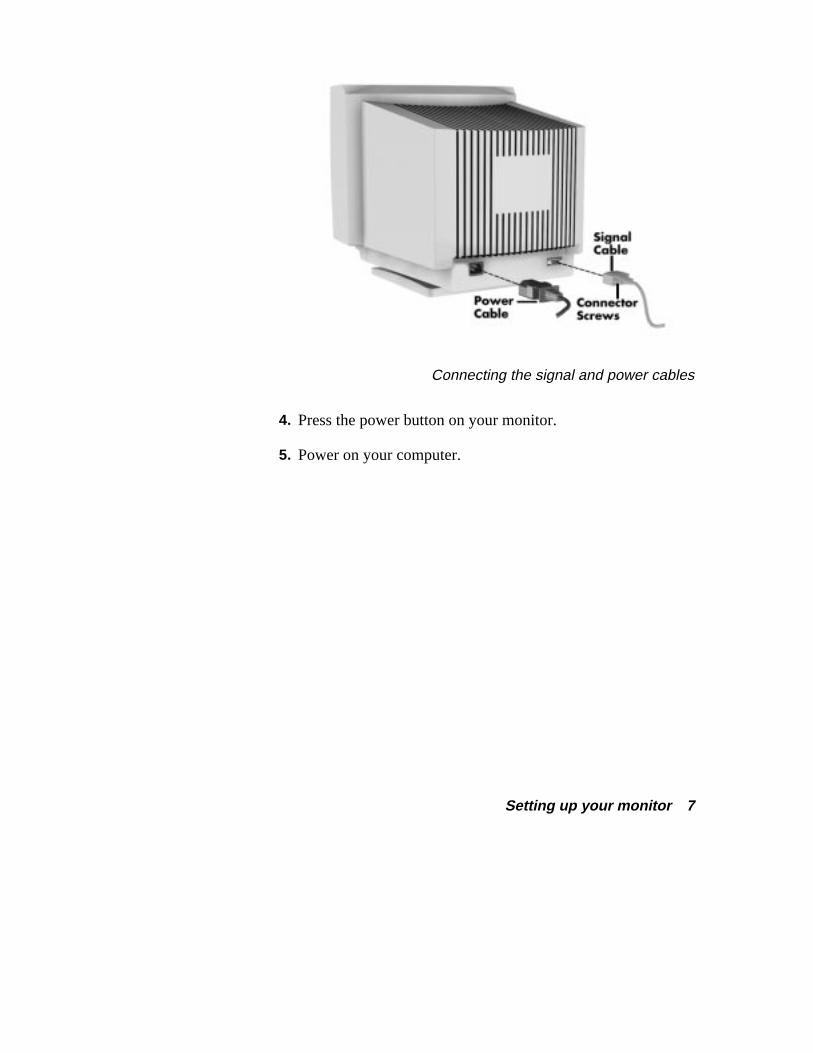
2. Connect the signal cable (see the following figure).
� Remove the protective cap from each connector on thesignal cable.
� Locate the connector marked with a C (for computer).Carefully align the connector with the VGA video port onyour computer and plug it into the port. Tighten the twoconnector screws.
� Carefully align and plug the other connector into the rearof your monitor. Tighten the two connector screws.
3. Connect one end of the power cable to the monitor and theother end to a properly grounded power outlet.
Setting up your monitor 7
Connecting the signal and power cables
4. Press the power button on your monitor.
5. Power on your computer.
Looking at features 9
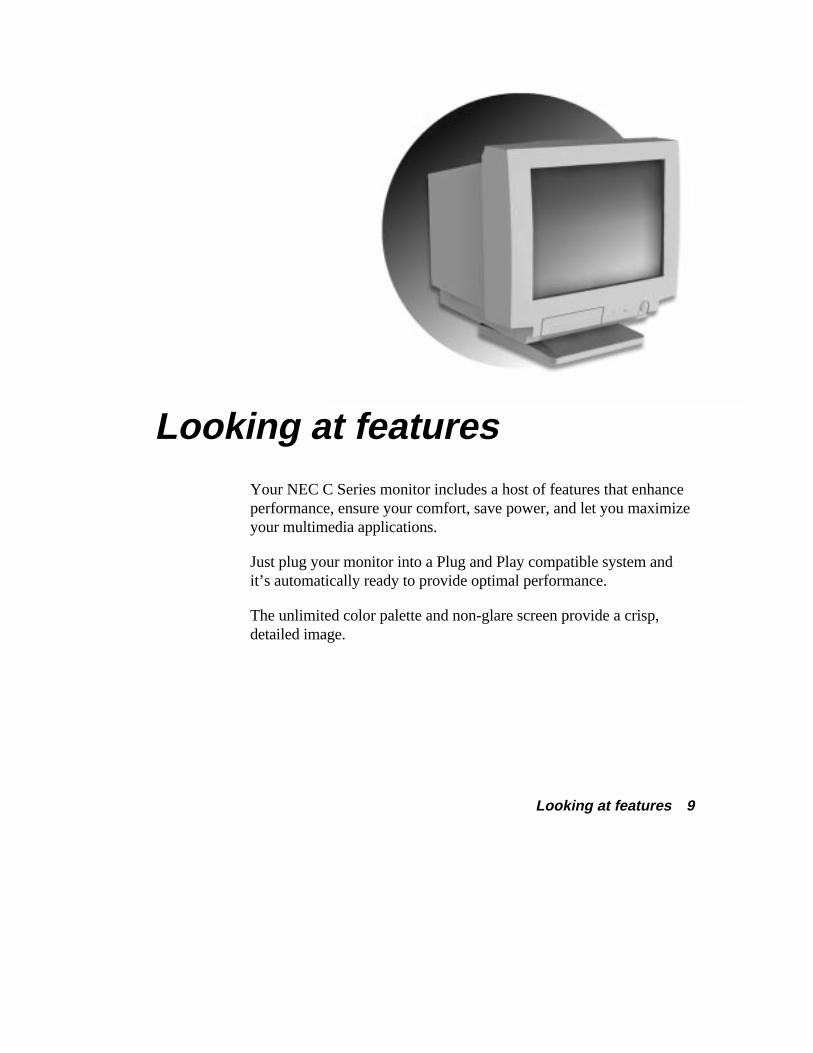
Looking at features Your NEC C Series monitor includes a host of features that enhanceperformance, ensure your comfort, save power, and let you maximizeyour multimedia applications.
Just plug your monitor into a Plug and Play compatible system andit’s automatically ready to provide optimal performance.
The unlimited color palette and non-glare screen provide a crisp,detailed image.
10 Looking at features
Your color monitor has the following features:
� Plug and Play capability
� contemporary ergonomic design
� optimized power management system
� reduced magnetic field technology
� multiple frequency technology
� color management with the On-Screen Display (OSD).
Plug and Play Plug and Play is the Microsoft solution with Windows 95 thatprovides automatic peripheral connections without confusing andtime-consuming setup. When used with a Plug and Play compatiblesystem and display board, the NEC C Series monitor automaticallytells the system its identification and capabilities. The system thenselects its highest resolution and refresh rate to take advantage of thecapabilities of your monitor.
Ergonomic design The NEC C Series monitor has been designed to enhance humanergonomics (human and earth conditions), which improve theworking environment, protect the health of the user, and save money.
The color monitor has a tilt/swivel stand so you can adjust it fully formaximum comfort. It has a high-resolution, flicker-free screen thatcan be adjusted using an easy-to-use screen display.
The ergonomic principles used in the monitor design parallel the strictEuropean standards of power management and reduced emissions andthe requirements in the TCO (Swedish Confederation of ProfessionalEmployees) Agreement on Environmental Labeling 1992.
Looking at features 11
Optimized power management The NEC C Series monitor uses an optimized power managementsystem. This is an innovative power-saving feature that complies withboth the EPA’s Energy Star requirements and Europe’sTCONUTEK’s power management requirements. Energy Starproducts use less than 30 watts when in the main power-saving mode.The NUTEK specification 803299 requires automatic power down toless than 30 watts in the suspend mode and less than 8 watts in the offmode.
When in the maximum power-down mode, the monitor consumesapproximately 10% of the total power drawn under normal operation.This innovation adds up to 90% energy savings, longer monitor life,environmental protection, reduced emissions, and reduced airconditioning costs of the work environment.
Reduced emissions The NEC C Series monitor incorporates reduced magnetic fieldtechnology to reduce magnetic and alternating electric field emissionsand static electricity.
NEC monitors follow the strictest magnetic field, alternating electricfield, and electrostatic recommendations of the Swedish Board forTechnical accreditation.
SWEDAC (previously known as MPR, National Board forMeasurement and Testing) specifies maximum recommended valuesof electric and magnetic fields. The NEC C Series monitor conformsto SWEDAC’s MPR 1990:8 (MPR II) methods, which is one of themost restrictive guidelines in the world.
12 Looking at features
Multiple frequency technology Multiple frequency technology automatically adjusts the monitor tothe display card’s scanning frequency, displaying the resolution youdesire.
Increased refresh rates at all resolutions provide a flicker-free imagewhich is easier on your eyes and extends your viewing time.
Depending on the system used, a wide range of graphics standards issupported by the monitor:
� 640 x 480 — 60 to 75 Hz vertical refresh
� 800 x 600 — 56 to 75 Hz vertical refresh
� 832 x 624 — 75 Hz vertical refresh
� 1024 x 768 — 60 to 75 Hz vertical refresh (recommended foroptimal display performance)
� 1280 x 1024 — 60 Hz (maximum resolution based onhorizontal and vertical frequencies only).
Adjusting the monitor 13
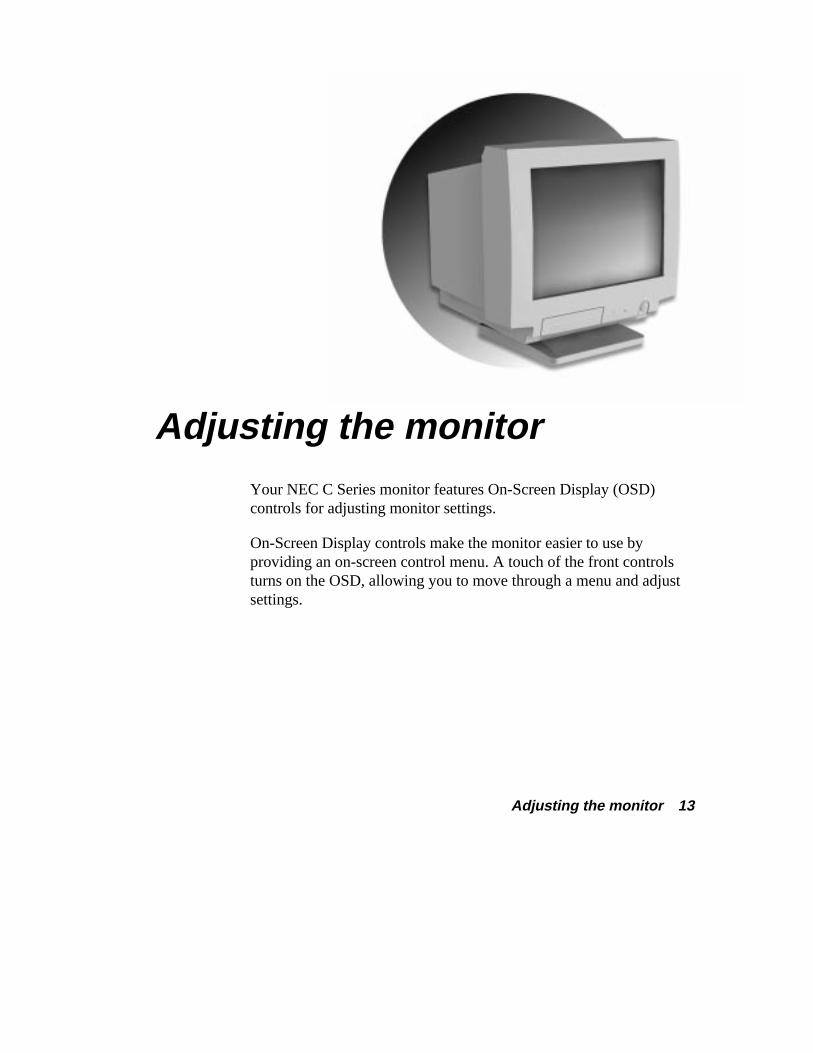
Adjusting the monitor Your NEC C Series monitor features On-Screen Display (OSD)controls for adjusting monitor settings.
On-Screen Display controls make the monitor easier to use byproviding an on-screen control menu. A touch of the front controlsturns on the OSD, allowing you to move through a menu and adjustsettings.
14 Adjusting the monitor
OSD controls let you adjust the following settings:
� horizontal and vertical position
� horizontal and vertical size
� a convex or concave screen
� trapezoid screen shape
� color saturation and balance.
You can also use OSD controls to:
� return to factory-state settings
� degauss (demagnetize) the monitor.
In addition, two manual controls on the front of the monitor allowyou to adjust the brightness and contrast of your monitor screen.
See the following sections for information about using the OSDcontrols and the brightness and contrast controls.
Access the On-Screen Display You can adjust your monitor using a combination of the followingfeatures:
� On-Screen Display (OSD) control menu
� control panel buttons.
See the following sections for information about using the controlpanel buttons and the OSD control menu. The buttons are locatedbehind the control panel door.
To open the control panel door, press the triangle-shaped icon at thelower right corner of the door.
Adjusting the monitor 15
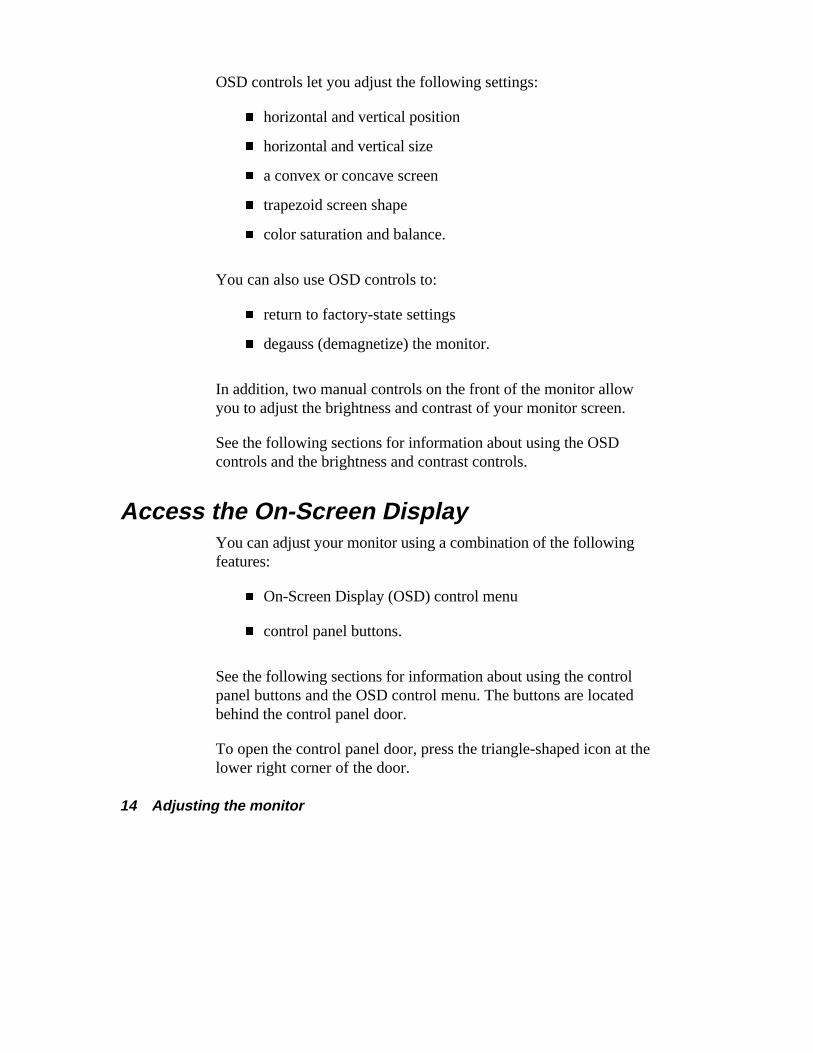
Control panel buttons To use control panel buttons, monitor and computer power must beon. See the following figure to locate the monitor control panelbuttons.
Locating control panel buttons
Note: The power lamp shows the operating state ofthe monitor. When the lamp is red, the monitor is on, but itis not getting a signal (either because the signal cable isnot connected or the computer is not on). When the lamp isgreen, the monitor is on and is receiving a signal. When thelamp is orange, the monitor is in power management mode.
Use control panel buttons to bring up the OSD menus and adjustmonitor settings.
16 Adjusting the monitor
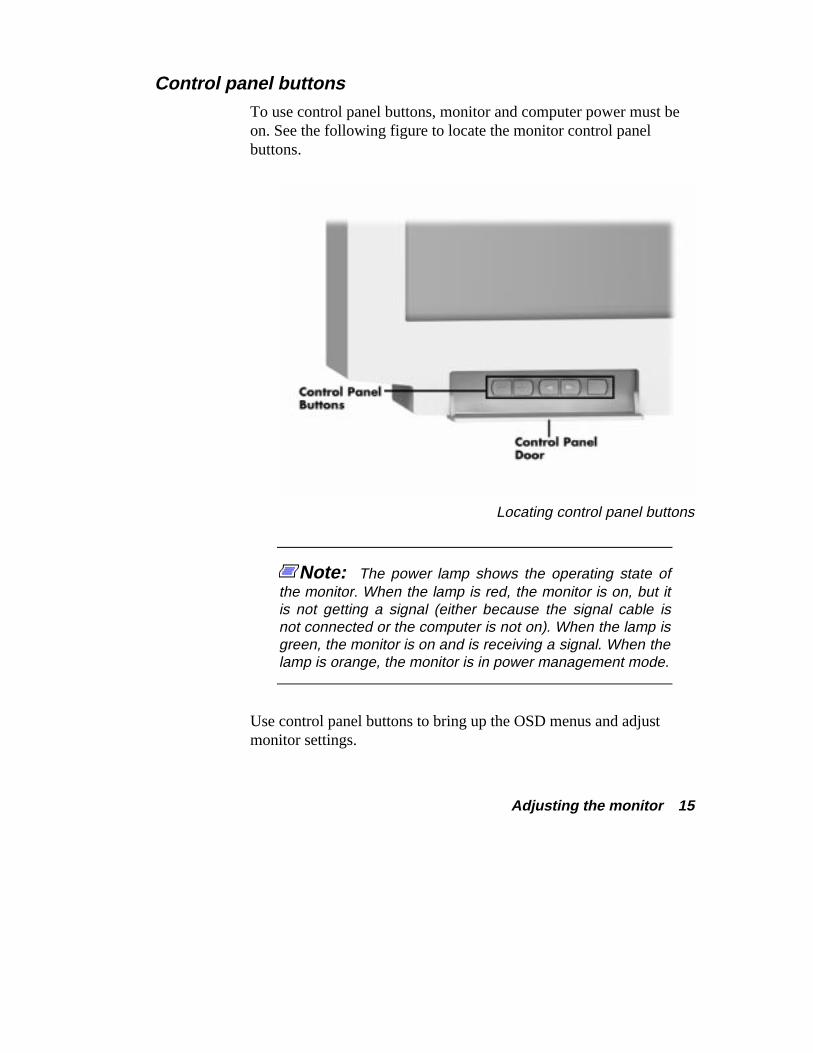
On-Screen Display The On-Screen Display consists of an OSD status display and anOSD control menu.
The OSD status display shows the horizontal and vertical frequencyand synchronization polarities of the monitor. The status display alsoshows the type of display. The OSD status display looks like thefollowing when you bring it up.
The OSD status display
The OSD control menu is comprised largely of icons. The iconsrepresent the settings you can access. The OSD control menu isdivided into two areas:
� the icon bar
� the adjustment bar.
Two rows of icons appear on the top of the OSD control menu in theicon bar. The adjustment bar appears along the bottom of the menu.The adjustment bar shows the value of the monitor settings. The OSDcontrol menu looks like the following menu when you bring it up.
The OSD control menu
Adjusting the monitor 17
Use the On-Screen Display To use the OSD, you need to know how to do the followingprocedures:
� bring-up the OSD status display
� bring up the OSD control menu
� move through the control menu
� adjust monitor settings
� save new settings
� reset the OSD control menu to the factory set settings
� exit the OSD control menu and the On-Screen Displayprogram.
The status display From the control panel, press the MENU button once to bring up theOSD status display.
The OSD status display has an inactivity time-out. The display clearsfrom the screen if no control panel buttons are pressed in the time-outperiod.
If the OSD status display is off-center on your screen, pressthe – button to adjust the horizontal position or the + button to adjustthe vertical position of the menu.
18 Adjusting the monitor
The control menu Here’s a quick preview of the control menu buttons you’ll use toadjust monitor settings. Go to the following sections for procedureson setting individual settings.
� MENU buttonOpens or exits the control menu. Saves settings on exit.
� SELECT or buttonAdvances through and selects a control icon.
� ADJUST or buttonIncreases or decreases setting adjustment.
� MENU and SELECT buttons (“RECALL”)Reset all monitor settings to factory state.
The adjustment bar expands to the right when the adjustment isincreased and it contracts to the left when the adjustment isdecreased.
When an icon is selected, the icon turns yellow. When the icon isdeselected, the icon turns blue.

Adjusting the monitor 19
How to adjust your monitor Here are procedures for using the contrast and brightness controlsand the OSD control menu to adjust your monitor.
Contrast control The contrast control on the front of the monitor adjusts the imagebrightness in relation to the background. Rotate the controlcounterclockwise to make the screen darker, clockwise to make thescreen lighter.
Note: The position of the contrast control affects theimage quality.
Brightness control The brightness control on the front of the monitor adjusts overallimage brightness. Rotate the control counterclockwise to dim thescreen and clockwise to make the screen brighter.
20 Adjusting the monitor
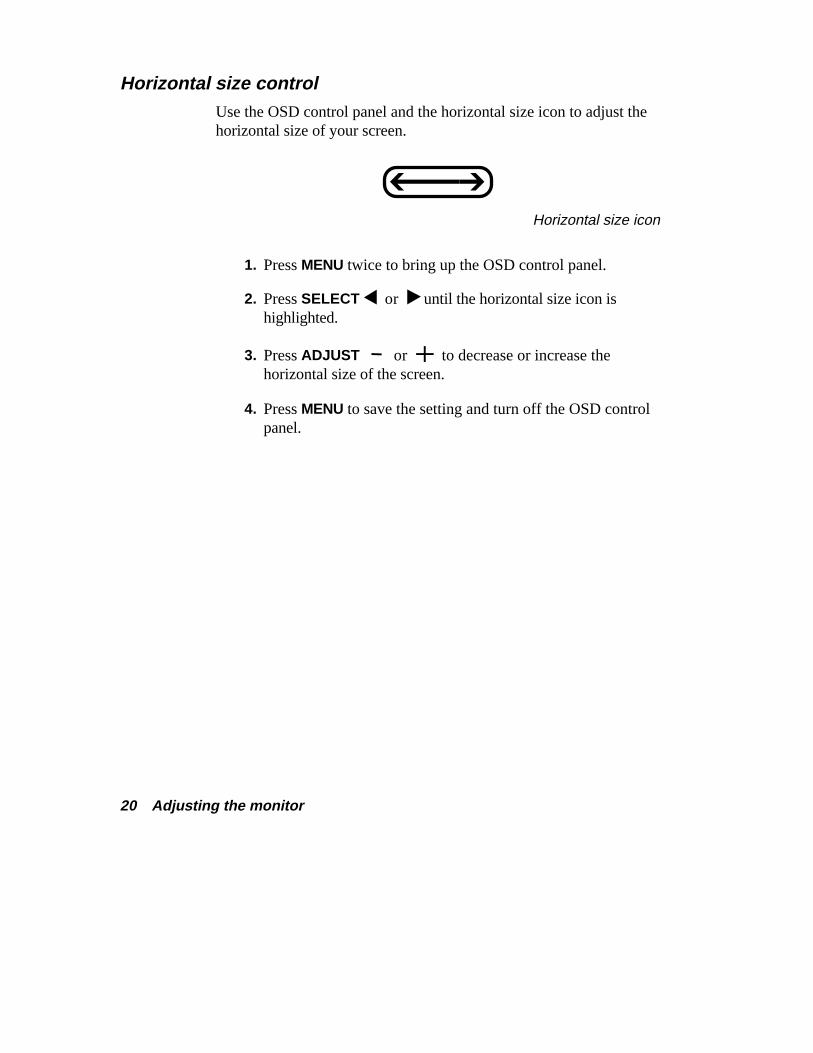
Horizontal size control Use the OSD control panel and the horizontal size icon to adjust thehorizontal size of your screen.
Horizontal size icon
1. Press MENU twice to bring up the OSD control panel.
2. Press SELECT or until the horizontal size icon ishighlighted.
3. Press ADJUST or to decrease or increase thehorizontal size of the screen.
4. Press MENU to save the setting and turn off the OSD controlpanel.
Adjusting the monitor 21
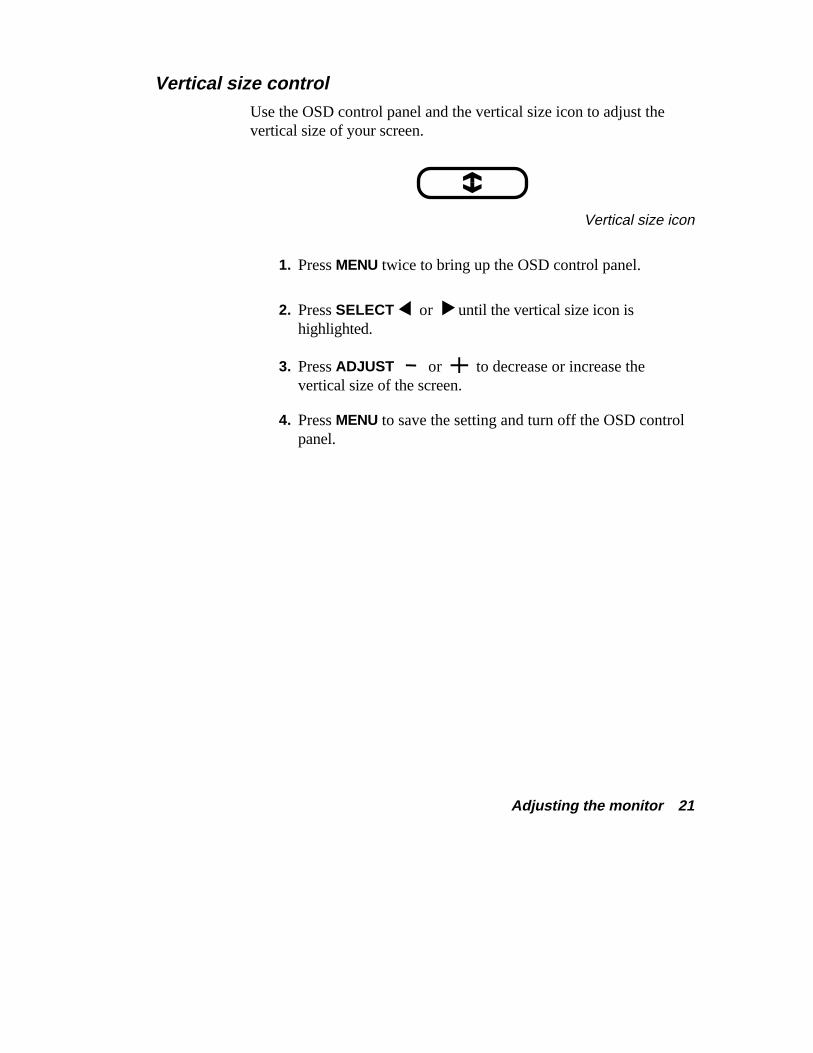
Vertical size control Use the OSD control panel and the vertical size icon to adjust thevertical size of your screen.
Vertical size icon
1. Press MENU twice to bring up the OSD control panel.
2. Press SELECT or until the vertical size icon ishighlighted.
3. Press ADJUST or to decrease or increase thevertical size of the screen.
4. Press MENU to save the setting and turn off the OSD controlpanel.
22 Adjusting the monitor
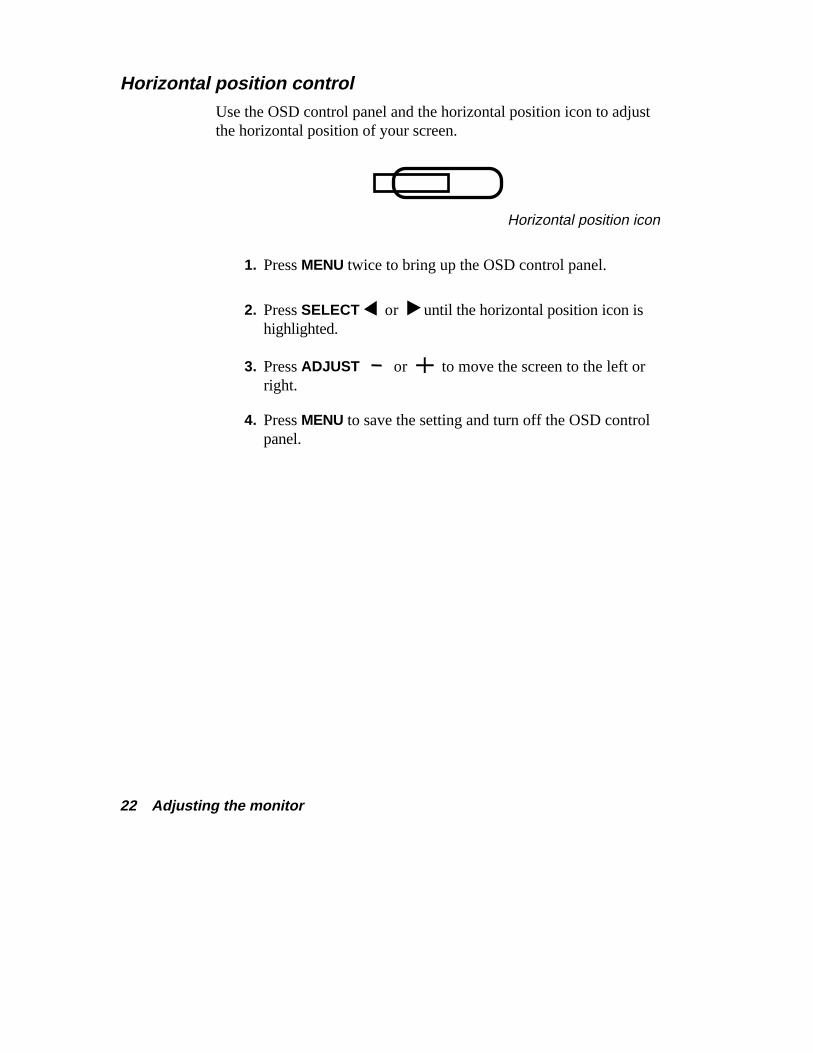
Horizontal position control Use the OSD control panel and the horizontal position icon to adjustthe horizontal position of your screen.
Horizontal position icon
1. Press MENU twice to bring up the OSD control panel.
2. Press SELECT or until the horizontal position icon ishighlighted.
3. Press ADJUST or to move the screen to the left orright.
4. Press MENU to save the setting and turn off the OSD controlpanel.
Adjusting the monitor 23
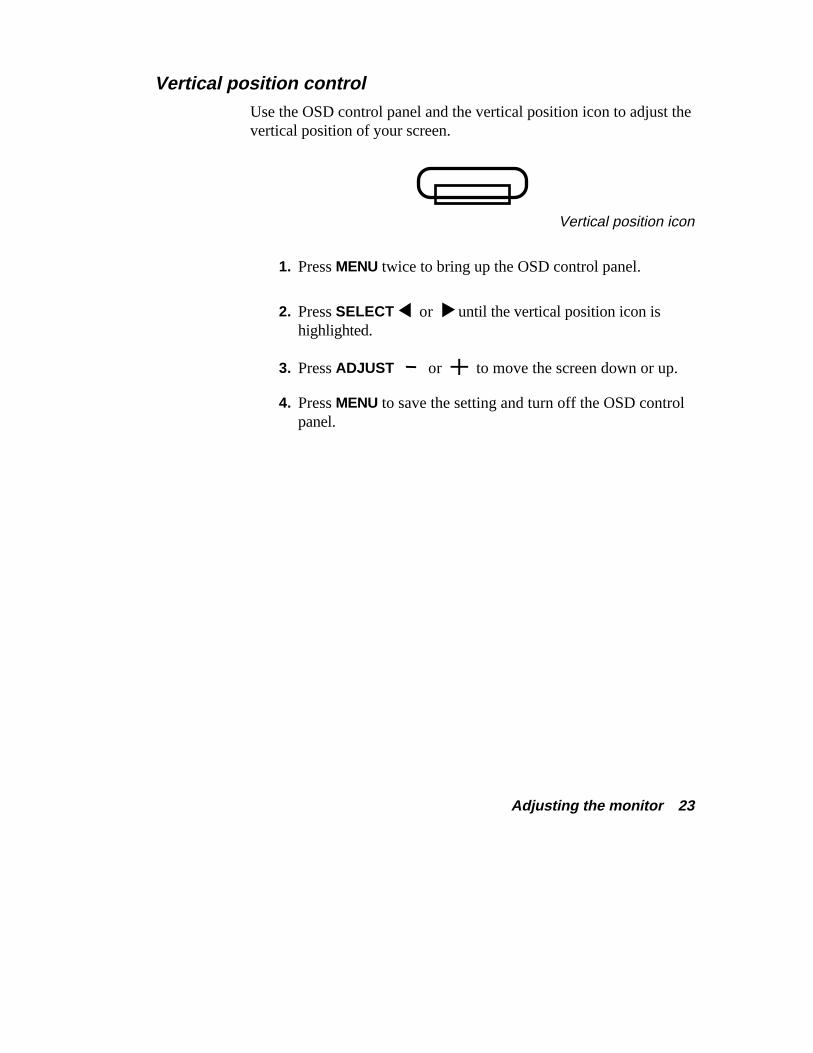
Vertical position control Use the OSD control panel and the vertical position icon to adjust thevertical position of your screen.
Vertical position icon
1. Press MENU twice to bring up the OSD control panel.
2. Press SELECT or until the vertical position icon ishighlighted.
3. Press ADJUST or to move the screen down or up.
4. Press MENU to save the setting and turn off the OSD controlpanel.
24 Adjusting the monitor
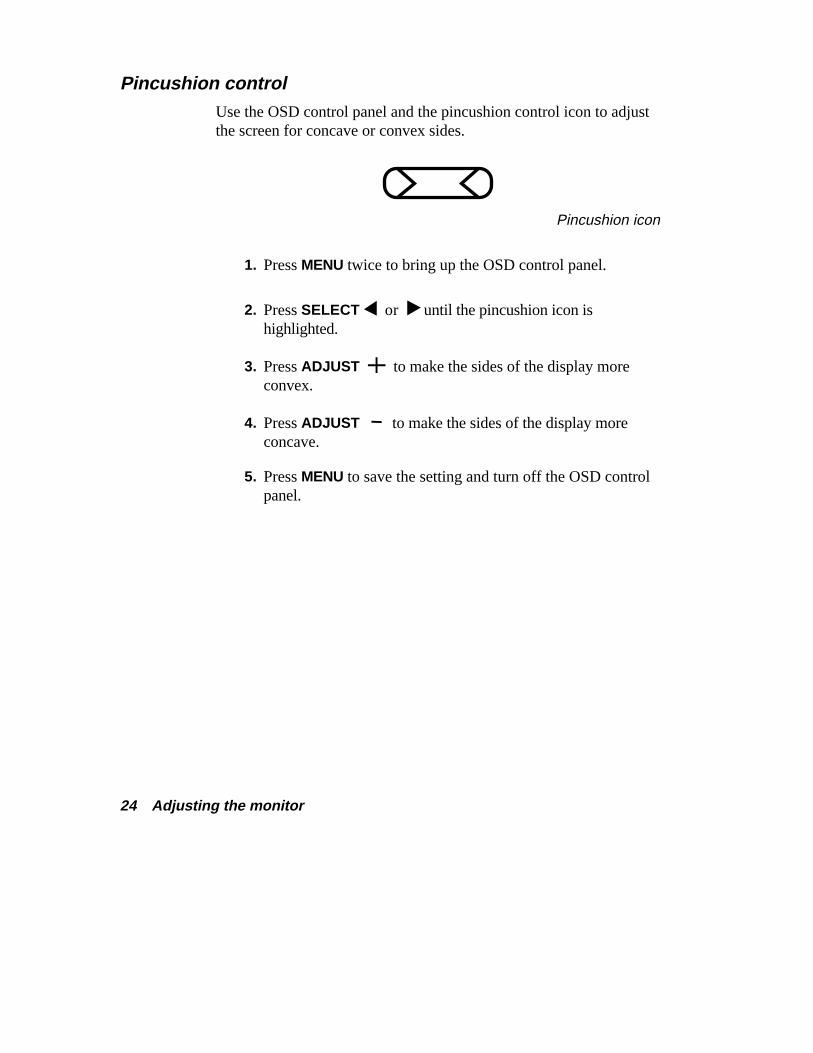
Pincushion control Use the OSD control panel and the pincushion control icon to adjustthe screen for concave or convex sides.
Pincushion icon
1. Press MENU twice to bring up the OSD control panel.
2. Press SELECT or until the pincushion icon ishighlighted.
3. Press ADJUST to make the sides of the display moreconvex.
4. Press ADJUST to make the sides of the display moreconcave.
5. Press MENU to save the setting and turn off the OSD controlpanel.
Adjusting the monitor 25
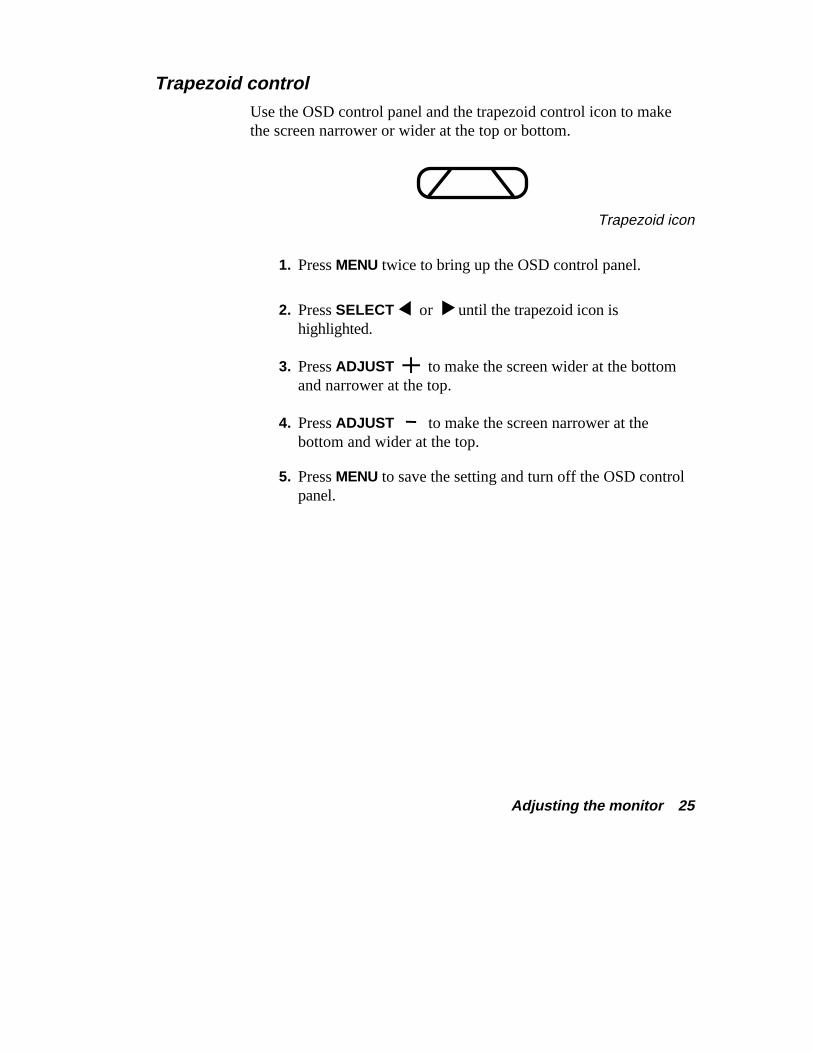
Trapezoid control Use the OSD control panel and the trapezoid control icon to makethe screen narrower or wider at the top or bottom.
Trapezoid icon
1. Press MENU twice to bring up the OSD control panel.
2. Press SELECT or until the trapezoid icon ishighlighted.
3. Press ADJUST to make the screen wider at the bottomand narrower at the top.
4. Press ADJUST to make the screen narrower at thebottom and wider at the top.
5. Press MENU to save the setting and turn off the OSD controlpanel.
26 Adjusting the monitor
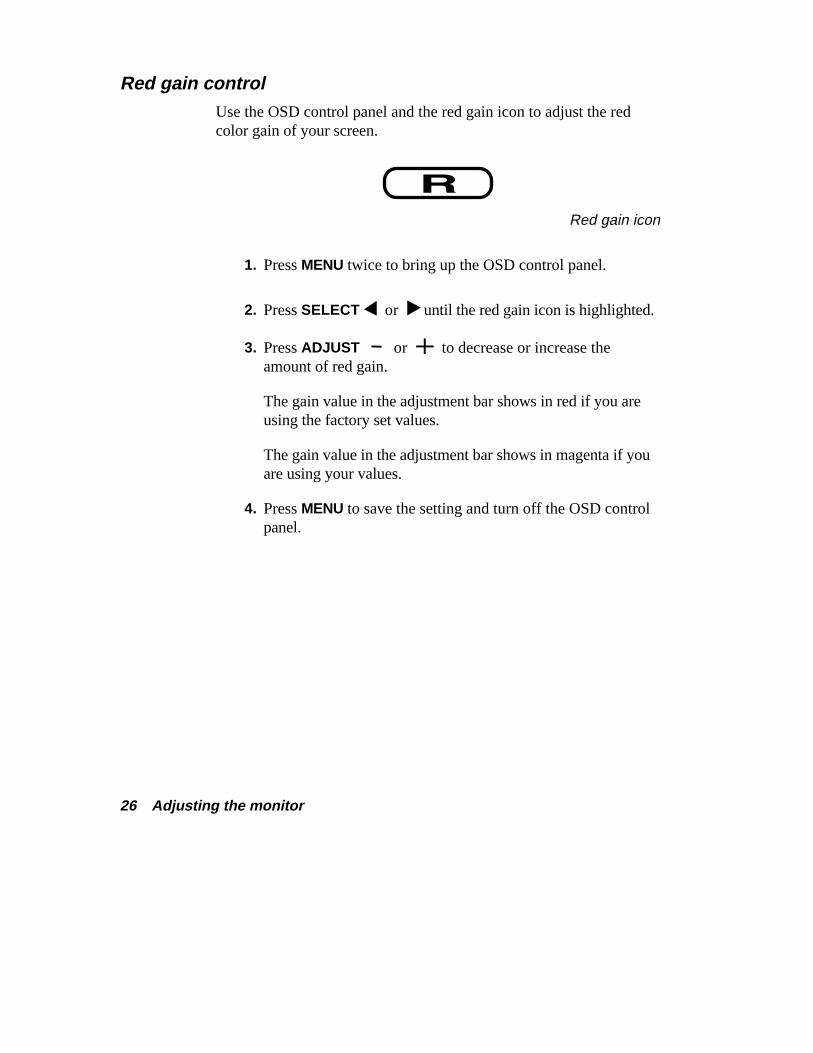
Red gain control Use the OSD control panel and the red gain icon to adjust the redcolor gain of your screen.
Red gain icon
1. Press MENU twice to bring up the OSD control panel.
2. Press SELECT or until the red gain icon is highlighted.
3. Press ADJUST or to decrease or increase theamount of red gain.
The gain value in the adjustment bar shows in red if you areusing the factory set values.
The gain value in the adjustment bar shows in magenta if youare using your values.
4. Press MENU to save the setting and turn off the OSD controlpanel.
Adjusting the monitor 27
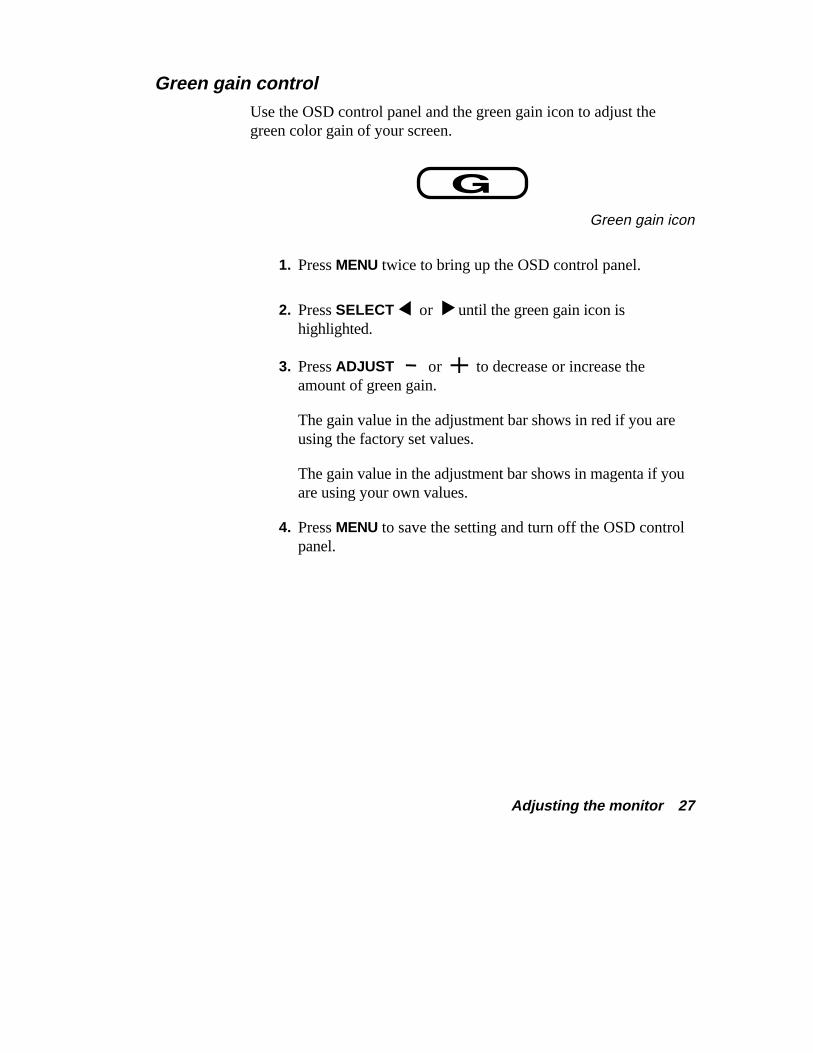
Green gain control Use the OSD control panel and the green gain icon to adjust thegreen color gain of your screen.
Green gain icon
1. Press MENU twice to bring up the OSD control panel.
2. Press SELECT or until the green gain icon ishighlighted.
3. Press ADJUST or to decrease or increase theamount of green gain.
The gain value in the adjustment bar shows in red if you areusing the factory set values.
The gain value in the adjustment bar shows in magenta if youare using your own values.
4. Press MENU to save the setting and turn off the OSD controlpanel.
28 Adjusting the monitor
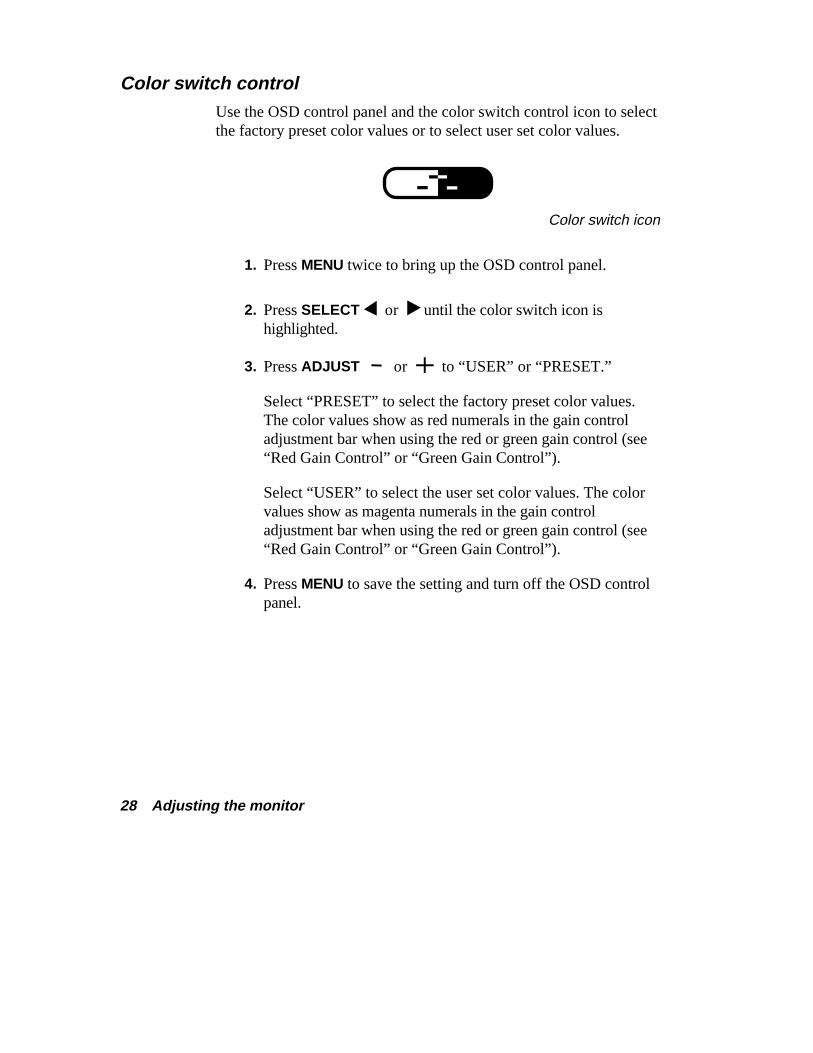
Color switch control Use the OSD control panel and the color switch control icon to selectthe factory preset color values or to select user set color values.
Color switch icon
1. Press MENU twice to bring up the OSD control panel.
2. Press SELECT or until the color switch icon ishighlighted.
3. Press ADJUST or to “USER” or “PRESET.”
Select “PRESET” to select the factory preset color values.The color values show as red numerals in the gain controladjustment bar when using the red or green gain control (see“Red Gain Control” or “Green Gain Control”).
Select “USER” to select the user set color values. The colorvalues show as magenta numerals in the gain controladjustment bar when using the red or green gain control (see“Red Gain Control” or “Green Gain Control”).
4. Press MENU to save the setting and turn off the OSD controlpanel.
Adjusting the monitor 29
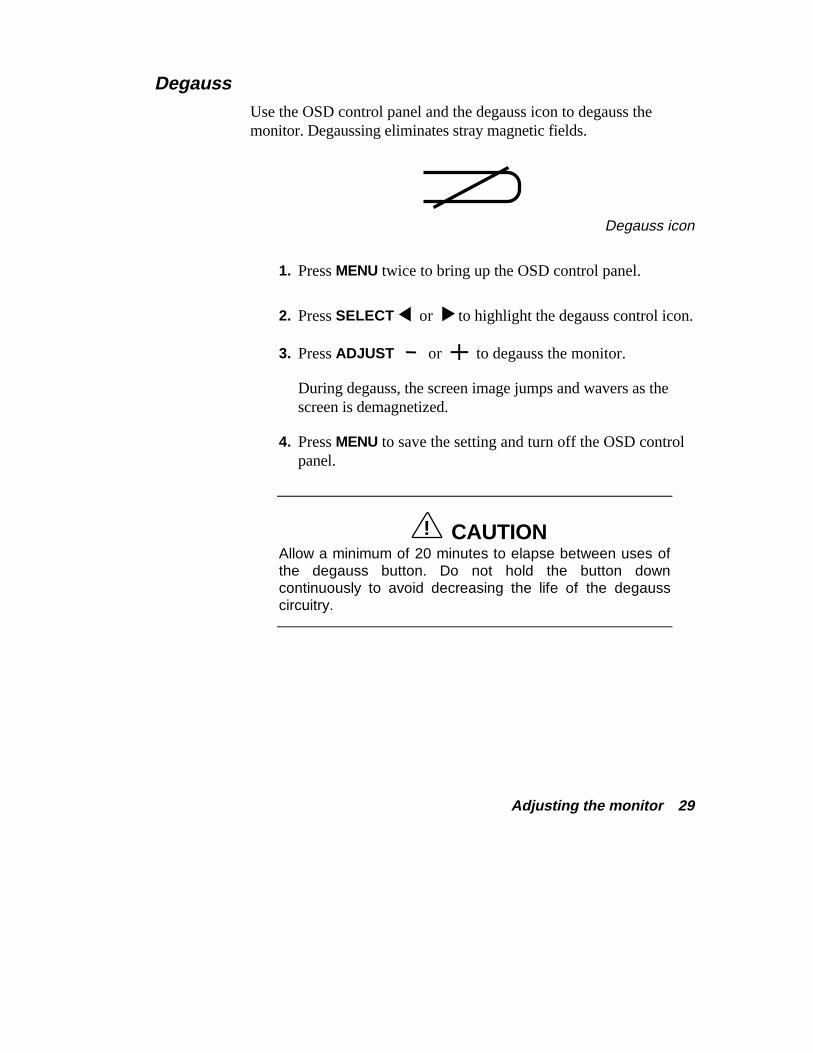
Degauss Use the OSD control panel and the degauss icon to degauss themonitor. Degaussing eliminates stray magnetic fields.
Degauss icon
1. Press MENU twice to bring up the OSD control panel.
2. Press SELECT or to highlight the degauss control icon.
3. Press ADJUST or to degauss the monitor.
During degauss, the screen image jumps and wavers as thescreen is demagnetized.
4. Press MENU to save the setting and turn off the OSD controlpanel.
! CAUTION Allow a minimum of 20 minutes to elapse between uses ofthe degauss button. Do not hold the button downcontinuously to avoid decreasing the life of the degausscircuitry.
30 Adjusting the monitor
Reset Use the “RECALL” settings to reset all the monitor settings to theirfactory state.
1. Press and hold down the MENU button.
2. Press SELECT to change all settings back to their factory-set state.
3. Release the buttons.
Solving problems 31
Solving problems Once in a while you may encounter a minor problem with yourmonitor. The problem is often one you can solve yourself. If youencounter a problem, look through this section to:
� solve minor problems
� get help when you need it.

32 Solving problems
Solving common problems Look here to match your problem and find the possible cause andsolution.
Note: When trying to solve a problem, note what yoursystem was doing when the problem occurred and whatyou tried to do to correct the problem. This information ishelpful if you need to call for help.
� Monitor screen is dark and the power lamp is off
Check that the monitor power cable is connected to themonitor and a power outlet.
� Monitor screen is dark and the power lamp is red
Check that the monitor signal cable is connected to yourcomputer and is tightly secured.
Check that your computer power is on.
� Monitor screen is dark and the power lamp is orange
Press the space bar or move the mouse to take the system outof a power management mode.
Adjust the contrast and brightness controls on the front of themonitor.
�� The image on your screen is discolored
Try turning the monitor off for several seconds, then back on.
Solving problems 33
� There is constant movement on the screen
A magnetic field is affecting your monitor. Move any devices(fan, motor, another monitor) that generate magnetic fieldsaway from your monitor.
If possible, position the monitor to face east.
� The screen display is fuzzy or flickering, graphicscharacters or garbage appears on the screen
Check that the video refresh rate and video driver are correct.For information about checking and changing video drivers,see your computer documentation.
Press the degauss button once. Caution: Wait a minimum of20 minutes before pressing the degauss button a second time.Do not hold down the degauss button continuously.
� Display image is not centered, too small, or too large
Use the monitor’s On-Screen Display to adjust the image.Select and adjust the size and position settings.
� Display image is scrolling
Check that the monitor signal cable is tightly secured to yourcomputer’s video connector.
� Left and right edges of display image are curved eitherinward or outward
Use the monitor’s On-Screen Display to adjust the pincushionsetting.
If possible, position the monitor to face east.
34 Solving problems
Getting help If you need information about your monitor or you have a problemthat you cannot resolve yourself, help is available by phone.
� Call 1-800-632-4565 if the monitor came with your purchaseof an NEC PowerMate® Computer.
� Call 1-888-632-2678 if the monitor came with your purchaseof an NEC Direction Computer.
� Call 1-800-633-6698 if the monitor came with your purchaseof an NEC Ready Computer.
� Call 1-888-632-9693 if you purchased your monitorseparately.
Note: See the warranty card that comes with yourNEC C Series monitor for a complete list of services andsupport available to you.
Before calling for help, have ready:
� your monitor name (NEC C400™ or NEC C500™)
� model number
� serial number
� purchase date.
Also have ready as much information as possible about the problemyou are having, including what you have attempted to correct theproblem yourself.
Working safely 35
Working safely One of the most important considerations when setting up and usingyour monitor is working safely. If you follow the precautions in thissection, you can prolong the life of your monitor and optimize itsperformance. More importantly, you can preserve your own healthand ensure your safety. We recommend that you read and follow allthe precautions in this section before setting up or using yourmonitor.
36 Working safely
Safety precautions
! WARNING For safety and optimum performance, please note thefollowing when setting up and using the NEC C Seriesmonitor.
� DO NOT OPEN THE MONITOR. There are no userserviceable parts inside and opening or removing covers mayexpose you to dangerous shock hazards or other risks. Referall servicing to qualified service personnel.
� Do not insert objects of any kind into the cabinet slots, as theymay touch dangerous voltage points, which can be harmful orfatal or may cause electric shock, fire or equipment failure.
� Allow adequate ventilation around the monitor so that heatcan properly dissipate. Do not block ventilated openings orplace the monitor near a radiator or other heat sources. Donot put anything on top of the monitor.
� To prevent fire or shock hazards, do not expose this unit torain or moisture. Do not spill any liquids into the cabinet oruse your monitor near water.
� Do not use this unit’s polarized plug with an extension cordreceptacle or other outlets unless the prongs can be fullyinserted.
� Do not place any heavy object on the power cord. Damage tothe cord may cause shock or fire.

Working safely 37
� Do not place this product on a sloping or unstable cart, stand,or table, as the monitor may fall, causing serious damage tothe monitor.
� Keep the monitor away from high capacity transformers,electric motors and other devices such as external speakers orfans, which may create strong magnetic fields.
� If possible, position the monitor so that it is facing the east tominimize the effects of the earth’s magnetic field.
� Changing the direction of the monitor while it is powered onmay cause image discoloration. To correct this, turn themonitor off for 20 minutes before powering it back on.
� The power cable connector is the primary means of detachingthe system from the power supply. The monitor should beinstalled close to a power outlet which is easily accessible.
� Handle with care when transporting. Save packaging fortransporting.
Immediately unplug your monitor from the wall outlet and referservicing to qualified service personnel under the followingconditions:
� When the power supply cord or plug is damaged.
� If liquid has been spilled, or objects have fallen into themonitor.
� If the monitor has been exposed to rain or water.
� If the monitor has been dropped or the cabinet damaged.
� If the monitor does not operate normally by followingoperating instructions.

38 Working safely
Setting up a healthy work environment Correct placement and adjustment of the monitor can reduce eye,shoulder and neck fatigue. Check the following when you position themonitor:
� Adjust the monitor height so that the top of the screen is at orslightly below eye level. Your eyes should look slightlydownward when viewing the middle of the screen.
� Position your monitor no closer than 12 inches and no furtheraway than 28 inches from your eyes. The optimal distance is18 inches.
� Rest your eyes periodically by focusing on an object at least20 feet away. Blink often.
� Position the monitor at a 90° angle to windows and other lightsources to minimize glare and reflections. Adjust the monitortilt so that ceiling lights do not reflect on your screen.
� If reflected light makes it hard for you to see your screen, usean anti-glare filter.
� Clean your monitor regularly. Use a lint-free, non-abrasivecloth and a non-alcohol, neutral, non-abrasive cleaningsolution or glass cleaner to minimize dust.
� Adjust the monitor’s brightness and contrast controls toenhance readability.
� Use a document holder placed close to the screen.
� Position whatever you are looking at most of the time (thescreen or reference material) directly in front of you tominimize turning your head while you are typing.
� Get regular eye checkups.
For more information on setting up a healthy work environment, seethe documentation that comes with your computer.
Monitor specifications 39
Monitor specifications Look through these specifications for detailed information about thecharacteristics and capabilities of your NEC C Series monitor.
40 Monitor specifications
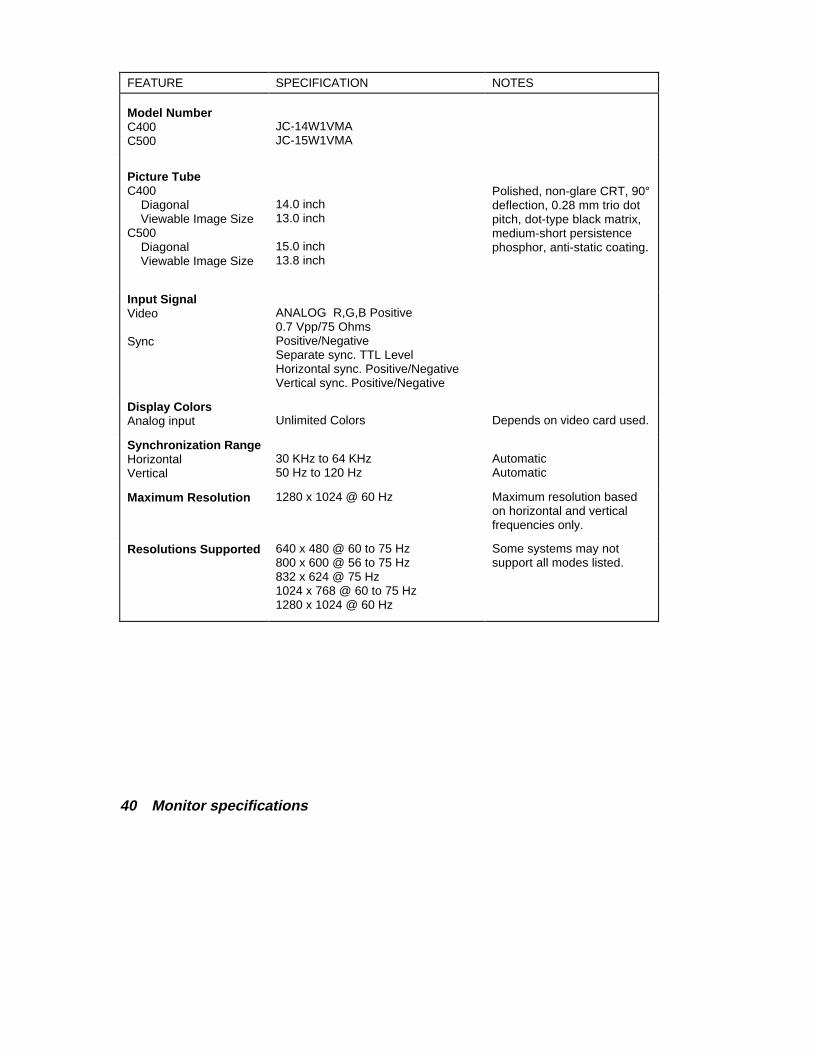
FEATURE SPECIFICATION NOTES
Model NumberC400C500
JC-14W1VMAJC-15W1VMA
Picture TubeC400 Diagonal Viewable Image SizeC500 Diagonal Viewable Image Size
14.0 inch13.0 inch
15.0 inch13.8 inch
Polished, non-glare CRT, 90°deflection, 0.28 mm trio dotpitch, dot-type black matrix,medium-short persistencephosphor, anti-static coating.
Input SignalVideo
Sync
ANALOG R,G,B Positive0.7 Vpp/75 OhmsPositive/NegativeSeparate sync. TTL LevelHorizontal sync. Positive/NegativeVertical sync. Positive/Negative
Display ColorsAnalog input
Unlimited Colors
Depends on video card used.
Synchronization RangeHorizontalVertical
30 KHz to 64 KHz50 Hz to 120 Hz
AutomaticAutomatic
Maximum Resolution 1280 x 1024 @ 60 Hz Maximum resolution basedon horizontal and verticalfrequencies only.
Resolutions Supported 640 x 480 @ 60 to 75 Hz800 x 600 @ 56 to 75 Hz832 x 624 @ 75 Hz1024 x 768 @ 60 to 75 Hz1280 x 1024 @ 60 Hz
Some systems may notsupport all modes listed.
Monitor specifications 41
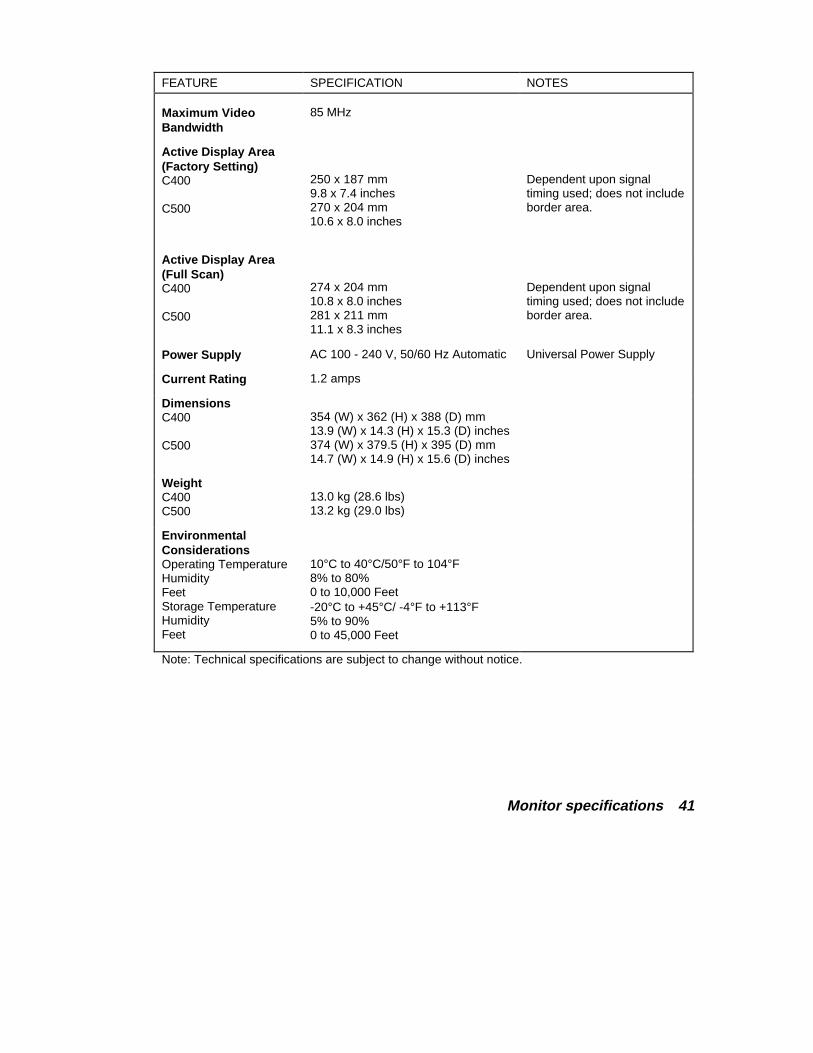
FEATURE SPECIFICATION NOTES
Maximum VideoBandwidth
85 MHz
Active Display Area(Factory Setting)C400
C500
250 x 187 mm9.8 x 7.4 inches270 x 204 mm10.6 x 8.0 inches
Dependent upon signaltiming used; does not includeborder area.
Active Display Area(Full Scan)C400
C500
274 x 204 mm10.8 x 8.0 inches281 x 211 mm11.1 x 8.3 inches
Dependent upon signaltiming used; does not includeborder area.
Power Supply AC 100 - 240 V, 50/60 Hz Automatic Universal Power Supply
Current Rating 1.2 amps
DimensionsC400
C500
354 (W) x 362 (H) x 388 (D) mm13.9 (W) x 14.3 (H) x 15.3 (D) inches374 (W) x 379.5 (H) x 395 (D) mm14.7 (W) x 14.9 (H) x 15.6 (D) inches
WeightC400C500
13.0 kg (28.6 lbs)13.2 kg (29.0 lbs)
EnvironmentalConsiderationsOperating TemperatureHumidityFeetStorage TemperatureHumidityFeet
10°C to 40°C/50°F to 104°F8% to 80%0 to 10,000 Feet-20°C to +45°C/ -4°F to +113°F5% to 90%0 to 45,000 Feet
Note: Technical specifications are subject to change without notice.
Index-1
AAdjustment bar, 16
BBrightness control, 19, 38
CCarton contents, 2Color management, 10Color switch control, 28Contrast control, 19, 38Control panel buttons, 15Controls
brightness, 19color switch, 28contrast, 19degaussing, 29green gain, 27horizontal position, 22horizontal size, 20pincushion, 24red gain, 26resetting to factory state, 30trapezoid, 25vertical position, 23vertical size, 21
DDegaussing the monitor, 29Dimensions, 41Dot pitch, 40
EEnergy Star, 11EPA, 11Ergonomics, 10, 38
FFactory state resetting, 30
GGreen gain control, 27
HHelp, 34Horizontal position control, 22Horizontal size control, 20
IIcon bar, 16
MMonitor
adjusting controls, 13connecting, 6controls, 4degaussing, 29On-Screen Display, 14setting up, 1specifications, 39troubleshooting, 31
Monitor standattaching, 2removing, 2
Index

Index-2
MPR, 11Multiple frequency technology, 10, 12
NNational Board for Measurement and
Testing, 11NUTEK, 11
OOn-Screen Display, 16, 17
PPicture tube, 40Pincushion control, 24Plug and Play, 10Power button, 15Power lamp, 15Power management, 10, 11Problems, 31
RRed gain control, 26Reduced magnetic field technology,
10, 11Resetting to factory state, 30Resolutions, 10, 12, 40
SSolving problems, 31Specifications, 39SWEDAC, 11Swedish Confederation of Professional
Employees, 10Synchronization range, 40
TTCO, 10Telephone support, 34Trapezoid control, 25Troubleshooting, 31
VVertical position control, 23Vertical size control, 21
WWorking safely, 35
(For United States Use Only)
FEDERAL COMMUNICATIONS COMMISSIONRADIO FREQUENCY INTERFERENCE STATEMENT
WARNING: Changes or modifications to this unit not expressly approved by theparty responsible for compliance could void the user’s authority to operate theequipment.
NOTE: This equipment has been tested and found to comply with the limits for aClass B digital device, pursuant to Part 15 of the FCC Rules. These limits aredesigned to provide reasonable protection against harmful interference in aresidential installation. This equipment generates, uses and can radiate radiofrequency energy, and, if not installed and used in accordance with the instructions,may cause harmful interference to radio communications.
However, there is no guarantee that interference will not occur in a particularinstallation. If this equipment does cause harmful interference to radio or televisionreception, which can be determined by turning the equipment off and on, the useris encouraged to try to correct the interference by one or more of the followingmeasures.
� Reorient or relocate the receiving antenna.
� Increase the separation between the equipment and receiver.
� Connect the equipment into an outlet on a circuit different from that to whichthe receiver is connected.
� Consult the dealer or an experienced radio/TV technician for help.
Use shielded and properly grounded I/O cables and power cable to ensurecompliance of this unit to the specified limits of the rules.
If necessary, the user should contact the dealer or an experienced radio/televisiontechnician for additional suggestions. The user may find the following booklet,prepared by the Federal Communications Commission, helpful: “How to Identify andResolve Radio-TV Interference Problems.” This booklet is available from the U.S.Government Printing Office, Washington, D.C., 20402, Stock No. 004-000-00345-4.

(For Canadian Use Only)
DOCThis Class B digital apparatus meets all requirements of the Canadian Interference-Causing Equipment regulations.
Cet appareil numérique de la classe B respecte toutes les exigences du Règlement surle matériel brouiller du Canada.
C-ULBears the C-UL Mark and is in compliance with Canadian Safety Regulationsaccording to C.S.A. 22.2 #950.
Ce produit porte la marque ‘C-UL’ et se conforme aux règlements de sûreteCanadiens selon CAN/CSA 22.2 No. 950.