Embed Size (px)
Citation preview

i
User’s Quick Start Guide
Advantech
ADAMView
1st Edition

iii
Contents Table of Contents
Copyright Notice Trademarks Technical Support
PART I: Getting Started
1 Introduction 1 Introduction ...................................................................................... 2
1.1 ADAMView Overview .................................................................... 2
1.2 ADAMView System Architecture ................................................. 3
1.3 ADAMView Component Description .......................................... 5
2 Preparing to Install ADAMView 2.1 System Requirements .............................................................. 20
2.2 Installation and Configuration ................................................. 21
2.3 ADAMView Program Group Icons.............................................28

viii
Copyright
Copyright 1993-1995 American Advantech Corporation
All Rights Reserved.
Published by AMERICAN ADVANTECH Corporation. This manual contains proprietary information which is protected by copyright. No part of this manual may be reproduced, translated into any lan- guage or computer language, transcribed, transmitted in any form whatsoever, without prior written consent of the publisher. For additional information contact:
AMERICAN ADVANTECH CORP.
750 East Arques Avenue Sunnyvale, CA 94086
(408) 245-6678 FAX (408) 245-5678
Notice:American Advantech Corporation does not warrant that the ADAMView software package will function properly in every hardware/software environment. American Advantech Corporation makes no representation or warranties of any kind whatsoever with respect to the contents of this manual and specifically disclaims any implied warranties or fitness for any particular purpose. American Advantech Corporation shall not be held liable for errors in this manual or for incidental or consequential damages in connection with the use of this manual or its contents. American Advantech Corporation reserves the right to revise this manual at any time without prior notice.
Trademarks
ADAMView is a trademark of AMERICAN ADVANTECH CORPORATION. All other brand and product names are trademarks of their respective owners.

ix
Technical Support AMERICAN ADVANTECH provides telephone support to registered users of ADAMView.
If you purchased your ADAMView package from a dealer or your hardware interface vendor, the dealer or vendor may have special arrangements for providing you with technical support.
If you encounter a problem while using ADAMView, first consult the on-line help and this manual. If you are unable to resolve the problem, or if you have questions specific to your application, don’t hesitate to FAX or call for technical support. You can also look for Q&A at http://www.advantech.com.tw
USA:
American Advantech Corporation 750 East Arques Avenue
Sunnyvale, CA 94086 (408) 245-6678
FAX (408) 245-5678 E-mail: [email protected]
ASIA:
Advantech CO., LTD. Fl. 4, No. 108-3, Ming-Chuan Rd.
Shing-Tien City, Taipei, Taiwan, R.O.C. TEL: (886-2) 2218-4567 FAX: (886-2) 2218-1989
E-mail: [email protected] EUROPE:
Advantech Germany Karlsruherstr. 11/1
D-70771 Leinf.-Echterdingen Germany
TEL: +49(0) 711 797 333 60 FAX: +49(0) 711 797 333 85
Advantech Italy Via Don Verderio,
4/B-20060 Cassina de, Pecchi (MI), Italy. TEL:
39-2-95343054 FAX: 39-2-95343067

x
MAINLAND CHINA:
Beijing office: No. 7, 6th street, Shang Di Zone, Haidian District, 100085 Beijing,
China TEL: 86-10-62984345~47, 62986314~17
FAX: 86-1-62984341~42
Shanghai office: Rm#701, 7 F., Hua-Fu Building A,
585 Long Hua W. Rd. 200232 Shanghai, China
TEL: 86-21-64696831, 64697910 FAX: 86-21-64696834

1
Getting Started
2
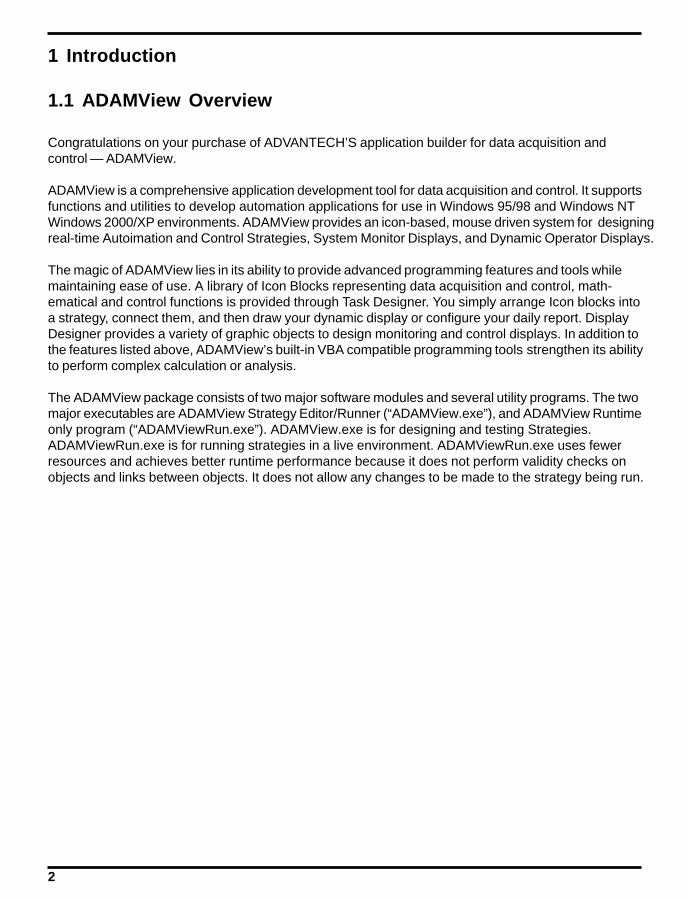
1 Introduction 1.1 ADAMView Overview
Congratulations on your purchase of ADVANTECH’S application builder for data acquisition and control — ADAMView.
ADAMView is a comprehensive application development tool for data acquisition and control. It supports functions and utilities to develop automation applications for use in Windows 95/98 and Windows NT Windows 2000/XP environments. ADAMView provides an icon-based, mouse driven system for designing real-time Autoimation and Control Strategies, System Monitor Displays, and Dynamic Operator Displays.
The magic of ADAMView lies in its ability to provide advanced programming features and tools while maintaining ease of use. A library of Icon Blocks representing data acquisition and control, math- ematical and control functions is provided through Task Designer. You simply arrange Icon blocks into a strategy, connect them, and then draw your dynamic display or configure your daily report. Display Designer provides a variety of graphic objects to design monitoring and control displays. In addition to the features listed above, ADAMView’s built-in VBA compatible programming tools strengthen its ability to perform complex calculation or analysis.
The ADAMView package consists of two major software modules and several utility programs. The two major executables are ADAMView Strategy Editor/Runner (“ADAMView.exe”), and ADAMView Runtime only program (“ADAMViewRun.exe”). ADAMView.exe is for designing and testing Strategies. ADAMViewRun.exe is for running strategies in a live environment. ADAMViewRun.exe uses fewer resources and achieves better runtime performance because it does not perform validity checks on objects and links between objects. It does not allow any changes to be made to the strategy being run.

1.2 ADAMView System Architecture
A major improvement over Version 4.xx is the change in system architecture. We design ADAMView 4.x with a modular-oriented, open integrated architecture. The open platform allows you to easily integrate ADAMView with other applications to share real-time control data. The performance and number of I/O blocks ADAMView can support are increased significantly through this new architecture. The new architecture is outlined in figure 1-1.
ADAMViewEngine
Figure 1-1 ADAMView 4.25 system architecture Module Description Data Center The central repository for data acquisition and control data. It manages all ADAMView real-time data and provides three set of interfaces to the outside world; DDE & OLE Automation and C API. Through these three interfaces, other applications can retrieve or input data to ADAMView. I/O Driver Responsible for accessing real-time data from hardware equipment. ADAMView I/O drivers cover all Advantech industrial automation ADAM Series hardware, including ADAM-4000 remote modules and ADAM-5000 distributed modules. Task Designer Responsible for designing the application system. ADAMView provides many standard data acquisition and control function blocks. Users just drag and drop function blocks to design a system without any programming. ADAMView 4.x allows you to design and execute multiple tasks simultaneously. That is, you can divide a complex system into several independent tasks and execute them at the same time. Display Designer Responsible for creating a dynamic display for industrial automation. Display Designer features many common graphic objects to simplify building a display. In addition, ADAMView provides several drawing tools to create custom displays.
3

4
Script Designer Responsible for controlling tasks and calculating and analyzing real-time data. ADAMView provides a VBA compatible development environment for script programming.
The design work in ADAMView is saved as a strategy file. A strategy file (with extension .GNI) is a binary file that stores all information about an editing session. A strategy is defined as one or more “tasks” together with one or more “displays” and one or no “main script”. “Task”, “Display”, and “Main Script” are the three primary elements used to design strategies. A simple strategy has one task with one display and no main script, because a strategy can not function without at least one Task in it. Task are essential to have a strategy. Because the most important job of a task is to provide timing for “scanning”, so “Scan Task” is used interchangeably with “Task” throughout this manual.
A task is a collection of icon blocks. A display is a collection of display items. Icon blocks and display items are the building blocks of strategy. You can see them as similar objects, except that display items have a graphic representation (provide some kind of GUI) when running while icon blocks do not. They are connected to each other by connection wires or invisible links. The connections be- tween icon blocks are visible in the task designer window. The links are referred to as “wires” be- cause of their appearance. The connection between an icon block and a display item, or one display item and another, is not visible. Hence, these are referred to as “Links”.
Each task and display has its own properties. When first created, default properties are assigned to the new task or new display. Users can change properties according to their needs. A task has properties such as scan period, sample rate, starting method and stopping method. A display has properties such as display name, visibility, etc.
ADAMView features four different editors: Task Designer, Display Designer, and Script Designer. They are used to edit Tasks, Displays, Reports and Main Script respectively. Because there can be multiple tasks in one strategy, you can create multiple Task Designer windows inside ADAMView. For the same reason, you can create multiple Display Designer windows for editing multiple Displays. In any application there can be only one Main Script. Therefore, only one Script Designer window can be opened.
Any number of Blocks and I/O Devices can be used at one time, limited only by your system’s speed and memory. It is suggested that the number of icon blocks not exceed 500. If the number of icon blocks exceeds 500 system performance may be adversely affected. From small applications inter- facing only a few blocks, through full-scale industrial process control systems running many I/O Devices simultaneously, ADAMView provides you with the quickest and most efficient acquisition/control solution.

5
1.3 ADAMView Component Description The intent of this section is to provide a general idea about what’s been added to this new version of ADAMView. ADAMView has been transformed from data acquisition and control application software to an application builder for all kinds of automation. We have placed an emphasis on expandability, capac- ity, and programmability. The architecture is modified to be more open, allowing access to all data items in ADAMView. Also, hardware support has been greatly expanded. Hardware support now covers virtually all Advantech ADAM hardware families, as well as a myriad of products from other vendors.
1.3.1 VBA Compatible Script Designer
ADAMView Script Designer is a VBA-compatible basic script engine. Script Designer not only features a robust Visual Basic programming engine, but also includes many tasks and real time data access functions. Through this script engine, users can call DDE, OLE Automation and ODBC (SQL) func- tions to integrate with other applications.
VBA Compatible Script Editing The script designer is basically a text editor with some convenient features for editing script code. The script source will be compiled into p-code after editing so it won’t need to be compiled again at runtime. The syntax of the BasicScript is compatible with Microsoft VBA (Visual Basic for Application in Excel, Word, Access, etc.) and Microsoft Visual Basic. It is possible to take a Visual Basic source code and compile and execute it under BasicScript without changing a word if only common functions are used. The two development environments are very similar. In the source code design stage it features cut, copy and paste functions.
Script Debug Functions The ADAMView editing program can run strategies in a debug mode, in which you work through a program line by line and review a scan task block by block. This major improvement allows users to design and debug complicated strategies in the editor before using the runtime only program. The runtime program now uses even less memory and offers improved performance.
Programming Tasks and Real-time I/O Directly The Script Designer is used for editing the main script and scripts inside a task. The main script controls the entire runtime, including starting a task and/or stopping a task. In addition to task man- agement, ADAMView provides a variety of commands to process I/O data.
Main Script The main script is used to control and manage tasks. The initialize statement initializes all the data related to a task. The Start/Stop statement is used to start and run a task to completion. Single Scan statement will do a one-time scan of the task specified.
Pre-task Script The pre-task script is used to define task properties and initialize all data related to a task.
Post-task Script The post-task script is used to clear-out task related data.

6
Basic Script Icon BasicScript is used to get, analyze and set I/O data.
1.3.2 Task Designer
ADAMView Task Designer uses a dataflow programming model that frees you from the linear architecture of text-based languages. To create a process monitoring and control application, you construct the block diagram without worrying about the many syntactical details of conventional programming. Simply select objects (icons) from the Icon Toolbox and connect them with wires to pass data from one block to the next.
Multiple Tasks to Improve Performance ADAMView Task Designer allows editing of multiple tasks at the same time. Each task is contained in a task window and has it‘s own properties such as scan rate, start/stop method, etc. One strategy file is used to store all scan tasks that are related to a control strategy. For simple strategy with only one task, it runs the same way as before. But for strategies that have more than one scan task, a top-level main script is required to manage the execution of all scan tasks. ADAMView supports up to 8 tasks.
A large complicated task can be broken into several smaller, simpler tasks. This not only simplifies the editing job, but also increases the performance at runtime, as fewer blocks need to be processed at each scan.
Block Sequence Arrangement ADAMView Task Designer features the block sequence arrangement functions that shows the order of execution on all blocks. With displayed order number, users can arrange the order of execution of the blocks (icons) based on the priority of operations to meet the requirements of system needs.
Virtual Tag The Virtual Tag is a powerful feature that provides the ability to let developer to create customized tag in Task Designer without using User Defined DLL. The virtual tag is created by Task Designer and stored in data center as other built-in blocks. The virtual tags are global available to all tasks, so you can use virtual tags to share data among multiple tasks.
1.3.3 Display Designer
If you have MMI requirements, ADAMView screen designer will help you quickly create intuitive standard graphical displays by provided graphical wizards. And, you can further customize your MMI with drawing tools and user-defined display tool.
Drawing Tools ADAMView enhances the man-machine interface (MMI) by providing graphic tools to draw pumps, valves, rectangles, circles, segments, and polygons in the screen designer’s toolbox. In addition, it allows the user to configure the colors and sizes of these figures. These drawing tools include oval, rectangle, round rectangle, polygon and line. In addition to drawing tools, ADAMView also provides “Make Object” and “Break Object” commands to let you integrate drawing components into a meaningful picture for your data acquisition and control.

8
1.3.4 Open Data Center
Data Center is the central repository for all process monitoring and control data in ADAMView. You can easily integrate real-time data from the data center into a company-wide information system to effi- ciently support decision-making. Data Center features two different sets of interfaces to the outside world: C API, OLE automation, and DDE functions.
C API is the most efficient interface, so it is used for all communication between components of ADAMView. OLE automation is designed to interface with OLE-aware applications.
9
1.4 What's New in ADAMView 4.25
Convenient Install and Uninstall Program ADAMView 4.25 includes an convenient installation and uninstallation program.
Serial Number Protection and Free Two Hours Trail Use ADAMView is a Serial Protected Software, The serial number is labled on the box and CD Case, we also provide two hours trial use by keyin 0000000000 for Trail use serial number.
Compatible with Windows 95/98 , Windows NT/2000 and Windows XP ADAMView is compatible with Windows 95/98, Windows NT(Service Pack 4 or Above) and Windows 2000/XP Operating System.
Improved Reliability and Robustness ADAMView includes many substantial improvements over Advantech GENIE 3.0. ADAMView 4.25 provides memory monitoring functions and protection against insufficient hard disk space during continuous operation. In addition, it is protected against improper use and hardware failure.
Other Enhancements ADAMView includes a few new functions over Advantech GENIE 3.0. These include new Basic Script commands, an improved and other features that lead to higher productivity.
Limitations and Restrictions In order to assist users in using ADAMView more effectively, this release note includes more information about usage and limitations with respect to using Basic Script, the, deploying GENIE in a network environment, etc.
1.4.1 Compatible with Windows 95/98 , Windows NT and Windows 2000/XP
ADAMView has resolved the compatibility problems that Advantech ADAMView had with Windows 95/98 Windows NT(Service Pack 4 or Above) and Windows 2000/XP.
1.4.2 Year 2000 Compliance
ADAMView 4.25 is Y2K compliant. The allowable date range is from January 1, 1980 to January 18, 2038. This limitation is due to Microsoft Visual C++, the development tool that was used to write the program code.
Detailed information about how ADAMView handles date information is as follows:

10
(1) Item: Time Stamp Block The date format of Time Stamp Block is MON Sep 23 14:43:52 1992. Note that the year is in a four- digit format. (2) Item: Timer Clock Block For Time of Date or Elapsed Time (both cyclic and non-cyclic), the block output is based on the seconds elapsed since midnight (i.e., 00:00:00) January 1, 1970 Universal Coordinated Time.
(3) Item: Alarm Log Block If the Alarm Message Format: Date (MM/DD/YYYY) option is checked, the date message for the alarm will be stored in the ADAMView.ELF file in MM/DD/YYYY format, where YYYY represents the year. It is a four-digit year format, and thus Y2K compliant. This file is used in the ffor a listing report.
(4) Item: Historical Trend Block This stores one file per day in binary format and the filename is YYMMDDXX.HST, where YY represents the year. For example, if it is 1998, then YY = 98. For the year 2001, YY = 01. If your system is running from December 31, 1999 to January 1, 2000, ADAMView will store the historical data into two binary files: one is 99123101.HST and the other is 00000101.HST. You can search back and forth to view the data on December 31, 1999 and January 1. 2000. It dis- plays the date as month/day/year, where the year is in a four-digit format. In addition, the HIST Conversion under the File menu can accept a four-digit year in the Start Date and End Date fields for the conversion range. ADAMView can retrieve the right historical binary file (*.HST) and convert it to an ASCII file (*.TXT).
(5) Item: Log File Block For the Open method: "Open at n minutes from midnight" under Advanced Option, the file will be opened according to the day which is independent of the year.
(6) Item: Runtime Error Message File: RUNERR.LOG The date format is MM/DD/YY HH:MM:SS. Although the year is stored in two-digit format, this is only for storage purposes.
(7) Item: Basic Script Commands The date-related commands (i.e., Date and Year) both accept and output 4-digit years.

11
1.4.3 Improved Setup/Uninstallation Utility
ADAMView 4.25 includes a comprehensive installation and uninstallation utility. After installing ADAMView 4.25, it will create an Advantech Automation /ADAMView folder by default. It contains the following icons: ADAMView Builder, ADAMView Runtime, ADAM Device Manager, Uninstall ADAMView, ADAMView Help and Basic Script Help. If you wan to uninstall ADAMView, you simply click on the Uninstall ADAMView icon. ADAMView, including program files, installation folders and Windows registry, will be automaticallyremoved from your computer. You do not have to worry about deleting files manually.
1.4.4 Improved Robustness and Reliability
Program robustness and reliability have been improved considerably in this release. ADAMView 4.25 provides memory monitoring functions and protection against insufficient hard disk space during continuous operation. In addition, there is also improved protection against improper use and hardware failure.
(1) Memory Monitoring Functions A new tag named "FreeSpace" has been added under "VIRTASK". It is used to monitor the free memory space of the system when running. To enable this function, the user has to set a value in the \Windows\ADAMView.INI file manually as follows:
[System]
MemoryCheck = 1
After adding this entry to the ADAMView.INI file you should open ADAMView and create a tag block. Configure this tag block by selecting VIRTASK under the Display/Virtual Tag field, and then select FreeSpace in the Tag Name field.
(2) Protect Historical Data Against Insufficient Hard Disk Space In the Historical Trend Display, ADAMView will record the historical data to files by date. When ADAMView is run continuously for long periods of time, there is a chance of running out of hard disk space. To protect against this, ADAMView 4.25 removes the files generated by Historical Trend Display automatically. It automatically removes historical files that are older than 30 days by default. Users can change this period by setting "HistDaysAgo" under the [System] section in the \Windows\ADAMView.INI files as follows:
[System]
HistDaysAgo = 15
This modification will cause ADAMView will remove historical files that are older than 15 days.
Note: If you want to keep all historical files, you should set "HistDaysAgo = 0". ADAMView will not remove any historical files.

12
In addition, ADAMView 4.25 keeps the runtime from logging the same error messages. This will save space within the log files and lessen the chance of running out of hard disk space.
(3) Protect Software Against Improper Use and/or Hardware Failure To protect ADAMView runtime from a strategy that is partially or improperly configured, ADAMView 4.25 requests the user to configure all icons correctly. Partially configured or improperly configured strate- gies will not be allowed to run in ADAMView 4.25. In addition, this protects ADAMView from hardware malfunction by isolating the input.
1.4.5 More Enhancements
ADAMView 4.25 provides some new functions, including
(1) A New Basic Script Command
Command Description
Quit(0) Stops the overall system (3) Network Communication Status in Event Windows and Log Files For networking communication status, the connection/disconnection messages will show in the Event window. The will also log into the alarm file (ADAMView.ELF) by enabling the Runtime Preference event log in ADAMView. (4) Save and restore previous values This function is used to save the values of control displays at system stop. These values will then be restored at the next system start. This function is included in Binary Button Control , Conditional Button Control, Numeric Control, Knob Control, Slider Control and Log File Block.

13
1.5 Limitations and Restrictions
ADAMView 4.25 includes the following information about usage and limitations of the software to help users use ADAMView correctly.
(1) Basic Script Programming
Category Task Description ScanTask
Start/stop a task
* To start/stop a task by Script, the task's starting method must be Inactive in Task Property *In Basic Script block or Pre/Post-task Script, it cannot start or stop the task by itself. * The possible task names passed into GetScanTask ("task name") command refer to "the tags created by ADAMView".
Tag
Retrieve/ set value to or from Data Center
* To retrieve/set values of tags in the Data Center via Basic Script. Make sure that the data type is correct. Refer to the Data Center for data types of tags. The user can also use Variant type in the Script to retrieve or set values of tags. * If the channel count of the specified tag is greater than 1, the user needs to use the Tag.Array[n] command to retrieve/set a value for channel n. Make sure n does not exceed the maximum number of channels. If using the Tag.Value command to retrieve/set a value, it will be the channel 0. * The possible tag names refer to "the tags created byADAMView".
Output commands in Basic Script block
Output value in Basic Script to another block
* Don't use these commands in main script or pre/post- task script. It is only for a Basic Script block. * Select the correct command to output the value. For example, if you need to output a string, select OutputS command and pass a string type parameter.
Quit(0) command
Stops the overall system
* new command
Notice
(a) In the debug environment for the Main Script, Pre/post-task Script or Basic Script block, the
following commands are disabled: • ScanTask.start • ScanTask.stop • ScanTask.SingleScan • ScanTask.GetStatus • OutputI • OutputL • OutputF • OutputS • Display

14
• Quit However, all commands will function at runtime. (b) When using the Msg command to create modeless dialogs or the Sleep command for waiting, do
not stop ADAMView when the modeless dialog is still active or the Sleep command is still working. (c) Be careful when programming the script to avoid an infinite loop.
Limitations
(a) Strings are limited in length to 32764 characters. (b) The data area that holds public variables is limited to 16 KB. (c) The size of source code script is limited to 65534 characters. (d) Arrays can have up to 60 dimensions. (e) Variable names are limited to 80 characters. (f) Labels are limited to 80 characters. (g) The number of open DDE channels is not fixed; rather, it is limited only by available memory and
system resources. (h) The number of open files is limited to 512 or the operating system limit. (i) The size of an array cannot exceed 32 KB.
(2) The Tags Created by ADAMView are the Following:
Block Tag name Data type Channel count Analog Input TASK1/AI1 Floating point 3 2Analog Outp t u TASK1/AO 1 Floatin point g 1 Digital Input TASK1/DI1 Integ er 1 Digital Outpu t TASK1/DO1 Long 1 Temperature TASK1/TMP1 Floating point 1 Hardware Count er TASK1/CTFQ 1 Float g point in 1 Hardwa Alarm re TASK1/ALM1 Long 1 RS-232 TASK1/SER 1 String 8 Input File TASK1/INF1 Float g point in 1 Alarm og L TASK1/ALOG 1 Long 1 Ramp TASK1/RMP1 Floating poin t 1 Moving Average TASK1/AVG1 Floating point 1 Single alculation C TASK1/SOC1 Float g point in 1 Timer TASK1/ET1 Long 1 Time St mp a TASK1/TS1 Strin g 1 Counter TASK1/CNT1 Long 1 On/Off Cont l ro TASK1/ONF 1 Integer 1 PID Control TASK1/PID1 Floati point ng 1 DDE Client TASK1/DDEC1 Strin g 1 Cond ional Sound it TASK1/SOU D1 N Long 1 Beep TASK1/SP1 Long 1 Button Contro l DISP1/BBTN1 Long 1 Knob Control DISP1/KNOB1 Floating point 1 Numeric Cont l ro DISP1/NCTL1 Floating point 1 Slider Control DISP1/SPIN1 Floating point 1 Ameter Disp ay l DISP1/METE 1 R Floating point 1 Bar Display DISP1/BAR 1 Float g point in 1 Indicator Display DISP1/INDI1 Long 1 Drawing Display DISP1/CELL1 Long 1 Conditional Button DISP1/CBTN 1 1 Long 1 Conditional Bitm p a DISP1/BMP1 Long 1 Conditional Tex t DISP1/CTXT String 1 Historical Tr nd e DISP1/HIST1 Floating poin t 8 Virtual Tags VIRTASK/V1 Floating point 1

16
Notice
(a) TASK1 can change to TASK2 to TASK8 that depends on the tag in which TASK. The tag name consists of the block type and ordinal number; for example, AI block with ordinal number 3, then the tag name is AI3.
(b) DISP1 is the title of the display that is assigned in Display Property Menu. (c) VIRTASK stores the VIRTAG tags that are added by the Add/Delete Virtual Tags menu. (d) The maximum string length for string type tags is 128.
(4) Alarm Printing ADAMView 4.25 resolves compatibility problems between the alarm printing function and Windows 95/98. If you will be using this feature in ADAMView 4.25, we strongly suggest that you use a dedicated dot matrix printer for alarm printing. According to the Microsoft Knowledge Base, Windows 95/98 does not support single line printing.
Note:
(a) Alarm printing does not work if the printer is shared (b) Alarm printing is only compatible with dot matrix printers or other printers capable of printing a
single line or a single line feed. It will not work with HP LaserJet printers that must print a complete page per printing session.
(5) Historical Trend (a) Support up to 6 Historical Trends. Each Historical Trend can accept up to 8 traces. (b) ADAMView 4.25 removes the files generated by Historical Trend Display automatically. It removes
historical log entries that are 30 days old by default. Users can change it to the desired number of days by setting "HistDaysAgo" under the [System] section in the \Windows\ADAMView.INI file as follows:
[System]
HistDaysAgo = 15 This example will cause ADAMView to remove historical file that are older than 15 days old.
Note: If you want to keep all historical files, you should set "HistDaysAgo = 0". ADAMView will not
remove any historical files. (6) Networking Support (a) One station can connect to a maximum of fourteen stations, the maximum number of output
stations is seven and the maximum number of input stations is seven. There is no limitation on the total number of stations in a network.
(b) One station can setup network input and network output blocks simultaneously. The maximum number of network blocks is 100; this allows a maximum of 800 points in the network.

17
(c) ADAMView has a dedicated timer for network communication. The polling time of the timer can be different from the scan time. The polling time is set in the configuration file \WINDOWS\ADAMView.INI (the entry NetPollTime). The value of polling time depends on the number of stations and blocks. You can use the following equation to calculate the approximate polling time: Polling time = (Station * (Station - 1)) / 2) * base polling time
Total time for transferring all blocks = (Network blocks/10) * polling time
which base polling time depends on your PC’s performance. Based on our tests, for three stations running on a Pentium 166 with 64M RAM, and forty blocks for each station, the polling time can be up to 500 milliseconds.
(d) The maximum string size for each channel of a network block is 32 characters (including a Null character).
(e) ADAMView networking can work in Windows 95/98 but not in Windows 3.1. (f) When restarting networking, you must wait for a few moments to make sure that the remote station
receives the stopping message. If you fail to check this, proper connection with the remote station may not occur. If this happens, you will have to stop all stations and start again. You can check the Event window to make sure that the remote station receives the stopping message.
(g) Connection status will show in the Event window. It will also be entered into the alarm log file (ADAMView.ELF) by enabling the event log under Runtime Preferences.

18
(7) Input Range for Display Items
Display Items Field Range From -999999.0 to +999999.0
Bar Graph To -999999.0 to +999999.0 Range of X axis (From) -999999.0 to +999999.0 Range of X axis (To) -999999.0 to +999999.0 Range of Y axis (From) -999999.0 to +999999.0 Range of Y axis (To) -999999.0 to +999999.0
Trend Graph
Update Rate 0 to 9999 Range of X axis (From) -999999.0 to +999999.0 Range of X axis (To) -999999.0 to +999999.0 Range of Y axis (From) -999999.0 to +999999.0 Range of Y axis (To) -999999.0 to +999999.0
XY Graph
Size of the Trace Buffer 0 to 8192 Group Box Border Width 0 to 32767 Numeric/String Update Rate 0 to 9999
Privilege Level 0 to 255 Initial Value -999999.0 to +100000000.0 Step Value -999999.0 to +100000000.0 High Limit -999999.0 to +100000000.0
Numeric Control
Low Limit -999999.0 to +100000000.0 Privilege Level 0 to 255 Initial Value -5 to 5 Start Tics 2 to 40 End Tics 2 to 40 Tics Rate 2 to 40
Knob Control
Decimal Places 0 to 6 Anameter Tics Number 2 to 40
depends on graph size and resolution
Historical T end rChar Span
Number of Tics 2 to 40

2
Preparing to Install ADAMView

2 Preparing to Install ADAMView
20
ADAMView requires specific hardware and software to be installed in your computer before installation Verify that your computer system conforms or exceeds the requirements defined in the sections System Hardware Requirements and System Software Requirements before attempting to install the ADAMView system software.
2.1 System Requirements
Your computer system must meet or exceed the following requirements in order to run ADAMView.
System Hardware Requirements • IBM PC/AT 486 chip compatible computer or higher • 64 MB RAM memory (minimum) • 20 MB free hard disk drive space (minimum) • One CDROM drive • VGA controller and monitor • Serial or PS/2 mouse • Math co-processor recommended
ADAMView requires that certain operating systems and system settings be present on your system. The following are minimum requirements to run ADAMView successfully.
System Software Requirements
• Microsoft Windows 98, Windows NT 4.0 (SP4 above), Windows 2000/XP
In addition, there must be a CONFIG.SYS file in your root directory that includes the following state- ments:
FILES = 50 BUFFERS = 10
• DOS TSR (terminate, but stay resident) application programs may be loaded while using ADAMView.
Remember that these programs do take up memory and can affect system performance.
• An extended memory manager, such as MS-DOS HIMEM.SYS, QEMM, or EMM386 must be installed.

21
2.2 Installation and Configuration
This section lists the contents of your ADAMView system and instructions to install the ADAMView system software to a level that enables you to run the DEMO Strategy supplied on the SETUP disk.
ADAMView Package Contents
Your ADAMView package includes the following items: • ADAMView Setup CD, including all ADAMView files, DLL drivers and example strategies
• This manual (Advantech ADAMView User’s Quick Start Guide)
ADAMView Program Installation
Complete the steps listed below to install and configure your ADAMView software.
During the installation process, the setup program (SETUP.EXE) allows you to specify where you would like the ADAMView software installed. The default destination directories are:
ADAMView specific files C:\Program Files\ADVANTECH\ADAMView Example strategies: C:\Program Files\ADVANTECH\ADAMView\STRATEGY The program group “Advantech Automation\ADAMview” will be automatically created within WINDOWS, and the six ADAMView icons (ADAMView Builder, ADAMView Runtime, ADAM Device Manager, ADAMView Help, BasicScript Help and Uninstall ADAMView) will be placed inside.
If you make an error when entering a response to a question, simply click the “Back” or “Retry” button to return to the previous step. The installation process can be aborted at any time by clicking “exit”.
1. Turn on your computer and boot up with DOS 3.3 or above.
2. Once in WINDOWS, insert the ADAMView Setup CD into the CDROM drive.
3. The installation Program will be launched automatically. Or you can use your Windows Explorer or
the Windows Run command, execute the following file on the ADAMView installation CD-ROM disc
D:\Setup.exe
22
Where D is the drive into which you inserted your ADAMView Setup CD and click Run..
Following on-line description, you can install ADAMView on your computer with ease.
When all the files have been copied, you should see the Advantech Automation / ADAMView group created within Windows. The siz ADAMView icons will be displayed in the group window. The setup screen will return to display a success message. ADAMView is now installed. Should you have any problems installing ADAMView (any error messages), call Advantech Technical Support.

The DEMO Strategy, alarm.gni, is a simple strategy that interfaces the DEMO I/O Device to the Display.
1. Load the DEMO Strategy into ADAMView, enter the ADAMView Task Designer by double clicking
on the ADAMView Builder icon in the Advantech ADAMView group. Once in the ADAMView Main screen, click the File menu, then open an existing file. You will see a displayed directory tree containing the ADAMView directory and the STRATEGY directory. Double click on the Strategy directory, and you will see all *.gni files contained in the STRATEGY directory. Highlight the one called “DEMO01.GNI”, and press OK.
Figure 2-1 Opening strategy files
alarm.gni is a simple strategy that configures the DEMO I/O Device analog input channel 0 to a trend graph display item. Double click on the AI icon and you will see a box displaying information about the Analog Input Block. Click on the arrow to the right of the box labeled Device, and you should see a list of all installed devices that provide the Analog Input function. Highlight the DEMO device. This is the device from which we will collect Analog Input information within this AI block. Choose channel 0 for sine wave and click OK to accept your choices.
24

Figure 2-2 Analog Input block configuration
Double-click on the trend graph display icon in DISP1 within Display Designer. The Display Designer should open, along with a trend graph Display Item. This is one of many display types you can choose when you later design your display window.
25

Figure 2-3 Task and Display connection
2. Run the DEMO Strategy. To run the Strategy from within ADAMView Builder, first save the Strategy (File, Save), and then press Run, located on the menu bar at the top of the Strategy Editor. The DEMO I/O Device’s ± 5 volt sine wave will be generated in real time on the Y-T display. The sine wave continues to be generated until you press Stop on the Run Menu bar. You can also run from an icon called ADAMView Runtime.
Figure 2-4 DEMO01 running
26

Uninstalling ADAMView
If you wish to completely remove ADAMView from your system, you just click on the Uninstall ADAMView icon. ADAMView will be removed from your system automatically. You don’t worry about deleting files.
27

28
2.3 ADAMView Program Group Icons
Program Icons Description ADAMView Builder The ADAMView icon allows you to invoke the ADAMView development environment
to create new ADAMView application, select recently designed ADAMView applica- tions, or scan drives for existing ADAMView strategy files. You may also modify the application directory list being displayed as well as create and/or edit the application.
ADAMView Runtime The Runtime icon allows you to invoke only the ADAMView runtime environment
without the development functions. You can execute ADAMView strategy files only without worrying about any changes being made. This utility is often used after you finished your system and run it at the end user site.
Device Manager This icon is used for installing H/W drivers with ADAMView to connect equipment
hardware. You can easily connect all Advantech hardware through supplied drivers.
BasicScript Help The BasicScript icon is a help file to tell you how to use the BasicScript
development environment. It includes a BasicScript function library and BasicScript program syntax.
ADAMView Help This icon invokes a help file which can be used to quickly access context-
sensitive help for your operations.
Uninstall ADAMView This icon is used for removing ADAMView from your system.