Embed Size (px)
Citation preview

VEX COACHES' TRAINING
October 11, 2013

Welcome and Introductions…
• Carlos Castro– Woodbridge Senior High School– Engineering Instructor– Coach, WSHS Robotics Team

So you want to start a Robotics Team..
• How will you be classified at your school?• Team or Club?• Part of school sanctioned clubs…get admin
on board• Your vision for this team?– Your Leadership– Will you be a team or a club?

Recruitment of students
• How/where do you plan to find students?• How can you advertise for students?• Do you need an application?• Create a set of rules or a team charter.• Create a consent to participate form.• WSHS uses a detailed charter that students
must sign to participate.

Fund Raising…• Administration's support• Activity fees collected from students?• PTO• County STEM offices• Fundraisers– Selling items(food, coupon books, calanders) – Car washes– Tag Day?– School Cross Promotions

Support materials to buy(besides the robots kits)
• Coaches Manual has a list of items• Storage containers• Tool boxes for transporting parts• Find a cabinet or room for storage you can
control access to

Robot C…
• Downloadable from http://www.robotc.net/• You can download Virtual Worlds as well– Get all relevant map packs
• You have 30 days of full functionality – After, you need to enter license file and password
• Year License vs. Perpetual License?– Yearly is non transferable
• Install does take a while– Need to install USB drivers takes longest

Robot C, adding license infoSelect Manage Licenses from Help tab

Robot C, adding license info
You should see 30 day trial license. Click Add License

Robot C, Enter License and password
Select Products and enter License and Password

Robot C, licensing
• Licenses are controlled– You will see how many activations you have left
before license is used up– Be sure of computer you want to use• Yearly license can’t be transferred• Perpetual licenses require a bit of work to release and
transfer
• Update Robot C regularly– If it sees that an update is available, it will not
want to program robot until you update it

Setting up brand new Cortex
• Even new out of box, you will want to make sure that Cortex has newest firmware and Robot C version installed
• You will need – Cortex– You will need an orange USB A to A cable– A charged 7.2V battery

Connection for Cortex
• Select only 1 USB port on computer to use
• Connect battery to Cortex and turn on
• Connect USB cable between Cortex and chosen USB port
• Wait until drivers are found and installed– May need account
permissions

Software Download
• Launch Robot C and select Robot Tab– Select “Download Firmware”– Select “Manually Update Firmware”– Select “Master CPU Firmare”– Select “Standard File”
• Robot C will start the download– Sometimes it may fail -> Repeat until it works

Software Download

Software Download
• After Master CPU is downloaded successfully– Repeat process and manually download Robot C
Firmware, Standard Version• Must do both Master CPU and Robot C
firmware!!!• Automatic doesn’t always work• Need to have Cortex in a known state to start– Repeat this process on same Cortex only as a last
resort when everything is gone haywire

Update the VEXnet Joystick Firmware
• You will need to make sure the most recent firmware is installed in joystick– You need VEXnet Joystick (the one with USB port)– 6 AAA batteries installed– Orange A to A USB cable
• Partner joystick does not need to be updated
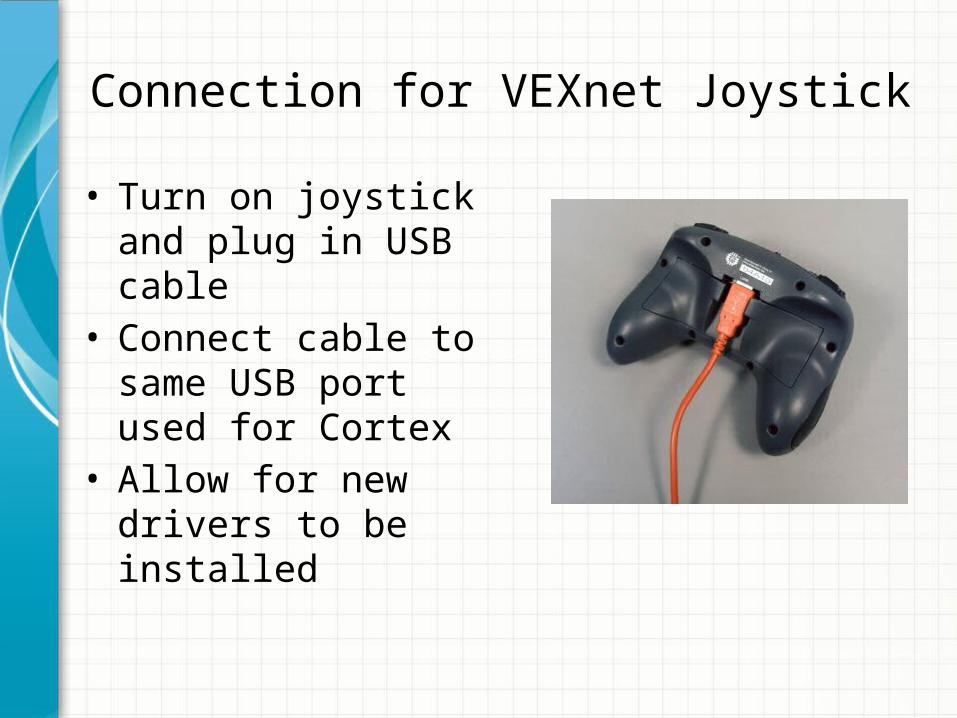
Connection for VEXnet Joystick
• Turn on joystick and plug in USB cable
• Connect cable to same USB port used for Cortex
• Allow for new drivers to be installed

Software Download for Joystick
• Almost same as Cortex Update
• This time select VEXnet Joystick Firmware
• Select Standard File• Wait for it to download

Pair Cortex to Joystick• Once all firmware is up to
date, pair devices• Use orange USB cable• Connect Cortex to joystick• Turn on Cortex, need not
be on.• Wait for sync to occur
– 2 green lights on Cortex and two on joystick (three if power on) and synced
• Use only 1 VEXnet joystick per Cortex

VEXnet…• Cortex and joystick
connect via wi-fi• Has a line of sight range
in excess of 200 ft• Can be easily damaged• Avoid giving out until
really ready to start testing
• Use wireless programming cable set to prevent wear and tear

The Clawbot
• Good basic intro bot• Capable of playing Toss
Up

Things to watch for
• No pop rivets• Use 8-32 screw and
nuts• Avoid cutting parts on
whim• Aluminum is 60% lighter
and twice as expensive– Reserve for lift units