Embed Size (px)
Citation preview
Version 3.02 Manual
Copyright © 2013-2018 by Harald Heim & The Plugin Site
Support
Web site: http://thepluginsite.com
E-mail: http://www.thepluginsite.com/about/contact.htm
User Forum:http://www.thepluginsite.com/forum/viewforum.php?f=42
Credits
Idea and Concept: Harald Heim
Windows Development: Harald Heim
Mac Development: Nick Utenkov, Harald Heim
Components: dcraw by Dave Coffin (without restrictedfunctions), libtiff by Sam Leffler, AMaZE by Emil Martinec(with BSD license), Fujifilm compressed decoder by AlexeyDanilchenko (under CDDL license), Lens Info from LibRaw(under CDDL license).
Logo and Artwork: Harald Heim
Beta Testers: Roberto Muscia, Shannon Carnevale, RobertTerrell
Table of Contents1 Introduction .......................................................................................................................................1
1.1 Description............................................................................................................................11.2 FAQ......................................................................................................................................31.3 Compatibility.........................................................................................................................61.4 Installation..........................................................................................................................141.5 Step by Step.......................................................................................................................16
1.5.1 Applying Adobe Camera Raw as a Filter...................................................................161.5.2 Opening Raw Files with MetaRaw.............................................................................161.5.3 Setting up MetaRaw For Regular Usage...................................................................16
2 Functionality ....................................................................................................................................182.1 General Usage...................................................................................................................18
2.1.1 Opening Raw Files with MetaRaw.............................................................................182.1.2 Using MetaRaw from the Open As file dialog...........................................................182.1.3 Batch Processing with MetaRaw...............................................................................19
2.2 Main Dialog.........................................................................................................................202.2.1 Thumbnail Preview....................................................................................................202.2.2 Raw Converter...........................................................................................................202.2.3 Camera Raw Adjustments.........................................................................................212.2.4 Do Not Display...........................................................................................................222.2.5 Off..............................................................................................................................22
2.3 Settings...............................................................................................................................232.3.1 General Usage...........................................................................................................232.3.2 Adobe DNG Converter...............................................................................................232.3.3 MetaRaw Converter...................................................................................................242.3.4 Raw Correction..........................................................................................................26
2.4 Camera Raw Filter / Smart Object......................................................................................27
MetaRaw Manual
i
1 Introduction
1.1 Description
MetaRaw extends the functionality of the Adobe Camera Raw plugin in Photoshop and Photoshop Elements. It lets youopen camera raw files with Adobe Camera Raw, which are normally not supported by it, and allows applying AdobeCamera Raw as a filter to image layers. In Photoshop Elements MetaRaw provides automatic lens correction andchromatic aberration removal features for Adobe Camera Raw. Additionally MetaRaw includes its own raw converter,which has several advantages over Adobe Camera Raw.
With MetaRaw you do not have to upgrade to the latest version of Photoshop or Photoshop Elements if you only needsupport for a new camera raw file type or want to apply Adobe Camera Raw as a filter to image layers and smart objects.Before MetaRaw became available, Photoshop users had to upgrade to a newer version of Photoshop, PhotoshopElements or the Creative Cloud if they wanted to open a new kind of camera raw file. MetaRaw solves this dilemma byempowering users to open the latest variety of raw files with Adobe Camera Raw, even if they use such old applicationsas Photoshop CS1 and Photoshop Elements 3 under Windows or Photoshop CS3 and Photoshop Elements 8 underMacOS X. MetaRaw also applies the Camera Raw effects to image layers and smart objects. This provides users of olderPhotoshop versions and Photoshop Elements with a similar functionality as the new Camera Raw filter in Photoshop CC.
MetaRaw seamlessly runs three different raw converters directly within Photoshop and Photoshop Elements: AdobeCamera Raw, Adobe DNG Converter and MetaRaw's built-in raw converter. If one of them does not support a certain rawfile, one of the others is automatically used. No matter which raw converter you choose, its output can be processed withAdobe Camera Raw.
The built-in MetaRaw Converter produces images that are up to 0.4 megapixel larger than those of Adobe Camera Raw. Itis able to open camera raw files from unknown future cameras and supports 280 camera models and 13 raw fileextensions that are not supported with the latest version of Adobe Camera Raw. The output of the MetaRaw Converterlooks quite similar to Adobe Camera Raw and can be further processed with Adobe Camera Raw. MetaRaw Converterproduces images with better details and less moire, preserves more shadow and highlight details at default settings thanAdobe Camera Raw and produces a more natural look for certain raw files. Additonally you can also use the JPEGExtractor option to open the JPEG data that is embedded inside almost every raw file. This way you can have a look atthe original conversion of the camera or use it as an alternative if none of the three raw converters support a certain rawfile.
In Photoshop Elements the Adobe Camera Raw window offers a limited number of controls. MetaRaw provides twoadditional features in Photoshop 10 and higher: automatic lens correction and chromatic aberration removal. This avoidtwo additional image processing steps, which otherwise have to be done manually. MetaRaw lets you open raw imageswithout displaying the Camera Raw dialog, which can be handy at times. You can also choose to open a raw file as smartobject for readjusting the Camera Raw settings without reopening the raw file again. For archival purposes MetaRaw isable to automatically save a DNG or TIFF file while opening a raw file.
New in Version 3
Support for Adobe DNG Converter 10.2 (and higher), which is finally a 64-bit executable under Windows 64-bit.• The Lens Correction and CA Removal options finally work with MetaRaw Converter• When using MetaRaw Converter the Camera Raw settings are now stored in .xmp files and are restored whenopening the same raw file again
•
MetaRaw Converter now outputs demosaiced DNG files by default• UI Enhancements• Action / Batch Processing Enhancements• Support for 10 new cameras•
Features
Open raw files with Adobe Camera Raw that are normally not supported by it• Apply Adobe Camera Raw as a filter in Photoshop and Photoshop Elements• Create smart objects that can be edited with Adobe Camera Raw• Apply automatic lens corrections and remove chromatic aberration with Adobe Camera Raw in PhotoshopElements 10 and higher
•
Choose between Adobe Camera Raw, Adobe DNG Converter and MetaRaw's own converter for opening cameraraw files. If one of them does not support a certain raw file, one of the others is used automatically.
•
Automatically process the output of the Adobe DNG Converter and the MetaRaw Converter with Adobe CameraRaw
•
Advantages of the MetaRaw Converter:Produces images that are up to 0.4 megapixel larger than those of Adobe Camera Raw♦ Is able to open raw files from unknown future cameras (even without an update)♦ Supports 280 camera models and 13 raw file extensions that are not supported by the latest version ofAdobe Camera Raw
♦
Produces images with better details and less moire than Adobe Camera and DNG Converter with its"Very High" or "High (Moire Removal)" settings
♦
Produces more natural looking images than Adobe Camera Raw from cameras with an Fujufilm X-Transsensor
♦
Preserves more shadow and highlight details at default settings than Adobe Camera Raw♦ Produces more natural skin colors in some cases♦ Its output looks quite similar to Adobe Camera Raw♦
•
Option to open raw images in Photoshop and Photoshop Elements without displaying the Camera Raw dialog•
MetaRaw Manual 2

1.2 FAQ
I use Adobe Camera Raw in Photoshop or Photoshop Elements. Why do I need MetaRaw?
MetaRaw allows you to open camera raw files, which are normally not supported by your version of Adobe Camera Raw.You can also apply Adobe Camera Raw as a filter with the help of MetaRaw and create smart objects from normal layersthat can be edited with Adobe Camera Raw.
Additonally MetaRaw's own raw converter produces images that are up to 0.4 megapixel larger than those of AdobeCamera Raw. It is able to open camera raw files from unknown future cameras and supports 280 camera models and 13raw file extensions that are not supported with the latest version of Adobe Camera Raw. It converts some raw files a bitslower than Adobe Camera Raw, but you may like its output better, e.g. better details, less moire, its skin colors, itspreservation of shadow and highlight details or the more natural look of converted X-Trans raw files.
Futhermore, in Photoshop Elements 10-14 MetaRaw lets you apply two hidden settings of Adobe Camera Raw: auto lenscorrection and chromatic aberration removal. Another feature of MetaRaw is hiding the Adobe Camera Raw dialog whenopening a raw file.
If you use Photoshop Elements or a pre-CC version of Photoshop, you can ulilize all features of MetaRaw. If you usePhotoshop CC, your benefits are MetaRaw's own raw converter and the Camera Raw Smart Object feature.
Photoshop (or Photoshop Elements) does not allow me to open raw files from the camera thatI recently bought. Can I use MetaRaw instead?
Yes, MetaRaw definitely lets you to open raw files of newer camera models in Photoshop and Photoshop Elements.MetaRaw lets you work around the fact that Adobe only provides new Camera Raw updates for the latest version ofPhotoshop and Photoshop Elements. So if you are using an older version of Photoshop or Photoshop Elements and donot plan to update to the latest version, you can use MetaRaw to compensate for the missing raw file support.
Why should I use MetaRaw instead of an external raw converter?
MetaRaw allows you to open camera raw files directly in Photoshop with Camera Raw, even if the Camera Raw plugindoes not support the files. So you do not need to leave Photoshop and use an external application or tool to process yourraw files before you can return to Photoshop to open them. This saves you quite some time and hassle.
Additionally you do not have to worry about the conversion quality of an external tool. MetaRaw makes sure that you getthe same premium image quality that you expect from Photoshop.
Which raw converters does MetaRaw support and what are their advantages anddisadvantages?
MetaRaw currently supports three raw converters and manages to utilize their advantages while bypassing theirdisadvantages. Here are the pro and cons of these three raw converters:
Adobe Camera Raw:
+ Works as a plugin in Photoshop and Photoshop Elements+ Many image adjustment options+ Relatively fast raw conversion- You have to update to the latest version of Photoshop or Photoshop Elements to get support for thelatest camera raw files.- Does not open raw files from unknown or exotic cameras
MetaRaw Manual 3
Adobe DNG Converter:
+ Supports the latest camera raw file types+ Available for free+/- Produces DNG files, which still need to be converted with Adobe Camera Raw, but this also meansthat the resulting images are identical.- Is only available as a standalone application and not as a plugin- It is inconvenient to use and only allows you to process a whole folder of raw files from its UI- You have to use an outdated version of it under Windows XP/Vista as well as MacOS X 10.10 andolder
MetaRaw Converter:
+ Built into the MetaRaw plugin+ Produces up to 0.4 megapixel larger images than Adobe Camera Raw+ Supports 280 cameras and 13 raw file extensions that are not supported by Adobe Camera Raw+ Is able to open raw files from unknown future cameras (even without an update)+ Produces images with better details and less moire than Adobe Camera and DNG Converter with its"Very High" or "High (Moire Removal)" settings+ Produces a more satisfying result than Adobe Camera Raw in some cases+/- Its output looks quite similar but not identical to Adobe Camera Raw- Conversion speed for a few raw formats is a bit slower than Adobe Camera Raw and Adobe DNGConverter
MetaRaw compensates the disadvantages of Adobe Camera Raw by running Adobe DNG Converter or the MetaRawconverter when Adobe Camera Raw does not know a certain raw file type. MetaRaw evens out the inconvenience ofAdobe DNG Converter by running it from within Photoshop and automatically processing its output with Adobe CameraRaw. The tiny speed disadvantage of the MetaRaw converter (which will diminish in future updates) can be minimized byusing the other two converters whenever possible.
I use the Adobe Bridge version that was installed with my older version of Photoshop and donot see thumbnail images of newer raw files. Can MetaRaw help here?
Actually we thought about creating a MetaRaw plugin for Adobe Bridge, but as Adobe Bridge CC is now available for free,there is no need for it. You can download Adobe Bridge CC from here. Once you have it installed you can see thethumbnails and previews of newer raw files with it. To make sure that it supports the latest raw files, choose Help >Updates on its menu to download and install the latest Camera Raw version.
Bridge CC requires at least Windows 7, so if you are still using Windows XP or Vista, please get a free image viewer likeXnView or IrfanView for viewing the thumbnails of your raw files.
I do not see a difference when activating the Auto Lens Correction feature of MetaRaw. Whatis the problem?
There are different factors that determine if the Auto Lens Correction feature works in Photoshop Elements 10 and higher:
1. If the Auto Lens Correction does not work with MetaRaw Converter, try selecting "Adobe Camera Raw" or "Adobe DNGConverter" as the raw converter on the MetaRaw dialog.
2. The raw file has to have the lens data mentioned in its EXIF data. If you use a lens of the same brand as the camera orthe lens is an auto focus lens, that is usually the case.
3. A lens profile of the used lens has to be available. If you installed the latest version of Adobe DNG Converter, AdobeCamera Raw has access to the latest lens profiles.
4. If the photo was taken with a focal length near 50mm (this value can be different for different cameras), no lenscorrection is necessary, so none will be applied.
If you do not see a difference in the opened image when Auto Lens Correction is activated, one of the mentioned pointsmay be the problem.
MetaRaw Manual 4
Is MetaRaw Converter based on the free dcraw converter?
Yes, MetaRaw's own converter is based on dcraw, but it has some advantages over it:
1. MetaRaw is updated much more often than dcraw, so it offers support for new raw files much sooner. It also supportssome raw files that dcraw does not support.
2. MetaRaw Converter uses dcraw for opening the raw files, but uses own demosaicing and post processing algorithms,which run on multiple cores. As a result it converts raw files much faster than dcraw.
3. MetaRaw Converter produces a better conversion result for most raw files than dcraw, because of its improveddemosaicing and post processing algorithms.
4. MetaRaw offers a graphical user interface and automatically opens the converted images in Photoshop and PhotoshopElements whereas dcraw has to be used from the command line.
MetaRaw Manual 5
1.3 Compatibility
MetaRaw works under Windows (10, 8, 7, Vista, XP) as well as MacOS X (10.6 and higher).
The MetaRaw format plugin, which provides extended raw file support, requires one of the following applications to beinstalled:
Windows:Adobe Photoshop CS2 to CS6, CC and higher♦ Adobe Photoshop CS1 (with Camera Raw 2.4 update)♦ Adobe Photoshop Elements 4 and higher♦ Adobe Photoshop Elements 3 (with Camera Raw 2.4 update)♦
•
MacOS X:Adobe Photoshop CS3 to CS6, CC to CC 2015 (CC 2015.5/2017 not yet)♦ Adobe Photoshop Elements 8 and higher♦
•
MetaRaw's Camera Raw Filter feature, which allows applying Adobe Camera Raw as a filter, supports the followingimage modes: RGB, Grayscale, CMYK, Lab with 8-bit and 16-bit per channel. It requires one of the the followingapplications to be installed:
Windows:Adobe Photoshop CS3 to CS6, CC and higher♦ Adobe Photoshop Elements 6 and higher♦
•
MacOS X:Adobe Photoshop CS3 to CS6, CC to CC 2015 (CC 2015.5/2017 not yet)♦ Adobe Photoshop Elements 8 and higher♦
•
MetaRaw's Camera Raw Smart Object feature, which allows applying Adobe Camera Raw as a filter, supports thefollowing image modes: RGB, Grayscale, CMYK, Lab with 8-bit and 16-bit per channel. It requires one of the the followingapplications to be installed:
Windows:Adobe Photoshop CS4 to CS6, CC and higher♦ Adobe Photoshop Elements 7 and higher♦
•
MacOS X:Adobe Photoshop CS3 to CS6, CC to CC 2015 (CC 2015.5/2017 not yet)♦ Adobe Photoshop Elements 8 and higher♦
•
The MetaRaw dialogs are available in English or German language.
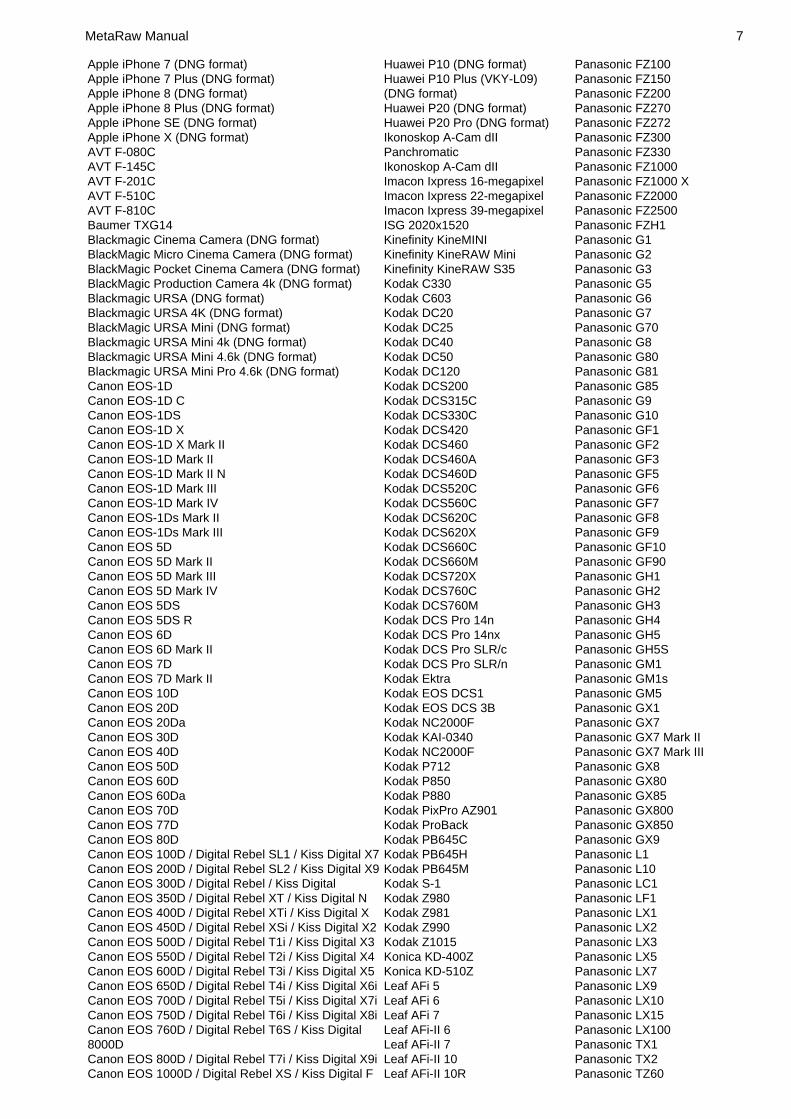
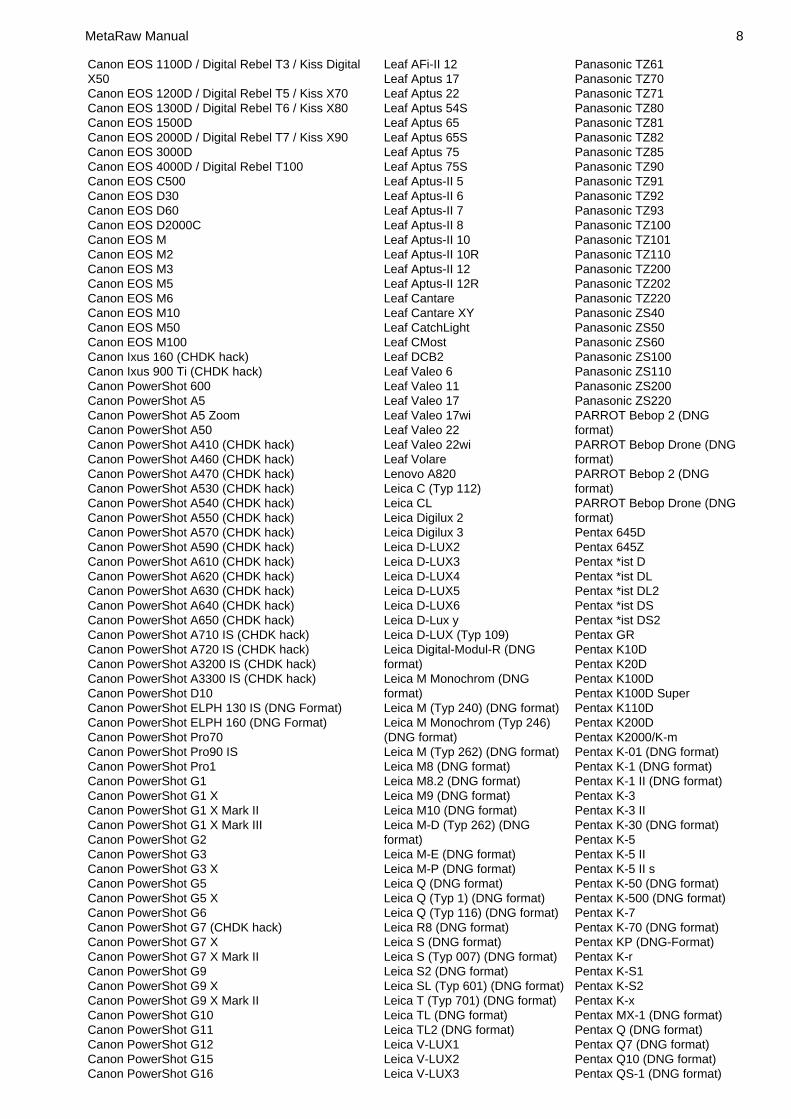
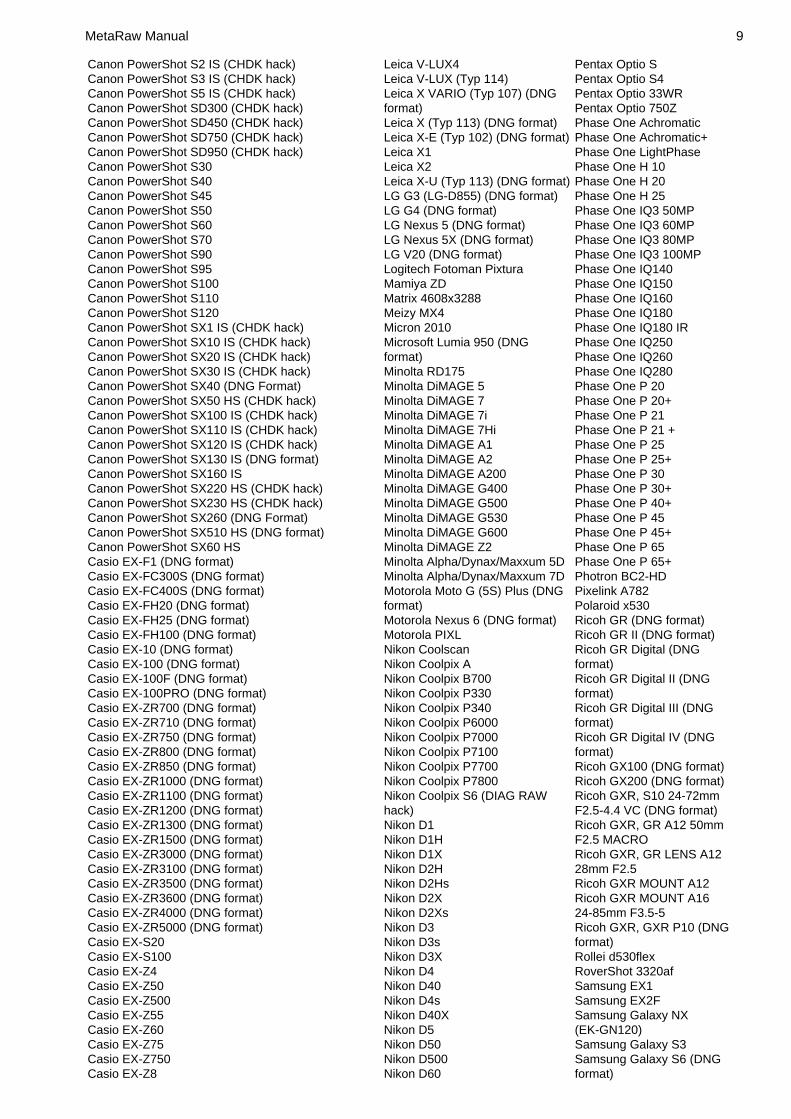
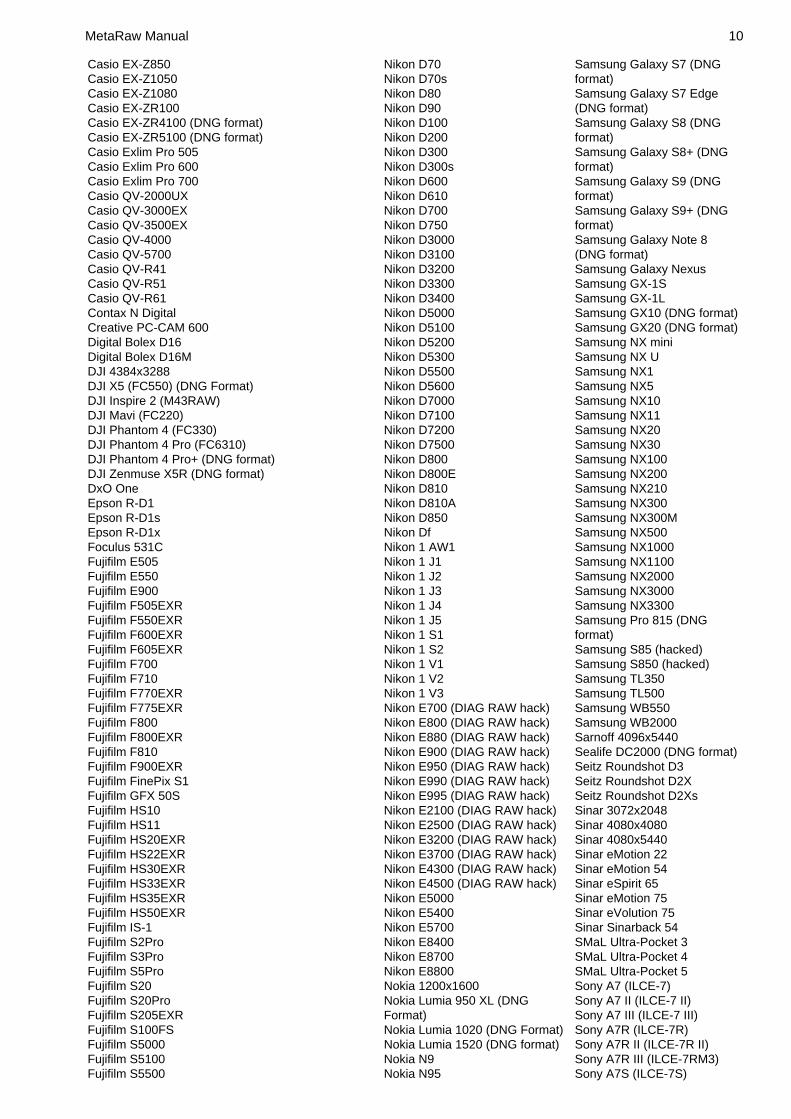
Supported Cameras
The MetaRaw Converter supports raw files from the following 1105+ cameras. If your camera is not mentioned here,please try MetaRaw anyway, as it can also open raw files from unknown cameras. Sigma cameras are not mentionedhere, but MetaRaw is able to extract the embedded JPEG.
AgfaPhoto DC-833mAlcatel 5035DAlcatel 5235DApple QuickTake 100Apple QuickTake 150Apple QuickTake 200Apple iPad Pro 9.7" (DNG format)Apple iPhone 6s (DNG format)Apple iPhone 6s Plus (DNG format)
Huawei Honor 6A (DNG format)Huawei Honor 9 (DNG format)Huawei Honor View 10 (DNGformat)Huawei Mate 9 (DNG format)Huawei Mate 10 (DNG format)Huawei Mate 10 Pro (DNGformat)Huawei P9 (DNG format)
Panasonic FZ45Panasonic FZ50Panasonic FZ7Panasonic FZ70Panasonic FZ72Panasonic FZ8Panasonic FZ80Panasonic FZ82Panasonic FZ85
MetaRaw Manual 6
Apple iPhone 7 (DNG format)Apple iPhone 7 Plus (DNG format)Apple iPhone 8 (DNG format)Apple iPhone 8 Plus (DNG format)Apple iPhone SE (DNG format)Apple iPhone X (DNG format)AVT F-080CAVT F-145CAVT F-201CAVT F-510CAVT F-810CBaumer TXG14Blackmagic Cinema Camera (DNG format)BlackMagic Micro Cinema Camera (DNG format)BlackMagic Pocket Cinema Camera (DNG format)BlackMagic Production Camera 4k (DNG format)Blackmagic URSA (DNG format)Blackmagic URSA 4K (DNG format)BlackMagic URSA Mini (DNG format)Blackmagic URSA Mini 4k (DNG format)Blackmagic URSA Mini 4.6k (DNG format)Blackmagic URSA Mini Pro 4.6k (DNG format)Canon EOS-1DCanon EOS-1D CCanon EOS-1DSCanon EOS-1D XCanon EOS-1D X Mark IICanon EOS-1D Mark IICanon EOS-1D Mark II NCanon EOS-1D Mark IIICanon EOS-1D Mark IVCanon EOS-1Ds Mark IICanon EOS-1Ds Mark IIICanon EOS 5DCanon EOS 5D Mark IICanon EOS 5D Mark IIICanon EOS 5D Mark IVCanon EOS 5DSCanon EOS 5DS RCanon EOS 6DCanon EOS 6D Mark IICanon EOS 7DCanon EOS 7D Mark IICanon EOS 10DCanon EOS 20DCanon EOS 20DaCanon EOS 30DCanon EOS 40DCanon EOS 50DCanon EOS 60DCanon EOS 60DaCanon EOS 70DCanon EOS 77DCanon EOS 80DCanon EOS 100D / Digital Rebel SL1 / Kiss Digital X7Canon EOS 200D / Digital Rebel SL2 / Kiss Digital X9Canon EOS 300D / Digital Rebel / Kiss DigitalCanon EOS 350D / Digital Rebel XT / Kiss Digital NCanon EOS 400D / Digital Rebel XTi / Kiss Digital XCanon EOS 450D / Digital Rebel XSi / Kiss Digital X2Canon EOS 500D / Digital Rebel T1i / Kiss Digital X3Canon EOS 550D / Digital Rebel T2i / Kiss Digital X4Canon EOS 600D / Digital Rebel T3i / Kiss Digital X5Canon EOS 650D / Digital Rebel T4i / Kiss Digital X6iCanon EOS 700D / Digital Rebel T5i / Kiss Digital X7iCanon EOS 750D / Digital Rebel T6i / Kiss Digital X8iCanon EOS 760D / Digital Rebel T6S / Kiss Digital8000DCanon EOS 800D / Digital Rebel T7i / Kiss Digital X9iCanon EOS 1000D / Digital Rebel XS / Kiss Digital F
Huawei P10 (DNG format)Huawei P10 Plus (VKY-L09)(DNG format)Huawei P20 (DNG format)Huawei P20 Pro (DNG format)Ikonoskop A-Cam dIIPanchromaticIkonoskop A-Cam dIIImacon Ixpress 16-megapixelImacon Ixpress 22-megapixelImacon Ixpress 39-megapixelISG 2020x1520Kinefinity KineMINIKinefinity KineRAW MiniKinefinity KineRAW S35Kodak C330Kodak C603Kodak DC20Kodak DC25Kodak DC40Kodak DC50Kodak DC120Kodak DCS200Kodak DCS315CKodak DCS330CKodak DCS420Kodak DCS460Kodak DCS460AKodak DCS460DKodak DCS520CKodak DCS560CKodak DCS620CKodak DCS620XKodak DCS660CKodak DCS660MKodak DCS720XKodak DCS760CKodak DCS760MKodak DCS Pro 14nKodak DCS Pro 14nxKodak DCS Pro SLR/cKodak DCS Pro SLR/nKodak EktraKodak EOS DCS1Kodak EOS DCS 3BKodak NC2000FKodak KAI-0340Kodak NC2000FKodak P712Kodak P850Kodak P880Kodak PixPro AZ901Kodak ProBackKodak PB645CKodak PB645HKodak PB645MKodak S-1Kodak Z980Kodak Z981Kodak Z990Kodak Z1015Konica KD-400ZKonica KD-510ZLeaf AFi 5Leaf AFi 6Leaf AFi 7Leaf AFi-II 6Leaf AFi-II 7Leaf AFi-II 10Leaf AFi-II 10R
Panasonic FZ100Panasonic FZ150Panasonic FZ200Panasonic FZ270Panasonic FZ272Panasonic FZ300Panasonic FZ330Panasonic FZ1000Panasonic FZ1000 XPanasonic FZ2000Panasonic FZ2500Panasonic FZH1Panasonic G1Panasonic G2Panasonic G3Panasonic G5Panasonic G6Panasonic G7Panasonic G70Panasonic G8Panasonic G80Panasonic G81Panasonic G85Panasonic G9Panasonic G10Panasonic GF1Panasonic GF2Panasonic GF3Panasonic GF5Panasonic GF6Panasonic GF7Panasonic GF8Panasonic GF9Panasonic GF10Panasonic GF90Panasonic GH1Panasonic GH2Panasonic GH3Panasonic GH4Panasonic GH5Panasonic GH5SPanasonic GM1Panasonic GM1sPanasonic GM5Panasonic GX1Panasonic GX7Panasonic GX7 Mark IIPanasonic GX7 Mark IIIPanasonic GX8Panasonic GX80Panasonic GX85Panasonic GX800Panasonic GX850Panasonic GX9Panasonic L1Panasonic L10Panasonic LC1Panasonic LF1Panasonic LX1Panasonic LX2Panasonic LX3Panasonic LX5Panasonic LX7Panasonic LX9Panasonic LX10Panasonic LX15Panasonic LX100Panasonic TX1Panasonic TX2Panasonic TZ60
MetaRaw Manual 7
Canon EOS 1100D / Digital Rebel T3 / Kiss DigitalX50Canon EOS 1200D / Digital Rebel T5 / Kiss X70Canon EOS 1300D / Digital Rebel T6 / Kiss X80Canon EOS 1500DCanon EOS 2000D / Digital Rebel T7 / Kiss X90Canon EOS 3000DCanon EOS 4000D / Digital Rebel T100Canon EOS C500Canon EOS D30Canon EOS D60Canon EOS D2000CCanon EOS MCanon EOS M2Canon EOS M3Canon EOS M5Canon EOS M6Canon EOS M10Canon EOS M50Canon EOS M100Canon Ixus 160 (CHDK hack)Canon Ixus 900 Ti (CHDK hack)Canon PowerShot 600Canon PowerShot A5Canon PowerShot A5 ZoomCanon PowerShot A50Canon PowerShot A410 (CHDK hack)Canon PowerShot A460 (CHDK hack)Canon PowerShot A470 (CHDK hack)Canon PowerShot A530 (CHDK hack)Canon PowerShot A540 (CHDK hack)Canon PowerShot A550 (CHDK hack)Canon PowerShot A570 (CHDK hack)Canon PowerShot A590 (CHDK hack)Canon PowerShot A610 (CHDK hack)Canon PowerShot A620 (CHDK hack)Canon PowerShot A630 (CHDK hack)Canon PowerShot A640 (CHDK hack)Canon PowerShot A650 (CHDK hack)Canon PowerShot A710 IS (CHDK hack)Canon PowerShot A720 IS (CHDK hack)Canon PowerShot A3200 IS (CHDK hack)Canon PowerShot A3300 IS (CHDK hack)Canon PowerShot D10Canon PowerShot ELPH 130 IS (DNG Format)Canon PowerShot ELPH 160 (DNG Format)Canon PowerShot Pro70Canon PowerShot Pro90 ISCanon PowerShot Pro1Canon PowerShot G1Canon PowerShot G1 XCanon PowerShot G1 X Mark IICanon PowerShot G1 X Mark IIICanon PowerShot G2Canon PowerShot G3Canon PowerShot G3 XCanon PowerShot G5Canon PowerShot G5 XCanon PowerShot G6Canon PowerShot G7 (CHDK hack)Canon PowerShot G7 XCanon PowerShot G7 X Mark IICanon PowerShot G9Canon PowerShot G9 XCanon PowerShot G9 X Mark IICanon PowerShot G10Canon PowerShot G11Canon PowerShot G12Canon PowerShot G15Canon PowerShot G16
Leaf AFi-II 12Leaf Aptus 17Leaf Aptus 22Leaf Aptus 54SLeaf Aptus 65Leaf Aptus 65SLeaf Aptus 75Leaf Aptus 75SLeaf Aptus-II 5Leaf Aptus-II 6Leaf Aptus-II 7Leaf Aptus-II 8Leaf Aptus-II 10Leaf Aptus-II 10RLeaf Aptus-II 12Leaf Aptus-II 12RLeaf CantareLeaf Cantare XYLeaf CatchLightLeaf CMostLeaf DCB2Leaf Valeo 6Leaf Valeo 11Leaf Valeo 17Leaf Valeo 17wiLeaf Valeo 22Leaf Valeo 22wiLeaf VolareLenovo A820Leica C (Typ 112)Leica CLLeica Digilux 2Leica Digilux 3Leica D-LUX2Leica D-LUX3Leica D-LUX4Leica D-LUX5Leica D-LUX6Leica D-Lux yLeica D-LUX (Typ 109)Leica Digital-Modul-R (DNGformat)Leica M Monochrom (DNGformat)Leica M (Typ 240) (DNG format)Leica M Monochrom (Typ 246)(DNG format)Leica M (Typ 262) (DNG format)Leica M8 (DNG format)Leica M8.2 (DNG format)Leica M9 (DNG format)Leica M10 (DNG format)Leica M-D (Typ 262) (DNGformat)Leica M-E (DNG format)Leica M-P (DNG format)Leica Q (DNG format)Leica Q (Typ 1) (DNG format)Leica Q (Typ 116) (DNG format)Leica R8 (DNG format)Leica S (DNG format)Leica S (Typ 007) (DNG format)Leica S2 (DNG format)Leica SL (Typ 601) (DNG format)Leica T (Typ 701) (DNG format)Leica TL (DNG format)Leica TL2 (DNG format)Leica V-LUX1Leica V-LUX2Leica V-LUX3
Panasonic TZ61Panasonic TZ70Panasonic TZ71Panasonic TZ80Panasonic TZ81Panasonic TZ82Panasonic TZ85Panasonic TZ90Panasonic TZ91Panasonic TZ92Panasonic TZ93Panasonic TZ100Panasonic TZ101Panasonic TZ110Panasonic TZ200Panasonic TZ202Panasonic TZ220Panasonic ZS40Panasonic ZS50Panasonic ZS60Panasonic ZS100Panasonic ZS110Panasonic ZS200Panasonic ZS220PARROT Bebop 2 (DNGformat)PARROT Bebop Drone (DNGformat)PARROT Bebop 2 (DNGformat)PARROT Bebop Drone (DNGformat)Pentax 645DPentax 645ZPentax *ist DPentax *ist DLPentax *ist DL2Pentax *ist DSPentax *ist DS2Pentax GRPentax K10DPentax K20DPentax K100DPentax K100D SuperPentax K110DPentax K200DPentax K2000/K-mPentax K-01 (DNG format)Pentax K-1 (DNG format)Pentax K-1 II (DNG format)Pentax K-3Pentax K-3 IIPentax K-30 (DNG format)Pentax K-5Pentax K-5 IIPentax K-5 II sPentax K-50 (DNG format)Pentax K-500 (DNG format)Pentax K-7Pentax K-70 (DNG format)Pentax KP (DNG-Format)Pentax K-rPentax K-S1Pentax K-S2Pentax K-xPentax MX-1 (DNG format)Pentax Q (DNG format)Pentax Q7 (DNG format)Pentax Q10 (DNG format)Pentax QS-1 (DNG format)
MetaRaw Manual 8
Canon PowerShot S2 IS (CHDK hack)Canon PowerShot S3 IS (CHDK hack)Canon PowerShot S5 IS (CHDK hack)Canon PowerShot SD300 (CHDK hack)Canon PowerShot SD450 (CHDK hack)Canon PowerShot SD750 (CHDK hack)Canon PowerShot SD950 (CHDK hack)Canon PowerShot S30Canon PowerShot S40Canon PowerShot S45Canon PowerShot S50Canon PowerShot S60Canon PowerShot S70Canon PowerShot S90Canon PowerShot S95Canon PowerShot S100Canon PowerShot S110Canon PowerShot S120Canon PowerShot SX1 IS (CHDK hack)Canon PowerShot SX10 IS (CHDK hack)Canon PowerShot SX20 IS (CHDK hack)Canon PowerShot SX30 IS (CHDK hack)Canon PowerShot SX40 (DNG Format)Canon PowerShot SX50 HS (CHDK hack)Canon PowerShot SX100 IS (CHDK hack)Canon PowerShot SX110 IS (CHDK hack)Canon PowerShot SX120 IS (CHDK hack)Canon PowerShot SX130 IS (DNG format)Canon PowerShot SX160 ISCanon PowerShot SX220 HS (CHDK hack)Canon PowerShot SX230 HS (CHDK hack)Canon PowerShot SX260 (DNG Format)Canon PowerShot SX510 HS (DNG format)Canon PowerShot SX60 HSCasio EX-F1 (DNG format)Casio EX-FC300S (DNG format)Casio EX-FC400S (DNG format)Casio EX-FH20 (DNG format)Casio EX-FH25 (DNG format)Casio EX-FH100 (DNG format)Casio EX-10 (DNG format)Casio EX-100 (DNG format)Casio EX-100F (DNG format)Casio EX-100PRO (DNG format)Casio EX-ZR700 (DNG format)Casio EX-ZR710 (DNG format)Casio EX-ZR750 (DNG format)Casio EX-ZR800 (DNG format)Casio EX-ZR850 (DNG format)Casio EX-ZR1000 (DNG format)Casio EX-ZR1100 (DNG format)Casio EX-ZR1200 (DNG format)Casio EX-ZR1300 (DNG format)Casio EX-ZR1500 (DNG format)Casio EX-ZR3000 (DNG format)Casio EX-ZR3100 (DNG format)Casio EX-ZR3500 (DNG format)Casio EX-ZR3600 (DNG format)Casio EX-ZR4000 (DNG format)Casio EX-ZR5000 (DNG format)Casio EX-S20Casio EX-S100Casio EX-Z4Casio EX-Z50Casio EX-Z500Casio EX-Z55Casio EX-Z60Casio EX-Z75Casio EX-Z750Casio EX-Z8
Leica V-LUX4Leica V-LUX (Typ 114)Leica X VARIO (Typ 107) (DNGformat)Leica X (Typ 113) (DNG format)Leica X-E (Typ 102) (DNG format)Leica X1Leica X2Leica X-U (Typ 113) (DNG format)LG G3 (LG-D855) (DNG format)LG G4 (DNG format)LG Nexus 5 (DNG format)LG Nexus 5X (DNG format)LG V20 (DNG format)Logitech Fotoman PixturaMamiya ZDMatrix 4608x3288Meizy MX4Micron 2010Microsoft Lumia 950 (DNGformat)Minolta RD175Minolta DiMAGE 5Minolta DiMAGE 7Minolta DiMAGE 7iMinolta DiMAGE 7HiMinolta DiMAGE A1Minolta DiMAGE A2Minolta DiMAGE A200Minolta DiMAGE G400Minolta DiMAGE G500Minolta DiMAGE G530Minolta DiMAGE G600Minolta DiMAGE Z2Minolta Alpha/Dynax/Maxxum 5DMinolta Alpha/Dynax/Maxxum 7DMotorola Moto G (5S) Plus (DNGformat)Motorola Nexus 6 (DNG format)Motorola PIXLNikon CoolscanNikon Coolpix ANikon Coolpix B700Nikon Coolpix P330Nikon Coolpix P340Nikon Coolpix P6000Nikon Coolpix P7000Nikon Coolpix P7100Nikon Coolpix P7700Nikon Coolpix P7800Nikon Coolpix S6 (DIAG RAWhack)Nikon D1Nikon D1HNikon D1XNikon D2HNikon D2HsNikon D2XNikon D2XsNikon D3Nikon D3sNikon D3XNikon D4Nikon D40Nikon D4sNikon D40XNikon D5Nikon D50Nikon D500Nikon D60
Pentax Optio SPentax Optio S4Pentax Optio 33WRPentax Optio 750ZPhase One AchromaticPhase One Achromatic+Phase One LightPhasePhase One H 10Phase One H 20Phase One H 25Phase One IQ3 50MPPhase One IQ3 60MPPhase One IQ3 80MPPhase One IQ3 100MPPhase One IQ140Phase One IQ150Phase One IQ160Phase One IQ180Phase One IQ180 IRPhase One IQ250Phase One IQ260Phase One IQ280Phase One P 20Phase One P 20+Phase One P 21Phase One P 21 +Phase One P 25Phase One P 25+Phase One P 30Phase One P 30+Phase One P 40+Phase One P 45Phase One P 45+Phase One P 65Phase One P 65+Photron BC2-HDPixelink A782Polaroid x530Ricoh GR (DNG format)Ricoh GR II (DNG format)Ricoh GR Digital (DNGformat)Ricoh GR Digital II (DNGformat)Ricoh GR Digital III (DNGformat)Ricoh GR Digital IV (DNGformat)Ricoh GX100 (DNG format)Ricoh GX200 (DNG format)Ricoh GXR, S10 24-72mmF2.5-4.4 VC (DNG format)Ricoh GXR, GR A12 50mmF2.5 MACRORicoh GXR, GR LENS A1228mm F2.5Ricoh GXR MOUNT A12Ricoh GXR MOUNT A1624-85mm F3.5-5Ricoh GXR, GXR P10 (DNGformat)Rollei d530flexRoverShot 3320afSamsung EX1Samsung EX2FSamsung Galaxy NX(EK-GN120)Samsung Galaxy S3Samsung Galaxy S6 (DNGformat)
MetaRaw Manual 9
Casio EX-Z850Casio EX-Z1050Casio EX-Z1080Casio EX-ZR100Casio EX-ZR4100 (DNG format)Casio EX-ZR5100 (DNG format)Casio Exlim Pro 505Casio Exlim Pro 600Casio Exlim Pro 700Casio QV-2000UXCasio QV-3000EXCasio QV-3500EXCasio QV-4000Casio QV-5700Casio QV-R41Casio QV-R51Casio QV-R61Contax N DigitalCreative PC-CAM 600Digital Bolex D16Digital Bolex D16MDJI 4384x3288DJI X5 (FC550) (DNG Format)DJI Inspire 2 (M43RAW)DJI Mavi (FC220)DJI Phantom 4 (FC330)DJI Phantom 4 Pro (FC6310)DJI Phantom 4 Pro+ (DNG format)DJI Zenmuse X5R (DNG format)DxO OneEpson R-D1Epson R-D1sEpson R-D1xFoculus 531CFujifilm E505Fujifilm E550Fujifilm E900Fujifilm F505EXRFujifilm F550EXRFujifilm F600EXRFujifilm F605EXRFujifilm F700Fujifilm F710Fujifilm F770EXRFujifilm F775EXRFujifilm F800Fujifilm F800EXRFujifilm F810Fujifilm F900EXRFujifilm FinePix S1Fujifilm GFX 50SFujifilm HS10Fujifilm HS11Fujifilm HS20EXRFujifilm HS22EXRFujifilm HS30EXRFujifilm HS33EXRFujifilm HS35EXRFujifilm HS50EXRFujifilm IS-1Fujifilm S2ProFujifilm S3ProFujifilm S5ProFujifilm S20Fujifilm S20ProFujifilm S205EXRFujifilm S100FSFujifilm S5000Fujifilm S5100Fujifilm S5500
Nikon D70Nikon D70sNikon D80Nikon D90Nikon D100Nikon D200Nikon D300Nikon D300sNikon D600Nikon D610Nikon D700Nikon D750Nikon D3000Nikon D3100Nikon D3200Nikon D3300Nikon D3400Nikon D5000Nikon D5100Nikon D5200Nikon D5300Nikon D5500Nikon D5600Nikon D7000Nikon D7100Nikon D7200Nikon D7500Nikon D800Nikon D800ENikon D810Nikon D810ANikon D850Nikon DfNikon 1 AW1Nikon 1 J1Nikon 1 J2Nikon 1 J3Nikon 1 J4Nikon 1 J5Nikon 1 S1Nikon 1 S2Nikon 1 V1Nikon 1 V2Nikon 1 V3Nikon E700 (DIAG RAW hack)Nikon E800 (DIAG RAW hack)Nikon E880 (DIAG RAW hack)Nikon E900 (DIAG RAW hack)Nikon E950 (DIAG RAW hack)Nikon E990 (DIAG RAW hack)Nikon E995 (DIAG RAW hack)Nikon E2100 (DIAG RAW hack)Nikon E2500 (DIAG RAW hack)Nikon E3200 (DIAG RAW hack)Nikon E3700 (DIAG RAW hack)Nikon E4300 (DIAG RAW hack)Nikon E4500 (DIAG RAW hack)Nikon E5000Nikon E5400Nikon E5700Nikon E8400Nikon E8700Nikon E8800Nokia 1200x1600Nokia Lumia 950 XL (DNGFormat)Nokia Lumia 1020 (DNG Format)Nokia Lumia 1520 (DNG format)Nokia N9Nokia N95
Samsung Galaxy S7 (DNGformat)Samsung Galaxy S7 Edge(DNG format)Samsung Galaxy S8 (DNGformat)Samsung Galaxy S8+ (DNGformat)Samsung Galaxy S9 (DNGformat)Samsung Galaxy S9+ (DNGformat)Samsung Galaxy Note 8(DNG format)Samsung Galaxy NexusSamsung GX-1SSamsung GX-1LSamsung GX10 (DNG format)Samsung GX20 (DNG format)Samsung NX miniSamsung NX USamsung NX1Samsung NX5Samsung NX10Samsung NX11Samsung NX20Samsung NX30Samsung NX100Samsung NX200Samsung NX210Samsung NX300Samsung NX300MSamsung NX500Samsung NX1000Samsung NX1100Samsung NX2000Samsung NX3000Samsung NX3300Samsung Pro 815 (DNGformat)Samsung S85 (hacked)Samsung S850 (hacked)Samsung TL350Samsung TL500Samsung WB550Samsung WB2000Sarnoff 4096x5440Sealife DC2000 (DNG format)Seitz Roundshot D3Seitz Roundshot D2XSeitz Roundshot D2XsSinar 3072x2048Sinar 4080x4080Sinar 4080x5440Sinar eMotion 22Sinar eMotion 54Sinar eSpirit 65Sinar eMotion 75Sinar eVolution 75Sinar Sinarback 54SMaL Ultra-Pocket 3SMaL Ultra-Pocket 4SMaL Ultra-Pocket 5Sony A7 (ILCE-7)Sony A7 II (ILCE-7 II)Sony A7 III (ILCE-7 III)Sony A7R (ILCE-7R)Sony A7R II (ILCE-7R II)Sony A7R III (ILCE-7RM3)Sony A7S (ILCE-7S)
MetaRaw Manual 10
Fujifilm S5200Fujifilm S5600Fujifilm S6000fdFujifilm S7000Fujifilm S9000Fujifilm S9100Fujifilm S9500Fujifilm S9600Fujifilm S200EXRFujifilm SL1000Fujifilm X10Fujifilm X20Fujifilm X30Fujifilm X70Fujifilm X100Fujifilm X100FFujifilm X100SFujifilm X100TFujifilm X-A1Fujifilm X-A2Fujifilm X-A3Fujifilm X-A5Fujifilm X-A10Fujifilm X-A20Fujifilm X-E1Fujifilm X-E2Fujifilm X-E2SFujifilm X-E3Fujifilm XF1Fujifilm X-H1Fujifilm X-M1Fujifilm X-Pro1Fujifilm X-Pro2Fujifilm X-S1Fujifilm X-T1Fujifilm X-T1 IRFujifilm X-T2Fujifilm X-T10Fujifilm X-T20Fujifilm XQ1Fujifilm XQ2Gione E7GITUP GIT2GITUP GIT2PGoogle Pixel XLHasselblad A6D-100cHasselblad CF-22Hasselblad CF-22MSHasselblad CF-31Hasselblad CF-39Hasselblad CF-39MSHasselblad CF-132Hasselblad CFHHasselblad CFH-22Hasselblad CFH-39Hasselblad CFVHasselblad CFV-2Hasselblad CFV-50Hasselblad CFV-50cHasselblad H2D (DNG format)Hasselblad H2D-22 (DNG format)Hasselblad H2D-39 (DNG format)Hasselblad H3D-22Hasselblad H3D-31Hasselblad H3D-39Hasselblad H3D-50Hasselblad H3DII-22Hasselblad H3DII-31Hasselblad H3DII-39Hasselblad H3DII-39MS
Nokia X2Olympus AIR A01Olympus C3030ZOlympus C5050ZOlympus C5060WZOlympus C5060ZOlympus C7070WZOlympus C70ZOlympus C7000ZOlympus C740UZOlympus C770UZOlympus C8080WZOlympus X200Olympus D560ZOlympus C350ZOlympus E-1Olympus E-3Olympus E-5Olympus E-10Olympus E-20Olympus E-30Olympus E-300Olympus E-330Olympus E-400Olympus E-410Olympus E-420Olympus E-450Olympus E-500Olympus E-510Olympus E-520Olympus E-600Olympus E-620Olympus E-M1Olympus E-M1 Mark IIOlympus E-M10Olympus E-M10 Mark IIOlympus E-M10 Mark IIIOlympus E-M5Olympus E-M5 Mark IIOlympus E-P1Olympus E-P2Olympus E-P3Olympus E-P5Olympus E-PL1Olympus E-PL1sOlympus E-PL2Olympus E-PL3Olympus E-PL5Olympus E-PL6Olympus E-PL7Olympus E-PL8Olympus E-PL 9Olympus E-PM1Olympus E-PM2Olympus PEN-FOlympus SH-2Olympus SH-3Olympus SP310Olympus SP320Olympus SP350Olympus SP500UZOlympus SP510UZOlympus SP550UZOlympus SP560UZOlympus SP565UZOlympus SP570UZOlympus Stylus 1Olympus Stylus 1sOlympus TG-4Olympus TG-5
Sony A7S II (ILCE-7S II)Sony A9 (ILCE-9)Sony A33 (SLT-A33)Sony A35 (SLT-A35)Sony A37 (SLT-A37)Sony A55V (SLT-A55V)Sony A57 (SLT-A57)Sony A58 (SLT-A58)Sony A65 (SLT-A65)Sony A65V(SLT-A65V)Sony A68 (SLT-A68)Sony A68 (ILCA-68)Sony A77 (SLT-A77)Sony A77 II (ILCA-77M2)Sony A99 (SLT-A99V)Sony A99 II (ILCA-99 II)Sony A100 (DSLR-A100)Sony A200 (DSLR-A200)Sony A230 (DSLR-A230)Sony A290 (DSLR-A290)Sony A300 (DSLR-A300)Sony A330 (DSLR A330)Sony A350 (DSLR-A350)Sony A380 (DSLR-A380)Sony A390 (DSLR-A390)Sony A450 (DSLR-A450)Sony A500 (DSLR-A500)Sony A550 (DSLR-A550)Sony A560 (DSLR-A560)Sony A580 (DSLR-A580)Sony A700 (DSLR-A700)Sony A850 (DSLR-A850)Sony A900 (DSLR-A900)Sony A3000 (ILCE-3000)Sony A3500 (ILCE-3500)Sony A5000 (ILCE-5000)Sony A5100 (ILCE-5100)Sony A6000 (ILCE-6000)Sony A6300 (ILCE-6300)Sony A6500 (ILCE-6500)Sony F828 (DSC-F828)Sony IMX135-mipi 13mpSony IMX135-QCOMSony IMX072-mipiSony IMX214Sony IMX219Sony IMX230Sony IMX298-mipi 16mpSony IMX219-mipi 8mpSony NEX-3Sony NEX-3NSony NEX-5Sony NEX-5NSony NEX-5RSony NEX-5TSony NEX-6Sony NEX-7Sony NEX-C3Sony NEX-F3Sony NEX-VG20Sony NEX-VG30Sony NEX-VG900Sony R1 (DSC-R1)Sony RX0 (DSC-RX0)Sony RX1 (DSC-RX1)Sony RX1R (DSC-RX1R)Sony RX1R II (DSC-RX1RM2)Sony RX10 (DSC-RX10)Sony RX10 II (DSC-RX10M2)Sony RX10 III (DSC-RX10M3)
MetaRaw Manual 11
Hasselblad H3DII-50Hasselblad H3DII-50MSHasselblad H4D-31Hasselblad H4D-40Hasselblad H4D-50Hasselblad H4D-60Hasselblad H5D-40Hasselblad H5D-50Hasselblad H5D-50cHasselblad H5D-50cMSHasselblad H5D-200cMSHasselblad H6D-100cHasselblad H6D-100cMSHasselblad HVHasselblad LussoHasselblad LunarHasselblad True ZoomHasselblad StellarHasselblad Stellar IIHasselblad V96CHasselblad X1DHTC 10 (DNG format)HTC One (A9) (DNG format)HTC One (M9) (DNG format)HTC MyTouch 4G (DNG format)HTC UltraPixel (DNG format)
Olympus XZ-1Olympus XZ-2Olympus XZ-10OmniVision 4688OmniVision 13860OmniVision OV5647 (RaspberryPi)OmniVision OV5648OmniVision OV8850OnePlus One A0001 (DNGformat)OnePlus 3 (DNG format)OnePlus 3T (DNG format)OnePlus 5 A5000Panasonic CM1Panasonic CM10Panasonic FX150Panasonic FZ18Panasonic FZ28Panasonic FZ30Panasonic FZ35Panasonic FZ38Panasonic FZ4Panasonic FZ40Panasonic FZ42
Sony RX10 IV (DSC-RX10M4)Sony RX100 (DSC-RX100)Sony RX100 II(DSC-RX100M2)Sony RX100 III(DSC-RX100M3)Sony RX100 IV(DSC-RX100M4)Sony RX100 V(DSC-RX100M5)Sony RX100 VI(DSC-RX100M6)Sony QX1 (ILCE-QX1)Sony V3 (DSC-V3)Sony XCD-SX910CRSony Xperia L (DNG Format)STV680 VGAXiaomi MI3 (DNG Format)Xiaomi RedMi Note3 Pro(DNG Format)Xiaoyi YDXJ 2 (DNG Format)Xiro Xplorer VYi Xiaoyi M1 (DNG Format)Yuneec CGO3 (DNG format)Yuneec CGO3P (DNG format)Yuneec CGO4
Here is a list of 281 cameras which are supported by MetaRaw Converter but not by Adobe Camera Raw:
AgfaPhoto DC-833mAlcatel 5035DAlcatel 5235DApple QuickTake 100Apple QuickTake 150Apple QuickTake 200AVT F-080CAVT F-145CAVT F-201CAVT F-510CAVT F-810CBaumer TXG14Canon EOS C500Canon EOS D2000CCanon Ixus 160 (CHDK hack)Canon Ixus 900 Ti (CHDK hack)Canon PowerShot A410 (CHDK hack)Canon PowerShot A460 (CHDK hack)Canon PowerShot A470 (CHDK hack)Canon PowerShot A530 (CHDK hack)Canon PowerShot A540 (CHDK hack)Canon PowerShot A550 (CHDK hack)Canon PowerShot A570 (CHDK hack)Canon PowerShot A590 (CHDK hack)Canon PowerShot A610 (CHDK hack)Canon PowerShot A620 (CHDK hack)Canon PowerShot A630 (CHDK hack)Canon PowerShot A640 (CHDK hack)Canon PowerShot A650 (CHDK hack)Canon PowerShot A710 IS (CHDK hack)Canon PowerShot A720 IS (CHDK hack)Canon PowerShot A3200 IS (CHDK hack)Canon PowerShot A3300 IS (CHDK hack)Canon PowerShot G7 (CHDK hack)Canon PowerShot S2 IS (CHDK hack)Canon PowerShot S3 IS (CHDK hack)Canon PowerShot S5 IS (CHDK hack)Canon PowerShot SD300 (CHDK hack)Canon PowerShot SD450 (CHDK hack)
Hasselblad CF-31Hasselblad CFHHasselblad CFV-2Hasselblad CFV-50Hasselblad H3D-31Hasselblad H3D-50Hasselblad H3DII-50MSHasselblad H4D-31Hasselblad H4D-50Hasselblad H5D-50cMSHasselblad H5D-200cMSHasselblad LussoHasselblad StellarHasselblad V96CIkonoskop A-Cam dII PanchromaticIkonoskop A-Cam dIIImacon Ixpress 16-megapixelImacon Ixpress 22-megapixelImacon Ixpress 39-megapixelISG 2020x1520Kinefinity KineMINIKinefinity KineRAW MiniKinefinity KineRAW S35Kodak C330Kodak C603Kodak DC20Kodak DC25Kodak DC40Kodak DC50Kodak DC120Kodak DCS200Kodak DCS315CKodak DCS330CKodak DCS420Kodak DCS460Kodak DCS460AKodak DCS520CKodak DCS560CKodak DCS620C
Nikon E2100 (DIAG RAW hack)Nikon E2500 (DIAG RAW hack)Nikon E3200 (DIAG RAW hack)Nikon E3700 (DIAG RAW hack)Nikon E4300 (DIAG RAW hack)Nikon E4500 (DIAG RAW hack)Nikon E5000Nikon E5400Nikon E5700Nikon E8400Nikon E8700Nikon E8800Nokia 1200x1600Nokia N9Nokia N95Nokia X2Olympus C3030ZOlympus C70ZOlympus C7000ZOlympus C740UZOlympus C770UZOlympus X200Olympus D560ZOlympus C350ZOlympus SH-3OmniVision 4688OmniVision 13860OmniVision OV5647 (Raspberry Pi)OmniVision OV5648OmniVision OV8850Panasonic FZ4Panasonic FZ42Panasonic FZ7Panasonic FZ70Panasonic FZ72Panasonic FZ8Panasonic FZ80Panasonic FZ82Panasonic FZ1000 X
MetaRaw Manual 12
Canon PowerShot SD750 (CHDK hack)Canon PowerShot SD950 (CHDK hack)Canon PowerShot SX1 IS (CHDK hack)Canon PowerShot SX10 IS (CHDK hack)Canon PowerShot SX20 IS (CHDK hack)Canon PowerShot SX30 IS (CHDK hack)Canon PowerShot SX50 HS (CHDK hack)Canon PowerShot SX100 IS (CHDK hack)Canon PowerShot SX110 IS (CHDK hack)Canon PowerShot SX120 IS (CHDK hack)Canon PowerShot SX220 HS (CHDK hack)Canon PowerShot SX230 HS (CHDK hack)Casio EX-S20Casio EX-S100Casio EX-Z4Casio EX-Z50Casio EX-Z500Casio EX-Z55Casio EX-Z60Casio EX-Z75Casio EX-Z750Casio EX-Z8Casio EX-Z850Casio EX-Z1050Casio EX-Z1080Casio EX-ZR100Casio Exlim Pro 505Casio Exlim Pro 600Casio Exlim Pro 700Casio QV-2000UXCasio QV-3000EXCasio QV-3500EXCasio QV-4000Casio QV-5700Casio QV-R41Casio QV-R51Casio QV-R61Creative PC-CAM 600Digital Bolex D16Digital Bolex D16MDJI 4384x3288Foculus 531CFujifilm E505Fujifilm E550Fujifilm F710Fujifilm F800Fujifilm F810Fujifilm HS11Fujifilm S100FSFujifilm S5100Fujifilm S5500Fujifilm S5600Fujifilm S9500Fujifilm S9600Fujifilm S200EXRGione E7GITUP GIT2
Kodak DCS620XKodak DCS660CKodak DCS660MKodak DCS Pro SLR/cKodak EOS DCS1Kodak EOS DCS 3BKodak KAI-0340Kodak NC2000FKodak ProBackKodak PB645CKodak PB645HKodak PB645MKodak S-1Kodak Z1015Konica KD-400ZKonica KD-510ZLeaf AFi 5Leaf AFi 6Leaf AFi 7Leaf AFi-II 10Leaf AFi-II 10RLeaf AFi-II 12Leaf Aptus-II 10Leaf Aptus-II 12RLeaf Aptus 65SLeaf CantareLeaf Cantare XYLeaf CatchLightLeaf CMostLeaf DCB2Leaf Valeo 17wiLeaf Valeo 22wiLeaf VolareLenovo A820Leica V-LUX2Leica X1Logitech Fotoman PixturaMatrix 4608x3288Meizy MX4Micron 2010Minolta RD175Minolta DiMAGE G400Minolta DiMAGE G500Minolta DiMAGE G530Minolta DiMAGE G600Minolta DiMAGE Z2Motorola PIXLNikon CoolscanNikon Coolpix S6 (DIAG RAWhack)Nikon E700 (DIAG RAW hack)Nikon E800 (DIAG RAW hack)Nikon E880 (DIAG RAW hack)Nikon E900 (DIAG RAW hack)Nikon E950 (DIAG RAW hack)Nikon E990 (DIAG RAW hack)Nikon E995 (DIAG RAW hack)
Panasonic G70Pentax GRPentax Optio SPentax Optio S4Pentax Optio 33WRPentax Optio 750ZPhase One AchromaticPhase One Achromatic+Phase One LightPhasePhase One H 10Phase One IQ180 IRPhase One P 65Photron BC2-HDPixelink A782Polaroid x530Ricoh GXR, GR A12 50mm F2.5MACRORicoh GXR MOUNT A12Ricoh GXR MOUNT A16 24-85mmF3.5-5Rollei d530flexRoverShot 3320afSamsung Galaxy S3Samsung Galaxy NexusSamsung NX miniSamsung NX300MSamsung NX1100Samsung S85 (hacked)Samsung S850 (hacked)Samsung WB550Sarnoff 4096x5440Seitz Roundshot D3Seitz Roundshot D2XSeitz Roundshot D2XsSinar 3072x2048Sinar 4080x4080Sinar 4080x5440Sinar eMotion 22Sinar eMotion 54Sinar eSpirit 65Sinar eMotion 75Sinar eVolution 75Sinar Sinarback 54SMaL Ultra-Pocket 3SMaL Ultra-Pocket 4SMaL Ultra-Pocket 5Sony IMX135-mipi 13mpSony IMX135-QCOMSony IMX072-mipiSony IMX214Sony IMX219Sony IMX230Sony IMX298-mipi 16mpSony IMX219-mipi 8mpSony XCD-SX910CRSTV680 VGA
MetaRaw Manual 13
1.4 Installation
Uninstallation
If you want to install the full version and already installed the trial version, you normally do not need to uninstall the trialversion. The trial version will be overwritten when installing the full version - provided that you install the full version to thesame location as the trial version and under Windows choose the same application(s) in Plugin Installer. If you are notsure, you can nevertheless uninstall the trial version before installing the full version.
To uninstall MetaRaw under Windows go to Start > Control Panel > Uninstall a program (Windows 7) or right click theStart button, select Control Panel and click on "Programs and Features" (Windows 8 & 10). On the appearing dialogdouble click the appropriate item to uninstall it. Under MacOS X you have to manually delete the "MetaRaw.plugin" file orthe MetaRaw folder from the Plug-Ins folder of Photoshop or Photoshop Elements. Alternatively you can use the Uninstallicon of the .dmg file to remove all copies of MetaRaw.
Installation under MacOS X
Double click the downloaded .dmg file and then drag and drop MetaRaw.plugin file or the MetaRaw folder onto the one ofthe icons on the right in the same window. For example if you are using Photoshop CS6, please drag and drop theMetaRaw onto the "Photoshop CS6" icon. If Photoshop should be running, quit and start it again in order to use MetaRaw.Alternatively double click the Install icon to install MetaRaw into all available Photoshop and Photoshop Elementsversions.
Installation under Windows
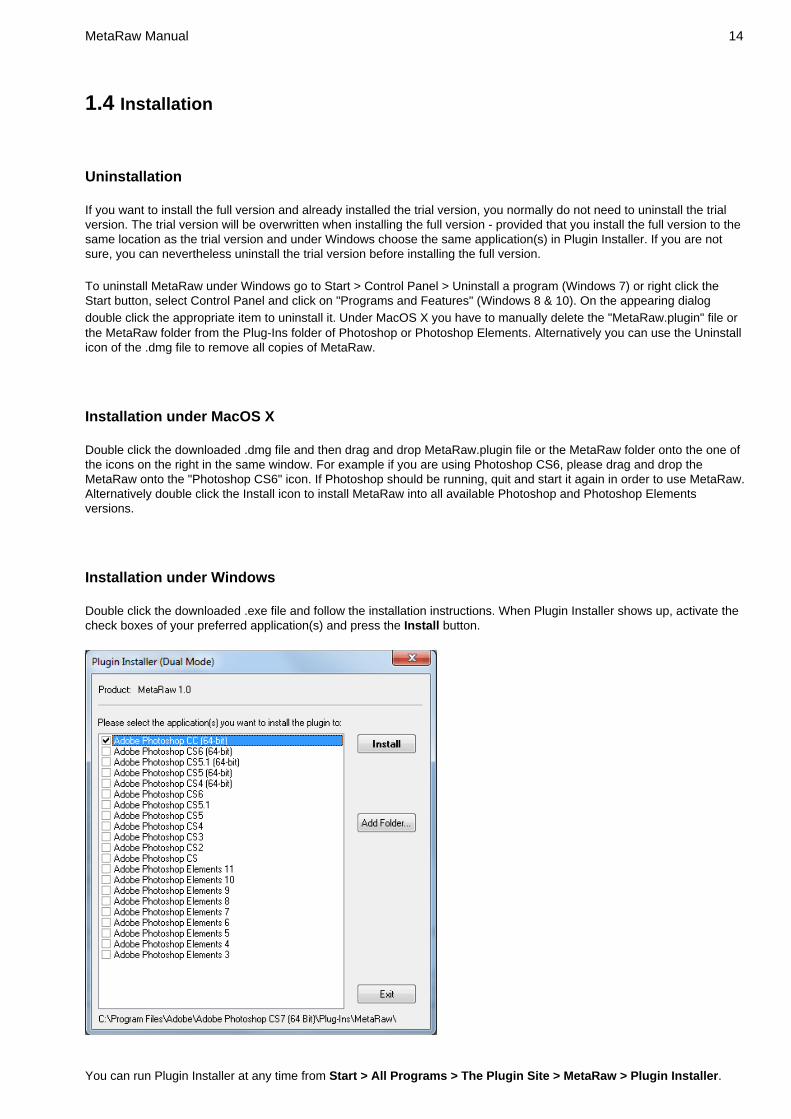
Double click the downloaded .exe file and follow the installation instructions. When Plugin Installer shows up, activate thecheck boxes of your preferred application(s) and press the Install button.
You can run Plugin Installer at any time from Start > All Programs > The Plugin Site > MetaRaw > Plugin Installer.
MetaRaw Manual 14
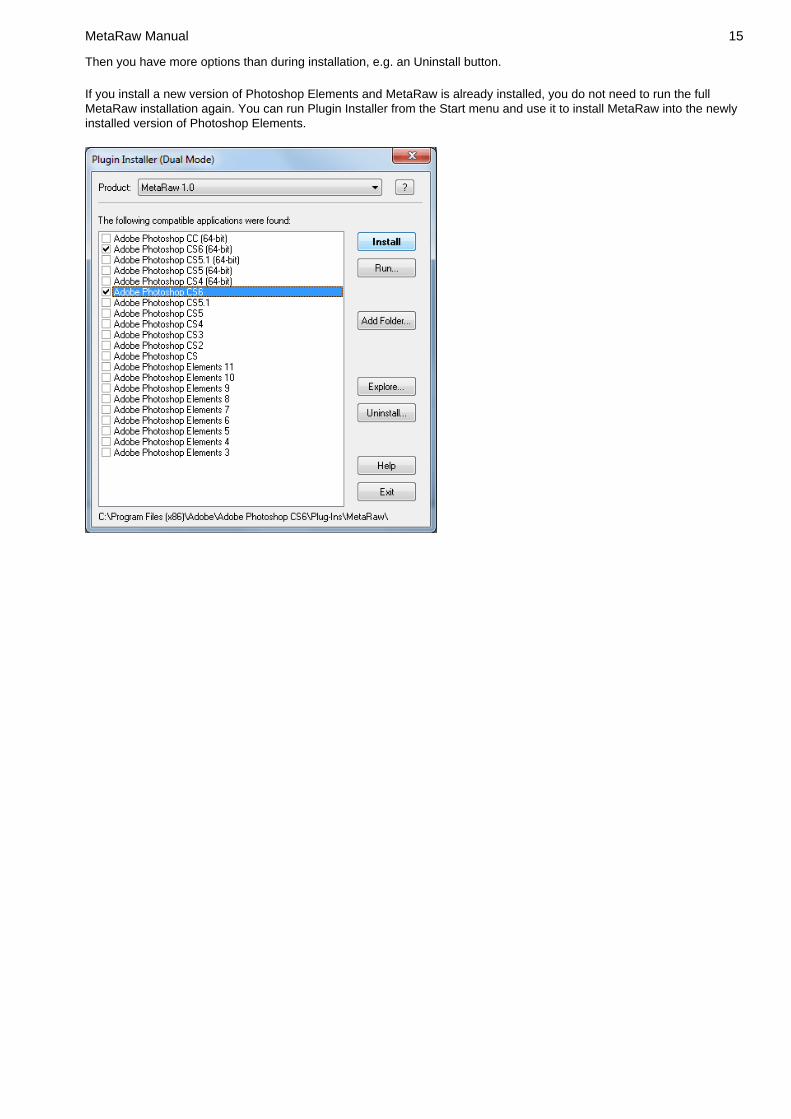
Then you have more options than during installation, e.g. an Uninstall button.
If you install a new version of Photoshop Elements and MetaRaw is already installed, you do not need to run the fullMetaRaw installation again. You can run Plugin Installer from the Start menu and use it to install MetaRaw into the newlyinstalled version of Photoshop Elements.
MetaRaw Manual 15
1.5 Step by Step
1.5.1 Applying Adobe Camera Raw as a Filter
1. Open an image in Photoshop or Photoshop Elements.
2. Choose File > Automate / Automation Tools > Camera Raw Filter from the menu
3. Adjust the settings on the Camera Raw dialog.
4. Click the OK button on the Camera Raw dialog to apply the effect.
1.5.2 Opening Raw Files with MetaRaw
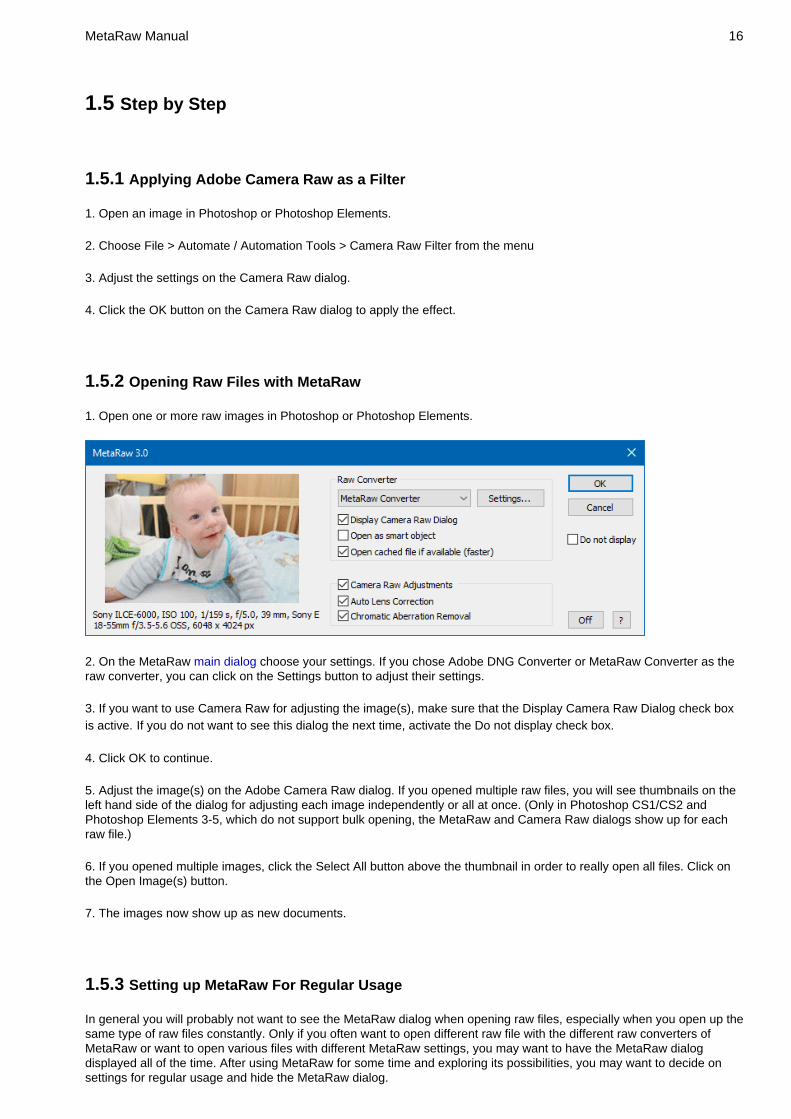
1. Open one or more raw images in Photoshop or Photoshop Elements.
2. On the MetaRaw main dialog choose your settings. If you chose Adobe DNG Converter or MetaRaw Converter as theraw converter, you can click on the Settings button to adjust their settings.
3. If you want to use Camera Raw for adjusting the image(s), make sure that the Display Camera Raw Dialog check boxis active. If you do not want to see this dialog the next time, activate the Do not display check box.
4. Click OK to continue.
5. Adjust the image(s) on the Adobe Camera Raw dialog. If you opened multiple raw files, you will see thumbnails on theleft hand side of the dialog for adjusting each image independently or all at once. (Only in Photoshop CS1/CS2 andPhotoshop Elements 3-5, which do not support bulk opening, the MetaRaw and Camera Raw dialogs show up for eachraw file.)
6. If you opened multiple images, click the Select All button above the thumbnail in order to really open all files. Click onthe Open Image(s) button.
7. The images now show up as new documents.
1.5.3 Setting up MetaRaw For Regular Usage
In general you will probably not want to see the MetaRaw dialog when opening raw files, especially when you open up thesame type of raw files constantly. Only if you often want to open different raw file with the different raw converters ofMetaRaw or want to open various files with different MetaRaw settings, you may want to have the MetaRaw dialogdisplayed all of the time. After using MetaRaw for some time and exploring its possibilities, you may want to decide onsettings for regular usage and hide the MetaRaw dialog.
MetaRaw Manual 16

1. To setup MetaRaw for regular usage either open a raw file or go to Help > About Plugins > Camera Raw on the menu.The MetaRaw main dialog shows up now.
2. Choose your options and also click on the Settings button to adjust the settings for the Adobe DNG Converter orMetaRaw Converter.
3. Activate the Do not display check box on the main dialog and click on the OK button. Now the MetaRaw dialog will notshow up when opening raw files. Only the MetaRaw progress window will appear in the top left corner of the Photoshopand Photoshop Elements window.
4. In case you need to change the MetaRaw settings again either go to Help > About Plugins > Camera Raw or hold downthe Alt key when opening a raw file. If you want the MetaRaw dialog to display again, deactivate the Do not display checkbox once more.
MetaRaw Manual 17
2 Functionality
The MetaRaw product includes two plugins. A format plugin, also called MetaRaw, for extending the raw file support andan automation plugin, called Camera Raw Filter, for using Adobe Camera Raw as a filter. The following section refers tothe MetaRaw format plugin.
2.1 General Usage
2.1.1 Opening Raw Files with MetaRaw
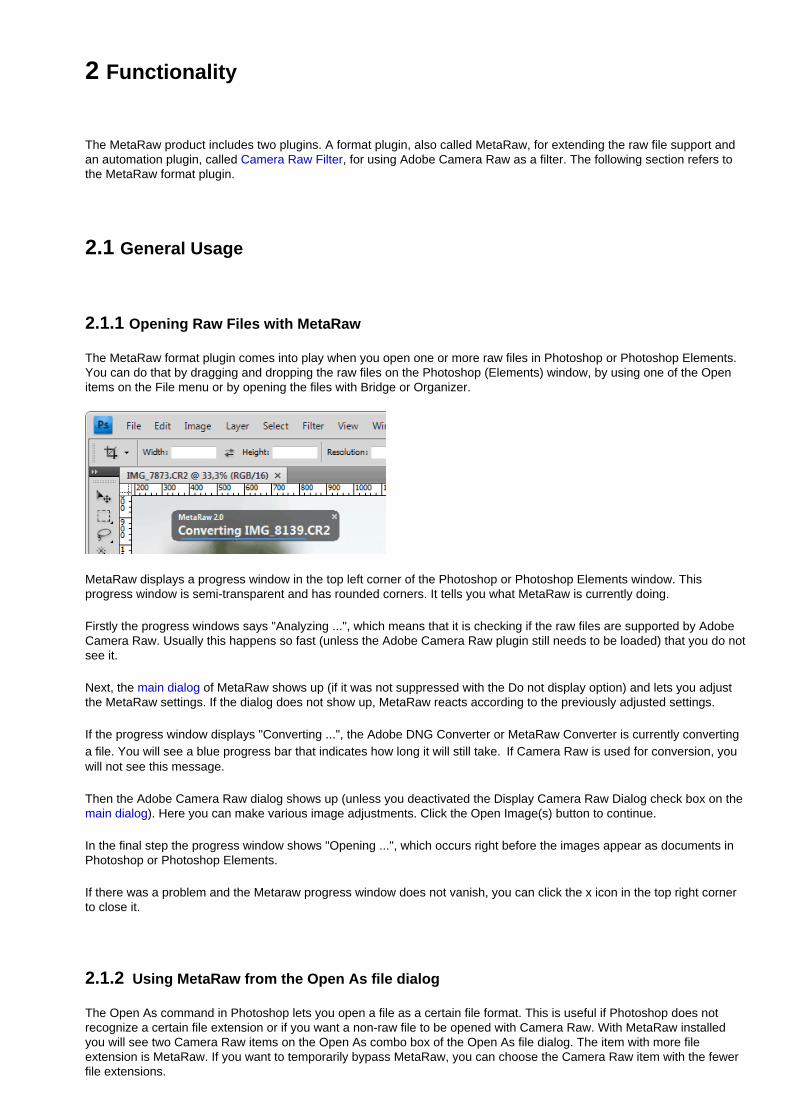
The MetaRaw format plugin comes into play when you open one or more raw files in Photoshop or Photoshop Elements.You can do that by dragging and dropping the raw files on the Photoshop (Elements) window, by using one of the Openitems on the File menu or by opening the files with Bridge or Organizer.
MetaRaw displays a progress window in the top left corner of the Photoshop or Photoshop Elements window. Thisprogress window is semi-transparent and has rounded corners. It tells you what MetaRaw is currently doing.
Firstly the progress windows says "Analyzing ...", which means that it is checking if the raw files are supported by AdobeCamera Raw. Usually this happens so fast (unless the Adobe Camera Raw plugin still needs to be loaded) that you do notsee it.
Next, the main dialog of MetaRaw shows up (if it was not suppressed with the Do not display option) and lets you adjustthe MetaRaw settings. If the dialog does not show up, MetaRaw reacts according to the previously adjusted settings.
If the progress window displays "Converting ...", the Adobe DNG Converter or MetaRaw Converter is currently convertinga file. You will see a blue progress bar that indicates how long it will still take. If Camera Raw is used for conversion, youwill not see this message.
Then the Adobe Camera Raw dialog shows up (unless you deactivated the Display Camera Raw Dialog check box on themain dialog). Here you can make various image adjustments. Click the Open Image(s) button to continue.
In the final step the progress window shows "Opening ...", which occurs right before the images appear as documents inPhotoshop or Photoshop Elements.
If there was a problem and the Metaraw progress window does not vanish, you can click the x icon in the top right cornerto close it.
2.1.2 Using MetaRaw from the Open As file dialog
The Open As command in Photoshop lets you open a file as a certain file format. This is useful if Photoshop does notrecognize a certain file extension or if you want a non-raw file to be opened with Camera Raw. With MetaRaw installedyou will see two Camera Raw items on the Open As combo box of the Open As file dialog. The item with more fileextension is MetaRaw. If you want to temporarily bypass MetaRaw, you can choose the Camera Raw item with the fewerfile extensions.
Please note: Photoshop would normally run Adobe Camera Raw instead of MetaRaw, so MetaRaw internally uses thename "Camera Raw" to avoid this. That is why you do not see a MetaRaw item but two Camera Raw items on the OpenAs file dialog and the Help > About Plugins sub menu. In Photoshop CS3 and higher this could be avoided by deactivatingthe Prefer Adobe Camera Raw for Supported Raw Files check box under Edit > Preferences > File Handling. It wouldprobably also be possible for MetaRaw to deactivate a similar hidden setting in Photoshop Elements 6 and higher. ButMetaRaw also supports Photoshop CS1/CS2 and Photoshop Elements 3-5, which do not have such a setting, which iswhy this strategy was chosen.
2.1.3 Batch Processing with MetaRaw
Batch processing raw files with MetaRaw installed does not differ from your normal workflow with Adobe Camera Raw. InPhotoshop you have to record an action that opens a raw file, applies some effects, saves the raw file and closes it. Onthe File > Automate > Batch dialog you have to choose this action and activate the two Override check boxes. InPhotoshop Elements you choose File > Process Multiple File from the menu and activate the Convert File to check box.After adjusting the other batch settings, you can click OK.
During batch processing the MetaRaw dialog will show up for each file (except if you use the batch processing feature ofActionsXXL 1.05 (or higher)) unless you previously activated the Do not display check box. So if the MetaRaw dialogshows up, choose your settings, activate the Do not display check box and click OK. Now it will not show up again for theremaining files.
If you want MetaRaw to show its dialog again by default, go to Help > About Plug-Ins > Camera Raw (under Windows) orAdobe Photoshop (Elements) > About Plug-Ins > Camera Raw (under MacOS), deactivate the Do not display check boxand click OK. If there was a problem and the Metaraw progress window does not vanish, you can click the x icon in thetop right corner to close it.
Alternatively you can suppress the MetaRaw dialog during batch processing in Photoshop, if you record an open step inyour action and activate the "Override Action 'Open"commands" check box on the Batch dialog.
MetaRaw Manual 19

2.2 Main Dialog
After initiating the opening of one or more raw files, MetaRaw's main dialog shows up (unless you activated the Do notdisplay check box described below). It lets you define how MetaRaw works. Clicking the OK button continues openingraw files whereas the Cancel button aborts the opening process. The ? button displays this help page.
2.2.1 Thumbnail Preview
On the left side of the MetaRaw dialog you can see a preview of the opened raw file. If you opened multiple raw files, youwill only see the first one. For a few raw file types no preview will be shown, because they contain no embedded JPEGimage.
The preview shows the embedded JPEG image of the raw file, so you see the photo as it was converted by the camera.The raw conversion result of MetaRaw may look very similar or sometimes even different. Below the thumbnail you cansee some EXIF data of the raw file, e.g. camera name, ISO value, exposure time, focal range and pixel dimensions.
2.2.2 Raw Converter
MetaRaw supports three raw file converters: Adobe Camera Raw, Adobe DNG Converter and MetaRaw's built-inconverter. You can choose one of these four options from the combo box. The chosen converter will be used for the rawconversion process provided that it recognizes the raw file. Otherwise one of the other options will be automatically used.
In addition to the three raw converters there is also a JPEG Extractor option, which extracts the JPEG preview data that isembedded in raw files instead of converting the raw data. The JPEG image that will be opened was produced by thecamera itself. Extracting the JPEG data is much faster than raw conversion but you will get an 8-bit image in jpeg quality.Many cameras store full resolution JPEGs in raw files, but some embed only a sized-down image. So depending on theraw file you may not get a full size image. This feature can also be used to compare the raw conversion of the camera tothe raw conversion of the converters used by MetaRaw.
It is best to keep the combo box set to "Adobe Camera Raw". If Adobe Camera Raw is selected and it does not recognizea raw file, MetaRaw tries converting it with Adobe DNG Converter. If Adobe DNG Converter also fails, the MetaRawConverter is used. If MetaRaw Converter should fail, the JPEG Extractor is triggered. Setting this combo box to "AdobeDNG Converter" only makes sense if you want to produce DNG files while opening raw files. In this case you have to clickthe Settings button and activate the Keep converted files option.
If you want to make use of the special abilities of the MetaRaw Converter, e.g. larger image size or higher qualitydemosaicing, select "MetaRaw Converter" from the combo box. Otherwise it will only be used if Adobe Camera Raw andDNG Converter do not know the raw file type.
Settings
The Settings button displays the Settings dialog for choosing the output parameters for the Adobe DNG Converter as wellas the MetaRaw Converter.
MetaRaw Manual 20
Display Camera Raw dialog
This check box is activated by default and makes sure that the dialog of Adobe Camera Raw shows up regardless whichraw converter you have chosen. If you want to open raw files without displaying this dialog, deactivate the check box. Ifyou prefer to edit your images in Photoshop and Photoshop Elements rather than with Adobe Camera Raw, this savesyou one or more clicks.
Open as smart object
This check box has the same functionality as the Open as Smart Object menu item of the Photoshop's File menu. It opensthe raw file as a smart object for applying non-destructive image adjustments, the so-called smart filtering.
Photoshop Elements normally does not support smart filtering, but our other ElementsXXL product enables it. Pleasenote: Photoshop Elements does not support smart objects for images with 16-bit per channel. So please choose 8-bit perchannel in Adobe Camera Raw to open the raw file as a smart object, otherwise you will be asked to convert it to 8-bit perchannel or to a normal layer.
Open cached file if available
This check box is only enabled if you choose Adobe DNG Converter or MetaRaw Converter from the top combo box, so ithas no meaning for Adobe Camera Raw and JPEG Extractor. Even if you mainly use Adobe Camera Raw you shouldkeep it activated, in case the other raw converters are automatically used for opening a raw file that is not known byAdobe Camera Raw.
If activated, MetaRaw searches for a converted version of the raw file and opens it instead of converting the raw file again,which saves some time. It looks for a dng or tiff file with the same file name in the following way:
1. A .dng file in the folder of the raw file2. A .dng file in dng sub folders of the raw file folder3. A .tiff file in the folder of the raw file4. A .tif file in the folder of the raw file5. A .tiff file in tiff sub folders of the raw file folder6. A .dng file in tiff sub folders of the raw file folder7. A .dng file in the MetaRaw cache folder8. A .tiff file in the MetaRaw cache folder
The likelihood of finding a converted file is higher if you have the the Keep converted files or Delete on Exit optionactivated on the Settings dialog.
2.2.3 Camera Raw Adjustments
These features are only available if you use MetaRaw in Photoshop Elements 10 and higher or Photoshop CS5 andhigher. Older versions of Camera Raw in Photoshop 7 to CS4 and Photoshop Elements 3 to 9 do not support themanyway.
MetaRaw is able to activate two image correction features of Camera Raw, which are not accessible from the AdobeCamera Raw dialog in Photoshop Elements. This way you can benefit from an automatic lens correction and chromaticaberration removal when opening raw files. In Photoshop CS5 (and higher) you can access them from the Adobe CameraRaw dialog itself, but having them automatically activated by MetaRaw saves some additional clicks.
Automatic lens correction means that if Adobe Camera Raw has a profile for the lens that was used to take the photo, itapplies the correction described in the corresponding lens profile. Landscape photos may look better, but portrait shotsare sometimes negatively affected as they may look better with the lens distortion. Please note: This feature does notwork if MetaRaw Converter is used for the conversion. It will be supported in a future update.
Chromatic aberration removal tries to remove tiny color shifts along object edges in a photo. Chromatic aberration ismore visible with lower quality lenses and caused by reflecting different wave lengths of the light differently, especially inthe outer areas of the lens.
First of all, you have to activate the Camera Raw Adjustments check box. Then you can activate or deactivate the othertwo check boxes (Automatic lens correction and Chromatic aberration removal) as needed.
MetaRaw Manual 21
Please note: If you have the Camera Raw Adjustments check box activated and the other two check boxes aredeactivated, the automatic lens correction and chromatic aberration removal features will be deactivated in AdobeCamera Raw. This only concerns the case where these two features were previously activated or deactivated whenopening the same raw file with MetaRaw or in Photoshop. So if you want to open the raw file with the same automatic lenscorrection and chromatic aberration removal settings as last time, deactivate the Camera Raw Adjustments check box.
2.2.4 Do Not Display
By default the main dialog of MetaRaw is displayed whenever you try to open one or more raw files. Once you have foundthe settings that work best for you, you usually do not need to have this dialog displayed all of the time. You can avoid itby activating the Do not display check box.
In case you want to use other settings for MetaRaw, you can make it display again by holding down the Alt key whenopening a raw file or by choosing the following menu command: Help > About Plug-Ins > Camera Raw (under Windows)or Adobe Photoshop (Elements) > About Plug-Ins > Camera Raw (under MacOS). You will see two Camera Raw items onthe About Plug-Ins menu. Try both until you see the MetaRaw dialog.
However, there are two exceptions when MetaRaw does not display its dialog:
1) When a raw file is opened from an action in Photoshop.2) While ActionsXXL is batch processing. ActionsXXL 1.05 and higher is required to make it work.
Unfortunately there is no way for MetaRaw to check if Photoshop or Photoshop Elements are performing batchprocessing. So in order to suppress the MetaRaw dialog during batch processing in Photoshop, you have to record anopen step in your action and activate the "Override Action 'Open"commands" check box on the Batch dialog. Otherwiseyou have to use the "Do no display" check box on the MetaRaw dialog.
2.2.5 Off
Under special circumstances it may be necessary to deactivate MetaRaw completely. Luckily, you do not need to uninstallMetaRaw to achieve it. If you click on the Off button on the MetaRaw dialog, you can switch off MetaRaw. MetaRaw willthen be bypassed when a camera raw file is opened and lets Adobe Camera Raw do the work.
To activate MetaRaw again simple go to the Help > About Plug-Ins > Camera Raw (under Windows) or Adobe Photoshop(Elements) > About Plug-Ins > Camera Raw (under MacOS) menu item. Once the MetaRaw dialog shows up, you can beassured that it is active again.
MetaRaw Manual 22
2.3 Settings
The Settings window lets you adjust the parameters of the Adobe DNG Converter and MetaRaw's own raw converter.
2.3.1 General Usage
The Settings dialog is similar to the Preferences dialog of Photoshop and Photoshop Elements. The list box on the rightworks similar to a tab sheet. Click its entries to display different control groups. The Prev and Next buttons switchbetween the items in the list box. The Reset button restores the default settings. The OK button leaves the dialog andstores the changed settings. The Cancel button also exits the dialog but restores the old settings. The ? button displaysthis help page.
2.3.2 Adobe DNG Converter
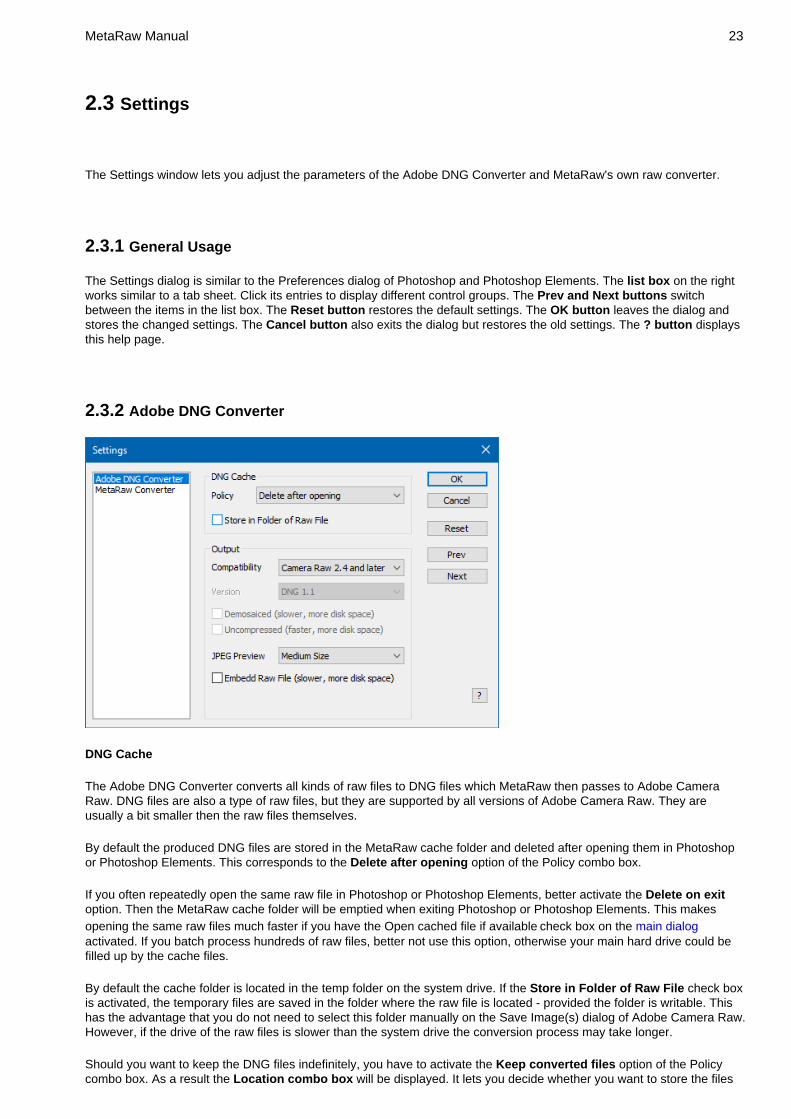
DNG Cache
The Adobe DNG Converter converts all kinds of raw files to DNG files which MetaRaw then passes to Adobe CameraRaw. DNG files are also a type of raw files, but they are supported by all versions of Adobe Camera Raw. They areusually a bit smaller then the raw files themselves.
By default the produced DNG files are stored in the MetaRaw cache folder and deleted after opening them in Photoshopor Photoshop Elements. This corresponds to the Delete after opening option of the Policy combo box.
If you often repeatedly open the same raw file in Photoshop or Photoshop Elements, better activate the Delete on exitoption. Then the MetaRaw cache folder will be emptied when exiting Photoshop or Photoshop Elements. This makesopening the same raw files much faster if you have the Open cached file if available check box on the main dialogactivated. If you batch process hundreds of raw files, better not use this option, otherwise your main hard drive could befilled up by the cache files.
By default the cache folder is located in the temp folder on the system drive. If the Store in Folder of Raw File check boxis activated, the temporary files are saved in the folder where the raw file is located - provided the folder is writable. Thishas the advantage that you do not need to select this folder manually on the Save Image(s) dialog of Adobe Camera Raw.However, if the drive of the raw files is slower than the system drive the conversion process may take longer.
Should you want to keep the DNG files indefinitely, you have to activate the Keep converted files option of the Policycombo box. As a result the Location combo box will be displayed. It lets you decide whether you want to store the files
MetaRaw Manual 23
in the same folder as the raw file or in a sub folder called "dng".
Output
The Compatibility combo box defines which version of Adobe Camera Raw is able to open the file. By default it is set tothe most compatible setting of Camera Raw 2.4 and higher. This setting produces the most compatible and smallest DNGfiles and usually ensures the fastest conversion process. When using Adobe DNG Converter for converting raw files forAdobe Camera Raw, we recommend keeping this setting. If you choose the Custom option from the Compatibility combobox, three new settings can be manually adjusted for producing other types of DNG files.
The DNG format has been improved over time, so there are a few specifications available, which can be chosen with theVersion combo box. By default it is set to the most compatible setting of DNG 1.1.
The Demosaiced check box makes Adobe DNG Converter convert the raw data. As a result image data and not raw datawill be stored in the DNG file and the file size increases by a factor of 3-4 with compression and 6 without compression.This also means that the conversion will take longer, but the image will be opened a bit faster in Photoshop. Unless youwant to keep such a DNG file (a so-called linear DNG file) for a special purpose, we advice against activating this setting.
The Uncompressed check box makes Adobe DNG Converter produce uncompressed DNG files, which usually consumeup to two times more disk space. If you do not have the Demosaiced check box deactivated, an activated Uncompressedcheck box does normally not speed up the conversion process. If you have Demosaiced activated, the conversion isfaster with the Uncompressed check box activated.
The JPEG Preview combo box determines if a preview image in JPEG format is embedded in the DNG file and what sizeit has. The None option will make the DNG files only slightly smaller, but prevents a faster image preview. The Large Sizeoption embeds a full size JPEG into the DNG files, which will make it much larger and slow down the conversion process.We recommend to keep this setting at Medium Size.
The Embed Raw File check box embeds the original raw file in the DNG file. This makes the DNG at least twice as largeas normal. This option is only recommended if you want to delete the original raw file and only keep the DNG file. Shouldyou ever need the original raw file again, you can extract it again with Adobe DNG Converter. We do not recommend touse this option.
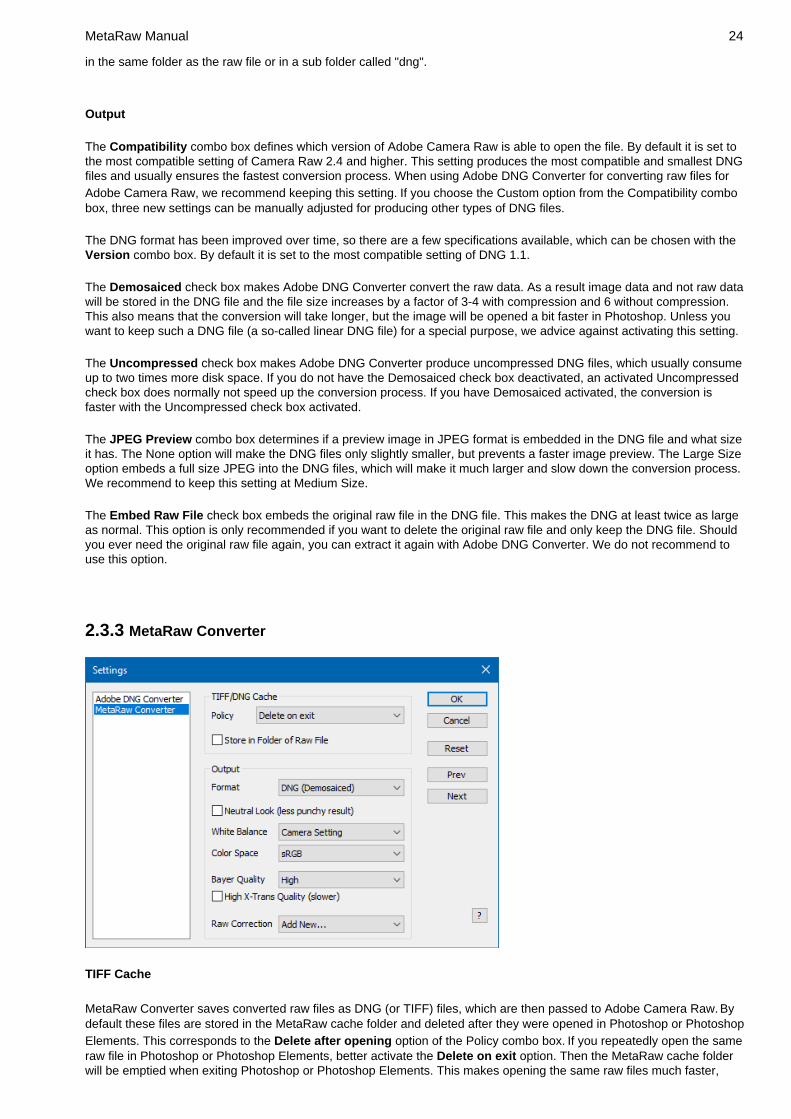
2.3.3 MetaRaw Converter
TIFF Cache
MetaRaw Converter saves converted raw files as DNG (or TIFF) files, which are then passed to Adobe Camera Raw. Bydefault these files are stored in the MetaRaw cache folder and deleted after they were opened in Photoshop or PhotoshopElements. This corresponds to the Delete after opening option of the Policy combo box. If you repeatedly open the sameraw file in Photoshop or Photoshop Elements, better activate the Delete on exit option. Then the MetaRaw cache folderwill be emptied when exiting Photoshop or Photoshop Elements. This makes opening the same raw files much faster,
MetaRaw Manual 24
provided that you have the Open cached file if available check box on the main dialog activated.
By default the cache folder is located in the temp folder on the system drive. If the Store in Folder of Raw File check boxis activated, the temporary files are saved in the folder where the raw file is located - provided the folder is writable. Thishas the advantage that you do not need to select this folder manually on the Save Image(s) dialog of Adobe Camera Raw.However, if the drive of the raw files is slower than the system drive the conversion process may take longer.
If you want to keep the TIFF/DNG files indefinitely, you have to activate the Keep converted files option of the Policycombo box. As a result the Location combo box will be displayed. It lets you decide if you want to store the files in thesame folder as the raw file or in a sub folder called "tiff".
Output
MetaRaw Converter saves raw files as demosaicked DNG files (or TIFF files) before they are handed over to AdobeCamera Raw. Whereas raw files (and mosaiced DNG files) store the unprocessed data of the camera sensor,demosaiced DNG files (or TIFF files) contain the final processed image and are thus much bigger. A 25 megapixeluncompressed TIFF file is 150 MB large and a 50 megapixel one is 300 MB large. So demosaiced DNG files are usuallysix times larger than raw files (and mosaiced DNG files).
You can use the Format check box to switch between DNG and TIFF format. The default is "DNG (Demosaiced)" andwe recommend to keep this setting, because it offers three advantages:
1) The Lens Correction and Chromatic Aberration Removal options on the MetaRaw main dialog work inPhotoshop Element 10 and higher.2) The lens profile is preselected in Camera Raw and lens correction is automatically activated inPhotoshop CS5 and higher.3 ) The Camera Raw settings are stored in .xmp files and can be used again when opening the raw fileagain.4) When clicking the Done button on the Camera Raw dialog there is no error message anymore.
On the other hand if you set the format to TIFF you can produce a stronger noise reduction effect with the same settingsin Camera Raw, which is the only advantage of using TIFF. In Photoshop CS1/CS2 and Photoshop Elements 3-5MetaRaw Converter only outputs demosaiced DNG files, because Adobe Camera Raw 2 and 3 do not support TIFF files.The Format combo box is disabled in this case.
The MetaRaw Converter tries to produce a similar look like Adobe Camera Raw. If you like to have a less punchy imagein order to adjust the shadows and highlights yourself manually, you can activate the Neutral Look check box. Thisproduces a less bright and contrasty image.
The White Balance combo box defines which white balance operation is applied if any. The Camera Setting optionapplies a color correction that corresponds to the color temperature recorded by the camera. If no color temperature wasstored or is found by MetaRaw, an automatic color correction will be performed. The Automatic option ignores the storedcolor temperature and performs an automatic color correction. In some cases this may produce better colors, but werecommend to use the Camera Setting option nevertheless and adjust the color with Adobe Camera Raw or directly inPhotoshop or Photoshop Elements. The None option does not perform any white balancing and usually producesincorrect or dirty colors. This is only something for color correction experts, who want to want to do this step manually.
The Color Space combo box lets you choose the color space of the image produced by the MetaRaw Converter. Werecommend to set it to the color space that you use for your workflow. In most cases it is sRGB or Adobe RGB.
Please note: The color space of the image is actually determined by the color space setting in Adobe Camera Raw. So ifyou choose sRGB here in MetaRaw and have Adobe Camera Raw set to Adobe RGB, the image opened in Photoshop orPhotoshop Elements will be Adobe RGB. But the net result is that some color values will be lost on the way, even if thereis no visible difference. So make sure that this combo box has the same color space as the corresponding setting inAdobe Camera Raw.
The Bayer Quality combo box lets you choose the quality of the conversion for raw file that were captured with aconventional Bayer sensor. Such a sensor is used in all cameras except those with a X-Trans sensor (some Fujifilmcameras) or a Foveon sensor (only Sigma cameras). This option basically defines the demosaicing algorithm that is used.Here are some comments about the different options:
Very High: Uses AMaZE demosaicing, which produces great details and removes most moire artifacts. It is fivetimes slower than the default High option. If conversion speed is not your concern, we recommend activating it.
•
High: This is the default setting, which used AFD demosaicing. It is extremely fast, but does not reduce moire. Afew details may get a bit too sharp with it. It is quite similar to the demosaicing of Adobe Camera Raw and DNGConverter.
•
MetaRaw Manual 25
High (Moire Removal): It uses LMMSE demosaicing and is a bit slower than the High option. It removes Moireartifacts very effectively, but may add grain to tiny details that are 2-3 pixel large.
•
Good (MetaRaw 1.x): This is an improved version of the AHD demosaicing algorithm of MetaRaw 1. It is a bitslower than the High setting and tends to produce maze artifacts. We do not recommend using it with high ISOraw files, because it smears the noise and does not produce fine grain, which would be easier to remove withnoise reduction. But it is included for backward compatibility with MetaRaw 1.
•
The High X-Trans Quality check box only concerns raw files that were recorded with a Fujifilm X-Trans sensor. If youactivate it there are less colored edges in the converted image, but the conversion time is 2.5 times longer. You usuallyonly see a difference at zoom ratios of 400% or higher if you look really close, so we do not really recommend activatingthis check box.
The Raw Correction combo box provides options for fixing the colors and cropping of raw files of unknown futurecameras. To add a new correction and display the Raw Correction dialog please select the "Add New ..." item of thiscombo box. If you already added corrections for cameras, you will see their names here. To edit (or delete) an existingcorrection, simply select it. All options display the following dialog.
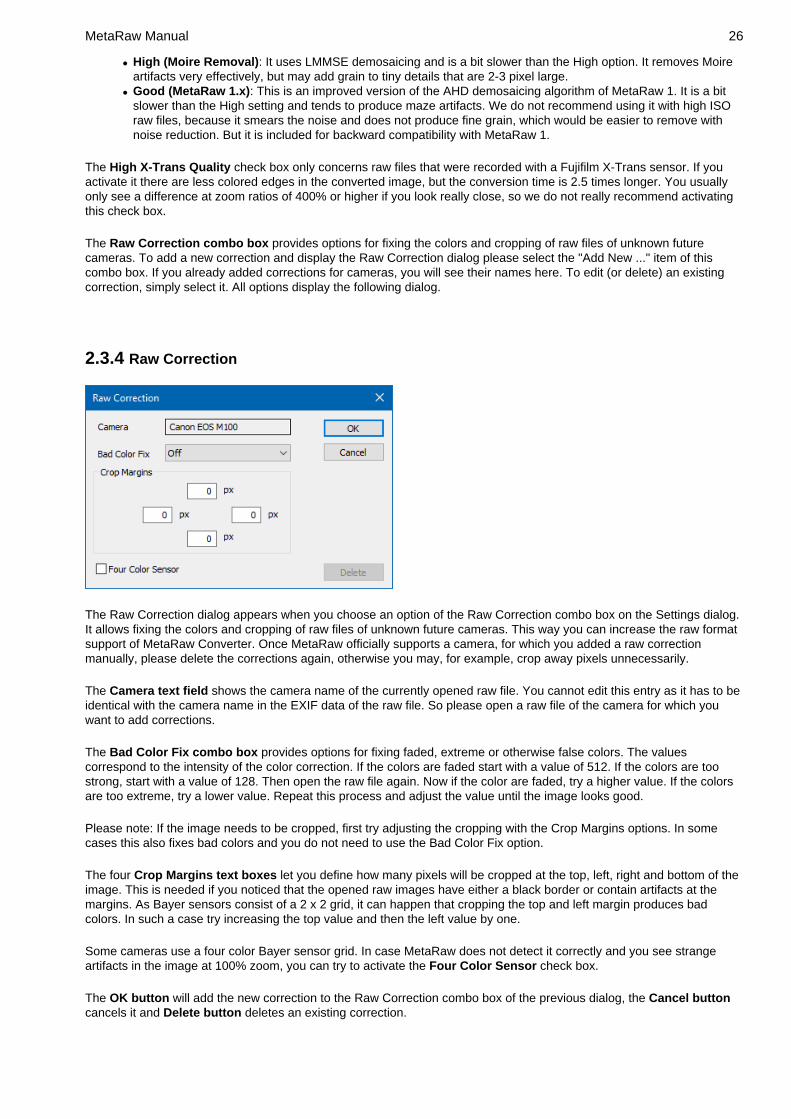
2.3.4 Raw Correction
The Raw Correction dialog appears when you choose an option of the Raw Correction combo box on the Settings dialog.It allows fixing the colors and cropping of raw files of unknown future cameras. This way you can increase the raw formatsupport of MetaRaw Converter. Once MetaRaw officially supports a camera, for which you added a raw correctionmanually, please delete the corrections again, otherwise you may, for example, crop away pixels unnecessarily.
The Camera text field shows the camera name of the currently opened raw file. You cannot edit this entry as it has to beidentical with the camera name in the EXIF data of the raw file. So please open a raw file of the camera for which youwant to add corrections.
The Bad Color Fix combo box provides options for fixing faded, extreme or otherwise false colors. The valuescorrespond to the intensity of the color correction. If the colors are faded start with a value of 512. If the colors are toostrong, start with a value of 128. Then open the raw file again. Now if the color are faded, try a higher value. If the colorsare too extreme, try a lower value. Repeat this process and adjust the value until the image looks good.
Please note: If the image needs to be cropped, first try adjusting the cropping with the Crop Margins options. In somecases this also fixes bad colors and you do not need to use the Bad Color Fix option.
The four Crop Margins text boxes let you define how many pixels will be cropped at the top, left, right and bottom of theimage. This is needed if you noticed that the opened raw images have either a black border or contain artifacts at themargins. As Bayer sensors consist of a 2 x 2 grid, it can happen that cropping the top and left margin produces badcolors. In such a case try increasing the top value and then the left value by one.
Some cameras use a four color Bayer sensor grid. In case MetaRaw does not detect it correctly and you see strangeartifacts in the image at 100% zoom, you can try to activate the Four Color Sensor check box.
The OK button will add the new correction to the Raw Correction combo box of the previous dialog, the Cancel buttoncancels it and Delete button deletes an existing correction.
MetaRaw Manual 26
2.4 Camera Raw Filter / Smart Object
In addition to providing enhanced support for raw files, MetaRaw includes other features, which allows you to apply theeffects of Adobe Camera Raw to an already opened image as well as create a smart object that can be edited withCamera Raw. The file format of the opened image does not matter. The mode of the image has to be RGB, Grayscale,CMYK or Lab with 8-bit or 16-bit per channel. If it is not the case, MetaRaw asks for conversion into RGB image mode.
Camera Raw Filter
MetaRaw's Camera Raw Filter feature allows you to apply the effects of Adobe Camera Raw to an already opened image.You can run it in Photoshop from the File > Automate > Camera Raw Filter menu item and in Photoshop Elements fromthe File > Automation Tools > Camera Raw Filter menu item. Then the Adobe Camera Raw dialog shows up and youcan choose your effect settings. Finally click the OK button (or Open Image button) to apply the effect to the image.
This feature supports layers, selections and transparent areas (alpha channel) of layers. It does not touch layer masks,vector masks and layer effects. However, if you apply it to a smart object, you are asked whether you want to rasterize it.This means that the smart object will be transformed into a normal layer. So best apply Camera Raw before you convert alayer to a smart object. If you try to apply it to a non-image layer or if there is no layer selected, you will get a warning. Ifyou have multiple layers selected, they will be merged into one layer before Camera Raw is applied.
Better not crop the image in Adobe Camera Raw, otherwise the resulting smaller image will be centered in the originalimage and you have to crop it again. So it makes more sense to crop the image after applying Camera Raw.
Camera Raw Smart Object
MetaRaw's Camera Raw Smart Object feature creates a smart object from the selected layer(s), which can be edited withCamera Raw. You can run it in Photoshop from the File > Automate > Camera Raw Smart Object menu item and inPhotoshop Elements from the File > Automation Tools > Camera Smart Object menu item. Then the Adobe CameraRaw dialog shows up and you can choose your effect settings. Finally click the OK button (or Open Image button) to turnthe selected layers into a smart object.
Please note: If you selected more than one layer before running the Camera Raw Smart Object command, the layers willbe merged before they are converted into a smart object. This is necessary because Camera Raw cannot processmultiple layers.
To edit the created smart object double click its thumbnail in the Layers panel. As a result the Camera Raw dialogappears and you can change the settings non-destructively. In Photoshop Elements this is only possible if ElementsXXL 3(or higher) for Windows or ElementsXXL 1.03 (or higher) for MacOS X is installed.
MetaRaw Manual 27

Copyright © 2013-2018 by Harald Heim & The Plugin Site
MetaRaw Manual 28