Embed Size (px)
Citation preview
Page 1 of 52 VICAS 2012 ©Ronan Doyle
STS2
Making Ends Meet:
Wound Management and Closure in Dogs and Cats
Ronan Doyle MVB CertSAS MRCVS DipECVS
RCVS and European Specialist in Small Animal Surgery Head of the Soft Tissue Surgery Service
Davies Veterinary Specialists
Hertfordshire, UK [email protected]
Kindly Sponsored by:
Page 2 of 52 VICAS 2012 ©Ronan Doyle
TABLE OF CONTENTS
1. Understanding the Process of Wound Healing 3
2. Principles of Wound Management 11 Acute Wound Management 12
Ongoing Open Wound Management 21 Bandaging Wounds 23
3. Principles of Surgical Oncology 31
4. Surgical Wound Closure 36
Key Principles 36 Managing Skin Tension 41 Local Flaps 46 Axial Pattern Flaps 48 Free Skin Grafts 49 Complications 51
5. Selected Reading List 52

Page 3 of 52 VICAS 2012 ©Ronan Doyle
Understanding the Process of Wound Healing
Wound management is a field, which has undergone considerable advances in the last 20 years
with a resultant plethora of new technologies, products or techniques. Most of these products
have been designed with the chronic non-healing human wound in mind, which is a very different
situation to the majority of wounds that are encountered in our veterinary patients. This often
leads to a tendency to apply the ‘newest’ treatment with a failure to fully appreciate their effect
or appropriateness for the local wound environment. Similarly wound management dependent on
outdated theories or therapies will often be to the detriment of the wound.
Effective wound management relies upon an understanding of the stages of wound healing and
an ability to identify these stages within a wound. From this the key issues that are affecting
wound healing can be recognised and effective steps can be taken to aid wound healing. This
informed ‘problem-solving’ approach is the most successful for the vast majority of wounds
encountered.
Skin Structure Skin is composed of an outer stratified epithelium and an underlying fibrous dermis. The
epidermis is of variable thickness but is generally thicker in areas without a hair coat especially at
the nasal planum and the digital pads. The thickness of the skin is directly related to the
thickness of the dermis and varies with age, sex, breed and area. The thickest skin (and
therefore dermis) in the dog and cat is over the dorsal midline, head and neck, whereas the
thinnest is on the ventral surface, the medial aspects of the limbs and the inner pinna.
Skin is an elastic tissue and this quality is dependent on the arrangement of the dermal collagen.
As a progressively larger load is applied to skin, it stretches as convolutions in the dermal
collagen flatten, followed by alignment of the collagen fibres parallel to each other and finally
stretching of the aligned collagen fibres. This ability to stretch is utilised in pre-stretching skin
before reconstruction. The most pliable skin is over the dorsal neck, axilla and flank, whereas the
least pliable is over the tail, pinnae and the pads.

Page 4 of 52 VICAS 2012 ©Ronan Doyle
Within the skin are the adnexa including hair follicles, sweat glands and sebaceous glands. The
specialised glands include the mammary glands and the circumanal glands. The hair follicles are
located within the dermis and may extend into the underlying subcutaneous tissue. The wall of
the hair follicle is continuous with the epidermis, so that if the main portions of the epidermis are
lost then re-epithelialisation can occur from migration of epithelial cells from the follicles (as well
as from the sweat and sebaceous glands). Hair growth rates vary with more rapid growth in
winter. Short canine coats take about 130 days to regrow, however in long haired dogs regrowth
can take up to 18 months.
The subcutaneous tissue is composed primarily of fat with loose collagen and elastic fibres. A key
component of this layer over much of the body is the panniculus musculature (the cutaneous
muscle). This is present over most of the head, neck and trunk but is lacking over the middle and
distal regions of the limbs (where the skin is more firmly attached to the underlying structures).
These muscle fibres penetrate the dermis and allow voluntary movement of the skin. The main
paniculus muscle is the cutaneous trunci that originates in the gluteal region and extends
cranially to the axilla.
The blood supply to the skin is divided into the deep subcutaneous plexus, the middle plexus and
the superficial plexus with interconnections between all three levels. It is the deep subcutaneous
plexus that is the key layer as it is from here that branches extend up to the middle and
superficial layers. Where there is panniculus muscle the deep subcutaneous plexus is deep and
superficial to it. In dogs and cats the deep subdermal plexus is supplied by the direct cutaneous
vessels that run parallel with the overlying skin. This is different from humans where the blood
supply to skin is supplied by musculocutaneous vessels that penetrate up from the underlying
muscle. Knowledge of the positions of these direct cutaneous vessels is very important when
planning wound closure to prevent iatrogenic damage to the blood supply to a section of skin and
also when using axial pattern flaps.

Page 5 of 52 VICAS 2012 ©Ronan Doyle
The Surgical Perspective
The importance of the panniculus muscle is that the major blood supply to the
overlying skin (the deep subdermal plexus) is intimately associated with it. The
panniculus muscle must be preserved when undermining skin.
Where there is no panniculus muscle the deep subdermal plexus is associated with
the subcutaneous fat on the deep face of the dermis. Skin should therefore be undermined below this layer. This may mean undermining below the outer muscle
fascia if the skin is very closely associated with it.
Using an atraumatic surgical technique such as careful blunt dissection helps to
minimise damage to the subdermal plexus.
Avoid damage to the direct cutaneous vessels when dissecting.
In traumatised skin, the blood supply will be compromised by oedema, bruising and infection. Therefore wait until there is restoration of a good blood supply before
extensive dissection or reconstruction is performed.

Page 6 of 52 VICAS 2012 ©Ronan Doyle
Stages of Wound Healing
Wound healing a complex and dynamic process which is initiated, mediated and controlled by a
complex interaction of cytokines and growth factors. This enormous field of study is incompletely
understood, however the surgeon needs a good working knowledge of this process. To aid this
wound healing can be divided into the following four stages.
1. Haemorrhage/Coagulation/Initiation
2. Inflammation and Debridement
3. Reparative
4. Maturation
The key skill for the surgeon is recognition of each of these stages and to have a working
knowledge of what is occurring during each of the stages.
1. Haemorrhage/coagulation/initiation
Trauma to tissue results in disruption to blood vessels and cell membranes. Obviously the type
and degree of trauma sustained is important in determining the subsequent progression of
wound healing. The immediate haemorrhage flushes the wound surface and fills the wound.
Vasoconstriction of the vessels occurs rapidly to reduce blood loss but this lasts only about 5-10
minutes. After this the vessel undergo vasodilation allowing extravasation of intravascular cells
and fluid into the extravascular space. The blood clot that forms due to the activation of platelets
and the crosslinking of fibrin helps to protect the wound from trauma and acts as a barrier to
infection. This clot forms a provisional extracellular matrix (ECM) that forms the framework for
early organisation of the wound as cells migrate into the site. The fibrin within the clot stabilises
the wound edges and provides some initial (minimal) wound strength. The surface of the clot
dries to from a scab under which wound healing may progress with some protection.
2. Inflammation and Debridement
Inflammation is characterised by migration of leucocytes into wound and begines from 6 hours
after the injury. In the early stages neutrophils predominate and the classic signs of inflammation
(redness, pain, swelling and heat) can be identified. The neutrophils phagocytise bacteria and
extracellular debris as well as release superoxide radicals that kill bacteria and degrade debris.

Page 7 of 52 VICAS 2012 ©Ronan Doyle
Neutrophils also release chemoattractants for further neutrophils. The combination of debris,
extracellular fluid and dead neutrophils makes up the wound exudate visible at this stage (pus).
Monocytes also migrate into the wound along with the neutrophils but as they make up a smaller
percentage of the leukocytes within the blood they are initially in small numbers. With time they
begin to predominate, as the neutrophils are short lived. The degree of heat, pain, swelling and
redness subsides and the monocytes differentiate into wound macrophages. Macrophages are
highly effective at debridement of foreign material, bacteria, damaged cells/ECM, depleted
neutrophils. Macrophages control the wound environment by cytokines that modulate the wound
from the inflammatory to the proliferation phase with the formation of granulation tissue. If there
is continued foreign material/infection within the wound (chronic inflammation) then proliferation
of monocytes occurs and the development of granulation tissue can be delayed or hindered.
The appearance of the wound during the inflammatory/debridement phase is of inflammation, a
blood clot or denuded wound surface and a serosanguinous to purulent discharge. This apparent
lack of activity within the wound led to it being traditionally called the lag phase, whereas in fact
it is a stage of considerable activity before the proliferative phase. It is important to remember
that a discharge from an open wound is a normal finding and an indicator of an active wound
healing process.
If the wound has been apposed and there has been minimal trauma, devitalised tissue or
infection (as with a surgical wound), the inflammatory phase is minimal and the wound may
begin to epithelialise at this stage.
3. Reparative
This stage is characterised by the formation of granulation tissue and epithelialisation. In the
later stages of the stage wound contraction occurs.
Granulation tissue formation
This is the most obvious feature of the Reparative stage and characterised by the proliferative
processes of fibroplasia and angiogenesis. Fibroblasts proliferate and migrate from surrounding
healthy tissue under the control of mediators from the provisional ECM and macrophages.
Fibroblast migration into the wound is along the ECM molecules and fibrin strands. Wound
Macrophages are essential to wound healing – initially they effectively debride the
wound and then modulate the formation of granulation tissue.
Page 8 of 52 VICAS 2012 ©Ronan Doyle
fibroblasts do not survive in adverse environmental conditions. Their high metabolic rate creates
a requirement for oxygen and they do not compete well with bacteria. With fibroplasia there is
the simultaneous process of angiogenesis to supply these requirements. Endothelial cells initially
migrate and then proliferate within the ECM to form capillaries. This ingrowth of capillaries is
from the surrounding pre-existing vessels at the wound edges and again modulated by wound
macrophages. The rate of capillary in-growth is therefore dependent on the vascularity of the
surrounding tissue, which is why wounds over muscle will rapidly form granulation tissue whereas
those over bone and tendon will not. Migrating capillary buds advance from surrounding tissue
into clean wound @ 0.4-1.0mm/day.
The wound fibroblasts produce collagen and ground substance within the wound which leads to
the transformation of the provisional ECM to the true collagenous ECM. Collagen confers strength
to the wound changing it from weak fibrin-based ECM to more durable granulation tissue.
The shift from the inflammatory stage to the reparative stage usually occurs by day 3-5 and is
identified by the formation of granulation tissue. Remember however that the rate of
development will vary depending on the degree of inflammation/infection present and the
surrounding tissue type (bone, tendon sheaths, periosteum, fascia, nerve sheaths produce more
slowly). In larger wounds there may be areas of the wound that are still in an
inflammatory/debridement stage whereas the rest will be in the reparative stage.
Normal healthy granulation tissue very pink, granular and slightly moist in appearance. Pale, dry
granulation has poorer vascularity and therefore poorer collagen synthesis. This is likely to lead
to significant delays in healing.
Granulation tissue is highly resistant to infection due to its excellent vascularity. It is also the
ideal surface for epithelial cells to migrate across, although this relies on a flat surface to the
wound. Specialised fibroblasts on the surface of the granulation tissue called myofibroblasts are
able to shorten in length and allow contraction of the wound to occur. Matrix metalloproteinases
are enzymes produced by the fibroblasts, epidermal cells and macrophages to remove damaged
Recognition of granulation tissue is key to identifying the reparative stage of wound
healing
Granulation tissue develops from the wound margins therefore careful handling of
the margins of a fresh wound or surgical wound is essential to prevent delays in
healing

Page 9 of 52 VICAS 2012 ©Ronan Doyle
ECM and to reorganise the wound. Their behaviour is thought to be modulated by the
macrophages, however their action can be indiscriminate leading to destruction of the wound. In
inflamed wounds their destructive action will prevent initiation and progression of the reparative
phase. Therefore prevention of inflammation during the reparative stage is essential for wound
progression. Also as wound exudates contain high levels of these enzymes control of exudate is
very important during this stage of wound healing.
Contraction
Contraction depends on adherence of the skin edges to the underlying granulation tissue as the
edges are actively moved over the wound. Visible wound contraction is evident by 5 to 9 days
after injury but obviously depends on a good granulation tissue bed (with active myofibroblasts).
As animals generally have very abundant and elastic skin, the degree of contraction that can
occur is generally very significant. This can be anticipated by assessing the degree elasticity of
the surrounding skin. Contraction can also be aided by stretching the surrounding skin.
Contraction can be undesirable if this will limit mobility (especially if it occurs on the flexor
surface of a joint) or if it will lead to uncosmetic scar (especially seen with large circular defects).
Contraction decreases as the wound progresses due to a drop in the number of myofibroblasts.
Contraction ceases when the wound edges are apposed or when the tension in the surrounding
tissues overcomes the strength of contraction.
Epithelialisation
Epithelialisation is the other key event that is occurring during the reparative stage. In the very
early phases of a wound there is migration of epithelial cells from the peripherary of the wound.
In a closed sutured wound can be covered with epithelium within 24-48 hours whereas with an
open wound epithelialisation may not be noted until 4-5 days after injury. With partial thickness
abrasions epithelial cells will migrate from the adnexal structures (such as sweat glands and
hairfollicles) and rapidly re-epithelialise a wound.
Behind the initial migrating epithelial cells, proliferation of epithelial cells occurs at the wound
margins 1-2 days after injury but this is generally not visible until 4-5 days as a pink smooth
margin around the wound. The epithelial cells migrate over each other onto the wound surface
where they then attach and start to undergo replication. The new epithelial cells then migrate
again. This leapfrogging of cells over each other continues until the wound is covered with a thin
Epithelial cells are fragile and require an adequate surface over which they can migrate
(such as granulation tissue within a full thickness open wound)
Page 10 of 52 VICAS 2012 ©Ronan Doyle
epithelial surface at which further migration is inhibited. This is essentially a monolayer of cells
over the wound surface and as such is extremely fragile especially to friction. The basement layer
of cells continues to undergo replication until a stratified layer of cells develops and further
differentiation occurs to develop a keratinised surface. Macroscopically the epithelial surface
changes from a pink appearance, due to the vascularity of the underlying granulation tissue, to a
pale colour as it thickens and the granulation tissue vascularity decreases. With very large full
thickness wounds this process may take weeks to months and ongoing trauma can leave a
central area of chronic granulation tissue. In full thickness wounds the adnexal structures do not
regenerate.
4. Maturation
Even though an open wound may be considered closed once there is a covering of adequate
epithelium, considerable healing still needs to occur as the wound matures. The initial random
and haphazard arrangement of the collagen and cellular content of the granulation tissue needs
to undergo considerable reorganisation. The cellular content of the tissue reduces as the cells die
off and the collagen needs to rearrange and mature. This remodelling of the collagen fibres
occurs as they become thicker and develop more cross linkages. Collagen will rearrange along
lines of tension and there is a very gradual increase in strength as the rearrangement occurs.
Maximal strength occurs when the collagen fibres are orientated parallel to the lines of greatest
stress. This process occurs with increased use of the injured animal. Collagen fibres that are
inappropriately orientated are removed. Even with this maximal strength after the end of
maturation, which may take months to years, is usually no more than 80% of normal.
Wound strength of the healing wound:
Initial wound strength is provided by the fibrin clot for the first 3-5 days. The ingrowth of
capillaries and of any epithelialisation across an apposed will provide some wound strength. The
most rapid increase in wound strength occurs between 7 and 14 days as there is a rapid
accumulation of collagen within the wound. However wound strength by 3 weeks after injury is
only about 20% of their final strength. Further increases in strength occurs slowly over months to
years but even at maximal strength is no more than about 80% as strong as normal tissue.
Promoting early but protected use of a wounded area encourages alignment of
fibroblasts and collagen along anticipated lines of physiological stress. Physiotherapy and massage are therefore important in the rehabilitation process.

Page 11 of 52 VICAS 2012 ©Ronan Doyle
Principles of Wound Management The initial assessment and management of a wound can be critical to the subsequent
healing of the tissue. The goal is to achieve the most rapid healing as possible to allow a
rapid return to function. This will be achieved most rapidly with primary closure of a
wound. However if there is significant contamination, devitalisation or infection, then
inappropriate primary closure can lead to major wound complications. Therefore in many
cases a period of initial open wound management is required. This allows continued
evaluation, drainage and debridement of the wound. This can then be followed by
delayed primary closure, once the inflammatory stage has subsided. More commonly
there will be a delay until there is the presence of granulation tissue/epithelialisation (the
reparative stage), at which closure at this stage is called secondary closure. Ongoing
open wound management will allow the wound to eventually close by second intention
healing, however this can be time-consuming and expensive. If there is extensive
scarring that is poorly functional or uncosmetic then revision surgery of the site may be
required.
In order to achieve rapid healing of the wound with minimal disruption in function,
minimal inconvenience to the patient and minimal cost to the client, an active decision
making approach to wound management is required. This is needed at every stage of
wound management, but in particular when initially assessing and managing the wound.
Obviously management of the whole animal is more important that managing just the
wound. A complete history, clinical examination and appropriate diagnostic testing allow
identification of concurrent or underlying problems. A balanced approach is where the
systemic problems are diagnosed and managed, while the wound has appropriate first
aid treatment. Neither is managed to the exclusion of the other as obviously systemic
derangements will negatively influence wound healing just as major wound
complications can have major systemic consequences. An example is the extensively
damaged dog or cat following a major trauma which may be in shock and is at risk of
developing systemic inflammatory response syndrome and disseminated intravascular
coagulation.
On admission the wound can be covered with sterile dressing to prevent further
contamination and drying. Broad spectrum systemic antibiotics can also be administered
with seriously contaminated wounds (they become unnecessary when there is a healthy
Page 12 of 52 VICAS 2012 ©Ronan Doyle
granulation tissue bed within the wound). Good analgesia is also essential to improve
comfort and decrease stress. Wound assessment is then performed under sedation or
general anaesthesia once the animal is reasonable stable.
1. Initial wound evaluation
a. Type of wound and extent of injury
Wounds are initially classified as either open or closed. Closed wounds are associated
with contusions and crushing injuries, and although there may not be an open skin
wound there may be very significant injuries to the skin and underlying tissue.
Open wounds can be classified according to their aetiology:
Abrasions: partial thickness skin wounds where there is loss of the dermis and
portions of the dermis. These wounds generally rapidly re-epithelialise but need
protection to prevent further damage or contamination. A severe form of abrasion
injury is that seen to the lower limbs with shearing injuries following road traffic
accidents. This type of injury can be very challenging due to the extensive tissue
that is lost along with the major orthopaedic injuries that can occur
(tendon/ligament and bone loss). Closure options for wounds in this area can be
difficult often requiring skin grafts or axial pattern flaps.
Avulsion: skin is torn from its underlying attachments. These are common with
the distal limbs (the degloving injury). The skin that is detached is dependent on
the blood supply from the subdermal plexus arising from the flap’s base. If the
degree of underrunning is limited, these flaps may be excised or managed until
there is an underlying granulation bed to suture them to. However if extensive
then preservation by early management of contamination, resuturing to the
underlying attachments and management of dead space is necessary. Even with
Acute wound management 1. Initial wound evaluation
2. Debridement and lavage
3. Further evaluation and decision to close or manage open
Page 13 of 52 VICAS 2012 ©Ronan Doyle
this approach major portions of the flap may undergo necrosis due to vascular
damage.
Incision: as seen with surgical wounds. Wound edges are smooth and there is
minimal trauma to surrounding tissue. Immediate primary closure of this type of
wound is usually possible with little risk of dehiscence.
Laceration: these are ragged incisions with variable damage to the underlying
and surrounding tissue. The skin edges are often detached from their underlying
fascia and there may be vascular compromise extending beyond the wound
margins. This type of wound can generally be closed primarily but may require
more extensive debridement with careful assessment of the viability of the wound
edges and dead space is required. In some cases an en-bloc debridement will
allow removal of all of the wound bed and conversion to a clean incision.
Burns: these are classified according to their depth being either first degree
(superficial), second degree (partial thickness) or third degree (full thickness).
Second and third degree burns are more serious due to their extent and their
potential life-threatening nature from the development of shock and systemic
derangement. Secondary infection of the burn site is also common. Emergency
care is aimed at cooling the area with towels soaked in ice-cold water or
submersion in cold water. This helps to limit pain and possibly the progression of
the burn.
Following stabilisation the extent of the burn can be assessed. For superficial and
partial thickness burns the area is managed to maintain a moist wound surface,
necrotic tissue is removed and reepithelialisation occurs from the surviving
adnexal structures. If the area easily excised and reconstructed this may allow
the quickest and most cosmetic resolution of the area. For full thickness burns,
the definitely devitalised area (known as the burn eschar) is excised and the
wound is managed either by definitive closure or open wound management.
Questionable areas of viability can be covered with a topical antibiotic ointment –
silver suphadiazine (Flamazine) ointment is particularly suited to this due to its
deep penetration of the eschar and effectiveness against a broad spectrum of
bacteria. Eschar retention has been shown to slow granulation tissue formation,
contraction and is a medium for bacterial proliferation.
Puncture: these are most commonly due to bite wounds but can also be with
ballistic missiles. Puncture wounds can be very misleading as although there

Page 14 of 52 VICAS 2012 ©Ronan Doyle
may be minimal external skin damage there may be extensive damage to the
underlying tissue with contamination with hair, debris, bacteria etc. Due to the
lack of drainage, a closed hypoxic area develops which is an ideal environment
for bacterial growth. Often cellulitis or abscessation can develop in these areas,
sometimes leading to major systemic derangement. Many of these wounds can
also have deep retained foreign bodies.
Bite wounds should always be treated seriously and surgical exploration,
debridement, copious lavage and management of dead space is indicated. Due
to the major risk of infection, broad spectrum antibiotics are indicated. Deep
tissue biopsies for culture are necessary with deep contamination.
Thoracic and abdominal wall puncture wounds need to be managed with caution
due to the possibility of major thoracic and abdominal injuries. Careful monitoring
and aggressive intervention may be required if there is a failure to respond to
stabilisation.
Obviously the position of the wound is also important, both from the proximity of
important local structures and the effect that the wound is having on local and
systemic function.
b. Evidence of contamination/infection
Open wounds can be classified by the degree of contamination as either clean(none),
clean-contaminated (minor contamination), contaminated or infected (when there is
greater than 105 bacteria/gram of tissue). Bacteria become detrimental to a wound when
they overcome the wound defences due to their numbers or virulence. The bacteria
occupy the macrophages preventing progression to the reparative stage, but also
produce enzymes that breakdown fibrin and collagen.
The presence of foreign bodies, necrotic and devitalised tissue in contaminated wounds
decrease the number of bacteria required to overcome the immune defences and lead to
infection developing. The development of a seroma or the presence of haematoma
similarly increases the risk of infection. Therefore appreciation of the need of adequate
drainage of a wound is important.
Using specific time periods since the injury (such as the 6 hour ‘golden period’) to
determine infection is generally unhelpful as the wound condition is more likely to be
associated with the type of contamination, the degree of traumatised tissue present and
the vascularity of the surrounding tissue.

Page 15 of 52 VICAS 2012 ©Ronan Doyle
Culture of infected wounds is best achieved by taking a biopsy of tissue within the
wound bed rather than a superficial swab. This should identify the pathogenic bacteria
and not just surface contaminants. As healthy granulation tissue is highly resistant to
infection, culture of surface exudate is of little value. If there is a major deterioration of
granulation tissue then a biopsy can be valuable to identify infection.
c. Adequacy of blood supply
Assessing the adequacy of the local blood supply is important as the development of
granulation tissue is from the adjacent tissue. With poorly vascularised tissue the
development of granulation tissue will be slow. The ability of the immune system to
access the area may also be more limited, increasing the risk of infection. Assessing the
vascularity of the wound bed or avulsed skin flaps can be difficult in the early stages but
is important when deciding on the extent of debridement necessary (see later).
d. Stage of healing
Not all wounds present in an acute stage or have a clear history. Repeated assessment
of most wounds is also necessary. Therefore being able to assess
the stage of wound healing is critical in decision making. Assessing if the wound is
progressing as expected or not is essential in the early recognition of the difficult non-
healing wound. Knowledge of the events occurring during each stage is also essential
(see previous chapter) in deciding on the most appropriate wound dressing for a wound
(see later).
2. Debridement and Lavage Devitalised tissue, foreign bodies and bacteria prolong the inflammatory phase and
promote infection. Removal of this material therefore helps to minimise this phase and
speeds the development of the reparative stage. Debridement and lavage is used to try
to convert the wound to as clean a wound as possible. Both these techniques are used
in combination throughout the procedure.
Inadequate debridement is the most likely cause of a prolongation of the
inflammatory phase and delays in wound healing

Page 16 of 52 VICAS 2012 ©Ronan Doyle
In preparation for this the animal is usually under general anaesthesia. The open wound
is covered with sterile K-Y jelly or moistened saline swabs prior to a wide clip of the
surrounding hair. Hair at the wound edge can be removed using a scissors with the
blade edges smeared with K-Y jelly. Dirt and debris surrounding the wound edges
removed with antiseptic scrubs of either chlorhexidine gluconate or povidone iodine with
care to avoid contacting the open wound. A water-impermeable drape is draped around
the wound site.
a. Debridement
The extent of debridement will depend on the degree of trauma and contamination of the
wound. Minimal debridement followed by closure may be possible for clean or minimally
contaminated wounds. Before debridement the wound is carefully explored to assess the
depth, degree of contamination and vascularity. Haemorrhage from a tissue is generally
a good indicator of viability, although with some tissues especially skin), the lack of
haemorrhage does not denote devitalisation. Similarly with vital structures (such as
nerves and tendons) a decision on viability is probably best delayed. Therefore the most
common technique for debridement is a staged layered approach – where the
debridement begins on the surface and progresses to the deeper layers with
questionable tissue left for debridement at a later stage. Staged debridement allows
questionable tissue to be preserved or to become obviously necrotic (particularly with
skin). This may be especially important where the tissue will be required for tension –
free closure
Debridement can be performed as a single event with complete excision of the wound
bed, thereby converting it to a clean wound. This is followed by wound closure and
provision of adequate drainage. This is obviously only applicable in areas where
sufficient tissue allow.

Page 17 of 52 VICAS 2012 ©Ronan Doyle
Other methods of debridement include enzymatic and mechanical. Enzymatic
debridement is of limited application and expensive. Medicinal maggots secrete enymes
onto the wound that selectively dissolve necrotic tissue, disinfect the wound and appear
stimulate granulation tissue. The most useful and commonly used technique is the use
of wet-to-dry bandages for ongoing mechanical wound debridement after surgical
debridement (see later).
b. Lavage
Lavage of the wound is a form of debridement that allows the dilution and removal of
foreign debris, devitalised tissue, bacteria, wound exudate and pus. Lavage is used
initially to mechanical remove this material to allow clearer evaluation of the wound. It is
then used after each layer of debridement and at the end of the process. For open
wound management gentle lavage is a routine step to remove excess wound exudates
and devitalised cells.
Most small to moderate sized wounds are lavaged with 500-1000ml of an isotonic
solution. Larger more extensive wounds require a larger volume. Some pressure is
required to remove bacteria and 8 pounds/sq inch appears to be maximally effective. I
achieve an approximation of this with a 20 or 50ml syringe with an 18G needle. For ease
Rules of debridement
Sharp excision with a scalpel is generally best
Be conservative with skin
Preserve bone, tendon, bloods vessels and nerve
Be radical with fat, muscle, haematoma
Use clinical judgement – there is no point in preserving obviously
necrotic tissue
The most important debridement that occurs within the wound during the inflammatory
stage is the microscopic AUTOLYTIC DEBRIDEMENT performed predominantly by the
macrophages.
Modern bandage techniques, which emphasise maintenance of a moist wound
environment, aims to create ideal conditions for autolytic debridement. This is important
from 24 hours after injury and attempts should be made to limit disruption of this.

Page 18 of 52 VICAS 2012 ©Ronan Doyle
of use I attach these to a bag of isotonic fluids, a giving set and a three way tap. High
pressure lavage (> 25psi) holds no major advantage and leads to oedema of the deeper
tissues that increases the risk of infection.
Types of lavage fluid:
Tap water: In the early stages of a grossly contaminated wound use of tap water is
possible. Being very cheap large volumes can be easily used. However it is hypotonic
this is potentially toxic to the inflammatory cells. It is therefore best to use it for no more
than the first 24 hours (or not at all) and not if there is evidence of granulation tissue
formation.
Isotonic solutions: Normal (0.9%) saline or Hartmanns (Lactated Ringers) solution
are the most useful solutions for the lavage of wounds. They are isotonic, sterile,
easily available, relatively cheap and minimally toxic to the wound tissue. Of these two
solutions, Hartmanns may be marginally less cytotoxic although normal saline does not
appear to impede wound healing.
Antiseptic solutions: Topical antiseptics are toxic to fibroblasts and epithelial cells and
probably do more to slow healing than to counter infection. They are also rapidly diluted
by wound exudates. Chlorhexidine diacetate (Hibitane diacetate) diluted to a 0.05%
solution in water significantly reduces bacteria on wounds without increasing tissue
inflammation. This also has a residual activity and is active with residual organic
material. Some gram negative organisms, such as Pseudomonas, can develop
resistance to it. An alternative is povidone-iodine (Pevidine) diluted to a 1% solution in
saline, which has good antimicrobial activity but is inactivated by organic material and
has no residual tissue.
Other solutions that are used include Dakins solution (0.25% sodium hypochlorite
(bleach)) but this is not recommended for routine use. Hydrogen peroxide is not
recommended as it is of little value as an antiseptic but can cause considerable tissue
damage. Tris-EDTA has antibacterial properties especially against many gram negative
bacteria (especially Pseudomonas, Proteus and E.coli). It can therefore be very useful
for difficult topical infections. Its effect is to damage the cell wall and can be used
synergistically with other antimicrobials.
The default lavage solution is always either sterile saline or Hartmanns solution

Page 19 of 52 VICAS 2012 ©Ronan Doyle
3. Further evaluation and decision to close wound or manage open
Following debridement and lavage, further evaluation of the wound and decisions
regarding the future management of the wound need to be made. The key decision is
whether the wound can be closed or managed open. The decision to close the wound
requires either a clean sterile wound (as with an incision) or a wound that has been
converted to a clean state. Ongoing drainage is also required in all but the most
superficial wounds (see later).
If the wound is to be managed open at this initial stage, then an initial plan for
subsequent closure needs to be determined. This may be delayed primary closure, once
the inflammatory stage is subsiding, or secondary closure once there is granulation
tissue present. In both these cases the wound bed or granulation tissue may be partially
debrided or completely excised before closure. The techniques for wound closure are
detailed in a later section.
The decision regarding ongoing wound management has major implications from the
point of view of the work involved for veterinarian, the morbidity for the animal and the
management and costs required of the client. A clear assessment of the situation is
needed and a thorough treatment plan needs to be formulated. This plan should be
aiming to actively manage the wound so as to achieve resolution in the shortest time
with the least cost to both animal and client. Avoid using ongoing open wound
management and eventual second intention healing as the default for wound closure as
the total work and costs involved can be very considerable and the care can be over
many months. In many cases the ‘big’ reconstructive surgical option will achieve the
quickest and cheapest resolution. At this stage a decision to refer may need to be made
depending on the surgeon’s experience, the animal’s status and the financial
implications. For referral the wound is bandaged to prevent damage during transport.
If the decision is for ongoing open wound management, a clear plan as to when this will
be converted to a reconstructive closure or continuation to second-intention healing is
required.
Effective debridement and lavage with saline/Hartmanns is always preferable
to lavage with antiseptics
Page 20 of 52 VICAS 2012 ©Ronan Doyle
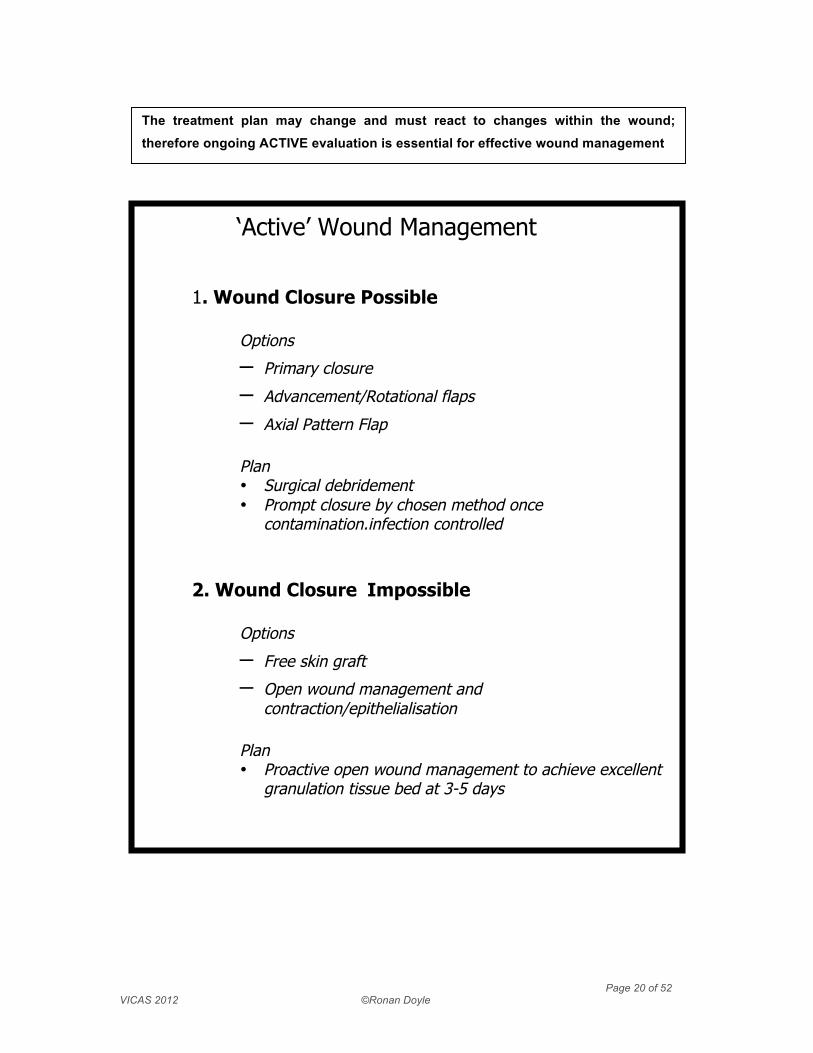
The treatment plan may change and must react to changes within the wound; therefore ongoing ACTIVE evaluation is essential for effective wound management
‘Active’ Wound Management
1. Wound Closure Possible
Options
– Primary closure
– Advancement/Rotational flaps
– Axial Pattern Flap Plan • Surgical debridement • Prompt closure by chosen method once
contamination.infection controlled
2. Wound Closure Impossible
Options
– Free skin graft
– Open wound management and contraction/epithelialisation
Plan • Proactive open wound management to achieve excellent
granulation tissue bed at 3-5 days

Page 21 of 52 VICAS 2012 ©Ronan Doyle
Ongoing Open Wound Management
The objectives with ongoing open wound management are to:
1. Minimise the inflammatory/debridement stage and promote the development of the
reparative stage
2. Manage the reparative stage to encourage contraction and epithelialisation
The wound is managed by ongoing assessment and appropriate bandage selection
At each bandage change the following needs to be assessed:
Degree of inflammation
⇒ ongoing or increased inflammation prevents the development of the reparative
stage of wound healing
⇒ Intervention is needed at each bandage change or with the primary dressing to
debride the foreign or necrotic material
Degree of exudate
⇒ the inflammatory and reparative stages of wound healing are enhanced in a
warm, moist environment. This is the concept of MOIST WOUND HEALING. The
functions of cells, proteases, and growth factors are supported by maintaining
this environment using a moisture retentive dressing (MRD). Wound exudate
provides the appropriate ratio of proteases, protease inhibitors, growth factors
and cytokines at each stage of wound healing.
⇒ Excess wound exudates needs to be removed as it can contain excessive
proteases (especially in chronic wounds) that can damage the wound by
increasing inflammation. It can also lead to maceration of the surrounding skin
edges.
⇒ The aim is to keep the wound bathed in exudates but not drenched in them
Presence and quality of granulation tissue
⇒ the presence of granulation tissue is indicative of the beginning of the reparative
stage. Good healthy granulation tissue is desirable as it is highly resistant to
infection and allows contraction and epithelialisation to proceed rapidly.

Page 22 of 52 VICAS 2012 ©Ronan Doyle
⇒ Granulation tissue needs protection to prevent damage to fragile capillaries and
epithelial tissues
⇒ If there is chronic granulation tissue then intervention is needed to either debride
and kickstart the process or restimulate activity in the granulation tissue bed.
Skin edges
⇒ adherence of the wound edges to the underlying fascia or granulation tissue is
essential for contraction and epithelialisation to occur.
⇒ Avoid the development of large underrun pockets lined with thin chronic
granulation tissue. This is particularly seen in cats and in high motion areas such
as the axilla and inguinal region.
Degree of epithelialisation
⇒ epithelialisation needs a smooth granulation bed with well adhered wound edges
to proceed. The new epithelium is fragile and needs protection to prevent
frictional damage and dessication.
An essential wound management skill is the identification and monitoring of the growth and
quality of granulation tissue

Page 23 of 52 VICAS 2012 ©Ronan Doyle
Bandaging wounds
Bandages are required to manage the wound surface (maintain the primary contact layer
and absorb exudates) and to protect the wound from excess movement, contamination
and self-interference. Obviously strict care is needed by veterinary professionals and the
owner to prevent complications such as slippage, consumption of the bandage by the
patient and ischaemic injuries.
The bandage construction is of a primary layer, the purpose of which is to assist the
wound healing process. This is followed by a secondary layer that may absorb exudates,
provide padding and support the area. This is usually made of woven rolled padded
material (e.g Soffban) or cotton wool. The final tertiary layer is to secure and compress
the secondary layer. This is usually a nonadhesive conformable bandage (e.g. K-lite,
Easifix) followed by an adhesive outer layer (e.g. Vetwrap, Coflex). Correct bandage
construction is a skill not to be underestimated.
Bandaging in more difficult areas such as the perineal, rump, axilla and inguinal region
may utilise a tie-over type dressing. This is constructed by placing suture loops around
the wound approximately 2-4cm from the wound edges. The primary dressing layer is
then placed on the wound surface with additional layers of absorptive material (such as
large gauze sponges). This is secured by interlacing suture material or tape between the
suture loops, crisscrossing over the secondary material.
Other options for difficult areas include conformable netting type bandages (e.g.
Surgifix), body coats and adhesive dressings. In areas where motion will be to the
detriment of the wound, bandages may be augmented with splints or half-casts. In areas
with major orthopaedic injury (as with distal limb shearing/degloving injuries) orthopaedic
implants, such as external skeletal fixators or bone plates, are used to stabilise the area.
The following discussion of primary wound dressings is focused on the options for each
stage of wound healing. It is not an exhaustive list and is based on the author’s and his
colleagues experience. For a more extensive discussion on the various properties,
advantages and disadvantages of primary wound dressings, the reader is referred to the
reading list. I also do not advocate any particular brand of bandage material.
The best policy is to select dressings according to the state of the wound following
assessment. Instead of always moving towards the newest bandage, building

Page 24 of 52 VICAS 2012 ©Ronan Doyle
experience and confidence with a smaller selection of bandages is preferable. Most of
the bandages have been designed with the human patient in mind and although they
may speed up wound healing marginally, they often do not justify the expense involved.
The objective in dogs and cats is to promote normal healing to progress and avoid
dressings that are likely to hinder the process. Again an ACTIVE decision making
approach is necessary rather than falling into default mode but as a general rule - KEEP
IT SIMPLE!
Primary Contact Layer Options: Wet-to-Dry dressings:
• Heavily soiled or necrotic wounds only
• Sterile gauze, soaked in saline applied directly to wound surface
• Bandaged in place with secondary absorptive layers
• Changed every 12-24 hours depending on wound status (degree of exudate)
• Dead tissue and debris wicks into the dressing as it dries and is ‘lifted’ off wound at
change. Sedation and analgesia is necessary at bandage change due to discomfort
• This is a highly effective and cheap dressing
• The mechanical debridement that occurs is indiscriminate and I usually discontinue
its use after 24-48 hours
Moisture retentive dressings:
Foam dressings: Polyurethane foam (e.g. Allevyn, Advazorb Plus)
o The primary function is absorption and will function in minimally to heavily exudative
wounds at all stages of wound healing.
o They absorb excess moisture and keep the wound surface moist, thereby promoting
autolytic debridement, granulation tissue formation, contraction and epithelialisation
o They have no bioactivity and no mechanical debriding action
o They can absorb up to 10 times their own weight and therefore do not need to be
changed as frequently for moderately exudative wounds in the reparative stage.
o There is a tendency to dry the wound due to the semi-permeable backing on the
dressings and therefore require some exudation from the wound to maintain a moist
wound environment.

Page 25 of 52 VICAS 2012 ©Ronan Doyle
Highly absorptive dressings Example: Eclypse, Eclypse Adherent
o Highly absorptive primary wound dressings have a high capacity for wound exudate,
therefore are very useful for the highly exudative wound, thereby preventing
maceration of the tissues.
o Another example if reduced cost is required is using a nappy, which are designed to
be highly absorptive, although this is probably best as a secondary layer.
Hydrocolloid dressings: Examples: TegasorbTM, GranuflexTM, Cutinova Hydro
o These dressings are bioactive, encouraging the growth of granulation tissue but also
allowing good debridement of the wound.
o They create an excellent moist wound environment and once it forms a gel it is non-
adherent.
o They are however expensive, the wounds may initially enlarge, may require frequent
changes as they are less absorptive and thay are not suitable for infected wounds
Hydrogels: Examples: Citrugel, Intrasite, NuGel
o Hydrogels keep the wound surface moist, facilitating autolytic debridement and
rehydrating necrotic tissue.
o They are highly absorptive thereby reducing oedema,
o They are useful on minimal to low exudates wounds to keep them moist
o They need a secondary dressing to maintain in place – vapour permeable film or
foam dressing
o Anaerbes can also grow in the gel.
Alginate dressings: Examples: Kaltostat, Algivon (including honey)
o Calcium alginate dressings actively encourage the formation of granulation tissue
and maintain a moist wound environment
o They can therefore be useful in moving the wound from the inflammatory to the
reparative stage
o They can be used in infected wounds (especially if contain honey)
o Disadvantages are the potential over-stimulation of granulation tissue and they
generally require a secondary dressing to maintain them (such as a polyurethane
foam) and remove excessive exudate

Page 26 of 52 VICAS 2012 ©Ronan Doyle
Honey/Sugar:
• Honey (Examples: Activon Tube, Activon Tulle (dressing), Algivon (alginate
impregnated with honey)
o Honey is antibacterial due to low levels of hydrogen peroxide, hypertonicity, low pH
and inhibins.
o The hypertonicity aids debridement and removes excess exudate/oedema. The
wound surface is kept moist, thereby aiding wound healing.
o It also promotes the rapid formation of granulation tissue.
o Sterile honey must be used to avoid contamination with clostridial spores and
Bacillus spp.
• Sugar paste
o can be used on dirty and infected wounds due to its antibacterial effects. It acts by
competing for the freely available water with bacteria. It also reduces oedema. It is
not suitable for granulating wounds.
Non-adherent/low adherence dressings:
• Perforated polyurethane membranes dressings backed with variable amounts of
absorptive material (e.g. Melolin, Rondopad, Primapore etc).
o These are primarily used on closed wounds to prevent contamination over the first
12 hours and to prevent adherence of secondary bandage material.
o They can also be used to protect fragile epithelium on wounds in the maturation
stage of wound healing
o These dressings have a slight drying effect as they are fully permeable and are
therefore generally not indicated for an open wound. They are also used to maintain
other wound dressings such as hydrogels and honey, but will need to be changed
frequently due to their drying effect.
• Silicone surface (Silflex)
o These are almost completely non-adherent. Allows one way movement of exudate to
secondary absorptive layers. They do not tend to interfere with normal healing and
are therefore useful for delicate epithelialising wounds or skin grafts
• Paraffin gauze (e.g Jelonet)
o This is cloth material impregnated with soft paraffin. The paraffin stops the secondary
dressing sticking to the wound.

Page 27 of 52 VICAS 2012 ©Ronan Doyle
o Exudate is absorbed by the secondary layer so there is a major drying effect. The
dressing can dry onto the surface of the wound. This type of dressing now has very
limited application with the modern moist wound environment approach to wound
healing. This dressing also slows epithelialisation
Biologic dressings:
• Collagens (e.g. Biosist, Collamend, Emovet)
o Action is questioned – may improve epithelialisation but may delay contraction.
o Possibly acts as scaffold for fibroplasia as becomes incorporated into ECM of wound
and may also act as a stem cell attractant into wound
Maggots:
• Medicinal maggots available through website www.LarvE.co.uk
o Larvae of Lucillus sericata produced in sterile manner.
o Maggots used since antiquity. Stage 1 larvae lack mouthparts and act by secreting
digestive enzymes onto wound selectively dissolving necrotic tissue, bacteria and
exudate.
o Left in place for 3 days, but must be kept hydrated. Then removed and new batch
can be applied.
o Rarely indicated for only specific wounds that are not amenable to surgical
debridement/standard debriding dressings. Often by time maggots have been
ordered and delivered, the wound is out of a dirty/infected state!
o May be useful at promoting granulation tissue.
Vacuum-Assisted Closure
o Wound management systems available from KCL (VACTM) and Smith&Nephew)
o A layer of special foam is applied to the wound, with interstices that allow
transmission of negative pressure through to the wound bed.
o A tube is inserted under an occlusive outer layer and attached to an external device
that generates a negative pressure. This device sucks exudate away from the wound
bed. It also applies inward traction on the wound edges, encouraging wound
contraction and stretching of the surrounding skin.

Page 28 of 52 VICAS 2012 ©Ronan Doyle
o This type of dressing can be applied to virtually any wound, including wounds in
areas that would traditionally be very difficult to bandage as the vacuum applied
holds the dressing onto the wound site as long as it is kept air-tight. Once applied,
the dressing need only be replaced when the fluid reservoir fills with fluid, or the
clinician wishes to inspect the wound (usually every 2-3 days). This is an effective
way of debriding open wounds as necrotic tissue is sucked away as soon as it
liquefies.
o Anecdotal reports suggest that open wounds treated with vacuum assisted closure
granulate and contract more quickly than wounds treated with conventional
bandaging.
Bandages Applicable to the Stage of Wound Healing: 1. inflammatory/debridement stage
The aim is to minimise the inflammatory/debridement phase and promote the
development of the reparative stage
Role of primary contact layer:
⇒ Ongoing debridement
⇒ Control infection
⇒ Remove excess exudate
⇒ Manage oedema
⇒ Prevent drying
⇒ Protect area
Options:
⇒ Wet-to-Dry dressing – mechanical debridement – I rarely use this for longer than
48 hours on the wound, as after this it is too destructive to the wound and delays
onset of the reparative stage. After this dressing I switch to a moisture retentive
dressing.
⇒ Moisture retentive dressings – autolytic debridement
Polyurethane foam dressings are an excellent dressing during most stages of wound
management as they are applicable to minimally to heavily exudative wound. They absorb
excess moisture and keep the wound surface moist, thereby promoting autolytic
debridement, granulation tissue formation, contraction and epithelialisation.

Page 29 of 52 VICAS 2012 ©Ronan Doyle
• Polyurethane foam dressing (e.g. Advazorb, Allevyn)
• High absorptive capacity bandage (e.g. Eclypse)
• Hydrogels (e.g. Citrugel, Intrasite, NuGel etc) (+ either a non-adherent
dressing (e.g. Melolin) or a foam dressing)
• Alginate dressings (e.g. Kaltostat) (+ either a non-adherent or a foam
dressing)
⇒ Honey (+ a dressing to maintain in place) - autolytic debridement and antibacterial
effect. This is probably my dressing of choice in an infected/heavily contaminated
wound environment
⇒ Vacuum assisted closure
⇒ ?Maggots
Frequent bandage changes are necessary to remove exudates and prevent water
logging of dressing. Repeated staged debridement and lavage may be necessary at
each bandage change.
2. The Reparative stage
The aim during the reparative stage is form and maintain healthy granulation tissue and
to achieve rapid contraction and epithelialisation
Role of primary bandage layer:
⇒ Maintain moist wound environment
⇒ Protect wound
⇒ Prevent infection/inflammation
⇒ Facilitate epithelialisation
⇒ Facilitate wound contraction
Primary layer options for late inflammatory/early reparative stage
⇒ ?Wet-to-Dry dressing – but will lead to continued indiscriminate mechanical
debridement which will slow cell proliferation
⇒ Moisture retentive dressings
Polyurethane foam dressing (e.g. Allevyn, Advazorb)
Hydrogels (e.g. Intrasite, NuGel etc) (+ either a non-adherent dressing (e.g. Melolin)
or a foam dressing)

Page 30 of 52 VICAS 2012 ©Ronan Doyle
Alginate dressings (e.g. Kaltostat) (+ either a non-adherent or a foam dressing)
⇒ Honey (+ non-adherent/foam dressing to maintain in place). Very useful if concerns
that the wound is becoming infected
⇒ Vacuum assisted closure
Primary layer options for reparative stage once there is good granulation tissue
⇒ Moisture retentive dressings
• Polyurethane foam dressing/Highly absorptive dressing
• + Hydrogel if drying out
• Vacuum assisted closure
Primary layer options for late reparative/maturation stage
⇒ Non-adherent dressing – to protect fragile epithelial surface
⇒ Polyurethane foam dressing – if still small area left to epithelialise this keeps the
area moist.
Encouraging contraction to occur can be achieved by placing sutures from the wound
edges across the wound, only if the edges are attached to the underlying granulation
tissue. These can be gradually tightened every 2-4 days to help bring the edges
together. Vacuum assisted closure is another option currently gaining popularity.
Perform ACTIVE bandage management by
assessing at each change: • Degree of inflammation • Presence and quality of granulation tissue • Degree of exudate • Skin edges
• Degree of epithelialisation

Page 31 of 52 VICAS 2012 ©Ronan Doyle
Principles of Surgical Oncology
Treatment of the cancer patient requires an informed decision on the part of the owner
and the veterinarian. Questions that may be helpful include identity of the cancer,
expected biological behaviour of the tumour (benign vs malignant, local invasion vs
metastass and expected sites of metastasis), options for treatment (surgical vs medical),
welfare of the patient before, during and after treatment, prognosis with, and without,
treatments and cost of treatment.
Assessing the mass The following observations should be recorded about a mass:
• Location – ideally use a body map to record the location
• Description of the mass – appearance, attachment to skin, muscle etc. diffuse vs
circumscribed
• Size of the mass – measure with callipers
The identity of the mass should then be elucidated.
Cytologic evaluation of the mass
Cells can be collected from tumours by a variety of techniques:
• Fine needle aspiration (FNA)
o Diagnostic cytology is easy, quick and cheap and can be used to obtain
information about a wide variety of masses and body fluids. Superficial
masses can be easily immobilised and are readily sampled. Deeper
masses within the body cavity may be aspirated under ultrasound
guidance.
All suspicious dermal and subcutaneous masses identified at routine examination
(eg vaccination) should ideally be subjected to a fine needle aspiration.

Page 32 of 52 VICAS 2012 ©Ronan Doyle
o Multiple samples are taken from the mass at different sites if possible. In
larger masses try to avoid sampling only the centre of the mass as the
centre is often necrotic and therefore not representative of the mass.
• Impression smears from surface of tumour
• Tissue scrapings from surface of tumour
Biopsy Cytology does not reveal architectural information about a tissue. In addition, certain
neoplasms may not exfoliate sufficient cells for a cytologic diagnosis or cytologic
examination may provide insufficient information to make an accurate diagnosis.
Histopathologic examination is necessary for assessment of tissue architecture and may
be used to establish the tumour grade (eg for mast cell tumours) which may affect
prognosis and, consequently, the treatment.
There are a variety of techniques for collection of tumour samples for histopathology:
• Needle biopsy (e.g. Tru-cut and Jamshidi)
• Biopsy forceps used for sampling tumours during endoscopy
• Incisional biopsy (including skin-punch biopsy)
• Excisional biopsy
Needle biopsy is a very commonly used biopsy technique, which is especially useful for
biopsy of abdominal organs (liver, spleen and kidney) with ultrasound guidance. It is a
straight-forward and quick method of getting a sample, but has the disadvantage that the
sample size is small. This can be a problem if the sample collected is not representative
of the tumour (for example, an area of haemorrhage or necrosis) and is non-diagnostic.
Biopsy forceps are crocodile jaw type ‘grab’ forceps that are used to take samples from
the mucosal surface of the respiratory, gastrointestinal and urinary tracts generally using
endoscopy for guidance.
Incisional biopsy is generally applied to tumours which can be approached for direct
visualisation but which are too large to be easily or completely removed, particularly
where the histopathology may alter the treatment plan, for example tumours on distal
limbs.

Page 33 of 52 VICAS 2012 ©Ronan Doyle
A wedge or a core is taken from the tumour in an area that could later be completely
excised. The section should be large enough and deep enough to obtain a
representative sample and ideally should contain a junction between normal and
abnormal tissue. Avoid biopsy of an area that contains only ulcerated or inflamed tissue
as this may provide a non representative sample. Inicisional biopsy is usually easily
performed under sedation/local or short GA
Excisional biopsy is suitable for small or easily removed tumours (for example dermal
tumours on the trunk). Diagnosis and treatment are therefore performed concurrently.
Preoperative assessment of the tumour via cytology is preferable to ensure adequate
margins are obtained to maximise probability of a cure. As the subsequent scar may be
larger than the original mass, it is important that consideration is given to the complexity
involved if subsequent scar excision if tumour remains is then necessary.
Surgical Treatment of Cancer Despite the advances in chemotherapy and other treatment modalities, surgery
continues to be the most effective option for the management of cancer. Clinical cures
are more commonly attained by surgical extirpation of localised disease than with any
other treatment modality, however ‘the first time to cut is the best time to cure’ and
subsequent surgeries following an incomplete resection are more likely to be associated
with tumour recurrence.
Before the tumour is removed, the surgeon must consider the ‘dose’ of surgical
intervention required, i.e. is local excision sufficient or is enbloc or compartmental
excision necessary.
Preoperative assessment must include assessment of the patient for concurrent disease.
Some tumours can cause specific clinical disease (paraneoplastic disease) that can
Incisional biopsy is an oft neglected technique but is ESSENTIAL with tumours that might
require major surgical intervention. The information provided may strongly influence the
planned surgery, especially as the ‘the first time to cut is the best time to cure’.
Newer histopathologic assessment (such as Ki-67 for mast cell) tumours can significantly
affect the approach to management

Page 34 of 52 VICAS 2012 ©Ronan Doyle
complicate case management. If the tumour is considered malignant, accurate staging of
the tumour is essential to provide an accurate prognosis. This requires examination of
local and regional lymph nodes and determination of distant metastasis via a
combination of imaging modalities.
Surgical management of cancer should ideally be performed with curative intent.
Important features of oncologic surgery include:
• Minimal and gentle handling of neoplastic tissue to avoid exfoliation of tumour
cells during the surgery
• Irrigate the wound with sterile saline following extirpation to remove any
exfoliated cells
• If the tumour has been biopsied remove the biopsy tract
• Handle and cut through normal tissue not the tumour.
• Ligate the venous drainage for large encapsulated tumours early in the
procedure to avoid haematogenous spread of large tumour emboli.
o This is open to question as it this will lead to a blood engorged mass until
the arterial supply is ligated. The risk of embolisation with initial arterial
ligation is probably small as once ligated, the venous system rapidly
collapses. It is more important to handle a very vascular encapsulated
tumour carefully to reduce the risk of embolisation.
Local excision
The surgical dissection plane is directly onto the tumour capsule and the mass is ‘shelled
out’ from the surrounding tissue. This is the least invasive and easiest method, however
as microscopic disease will remain within the tumour bed, local excision must be
confined to beingn tumours with negligible risk of recurrence and is contraindicated in
all malignant and invasive benign tumours. Tumours amenable to local excision
include lipoma, histiocytoma and certain adenomas, for example perianal adenoma.
Wide, local excision
For benign tumours that do not have a distinct capsule, excision of the tumour together
with a margin of tissue is indicated. Gross tumour should not be observed within the
Adipose tissue is not considered a fascial plane.
For dermal tumours, the panniculus muscle provides an effective fascial plane in most instances; for subcutaneous tumours excision of aponeurosis, fascia or deeper muscle may be required

Page 35 of 52 VICAS 2012 ©Ronan Doyle
dissection plane at any time. The margin of normal tissue required varies with the tumour
type, grade and local invasiveness. A margin of 2 cm is often quoted, but a wider margin
may be required with high grade malignancies to ensure the removal of all microscopic
disease and similarly a smaller margin may be appropriate depending on the tumour
location – individual assessment is required. The tissue margin must extend in three
dimensions all around the mass. Often the deep margin is neglected. As tumours
rarely cross fascial planes, the deep dissection can terminate one fascial plane beyond
the tumour.
Compartmental resection
Tumours with aggressive invasion into local tissue or that have arisen from anatomical
structures (such as muscle) may require resection of the complete anatomical structure.
This requires careful preoperative planning with advanced imaging (CT or MRI) to
determine the extent of the tumour and subsequent excision required as well as
ensuring that reconstruction of the resulting deficit can be achieved

Page 36 of 52 VICAS 2012 ©Ronan Doyle
Surgical Wound Closure:
Key Principles
Closure of a wound using a surgical technique is usually the quickest and often the most
cost effective method in achieving resolution of an open wound for our patients.
Reconstruction of large skin and deeper tissue deficits is obviously a key skill in surgical
oncology. In these situations having a choice of a number of options of closure and
utilising multiple techniques with confidence is essential in achieving successful results.
For all surgical techniques, but in particular in relation to closure of skin wounds, an
appropriate surgical technique is essential. The basic principles of surgery were summed
up by Halsted in the 19th century.
Tissue handling and instrumentation:
Avoid the use of large rat-toothed forceps as these can cause considerable trauma to
wound edges, especially if repeatedly used for assessing wound approximation. I prefer
use of either an Adson or Adson-Brown thumb forceps or a Debakey forceps. Better still,
if repeated manipulation of a skin flap will be required use either a pointed reduction
forceps or place stay sutures. Correct application of the scalpel blade in a perpendicular
manner to the skin surface is important to avoid partial thickness ragged incisions which
will promote more inflammation. Careful blunt dissection with a blunt tipped Metzenbaum
scissors or Mosquito haemostats is used to undermine skin or dissect between fascial
layers.
Halsted’s Principles of Surgery
Strict asepsis
Gentle tissue handling
Accurate hemostasis
Maintenance of adequate blood supply
Careful approximation of tissues
Avoidance of tension in tissues
Obliteration of dead space

Page 37 of 52 VICAS 2012 ©Ronan Doyle
Other equipment required are a marker pen and ruler to measure margins. Intermittent
lavage of large flaps or placing saline soaked sponges over them is necessary to
prevent dessication. Copious lavage of the wound site prior to closure is also advised to
remove any residual debris. Electrosurgical coagulation is very useful for larger
procedures to speed up operating time and prevent haematoma formation. It is important
to avoid excessive use especially in areas that may be under tension or with reduced
vascularity as it will cause considerably more inflammation.
Suture material
As previously discussed the initial strength of a wound is due to the fibrin clot and
therefore minimal. Until days 7-14 when collagen is deposited into the wound, the
sutures must support the wound. Therefore correct suture selection and avoiding
prolongation of the inflammatory phase so that wound healing occurs rapidly is critical.
All suture materials act as a foreign body within the wound, which will therefore tend to
slow wound healing. Therefore use of a suture material must be advantageous to the
wound and exceed any deleterious side effects associated with it. There is now no place
for the older natural suture materials such as catgut that elicit a strong inflammatory
reaction within the wound. These suture materials breakdown due to this inflammatory
reaction which makes them also unreliable within the wound. The modern absorbable
synthetic suture materials are absorbable by hydrolysis and elicit a minimal inflammatory
reaction within the wound. The degree of suture reaction elicited is proportional to the
amount of suture within the wound. The amount of suture depends on the diameter of
the suture and the suture pattern used with much more suture present for interrupted
compared to continuous techniques.
Suture selection is generally based on surgeon preference and experience. However
use of monofilament sutures is advisable for most wounds as there is less tissue drag
(and therefore less trauma) and allow less bacterial adherence. This later point is
especially important in contaminated wounds. I prefer not to use multifilament suture
material for skin suturing as it generally elicits much more inflammation. For skin suturing
I prefer to use either monofilament nylon or polypropylene, generally size 2 to 3 metric
(3/0 – 2/0 USP). I use the larger size for only large/giant dogs.
For the subcutaneous tissues, sutures need to be absorbable and either monofilament
or multifilament synthetic absorbable sutures can be used, although multifilament is

Page 38 of 52 VICAS 2012 ©Ronan Doyle
avoided with any contamination. My preference is for a monofilament in all cases and I
generally use either polydioxanone (PDS, Ethilon) or glycomer 631 (Biosyn, Covidien),
although if there will be minimal tension present and rapid healing anticipated then
poligecaprone (Monocryl, Ethilon) or Caprosyn (Covidien) are alternatives. These can be
especially useful in cats as they subjectively appear to cause less reaction. For most
fascial planes my suture preference is for one of the longer acting absorbable
monofilaments, such as polydioxanone (PDS, Ethilon) or polyglyconate (Maxon,
Covidien). The size of suture depends on the tissue but is generally 2metric (3/0 USP)
for the subcutaneous tissue and size 2 to 3.5 metric (3/0 – 0 USP) for the fascia
depending on the tension and size of animal.
Assessment and Planning
Surgical planning, whether for an open wound or for tumour removal, requires an
accurate estimation of the tissue deficit that needs to be closed. Various options for
closure of the wound are then assessed and ranked according to the likelihood of the
most rapid closure and return to function for the patient. This is then balanced against
surgeon experience, patient management and client acceptability. The closure options
available will depend on the region where the wound is and the availability of local skin.
It is very common to utilise a combination of techniques especially for large
reconstructions. Therefore a thorough knowledge of the available closure options is
essential.
The surrounding skin is manipulated to determine its local tension and availability (a
process that my colleague Jonathan Bray terms scrunching!). This allows assessment of
whether the wound can be closed by mobilisation of the local skin or if more distant flaps
will be required. This step is initially performed with the animal conscious and in various
normal positions. When under anaesthesia I repeat this before the hair is clipped to
assess the cosmetic effect. I then repeat it after the clip to ensure that sufficient hair has
been clipped. After position in surgery I repeat the ‘scrunch’ to ensure the area is
sufficiently draped and that the patient position is ideal. I scrunch again after I have
drawn the required margin around the tumour to ensure that with this margin closure can
be achieved. After tumour removal the wound edges will retract and the defect will look
considerably bigger. Scrunching now may be more difficult but should be possible

Page 39 of 52 VICAS 2012 ©Ronan Doyle
(manipulate the skin with stay sutures attached to the edges). If I have been satisfied up
to now I can be reasonably confident that local closure will be possible.
The same process is undertaken if skin is to be taken from another site (as with
transposition flaps and axial pattern flaps) to assess the ability to close this donor site
can be made.
When preparing the site I will generally clip wide enough so that I have at least two
options for closure possible, especially with more challenging reconstructions. As a
default I will always clip and prepare more skin than obviously necessary. Obviously
owners need to be warned of this prior to surgery.
Surgical Drains
Obliteration of dead space is one of the key principles of successful surgery. Dead
space will inevitably fill with exudates from the wound and if this continues to collect can
lead to a separation of fascial planes. Apposition of the tissue layers is prevented and
this will at least delay healing but can lead to wound dehiscence. In the presence of
bacterial contamination, infection of the dead space will lead to abscessation.
Most open wounds will be able to drain through the wound by gravity, although if there is
a ventral pocket additional drainage may be required. For closed wounds, drains are
needed to control the dead space by removing any exudates that collect in the area.
Dead space can be controlled by careful layered closure of deeper wounds with
interrupted sutures or continuous suture lines. However to remove the exudate that will
collect in the remaining dead space, wound drainage is required. If closure of dead
space is not possible due to important local structures drainage will definitely be closed.
Use of pressure bandages can also be used to close dead space/restrict movement.
Wound drains are classified as either passive, active or sump.
Passive: Passive drainage is performed using radioopaque latex Penrose drains.
These are available in different widths but the basic principle is that there will be gravity
dependent flow of fluid over the surface of the drain. Therefore it is obvious that Penrose
drains must exit at a site ventral to the area to be drained. The drain is usually anchored
in a dorsal position with a single skin suture that goes through the skin, tacks the drain
and exits out through the skin. There is no advantage to having a separate dorsal hole
through which the drain enters. It is best not to place the drain directly below the closed
wound incision. It is also very important not to exit drain through the closed wound

Page 40 of 52 VICAS 2012 ©Ronan Doyle
incision as this will delay healing, but to exit it through a separate ventral exit site. At this
position the drain is anchored to the skin with a single suture.
The disadvantage of Penrose drains is that they are often unable to adequately drain
large areas, however in this case multiple drains may be placed with a layered closure.
Passive drains are also messy and the exit site must be covered to collect the exudates
and to prevent introduction of bacteria. This bandage will need to be changed regularly
to assess the level and type of fluid production.
The resolution of dead space can be slow with Penrose drains and it can be difficult to
decide when to remove them, as assessment of the rate of fluid production is tricky.
Penrose drains are usually maintained for 3-5 days or when the production is minimal.
Drains will elicit some fluid production themselves, therefore once fluid production
appears to tail off and stabilise, removal should be appropriate.
Active: Active or closed suction drains have considerable advantage over passive
drains. They rapidly eliminate dead space, leading to a good approximation of underlying
tissues and thereby a quicker cessation of drainage. They are less messy as the fluid is
collected in the vacuum container, which also allows calculation of fluid production. This
is very useful in determining the progression of the dead space obliteration. They do not
require bulky bandaging over the wound site but instead can be secured with stockinette
or ties. These drains are placed into the dead space and are then exited (usually with a
swaged-on needle with commercial drains) at a site distant from the wound. They do not
rely on gravity. Active suction drains are dependent on creating a vacuum within the
dead space, therefore it is essential that the primary wound has been completely closed.
Obviously they cannot be used in combination with passive drains and if primary wound
dehiscence does occur then the drain will become ineffective. The disadvantage is that
they are more expensive, although the reduced bandaging and hospitalisation required
will usually offset this. Drains are produced by many companies, with my preference for
the less bulky vacuum containers that can be easily removed, emptied and replaced.
Homemade drains can also be made using butterfly catheters and vacutainers.

Page 41 of 52 VICAS 2012 ©Ronan Doyle
Managing Skin Tension
There are many strategies to manage skin tension that can be utilised during surgery.
However the key to consistent successful management is the anticipation of tension
during the initial surgical planning stages (see scrunching earlier). Anticipated tension
can then be managed using a combination of techniques before, during and after
surgery.
Preoperative techniques
Assessment of tension lines: tension lines have been mapped in the dog and cat and
can be useful when planning excisions and closures. In general the length of the incision
is made parallel to these lines, otherwise there is a greater tendency for the wound to
widen. However there can be considerable variability between breeds and the maps are
somewhat inaccurate, particularly on the limbs. This can confuse planning and closure.
An easy way to assess the direction of the tension lines following a tumour excision is to
examine the shape a circular wound assumes. An initial circular wound will be stretched
into an elliptical shape, whose long axis is parallel to the tension lines. This ellipse can
then be lengthened (to prevent dog ears) and closed.
Presurgical skin-stretching: skin is a viscoelastic tissue and the application of a
stretching force over time allows the skin to extend beyond its inherent elasticity. The
most commonly used technique is pre-suturing of skin, a technique used exclusively in
the distal limbs for smaller skin deficits. Tension vertical mattress sutures are placed
across the elective surgical site to stretch the skin on opposite sides. Sutures are placed
under local anaesthesia, sedation or short GA 24 hours prior to intended surgery. The
bites are placed about 3-5cm from the edges of the intended excision margins. A
number of sutures are placed along the length of the wound and the sutures when tied
place the surrounding skin under tension. For large defects, in particular on the trunk,
Always start with a CIRCULAR incision when excising skin masses (which are mostly
circular) rather than an elliptical incision. Tension lines mean that most circular defects
change into an elliptical shape. This means that only enough skin as necessary is removed

Page 42 of 52 VICAS 2012 ©Ronan Doyle
skin stretchers (as described by Dr. Pavletic) can be utilised. These are made of
adhesive Velcro® pads that are glued (with tissue glue) to the surrounding skin. Velcro
tape is then attached and stretched between the pads across the elective surgical site.
These can be adjusted 3-4 times a day to keep the skin under continuous tension to
increase recruitment of local skin. These are kept in place for 1-4 days (with the greatest
gains at 3-4 days) and may also be used postoperatively to reduce incisional tension.
The disadvantage is that they may be difficult to maintain in position, especially in the
boisterous animal.
Patient position: correct patient positioning is essential when planning surgery.
Releasing skin that is trapped under the recumbent animal may mobilise more skin and
should be routinely performed prior to the final prep and draping. Placing pads under the
animal may help to mobilise skin, for example pads under the dependent scapula and
pelvis for large lateral flank wounds. Positioning the limbs in normal anatomical positions
is particularly important when working in the inguinal or ventral pelvic positions to aid
wound closure (for example bilateral caudal mastectomies).
Operative techniques
Undermining skin: correctly undermining skin is a crucial surgeon skill in releasing
tension and mobilising skin. Knowledge of the vascular anatomy of the skin is essential.
If present, the panniculus muscle must be preserved when undermining skin. This is
because the major blood supply to the overlying skin (the deep subdermal plexus) is
intimately associated with it. Where there is no panniculus muscle (middle and distal
limbs), the deep subdermal plexus is associated with the subcutaneous fat on the deep
face of the dermis. Skin should therefore be undermined below this layer. This may
mean undermining below the outer muscle fascia if the skin is very closely associated
with it.
Using an atraumatic surgical technique such as careful blunt dissection helps to
minimise damage to the subdermal plexus. Knowledge of the position of the direct
cutaneous vessels should avoid damage to them when dissecting. Use careful blunt
dissection with a blunt tipped Metzenbaum scissors or Mosquito haemostats (preferable
near vascular pedicles to avoid disastrous consequences) to undermine skin or dissect
between fascial layers. For skin that is firmly adhered to an underlying granulation tissue

Page 43 of 52 VICAS 2012 ©Ronan Doyle
bed when closing open wounds, use of a scalpel blade is best to release the edges (for
the first 1-2cm). Wherever possible, preserve small feeder vessels encountered during
dissection.
The risks in undermining are vascular compromise and creating excessive dead space.
Geometric patterns for closure: particular geometric patterns can be utilised to close
certain wounds shapes. These closure patterns can be useful in areas where there is
limited local skin, however as they rely on the elasticity of local skin there can be
considerable tension, particularly at points of intersection of multiple suture lines (with X
and Y configurations). These are common points of wound dehiscence. It is generally
preferable to close wounds in a linear or curvilinear fashion when possible. With circular
and elliptical defects, sutures are placed to halve the defect to achieve good apposition
along the length of the incision. Dog ears can occur at the incision ends of circular and
elliptical defects, but careful suturing or excision of small amounts of skin will achieve a
cosmetic closure. A length to width ratio of 4:1 avoids dog-ears at the ends of incisions,
but I feel this usually leads to excessive skin excision especially for excision of skin
tumours and is rarely necessary.
See the following diagrams for examples.

Page 44 of 52 VICAS 2012 ©Ronan Doyle
Releasing incisions:
Single – by making an incision parallel to the wound on one side, the intervening skin
can be undermined and slid across to close the primary incision. This technique is useful
in areas where the original wound is over key structures such as tendons, nerves,
vessels or bone (especially used following plating of the distal limb), whereas the
releasing incision in a less critical position. A single releasing incision is made
approximately 3 to 10cm from the wound depending on the size of the wound, intended
position of the releasing incision and the regional skin laxity. Blood supply to the
intervening skin is from either end (this is also called a bipedicle flap). The releasing
incision is left to heal by second intention (this will probably take 4-6 weeks) or can be
closed primarily if there is sufficient adjacent skin.
Multiple – rows of multiple incisions can be made on either side of a wound (in particular
when reconstructing defects on the distal limb) to aid closure. The incisions are at least
1cm from the wounds, are approximately 1cm long and at least 1cm apart. A further row
of incisions can be made 1-2 cm from the initial row. Only enough incisions are made to
release the tension on wound, which is usually held near to apposition when making the
incisions. If this technique is used for defects of 25% of the circumference of the limb
then, the cosmetic appearance is good whereas if the defect is 33% then cosmesis is
poor. The main concern with this technique is that there can be some compromise to the
vascularity of the skin, especially if this is an area under tension. A long single releasing
incision provides maximum tension relief compared to multiple rows of small incisions.
Single releasing incision
Multiple releasing incisions

Page 45 of 52 VICAS 2012 ©Ronan Doyle
Walking sutures: these are used to move skin across a defect, to obliterate dead space
and to distribute tension across a wound. The sutures are placed by taking a bite of the
undermined skin followed by a bite of the underlying fascia or connective tissue but at a
point 2-3 cm closer to the middle of the wound. By staggering rows of these sutures on
either side of the wound, the skin is advanced towards its centre. as the sutures are tied.
This technique can be used to a stage where the wound edges are near to apposition
and can be closed. Absorbable sutures of 2 metric (3/0 USP) are used for these sutures
and they are spaced at least 2-3 cm apart. The skin overlying these sutures is usually
dimpled but this will resolve as the suture is absorbed. Placement of these sutures is
commenced at the deepest portions, and it is useful to preplace all the sutures in a row
before tying. Care is needed to avoid direct cutaneous vessels. Remaining dead space
will still need to be controlled using drains or bandages. A possible complication is the
formation of multiple seromas that do not communicate.
V-Y plasty: this technique is simple to execute and can be used to relieve minor tension
in certain areas such as the eyelids. Closing the distal portion of the V as the lY, pushes
a small triangle of skin forward along the line of the Y.
Use of skin suturing tension relieving patterns: the ideal situation is that the skin
edges are under a minimal amount of tension and that the skin sutures are only required
to keep the skin edges in apposition, to allow rapid epithelialisation. Tension relieving
skin suture patterns are not to be relied upon as a sole source of tension relief and for
larger wounds this is a sure route to dehiscence. The skin edges are generally unable to
withstand significant tension as this leads to vascular compromise and necrosis of the
skin edges. However certain suture patterns can be useful in relieving minor tension or
intermittent tension.
Simple interrupted sutures are easy to place and commonly used but are more time
consuming to place. My personal preference for nearly all wounds is interrupted cruciate
Walking sutures are very useful in distributing tension across a wound surface to
reduce tension on the primary suture line. They can also be used to close dead
space but do not replace the provision of adequate drainage for most cases.
Page 46 of 52 VICAS 2012 ©Ronan Doyle
sutures using 3/0 swaged-on monofilament polypropylene or nylon (I use 2/0 for large
dogs or on the thicker dorsal skin). Compared to simple interrupted they provide a
stronger closure, resist tension, prevent eversion and are quicker to place. If small gaps
are present or very accurate placement is required I will use occasional simple
interrupted sutures. Skin staples can be very useful for rapid placement, but are only
suitable if there is no tension and are placed in relatively thin skin. They can easily pull
out or devitalise the skin edge if the vascularity of the skin is reduced or there is
increased tension.
Vertical and horizontal mattress suture patterns are placed away from the wound edges.
Stents of tubing or buttons can be used to prevent suture cut through or impairment of
skin circulation. Close daily inspection for evidence of skin necrosis is necessary. The
horizontal mattress suture is more likely to cause a zone of vascular compromise
compared to the vertical mattress. Vertical mattress as well as far-near-near-far and far-
far-near-near suture patterns are placed perpendicular to the wound and therefore cause
less vascular compromise.
Intradermal suture patterns allow excellent apposition and cosmesis, but are not
advisable if there is considerable tension as they will increase the vascular compromise
at the skin edge.
Local flaps (sub-dermal plexus flaps) Pedicle grafts are partially detached segments of skin and subcutaneous tissue that
receives its vascular supply from the pedicle (base) of the flap. If this type of flap is
elevated adjacent to the wound then it is termed a local flap. These are also termed
deep subdermal plexus flaps as they depend on an intact deep subdermal plexus
entering the flap for survival. These flaps can be developed if a wound is located
adjacent to an area of loose elastic skin that can be mobilised. It is important to
remember that this may lead to a deficit at the donor site that needs to be closed. As
these flaps are dependent on the subdermal plexus, they are generally not applicable to
very large deficits. With all these flaps great care is needed in handling to minimise
damage to the vascular supply. If the flap is adjacent to direct cutaneous vessels, they
can be include in the base of the flap or alternatively an axial pattern flap can be utilised.

Page 47 of 52 VICAS 2012 ©Ronan Doyle
Advancement flaps
• These are local flaps that are elevated and advanced forwards over the defect.
• They are developed parallel to lines of least resistance – assessment and scrunching
around the circumference of the wound identifies the best orientation of the flap.
• The flap width is determined by the width of the defect. The flap is developed using
two diverging incisions.
• The flap is undermined and advanced into the defect.
• There are no rules regarding appropriate width:length ratios as regional vascularity
varies. However it is advisable to have a flap with a base slightly wider than its body.
• Avoid long narrow flaps as the end is more likely to undergo ischaemic necrosis.
• The sutures along the sides of the advancement flap should therefore be placed first
with the aim of taking most of the tension off the distant suture line.
• Instead of a single large advancement flap, develop advancement flaps on either
side of a wound and close in a H formation.
Rotation flaps
• This is a semicircular flap that rotates into the adjacent wound. Again this flap relies
on stretching of the undermined skin but in a semicircular manner.
• Traditionally this flap has been described with an arc of rotation four times the length
required to rotate the flap into the defect. This however is usually unnecessary in
dogs and cats and the flap is developed in a stepwise manner until it can close the
wound.
• In my experience these flaps are infrequently indicated.
Although easy to create, advancement flaps have significant limitations as they rely on
stretching the skin to close the defect. The wound closure will therefore have some
tension due to the elastic retractive force of the stretched flap. This increases the risk of
wound dehiscence of the distant suture line.
Gentle tissue handling, careful undermining and management of tension are essential to maximise the success of local flaps

Page 48 of 52 VICAS 2012 ©Ronan Doyle
Transposition flaps
• These are very useful local flaps as they supply additional new loose skin into the
wound. They do require more detailed planning and assessment prior to use and a
donor wound is created that needs to be closed.
• These flaps are developed from loose skin that is within 45 to 90 degrees of the
wound deficit. The long axis of the flap is developed parallel to tension lines, as this
makes closure of the donor wound more straightforward
• The width of the flap corresponds to the width of the defect adjacent to the proposed
flap. The pivot point of the flap is identified and a measurement is made from this
point to the farthest position of the defect. This distance will be equal to the distance
from the pivot point to the farthest point of the flap. Once elevated the flap will be
rotated through an arc into the defect.
• As the arc of rotation of the flap increases the length of the transposition flap
decreases and a dog ear can develop at the base.
• This is a very versatile flap that can be used in numerous locations on the body. On
the distal limb the flap is created parallel to the long axis of the limb.
Axial pattern flaps Axial pattern flaps are pedicle grafts that contain a direct cutaneous artery and vein. The
regions of skin that are supplied by most of the main direct cutaneous vessels have
been mapped in dogs and cats. This allows consistent identification and mobilisation of
large skin flaps in one stage with confidence that there is a reliable vascular supply.
These can then be used for the closure of many large adjacent defects.
Axial pattern flaps are generally rectangular in shape; although they can be modified
with a right angle extension (this area of the flap is dependent on the deep subdermal
plexus). The planning and execution of an axial pattern flap must be meticulous, as
if there is failure of the flap, the results can be catastrophic. Flap failure is generally
due to technical error (failure to identify perimeters correctly, failure to preserve the
vascular pedicle, failure to manage dead space etc.). There will also be a significant
donor site to be closed. Axial pattern flap surgery is time-consuming with consequent
lengthy anaesthesia.

Page 49 of 52 VICAS 2012 ©Ronan Doyle
The elevated flap can be rotated into position with a base of skin still intact or this base
can be incised to create an ‘island’ flap. This reduces the wastage that results in with
rotation when the base is intact (when a large dog ear can develop). However the island
flap is now completely dependent on its vascular pedicle for its blood supply and as
there is no skin attachment there is a risk of kinking the pedicle with resultant vascular
compromise. All the principles of surgical wound closure must be adhered to especially
dead space management.
In the postoperative period the flap margins should always appear pink and viable.
Cyanosis or excess swelling are indicators of vascular compromise and potential
impending necrosis.
These flaps have also been used for microvascular transfer techniques where the
cutaneous vessels are identified; the flap is elevated and then transfered to a distant site
where the vessels can be anastomosed to large local vessels. This procedure requires
considerable experience and expertise and are very rarely indicated.
Free Skin Grafts Free skin grafts are a versatile and accessible method of closing small to large sized
wounds, usually following a period of open wound healing. In difficult areas such as the
distal limbs, free skin grafts can be utilised to achieve durable epithelial cover. Full
thickness grafts have the advantage of including the adnexal structures which improves
cosmesis and are by far the most commonly used graft in dogs and cats.
Free skin grafts lack a vascular attachment on transfer to the wound and must depend
on imbibition of wound fluid from the recipient bed for the first 48 hours. It follows
therefore that having a healthy vascular bed plays a key role in the initial preparation for
a free skin graft. The most common recipient bed is clean healthy granulation tissue, but
healthy muscle and periosteum can also support a graft. Chronic granulation tissue
(pale, poorly vascularised) is unsuitable but can be coverted back to good tissue by
serial debridement and bandaging for a few days prior to grafting.
Axial pattern flaps provide the ability to resect large tumours and close large
defects with vascularised skin. However flap failure is a castastrophic disaster so surgery should be not undertaken lightly!

Page 50 of 52 VICAS 2012 ©Ronan Doyle
The graft is harvested from an area where there is plenty of free skin. This is then
prepared by removing all subcutaneous fat or muscle. The graft is then meshed by
placing small incisions at staggered intervals. This is to allow effective drainage of fluid
that may collect beneath the graft. The graft is orientated in the correct direction of hair
growth, secured to the recipient site with sutures, overlapping the edges by 2-5 mm.
Any accumulation of debris, blood, purulent material or foreign material between the
graft and the recipient site will impair plasmatic imbibition (absorption of recipient site
wound fluid) and will lead to ischaemic necrosis of the graft. Therefore the recipient bed
should be smooth, clean, free of infection and have all haemorrhage controlled. For the
first 48-72 hours the graft will appear swollen and slightly cyanotic. All subcutaneous fat
must be removed to allow imbibition to occur. Vascularisation of the graft occurs via
entry of capillaries of old vascular channels (inosculation) or creation of new vessels
(revascularisation). These vessels are fragile and any movement of the graft will prevent
a successful ‘take’ – therefore careful immobilisation of the graft to the recipient bed by
carefully suturing in position and subsequent bandaging to immobilise the area is very
important. The initial bandage (an absorbent foam, silicone dressing with absorptive
secondary layer, or possibly vacuum-assisted closure) to maintain moist wound
conditions is recommended) is usually left in place for at least 72 hours (I usually wait 3-
5 days unless concerned). Sedation is essential for the first bandage change to prevent
excessive movement. Extreme care is needed when lifting off the bandage material in
case there is some adherence to the graft. The bandage is then changed every 2-3 days
for about 10-14 days. A light dressing is then placed for a further 2 weeks to protect the
initially delicate epithelium.
Should the graft appear to undergo necrosis, all may not be lost as the deeper dermal
and adnexal layers may survive and epithelialisation can occur from these areas.
Therefore avoid debridement of the graft even for at least 5-6 days even if it looks as if
full necrosis has occurred.
An alternative to full thickness meshed grafts is the use of punch grafts. These are
harvested with a biopsy punch and placed in holes created in the granulation tissue bed.
This is a very useful and fast technique for closure of small wounds, especially if more
movement is anticipated

Page 51 of 52 VICAS 2012 ©Ronan Doyle
Complications of wound closure Seroma/haematoma
Fluid or blood that collects between tissue layers will significantly delay healing. Dead
space management is a key element of surgical wound closure (see earlier section on
drains). However if a seroma develops due to poor drain selection, failure to close dead
space, premature drain removal, a high motion area (the cervical region, shoulder and
inguinal region are common sites for development), then management is required as if
further fluid collects in the dead space then enlargement of the area can lead to further
disruption or enlargement of the wound. This can place pressure on the wound, leakage
of fluid from the sutured incision and dehiscence. Should bacteria gain access to the
area, then the fluid can be an ideal medium for infection to develop.
Management depends on the extent of the seroma. Monitoring of small accumulations is
appropriate, with needle drainage if necessary. These will often resolve without
treatment. Larger or rapidly developing accumulations can be needle drained (with strict
asepsis) and then bandaged to control dead space or a new drain (active or penrose)
may need to be placed. Placement of active drains can be achieved in a closed manner
- the swaged-on needle drain can be placed through the skin, placed through the
seroma and then manipulated to exit at a distant site. The drain can then be pulled
through into the seroma cavity. The drain is secured at the distant exit site. This
technique is considerably easier then having to open the wound again and place a
penrose drain. With active drainage the seroma cavity (by now usually lined with
granulation tissue) will be sucked into apposition and usually will rapidly close.
Wound dehiscence
Pavletic has identified 12 potential causes of dehiscence – knowledge of these before
embarking on surgery helps the anticipation and avoidance of this major complication.
Nearly all of these causes are technical surgeon errors!
• Excessive tension leading to ischaemic necrosis of wound edges and suture pullout
• Inappropriate suture placement too close to skin edge (within 5mm there is a zone of
increased collagenase activity which increases the risk of suture pullout)
• Suture placement in scar tissue which has poor suture-holding capacity

Page 52 of 52 VICAS 2012 ©Ronan Doyle
• Inappropriate suture material – size, type (especially avoid multifilament for skin),
pattern, placement etc. for skin type
• Inappropriate suture pattern leading to vascular compromise of skin edge and
subsequent necrosis
• Premature removal of sutures
• Premature closure of inflamed skin leading to skin necrosis
• Exudative wound leading to maceration of skin edges
• Underrun skin edges with major dead space or underlying infection, foreign bodies,
necrosis, neoplasia
• Poor postoperative management with patient self-trauma of wound or lack of
immobilisation, poor bandage technique, iatrogenic bandage injury
• Delayed healing due to corticosteroids (usually with long-term treatment) or other
agents
• If all the above are excluded – suspect an underlying healing disorder
Further reading BSAVA Manual of Canine and Feline Wound Management and Reconstruction, 2nd Edition, 2009, BSAVA Atlas of Small Animal Reconstructive Surgery 3nd Edn., Pavletic M.M., W.B Saunders Small Animal Surgery, 3rd Edn., Fossum T.W., Mosby Textbook of Small Animal Surgery, 3rd Edn, Slatter, W.B. Saunders Veterinary Clinics of North America, Small Animal Practice: Wound Management, July 2006, Ed Swaim S.F., Krahwinkel D.J.
Although any wound dehiscence is disappointing and frustrating, always use it as an
opportunity to identify the cause and then try to avoid repeating the same mistake on
this or the next wound!