Embed Size (px)
Citation preview
FLANGED BINDING
This technique uses two narrow complimentary fabric strips to make the binding strip. It adds a little punch of color and frames your quilt in style. The flanged binding method is accomplished by attaching the binding to the back of the quilt then flipping it over and machine stitching in the ditch between the 2 strips on the front.
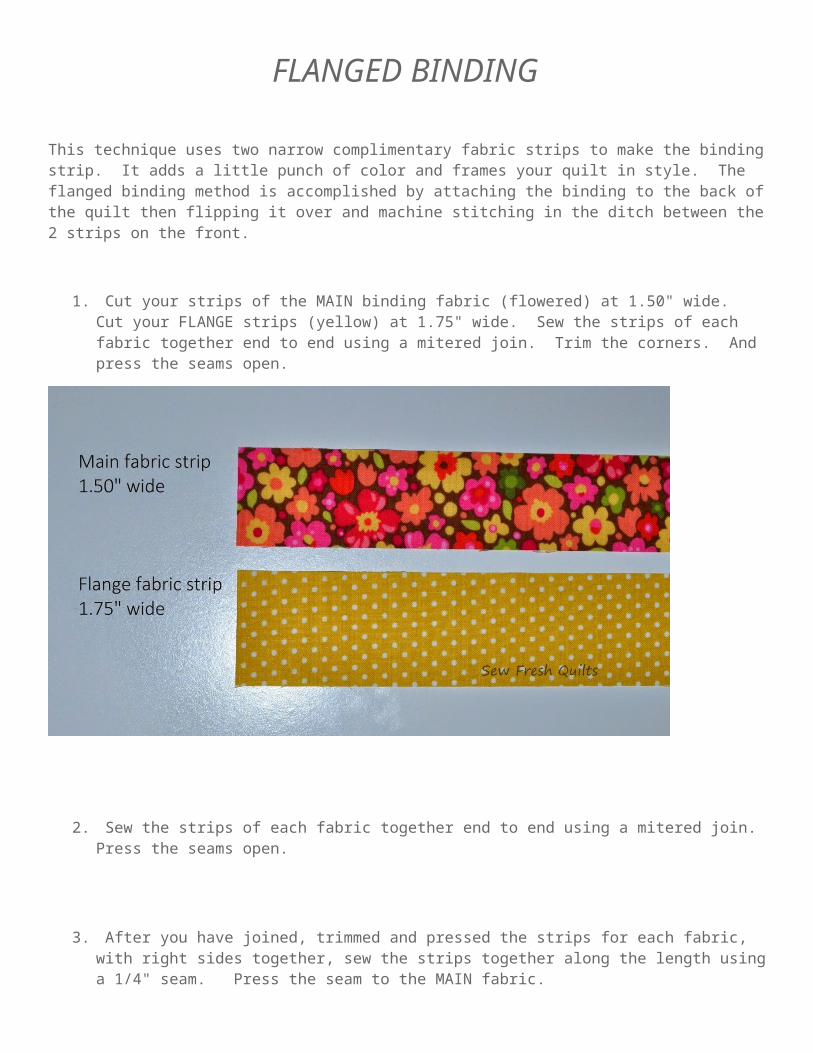
1. Cut your strips of the MAIN binding fabric (flowered) at 1.50" wide. Cut your FLANGE strips (yellow) at 1.75" wide. Sew the strips of each fabric together end to end using a mitered join. Trim the corners. And press the seams open.
2. Sew the strips of each fabric together end to end using a mitered join. Press the seams open.
3. After you have joined, trimmed and pressed the strips for each fabric, with right sides together, sew the strips together along the length using a 1/4" seam. Press the seam to the MAIN fabric.

4. As with traditional binding, press with wrong sides together along the length matching the raw edges.
5. Before starting to sew the binding in place, for a small project like this runner, I like to lay my binding around the perimeter of the quilt to ensure none of the joins will end up at a corner on the quilt.

6. Leaving a 10" tail, apply the binding to the BACK of the quilt with the FLANGE fabric facing up. Keep the raw edges of the binding even with the raw edge of your backing and use a 1/4" seam. Backstitch at the beginning of the seam.
7. Sew the binding all the way around the quilt until you are about 12" away from where you started. Backstitch and stop sewing. Remove the quilt from your machine.
8. Fold your ending tail down across the starting tail and overlap by the width of the binding. This would be 2.5". I cut my tail a little shorter to ensure that binding is taut and there is no sag or ruffle.
9. Open your tails as shown. Mark a diagonal line on your starting tail, 2.5" in from the corner on the bottom, up to the corner at the top. Overlap your tail ends to make a miter join. Take care to use a pin to match where the seam lines on the two tails will meet along the diagonal. When making your final joining seam, it can be a bit tricky to get the seam to match. Notice the pin is helping to line up the two seams on the tails.

10. Sew along the diagonal line being careful to have your needle land in the hole made where the pin is matching the two seam lines. Open up your seam to have a look before cutting your tails. If your seams don't line up well, remove the stitching and try again. Trim the seam and press the seam open and as you did when joining the strips to make your binding. Then place the quilt back on the machine to finish attaching your binding. Backstitch at the beginning and end of your final seam.


11. Press the binding out away from the back of your quilt towards the front. Flip the quilt over to the front and, begin sewing the binding to the front of the quilt. Setting stitch length to 3.0. Stitch in the ditch between the flange and the main fabric. If you have a stitch in the ditch foot for your machine, this would be a great time to use it. The Flanged Binding method does result in a seam line on the back of your quilt, within about .25" of the binding, but it’s barely visible and saves time by not having to do any hand sewing
12. When nearing your first corner, fold the bottom edge of your binding up. Then fold the side you are working on down over the corner to make a nice mitered corner and pin or hold in place. Continue to sew your binding all the way around the quilt, mitering the corners as you go.
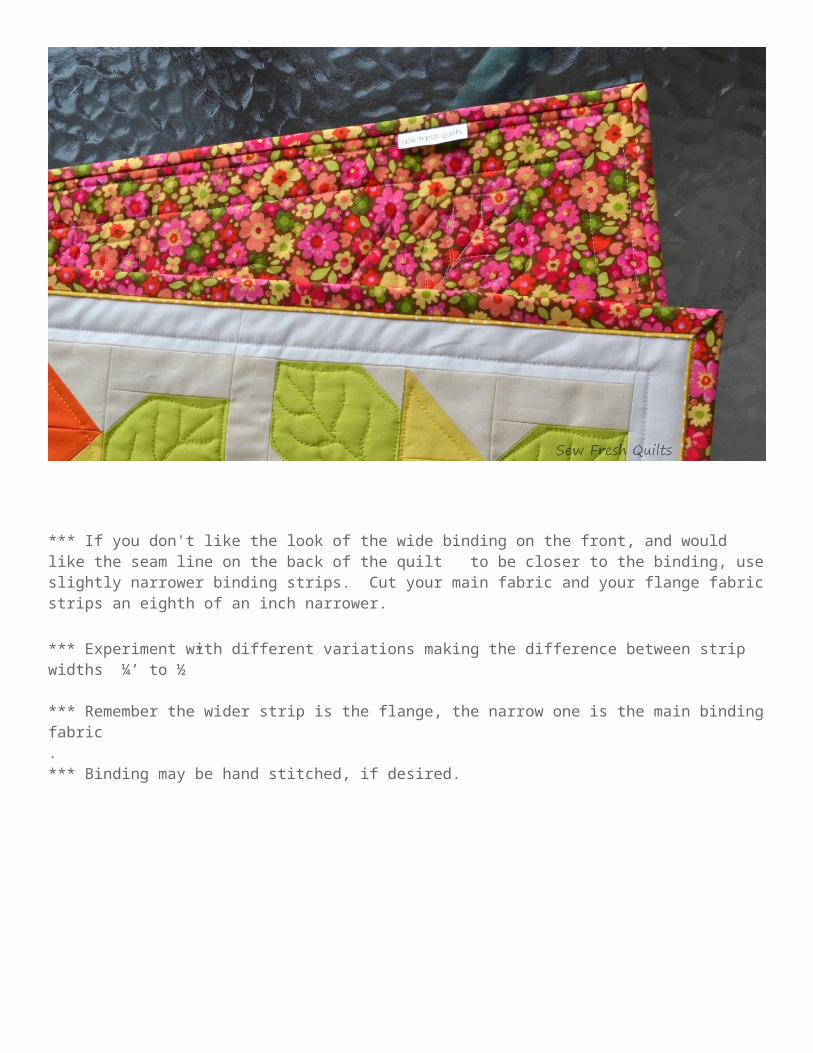
*** If you don't like the look of the wide binding on the front, and would like the seam line on the back of the quilt to be closer to the binding, use slightly narrower binding strips. Cut your main fabric and your flange fabric strips an eighth of an inch narrower.
*** Experiment with different variations making the difference between strip widths ¼’ to ½”
*** Remember the wider strip is the flange, the narrow one is the main binding fabric.*** Binding may be hand stitched, if desired.