Embed Size (px)
Citation preview

Vocational Training Programme in Antalya Region
Proposal
United Nations Joint Programme
Growth with Decent Work for All:
National Youth Employment Program and Pilot Implementation in Antalya
UNJP/TUR/051/SPA
Food and Agriculture Organization of the United Nations
Dragan Terzić, Consultant
May, 2011

2
Introduction ................................................................................................................................................5
How to Use This Manual ............................................................................................................................6
To the Trainer and Facilitator ....................................................................................................................7
Module 1: Proposed Organization and Work Methodology ......................................................................9
1.1 Organization of Training ......................................................................................................................9
1.2 Proposed Work Methodology ............................................................................................................. 12
1.3 Course Content ................................................................................................................................... 14
Module 2: Regular Field School Meetings ................................................................................................. 16
2.1 Typical Field School Session .............................................................................................................. 16 2.1.1 Roll call and review of the previous school day ......................................................................... 17 2.1.2 The Agro-eco System Analysis (AESA) ..................................................................................... 18 2.1.3 Facilitation of topics of day ......................................................................................................... 22 2.1.4 Facilitation of special topics ....................................................................................................... 23 2.1.5 Group dynamic ............................................................................................................................ 24 2.1.6 Review of the day’s activities ................................................................................................ 26 2.1.7 Planning for the next session....................................................................................................... 28 2.1.8 Summary and closure .................................................................................................................. 28
Module 3: Understanding the Field School and Team Building ............................................................. 30
3.1 Welcome and Getting Started ............................................................................................................. 30 3.1.1 Exercises: Getting started ............................................................................................................ 30 3.1.2 Exercise: Official opening of the school ..................................................................................... 31
3.2 Understanding the Field School ......................................................................................................... 31 3.2.1 Exercise: Understanding the purpose of the field school ............................................................ 31
3.3 Team Building .................................................................................................................................... 34 3.3.1 Exercise: Ground rules ................................................................................................................ 35 3.3.2 Exercise: Naming our FS ............................................................................................................ 36
3.4 Managing and Sustaining our Field School ....................................................................................... 36 3.4.1 Exercise: Organizing the FS........................................................................................................ 36 3.4.2 Exercise: Financing in FS ........................................................................................................... 39
Module 4: Exercises ..................................................................................................................................... 40
4.1 Plant and Environmental Factors ....................................................................................................... 40 4.1.1 Exercise: Parts of plant ............................................................................................................... 40 4.1.2 Exercise: Parts of a flower .......................................................................................................... 40 4.1.3 Exercise: Part of flower - match with description ....................................................................... 41 4.1.4 Exercise: Plant growth ................................................................................................................ 42 4.1.5 Exercise: Plant roots and vessels ................................................................................................. 43 4.1.6 Exercise: Transpiration ............................................................................................................... 44 4.1.7 Exercise: Light stress .................................................................................................................. 44 4.1.8 Exercise: Temperature ................................................................................................................ 45
4.2. Soil ..................................................................................................................................................... 46 4.2.1 Exercise: Land preparation ......................................................................................................... 46 4.2.2 Exercise: Soil particles ................................................................................................................ 47 4.2.3 Exercise: Determination of texture ............................................................................................. 48

3
4.2.4 Exercise: Percolation ................................................................................................................... 49 4.2.5 Exercise: Soil sampling ............................................................................................................... 50 4.2.6 Exercise: Soil pH ........................................................................................................................ 50
4.3 Plant Nutrition .................................................................................................................................... 52 4.3.1 Exercise: Plant nutrients .............................................................................................................. 52 4.3.2 Exercise: How the plant feeds (nutrient uptake) ......................................................................... 53 4.3.3 Exercise: Nutrient deficiencies of crops ...................................................................................... 54 4.3.4 Exercise: Soil nutrient evaluation to develop a fertilizer recommendation ................................. 55
4.4 Fertilizer ............................................................................................................................................. 56 4.4.1 Exercise: Fertilizers and their use ............................................................................................... 56 4.4.2 Exercise: Measuring the solubility of fertilizer ........................................................................... 57 4.4.3 Exercise: Fertilising seed beds .................................................................................................... 58 4.4.4 Exercise: Multi-nutrient (compound) or straight fertilsers ? ....................................................... 59 4.4.5 Exercise: Fertilising experiments ................................................................................................ 60 4.4.6 Exercise: Use of foliar fertilizers ................................................................................................ 60
4.5 Water and Irrigation ........................................................................................................................... 61 4.5.1 Exercise: Water holding capacity of different soils and organic matter ...................................... 61 4.5.2 Exercise: Calculating field capacity ............................................................................................ 62 4.5.3 Exercise: Water management ...................................................................................................... 63
4. 6 Pest and Disease ................................................................................................................................ 64 4.6.1 Exercise: Spray dye exercise ....................................................................................................... 64 4.6.2 Exercise: Show effects of beneficials incl. natural enemies ........................................................ 65 4.6.3 Exercise: Use of clean soil: solarisation of the seed bed ............................................................. 65 4.6.4 Exercise: Description of disease symptoms ................................................................................ 66 4.6.5 Exercise: Identification of disease symptoms ............................................................................. 67 4.6.6 Exercise: Demonstration of spread of pathogens ........................................................................ 68 4.6.7 Exercise: Sampling for arthropods with sticky board ................................................................. 69 4.6.8 Exercise: Micro habitat distribution of pests and natural enemies within the plant .................... 70 4.6.9 Exercise: Thrips feeding symptom development ........................................................................ 71 4.6.10 Exercise: Spot application of acaricides to manage mites ......................................................... 71
4.7 Greenhouses ....................................................................................................................................... 72 4.7.1 Exercise: Possibilities of the greenhouse .................................................................................... 72
4.8 Harvest and Post Harvest ................................................................................................................... 73 4.8.1 Exercise: Which flowering stem should be cut today ? .............................................................. 73 4.8.2 Exercise: Where should this flowering stem be cut ? .................................................................. 73 4.8.3 Exercise: Cutting stem at different lengths ................................................................................. 74 4.8.4 Exercise: Flowers begin to die .................................................................................................... 74 4.8.5 Exercise: Fresh flower food (preservatives) ................................................................................ 75 4.8.6 Exercise: pH preservatives .......................................................................................................... 76 4.8.7 Exercise: Recutting stems ........................................................................................................... 76 4.8.8 Exercise: Judging flowers ........................................................................................................... 77
4.9 Farm Management .............................................................................................................................. 78 4.9.1 Exercise: Decision-making ......................................................................................................... 78 4.9.2 Exercise: Importance of farm records ......................................................................................... 78
4.10 Marketing .......................................................................................................................................... 79 4.10.1 Exercise: Exploring market empowerment options .................................................................. 79 4.10.2 Exercise: Formulating a marketing plan ................................................................................... 80
4.11 Other Exercises ................................................................................................................................. 83 4.11.1 Exercise: Identifying crop production and post-harvest problems ............................................ 83 4.11.2 Exercise: Problem prioritization through ‘’individual voting’’ ................................................. 83 4.11.3 Exercise: Identification of solutions: group workshop .............................................................. 84

4
Module 5: Technical Manual ...................................................................................................................... 86
5.1 How Plants Grow ............................................................................................................................ 86 5.1.1 Flower structure .......................................................................................................................... 87
5.2 Environmental Factors ....................................................................................................................... 88
5.3 Soil ...................................................................................................................................................... 91
5.4 Soil Chemical Characteristics ............................................................................................................ 99
5.5 The Nutrient Elements ...................................................................................................................... 101
5.6 Diagnosis of Nutritional Problems ................................................................................................... 106
5.7 Fertilizers .......................................................................................................................................... 109
5.8 Water and Irrigation ......................................................................................................................... 114
5. 9 Weed Control ................................................................................................................................... 118
5.10 Greenhouse ..................................................................................................................................... 122
5.11 Management in a Greenhouse ........................................................................................................ 133
5.12 Disease ............................................................................................................................................ 140 5.12.1 Fungi ....................................................................................................................................... 141 5.12.2 Plant viruses ............................................................................................................................ 143
5.13 Pests ................................................................................................................................................ 144
5.14 Pest and Disease Control ............................................................................................................... 147
5.15 Safety Procedures When Using Agricultural Chemicals – Golden Rules ....................................... 156
5.16 Environmental Problems ................................................................................................................ 157
5.17 Harvest and Post Harvest ............................................................................................................... 162 5.17.1 Harvesting ............................................................................................................................... 163 5.17.2 Post-harvest ............................................................................................................................. 164 5.17.3 Major factors that influence post-harvest life .......................................................................... 169
5.18 Post-harvest Treatments ................................................................................................................. 169
5.19 Grading ........................................................................................................................................... 171
5.20 Packaging ....................................................................................................................................... 172
5.21 Storing Flowers .............................................................................................................................. 175
5.22. Standards ....................................................................................................................................... 175
5.23 Marketing ........................................................................................................................................ 179
Annex 1 Overview of the Field Farmer School Approach ................................................................. 184 Annex 2 Group Dynamic Exercises ................................................................................................... 187 Annex 3 School Membership Roll ..................................................................................................... 206 Annex 4 Treasurer’s Report ............................................................................................................... 208 Annex 5 School Meeting Checklist.................................................................................................... 209
5
Introduction
The manual has the purpose to support for extension services in organization of vocational training programme aimed at increase of employment of vulnerable youth including young women and migrants. This proposal manual describes methodology, introduces the guiding principles, and suggests how to organise the overall vocational training programme for the cut flower sector. The purpose of the Vocational Training Programme is to develop the capacities and systems of local stakeholders to increase employment of vulnerable youth including young women and migrants in Turkey’s top migration receiving city, Antalya within the framework of the UN MDG-F Joint Programme: “Growth with Decent Work For All: A Youth Employment Program in Antalya”. Expected outcome of the Training Programme enhanced the labour absorption capacity of the agricultural value chain in Antalya through improved vocational training and extension services delivery of relevant institutions. Previous studies indicated the gaps and recommendations for improved provision of vocational training and advisory services geared towards increased opportunities for employment of young migrant workers in cut flower production. Analysis of the perception of owners/managers and engineers indicate that labour should be trained in production techniques and post harvest operations and that trainings should be organised in systematic way. The analysis shows that business owners and labour prefer the training to be organised on private enterprises in actual production and processing conditions. Usually young people are not much interested in improvement of the knowledge in the field of agriculture, especially in environment where there is employment potential in sectors which are interesting to young people (tourism sector). Therefore, it is special challenge to attract the young people to participate in the agricultural enterprise training and contribute that youth improve their management skills and become knowledge experts u cut flower production and post harvest operations. In this manual the attempt was made to produce a program with different approaches which contains flexibility in order to be adjustable to the needs in the field. The manuals and guidelines will facilitate extension services in their activities in support of the vocational training programme. Methodology of work and certain modules are applicable to other similar agricultural sectors, especially high value vegetable crops. Topics and methods of work can be adapted in accordance with specific needs of young people and existing modules developed by Ministry of Education (MoE) are included in the program. Focus in this manual was to make training program interesting for the young, create environments, use multiple teaching methods and meet the needs of employers, i.e. that the training is carried out in actual production conditions and that trainees receive practical knowledge, skills and attitudes that they can use immediately in practice. In this way everyone would benefit short-term and long-term from the training.

6
How to Use This Manual
Structure of the manual is different parts and subparts according to the needs of the readers. It is recommended that all parts are read before the beginning of the work. In the first module, there is theoretical part for the purpose of better understanding of methodology issues and how to organise training. Also, course content with main topics is proposed. In the second module, main elements of regular meetings which need to be organised in the enterprise were explained. In the third module, instructions are given for the beginning of work and building of team within the group. In the fourth module, exercises are given which can be used in work with participants during school sessions. Exercises can be used as prepared. However, it is possible to modify them or adapt depending on the current situation in the field. In the fifth part, technical elements for assistance in the work of trainers were given. Assumption is that trainers already have necessary technical knowledge and given technical information should just refresh their memory. Material is reference material related to exercises and work plan and program. Also, modules developed by MoE should be used in the work. Annex 1 gives more information about the FFS methodology in order to better explain some basic principles and approaches. Annex 2 gives group dynamic exercises which can be used in work. Annex 3 gives additional forms that can be used in the work. Before the work starts, it is necessary to study proposed work methodology and given exercises in order to select the most suitable ones. At the beginning, special attention should be paid to work methodology and organization. Later, more focus/emphasis should be placed on understanding of exercises, technical part and group exercises. Precise schedule of the organization of topics should be in accordance with actual production and post-harvest operations. This differs depending on the time when the training is organized. In this manual, we try to find effective ways to respond to the different needs of each learner through the active participation of all learners. There is no single best way. This is proposal draft which needs to be tested and adapted in the practice and improved all the time.

7
To the Trainer and Facilitator
This manual is designed to assist trainers in implementation of training. You need to be familiar with the contents of guide in order to use this leader guide effectively. In general, people feel more satisfied and achieve more when they can actively contribute to the process of learning. So learning is not just about a teacher giving information. Learning is an active process where a learner goes through an experience and learns from it. There are many ways that we can think of to involve learners in their learning. As much as possible, involve participants in planning project activities. Successful learning will depend on how well you involve members in hands-on activities. Instead of being told “the answers,” they are presented with a question, problem, situation, or activity which they must make sense of for themselves. Try to develop Inquiry. They will have a greater commitment to the project if they have been involved in its planning. As you begin to use this process, it may take more time to prepare than lecture/demonstration/exercises for meeting. Yet, you will soon find the time spent is well worth the effort. The training should contribute to improvement of the knowledge, skills and attitudes of participants, and to be able to get and maintain jobs and in this way meet their life/existential needs. Also, never forget respect is main human need! You have the chance to give contribution to improving the lives of these learners. Through this program they should be able to earn better incomes. With better incomes they can provide better benefit for them and their needs for the rest of their life in future. Your first task is to encourage youth in your area to participate in the programme. Once you have a group of 20-25 participants, you are ready to start. The type of interaction between a facilitator and participants determines the relationship and trust that develops, and affects the types of issues and information that participants are willing to discuss in an open manner. Therefore, trainer/facilitators must be constantly aware of their own attitudes and behaviour. Many of the methods work best when a team of two or more trainer/facilitators work together. Roles within the team should be clearly defined. One person should be the facilitator. The facilitator introduces the session, asks questions, explains the method and checks the information as it arises from the participants. The facilitator interacts directly with the participants and does not need to write anything down. This avoids interrupting the communication flow. Other person will have the role of trainer and be focused on delivery of topics in order to improve level knowledge among the participants and enhance the participants’ technical knowledge and present the participants with information they need at the time they need it. Team members need to prepare their use of participatory methods and decide who is going to do and say what. It can be very confusing for participants if, for example, the team members interrupt or contradict each other when explaining a particular method.

8
You were shown how to do this during your training. This manual contains plan of implementation and it will make the implementation of training easier. Before you start, you should read through your notes and the facilitator training materials you received. This will refresh your mind. The methods mentioned in this part emphasize active involvement as an effective part of learning. At the same time, we have to remember that participation is optional in some cases. We cannot force people to speak up if they don’t want to. As a facilitator, we have to explore other approaches to mobilize their active participation in the programme. If our learners are not so interested in the activities, we have to ask ourselves: What is wrong with this approach? Are there better ways of achieving the same objective?’’ Don’t ask, ’’What is wrong with our learners?’’
Good luck!

9
Module 1: Proposed Organization and Work Methodology
1.1 Organization of Training
How to organise the trainings? Organise groups of preferably 20-25 participants. Trainings should comprise theoretical education and practical training/work. In theoretical training, combination of different approaches is planned. Adults do not change their behaviour and practices just because someone tells them what to do. They learn better through experience than from passive listening at lectures or demonstrations. Discovery-based learning enables the participants to develop a feeling of ownership and to gain the confidence that they are able to reproduce the activities and results. Combination of different approaches should contribute to higher motivation and more efficient learning. The use of teaching methods such as: Observation, Lecture, Demonstration, Exercises, Games Play, etc are planned to be used.
Who are the beneficiaries/participants of the training program? Beneficiaries of the program, according to ISKUR requirement, should be from 14 to 29 years old. According to ISKUR requirement, certain number of them should be employed at the end of the training. In talks with ISKUR representatives it was expressed that they don’t have many young people interested in training in cut flower sector and/or agriculture. On the other hand, entrepreneurs have expressed the need for better qualified labour. For the purpose of finding training candidates, one of the recommendations was that the candidates be selected/sent by private enterprises/farms with which they had previous cooperation, or young persons which have occasionally or permanently worked for them or which they plan to include in their work in future. For instance, 12 enterprises/farms send each 2 candidates (through ISKUR) and in this way a group of 24 is formed. Enterprises/farms are obligated to give jobs to certain number of candidates after the training. Participants can be also persons with some experience in cut flower sector and those without any experience. Requirement of MoE is that the candidates should at least be literate. It is preferable that the candidates be of approximately the same age. If applied candidates differ in their age, then it would be good to make groups according to their age (to avoid having in one group together 14 year old teenagers and older people who also have kids in school).
Where to organise trainings? Most of theoretical trainings (2/3) should be organised on the farm/enterprise where production, processing and packaging take place (Field school). Also, study plot should be organised within the enterprise where participants through simple exercise will learn in objective/actual conditions. In addition to study plot, the farm/enterprise should have a room/classroom and in the field/enterprises where group training can be organised – not more than 100 m away from the study plot.

10
One part of the theoretical training (1/3) should be organised in conventional class rooms, for topics training for which conventional classroom is better suited. This classroom can be away from the farm/study plot/enterprise. Practical training should be organised in enterprises which have sent the candidates or where theoretical part of training is organised (Field school). Preferably, single farm/enterprise should accommodate maximum two groups. Other groups should be organised in other enterprises. Preferably it should be those enterprises which would later hire trained persons or certain number of them. Who should be trainers? It is recommended that trainers should be at least engineers of agriculture with minimum 4 years of working experience in production, processing, and storage in cut flower sector. Trainers should have experience in formal and/or informal education. Trainers should have certificate from MoE. It is recommended that trainers are engineers who are already working in the production. It is recommended that practical training is organised and run by engineers who are supervising the production on the farm/enterprise where the training is organised. For special topics, relevant trainers/lecturers can be hired from other fields.
How many trainers are necessary? Preferably, during sessions delivering theoretical topics, two trainers should be included in the work with group. It is recommended that two trainers lead one (max two) groups. One of them should be agricultural engineer and the other one can also be agricultural engineer but also of other field, such as economics, etc. One should have more of facilitator role and the other one role of a teacher. It is recommended to have meetings twice a week, which means two trainers training one/two groups. Also, preferably, man and woman trainer should work together as leaders of two groups. During one week, trainers would be busy with the theory training 2 (max 4) days, and the remaining day would be used for preparation and supervision of the practical training.
What should we teach the youth? Topics are relating to production process and post-harvest operation. Topics should be divided into general and cut flower species. Main/basic topics are necessary in order to better understand the processes and functioning of plant in generally (cultivation, harvest, and post harvest care), and some special topics. Cut flower species (carnation and gerbera) should be production and post harvest process according to species. Participants should be trained to work in all operations throughout the year. Material will comprise the material prepared by FAO in cooperation with the trainers. Also, modules prepared by MoE will be included in the training. It is recommended that during training, for the purpose of improvement/enhancement of motivation, some topics (20% max) shall be selected by learners/participants in cooperation with trainers which can but don’t have to be associated with cut flower production. Also, parts of the training are topics which will include trainings planned by IOM.

11
What kind of training will the trainers receive? Before the beginning of the training, trainers will receive Training of Trainers (ToT) organised by FAO relating to organization of trainings, methodology of work and technical topics. Implementation partner will receive the guide for implementation of the training. Implementation partner should have the lead engineer/trainer who should be agricultural engineer, in charge of later coordination and monitoring and support of work of other trainers and coordination of practical training and implementation of training.
When to organise the trainings? It is very important that the trainings follow seasonal cycle of production and post-harvest activities. Important part of planed training is based on exercise, experiments and through observation and analysis of current production enterprises, through learning by doing and problem solving approach. When the seasonal cycle is followed, it is possible to teach the trainees in the actual situation and learn how to solve problems in actual situation. Preferably trainings should be organised throughout the year and participants should periodically (every or every other week) meet during the year. However, support by ISKUR can only be 6 months. On the other hand, ISKUR has no possibility to make a contract where within 12 months training would be organised 3-4-5 days per month. In the existing situation (with mentioned restrictions), it is proposed that trainings last 6 months. Within 6 months (25 weeks), two days weekly for theoretical training (22 weeks), and three days weekly of practical work.
When to organise trainings during day and week? Duration of theoretical sessions of 5 h/day is proposed. Two days in the week should be selected for theoretical topics (e.g. Monday and Thursday or Tuesday and Friday), there has to be time interval between two topics/trainings in order to be able to spot changes which occur in experiments or trials that are carried out. Teachers, in agreement with trainees/participants should determine the time during the day e.g. 830 to 1330 or 13 to 18h. Defined time can be changed only once a month. Changes of times must be known to all in advance. FAO should have the schedule and must be informed in advance about any changes.
What are the obligations of the Implementation partners?
Ensure interested participants/students Ensure private enterprises/farms interested to train and hire trained labour force. Provide certified trainers by MoE Provide space/premises for realization of theoretical training – classrooms (not
for entire time) for periodical gathering. Provide training equipment (LCD projector, flip chart, notebook, printed material) To select the farm or private enterprise which will enable organization of Field
School, that is to - allow free access to production areas - provide adequate space on the farm/production facility where participants (approx. 25 participants) can be accommodated (to sit in adequate environment) during all sessions
12
-provide/allow forming of study plot and realize exercises on their farm, with objective to train students. Surface in the plastic greenhouse for study plot - 200m2 - 500 m2 and in rooms 2-5m2. - allow use of material already used in production to be used in the training.
Provide material for participants (notebooks, printed material, etc.) Use FAO training material and contribute to its development, and use material of
the Ministry of Education. Provide transportation for participants (if necessary) Provide refreshments for participants Organise one study trip (organise visits to other regions where there is the same
production, markets, institutions) and Exchange visit (visit to other study plots and other groups on different farms/enterprises).
Provide requested % of ensured employment/hiring according to ISKUR requirements
After training organise exam and issue certificates to training participants according to MoE
Supervise all activities in the field and submit regular reports
1.2 Proposed Work Methodology
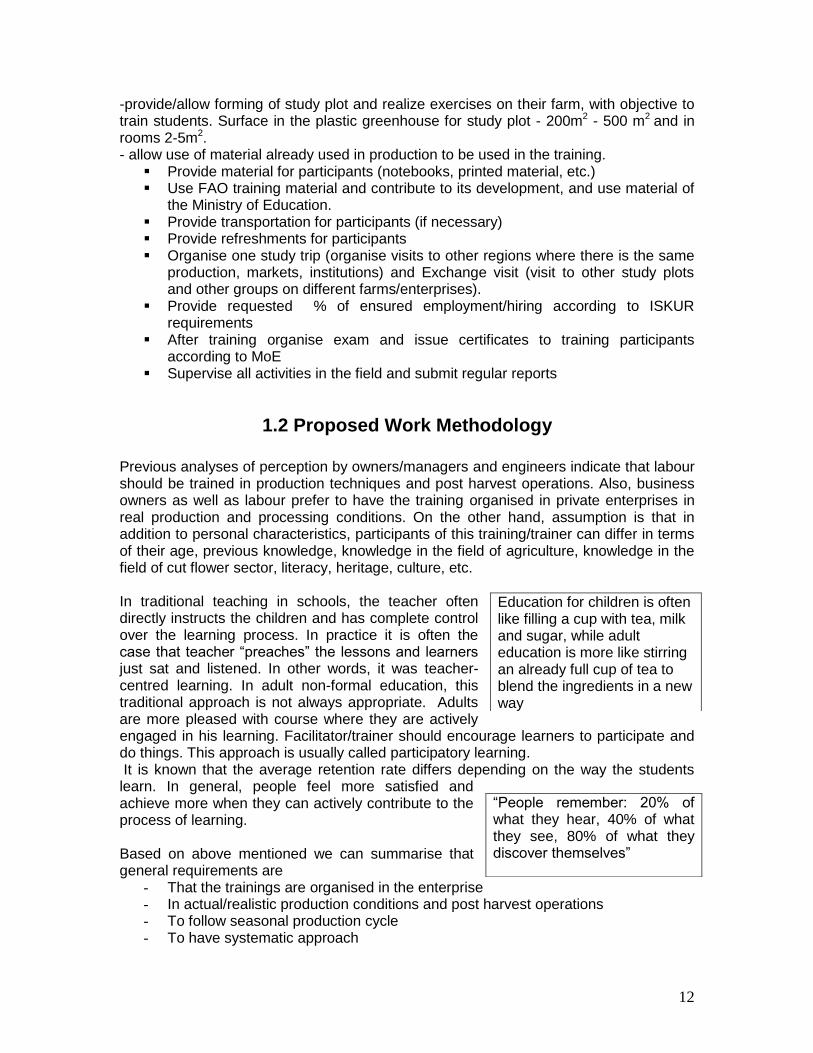
Previous analyses of perception by owners/managers and engineers indicate that labour should be trained in production techniques and post harvest operations. Also, business owners as well as labour prefer to have the training organised in private enterprises in real production and processing conditions. On the other hand, assumption is that in addition to personal characteristics, participants of this training/trainer can differ in terms of their age, previous knowledge, knowledge in the field of agriculture, knowledge in the field of cut flower sector, literacy, heritage, culture, etc. In traditional teaching in schools, the teacher often directly instructs the children and has complete control over the learning process. In practice it is often the case that teacher “preaches” the lessons and learners just sat and listened. In other words, it was teacher-centred learning. In adult non-formal education, this traditional approach is not always appropriate. Adults are more pleased with course where they are actively engaged in his learning. Facilitator/trainer should encourage learners to participate and do things. This approach is usually called participatory learning. It is known that the average retention rate differs depending on the way the students learn. In general, people feel more satisfied and achieve more when they can actively contribute to the process of learning. Based on above mentioned we can summarise that general requirements are
- That the trainings are organised in the enterprise - In actual/realistic production conditions and post harvest operations - To follow seasonal production cycle - To have systematic approach
Education for children is often like filling a cup with tea, milk and sugar, while adult education is more like stirring an already full cup of tea to blend the ingredients in a new way
“People remember: 20% of what they hear, 40% of what they see, 80% of what they discover themselves”

13
- That it is youth education appropriate - That it is attractive and that it attracts youth - That it is efficient and effective
In order to respond to requirements organization of Field school is planned, that would be organised in systematic way. It is proposed that the most of the program should be organised as Field school, and the other part will be conventional school. One part of teaching will be organised in conventional „school with walls”, whereas the more important part will be organised in the „school without walls” (as FFS are popularly called).
Why Field School?
In the FS the field is the teacher, and it provides most of the training materials like plants, pests, soil particles and real problems. The field (crop production and postharvest system) is the main learning tool. All activities are organised around it. Participants learn directly from what they observe, collect and experience in their fields instead of text books, pictures or other extension materials. Participants generate their own learning materials, from drawings of what they observe, to the field trials themselves. These materials are always consistent with local condition and less expensive to develop. Working in small subgroups, they collect data in the field, analyse the data, make active decisions based on the analyses, and present their decisions to the other participants in the field school for discussion, questioning and refinement.
Field Schools try to focus on basic processes through field observations, season-long research studies, and hands-on activities. It has been found that when participants have learned about basics, combined with their own experiences and needs, they make decisions that are effective. Through organization of study plot, observing of current activities, organization of experiments/trials, learners are actively included in the process of learning. Field School enables learning environment where it is possible to apply methods which contribute that learners realize higher average retention rate and it is in accordance with what business owners and workers think is more suitable training method. Adults are usually much more comfortable in field situations than in classrooms. The Field Schools are not a new idea, just an effective mixture of various extension ideas ignored by those caught in the system of top-down message delivery. FS will use one part methodology well known and widely applied within Farm Field School. In actual surrounding/environment there are limiting factors which limit the full implementation of FFS but major elements relevant to some processes within FFS will be basis of this training program. (More on FFS methodology see Annex 1)
Why the school in classroom? For certain topics for which the field is not necessary, teaching can take place in the classroom. Especially for topics which are not related to agriculture and which participants want to choose themselves, as well as those planned by IOM. Presently, trainings cannot be organised throughout the year, so one part of the training which will not take place in the field can be done in the classroom. Probably, some of participants have never attended school and training in classroom can motivate them positively so that they as others attend the school and get diploma.
14
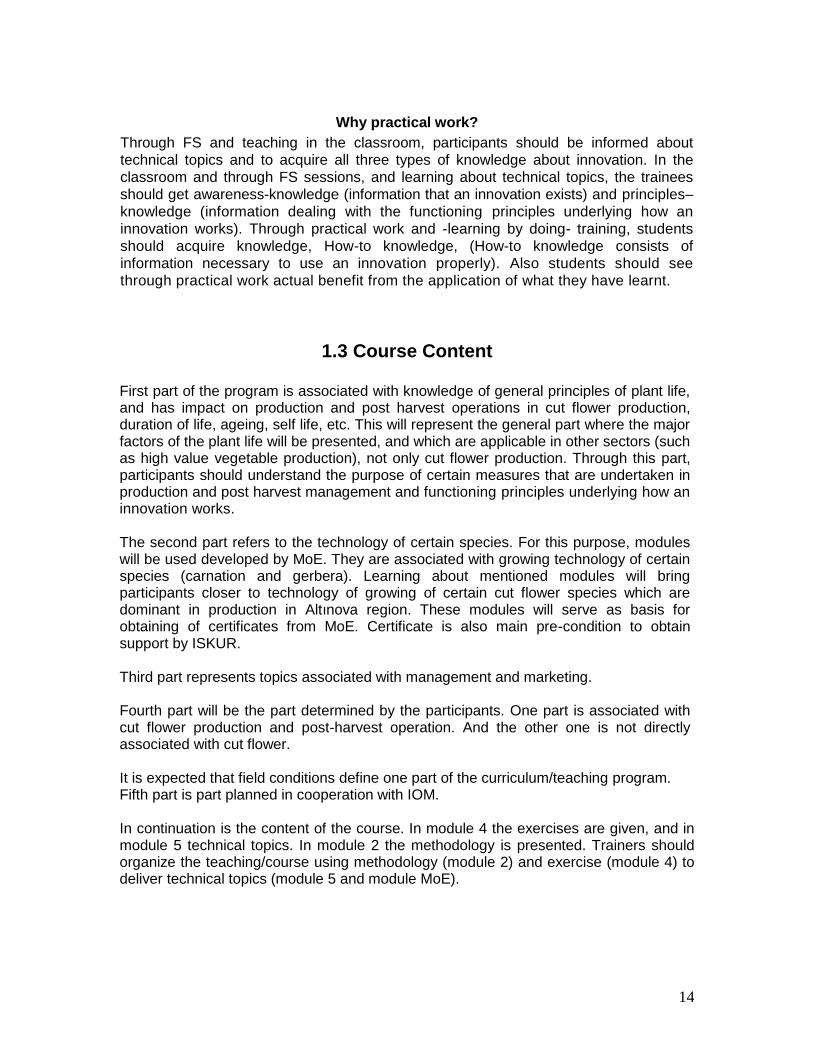
Why practical work?
Through FS and teaching in the classroom, participants should be informed about
technical topics and to acquire all three types of knowledge about innovation. In the
classroom and through FS sessions, and learning about technical topics, the trainees
should get awareness-knowledge (information that an innovation exists) and principles–
knowledge (information dealing with the functioning principles underlying how an
innovation works). Through practical work and -learning by doing- training, students
should acquire knowledge, How-to knowledge, (How-to knowledge consists of
information necessary to use an innovation properly). Also students should see
through practical work actual benefit from the application of what they have learnt.
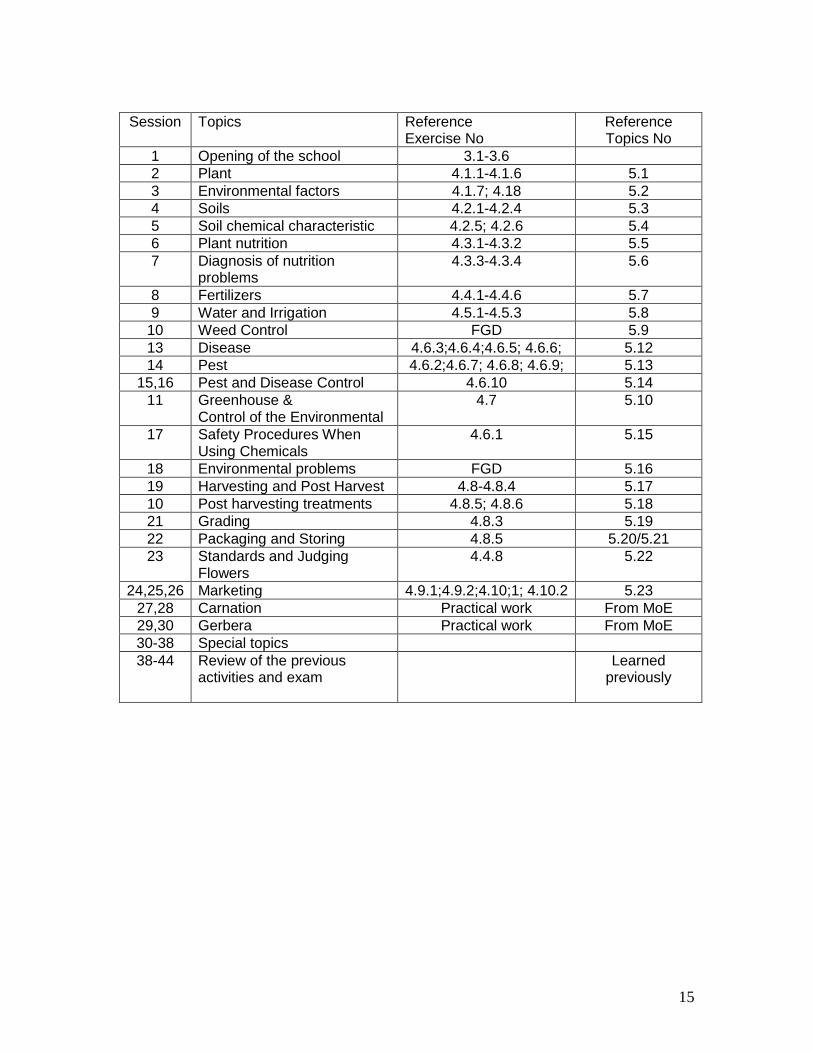
1.3 Course Content First part of the program is associated with knowledge of general principles of plant life, and has impact on production and post harvest operations in cut flower production, duration of life, ageing, self life, etc. This will represent the general part where the major factors of the plant life will be presented, and which are applicable in other sectors (such as high value vegetable production), not only cut flower production. Through this part, participants should understand the purpose of certain measures that are undertaken in production and post harvest management and functioning principles underlying how an innovation works. The second part refers to the technology of certain species. For this purpose, modules will be used developed by MoE. They are associated with growing technology of certain species (carnation and gerbera). Learning about mentioned modules will bring participants closer to technology of growing of certain cut flower species which are dominant in production in Altınova region. These modules will serve as basis for obtaining of certificates from MoE. Certificate is also main pre-condition to obtain support by ISKUR. Third part represents topics associated with management and marketing. Fourth part will be the part determined by the participants. One part is associated with cut flower production and post-harvest operation. And the other one is not directly associated with cut flower. It is expected that field conditions define one part of the curriculum/teaching program. Fifth part is part planned in cooperation with IOM. In continuation is the content of the course. In module 4 the exercises are given, and in module 5 technical topics. In module 2 the methodology is presented. Trainers should organize the teaching/course using methodology (module 2) and exercise (module 4) to deliver technical topics (module 5 and module MoE).
15
Session Topics Reference Exercise No
Reference Topics No
1 Opening of the school 3.1-3.6
2 Plant 4.1.1-4.1.6 5.1
3 Environmental factors 4.1.7; 4.18 5.2
4 Soils 4.2.1-4.2.4 5.3
5 Soil chemical characteristic 4.2.5; 4.2.6 5.4
6 Plant nutrition 4.3.1-4.3.2 5.5
7 Diagnosis of nutrition problems
4.3.3-4.3.4 5.6
8 Fertilizers 4.4.1-4.4.6 5.7
9 Water and Irrigation 4.5.1-4.5.3 5.8
10 Weed Control FGD 5.9
13 Disease 4.6.3;4.6.4;4.6.5; 4.6.6; 5.12
14 Pest 4.6.2;4.6.7; 4.6.8; 4.6.9; 5.13
15,16 Pest and Disease Control 4.6.10 5.14
11 Greenhouse & Control of the Environmental
4.7 5.10
17 Safety Procedures When Using Chemicals
4.6.1 5.15
18 Environmental problems FGD 5.16
19 Harvesting and Post Harvest 4.8-4.8.4 5.17
10 Post harvesting treatments 4.8.5; 4.8.6 5.18
21 Grading 4.8.3 5.19
22 Packaging and Storing 4.8.5 5.20/5.21
23 Standards and Judging Flowers
4.4.8 5.22
24,25,26 Marketing 4.9.1;4.9.2;4.10;1; 4.10.2 5.23
27,28 Carnation Practical work From MoE
29,30 Gerbera Practical work From MoE
30-38 Special topics
38-44 Review of the previous activities and exam
Learned previously
16
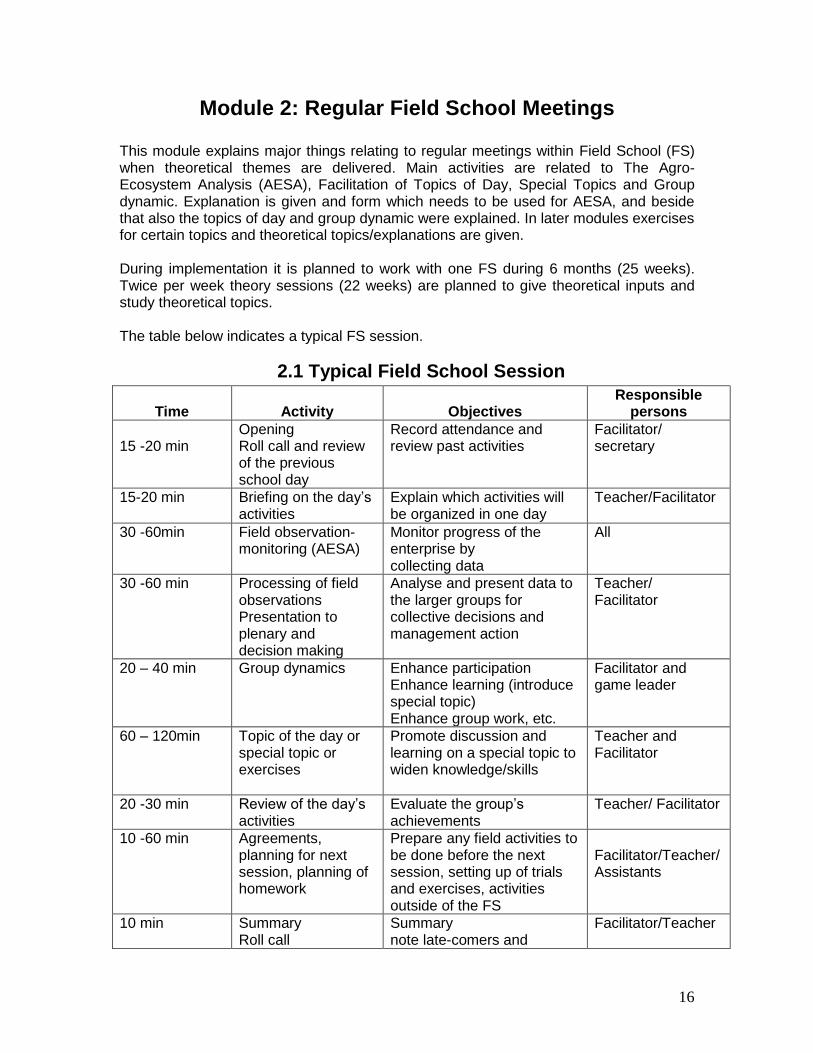
Module 2: Regular Field School Meetings This module explains major things relating to regular meetings within Field School (FS) when theoretical themes are delivered. Main activities are related to The Agro-Ecosystem Analysis (AESA), Facilitation of Topics of Day, Special Topics and Group dynamic. Explanation is given and form which needs to be used for AESA, and beside that also the topics of day and group dynamic were explained. In later modules exercises for certain topics and theoretical topics/explanations are given. During implementation it is planned to work with one FS during 6 months (25 weeks). Twice per week theory sessions (22 weeks) are planned to give theoretical inputs and study theoretical topics. The table below indicates a typical FS session.
2.1 Typical Field School Session
Time
Activity
Objectives
Responsible persons
15 -20 min
Opening Roll call and review of the previous school day
Record attendance and review past activities
Facilitator/ secretary
15-20 min Briefing on the day’s activities
Explain which activities will be organized in one day
Teacher/Facilitator
30 -60min Field observation-monitoring (AESA)
Monitor progress of the enterprise by collecting data
All
30 -60 min Processing of field observations Presentation to plenary and decision making
Analyse and present data to the larger groups for collective decisions and management action
Teacher/ Facilitator
20 – 40 min Group dynamics Enhance participation Enhance learning (introduce special topic) Enhance group work, etc.
Facilitator and game leader
60 – 120min Topic of the day or special topic or exercises
Promote discussion and learning on a special topic to widen knowledge/skills
Teacher and Facilitator
20 -30 min Review of the day’s activities
Evaluate the group’s achievements
Teacher/ Facilitator
10 -60 min Agreements, planning for next session, planning of homework
Prepare any field activities to be done before the next session, setting up of trials and exercises, activities outside of the FS
Facilitator/Teacher/ Assistants
10 min Summary Roll call
Summary note late-comers and
Facilitator/Teacher

17
Announcements Closure
absentees Closure
This is a scheme that can be applied in regular meetings during FS. Certain elements are explained in the following text.
2.1.1 Roll call and review of the previous school day List of members should be kept by the trainer. At the beginning of the meeting, the Secretary should keep an accurate record of each member’s attendance. When the president asks you to take roll at the meeting, membership should stay seated. When a member is present, mark an “x” in the correct box; when a member is absent, leave the box blank. In addition to attendance records, this also lets members get to know each other a little better. Brief recap should remind them what was done on the last meeting. It is very important that they repeat important issues from the previous meeting.
Exercise: Review of the previous school day Each meeting of the school participants starts with a summary of what occurred the previous school day. This will help to bring attention back to the school topics, and to refresh memories on what has been discussed, achieved, and agreed during the previous school meeting. Learning outcome Participants will refresh their memories of what has been discussed, achieved, and agreed during the previous school meeting. Time needed 15 minutes Steps 1. Ask a selected participant to summarise for the participants what was achieved and discussed during the previous session. 2. Extend and explain the summary when needed. 3. Before the end of the day’s session identify the participant who will summarise findings at the next school session so that they can prepare notes. Some suggestions to facilitate group discussion: What have we learnt on the last class? Why is it important? How can we use this in our work?
Before moving to the field it is important for participants to know which activities that they are going to undertake both in the field and in the classroom (meeting place). This helps understanding and a smooth allocation of tasks.

18
Exercise: Briefing on the day’s activities Learning outcomes Participants will know the programme activities and allocation of tasks for today’s meeting. Steps 1. Present to the participants the activities that have been planned for today. 2. Discuss, if relevant, which observations will be conducted in the experiment plots, measurements to be made, monitoring data to be collected. 3. Indicate to participants the special topics the school will focus on today. 4. Organise the field visit, if relevant agree on group composition (three or four smaller groups is suggested); 5. Reach a consensus before moving to the field/plots. 6. Wrap-up, summarising the main points discussed. Some suggestions for leading question • Which plot will be visited by each group? • What management practices will be observed? • What practice will be observed? • What data will be collected?
• Who will keep the records of the observation and monitoring data?
2.1.2 The Agro-eco System Analysis (AESA) Background
The AESA is the corner stone of the approach. It addresses the interactions between components of the ecosystem (e.g. plants, soil, water, and the wider environment) and the functioning/performance of the system. The AESA helps identify strengths, weaknesses, opportunities and threats within the ecosystem (i.e. nutrient depletion, diseases, pests, etc.). Participants in the FS undertake AESA with the aim of improving their decision making process based on field observations. It also helps in monitoring yields and other impacts. Participants conduct AESA as they visit the study plots/production by observing the ecosystem, including interactions and ecological processes, by sampling, recording and the comparison and analysis of information for decision-making and action taking based on facts. Thus, AESA is a monitoring tool that should be conducted frequently, regularly and curiously.
Table 2. Examples of frequency of monitoring of common indicators in crop-based trials
Frequency of monitoring Indicators
At start of the experiment/production
Prior land use, soil type, salinity, land area, date of planting, germination rate
Periodically (through AESA) Nutrient deficiency signs, weeds,
Frequently (through AESA) Plant growth, pest and diseases, soil moisture, moisture stress, management practices carried out, labour input

19
At the end of experiment Yield, soil nutritional level, total labour input, cost/benefit analysis
Objectives
o learn the value of being a good observer
become aware of how observation relates to farm management
o introduce the concept behind the AESA exercise.
o improve decision-making skills through analysis of a field situation by observation,
o analysis, drawing pictures and discussion o improve decision-making skills by
presenting small group decisions for critique in the large group.
The Agro-Ecosystem Analysis (AESA) sheet
NAME OF FS: Aesa No: Group No: Plot No:
PROBLEM ADRESSED: Date: Time of observation: Name of the host farmer/enterprise:
PLANT DRAWING
GENERAL INFO. Variety: Date planted: Stage of crop:
When was the beginning of the harvest? The amount of harvested product (since the last visit): Amount of total harvested product: Quality of harvested product:
Background activities during the period from last visit till now
PLANT OBSERVATIONS: Plant types/associations Length of plant: No of leaves:
Moisture stress
Disease observed Types and damage:
Insect observed: Types and numbers
Nutrient deficiency or

20
sufficiency signs
Applied fertilizer
Irrigation / Soil moisture
Weeds
Main mistakes/omissions/problems in previous period
Other comments and remarks
Problems which have to be solved urgently
RECOMMENDATIONS What management practices should be applied?
Who? , When?
The purpose of using AESA is for participants to learn to make regular field observations, analyse problems and opportunities encountered in the field and to improve decision-making skills. By carrying out AESA regularly in the FS, participants develop a mental checklist of indicators to be observed when monitoring production practices. Some of the main steps in AESA include:
• Making observations in the field: In sub-groups, participants make observations in the field based on a range of monitoring indicators (see example of AESA sheet). Emphasis is on observing the interactions between various factors in the soil-crop-environment interactions. Subgroups of the FS are organised to undertake the monitoring.
• Taking records: Each sub-group prepares a brief of their findings in a structured recording sheet (AESA) comprising summary data, pictures and drawings of the field situation and decisions and recommendations of the sub-group.
• Plenary presentation: Following the discussion in sub-groups a plenary session is held where the sub-groups present their results and conclusions.
• Plenary discussion: This “whole group” analysis and discussion of the findings of the monitoring, for example often a weekly session for crop studies, helps the FS group to make decisions on management actions required to address the situation observed in the field.
21
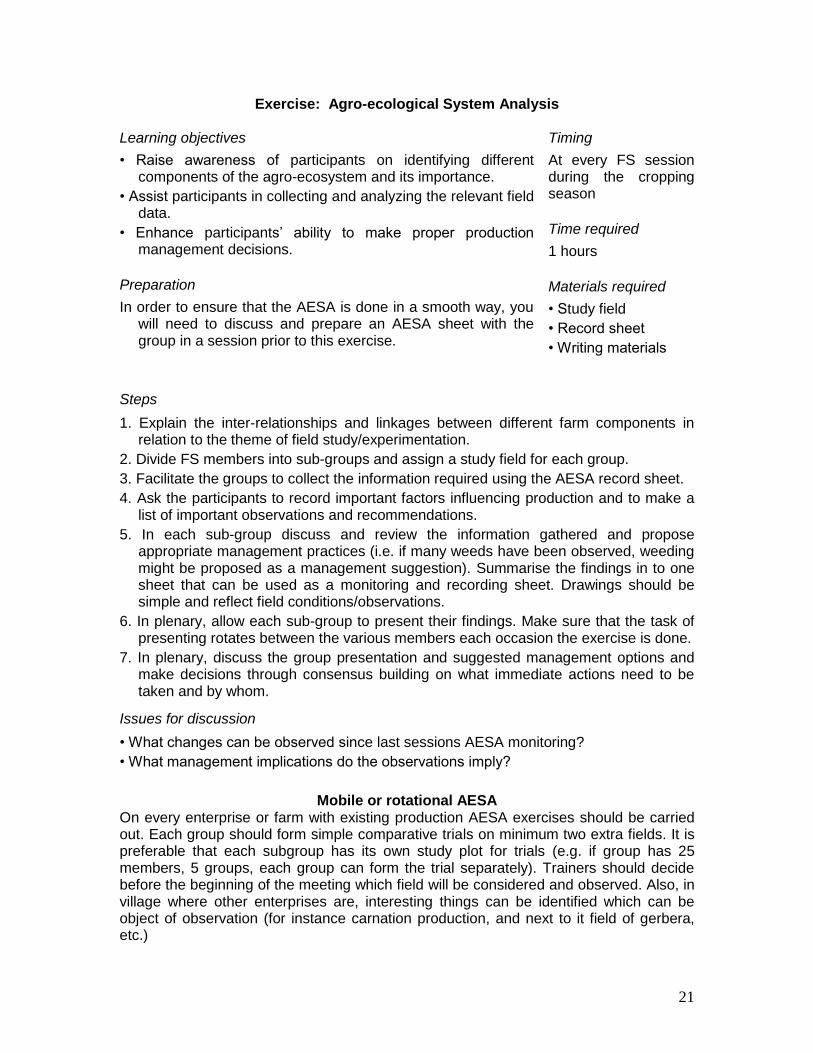
Exercise: Agro-ecological System Analysis Learning objectives
• Raise awareness of participants on identifying different components of the agro-ecosystem and its importance.
• Assist participants in collecting and analyzing the relevant field data.
• Enhance participants’ ability to make proper production management decisions.
Preparation
In order to ensure that the AESA is done in a smooth way, you will need to discuss and prepare an AESA sheet with the group in a session prior to this exercise.
Timing
At every FS session during the cropping season
Time required
1 hours
Materials required
• Study field
• Record sheet
• Writing materials
Steps
1. Explain the inter-relationships and linkages between different farm components in relation to the theme of field study/experimentation.
2. Divide FS members into sub-groups and assign a study field for each group.
3. Facilitate the groups to collect the information required using the AESA record sheet.
4. Ask the participants to record important factors influencing production and to make a list of important observations and recommendations.
5. In each sub-group discuss and review the information gathered and propose appropriate management practices (i.e. if many weeds have been observed, weeding might be proposed as a management suggestion). Summarise the findings in to one sheet that can be used as a monitoring and recording sheet. Drawings should be simple and reflect field conditions/observations.
6. In plenary, allow each sub-group to present their findings. Make sure that the task of presenting rotates between the various members each occasion the exercise is done.
7. In plenary, discuss the group presentation and suggested management options and make decisions through consensus building on what immediate actions need to be taken and by whom.
Issues for discussion
• What changes can be observed since last sessions AESA monitoring?
• What management implications do the observations imply?
Mobile or rotational AESA On every enterprise or farm with existing production AESA exercises should be carried out. Each group should form simple comparative trials on minimum two extra fields. It is preferable that each subgroup has its own study plot for trials (e.g. if group has 25 members, 5 groups, each group can form the trial separately). Trainers should decide before the beginning of the meeting which field will be considered and observed. Also, in village where other enterprises are, interesting things can be identified which can be object of observation (for instance carnation production, and next to it field of gerbera, etc.)
22
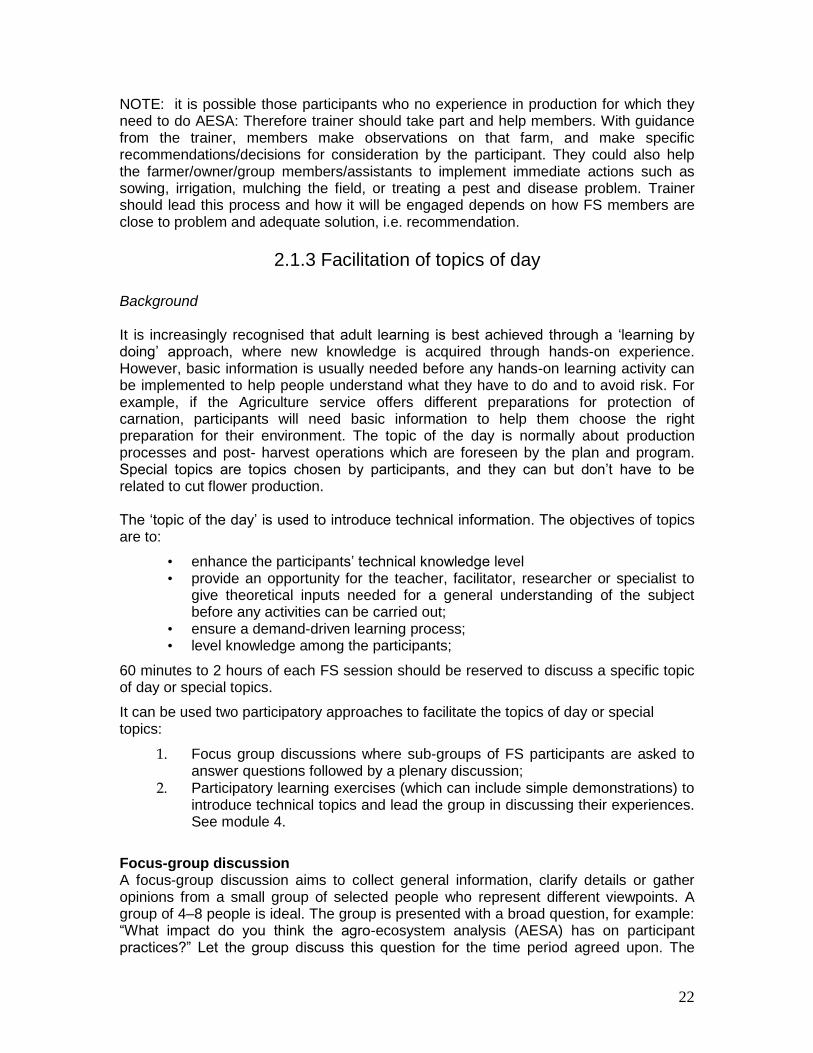
NOTE: it is possible those participants who no experience in production for which they need to do AESA: Therefore trainer should take part and help members. With guidance from the trainer, members make observations on that farm, and make specific recommendations/decisions for consideration by the participant. They could also help the farmer/owner/group members/assistants to implement immediate actions such as sowing, irrigation, mulching the field, or treating a pest and disease problem. Trainer should lead this process and how it will be engaged depends on how FS members are close to problem and adequate solution, i.e. recommendation.
2.1.3 Facilitation of topics of day
Background It is increasingly recognised that adult learning is best achieved through a ‘learning by doing’ approach, where new knowledge is acquired through hands-on experience. However, basic information is usually needed before any hands-on learning activity can be implemented to help people understand what they have to do and to avoid risk. For example, if the Agriculture service offers different preparations for protection of carnation, participants will need basic information to help them choose the right preparation for their environment. The topic of the day is normally about production processes and post- harvest operations which are foreseen by the plan and program. Special topics are topics chosen by participants, and they can but don’t have to be related to cut flower production. The ‘topic of the day’ is used to introduce technical information. The objectives of topics are to:
• enhance the participants’ technical knowledge level • provide an opportunity for the teacher, facilitator, researcher or specialist to
give theoretical inputs needed for a general understanding of the subject before any activities can be carried out;
• ensure a demand-driven learning process; • level knowledge among the participants;
60 minutes to 2 hours of each FS session should be reserved to discuss a specific topic of day or special topics.
It can be used two participatory approaches to facilitate the topics of day or special topics:
1. Focus group discussions where sub-groups of FS participants are asked to answer questions followed by a plenary discussion;
2. Participatory learning exercises (which can include simple demonstrations) to introduce technical topics and lead the group in discussing their experiences. See module 4.
Focus-group discussion A focus-group discussion aims to collect general information, clarify details or gather opinions from a small group of selected people who represent different viewpoints. A group of 4–8 people is ideal. The group is presented with a broad question, for example: “What impact do you think the agro-ecosystem analysis (AESA) has on participant practices?” Let the group discuss this question for the time period agreed upon. The
23
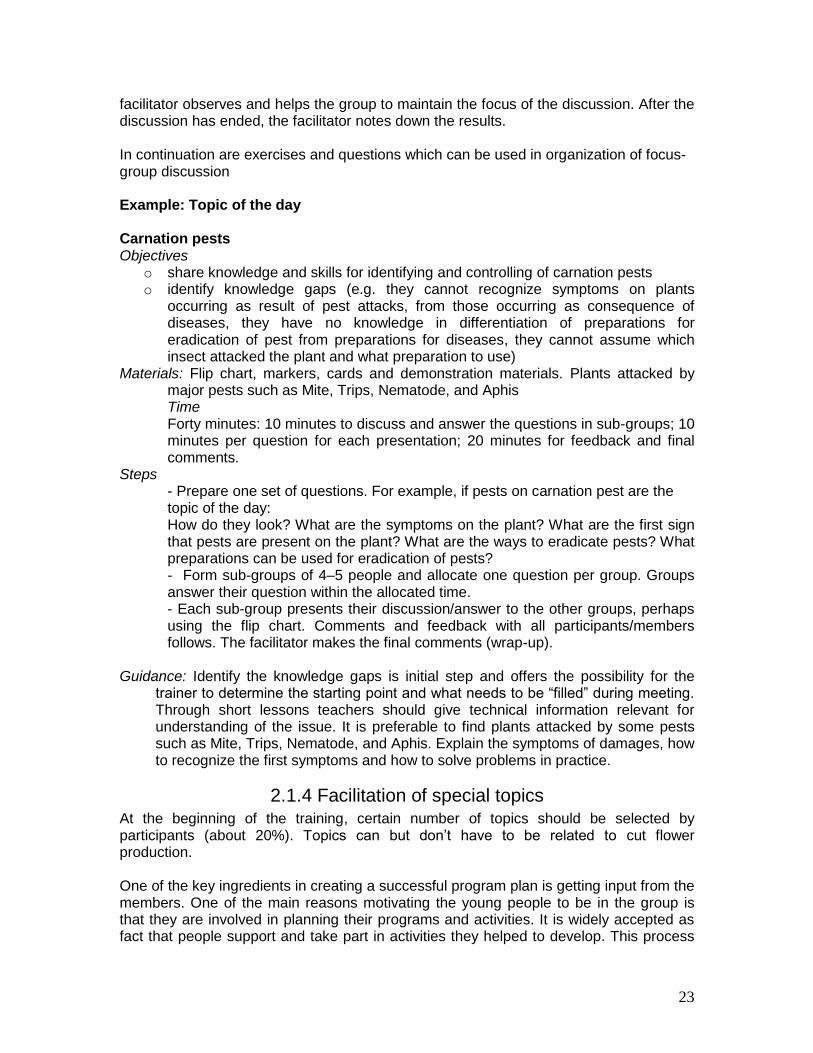
facilitator observes and helps the group to maintain the focus of the discussion. After the discussion has ended, the facilitator notes down the results. In continuation are exercises and questions which can be used in organization of focus-group discussion Example: Topic of the day Carnation pests Objectives
o share knowledge and skills for identifying and controlling of carnation pests o identify knowledge gaps (e.g. they cannot recognize symptoms on plants
occurring as result of pest attacks, from those occurring as consequence of diseases, they have no knowledge in differentiation of preparations for eradication of pest from preparations for diseases, they cannot assume which insect attacked the plant and what preparation to use)
Materials: Flip chart, markers, cards and demonstration materials. Plants attacked by major pests such as Mite, Trips, Nematode, and Aphis Time Forty minutes: 10 minutes to discuss and answer the questions in sub-groups; 10 minutes per question for each presentation; 20 minutes for feedback and final comments.
Steps - Prepare one set of questions. For example, if pests on carnation pest are the topic of the day: How do they look? What are the symptoms on the plant? What are the first sign that pests are present on the plant? What are the ways to eradicate pests? What preparations can be used for eradication of pests? - Form sub-groups of 4–5 people and allocate one question per group. Groups answer their question within the allocated time. - Each sub-group presents their discussion/answer to the other groups, perhaps using the flip chart. Comments and feedback with all participants/members follows. The facilitator makes the final comments (wrap-up).
Guidance: Identify the knowledge gaps is initial step and offers the possibility for the
trainer to determine the starting point and what needs to be “filled” during meeting. Through short lessons teachers should give technical information relevant for understanding of the issue. It is preferable to find plants attacked by some pests such as Mite, Trips, Nematode, and Aphis. Explain the symptoms of damages, how to recognize the first symptoms and how to solve problems in practice.
2.1.4 Facilitation of special topics At the beginning of the training, certain number of topics should be selected by participants (about 20%). Topics can but don’t have to be related to cut flower production. One of the key ingredients in creating a successful program plan is getting input from the members. One of the main reasons motivating the young people to be in the group is that they are involved in planning their programs and activities. It is widely accepted as fact that people support and take part in activities they helped to develop. This process
24
helps members feel that the group’s program belongs to them. Planning can allow for sharing the responsibilities for a successful training program among the members, facilitator and teacher. When we know our learners and what they want, it is also easier to make activities relevant to them. Often the things that our learners want to learn will be linked to improving the quality of their lives. The facilitator could initiate such special topics by inviting guest speakers to handle topics that deal with health, group cohesion, micro-credit, gender, innovations, and participants’ opportunities and challenges. This gives participants the chance to learn about anything they feel is important to their livelihood. If the facilitator lacks the specific expertise, it can be invited external scientists, specialists or other participants to lead the discussion. The role of the facilitator is to target a specific topic at the most relevant time for FS participants.
Special topics can be organized every second weak, during one day.
In addition to special topics they can organise special activities such as study trip and exchange visit. Study trips or visits to other regions can be organised where there is production, market or some institutions. Exchange visits include visits to other study plots and other groups on other enterprises (once per month). Some of the activities can be financed from the group fund.
2.1.5 Group dynamic An important task when forming a FS is to slowly build up social skills and encourage the group to share practical and social responsibilities in the group. The facilitator may introduce social gestures and activities that are repeated when the FS group meet. Willingness to work in groups and share experiences should be encourages. By gradually adding responsibilities FS members will grow in self-confidence. Group dynamic exercises create a pleasant learning environment, facilitate learning and create space to reflect. They also enhance communication, problem solving and leadership skills. The games and exercises are lively and convey messages. They also break the ice and improve participation and bring fun. Furthermore, people tend to remember the exercises and thus the message. Each exercise can serve multiple purposes. To apply group dynamics properly, the facilitator should keep the following in mind:
o be clear about what you want to achieve with the exercise o be aware of the appropriate moment, e.g. do an exercise to energise people
when they are feeling tired, or to tackle conflict if you see one arising o plan and prepare the exercises (reserve time for them in the FS programme) and
always o add a ‘head’ and a ‘tail’ (introduction and analysis) o good exercises involve everyone in the group o exercises should be adapted to local and cultural conditions and should not
offend people or make them feel embarrassed o vary the type and use of the exercises – don’t only do exercises that energize
25
o treat group dynamic exercises as a toolbox – do not become trapped in a fixed formula.
o Remember that each FS is unique and exercises should be modified for each specific FS. Group dynamic exercise can be carried out before the topic of the day, but also between two sessions/theme units within the topic of the day. Objectives This section gives examples of group dynamic exercises which aim to facilitate various objectives:
energise participants enhance participation strengthen a learning topic strengthen group work and cohesion solve conflict
Throughout life-cycle of a FS the facilitator can use trivial games and exercises to enhance group dynamics. The activities should be related to the FS subject and based on local social and cultural practices. The facilitator should act as a mentor to the groups, by showing respect and interest in the groups. Facilitators should let the groups make their own decisions and mistakes and allow for feedback from other groups. The facilitators are there to guide the groups, not to organise them. The groups should have group own leaders, but the facilitators should always remember to communicate freely with all members, not just the group leaders. Communicating only through group leaders may cause unnecessary tension within and outside the groups. Simple rules to enhance group coherence and knowledge-sharing include: • Simple energisers, for example songs, dances, stories or games. Remember it is fun if everyone laughs, but not if some laugh at the mistakes of others. • Always sit face to face in a circle on chairs or on the floor. Do not use tables, as they may create invisible barriers. • Let one person talk at a time and look at the person talking. • Do not interrupt others talking. • Always applaud persons, who stand up and share freely. In Annex 2 are exercises which can be used for strengthening of group dynamics. Facilitator should choose an exercise for which he thinks is adequate to cultural and social situation in Antalya region and for each FS individually. This is very important part and we should constantly work on finding already existing songs, dances, stories or games and other exercises which exist at the local level, and can be used for the purpose of strengthening of group dynamics. More on exercises can be found in Annex 2.
26
2.1.6 Review of the day’s activities The use of feedback exercises and summaries informs the teacher/facilitator and participants on how the information was delivered, exercises carried out, how the school is progressing from the point of view of the participants. The summary of the feedback informs as to how participants are reacting to the school. It enables the facilitator to stay abreast of participants’ feelings as well as their learning. Future plans for the school can be adjusted in line with the responses to the participants’ feedback. Daily feedback strengthens school design and increases feelings of ownership.
Exercise: Daily feedback: Word Remembered
Learning outcome Participants are able to give accurate feedback on a school session or day; -participants are showing evidence of reflecting on the feedback given. Time needed 20 minutes Materials -cards, markers, pencils Steps 1. Explain the learning outcomes and the procedure of this exercise to the participants. 2. Ask participants to write down words which, for example: • the best describe what you have learned today, or • represent the school experience you had today. 3. Promote discussion by asking questions about these words, for example: • Why did you choose these words? • Can you say more about the words you have chosen? 4. Keep records of the words and comments for possible future use. Exercise with same goal can be done in different way
Exercise: Daily feedback: Feedback cards
Materials -cards, markers, pencils, pins, tape Steps 1. Explain the learning outcomes and the procedure of this exercise to the participants; 2. Distribute note cards (two colours); 3. Ask participants to write a brief answer to each of the following questions on one of the coloured cards: Either: • What was the most helpful today? Followed by Why? or What was most useful, interesting? followed by Why? 4. Ask participants to write a brief answer to the following questions on a second coloured card: • What was least helpful, less useful? followed by either What could have been improved? Or why? 5. Collect cards.

27
6. Summarise the responses before the next meeting (overnight). Count the number of responses related to each aspects of the day mentioned then summarise the responses. The count, or number or responses, tell facilitators and participants which aspects were of great interest to participants and the summary of comments tells what the participants were saying. 7. Discuss the feedback with the participants. Alternatively 4. If there is time, redistribute and have one person read aloud all the cards with one colour. Discuss. 5. Have another person read the cards of the other colours. Discuss. 6. Keep records of the words and comments for your use. Some suggestions to facilitate group discussion: What was most helpful today?/Why? What was most useful today?/ Why? What was most interesting today?/ Why? What did you like most?/Why? What was most difficult today?/Why? What was least helpful today?/Why? What did you not like?/Why? What could have been improved? Alternatively
Exercise: Daily feedback: Likes and Dislikes - Statements
Materials: none Steps 1. Explain the learning outcomes and the procedure of this exercise to the participants. 2. There are two parts to this exercise. Arrange participants in a circle or hollow U, so that all have eye contact with each other. In turn each participant completes the sentence: “I didn’t like it when .......... because........” This may refer to anything that happened during the session or day. Each person may choose to say nothing or complete the sentence as many times as necessary. No one should pass judgement on what others say. 3. After everybody has answered this question, the procedure is repeated for what they appreciated. This time complete the sentence: “I liked it when......... because...........” 4. Keep records of the answers and comments and discuss with the participants. Note • The exercise finishes with what was liked, so participants finish on a positive note. • You can also end by asking participants to mention one good thing they feel they have personally contributed to the group. This help to build self-esteem. • You can also end by asking for “suggestions”. Participants comment on what they would like to see changed.
28
Alternatively:
Exercise: Daily feedback: Likes and Dislikes - Cards Materials -cards, markers, pencils, pins, tape Time: 20 minutes Steps: 1. Distribute coloured cards, one to each person. 2. Ask each participant to write on one card “what they did not like” during the session or day (each card one comments only). This may refer to anything that happened. Each person may choose to write nothing or to write on as many cards as necessary. 3. The cards are pinned to a board or stuck to a piece of paper for all to see. The authors should remain anonymous. 4. After everybody has written the answers to the first question, ask each participant to write on a second card “what they did like” during the session or day. This may refer to anything that happened. Each person may choose to write nothing or to write on as many cards as necessary. 5. After everybody has written the answers to the second question ask a participant to collect all the cards and pin them to a board or stuck to a piece of paper for all to see. The authors should remain anonymous. 6. Discuss the feedback with the participants. Suggestion • A third card can be distributed for “suggestions” and participants asked to comment on what they would like to see happen in future sessions.
2.1.7 Planning for the next session
Within this part activities should be done that should be carried out before next meetings. One number of these activities and exercises given in the module on exercises should be prepared earlier. It is very important that some exercises are determined and set in advance so that participants could later see the desired changes. All other preparations concerning study plots can be made earlier. Precise time depends on the period of the year when exercises are carried out within the seasonal cycle and when the training is organised, during which part of the year. In accordance with mentioned, trainers should determine the timing for execution of activities.
2.1.8 Summary and closure Each school meeting ends with a summary of what has occurred during the day. This will help participants to recall and remembers what has been discussed, achieved, and agreed during the day’s meeting.
Exercise: Summary and closure Learning outcome: - Participants will recall and remember what they have discussed, achieved, and agreed during the day’s meeting.

29
Steps: 1. Summarise the topics discussed and the main findings of the day’s session. Remind participants of the assignment given for the week (if any). 2. Remind a selected participant that at the beginning of the next school day they will summarise the topics discussed and the main findings of day’s session; 3. At the end of each session, group should do the School Meeting Checklist and analyse what was done well and what needs to be improved. 4. Close the session reminding participants of the next school date.

30
Module 3: Understanding the Field School and Team Building
3.1 Welcome and Getting Started
3.1.1 Exercises: Getting started Preparation This will be the first formal meeting of the Field School (FS). You should try to make it memorable. You may want to invite someone special to help you open it. You may want to arrange with the participants for each of them to bring some food or drink in order to share to celebrate the start of the school. Before the start of the school it is necessary to carry out all activities mentioned in the module of FS organization in order to have successful start. Guidance The purpose of the first few sessions is to get the FS organised and to build unity and cooperation among the participants. Process 1. Cover the following points:
Welcome all the participants to the first day of the FS. Congratulate the participants on their determination to improve their knowledge
and skills. The determination itself and decision to dedicate their time to this training program is their decision to contribute to better future
Explain how you believe that training will have positive impact on the rest of their life.
Check if everyone knows everyone else. If not, ask them to briefly introduce themselves.
Explain that the first two meetings of the FS will be about the purpose of the school and how the school will be run. After that, you will begin to learn about
Production processes, Post- harvest Operations and Specified Subjects which will be prepared by the trainer, but the program will also include topics of interest to participants.
The whole program will last 6 months.
2. Distribute exercise books and pens 3. Explain that how the FS will be run. There are activities and exercises that have
been prepared to help us learn. They should remember to bring their exercise books and pens or pencils each time you meet.
4. Ask if there are any questions. Answer them as best you can. 5. Explain that you will now start with the first module of the school.
Tell them You will: - Study some important things about probably the most important life on earth –living plants - Learn how plant grow and how these plants are affected by their surroundings - Learn how to manage the production and post harvest operations -Learn to recognize many important insects, diseases and weeds that attack your plant
31
-Learn how plants the ways of a scientist –how he carries out his test and experiments. -Keep records on what you see so you can write your report Don’t be surprised if you even learn some new, scientist words. In short you will become a plant scientist for brief time
It is useful to invite officials for the opening of the school. One or two speeches are sufficient to make an impact while ensuring that efficiency and goodwill are not dissipated. Possible speakers to consider for the opening ceremony could be: representatives of ISKUR, representatives of MoE, FAO, employers, and religious representative
3.1.2 Exercise: Official opening of the school Learning outcomes -Participants will have a clear understanding of the wider communities support for the implementation of the school; -prestigious offices will have been sensitized to participatory learning approaches; (this will also help to create support for the replication of similar initiatives) participants will have realised that to follow the school is a serious undertaking and be committed to participating during the full course; -participants will feel pride in recognition of their knowledge and experience as the centre of the participant field school. Materials - Programme should be written on large piece of paper Steps 1. Start preparations well in advance. 2. Agree on the date, time and venue both with the participants and the officers you wish invite. 3. Brief officers on the school approach and topics. 4. Include participants’ leaders in the opening speeches.
3.2 Understanding the Field School
3.2.1 Exercise: Understanding the purpose of the field school Objective: To provide participants with information about what they will learn from attending a FS. To provide that participants have better understanding of problems which are targeted, and which not
Materials required: White Board or Black Board, markers or chalk Exercise books
Learning Process, Methods and Activities: Brainstorming in small groups
Key questions What is the purpose of the Field School? What topics should be covered and when?

32
What are their expectations? How would they like the training to be organised? Which problems will be targeted? Over which problems we have influence?
Guidance In this session you will use small group discussions. Such groups are useful for encouraging participation and getting richer information. This is also a good way to get participants used to talking in a small working group – which is how much of the Field School will operate. Preparation Write the following two questions at the top of the board:
What do you understand by the FS?
What do you expect to learn in the FS? Below the questions, write the following headings on the board as shown below: “What do you understand by FS”; and “Learning Expectations”.
Understanding of FS Learning Expectations
Process: 1. Ask the participants to form small discussion groups. Start a discussion on what
they understand by FS. Ask them to discuss the questions. Ask each participant to keep a record in his/her own exercise book. Give them about 5 minutes to do this.
Guidance: You should visit each group to listen to how the discussion is going and offer help and guidance as needed to keep them focused. You will know what goals have been set for participants in the learning sessions that follow, but you need to use this discussion session to find out if these goals match their understanding of FS. 2. When the groups have completed their discussions ask each participant in turn to
share what they have written in their books about the first question. The participants should give one answer at a time so that each participant gets a chance to participate. As the participants share their ideas write them under the first column of the board. An example is given below.
Understanding of FS Learning Expectations
It is a school where youth learn about cut flower production

33
Guidance: If a participant repeats a point raised by another participant, you do not need to write it again, but add a tick () next to the point each time it is raised by a group. This will allow you to identify common thinking amongst the participants. 3. When each of the participants has had a chance to contribute, review the answers
on the board. Look for the most common answers. Encourage discussion that leads to unity of thought about the question.
Guidance: Understanding FS this is an open-ended question. The answers will help you and all the participants to be more focused. 4. When you have finished the first question, ask the participants to discuss their
expectations. Write them down on the board. Guidance: The expectations that the participants have may be similar or they may be very different. It is important that you know what they are expecting to learn so you can check if the FS programme covers those points or not. Suggest forming of realistic expectations. It is not a problem if the participants’ expectations are not exactly the same as the objectives of the FS programme. This will be sorted out as you work through the programme. If their expectations and goals aren’t realistic, and it is not possible to realize them during this program, explain that our goal is not to focus in the school on problems which are not under our influence. We want to use our time and energy on problems over which we have some control. Objective is to focus discussion on problems that we can influence. In the school we will focus on problems that we can influence. 5. When the participants have shared all their expectations, take them through the
topics covered by planned teaching program. 6. Identify similarities between their expectations and planned program. Identify
differences. 7. Ask participants: without which answers/knowledge/skills you do not want to
complete this training? Guidance: Explain that there is one part of the program already determined by the plan and program, and there is other part which will be developed together with them and in accordance with their expectations (special topics). They should consider and think about this and on one of the next meetings special topics will be selected which are interesting to them. Some of them will surely be within their expectations. Explain that, as the school progresses, they will be able to identify additional things they want to learn.
8. Discuss how the program is going to be implemented. Start a discussion on how
they will learn at a FS.
Guidance: For the duration of entire program, there is plan to do theoretical topics and practical work. Practical work will be done on farms/enterprises, in production.

34
Explain how the theoretical part will be delivered. Explain that one smaller part of theoretical activities will be done in classroom, and bigger part will be done in the field, where actual production takes place. Say how you believe that this part will be very interesting. Their observations and active participation are very important in school, explain to them their role as researchers, how they will be setting up simple trials, so like „young researchers“. Many exercises are planned through which we should acquire important information. During each meeting, there will be lot of discussion in groups. It is planned that 2/3 of discussions will be by them, and 1/3 by the teacher/facilitator. Also, plan is to have lot of fun. Many games, dances, jokes are planned. Significant part of time will be spent on fun. Explain the approaches which will be used:
Explain the role of the participants as active rather than passive: they work with you rather than simply take lessons from you.
Your role is to learn and facilitate training. You will listen to the participants in acting as both a trainer and a listener to participants’ problems
The program uses Learning by doing approach
Field is the learning ground
The program is linked to the actual operations on farms/enterprises
The program uses a problem-solving approach
Learning from mistakes
9. Check the participants’ understanding of each point. Encourage the participants to
discuss each point and to ask questions about them. 10. Summarise the expectations. Then provide an outline of what is planned in the
future sessions. Explain that the participants schedule of meetings. How often will they meet? What day of the week? What time? What venue? Write the agreed program onto the board and ask the participants to copy this information into their exercise books.
Guidance: It is important that participants leave this initial session with an understanding of what an FS is, and what lies ahead of them in future sessions, especially those sessions to be conducted in the first quarter. Very important that they have good impression at the beginning Wrap up:
Take a few minutes to review the key points covered in this meeting.
3.3 Team Building Guidance: Before you prepare for this module, you should assess the group of participants you are working with. Objective:
Build unity among the members of the FS.
Establish ground rules to work in the group effectively and without conflict.
Materials required: White Board or Black Board, markers or chalk

35
Learning Process, Methods and Activities: Brainstorming
Key questions: How can we effectively work as a group?
3.3.1 Exercise: Ground rules
Process: 1. Start a discussion about the rules for holding school meetings. Encourage each
participant to talk by suggesting ground rules or commenting constructively on the suggestions made by others.
2. As suggestions are made write them on the board
3. Clarify how a given rule may work. Challenge some of the rules set. Use the checklist below to help guide the discussion.
We should ensure that each member has the equal right to participate and make decisions.
We should ensure that decisions are made collectively in consultation with group members.
We should treat one another with equality and respect at all times.
We need to be self-disciplined as individuals and responsible to the group.
We should be honest and dedicated and always do our best in the interest of the group.
We should agree to disagree and never get angry if any individual opinion is not accepted.
We should always accept the decisions of the majority, even if it is against your individual view.
We should be open, accountable and transparent in our dealings with all group members.
We should always try to fix problems and not lay blame when things go wrong.
4. Ensure that there is consensus on the rules chosen.
5. Ask each participant to write the agreed rules into their exercise books.
6. Discuss the importance of these rules in ensuring success for the group. These
points must be constantly kept in mind and should be treated as the ground rules of the group.
Guidance: If there aren’t any illiterate persons, each member should sign a copy of agreement. On the next meeting distribute copies of signed agreement. If there are illiterate persons, avoid signing, just distribute the agreed document.

36
3.3.2 Exercise: Naming our FS
Process:
1. Organise the participants into small groups of 3-5. Ask each group to discuss and suggest a name for the FS. They should suggest one name. Give them about 5 minutes for this.
2. When the time is up, ask each group in turn to share its suggestion. Write them on the board. If any small groups have the same suggestion, write it once and add a () for each group that suggests it.
3. After all the suggestions have been given, ask the participants to discuss which name would be best for their FS. Facilitate agreement on a name.
4. If they cannot reach an agreement, then organise voting about the name 5. Ask all the participants to write that name on the cover of their exercise books. 6. Ask the participants if they would like to have a special symbol for their FS. If so, ask if any of
the participants can draw or has a member of his family that can draw. Organise at least one participant or a group, or a member of their families to get together to draw some ideas for a sign for the school. They should work on that and bring their suggestions to the next meeting.
3.4 Managing and Sustaining our Field School
3.4.1 Exercise: Organizing the FS
Objective: To agree on ways of sustaining and managing the FS. Help membership to carry out many duties. Improve the relationship towards the school
Materials required: White Board or Black Board, markers or chalk 2 Exercise Books, Pen
Learning Process, Methods and Activities: Brainstorming, Group decision-making
Key questions: How do we organise our FS? What do we need to do to sustain our FS financially?
Preparation: The work done in this session is formal. It needs to be written down and kept in a safe place. It forms the basis for a constitution of the FS which may be needed in the future This form should be written down and kept by the Secretary Process: Start a discussion on how the FS should be organised. Do they want to have officers such as a President, Vice-President, Secretary and Treasurer? What other ideas do they have? We have lot of trials to carry out, do we need assistants? How many assistants? We want to have fun. Do we need the game leader? Facilitate the discussion towards a consensus on some kind of leadership which can be identified with descriptions such as President, Vice-President, Secretary Treasurer, Game leader and Assistant.
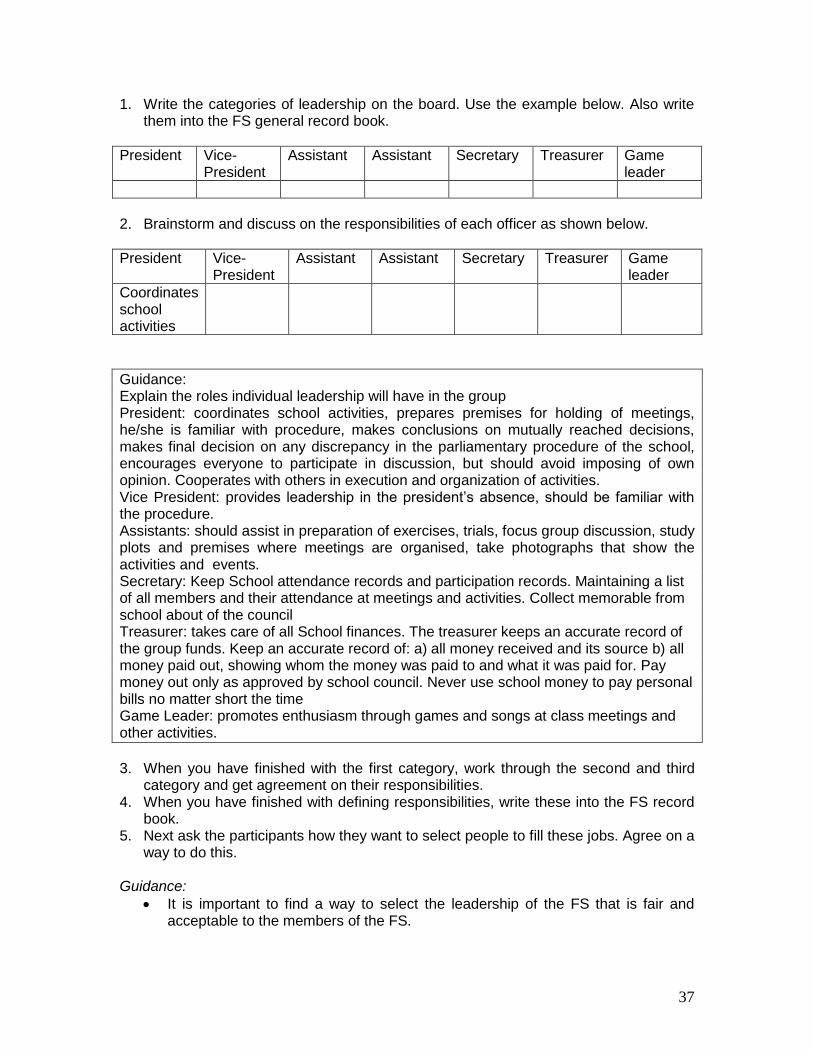
37
1. Write the categories of leadership on the board. Use the example below. Also write them into the FS general record book.
President Vice-President
Assistant Assistant Secretary Treasurer Game leader
2. Brainstorm and discuss on the responsibilities of each officer as shown below.
President Vice-President
Assistant Assistant Secretary Treasurer Game leader
Coordinates school activities
Guidance: Explain the roles individual leadership will have in the group President: coordinates school activities, prepares premises for holding of meetings, he/she is familiar with procedure, makes conclusions on mutually reached decisions, makes final decision on any discrepancy in the parliamentary procedure of the school, encourages everyone to participate in discussion, but should avoid imposing of own opinion. Cooperates with others in execution and organization of activities. Vice President: provides leadership in the president’s absence, should be familiar with the procedure. Assistants: should assist in preparation of exercises, trials, focus group discussion, study plots and premises where meetings are organised, take photographs that show the activities and events. Secretary: Keep School attendance records and participation records. Maintaining a list of all members and their attendance at meetings and activities. Collect memorable from school about of the council Treasurer: takes care of all School finances. The treasurer keeps an accurate record of the group funds. Keep an accurate record of: a) all money received and its source b) all money paid out, showing whom the money was paid to and what it was paid for. Pay money out only as approved by school council. Never use school money to pay personal bills no matter short the time Game Leader: promotes enthusiasm through games and songs at class meetings and other activities.
3. When you have finished with the first category, work through the second and third
category and get agreement on their responsibilities. 4. When you have finished with defining responsibilities, write these into the FS record
book. 5. Next ask the participants how they want to select people to fill these jobs. Agree on a
way to do this. Guidance:
It is important to find a way to select the leadership of the FS that is fair and acceptable to the members of the FS.

38
The simplest would be an election by secret ballot. The FS members could simply vote for each office without nominations. The person receiving the highest number of votes would be elected to the office.
Alternatively the FS members could nominate members for each office and then vote by secret ballot from among those who have been nominated.
Explain that bylaws may be changed with a standard majority vote any time throughout the time.
6. When you have agreed on how to select the FS leaders, ask the participants how
long each officer should serve. It is suggested that they should serve for the entire program.
7. When the term of office has been agreed, write this into the FS record book under the heading: Procedure for selecting FS leadership.
8. Next, start the process of selecting the FS leaders according to the agreed procedure.
Guidance: It may happen that the members feel that it is too early to select leaders. If this is the case, ask them when they would like to do this and put it into the FS schedule. 9. When the selection is done, record the names of the selected leaders into the FS
general record book. Write this on a new page in the book under the heading: Selection of FS leadership for.
10. Show the book to the participants and explain that it is important to have a formal
record of this process. You have been doing this up to now. This will now be the responsibility of the FS (Secretary). But before handing this over, ask all the members to sign the section of the book that records the selection procedure and the results of the selection process. Then give the record book to the Secretary.
Note: Allowing participants to elect their own officers serves the following purposes:
o Members feel ownership in their school meetings. o To agree on ways of sustaining and managing the FS.
Selection leadership
Office Name Address Phone number
President
Vice-President
Assistant
Assistant
Secretary
Treasury
Game leader

39
o Help membership to carry out many duties o Those elected learn to be responsible to their organization, leadership skills and
parliamentary procedure o All members learn about and participate in elections. o A variety of experiences help the member develop new skills.
3.4.2 Exercise: Financing in FS Process: 1. Start a discussion with the participants about how the FS can find financing for some
of its activities 2. Explain that part of the costs for functioning of FS will be covered by project (if it is
foreseen by the project, and if not – do not mention financing from the project), Are they ready to contribute? Are they ready to cover one part of the costs themselves and for which part? How can they find money for their mutual fund? Do business owners want to contribute to forming of mutual fund? Facilitate the discussion toward an agreed process.
3. Write the agreed process into the FS financial record book under the heading: Procedure for raising and handling funds for the FS.
4. Show the book to the participants and explain that it is important to have a formal record of this process. You have been doing this up to now. This will now be the responsibility of the FS (Treasurer). But before handing this over, ask all the members to sign the section of the book that records the financial procedure of the FS.
Wrap up:
Take a few minutes to review the key points covered in this meeting.
Remind the participants about the next meeting.
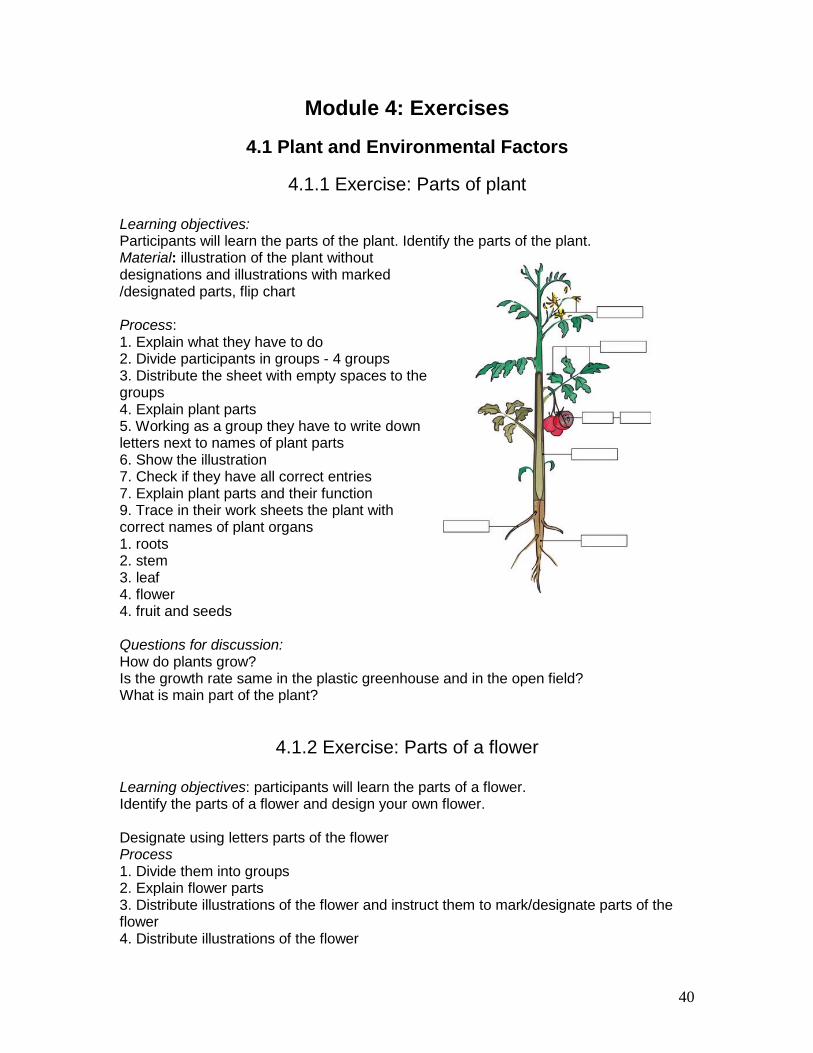
40
Module 4: Exercises
4.1 Plant and Environmental Factors
4.1.1 Exercise: Parts of plant Learning objectives: Participants will learn the parts of the plant. Identify the parts of the plant. Material: illustration of the plant without designations and illustrations with marked /designated parts, flip chart Process: 1. Explain what they have to do 2. Divide participants in groups - 4 groups 3. Distribute the sheet with empty spaces to the groups 4. Explain plant parts 5. Working as a group they have to write down letters next to names of plant parts 6. Show the illustration 7. Check if they have all correct entries 7. Explain plant parts and their function 9. Trace in their work sheets the plant with correct names of plant organs 1. roots 2. stem 3. leaf 4. flower 4. fruit and seeds Questions for discussion: How do plants grow? Is the growth rate same in the plastic greenhouse and in the open field? What is main part of the plant?
4.1.2 Exercise: Parts of a flower Learning objectives: participants will learn the parts of a flower. Identify the parts of a flower and design your own flower. Designate using letters parts of the flower Process 1. Divide them into groups 2. Explain flower parts 3. Distribute illustrations of the flower and instruct them to mark/designate parts of the flower 4. Distribute illustrations of the flower
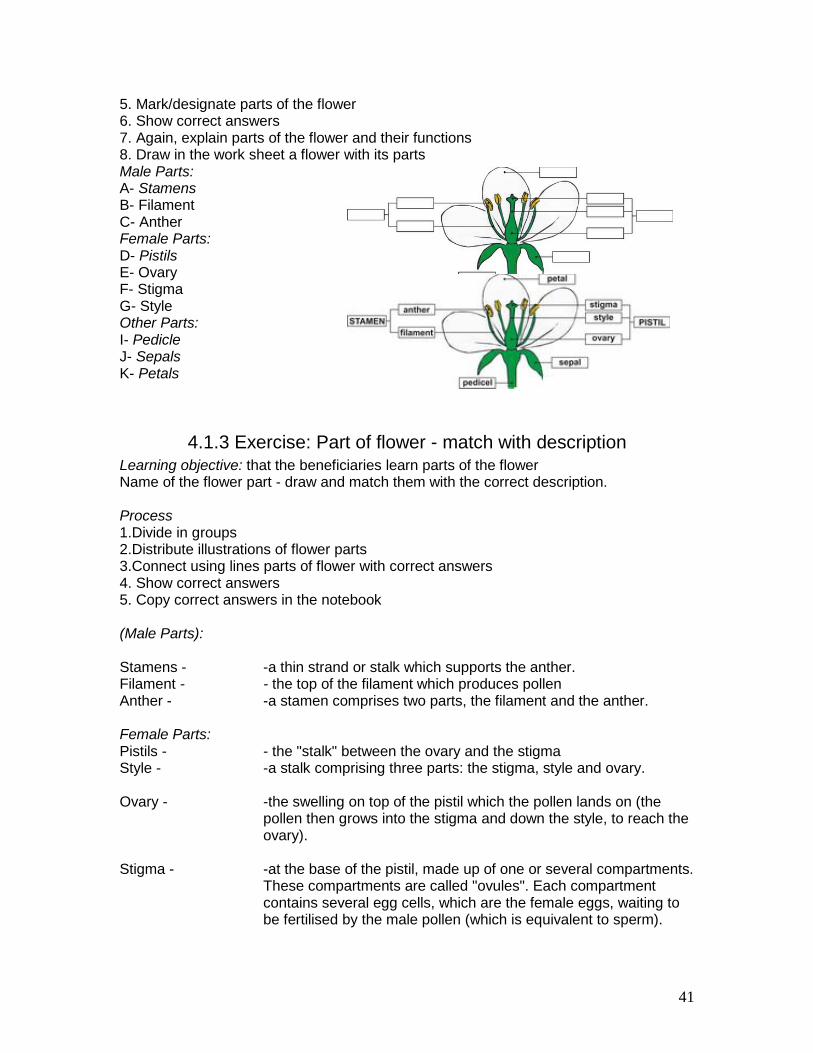
41
5. Mark/designate parts of the flower 6. Show correct answers 7. Again, explain parts of the flower and their functions 8. Draw in the work sheet a flower with its parts Male Parts: A- Stamens B- Filament C- Anther Female Parts: D- Pistils E- Ovary F- Stigma G- Style Other Parts: I- Pedicle J- Sepals K- Petals
4.1.3 Exercise: Part of flower - match with description Learning objective: that the beneficiaries learn parts of the flower Name of the flower part - draw and match them with the correct description. Process 1.Divide in groups 2.Distribute illustrations of flower parts 3.Connect using lines parts of flower with correct answers 4. Show correct answers 5. Copy correct answers in the notebook (Male Parts): Stamens - -a thin strand or stalk which supports the anther. Filament - - the top of the filament which produces pollen Anther - -a stamen comprises two parts, the filament and the anther. Female Parts: Pistils - - the "stalk" between the ovary and the stigma Style - -a stalk comprising three parts: the stigma, style and ovary. Ovary - -the swelling on top of the pistil which the pollen lands on (the
pollen then grows into the stigma and down the style, to reach the ovary).
Stigma - -at the base of the pistil, made up of one or several compartments.
These compartments are called "ovules". Each compartment contains several egg cells, which are the female eggs, waiting to be fertilised by the male pollen (which is equivalent to sperm).
42
Other Parts: Pedicle - - the often colourful "bracts" or "sheets" which surround the male
and female parts of a flower. Sepals - -"scales" which encompass the flower when it is still a bud. When
the flower opens, the sepals are left as a small petal or leaf like objects below the flower, extending from the top of the pedicle.
Petals – -the stalk which the flower sits on top of. FLOWER STRUCTURE It may seem obvious but the first thing a cut flower grower needs to know about his flowers. Surprisingly, many people who work with flowers do not understand the basics of flower structure A flower is made up of the following parts: Male Parts: • Stamens - a stamen comprises two parts, the filament and the anther. • Filament - a thin strand or stalk which supports the anther. • Anther - the top of the filament which produces pollen. Female Parts: • Pistils - a stalk comprising three parts: the stigma, style and ovary. • Ovary - at the base of the pistil, made up of one or several compartments. These compartments are called "ovules". Each compartment contains several egg cells, which are the female eggs, waiting to be pollinated by the male pollen (which is equivalent to sperm). • Stigma - the swelling on top of the pistil which the pollen lands on (the pollen then grows into the stigma and down the style, to reach the ovary). • Style - the "stalk" between the ovary and the stigma. Other Parts: • Pedicle - the stalk which the flower sits on top of. • Sepals - "scales" which encompass the flower when it is still a bud. When the flower opens, the sepals are left as a small petal or leaf like objects below the flower, extending from the top of the pedicle. • Petals - the often colourful "bracts" or "sheets" which surround the male and female parts of a
flower.
4.1.4 Exercise: Plant growth Learning objectives: determine the plant growth and factors of the plant growth. Time: setting up of the experiment one or two week before planned theoretical topic . Material: carnation plants, meter, stickers, marker, wooden slats Process:
1. Divide participants in three groups 2. Find carnation plants in plastic greenhouse in the location
foreseen as study plot 3. Choose one plant 4. Place wooden slat next to it 5. Fix one stem to the wooden slat (loosely)

43
6. Measure the height of the stem 7. Ask the participants what are their expectation, how much will the plant grow in 2
and 7 days 8. Write down their answers 9. Check the height after 2 days 10. Check the height after 7,14,21 days
Questions for discussion: Which factors influence the plant growth? Is the growth rate same in the plastic greenhouse and in the open field? Do plants grow faster during the day or the night? How does the temperature influence the plant growth? How does the light influence the plant growth? How does the water influence the plant growth? What other factors have significant influence on plant growth?
4.1.5 Exercise: Plant roots and vessels Fertilizers and other chemicals are applied on the soil in order to be taken up by the plant. To enter the plants, such chemicals must be solved in water. The plant roots can then absorb the chemicals. In order to appreciate transport of water and chemicals in a plant, the following exercise can be done. Objective: To understand transport of water and nutrients/chemicals in a plant and the effect of light on this process. Materials: Jars or cups, red ink or dye, drinking straws (2 per group), Process: 1.Add water to the jars and add several drops of ink or dye to the water. The colour of the water in the jars should be dark red or blue. 2.Go out to the field and collect leaves of different plants (vegetables, cut flowers weeds, grasses), preferably with long leaf stems. E.g. cucumber. You can choose carnation plants, but also other plants with wider leaves. 3. Back in the classroom, place the leaves with the leaf stems in the cups. 4. Flatten one drinking straw. Put one flattened and one un-flattened straw in one of the cups. 5. Make two series: place one series of cups in a bright (sunny) place and the other series in a shady place. 6. Write down your expectations 7. Wait 1 hour and observe the leaves and straws. Watch the colouring of the leaf veins by the dye. 8. Observe again after 2 and 3 hours and the next meting Note: Water in drawn from the glass, up the stem, to the leaves. This shows that plant take up water from the soil with their roots. Discussion: What happens with the colour of the leaves over time? Was there a difference between the series in the light and the one in the shady place? What does this mean for chemicals (fertilizers, pesticides) that are applied on the soil?
44
What happens with the water and the chemical after it reaches the tip of the leaf? Was there water on the leaf margins early morning? Was it coloured? Why?
4.1.6 Exercise: Transpiration
Learning objective: Visualize the transpiration process, observing water transpired from the leafy part of a plant through the stomata. Materials: well-watered plant or tree, small plastic bag, twist tie, paper towel Process: 1. Divide the participants in sub-groups of 3-5 persons each; each group carries out the exercise 2. Select a plant and field where the soil is moist, where tall leafy plants are growing (preferably one that is in the sun). If there is no moisture in the soil, water the plants before setting up of the exercise. You can choose carnation plants, but also other plants with wider leaves. 3. Cover at least three leaves on the end of the stem or twig of the plant with the dry transparent plastic bag. Enclose many of the leaves as possible 4. Fasten the twist tie around the plastic bag being careful not to damage the plant. 5. What do you think will happen inside the plastic bag? Note: Answers will vary 5. Wait twenty minutes. 6. Remove the plastic bag and the twist tie. 7. Wipe the inside of the plastic bag with a paper towel. 8. What do you see on the towel? Note: Water, 9. What does this tell you about the plant? Note: This shows that plants lose water through their leaves. This process is called transpiration 10. Compare the differences 11. Explain the process of movement of water through the plant, from the root to the leaves. 12. Repeat steps 1-3 for plants in the sun, or during different hours of the day (early morning, late afternoon, evening) Note: As water vapour is lost from leaves of plants through small surface pores, called stomata, water is drawn through plant roots and tissues from the soil. Plants are in ideal conditions when water stored in the soil in the rooting zone is sufficient to supply the plant water requirements- the stomata are open. When there is not enough available water in the soil, the plants close their stomata and very little moisture is lost from the leaf surfaces. This is how plants protect themselves against drought. In this exercise you are going to visualize the above-mentioned conditions and compare the effects of the differences.
4.1.7 Exercise: Light stress Learning objectives: participants should understand the importance of light for plant growth and life. Experiment focuses on one possible a biotic factor, the impact of light vs. shade.
45
Materials: 4 Styrofoam /container pots or cups, 8 cucumber seeds, 8 water melon seeds If there are cuttings of carnation, that have put down the roots and started to grow, you can also use them; 4 labels; potting soil; A large plastic container (dark in colour) or a cardboard box Process: 1.First, poke holes in the bottom of the container / cups for drainage purposes. 2.Fill each pot with potting soil, leaving about 2.-5cm of space at the top of the pot. 3. Plant four seeds per pot (two pots with four cucumber seeds each and two pots with four water melon seeds each). 4.Label the pots as follows: 1–cucumber light, 2–cucumber dark, 3– water melon light, 4–water melon dark. If you are using cuttings of carnation, place carnation light and carnation dark 5. Include the date on each label. 6. Place the two pots for light on a windowsill or in a place where there is direct sunlight. 7.Place the two pots labelled dark in the same area but with the plastic container/box covering them to block the sunlight. 8.Water the plants until the soil is damp. (Be sure to have something under the pots to collect the extra water.) 9. Participants should write prediction of how the plants in the light will differ from the plants in the dark. 10. Observe your plants twice a week for two weeks. 11. Measure and record the plant height and colour and any other data that would be useful in determining the role of light on plant growth. 12. At the end of the initial two-week period, move the dark plants to the same location as your light plants (remove the plastic container/box) and continue making observations for an additional week. Record your observations and conclusions regarding the
influence of light on plant health Some suggestions to facilitate the group discussion: How does light affect the plant life? Is the duration of day important for plants? Is the intensity of light important? What is photosynthesis? What other environmental factors are important for life of plants?
4.1.8 Exercise: Temperature
Learning objectives: participants should understand the importance of temperature for the life of plants. Materials: 6 Styrofoam /container pots or cups; 12 cucumber seeds; 12 water melon seeds; If you have cuttings of carnation, that have put down the roots and started to grow, you can also use them; 4 labels; potting soil; three places where you will store containers (1st at higher temperature, 2nd at lower temperature, and 3rd in cold store) Process: 1.First, poke holes in the bottom of the container / cups for drainage purposes. 2.Fill each pot with potting soil, leaving about 1/2-inch of space at the top of the pot. 3. Plant four seeds per pot (two pots with four cucumber seeds each and two pots with four water melon seeds each).
46
4.Label the pots as follows: 1–cucumber plastic greenhouses, 2–cucumber open filed, 3– cucumber refrigerator. 4–water melon plastic greenhouses, 5–water melon open filed, 6– water melon refrigerator. If you are using cuttings of carnation place carnation plastic greenhouses, open filed and refrigeration 5. Include the date on each label. 6.Water the plants until the soil is damp. (Be sure to have something under the pots to collect the extra water.) 7. Place the two pots on the spot in the plastic greenhouse (study plot) in a place where there is direct sunlight. 8.Place the two pots labelled ,,open field,, somewhere safe in the open field 9. Place the two pots labelled ,, refrigeration,, certain location in cold store at temperature to 10o C. 10. Participants should write prediction of how the plants grow in different temperatures. 10. Observe your plants twice a week for two weeks or several weeks if the weather is cold throughout the year 11. Measure and record the time for germination, plant height and colour and any other data that would be useful in determining the role of temperature on plant growth. 12. At the end of the initial two-week period, or longer in case of seed that didn’t germinate, find the seeds in the soil and see what happened to them 13. Record observations and conclusions regarding the influence of temperature on plant growth. Some suggestions to facilitate the group discussion How does the temperature affect the plat life? How does the temperature affect the photosynthesis, respiration, transpiration, sugar storage, flowering?
4.2. Soil
4.2.1 Exercise: Land preparation
One of the factors that affect plant growth is land preparation. Properly prepared fields promote good root development and better weed, pest and disease management. Learning outcomes -Participants will have further improved their understanding of land preparation in relation to growing a healthy crop -participants will know the advantages and disadvantages of land preparation practices. Materials: Newly planted fields, large sheets of paper and marker pens Process: 1. Explain the objectives and the procedure of this exercise to the participants. 2. Brainstorm with the whole group the important things to note when planning for land preparation. Come to an agreement on the important indicators and write them down. The list may include, but not be limited to, the following: • Is the presence of weeds a problem? • Is seed germinated even? • Is the crop healthy? • Is it well established? • Is the field prepared in beds?
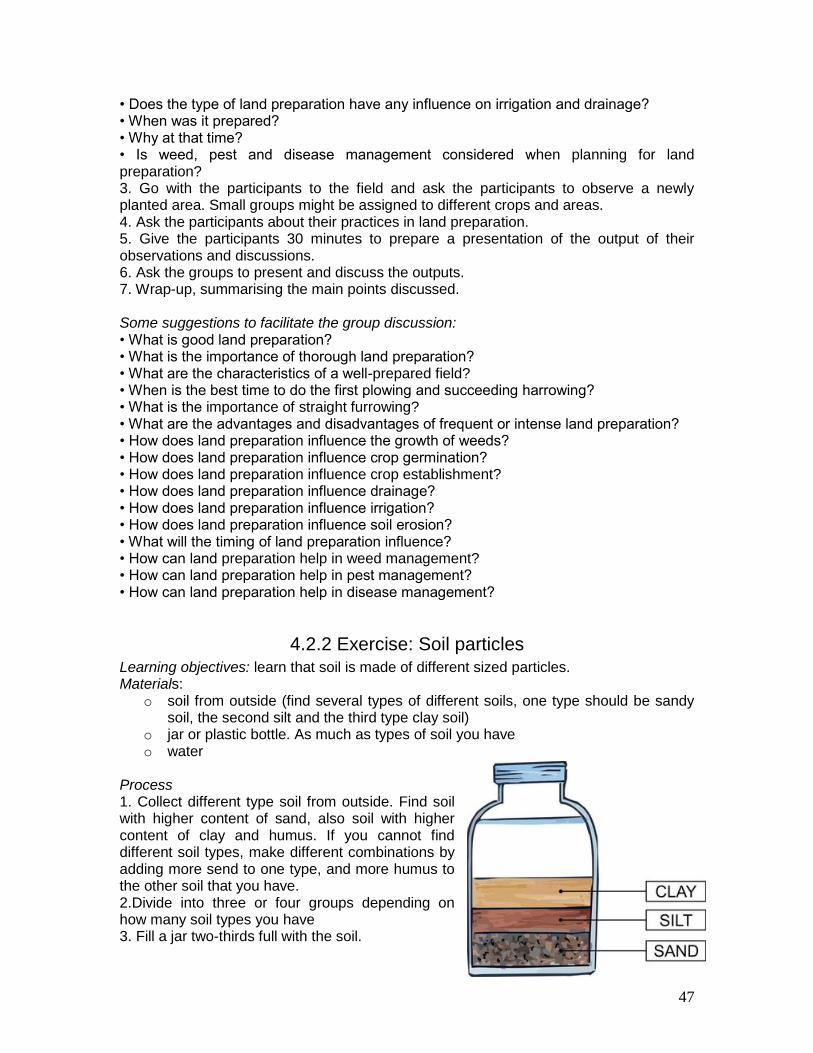
47
• Does the type of land preparation have any influence on irrigation and drainage? • When was it prepared? • Why at that time? • Is weed, pest and disease management considered when planning for land preparation? 3. Go with the participants to the field and ask the participants to observe a newly planted area. Small groups might be assigned to different crops and areas. 4. Ask the participants about their practices in land preparation. 5. Give the participants 30 minutes to prepare a presentation of the output of their observations and discussions. 6. Ask the groups to present and discuss the outputs. 7. Wrap-up, summarising the main points discussed. Some suggestions to facilitate the group discussion: • What is good land preparation? • What is the importance of thorough land preparation? • What are the characteristics of a well-prepared field? • When is the best time to do the first plowing and succeeding harrowing? • What is the importance of straight furrowing? • What are the advantages and disadvantages of frequent or intense land preparation? • How does land preparation influence the growth of weeds? • How does land preparation influence crop germination? • How does land preparation influence crop establishment? • How does land preparation influence drainage? • How does land preparation influence irrigation? • How does land preparation influence soil erosion? • What will the timing of land preparation influence? • How can land preparation help in weed management? • How can land preparation help in pest management? • How can land preparation help in disease management?
4.2.2 Exercise: Soil particles Learning objectives: learn that soil is made of different sized particles. Materials:
o soil from outside (find several types of different soils, one type should be sandy soil, the second silt and the third type clay soil)
o jar or plastic bottle. As much as types of soil you have o water
Process 1. Collect different type soil from outside. Find soil with higher content of sand, also soil with higher content of clay and humus. If you cannot find different soil types, make different combinations by adding more send to one type, and more humus to the other soil that you have. 2.Divide into three or four groups depending on how many soil types you have 3. Fill a jar two-thirds full with the soil.
48
4. Fill the jar almost to the top with water. Leave one to 5 cm of air space at the top. 5. Put the lid on tightly. 6. Shake the jar for three to five minutes until all the clumps of soil are mixed well with the water. You may need a spoon to break apart some of the clumps. 7. Set the jar down and wait for 5 minutes.
What does the soil inside the jar look like ?
After 5 Minutes After Ten Minutes After One Hour
7. Compare your “soil shake” to another group’s shake. How are they similar? How are they different? 8. Explain different parts of soil and their significance 9. Leave the experiment for the next meeting and check again during the next meeting and discuss differences Note: Soils are made of three kinds of particles: sand, silt, and clay. Good soil is made up of a balanced mixture of these three particles: sand, silt, and clay. Make a soil shake to observe the particles in your soil. Discussion: Do you think your soil would be a good soil for cut flowering growing plants? Why or why not? How do soil particles influence the water capacity of soil? What type of soil is easier to cultivate? Is the soil colour different due to particle size?
4.2.3 Exercise: Determination of texture Learning objectives: To evaluate soil texture in different soil types. Materials: water dispenser; soil sample; measuring spoon; water container for hand washing Process: 1.Take a soil sample of a selected soil, about a spoonful. 2.Put it on your left hand. 3. With the aid of the water dispenser, gradually add some water (drop by drop) and with your right hand manipulate it to the point where a sticky consistency is reached and then make a 2- 5 cm ball (3 do 5 cm) diameter. The point at which the wet soil becomes malleable is an indicator of its texture. 4. In order for you to identify the textural class the soil belongs to, compare it to the table below. Sandy The soil stays loose and separated, and can be
accumulated only in the form of a pyramid Sandy Loam The soil contains enough silt and clay to become sticky,
and can be given the shape of an easy-to-take-apart ball Silty Loam Similar to the sandy loam but the soil can be shaped
rolling it with a small and short cylinder Loam Contains almost the same amount of sand, silt and clay.
can be rolled with a 6” long (approximately) cylinder that
49
breaks when bends
Clayey Loamy Similar to the loamy, although this one can be bent and be given a U shape (without forcing it) and does not break
Fine Clay The soil can be given the shape of a circle, but shows some cracks
Heavy Clay The soil can be shaped as a circle, without showing any crack
4.2.4 Exercise: Percolation
The percolation rate is a measure of the ‘vertical permeability of the soil’ - the rate at which water moves vertically through the soil to the water table (i.e. the groundwater level). During rainfall on a soil with low permeability the surface soil layers will become rapidly saturated as the rainfall rate will exceed movement through the soil resulting in runoff even though the soil at depth may remain dry. In a highly permeable soil rainfall will move rapidly deep into the soil and will drain away so there will be less risk of saturation and water logging. Waterlogged soils due to lack of air prevent root function and nutrient and moisture uptake. This exercise will visualize percolation differences between soils and effects of those differences. Learning objective: • Visualize deep percolation and its potential contribution to groundwater recharge. Preparation Collect two or three contrasting types of soil; a sandy soil, a soil rich in organic matter and a clayey soil. Timing This exercise can be carried out at any time of the year, not limited by adverse weather conditions Time Initially 1 hour; more observations the next day(s) Materials • 4 two litre plastic bottles • 1 sharp knife • Some “sticky stuff” (or patty) Steps 1. Divide the participants in sub-groups of 3-5 persons each; each group carries out the exercise. 2. Cut the tops from two of the soda bottles and make small holes in the bottom to allow water to continue moving downwards by gravity. 3. Fill each container with a different type of soil or sand, compost, and soil. 4. Cut the base from the two other plastic containers and place or fix them under the two containers filled with soil. Pour the same amount of water (a cupful) into each container. Do it where people can see what happens over the next few minutes. 5. Each group should prepare a presentation of their results and findings for each type of soil. 6. Plenary presentation and discussion.
50
Some suggested questions for processing discussion: • What different factors affect the percolation rate of a soil and ultimately the groundwater recharge? • What is the groundwater depth in your area? How does it fluctuate? • Compare the situation in the village over the years - What are the participants’ perceptions of the quantity and quality of groundwater? - How has the situation changed over the last 10 or 20 years? - What are the dominant causes of groundwater pollution?
4.2.5 Exercise: Soil sampling Learning outcomes: participants have acquired knowledge, skills and experience on how to collect soil samples for testing. Materials: Shovel or other digging tools, plastic bags, marker, paper Process: 1. Explain the learning outcomes and the procedure of this exercise to the participants. 2. Ask participants how they would collect soil samples for an analysis. 3. Go to the field and demonstrate how to take a soil sample 4. Ask participants to take (sub) samples for further analysis. 5. Discuss the important steps of soil sampling. 6. Wrap-up, summarising the main points discussed during this exercise. Note: Correct soil sampling and accurate soil analysis would help in ascertaining the right amount of fertilizer to be applied in order to have a good yield. However, this is not usually done by participants because of its complexity. Hence, this exercise would let participants acquire the skills for proper soil sampling. Some suggestions to facilitate the group discussion: • What are the steps in collecting soil samples? • What are the materials needed? • What is the importance of collecting soil samples? • What are the do's and don'ts in collecting soil samples? • How will you get good samples in areas having steeper or less steep slopes?
4.2.6 Exercise: Soil pH Learning objectives: participants will learn about soil pH and why it is important to plants. Material:
o two glass jars with lids o masking tape o litmus paper (available from teacher supply stores or science suppliers) o spoon o limestone (available at garden centres or construction market) o iron sulphate Known since ancient times as copperas (available at garden
centres) o measuring cup o water o soil from the lawn or garden

51
Nutrients in the soil are most available to plants if the pH of the soil is between 5.5 and 7.0. If the soil pH is too acidic or too basic, the plants will grow slowly or not grow.. Gardeners test the soil with a kit or send it to a lab to have the pH measured. Then they decide whether to add limestone and iron sulphate to the soil to change the pH. Experiment with pH by using litmus paper. Litmus paper changes colour when it touches acidic or basic solutions. Blue litmus paper turns red when it touches an acidic solution. Red litmus paper will turn blue if it touches a basic solution.
ACIDIC NEUTRAL BASIC 1 2 3 4 5 6 7 8 9 10 11 12 13 Too acidic for most plant
Most desirable range for plants pH=5.5-7.0
Too basic for most plants
Experiment Use the chart above to help you with the experiment. Test the pH of limestone and iron sulphate. Process: 1. Label two jars with masking tape. 2. Put a strip of litmus paper at the bottom of each jar. 3. Put a spoonful of limestone in one jar and a spoonful of iron sulphate in the other. 4. Add 1/2 to 1 cup water to each jar. 5. Place the lid on the jar and shake it. 6. Look at the litmus paper.
1. What colour is the litmus paper in the jar with limestone? Note: Blue 2. Is limestone acidic or basic? Note: Basic 3. What colour is the litmus paper in the jar with iron sulphate? Note: Pink 4. Is iron sulphate acidic or basic? Note: Acidic 5. Circle which one you would add to the soil if the pH was too high. iron sulphate or limestone 6. Circle which one you would add to the soil if the pH was too low. iron sulphate or limestone Soil Test Collect a sample of soil from outside. Perform the litmus test on the soil. Is the soil acidic, neutral, or basic? Do you need to add anything to change the pH to the desirable range?
52
4.3 Plant Nutrition
4.3.1 Exercise: Plant nutrients
In common with all living beings, plants need food for their growth and development. Plants live, grow and reproduce by taking up water and mineral substances from the soil, carbon dioxide from the air and energy from the sun to form plant tissues. As with other living beings, plants need different kinds of mineral nutrients (just as human food needs to be balanced with different kinds of food; rice, meat, vegetables, etc.). For optimal soil fertility management it is essential to know the crops’ nutrients needs: the kinds and amounts required, as well as their optimum timing for growth phases. Their are 13 essential mineral nutrients Learning objectives: participants will learn what nutrients plants need to survive and grow. Materials: large sheet of paper, marker Process: 1. Explain learning outcomes and the procedure of this exercise to the participants. 2. Draw a plant on a sheet of paper and ask the participants if they know what different kinds of need a plant/crop needs for its growth and development (air, water, sun and soil). Write these around the plant (with arrows) on the paper. 3. Ask the participants to mention all the soil nutrients they know and list them on the sheet of paper also. 4. Inform the participants that: • there are 13 different elements which a crop needs for healthy growth • there are 3 primary, 3 secondary and 7 micro nutrients. 5. Explain the differences between primary, secondary and micro nutrients (differences in the quantities needed by the crop). 6. Discuss with the participants what will happen if the soil cannot provide one or two of the nutrients needed by the plant at a specific time, and what the participant could do to correct/prevent this situation. 7. Wrap-up, summarising the main points discussed.
Some leading questions for the promotion of discussion: • What are the soil mineral elements a crop needs? • Is there a resemble between the theory of “the weakest link in a chain” and the effect of one mineral soil element limiting crop growth and development? • What can you do if a soil mineral element is limiting crop growth? • What will be the effect of using N, P and/or K chemical fertilizers over a large number of years on the availability of the other 13 essential mineral nutrients in the soil? • What can be done to maintain the availability of those other essential mineral nutrients?
53
4.3.2 Exercise: How the plant feeds (nutrient uptake)
To be able to decide on the best way to manage soil fertility it is important for the participant to understand how a plant absorbs nutrients. Most of the nutrients are taken up by the plant through its root system. Root development is therefore very important for crop nutrient uptake. A plant can only take up nutrients when they are dissolved in water and therefore soil water plays a crucial role in the nutrient uptake process. Learning outcomes Participants will be able to understand the limitation factors in nutrient uptake by plants. Materials: spade, handful of a nitrogen (urea) fertilizer and handful of phosphate fertilizer (SSP or TSP), watering can with water Process: 1. Explain learning outcomes and the procedure of this exercise to the participants. 2. Ask the participants to discuss what the influence will be on the root growth and the nutrient uptake capacity of the plant of: - a compacted soil layer or hardpan, - water table close to the surface, - very dry soil conditions. 3. Go with the participants to a nearby field where differences in crop growth can be observed which, most likely, are related to limited root development. (Fields located in a depression or fields with a compacted layer in the subsoil). 4. Ask the participants to dig a pit close to a well-developed plant and one close to a badly developed plant (most likely to be as the result of limited root development). 5. Observe the root development of the different plants. 6. Compare and discuss with the participants the relationship between root development, nutrient uptake and crop development. 7. Show the participants a handful of nitrogen fertilizer (Urea) and a handful of phosphate fertilizer (SSP or TSP) and ask the participants if the plant can take up the fertilizer in this solid form or if it has to be first dissolved in water. 8. Ask the participants what they think will happen to the fertilizer when it is added to the soil. 9. Sprinkle a little of the nitrogen fertilizer on the ground and do the same with the phosphate fertilizer on another spot. Ask the participants if the plants will be able to take up the two different fertilizer nutrients from where they are now. 10. Water the two spots with a watering can till most of the urea has disappeared. Use the same amount of water for the two spots. 11. Ask the participants if the plant will be able to now take up all the nitrogen of the fertilizer? What about the phosphate fertilizer? 12. Discuss the importance of the ability of the nutrient to dissolve in water for plant uptake and the mobility of the nutrient in the soil for it to be able to reach the roots. 13. Discuss with the participants what the consequences are for their soil fertility management of: (a) limited root development limiting nutrient uptake; and (b) the fact

54
that nutrients have to dissolve in water first before they can move around within the soil and be taken up by the plants. 14. Wrap-up, summarising the main points discussed. Some suggestions for discussion • Does an improvement in the soil structure also improve the soil fertility? • Are the nutrients present in the root zone the only nutrients available for the plant? • Does the amount of nutrients available for a plant also depend on the size of the root system? • Are the availability of water and the availability of nutrients related to each other? • Does irrigation influence the nutrient uptake of the crop? • Are all nutrients needed by the plant easily dissolved in water and made available to the plant? • What will be the influence of deep ploughing on the fertility of a soil? • What will be the differences between broadcasting and mixing into the soil for a nitrogen and a phosphate fertilizer? • What will be the effect of a nutrient such as nitrogen being easily dissolved on the long term availability of the nutrient for the crop? What will be the consequences for fertilizer management (split applications?)?
4.3.3 Exercise: Nutrient deficiencies of crops Learning outcomes Participants have diagnosed abnormal appearance or signs of abnormal growth as a result of nutrient deficiencies. Materials: Brown paper, crayon , pencil, tape Process: 1. Explain the learning outcomes and the procedure of this exercise to the participants. 2. Ask the participants if they have ever observed an abnormal appearance or signs of abnormal growth in their crop. 3. Go into the field to a place indicated by the participants where they have observed an abnormal appearance or signs of abnormal growth of the crop. 4. Ask the participants, to form small groups to observe the plants with abnormalities and to discuss in their groups: -if the abnormal symptoms have appeared just recently or if they have been present for a longer period. -if the symptoms are present on only a few plants/trees/small area or on a large number of plants/trees/large area. -if the area infected resembles a soil type unit and/or an area which has received equal/unequal soil management treatments. 5. Ask each group, to take one specimen of an abnormal and one of a healthy plant and to identify where the symptoms appear: mainly on the older (lower) or on the younger (upper) leaves or almost equally on both old and new leaves. 6. Ask each group to draw and report their observations on their specimens. 7. Ask the participants what they think the following characteristics indicate about the causes of the symptoms: • the length of time the abnormal symptoms have been present on the plants, • the shape of the area covered with plants with the same symptoms, • the area covered with plants with the same symptoms resembles an area with the same soil type and/or received the same soil management,
55
• the distribution of the symptoms on the plant. 8. If available, compare the identified symptoms with the descriptions in “Nutrient deficiencies of crops”. 9. Ask the participants what can be concluded about the cause of the abnormal symptoms based on the observations made. 10. Repeat with the participants all the steps they have gone through during “the nutrient deficiency diagnosis process” which they just practised. 11. Repeat the process if the participants would like to do this at another location. Note: Plants develop an abnormal appearance or show signs of abnormal growth when they receive an inadequate supply of a particular plant nutrient. Recognizing the symptoms of a particular nutrient deficiency can provide the participant with some valuable basic information upon which to plan further action. It is a preliminary diagnosis technique and, as soil testing, also has its limitations. It is part of the diagnosis of nutrient deficiencies, but does not, in itself, give the whole story, nor does it necessarily supply a solution to the problem. But, for the participant, who has often no access to other diagnosis techniques, it can provide some indicators for soil fertility management. The symptoms of nutrient deficiencies and of pest infestations often look the same. But, if the symptoms have been observed over a long period of time and are universal to a large area related to one soil type or type of soil management, they are probably due to a nutritional disorder. Further, plant nutrients differ in mobility within the plant and therefore deficiency symptoms appear in different parts of the plant for different nutrients. -Nutrients such as potassium and magnesium, which are highly mobile in the plant, show deficiency symptoms in the older leaves. -Nutrients such as calcium and boron, which have a low mobility in the plant, show deficiency symptoms in the younger leaves. -Nutrients such as nitrogen, phosphorus and sulphur, which have a medium mobility in the plant, show deficiency symptoms evenly spread over the plants. Some leading questions for the processing discussions: • Does the symptom occur during the wet or dry season or both? • On what type of soil did you observe the symptom? • What can you say about the symptoms (relate them to the functions of nutrients)? • What part of the plants have the symptoms; upper/middle or any portion of the plants? • Can you identify what causes the symptoms? • Is it a nutrient deficiency or a pest? • What about the root system of the plants? • Can you describe the root of the healthy and the abnormal plants? Is there a difference?
4.3.4 Exercise: Soil nutrient evaluation to develop a fertilizer recommendation
Learning outcomes: Participants will be enabled to obtain information for correct fertilizer use. Materials: Large sheet of paper, marker

56
Process: 1. Explain learning outcomes and the procedure of this exercise to the participants. 2. Ask the participants how they decide on the amount and type(s) of fertilizer they are going to use for their crops. List the points made on a large sheet of paper. 3. Discuss with the participants how they evaluate the nutrient status of their soils in making their fertilisation management decisions. 4. List and explain the different methods which can be used to evaluate the nutrient status of a soil or plant tissue and ask the participants if there are other methods they know about. 5. Ask the participants to discuss (in small groups) for each of the listed methods the feasibility of these methods for their own use. 6. Inform the participants that the extension office formulates those fertilizer recommendations based on fertilizer trials at research stations and participants’ fields as well as on the need to replace the nutrients used by the crop to ensure that fertilizer recommendations maintain the soil nutrient status. 8. Discuss with the participants how these recommendations can be used by the participants in making their fertilizer management decisions. 9. Wrap-up, summarising the main points discussed. Some leading questions for the promotion of discussion: • How do you decide on the amount and type of fertilizer to use? • What are your sources of information for making your fertilizer use decisions? • Do you think it is important to evaluate the nutrient status of your soil? • Do you think it is possible to evaluate the nutrient status of your soil? • Are the methods listed feasible for you when you want to evaluate the soil nutrient status? • What are the problems with these methods? • Would you like to learn more and try out one of these methods to evaluate the soil nutrient status of your soil? • If the official fertilizer recommendation is developed on a research station far from here, what is the relevance of that recommendation then in your situation? • Fertilizer recommendations are based on on-farm trials. Would it be possible for the participants to carry out those on-farm trials themselves in their own environment?
4.4 Fertilizer
4.4.1 Exercise: Fertilizers and their use
A variety of organic and inorganic fertilizers are available to participants. Their use in terms of type, time and quantity and modality of application may differ from participant to participant. Learning outcomes -Participants will be able to distinguish the nutrient content of each type of fertilizer available in the area, (organic and inorganic) and can explain the information written on the fertilizer bags; -participants will be able to estimate the amount, timing, and modality of fertilizers eeded to grow a healthy crop on their farms;
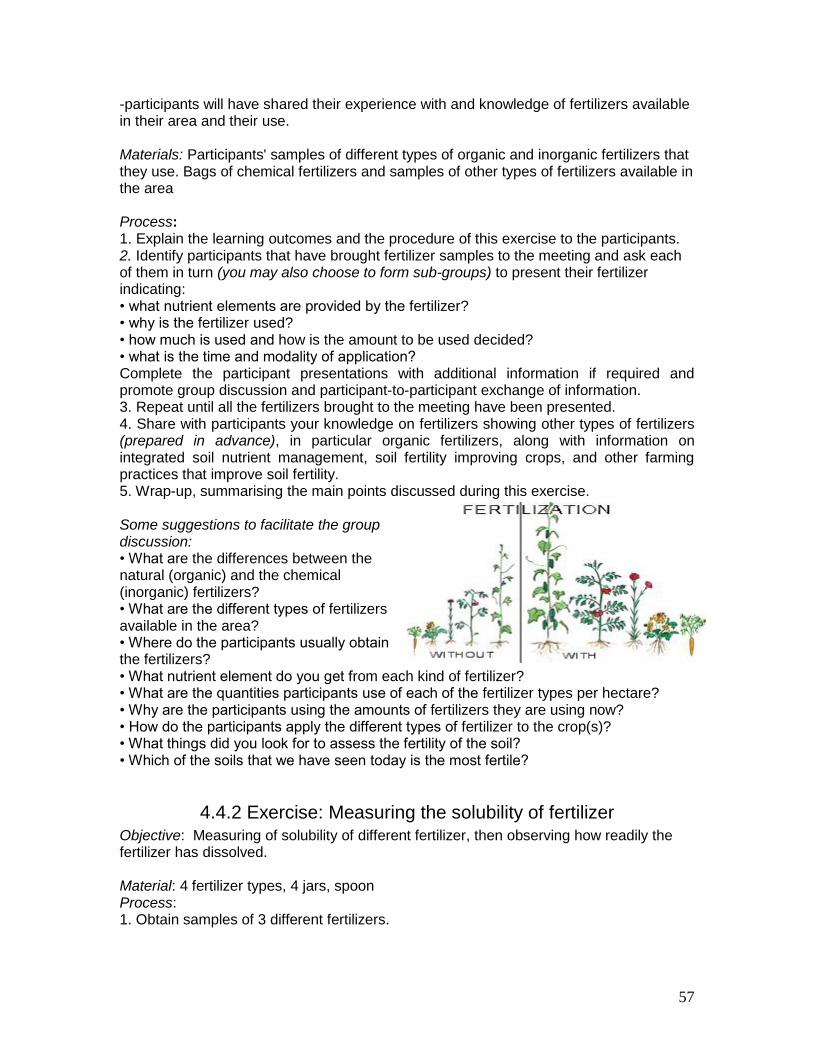
57
-participants will have shared their experience with and knowledge of fertilizers available in their area and their use. Materials: Participants' samples of different types of organic and inorganic fertilizers that they use. Bags of chemical fertilizers and samples of other types of fertilizers available in the area Process: 1. Explain the learning outcomes and the procedure of this exercise to the participants. 2. Identify participants that have brought fertilizer samples to the meeting and ask each of them in turn (you may also choose to form sub-groups) to present their fertilizer indicating: • what nutrient elements are provided by the fertilizer? • why is the fertilizer used? • how much is used and how is the amount to be used decided? • what is the time and modality of application? Complete the participant presentations with additional information if required and promote group discussion and participant-to-participant exchange of information. 3. Repeat until all the fertilizers brought to the meeting have been presented. 4. Share with participants your knowledge on fertilizers showing other types of fertilizers (prepared in advance), in particular organic fertilizers, along with information on integrated soil nutrient management, soil fertility improving crops, and other farming practices that improve soil fertility. 5. Wrap-up, summarising the main points discussed during this exercise. Some suggestions to facilitate the group discussion: • What are the differences between the natural (organic) and the chemical (inorganic) fertilizers? • What are the different types of fertilizers available in the area? • Where do the participants usually obtain the fertilizers? • What nutrient element do you get from each kind of fertilizer? • What are the quantities participants use of each of the fertilizer types per hectare? • Why are the participants using the amounts of fertilizers they are using now? • How do the participants apply the different types of fertilizer to the crop(s)? • What things did you look for to assess the fertility of the soil? • Which of the soils that we have seen today is the most fertile?
4.4.2 Exercise: Measuring the solubility of fertilizer Objective: Measuring of solubility of different fertilizer, then observing how readily the fertilizer has dissolved. Material: 4 fertilizer types, 4 jars, spoon Process: 1. Obtain samples of 3 different fertilizers.
58
2. Test each one in turn by placing one tablespoon full of fertilizer into a jar along with 1 cup full of water, then shaking ten times. 3. After shaking, observe how much residue, if any is left from the fertilizer being tested. 4. Grade the three different fertilizers according to most soluble through to least soluble. Note: The rate at which a plant is able to absorb a fertilizer depends on the solubility of that fertilizer (among other things) Some suggested question for processing discussion: Are there differences in solubility ? How does the solubility affect the intake/absorption by plants? Which leach more easily ?
4.4.3 Exercise: Fertilising seed beds
Objective: To compare organic with inorganic fertilizers in the nursery. Materials needed: Nursery site with good access to irrigation, Sand, Compost and / or manure (fully mature), N-P-K chemical fertilizers, vegetable seeds, carnation seedlings Process: 1. Prepare a seed bed of about 2 x 5 m2 (+ border) according to participants' practices, including harrowing. 2. Measure two plots of 2 x 2.5 m2 each (make sure that the field is level, in order to avoid water flow from one plot to the other). 3. Label one plot 'organic fertilizers' and apply the compost and/or manure (no inorganic fertilizers may be used!). 4. Label the other plot 'inorganic fertilizers' and apply the N-P-K fertilizer (no organic material may be added!) or wait with that application until after sowing, after emergence of seedlings. 5. Sow 200 seeds in each plot or carnation seedlings 6. Apply normal irrigation and other nursery practices (not fertilizing!) during the seedling raising period. Observations: 7. Depending on the crop, after 4 to 6 weeks, record numbers of growing seedlings, of weeds and of diseased seedlings. 8. Calculate the overall percentage of healthy seedlings. 9. Randomly uproot 25 seedlings per treatment. Assess the average number of leaves per seedling and measure root and shoot length. Note: Usually, participants use both organic and inorganic fertilizers in their nurseries. The organic matter contents in the seed bed is important. Not only is it the medium in which seeds need to germinate and grow, it is also the medium which is, with the seedling, transferred to the field. This exercise tests purely organic versus purely inorganic fertilisation in the nursery to observe effects on seedling growth and development.
59
Some suggested question for processing discussion: What are the differences between the different treatments? Was there difference in seedling growth and health? Why? What is the cost and labour needed for both treatments? What are advantages and disadvantages of both treatments?
4.4.4 Exercise: Multi-nutrient (compound) or straight fertilsers ?
Learning outcomes: Participants will have obtained a better understanding of the characteristics of multi-nutrient (compound), and straight fertilizers to be enabled to make better decisions on what type of fertilizer to use. Materials: Large sheet of paper, marker, samples of compound and straight fertilizers Process: 1. Explain learning outcomes and the procedure of this exercise to the participants. 2. Ask the participants which type of chemical fertilizers they are using, compound or straight. If needed, explain the differences and give examples. 3. Ask if the other type of fertilizer is available. 4. If yes, who is using them? If only some participants are, would the others like to try also? 5. Ask the participants to compare the two types of chemical fertilizer through answering the following questions for both types: • Is it easy to obtain (buy) the fertilizer? • What is the reliability of the supply of the fertilizers? • Is it difficult to decide on how much fertilizer to use? • Is it difficult to decide on the mixture of fertilizers to use? • Is there a differences in effectiveness between the two types of fertilizers? • Which of the fertilizers is cheaper to use? • Which of the fertilizers is easier to use? 6. Summarise the answers in two columns for each of the two types of fertilizers and discuss the differences. 7. Wrap-up, fertilizers the main points discussed. Note: When participants know which nutrients they need to supply for their crop, they still need to decide on the type of fertilizer. Often the choices between a multi-nutrient or compound fertilizer and a straight fertilizer. Compound fertilizers are combinations of straight fertilizers and therefore are more expensive. A participant could save money if a straight fertilizer was used. On the other hand, to obtain balanced nutrition, compound fertilizers are easier to use. In most cases, two or three different kinds of compound fertilizers, suitable for the most common crops and soil types, are made available to the participants. For all the other crops and soil types participants have to settle for an unbalanced compound fertilizer or an unbalanced compound fertilizer in combination with a straight fertilizer or only a straight fertilizer. Some suggestions for the promotion of discussion: • Why do you think straight fertilizers are not promoted by the extension service? • If straight fertilizers are cheaper in use, why are you not using them?
60
• Do you think you have enough knowledge and/or information to make you own balanced fertilizer mix out of straight fertilizers?
4.4.5 Exercise: Fertilising experiments
Objective: To test effects of application of different types and amounts of fertilizers. Materials needed: cut flower field with drip irrigation system; N fertilizers, NPK, fertilizer, NPK + microelements, water soluble fertilizer which ordinary used in crops productiom. Process 1.Within study plot, to prepare area under carnation of 3x 35m 2 to realize this experiment. 2.Divide participants into three groups. Each group should carry out the experiment on three separate fields of 35m2) 3. Every group should remove the drip irrigation from the area of 35 m2 and divide it into plot A) control, Plot B) fertilisation using only N fertilizers, plot C) fertilisation using NPK fertilizers, plot D) NPK + micro elements 4. Discussion with all participants about necessary quantities of fertilizers 5. For each variant to determine two doses, smaller and bigger. For all three groups determined quantities should be same. 6. Mark with visible label the area 7. Add fertilizer as top dressing – each group separately 8. Irrigate regularly the area using the same amount of water 9. Outside the experimental are, implement regular fertilisation practice Observations: 10. Monitor the different plots weekly and assess crop growth. 11. Assess final yield at harvest and market price. Some suggested question for processing discussion: Compare the results with present practices. Are there differences ? What are the differences between the different treatments? Which treatment gave the best crop growth? Were there any differences in quality of the harvested product? How are the plants affected with N fertilizer, and how by NPK fertilizer, and how when also micro elements are added Which treatment gave the best return?
4.4.6 Exercise: Use of foliar fertilizers Objective: To study the effect of foliar fertilizers. Materials: Cut flower field., One or more selected foliar fertilizer(s) (with or without high N concentrations), Solid fertilizers (according to local participants' use: N-P-K, manure, etc.) Process: 1. Apply three (or more) different treatments: A. With use of solid fertilizers, including manure, according to standard practices only B. With use of solid fertilizers as in A. plus weekly application with a foliar fertilizer C., D., E., etc. (if applicable) As B but using different foliar fertilizers 2. Apply crop management (including fertilisation), based on agro-ecosystem analysis.
61
3. Observations: Monitor the different plots weekly and assess crop growth. Assess final yield at harvest and market price. Note: Many foliar fertilizers contain rather high concentrations of N and crops generally respond quickly to an application with foliar fertilizers. However, foliar fertilizers are theoretically only useful (economical?) when macro-nutrients are optimally available to the crop but the micro-nutrients are lacking or low. Accurate soil testing equipment is often not available to participants and that may be a reason that participants decide to apply foliar ‘just in case’. In order to assess the economic returns of applications with foliar fertilizers as well as possible effects on crop health, the following season-long field trial can be done. Some suggested question for processing discussion: What are the differences between the different treatments? What are the advantages and disadvantages of the treatment? Which treatment gave the best return?
4.5 Water and Irrigation
4.5.1 Exercise: Water holding capacity of different soils and organic matter
Learning objectives • Investigate the amount of water different soils can hold. • Understand how water moves through the soil and is held by soil particles. • Understand the role of organic matter in water holding capacity of a soil. Preparations Identify different types of soil, like sandy, clayey and/or loamy soils; poor and rich soils according to participants and compost. Materials • Samples of different types of soil and compost • Filter paper or pieces of cloth • Funnels, made from plastic soft drink bottles • Measuring cup - or alternatively jars and balance • Jars or beakers Process: 1. Place the funnel in the measuring jar. 2. Place the filter paper or piece of cloth in the funnel. 3. Add a known amount of soil to the funnel. 4. Pour a known amount of water into the funnel, for instance 20 ml 5. Wait until the water has stopped dripping out of the funnel and read of the amount of water in the measuring jar or weigh the amount of water on the scale. 6. It may take 10-15 minutes for the water to stop dripping from the soil. 7. Record the results in a table similar to the one below. 8. Throw soil and filter paper/cloth in the bin and repeat steps1-6fortheothersoils. 9. Plenary discussion about results. Note: The amount of water absorbed by a soil depends on many factors. The size of the particles making up the soil is an important factor in water absorption. The water stored

62
in the space between the soil particles is called soil water. The larger the spaces, or pores, the faster water can move through the soil. Some suggested questions for processing discussion and points to emphasize • Which soil type holds the most amount of water? • Which soil type holds the least amount of water? • Which soil type would support plant growth longest during a dry spell?
Soil type: Amount of water added to sample
Amount of water in the jar Amount of water in the soil
4.5.2 Exercise: Calculating field capacity
Objective: Understanding of the water holding capacity of soil Material: bin for watering, dryer, balance Process: 1. Choose two types of soil, one of which is more sandy 2. Wet a soil sample to near saturation. 3. Cover to reduce evaporation. 4. Let it drain for 2-3 days. 5. Take a sample of the soil and weigh it. 6. Place the soil sample in an oven at between 100-105°C for 16 hours. 7. Weigh and record this second weight after drying. Do not heat at a higher temperature as this can destroy organic material and give a false reading. 8. Calculate Field Capacity with the following formula: Field Capacity = Loss in Weight x 100/ Final Dry Weight Calculating Permanent Wilting Point (PWP)
1. Fill a pot with the soil to be tested. 2.Grow a plant in the pot until its roots penetrate most of the soil and are visible at the bottom of the pot. 3.Use a plant which shows signs of wilting easily when wilting point is reached – for example, a petunia, tomato, cucumber or fuchsia. 4. Now cease watering until wilting occurs. When the plant wilts, seal the surface of the pot with a sheet of plastic to prevent further loss of water through evaporation. 5. Now place overnight in a humid enclosure (i.e. either a humid greenhouse or plastic tent). If permanent wilting has not occurred the plant will recover. If the wilting persists in the morning, you have then reached permanent wilting point. • Now calculate moisture content by drying the soil at 100-105 degrees centigrade for 16 hours, then separate the roots from the soil to find the final dry soil mass. PWP = moist weight - dry weight (incl. roots) 100
------------------------------------------ X ------ final dry weight 1
63
4.5.3 Exercise: Water management
A very important influence on crop growth is the availability of water to the crop. Participants try to provide the optimum amount of water to the crop according to the species and plant development stages. Learning objective -Participants will have identified problems that affect irrigation management and water distribution in the field; -participants will know the importance of water in relation to crop growth and development. Preparation: Two weeks before execution of exercise move the drip irrigation pipe from carnations and place it so that some rows are without irrigation and other receive double the amount of water than normal watering Process: 1. Explain the objective and the procedure of this exercise to the participants. 2. Ask the participants to form small groups (4-5 participants) and to make a field walk, each group in a different direction, for half an hour. 3. Ask each group to observe and record: • The different water management practices • The problems with water management • How these problems influence crop growth and development. 4. Having returned from the field walk ask the groups to report on their observations. 5. Discuss the problems observed, causes and possible solutions as well as the importance of good water management. Some suggestions to facilitate the group discussion: • Is there enough water for the crops? • Are the right water levels used during the different stages of the crop growth cycle? • Is there a drainage problem? • Is there a water distribution problem? • What can be done to improve the water management?
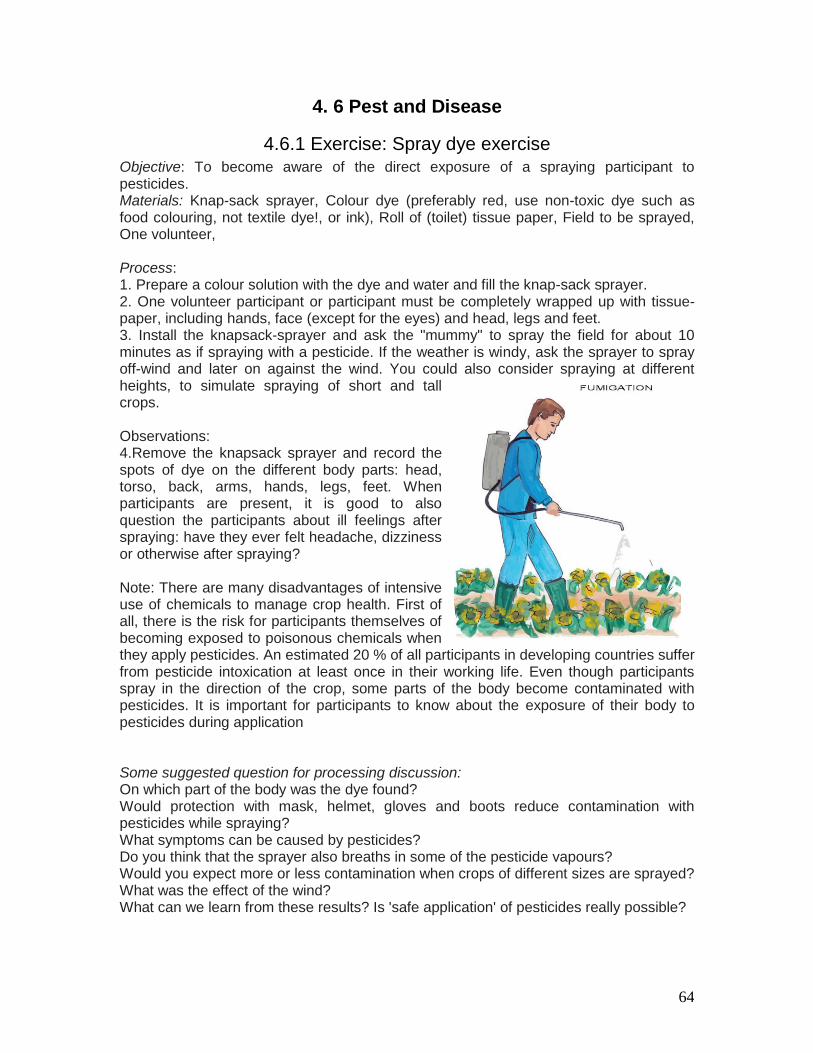
64
4. 6 Pest and Disease
4.6.1 Exercise: Spray dye exercise Objective: To become aware of the direct exposure of a spraying participant to pesticides. Materials: Knap-sack sprayer, Colour dye (preferably red, use non-toxic dye such as food colouring, not textile dye!, or ink), Roll of (toilet) tissue paper, Field to be sprayed, One volunteer, Process: 1. Prepare a colour solution with the dye and water and fill the knap-sack sprayer. 2. One volunteer participant or participant must be completely wrapped up with tissue-paper, including hands, face (except for the eyes) and head, legs and feet. 3. Install the knapsack-sprayer and ask the "mummy" to spray the field for about 10 minutes as if spraying with a pesticide. If the weather is windy, ask the sprayer to spray off-wind and later on against the wind. You could also consider spraying at different heights, to simulate spraying of short and tall crops. Observations: 4.Remove the knapsack sprayer and record the spots of dye on the different body parts: head, torso, back, arms, hands, legs, feet. When participants are present, it is good to also question the participants about ill feelings after spraying: have they ever felt headache, dizziness or otherwise after spraying? Note: There are many disadvantages of intensive use of chemicals to manage crop health. First of all, there is the risk for participants themselves of becoming exposed to poisonous chemicals when they apply pesticides. An estimated 20 % of all participants in developing countries suffer from pesticide intoxication at least once in their working life. Even though participants spray in the direction of the crop, some parts of the body become contaminated with pesticides. It is important for participants to know about the exposure of their body to pesticides during application Some suggested question for processing discussion: On which part of the body was the dye found? Would protection with mask, helmet, gloves and boots reduce contamination with pesticides while spraying? What symptoms can be caused by pesticides? Do you think that the sprayer also breaths in some of the pesticide vapours? Would you expect more or less contamination when crops of different sizes are sprayed? What was the effect of the wind? What can we learn from these results? Is 'safe application' of pesticides really possible?
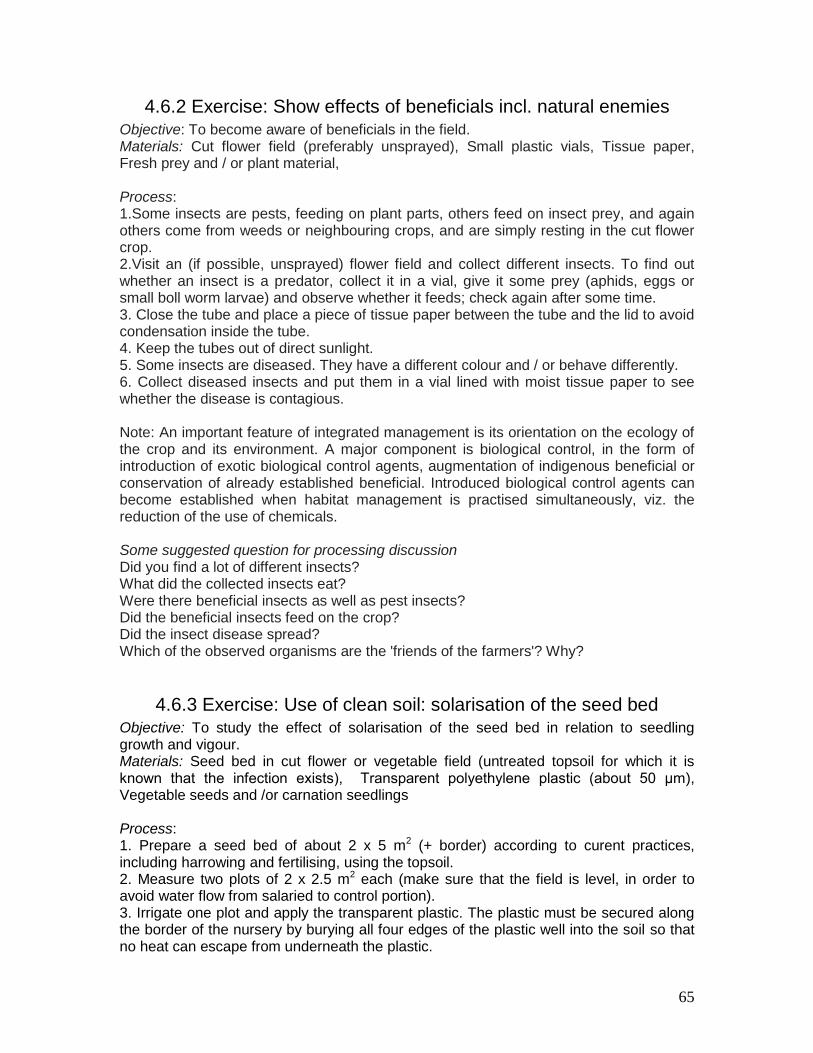
65
4.6.2 Exercise: Show effects of beneficials incl. natural enemies Objective: To become aware of beneficials in the field. Materials: Cut flower field (preferably unsprayed), Small plastic vials, Tissue paper, Fresh prey and / or plant material, Process: 1.Some insects are pests, feeding on plant parts, others feed on insect prey, and again others come from weeds or neighbouring crops, and are simply resting in the cut flower crop. 2.Visit an (if possible, unsprayed) flower field and collect different insects. To find out whether an insect is a predator, collect it in a vial, give it some prey (aphids, eggs or small boll worm larvae) and observe whether it feeds; check again after some time. 3. Close the tube and place a piece of tissue paper between the tube and the lid to avoid condensation inside the tube. 4. Keep the tubes out of direct sunlight. 5. Some insects are diseased. They have a different colour and / or behave differently. 6. Collect diseased insects and put them in a vial lined with moist tissue paper to see whether the disease is contagious. Note: An important feature of integrated management is its orientation on the ecology of the crop and its environment. A major component is biological control, in the form of introduction of exotic biological control agents, augmentation of indigenous beneficial or conservation of already established beneficial. Introduced biological control agents can become established when habitat management is practised simultaneously, viz. the reduction of the use of chemicals. Some suggested question for processing discussion Did you find a lot of different insects? What did the collected insects eat? Were there beneficial insects as well as pest insects? Did the beneficial insects feed on the crop? Did the insect disease spread? Which of the observed organisms are the 'friends of the farmers'? Why?
4.6.3 Exercise: Use of clean soil: solarisation of the seed bed Objective: To study the effect of solarisation of the seed bed in relation to seedling growth and vigour. Materials: Seed bed in cut flower or vegetable field (untreated topsoil for which it is known that the infection exists), Transparent polyethylene plastic (about 50 μm), Vegetable seeds and /or carnation seedlings Process: 1. Prepare a seed bed of about 2 x 5 m2 (+ border) according to curent practices, including harrowing and fertilising, using the topsoil. 2. Measure two plots of 2 x 2.5 m2 each (make sure that the field is level, in order to avoid water flow from salaried to control portion). 3. Irrigate one plot and apply the transparent plastic. The plastic must be secured along the border of the nursery by burying all four edges of the plastic well into the soil so that no heat can escape from underneath the plastic.

66
4. Leave the other plot (control) fallow. 5. Record the weather during the following weeks (sunny / cloudy / rain). 6. After 4 to 6 weeks, the plastic can be removed. 7. Sow 200 seeds in each plot. 8. Apply normal irrigation and other nursery practices (not spraying!) during the seedling raising period. 9. If needed, construct a cage with screen net to keep insects out. Observations: 10. At removal of the plastic, check the plastic in the soil solarisation experiment for holes. Record in case there are holes (these will negatively influence the effect of the solarisation). 11. Depending on the crop, after 4 to 6 weeks, record numbers of growing seedlings, of weeds and of diseased seedlings. Calculate the overall percentage of healthy seedlings. 12. Randomly uproot 25 seedlings per treatment. Assess the average number of leaves per seedling and measure root length. 13. Prepare presentations in the form of an agro-ecosystem analysis poster with, per treatment, a drawing of a seedling and all the data grouped around the seedling. Some suggested question for processing discussion: What are the differences between the different treatments? Was there difference in seedling growth and health? Why? What is the cost and labour needed for the solarisation? What will happen to the beneficial (incl. natural enemies) in the topsoil? What are other advantages and disadvantages of the treatment?
4.6.4 Exercise: Description of disease symptoms A training session on disease management could start with this group dynamic which will make participants aware of the importance of proper descriptions of symptoms and careful observation. Objective: To become aware of the need for field observations. Materials: Diseased plant material; different crops or different diseases per group, Poster paper, Colour crayons Process: 1. Divide the class into the usual subgroups of 4 to 6 persons. 2. Per group, isolate one person. The isolated person is not allowed to see his/her fellow group members. 3. The fellow group members are not allowed to see the person or the diseased plant. 4. So, ask the group to line up, faces all in one direction and ask the isolated person to stand behind the line, facing the opposite direction. Hand a diseased plant or diseased plant part out to the isolated person. 5. Ask the isolated person to describe the disease symptoms of the plant without mentioning the name of the disease or mentioning any technical term. 6. The isolated person may mention the common name of the plant. The others in the group are asked to make drawings of the diseased plant without looking at the isolated person or the plant sample. They are allowed to ask questions! Observations:

67
7. After about 15 minutes, the drawings should be finalized. Ask each group to present the drawings and explain about the disease they thought the sample was infected with. 8. Compare the drawings with the diseased specimen. Some suggested question for processing discussion: Was it difficult to make the drawings? Are the drawings accurate? Do they resemble the symptoms? What does the drawing tell about the severity of the disease? Could one tell from the drawing whether or not this disease is a problem in the field? What does the drawing tell about the stage of the disease (spreading or not) ? Can one give advice on the management of this disease based on the drawings? If no, why not? Note: This exercise resembles the situation when a farmer visits an extension office and describes the problem he has with his crop. It shows how difficult it is to make recommendations or decisions on what crop health management actions need to be taken without visiting a field and actually observing the crop.
4.6.5 Exercise: Identification of disease symptoms Once the importance of field inspections in relation to disease identification and management has become evident, a following exercise could be conducted to learn about different types of disease symptoms and about stages of severity of diseases in the field. The exercise shows that, without knowing names of diseases, one can group types of diseases and learn about the developmental stages of a disease in the field. Objective: To distinguish between different groups of disease symptoms and learn about the developmental stages. Materials: Cut flower or Vegetable field with different diseases in different progressive stages, Hand lens (at least 1 per group), Poster paper, Colour crayons, Plastic bags Process: 1. Visit the field and ask each group to collect as many different disease symptoms in different progressive stages as can be found (so not only leaf spots, but also other disease symptoms such as deformed roots, discoloured leaves, etc.). 2. In the 'classroom', the disease symptoms should be grouped into leaf spot diseases (including moulds/mildews), wilts, rots, root disorders, shoot disorders and mosaics. 3. Assign each disease group to a group of trainees. Request the trainees per group to rank the disease symptoms in order of severity. 4. Use the hand lens to check whether any spore structures can be found. 5. Ask each group to make drawings of progressive stages of the disease. 6. Have a presentation on the disease symptoms and disease development per group. Avoid the use of scientific terms such as Latin names of diseases. Some suggested question for processing discussion:
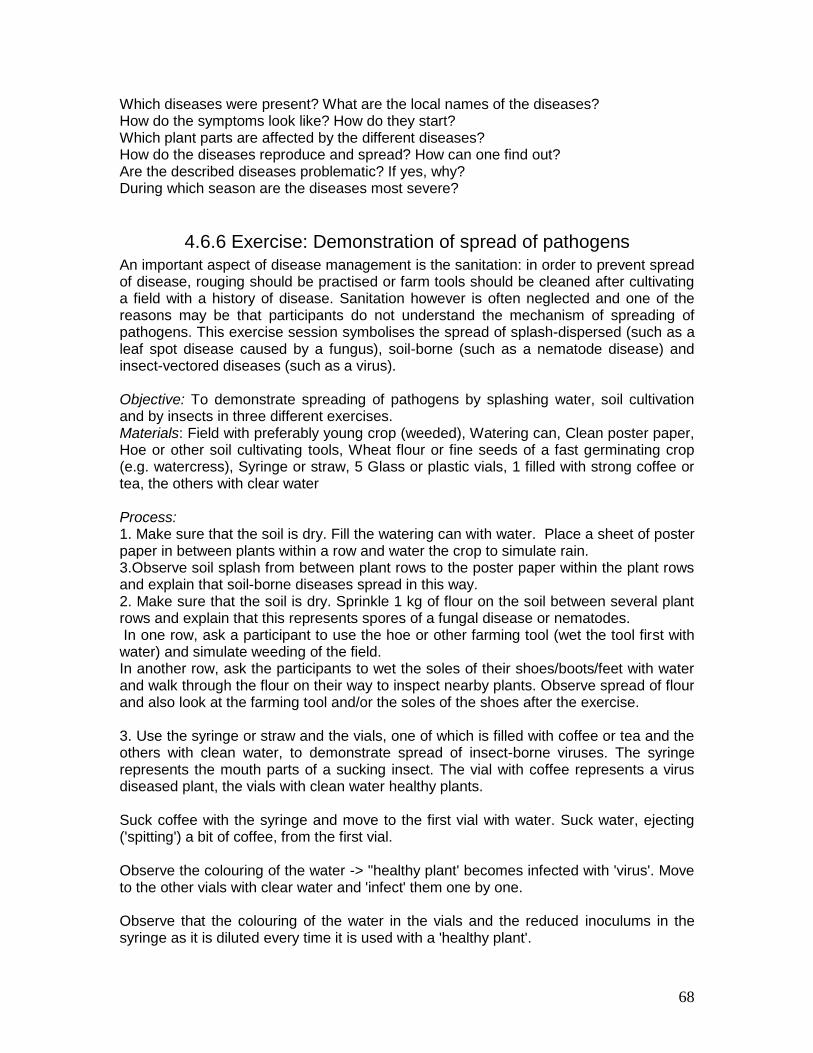
68
Which diseases were present? What are the local names of the diseases? How do the symptoms look like? How do they start? Which plant parts are affected by the different diseases? How do the diseases reproduce and spread? How can one find out? Are the described diseases problematic? If yes, why? During which season are the diseases most severe?
4.6.6 Exercise: Demonstration of spread of pathogens An important aspect of disease management is the sanitation: in order to prevent spread of disease, rouging should be practised or farm tools should be cleaned after cultivating a field with a history of disease. Sanitation however is often neglected and one of the reasons may be that participants do not understand the mechanism of spreading of pathogens. This exercise session symbolises the spread of splash-dispersed (such as a leaf spot disease caused by a fungus), soil-borne (such as a nematode disease) and insect-vectored diseases (such as a virus). Objective: To demonstrate spreading of pathogens by splashing water, soil cultivation and by insects in three different exercises. Materials: Field with preferably young crop (weeded), Watering can, Clean poster paper, Hoe or other soil cultivating tools, Wheat flour or fine seeds of a fast germinating crop (e.g. watercress), Syringe or straw, 5 Glass or plastic vials, 1 filled with strong coffee or tea, the others with clear water Process: 1. Make sure that the soil is dry. Fill the watering can with water. Place a sheet of poster paper in between plants within a row and water the crop to simulate rain. 3.Observe soil splash from between plant rows to the poster paper within the plant rows and explain that soil-borne diseases spread in this way. 2. Make sure that the soil is dry. Sprinkle 1 kg of flour on the soil between several plant rows and explain that this represents spores of a fungal disease or nematodes. In one row, ask a participant to use the hoe or other farming tool (wet the tool first with water) and simulate weeding of the field. In another row, ask the participants to wet the soles of their shoes/boots/feet with water and walk through the flour on their way to inspect nearby plants. Observe spread of flour and also look at the farming tool and/or the soles of the shoes after the exercise. 3. Use the syringe or straw and the vials, one of which is filled with coffee or tea and the others with clean water, to demonstrate spread of insect-borne viruses. The syringe represents the mouth parts of a sucking insect. The vial with coffee represents a virus diseased plant, the vials with clean water healthy plants. Suck coffee with the syringe and move to the first vial with water. Suck water, ejecting ('spitting') a bit of coffee, from the first vial. Observe the colouring of the water -> "healthy plant' becomes infected with 'virus'. Move to the other vials with clear water and 'infect' them one by one. Observe that the colouring of the water in the vials and the reduced inoculums in the syringe as it is diluted every time it is used with a 'healthy plant'.
69
Some suggested question for processing discussion: What did you observe? Which diseases do you know that spread in this way (splash - soil - insect)? How might these methods of spreading of pathogen affect crops in the field? How could spread of pathogens be prevented?
4.6.7 Exercise: Sampling for arthropods with sticky board As much information as possible on the abundance of pests and their natural enemies in the field is considered desirable for making a well-informed and good decision in pest management. Different trapping methods have different specific advantages, but each giving only a partial picture. For example, sticky board will generally catch only flying adults. Together with other methods, the catches can provide a fuller picture of the agro-ecosystem. Objective: To learn how to use sticky boards and discover which arthropods are trapped using sticky boards. Materials: Sticky board (yellow or white). Ready-made commercial ones may be used or others which can be prepared using appropriate glue and board/tin plate of yellow or white colour. Plastic bags (to collect the catches). Camel or fine hair brushes. Forceps. Pin mounted on a pencil-like wooden handle (for separating the specimens). Vials, containers (to keep specimen if needed for future reference). 1 pencil and paper for labels. 1 marker pen. Pieces rope to hold up traps for greenhouse. Process: 1. The sticky board can tied onto greenhouse. 2. Keep the board in the vertical position and a little above the crop. 3. It is best to set up the sticky trap in the morning and to collect it later in the day before dark. 4. During collection, each board can be slipped into a clear plastic bag and labeled before taking it to the lab/classroom for checking/counting of the catch. 5. To facilitate counting, grid lines may be drawn with marker pen over the plastic bag (without removing the sticky board). 6. Counts from each square are taken and subsequently pooled together for each group of arthropod (leafhoppers, flies, wasps, etc.) caught. They are then tabulated and the results analysed and discussed. Note: For purposes of comparison or to complement the catch information by other means (sampling methods), the sticky board may also be set up at about the same time as the others, such as water pan trap, pitfall trap, light trap. Some suggested question for processing discussion: What does the catch consist of mostly (larva/nymph or adult)? What are the main groups of insects/arthropod caught? Which group is most and which is least prevalent? And what is the ranking (in abundance) of the others? Since all these are caught using the sticky board, what can you conclude? Can you relate any of these with the crops in the area where the trap is set up?
70
What particular groups (stage and types) are not caught? And what can you conclude from this? In what way is the sticky board useful and what are it’s limitations? If other traps are also set up (or other assessment methods done), how do the catches of the sticky board compare with them? What can you conclude?
4.6.8 Exercise: Micro habitat distribution of pests and natural enemies within the plant
Objectives: -To understand on what parts of the plant pest stages are mostly found; -To understand whether predator species are found on the same plant parts as pests. Materials: One blank data sheet for each subgroup. Charts with drawing pens Process: 1. Divide each group into 2 or 3 subgroups that can separately make their observations. 2. Assign one species (pest or defender) to each subgroup (only this species has to be recorded, all other insects can be ignored). Select those species that are available in the field. 3. Number of plants to be sampled: 10 (larger species); or 5 (small species); some pests or defenders are small but quite common, sampling 5 plants will be sufficient in these cases. 4. Walk through the field and select plants that are relatively erected. 5. Measure the plant and divide the plant into three equal parts, top, middle and bottom. The best way to sample may be to start at the growing top, then observe the stem, then all the fruits and finally the 5 leaves from that section of the plant (top, middle or bottom). For small species, leaves should be picked so that you can observe more closely. Because it is very tedious to sample all leaves of the plant, it suffices to sample 5 leaves from the top, 5 leaves from the middle and 5 leaves from the bottom of the plant. 7. To analyse the results, calculate the total and the average number on each plant part. Each group should prepare a chart for presentation. Note: So far we have recorded pests and natural enemies, or defenders, by sampling the whole plant (or by sampling leaves only for small sucking pests). We made no distinction between different parts of the plant; whether insects occur on the fruits, leaves, in the top or at the bottom of the plant. To increase our understanding of the ecology of pests and interactions with the plant and with the defenders, we will look at more detail into their position within the plant. If defenders are found on the same plant parts as pests, there is more chance they will meet and consume the pests. Some suggested question for processing discussion: What is the distribution of each pest within the plant? Why are pests found on specific plant parts? Are predators found on the same or on different parts of the plant as the pests? What could this mean?
71
4.6.9 Exercise: Thrips feeding symptom development Objective: To learn the specific symptoms of thrips feeding injury. Materials: Fine screen cage of about 1 m high and 50 cm diameter (1 per group), Healthy, unsprayed vegetable seedlings (about 5 weeks old) (2 per group), cut flower or vegetable field with thrips Process: 1. Collect cut flower leaves and/or flowers with thrips in the field. 2. Do not touch the thrips as they are very sensitive to handling. 3. Transfer the leaves / flowers with the thrips inside to a vegetable or cut flower seedling (position the leaves / flowers somewhere in the top of the seedling). Cover the seedling with the screen cage. Cover another seedling with a screen cage as a control plant. Make sure there are no thrips on the control plant! 4. Observations: Daily observe symptom development on the thrips infected plant. Check the upper sides and under sides of all leaves. Always compare with the control plant. Check whether you can find any thrips. Irrigate the plants daily after the observation. Some suggested question for processing discussion: After how many days did you find symptoms? What are thrips feeding injury symptoms? Where are the symptoms found? Where are the thrips found?
4.6.10 Exercise: Spot application of acaricides to manage mites Objective: To manage mites using minimal amounts of acaricides. Materials: Cut flower or Vegetable field (any time in the growing season, as long as mites are not yet abundant), Hand lens Acaricide (e.g. dicofol), Process: 1. Allocate three plots in the cut flower field of about 10 x 10 m2 and label one plot as "spot application", another as "calendar spray" and the third one as "control". Weekly observe all plants in the plots and assess per plot the percentage of mites infested plants. In the "spot application" plot, tag plants with mites. 2. Use a hand lens to verify that mites are present. In the "control" plot, no acaricides are applied at all. 3. In the "calendar spray" plot, acaricides are applied on a weekly interval. In the "spot application" plot, acaricides are applied only on the (tagged) plants with mites. 6. Observations: Record the number of acaricide applications in the "spot application" plot and the number of plants treated per application. Make a graph of the percentages of mites infested plants over time per plot. At harvest, record the yield and market grade of the produce per plot. Note: Some acaricides have proved to be relatively harmless to predatory mites (e.g. clofentezine, flucycloxuron, propargite). However, they may be harmful to other beneficials. The use of acaricides should therefore be minimized as much as possible. One approach is to monitor mites injury incidence and apply acaricides only on those plants with symptoms: "spot application".
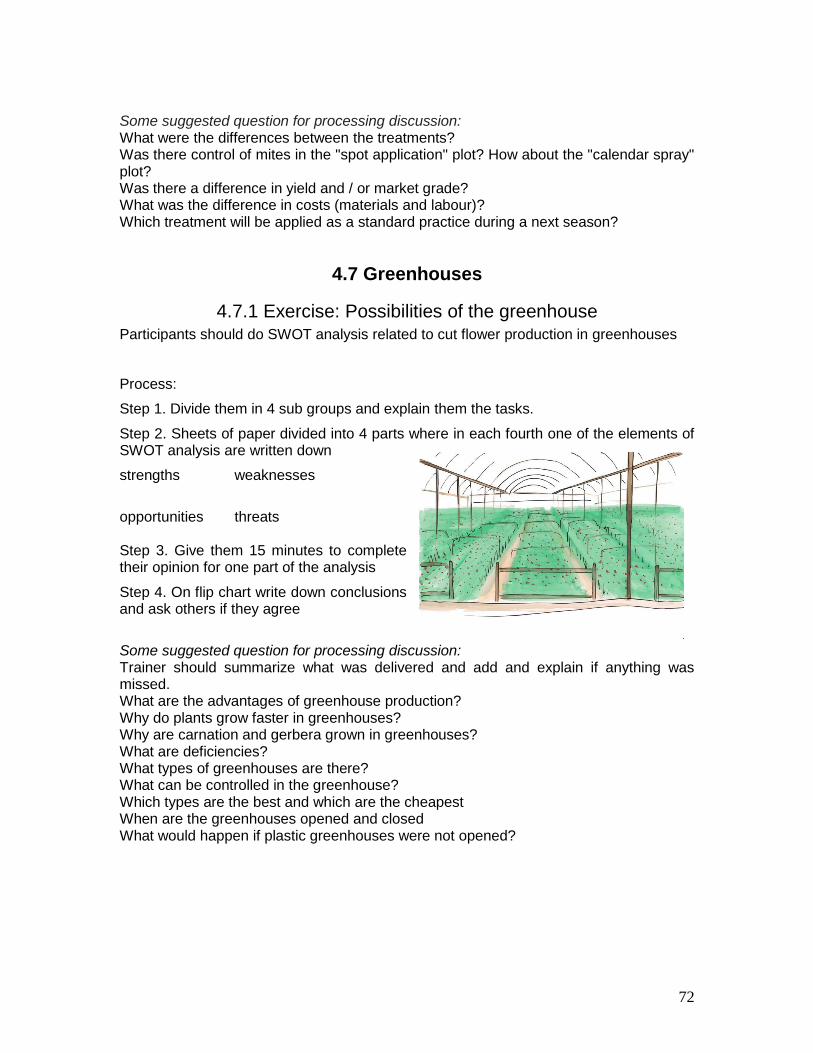
72
Some suggested question for processing discussion: What were the differences between the treatments? Was there control of mites in the "spot application" plot? How about the "calendar spray" plot? Was there a difference in yield and / or market grade? What was the difference in costs (materials and labour)? Which treatment will be applied as a standard practice during a next season?
4.7 Greenhouses
4.7.1 Exercise: Possibilities of the greenhouse Participants should do SWOT analysis related to cut flower production in greenhouses
Process:
Step 1. Divide them in 4 sub groups and explain them the tasks.
Step 2. Sheets of paper divided into 4 parts where in each fourth one of the elements of SWOT analysis are written down
strengths weaknesses
opportunities
threats
Step 3. Give them 15 minutes to complete their opinion for one part of the analysis
Step 4. On flip chart write down conclusions and ask others if they agree
Some suggested question for processing discussion: Trainer should summarize what was delivered and add and explain if anything was missed. What are the advantages of greenhouse production? Why do plants grow faster in greenhouses? Why are carnation and gerbera grown in greenhouses? What are deficiencies? What types of greenhouses are there? What can be controlled in the greenhouse? Which types are the best and which are the cheapest When are the greenhouses opened and closed What would happen if plastic greenhouses were not opened?
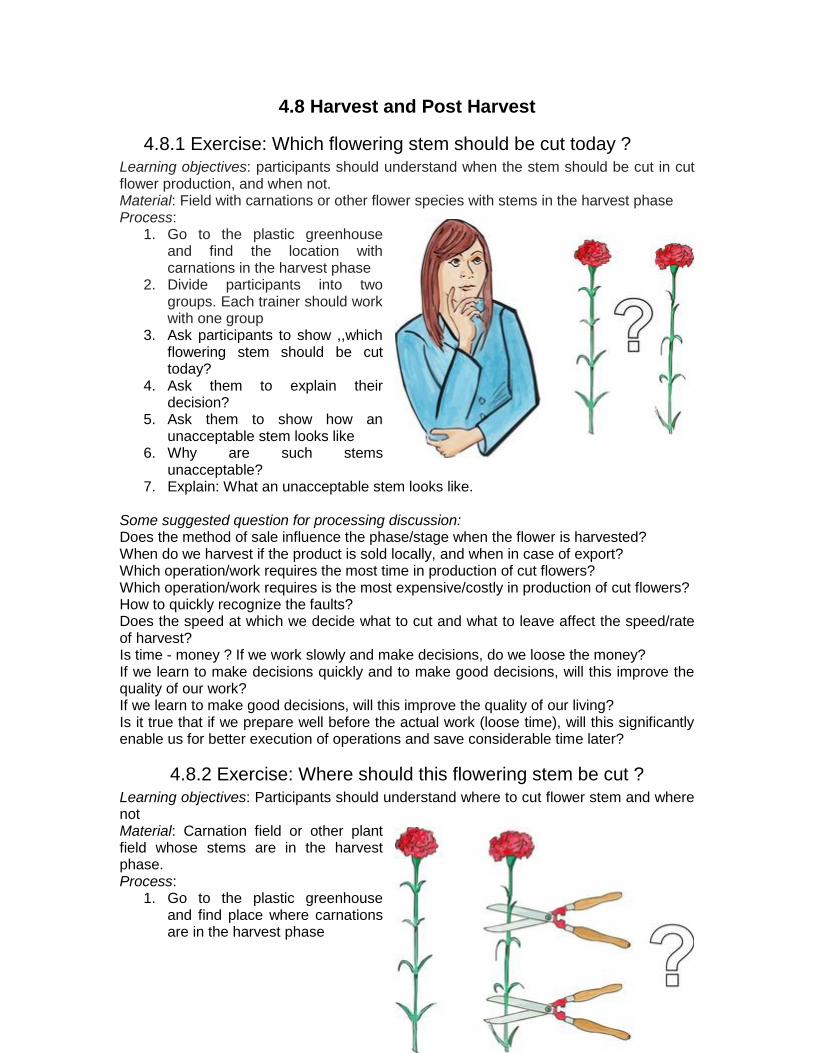
73
4.8 Harvest and Post Harvest
4.8.1 Exercise: Which flowering stem should be cut today ? Learning objectives: participants should understand when the stem should be cut in cut flower production, and when not. Material: Field with carnations or other flower species with stems in the harvest phase Process:
1. Go to the plastic greenhouse and find the location with carnations in the harvest phase
2. Divide participants into two groups. Each trainer should work with one group
3. Ask participants to show ,,which flowering stem should be cut today?
4. Ask them to explain their decision?
5. Ask them to show how an unacceptable stem looks like
6. Why are such stems unacceptable?
7. Explain: What an unacceptable stem looks like. Some suggested question for processing discussion: Does the method of sale influence the phase/stage when the flower is harvested? When do we harvest if the product is sold locally, and when in case of export? Which operation/work requires the most time in production of cut flowers? Which operation/work requires is the most expensive/costly in production of cut flowers? How to quickly recognize the faults? Does the speed at which we decide what to cut and what to leave affect the speed/rate of harvest? Is time - money ? If we work slowly and make decisions, do we loose the money? If we learn to make decisions quickly and to make good decisions, will this improve the quality of our work? If we learn to make good decisions, will this improve the quality of our living? Is it true that if we prepare well before the actual work (loose time), will this significantly enable us for better execution of operations and save considerable time later?
4.8.2 Exercise: Where should this flowering stem be cut ? Learning objectives: Participants should understand where to cut flower stem and where not Material: Carnation field or other plant field whose stems are in the harvest phase. Process:
1. Go to the plastic greenhouse and find place where carnations are in the harvest phase

74
2. Divide participants into two groups. Each trainer has one group 3. Ask participants to show on the same stem, where should this flowering stem be
cut 4. Tell them to explain their decision ? 5. Tell them to show where to cut 6. Tell them to explain their decision ? 7. Explain: What is the minimum stem length you must leave attached to the plant
to maintain its health and vigour (productivity)?
Some suggested question for processing discussion: Does the length of cut stem influence the price and the quality ? How many stems should remain on the plant ? Why ? Does the length of remaining stem affect the regeneration of the plant? Does the length of remaining stem affect the future yield? How to quickly recognize the faults?
4.8.3 Exercise: Cutting stem at different lengths Material: scissors, carnation field, stickers, label, marker, label boards Process
1. Divide participants into two groups 2. First group should cut the stems at a point 4-5 lateral shoots on the area of 5 m2. 3. The second group should cut stems at a point 1-2 lateral shoots on the other
area of 5 m2 4. Mark the stems that have been cut 5. Mark the locations were the trial was set up. 6. After one month visit the trial again 7. What difference can be observed
Some suggested question for processing discussion: Does the length of remaining part of the stem affect the plant regeneration? Does the length of remaining part of the stem affect the future yield?
4.8.4 Exercise: Flowers begin to die Learning objectives: that participants understand the impact of water on vase life cut flower Materials:
o Flowers (gerbera and carnation or other flowers) o 4 jars or vases o Water o Little separate space in the
greenhouse o Little separate place in the cold
store o Little separate place in the
shade
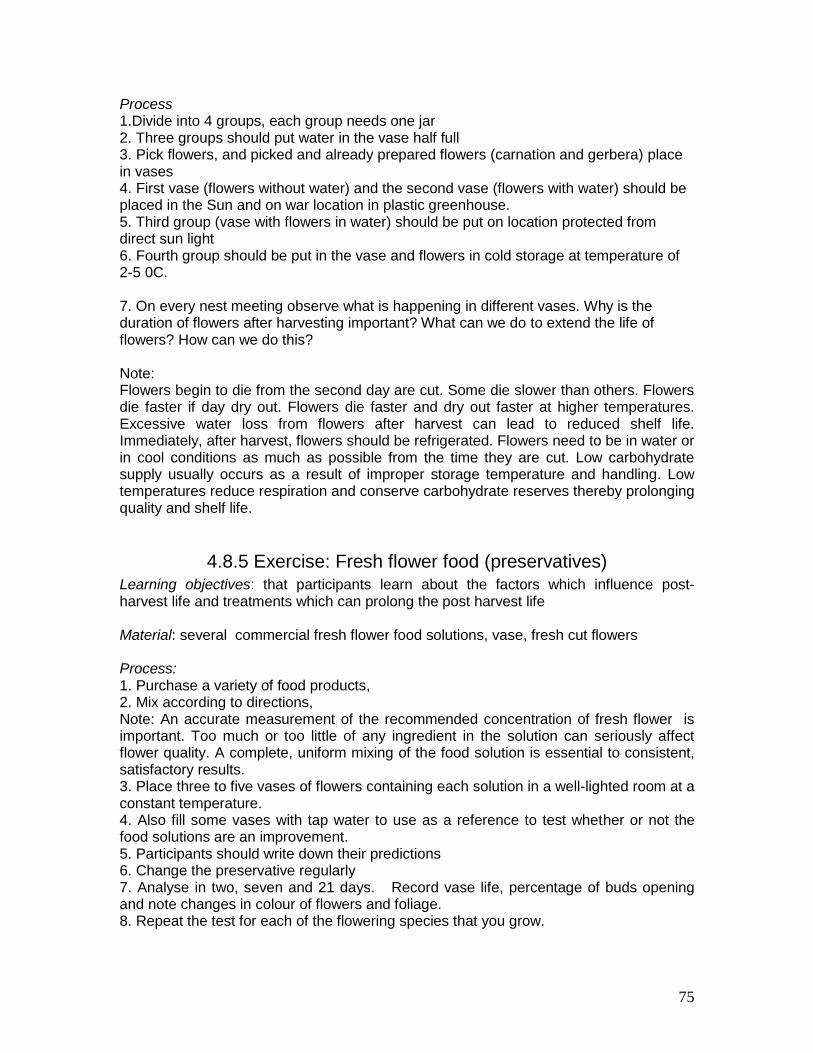
75
Process 1.Divide into 4 groups, each group needs one jar 2. Three groups should put water in the vase half full 3. Pick flowers, and picked and already prepared flowers (carnation and gerbera) place in vases 4. First vase (flowers without water) and the second vase (flowers with water) should be placed in the Sun and on war location in plastic greenhouse. 5. Third group (vase with flowers in water) should be put on location protected from direct sun light 6. Fourth group should be put in the vase and flowers in cold storage at temperature of 2-5 0C. 7. On every nest meeting observe what is happening in different vases. Why is the duration of flowers after harvesting important? What can we do to extend the life of flowers? How can we do this? Note: Flowers begin to die from the second day are cut. Some die slower than others. Flowers die faster if day dry out. Flowers die faster and dry out faster at higher temperatures. Excessive water loss from flowers after harvest can lead to reduced shelf life. Immediately, after harvest, flowers should be refrigerated. Flowers need to be in water or in cool conditions as much as possible from the time they are cut. Low carbohydrate supply usually occurs as a result of improper storage temperature and handling. Low temperatures reduce respiration and conserve carbohydrate reserves thereby prolonging quality and shelf life.
4.8.5 Exercise: Fresh flower food (preservatives) Learning objectives: that participants learn about the factors which influence post-harvest life and treatments which can prolong the post harvest life Material: several commercial fresh flower food solutions, vase, fresh cut flowers Process: 1. Purchase a variety of food products, 2. Mix according to directions, Note: An accurate measurement of the recommended concentration of fresh flower is important. Too much or too little of any ingredient in the solution can seriously affect flower quality. A complete, uniform mixing of the food solution is essential to consistent, satisfactory results. 3. Place three to five vases of flowers containing each solution in a well-lighted room at a constant temperature. 4. Also fill some vases with tap water to use as a reference to test whether or not the food solutions are an improvement. 5. Participants should write down their predictions 6. Change the preservative regularly 7. Analyse in two, seven and 21 days. Record vase life, percentage of buds opening and note changes in colour of flowers and foliage. 8. Repeat the test for each of the flowering species that you grow.
76
Some suggested question for processing discussion: How does the plant feed in the field Why do we add fresh flower food (preservatives) What affects shelf life What are the main factors influencing the post harvest life What post harvest treatments are used to prolong post harvest life
4.8.6 Exercise: pH preservatives Objectives: determine the ph preservatives Materials: colour –fixes indicator sticks , citric acid, final products Process: 1. Divide into three groups 2. Fist group is working with clear/pure water 3. Second group should put 2,5 grams of citric acid in 1 litre of water 4. Third group should make solution of commercial preparations as preservative for cut flowers 5. All groups should take colour – fixes indicators sticks and put them in mentioned solutions 6. Evaluate pH of the solution 7. Compare differences in colours between groups Some suggested question for processing discussion: How does citric acid affect intake of water What are reactions on commercial preservative What is the pH of water
4.8.7 Exercise: Recutting stems Learning objectives: that participants learn about the importance of recutting of stems and comparing vase life flowers to the alternative recutting method. Material: three carnation bouquets, scissors, three vases, place to put the vases Process: 1. Divide in three groups 2. One group should do the recutting of stems at 2 cm and place them in vase with water to light and warm place. Repeat that during each meeting next 2 weeks 3. Second group should cut the stem at 10 cm and put them into vase with water 4.Third group, without cutting, to put them in vase with water 5. Each group should write down their predictions 6. Visit the them in one or two weeks. Are there any differences? Some suggested question for processing discussion:
1. How do plants loose water before and after harvest 2. Why is water important in the life of plants 3. Why is the recutting of stems done? 4. At what length? 5. What happens if we cut more stem than necessary
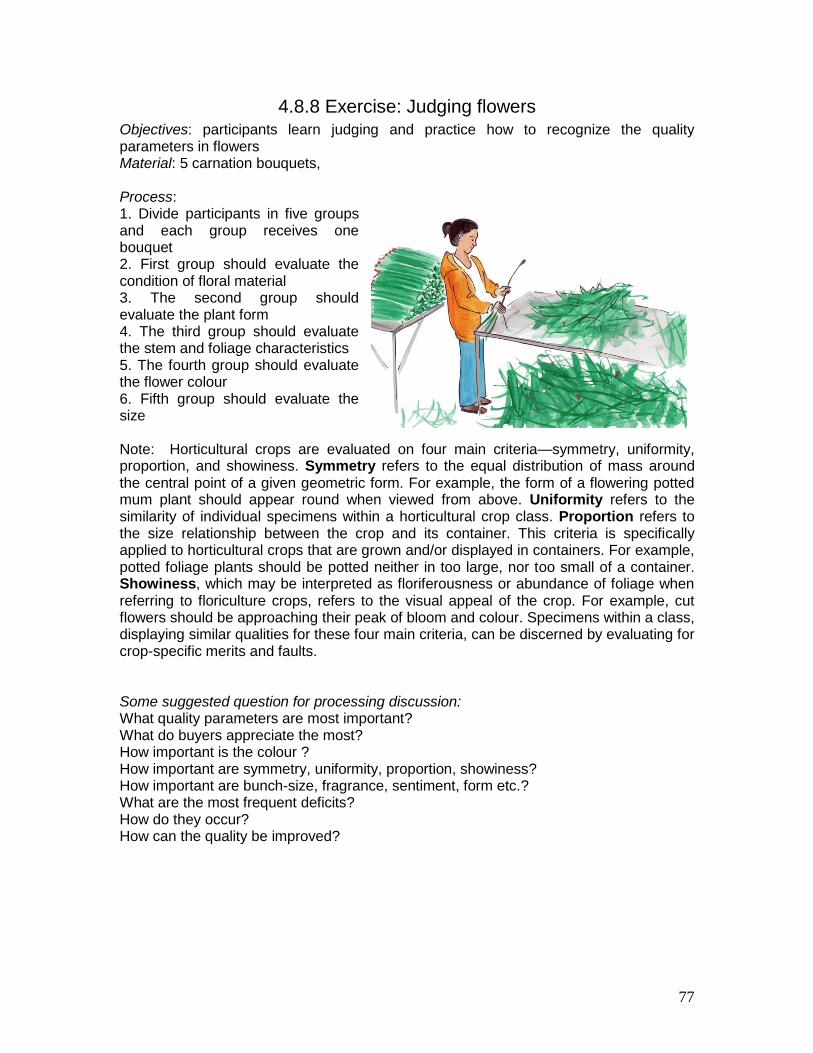
77
4.8.8 Exercise: Judging flowers Objectives: participants learn judging and practice how to recognize the quality parameters in flowers Material: 5 carnation bouquets, Process: 1. Divide participants in five groups and each group receives one bouquet 2. First group should evaluate the condition of floral material 3. The second group should evaluate the plant form 4. The third group should evaluate the stem and foliage characteristics 5. The fourth group should evaluate the flower colour 6. Fifth group should evaluate the size Note: Horticultural crops are evaluated on four main criteria—symmetry, uniformity, proportion, and showiness. Symmetry refers to the equal distribution of mass around the central point of a given geometric form. For example, the form of a flowering potted mum plant should appear round when viewed from above. Uniformity refers to the similarity of individual specimens within a horticultural crop class. Proportion refers to the size relationship between the crop and its container. This criteria is specifically applied to horticultural crops that are grown and/or displayed in containers. For example, potted foliage plants should be potted neither in too large, nor too small of a container. Showiness, which may be interpreted as floriferousness or abundance of foliage when referring to floriculture crops, refers to the visual appeal of the crop. For example, cut flowers should be approaching their peak of bloom and colour. Specimens within a class, displaying similar qualities for these four main criteria, can be discerned by evaluating for crop-specific merits and faults. Some suggested question for processing discussion: What quality parameters are most important? What do buyers appreciate the most? How important is the colour ? How important are symmetry, uniformity, proportion, showiness? How important are bunch-size, fragrance, sentiment, form etc.? What are the most frequent deficits? How do they occur? How can the quality be improved?
78
4.9 Farm Management
4.9.1 Exercise: Decision-making
This exercise aims at introducing the participants to decision making in a changing environment. Learning objective • Understand and appreciate the importance of decision-making in a changing environment Preparation The facilitator should provide each FS member with an exercise book for the learning process based on simple discussion and calculation exercises and for future reference. Materials: Flipchart, exercise books, pencils, rubbers, felt pen Process: 1. The FS participants assemble and are divided into three to four groups. 2. Each group is given one of the following tasks: Track the changes in prices of common inputs within a selected period (trends); • Track the changes in market gates prices of common crops between planting time, and the time the crop matures and is ready for sale; • Identify which institutions are the farmers stakeholders in specific farming enterprises (e.g. input stockist, merchants, chemical companies, etc.); and, • Identify who makes which farm decisions (man, woman, head of household, children, and youth out of school). 3. Group discussion. The facilitator will use the participants’ knowledge and the information from the group work, to help discover how their decisions can negatively or positively impact on them. Questions (see below) about who makes decisions and who is usually trained during FS will be tackled. The facilitator will try to balance the roles, and help change negative attitudes and perceptions right from the beginning of this FS module. Trends in prices of inputs and products from group work will assist the FS to discover when to make short term, medium or long tern decisions. Some suggested questions for facilitating the discussion and points to emphasize • Who makes the main farm decisions? Who could/should be making them? • Who actually does the farm tasks? Who could/should be doing them? • Who attends the FS sessions? Who could/should be attending?
4.9.2 Exercise: Importance of farm records This exercise will help FS groups discover the importance of record keeping through interaction, discussion and by doing. Learning objectives: • Realize and understand the importance of keeping farm records • Demonstrate the simplicity of record keeping through learning by doing
79
• Learn how to start, keep and use simple farm records Preparations This exercise requires that participants are informed during the group session prior to this exercise by posing related questions, e.g. can you remember carnation and other input prices of last season. What were the yields of carnation or … last year? Since this will be a group exercise but conducted at the individual FS members’ farms, the individual participants who will host the group should be prepared, with facilitators’ support, to suggest various enterprises and interests for recording Time 2 hours during the FS session and one hour per week for each participant thereafter. Materials: • Newsprint • A4 papers • Pencils
Process: 1. Group participants in four or five sub-groups. 2. Let each sub-group select a different farming activity on the farm and to identify the various inputs used to accomplish these activities. Ask them to write down what they consider the most important to remember about the selected enterprise. 4. Presentation of sub-groups in plenary. Allow each sub-group explain in detail what should be recorded and why. 5. After the plenary presentation stimulate the sub-groups to go to neighbouring enterprises to cross-check/note any issues they had omitted and what additional points could be important to report on. 6. Plenary discussion. When they come back, facilitate the group in plenary to discuss the importance and organization of farm recording activities in the FS. Some suggested questions for processing discussion and point to emphasize • What are the lessons learnt from the group exercise? • How did the groups help the non-literate members? • Where are differences in roles of household members in record keeping? • Were youth helpful in helping their parents in keeping and interpreting records?
4.10 Marketing
4.10.1 Exercise: Exploring market empowerment options
This exercise aims at sensitizing to marketing as a group as a way of minimizing the transaction cost and risk Learning objective: • To explore options for market empowerment activities Materials: flip chart, felt pens, pens, pencils, notebook 1. Plenary discussion to identify needs for market empowerment and diversification activities based on what the group has learned and discovered so far. Try to
80
identify advantages and disadvantages of a group approach. 2. Sub-divide participants in sub-groups to identify options for market empowerment activities (input supply, marketing output, activities outside primary agriculture such as processing, alternative income generating activities). 3. In plenary, conduct priority ranking among the various options. 4. For the two highest ranked options define there required conditions and activities for successful implementation. The FS could then agree to take up this priority activity ranging from maybe purchasing input in bulk in order to reduce transaction cost or value adding in order to target certain markets.
4.10.2 Exercise: Formulating a marketing plan
Learning objectives: • Identify major technical and marketing problems related to particular enterprises. • Identify the major information gaps and how this information can be gathered. • Formulate an implementation and marketing plan for this enterprise. Materials: pens, paper, transport, checklists, marketing plan format Steps 1. Discuss the objectives of a marketing plan with the whole group. 2. Per sub-group jointly identify, using the checklist, the essential information needed to formulate a marketing plan (try to identify 3-4 major essential questions per heading in the checklist). 3. Design a format for a plan making use of the example format. 4. Each sub-group goes to the market to learn about the conditions of the market for the products of their sub-group. 5. Each sub-group conducts the market survey. 6. Upon return to the training venue, the sub-groups work on their market plan for their current products plus for the product assigned to their team. They should justify how they arrived at their marketing plan. 7. Discuss the reports in plenary.
Checklist for market surveys a) Information on farm enterprises • When crops are harvested? What are the yields, the prices attained and the level of production? • What are the advantages of these crops over others in terms of yield, quality, price, and seasonality? • Is the produce graded? If so, into what grades? • Is the produce packed? If so, what is the type, size and cost of packing material? • What is the break-even price for each enterprise? • What are the costs of growing, harvesting and transporting the crop? • What are the main production problems? b) Input Supply and Financing • How readily available are the enterprise inputs? • Are they of the right quality? • Do input suppliers provide advice to farmers? If so, how good is the advice?
81
• Do farmers have money to pay for these inputs? • Do farmers have savings? Have they saved in the past? • Do farmers have access to credit for working capital and long-term loans? • What are the sources of credit available? What types of collateral is required and how available is finance? • How easily can farmers obtain farm equipment (buying or hiring)? c) Local Marketing System • How is the farm produce marketed at present? • Who buys the produce and when? • Who are the most important intermediaries or buyers? • Which buyers have the best reputation? • What prices are paid? • What competition is there between buyers? • What is the variation between the prices received by farmers for similar produce in the same area? What causes this variation? • Do buyers provide credit to farmers and on what conditions? • How is produce transported to the market? • Where are the main markets and where is the produce sold? • Who provides transportation? • What is the unit price of transport to the different markets? • How long do the journeys take? • How efficient are the transport links? • What form of transport should be used to get the produce to the market? • Should the transport of produce be pooled or sent individually? • What is the frequency of shipment and the best day for arrival in the market? • How much contact do farmers have with the market? What is their source of information and how quickly do they obtain market information on prices, volumes and quality requirements? • What complaints do farmers have about intermediaries? • What complaints do intermediaries have about farmers? d) Product Requirement by Market Product Type and Form • What products do customers desire? • What forms should produce be sold (fresh, processed, etc.)? Competition • How competitive is the market? • Who are the main suppliers to that market? • How much is sold and in what months of the year? (Daily, monthly, annually?) • What are farmers strengthens and weaknesses compared to competitors? External Factors • What external factors are likely to affect sales of the produce (country growth, inflation, rising input prices, family income)? What are most critical? • What legal factors are likely to affect the market? Buyers/Consumers • What are the characteristics of buyers/consumers? • How is the product to be used? Market Potential • How large is the market? How much can the market absorb? • What percentage of produce should farmers be interested in producing? Storage
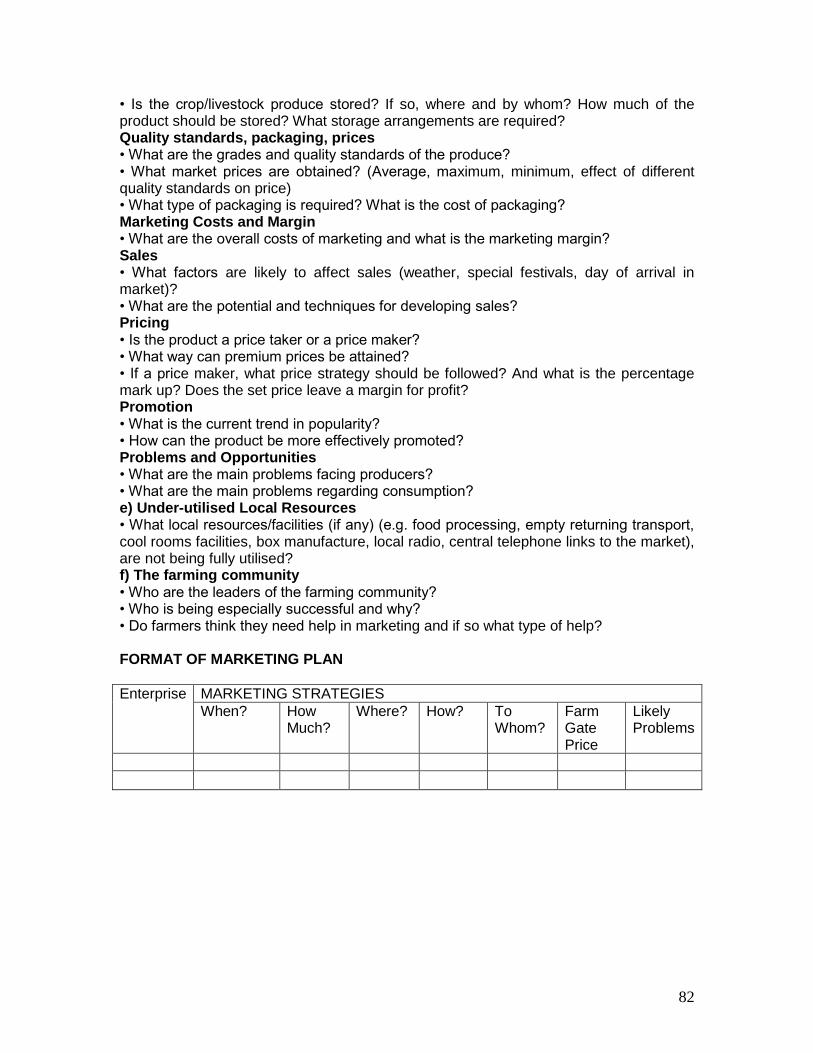
82
• Is the crop/livestock produce stored? If so, where and by whom? How much of the product should be stored? What storage arrangements are required? Quality standards, packaging, prices • What are the grades and quality standards of the produce? • What market prices are obtained? (Average, maximum, minimum, effect of different quality standards on price) • What type of packaging is required? What is the cost of packaging? Marketing Costs and Margin • What are the overall costs of marketing and what is the marketing margin? Sales • What factors are likely to affect sales (weather, special festivals, day of arrival in market)? • What are the potential and techniques for developing sales? Pricing • Is the product a price taker or a price maker? • What way can premium prices be attained? • If a price maker, what price strategy should be followed? And what is the percentage mark up? Does the set price leave a margin for profit? Promotion • What is the current trend in popularity? • How can the product be more effectively promoted? Problems and Opportunities • What are the main problems facing producers? • What are the main problems regarding consumption? e) Under-utilised Local Resources • What local resources/facilities (if any) (e.g. food processing, empty returning transport, cool rooms facilities, box manufacture, local radio, central telephone links to the market), are not being fully utilised? f) The farming community • Who are the leaders of the farming community? • Who is being especially successful and why? • Do farmers think they need help in marketing and if so what type of help? FORMAT OF MARKETING PLAN
Enterprise MARKETING STRATEGIES
When? How Much?
Where? How? To Whom?
Farm Gate Price
Likely Problems

83
4.11 Other Exercises
4.11.1 Exercise: Identifying crop production and post-harvest problems
Learning outcomes -Participants will have identified the existing main crop production and post harvest problems or exercises, and their causes and influence. Materials -Cards, markers Steps 1. Explain the learning outcomes and the procedure of this exercise to the participants. 2. Ask participants to form small groups (3 or 4 groups) to discuss and to write on cards the main problems they have identified (one card problem); 3. Ask each groups’ representative to present their pooled information and to fix their cards on the board or flip chart for all to see; facilitate discussion during these presentations. 4. At the end of the participants’ presentations cluster/regroup the problems according to major categories so that a total of 6-10 problems are listed. Major categories could be related to the position of the participants’ fields on the slope, or according to sloping and level land, or according to soil types, etc. Ask all participants to confirm the final list of problems. 5. Wrap-up, summarising the main points discussed during this exercise. Some suggestions to facilitate the group discussion: • Are the problems observed related to crop production and post-harvest management activities? • Are these constraints or not?
4.11.2 Exercise: Problem prioritization through ‘’individual voting’’
In order to identify what participants see as their most relevant management related problems and what they would like to learn more about during the school sessions the identified problems need to be summarised and prioritised according to the participants assessments. Through this exercise an average preference list can be obtained based on the individual ranking preferences of the participants. Learning outcomes -Participants will be able to prioritise crop production and post harvest problems. Material -White board or large sheet of paper, markers Steps 1. Explain the learning outcomes and the procedure of this exercise to the participants. 2. Write on the board or large sheet of paper the list of identified problems (by major categories). 3. Ask participants if they wish to include additional problems/wishes/interesting . Add them to the list.
84
4. Prepare a matrix on the large paper or board. Indicate the problems/wishes/interesting on the left of the matrix. 5. Ask the participants individually to go the chart and write their priority for each problem (1 low priority, 2, 3, 4, 5 etc. high priority). 6. Make a summary of the preferences and rank the problems accordingly. 7. Ask participants if they agree with the results of the prioritization and finalize the list. 8. Discuss with participants if these problems represent the topics they would like to know more about during the Field School. 9. Wrap-up, summarising the main points discussed during this exercise. Some suggestions to facilitate the group discussion: • Have we listed all the problems identified during the previous exercises? • Are there still some problems missing on the list? • Are there problems on the list which are closely related to each other or can even be considered to be the same? • Are there problems which can be considered as specific for a certain group of participants? • Which problem do you think is more serious? • What are the reasons for your choices made during the prioritisation process? • Do you agree with the final prioritisation list of problems?
4.11.3 Exercise: Identification of solutions: group workshop Problems/interesting related to cut flower production and post harvest management practices have been identified and prioritised during the previous exercises. Now possible solutions to these problems need to be identified. Participants and specialists working together should identify which, if any, solutions are already being used locally. New practices or technologies based on specialist knowledge may be available from the school facilitator. Similarly, the appropriate solutions may be found in the participants’ indigenous knowledge either within the community or in nearby communities. During this exercise all these possible solutions will be listed and discussed, first in small groups and later in a plenary session. Learning outcomes - Participants will have identified possible solutions to prioritised problems. Materials -White board or large sheet of paper - coloured cards, markers, pins, tape, paper clips Steps 1. Explain the learning outcomes and the procedure of this exercise to the participants. 2. On the board or a large sheet of paper show the prioritised list of problems. 3. Ask the participants to divide into groups 4 or 5 to a group. 4. Ask each group to discuss "What are the possible solutions to the problems you have identified?” More than one solution may be found for each problem. 5. Assist the participants to recall solutions that have been mentioned during previous exercises. 6. Ask each group to write each solution on a card. 7. Ask the groups to select a presenter to present their findings to all. During the presentations promote discussion, ask clarifications, allow everybody to express their views.

85
8. After presentation, note similarities and differences in the solutions and cluster/regroup the solutions according to major categories, removing duplication so that a total of 3-4 solutions are listed for each problem. Discuss and ask all participants to confirm the final solutions list. 9. Wrap-up, summarising the main points discussed during this exercise. Some suggestions to facilitate the group discussion • What were management problems identified during the previous exercises? • What possible solutions for the problems listed were mentioned during the previous exercises? • Were all the solutions identified during the previous exercises listed? • Are these the only solutions possible, as far as we know, for those problems listed? • Are these solutions realistic in the present participants’ situation? • What is needed to implement this solution considering the present participants’ situation? • Which of these possible solutions can we test in the field? • Which of these possible solutions would you like to test in the field?
Note: Trainers should consider the needs and identified solutions and include them in future plans
86
Module 5: Technical Manual
5.1 How Plants Grow To understand and practice cut flower production successfully requires the grower to have an understanding of how plants grow. These plants have four main parts: • roots -the parts which grow below the soil • stems - the framework • leaves - required for respiration, transpiration and photosynthesis • reproductive parts - flowers and fruits
Roots Soil provides the plant with the following things: • Nutrients • Water • Air • Support Roots absorb nutrients, water and gasses transmitting these "chemicals" to feed other parts of the plant. Roots hold the plant in position and stop it from falling over or blowing away.
Stems The main stem and its branches are the framework that supports the leaves flowers and fruits. The leaves, and also green stems, manufacture food via the process known as photosynthesis, which is transported to the flowers, fruits and roots. The vascular system within the stem consists of canals, or vessels, which transfer nutrients and water upwards and downwards through the plant.
Leaves The primary function of leaves is photosynthesis, which is a process in which light energy is caught from the sun and stored via a chemical reaction in the form of carbohydrates such as sugars. The energy can then be retrieved and used at a later date if required in a process known as respiration. Leaves are also the principle plant part involved in the process known as transpiration whereby water evaporating, mainly through the leaf pores (or stomata), sometimes through the leaf cuticle (or surface) as well, passes out of the leaf into a drier external environment. This evaporating water helps regulate the temperature of the plant. The process of water evaporating from the leaves is very important in that it creates a water gradient or potential between the upper and lower parts of the plant. As the water evaporates from the plant cells in the leaves then more water is drawn from neighbouring cells to replace the lost water. Water is then drawn into those neighbouring cells from their neighbours and from conducting vessels in the stems. This process continues, eventually drawing water into the roots from the ground until the water gradient has been sufficiently reduced. As the water moves throughout the plant it carries nutrients, hormones, enzymes etc. In effect this passage of water through the plant has a similar effect to a water pump, in this case causing water to be drawn from the ground, through the plant and eventually out into the atmosphere.
87
Reproductive Parts These reproduce by pollen (ie. male parts) fertilizing an egg (ie. female part found in the ovary of a flower). The ovary then grows to produce a fruit and the fertilised egg(s) grow to produce seed.
5.1.1 Flower structure It may seem obvious but the first thing a cut flower grower needs to know about is flowers. Surprisingly, many people who work with flowers do not understand the basics of flower structure A flower is made up of the following parts: Male Parts: • Stamens - a stamen comprises two parts, the filament and the anther. • Filament - a thin strand or stalk which supports the anther. • Anther - the top of the filament which produces pollen. Female Parts: • Pistils - a stalk comprising three parts: the stigma, style and ovary. • Ovary - at the base of the pistil, made up of one or several compartments. These compartments are called "ovules". Each compartment contains several egg cells, which are the female eggs, waiting to be fertilised by the male pollen (which is equivalent to sperm). • Stigma - the swelling on top of the pistil which the pollen lands on (the pollen then grows into the stigma and down the style, to reach the ovary). • Style - the "stalk" between the ovary and the stigma. Other Parts: • Pedicle - the stalk which the flower sits on top of. • Sepals - "scales" which encompass the flower when it is still a bud. When the flower opens, the sepals are left as a small petal or leaf like objects below the flower, extending from the top of the pedicle. • Petals - the often colourful "bracts" or "sheets" which surround the male and female parts of a flower.
Development of a Flower Pollen from the top of the stamen is carried by wind or insects (or some other means), to land on top of the pistil (ie. the stigma). The pollen then grows through the pistil, to the base of the pistil where it fertilizes the female egg cell (or cells) in the ovary, once fertilised these eggs can begin to grow to produce plant seeds. The walls of the ovary grow around the developing seed to produce the "fruit". Complete and Incomplete Flowers Some flowers contain all main flower parts (ie. sepals, petals, stamens and pistil). These are "complete" flowers. Some flowers contain no petals; these being called "Apetalous" flowers. Some flowers contain stamens which function (ie. produce fertile pollen); but non functional pistils (ie. seed does not form). These are called "Staminate" flowers.
88
5.2 Environmental Factors Plant growth greatly affected by the environment. If any environmental factor is less than ideal, it limits a plant's growth. Environmental factors that affect plant growth include light, temperature, water (humidity), and nutrition. It is important to understand how these factors affect plant growth and development. With a basic understanding of these factors, cut flower grower may be able to manipulate plants to meet their needs, whether for increased leaf, flower, or fruit production. By recognizing the roles of these factors, grower also will be better able to diagnose plant problems caused by environmental stress. Either directly or indirectly, most plant problems are caused by environmental stress. In some cases, poor environmental conditions (e.g., too little water) damage a plant directly. In other cases, environmental stress weakens a plant and makes it more susceptible to disease or insect attack.
Light Light is essential for plant growth - for the vegetative growth, flowers and fruit. Light is the source of energy for plants. Light energy combined with carbon dioxide and water commences the process of photosynthesis. Light is essential for photosynthesis. The green colour of plants is the result of chlorophyll, which is the site of the photosynthetic process. Light has three principal characteristics that affect plant growth: quantity, quality, and duration. Light quantity refers to the intensity or concentration of sunlight and varies with the season of the year. The
maximum is present in the summer and the minimum in winter. The more sunlight a plant receives (up to a point), the better capacity it has to produce plant food through photosynthesis. As the sunlight quantity decreases the photosynthetic process decreases. Light quantity can be decreased in a garden or greenhouse by using shade-cloth or shading paint above the plants. It can be increased by surrounding plants with white or reflective material or supplemental lights. Light quality refers to the colour or wavelength reaching the plant surface. Sunlight can be broken up by a
prism into respective colours of red, orange, yellow, green, blue, indigo, and violet. On a rainy day, raindrops act as tiny prisms and break the sunlight into these colours producing a rainbow. Red and blue light have the greatest effect on plant growth. Green light is least effective to plants as most plants reflect green light and absorb very little. It is this reflected light that makes them appear green. Blue light is primarily responsible for vegetative growth or leaf growth. Red light when combined with blue light, encourages flowering in plants. Fluorescent or cool-white light is high in the blue range of light quality and is used to encourage leafy growth. These lights are excellent for starting seedlings. Incandescent light is high in the red or orange range but generally produces too much heat to be a valuable light source. Fluorescent "grow" lights have a mixture of red and blue colours that attempts to imitate sunlight as closely as possible. They are costly and generally not of any greater value than regular fluorescent lights. Light duration or photoperiod refers to the amount of time that a plant is exposed to sunlight. When the
concept of photoperiod was first recognised it was thought that the length of periods of light triggered flowering. The various categories of response were named according to the light length (i.e., short-day and long-day). It was then discovered that it is not the length of the light period but the length of uninterrupted dark periods that is critical to floral development. The ability of many plants to flower is controlled by photoperiod. Plants can be classified into three categories, depending upon their flowering response to the duration of darkness. These are short-day, long-day, or day-neutral plants.

89
Photosynthesis Photosynthesis is the process by which plants form sugar and oxygen from carbon dioxide and water, using the energy of sunlight and aided by chlorophyll. Plants are able to combine the sugar molecules into large molecules of starch and still larger molecules of cellulose. Sugar and starch are used as food by plants. Chemical energy is stored by plants in the form of starch. Cellulose is the fibrous part of the plant body. Sugar is the source of energy which is necessary for all living activities. All energy for living processes comes from sugar made by photosynthesis in plants. The sugar is transformed in the plants leaves and it is either transported away from the leaves through the veins to all parts of the plant or else it is converted into starch and stored temporarily (as in bulbs). • Water used in photosynthesis is absorbed from the soil through the plant roots and is transported to the leaves through the stems or tree trunk. • Carbon dioxide is absorbed from the atmosphere by the leaves. • Oxygen is released as a gas and passes from the leaves to the atmosphere. • Chlorophyll is the green colouring matter of plants. It plays an important part in photosynthesis. • Light energy absorbed from the sun by the chlorophyll is then able to take part in converting carbon dioxide and water into sugar and oxygen. Environmental factors which effect photosynthesis: • Light As a general rule as light increases so too does photosynthesis. In relation to C3 and C4 plants, C4 plants will continue to photosynthesis in higher light intensities whereas a C3 plant stops its rate of photosynthesis at its saturation point. Light is essential for plant growth - for the vegetation, flowers and fruit. Provided the plant receives the correct amount and quality of light, the plant will still thrive. The green colour of plants is the result of chlorophyll which is the site of the photosynthetic process. The light spectrum can be separated into its colours, all of which effect plants differently. For example, the blue spectrum is involved in phototropic responses (the bending of plants towards the light source), and green light actually has little effect on plant growth. The intensity of the light source is important as is the duration. Some plants known as "short-day plants" flower when the days become shorter (night longer), others are known as long-day plants. This is not the rule as some plants flower irrespective of light duration and are known as day-neutral plants. These flowering responses are controlled by the red/far-red phytochrome pigments of light.
90
• Carbon dioxide concentration As CO2 increases, so too does photosynthesis. • Temperature Photosynthesis will increase with temperature until a point of equilibrium is met. At this point photosynthesis stays uniform as temperature increases. Growth is defined as photosynthesis minus respiration. As temperature increases, respiration will continue to increase, therefore at some point respiration will exceed photosynthesis resulting in no net growth. • Water balance Stomatal aperture is controlled by light energy, turgor pressure of the surrounding guard cells, temperature, CO2 concentration in the stomatal cavity, and chemicals such as anti-transpirants. • Leaf age As the leaf becomes older, the photosynthetic capacity of the leaf decreases. • Environmental history Longitude, latitude and elevation all affect photosynthesis. The meaning of C3 and C4 C3 and C4 refers to biochemical pathways of carbon fixation during photosynthesis. The symbol C3 refers to Calvin Cycle plants. The symbol C4 refers to Krantz Cycle plants. C4 is an evolutionary advance over C3.
Temperature Condition for physiological processes in the plant is favourable temperature. Three different temperatures can be identified: minimal, optimal and maximal. Below the minimal and above maximal, the physiological processes stop, whereas at optimal temperature they continue in the best way. Low temperatures can result in poor growth. Photosynthesis slows at low temperatures. Since photosynthesis is slowed, growth is slowed and this results in lower yields. High temperatures cause increased respiration sometimes above the rate of photosynthesis. This means that the products of photosynthesis are being used more rapidly than they are being produced. For growth to occur photosynthesis must be greater than respiration. Plant species differ in their requirements regarding the temperature and growth stage, i.e. for each physiological process (photosynthesis, respiration, transpiration, growth, fertilization), requirements differ according to temperature. Photosynthesis: Increases with temperature to a point. Respiration: Rapidly increases with temperature. Transpiration: Increases with temperature. Flowering: May be partially triggered by temperature. Sugar storage: Low temperatures reduce energy use and increase sugar storage. Dormancy: Warmth, after a period of low temperature, will break dormancy and the plant will resume active growth.
91
Water Water is essential to plant growth and is often the major limitation to productivity. Why is Water Important to Plants? Plants absorb more water then any other material, most of it entering the plants through its root system from the soil. • Seeds require water to initiate enzyme activity required to activate germination. • Water is used in photosynthesis and all other metabolic processes associated with plant growth and development. • Water lowers the temperature of the plant’s leaves when it is dissipated through transpiration. • Water dissolves nutrients before they are up-taken by plants. • Water functions as a transport system within the plant, moving nutrients to sites where they are converted into products of photosynthesis, then transporting the synthesised materials to sites of storage or use within the plant
Plant nutrition Like all organisms, higher green plants need nutrients for their growth and development. Nutrients are indispensable as plant constituents, for biochemical reactions, and for the production of organic materials referred to as photosynthesis (carbohydrates, proteins, fats, vitamins, etc.) by photosynthesis. Plant nutrition refers to a plant's need for and use of basic chemical elements. Fertilisation is the term used when these materials are added to the environment around a plant. Plants produce their own food from water, carbon dioxide, and solar energy through photosynthesis. This food (sugars and carbohydrates) is combined with plant nutrients to produce proteins, enzymes, vitamins, and other elements essential to growth. In agriculture (including horticulture), optimal crop nutrition is an important prerequisite for obtaining high yields and good-quality produce. The nutrients required are obtained by plants both from soil reserves and external nutrient sources (fertilizers, organic manures, the atmosphere, etc). Almost all of the 90 natural elements can be found in green plants although most of them have no function (e.g. the heavy metal gold).
Plant nutrition often is confused with fertilisation. Plant nutrition refers to a plant's need for and use of basic chemical elements. Fertilisation is the term used when these materials are added to the environment around a plant. A lot must happen before a chemical element in a fertilizer can be used by a plant.
5.3 Soil Objective: Determine soil and nutrition requirements for cut flower growing.
Soil is important to the plant in providing the following: • Nutrition- the plant derives its food from nutrients in the soil. • Support - the soil holds the plant firm and stops it falling over • Water and air - roots absorb both water and air. The soil must contain both. Soil with too much air leaves the plant starved for water. Soil with too much water leaves the plant starved for air. Different soils have different characteristics with respect to the above factors. For example, a sandy soil can provide less physical support for a tree than a clay soil. A clay soil provides less air, but has a greater capacity to hold water than sand. A soil high in
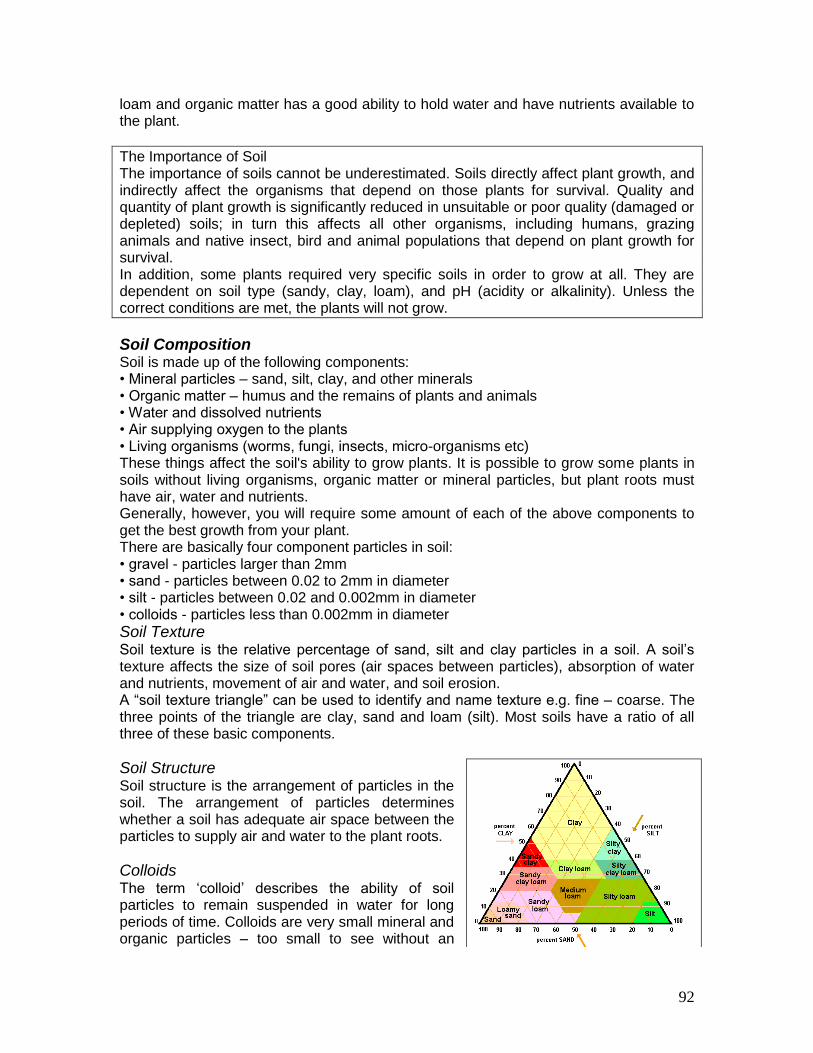
92
loam and organic matter has a good ability to hold water and have nutrients available to the plant.
The Importance of Soil The importance of soils cannot be underestimated. Soils directly affect plant growth, and indirectly affect the organisms that depend on those plants for survival. Quality and quantity of plant growth is significantly reduced in unsuitable or poor quality (damaged or depleted) soils; in turn this affects all other organisms, including humans, grazing animals and native insect, bird and animal populations that depend on plant growth for survival. In addition, some plants required very specific soils in order to grow at all. They are dependent on soil type (sandy, clay, loam), and pH (acidity or alkalinity). Unless the correct conditions are met, the plants will not grow.
Soil Composition Soil is made up of the following components: • Mineral particles – sand, silt, clay, and other minerals • Organic matter – humus and the remains of plants and animals • Water and dissolved nutrients • Air supplying oxygen to the plants • Living organisms (worms, fungi, insects, micro-organisms etc) These things affect the soil's ability to grow plants. It is possible to grow some plants in soils without living organisms, organic matter or mineral particles, but plant roots must have air, water and nutrients. Generally, however, you will require some amount of each of the above components to get the best growth from your plant. There are basically four component particles in soil: • gravel - particles larger than 2mm • sand - particles between 0.02 to 2mm in diameter • silt - particles between 0.02 and 0.002mm in diameter • colloids - particles less than 0.002mm in diameter
Soil Texture Soil texture is the relative percentage of sand, silt and clay particles in a soil. A soil’s texture affects the size of soil pores (air spaces between particles), absorption of water and nutrients, movement of air and water, and soil erosion. A “soil texture triangle” can be used to identify and name texture e.g. fine – coarse. The three points of the triangle are clay, sand and loam (silt). Most soils have a ratio of all three of these basic components.
Soil Structure Soil structure is the arrangement of particles in the soil. The arrangement of particles determines whether a soil has adequate air space between the particles to supply air and water to the plant roots.
Colloids The term ‘colloid’ describes the ability of soil particles to remain suspended in water for long periods of time. Colloids are very small mineral and organic particles – too small to see without an
93
electron microscope. They function in soil by holding and supplying nutrients to plant roots. Due to their very small size, they represent an enormous surface area on which nutrients may be held. Soils with a high proportion of dispersing clay colloids tend to have poor structure (e.g. leached clay soils which are high in sodium). Air spaces (pores) between particles are reduced, potentially resulting in the following: • poor drainage • increased soil compaction • reduced oxygen available to roots • poor root penetration • poor fertilizer uptake • increased tendency for soil erosion Improving a soil’s structure has the effect of flocculating the colloids; in other words, clumping or aggregating the particles together to form structured peds. Adding organic matter significantly improves a soil’s ability to form peds as it acts as a natural cementing agent, binding the mineral colloids and stabilising the peds. This improves the balance between drainage and water retention, and also gives plant roots access to the greatest possible quantity of nutrients on the colloids.
Characteristics of Sand, Clay and Loam Soils The nature of a soil depends on its texture and structure. Soils with a high proportion of sand particles have large air spaces between the particles, hence drain rapidly. These are usually better for propagating seeds or cuttings, but need to be kept well watered. Sandy soils are generally low in organic matter and nutrients. Clay soils have a high proportion of small particles, with small air spaces between the particles. Water is absorbed slowly and percolates (drains) slowly through to the lower layers. Clay soils tend to remain waterlogged during prolonged periods of rain or irrigation, they are prone to compaction while wet, and they can be difficult to cultivate. As they dry out, they may become cloddy and cracked. They generally have moderate levels of organic matter and good levels of nutrients. Loam soils vary widely in their composition and structure. The best loam soils often contain a high proportion of silt particles (silty loams). They contain good levels of nutrients, they have moderate to good amounts of organic matter - they drain freely and hold sufficient water for plant roots. They are easy to cultivate and are able to support a wide variety of plant types, including many of our important crop varieties. However, not all loams provide these ideal conditions – some have a hard crust that repels water, others are low in nutrients. The best types of soil for good plant health have the following attributes: • Well drained • Deep-rooting zone capacity • Easily penetrated by air, water and roots • Good water-holding capacity • Maintains a balanced nutrient supply • Resists erosion.
94
Soil Peds As described above, the structure of a soil affects the ability of water and air to percolate into the soil, and can inhibit the penetration ability of plant roots. Soil can be structured so that the various soil particles aggregate into larger components called ‘peds’. Different soils have different ped structures - blocky, angular, prismatic or columnar structures (these terms relate to the appearance of the peds). Structure-less soil have no noticeable peds. They may be massive (a single consolidated mass of soil that does not readily break up into peds) or single grained (individual soil particles that do not cohere to one another to form peds). Heavy clay soils tend to be massive; very sandy soils are unconsolidated. Before deciding how to (or even whether to) improve a soil, you need to know whether a soil is good, bad or whatever. The improvement of soil structure may use two approaches. First, where the soil has not been badly leached, the addition of organic material, use of crop rotations (with legume cover crops to fix nitrogen) and proper (not excessive) cultivation, will normally give the best long-term results. However, where soils have been leached and have become very acid, or very alkaline, the use of soil ameliorants such as lime and gypsum may be required. These act, not only to adjust soil pH, but to replace sodium ions in the soil with others (principally calcium and magnesium). These help flocculate clay particles and so produce some initial structure that will allow the soil to be worked as above. There are several ways to improve soils, and these include: • Adding sand or coarse grit to clay soils to improve drainage. Sand added to a clay soil may improve drainage and have some effect on structure. However large quantities of sand are required to cause any noticeable effect and mixing can destroy the structure of clay peds. The smaller clay particles may clog up the air spaces between the sand particles, resulting in poor water infiltration. • Adding clay or organic material to sandy soil to improve its ability to hold water. Smaller amounts of clay (20-30%) are needed to improve sandy soils, but it can be difficult to get an even mix. • Adding organic matter, while improving water holding capacity, will not affect drainage to the same degree as the addition of clay will. • Adding sand, grit or organic matter will help break up a clay soil, making cultivation easier (although the two will act in different ways). • Adding organic matter will usually improve the nutritional status of the soil. • Using soil ameliorants - lime, gypsum, sulphates. • Rotating crops. • Using correct cultivation techniques. Structural problems can include compaction, hard pans, surface crusting, and lack of coherence. All of these factors can lead to reduced root penetration, water repellence or poor drainage, lack of soil air, and other problems such as erosion. Soil structure can be improved by cultural means and by addition of particular inputs. The following methods can be effective: • Organic matter will help bind non-coherent soils and likewise will help to make massive soils more friable. Organic matter can be imported in forms such as mulch, manure, compost etc. – more or less any form of organic matter can be useful although some are
95
more readily utilised than others, some may contain chemical residues, and some may have more desirable features such as appearance. Organic matter can also be produced within the garden (for example, grass clippings, prunings, green manure crops). • Composts, made from recycled organic material eg. decomposed kitchen and garden wastes, are a particularly beneficial form of organic matter. Compost contains humus – a form of organic matter in which nutrients, water, carbon etc. are all held in a stable, plant-available form. • Correct cultivation. Cultivation can be used to break up hard pans surface crusts and massive soil structures, aerate soil, and improve drainage. Correct methods are essential though. Care should be taken not to turn the soil (i.e. don’t mix up the soil profile) as this can hinder biological activity and the natural shape of the soil. In the garden, a garden fork is a useful tool for cultivation. It can be used to aerate lawns and garden beds, break large soil clods etc, and also to move grass clippings and other mulch. • Cultivation to improve soil structure works best in association with cultivation of deep-rooted plants. Letting lawns grow a little longer can increase the depth of root penetration into the soil for example, or deep rooted legumes such as Lucerne can be sown as green manures in the garden. • Inputs like gypsum, lime, dolomite, and vermiculite can improve the soil structure in various ways such as adjusting pH, replacing sodium in the soil with other minerals such as calcium or magnesium, or assisting soil particles to cohere to one another.
Improving Fertility Fertility can be improved through cultural methods such as growing leguminous green manures to increase the nitrogen content of soil, and by the addition of nutrients in various forms. • ‘Natural’ fertility inputs include raw or pelletised manures, rock phosphates and minerals, dolomite, mulches and other organic matter, blood and bone, seaweed fertilizers, fish emulsion etc. • ‘Chemical’ inputs are minerals that have been chemically treated (frequently with acid) to make them more soluble, or more available to the plant. Commercial fertilizers most frequently consist of chemically treated nutrients. Even chemical fertility inputs work best in association with the addition of organic matter.
Organic Matter and Living Soil Organisms Soils with a good organic matter content are generally easily worked (we say they have a good tilth if they are easily worked). If you squeeze a handful of soil into a ball in your hand and it remains in a hard lump, then it has a poor tilth - hard clods will result when it is ploughed. If it crumbles, then it is well granulated -organic matter promotes granulation. Cultivated soils with good tilth are less subject to wind and water erosion. It is difficult to increase the percentage of organic matter in a soil, but it is important to try to maintain that percentage. The average mineral soil contains around 2 to 4% organic matter. Organic content will drop if you remove plant material that grows in a soil and don't return organic material to the soil. This can be done the following ways: • The roots of plants grown, once finished, should be cultivated back into soil. • Compost should be added regularly. • Organic mulches should be used on the soil. • Plants should be fed with manure or compost (preferably well rotted).
96
The Benefits of Adding Organic Matter to Soils Raising the level of organic matter in soils has a number of beneficial effects: • Binds soil particles together, but keeps soil open and prevents compaction. • Restricts erosion to some degree. • Holds moisture in the soil. • As it decomposes it provides nutrients for the plants. • Slows down the rate of soil temperature changes. • Aids root penetration. • Retains nutrients in an available form. • Creates an attractive environment for worms and other beneficial soil organisms.
Types of Soil Degradation A number of major soil related problems can occur these include: • Loss of soil fertility (over cropping) • Erosion • Salinity • Soil compaction • Soil acidification • Build up of dangerous chemicals
Soil quality and plant health If adequate nutrients are not present in the soil, plant growth will be stunted. This effect is subtle and not usually noticed until the plant is suffering a severe deficiency. It can be that nutrient requirements drop to as low as 30 percent below the optimum level before deficiency symptoms (such as discolouration) appear in the leaves. By this time, the overall growth rate and general health of the plant has been affected significantly
Soil Temperature The rate of absorption of water and nutrients is affected by the temperature of the soil. Too much heat or cold will slow the whole metabolism down. Soil temperature is not always the same as atmospheric temperature. Mulching a plant, or adding organic matter to the soil will even out (or lessen) the fluctuations in soil temperature. As with most organisms, plant roots will grow within a particular range of tolerance which will vary from one species to another.
Soil Water Three forces are responsible for water movement on soil: • Gravity – is the principal force in saturated soil causing the water to move downwards under tension. • Adhesion – is the force of attraction between two unlike molecules ie. soil particles and water are attracted to each other. • Cohesion – is the force of attraction between two like molecules in this instance water and water. Adhesion and cohesion are the two forces that can cause water to move by capillary action (capillarity) in any direction ie. up and down or laterally. They are the two principal forces that move water in unsaturated soil.
Water Loss from Soils Water is lost from soil due to three factors: • Percolation – gravitational water
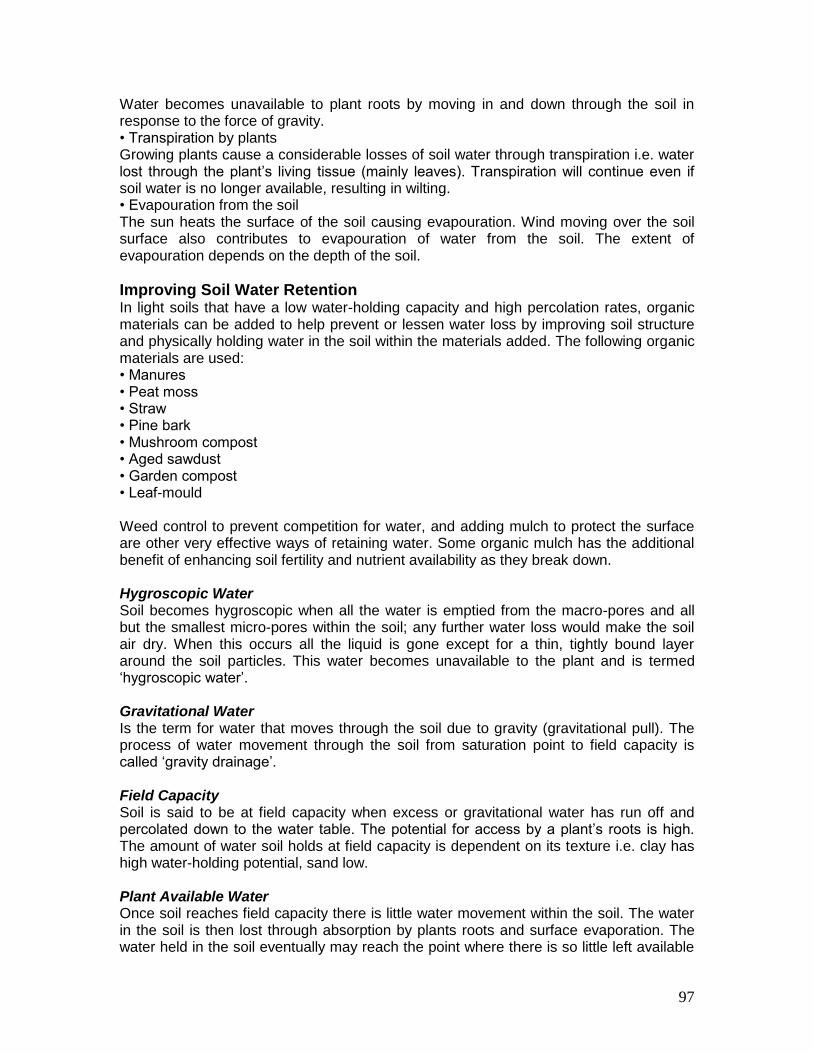
97
Water becomes unavailable to plant roots by moving in and down through the soil in response to the force of gravity. • Transpiration by plants Growing plants cause a considerable losses of soil water through transpiration i.e. water lost through the plant’s living tissue (mainly leaves). Transpiration will continue even if soil water is no longer available, resulting in wilting. • Evapouration from the soil The sun heats the surface of the soil causing evapouration. Wind moving over the soil surface also contributes to evapouration of water from the soil. The extent of evapouration depends on the depth of the soil.
Improving Soil Water Retention In light soils that have a low water-holding capacity and high percolation rates, organic materials can be added to help prevent or lessen water loss by improving soil structure and physically holding water in the soil within the materials added. The following organic materials are used: • Manures • Peat moss • Straw • Pine bark • Mushroom compost • Aged sawdust • Garden compost • Leaf-mould Weed control to prevent competition for water, and adding mulch to protect the surface are other very effective ways of retaining water. Some organic mulch has the additional benefit of enhancing soil fertility and nutrient availability as they break down. Hygroscopic Water Soil becomes hygroscopic when all the water is emptied from the macro-pores and all but the smallest micro-pores within the soil; any further water loss would make the soil air dry. When this occurs all the liquid is gone except for a thin, tightly bound layer around the soil particles. This water becomes unavailable to the plant and is termed ‘hygroscopic water’. Gravitational Water Is the term for water that moves through the soil due to gravity (gravitational pull). The process of water movement through the soil from saturation point to field capacity is called ‘gravity drainage’. Field Capacity Soil is said to be at field capacity when excess or gravitational water has run off and percolated down to the water table. The potential for access by a plant’s roots is high. The amount of water soil holds at field capacity is dependent on its texture i.e. clay has high water-holding potential, sand low. Plant Available Water Once soil reaches field capacity there is little water movement within the soil. The water in the soil is then lost through absorption by plants roots and surface evaporation. The water held in the soil eventually may reach the point where there is so little left available
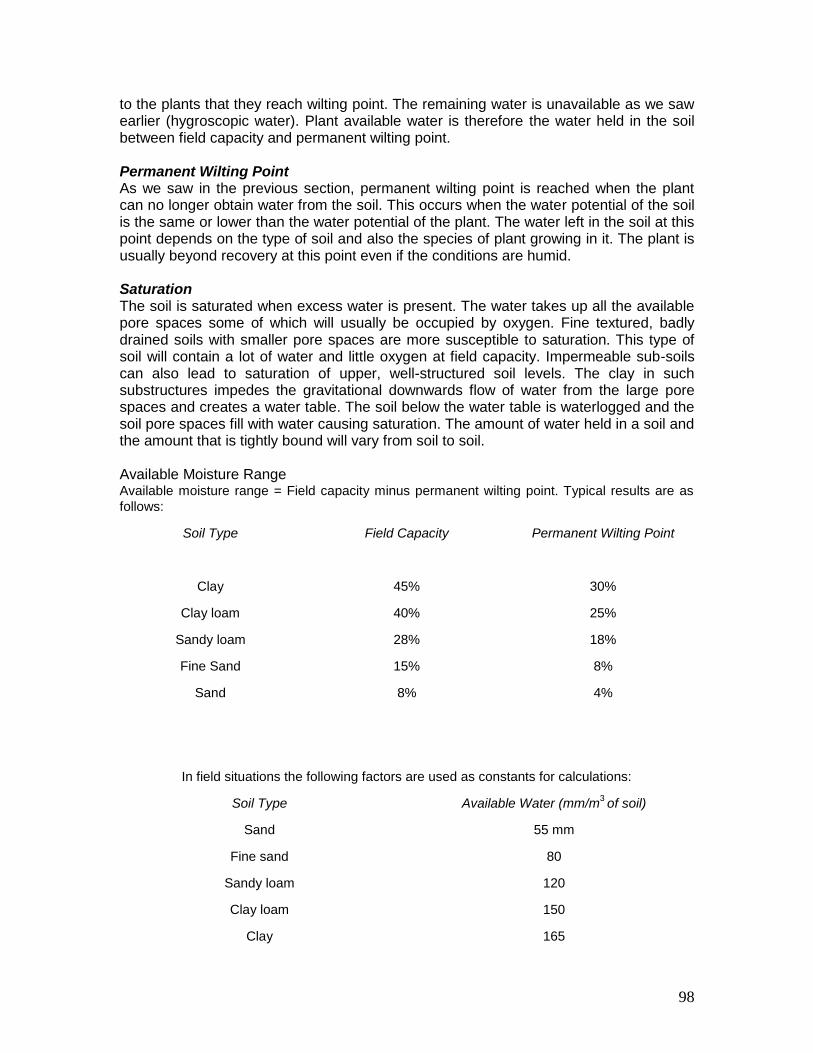
98
to the plants that they reach wilting point. The remaining water is unavailable as we saw earlier (hygroscopic water). Plant available water is therefore the water held in the soil between field capacity and permanent wilting point. Permanent Wilting Point As we saw in the previous section, permanent wilting point is reached when the plant can no longer obtain water from the soil. This occurs when the water potential of the soil is the same or lower than the water potential of the plant. The water left in the soil at this point depends on the type of soil and also the species of plant growing in it. The plant is usually beyond recovery at this point even if the conditions are humid. Saturation The soil is saturated when excess water is present. The water takes up all the available pore spaces some of which will usually be occupied by oxygen. Fine textured, badly drained soils with smaller pore spaces are more susceptible to saturation. This type of soil will contain a lot of water and little oxygen at field capacity. Impermeable sub-soils can also lead to saturation of upper, well-structured soil levels. The clay in such substructures impedes the gravitational downwards flow of water from the large pore spaces and creates a water table. The soil below the water table is waterlogged and the soil pore spaces fill with water causing saturation. The amount of water held in a soil and the amount that is tightly bound will vary from soil to soil. Available Moisture Range Available moisture range = Field capacity minus permanent wilting point. Typical results are as
follows:
Soil Type Field Capacity Permanent Wilting Point
Clay 45% 30%
Clay loam 40% 25%
Sandy loam 28% 18%
Fine Sand 15% 8%
Sand
8% 4%
In field situations the following factors are used as constants for calculations:
Soil Type Available Water (mm/m3 of soil)
Sand 55 mm
Fine sand 80
Sandy loam 120
Clay loam 150
Clay 165
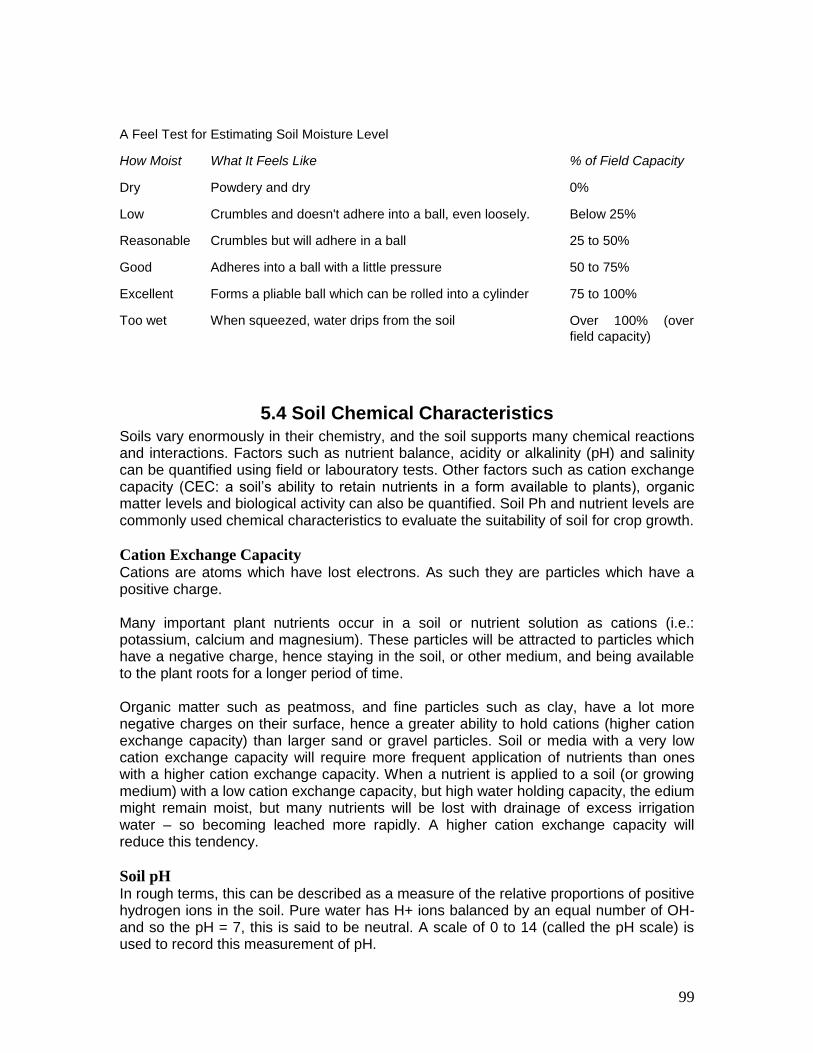
99
A Feel Test for Estimating Soil Moisture Level
How Moist What It Feels Like % of Field Capacity
Dry Powdery and dry 0%
Low Crumbles and doesn't adhere into a ball, even loosely. Below 25%
Reasonable Crumbles but will adhere in a ball 25 to 50%
Good Adheres into a ball with a little pressure 50 to 75%
Excellent Forms a pliable ball which can be rolled into a cylinder 75 to 100%
Too wet When squeezed, water drips from the soil Over 100% (over
field capacity)
5.4 Soil Chemical Characteristics Soils vary enormously in their chemistry, and the soil supports many chemical reactions and interactions. Factors such as nutrient balance, acidity or alkalinity (pH) and salinity can be quantified using field or labouratory tests. Other factors such as cation exchange capacity (CEC: a soil’s ability to retain nutrients in a form available to plants), organic matter levels and biological activity can also be quantified. Soil Ph and nutrient levels are commonly used chemical characteristics to evaluate the suitability of soil for crop growth.
Cation Exchange Capacity Cations are atoms which have lost electrons. As such they are particles which have a positive charge. Many important plant nutrients occur in a soil or nutrient solution as cations (i.e.: potassium, calcium and magnesium). These particles will be attracted to particles which have a negative charge, hence staying in the soil, or other medium, and being available to the plant roots for a longer period of time. Organic matter such as peatmoss, and fine particles such as clay, have a lot more negative charges on their surface, hence a greater ability to hold cations (higher cation exchange capacity) than larger sand or gravel particles. Soil or media with a very low cation exchange capacity will require more frequent application of nutrients than ones with a higher cation exchange capacity. When a nutrient is applied to a soil (or growing medium) with a low cation exchange capacity, but high water holding capacity, the edium might remain moist, but many nutrients will be lost with drainage of excess irrigation water – so becoming leached more rapidly. A higher cation exchange capacity will reduce this tendency.
Soil pH In rough terms, this can be described as a measure of the relative proportions of positive hydrogen ions in the soil. Pure water has H+ ions balanced by an equal number of OH- and so the pH = 7, this is said to be neutral. A scale of 0 to 14 (called the pH scale) is used to record this measurement of pH.

100
Most plants prefer a pH of 6 to 6.5 (i.e. slightly acid), although there are many exceptions and often it is the effect of pH on the soil (rather than on the plant directly) which causes harm. Generally, plants may grow outside of their ideal pH range, but they will not grow as well. If the pH is below 4.5 or above 8 it is very bad for the vast majority of plants.
Salinity High salt levels in soils reduce the ability of plants to grow or even to survive. This is can be caused by natural processes, but much occurs as a consequence of human action. Salinity has been described as the 'AIDS of the earth' and its influence is spreading throughout society; particularly in rural communities, where crop production has been seriously affected and caused economic hardship. Salinity problems have been grouped into two main types. Dry land salinity is that caused by the discharge of saline groundwater, where it intersects the surface topography. This often occurs at the base of hills or in depressions within the hills or mountains themselves. The large scale clearing of forests has seen increased 'recharge' of aquifers (where groundwater gathers in the ground) due to reduced evapotranspiration back to the atmosphere. The result has been a rise in groundwater levels, causing greater discharges to the surface. Wetland salinity occurs where irrigation practices have caused a rise in water-tables, bringing saline groundwater within reach of plant roots. This is common on lower slopes and plains and is particularly common on riverine plains. The wetland salinity problem is exacerbated by rises in groundwater flow due to dry-land salinization processes higher in the catchment.
Nutrient Availability and pH The presence of a nutrient in the soil doesn't mean that plants have access to the nutrient. The chemistry of soils can be complicated and nutrient availability can be affected by pH and by disproportionate quantities or excessive quantities of some other nutrients. The ease with which a plant can use a nutrient depends on, among other things, the form in which the nutrient is found. The degree of solubility in water usually gives some indication of how quickly a plant will absorb a nutrient. If it dissolves easily, then it will be used more quickly. Soils have varying abilities to hold nutrients (and water). In sandy (light) soils, nutrients leach out very quickly. A problem with these soils is that the nutrients which are easier for the plant to use are the same types which are leached out of a sandy soil faster. The ease with which nutrients are able to enter a plant is greatly affected by pH. Extremely acid or alkaline soils can often stop the nutrients present being absorbed and used by the plant. The plant will suffer a nutrient deficiency, not because the required nutrient is not in the soil, but because the plant cannot get it. (ie. it is not available). The ideal pH for nutrient availability is different for each nutrient. A pH that makes iron is very available will make calcium much less available. The only answer is to compromise
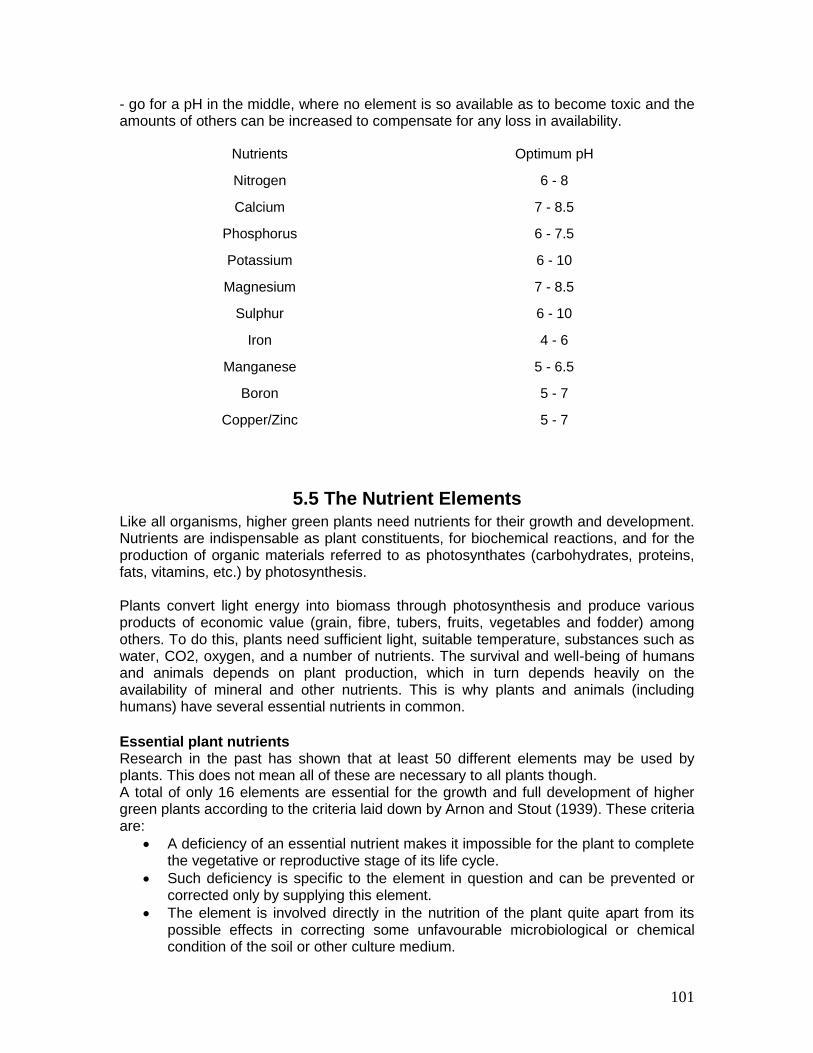
101
- go for a pH in the middle, where no element is so available as to become toxic and the amounts of others can be increased to compensate for any loss in availability.
Nutrients Optimum pH
Nitrogen 6 - 8
Calcium 7 - 8.5
Phosphorus 6 - 7.5
Potassium 6 - 10
Magnesium 7 - 8.5
Sulphur 6 - 10
Iron 4 - 6
Manganese 5 - 6.5
Boron 5 - 7
Copper/Zinc 5 - 7
5.5 The Nutrient Elements Like all organisms, higher green plants need nutrients for their growth and development. Nutrients are indispensable as plant constituents, for biochemical reactions, and for the production of organic materials referred to as photosynthates (carbohydrates, proteins, fats, vitamins, etc.) by photosynthesis. Plants convert light energy into biomass through photosynthesis and produce various products of economic value (grain, fibre, tubers, fruits, vegetables and fodder) among others. To do this, plants need sufficient light, suitable temperature, substances such as water, CO2, oxygen, and a number of nutrients. The survival and well-being of humans and animals depends on plant production, which in turn depends heavily on the availability of mineral and other nutrients. This is why plants and animals (including humans) have several essential nutrients in common.
Essential plant nutrients Research in the past has shown that at least 50 different elements may be used by plants. This does not mean all of these are necessary to all plants though. A total of only 16 elements are essential for the growth and full development of higher green plants according to the criteria laid down by Arnon and Stout (1939). These criteria are:
A deficiency of an essential nutrient makes it impossible for the plant to complete the vegetative or reproductive stage of its life cycle.
Such deficiency is specific to the element in question and can be prevented or corrected only by supplying this element.
The element is involved directly in the nutrition of the plant quite apart from its possible effects in correcting some unfavourable microbiological or chemical condition of the soil or other culture medium.

102
Out of these 16 elements, carbon (C) and oxygen are obtained from the gas CO2, and hydrogen (H) is obtained from water (H2O). These three elements are required in large quantities for the production of plant constituents such as cellulose or starch. The other 13 elements are called mineral nutrients because they are taken up in mineral (inorganic) forms. They are traditionally divided into two groups, macronutrients and micronutrients, according to the amounts required. Regardless of the amount required, physiologically, all of them are equally important. The 13 mineral elements are taken up by plants in specific chemical forms regardless of their source. Oxygen, C and H make up 95 percent of plant biomass, and the remaining 5 percent is made up by all other elements. A number of other elements are required by plants and these are generally divided into two groups: the major elements (or macro-nutrients), and the minor elements (or trace elements or micro-nutrients). There are six macro-nutrients of plants. They are nitrogen (N), phosphorus (P), potassium (K), magnesium (Mg), calcium (Ca), and sulphur (S). The micro-nutrients include all those elements taken up by plants in only small amounts. The number and importance of elements in this group will vary according to the type of plant and the use to which it may be put (i.e. some are only required for human nutrition). It would also be possible to include a third group of elements: those non-toxic elements taken up but not required by plants. This group could be very large, and even includes Gold (Au), but is of no importance to our discussions here. The micro-nutrients (also called trace elements) include iron (Fe), zinc (Zn), manganese (Mn), copper (Cu), boron (B), chlorine (Cl), molybdenum (Mo) and chlorine (Cl). Some elements are more important for human nutrition than for that of plants. Some examples include: cobalt (Co), chromium (Cr) and iodine (I). Other elements are only needed by certain types of plants, or their requirements are uncertain. These include: sodium (Na), aluminium (Al), silicon (Si), and selenium (Se). For all these elements, there are generally only two routes of entry into the plant – by air and by water. Carbon and oxygen are all obtained mostly from the air. Also, as they are required by all parts of the plant, the roots will rely heavily on the 'soil air' for their supply of oxygen. Therefore the condition of waterlogging is really more a form of suffocation. The soil is so saturated with water that the roots can no longer obtain the oxygen they need. All other elements enter the plant dissolved in water. This is generally taken up by the roots, from the soil or other growth medium. However, the plant also has a certain capacity for nutrient uptake from solutions sprayed onto the leaves.
Major Elements Nitrogen, phosphorus, potassium, calcium, magnesium and sulphur are needed by plants in much larger quantities than any other elements (except carbon, oxygen and hydrogen). Most soils have ample supplies of calcium and magnesium; hence fertilizers
103
which are used in horticulture are usually almost completely made up of nitrogen, phosphorus and potassium foods. (The one exception is hydroponics where it becomes necessary to add large amounts of magnesium and calcium.) Every nutrient has its purpose, and a deficiency or oversupply of even a minor nutrient can have a major effect on the plant. Deficiencies can be difficult to detect, but as time passes symptoms will appear. Signs are stunted growth, unhealthy leaves that may be mottled, stunted and dying off, distorted stems and undeveloped root systems. If a nutrient is easily dissolved, the older leaves will be affected first, otherwise the growing tips, i.e. the new leaves, will be affected initially. An oversupply of nutrients may initially cause extra growth, but may then become toxic, and plant growth will be reduced. Deficiencies are not always a result of the nutrient not being present, it may be the nutrient is being held in some form that prevents the plant taking it up, for example it could be attached to an insoluble material (known as "immobilisation" or being "locked up"), or be affected by pH. In simple terms, in order to ensure health plant growth do not let plants suffer from nutrient deficiency or toxicity. For the organic farmers and gardeners, supply of minor trace elements to suffering plants may seem a bit daunting. Provided you use a wide range of organic fertilizers as sources of organic matter, it is unlikely that plants will suffer from any deficiencies. In fact, soils high in organic matter hold more nutrients than soils low in organic matter. Nutrients can also be readily lost from the soil through erosion, through leaching (the loss of soluble nutrients down through the soil profile in soil water), through conversion of nutrients to gaseous forms (eg. ammonia gas) - which escapes to the atmosphere, and through the removal of plant material (eg. crops). Compensation for the loss of nutrients by such means should be a major priority of the sustainable farmer. Chemical fertilizers will compensate for these losses in the short-term however the sustainable farmer should be looking more towards cover crops, mineral powders and composts which release nutrients slowly. This requires careful planning as benefits will only accumulate gradually. Nitrogen This element is essential for good foliage and stem growth. When there is a flush of rapid growth, nitrogen requirements become particularly high. Adequate nitrogen is essential for good fruiting and other plant processes, as it is required in the synthesis of proteins and enzymes in every living cell, though it is more closely related to the green growth. Nitrogen is obtained via the roots from the soil (and to a degree from the atmosphere by legumes). Nitrogen fertilizers are applied to plants in the order to stimulate green, vegetative growth. Obvious situations to apply nitrogen would be - on leafy vegetables, on young plants to stimulate faster growth, on lawns, and on plants grown for their foliage. Symptoms of deficiency include stunted growth and general chlorosis, while toxicity is generally first
104
noticed by a lush green overgrowth, with increased susceptibility to frosts, etc. and eventual collapse. Nitrogen fertilizers include: • Sulphate of ammonia • Sodium nitrate • Calcium nitrate • Potassium nitrate • Urea Phosphorus Adequate phosphorus is essential to maximise root development, for growth and energy transfer. Deficiencies lead to poor fruiting and spindly growth. Other symptoms may include purplish tinting of leaves and poor seed set. It should be remembered that of any amount of phosphorus applied to the soil, only about 20percent may be immediately available to the plant, the rest being released slowly over a period of time. Good sources of phosphorous include: • Superphosphate • Monocalcium phosphate • Shrimp waste • Raw sugar waste Potassium Potassium is required by the plant in quite large amounts and is necessary to maintain cell turgor and the plant's water relations, controlling the opening of stomata, etc. Soils in dry areas usually have good reserves of potassium. It is very soluble and very mobile in the plant. It is known that good levels of potassium are needed, in particular, for successful flowering and fruiting. It is also very active in meristematic tissue, where it appears to behave in a similar way to calcium. Deficiency symptoms include marginal chlorosis of older leaves, low yields, weak stems and meristematic necrosis. Good sources of potassium are: • Potassium sulphate (sulphate of potash) • Potassium chloride (muriate of potash) • Wood ash and organic fertilizers (seaweed, straw, and most manures etc.) Magnesium Essential to chlorophyll formation and energy transfer processes. Developing fruit have a high requirement. Deficiencies are usually noted by interveinal chlorosis and stunting. Fertilizers include: • Dolomitic limestone (dolomite) • Epsom salts. Calcium The main role of calcium is in formation of peptic compounds of the middle lamella. It is not transportable in the phloem, where it is rapidly precipitated as calcium oxalate. Thus, symptoms of deficiency occurs in active meristematic tissue as apical and marginal chlorosis of young shoots and leaves, as well as in developing fruits. Calcium fertilizers include: • Slaked lime
105
• Agricultural limestone • Dolomite • Gypsum Sulphur This element is not often deficient, as many forms of fertilizer are provided as sulphates. Also, toxicity is rare due to high tolerances in many plants. This, along with their solubility, is the reason for the use of sulfurates in fertilizers. Sulphur is, however, very necessary for plant growth and a plant may require almost as much sulphur as it does magnesium. One of its main functions in the cell is the formation of disulphide bonds in protein molecules. These bonds are largely responsible for the tertiary structure of many proteins and so deficiency will inactivate them. When deficiency occurs it is usually noticed as chlorosis of the leaf veins (as opposed to the interveinal chlorosis of other nutrients).
Minor Elements Many of these are just as essential as the major elements but are not required in as large a quantity. Deficiency of a minor element can have just as devastating results as deficiency of a major one. • Iron - essential for the functioning of a number of accessory photosynthetic pigments. Lack of the small amount of required iron will cause plant growth to cease and produce interveinal chlorosis in many plants. Iron deficiencies are more common than any other minor nutrient problem. Iron can be fed to a plant by applying; iron chelate, iron sulphate or even some old rusty nails. • Zinc - contributes to the manufacture of carbohydrates and proteins, by functioning as an activator of a number of enzyme reactions. Fertilizer: Zinc sulphate. • Manganese - necessary, but quantity varies greatly between species. Its functions are similar to those of zinc. Evergreens generally use more than deciduous. Fertilizer: Manganese sulphate. • Copper - very small quantities are needed, although it is known to be essential. Little is known of its function, but excess copper is known to be toxic, and, in some plants, causes an iron deficiency. Fertilizer: copper sulphate. • Molybdenum - essential in nitrate reduction, a component of some enzymes, important in nitrogen fixation which occurs in the roots of legumes. Deficiency occurs more often on acid soils. Fertilizer: ammonium molybdate. • Boron - may assist utilisation of calcium, may play a part in formation of cell walls, involved in cell division and essential to carbohydrate and nitrogen metabolism. Fertilizers: Borax or boric acid. • Chlorine - this element is essential, but tolerances vary widely and the precise function of this element within the plant is still uncertain. There are no records of a plant needing to be fed chlorine, although toxicities are known, especially in tobacco and potatoes. • Cobalt - there is no direct proof that this is absolutely necessary in plants, though it does seem important to nitrogen fixation in legumes. It is important to human nutrition in the formation of certain compounds such as vitamin B12. The amount of cobalt in plants can vary greatly. • Silicon - occurs in greater quantities in monocotyledons (eg. grasses, iris, lilies, orchids). Silicon does improve the growth of some plants. Some say it is necessary in minute amounts, but this is by no means an established fact.
106
• Aluminium - essential in some species only (eg. peas, corn, sunflower and some grasses). Over 10ppm is toxic. It can also help reduce the effects of phosphorus toxicity to some degree. • Selenium - is used in varying amounts by some species only. • Sodium - not usually considered essential.
Total Salts Most nutrients in the soil exist in the form of a salt (eg. common table salt is sodium chloride - or a sodium salt). "Total Salts" refers to the combined effect of all different types of salts in the soil. Individually, salts might not have any effect, but combined they may be toxic to a plant. Excessive salt is often indicated by a whitish caking on the surface of the soil. Symptoms: Drying of leaf margin beginning at the tip followed by death of the tip and then marginal leaf burn; in severe cases leaves shrivel and whole branches suddenly wilt. Chemical laboratory analysis is needed to confirm the problem. The only solution is to wash the salts out of the soil. In places with inadequate drainage this is next to impossible. The soil may be permanently damaged, unless some form of drainage system can be installed.
5.6 Diagnosis of Nutritional Problems The following key may be used to identify nutrient deficiencies from the visual symptoms. Note, however, deficiency may exist with no symptoms other than stunted growth or reduced yield. Also, combined deficiencies are very common and may not be identifiable from this key. In such cases, laboratory analysis of plant tissue may be necessary to identify the problem. This key will not be useful for diagnosis of toxicities (for these, refer to notes on individual elements). Elements Nutritional problems
NITROGEN Older or lower leaves mostly affected.
Effects generalised over the whole plant, with the older leaves
showing the worst symptoms.
Plant light green, lower leaves prominently yellow, drying to
light brown. Leaves small and thin, with strong autumn colours
and drop early. Compound leaves have fewer leaflets.
Flowers bloom heavily but late.
Fruit set is light, small, highly coloured and early to mature.
Stalks slender and short and possibly reddish or reddish brown
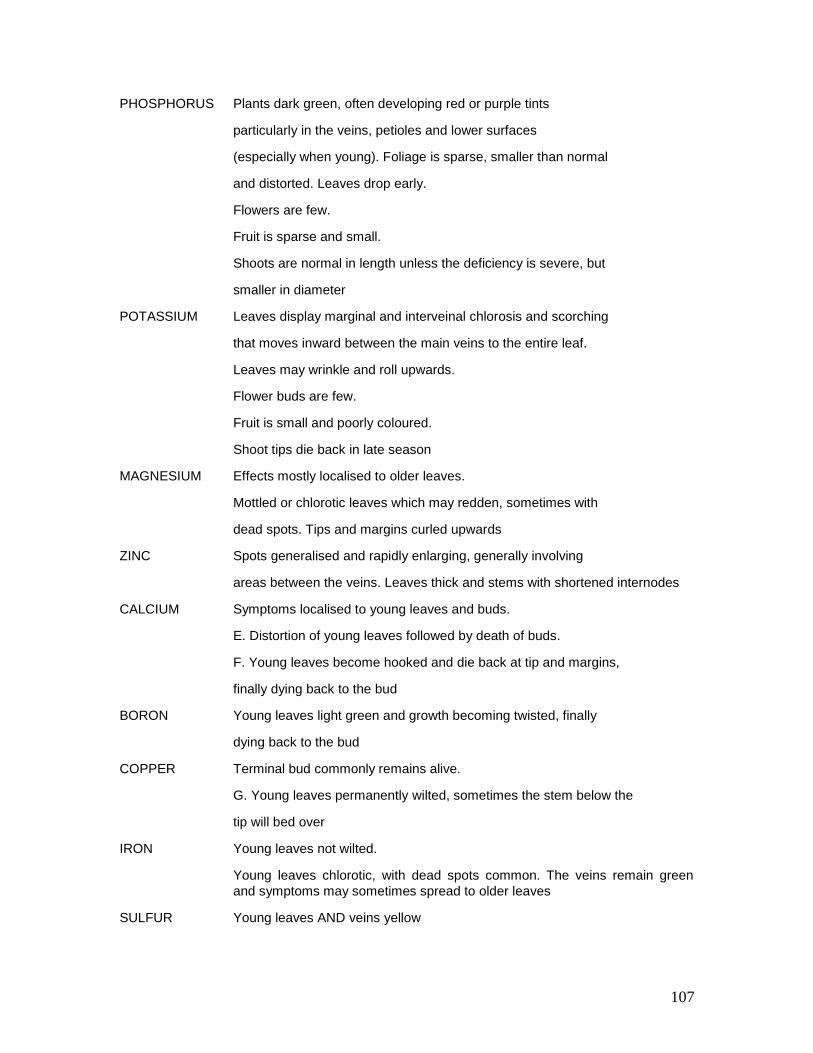
107
PHOSPHORUS Plants dark green, often developing red or purple tints
particularly in the veins, petioles and lower surfaces
(especially when young). Foliage is sparse, smaller than normal
and distorted. Leaves drop early.
Flowers are few.
Fruit is sparse and small.
Shoots are normal in length unless the deficiency is severe, but
smaller in diameter
POTASSIUM Leaves display marginal and interveinal chlorosis and scorching
that moves inward between the main veins to the entire leaf.
Leaves may wrinkle and roll upwards.
Flower buds are few.
Fruit is small and poorly coloured.
Shoot tips die back in late season
MAGNESIUM Effects mostly localised to older leaves.
Mottled or chlorotic leaves which may redden, sometimes with
dead spots. Tips and margins curled upwards
ZINC Spots generalised and rapidly enlarging, generally involving
areas between the veins. Leaves thick and stems with shortened internodes
CALCIUM Symptoms localised to young leaves and buds.
E. Distortion of young leaves followed by death of buds.
F. Young leaves become hooked and die back at tip and margins,
finally dying back to the bud
BORON Young leaves light green and growth becoming twisted, finally
dying back to the bud
COPPER Terminal bud commonly remains alive.
G. Young leaves permanently wilted, sometimes the stem below the
tip will bed over
IRON Young leaves not wilted.
Young leaves chlorotic, with dead spots common. The veins remain green
and symptoms may sometimes spread to older leaves
SULFUR Young leaves AND veins yellow
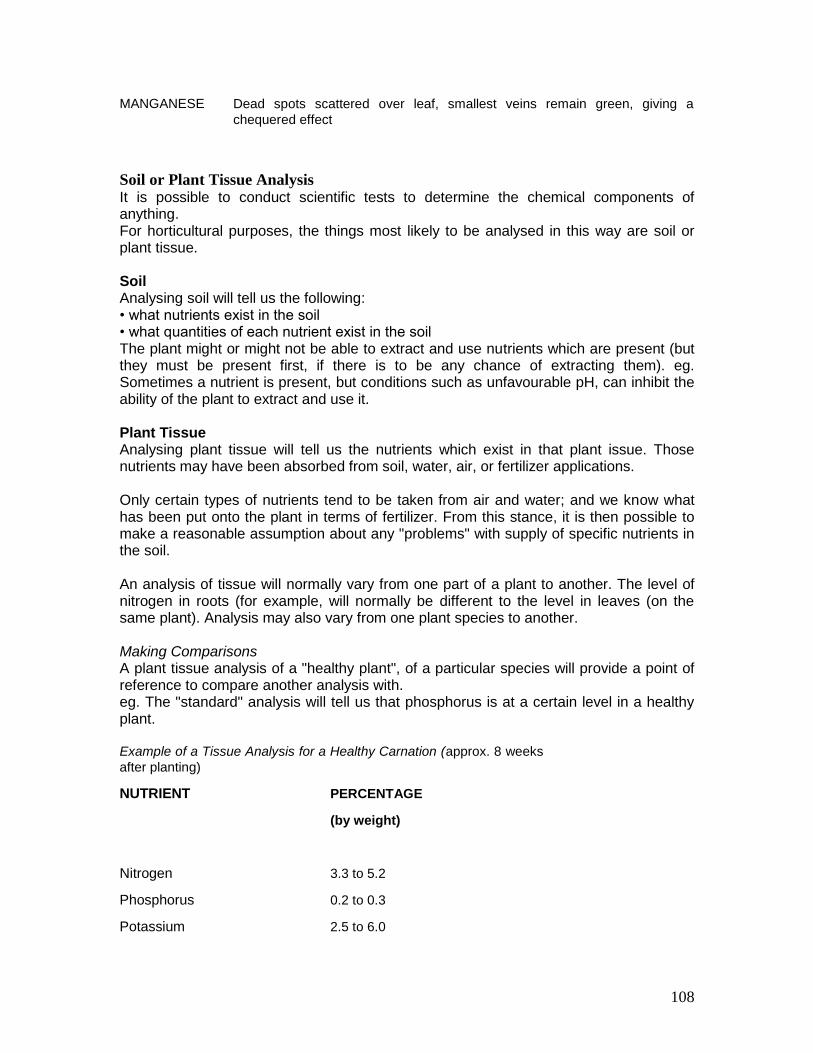
108
MANGANESE Dead spots scattered over leaf, smallest veins remain green, giving a
chequered effect
Soil or Plant Tissue Analysis It is possible to conduct scientific tests to determine the chemical components of anything. For horticultural purposes, the things most likely to be analysed in this way are soil or plant tissue. Soil Analysing soil will tell us the following: • what nutrients exist in the soil • what quantities of each nutrient exist in the soil The plant might or might not be able to extract and use nutrients which are present (but they must be present first, if there is to be any chance of extracting them). eg. Sometimes a nutrient is present, but conditions such as unfavourable pH, can inhibit the ability of the plant to extract and use it. Plant Tissue Analysing plant tissue will tell us the nutrients which exist in that plant issue. Those nutrients may have been absorbed from soil, water, air, or fertilizer applications. Only certain types of nutrients tend to be taken from air and water; and we know what has been put onto the plant in terms of fertilizer. From this stance, it is then possible to make a reasonable assumption about any "problems" with supply of specific nutrients in the soil. An analysis of tissue will normally vary from one part of a plant to another. The level of nitrogen in roots (for example, will normally be different to the level in leaves (on the same plant). Analysis may also vary from one plant species to another. Making Comparisons A plant tissue analysis of a "healthy plant", of a particular species will provide a point of reference to compare another analysis with. eg. The "standard" analysis will tell us that phosphorus is at a certain level in a healthy plant. Example of a Tissue Analysis for a Healthy Carnation (approx. 8 weeks
after planting)
NUTRIENT PERCENTAGE
(by weight)
Nitrogen 3.3 to 5.2
Phosphorus 0.2 to 0.3
Potassium 2.5 to 6.0

109
Calcium 1 to 2
Magnesium 0.25 to 0.5
(Concentrations are stated after oven drying as a percentage of the
total weight).
REFERENCE: Plant Analysis by Reuter and Robinson (Inkata Press)
The treatment to improve a soil is based upon what we assess the soil’s needs to be. Such an assessment should always be based upon a “representative” sample. If we only test one small part of a property which has sandy soil, and ignore the rest which is a heavier (more clay) soil, we may end up doing the wrong thing to the soil. If we only take a sample from the top centimetre or half inch, we may be only sampling the fertile topsoil. The soil below may be totally different. ALWAYS take samples from a variety of different points across the surface and take samples to an appropriate depth. If you collect a variety of samples and mix them you will be more likely to have a result that reflects how the soil might be after cultivation.
5.7 Fertilizers There is a tremendous variety of different fertilizers available, and everyone is different; using the wrong fertilizer or the right fertilizer at the wrong rate, can create problems in your production rather than overcoming problems. The variables: • Relative proportions of each nutrient. • Actual concentration of the nutrient (this is different in different types of fertilizers). • Solubility. • Period of time over which the nutrient will be used. • What else is with the nutrient (eg. nitrogen applied as potassium nitrate will supply potassium also). • Method of fertilizer application eg. to roots or foliage?, broadcast on the soil surface or soil injected?,in liquid or dry powder form?, watered-in or not? • Type of soil (will the fertilizer hold in the soil or be leached out?) • Type of plant and time of year (is the plant in a phase of rapid growth and, hence, use the fertilizer quickly?) Nitrogen Nitrogen can be obtained naturally by growing leguminous plants alongside other plants or as a cover crop (also known as a green manure crop) to be ploughed in before planting. Legumes e.g. peas, clover, lucerna, have colonies of bacteria in small nodules on their roots. These bacteria don't damage the plant. In fact, they extract nitrogen from the atmosphere and make it available for use by the plant. Nitrogen fertilizers include: • Sulphate of ammonia - 21% nitrogen • Potassium nitrate - 34% nitrogen. • Urea (cheap but can burn) - 46% nitrogen • Blood and bone, fowl manure etc.
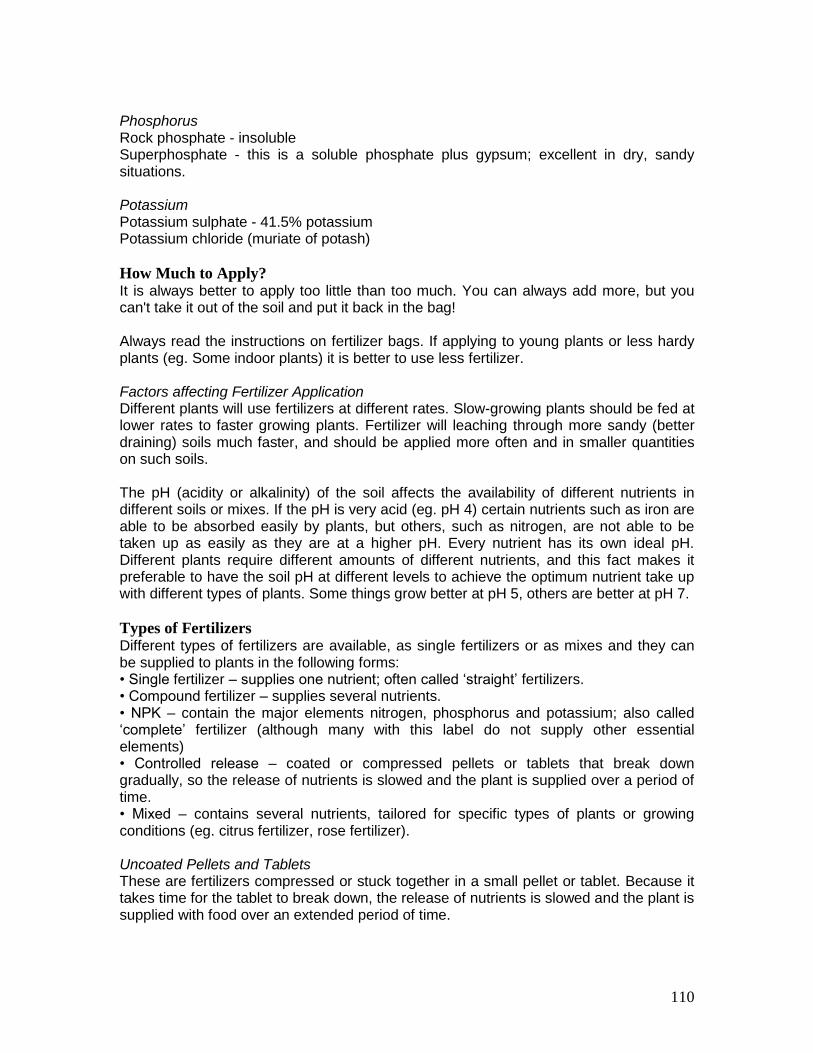
110
Phosphorus Rock phosphate - insoluble Superphosphate - this is a soluble phosphate plus gypsum; excellent in dry, sandy situations. Potassium Potassium sulphate - 41.5% potassium Potassium chloride (muriate of potash)
How Much to Apply? It is always better to apply too little than too much. You can always add more, but you can't take it out of the soil and put it back in the bag! Always read the instructions on fertilizer bags. If applying to young plants or less hardy plants (eg. Some indoor plants) it is better to use less fertilizer. Factors affecting Fertilizer Application Different plants will use fertilizers at different rates. Slow-growing plants should be fed at lower rates to faster growing plants. Fertilizer will leaching through more sandy (better draining) soils much faster, and should be applied more often and in smaller quantities on such soils. The pH (acidity or alkalinity) of the soil affects the availability of different nutrients in different soils or mixes. If the pH is very acid (eg. pH 4) certain nutrients such as iron are able to be absorbed easily by plants, but others, such as nitrogen, are not able to be taken up as easily as they are at a higher pH. Every nutrient has its own ideal pH. Different plants require different amounts of different nutrients, and this fact makes it preferable to have the soil pH at different levels to achieve the optimum nutrient take up with different types of plants. Some things grow better at pH 5, others are better at pH 7.
Types of Fertilizers Different types of fertilizers are available, as single fertilizers or as mixes and they can be supplied to plants in the following forms: • Single fertilizer – supplies one nutrient; often called ‘straight’ fertilizers. • Compound fertilizer – supplies several nutrients. • NPK – contain the major elements nitrogen, phosphorus and potassium; also called ‘complete’ fertilizer (although many with this label do not supply other essential elements) • Controlled release – coated or compressed pellets or tablets that break down gradually, so the release of nutrients is slowed and the plant is supplied over a period of time. • Mixed – contains several nutrients, tailored for specific types of plants or growing conditions (eg. citrus fertilizer, rose fertilizer). Uncoated Pellets and Tablets These are fertilizers compressed or stuck together in a small pellet or tablet. Because it takes time for the tablet to break down, the release of nutrients is slowed and the plant is supplied with food over an extended period of time.
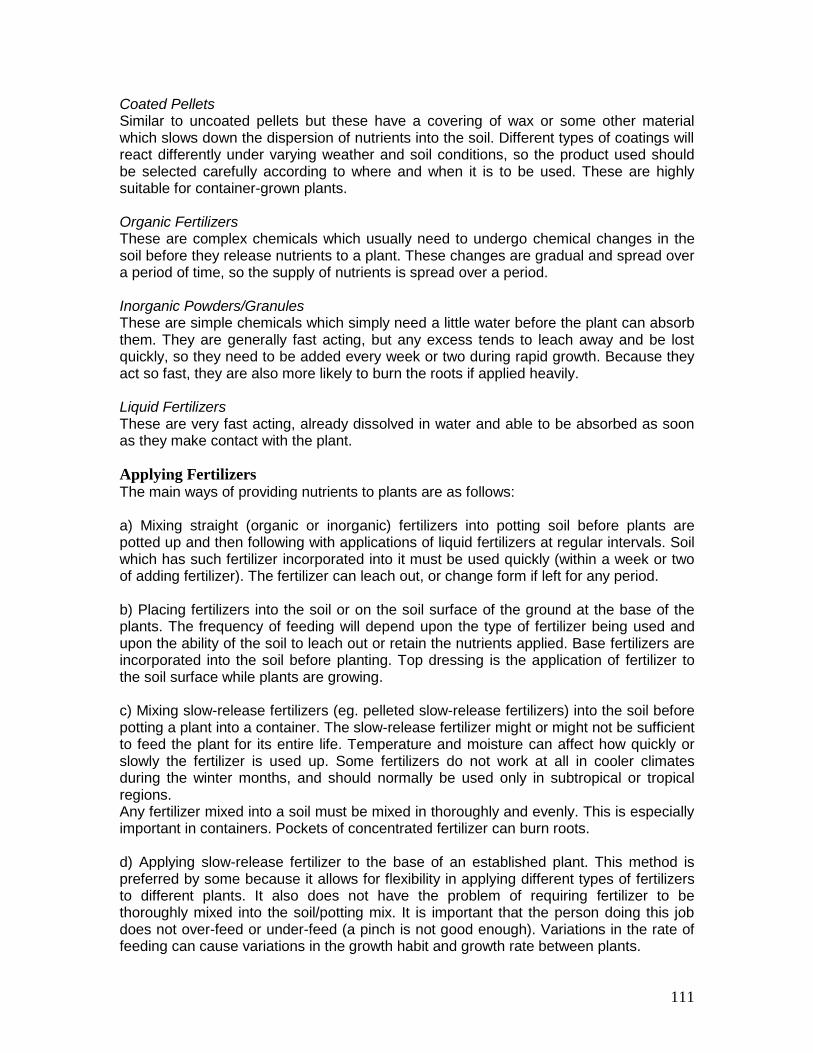
111
Coated Pellets Similar to uncoated pellets but these have a covering of wax or some other material which slows down the dispersion of nutrients into the soil. Different types of coatings will react differently under varying weather and soil conditions, so the product used should be selected carefully according to where and when it is to be used. These are highly suitable for container-grown plants. Organic Fertilizers These are complex chemicals which usually need to undergo chemical changes in the soil before they release nutrients to a plant. These changes are gradual and spread over a period of time, so the supply of nutrients is spread over a period. Inorganic Powders/Granules These are simple chemicals which simply need a little water before the plant can absorb them. They are generally fast acting, but any excess tends to leach away and be lost quickly, so they need to be added every week or two during rapid growth. Because they act so fast, they are also more likely to burn the roots if applied heavily. Liquid Fertilizers These are very fast acting, already dissolved in water and able to be absorbed as soon as they make contact with the plant.
Applying Fertilizers The main ways of providing nutrients to plants are as follows: a) Mixing straight (organic or inorganic) fertilizers into potting soil before plants are potted up and then following with applications of liquid fertilizers at regular intervals. Soil which has such fertilizer incorporated into it must be used quickly (within a week or two of adding fertilizer). The fertilizer can leach out, or change form if left for any period. b) Placing fertilizers into the soil or on the soil surface of the ground at the base of the plants. The frequency of feeding will depend upon the type of fertilizer being used and upon the ability of the soil to leach out or retain the nutrients applied. Base fertilizers are incorporated into the soil before planting. Top dressing is the application of fertilizer to the soil surface while plants are growing. c) Mixing slow-release fertilizers (eg. pelleted slow-release fertilizers) into the soil before potting a plant into a container. The slow-release fertilizer might or might not be sufficient to feed the plant for its entire life. Temperature and moisture can affect how quickly or slowly the fertilizer is used up. Some fertilizers do not work at all in cooler climates during the winter months, and should normally be used only in subtropical or tropical regions. Any fertilizer mixed into a soil must be mixed in thoroughly and evenly. This is especially important in containers. Pockets of concentrated fertilizer can burn roots. d) Applying slow-release fertilizer to the base of an established plant. This method is preferred by some because it allows for flexibility in applying different types of fertilizers to different plants. It also does not have the problem of requiring fertilizer to be thoroughly mixed into the soil/potting mix. It is important that the person doing this job does not over-feed or under-feed (a pinch is not good enough). Variations in the rate of feeding can cause variations in the growth habit and growth rate between plants.
112
e) Using liquid fertilizers only, normally applied through either sprays or through the normal watering system.
Natural Fertilizers Nutrients can be added to soil by digging in kitchen scraps, animal manures, cover crops, natural minerals such as rock dusts, and synthetic chemical fertilizers. Nutrients are also obtained from irrigation water, rainfall, from the atmosphere (ie. micro-organisms converting atmospheric nitrogen) and from the natural weathering of rock and soil itself. The source is unimportant to the plant, nitrogen from animal manures is exactly the same as nitrogen from sulphate of ammonia, and phosphorus from rock dusts is exactly the same as phosphorus from super phosphate. The choice of which source of nutrients to use, should depend on the effect that it will have on the soil. Artificial fertilizers are easier to apply and manage than animal manures and organic fertilizers, but can create major soil problems, in particular soil acidification. These fertilizers release nutrients quickly so nutrients are easily washed through the soil where they can pollute waterways. Organic fertilizers generally don't cause these problems, and have the added advantage of improving soil structure, and promoting beneficial soil life.
Choosing the Right Fertilizer Using the right fertilizer helps to minimise wastage, reduce costs, and reduce negative effects on the environment, while maximising plant growth. • Timing is important so as not to waste fertilizer. In the dormant season most plants are not growing so the fertilizer will not be taken up. Heavy feeding at the wrong time of year can also cause fruit trees to produce plenty of leaves at the expense of fruit. • Commercial fertilizers are available for certain types of plants or as general preparations to suit most plants. However, some are produced from non-renewable resources. • Quick-release or soluble fertilizers are very mobile, which makes them easier for the plants to get at, but unfortunately most of the nutrients can be leached into streams or ground water. They eventually end up in rivers, bays, dams and estuaries, causing problems such as algal blooms. • Using slow-release fertilizer can be a more efficient way of feeding plants, but again these may not be made from renewable materials. • Home-made fertilizers can be prepared using garden compost, animal manures and mulch material. Some plants themselves are excellent sources of nutrients, including legumes (eg. Lucerne). Often weeds are able to absorb minor nutrients from the soil, so they can also be used, if care is taken to ensure that the weeds have not set seed and will not re-establish. A handy way to make your own liquid fertilizer is to quarter fill a large container with weeds, and/or manures and legumes, top up with water to cover the material, and leave it all to stew for a couple of weeks, stirring occasionally. The resulting dark liquid should be diluted with water (1:100) and applied to the soil or used as a foliar (to the leaves) application. The golden rules in using any liquid manure is 'diluted' and 'frequent'. There comes a point where strong organic manure can be as disastrous as chemical manures used
113
injudiciously. Urine is excellent liquid manure if diluted about 1:20, but if used at full strength, it will kill almost any plant. Animal Manures All animal manures are useful as fertilizers. When mixed into compost as part of the composting process, the final material provides excellent all-purpose fertilizer. Manures can be used directly on plants; however they vary greatly in their nutrient content. It is impossible to give accurate figures on the micro-nutrients in animal manures, because they can vary so much. It depends on what the animal has eaten the storage method of the manure, and its maturity. Some idea of the nitrogen content is important in any manure you use. High levels of nitrogen can burn the plant roots. Well-rotted cow, sheep, horse and goat manures are generally safe (nitrogen is not too strong). Pulverised and partly composted cow manure can be used generously on a bed in preparation to plant seedlings on the same day, provided it is thoroughly mixed in the top 6-8cm of soil. (The same treatment with an equal amount of poultry or pigeon manure would result in disaster, with most, if not all of the seedlings dying within a few days.)
Measuring pH Excess acidity may create toxic soil conditions due to the increase in solubility of such elements as aluminium and manganese. Soils which are too basic may cause deficiencies of essential nutrients such as boron, iron, zinc and manganese. Because the availability of many micronutrients is influenced by soil acidity, it is essential that accurate pH measurements be made. Soil pH can be adjusted by the use of chemicals known as soil ameliorants. These include lime (to raise pH) and sulfate (to lower pH). However, the soil will tend to buffer the effect of these chemicals and so calculation of the amounts required is often difficult. The general rule is to apply small amounts until the required result is obtained - better too little than too much! When lime is added to break up hard clay soils, it will also raise the pH of the soil (i.e.: make it more alkaline). Addition of organic matter (eg: manure or compost), which contains weak acids, will cause the pH to drop. If fresh manure is used, it can cause a drastic drop in pH. Sulfate of ammonia will also cause pH to drop. Adding Acidic Materials to lower soil pH Sometimes it is necessary to lower the soil pH to provide the ideal growing conditions for particular plants. To try and alter soils with a higher pH than 7.5 can become quite expensive, and it is often best to simply grow plants that suit the alkaline conditions, or to slightly reduce the pH, rather than to try for major reductions in pH. This can be achieved on a large scale by the use of acidifying fertilizers, such as Sulfate of Ammonia and Superphosphate, or by the regular additions of organic matter, in particular manures. These will generally take several years to be effective. On a much smaller scale try the following: • Adding sulphur - Sulphur is oxidised into sulphuric acid by soil micro-organisms. This acid reacts with calcium carbonate in the soil to form gypsum, which has a pH close to neutral. The conversion of the alkaline calcium carbonate to gypsum therefore reduces soil pH. For soils that are neutral to slightly alkaline use from 25 grams for sands, to 100
114
grams for clays, of sulphur per m2 to lower the pH in the top 10cm of soil to around pH 6.0-6.5. This is equivalent to 250Kg of sulphur per hectare for sands, and 1000kg of sulphur for clays per hectare. To achieve greater reductions would necessitate quite extensive applications of sulphur, which would be very expensive. For quickest results mix the sulphur into the soil rather than spreading it on the soil surface. • Adding material such as peat which has considerable acidifying abilities. One cubic metre of peat has an equivalent acidifying effect to about 320-640 grams of sulphur. To lower the pH one point in the top 10cm of soil, one cubic metre of peat, incorporated into the soil will be effective over an area of about 3.25 m2 for clay soils ranging up to about 13 m2 for sandy soils. • Ferrous sulphate can be used at a rate of around 50-150 gm per m2. Diluted solutions of Iron sulphate or Phosphoric Acid can also be used. • Adding Gypsum - gypsum is commonly applied to hard packed or poorly structured clay soils. It has the ability to cause clay particles to aggregate together in small crumbs (or peds), thereby improving structure. It is also used to reclaim saline soils with high sodium levels (known as sodic soils). Gypsum contains around 23-25% Calcium and about 15% sulphur. It will not affect soil pH to any great extent. Rates of up to 2 tonnes per hectare are used to treat hard setting cereal growing soils, and up to 10 tonne per hectare to reclaim saline-sodic clay soils. NOTE: The previous treatments require moist soil conditions over several months to have a noticeable effect. It is important not to expect immediate results.
5.8 Water and Irrigation Water is essential to plant growth and is often the major limitation to productivity. Irrigation is now playing a more important role in horticulture than ever before. However, depending on the climate, the value of the crop, the value of the land and its suitability for irrigation, the cost, reliability and quality of the water supply, irrigation may or may not be possible or feasible. Irrigation may enable a crop to be grown in a dry climate where it would not otherwise be possible, or it may supplement the existing rainfall and improve yields by extending the growth period of the crop or by ensuring there is adequate moisture during critical periods when the crop is growing most rapidly. The value of irrigation can vary greatly from year to year depending on the distribution of rainfall during the growth season. Irrigation at appropriate times may also improve the quality of the product. Infiltration - this refers to process of water entry into the soil. It is influenced by: a. Soil type and soil texture. Sandy soils generally have higher long term water penetration rates than clayey soils. b. The condition of the surface soil. Water will enter faster if the soil surface is friable and open or is extensively and deeply cracked. Compacted or crusted soil with few cracks reduces infiltration. c. The stability of the surface soil. Low water stability means that the soil crumbs do not stay together when wetted. Low water stability results in slow water penetration unless
115
the soil is sandy. Also, it often results in the formation of a surface crust as the soil dries which will reduce infiltration at the next irrigation. d. Depth of soil above an impermeable layer. The soil may consist of light loamy topsoil over a clayey subsoil or bedrock. In this case, water up over the impermeable layer reduces water penetration. Internal Drainage - poor internal drainage can result in temporary waterlogging and loss of productivity and will eventually cause permanent waterlogging and high salinity levels if irrigated. Conversely, soils with excessive drainage are undesirable because of the large amount of irrigation water necessary to keep them moist. Thus a slowly permeable clay layer at a depth of one metre is desirable. In order to determine the physical aspects which make a soil suitable for irrigation, one needs knowledge of soil composition, texture, structure and the moisture characteristics of soils.
When to Irrigate Knowing when to water is extremely important for healthy plant growth. Over and under watering can be equally detrimental. Under-watered plants will exhibit the following symptoms: • leaves wilt - especially new growth • leaves turn yellow • leaves burn and sometimes drop off the plant • stunted growth, poor flower and fruit set – typical symptom of long-tem water deprivation Over watered plants will appear: • leggy, brittle stemmed and have lush, or even rank, new growth • flowering will be reduced at the expense of leaf and stem growth • general plant health will be reduced as soil nutrients are leached from the soil • disease problems will increase, particularly root and leaf fungus Observing stress symptoms should be a last resort in deciding when to water. A simple test that involves simply feeling a sample of soil can indicate soil moisture levels. The sample should be taken from the root zone of the plant:
Scheduling Irrigation Before scheduling irrigation you need to know: • precipitation rate of the system • infiltration rate of the soil • available water held in the soil per cm of soil depth • average daily evaporation • root depth The length of time you operate a sprinkler station for will depend upon: • the rate of water delivered by the system (this is known as the precipitation rate) • the rate at which water is absorbed into the soil (known as the infiltration rate)
Tensiometer A field tensiometer can be used to determine when irrigation is required by monitoring the soil moisture content. The tensiometer is used to gauge soil moisture characteristics. A vacuum gauge alerts the user as to when watering is needed, using predetermined calculations particular to the soil type. Clay soils may cause problems as they shrink around the tensiometer on drying. The use of tensiometers is restricted to high soil moisture conditions.
116
Important Elements The zone between wilting point and field capacity is important in irrigation. The aim is to keep moisture levels within this zone. It has been found generally that plants take most of their requirements from the upper half of the root zone and as a consequence only about half of the available water is used. Irrigation is therefore generally required when this approximately half of the available water is used up. The amount of water to be applied to a crop is therefore half of the available water in the root zone of the crop when the soil is at field capacity. Irrigation applications are timed according to how quickly plants use the available moisture and are generally dependant on climatic conditions and the availability of nutrients. The rate at which water is supplied by irrigation is also important and is governed by soil infiltration rates, or the rate at which water will pass into the soil. If water is supplied at a rate greater than the ground can absorb it; then runoff may occur and water may be wasted and be lost to the plants. The following table gives an indication of infiltration rates for some soils. Infiltration refers to how quickly water enters the soil:
Soil Type Infiltration Rate
Coarse sand 2500 mm/hr
Sandy loam 20-100 mm/hr
Loam 10-20 mm/hr
Silty loam 5-10 mm/hr
Clay loam 1-5 mm/hr
The ideal situation is where application rates are equal to infiltration rates. Infiltration rates can also be affected greatly by compaction which causes reduction in pore space and hence space available for water and its passage. Compaction becomes very important when designing irrigation systems for areas that are likely to suffer from a lot of traffic such as bowling greens, golf tees and popular lawn areas. Compacted soils are likely to have infiltration rates as low as 5-10 mm/hr. Measures that may have an effect on increasing infiltration rates such as coring of bowling greens should also be considered when irrigating and application rates adjusted accordingly. All plants need water to grow, and to survive. The amount of water needed however, will vary from plant to plant. A plant can suffer from a lack of water. A plant can also suffer from an excessive amount of water. When you water a plant it is important to strike that delicate balance between too little and too much. Over-watering can be just as bad as under-watering. The two main things which affect how much water a plant needs are: • The variety of the plant. Some types of plants have the ability to retain water within their tissues for later use. Other plants are unable to do this. • The environment in which the plant is growing. If there is plenty of water available around the plant, it is unlikely tend to remain more moist than exposed, windy, sunny situations.
117
Period of Watering
• In sandy soils you can apply a lot of water quickly and it will be absorbed. • In heavy clay soils you must water slowly over a long period (heavy applications will not soak in, and a lot will be lost as run off). • Deep rooted plants such as trees should be watered slowly over a long period, so as to wet the soil to a great depth. • Deep rooted plants can be watered less often. • Shallow rooted plants such as annual flowers and vegetables need frequent watering, but of a shorter duration at each watering. Watering lightly and often is undesirable in most situations. A light watering will never penetrate the soil much below the surface. If only the very surface is wet, it is easy for the soil to dry out quickly through loss to the air above. When the deeper soil remains drier than the surface, plant roots will tend to remain near the surface, making the plant less able to extract water from the deeper sub soil when the surface dries rapidly in hot weather. The best way to wet the soil deeply is with a cyclic watering method as follows: Water Extraction by Roots
In uniform soil, as a general rule, more root development occurs in the upper levels compared to lower levels. The extraction pattern of moisture from soil by plant roots is generally: 1st quarter depth of roots - 40% 2nd quarter depth of roots - 30% 3rd quarter depth of roots - 20% Deepest quarter depth of roots -10%
Irrigation Types Flood Irrigation This type of irrigation has been used in extensively in orchards in the past. This method wastes water, but once set up is inexpensive to operate, outside of the cost of water (ie. low equipment and labour costs). Flooding does not get the foliage of the plant wet. Flooding is thorough, wetting all parts of the ground. However overuse can raise the water table and encourage salinity. Sprinkler Irrigation Overhead sprinklers can be used to protect plants from frost, as well as to provide water. Foliage can stop even distribution of water to some parts of the ground. Wet fruit and vegetables can be more susceptible to disease and leaves may burn if they are sprayed in direct sunlight. Generally, sprinklers are expensive to install and need high pressure (often a pump) to operate. This can be a very inefficient form of watering as wind can displace and evapourate water. Drip Irrigation (Trickle) Drip irrigation operates on low pressure and directs water to exactly where it is required, and overall uses less water than sprinklers or flood irrigation. Although the design of systems varies greatly, the basic components of all trickle systems include an automatic controlling device, a pressure regulator (to ensure water pressure is even between droppers), filter, control valves, and drippers.
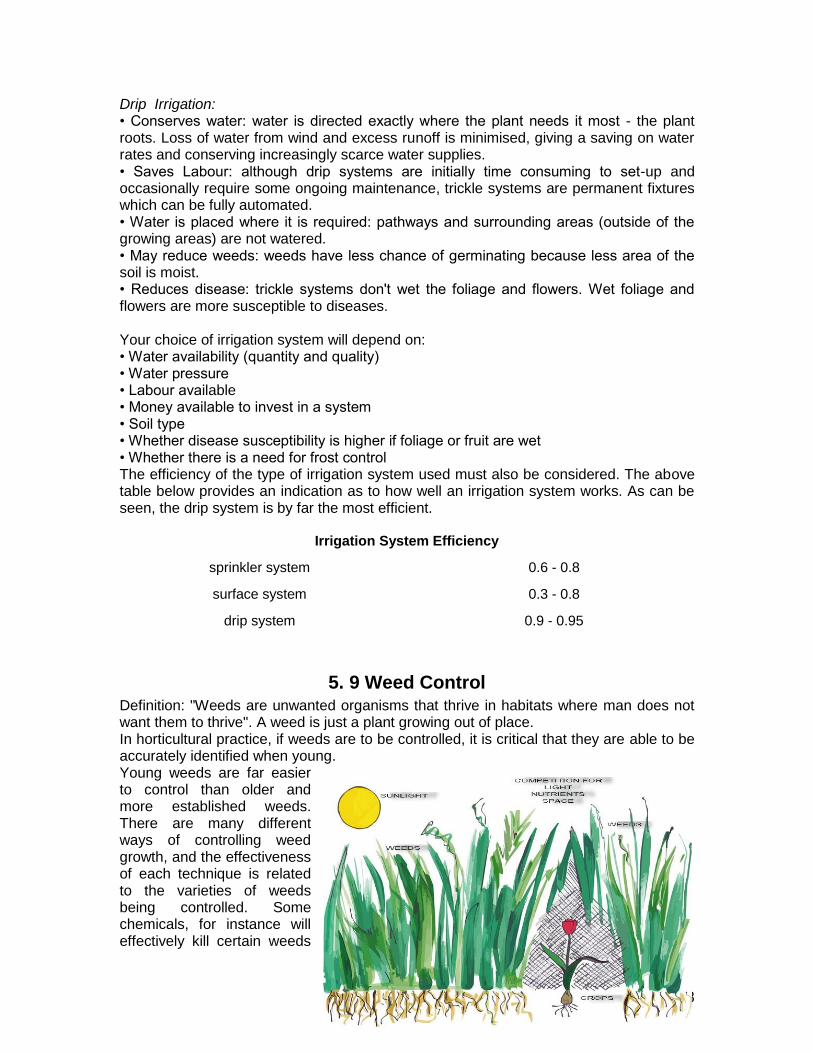
118
Drip Irrigation: • Conserves water: water is directed exactly where the plant needs it most - the plant roots. Loss of water from wind and excess runoff is minimised, giving a saving on water rates and conserving increasingly scarce water supplies. • Saves Labour: although drip systems are initially time consuming to set-up and occasionally require some ongoing maintenance, trickle systems are permanent fixtures which can be fully automated. • Water is placed where it is required: pathways and surrounding areas (outside of the growing areas) are not watered. • May reduce weeds: weeds have less chance of germinating because less area of the soil is moist. • Reduces disease: trickle systems don't wet the foliage and flowers. Wet foliage and flowers are more susceptible to diseases. Your choice of irrigation system will depend on: • Water availability (quantity and quality) • Water pressure • Labour available • Money available to invest in a system • Soil type • Whether disease susceptibility is higher if foliage or fruit are wet • Whether there is a need for frost control The efficiency of the type of irrigation system used must also be considered. The above table below provides an indication as to how well an irrigation system works. As can be seen, the drip system is by far the most efficient.
Irrigation System Efficiency
sprinkler system 0.6 - 0.8
surface system 0.3 - 0.8
drip system 0.9 - 0.95
5. 9 Weed Control Definition: "Weeds are unwanted organisms that thrive in habitats where man does not want them to thrive". A weed is just a plant growing out of place. In horticultural practice, if weeds are to be controlled, it is critical that they are able to be accurately identified when young. Young weeds are far easier to control than older and more established weeds. There are many different ways of controlling weed growth, and the effectiveness of each technique is related to the varieties of weeds being controlled. Some chemicals, for instance will effectively kill certain weeds
119
when they are in the early stages of growth, but will not control other types of weeds. You may need to be able to distinguish between types of weeds to determine whether the chemical will or won't work.
As adult plants weeds are much easier to distinguish one from another. The plants become different sizes and shapes, the leaf colours vary and the flowers which appear also vary. Young weed plants however are all the same size, frequently have similar coloured foliage and don't have any flowers to help you distinguish them one from another. When weed seedlings appear in a young crop of flowers it can be difficult to tell the crop from the weeds.
Preventative Measures
Although it is possible to apply several preventative control measures at the same time, how effective these measures are is determined by the weed species, and the environmental conditions that you are dealing with. Some preventative measures however, are very effective in controlling a range of weeds and these are the most regularly used: • Prevention and exclusion– avoid the introduction of new weed species or the spread of a new species accidentally introduced, by sourcing uncontaminated inputs as far as possible ie. hay, straw, manures, or contaminated crop seed. Weed seeds are also introduced through tools, machinery, animals or from neighbouring properties – monitor fence lines and clean machinery and tools to help prevent introduction and spread. Prevent spread of seed by eliminating them before seed dispersal. • Crop Rotation – can be a very efficient weed control method. At each rotation the growing conditions change – this in turn interrupts the conditions in which the weeds are living and helps to inhibit their growth and spread. • Cover crops – competes with weeds for nutrition, light and water and also becomes part of the crop rotation as outlined before. • Timing of seed sowing and spacing – time planting or sowing to be optimal to the crop ie. at a time when the plants will grow quickly. Dense spacing helps to block out weed growth - when there is a chance of high weed populations recurring. • Fertilising programs – use a balanced fertilizer program so that plants grow quickly to out-compete weeds. • Soil health - weeds are much more of a problem if your soil is infertile, poorly structured, or is regularly disturbed in some manner, such as by excessive cultivation. Keep your soil in good condition (eg. fertile, properly drained and friable) and your plants will compete strongly with weeds. Weed Control
Four Main Methods of Weed Control: • hand weeding • mechanical weeding • chemical control • biological control
Hand Weeding Probably the most effective, certainly the most expensive in terms of time required. Advantages:
120
• safe; no poison residues • control of weeds is complete • other work can be carried out at the same time • no capital outlay • weather doesn't stop the work being done Disadvantages • very costly • time consuming • no residual control
Mechanical Weeding Put simply, the thin layer of soil at the earth's surface is essential for maintaining life. If soil is lost or degraded, then the potential of an area to support life, both plant and animal is greatly reduced. In sustainable agriculture terms, maintaining, or even hopefully improving the soils you farm is vital. It is important to understand that soil is not the property of the land owner, the lease holder or the renter of the site. It is the property of everyone, now and in the future. It may take many thousands of years for a soil to form, but only a few years for it to be degraded, or lost due to poor management practices. For this reason it is critical that the techniques we use to manage our soils will maintain them in a manner that ensures that they are at least as productive for future generations as they are now, and hopefully are even improved. Here man is replaced by a machine; generally either cultivation or mowing (two methods not mentioned elsewhere are burning and flooding). Mechanical control is cheaper but less complete than hand weeding. Sometimes mechanical and hand weeding can be used together. Advantages: • takes less time than hand weeding • costs less than hand weeding • can be used to also add fertilizer to soil • can assist with water conservation Disadvantages: • degree of control is influenced by weather (if wet it is not so effective) • no residual control • can damage desirable plants Mowing can be used to prevent seeds forming on weeds and also deplete reserves built up in weeds.
Chemical Control Chemical methods: agricultural chemicals are often controversial and can be dangerous if not handled properly. If you are careful and if you follow all of the safety rules and the instructions on the package, chemical control will usually give you better results than other methods. Before using chemicals to control pests and diseases, be sure you know what the problem is and that you have the right chemical to control that problem. Chemical weedicides can be categorised according to the following differences: • ‘knockdown’ or ‘residual’ • ‘contact’ or ‘systemic’ • ‘specific’ or ‘broad-spectrum’ Knockdown and residual herbicides
121
Knockdown herbicides kill plants that are actually growing but do not persist in the soil to kill future generations of plants. Residual herbicides remain in the soil and kill seedlings as they germinate subsequent to the herbicide application. Contact and systemic herbicides Contact herbicides kill the plant on contact. The herbicide must actually come in contact with a plant part in order to kill that part. These herbicides do not actively kill roots and some other plant parts, so effective weed kills can only be achieved in certain species at certain stages of growth. Systemic herbicides are absorbed by the plant and moved around within the plant’s system, from where they kill the plant. Specific and broad-spectrum herbicides Specific herbicides kill plants from particular groups (for example they might only affect broadleaved plants). Broad-spectrum herbicides kill a wide range of plants. Herbicides of many different types can be used to control weeds in many different ways: • Pre-emergent weedicide attacks and kills the weed just as it emerges from the seed, without affecting the desirable plants. • Post-emergent weedicide normally attacks and kills the young weed after germination of the seed (often the affect on older weeds is nil). • Knockdown Sprays will kill everything (also known as total weedicide). • Residual Chemicals remain active in the soil. They keep on killing for a long time after they are first applied. • Non Residual Chemicals kill when first applied but very quickly decompose into harmless substances. Using Chemicals Advantages and Disadvantages: Advantages: • complete control (if used properly) • some chemicals have residual control • less demand on labour than other methods • costs can be far less • reduces soil compaction problems through less soil disturbance • no chance of physical damage to plants Disadvantages: • can get side effects on desirable plants • soil type and climate can affect how some herbicides perform • can get build up of resistant weeds • initial expense for spray equipment can be significant
Natural Methods There are several ways of controlling problems without using chemicals, as outlined below: a. Hygiene: destroy diseased plants or diseased parts, as soon as detected (usually by burning). Use clean tools (wash them after use). Use clean pots. Do not re-use old soil. Remove pests by hand on a regular basis. b. Resistant Plants: grow varieties which are less likely to be attacked by pests or diseases. c. Solarisation before planting: pin down a clear plastic sheet over an area you are going to plant in. Leave it for a week or two of warm sunny days. The heat generated under the plastic will kill many of the pest and disease organisms in the soil. This is only affective in warmer climates.
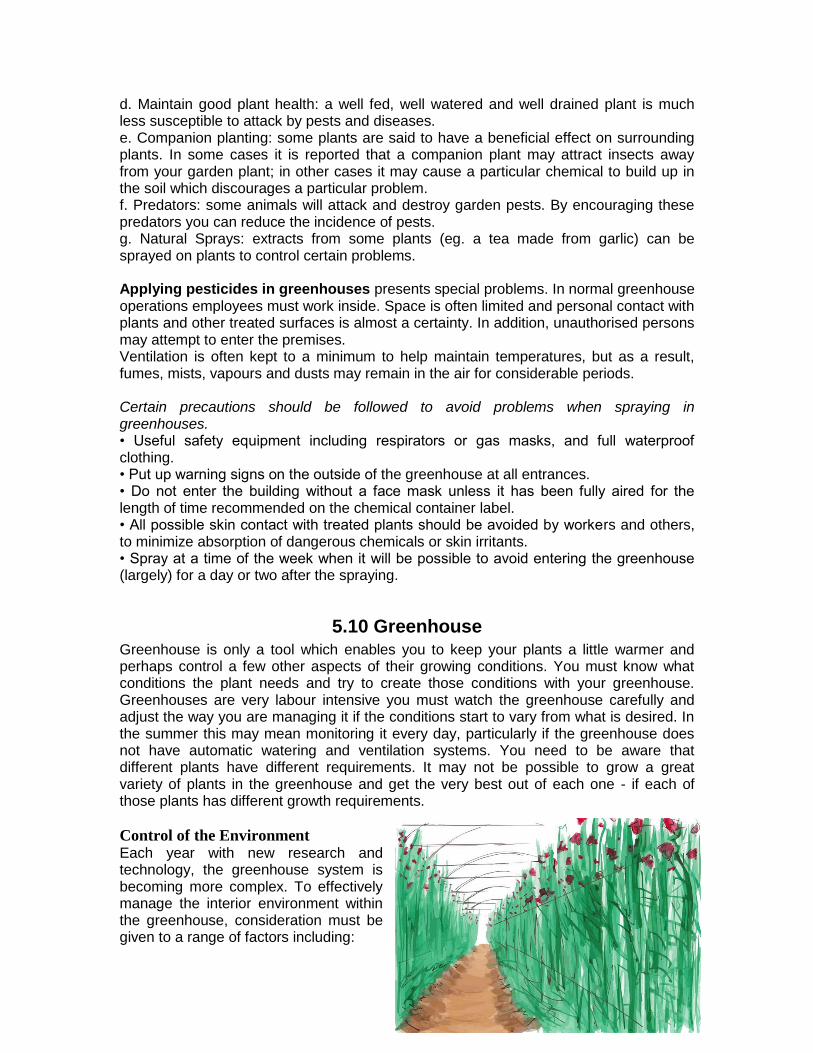
122
d. Maintain good plant health: a well fed, well watered and well drained plant is much less susceptible to attack by pests and diseases. e. Companion planting: some plants are said to have a beneficial effect on surrounding plants. In some cases it is reported that a companion plant may attract insects away from your garden plant; in other cases it may cause a particular chemical to build up in the soil which discourages a particular problem. f. Predators: some animals will attack and destroy garden pests. By encouraging these predators you can reduce the incidence of pests. g. Natural Sprays: extracts from some plants (eg. a tea made from garlic) can be sprayed on plants to control certain problems. Applying pesticides in greenhouses presents special problems. In normal greenhouse operations employees must work inside. Space is often limited and personal contact with plants and other treated surfaces is almost a certainty. In addition, unauthorised persons may attempt to enter the premises. Ventilation is often kept to a minimum to help maintain temperatures, but as a result, fumes, mists, vapours and dusts may remain in the air for considerable periods. Certain precautions should be followed to avoid problems when spraying in greenhouses. • Useful safety equipment including respirators or gas masks, and full waterproof clothing. • Put up warning signs on the outside of the greenhouse at all entrances. • Do not enter the building without a face mask unless it has been fully aired for the length of time recommended on the chemical container label. • All possible skin contact with treated plants should be avoided by workers and others, to minimize absorption of dangerous chemicals or skin irritants. • Spray at a time of the week when it will be possible to avoid entering the greenhouse (largely) for a day or two after the spraying.
5.10 Greenhouse Greenhouse is only a tool which enables you to keep your plants a little warmer and perhaps control a few other aspects of their growing conditions. You must know what conditions the plant needs and try to create those conditions with your greenhouse. Greenhouses are very labour intensive you must watch the greenhouse carefully and adjust the way you are managing it if the conditions start to vary from what is desired. In the summer this may mean monitoring it every day, particularly if the greenhouse does not have automatic watering and ventilation systems. You need to be aware that different plants have different requirements. It may not be possible to grow a great variety of plants in the greenhouse and get the very best out of each one - if each of those plants has different growth requirements.
Control of the Environment Each year with new research and technology, the greenhouse system is becoming more complex. To effectively manage the interior environment within the greenhouse, consideration must be given to a range of factors including:
123
o temperature o irrigation o shading -both natural and with blinds/curtains o light-including supplemented light if needed o levels of CO2 o mist/fogging
Sophisticated monitoring and control systems such as analogue controls, thermostats and computerised environmental management equipment are often used in large set-ups to enable the grower to accomplish the monitoring process. Computer controlled equipment is now available to manage the greenhouse environment. The computers are capable of delivering a 15 to 25% saving in costs and reduce labour considerably. They are able to control temperature, humidity, light intensity, application of black cloth shade, light reduction as needed, ventilation fans and irrigation. Some of the advantages are: Computer controlled environments can control the temperature to within one-tenth of a degree where manual control is at best within 2-3 degrees. They also do the job gently which puts less ‘load’ on the equipment, rather than the abrupt changes from manual operation. It works 24 hours a day, 7 days a week. It will deliver the most cost-efficient control of your heating/ventilating system every minute of the day and night. Thermostats either on-off or proportioning are inexpensive and easy to install. On-off thermostats control fans, heaters and vents as temperatures change. Proportioning thermostats provide continuous control of systems with changes in temperature. Analogue controls use electronic sensors that enable the heating and cooling systems to be integrated giving greater environmental control and performance then just thermostats alone. Computerised controls use microprocessors to make complex evaluations from sensors placed throughout the greenhouse. Computerised environmental management systems are the most sophisticated, flexible and accurate way to control the greenhouse environment. All the equipment throughout the system is tied together allowing unlimited environmental control options. The greenhouse is divided into zones each zone has an array of sensors that feed information back to the computer which then analyses and changes settings according to the environmental conditions. These systems are becoming popular with large producers. Link to external weather station – sensors strategically placed within the structure and linked to external computers that are programmed to activate to establish optimal balance of growing conditions can manipulate all environmental factors. The measurements and adjustments are made to maintain growth at the fullest potential, without unnecessary expenditure of energy. The new computer control systems are manually programmed, which allows the grower to alter growing parameters to accommodate a new crop or incorporate new information.
124
Ability of systems to record data - these new computer controlled systems, known as ‘intelligent environmental controllers’ also record data, including temperature, light intensity, carbon dioxide concentrations and humidity. The adjustments are also recorded so the grower can ensure growing conditions are maintained at optimum levels.
Measurement of Environmental Factors Growing Media Soil used in greenhouses does not usually contain soil. It is actually a soil less mix containing equal parts peat moss or composted bark fines, vermiculite and washed river sand. The growing media must serve 4 basic functions, provide water, supply nutrients, provide gas exchange to and from the roots and provide support for the plant. Preferred properties of a growing media are a high percentage of organic matter, which will not disappear during the life of the crop, a pH 5.5 – 6.0 for most crops and at least 15% by volume of air and a bulk density heavy enough to be able to support the plant. Sufficient availability of all macro and micronutrients the plants require.
Temperature of Air Greenhouses require cooling during the summer months. Most locations experience temperatures that are detrimental to plants during summer. Temperatures inside the greenhouse are often 11 degrees Celsius higher than outside. Adverse effects on plants from excessive heat include reduction of flower size, delays in flowering and loss of stem length. Most plants prefer the air temperature between 15 – 24 degrees Celsius. Maintain a constant day temperature 3-6 degrees C above the daily minimum and allow a 6 degree C fall at night. Summer cooling requires large volumes of air be brought into the greenhouse and pass through the entire plant zone. Air conditioners are not recommended, as the air is very dry and unsuitable except for the production of mushrooms. • A cold greenhouse – unheated except by the sun temperatures can fall to within 5 degree C of outside temperatures it allows the grower to extend the growing season by about 4 weeks (earlier crops) but is not suited to frost sensitive plants • Cool greenhouse conditions with a minimum temperature of around 7 degrees C extend the growing season by around 8 weeks and is suited to frost sensitive plants • Warm greenhouse environment does not drop below 13 degrees C warm climate plants can be grown • Hothouse minimum temperature of 18 degrees C may be too warm for some plants
Moisture Misting If intermittent sprays of water mist can be applied to the top of cuttings, then a temperature differential will develop between the root and leaf zones. If the root zone can be kept warmer than the leaf zone there will be a tendency towards greater growth in the root zone. In other words the warmest part of the plant will grow the fastest. In addition the increased humidity created by the misting reduces water loss from the

125
cutting. Misting systems generally have a solenoid valve between the water source and the misting system. To make sure that cuttings will never dry out this will remain open. When electricity is applied the valve is closed and water is shut off. The solenoid valves are generally controlled by either: a) Simple timers which will turn the system on to give a short pulse of water (eg. for 15 seconds) at regular intervals (eg. 2-5 minutes); intervals can vary according to season, local conditions, type of plants grown, etc. This type of control is very dependable and can be used to control a lot of individual systems at the one time. Their major disadvantage is that they do not respond to fluctuations in local environmental conditions (eg. temperature, humidity, light intensity. etc.). b) By some sort of sensor such as a pair of carbon electrodes set in an ebonite block (known as electronic leaf or carbon block sensor) placed under the mist with the cuttings. As the top of the block dries, the current between the sensors is broken. This causes a solenoid valve to open releasing water into the misting system. The mist then settles on the sensor connecting the electric circuit, which in turn closes the solenoid valve cutting off the water supply. Another common sensor is the screen balance (or balance arm) control, which has a small stainless steel screen on one end of a balance arm or level to which is attached a mercury switch. When the mist is on water lands on the screen causing it to drop, this trips the mercury switch turning off a solenoid causing it to close. When water evapourates off the screen it raises causing the mercury switch to connect turning on the solenoid and so releasing water. The screen balance should be placed in a position where it will not be affected by wind. Salt deposits and algal growth can affect the balance of the screen, so a regular cleaning program should be carried out. This type of sensor is commonly used in areas where there are considerable fluctuations in conditions during the day. c) Computer controlled systems that monitor a wide range of environmental variables are increasingly being used in some countries to control misting. The mist droplet size should ideally be in the vicinity of 50 to 100micrometres diameter. The type of spray nozzle selected will govern this. Fog Fog systems are a comparatively new development in nursery propagation that has been found by many growers to give extremely good results in striking cuttings. They are used as an alternative to the more traditional method of intermittent misting to provide the cuttings with a humid environment. The advantage of a fog system is that it still creates the humid environment, which is necessary to prevent the cuttings from drying out, but eliminates the water droplets that sit on the leaves in mist systems. Droplet sizes are less than 20micrometres and they remain airborne long enough for evapouration to occur so that the water is held suspended in the air as a vapour, unlike the larger drops from misting systems which fall out of suspension onto leaves, etc. Humidity levels will be in the vicinity of 90-100%. The absence of free water from the leaves results in: • reduced fungal problems • reduced leaching of leaf nutrients • improved aeration of the propagation medium Cuttings propagated by this method have given more successful strike rates, and are healthier and faster to develop roots. They are not designed as irrigation systems; so extra watering may be required to prevent the media from drying out. Fogging systems

126
are a lot more expensive than misting systems to set up, but has been worthwhile for many nurseries due to improved strike rates, and reduced times to achieve a strike.
Light Light is the source of energy for plants. Light energy combined with carbon dioxide and water commences the process of photosynthesis. Therefore, it is important to ensure the maximum light intensity possible is provided in autumn through winter to achieve plant growth. The design of the structure and the orientation determine the light intensity. Other factors effecting light include the frame itself, if timber is used for the frame it must be painted white to reflect the light, the covering material, glass transmits up to 89% of light, polyethylene 84% and fibreglass starts high but quickly diminishes as the material hazes from the UV rays. The covering material accumulates dust and grime, which reduce the light intensity by up to 20%. Therefore it is essential, that after the hottest part of the summer, the glass is cleaned. Light Transmission Properties Not all light is useful in photosynthesis. Light is classified according to wavelength (nm) and referred to as quality. Ultraviolet light has a short wavelength below 400nm. In large quantities it is harmful to plants. Glass screens out most of the UV light. Visible or white light occurs between the wavelengths of 40-700nm. Far red light 750nm is at the limit of our visual perception and has an effect on plants other than through photosynthesis. Infrared light is not useful in plant growth or processes. It is the visible spectrums of light that is used in photosynthesis, and that is all growers have to be concerned with. It is therefore important to ensure the highest light intensity possible is available to the plants during the winter months Factors Affecting Light Transmission: Shape and Orientation The shape of the greenhouse will not have a great impact on light transmission. The traditional span roof style has vertical sides but is covered in for the lower one-third to reduce heat loss in winter. This design is most suited to colder temperate climates. Rigid structures with curved panels to the ridge, with louvers in the lower panels are more attractive however they are not suitable for supporting vines and larger growing plants. The most efficient heat traps are the polygon and dome shapes. These are more suited to home use than commercial use as the shape is not ergonomic for working in. They display the plants better and are able to support vines. The tunnel shape covered with a plastic film is the most economical however they are only suitable for low growing vegetables such as lettuce and strawberries. Orientation or the position of the structure in relation to the sun is important. The frame of the structure casts shadows. The length of the shadow depends upon the angle of the sun and the season. The effect is most noticeable in winter when sunlight is often limited. Greenhouses located above the 40th parallel of both hemispheres should be positioned so the long side is facing east-west. This is to optimise the quantity of light that can enter along the long sides during winter. Below this parallel greenhouses should be orientated along a north-south axis as the angle of the sun is much higher. It should be located in the open, not close to trees or other buildings. A planted windbreak is most beneficial in reducing wind swirling around the structure and also acts

127
as a suntrap. However, there should be a minimum of 5 metres from shrub and 10 metres from trees in the windbreaks. The correct orientation is noticeable in winter when maximising sunlight is important. Each degree of heat provided by the sun saves in heating costs, and therefore the correct orientation will provide up to 10 degrees Celsius of free heat.
Carbon Dioxide Enrichment in the Greenhouse Carbon is an essential plant nutrient and is supplied to the plant in the form of atmospheric carbon dioxide. Air normally contains approx. 300ppm of carbon dioxide. This is ample to support normal plant growth In greenhouses, the proportion of carbon dioxide in air can be increased in some situations in order to increase the rate of plant growth, hence shortening the growing period from planting to flowering. Given that photosynthesis occurs in the presence of light, the increase in carbon dioxide is only necessary during the day time. Carbon dioxide is, in some instances, supplied from gas cylinders to enrich the greenhouse environment. It is used during daylight hours in the process of photosynthesis, but at times, particularly during winter, when greenhouses may be closed up tight to reduce heat loss, then carbon-dioxide levels may be deficient. Plant growth is then considerably reduced. To overcome this problem, carbon dioxide is added to the greenhouse atmosphere during daylight hours. The most common method of addition is through the burning of kerosene, LP gas, or natural gas in special burners inside the greenhouse. Concentrations of 500 to 1500 ppm will help accelerate growth of most crops, although there will be differences in response between varieties. Alternatively bottled carbon dioxide can be used. This is usually more expensive than using a combustion heater, but has the advantage of not producing heat, which is not always desired, or not producing other gases and/or smoky fumes which can be detrimental to plant growth or settle on covering materials reducing light transmission. Fertilising and irrigating programs will correspondingly need to be stepped up to match the increased growth rates. Use of CO2 in plant production is known to do the following: • Carnations - faster crops, production up by 1/3; stems longer • Chrysanthemums - longer and heavier stems; quicker crops • Roses - significant production increases, improved grades, varietal differences, shorter cropping times • Snapdragons - earlier flowering, better quality, heavier stems • Geraniums - more cuttings form stock plants (30% more), cuttings rooted faster, plants from CO2 cuttings were larger, more branching, faster cropping • Bedding Plants - earlier flowering, larger leaves, taller, larger stem diameters, more fresh weight, seedling growth faster. As can be seen, different plants react differently with varying concentrations of CO2 and other external variables. Research is well known to show that level of CO2 reduces the daylight hours in a greenhouse, especially during autumn, winter and spring. Under these circumstances, a
128
limit of CO2 will also result in reduced photosynthesis and ultimately plant growth. Therefore, during these hours, CO2 is best to be added to overcome this limiting factor. For plants that respond to CO2 in early growth phases (eg. Chrysanthemums), it is recommended to stop the treatment in the mature (finishing-off) period. Plants That Respond to CO2 Potted Plants Azaleas, begonias, begonia tuberous, coleus, chrysanthemums, cucumber, cyclamen, geraniums, impatiens, lettuce, poinsettias, tomato, violets Cut Flowers Carnations, chrysanthemums, roses, snapdragons It is important to note that varietal differences occur in plants. Even though one species of plant (or variety) may respond favourable to treatment with CO2, it does not necessarily mean other species or varieties of the same plant will also respond. The level of CO2 used will vary on a number of criteria: • species and variety of plant being treated • stage of plant growth • growing methods and other cultural practices • other external influences (eg. temp, light, other gases, etc) Do not allow the CO2 level to exceed 5000ppm, for safety of humans and to prevent wastage (cost). Sources of Carbon Dioxide: • ventilation (exchanging greenhouse air with fresh outside air) • decomposition of mulches • compressed CO2 gas • dry ice • liquid CO2 • combustion of various fuels (eg. propane, natural gas or kerosene) • If using fossil fuels, it is essential to supply sufficient quantities of oxygen to that noxious gases such as ethylene and sulphur dioxide do not cause deleterious effects to plants. Automation Modern computer sensors can monitor temperatures, humidity, light intensity and CO2 levels. By presetting the computer, vents and injectors will be automatically turned on to maximise growth of the plants in the full range of external temperatures, light levels and climates.
Day-length Manipulation The purpose of day-length manipulation is to control flower growth. Flowers such as chrysanthemums are grown for an initial period under short night conditions to develop a plant of suitable size to support large flowers and tall stems, and then the plants are grown under long night conditions to induce flower growth and development. Short night treatment simply entails turning on the lights in the late afternoon, to extend the day into the evening, or they may be turned on during the night to break the dark period. After a period of short nights and the plant is established, a period of long nights must be introduced to initiate flowering. During winter the nights may be long enough, however, during summer, it will be necessary to cover the plants in late afternoon and remove the
129
cover in the morning. Automatic equipment operated on a timer is available to perform this operation. Energy or shade curtains also named short day curtains are used to manipulate day-length. They are used to trigger flowering in the production of crops such as Kalanchoe and Chrysanthemums. Blackout Some species benefit from short periods of complete darkness or blackout. These blackout periods produce shorter, more compact plants that develop uniform flowering. The older the plant the more readily it will produce flowers. The number of flowers and flower buds on Begonias will be at their peak when day-length is reduced to 10 hours and periods of blackout are implemented. Shading Shading includes the use of roll down blinds, either wooden or plastic slats. If the blinds are fitted on the outside the temperature inside is reduced, however, usually the ventilators cannot be opened. If the blinds are fitted on the inside the internal temperature is not reduced, but the light intensity is. Blinds can be automated to open and close on preset temperatures. Another method is double sheets suspended from the internal roof trusses lengthways. These mechanically controlled systems roll the double layers into very small diameter rolls that minimise the loss of light. The upper layer is a white polyester fabric that reduces light by 45% while the lower polyethylene level permits 90% of the light to pass to the crop. Automatically open and closed energy curtains or shades installed gutter to gutter are used to filter light during the day, trap heat to reduce fuel bills by drawing them before nightfall or exclude excessive heat depending on the outside environmental conditions, are also becoming popular. Another method that is not as practical is to apply a shading paint or a product called Lightening Crystals, which can be sprayed on the roof and which is removable. Insulation Although not as widely practised today an inner lining of transparent plastic sheeting may be used to cut down fuel bills by retaining heat. The lining is attached to the inside of the greenhouse close to the glass leaving a one to two centimetre gap using tape, staples or drawing pins. However this practice can cause condensation as well as cutting out light by about 15 – 18%. Thermal Screens Other methods of reducing the light intensity include thermal screens, which are a dark colour sleeve that fits onto the roof panels. They reduce the amount of Ultra violet light entering the greenhouse. A good computer environmental control system will extend the thermal sheets anytime during the day when the light exceeds a preset level set by the grower.
Light Equipment Light is essential for plant growth. Provided the plant receives the correct amount and quality of light, the plant will continue to thrive.
130
The light spectrum can be separated into its colours, all of which effect plants differently. For example, the blue spectrum is involved in phototropic responses (the bending of plants towards the light source), and green light actually has little effect on plant growth. The intensity of the light source is important, as is the duration. Some plants known as "short-day plants" flower when the days become shorter (night longer), others are known as long-day plants. This is not the rule as some plants flower irrespective of light duration and are known as day-neutral plants. The red/far-red phyto-chrome pigments of light control these flowering responses. Greenhouse structures frequently use lighting to assist growth by supplementing natural light. Plants will respond to the artificial lights as all lamps radiate different qualities of the light spectrum. Types of Lights Lamps used in nurseries are normally one of the following: Incandescent (tungsten filament) These are generally not ideal in nurseries. Among other things the quality of light is poor and they create excessive heat. They have a high proportion of red light and this can facilitate fast stalk growth and bloom at the expense of longevity. Fluorescent (eg. Gro-Lux Fluorescent Lamps). Fluorescent lamps have been useful in propagation areas and with young plants, but are not suitable for plants in the latter stages of production. They increase flowering for a longer duration. High Intensity Discharge (eg. high pressure mercury or metal halide). These are the best for plants in the latter stages of production, before selling and increase thicker stalks.
Artificial Light Artificial light is important for interior plant-scapes, interior hydroponics, or influencing short-day/long-day plants. Greenhouse structures frequently use lighting to assist growth by supplementing natural light.
Greenhouse Irrigation and Nutrition Control The application of water is the operation that accounts for the most loss in crop quality. While it may appear a simple operation, it is if performed correctly, watering at the wrong time or with the wrong volume of water causes irreparable damage to the quality of the crop. Under watering is when water is not applied frequently enough and plants wilt, slowing growth. This results in smaller leaves, shorter stems and a hardened appearance to the plants. Over watering is when water is applied too frequently in small applications. While the new foliage becomes large, it also becomes soft and plants taller. Over watering also affects the soil by reducing the oxygen content resulting in damage to the plant roots. The rule is to water thoroughly, so that water reaches the bottom of the planting media and can drain away. Watering should be commenced prior to the plant displaying symptoms of moisture stress. It takes an experienced grower to be able to determine the most appropriate time to water. However, technology is to the rescue, watering is now computer automated, with sensors placed into the root zone, which activate the watering system as required.
131
Appropriate watering systems are designed to suit the crop. Watering is rarely from overhead sprinklers. Most are from a central pipe with smaller tubes coming off to individual plants. Nutritional fertilisation of greenhouse crops is completely different to field grown crops. Plant growth is forced in suitable conditions, with minimal soil volume. Therefore, fertilizer applications are a high priority if growth is to be maximised. The standard practice is to dissolve high analysis fertilizer, high in Nitrogen and Potassium, into concentrated solutions and proportioned by an injector pump into the water line. Automated irrigation systems then deliver the liquid solution to each plant. However, all 12 essential elements do not need to be delivered on a continual basis. Some of the elements can be supplied prior to planting, mixed into the soil. These elements include Calcium, Magnesium, Phosphorus, Sulphur, Iron, Manganese, Zinc, Copper, Boron and Molybdenum. The N.P.K. for the continued supply through the irrigation system should be in the range of 20-2-20, but this is somewhat dependant on the species of the crop. Plants need both water and oxygen in their root environment. The trick to successful plant growing is often to provide the proper delicate balance between these two things. Too much air usually means too little water, and too much water usually means too little air. In aggregate culture, you should usually mix a well draining medium (eg. gravel) with a water retaining medium (eg. vermiculite to gain the required balance of water retention. In many fruits water constitutes 90% of the total weight. In leaves - 80% In seeds -10% Apart from its part in the composition of plant parts, water is also important for the movement of nutrients into the plant and the movement of waste products out. Everything in a plant moves in a dissolved form. If water isn't constantly replaced a plant's cells lose turgidity and the plant wilts. Water Excess Symptoms: Development of leggy seedling. This usually happens when plants are close together and the soil is warm and moist. This often happens in glasshouses. • Appearance of growth cracks (cracking of tomato fruit, cabbage heads or carrots). • Increasing cell size. • Long internodes (longer gaps between buds on stems). • Bursting cells (if you look under the microscope). • This is usually caused by poor drainage or over watering. • Water excess can lead to stunting, dieback of the top of the plant and in extreme situations death. • There is a greater likelihood of infection of moulds, rots and other fungal diseases in a wet situation. Water Deficiency Symptoms: The first symptom is that the growth rate reduces. Leaves become smaller (though still well coloured). Stems later become slender, flowers and fruit are smaller. In some watery fruits (eg. tomatoes, peaches etc) the plant sometimes draws water from half grown fruit causing the fruit to shrivel. Die back from the leading shoots can occur followed by death in extreme cases.
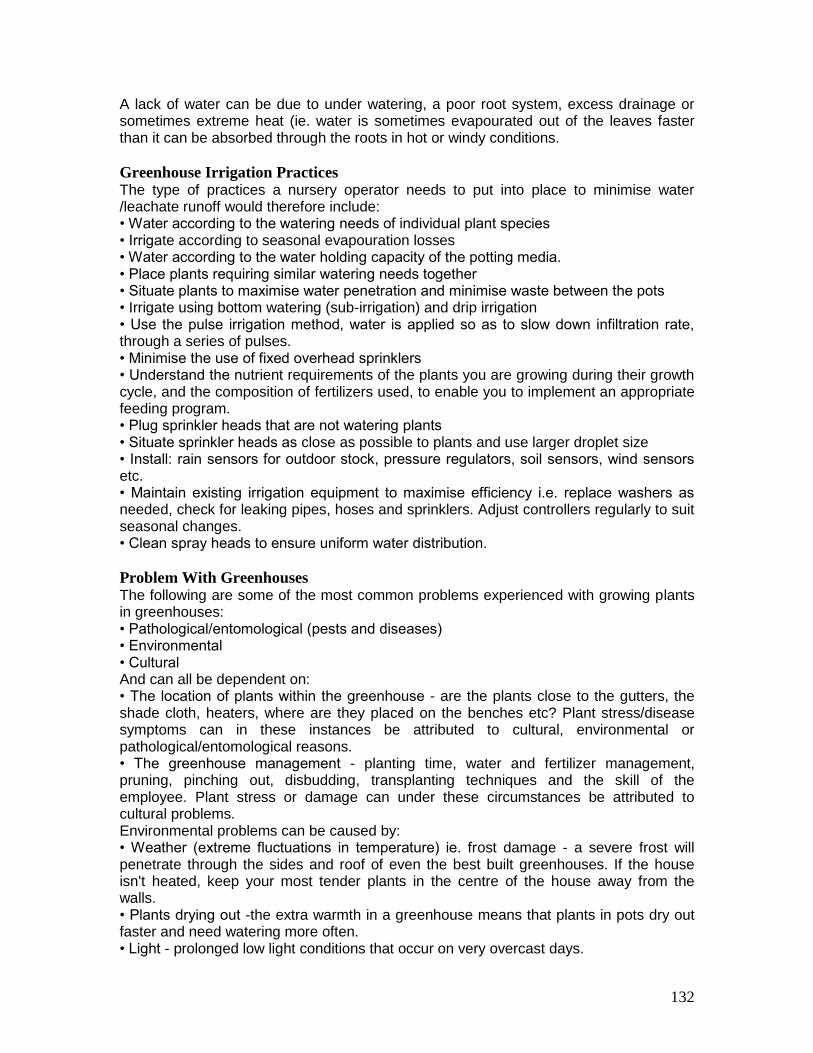
132
A lack of water can be due to under watering, a poor root system, excess drainage or sometimes extreme heat (ie. water is sometimes evapourated out of the leaves faster than it can be absorbed through the roots in hot or windy conditions.
Greenhouse Irrigation Practices
The type of practices a nursery operator needs to put into place to minimise water /leachate runoff would therefore include: • Water according to the watering needs of individual plant species • Irrigate according to seasonal evapouration losses • Water according to the water holding capacity of the potting media. • Place plants requiring similar watering needs together • Situate plants to maximise water penetration and minimise waste between the pots • Irrigate using bottom watering (sub-irrigation) and drip irrigation • Use the pulse irrigation method, water is applied so as to slow down infiltration rate, through a series of pulses. • Minimise the use of fixed overhead sprinklers • Understand the nutrient requirements of the plants you are growing during their growth cycle, and the composition of fertilizers used, to enable you to implement an appropriate feeding program. • Plug sprinkler heads that are not watering plants • Situate sprinkler heads as close as possible to plants and use larger droplet size • Install: rain sensors for outdoor stock, pressure regulators, soil sensors, wind sensors etc. • Maintain existing irrigation equipment to maximise efficiency i.e. replace washers as needed, check for leaking pipes, hoses and sprinklers. Adjust controllers regularly to suit seasonal changes. • Clean spray heads to ensure uniform water distribution.
Problem With Greenhouses The following are some of the most common problems experienced with growing plants in greenhouses: • Pathological/entomological (pests and diseases) • Environmental • Cultural And can all be dependent on: • The location of plants within the greenhouse - are the plants close to the gutters, the shade cloth, heaters, where are they placed on the benches etc? Plant stress/disease symptoms can in these instances be attributed to cultural, environmental or pathological/entomological reasons. • The greenhouse management - planting time, water and fertilizer management, pruning, pinching out, disbudding, transplanting techniques and the skill of the employee. Plant stress or damage can under these circumstances be attributed to cultural problems. Environmental problems can be caused by: • Weather (extreme fluctuations in temperature) ie. frost damage - a severe frost will penetrate through the sides and roof of even the best built greenhouses. If the house isn't heated, keep your most tender plants in the centre of the house away from the walls. • Plants drying out -the extra warmth in a greenhouse means that plants in pots dry out faster and need watering more often. • Light - prolonged low light conditions that occur on very overcast days.
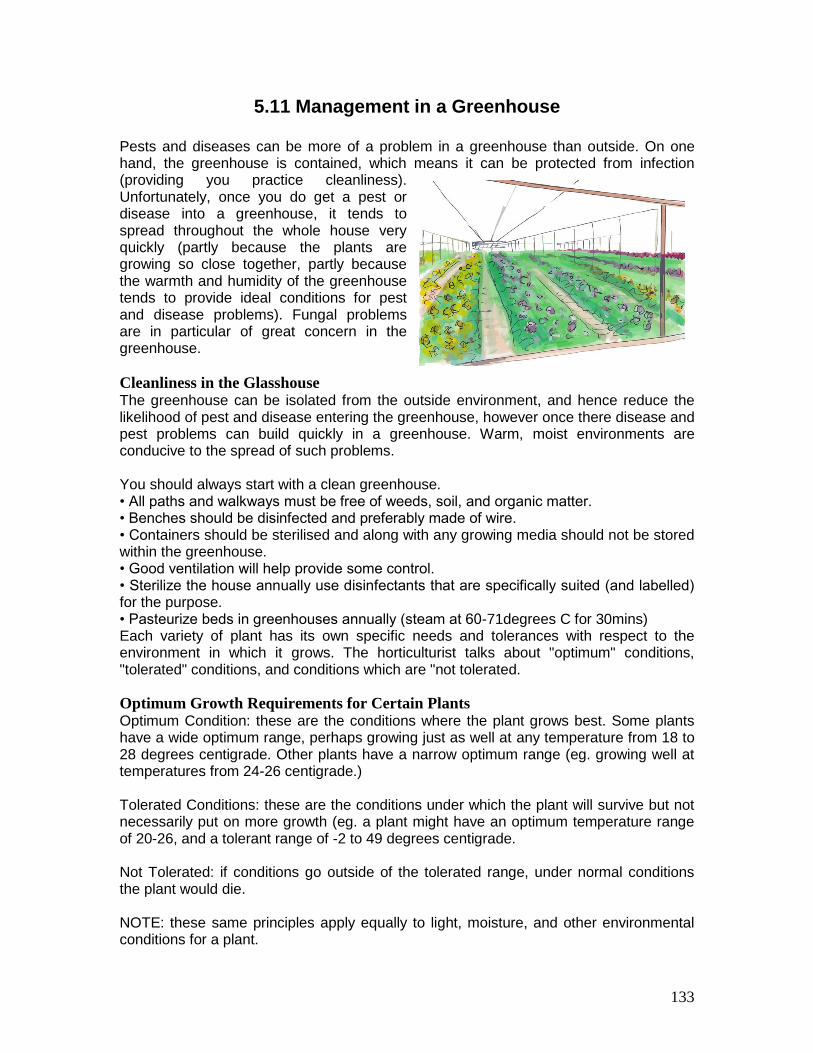
133
5.11 Management in a Greenhouse Pests and diseases can be more of a problem in a greenhouse than outside. On one hand, the greenhouse is contained, which means it can be protected from infection (providing you practice cleanliness). Unfortunately, once you do get a pest or disease into a greenhouse, it tends to spread throughout the whole house very quickly (partly because the plants are growing so close together, partly because the warmth and humidity of the greenhouse tends to provide ideal conditions for pest and disease problems). Fungal problems are in particular of great concern in the greenhouse.
Cleanliness in the Glasshouse The greenhouse can be isolated from the outside environment, and hence reduce the likelihood of pest and disease entering the greenhouse, however once there disease and pest problems can build quickly in a greenhouse. Warm, moist environments are conducive to the spread of such problems. You should always start with a clean greenhouse. • All paths and walkways must be free of weeds, soil, and organic matter. • Benches should be disinfected and preferably made of wire. • Containers should be sterilised and along with any growing media should not be stored within the greenhouse. • Good ventilation will help provide some control. • Sterilize the house annually use disinfectants that are specifically suited (and labelled) for the purpose. • Pasteurize beds in greenhouses annually (steam at 60-71degrees C for 30mins) Each variety of plant has its own specific needs and tolerances with respect to the environment in which it grows. The horticulturist talks about "optimum" conditions, "tolerated" conditions, and conditions which are "not tolerated.
Optimum Growth Requirements for Certain Plants Optimum Condition: these are the conditions where the plant grows best. Some plants have a wide optimum range, perhaps growing just as well at any temperature from 18 to 28 degrees centigrade. Other plants have a narrow optimum range (eg. growing well at temperatures from 24-26 centigrade.) Tolerated Conditions: these are the conditions under which the plant will survive but not necessarily put on more growth (eg. a plant might have an optimum temperature range of 20-26, and a tolerant range of -2 to 49 degrees centigrade. Not Tolerated: if conditions go outside of the tolerated range, under normal conditions the plant would die. NOTE: these same principles apply equally to light, moisture, and other environmental conditions for a plant.
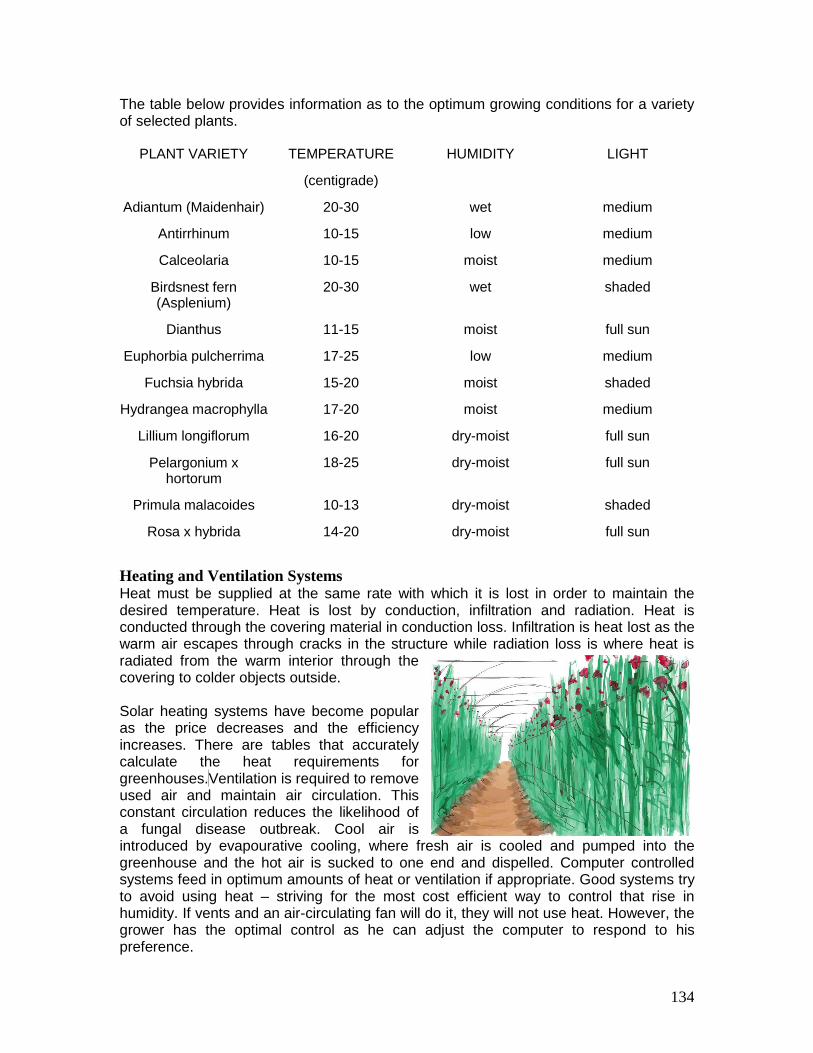
134
The table below provides information as to the optimum growing conditions for a variety of selected plants.
PLANT VARIETY TEMPERATURE
(centigrade)
HUMIDITY LIGHT
Adiantum (Maidenhair) 20-30 wet medium
Antirrhinum 10-15 low medium
Calceolaria 10-15 moist medium
Birdsnest fern (Asplenium)
20-30 wet shaded
Dianthus 11-15 moist full sun
Euphorbia pulcherrima 17-25 low medium
Fuchsia hybrida 15-20 moist shaded
Hydrangea macrophylla 17-20 moist medium
Lillium longiflorum 16-20 dry-moist full sun
Pelargonium x hortorum
18-25 dry-moist full sun
Primula malacoides 10-13 dry-moist shaded
Rosa x hybrida 14-20 dry-moist full sun
Heating and Ventilation Systems Heat must be supplied at the same rate with which it is lost in order to maintain the desired temperature. Heat is lost by conduction, infiltration and radiation. Heat is conducted through the covering material in conduction loss. Infiltration is heat lost as the warm air escapes through cracks in the structure while radiation loss is where heat is radiated from the warm interior through the covering to colder objects outside. Solar heating systems have become popular as the price decreases and the efficiency increases. There are tables that accurately calculate the heat requirements for greenhouses. Ventilation is required to remove used air and maintain air circulation. This constant circulation reduces the likelihood of a fungal disease outbreak. Cool air is introduced by evapourative cooling, where fresh air is cooled and pumped into the greenhouse and the hot air is sucked to one end and dispelled. Computer controlled systems feed in optimum amounts of heat or ventilation if appropriate. Good systems try to avoid using heat – striving for the most cost efficient way to control that rise in humidity. If vents and an air-circulating fan will do it, they will not use heat. However, the grower has the optimal control as he can adjust the computer to respond to his preference.
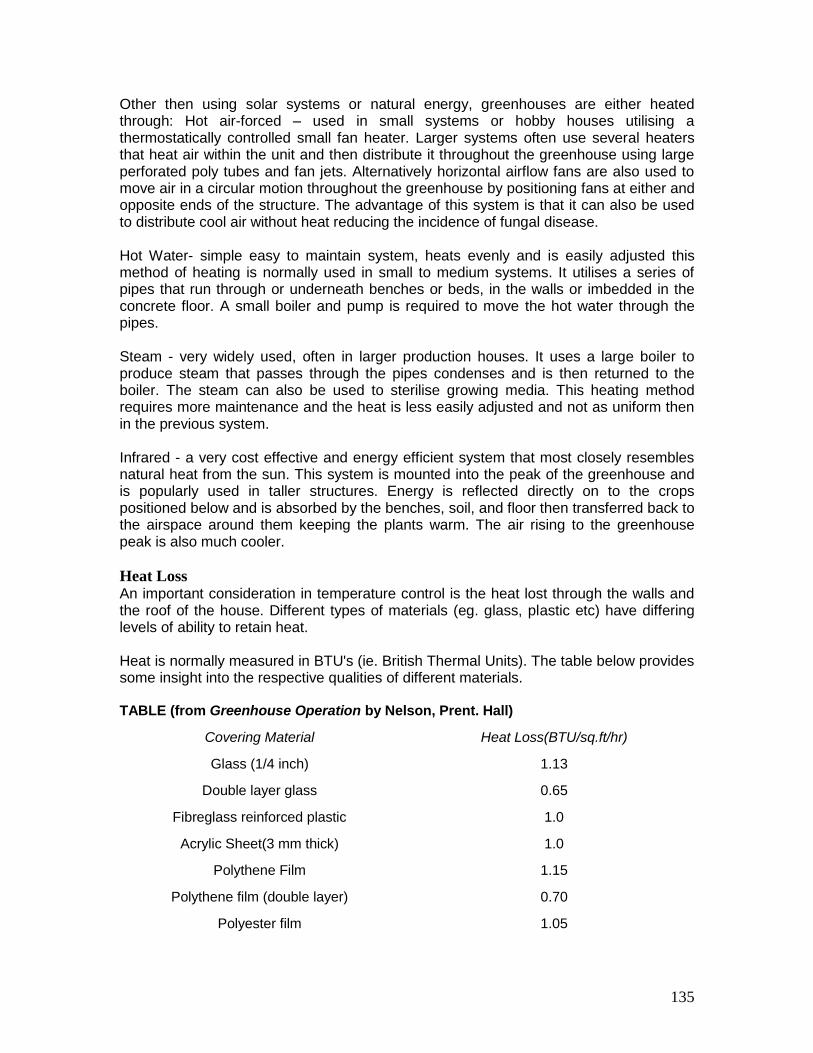
135
Other then using solar systems or natural energy, greenhouses are either heated through: Hot air-forced – used in small systems or hobby houses utilising a thermostatically controlled small fan heater. Larger systems often use several heaters that heat air within the unit and then distribute it throughout the greenhouse using large perforated poly tubes and fan jets. Alternatively horizontal airflow fans are also used to move air in a circular motion throughout the greenhouse by positioning fans at either and opposite ends of the structure. The advantage of this system is that it can also be used to distribute cool air without heat reducing the incidence of fungal disease. Hot Water- simple easy to maintain system, heats evenly and is easily adjusted this method of heating is normally used in small to medium systems. It utilises a series of pipes that run through or underneath benches or beds, in the walls or imbedded in the concrete floor. A small boiler and pump is required to move the hot water through the pipes. Steam - very widely used, often in larger production houses. It uses a large boiler to produce steam that passes through the pipes condenses and is then returned to the boiler. The steam can also be used to sterilise growing media. This heating method requires more maintenance and the heat is less easily adjusted and not as uniform then in the previous system. Infrared - a very cost effective and energy efficient system that most closely resembles natural heat from the sun. This system is mounted into the peak of the greenhouse and is popularly used in taller structures. Energy is reflected directly on to the crops positioned below and is absorbed by the benches, soil, and floor then transferred back to the airspace around them keeping the plants warm. The air rising to the greenhouse peak is also much cooler.
Heat Loss An important consideration in temperature control is the heat lost through the walls and the roof of the house. Different types of materials (eg. glass, plastic etc) have differing levels of ability to retain heat. Heat is normally measured in BTU's (ie. British Thermal Units). The table below provides some insight into the respective qualities of different materials. TABLE (from Greenhouse Operation by Nelson, Prent. Hall)
Covering Material Heat Loss(BTU/sq.ft/hr)
Glass (1/4 inch) 1.13
Double layer glass 0.65
Fibreglass reinforced plastic 1.0
Acrylic Sheet(3 mm thick) 1.0
Polythene Film 1.15
Polythene film (double layer) 0.70
Polyester film 1.05

136
There are two main types of heating systems: • Centralized Heating System Normally a boiler or boilers in one location generate steam or hot water which is piped to one or more greenhouse complexes. This is usually the most expensive to install and may be more expensive to operate. There are side benefits though (eg. steam which is generated can be used to sterilize soil, pots etc). This type of system is only appropriate in large nurseries. • Localized Heating Systems This system uses several individual heaters, normally blowing hot air into the greenhouse. Hot air is often distributed through a plastic tube (or sleeve), 12 to 24 inches diameter which is hung from the roof and has holes cut at calculated intervals for distributions of warm air.
Localized Heaters The main types of localized heaters are described below: Unit Heaters These consist of three parts: 1. Fuel is burnt in the firebox to provide heat at the bottom of the unit (fuel could be gas, oil or something else). 2. Heat rises through a set of thin walled metal tubes or pipes, which heat up. 3. Behind the heated tubes is a fan which blows cold air through the pipes out the other side into the house. Convection Heaters These are cheap to purchase and as such, frequently used by hobbyists and small commercial growers. They differ from unit heaters in that they do not have a built-in heat exchanger. Fuel of almost any type can be combusted in the firebox (eg. wood, coal, gas, oil etc). Hot fumes then pass out of an exhaust pipe which can be placed between rows of plants, above the heater, or wherever you wish. The exhaust pipe should be sufficiently long (or outlets placed far enough way from plants) to ensure dangerously hot air does not come in contact with the plants. A metal stovepipe or insulated ducting is ideal however polythene tubing can be used as well. A pot belly stove or something similar could be used as a convection heater. Electric Heaters In some areas electricity is cheap. If you happen to have cheap electricity, an electric heater may be considered. These generally consist of a heating element and a fan which blows air across the heating element and into the glasshouse. This type of heater can cost as little as 2c per hour to operate, but in some places as much as 15 cents or more. (Costs calculated for operating a 2000 watt heater which would be sufficient to heat a 3m x 4.5 m house.) Radiant Heaters Low energy, infrared radiant heaters have become popular in the USA in recent years. Growers report significant savings on fuel costs.
137
Solar Heaters There are several different types of solar heaters which can be used or adapted for use in greenhouse heating. The components of a solar heater are: • A Collector - different types are possible. They are usually panels heated by direct sunlight. The front is transparent to allow light in the back is black and insulated to stop energy escaping. Light is converted to heat when it is absorbed by the dark surface. • A Heat Store - water and rocks are two of the most common stores. Water can be passed through the collector and returned to a storage tank of water. Air can pass through the collector and return to the storage tank of rocks. • A Heat Exchanger - pipes or tubes can pass through the heat store and out through the greenhouse and back to complete the cycle. A heat exchange fluid or perhaps air can flow through these pipes. A backup heater may be needed to be used in conjunction with a solar system.
Ventilators Ventilation is the exchange of inside air for outside air to control temperature, remove moisture, or replenish carbon dioxide (CO2). Ventilators can be hinged or louvered and manually operated to fully automated, more then one system can be used but care needs to be taken when using two types of systems to ensure that they work correctly. Natural ventilation uses roof vents on the ridge line with side inlet vents in the form of louvers. As the warm air rises on convective currents to the top, cool air is drawn in through the sides. An exhaust fan sized to ensure that the total volume of air in the greenhouse is exchanged each minute during summer, (and around 20 to 30% of one air volume during winter) can be used as a mechanical ventilation method. The fan moves air out of one end of the greenhouse while at the same time outside air is drawn in at the other end through motorized inlet louvers. More then one fan may be required to ensure the necessary air exchange. The total volume of air in a medium to large greenhouse can be estimated by multiplying the floor area times 8.0 (the average height of a greenhouse). A small greenhouse (less than 1500 m cubed in air volume) should have an exhaust-fan capacity estimated by multiplying the floor area by 12. The capacity of the fan should be selected to satisfy these requirements the fan capacity (static pressure rating) should be shown on the manufacturer’s specifications and should be selected at one eighth of an inch static water pressure. Using only one single-speed fan will not meet the criteria two single-speed fans will widen the possibilities to include changing climatic conditions. As a two-speed motor on low speed delivers about 70 percent of its full capacity a combination of a single-speed fan and a two-speed fan will therefore allow for three ventilation rates that best meet year round requirements. A single-stage and a two-stage thermostat are needed to control the operation. If the two fans have the same capacity rating, then the low-speed fan supplies about 35 percent of the combined total. This rate of ventilation is reasonable for the winter. In spring, the fan operates on high speed. In summer, both fans operate on high speed ensuring full air exchange per minute.
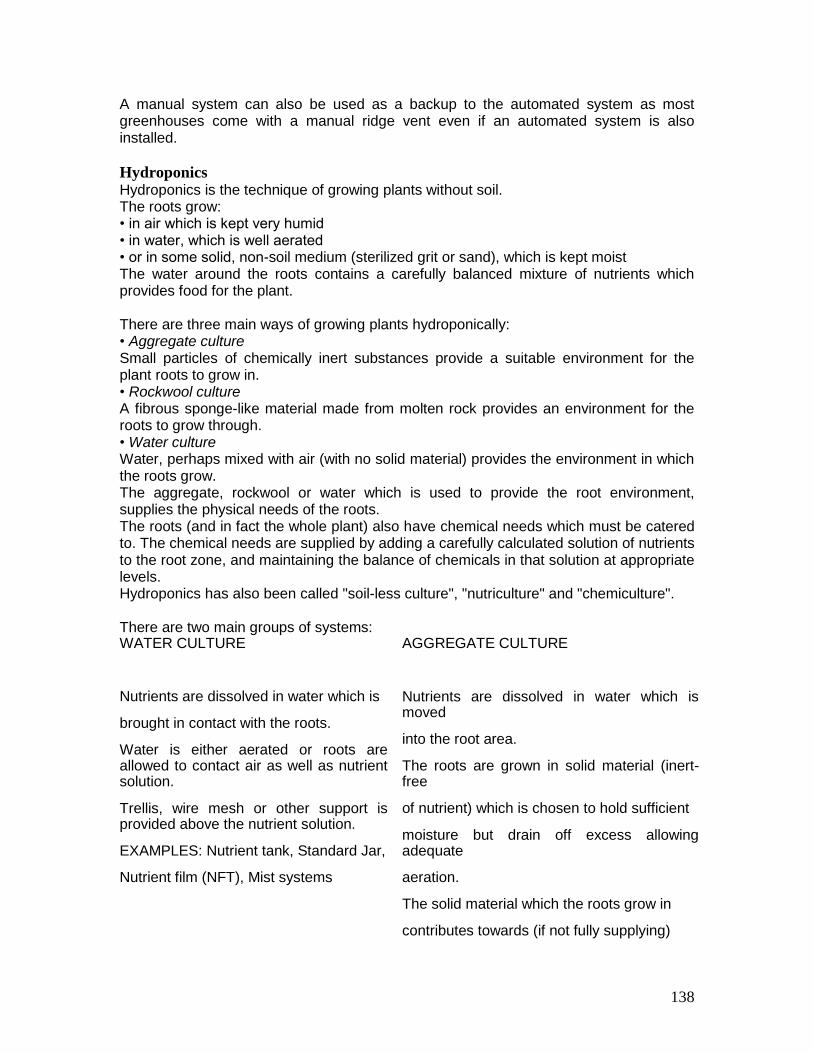
138
A manual system can also be used as a backup to the automated system as most greenhouses come with a manual ridge vent even if an automated system is also installed.
Hydroponics Hydroponics is the technique of growing plants without soil. The roots grow: • in air which is kept very humid • in water, which is well aerated • or in some solid, non-soil medium (sterilized grit or sand), which is kept moist The water around the roots contains a carefully balanced mixture of nutrients which provides food for the plant. There are three main ways of growing plants hydroponically: • Aggregate culture Small particles of chemically inert substances provide a suitable environment for the plant roots to grow in. • Rockwool culture A fibrous sponge-like material made from molten rock provides an environment for the roots to grow through. • Water culture Water, perhaps mixed with air (with no solid material) provides the environment in which the roots grow. The aggregate, rockwool or water which is used to provide the root environment, supplies the physical needs of the roots. The roots (and in fact the whole plant) also have chemical needs which must be catered to. The chemical needs are supplied by adding a carefully calculated solution of nutrients to the root zone, and maintaining the balance of chemicals in that solution at appropriate levels. Hydroponics has also been called "soil-less culture", "nutriculture" and "chemiculture". There are two main groups of systems: WATER CULTURE AGGREGATE CULTURE
Nutrients are dissolved in water which is
brought in contact with the roots.
Water is either aerated or roots are allowed to contact air as well as nutrient solution.
Trellis, wire mesh or other support is provided above the nutrient solution.
EXAMPLES: Nutrient tank, Standard Jar,
Nutrient film (NFT), Mist systems
Nutrients are dissolved in water which is moved
into the root area.
The roots are grown in solid material (inert-free
of nutrient) which is chosen to hold sufficient
moisture but drain off excess allowing adequate
aeration.
The solid material which the roots grow in
contributes towards (if not fully supplying)
139
anchorage.
EXAMPLES: Beds; tier systems etc
Why Practice Hydroponics? Hydroponics has been practised by market gardeners and other growers since the 1940s. The advantages of hydroponics are many however the disadvantages should not be overlooked when you are deciding whether or not to set up a hydroponics system. Advantages 1. You can grow anywhere. Crops can be grown where no suitable soil exists or where the soil is contaminated with disease. 2. Culture is intensive. A lot can be grown in a small space, over a short period of time. It is also possible to grow on multi-levels. Where transportation costs to the market are significant (e.g. in the centre of large cities), hydroponic farms may be viable irrespective of land values. 3. Heavy work is reduced Labour for tilling the soil, cultivation, fumigation, watering and other traditional practices can be reduced and sometimes eliminated. 4. Water is conserved. A well designed, properly run hydroponic system uses less water than soil gardening. 5. Pest and disease problems are reduced. The need to fumigate is lessened. Soil-borne plant diseases are more easily eradicated in many nutriculture systems. This is particularly true in "closed systems" which can be totally flooded with an eradicant. The chance of soil borne human disease is also reduced. Though rare in developed countries, it is possible for diseases to transmit from animal manures or soil micro-organisms onto food plants grown in soil, leading to illness. 6. Weed problems are almost eliminated 7. Yields can be maximized. Maximum yields are possible, making the system economically feasible in high density and expensive land areas. 8. Nutrients are conserved. This can lead to a reduction in pollution of land and streams because valuable chemicals needn't be lost. 9. The environment is more easily controlled. For example in greenhouse type operations the light, temperature, humidity and composition of the atmosphere can be manipulated, while in the root zone the timing and frequency of nutrient feeding and irrigation can be readily controlled. 10. Root zone chemistry is easier to control: • Salt toxicities can be leached out • pH can be adjusted 11. New plants are easier to establish. Transplant shock is reduced. 12. Crop rotation/fallowing is not necessary • All areas can be used at all times - you don't need to leave a paddock for a year to fallow every so often. Disadvantages • Initial cost is high. The original construction cost per hectare is great. This may limit you to growing crops which either turnover fast or give a high return. • Skill and knowledge is needed for efficient operation. Trained plants-men must direct the growing operation. Knowledge of how plants grow and the principles of nutrition are important.
140
• Disease and pests can spread quickly through a system. Introduced diseases and nematodes may be quickly spread to all beds using the same nutrient tank in a closed system. • Beneficial soil life is normally absent • Plants react quickly to both good and bad conditions. The plants in hydroponics react more quickly to changes in growing conditions. This means that the hydroponic gardener needs to more closely watch his plants for changes. • Available plant varieties are not always ideal Most available plant varieties have been developed for growth in soil and in the open. Development of varieties which are specifically adapted to more controlled conditions is something which will be slower to come.
5.12 Disease If a plant is not healthy it is due to one of four possible things: 1. A disease 2. A pest 3. An environmental problem - the growing environment is not appropriate 4. A nutritional problem - the plant is not getting the right nutrients in the appropriate combination or quantity If it is a disease, in most cases it is one of the following types of diseases: • Damping off – stems of young plants rotting at soil level: plants collapse. • Blight - quick death of plant parts. • Anthracnose - dead spots, usually sunken • Galls - abnormal swellings. • Leaf Spot - dead or off-colour spots on leaves. • Mildew - young growth becomes distorted and grey/white powdery coating on surface. • Rots - decaying tissue. • Rust - brown-orange spots or stripes. • Smut - sooty-powdery covering. • Sooty Mould - similar to smut (associated with insects and accompanied by sticky deposit). • Canker - dead tissue in one place only. • Virus - causes distortion or discolouration. • Wilt - drooping foliage. If it is a PEST, it is probably one of the following: Aphis
Caterpillars
Mites
Thrips
Beetles
Leafhoppers Nematodes
Whitefly
Birds
Mealy Bugs
Scale
Bugs
Millipedes
Slugs or Snails
141
5.12.1 Fungi General characteristics common to all fungi: • Lack of chlorophyll (ie. lack the ability to produce or secure energy. They therefore must live off other organisms - in some cases dead, in some cases alive). • Structurally they are thread-like filaments (mycelium) which grow inside the tissue they colonize. • Fruiting bodies usually emerge from these threads on the surface of the tissue they colonize. • Fruiting bodies produce thousands of spores at a time each one having the ability to grow into a new mass of mycelium, infecting new tissue. Different species of fungi vary from one to another in the following ways: • the rate at which they affect the organism they attack • the severity with which it causes damage • the ease with which the spores take hold • the part(s) of the 'plant' it affects • the length of time spores will remain viable before causing infection Common Fungal Problems Damping Off Characterised by young plants rotting off at soil level,and collapsing; There are several fungi species causing damping off. These include Pithium, Rhizoctonia, Phytophthora, Sclerotium and Fusarium. This type of disease is common in seedlings and is a serious nursery problem. Older plants are rarely killed by this group of diseases; however their growth may be considerably retarded by root damage. Symptoms: Symptoms are exceedingly variable but all result in death: seeds can rot before germination; shoots from freshly germinated seeds can rot before they emerge from the growing media, or young seedlings rot at the base after they have emerged and collapse. On older trees, root and stem lesions and root rots may occur. Control - Natural: Cleanliness, hygiene, good drainage: provide good ventilation. Do not plant too close together: apparently healthy seedlings from a container of diseased ones should not be used: seed trays/punnets/boxes should be disinfected before use. Use sterilised compost. If possible use sterilised seed raising and potting mixes when growing your own plants (if the compost provenance is uncertain small quantities of compost for domestic use can be cooked in an oven for 2 hours at 120oC, as a sterilising process). Potting mixes using composted tree barks eg. pine bark instead of soil, significantly reduce the incidence of damping off. Control –Chemical Blight A disease characterised by general and rapid death of plant parts: parts of a plant (eg. leaves) stop growing and die without rotting: rotting may occur later, particularly in damp or humid conditions. Blight is generally sudden, and commonly involves death of parts of a plant, and sometimes dropping of leaves or fruit. Blight is caused by several different pathogens for example Alternaria solani causes Early Blight in potato and tomato,
142
Phythophthora infestans causes potato and tomato blight, Pseudomonas phaseolicola causes Halo blight in dwarf, French and runner beans. Control: Hygiene is most important for all blights. Remove and burn all infected tissue as soon as detected. Alternaria spp. There are many different Alternaria diseases, and these are the most common diseases of many plants throughout the world. Alternaria diseases cause both blights and leaf spots. Sometimes the leaf spot and blight effects appear together. Plants affected include: Carnations, Cucurbits, Carrots, Potato, Tomato, Violet, Zinnia, Schefflera spp. (Umbrella tree), Hedera spp. (Ivy), Aralia. Control: Chemical control Botrytis Grey moulds, are serious, widespread diseases worldwide on flowers, vegetables, ornamentals, fruits and some field crops. They are the most common diseases of greenhouse crops. Symptoms: Mainly occurs as blossom blights or fruit rots but can also appear as damping off of seedlings, stem cankers, spots on leaves or rots of below ground parts such as tubers or bulbs. Blossom blights often precede and lead to rots on other parts of the plant. The fungus usually establishes in flower, as they age: flowers turn brown and rot: the infection then spreads to the other plant parts. In humid conditions a noticeable fluffy, cobwebby, whitish-grey or light brown growth is produced that is characteristic of Botrytis disease. Control -Natural: In greenhouses humidity should be reduced by improved ventilation and increased heating, Control – Chemical Leaf Spot Brown or black spots on leaves which are dead tissue. Leaf spot diseases occur on a huge range of plant varieties: they are characterised by spots of dead and discoloured tissue on a leaf, usually brown or black. Leaf spot diseases are some of the most common diseases of virtually any plant. Most leaf spots flourish during or after wet weather. They rarely require attention, unless an outbreak is severe: nevertheless, affected leaves should always be removed and burned: Many different fungi cause different leaf spots on different types of plants: some are unique in the disease they cause and may or may not be plant specific, e.g. Pseudopeziza ribis affects currant and gooseberry: Heterosporium varibile affects spinach: Coniothyrium hellebore affects hellebores: Glomerella cingulata affects rhododendrons and azaleas: Phyllosticta sp. affect anemone: other leaf spot diseases are caused by pathogens which also cause other diseases, such as Alternaria or Septoria Control – Natural: Where plants are growing very close together, increase ventilation/air circulation by removing alternate plants. Use treated seed, where available treated. Practice crop rotation. Control – Chemical
143
Mildew Causes young leaves and tip growth to become distorted and appear grey. Commonly occurs on azaleas, apples and a wide range of other plants. Downy Mildew The fungi which cause downy mildews are obligate parasites – that is the must parasitize a host plant to survive. High humidity, damp conditions and a film of water on plant tissues increases susceptibility of host and development of mildew. The upper leaf surface develops yellow spots, while a grey mould begins to develop on the underside, directly below the spots: later the lesions turn brown and the under surface turns dark grey: distortion of the leaves and stems may occur. Control –Chemical Powdery Mildew they are probably the most common, conspicuous and widespread diseases: easily recognisable, they affect all kinds of plants from grasses to forest trees. Infections are characterised by spots or patches of white to greyish, powdery, cobwebby growth on young tissues or entire plants. Causes young leaves and tip growth to become distorted and appear grey. Commonly occurs on roses, peach, strawberry, grape and a wide range of other plants. Control –Natural: Don't overcrowd plants. Water from underneath in hot, humid or moist conditions. Control – Chemical Rust Rusts are caused by Basidiomycetes fungi and have a world-wide distribution of about 4,500 species: they affect a wide range of vegetables, fruit, trees and ornamentals, including corn (cereals) and beans. Many rusts alternate between different host plants, during different stages of their growth; the two hosts may often be unrelated botanically and control can be achieved by eradicating one host to benefit the other. Rust fungi tend to attack only certain host genera. General symptoms are characterised by brown to orange spots, pustules or stripes, normally on leaves. The parasitic rust causes a general debilitation to the host plant, draining nutrient from it without actually killing it. Control -Chemical
5.12.2 Plant viruses Viruses are small microscopic organisms which live inside the bodies of other organisms. They are parasites and can have a wide variety of different effects on the organism they infect. One of the most common symptoms in plants is a change of colour in leaves/and or flowers. Infected leaves frequently show light green or yellow patches (ie. a variegated effect) due to interruption of chlorophyll production: hence photosynthesis is reduced. This type of infection can cause reduction of crop yield or quality, or a general stunting of the plant. One of the most severe effects of virus would be death, although this is not common (virus can only live in a host organism while the host is alive; if the host dies, the virus dies and hence eliminates itself). Growth patterns can be disturbed and changed by virus. In some cases stunting (mild or severe) will be the only obvious effect. In other cases, virus can cause distortion in the growth such as twisting, blistering or other
144
distorted formations in leaves, stems, roots or flowers. In extreme cases, leaves can be reduced to a central midrib ie. with no leaf blade at all. Flowering and seed production can be stopped completely by a virus. Virus can also induce leaf rolling, leaf yellowing, plant wilting and changes to the physiological processes in the plant so that some functions of a cell's metabolism cease completely. One or several of these symptoms might occur. Plants which are very commonly affected by serious virus problems include: gladioli, carnations, chrysanthemums, tomatoes strawberry, tulip etc. Virus Control Viruses are not as easy to control as most other diseases. Once a plant cell is infected with a virus, the only way to eradicate the virus is by killing that plant cell. In the case of virus, generally speaking, prevention is the only cure. If a plant is infected with virus - remove and burn the plant. Make sure (when dealing with plants which are very susceptible to virus) that you always start out with "clean stock". Control insects (aphis in particular): insects are the most important vectors (carriers) of virus from oneplant to another: fungi and nematodes also spread virus. Use plant varieties which are more tolerant to virus, when the choice is available.
5.13 Pests Aphis spp. (Aphids) Many different types, 1-4mm long, in various colours, most commonly green. They sit on soft plant tissue with a syringe like mouthpiece injected into the plant tissue sucking nutrients out of the plant. They can transfer virus or other diseases from plant to plant. They are normally found in colonies comprising dozens to thousands of individuals. Aphids are most likely to attack the more tender tissue on shoot tips,leaves or stems. They can also attack bulbs and roots. Control -Natural: • use predatory insects such as Ladybirds - adults and larvae eat aphids • lacewings (Chrysoperla or Chrysopa species) - larvae eat aphids • use a garlic spray • use companion planting Dill and Fennel- amongst vegetables - attracts hoverflies, which then eat aphids. Garlic and Chives- under roses - keeps away aphids. Natural – inside: Use parasite such as Aphidius colemani – a parasitic wasp which lays its egg inside the aphid which is subsequently eaten by the wasp larva. Use a pathogen such as Erynia neoaphidis – the most common fungus that infects aphids. Chemical control Caterpillars There are many different types of caterpillars which normally eat the tender parts of a plant (leaves and young shoots). Some, like the spitfires cluster together in colonies as
145
one ball of crawling grubs. Most caterpillars however are solitary, each one crawling around independent of the others. Control – Natural: Spray with commercially available bacterial preparation containing a bacterium called Bacillus thuringiensis which infects and kills only caterpillars. Remove by hand. Control – Chemical Leafhoppers A number of species of insects are called Leafhoppers: affect a large range of ornamental and crop plants. Symptoms are characterised by small, pale green or white dots on upper surfaces of leaves: these gradually join up into one big area and much of leaf green colour is lost. Leafhoppers transmit virus diseases. Small, pale yellow insects. About 2-3mm long. Jump when disturbed. Suck sap from undersides of leaves: cause shiny sticky sap on branches. They can infest a very large range of plants in large numbers. Control: chemical, apply when leaf spotting is first seen Leaf Miner A small insect that eats long winding tunnels between the surfaces of leaves. Normally tunnels are white first, but turn brown later. This group of pests can attack a very wide variety of plants. Control – Natural: Remove infected parts and burn: control weeds which support them: Cover plants with fleece or insect-proof mesh (celery, parsley). Glasshouse – biological control using parasitic wasp Diglyphus isaea. Chemical control Mites Including Red Spider Mite Many types damage plants by the sucking sap and, in the case of some, distorting plant growth. The adult red spider mite is about 0.5 mm long, with a pink or light red colour. The female has a round shape, while the male has a more elongated body. Adults and most nymphs have 8 legs (though when they first hatch out of the eggs, the young nymphs have only six legs). The eggs are round, dark red, and shiny. Small red-coloured mites who resemble spiders, almost invisible to the naked eye, that appears as a red haze, usually on the back of leaves. Red spider mites are found on both sides of the leaf and are concentrated along the central rib of the leaf. Leaves can turn a bronze colour and die. They walk very slowly. When they are feeding, they usually do not move at all. Groups of spider mites often cover themselves lightly with a “cobweb” of short strands of silk. This is why they are called “spider” mites. The spider mites can be found underneath the silk, walking slowly on the leaf surface. Mites attack and feed on a variety of plants and animal materials. They are common for many ornamental plants, and often a significant glasshouse problem. Some mites are used to attack and control harmful species. Plants which are watered regularly are less susceptible to the mites. Control –Natural: Introduce the natural predator Phytoseiulus persimilis to the garden. Use repellent plants such as onion, garlic and chives.

146
In glasshouses keep humidity levels high. Treat with natural plant extracts. Control – Chemical If you decide you need to spray, avoid insecticides that will kill many natural enemies. Especially, avoid pyrethroids, which are well known to increase problems with mites, because they kill the natural enemies of the mites. In fact, many common insecticides are not very good for killing mites. Instead, use a pesticide intended for mites (a “miticide”). Try to select one that is less harmful to natural enemies. Direct your spray to the sides of the leaves where mites are most concentrated. For example, scarlet mite are concentrated on the lower surfaces, but red spider mites can be on both sides of the leaf. If you have to spray more than once per crop, it is important to use a different miticide for each application (“rotate” your miticides). The reason is, mites can quickly become resistant to any single miticide. Mites have such a short generation time (sometimes only 5 days!) that they can quickly breed new strains that are resistant. Nematodes Nematodes, also known as eelworms, are microscopic worms (1-2mm long, 0.1mm wide), which attack and can burrow into plant tissue; commonly roots or leaves. They can cause distortion in growth (such as swellings), yellowing or dead patches. They are responsible for introducing virus and other diseases into plant tissues. Several species are used as biological controls on, for example, slugs, vine weevil. Control -Natural: Companion planting: eg. plant Tagetes spp. Crop rotation. Resistant varieties within an integrated pest management system. Current research into nematophagous fungi. Control - Chemical Note: the active ingredients of most nematicides are organo-phosphates and are prohibited or being withdrawn in most countries of the world because they are among the most toxic chemicals known to man. Thrips These tiny (1-2mm long) insects swarm over leaves and flowers in hot summer. The most common symptom is flecking of leaves or flowers. Thrips vary in colour – black, brown or cream coloured. Control – Natural: A small board, painted white and covered with a sticky substance such as honey will attract and hold thrips. Use products containing predatory mites Amblyseius cucumeris. Control – Chemical If you decide you need to spray, try to find an insecticide that is less toxic for natural enemies. If thrips are abundant in the buds, they will be sheltered from the insecticide. Therefore, you will need to use an insecticide that can move within the plant tissues (in other words, a systemic or translaminar insecticide). If thrips are on leaves, direct the spray at the undersides of the leaves. Whitefly There are many different types of whitefly. The young six-legged insects are minute in size, they feed on leaves and produce scales from which small winged flies emerge.
147
They can occur in large numbers on many types of ornamental plants. They commonly occur on the underside of leaves and fly in large numbers when disturbed. Control – Natural: Use companion plants such as nasturtium and marigold.Whiteflies (Trialeurodes vapourariorum) are parasitised by a small wasp, Encarsia formosa.Use products contining the fungal parasite Verticillium lecanii. Control – Chemical Pests develop resistance to pesticides ! The development of resistance is one of the more serious problems in pest management. Resistance means that an insect, disease, or weed becomes able to tolerate a pesticide that used to kill it. Many insect pest species have now developed resistance to some types of insecticides, and few chemical control options exist for these pests.
5.14 Pest and Disease Control Objectives: Determine the cultural requirements for commercial production of a cut flower crop.
Non Chemical Methods There are several ways of controlling problems without using chemicals. These include: • Much of non chemical pest control is actually cultural and managerial: changing habitats to eliminate food, water and shelter for pests and diseases. This may include changes to the design of structures such as greenhouses and glasshouses to incorporate pest-resistant materials also to ensure adequate hygiene and sanitation procedures are in place. This is particularly important in relation to rats and mice. • Cleanliness in the garden - destroy diseased plants or diseased parts, as soon as detected (usually by burning). Use clean tools (wash them after use). Use clean pots. Do not re-use old soil etc. Remove pests by hand on a regular basis. • Resistant plants - grow varieties which are less likely to be attacked by pests or diseases. • Solarisation before planting - pin down a clear plastic sheet over an area you are going to plant in. Leave it for a week or two of warm sunny days. The heat generated under the plastic will kill many of the pest and disease organisms in the soil. This only works in warm climates. • Maintain good plant health - a well fed, well watered and well drained plant is much less susceptible to attack by pests and diseases. • Companion planting - some plants can have a beneficial effect on surrounding plants. In some cases, a companion plant may attract insects away from your garden plant; in other cases it may cause a particular chemical to build up in the soil which discourages a particular problem. • Predators - some animals will attack and destroy garden pests. By encouraging these predators you can reduce the incidence of pests. Natural Sprays - extracts from some plants (eg. a tea made from garlic) can be sprayed on plants to control certain problems. • Biological and microbial - the pest's natural predators are used to control the pest, this may include ways conserve natural predator numbers, laying attractant baits for the
148
target pest, building up predator numbers by feeding or purchasing commercially available ones (eg. lady beetles used to control aphids); and, the use of microbes such as bacteria, fungi and viruses to minimise the numbers of pests, eg. the microbial insecticide Bacillus thuringiensis which kills caterpillars. Although it must be stated that care needs to be taken in introducing “control” species into the environment as the full effect of this practice is not fully understood. • Pheromones and attractants. Pheromones are chemical signals emitted by animals, e.g. sex pheromones and alarm signals. Pheromone traps work by using a pheromone attractant to lure the insect into a trap. • Insect growth regulators. The application of juvenile growth hormones can prevent juveniles from metamorphosing into adults thereby inhibiting sexual reproduction and pest numbers. Other insect growth regulators inhibit the production of chiton in insects, which is the waxy outer cuticle. • Repellents. Botanical materials such as natural oils like citronella and eucalyptus can repel insects. • Desiccating dusts. Dusts made from natural materials such as diatomaceous earth and silica aerogel kill insects by abrading the outer waxy coating that keeps water inside their bodies thereby dehydrating them. • Pesticidal soaps and oil. Pesticidal soaps are often made from coconut oil which contains fatty acids that are toxic to insects. Soaps are considered to have low toxicity to mammals but high toxicity to aquatic life. Oils are usually highly refined and light so they can be applied to plants. • Botanical pesticides. Botanical pesticides derived from plants can be easily degraded in the environment, but they tend to be broad spectrum and kill more than the target pest, eg. pyrethrum*, neem, rotenone. It is important to realise that botanical pesticides can also be toxic and must be used with caution and according to label directions. Also check in your country to ensure that these products are still scheduled for use. Changes occur constantly as products are tested or more information becomes known. Note: Pyrethrum is a botanical insecticide extracted from the daisy flower Chrysanthemum cinerariaefolium and may also be referred to as 'pyrethrins'. Pyrethrum or pyrethrins should not be confused with 'pyrethroids' which are synthetically produced pesticides based on pyrethrum.
Integrated Pest Management Integrated Pest Management (IPM) is a system of managing pests that combines a number of different methods into the one management program. IPM might take advantage of several of the following: • sanitation - maintaining good hygiene • physical control methods (mowing, slashing, burning, flooding, hand removal), physical barriers (netting, fences), etc • using plant varieties that are resistant to pests and diseases • biological controls • chemical controls (artificial and naturally derived) • soil drenches/dips If you look carefully at the above six ways of managing pest and diseases (with IPM) you will see that the list starts with the control method that will have the least impact on the environment. Today most countries, adhering to ‘World’s Best Practice’ guidelines will encourage the use of the IPM system. Integrated Pest Management is a means of controlling pests without relying totally on chemical insecticides.
149
In the past farmers and horticulturists main approach to pest and disease control was to either wait until there was evidence of a problem and then eradicate the pest or disease with the application of chemicals, or implement a pest control program with regular and routine chemical treatments before there was any sign of damage. The approach that IPM takes is to look carefully for pests throughout the season and make decisions on what to do based on the results of the monitoring process Through the implementation of an IPM system pests are more likely to be found when they are still only in low numbers due to the fact that the plants are being checked regularly for signs of infestation or disease. The problem will be dealt with early before the outbreak becomes too big. There will always be some pests present in a crop or on plants. This does not necessarily mean that a control method needs to be implemented that quickly kills the pest, in IPM the best control method will also take into account control measures already in place ie. biological control and not jeopardise their effectiveness. It must be ascertained just how many pests can be tolerated without damage to the plants or crop In and this is dependent on the location, variety and other crops growing nearby. Using an IPM strategy farmers and horticulturists need to be able to identify the many different insects including pests and those that are not pests as well as diseases found on their crops or plants, they should know when action is needed by ascertaining whether an infestation is at a level so as to be of concern, and to ascertain the number of beneficial insects present. They also need to know how many pests can be tolerated before they need to take action; resistance to insecticides is an outcome as a result of chemical overuse in the past. Monitoring crops on a weekly basis will enable you to determine what the pests and beneficial insects are doing and whether the beneficial insects are controlling the pests, intervention should only occur when biological and cultural controls are not sufficient. What Does IPM Involve? Knowledge of the organism’s life cycle, its habits, environmental requirements and natural predators forms the basis of all IPM programs. IPM treatments use a combination of strategies including biological, mechanical, physical and chemical tools as well as other common-sense cultural and managerial practices. Education is central to the overall success of an IPM program In an IPM program, chemical controls are generally considered a last resort, unless there is a genuine emergency requiring a rapid response. When a chemical control is needed, the hazard associated with that chemical, which includes its toxicity and the potential for human and environmental exposure, must be assessed and the least hazardous chemical control chosen. A range of preventative measures should be used in an integrated system.
Alternatives to pesticide use The alternatives can be divided into Natural and Applied Control measures. Natural Control may utilize naturally occurring pest enemies, or rely on meteorological conditions to effect pest and disease control. Applied Control may be based on crop rotation, cultivar or variety selection, changes in sowing dates and or alterations in cultivation practices. The use of some or all of the above techniques, together with carefully selected pesticides, can provide an integrated approach to weed, pest and disease control.
150
Chemical Methods of Pest Control Chemicals are often controversial and can be dangerous if not handled properly. If you are careful and if you follow all of the safety rules and the instructions on the package, chemical control can be very useful. Before using chemicals to control pests and diseases, be sure you know what the problem is and that you have the right chemical to control that problem. Pesticide means any substance or mixture of substances intended for preventing, destroying or controlling any pest, including vectors of human or animal disease, unwanted species of plants or animals causing harm during or otherwise interfering with the production, processing, storage, transport or marketing of food, agricultural commodities, wood and wood products or animal feedstuffs, or substances which may be administered to animals for the control of insects, arachnids or other pests in or on their bodies. The term includes substances intended for use as a plant growth regulator, defoliant, desiccant or agent for thinning fruit or preventing the premature fall of fruit, and substances applied to crops either before or after harvest to protect the commodity from deterioration during storage and transport.
What is in a pesticide product? A pesticide product has two main components: the active ingredient(s) and the inert (other) ingredient(s). Active ingredient means the biologically active part of the pesticide. An inert ingredient is any substance in a pesticide product having no pesticidal action. The percent active ingredient(s) and inerts ingredient(s) is given on the label. Chemical Labels The label offers a wealth of information concerning safety precautions, application rate and modes, directions, storage conditions, first aid and safety instructions, batch numbers and container disposal instructions. The label may provide information on the following: • residues in foods • the safety of persons using the chemicals • environmental safety • safety to the plants or animals being treated • trade issues After reading the chemical label: • do not exceed label dose/application rates • do not apply chemicals more frequently than label instructions • do not use chemicals contrary to a specific label prohibition • be sure to observe withholding periods stated on the label
Using pesticides correctly Pesticides should only be used if there is an economically important need and all pesticides must be used strictly in accordance with their label recommendation. Product selection must assess the potential exposure hazard of the selected formulation and determine what control measures and dose rates the label recommendations advocate.
How to decide whether you need to apply a pesticide ? How can you decide whether or not it would be profitable to control an insect population? One of the methods based on the method known as action threshold, economic injury level (EIL), or tolerance level are mentioned. These terms are often explained as “the
151
level of infestation or damage at which some action must be taken to prevent an economic loss”. Traditionally, the operator had to look for the population of a certain insect in the field and when the population was higher than the value given for EIL, the operator was advised to spray. There are many formulas to calculate economic injury levels. One of them is the following:
cost of control (price/kg) EIL = ----------------------------------------------------------------------------------------------------
commodity value at harvest (price/ha) x damage coefficient (kg/ha lost per pest/ha)
The EIL formula basically says that it is only profitable to apply a pesticide if the value of the damage (the value of the yield loss due to insect or disease damage) is equal to the cost of control (costs of pesticides plus labour, for example). But the problem is, we don’t know most of the numbers that should be put into the equation. How much will product sell for when you finally harvest? How much will the vendor charge you for pesticides? And most difficult of all, how much loss will each pest insect cause? We don’t know; the answer depends on how healthy the bushes are, how much rain you have been getting, how many pest insects will be killed next week by natural enemies, etc. Because the numbers in the equation can only be estimated, the EIL equation results in a very theoretical value. In reality, EILs change with stage of crop growth, with costs of pesticides or labour, with weather conditions, with market prices, etc., etc. So, EILs can be very different for each month, each region, and even each field. The other way is to reach a decision by checking your field regularly and doing Agro-Ecosystem Analysis. The following table gives examples of a number of factors involved in decision-making for Economic Injury Levels and for Agro-Ecosystem Analysis. Economic Injury Level includes: Agro-Ecosystem Analysis includes:
cost of control cost of control cost of control cost of control
harvest value of crop (estimation) harvest value of crop (estimation)
type and number of insect pests or
plant diseases
type and number of insect pests or plant diseases
loss of income due to insect pests or plant diseases (estimation)
loss of income due to insect pests or plant diseases (estimation, based on many of the factors listed below)
weather factors
growth stage of the crop
crop health and vigour (including ability of the crop to compensate for pest damage)
152
type and amount of natural enemies
water availability (irrigation, drainage)
type and amount of weeds
soil fertility status
fertilizer applications
activities in the tea field during the past few weeks
other activities that the farmer needs to do (other crops, livestock, etc.)
other observations
Insecticide Use in IPM If the cultural and biological controls are not performing the job of preventing unacceptable levels of damage, insecticides may be appropriate, but ideally it would be best to use chemicals that kill the pest and do not kill beneficial insects. With the broader application of IPM more selective products are coming onto the market and this is a continuing trend. If pests are seen in numbers that can cause damage, or introduce disease, should insecticides be used? It must be understood that use of insecticides can make some pest problems far worse, although they can solve other pest problems. Extreme care must be made in the selection, timing and application of any insecticide. The treated crop should be monitored to make sure that the insecticide did what was asked. In addition, the potential losses hopefully saved by insecticide application should be weighed up against other insect or disease problems that can be created by the treatment.
How to choose the most suitable synthetic pesticide for your pest? Product selection The decision to select a given pesticide product must be based on an assessment of the risks and benefits, the materials hazard potential to both man and the environment.
o Products are registered for use, after local field evaluation for safety and efficiency and only approved and recommended products can be used.
o If several pesticides are recommended, then choose the least toxic to People o If several pesticides have low toxicity, then choose the least damaging to natural
enemies
Correct dose When using an approved pesticide the objective is to distribute the correct dose to a defined target with the minimum of wastage due to drift using the most appropriate spraying equipment. Pesticides only give acceptable field results if they are delivered safely and precisely. Unlike other field operations, the results from poor spraying may not become apparent for some time so that it is essential that those involved in pesticide selection and use are fully aware of their responsibilities and obligations, and are trained in pesticide use and application.
153
Pre application Time taken to check spray equipment before use will reduce costly delays when the season begins. Pre-season operational checks can be carried out with clean water but safety clothing should always be worn. Application timing The optimum time to spray is determined by the crop, pest, weed and disease growth stages. The product label will indicate treatment timing but it is usually at the start of an infestation that the lower label dose rates can be used. Application timing will also be influenced by meteorological conditions, which may result in physical, and volatility spray losses. Temperature, relative humidity, wind direction and velocity plus the possibility of rain can all effect the efficiency of spray dep Treatment timing The time of day a treatment is applied can be important. The optimum spray timing for efficacy may coincide with the foraging time of beneficial insects. It is therefore important to know and understand crop, insect and disease development and the ecological balance to determine when to spray. An understanding of product mode of action in relation to crop development will also be advantageous.
Why should we be worried? These chemicals are used to control pests, but they can also affect humans who are exposed to pesticides in a number of ways: Skin contact. Applicator often gets pesticides on their skin when they are mixing the
chemical, during spraying and when cleaning their equipment. This is called ‘dermal’ exposure, or skin exposure.
Breathing. Small drops of chemical easily get into the lungs of applicators when they are spraying pesticides. This is called ‘inhalation’ exposure.
Swallowing. This can happen as an accident, for example when pesticides are stored close to food. It can also happen deliberately, when somebody uses a pesticide to commit suicide. And of course it happens when food contains residues of pesticides that we applied by the applicators. This is called ‘oral’ exposure
Personal protection What precautions should I take to minimize pesticide exposure? When applying pesticides follow the directions on the label. Personal protective equipment means any clothes, materials or devices that provide protection from pesticide exposure during handling and application. In the context of this Code, it includes both specifically designed protective equipment and clothing reserved for pesticide application and handling. Personnel Protective equipment must be selected in accordance with the label recommendation. It must be comfortable to wear/use and be made of material, which will prevent penetration of the pesticide. PPE will only remain effective if it is correctly selected and maintained. Where the equipment is damaged, repairs must restore it to its original condition otherwise the item must be replaced. If you are aware of a pesticide application around the home or in a public place, avoid exposure. Tank filling Appropriate protective clothing must be worn when handling the formulated pesticide and filling the spray tank.
154
Liquid formulations remain the most popular as they are easy to measure and pour. The spray tank is half filled with water and the pump engaged to provide gentle agitation. The products must be introduced into the tank as per label recommendation, usually in the order of solids followed by liquids. The spray operator is at the highest risk when handling the pesticide concentrate. Where closed transfer systems are used for tank loading operator contamination is reduced. However, such systems must be thoroughly cleaned after use and transfer valves must be designed to be leak free when operated (dry-break couplings). Chemical containers must be kept secure when in use in the field. When appreciable distances are involved for the sprayer and the containers are left unattended, they must always be closed and secured from unauthorised interference. All spray operators must be fully trained and aware of the procedures to be carried out in the event of accidental spillage during tank filling. Tank-mixing Applying more than one product at the same time (tank-mixing) can improve the logistics of spraying provided the respective treatment timings coincide and the formulations are chemically and physically compatible. Only approved mixtures should be used. Risks associated with tank mixing may include a reduction in biological activity due to product antagonism. This may be seen as crop scorch, which although it may appear only transient, can reduce final yield. The most common problem affecting the spraying operation is physical incompatibility, which can block nozzles and filters as well as causing separation in the tank if the agitation through the return to tank is inadequate. Where trace elements are used as admixture candidates, blockages are common. The product label should give advice on suitable tank mix partners and the correct sequence of their introduction into the spray tank. Where an induction hopper is used to introduce products into the spray tank, it is advisable to add one product at a time. Agitation of the first material introduced into the tank is essential before the second formulation is introduced. Water temperature and quality may also influence the chemical compatibility of tank mixes Field application Adequate pre-preparation will help make sure that the actual spraying is carried out under the safe conditions and accurate spray timing will ensure that the product is applied with optimum effect. Employers and operators must make sure that all safety equipment and clothing is clean and in a good state of repair. The knapsack spray operator when using a forward-held hand lance is usually walking through a treated crop. As the crop grows, operator contamination increases so it is essential to make sure the operator has adequate body protection. Holding the hand-lance forward and to the down-wind side of the operator will help reduce contamination, but the use of a “tail-boom” should also be considered where appropriate. Cleaning (“decontamination”) of equipment and PPE After work, the spray equipment should be washed both internally and externally in the field and the rinse liquid sprayed onto a crop on which the product is registered, making
155
sure that the recommended dose rate is not exceeded by repeatedly spraying the same area. Many sprayers are now fitted with internal tank rinsing systems, which are fed, from clean water tanks designed specifically for the purpose. These tanks may also provide water for rinsing empty containers and swilling protective clothing after use. It is advisable to rinse the spraying system three times with a small amount of water each time rather than one rinse from a full tank. Equipment maintenance and repair When a spraying period is completed, machines must be prepared for storage by operators wearing appropriate protective clothing. Pesticide storage Unused pesticide must be returned to store. Pesticides in or damaged containers should be emptied into clean replacement containers, which are fully labeled. Store stock control must ensure that old stock is used before recently purchased similar new products. Good stock control and accurate planning will mean that waste concentrate and diluted spray is kept to a minimum. However, where old or obsolete chemical products have to be disposed of an approved contractor must be used. Chemicals for disposal must be secure in their original containers, fully labeled in accordance with local regulations. Field spray records An accurate and comprehensive recording system must cover all the relevant information and be simple to complete. The following information should be included:
Application date and time Operators name
Field location Adjacent crops
Treated crop and growth stage Products used and dose rate.
Target pest and growth stage Tank-mix information
Total chemical used Adjuvants used
Water volume used PPE used
"No-spray" barrier information Meteorological conditions at and after spraying
Notes to cover errors/problems Operator exposure, duration
What happens to a pesticide after application? With time, the pesticide may (1) break down (2) be redistributed within the application site or (3) move off site. Off site movement includes movement to groundwater, surface water, and the atmosphere. Off site movement also includes pesticide on a crop or livestock when it is removed from the site. Break down and movement occur simultaneously. There are many ways that pesticides can react, but most often they react with oxygen (oxidation) or water (hydrolysis). In addition, all pesticides are subject to breakdown in the presence of sunlight. In soil and sediments, microorganisms (bacteria, fungi, etc.) are primarily responsible for pesticide breakdown. Some pesticides may enter plant roots or foliage and break down through plant metabolism.

156
5.15 Safety Procedures When Using Agricultural Chemicals – Golden Rules
• Only use chemicals when actually needed! • Use the correct chemical for the job at hand, if unsure; seek advice. • Always read the label and the MSDS or Pesticide Information Sheets • Use protective clothing at ALL times. • Use the correct pesticide application equipment. • Don't spray on windy or very hot days! • Warn other people in the area that you are going to spray (and have sprayed) • Wash out all spray equipment thoroughly when finished (to government regulations and guidelines) • Do not eat or smoke while spraying. • Wash all protective clothing thoroughly after spraying. • Wash yourself thoroughly after spraying -especially the hands. • Store spraying equipment and chemicals in a safe, locked place. • Dispose of empty pesticide containers according to the label instructions (and government regulations) • Record all details of your spraying Keeping Records Records of pesticide usage are particularly important when using weedkillers. The record will help you to: • improve pest control practices and avoid unnecessary pesticide use • compare applications made with results achieved • purchase only the amounts of pesticides needed • reduce inventory carry over • when errors occur, establish where they were made • establish proof that you used recommended procedures if indemnity payments are involved What Information Should Be Kept • varieties of plants treated • pests (Weeds) treated • location and size of area being treated • time of day, date and year • type of equipment used • pesticide used including name, type of formulation, trade name, manufacturer and batch number • amount used per hectare or per 100 litres of water • amount of active constituent (ie. chemical) per hectare or per 100 litres water • stage of plant development (size of pot and size of plant) • pest/weed situation (eg. severe, mild etc) • weather, temperature, wind, rainfall etc • whether the chemical was watered in afterwards
157
• results of application -how long before weeds died, how well it worked
5.16 Environmental Problems Heat, cold, wind, rain, frost, shade, pollution and other environmental problems can have disastrous effects on plants.
Plants Have Varying Tolerance Levels Every type of plant has a different level of tolerance to adverse environmental effects: There are certain environmental conditions which are preferred: eg. most indoor plants prefer temperatures between 22 - 30ºC, and will grow best within that range. There is a broader range of environmental conditions which are tolerated: eg. most indoor plants will tolerate temperatures as low as 5 -10ºC and as high as 40 - 45ºC but below 15ºC or above 35ºC there is little, if any growth. Outside of the tolerated range of environmental conditions the plant will suffer and perhaps die eg. Most in-door plants will die at temperatures below 5ºC or above 45 ºC. Wind, frost, pollution and all other environmental conditions affect all plants in the same way as the examples above: i.e. plants have preferred or tolerated and intolerable environmental conditions for growth.
Common Environmental Problems Air Pollution Symptoms are generally burning or discolouration of leaves and growth tips. The effects will be worse in badly polluted areas, so if you suspect pollution from a nearby factory, look at plants growing closer to the factory; they should show more dramatic signs of pollution. Foliage Burn Water related • In the case of` some plants, wet foliage is likely to burn in direct sunlight. • Conifers which are watered on the foliage on a hot day commonly develop burn marks later. • Generally plants with soft or fine foliage are most susceptible to this type of burn. • Think about when the burn appeared. Was it straight after a hot day, and was the foliage wet then? • The symptoms would occur on the parts which were wet and most exposed to the sun (except in severe cases, burn would only be on one side). Sun Scorching • Burn will be most severe on the tender growth (usually the young leaves or growth tips). • Parts with the most exposure to the sun will be worst affected. • Symptoms will show very quickly (perhaps the next day). Pollutants • Chemicals in the soil can cause a more generalized burn; growth tips or young foliage over the whole plant show burn: (compare with sun burn which might be on one side only). • Consider whether the soil might have been polluted by a previous owner or if chemical toxins may have washed in from a neighbouring property. Pesticides
158
• Overuse of many types of insecticides or fungicides can burn foliage they are sprayed on. • Spraying on a hot day can cause foliage burn. • Look for the effect on the foliage most exposed to the chemicals. Fertilizer • Too much fertilizer can burn root tips, and in extreme situations, cause burn marks on foliage. • Fertilizer burn is more likely in hot weather when many fertilizers become more soluble due to the higher temperatures. Treatment: Damaged foliage cannot be repaired. It can only be removed to prevent decomposing tissue spreading infection to healthy tissue. Feed damaged plants and look after them well so as to promote rapid rejuvenation. Avoid making the same mistake again: do not put susceptible plant varieties in places where the environment is hostile to them: take care when applying water, fertilizer and other chemicals.
Drainage Problems • Too much water around roots encourages fungal root rots. • Young root tips are white when healthy, but black or brown when not. • Leaves often go yellow demonstrating a nitrogen deficiency induced by too much water around the roots: the plant is unable to absorb nitrogen from water-logged soil. • Too much soil water starves young roots for oxygen. Treatment: • Lay drainage pipes. • Use pots with a greater number of drainage holes. • Aerate the soil with an aeration fork. • Apply gypsum to break up the clay particles in the soil. • Plant susceptible plants on mounds or in raised beds.
Temperature • Cold - cold temperatures slow down growth and reduce flowering and fruit development. Extreme cold will kill parts or all of a plant very quickly. • Heat - the first symptom is slow growth, or no growth. As heat increases, the plant will wilt: plants can wilt and recover again as the temperature cools, but there is a point beyond which recovery is impossible: this is known as the “permanent wilting point”. In extreme heat parts or all of the plant will die quickly. Treatment: • Mulching reduces temperature extremes in the soil. • Shading can reduce temperature extremes. • Watering deeply can help plants sustain high temperatures without wilting: avoid watering when the temperature is high (in emergencies it is important to get water to the plant, but avoid wetting the foliage).
Frost • Frost burn generally appears as dead areas of foliage, and stems. • Affected parts turn black, may go watery. • Symptoms begin to show within hours of the frost occurring. • Areas on the outside of the plant are most affected (leaves closer to a wall or other plants are less affected).
159
• Can affect leaves, growth tips, fruit, flowers and buds. • Frost damage to fruit buds or flowers can cause a great reduction of fruit from fruit trees. Treatment: Do not remove burnt foliage until danger of further frosts has passed. (Dead damaged tissue should be cut off to prevent infection spreading as soon as frosts finish. Premature pruning will stimulate new shoots which will be particularly tender and vulnerable to frost damage). Cover with Hessian or some other physical protection such as horticultural fleece. Create air movement to stop frost settling (eg. in a frost prone greenhouse, a cheap fan might be left on overnight when there is a frost warning). Use a heat source on frost warning nights: even in the open, a small fire creates air movement which is often enough to prevent frost settling (there are inherent dangers with leaving unattended fires). Put sprinklers on for a few hours just before dawn when the chance of frost is greatest (ie. the slightly higher temperature of the water is often enough to prevent frost damage).
Hail • Hail can damage fruit, flowers and foliage severely. • The damage is obvious, causing denting and tearing of plant tissue. • Damaged tissue cannot be repaired and is normally cut off, to prevent disease or rot affecting damaged tissue.
Shade • Areas of a garden can become increasingly shaded as trees grow, without obvious change. • Growth in the shaded area becomes elongated and less bushy as plants stretch toward the light. • Plant vigour and flowering can become reduced. • Soil dries out more-slowly in over shaded areas: conversely, soil shaded by trees will receive less rainfall penetration than that in open areas. • Algae or moss may grow on paths or lawns. Treatment: • Remove some of the large trees. • Thin out branches in the tree canopies of large trees to let more light penetrate. • Replace some of the evergreen trees with deciduous trees to let more light in over winter.
Wind Strong wind causes foliage to dry out faster than water can be taken up from the roots. This causes wilting, particularly with more susceptible newly-planted plants. • Wind can cause drying out and death of the more tender and exposed parts of a plant. • Damage will be worse on the more exposed side of the plant. • Damage will be worse on growth tips and most tender foliage. • Plants can literally blow over, in extreme cases, out of the ground. • Wind-rock prevents roots becoming fully established in the soil and leads to weakened plants, susceptible to blowing over and which will ultimately die. Treatment: Erect or plant a windbreak. Use tree guards until the plant becomes established.
160
Stake plants to stop them blowing over.
Physical Plant Protection Methods Staking Plants are staked for the following reasons: 1. To support weakness in plant tissue until it strengthens (ie. if wood is soft and liable to break, the stake supports it till it gains strength). 2. To reduce likelihood of damage through movement -wind may break the plant at the base. 3. To reduce likelihood of physical damage through vandalism, mowing, cultivation etc. by actually placing a physical barrier to disturbing the plant. 4. To support transplanted plants (where the root system was cut back), until the roots can regrow and establish a firm hold in new ground. 5. To mark the location of small plants (ie. tube stock), so it is not inadvertently damaged by mowing, cultivation etc. by allowing you to see where the plant is while it is small. The main dangers with staking are: 1. Leaving ties on a plant too long: The stem grows, and the tie cuts into the bark ringbarking the plant. 2. Tying too tightly to the stake: If the plant does not move in the wind, the root system/trunk may not develop adequate strength to support the plant when the stake is removed. Frost Protection Frost protection can be achieved the following ways: 1. Having a vertical wall (temporary or permanent) close enough to the base of the plant, and high enough to overshadow the plant. (ie. this wall must be twice the height of the plant and located within a distance of half the plant's height -or 4 times the height of the plant and located no more than a distance away which is equal to the height of the plant) This can be achieved by planting close to a fence, wall or other structure; or by placing a temporary wall/cover around the plant (such as a Hessian bag fixed over stakes) 2. The crowns of tender perennial plants can be covered by organic material such as dry straw over the winter. 3. Air movement: fans are used in some fruit growing operations to keep air moving at times when frost is likely. 4. Frost Pots: also used in fruit growing to keep air moving - pots in an orchard burn cheap fuel – this creates air movement and reduces frost problem 5. Water: sometimes watering is enough to stop frost damage. 6. Covering: shade cloth, greenhouse film etc erected over plants during frost prone periods. Sun Protection Shade cloth is the best way of protecting plants from severe affects of sunburn - If a plant is exposed and continually burning then it is probably best moved or got rid of. Cages Cages (wire or plastic) are available for individual plants. These are useful to keep animals (possums, cattle, goats etc) away from young plants, but in the long term must be removed.

161
Controlling Birds • Bird netting • Scare crows • Scare-away fibre draped through tree • Scare guns
Pruning – General Rules When to Prune • General flowering shrubs, trees and herbaceous perennials are pruned immediately after flowering • Frost tender plants - after frost period Golden Rules • Remove all dead and diseased parts, then preferably burn (or otherwise dispose of) pruning material • Remove weak growth • Remove situations where growth is rubbing (and wounds could open up) Methods • Thinning - removing old, twiggy, crossing over, weak, diseased and excess wood to reduce density of growth without reducing height or width. • Heading - producing more compact and better shaped plant, reducing height and any imbalance in width (eg. unsymmetrical growths) • Shearing - cutting to predetermined lines (eg. trimming a formal hedge) • Rejuvenation - hard pruning aimed at replacing basic framework of the plant with a new framework made from new, vigourous and healthy wood • Stopping - stopping (also known as tip-pruning or pinching) is a system of pruning that encourages bushy growth. When a plant produces apical growth (known as apical dominance) it is because energy is concentrated in a single tip bud with the buds along the stem remaining dormant. If the apical tip is removed the buds lower down will start to produce side-shoots. Some plants such as bedding plants usually only need to be tip pruned once whereas shrubby plants will produce very bushy growth and prolific blooms by repeated stopping. Stopping is also a way of diverting energy into cropping into plants such as grapes. • Disbudding - this method of pruning removes the side or lateral buds as soon as they appear to focus energy in the terminal (top) bud. It reduces the amount of blooms allowing the remaining blooms to become larger: it is a method that is particularly used for roses and camellias. This method is also used to prevent crowding of stems is plants such as chrysanthemums and is also used to direct extra energy to root development. Basic Points • Always cut to a bud • Cut on an angle to ground level • The bud below your cut will probably produce the strongest growth. Consider the direction it points -that is where the growth will go • Use clean and sharp tools. Before Pruning Prior to pruning, look closely at the plant and try to understand how it grows. What parts of the plant produce flowers, what shape do you want to achieve, do you want small flowers or larger but less flowers?
162
You will notice that flower buds are borne on particular parts of a plant (eg. many plants only produce flowers on the tips of new shoots). Observe where either fruit (nuts) or dried flower heads are situated. The basis of your pruning should be to cut in a way which will encourage the development of the type of growth which will produce flowers for future years - but at the same time leave sufficient flower buds to allow a reasonable crop for the coming season. Points to Consider when Pruning: • The vigour of the plant or shoot depends on the direction of growth and the amount of leaf surface (among other things). • The more a shoot approaches the vertical position, the stronger its growth will be. • The top or terminal bud of a shoot generally has the greatest amount of growth. The growth potential of the buds will gradually decrease as you come closer to the base of a shoot. • The greater the vegetative growth, the lighter the crop, resulting in larger but poorer quality flower. • The fewer the number of buds on a shoot, the stronger will be the growth made by each individual shoot arising from these buds.
5.17 Harvest and Post Harvest Objectives: Determine harvest and post-harvest management practices for cut flower crops. At the time of harvest, the quality of the flowering stems is the best it will ever be. When a stem is cut, it begins to die. The task of the grower and harvest crew, from harvest on, is to slow the decline of the flowering stem. A quality product is essential for a grower to survive in the marketplace. All harvest systems must be designed to slow the decline of the flowering stem and provide the retailer and consumer with the possible longest life in the vase Any activity that accelerates the decline should be avoided or modified to minimize the effects on quality. By harvesting and handling a cut flower crop in the best way, you can improve quality of the marketable product; hence improve the potential profit from the crop. Different types of plants need to be harvested differently, and treated differently after harvest. The time at which you harvest depends upon the stage of growth that the plants are at; but it can also be affected by market demand (eg. You may decide to harvest plants before they reach an optimum stage because you can get more for the flowers at that earlier time when demand is higher). Some flowers should be opened well. For other flowers, the flower must be at least partially opened. It might not open if harvested too earlier. The grower needs to have a very good knowledge of how the flower continues to develop after harvest. Flowers perish easily and are generally fragile, by correct harvest and post harvest handling procedures the grower ensures a clean and quality crop as well as prolonging the bloom time. Sterilise equipment during harvest to prevent premature petal drop and the spread of bacteria. Growers must time the harvest carefully and the correct time will
163
depend on the species ie. some flowers are sold fully closed others just as they open or when they are fully open. Harvest of some species for example gladioli commences when about one third of flowers are open. Stems of flowers are cut as long as possible then strip off the lower leaves and place into buckets filled with warm water. Different harvest methods are used for woody species, bulbs that usually have a milky sap and hollow stemmed flowers. Flowers buckets are collected and placed into a cool room. The stems are then graded and packed before transporting to markets.
5.17.1 Harvesting Flowers should be cut with a sharp pair of secateurs to prevent crushing of the stem then the cut flowers should be placed in a preservative solution immediately to prevent wilting. Harvesting - General Rules: • cut only good quality flowers • don't cut diseased or wilting flowers • don't harvest flowers too young; or they won't open • don't harvest old flowers • place in water as soon as cut • place in a cool position as soon as cut In selecting a flowering stem to harvest, each stem with a flower must be considered and two questions answered. Is this flower at the correct stage of maturity for harvest? Is this flower and stem of sufficient quality to justify harvesting? Once the decision to cut a particular flowering stem has been made, then the decision of where on the stem to cut must be reached. The length of the stem attached to the flower has value but so does the length of the stem left attached to the plant. The longer the stem cut with the flower, the higher its value. Longer flowering stems provide increased salability, and likely increased income. The shorter the flowering stem is cut, the more stem remains attached to the plant. The longer the remaining stem, the greater the number of leaves left for photosynthesis, thereby increasing the productive capacity of the plant to produce more flowers. Do I cut here for a longer flowering stem, or do I cut here to maintain the productivity of the plant? In plants being produced in rows, it is also beneficial to cut the stem just above a node located on the side of the stem pointed toward a void or toward the outside of the plant. New growth will be strongest from this node and its growth directed outward, keeping the center of the plant open for better light penetration and improved air circulation for disease control. Again, it takes time to select the best point at which to cut the stem. Indecision time, time spent thinking, is costly time. A Trainer should spend time developing and continuously monitoring selection and cutting systems. Short term ,,waste of time,, will bring long-term benefit. Remember that labour is the single highest cost of producing specialty cut flowers. In practical work trainers should working elbow to elbow with each harvest worker for a minute or two each time a crop is harvested. By example, reminds each worker what is not acceptable and how much stem to leave on the plant. Then moves on to other workers.
164
One of the models is “no decisions” systems, ways of doing a labour activity that do not require the worker to make a decision developed as Stevens Labour Model. Its recommendations are: First, develop a system for selecting which flowering stems to cut. Establish the selection criteria. Teach the harvest workers the selection criteria. How you teach the selection criteria is critical to reducing the indecision time. The following is recommended:
Do not teach the harvest workers what an ideal or perfect flowering stem looks like. Teach them what an unacceptable stem looks like. Teach them what an unacceptable stem looks like
Do not teach the harvest workers how long to cut the flowering stem. Teach them how long to leave the plant stem. What is the minimum stem length you must leave attached to the plant to maintain its health and vigour (productivity)? What is the minimum stem length you must leave attached to the plant to maintain its health and vigour (productivity)?
Do not stop training the harvest crew You must train and retrain constantly for all systems that require workers to make
a decision. The quality of the flowers is the best it will ever be at the moment of harvest. After harvest, flower quality can only decline as the flower matures and the stem dies. Great care and attention to the smallest detail must be taken to slow the decline of the flowering stem during the harvest activities.
5.17.2 Post-harvest It should be noted that a post-harvest treatment cannot upgrade poor quality flowers. Post harvest treatments can only maintain the quality. Controlling temperature is one of the main tools for extending post harvest life: low temperatures slow product metabolism and the activity of microorganisms responsible for quality deterioration. As a result, reserves are maintained with a lower respiration rate, vapour pressure between product and ambient is minimized, reducing water loss. These factors contribute towards maintaining freshness by reducing the rate at which quality deteriorates and the nutritional value of the product is preserved. The most common and economical system for handling of harvested flowers is refrigerated storage.
Deterioration The things that cause all flowers to deteriorate are much the same. Temperate climate flowers (eg. Chrysanthemums) will deteriorate faster in heat, and in the presence of disease. If kept in cooler conditions (ie. 15-20 degrees Celsius, they will probably last longer. Flowers with unopened buds can actually keep for up to 2 weeks at 2 degrees Celsius. Humid air will makes flowers more susceptible to disease, the only way round that is to keep them in air conditioning. An old practice of hammering or crushing stems is bad - it only promotes disease.
165
If the plants they came from were heavily fertilised with nitrogen (eg. manures), and the foliage contains high levels of nitrogen; they tend to deteriorate faster. A slower grown plant gives longer lasting flowers. Plant tissues require sugar to carry out their vital functions. If you stand flowers in a solution that contains sugar (eg. coconut milk), they have more sugar available - so can keep activities like photosynthesis going a little longer. This will slow their deterioration. Sugar is only one of many factors -but it is one we can do something about with relative ease. Sugar can also help disease develop though -so eventually it can encourage rotting of the stems. Ethylene gas is produced when plant tissue begins to deteriorate - it is worse once tissues rot. Excessive ethylene shortens the life of the flowers - so it needs to be removed with ventilation; air conditioning is not good in this respect, particularly in small rooms.
Aging in flowers When a flower is harvested, it begins to deteriorate. The rate of deterioration can vary greatly, according to the type of flower, its condition upon harvest, the way it is treated, and the environmental conditions under which it is stored. The relative importance of these different factors will vary from one variety of plant to another. • Type of flower Orchids, for example, may last for 6 weeks or more as a cut flower, proteas can also last a number of weeks, but many herbaceous plants such as chrysanthemums, dahlias or stock may not last a week. • Condition at harvest If the flower, stem or foliage is damaged the flower can deteriorate faster. • Treatment Certain treatments may prolong the life of the flower (eg. adding sugar or certain chemicals to water which flowers stand in), protecting from exposure to wind, heat or other adverse environmental conditions. • Environment Physiological processes continue to function after a flower is cut (eg. the plant continues respiration). These processes can be slowed (eg. by lowering temperature or changing composition of gases in the air). By slowing physiological processes, the rate of deterioration can often be slowed. However the natural processes of senescence will still occur eventually. Some flowers die faster than others due to their chemical and internal physiological makeup.
The main reasons fresh flowers deterioration includes:
inability of the stems to absorb water because of stem blockage
excessive water loss from the cut flower a short supply of carbohydrate to support
respiration
166
• Genetics The longevity of flowers is genetically influenced and varies greatly amongst different cultivars of the same species. These differences in longevity correlate with stem diameter and rigidity. Thicker stems are less likely to bend or break and contain more respiratory substrates for the flowers hence prolonging their vase life. • Anatomy and Physiology This also exerts an effect. For example, a cultivar that produces more ethylene will age faster than one that doesn’t. A plant’s anatomy and physiology are influenced in turn by a number of environmental and technical factors as illustrated in the table below. • Light Light intensity directly influences the efficiency of photosynthesis and hence the carbohydrate content of plants. Flowers with high carbohydrate (especially mobile sugars) content will last longer when cut. Cooler temperatures, low light intensity and shorter periods of light reduce the life of cut flowers. • Temperature Excessively high temperature during cultivation will reduce cut flower life. High temperatures increase rate of use of carbohydrates and rapid water loss from the plant. • Humidity High humidity is required for optimal flower production in some species, e.g. roses, since it reduces transpiration (and hence stress) and the occurrence of pests such as red spider mite. However, high levels of humidity can increase the growth of bacterial diseases such as grey mould and downy mildew. Ventilation is necessary to reduce these effects and also to reduce ethylene in the atmosphere. • Stage of Flower Development Generally speaking flowers cut at a more advanced stage of development will not last as long as younger ones.
Factors Affecting the Longevity of Cut Flowers
During Cultivation During Post-Harvest Handling
Light
Temperature
Fertilisation
Watering
Humidity
Control of Pests and Diseases
Air Pollution and Sanitation
Stage of Flower Development at Harvest
Time of Harvest
Mode of Harvesting
Temperature
Humidity
Light
Ethylene Production and Flower Sensitivity
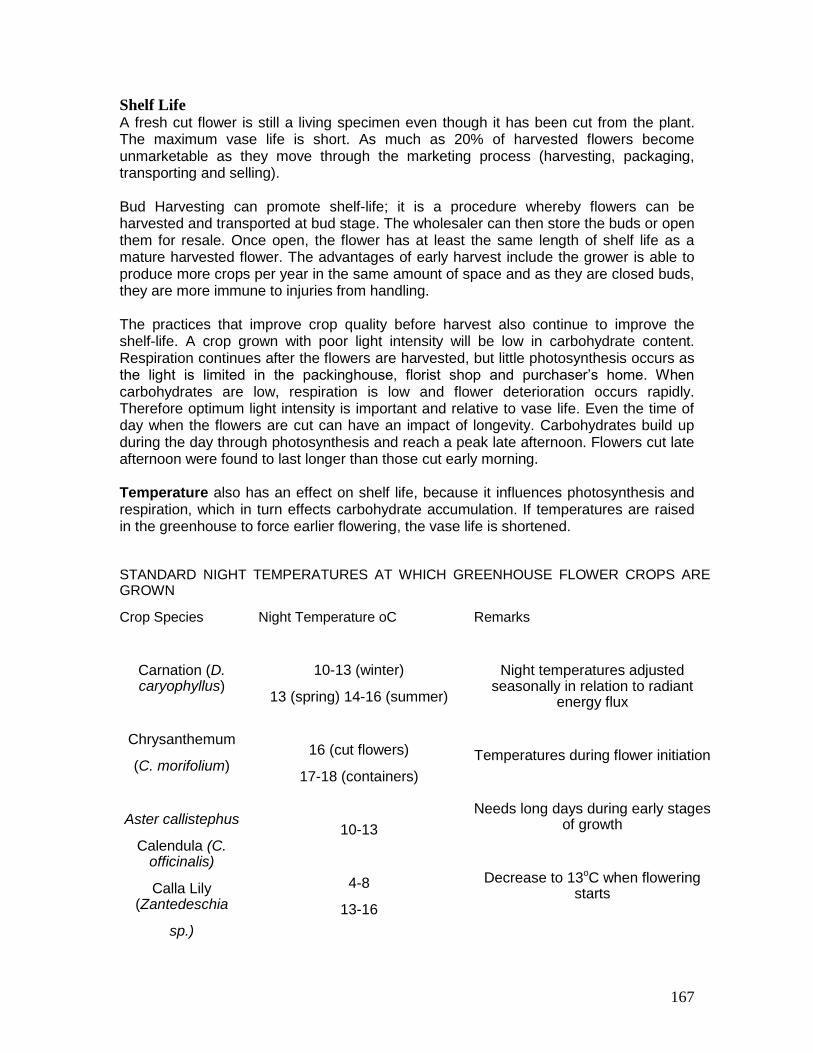
167
Shelf Life A fresh cut flower is still a living specimen even though it has been cut from the plant. The maximum vase life is short. As much as 20% of harvested flowers become unmarketable as they move through the marketing process (harvesting, packaging, transporting and selling). Bud Harvesting can promote shelf-life; it is a procedure whereby flowers can be harvested and transported at bud stage. The wholesaler can then store the buds or open them for resale. Once open, the flower has at least the same length of shelf life as a mature harvested flower. The advantages of early harvest include the grower is able to produce more crops per year in the same amount of space and as they are closed buds, they are more immune to injuries from handling. The practices that improve crop quality before harvest also continue to improve the shelf-life. A crop grown with poor light intensity will be low in carbohydrate content. Respiration continues after the flowers are harvested, but little photosynthesis occurs as the light is limited in the packinghouse, florist shop and purchaser’s home. When carbohydrates are low, respiration is low and flower deterioration occurs rapidly. Therefore optimum light intensity is important and relative to vase life. Even the time of day when the flowers are cut can have an impact of longevity. Carbohydrates build up during the day through photosynthesis and reach a peak late afternoon. Flowers cut late afternoon were found to last longer than those cut early morning. Temperature also has an effect on shelf life, because it influences photosynthesis and respiration, which in turn effects carbohydrate accumulation. If temperatures are raised in the greenhouse to force earlier flowering, the vase life is shortened. STANDARD NIGHT TEMPERATURES AT WHICH GREENHOUSE FLOWER CROPS ARE GROWN
Crop Species Night Temperature oC
Remarks
Carnation (D. caryophyllus)
Chrysanthemum
(C. morifolium)
Aster callistephus
Calendula (C. officinalis)
Calla Lily (Zantedeschia
sp.)
10-13 (winter)
13 (spring) 14-16 (summer)
16 (cut flowers)
17-18 (containers)
10-13
4-8
13-16
Night temperatures adjusted seasonally in relation to radiant
energy flux
Temperatures during flower initiation
Needs long days during early stages of growth
Decrease to 13oC when flowering starts
168
Nutrition of the crop has an effect on shelf life as well. Under or over supply of nutrients including nitrogen, calcium, magnesium, iron and manganese that reduce photosynthesis will reduce shelf life. Disease is another shelf- life factor. Premature wilting is caused by the xylem (water conducting tubes in the stem) being plugged by bacteria, yeast or fungi living in the water or on the flower foliage. These micro-organisms rapidly multiply and their chemical components plug the stem ends, restricting water absorption. The other important factor in maintaining quality of the harvested flowering stem is to maintain the water status of the plant tissue. Harvested stems, left dry until brought into the grading/packing shed, may wilt to a point beyond their ability to recover. Excessive water loss from flowers after harvest can lead to reduced shelf life. Immediately, after harvest, flowers should be refrigerated. Flowers need to be in water or in cool conditions as much as possible from the time they are cut. Low carbohydrate supply usually occurs as a result of improper storage temperature and handling. Low temperatures reduce respiration and conserve carbohydrate reserves thereby prolonging quality and shelf life. To optimise shelf life the following procedures should be followed. As soon as flowers arrive at the refrigeration room they should be placed in a new solution inside the refrigerator. The temperature should be at 3-5 degrees Celsius. The lower the temperature the better as the respiration rate falls as the temperature decreases. Flower coolers should maintain temperature at 2-4 degrees C. However, some flowers such as orchids and gardenias cannot tolerate this low of temperature and will show signs of frost injury (petal browning). Air should be circulated inside the cooler to ensure uniform temperature in all areas. Flowers should not be placed in the direct path of the air stream.
Bud Opening
Buds are stimulated to open by different things. For many plants, heat will stimulate bud opening; so keeping the plant cool is important if you wish to delay bud opening. Special solutions can be used to help regulate bud opening, extend the life of the flower and discourage disease attacking and rotting the stems. This is particularly important on some types of flowers when they are picked early. Solutions often contain sugars to compensate (partly) for inadequate food reserves available to the buds, and a steriliser such as sodium hypochlorite, to kill disease organisms in the water. The strength of chemicals used can be critical. Some flowers are damaged by concentrations, which are ideal for others. These solutions need appropriate temperatures to be absorbed by the plant. At very low temperatures they will not be absorbed, so cool stored plants may be sometimes put into a warmer situation for a period before cool storage to allow absorption.
169
5.17.3 Major factors that influence post-harvest life 1. Time • flowers begin to die from the second they are cut • some die slower than others 2. Temperature • flowers die faster and dry out faster at higher temperatures • most flowers are best kept at 1-2oC • some warm climate flowers need to be kept above 12oC 3. Water • flowers die faster if they dry out • water can carry disease, and that can cause flowers to rot • water can be kept clean by adding germicide, otherwise you must change the water frequently • stems can be recut under warm tap water to improve water uptake 4. Physical Damage Handle with care at all times. 5. Ethylene -Ethylene is also produced naturally in flowers. It is involved in the maturation of flowers -Ethylene gas kills or damages many types of flowers -Reducing the level of ethylene present in a flower will extend it’s vaselife -You should not keep flowers where ethylene is more than 0.1% of the air. Note: ethylene is produced by plants, fruit, vegetables, rotting organic material and plastic. -You should minimize the amount of these materials in the proximity of flowers -Silver thiosulfate (STS) is commonly used to reduce the effects of ethylene on some species of fresh cut flowers. -Some species are particularly sensitive to ethylene and need to be protected from its effects.
5.18 Post-harvest Treatments A post-harvest treatment is the use of chemicals by the grower after harvesting the flowers which is designed to extend the vase life of cut flowers. A range of different chemicals can be used, with some flowers, to prolong their life after cutting. Floral preservatives perform 3 main functions: • Provide sugar (carbohydrate) • Provide a bactericide to prevent microbial growth • They acidify the solution. This suppresses bacterial development and prevents wilting of flowers. Place the flowers as quickly as possible in the post-harvest treatment solution. Otherwise the flowers will dry out, or, what is even worse, air bubbles will come in the wood vessels of the stem. These air bubbles will block the uptake of water and/or post-harvest solution to a great extent. For most flowers the time between cutting and placing on the solution should be no longer than 30 minutes. The quicker, the better. Most of the water uptake of the flower takes place in the first 30 - 60 minutes after putting the flowers in the solution. After that time, only a very small amount can be taken up. This means that it makes no sense to put the flowers first in plain water and after an
170
hour or more (or after grading) in the post-harvest solution because the flower is already filled with water and unable to absorb the post-harvest treatment. Especially in a cold room, there will be no water uptake after the first hour, since there is no evapouration by the leaves. A system of preparing preservative solutions must be developed to provide a consistent concentration of preservative in each harvest container and to control the cost of labour to mix the solutions. A simple system would be to fill a scoop with preservative; scrape excess preservative off level with the top of the scoop; dump it into a bucket; fill the bucket with water to a line; and stir the solution until the preservative is completely dissolved in the water. In this system, the amount of preservative being used must be consistently measured. The amount of water being added must always be the same and the solution must be stirred to completely dissolve the preservative in the water. Any variation in any of these three activities will result in variation of preservative concentration and may affect the uniformity of flower quality. Careful and continuous attention to all details is essential to producing and delivering a quality product. Another system of preparing preservative solutions is to use an injector with a commercially prepared, concentrated preservative solution.
Chemical Treatments
Germicides Germicides such as chlorine (ie. stabilised pool chlorine) at 8gm per 100 litres or sodium hypochlorite at 5gm per 100 litres; such solutions need to be changed every 2 days. Sugar Sugar in solution often helps the flower to open, and improves vase life. The appropriate concentration will depend on the flower and the temperature. For most flowers: 10-20gm per litre for 24hrs after picking, then 50gm per litre at 15 to 25 degrees centigrade. Carnations and gypsophila require double this rate. Not all flowering species benefit from sugar in the solution (gerbera, asters), and may respond with shortened vase life. Citric Acid Citric acid improves water uptake in many flowers; generally use at about 2.5gm per 10 litres. Silver Thiosulphate This inhibits the destructive action of ethylene which causes death and flower drop with varieties. Commercial preparations usually have only a 2- 3 month shelf life. The fresh flower food solution in the storage container should be deep enough to cover the ends of all stems with sufficient margin for error and to allow for uptake without having to constantly refill to avoid stems sucking air. This is not to say the container should be filled to any great depth. Excess solution is wasteful and costly in materials and labour, as it should not be reused. Leaves should be removed from the stems up to a point just above where they won’t become submerged in the solution.
Other Treatments Cold Storage
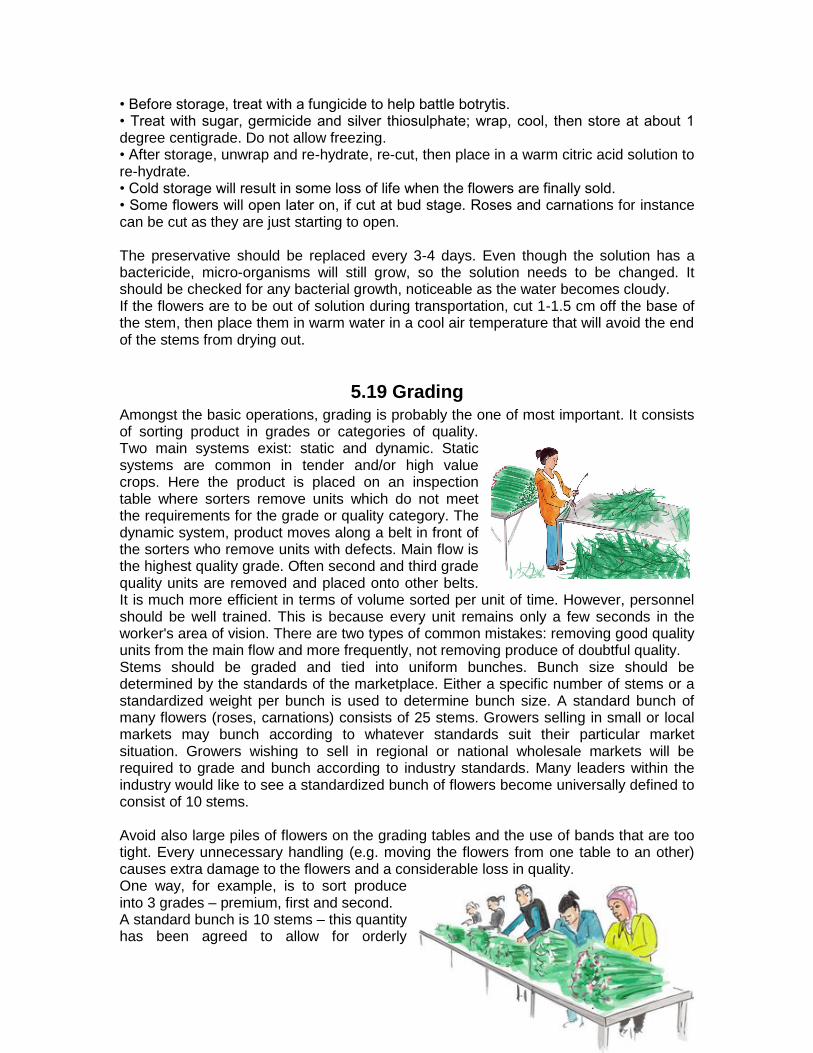
171
• Before storage, treat with a fungicide to help battle botrytis. • Treat with sugar, germicide and silver thiosulphate; wrap, cool, then store at about 1 degree centigrade. Do not allow freezing. • After storage, unwrap and re-hydrate, re-cut, then place in a warm citric acid solution to re-hydrate. • Cold storage will result in some loss of life when the flowers are finally sold. • Some flowers will open later on, if cut at bud stage. Roses and carnations for instance can be cut as they are just starting to open. The preservative should be replaced every 3-4 days. Even though the solution has a bactericide, micro-organisms will still grow, so the solution needs to be changed. It should be checked for any bacterial growth, noticeable as the water becomes cloudy. If the flowers are to be out of solution during transportation, cut 1-1.5 cm off the base of the stem, then place them in warm water in a cool air temperature that will avoid the end of the stems from drying out.
5.19 Grading Amongst the basic operations, grading is probably the one of most important. It consists of sorting product in grades or categories of quality. Two main systems exist: static and dynamic. Static systems are common in tender and/or high value crops. Here the product is placed on an inspection table where sorters remove units which do not meet the requirements for the grade or quality category. The dynamic system, product moves along a belt in front of the sorters who remove units with defects. Main flow is the highest quality grade. Often second and third grade quality units are removed and placed onto other belts. It is much more efficient in terms of volume sorted per unit of time. However, personnel should be well trained. This is because every unit remains only a few seconds in the worker's area of vision. There are two types of common mistakes: removing good quality units from the main flow and more frequently, not removing produce of doubtful quality. Stems should be graded and tied into uniform bunches. Bunch size should be determined by the standards of the marketplace. Either a specific number of stems or a standardized weight per bunch is used to determine bunch size. A standard bunch of many flowers (roses, carnations) consists of 25 stems. Growers selling in small or local markets may bunch according to whatever standards suit their particular market situation. Growers wishing to sell in regional or national wholesale markets will be required to grade and bunch according to industry standards. Many leaders within the industry would like to see a standardized bunch of flowers become universally defined to consist of 10 stems. Avoid also large piles of flowers on the grading tables and the use of bands that are too tight. Every unnecessary handling (e.g. moving the flowers from one table to an other) causes extra damage to the flowers and a considerable loss in quality. One way, for example, is to sort produce into 3 grades – premium, first and second. A standard bunch is 10 stems – this quantity has been agreed to allow for orderly
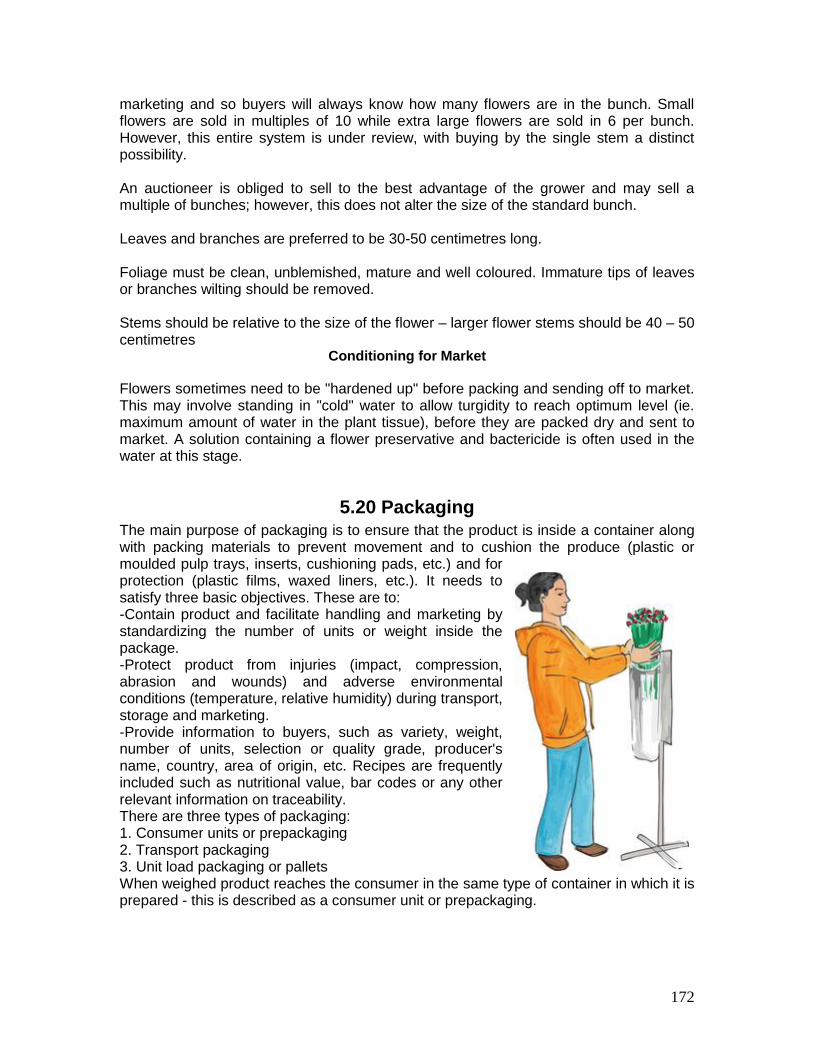
172
marketing and so buyers will always know how many flowers are in the bunch. Small flowers are sold in multiples of 10 while extra large flowers are sold in 6 per bunch. However, this entire system is under review, with buying by the single stem a distinct possibility. An auctioneer is obliged to sell to the best advantage of the grower and may sell a multiple of bunches; however, this does not alter the size of the standard bunch. Leaves and branches are preferred to be 30-50 centimetres long. Foliage must be clean, unblemished, mature and well coloured. Immature tips of leaves or branches wilting should be removed. Stems should be relative to the size of the flower – larger flower stems should be 40 – 50 centimetres
Conditioning for Market
Flowers sometimes need to be "hardened up" before packing and sending off to market. This may involve standing in "cold" water to allow turgidity to reach optimum level (ie. maximum amount of water in the plant tissue), before they are packed dry and sent to market. A solution containing a flower preservative and bactericide is often used in the water at this stage.
5.20 Packaging The main purpose of packaging is to ensure that the product is inside a container along with packing materials to prevent movement and to cushion the produce (plastic or moulded pulp trays, inserts, cushioning pads, etc.) and for protection (plastic films, waxed liners, etc.). It needs to satisfy three basic objectives. These are to: -Contain product and facilitate handling and marketing by standardizing the number of units or weight inside the package. -Protect product from injuries (impact, compression, abrasion and wounds) and adverse environmental conditions (temperature, relative humidity) during transport, storage and marketing. -Provide information to buyers, such as variety, weight, number of units, selection or quality grade, producer's name, country, area of origin, etc. Recipes are frequently included such as nutritional value, bar codes or any other relevant information on traceability. There are three types of packaging: 1. Consumer units or prepackaging 2. Transport packaging 3. Unit load packaging or pallets When weighed product reaches the consumer in the same type of container in which it is prepared - this is described as a consumer unit or prepackaging.
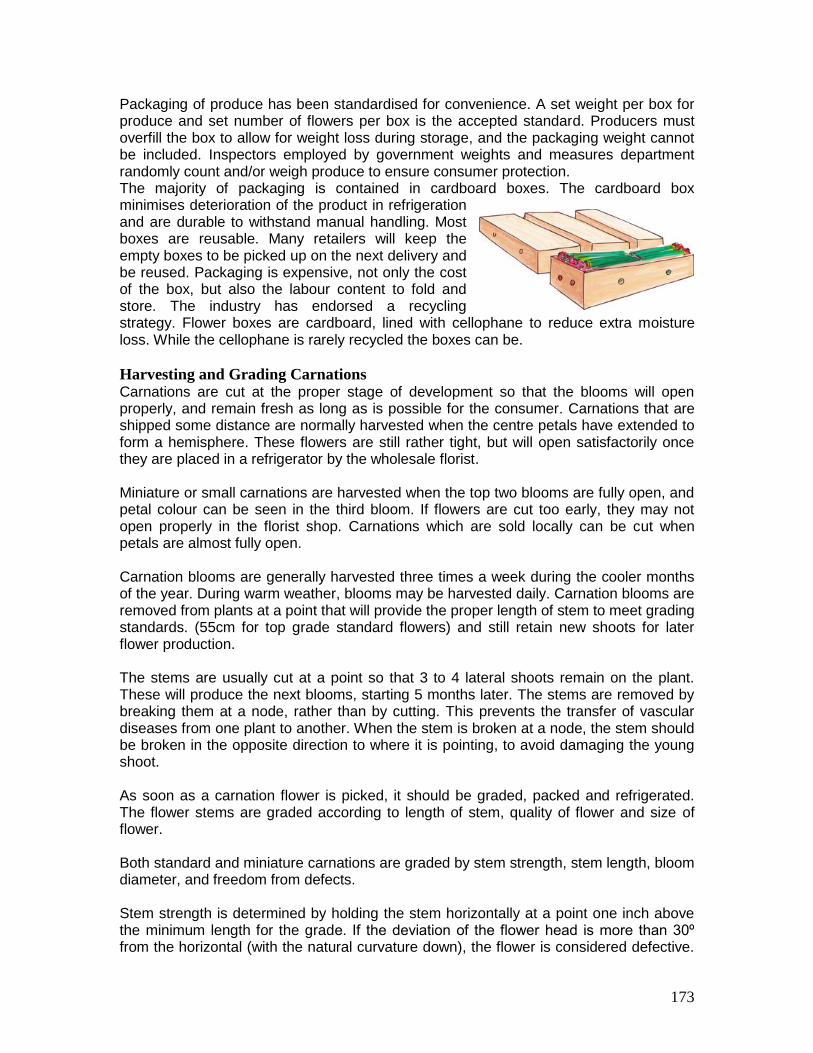
173
Packaging of produce has been standardised for convenience. A set weight per box for produce and set number of flowers per box is the accepted standard. Producers must overfill the box to allow for weight loss during storage, and the packaging weight cannot be included. Inspectors employed by government weights and measures department randomly count and/or weigh produce to ensure consumer protection. The majority of packaging is contained in cardboard boxes. The cardboard box minimises deterioration of the product in refrigeration and are durable to withstand manual handling. Most boxes are reusable. Many retailers will keep the empty boxes to be picked up on the next delivery and be reused. Packaging is expensive, not only the cost of the box, but also the labour content to fold and store. The industry has endorsed a recycling strategy. Flower boxes are cardboard, lined with cellophane to reduce extra moisture loss. While the cellophane is rarely recycled the boxes can be.
Harvesting and Grading Carnations Carnations are cut at the proper stage of development so that the blooms will open properly, and remain fresh as long as is possible for the consumer. Carnations that are shipped some distance are normally harvested when the centre petals have extended to form a hemisphere. These flowers are still rather tight, but will open satisfactorily once they are placed in a refrigerator by the wholesale florist. Miniature or small carnations are harvested when the top two blooms are fully open, and petal colour can be seen in the third bloom. If flowers are cut too early, they may not open properly in the florist shop. Carnations which are sold locally can be cut when petals are almost fully open. Carnation blooms are generally harvested three times a week during the cooler months of the year. During warm weather, blooms may be harvested daily. Carnation blooms are removed from plants at a point that will provide the proper length of stem to meet grading standards. (55cm for top grade standard flowers) and still retain new shoots for later flower production. The stems are usually cut at a point so that 3 to 4 lateral shoots remain on the plant. These will produce the next blooms, starting 5 months later. The stems are removed by breaking them at a node, rather than by cutting. This prevents the transfer of vascular diseases from one plant to another. When the stem is broken at a node, the stem should be broken in the opposite direction to where it is pointing, to avoid damaging the young shoot. As soon as a carnation flower is picked, it should be graded, packed and refrigerated. The flower stems are graded according to length of stem, quality of flower and size of flower. Both standard and miniature carnations are graded by stem strength, stem length, bloom diameter, and freedom from defects. Stem strength is determined by holding the stem horizontally at a point one inch above the minimum length for the grade. If the deviation of the flower head is more than 30º from the horizontal (with the natural curvature down), the flower is considered defective.
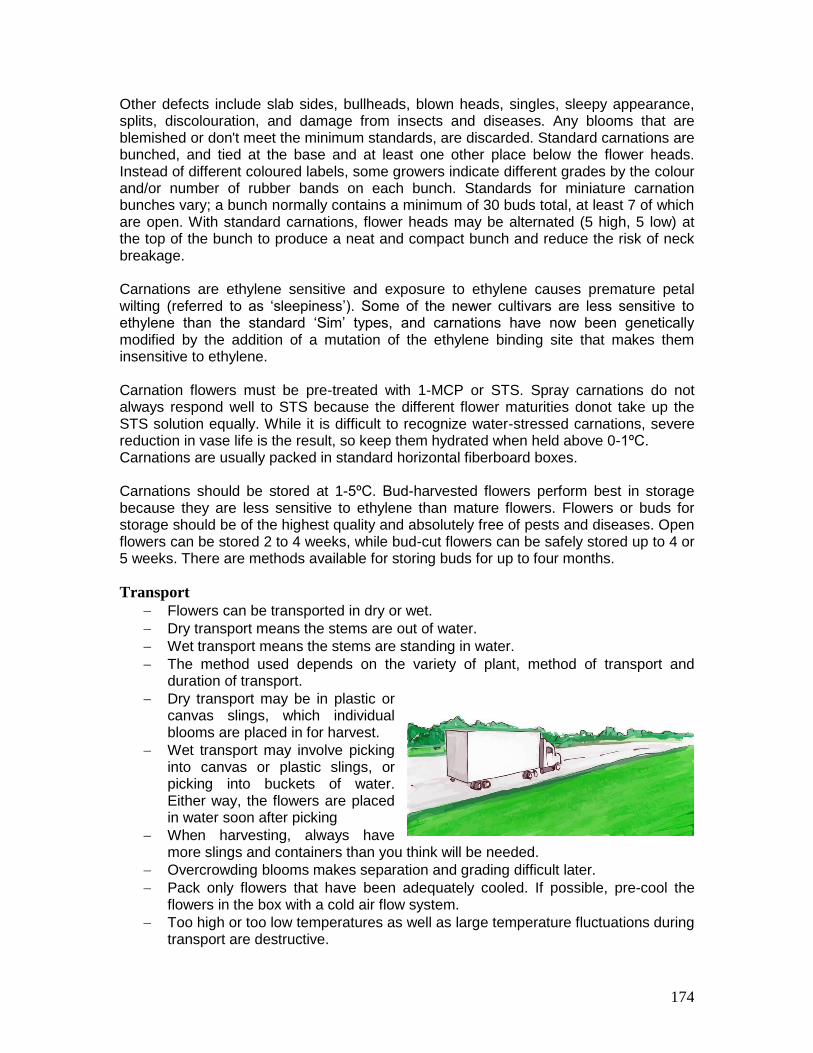
174
Other defects include slab sides, bullheads, blown heads, singles, sleepy appearance, splits, discolouration, and damage from insects and diseases. Any blooms that are blemished or don't meet the minimum standards, are discarded. Standard carnations are bunched, and tied at the base and at least one other place below the flower heads. Instead of different coloured labels, some growers indicate different grades by the colour and/or number of rubber bands on each bunch. Standards for miniature carnation bunches vary; a bunch normally contains a minimum of 30 buds total, at least 7 of which are open. With standard carnations, flower heads may be alternated (5 high, 5 low) at the top of the bunch to produce a neat and compact bunch and reduce the risk of neck breakage. Carnations are ethylene sensitive and exposure to ethylene causes premature petal wilting (referred to as ‘sleepiness’). Some of the newer cultivars are less sensitive to ethylene than the standard ‘Sim’ types, and carnations have now been genetically modified by the addition of a mutation of the ethylene binding site that makes them insensitive to ethylene. Carnation flowers must be pre-treated with 1-MCP or STS. Spray carnations do not always respond well to STS because the different flower maturities donot take up the STS solution equally. While it is difficult to recognize water-stressed carnations, severe reduction in vase life is the result, so keep them hydrated when held above 0-1ºC. Carnations are usually packed in standard horizontal fiberboard boxes. Carnations should be stored at 1-5ºC. Bud-harvested flowers perform best in storage because they are less sensitive to ethylene than mature flowers. Flowers or buds for storage should be of the highest quality and absolutely free of pests and diseases. Open flowers can be stored 2 to 4 weeks, while bud-cut flowers can be safely stored up to 4 or 5 weeks. There are methods available for storing buds for up to four months.
Transport
Flowers can be transported in dry or wet.
Dry transport means the stems are out of water.
Wet transport means the stems are standing in water.
The method used depends on the variety of plant, method of transport and duration of transport.
Dry transport may be in plastic or canvas slings, which individual blooms are placed in for harvest.
Wet transport may involve picking into canvas or plastic slings, or picking into buckets of water. Either way, the flowers are placed in water soon after picking
When harvesting, always have more slings and containers than you think will be needed.
Overcrowding blooms makes separation and grading difficult later.
Pack only flowers that have been adequately cooled. If possible, pre-cool the flowers in the box with a cold air flow system.
Too high or too low temperatures as well as large temperature fluctuations during transport are destructive.
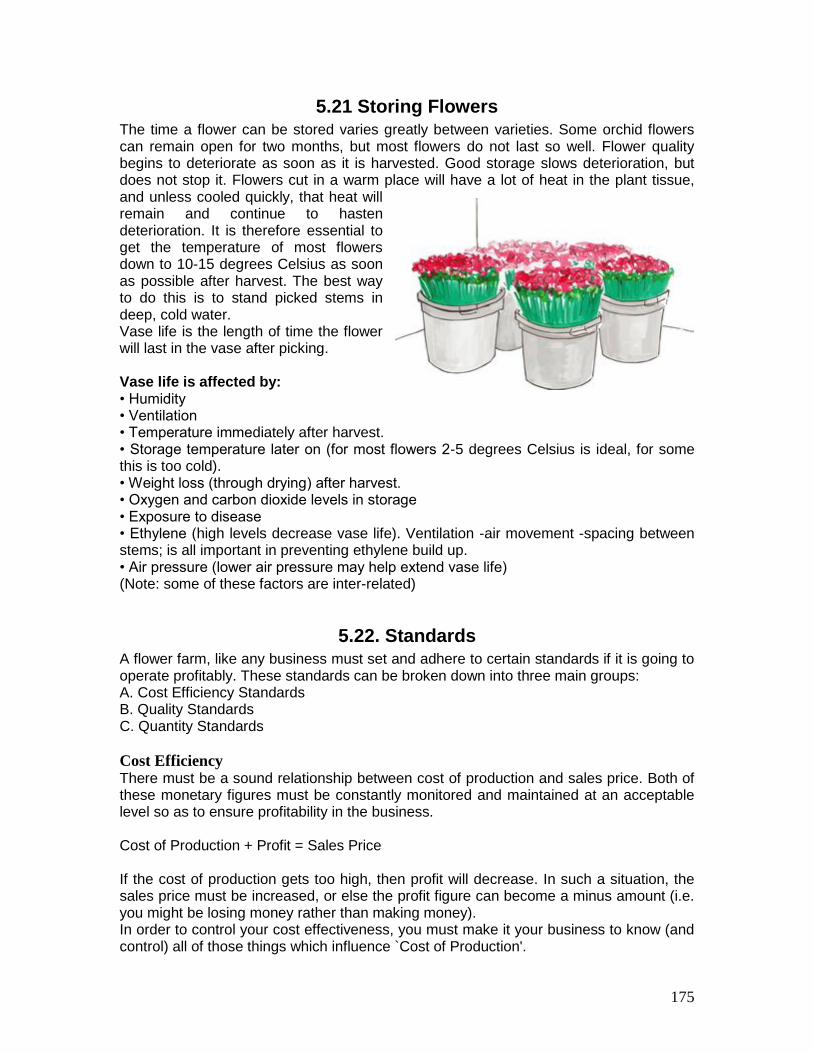
175
5.21 Storing Flowers The time a flower can be stored varies greatly between varieties. Some orchid flowers can remain open for two months, but most flowers do not last so well. Flower quality begins to deteriorate as soon as it is harvested. Good storage slows deterioration, but does not stop it. Flowers cut in a warm place will have a lot of heat in the plant tissue, and unless cooled quickly, that heat will remain and continue to hasten deterioration. It is therefore essential to get the temperature of most flowers down to 10-15 degrees Celsius as soon as possible after harvest. The best way to do this is to stand picked stems in deep, cold water. Vase life is the length of time the flower will last in the vase after picking. Vase life is affected by: • Humidity • Ventilation • Temperature immediately after harvest. • Storage temperature later on (for most flowers 2-5 degrees Celsius is ideal, for some this is too cold). • Weight loss (through drying) after harvest. • Oxygen and carbon dioxide levels in storage • Exposure to disease • Ethylene (high levels decrease vase life). Ventilation -air movement -spacing between stems; is all important in preventing ethylene build up. • Air pressure (lower air pressure may help extend vase life) (Note: some of these factors are inter-related)
5.22. Standards A flower farm, like any business must set and adhere to certain standards if it is going to operate profitably. These standards can be broken down into three main groups: A. Cost Efficiency Standards B. Quality Standards C. Quantity Standards
Cost Efficiency There must be a sound relationship between cost of production and sales price. Both of these monetary figures must be constantly monitored and maintained at an acceptable level so as to ensure profitability in the business. Cost of Production + Profit = Sales Price If the cost of production gets too high, then profit will decrease. In such a situation, the sales price must be increased, or else the profit figure can become a minus amount (i.e. you might be losing money rather than making money). In order to control your cost effectiveness, you must make it your business to know (and control) all of those things which influence `Cost of Production'.
176
The Cost of Production is influenced by the following factors: • Cost of site (lease/rent value) • Cost of site services (power, gas, water, insurance, rates etc) • Cost of materials (soil, pots, fertilizers etc) • Cost of unsold produce - a certain proportion may be lost, may die, or may just become unsaleable • Some horticultural businesses budget for as much as 30% of stock being thrown away • Labour costs; be sure to include your own time as well as employees. Advertising/ Promotion (printing, advertising in magazines, etc) • Selling costs (transportation, invoicing) • Taxation (don't forget payroll tax, income tax)
Profit This figure should be over and above money which you earn as wages. If you are only working for wages (with no profit), then you would be better putting your money into some different form of investment and going to work for someone else. Profit should be greater than the interest rate which you could get by investing your money elsewhere. Profit should normally be at least 15-20%. In horticultural businesses the profit margin can vary greatly from crop to crop and year to year. You will find that profit will be very low (possibly nothing) some years, and high other years. The profit must be viewed in terms of an average over several years. New operations should always have sufficient liquidity to carry them if they have a couple of bad seasons before some good seasons come along.
Sales Price The figure which a produce is sold for can vary considerably. This can be due to such factors as overall economic conditions, general availability of the product you are selling, and consumer demand.
Quality Standards The word "quality" comes from the Latin qualitas that means attribute, property or basic nature of an object. However, nowadays it can be defined as the "degree of excellence or superiority" (Kader, et al., 1985). Accepting this definition, we can say that a product is of better quality when it is superior in one or several attributes that are objectively or subjectively valued. In terms of the service or satisfaction that it produces to consumers, we could also define it as the "degree of fulfillment of a number of conditions that determine its acceptance by the consumer". Here, a subjective aspect is introduced, since different consumers will judge the same product according to their personal preferences. Producing a quality product begins well before planting the seed. Soil selection and preparation, its fertility and irrigation aptitude, weed control and crop rotations, variety selection and other decisions have an influence on the quality of the product. In the

177
same way, quality is affected by the climatic conditions during the growing period, as well as irrigation, fertilisations, control of pest and diseases and other cultural practices. Harvest is the end of cultivation and the beginning of post-harvest actions during which preparation for the market, distribution, and sale take place. The following factors are of concern when considering produce quality: • General appearance of vigour or health such as markings or lack of markings on produce (eg. disease, rot, bruising, etc) • Smell (eg. how sweet etc) • Freshness (ie. the quicker you can sell it after harvest, the better the quality will be considered).
Quantity Standards Commercial production must achieve certain standards in terms of the quantity of produce being harvested, its weight and the size of each unit harvested. (eg. how many carnations will you pick per year per square metre, and how big will each be). • For some crops, the size is not critical, but the number is (eg. Orchids are sold on the number of flowers. A slightly smaller or larger flower will not make a great deal of difference to the cost). • For other crops weight is critical, but size doesn't matter. (eg. beans are sold by the kilogram, irrespective of whether they are large or small beans). • For other crops size and weight are both important (eg. strawberries are sold by the kilogram, but large ones are sold at a different rate to small ones).
The quality system established by the standards is known as "Inspection for quality" where representative samples at the final stage of preparation for the market should fulfill the specified limits and their tolerances. Although it is easy to apply, it has, at least, two big disadvantages: firstly, they are not totally adapted to highly perishable products where quality varies continually. Secondly, its application does not improve the quality of the product, it only separates in degrees the quality that comes from the field.
This system was transferred to Japan after World War II where it evolved into what today is known as "Total Quality Management" or simply "Total Quality". Total quality is today the most complete conceptual framework to assure quality to which each person or activity within the production process is committed, aiming at zero defects and customer's complete satisfaction, even going beyond his/her expectations. At the same time that TQM was developed, the concept of "Quality Assurance" was coined in Europe. Its scope is slightly narrower than TQM, but a lot easier to implement and probably better adapted to fruit and vegetables. It is defined as all those planned and systematized actions necessary to guarantee that the product or service will satisfy the requirements of quality. It usually requires the fulfillment of certain rules, protocols, or standards developed specifically and with a certification by an independent company authorized to grant it. The ISO system is probably the best known and within it the series 9000.
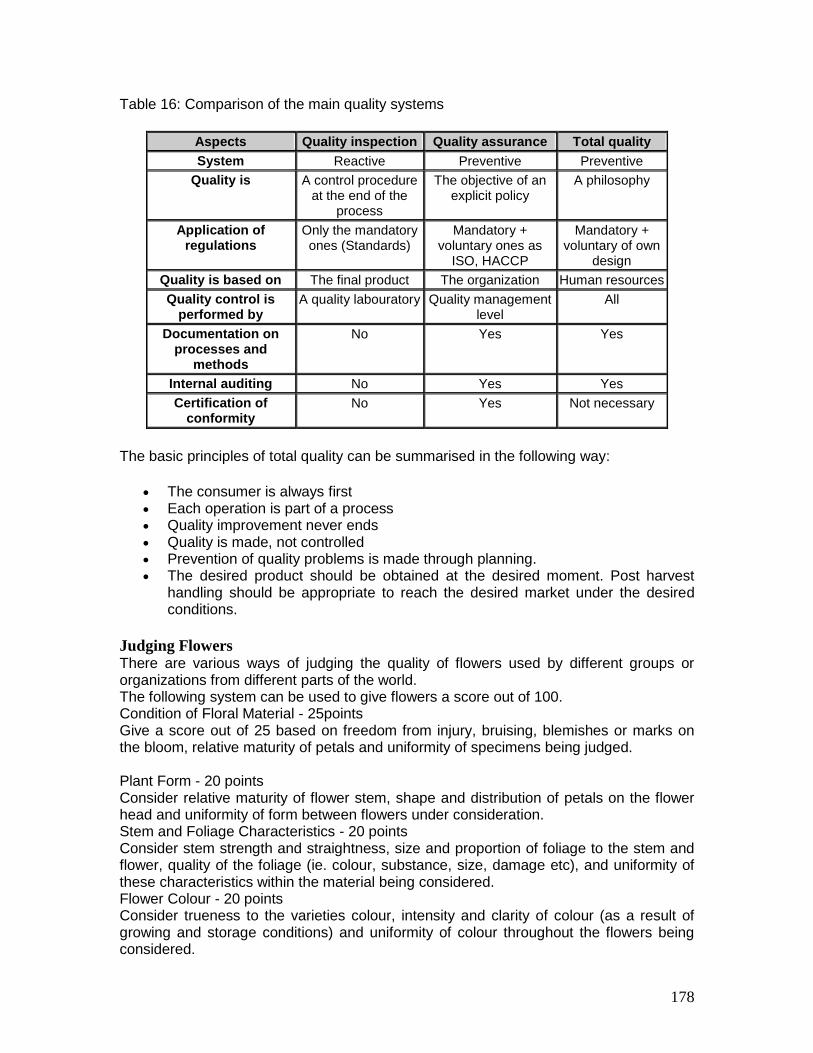
178
Table 16: Comparison of the main quality systems
Aspects Quality inspection Quality assurance Total quality
System Reactive Preventive Preventive
Quality is A control procedure at the end of the
process
The objective of an explicit policy
A philosophy
Application of regulations
Only the mandatory ones (Standards)
Mandatory + voluntary ones as
ISO, HACCP
Mandatory + voluntary of own
design
Quality is based on The final product The organization Human resources
Quality control is performed by
A quality labouratory Quality management level
All
Documentation on processes and
methods
No Yes Yes
Internal auditing No Yes Yes
Certification of conformity
No Yes Not necessary
The basic principles of total quality can be summarised in the following way:
The consumer is always first Each operation is part of a process Quality improvement never ends Quality is made, not controlled Prevention of quality problems is made through planning. The desired product should be obtained at the desired moment. Post harvest
handling should be appropriate to reach the desired market under the desired conditions.
Judging Flowers There are various ways of judging the quality of flowers used by different groups or organizations from different parts of the world. The following system can be used to give flowers a score out of 100. Condition of Floral Material - 25points Give a score out of 25 based on freedom from injury, bruising, blemishes or marks on the bloom, relative maturity of petals and uniformity of specimens being judged. Plant Form - 20 points Consider relative maturity of flower stem, shape and distribution of petals on the flower head and uniformity of form between flowers under consideration. Stem and Foliage Characteristics - 20 points Consider stem strength and straightness, size and proportion of foliage to the stem and flower, quality of the foliage (ie. colour, substance, size, damage etc), and uniformity of these characteristics within the material being considered. Flower Colour - 20 points Consider trueness to the varieties colour, intensity and clarity of colour (as a result of growing and storage conditions) and uniformity of colour throughout the flowers being considered.

179
Size - 15 points Consider the size of stem, foliage and flowers. Uniformity of size is particularly important. Overall, decorative rather than botanical value should be emphasised.
Understanding the consumer The term quality means different things to different people. Many quality experts have tried to define the term quality. Out of the more than 100 definitions of quality, one of them, which can be applied to all goods and services including also the cut flower business: Quality is the measure by which a product or service is adapted to the needs, wishes, behaviour, and even inconsistent behaviour, of the consumer.
This definition implies that to increase quality one has to do a market survey rather than a product survey.
Buyer motivations are quite complex and vary according to gender, age, cultural, ethnic, regional etc. The previous part showed that consumer attitudes do not follow a uniform pattern. There are other factors which also influence buying decisions. The main objective of buying is to obtain satisfaction. The tangible quality attributes such as uniformity, freshness, quality, colour, ripeness, packaging, etc which affect appearance and make produce more appealing or attractive compared to similar products. Buying decisions are also influenced by some intangible quality attributes such as quality, environmentally friendly production techniques, brand reputation, image of the supplier, etc. In one study answer the question what does the consumer look for when buying flowers, following results are obtained: Why consumers buy a specific type of flower:
long vase life - 60% colour -20% price -10% other, e.g.: bunch-size, fragrance, sentiment, form etc. -10%
Based on this study we can conclude that: if one wants to increase the turnover of cut flowers, one has first to increase the vase life of cut flowers. Although vase life of cut flowers depends on the type of flower, the variety and growth conditions, it can be extensively influenced by a proper post-harvest treatment. Post-harvest treatment cannot upgrade poor quality flowers. Post-harvest treatments can only maintain the quality. The practices that improve crop quality before harvest also continue to improve the shelf-life.
5.23 Marketing Marketing or the way we sell goods or services in the any industry does affect us all, and should be given due consideration by anyone who wants to be successful, no matter what type of business you are involved in.
180
It is obvious therefore that all business operators need to be concerned about marketing. In order to make a reasonable living and run a viable business he or she needs to sell products or a service; if they sell them well they will make a living if they do not, they might go broke. The contractor also needs to sell. It is just that the product is different. The contractor is selling an idea when they first deal with a client. They must follow through and be sure of customer satisfaction after they complete their design or construction work. Even the government-employed manager uses marketing ability. The parks superintendent needs to convince the council of his new proposal, the research worker needs to be able to win funds for a new program and the civil engineer needs to convince his/her minister of his/her new project. Marketing Involves: • Packaging and presenting the goods or services • Making contact with the person you are selling to • Communication - ensuring they understand about the goods or services (promoting the produce) • Convincing - presenting the "product" in a way which favours you achieving the result you are aiming for • Selling the produce • Transporting the produce • Follow-up - ensuring the "buyer" is satisfied with what they get (in the long term) The success or failure of marketing must relate to the relationship between supply and demand: Supply being the quantity of a good or service available; demand being how much it is wanted. If supply is low and demand is high, then marketing is easy (because there is no or little competition). If supply is high and demand low then marketing can be very difficult. To become successful at marketing you must know: • What the customer wants or needs. You may sell a customer what he or she thinks they need, but does not really need. When the customer decides they don’t really want what they bought, you may lose the chance of the customer returning to buy again! • How to communicate successfully with the customer. This involves knowing where and how to advertise; how to speak properly, how to read a person's mannerisms (voice and body language) etc. • Potential that exists for new products or services. • Changes likely to occur in demand for goods and services. Considering Your Markets Produce, whether cut flowers, vegetables or fruit, is generally sold through one of the following: • Direct Sales to the Public Example: From the packing shed on your property, or from a roadside stall. Some growers have supplemented their income by tapping the tourist market and catering in other ways to people visiting their property. It may be very viable to consider setting up conducted tours of a hydroponic farm together with direct sales of produce, and perhaps a shop selling souvenirs, refreshments etc. Some such operations may involve "pick your own" sales where the public pays a bargain price for what they pick themselves.
181
• Sales through Major Markets. Major cities operate fruit, vegetable and cut flower markets through which growers sell produce to shopkeepers. You can hire a stand at, or sell through an agent (who generally takes a commission) at such markets. • Selling direct to retail outlets. It may be viable for you to do your own distribution with some crops, and if you are big enough to make it worthwhile. Distribution can be expensive and time consuming though, and should not be tackled lightly. • Contract growing Some companies will contract produce to be grown for processing in factories. Generally the price paid for produce is predetermined, limiting the amount of profit which the grower may make, but giving a guaranteed sale. Market Research One of the major keys to success in any business is to "know your market". If you know that there is demand for what you are planning to grow, and if you can pinpoint where that demand is, your chances of success will increase greatly (not to mention the sleepless nights you will save). As such, one of the most important things you can do before growing any new crop is to thoroughly research the market. The following information is designed to give you some guide on how to approach researching the market. Successful marketing depends upon knowing the people/groups you are marketing to - what they want, how they are likely to react to your product, and what they will spend money on. When the market place is understood, you can then follow the steps below to achieve successful marketing: • Set realistic marketing goals • Provide structures for reaching those goals • Assess the results of marketing efforts and modify your approaches accordingly. Market research involves all those activities which help management reach marketing decisions. Market research attempts to make unknown things known; and in most instances, largely succeeds. Steps Involved In Market Research • Define the problem - what information is required? Example: how can I increase sales by 10% - or should I change the way I distribute my produce?) • Conduct an investigation.
o Examine past records which relate to the problem. o Speak with people in the know, who might help with this problem. o Try to find any relevant information which has been published.
Example: in trade magazines, Bureau of statistics. • If more information is required, you may decide to survey the customers (or potential customers). Note: this involves significantly more cost. • If the problem is still beyond you, you may employ a professional market research firm to handle it.

182
Gathering Information There are various ways you can obtain information about the market. After considering the possible marketing avenues (eg. direct sales to the public, selling through major markets, contract growing etc), and the type of produce you might grow; you should next try to find out all you can about the market you are considering. Get to know the details of how that market operates, what your chances might be of breaking in to that market and how strong that market is. This information can be gathered three main ways; asking questions, observing people or referring to literature. • Literature Magazines, newspapers and books are a great source of information. They can give a very good indication of what markets are most viable however literature is not always up to date. Things published today may have been written months or years ago. As such it may not be an accurate reflection of what is current. Newspapers and monthly magazines are generally better than quarterly journals or books. • Asking people (ie. surveys) Formal or informal, surveys can tell you a lot about a market. Surveys are relatively inexpensive and adaptable to a wide variety of situations. Questions are asked through personal interviews, mail questionnaires, telephone interviews, etc.
o Mail and telephone surveys are less expensive. o Telephone surveys produce quickest results. o Personal interviews are the most accurate.
• Watching People A lot can be learnt by observing what people in the market place. Visit a fruit or flower shop and watch what they buy, what produce they are attracted to, and how they buy. This involves observing reactions when something is presented to people. Some growers get excellent feedback from the public when they put on a promotional display at an agricultural or trade show. The main disadvantage is observations may not be accurate. What Do You Need to Research? In any business, success is determined by a combination of many factors. Market research considers different things in different situations; however, the following are commonly researched factors: • Progressive or backward (Is the market for your proposed produce expanding or contracting?) • Is the competition helpful and courteous to customers - or not? • Does the competition give quick and efficient service? • Is the produce you have in mind advertised/promoted well or poorly in the marketplace? • Is the produce you are considering inexpensive or expensive? How to Sell Successfully Whether you sell direct to the public or only deal with contractors or agents, you will find some basic sales skills can be invaluable. Often your ability to sell is the difference between a successful business and financial disaster. When you negotiate a sale, be prepared and make sure you know the following:
183
• Details of what you are selling; its attributes, its competition, its negative points (and how to counteract these). • Where and how to find the product/brochures/catalogues/order forms - or anything else relating to the sale. • The prices to charge and terms of sale. • Procedure for making a sale (including: using cash register, filling out order book, writing receipts). • Company policies (on returns, damaged goods). • How to package or deliver goods or services (eg. wrapping, directing other staff to deliver service or goods). • How to keep records in order. • How to maintain order and tidiness in sales area/equipment. A good sales person should possess the following characteristics: • A good appearance. • A pleasant personality. • Courtesy and tact. • Enjoy selling. • A basic understanding of human nature (practical not theoretical -ability to read people's body language). Key Rules Every Salesperson Should Follow: • Research your customer and product first. • You need to know both the customer and the product before you attempt to sell. • Find out everything your customer's needs to buy before you start dealing. • Highlight the benefits of a produce - rather than the features. • Tell the customer what it can do for them personally - don't tell them what is great and unique about the produce if it is not relevant to them in particular. • If there are objections, play it cool and try to determine, very specifically what they are - once you narrow down the objection, put it into perspective by showing something about the product which compensates that objection (eg. yes it is expensive - but it will sell better). Don't make it seem as if you have won a point. • Always keep control of the conversation - don't let yourself get into a defensive position. This is done by asking questions when the customer starts to take the offensive. • Do not talk while showing the produce. Show them, then stop and talk, stop talking while you show them again etc. • Handle produce with respect. • Get the customer to try out the produce (eg. give them a strawberry to eat or a flower to smell) • If you need to, use the phone or calculator to buy thinking time. Excuse yourself to make a phone call or calculate some figures. • Try to close the sale - ask for an order at the appropriate time, when the customer seems to be in a state of mind where he/she is likely to buy. Many a good sale is lost because the salesman doesn't close the deal when he has the chance. Once you and the customer part ways; the chances of getting back together to finalize the deal are greatly reduced. • Fulfilling the customer's needs is more important than improving your own knowledge or sales technique. • Remember that the customer is always right - without her/him you are not going to remain in business.
184
Annex 1 Overview of the Field Farmer School Approach
What is a Farmer Field School? Farmer Field Schools (FFS) consist of groups of people with a common interest, who get together on a regular basis to study the “how and why” of a particular topic. The FFS is particularly suited and specifically developed for field studies, where hands-on management skills and conceptual understanding (based on non-formal adult education principles) is required. An FFS is a capacity building method based on adult education principles using groups of farmers. It is best described as a “school without walls”, where farmers learn through observation and experimentation in their fields. This allows them to improve their management skills and become knowledge experts on their own farms.
The farmers’ fields provide “the”platform where the FFS group members with guidance from a trained facilitator discover meaning and solutions to their common problems. In the process farmers take active roles in developing and applying strategies aimed at improving their livelihoods.
It is a method to train adult farmers in an informal setting within their own environment, which empowers farmers to be their own technical experts on major aspects of farming.
Objectives “FFS is not about technology but about people development. It brings farmers together for them to assess their problems and seek ways of addressing them.” Specific FFS objectives include:
empowering farmers with knowledge and skills to make them experts in their own fields;
sharpening the farmers’ ability to make critical and informed decisions so that they can make their farming profitable and sustainable;
sensitising farmers to new ways of thinking and problem solving;
helping farmers learn how to organise themselves and their communities;
enhancing the relationships between farmers, extensionists and researchers, so they work together to test, assess and adapt a variety of options within the specific local conditions.
Approach There are five core activities that are repeated in each session to provide the framework for each FFS: agro-ecosystem analysis (AESA); field comparative experiments; topic of the day (special topic); participatory monitoring and evaluation (PM&E); and group dynamic exercises.
All FFS follow the same systematic training process. The key steps are:
observation
group discussion
analysis
decision making and action planning
185
Basic Principles There are a number of basic principles that help explain the FFS approach in terms of its participatory and collabourative nature, frequency of meeting and team building. The most important of ones include:
Farmers as experts Farmers have an opportunity to carry out comparative studies on the enterprises of their choice. In doing so they become experts on the particular practice they are investigating.
The farmer`s field is the learning ground The field (crop production and post harvest system) is the main learning tool. All activities are organised around it. Farmers learn directly from what they observe, collect and experience in their fields instead of text books, pictures or other extension materials.
Working in small subgroups, they collect data in the field, analyse the data, make active decisions based on the analyses, and present their decisions to the other farmers in the field school for discussion, questioning and refinement.
Farmer-led learning activities Farmers, not the facilitator, decide what is relevant to them and what they want the FFS to address. This ensures that the information is relevant and tailored to their actual needs. The facilitator simply guides the farmers through their learning process by creating participatory exercises to provide farmers with new experiences. Learning by doing Adults do not change their behavior and practices just because someone tells them what to do. They learn better through experience than from passive listening at lectures or demonstrations.
Discovery-based learning enables the farmers:
- to develop a feeling of ownership, and - To gain the confidence that they are able to reproduce the activities and
results on their own farm.
Problem-posing/problem-solving Problems are presented as challenges, not constraints. Farmer groups learn different analytical methods to help them gain the ability to identify and solve any problem they may encounter in the field
Learning from mistakes Every change in the production and marketing techniques, as well in behavior of the FFS members, requires time and patience. Learning is an evolutionary process characterized by free and open communication, confrontation, acceptance, respect and the right to make mistakes. The right to make mistakes is the key as people more often learned from mistakes than from successes. Each person’s experience of reality is unique.
Learn how to learn Farmers are learning the necessary skills:
- to improve their ability to observe and analyse their own problems; - to make conscious decisions; - learn how they can educate and develop themselves further;

186
The training follows the seasonal cycle Training in FFS is related to the seasonal cycle of the practice investigated. For annual crops this period includes the time of year from land preparation to harvesting. For fodder production it would include the dry season, to evaluate the quantity and quality at a time of year when livestock feeds are commonly in short supply. For tree production, and conservation measures such as hedgerows and grass strips, training would need to continue over several years for farmers to see the full range of costs and benefits Learner-centred learning materials Farmers generate their own learning materials, from drawings of what they observe, to the field trials them selves. These materials are always consistent with local condition and less expensive to develop.
The extension worker is a facilitator (not a teacher) The role of an extension worker is that of a facilitator rather than a conventional teacher. His/her task is to guide the learning processes, fill in the missing gaps and gradually hand over the stick. Group dynamics/team building Training also includes communication skills, problem solving, leadership and discussion methods. Group dynamic exercises are used to create a pleasant learning environment, facilitate learning and create space to reflect and share. They also enhance capacity building in communication skills, problem solving and leadership skills. Unity is strength
Empowerment through collective action is essential. Farmers united in a group have more power than individuals. Also, when recognised as an active member within a group, the social role of individuals within a community is enhanced.
The combination of two or more minds is often more successful than one mind on its own. The FFS expresses this as 1 + 1 = 3, i.e. one mind + one mind creates a new, third mind.
Every FFS is unique Training activities must be based on existing gaps in the community’s knowledge and skills and should also take into consideration its level of understanding.
Every group is different and has its own needs and realities. As participants develop their own content, each FFS develop itself in unique organization.
187
Annex 2 Group Dynamic Exercises
Background Throughout life-cycle of a FS the facilitator can use games and exercises to enhance group dynamics. Group dynamic exercises create a pleasant learning environment, facilitate learning and create space to reflect. They also enhance communication, problem solving and leadership skills. The games and exercises are lively and convey messages. They also break the ice and improve participation. Furthermore, people tend to remember the exercises and thus the message. Each exercise can serve multiple purposes. To apply group dynamics properly, the facilitator should keep the following in mind:
be clear about what you want to achieve with the exercise
be aware of the appropriate moment, e.g. do an exercise to energise people when they are feeling tired, or to tackle conflict if you see one arising
plan and prepare the exercises (reserve time for them in the FS programme) and always
add a ‘head’ and a ‘tail’ (introduction and analysis)
good exercises involve everyone in the group
exercises should be adapted to local and cultural conditions and should not offend people or make them feel embarrassed
vary the type and use of the exercises – don’t only do exercises that energise
treat group dynamic exercises as a toolbox – do not become trapped in a fixed formula.
The facilitator should act as a mentor to the groups, by showing respect and interest in the groups. Facilitators should let the groups make their own decisions and mistakes and allow for feedback from other groups. The facilitators are there to guide the groups, not to organise them. The groups should have group own leaders, but the facilitators should always remember to communicate freely with all members, not just the group leaders. Communicating only through group leaders may cause unnecessary tension within and outside the groups. Simple rules to enhance group coherence and knowledge-sharing include: • Simple energisers, for example songs, dances, stories or games. Remember it is fun if everyone laughs, but not if some laugh at the mistakes of others. • Always sit face to face in a circle on chairs or on the floor. Do not use tables, as they may create invisible barriers. • Let one person talk at a time and look at the person talking. • Do not interrupt others talking. • Always applaud persons, who stand up and share freely. • Always start with a role call, let everyone say their name, and possibly the names the other group members Remember that each FS is unique and exercises should be modified for each specific FS. Objectives This section gives examples of group dynamic exercises which aim to facilitate various objectives: introduce participants
188
energise participants enhance participation strengthen a learning topic strengthen group work and cohesion solve conflict
Phases in the Group Life Cycle
Groups generally go through four or five phases (1. Forming phase 2. Conflict phase 3. Settling phase 4. Peak perform. phase 5. Exit phase) For the facilitator each phase has its challenges and should be handled accordingly. In the forming phase group dynamics are often governed by the facilitators. The forming phase consists of setting agendas, objectives, rules and regulations for the group work, and establishing the group members hopes, fears and expectations. In the beginning of a FS the participants are quite reserved and reluctant to bring forth their expectations, hopes and fears. However since everything is new to the participants they will have an open mind. It is therefore important that the facilitator creates a relaxed atmosphere where everyone to get to know each other. The facilitators should encourage small games, which will energise the group and allow the group members to get to know each other An important task when forming a FS is to slowly build up social skills and encourage the group to share practical and social responsibilities in the group. The facilitator may introduce social gestures and activities that are repeated when the FS group meet. Willingness to work in groups and share experiences should be encourages. By gradually adding responsibilities FS members will grow in self-confidence. After forming a group small or large conflicts may emerge. Often conflicts arise when different views and objectives are expressed by individuals or subgroups. The causes of some conflicts are found in the dissimilar expectations and motivations for participation in a FS. The conflicts may be prevented or limited, if the expectations and motivations are aired and discussed openly at the onset of the FS. It is important that participants realise and appreciate that conflicts are a normal part of any group development. They should not give up on a group during a conflict, but accept that conflicts form part of the learning process. At a certain point a group moves into a settling phase; most conflicts have been resolved and the group membership is for the most part permanent. At this point an opportunity arises when the facilitators may reiterate the strengths of group-based problem-solving as oppose to solving problems individually. In the peak performance phase the groups are in charge of running the FS activities. The groups will organise FS sessions and the individual group members will appreciate and accept their roles and responsibilities. The group members will discuss with the facilitator the activities and topics to be included in the forthcoming FS session. Sometimes even more time is required, depending on group dynamics and the facilitator’s skills. The exit phase denotes when a group decides to dissolving itself. The group members may decide to form a new group with other people or move on individually.
189
Group Dynamics to Introduction
Name Game
Objective - To speed up the process of becoming acquainted -To help everyone learn the names of their fellow participants
Time Dependent on size of groups Materials None, except chairs placed in circle, with no tables in the middle, if possible.
Steps 1. Introduce and explain the exercise and start a round, in which everybody carefully says his/her (first) name. This is done slowly, so that the others have time to repeat the name for them and find a way to link that name to that person. Unusual names can be written on the board. Alternatively, each participant may be asked to provide a memory aid when introducing them, for example: “My name is Frank and I always try to be?” 2. When the round is completed, the trainer then says “My name is (……….)”’ points out another person (B), says B’s name, and asks B to look for person C. For example: My name is Frank, your name is Bert. Bert, would you please find Clare?” You should avoid looking at Clare as you do this and should ask the rest of the group not to help Bert by looking at Clare. 3. Bert has to say his own name first, point out Claire, mention Clare’s name and ask Clare to look for person D, at which point Bert should not look in D’s direction. 4. Continue until everyone has had a turn. Comments This is a simple but effective exercise and quite acceptable in new groups. It can be done as the first exercise when starting up as a group. Knowing and pronouncing names correctly is particularly important in mixed groups where many names will be unfamiliar, complex and could easily be mispronounced. One variation is when everyone has taken their turn, ask participants to change chairs, to avoid associating names with the position of the people in the circle. Use the procedure again, until everyone seems to know all the names. Finally, ask participants to say all the names in the group in the order in which the participants are sitting. People who get stuck on the way allowed to ask names.
The Seed mixer Objective - To introduce the participants to one another - To get participants talking to each other one-on-one - To create a relaxed but animated atmosphere and to establish an informal tone for the training.
Materials Enough seeds, beans, raisins, pebbles or beads for each participant to have the same number as there are people (for example, if there are 25 people, including the trainers, each person will require 25 seeds/beans). A few plastic or other cups or containers for any participants who do not have pockets
Time 10-25 minutes, depending on the number of participants, and how much they talk to each other.
Steps
190
1. Give each person one bean for each person in the room (for example, if there are 25 people, including the trainer, who should also participate in this exercise, give each person 25 beans) 2. Ask them to place the beans in one pocket and leave a second pocket empty. If anyone does not have pockets, they can use two small cups or containers instead. 3. The participants are given a set amount of time (about 10 minutes) in which to introduce themselves to each of the other participants (this may include saying their name, the enterprise for whom they work, and a few things about themselves. 4. During each introduction, they should give the other person a bean and accept one from them. They should place the other person’s bean in their empty pocket or cup. 5. At the end of this exercise, each person should be left with one bean in their first pocket (representing themselves) and a second pocket filled with beans for the total number of persons in the room minus one. Comments This is suitable for any number from 10 to 50 participants, but if there are more than 30 it is advisable to tell people to be very brief or the exercise will take too long. Trainers should take part. It is a good idea, about two-thirds of the way through the exercise, to warn that them time is getting short. There is no need for debriefing after this exercise. It is a very effective way for each person to have an informal, face-to-face encounter with everyone else in the training. It also creates an atmosphere of informality and conviviality.
Stepping Stones Objective - To frame introductions in a historical perspective - To learn where the various participants have come from and to hear what is important to them.
Time Dependent on size of group
Steps 1. Ask participants to work in pairs, interviewing each other. Each should choose 3-4 key important events or “stepping stones” in their lives that are significant to bringing them to this point (and to the workshop). Stepping stones may be: ♦ Childhood experience ♦ Influence of parents, relatives, friends ♦ Formal training experience ♦ Key events, meetings, reading, realizations ♦ Changes in career, job experience ♦ Or any other key event or stepping stone. 2. Start them off by giving an example of your own stepping stones. By mentioning something funny or irrelevant you can show that this is not too serious. 3. Participants can then feed back their chosen stepping stones to the group. This can be done in a number of ways-directly to the group, by paired introductions or visually by displaying the stepping stones for group inspection.
191
Comments This exercise can take some time, especially if the group is large (20 or more). You may have to remind people to keep to the main “stepping stones” and limit other details.
Group Dynamics to Energize Participants These games and exercises enhance the participatory learning process by energising participants: making them laugh, relaxing and calming them and refreshing their minds. They also enhance concentration and attentiveness. Energisers are used during and after a long or difficult session, when the group has become tired or tense or when the pace of the session needs to be changed.
Claps Objective In the FS many different types of claps are used to energise the participants and also to welcome or thank a contributor.
Time 1–3 minutes.
Steps 1. The FS clap: two rounds of three fast claps followed by one loud clap. 2. The OK clap: three fast stamps with one foot on the floor, three fast claps followed by the OK sign formed by the fingers. 3. The praise clap: three fast stamps on the floor, two fast claps followed by stretching the arms towards the person being welcomed or thanked. 4. The rain clap: the arms are raised above the head and the fingers are moving fast (like rain coming down), slowly the arms are lowered in a wide circle until they are down, followed by a loud clap with the hands. 5. The energy clap: the right arm is spinning around next to the body (like the wings of a helicopter) first slowly then faster. When the speed is at its fastest, a loud clap with the hands follows.
Fruits and Animals Objective Energise the participants
Time 5–10 minutes.
Steps 1. The facilitator asks the group to form a circle standing up. 2. The group claps three times then the facilitator says the name of a fruit. 3. After three more claps, the person next to the facilitator says the name of an animal. 4. After three more claps the next person says the name of a fruit and so on around the circle. 5. If someone says the name of a fruit when an animal is required, or cannot think of a fruit or animal, or repeats the name of a fruit or an animal that has been said already, they must sit down. 6. Continue until only one participant is left standing.
Inside the Field – Outside the Field Objective Energise the participants
Time 5–10 minutes.

192
Steps 1. Draw two parallel lines on the ground with a distance of approx.2 m between them. 2. Divide the group into two. Each group stands behind a line, so that the two groups are facing each other. 3. The facilitator explains that the area between the lines is the field. 4. When the facilitator says “Inside the field”, all participants have to step over the line into the field area. When the facilitator says “Outside the field”, the participants have to stand on the other side of the line. 5. The facilitator will gradually increase the speed of the commands to enhance the participants’ alertness. 6. Each participant that reacts too late, or does not follow the command correctly is out.
Family Members Objective Energise the participants Time 5 minutes
Materials Slips of paper with families and family member names on it, one for each participant
Steps 1. Prepare cards with family names in groups of four or five. Mother Participant, Father Participant, Sister Participant, Brother Participant. Use names of, for example, different animals, birds, fruits, or professions such as Teacher family, Banker Family, Fisher family. 2. Give each participant one slip of paper, and ask everyone to walk around the room, exchanging names as they meet other people. 3. Tell them that when you call; out “Family Reunion”, everyone should try to form a united “family” group. Everyone will start shouting their family names in an effort to be done first. 4. Ask the last group to form to act out briefly their family name. 5. Start again. 6. When you feel the group is energised and relaxed, stop and proceed with sub-group work, keeping the families together. Comments Another variation is using animal sounds. Prepare sufficient cards choosing animals that have recognizable and different sounds (namely chicken, sheep, monkey, lion, dog.) Ask participants to make the noise of their animal until “family reunion” is called and they are united as a “family”. If you need to select groups purposively, then write the names of participants on the back of the cards. Alternatively, keep a separate list of names and animals if you wish to re-use the cards.
Group Dynamics to Enhance Participation Since the FS participants are the key focus of the programme and their skills and experiences are the main resources, it is important to create an atmosphere where people feel free to share and exchange experiences and discuss views. Exercises to enhance participation should be included from the beginning of the FS to break the ice and create a pleasant learning environment where participants respect each other’s opinions and contributions.
193
Talking Object Objective Encourage participation and discourage dominance.
Time Fifteen minutes
Steps 1. Participants sit in a circle. 2. An object is passed around the circle and the group decides on the subject of discussion. 3. The person who receives the object has to talk continuously until his/her neighbour decides to take the object and takes over. 4. This continues until all participants have spoken. 5. To reflect upon the exercise, the facilitator asks the participants to express how they felt when they were talking, when they had to wait for the object, and when they were interrupted. 6. Discuss that in a group it is important to share (talk), listen and respect other participants.
Knotty Problem Objectives -Demonstrate that groups empowered to solve their own problems are much more successful than those instructed by outsiders -Strengthen participants’ confidence in their ability to solve problems themselves.
Time 10–15 minutes.
Steps 1. Select one, two or three participants to act as FS facilitators. They are asked to leave the room while the facilitator instructs the rest of the group. 2. Ask the remaining participants to hold hands in a circle and tie themselves into an entangled knot. They must not let go of each other’s hands. 3. Once the knot is complete, the ‘facilitators’ who left the room return and are asked to unravel this knotty problem within three minutes, using verbal instructions only. They should hold their hands behind their backs so they are not tempted to touch the others. 4. The participants entangled in the knot are asked to follow the facilitators’ instructions literally and not make it easier for them by doing anything they have not been told to do. 5. The attempt is generally not very successful and sometimes even produces a more complex knot. Now repeat the exercise with the facilitators participating in the knot. When the knot is ready, simply ask the participants to get out of the knot themselves. This untying process is usually much quicker. 6. Ask the participants to comment on the differences between the first and the second time the knot was unravelled and why these differences occur. “What does the game tell us about the role of outsiders/facilitators and insiders (in the knot and in other problems in general)?” “What does the exercise tell us about the effectiveness of outsiders and managers in organising people?” “Who were the most successful in solving problems and why?”

194
Folding Paper Game Objectives -Demonstrate that even simple instructions can be misinterpreted -Raise awareness of misinterpretation of instructions and facts through nonparticipation, -Absenteeism and not asking for clarification develop ways to avoid/resolve situations of misinterpretation.
Materials Several sheets of paper (square sheets are most interesting, as ingenious participants could choose to fold them from corner to corner, thus getting a triangle). Time Five minutes.
Steps 1. Select four participants (or ask for volunteers) and ask them to stand in front, facing the rest of the group. 2. Give each a sheet of paper. They must keep their eyes closed and must not ask questions. 3. Instruct them to fold their paper in half and then tear off the bottom righthand corner of the paper. Tell them to fold the paper in half again and then tear off the top right-hand corner. Tell them to fold the paper again and tear off the bottom left-hand corner. 4. Ask them to open their eyes and display the unfolded paper to each other and the audience. 5. It is quite likely that the pieces of paper will look different. “What words in the instructions could be interpreted in different ways?” “How could the directions have been clearer to reduce the ambiguity?” “How can we encourage people to ask for clarification when they do not understand something?”
Puzzle Objective -Increase understanding of teamwork. Time Fifteen minutes
Materials Puzzles made out of a piece of paper cut into pieces (better when the paper has a picture or drawing). Use a different puzzle for each sub-group.
Steps 1. Make or use existing sub-groups. 2. Give each sub-group a puzzle and ask them to solve it in three minutes. 3. Discuss which group managed to solve the puzzle? “How did they do it?” “What were the roles of the different members of the group (e.g. who took the lead, who put the pieces together and who stood back)?” “What makes a good team?” “What kind of people should a team have?”
Watch It Objectives To enable participants to observe non-verbal behaviour more effectively.
Time 20 minutes
Steps 1. Participants are asked to form pairs (A & B) who work together. 2. A assumes any position they wish. B observes it and tries to memorize it –body posture, position of arms and legs, position of hands and feet, tilt of head. Then B turns around.
195
3. A changes one detail in his/her position. B turns around again, and tries to detect what has been changed. 4. A and B swap roles. 5. Repeat several times. 6. The trainer should emphasize that initially A and B should make changes which are easy to detect, but that subsequently the changes made should be more subtle and difficult to detect. Comments The plenary discussion can focus on questions such as: - What is easy and what is difficult to spot, and why? - What is required to be a good observer? Most people pay most attention to legs, and facial expressions. They are far less observant of total body posture, and tend not to notice whether a person sits straight or is slouched. Yet posture is particularly important in judging someone else’s attitudes and feelings.
Group Dynamics to Strengthen a Learning Topic
FS facilitators should convert technical information into practical exercises and field activities and avoid lecturing or conventional forms of training. The aim is to ensure participation by all and to make the learning situation entertaining and effective. For example, instead of describing local cut flower species in front of the group, the facilitator should ask the participants to walk around in the field, observing and discussing the local cut flower species where they grow. Since the FS programme is guided by the FS participants, it is not possible to provide a list of all the technical exercises to be carried out. The facilitator needs to be very innovative and to develop different ways to deliver the technical content requested by participants. Some guiding principles:
o Avoid situations where the facilitator stands in front of the group and explains technical aspects away from the location of the topic of study.
o The participants should always talk more than the facilitator in any given learning session.
o Physical activity should be encouraged in all learning sessions, e.g. participants digging in the soil to look at root development or soil moisture.
o Entertaining aspects should be encouraged when delivering technical topics, e.g. a simple song or drama rather than a presentation on a flip chart. Folk media (role plays, drama, poems, songs, story telling, dances and legends) are particularly useful.
Group Dynamics to Strengthen Group Work and Cohesion Good group work enhances exchange of information, reflection and learning. In participatory processes, the different capabilities of different people complement one another. A group can only become a team when all the members are interdependent. With constructive interaction, dialogue and consensus, aspects such as cooperation and team work increase. Group dynamic exercises to strengthen group work and cohesion are designed to encourage such dialogue and to reflect on the nature and process of teamwork. Guidelines for dynamics on the formation of sub-groups, support of groups and strengthening of groups are presented in the following section.
196
The Goats and the Lion
Objective -Form sub-groups and make sure that the groups are mixed
Time Five minutes.
Steps 1. Participants are requested to roam around the room as if they were goats grazing. 2. The facilitator explains that a lion is approaching and that only the goats that are in groups of a certain number (e.g. groups of eight, but can be any number) will be safe. 3. The participants have to react quickly and hold each other’s hands or shoulders. 4. This is repeated until the desired number of sub-groups are formed. With a group of 25–30, sub-groups of around 5–6 are most effective for learning.
Gun, Rabbit, Wall Objectives -Enhance understanding of strengths and weaknesses, and learn importance of identifying strengths of each individual to help one another overcome weaknesses -Recognise importance of group work and consensus, since all members of a team need to be going in the same direction -Understand that a group needs to be organised to function well.
Time 10–15 minutes.
Steps 1. Split the group into two. 2. The facilitator explains that there are three characters: a gun, a rabbit and a wall, each having its specific strengths and weaknesses. The gun can beat the rabbit since the rabbit can be shot. The wall beats the gun as it can stop the bullet, and the rabbit beats the wall as it can jump over it. 3. Each group has to decide whether it is a rabbit (by placing the hands on the head), a gun (by placing the hands like a gun) or a wall (by stretching the arms out wide). 4. The two groups form a line facing each other. The facilitator counts to three, then the groups show which they are by making the movements. The team with the most ‘winning’ moves is declared the winner. 5. What can be learned from this exercise? Each creature has its strengths and weaknesses. Also, a group needs to be organised and must communicate well, and a good leader can bring the group together. 6. In addition, the group has to pull together and will lose out if one person does something different from the others. 7. Ask the participants to comment on what can be learned from the exercise (each creature has its strengths and weaknesses and that the group needs to be organised and communicate and reach a consensus to be able to win the game).
Digging Exercise Objective -Enhance group cohesion and facilitate work through proper planning.
Time 10–15 minutes. Materials A hoe.

197
Steps 1. The facilitator asks for three volunteers. 2. The participants are asked to dig together using the hoe. 3. In most cases, the participants struggle and the digging does not go very well. 4. The facilitator asks them to stop and asks the group what they just witnessed. What can we say about the digging? What can they do to improve the digging? 5. The three volunteers discuss amongst themselves and make another digging attempt. 6. When they have stopped digging, the facilitator asks what the group could observe comparing the two digging attempts. The first attempt was uncoordinated digging, whereas before the second attempt, the three participants coordinated the activity and agreed how to dig together. 7. One can learn from this exercise that group work needs coordination and communication (agreements amongst all members) to be able to successfully conduct activities. This is what the sub-groups in the FS need to keep in mind whenever they undertake an activity. This exercise can also be done using a pen (for literate participants) to draw an object of their choice on a flip chart, using the same procedure.
Cooperative Squares Objective To experience and analyse some of the element of cooperation, for individuals to look at their own behaviour when working in a group
Materials A table for each group of five people, and five envelopes containing pieces of card as indicated in the figure below.
Time About 1 hour (5 minutes introduction, 20 minutes task, 20-30 minutes evaluation)
Steps 1.Prepare the cards. For each group of five people you will need five envelopes labelled A, B, C, D and E and five pieces of thin card 15cm square. It helps if each group has a different colour and if the envelopes are labelled with the colour (“pink A, Pink B, Pink C”) for each group, cut their five squares exactly as shown in the figures. All the cuts are either to a corner or to the middle of a side. It is essential that you measure and cut accurately. Label the pieces as indicated, and put the pieces into the corresponding envelopes. 2. Start the exercise by explaining that this exercise allows us to look at what is essential for successful group cooperation. Ask the participants to form groups of five and to sit around a table. (It is possible to have one extra person to observe each group). 3. Then read the instructions to the whole group. Each of you will have an envelope which has pieces of cardboard for forming squares. When I give you the signal to begin, the task of each group is to form squares of equal size. There are two important rules; - No one may speak or signal – the task must be done in silence. - No one may take of ask for a piece from any other person, but they may give pieces to others The task is completed when each individual has before her or him a perfect square of the same size as those in front of the other group members.

198
Comments Looking at the diagram of the five squares, it seems very easy. But trainees usually end up with three or four squares and odd bits which just will not fit together. Participants come to realize that their individual desire to produce one square is secondary to the group task of completing five squares. Personal success does not always equal group success and may actually be impeding the group goal. A god solution for one person may in fact obstruct a good one for the group as a whole. Within the rules of the game, each group can make its own rules. For example all the members might decide (without talking or gesturing) to give all their pieces to the fifth. That person then does not have to wait for the others to give one piece at a time – but it is limiting as it is not possible to use the others help. It is important to spend some time on feedback from this exercise. The trainer may elicit responses from the groups by asking; - What happened? Was the task achieved quickly/ why not? - Did the group cooperate? Would increased cooperation have speeded things up? - What roles did different people in the group play? - Did anyone feel frustrated? How did they deal with this? - Did anyone break the rules? How? - What did the observers notice? This may be a good point to discuss the roles played by different group members.
Whispering Game (message relay) Objective Illustrate the breakdown of communication Demonstrate the importance of good communication in undertaking community projects. Steps 1.Ask all the participants to form a circle. 2.The facilitator then whispers a message to the first person on his right or to his left. Pass on the message on, i.e., whisper to the next person and the next until the message gets to the other end of the circles. 3.Ask the last person to receive the message to say the sentence aloud. 4.The first person to whom the facilitator whispered the message will verify the accurateness or correctness of the message. Relate the activity to good and clear communication as a significant factor in successfully carrying out community undertakings. People may view the degree of change in the original message or breakdown in communication as changes caused by certain hindrances or barriers to effective communication that affects implementation of community projects.
Rope Square Objective -To Explore how a group works as a group on a difficult task -To illustrate how people adopt different roles in a group
Materials A piece of rope that is tied so that it forms a circle, sufficiently long so that half the total group can hold onto it with both hands.
Time 20-30 minutes depending how long you debrief
199
Steps 1. Divide the group into two-the silent observe and the square-formers 2. Lay the rope in a circle on the floor in the middle of the room 3. Ask the square-forming group to stand in a circle around the rope. The observers should stand back and watch in silence. 4. Ask the square-forming group to pick up the rope circle with both hands. 5. Ask the square-forming group to close their eyes and walk around in a circle a couple of times so that they become somewhat disoriented. 6. Then ask the group to form a perfect square with the rope (without looking) 7. The other group should observe the dynamics, without commenting. 8. Change the roles of the groups, and then debrief Comments This is potentially a very powerful exercise, revealing a lot about the different types of actors within a group, including leaders and saboteurs. There are almost too many leaders. Use the discussion to draw these points out: “Who felt frustrated?” “Were the instructions given by other group members clear?” “How did you respond to contradictory orders or requests?” “Who took the lead? Why? When?” “Who played a bridging role” “Who kept quiet?” “Who cross-checked and evaluated orders from others?” The intention is not to make the evaluation personal, but to point out the range of qualities of members of a group and how they interact successfully and unsuccessfully in completing a difficult task. A variation is to ensure that participants do not speak. This makes is more difficult.
My Corner Objective To highlight that individual and group objectives and goals can be combined
Time 5 minutes
Steps 1. Ask the group to form a circle holding hands 2. Ask everyone to choose a corner of the room that is “theirs” but not to tell anyone 3. Explain that the objective of the exercise is to ensure that you visit “your corner”. The circle must not be broken in the process. 4. Discussion and debriefing. Comment What often happens in this exercise is that individuals doggedly try to persuade everyone to go to their coarser and their corner only. As most participants assume they are to visit and stay in their own corner, groups rarely decide collectively to go to everybody’s corner in turn, thus satisfying every individual’s objective through group cooperation.
Saboteur Objectives - To show how communication and group work can be easily disrupted
Materials Groups of three chairs. Time
200
- To create a group strategy for recognizing and dealing with sabotage. - Also successful as an equalizer and as an energiser
15 minutes or longer, depending on the length of feedback
Steps 1. The participants are divided into threes. Within each sub-group, they have to fill three roles – the speakers the listener and the saboteur. The speaker and listener face each other to talk, while the saboteur can move. The speaker is asked to describe some aspect of their work or life to the listener. The saboteur is asked to try to sabotage (i.e. disrupt) this discussion in any non-violet manner. 2. Roaming saboteurs can move between groups. These may be you, the trainer, plus any others who did not join groups when the full group was divided. 3. After two minutes ask participants to change roles. Then again after two more minutes, as it is essential for all participants to have the opportunity to play all three roles. Everybody should know what it feels like to be a saboteur and to be sabotaged. Comments Discussion after this exercise is essential. To establish a group strategy, it is necessary to get participants to reflect on how they felt: -What was it like to be a saboteur or to be sabotaged?” -Did you find it easy or difficult to disrupt the conversation?” Then asks everyone to call out the different types of saboteur they experienced or have experienced in the past, and write these on a flipchart. Examples include: dominance, rigidity, interruption (answers/questions), joking and not being serious, rudeness, silence, taking over with enthusiasm and physical distraction by fidgeting. Then ask the participants to reflect on ways to deal with such sabotage, i.e. sabotaging saboteurs: - How have you or could you deal with saboteurs? -What are the ways groups can deal with saboteur individuals? Write these strategies on another sheet. Examples include: ignore politely: polite/clear interruption: stop the discussion: talk it out (publicly or personally): acknowledge and postpone divert attention – form sub-groups or set task: use saboteur for debate: ask other for help: allow it: walk away. These can be stuck to the wall for all to see and can be referred to during the rest of the workshop. This exercise and discussion may be especially useful if there are particularly disruptive members of the group. Such an exercise may be an opportunity for them to reflect on their ehaviour and for the group to develop ways of dealing with the disruption. It can also prepare the group well for potentially difficult interviewing situations in the field. More important, however, it introduces the notion of sabotage to the whole group, as well as focusing on strategies to deal with it. During the rest of the workshop, it is likely that participant’s will self-regulate without any trainer input needed. Any group interruption will be greeted by calls of “sabotage”.
What is in the Bag Objective - To make participants understand the importance of working together as a team -Participants to be able to state the importance of working together -Mention at least two reasons why group members should work together as
Materials A bag. Many different articles which are familiar to the participants and are small enough to fit in the bag, a table, newsprint, felt pens, masking tape etc
201
a team Steps 1.Brainstorm on what is a group?, can one person do the work of the group effectively?, if you assign a similar job to a group and the same to an individual, who will finish faster and more efficiently? Why?, Why should group members work together as a team? 2.One group member should bring the bag containing the items(Materials). All the articles are put one by one on the table. Each article is identified by name before being placed on the table. All the articles are then returned to the bag. 3. One member of the group is requested to go out with one of the trainers and he/she lists the items from the bag he/she can remember. The rest of the group members with the other trainer to also list the items jointly. 4. The participant outside is told to come back in after 5 minutes. No more listing of the items should go on. The two lists to be compared Processing of the game What happened in the game? Why couldn’t one person remember all the articles? How does this relate to our FS and us as a group? Why is it important for us to work together as a group? What have you learnt from this session? Conclusion Emphasize the importance of working together
Group Dynamics to Solve Conflict
Where there are people, conflict can occur. Conflicts arise out of different perceptions, varying views, intolerance and prejudice. Conflicts hamper learning and should be tackled before they break up a group. A well-facilitated FS creates dialogue and encourages understanding and should not fear the management of conflicts. The group dynamics provided assist discussion on the causes and effects of conflicts and provide a start for problem solving.
Different Sites Objectives -Provide insight into cause and effect of conflict -Provide ways and means of addressing conflict.
Materials Several objects representing resources, such as books, pens and stones. Time Ten minutes
Steps 1. The facilitator asks for four volunteers to leave the FS learning site. 2. Objects (resources) are put in the middle of the remaining group of participants. 3. The facilitator gives instructions to the four volunteers separately. Each volunteer receives instructions to take all the objects to a location. However, the location given is different for each volunteer. 4. The volunteers are asked to come back, have a look at the objects and follow up their specific instructions. 5. Each volunteer will move the objects according the instructions given. Most probably a conflict occurs as none of the volunteers will manage to take all the objects to the place they were instructed, because the other volunteer will take the objects away again.
202
6. If the volunteers do not come up with a solution themselves, the facilitator needs to stimulate the volunteers to discuss how they can solve the problem. After discussing among themselves, the volunteers agree on a way to carry out the various instructions in a systematic way to the satisfaction of each of them. 7. The facilitator initiates the analysis of the exercise using questions like: “Has this exercise revealed general difficulties experienced in real life? If so, what kind?”, “What was the solution of the volunteers?”, “Is the solution applicable to conflict in real life?” and “What tool/mechanism was used?” (After discussion they understood each others’ instructions and could then decide to follow up the instructions, one by one.) “What can we learn from this exercise?” (That communication and understanding of each person’s needs and aims is crucial in conflict solving.)
Come and Over Objective -Demonstrate that non-resistance may actually work in your favour.
Time 5–10 minutes
Steps 1. The facilitator asks participants to form pairs and face each other while kneeling. 2. Designate one person ‘A’ and the other ‘B’. Partners place their hands against each other with palms open and forward. 3. Ask each person to push their hands against their partners’ with firm pressure. Tell A to give in (stop pushing) at any time without warning B. 4. Reverse the roles and repeat the exercise. 5. The facilitator asks the following questions: “How did it feel when you stopped resisting?” and “How did it feel when you exerted continued pressure?” Unnecessary strength or pressure can sometimes be counterproductive. “Can you think of some examples in daily life when this has happened?”, “Can you think of examples in the FS when this happened?”
Confronting the Lion Objectives -Show that people have different reactions to the same problem/obstacle -Encourage self-analysis show that obstacles can be overcome
Materials Flip charts and markers Time Twenty minutes.
Steps 1. Vividly describe a scene of walking alone and meeting a lion. 2. Ask participants to describe in one word what they would do in that situation. 3. The facilitator records these responses on a flip chart. 4. Why are the responses different? Discuss ways in which the responses may be similar to daily situations in which we meet ‘lions’ or problems and barriers.
Chair Exercise Objective To show participants how to manage conflict by turning it into cooperation -To help them focus on the possible differences in the interpretation of instruction
Time 30-45 minutes Materials Three instructions (see below); copies of each for one third of the participants. A room without tables, but with a chair for

203
-To make participants aware of cultural differences in handling conflict
each participant, as this will defeat the purpose of the exercise.
Steps 1. Explain to the participant the relevance of this exercise by referring of this exercise by referring to its objectives. Then give each participant one set of instructions (either A, B. or C), distributing equal numbers of the three different instructions. Tell them not to show their slip of paper to other participants, as this will defeat the purpose of the exercise. a) Put all the chairs in a circle. You have 15 Minutes to do this. b) Put all the chairs near the door. You have 15 Minutes to do this c) Put all the chairs near the window. You have 15 Minutes to do this. 2. The trainer tells everyone to start the exercise; following the instructions they were given. Comments The analysis focuses on aspects of non-aggressive conflict resolution. The instructions cannot be carried out unless people with identical instructions cooperate. The sub-groups cannot carrion out their instructions unless they cooperate. Several solutions are possible. 1. Putting all the chairs in a circle, between the door and window; 2. Consecutively putting all chairs in a circle, then near the door, then near the window; 3. Disobeying part of the instructions, by putting one third of the chairs in a circle, one third near the door, one third near the window. 4. Renaming the situation, by hanging two newprint sheets in the middle of the room, on one of which is written “Window” and on the other “Door”. 5. Disobeying the instructions entirely. This exercise has great scope for creative conflict resolution. Groups often burst into frantic action, use force and sometimes carry chairs with others desperately sitting on them to their corner. When some participants are trying to find a cooperative solution, others can be seen continuing to collect and defend their chairs. This in turn frustrates the cooperators, who forgot their positive intentions and join the argument. Relevant questions for the analysis include What did you experience when playing the game? Did you feel that the chair you were sitting on was yours, to do with as you pleased? How did you relate to people who wanted something else? Did you cooperate, persuade, argue, fight or give in? If you confronted others then how did you do this? Did you follow instructions? Why did you interpret them as you did? Did you see them as an instruction to be carried out whatever the cost and to the exclusion of others? Why? In what way are your feelings about instructions influenced by your cultural background? Has culture influenced the way you behaved in this situation? How would you handle this assignment if you did it a second time? Can you relate what happened here to real life situations?
Group Problem Solving and Team Contract Exercise Objectives -To give participatory field teams the opportunity to develop their own norms of
Materials prepared sheets with “What would you do if?” questions

204
behaviour. -To develop team contracts.
Time 45-90 minutes.
Steps 1. Divide the group into small groups of up to five people. Ideally these should be the groups that are going to work in the field together. 2. Hand out the prepared sheets of questions to the field teams. If you have more than one group, allocate specific questions to each group (see examples for four groups below). Ask hem to consider what they would do if they encountered these problems in the field. 3. When each group has considered their strategy for dealing with each problem, ask them to report back to plenary. When all the problems have been discussed, including comments from other sub-groups, ask each group to agree a team contract amongst themselves. This team contract is based on the discussions and will serve as a code of conduct for the field. 4. After the team contracts have been made, encourage everyone to write theirs in the back of their field notebook. You can also ask them to share it with the other groups. Comments The questions should contain a mix of problems relating to both group dynamics and difficulties related to using various participatory methods in the field. All of the 27 questions given as examples are problems that have arise in real fieldwork. The success of this exercise lies in anticipating problems related to fieldwork and dealing with them before they occur. In this way teams will know better what to do when such situations arise. Discussion is usually most animated amongst participants who have field experience, as they will illustrate problems and strategies with stories from there past. Having the contract in their notebook means that problematic team members can be encouraged simply to look at and stick to their contract, rather than be confronted directly with their behaviour. These ‘rules’ help to guide the teams through small crises as members ask each other to simply say: “team contract’. Sample: Questions for Rural Areas Group 1: what would you to IF 1. In a small group interview the informants are very silent, unresponsive and reluctant to answer your questions. 2. Part way through a small group interview, some participants say they must leave to attend to other matters? 3. A member of your team is late again in the morning and the other members are irritated? 4. A team member is over enthusiastic and keeps interrupting the participants when they are speaking? 5. On the final day of the fieldwork, important new information arises which contradicts an earlier key finding? 6. In the review meeting with participants, the local leader tries to control the choice of research priorities? 7. You arrive in the community planning to begin with mapping and modeling, but the team is nervous and unsure how to start Group 2. What would you do IF… 1. A participant calls you over as you are walking back to the vehicle looking forward to having something to eat and drink?

205
2. In front of a group of participants, one member of your team contradicts what one of the participants has just said? 3. The majority of people in the village in which you have been working identify income generation, and rural roads as more important than the work your institution is focusing upon? 4. One team member is frequently giving negative criticism in team discussions? 5. You realize by the end of the second day that very few women have been interviewed although they appear to be actively engaged in farming activities? 6. One of your team members wishes to leave the day before you complete the fieldwork 7. A very senior member of staff of your organization wishes to attend the fieldwork to observe the participatory methods. As he/she knows little of the attitudes require for good participation, you fear she/he will simply lecture the participants. Group 3: what would you do IF… 1. After the initial briefing of your team, during which they appeared to have a good gasp; of the concepts and objectives, they do not seem to know how to begin using the methods on arrival in the village? 2. The information received from the women participants largely contradicts that collected from the men? 3. One of your team members accuses another of making an offensive remark and refuses to work with that person? 4. Towards the end of the day you meet a participant who knows a great deal about experimenting on livestock but one of your team members are too tired to interview that person, and would rather return home? 5. One team member is not participating at all in the team discussions at the end of the day, during which the day’s information is being analysed and the next day’s checklist developed? 6. An official, who has accompanied your team to the community, misrepresents the purpose of the participatory work to the community? Group 4: What would you do IF… 1. You have asked a group of participants to create a mode of their village but they do not seem to know how to begin? 2. One team member is taking a condescending and patronizing attitude towards the participants and tends to lecture rather than listen? 3. During the matrix ranking and scoring, the more articulate and better dressed male participants dominate the discussions about local farming priorities? 4. The information you collect during the participatory analyses seems to contradict your secondary data sources? 5. One of the team wishes to work alone with participants, and so is often late back to the group?

206
Annex 3 School Membership Roll
No
Members FS Date
Name and Surname
1
2
3
4
5
6
7
8
9
10
11
12
13
14
15
16
17
18
19
20
21
22
23
24

207

Annex 4 Treasurer’s Report
School name_____________________ Treasurer’s Report 1. State the beginning balance: Date: __________________ Balance: _____________________________ 2. Indicate money received: amount TL____________for what purpose_____________________________ amount TL____________for what purpose_____________________________ amount TL____________for what purpose_____________________________ Total received: TL___________________ 3. State the expenses: TL______________ to ____________________________________________ for what purpose_________________________________________________ TL______________ to ____________________________________________ for what purpose_________________________________________________ TL______________to_____________________________________________ for what purpose_________________________________________________
Total expenses:TL__________________ 4. Indicate closing balance: Date:___________________________ Closing balance: TL_______________ If the School has a checking account, do the following: Add back checks that haven’t shown up on the bank statement plus________ Subtract deposits not showing up on bank statements minus______________ Adjusted balance should agree with bank statement equals_______________ Include clear copy of bank statement that agrees wit the total adjusted Balance, directly above. Prepared by:___________________ Accepted by:________________________ School treasurer’s signature School president’s signature Date:__________________________ Date:______________________________

209
Annex 5 School Meeting Checklist
Assessment Good Average Needs improvement
Meeting was well planned
Each officer did his/her job
Meeting moved along well
The program/activity was interesting
Each member spoke at least two times during the meeting
Meeting place was comfortable
Meeting room was set up when members arrived
All members took part in discussion
Recreation was included
Refreshments were served
Use this check list to do a quick evaluation of school meeting