Embed Size (px)
Citation preview

VoipNow ® Professional 2.5.3
Getting Started
For more information about VoipNow Professional, check:http://www.voipnow.comCopyright © 2012 4PSA.

Getting Started
Manual Version 90173.11 at 2012/06/01 17:59:48For suggestions regarding this manual contact:[email protected]
Copyright © 2012 4PSA
All rights reserved.
Distribution of this work or derivative of this work is prohibited unless prior writtenpermission is obtained from the copyright holder.
VoipNow is a registered trademark of 4PSA.
Asterisk is a trademark of Digium, Inc.
Linux is a registered trademark of Linus Torvalds.
All other trademarks and copyrights are property of their respective owners.

Table of Contents
Chapter 1. First Steps ............................................................................ 5
Logging in for the First Time ....................................................................... 5
Chapter 2. Before Adding a Reseller ........................................................ 8
Adding Time Intervals ................................................................................ 8
Adding SIP Channels ................................................................................. 9Add Public Phone Numbers .................................................................... 16Channel Cost Setup ............................................................................. 18
Adding Routing Rules ............................................................................... 20
Adding Charging Plans ............................................................................. 22
Chapter 3. Adding a Reseller Account .................................................... 26
Reseller Account Information ..................................................................... 26
Reseller Permissions and Phone Numbers ...................................................... 27
Chapter 4. Adding a Client Account ....................................................... 32
Chapter 5. Adding an Extension Account ................................................ 33
Adding a Phone Terminal Extension Account ................................................... 34Phone Terminal Extension Account Information ............................................ 34Phone Terminal Permissions and Limits ..................................................... 36Phone Terminal Extension Information ...................................................... 42Provisioning and SIP ............................................................................ 57
Adding a Queue Extension Account .............................................................. 64Queue Extension Account Information ....................................................... 65Queue Extension Permissions and Phone Numbers ....................................... 65Queue Extension Information ................................................................. 66
Adding an IVR Extension Account ............................................................... 79IVR Extension Account Information .......................................................... 79IVR Extension Permissions and Phone Numbers ........................................... 79IVR Extension Information ..................................................................... 81
Adding a Voicemail Center Extension Account ................................................. 85Voicemail Center Extension Account Information .......................................... 85Voicemail Center Extension Permissions and Phone Numbers ........................... 85Voicemail Center Extension Information .................................................... 87

Adding a Conference Extension Account ........................................................ 88Conference Extension Account Information ................................................. 88Conference Extension Permissions and Phone Numbers ................................. 88Conference Extension Information ........................................................... 90
Adding a Callback Extension Account ........................................................... 93Callback Extension Account Information .................................................... 93Callback Extension Permissions and Phone Numbers ..................................... 93Callback Extension Information ............................................................... 95
Adding a Call Card Extension Account ........................................................ 100Calling Card Extension Account Information .............................................. 100Calling Card Extension Permissions and Phone Numbers ............................... 101Calling Card Extension Information ......................................................... 102
Adding a Intercom/Paging Extension Account ............................................... 108Intercom/Paging Extension Account Information ........................................ 108Intercom/Paging Extension Permissions and Phone Numbers ......................... 108Intercom/Paging Extension Information ................................................... 110
Adding a Queue Login Center Extension Account ........................................... 112Queue Login Center Extension Account Information .................................... 113Queue Login Center Extension Permissions and Phone Numbers ..................... 113Queue Login Center Extension Information ............................................... 115
Chapter 6. Configuring a Phone Extension ............................................ 117
Chapter 7. Contact and Support ........................................................... 119Index ................................................................................................. 120

VoipNow Professional 2.5.3 Getting Started 5
Chapter 1First Steps
Logging in for the First Time
After the installation of the product, use your browser to access:
https://your_server_ip
If the your_server_ip resolves to a hostname, you can also access theonline interface using the hostname.
Your first login is admin and your password is welcome. In order to usethe product, you must agree to the End User License Agreement (EULA).
A license key will be requested. Click the Browse button and choose thelicense key file from your local computer.
If the license file is valid, then you will be directed to the VoipNowProfessional System Configuration Wizard page.
Using this page you are able to fill in the required contact information orto setup your first user accounts, client's charging plans and 4PSA SIP demochannel:
VoipNow Professional 2.5.3 Getting Started 6
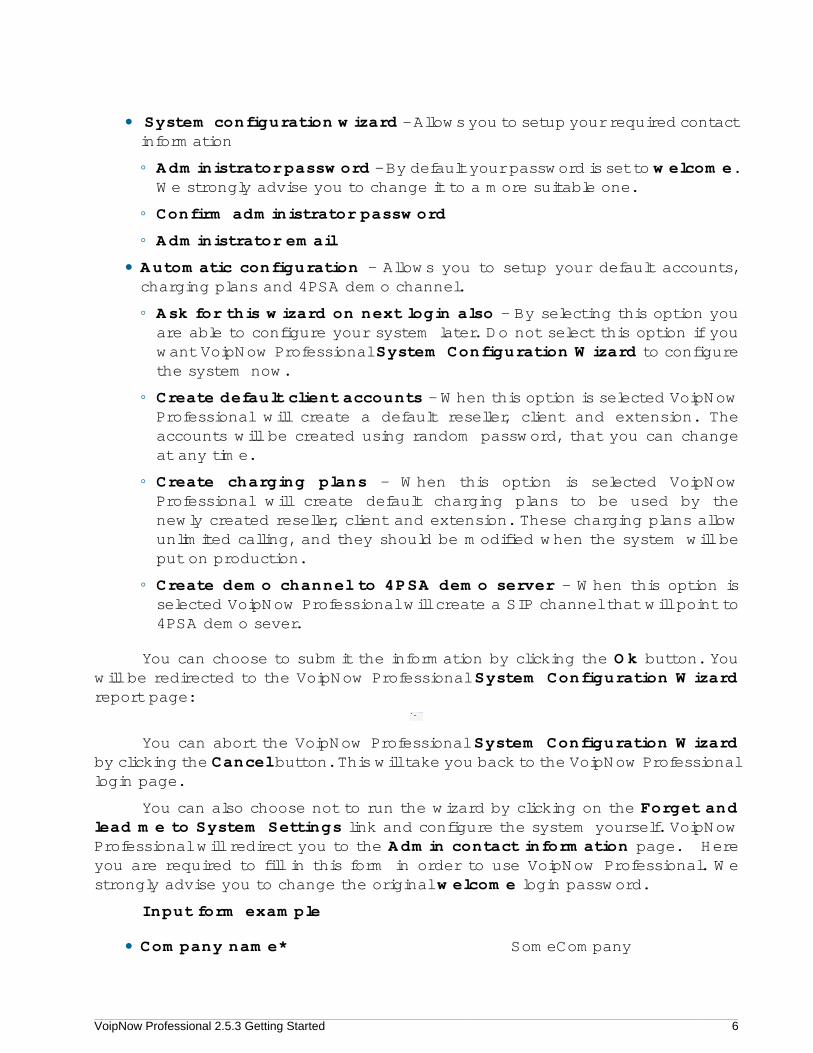
• System configuration wizard - Allows you to setup your required contactinformation
◦ Administrator password - By default your password is set to welcome.We strongly advise you to change it to a more suitable one.
◦ Confirm administrator password
◦ Administrator email
• Automatic configuration - Allows you to setup your default accounts,charging plans and 4PSA demo channel.
◦ Ask for this wizard on next login also - By selecting this option youare able to configure your system later. Do not select this option if youwant VoipNow Professional System Configuration Wizard to configurethe system now.
◦ Create default client accounts - When this option is selected VoipNowProfessional will create a default reseller, client and extension. Theaccounts will be created using random password, that you can changeat any time.
◦ Create charging plans - When this option is selected VoipNowProfessional will create default charging plans to be used by thenewly created reseller, client and extension. These charging plans allowunlimited calling, and they should be modified when the system will beput on production.
◦ Create demo channel to 4PSA demo server - When this option isselected VoipNow Professional will create a SIP channel that will point to4PSA demo sever.
You can choose to submit the information by clicking the Ok button. Youwill be redirected to the VoipNow Professional System Configuration Wizardreport page:
You can abort the VoipNow Professional System Configuration Wizardby clicking the Cancel button. This will take you back to the VoipNow Professionallogin page.
You can also choose not to run the wizard by clicking on the Forget andlead me to System Settings link and configure the system yourself. VoipNowProfessional will redirect you to the Admin contact information page. Hereyou are required to fill in this form in order to use VoipNow Professional. Westrongly advise you to change the original welcome login password.
Input form example
• Company name* SomeCompany

VoipNow Professional 2.5.3 Getting Started 7
Contact name* John Smith
Password* ******
Confirm password* ******
Phone* 210524023
Fax 210524023
Email [email protected]
Address* Street No 234
City Amarillo
Postal/ZIP code* 79101
Country* United States
Region* Texas
Timezone* America/Chicago GMT -5
The next step is to modify the default VoipNow Professional UnifiedCommunications System Preferences. The Server sends emails from addressfield is required, but it is a good idea to check the other fields too. You canclick Help or you can check the VoipNow Professional User's Guide in order tounderstand them better.
The first thing you must do in order to use the system is to create a reselleraccount.
VoipNow Professional 2.5.3 Getting Started 8
Chapter 2Before Adding a Reseller
Adding Time Intervals
Time intervals are very important because they are used in charging plansand in all routing and call filtering operations. So you must define at least onetime interval first.
Go to Unified Communications link in the Navigation Area. In the UnifiedCommunications settings section click the Time Interval icon and then Add time intervals. You will be required to fill in the time interval parameters.
Input form example
• Name Week
Matching algorithm Interval
Time zone Server default
Start at hour* 09:00
End at hour* 18:00
Start weekday Monday
VoipNow Professional 2.5.3 Getting Started 9
End weekday Friday
Start day of month 1
End day of month 31
Month September
Note
There are two types of time intervals:
Individual days – This method allows VoipNow Professional to match the sametime interval in different days. If in the previous example the time interval would havebeen of Individual Days type, all calls from 09:00 to 18:00 from Monday to Fridaywould have had to match it.
Interval – This method allows VoipNow Professional to match a continuous timeinterval that extends over several days. In the previous example, this means that theinterval extends from Monday 09:00 until Friday at 18:00.
For more details about time intervals, just click Help or check the VoipNowProfessional User's Guide.
Adding SIP Channels
Channels are a necessity if you want to communicate with the outsideworld. A channel is a connection to a telephony provider, which is able to giveyou access to the telephony network. It is possible to operate the system withoutusing channels, but in this case, you are restricted to internal calls.
Starting VoipNow Professional 2.5.1, the SIP channels can be configuredusing predefined provider templates that allow you to directly set up thechannels for a certain providers, without having to manually fill in all the specificparameters. This new feature simplifies the configuration process, reducing thetime required to define an up and running SIP channel. More information about onthis topic can be found by clicking Help or by checking the VoipNow ProfessionalUser's Guide.
The fastest and easiest method to define your first SIP channel is to upload aconfiguration file specific to the provider you want to use, if available. If you eitherhave a file downloaded from the 4PSA website or obtained from your provider,you have to follow the next steps:
1.Navigate to the Unified Communications >> Provider Templates pageand click the Add provider template icon.
VoipNow Professional 2.5.3 Getting Started 10
2.Use the available controls to upload the provider template.
Caution
If the file you are trying to upload does not match the default provider templatestructure, then it cannot be saved in the database. A warring message isdisplayed:
Failed to upload the new template.
3.Next, go to the Channels management page and click the Add SIPchannel icon.
4.Use the available controls to personalize the channel that will use thesettings provided in the uploaded configuration file.
Input form example
• Channel Information
Clone settings from channel --
Note
As this is your first channel, you do not have what settings to replicate fromother channels.
Name* My SIP Provider
Channel notes This is my first SIP channelusing My Provider forexternal calls.
I want to configure the channel using a known provider
• Select Your Provider
I want to get service in United States
Note
This list displays the countries the defined provider is available in, allowingyou to target the SIP channel for certain destinations.
Recommended providers SIP provider
VoipNow Professional 2.5.3 Getting Started 11
Note
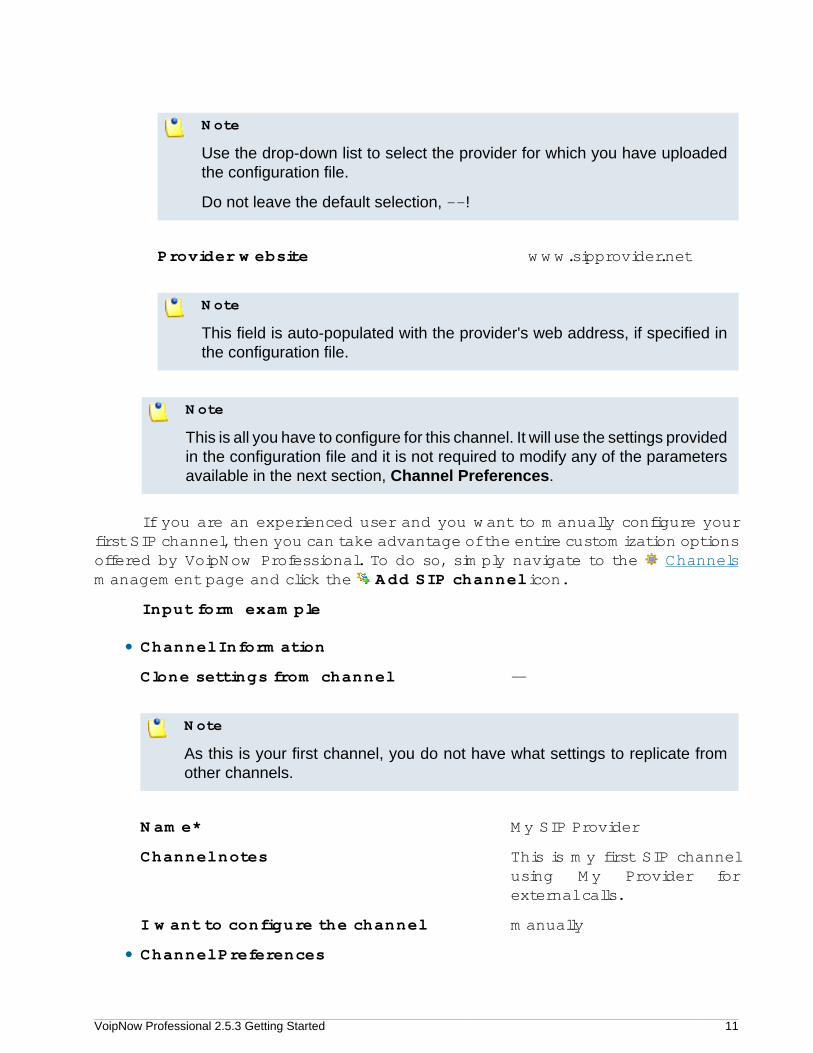
Use the drop-down list to select the provider for which you have uploadedthe configuration file.
Do not leave the default selection, --!
Provider website www.sipprovider.net
Note
This field is auto-populated with the provider's web address, if specified inthe configuration file.
Note
This is all you have to configure for this channel. It will use the settings providedin the configuration file and it is not required to modify any of the parametersavailable in the next section, Channel Preferences.
If you are an experienced user and you want to manually configure yourfirst SIP channel, then you can take advantage of the entire customization optionsoffered by VoipNow Professional. To do so, simply navigate to the Channelsmanagement page and click the Add SIP channel icon.
Input form example
• Channel Information
Clone settings from channel --
Note
As this is your first channel, you do not have what settings to replicate fromother channels.
Name* My SIP Provider
Channel notes This is my first SIP channelusing My Provider forexternal calls.
I want to configure the channel manually
• Channel Preferences
VoipNow Professional 2.5.3 Getting Started 12
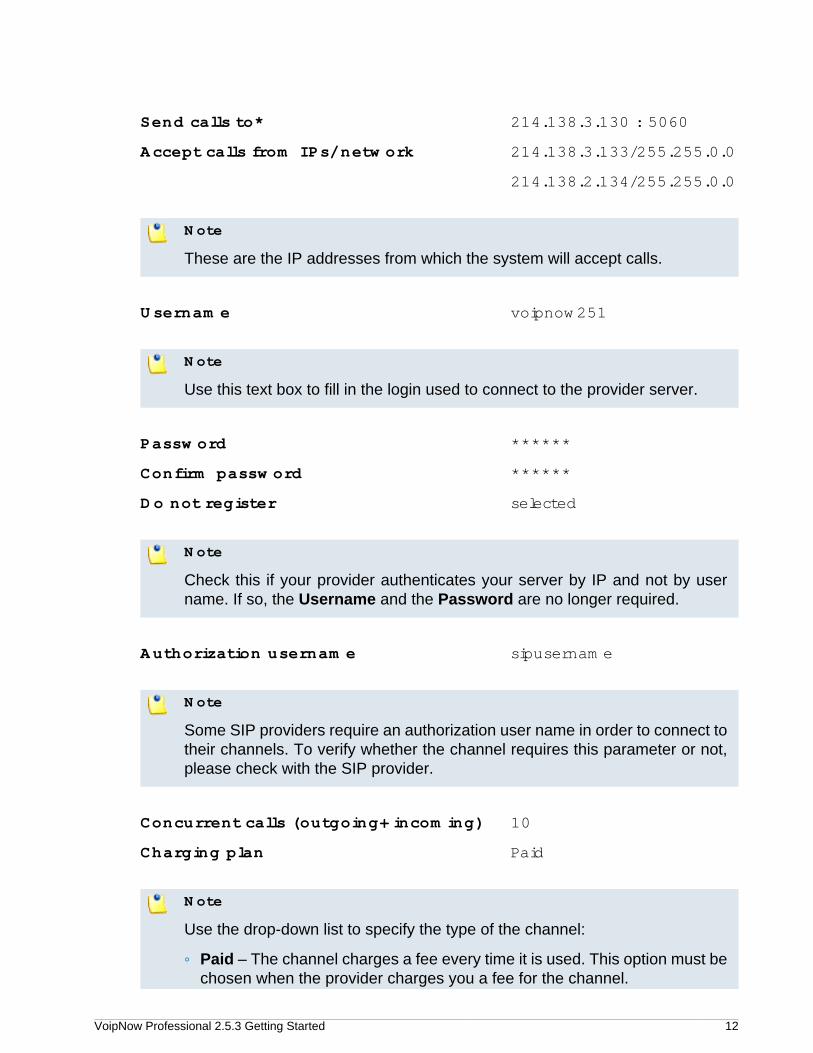
Send calls to* 214.138.3.130 : 5060
Accept calls from IPs/network 214.138.3.133/255.255.0.0
214.138.2.134/255.255.0.0
Note
These are the IP addresses from which the system will accept calls.
Username voipnow251
Note
Use this text box to fill in the login used to connect to the provider server.
Password ******
Confirm password ******
Do not register selected
Note
Check this if your provider authenticates your server by IP and not by username. If so, the Username and the Password are no longer required.
Authorization username sipusername
Note
Some SIP providers require an authorization user name in order to connect totheir channels. To verify whether the channel requires this parameter or not,please check with the SIP provider.
Concurrent calls (outgoing+incoming) 10
Charging plan Paid
Note
Use the drop-down list to specify the type of the channel:
◦ Paid – The channel charges a fee every time it is used. This option must bechosen when the provider charges you a fee for the channel.
VoipNow Professional 2.5.3 Getting Started 13
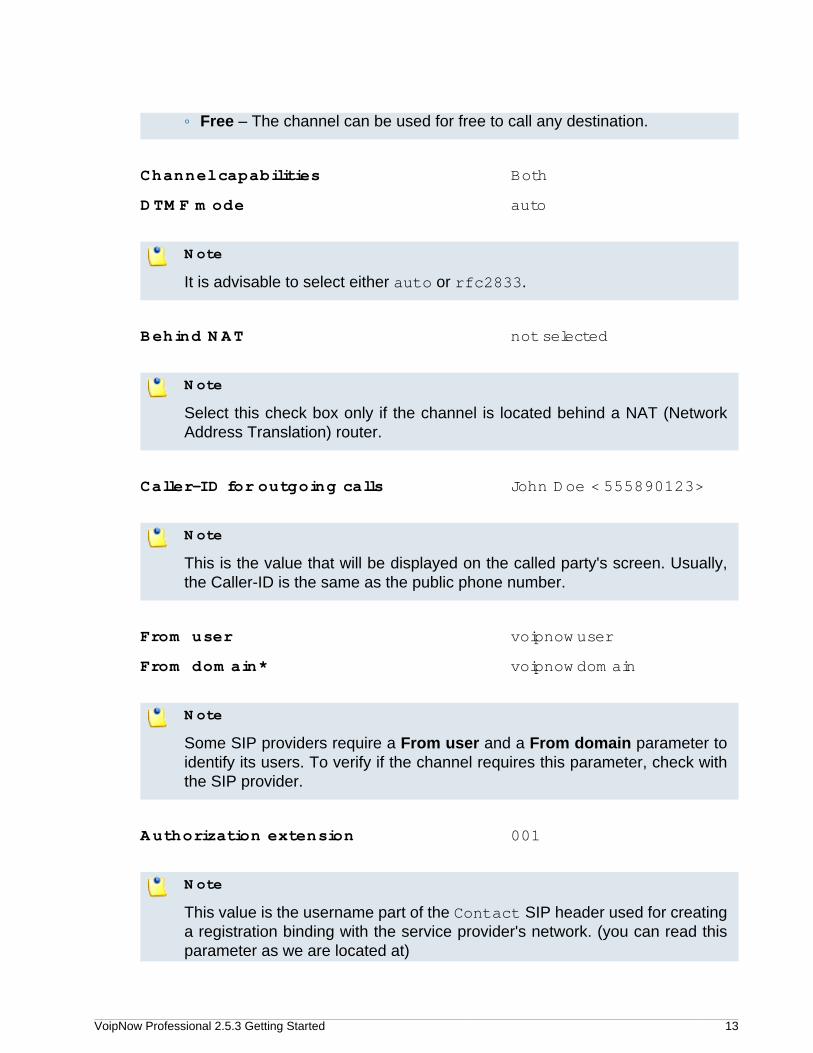
◦ Free – The channel can be used for free to call any destination.
Channel capabilities Both
DTMF mode auto
Note
It is advisable to select either auto or rfc2833.
Behind NAT not selected
Note
Select this check box only if the channel is located behind a NAT (NetworkAddress Translation) router.
Caller-ID for outgoing calls John Doe <555890123>
Note
This is the value that will be displayed on the called party's screen. Usually,the Caller-ID is the same as the public phone number.
From user voipnowuser
From domain* voipnowdomain
Note
Some SIP providers require a From user and a From domain parameter toidentify its users. To verify if the channel requires this parameter, check withthe SIP provider.
Authorization extension 001
Note
This value is the username part of the Contact SIP header used for creatinga registration binding with the service provider's network. (you can read thisparameter as we are located at)
VoipNow Professional 2.5.3 Getting Started 14
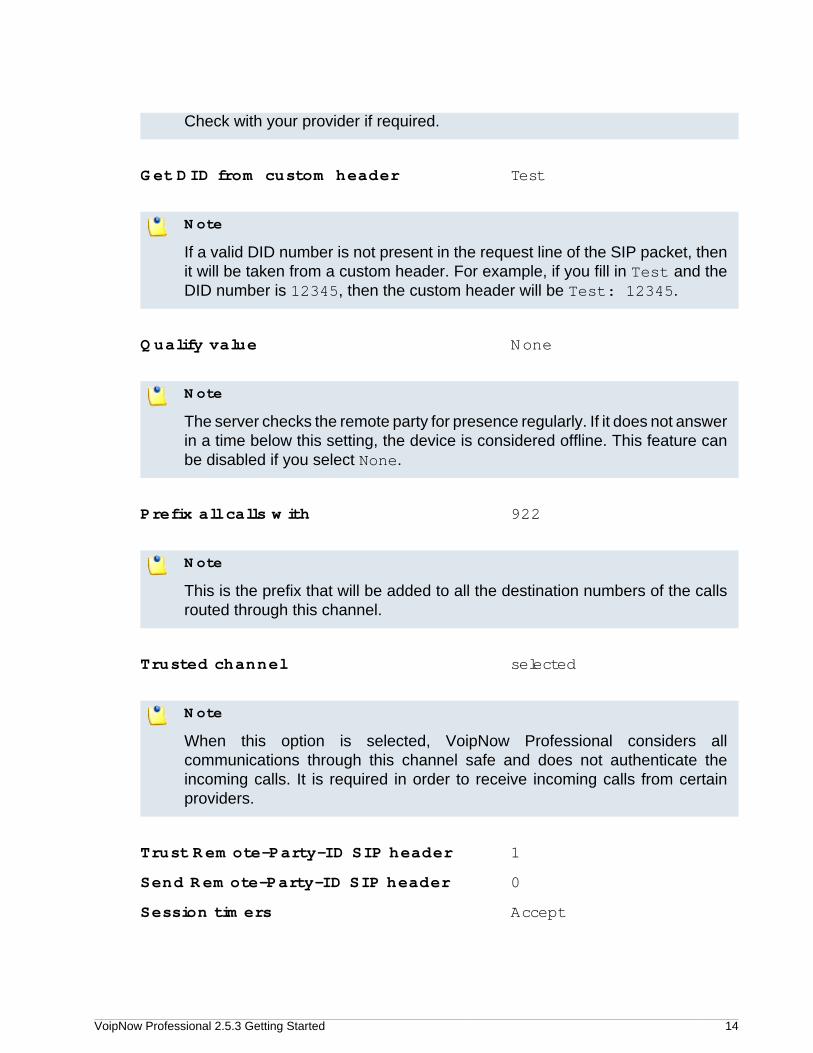
Check with your provider if required.
Get DID from custom header Test
Note
If a valid DID number is not present in the request line of the SIP packet, thenit will be taken from a custom header. For example, if you fill in Test and theDID number is 12345, then the custom header will be Test: 12345.
Qualify value None
Note
The server checks the remote party for presence regularly. If it does not answerin a time below this setting, the device is considered offline. This feature canbe disabled if you select None.
Prefix all calls with 922
Note
This is the prefix that will be added to all the destination numbers of the callsrouted through this channel.
Trusted channel selected
Note
When this option is selected, VoipNow Professional considers allcommunications through this channel safe and does not authenticate theincoming calls. It is required in order to receive incoming calls from certainproviders.
Trust Remote-Party-ID SIP header 1
Send Remote-Party-ID SIP header 0
Session timers Accept
VoipNow Professional 2.5.3 Getting Started 15
Note
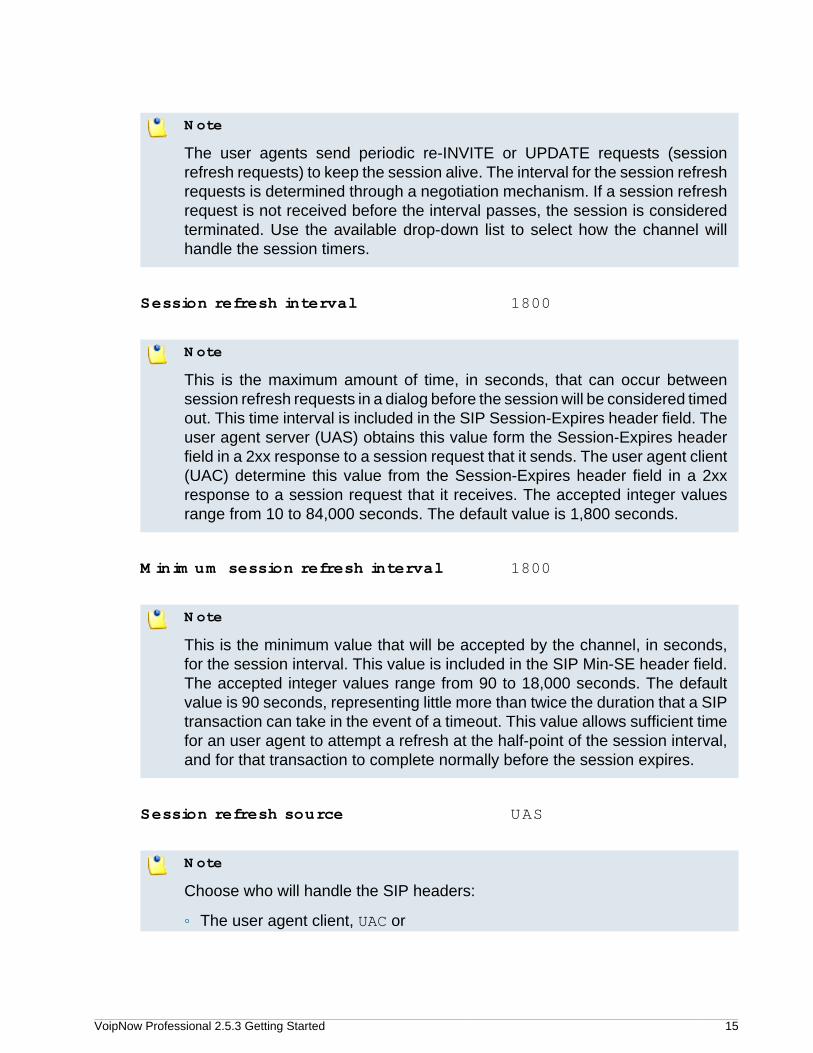
The user agents send periodic re-INVITE or UPDATE requests (sessionrefresh requests) to keep the session alive. The interval for the session refreshrequests is determined through a negotiation mechanism. If a session refreshrequest is not received before the interval passes, the session is consideredterminated. Use the available drop-down list to select how the channel willhandle the session timers.
Session refresh interval 1800
Note
This is the maximum amount of time, in seconds, that can occur betweensession refresh requests in a dialog before the session will be considered timedout. This time interval is included in the SIP Session-Expires header field. Theuser agent server (UAS) obtains this value form the Session-Expires headerfield in a 2xx response to a session request that it sends. The user agent client(UAC) determine this value from the Session-Expires header field in a 2xxresponse to a session request that it receives. The accepted integer valuesrange from 10 to 84,000 seconds. The default value is 1,800 seconds.
Minimum session refresh interval 1800
Note
This is the minimum value that will be accepted by the channel, in seconds,for the session interval. This value is included in the SIP Min-SE header field.The accepted integer values range from 90 to 18,000 seconds. The defaultvalue is 90 seconds, representing little more than twice the duration that a SIPtransaction can take in the event of a timeout. This value allows sufficient timefor an user agent to attempt a refresh at the half-point of the session interval,and for that transaction to complete normally before the session expires.
Session refresh source UAS
Note
Choose who will handle the SIP headers:
◦ The user agent client, UAC or
VoipNow Professional 2.5.3 Getting Started 16
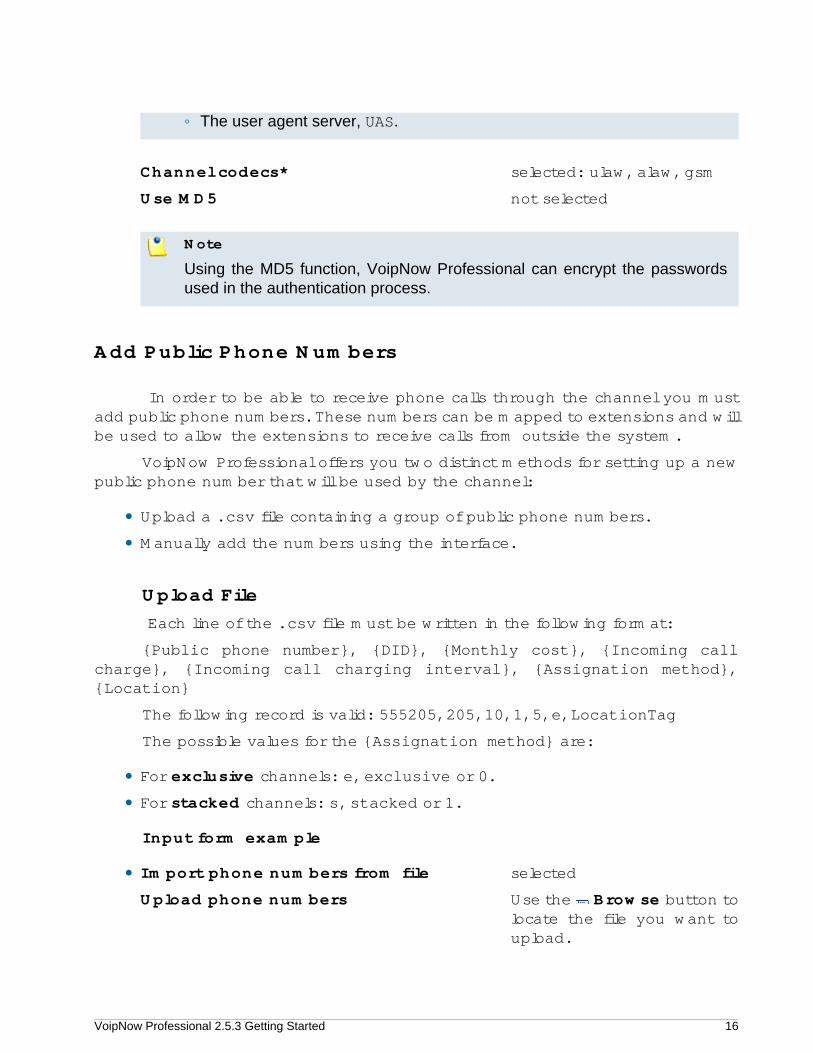
◦ The user agent server, UAS.
Channel codecs* selected: ulaw, alaw, gsm
Use MD5 not selected
Note
Using the MD5 function, VoipNow Professional can encrypt the passwordsused in the authentication process.
Add Public Phone Numbers
In order to be able to receive phone calls through the channel you mustadd public phone numbers. These numbers can be mapped to extensions and willbe used to allow the extensions to receive calls from outside the system.
VoipNow Professional offers you two distinct methods for setting up a newpublic phone number that will be used by the channel:
• Upload a .csv file containing a group of public phone numbers.
• Manually add the numbers using the interface.
Upload File Each line of the .csv file must be written in the following format:
{Public phone number}, {DID}, {Monthly cost}, {Incoming callcharge}, {Incoming call charging interval}, {Assignation method},{Location}
The following record is valid: 555205,205,10,1,5,e,LocationTag
The possible values for the {Assignation method} are:
• For exclusive channels: e, exclusive or 0.
• For stacked channels: s, stacked or 1.
Input form example
• Import phone numbers from file selected
Upload phone numbers Use the Browse button tolocate the file you want toupload.
VoipNow Professional 2.5.3 Getting Started 17
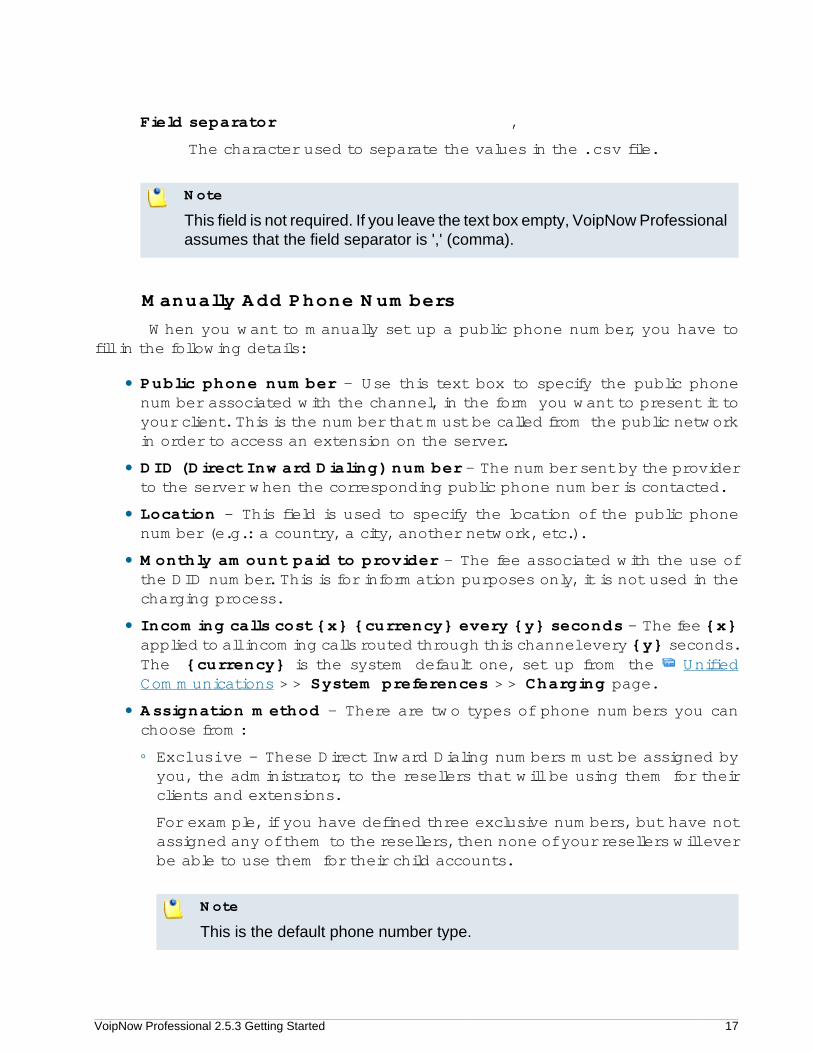
Field separator ,
The character used to separate the values in the .csv file.
Note
This field is not required. If you leave the text box empty, VoipNow Professionalassumes that the field separator is ',' (comma).
Manually Add Phone Numbers When you want to manually set up a public phone number, you have to
fill in the following details:
• Public phone number – Use this text box to specify the public phonenumber associated with the channel, in the form you want to present it toyour client. This is the number that must be called from the public networkin order to access an extension on the server.
• DID (Direct Inward Dialing) number – The number sent by the providerto the server when the corresponding public phone number is contacted.
• Location – This field is used to specify the location of the public phonenumber (e.g.: a country, a city, another network, etc.).
• Monthly amount paid to provider – The fee associated with the use ofthe DID number. This is for information purposes only, it is not used in thecharging process.
• Incoming calls cost {x} {currency} every {y} seconds – The fee {x}applied to all incoming calls routed through this channel every {y} seconds.The {currency} is the system default one, set up from the UnifiedCommunications >> System preferences >> Charging page.
• Assignation method – There are two types of phone numbers you canchoose from:
◦ Exclusive – These Direct Inward Dialing numbers must be assigned byyou, the administrator, to the resellers that will be using them for theirclients and extensions.
For example, if you have defined three exclusive numbers, but have notassigned any of them to the resellers, then none of your resellers will everbe able to use them for their child accounts.
Note
This is the default phone number type.
VoipNow Professional 2.5.3 Getting Started 18
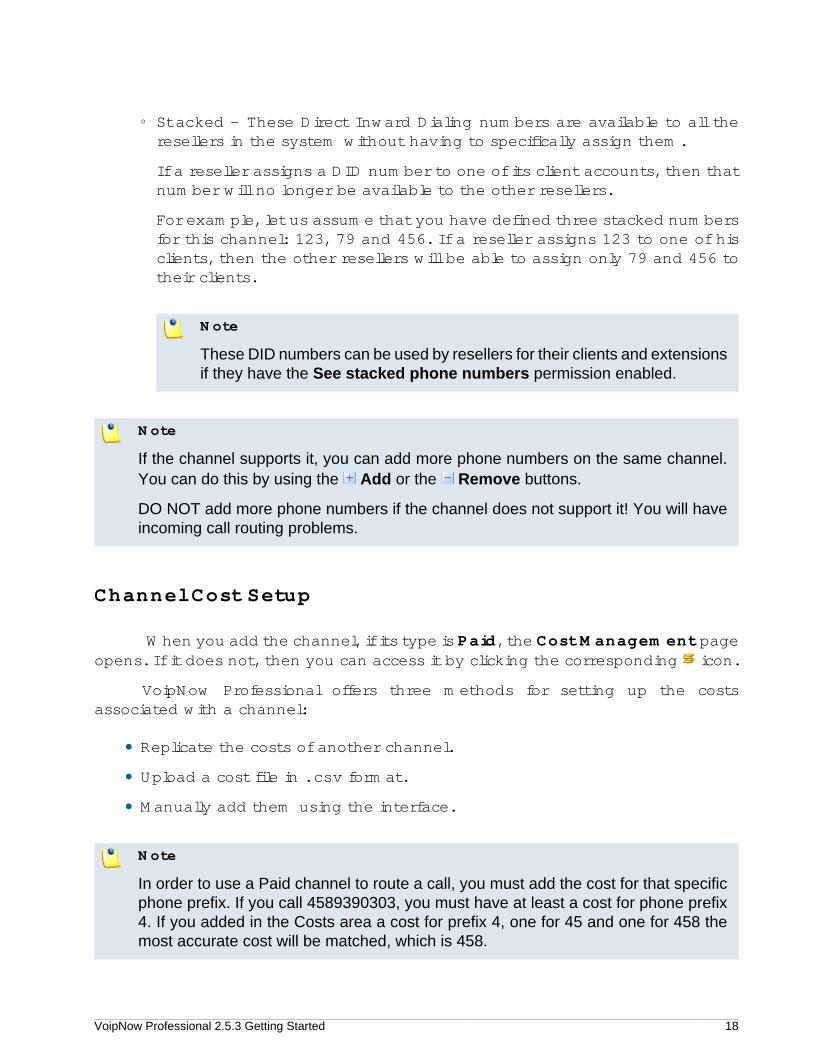
◦ Stacked – These Direct Inward Dialing numbers are available to all theresellers in the system without having to specifically assign them.
If a reseller assigns a DID number to one of its client accounts, then thatnumber will no longer be available to the other resellers.
For example, let us assume that you have defined three stacked numbersfor this channel: 123, 79 and 456. If a reseller assigns 123 to one of hisclients, then the other resellers will be able to assign only 79 and 456 totheir clients.
Note
These DID numbers can be used by resellers for their clients and extensionsif they have the See stacked phone numbers permission enabled.
Note
If the channel supports it, you can add more phone numbers on the same channel.You can do this by using the Add or the Remove buttons.
DO NOT add more phone numbers if the channel does not support it! You will haveincoming call routing problems.
Channel Cost Setup
When you add the channel, if its type is Paid, the Cost Management pageopens. If it does not, then you can access it by clicking the corresponding icon.
VoipNow Professional offers three methods for setting up the costsassociated with a channel:
• Replicate the costs of another channel.
• Upload a cost file in .csv format.
• Manually add them using the interface.
Note
In order to use a Paid channel to route a call, you must add the cost for that specificphone prefix. If you call 4589390303, you must have at least a cost for phone prefix4. If you added in the Costs area a cost for prefix 4, one for 45 and one for 458 themost accurate cost will be matched, which is 458.
VoipNow Professional 2.5.3 Getting Started 19
Clone Channel Costs
Channel cost can be imported from existing channels. After cloning youwill be able to manually add other costs or edit the existing ones.
Note
Cloning cost can affect the way in which VoipNow Professional routes calls. Forexample, let's assume you have manually defined the cost for the area code 02. Thismeans that the calls to the numbers 0219999999 and 0229999999 are charged thesame cost. When you import the costs from a channel that has defined the area code021, the calls to the number 0219999999 will be charged differently from the callsto number 0229999999.
After cloning, review the imported costs to make sure the channel willcharge calls the way you intended.
Input form example
• Import costs from another channel Not selected
Get costs from channel
Use the drop-down list to select an existing channel.
Upload a Cost File
Uploading costs for hundreds of destinations can be done using a .csvfile. The uploaded file must contain the Area code and the Cost, one per line,separated by a control character.
Note
Uploading a cost file is a risky operation because it replaces all the costs currentlyassociated with the channel. Therefore, you should perform this operation only if youknow what you are doing. It is also advisable to disable the channel before performingthis operation.
Input form example
Agree to replace ALL channel costs Selected
Before uploading a cost file, you must confirm this operation.
VoipNow Professional 2.5.3 Getting Started 20
Note
If you do not agree, the File to upload and File separator fields are also disabled.
File to upload Use the Browse button to locatethe cost file you want to upload.
Field separator
The character used to separate the values in the .csv file.
Note
This field is not required. If you leave the text box empty, VoipNow Professionalassumes that the field separator is ',' (comma).
Manually Add Costs
When you want to manually define channel costs for various destinations,you can use the controls available in the Add Costs fieldset.
Input form example
Cost 0.20 USD/60 seconds for call to 0040. Setup cost 0.8 USD. Maximumcharge per call 50 USD. Network code 21. Description Calls to Bucharest,Romania - land lines.
Use the buttons to add several cost entries at the same time.
Note
If you do not add costs for all destinations, then the system will not be able to routeall calls.
Adding Routing Rules
VoipNow Professional can route calls based on the call destination andcost. Routing rules describe how a call is sent to destination. Routing rules areassociated with charging plans. Without routing rules, calls cannot be routed tothe destination.
Go to Channels link in the Navigation Area. Click the Outgoing routingrules icon. A new page opens allowing you to enter information about the newrouting rule group.
VoipNow Professional 2.5.3 Getting Started 21
VoipNow Professional allows you to define four routing rule types:
1.Route through - In this case, the call is directed through a particularchannel.
2.Process target number – This rule can be used to perform complexoperations (e.g.: deleting or inserting digits, adding a prefix, etc.) on onenumber before directing the call through a particular channel.
3.Portability check – This rule is used to identify the network a numberbelongs to and thus to choose the appropriate charging method fordetermining the call cost. The routing rules following this one select the callcost based on the results provided by this rule.
Note
This routing rule is available only if the Number portability engine option isenabled. By default, this option is disabled.
To enable it, navigate to the Unified Communications >> Systempreferences >> Charging tab.
VoipNow Professional provides the engine that checks for portability, but if acertain customer wants to create a portability client (s)he should contact thecustomer support center for detailed information.
4.Block – VoipNow Professional forbids the call to be initiated to the provideddestination number.
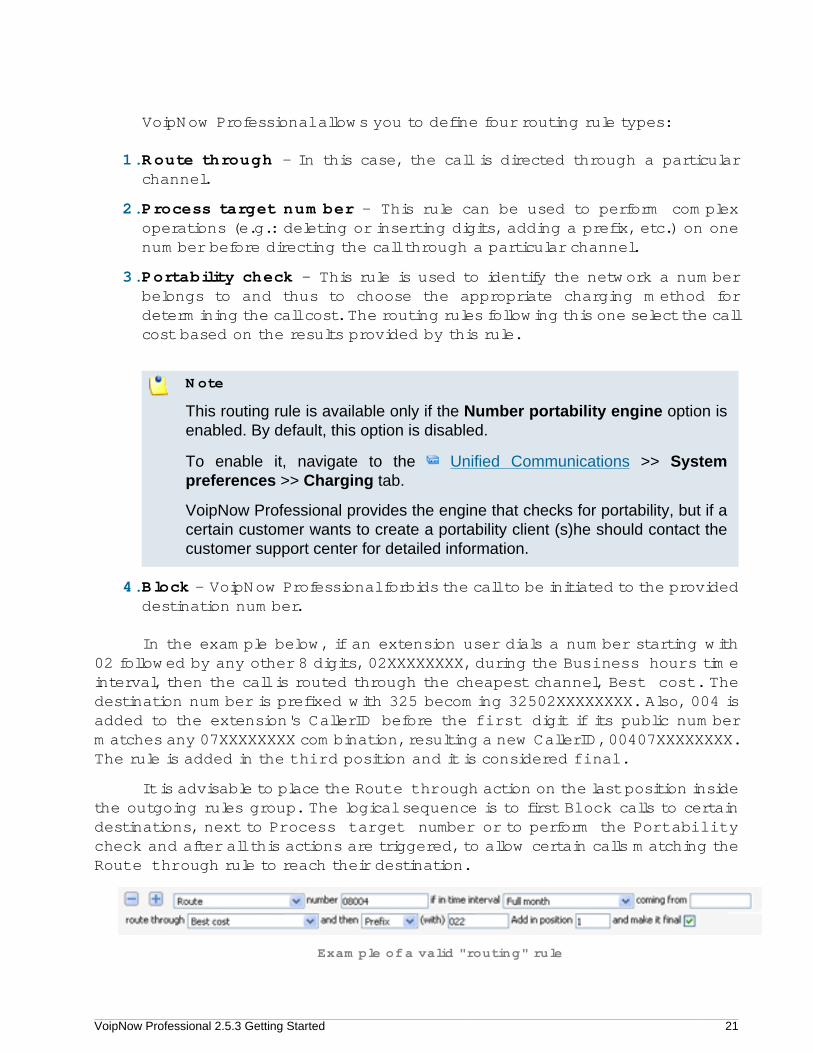
In the example below, if an extension user dials a number starting with02 followed by any other 8 digits, 02XXXXXXXX, during the Business hours timeinterval, then the call is routed through the cheapest channel, Best cost. Thedestination number is prefixed with 325 becoming 32502XXXXXXXX. Also, 004 isadded to the extension's CallerID before the first digit if its public numbermatches any 07XXXXXXXX combination, resulting a new CallerID, 00407XXXXXXXX.The rule is added in the third position and it is considered final.
It is advisable to place the Route through action on the last position insidethe outgoing rules group. The logical sequence is to first Block calls to certaindestinations, next to Process target number or to perform the Portabilitycheck and after all this actions are triggered, to allow certain calls matching theRoute through rule to reach their destination.
Example of a valid "routing" rule
VoipNow Professional 2.5.3 Getting Started 22
Note
For all the extension/destination numbers, you can specify any combination of thedigits 0-9 and the characters '.' , '*'.
The number entry supports the Asterisk number matching. You can enter a basicregular expression containing:
• X - Matches any digit from 0-9.
• Z - Matches any digit form 1-9.
• N - Matches any digit from 2-9.
• [] - Matches any digit or letter in the brackets.
• * - Matches 0, 1 or any number of the previous expression.
• . - Matches one or more characters.
For example:
• Number 0. will match any number starting with 0.
• Number 1X[123]N will match any number starting with 1, followed by any digitbetween 0 and 9, followed by 1,2 or 3 and followed by any digit between 2and 9, for example 1528.
Note
Only the Route through rule can be final!
Caution
The rule's position in the group is very important because it defines the order in whichVoipNow Professional matches the call rules. The Block rule is final. This meansthat when a rule is matched, the other rules are no longer checked.
Adding Charging Plans
Charging plans describe how a reseller, client or extension is charged forhis calls. Charging plans are very flexible; they support prepaid and postpaidcalls. Therefore, it is necessary to understand them very well.
Go to Charging Plans link in the Navigation Area. Click the Add ChargingPlan icon. A new page opens allowing you to configure the new Charging plan.
VoipNow Professional 2.5.3 Getting Started 23
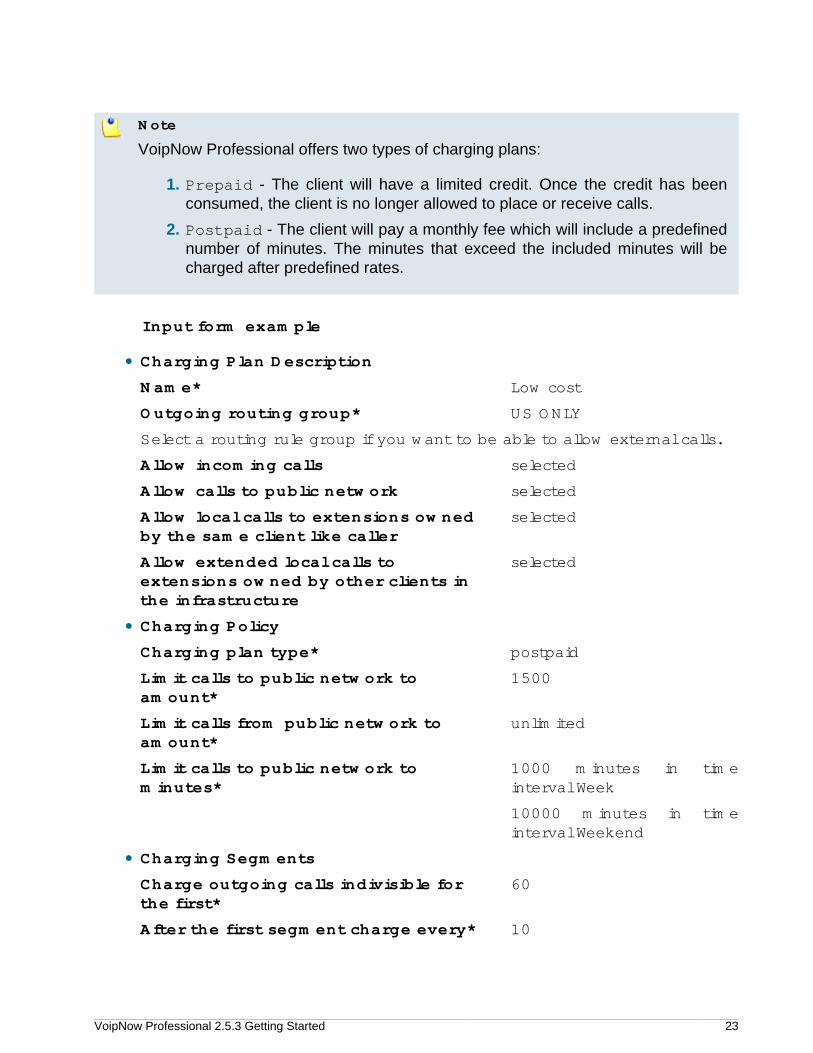
Note
VoipNow Professional offers two types of charging plans:
1. Prepaid - The client will have a limited credit. Once the credit has beenconsumed, the client is no longer allowed to place or receive calls.
2. Postpaid - The client will pay a monthly fee which will include a predefinednumber of minutes. The minutes that exceed the included minutes will becharged after predefined rates.
Input form example
• Charging Plan Description
Name* Low cost
Outgoing routing group* US ONLY
Select a routing rule group if you want to be able to allow external calls.
Allow incoming calls selected
Allow calls to public network selected
Allow local calls to extensions ownedby the same client like caller
selected
Allow extended local calls toextensions owned by other clients inthe infrastructure
selected
• Charging Policy
Charging plan type* postpaid
Limit calls to public network toamount*
1500
Limit calls from public network toamount*
unlimited
Limit calls to public network tominutes*
1000 minutes in timeinterval Week
10000 minutes in timeinterval Weekend
• Charging Segments
Charge outgoing calls indivisible forthe first*
60
After the first segment charge every* 10
VoipNow Professional 2.5.3 Getting Started 24
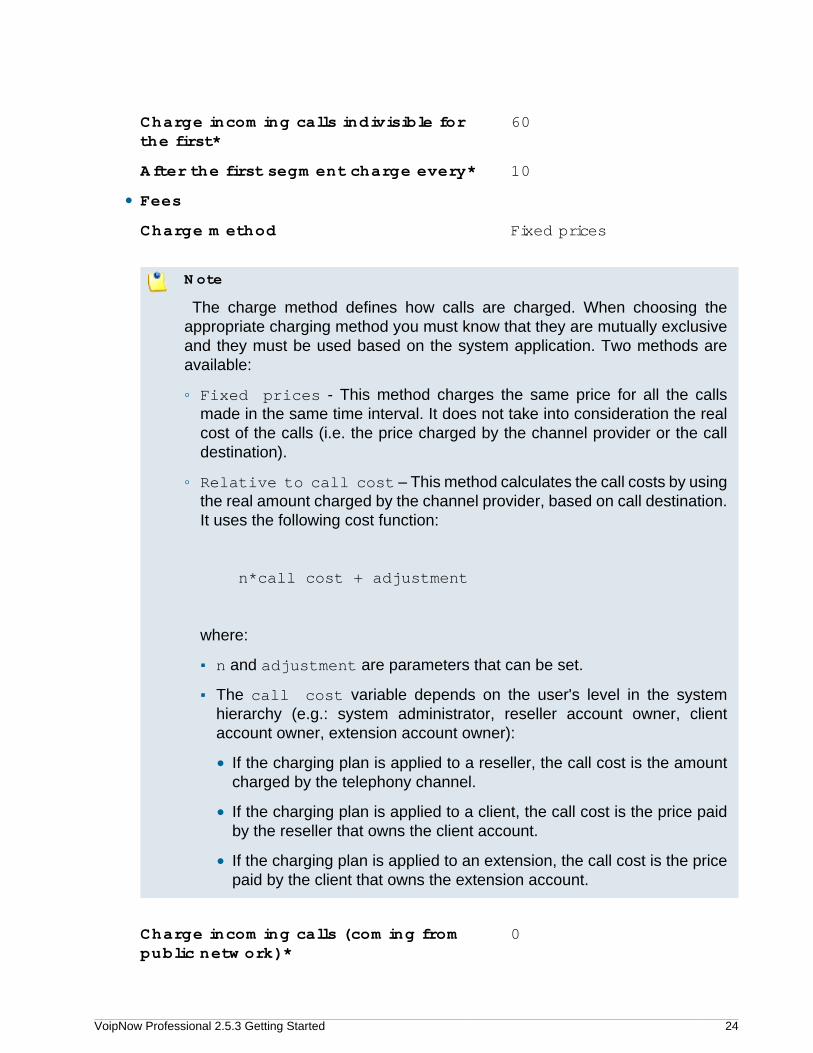
Charge incoming calls indivisible forthe first*
60
After the first segment charge every* 10
• Fees
Charge method Fixed prices
Note
The charge method defines how calls are charged. When choosing theappropriate charging method you must know that they are mutually exclusiveand they must be used based on the system application. Two methods areavailable:
◦ Fixed prices - This method charges the same price for all the callsmade in the same time interval. It does not take into consideration the realcost of the calls (i.e. the price charged by the channel provider or the calldestination).
◦ Relative to call cost – This method calculates the call costs by usingthe real amount charged by the channel provider, based on call destination.It uses the following cost function:
n*call cost + adjustment
where:
▪ n and adjustment are parameters that can be set.
▪ The call cost variable depends on the user's level in the systemhierarchy (e.g.: system administrator, reseller account owner, clientaccount owner, extension account owner):
• If the charging plan is applied to a reseller, the call cost is the amountcharged by the telephony channel.
• If the charging plan is applied to a client, the call cost is the price paidby the reseller that owns the client account.
• If the charging plan is applied to an extension, the call cost is the pricepaid by the client that owns the extension account.
Charge incoming calls (coming frompublic network)*
0

VoipNow Professional 2.5.3 Getting Started 25
Charge outgoing calls (destination is inpublic network)*
0.35 USD/second in timeinterval - (Week)
0.25 USD/second in timeinterval - (Weekend)
0.40 USD/second in timeinterval - (Anytime)
VoipNow Professional 2.5.3 Getting Started 26
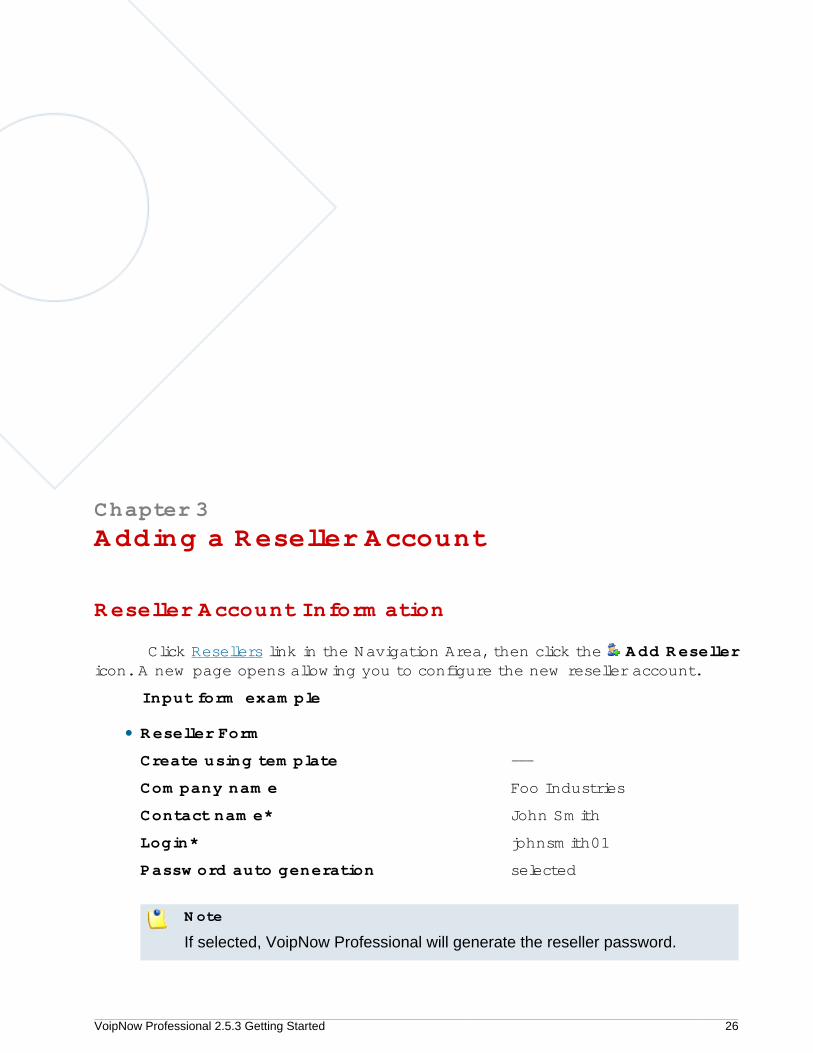
Chapter 3Adding a Reseller Account
Reseller Account Information
Click Resellers link in the Navigation Area, then click the Add Resellericon. A new page opens allowing you to configure the new reseller account.
Input form example
• Reseller Form
Create using template ---
Company name Foo Industries
Contact name* John Smith
Login* johnsmith01
Password auto generation selected
Note
If selected, VoipNow Professional will generate the reseller password.
VoipNow Professional 2.5.3 Getting Started 27
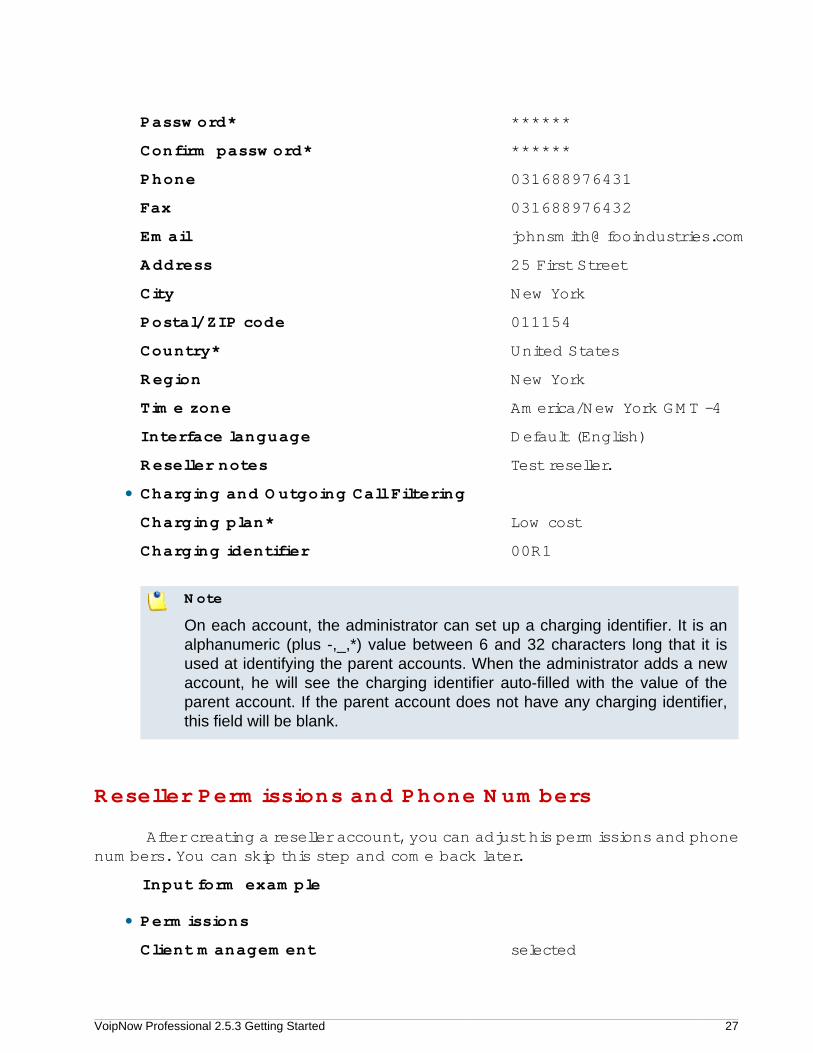
Password* ******
Confirm password* ******
Phone 031688976431
Fax 031688976432
Email [email protected]
Address 25 First Street
City New York
Postal/ZIP code 011154
Country* United States
Region New York
Time zone America/New York GMT -4
Interface language Default (English)
Reseller notes Test reseller.
• Charging and Outgoing Call Filtering
Charging plan* Low cost
Charging identifier 00R1
Note
On each account, the administrator can set up a charging identifier. It is analphanumeric (plus -,_,*) value between 6 and 32 characters long that it isused at identifying the parent accounts. When the administrator adds a newaccount, he will see the charging identifier auto-filled with the value of theparent account. If the parent account does not have any charging identifier,this field will be blank.
Reseller Permissions and Phone Numbers
After creating a reseller account, you can adjust his permissions and phonenumbers. You can skip this step and come back later.
Input form example
• Permissions
Client management selected
VoipNow Professional 2.5.3 Getting Started 28
Roles and phone numbersmanagement
selected
Extension management selected
Extension features management selected
Phone extension SIP management selected
IM management selected
Charging plans management selected
Sound management selected
Phone numbers management selected
See stacked phone numbers selected
See stacked phone numbers selected
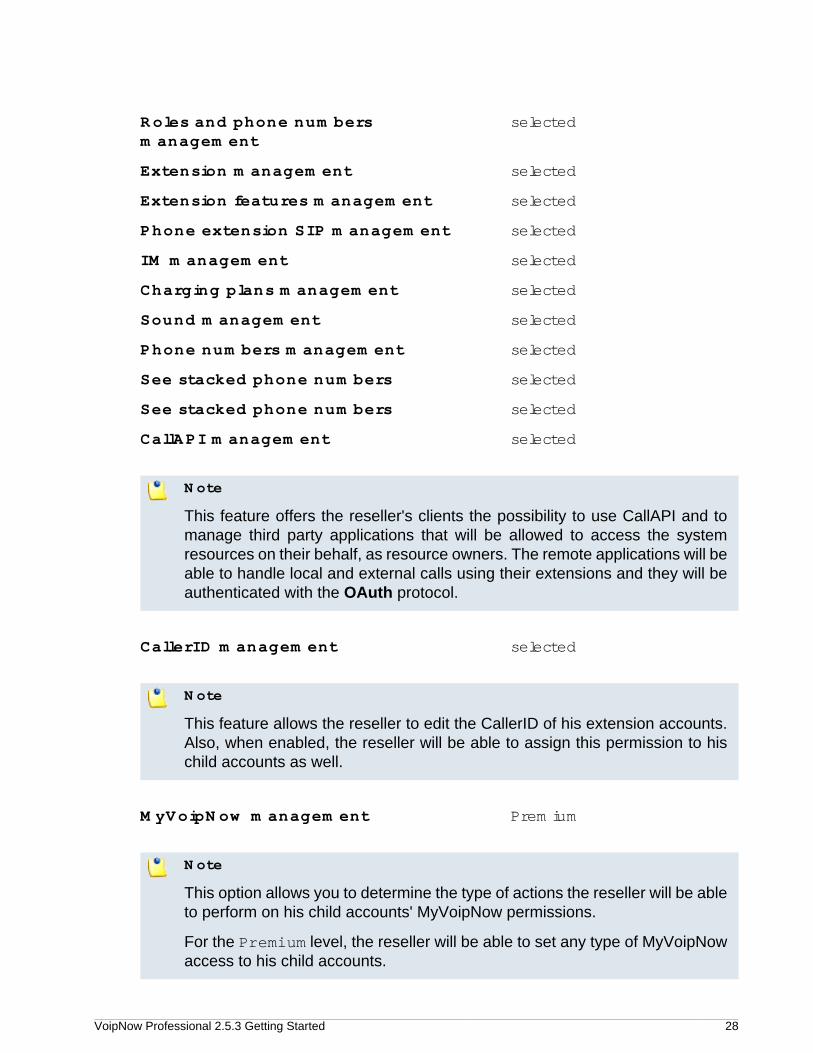
CallAPI management selected
Note
This feature offers the reseller's clients the possibility to use CallAPI and tomanage third party applications that will be allowed to access the systemresources on their behalf, as resource owners. The remote applications will beable to handle local and external calls using their extensions and they will beauthenticated with the OAuth protocol.
CallerID management selected
Note
This feature allows the reseller to edit the CallerID of his extension accounts.Also, when enabled, the reseller will be able to assign this permission to hischild accounts as well.
MyVoipNow management Premium
Note
This option allows you to determine the type of actions the reseller will be ableto perform on his child accounts' MyVoipNow permissions.
For the Premium level, the reseller will be able to set any type of MyVoipNowaccess to his child accounts.
VoipNow Professional 2.5.3 Getting Started 29
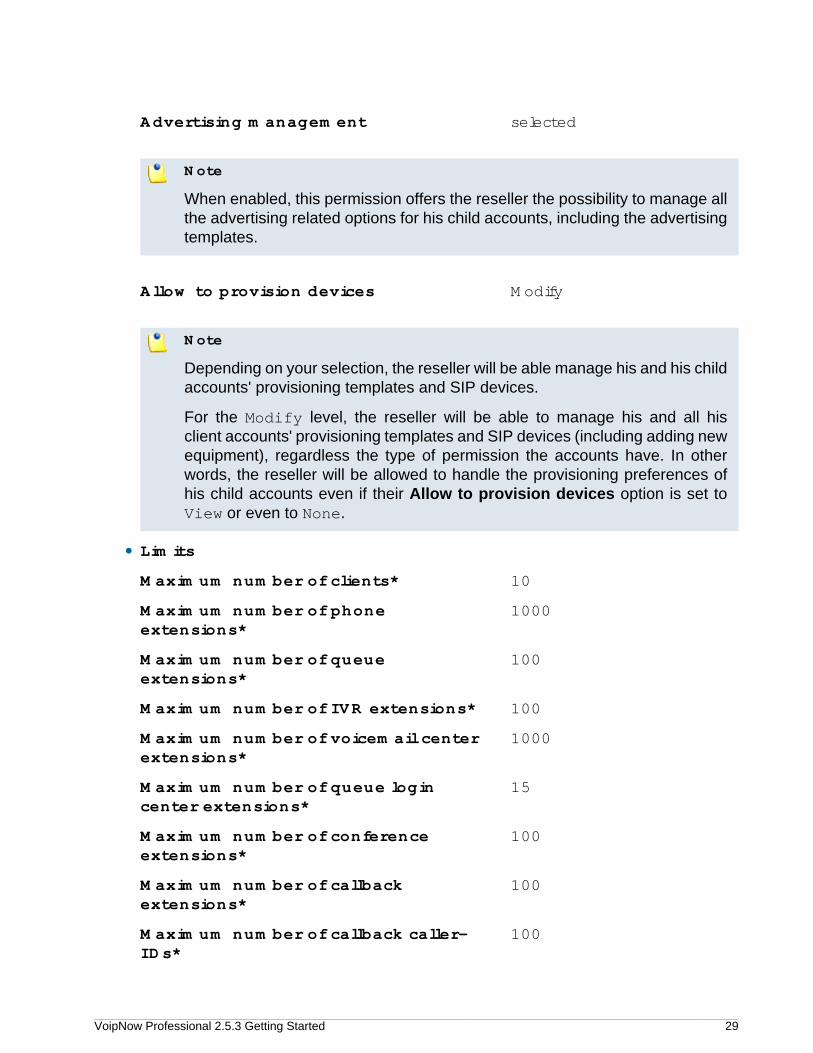
Advertising management selected
Note
When enabled, this permission offers the reseller the possibility to manage allthe advertising related options for his child accounts, including the advertisingtemplates.
Allow to provision devices Modify
Note
Depending on your selection, the reseller will be able manage his and his childaccounts' provisioning templates and SIP devices.
For the Modify level, the reseller will be able to manage his and all hisclient accounts' provisioning templates and SIP devices (including adding newequipment), regardless the type of permission the accounts have. In otherwords, the reseller will be allowed to handle the provisioning preferences ofhis child accounts even if their Allow to provision devices option is set toView or even to None.
• Limits
Maximum number of clients* 10
Maximum number of phoneextensions*
1000
Maximum number of queueextensions*
100
Maximum number of IVR extensions* 100
Maximum number of voicemail centerextensions*
1000
Maximum number of queue logincenter extensions*
15
Maximum number of conferenceextensions*
100
Maximum number of callbackextensions*
100
Maximum number of callback caller-IDs*
100
VoipNow Professional 2.5.3 Getting Started 30
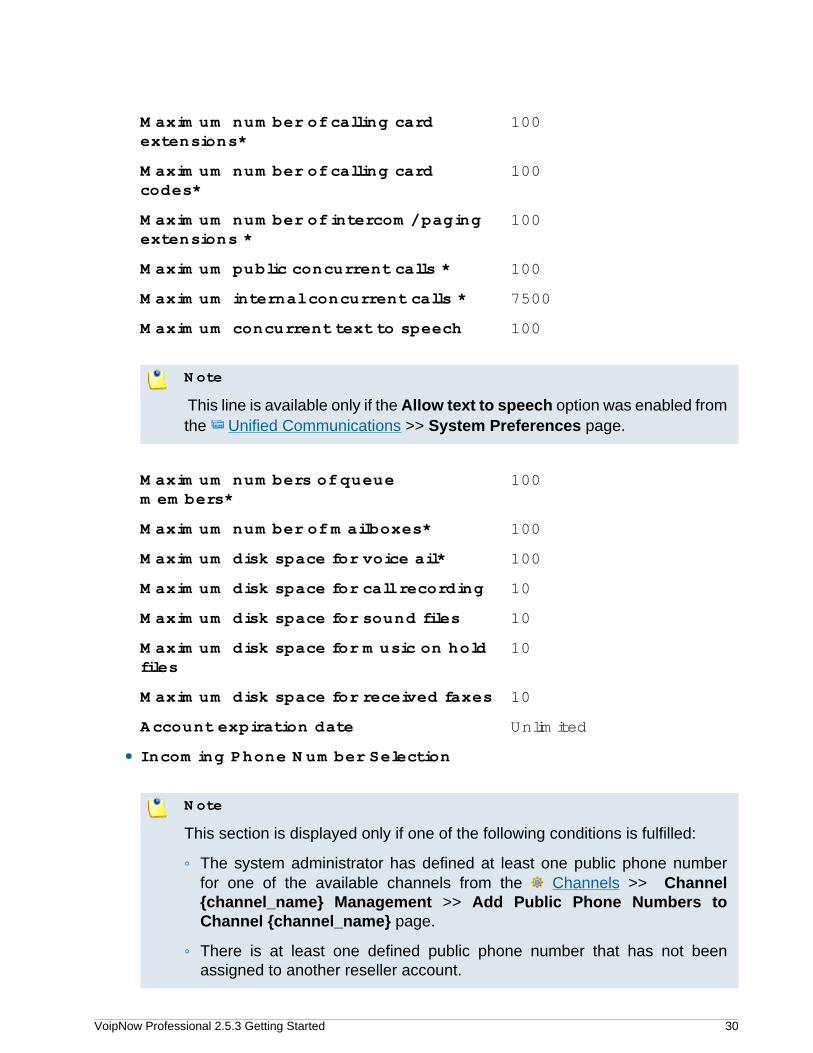
Maximum number of calling cardextensions*
100
Maximum number of calling cardcodes*
100
Maximum number of intercom/pagingextensions *
100
Maximum public concurrent calls * 100
Maximum internal concurrent calls * 7500
Maximum concurrent text to speech 100
Note
This line is available only if the Allow text to speech option was enabled fromthe Unified Communications >> System Preferences page.
Maximum numbers of queuemembers*
100
Maximum number of mailboxes* 100
Maximum disk space for voice ail* 100
Maximum disk space for call recording 10
Maximum disk space for sound files 10
Maximum disk space for music on holdfiles
10
Maximum disk space for received faxes 10
Account expiration date Unlimited
• Incoming Phone Number Selection
Note
This section is displayed only if one of the following conditions is fulfilled:
◦ The system administrator has defined at least one public phone numberfor one of the available channels from the Channels >> Channel{channel_name} Management >> Add Public Phone Numbers toChannel {channel_name} page.
◦ There is at least one defined public phone number that has not beenassigned to another reseller account.

VoipNow Professional 2.5.3 Getting Started 31
Assigned public phone numbers My Channel(999999)
VoipNow Professional 2.5.3 Getting Started 32
Chapter 4Adding a Client Account
Go to Resellers link in the Navigation Area and you will see the reselleraccounts. To manage the reseller you have just created, click his name.
In order to create a client account in the reseller context, you first must add:
• Time intervals – These are necessary for the reseller charging plans.These reseller charging plans can be applied to the clients in the resellercontext. They define how the reseller charges his clients. For a reseller, timeintervals can be created by clicking the Time intervals icon availablein his context.
• Charging plans – Once the time intervals have been added, you can startto create charging plans. For a reseller, charging plans can be created byclicking the Charging plans icon available in his context.
After you have created the time intervals and the charging plans, you canadd the client account. In order to do this, click the Add client icon in theReseller context.
VoipNow Professional 2.5.3 Getting Started 33
Chapter 5Adding an Extension Account
Extensions must be created under a client account. If you go to the Clientslink in the Navigation Area you will see the client accounts you have created. Toadd an extension, select the client that will be the owner of the extension account.
In order to create an extension account in the client context, you must firstadd:
• Time intervals – These are necessary for the client charging plans. Thesecharging plans can be applied to the extensions in the client context. Theydefine how the client charges his extensions. For a client, time intervals canbe created by clicking the Time intervals icon available in his context.
• Charging plans – Once the time intervals are added, you can start tocreate charging plans. For a client, charging plans can be created by clickingthe Charging plans icon available in his context.
• Forbidden numbers – This step is not compulsory but it is recommended.Before adding extensions to the system, you should define a list of forbiddenextension numbers (i.e. numbers that are reserved for special purposesand will not be assigned to regular extensions). To do this click the Unified
VoipNow Professional 2.5.3 Getting Started 34
Communications link in the left panel and then click the Forbiddenextensions icon.
For more information on forbidden extensions, check the Administrator'sGuide.
After you have created the time intervals and the charging plans, you canadd the extension account.
Adding a Phone Terminal Extension Account
A phone terminal is a SIP phone connected to the 4PSA VoipNowProfessional server using the network.
Phone Terminal Extension Account Information
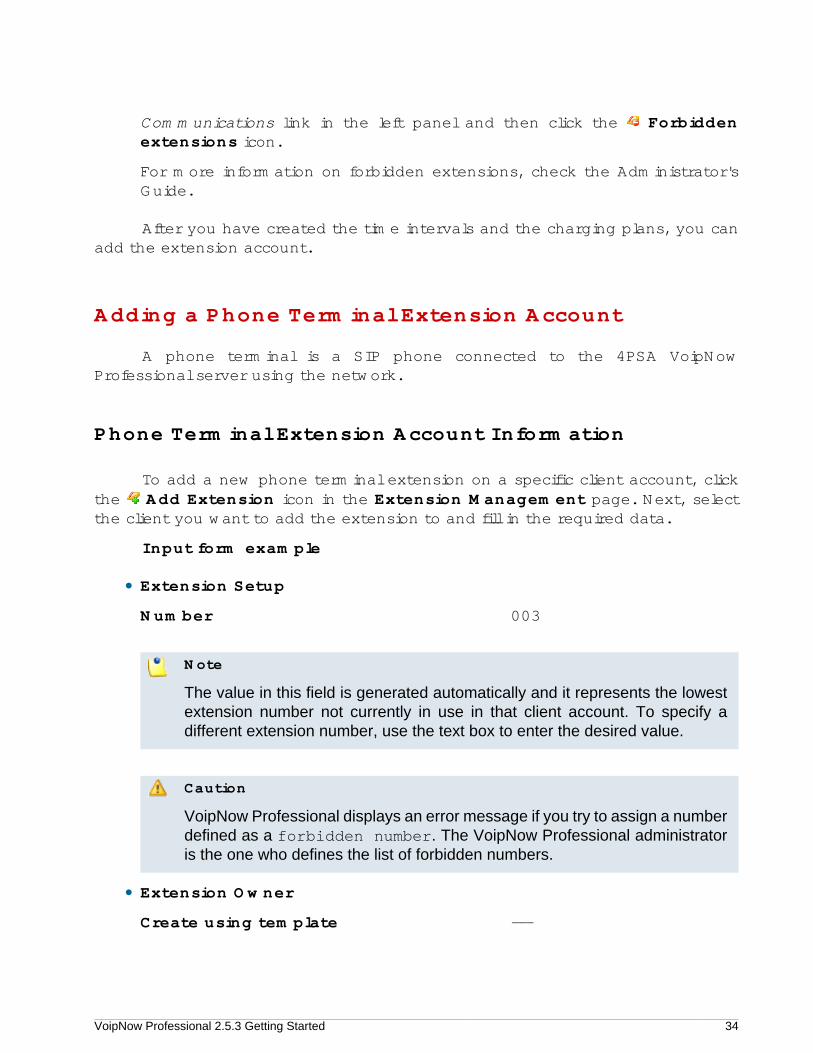
To add a new phone terminal extension on a specific client account, clickthe Add Extension icon in the Extension Management page. Next, selectthe client you want to add the extension to and fill in the required data.
Input form example
• Extension Setup
Number 003
Note
The value in this field is generated automatically and it represents the lowestextension number not currently in use in that client account. To specify adifferent extension number, use the text box to enter the desired value.
Caution
VoipNow Professional displays an error message if you try to assign a numberdefined as a forbidden number. The VoipNow Professional administratoris the one who defines the list of forbidden numbers.
• Extension Owner
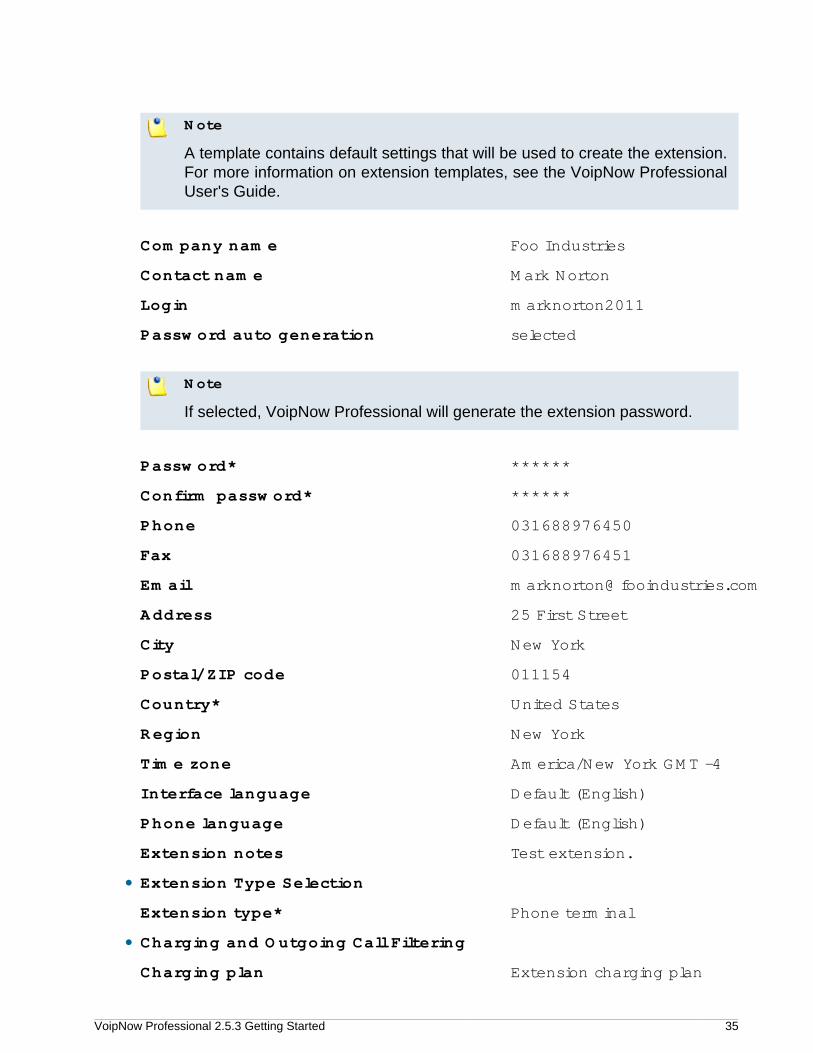
Create using template ---
VoipNow Professional 2.5.3 Getting Started 35
Note
A template contains default settings that will be used to create the extension.For more information on extension templates, see the VoipNow ProfessionalUser's Guide.
Company name Foo Industries
Contact name Mark Norton
Login marknorton2011
Password auto generation selected
Note
If selected, VoipNow Professional will generate the extension password.
Password* ******
Confirm password* ******
Phone 031688976450
Fax 031688976451
Email [email protected]
Address 25 First Street
City New York
Postal/ZIP code 011154
Country* United States
Region New York
Time zone America/New York GMT -4
Interface language Default (English)
Phone language Default (English)
Extension notes Test extension.
• Extension Type Selection
Extension type* Phone terminal
• Charging and Outgoing Call Filtering
Charging plan Extension charging plan
VoipNow Professional 2.5.3 Getting Started 36
Outgoing routing group --
Charging identifier leave empty
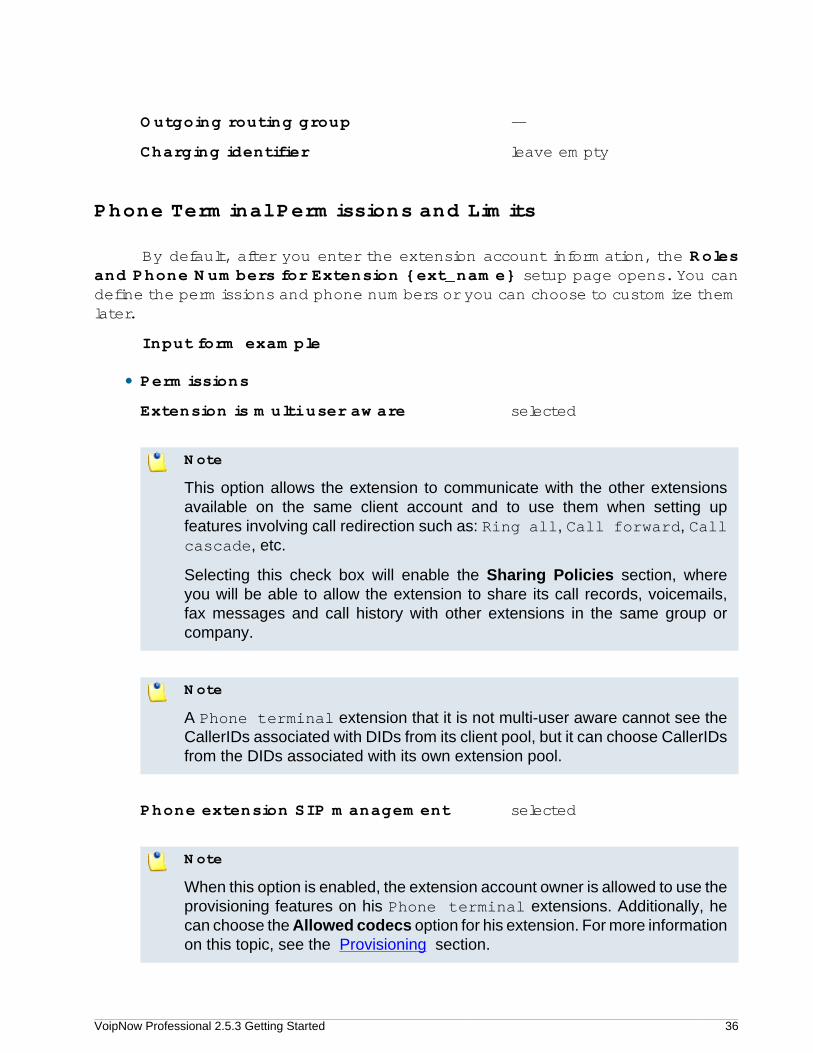
Phone Terminal Permissions and Limits
By default, after you enter the extension account information, the Rolesand Phone Numbers for Extension {ext_name} setup page opens. You candefine the permissions and phone numbers or you can choose to customize themlater.
Input form example
• Permissions
Extension is multi user aware selected
Note
This option allows the extension to communicate with the other extensionsavailable on the same client account and to use them when setting upfeatures involving call redirection such as: Ring all, Call forward, Callcascade, etc.
Selecting this check box will enable the Sharing Policies section, whereyou will be able to allow the extension to share its call records, voicemails,fax messages and call history with other extensions in the same group orcompany.
Note
A Phone terminal extension that it is not multi-user aware cannot see theCallerIDs associated with DIDs from its client pool, but it can choose CallerIDsfrom the DIDs associated with its own extension pool.
Phone extension SIP management selected
Note
When this option is enabled, the extension account owner is allowed to use theprovisioning features on his Phone terminal extensions. Additionally, hecan choose the Allowed codecs option for his extension. For more informationon this topic, see the Provisioning section.
VoipNow Professional 2.5.3 Getting Started 37
IM management selected
Call API management selected
CallerID management selected
Sound management selected
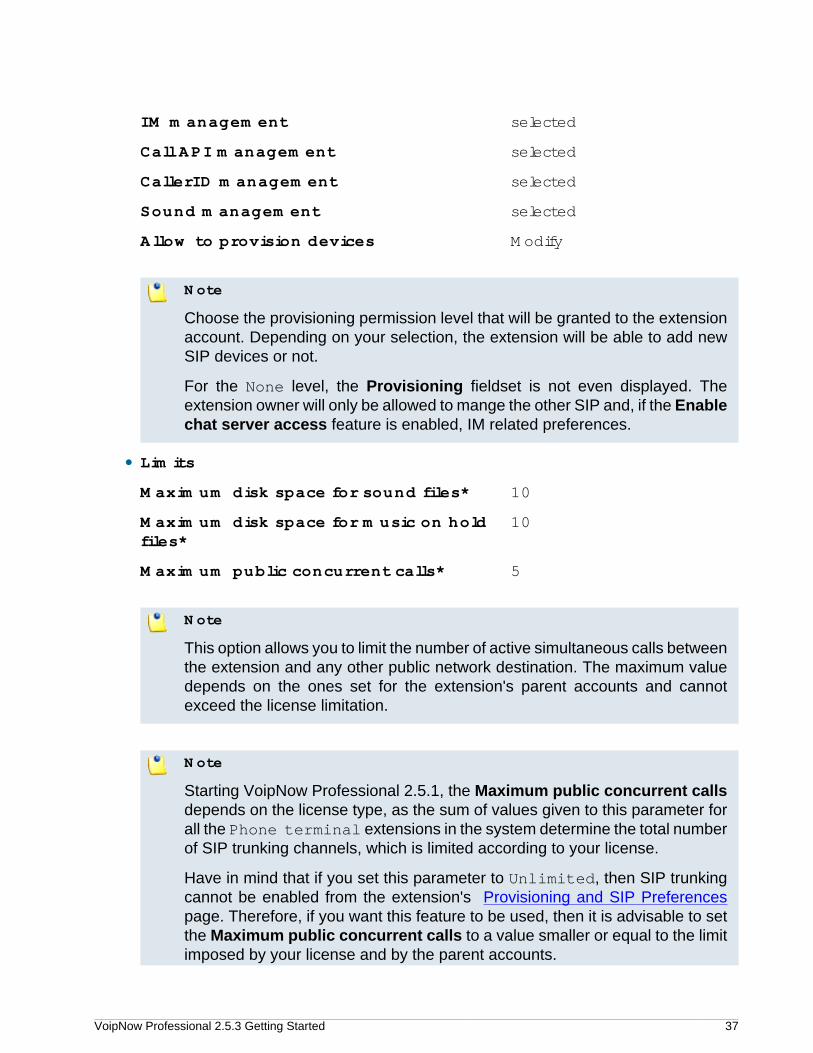
Allow to provision devices Modify
Note
Choose the provisioning permission level that will be granted to the extensionaccount. Depending on your selection, the extension will be able to add newSIP devices or not.
For the None level, the Provisioning fieldset is not even displayed. Theextension owner will only be allowed to mange the other SIP and, if the Enablechat server access feature is enabled, IM related preferences.
• Limits
Maximum disk space for sound files* 10
Maximum disk space for music on holdfiles*
10
Maximum public concurrent calls* 5
Note
This option allows you to limit the number of active simultaneous calls betweenthe extension and any other public network destination. The maximum valuedepends on the ones set for the extension's parent accounts and cannotexceed the license limitation.
Note
Starting VoipNow Professional 2.5.1, the Maximum public concurrent callsdepends on the license type, as the sum of values given to this parameter forall the Phone terminal extensions in the system determine the total numberof SIP trunking channels, which is limited according to your license.
Have in mind that if you set this parameter to Unlimited, then SIP trunkingcannot be enabled from the extension's Provisioning and SIP Preferencespage. Therefore, if you want this feature to be used, then it is advisable to setthe Maximum public concurrent calls to a value smaller or equal to the limitimposed by your license and by the parent accounts.
VoipNow Professional 2.5.3 Getting Started 38
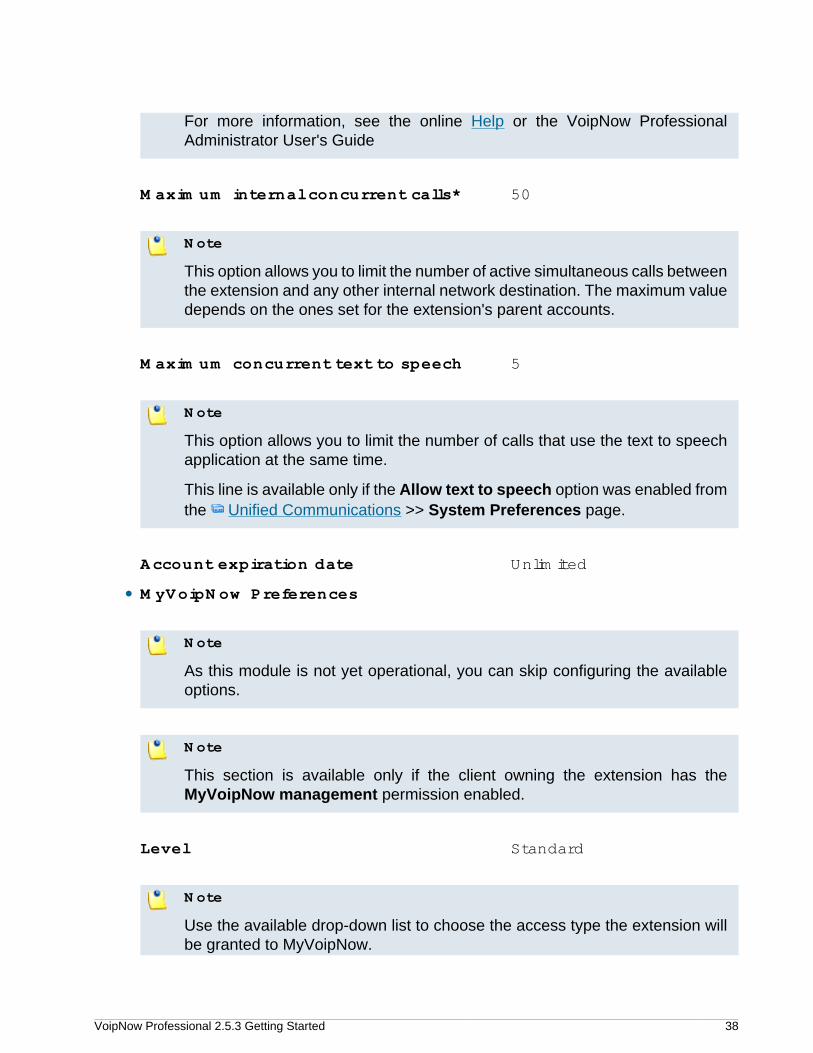
For more information, see the online Help or the VoipNow ProfessionalAdministrator User's Guide
Maximum internal concurrent calls* 50
Note
This option allows you to limit the number of active simultaneous calls betweenthe extension and any other internal network destination. The maximum valuedepends on the ones set for the extension's parent accounts.
Maximum concurrent text to speech 5
Note
This option allows you to limit the number of calls that use the text to speechapplication at the same time.
This line is available only if the Allow text to speech option was enabled fromthe Unified Communications >> System Preferences page.
Account expiration date Unlimited
• MyVoipNow Preferences
Note
As this module is not yet operational, you can skip configuring the availableoptions.
Note
This section is available only if the client owning the extension has theMyVoipNow management permission enabled.
Level Standard
Note
Use the available drop-down list to choose the access type the extension willbe granted to MyVoipNow.
VoipNow Professional 2.5.3 Getting Started 39
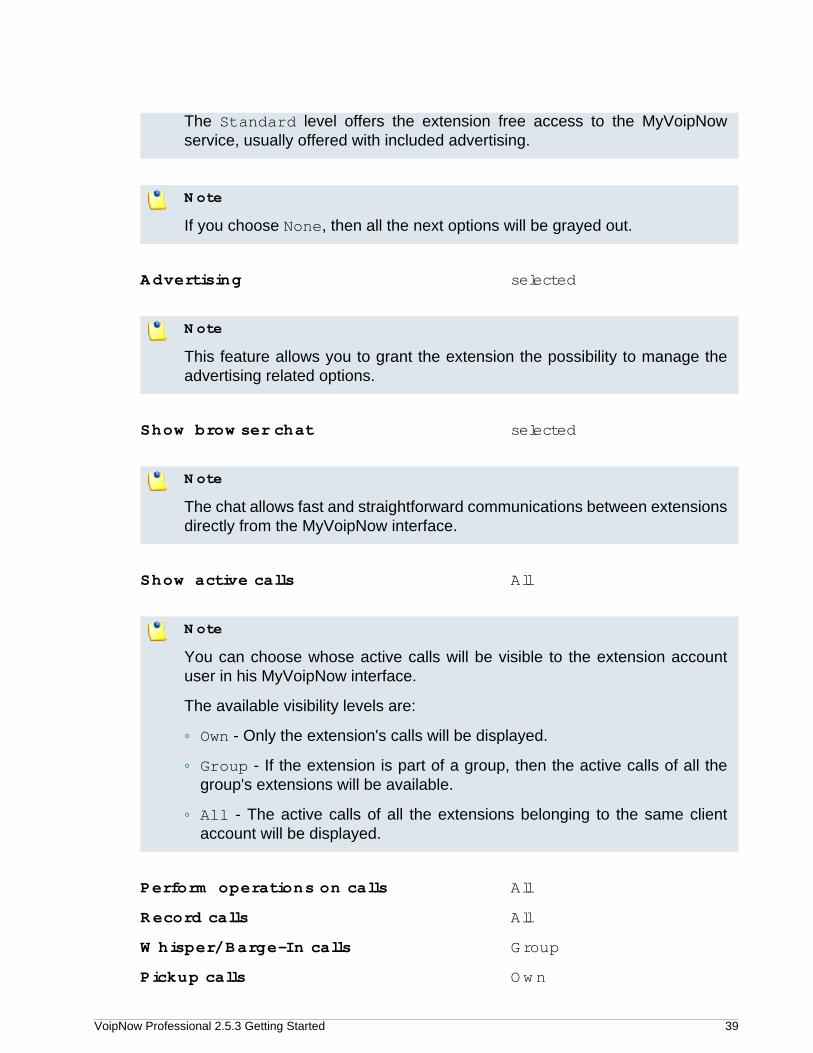
The Standard level offers the extension free access to the MyVoipNowservice, usually offered with included advertising.
Note
If you choose None, then all the next options will be grayed out.
Advertising selected
Note
This feature allows you to grant the extension the possibility to manage theadvertising related options.
Show browser chat selected
Note
The chat allows fast and straightforward communications between extensionsdirectly from the MyVoipNow interface.
Show active calls All
Note
You can choose whose active calls will be visible to the extension accountuser in his MyVoipNow interface.
The available visibility levels are:
◦ Own - Only the extension's calls will be displayed.
◦ Group - If the extension is part of a group, then the active calls of all thegroup's extensions will be available.
◦ All - The active calls of all the extensions belonging to the same clientaccount will be displayed.
Perform operations on calls All
Record calls All
Whisper/Barge-In calls Group
Pickup calls Own
VoipNow Professional 2.5.3 Getting Started 40
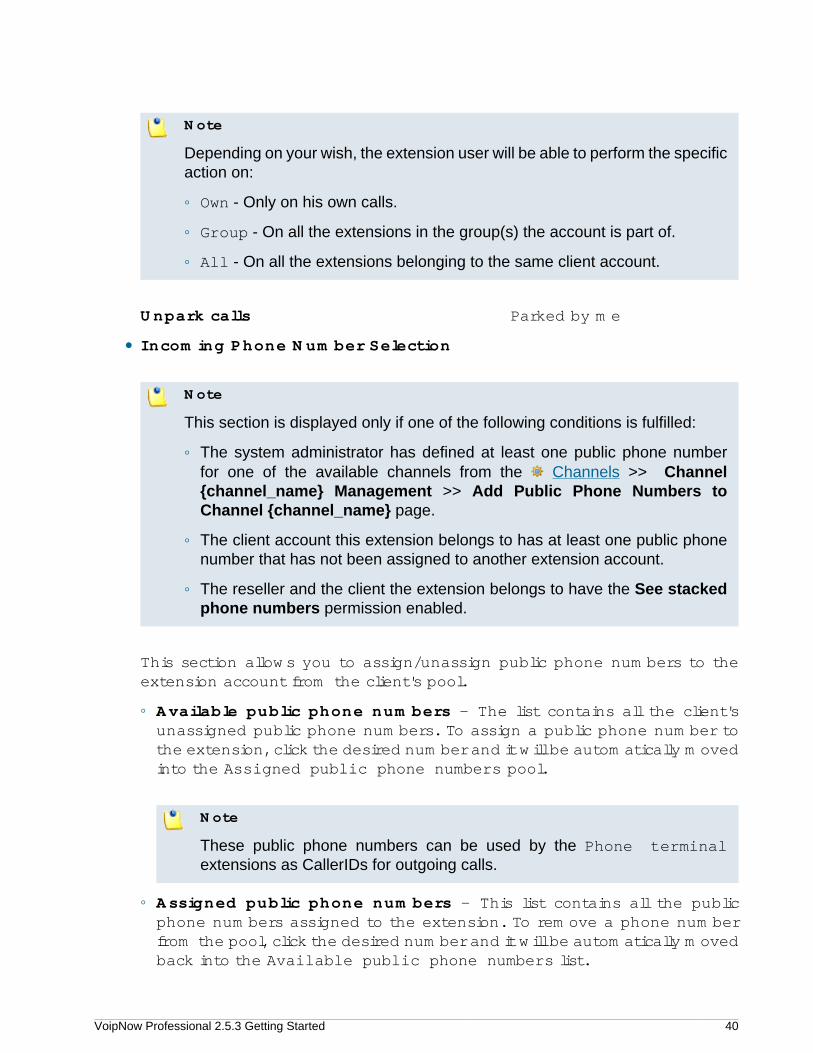
Note
Depending on your wish, the extension user will be able to perform the specificaction on:
◦ Own - Only on his own calls.
◦ Group - On all the extensions in the group(s) the account is part of.
◦ All - On all the extensions belonging to the same client account.
Unpark calls Parked by me
• Incoming Phone Number Selection
Note
This section is displayed only if one of the following conditions is fulfilled:
◦ The system administrator has defined at least one public phone numberfor one of the available channels from the Channels >> Channel{channel_name} Management >> Add Public Phone Numbers toChannel {channel_name} page.
◦ The client account this extension belongs to has at least one public phonenumber that has not been assigned to another extension account.
◦ The reseller and the client the extension belongs to have the See stackedphone numbers permission enabled.
This section allows you to assign/unassign public phone numbers to theextension account from the client's pool.
◦ Available public phone numbers – The list contains all the client'sunassigned public phone numbers. To assign a public phone number tothe extension, click the desired number and it will be automatically movedinto the Assigned public phone numbers pool.
Note
These public phone numbers can be used by the Phone terminalextensions as CallerIDs for outgoing calls.
◦ Assigned public phone numbers – This list contains all the publicphone numbers assigned to the extension. To remove a phone numberfrom the pool, click the desired number and it will be automatically movedback into the Available public phone numbers list.
VoipNow Professional 2.5.3 Getting Started 41
Note
When you assign a public phone number to an extension, the phone numberbecomes exclusive to that extension. No other extension will be able useit. From that moment on, the callers from outside the VoipNow Professionalsystem will be able to reach that extension by dialing the assigned publicphone number.
• Sharing Policies
Note
You may control the extension's sharing policies only if its Extension is multiuser aware permission is enabled.
Share my voicemail with EVERYBODY
Share my recordings with My group
Share my call history with EVERYBODY
Note
From the Available groups lists you may choose with whom the extensionwill share its call history:
◦ EVERYBODY - If you select this option, then the extension will share its datawith all the extensions from all the groups it is part of.
◦ NOBODY - The extension will not share anything with anyone.
◦ {group_name} - The list displays all the groups created by client wherethe extension is member. You can choose the group(s) the extension willshare data with by clicking the corresponding name. You may select asmany groups as you want.
To unassign a group, simply click on its name in the Assigned groups list.Also, if you want to unassign all the groups, click NOBODY.
Note
Inside a group, it is not necessary for an extension to have any sharing optionenabled in order to be able to see another extension's call history.
For example, Extension 1 shares its call history with NOBODY and it is memberof Group A. Extension 2 is part of the same Group A and shares its call history

VoipNow Professional 2.5.3 Getting Started 42
with all the group members (it has the {group_name} option selected. Than,Extension 1 will be able to see the call history for Extension 2.
Phone Terminal Extension Information
By default, after you have defined the permissions, you can set up theoptions specific to the chosen extension type.
If you do not want to finalize the process now, skip this step and come backlater by clicking the Phone terminal setup icon available in the extension'smanagement page.
The following options are available:
• Basic Settings
◦ Default music on hold folder – This folder contains the sound files thatwill be played in order, when the caller is on hold or when the extensionwaits for an operation to be performed. Click the icon to view theavailable folders. A pop-up window that allows you to select the desireddefault music on hold folder is displayed. Click the folder name link toview the contained music on hold files.
Select a music on hold file
The following information is provided:
▪ Listen - Use the available controls to listen to the message. Thesound's total length is displayed as well, using the hours : minutes :seconds format.
▪ Sounds inside folder {path} - The sound files available in the chosenfolder.
Note
The path will display the folder name and also its origin:
VoipNow Professional 2.5.3 Getting Started 43
//// placed before the name of a folder signals the admin's default folder.
/// placed before the name of a folder signals the reseller's default folder.
// placed before the name of a folder signals the client's default folder.
/ placed before the name of a folder signals the extension's default folder.
◦ CallerID name in public calls – This feature allows you to customizethe CallerID name that will be displayed on the callee's screen when theextension is calling public destinations. Use the drop-down list to chooseone of the three available options:
▪ Set by server - The callee's phone terminal will display, if it supportsthe CallerID function, the extension owner's Contact name.
▪ Set by equipment - The callee's phone terminal will display, if itsupports the CallerID function, the caller's name as it is set up from thephone terminal apparatus.
▪ Set by user - If you select this option, a text box will be displayed,allowing you to set the CallerID name to a custom alphanumeric value.The value defined here will be displayed by the callee's phone terminal,if it supports the CallerID function.
By default, the text box contains the extension's Contact name .
◦ CallerID number in public calls – This feature allows you to customizethe CallerID number that will be displayed on the callee's screen when theextension is calling public destinations. Use the drop-down list to chooseone of the three available options:
▪ Set by server - The callee's phone terminal will display, if it supportsthe CallerID function, the extension's public phone number.
▪ Set by equipment - The callee's phone terminal will display, if itsupports the CallerID function, the phone number of that particularphone terminal apparatus.
▪ Set by user - If you select this option, a text box will be displayed,allowing you to set the CallerID number to a custom numeric value withthree or more digits. The value defined here will be displayed by thecallee's phone terminal, if it supports the CallerID function.
By default, the text box contains the extension's phone number.
VoipNow Professional 2.5.3 Getting Started 44
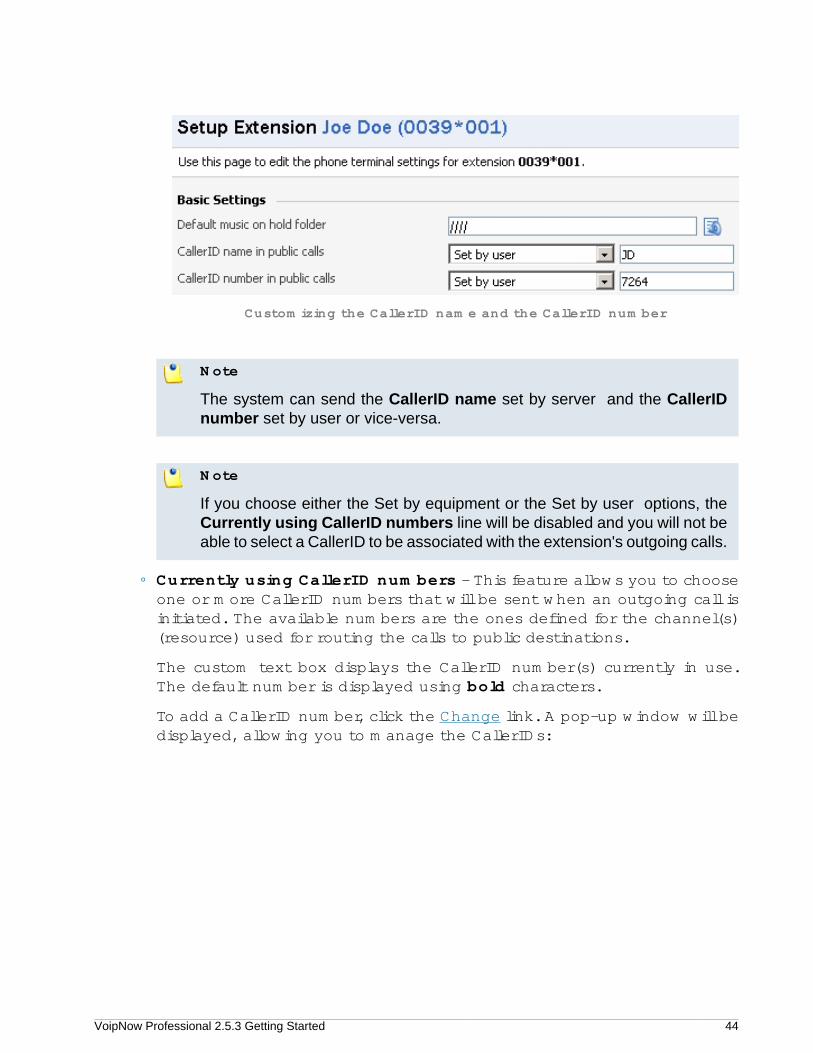
Customizing the CallerID name and the CallerID number
Note
The system can send the CallerID name set by server and the CallerIDnumber set by user or vice-versa.
Note
If you choose either the Set by equipment or the Set by user options, theCurrently using CallerID numbers line will be disabled and you will not beable to select a CallerID to be associated with the extension's outgoing calls.
◦ Currently using CallerID numbers - This feature allows you to chooseone or more CallerID numbers that will be sent when an outgoing call isinitiated. The available numbers are the ones defined for the channel(s)(resource) used for routing the calls to public destinations.
The custom text box displays the CallerID number(s) currently in use.The default number is displayed using bold characters.
To add a CallerID number, click the Change link. A pop-up window will bedisplayed, allowing you to manage the CallerIDs:
VoipNow Professional 2.5.3 Getting Started 45
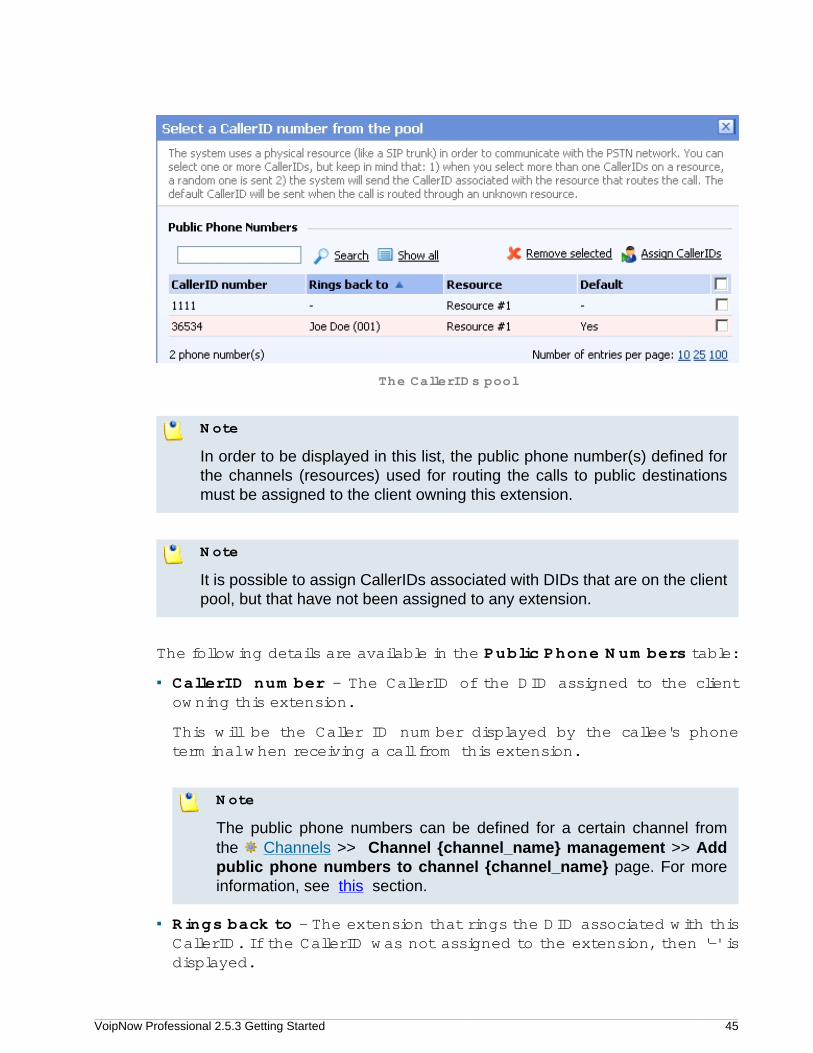
The CallerIDs pool
Note
In order to be displayed in this list, the public phone number(s) defined forthe channels (resources) used for routing the calls to public destinationsmust be assigned to the client owning this extension.
Note
It is possible to assign CallerIDs associated with DIDs that are on the clientpool, but that have not been assigned to any extension.
The following details are available in the Public Phone Numbers table:
▪ CallerID number - The CallerID of the DID assigned to the clientowning this extension.
This will be the Caller ID number displayed by the callee's phoneterminal when receiving a call from this extension.
Note
The public phone numbers can be defined for a certain channel fromthe Channels >> Channel {channel_name} management >> Addpublic phone numbers to channel {channel_name} page. For moreinformation, see this section.
▪ Rings back to - The extension that rings the DID associated with thisCallerID. If the CallerID was not assigned to the extension, then '-' isdisplayed.
VoipNow Professional 2.5.3 Getting Started 46
Note
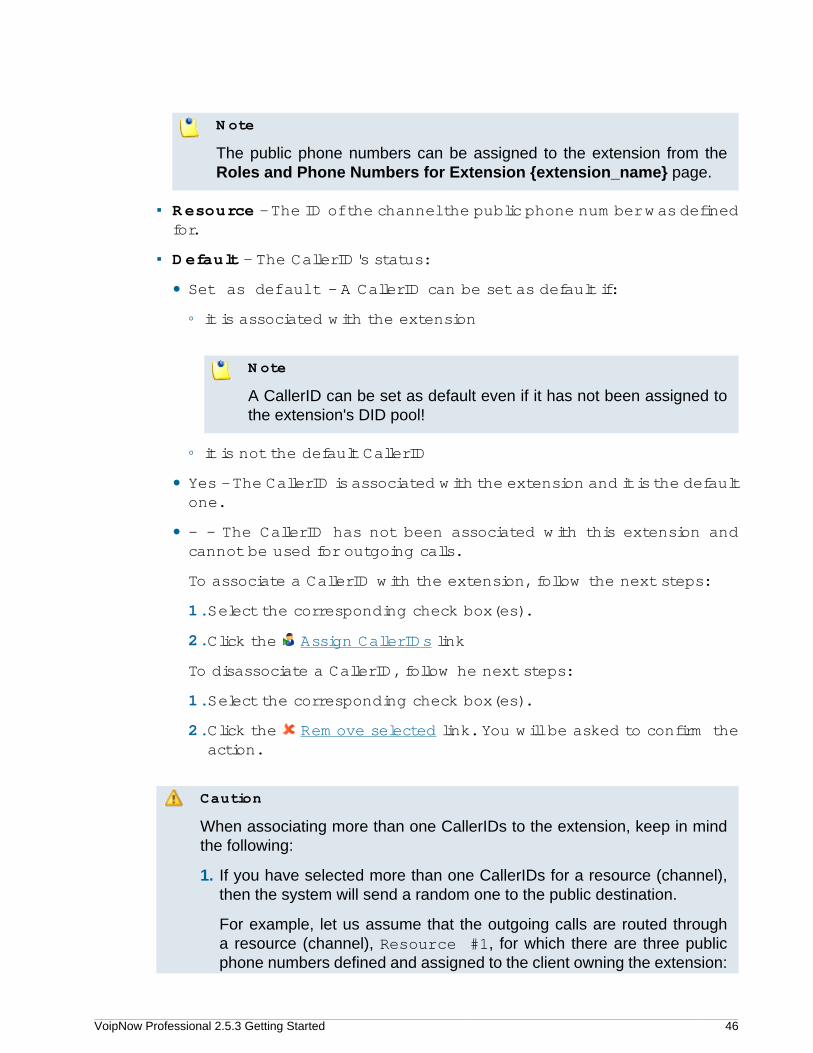
The public phone numbers can be assigned to the extension from theRoles and Phone Numbers for Extension {extension_name} page.
▪ Resource - The ID of the channel the public phone number was definedfor.
▪ Default - The CallerID's status:
• Set as default - A CallerID can be set as default if:
◦ it is associated with the extension
Note
A CallerID can be set as default even if it has not been assigned tothe extension's DID pool!
◦ it is not the default CallerID
• Yes - The CallerID is associated with the extension and it is the defaultone.
• - - The CallerID has not been associated with this extension andcannot be used for outgoing calls.
To associate a CallerID with the extension, follow the next steps:
1.Select the corresponding check box(es).
2.Click the Assign CallerIDs link
To disassociate a CallerID, follow he next steps:
1.Select the corresponding check box(es).
2.Click the Remove selected link. You will be asked to confirm theaction.
Caution
When associating more than one CallerIDs to the extension, keep in mindthe following:
1. If you have selected more than one CallerIDs for a resource (channel),then the system will send a random one to the public destination.
For example, let us assume that the outgoing calls are routed througha resource (channel), Resource #1, for which there are three publicphone numbers defined and assigned to the client owning the extension:
VoipNow Professional 2.5.3 Getting Started 47
1123, 345876 and 2854478. If you associate all three of them with theextension, when initiating an outgoing call, the callee's phone terminalwill display, if it supports the CallerID function, one of the three numbers.
2. If you have selected CallerIDs for more than one resource (channel), thenthe system will send the CallerID of the resource that routes the call.
For example, let us assume that the outgoing calls are routed throughResource #1 , for which there is one public number defined andassigned to the client owning the extension: 2255. You associate thisnumber with the extension and another one, 6987560, defined forResource #2. When initiating an outgoing call, the callee's phoneterminal will display, if it supports the CallerID function, 2255.
3. If the calls are routed through a resource that does not have a publicphone number assigned and you have a CallerID that belong to anotherresource set as default, than the system will send the default CallerID.
For example, let us assume that the outgoing calls are routed through aresource (channel), Resource #1, for which there are no public phonenumbers defined. Your default CallerID is set to 3689, that belongs toanother resource (channel), Resource #3. When initiating an outgoingcall, the callee's phone terminal will display, if it supports the CallerIDfunction, 3689.
◦ Do not send CallerID on public calls [] (Anonymous) - Selectthis check box if you do not want your CallerID to be sent to publicdestinations. The callee's phone terminal will display, if it supports theCallerID function, the Anonymous string.
◦ Send public CallerID on internal calls [] (if public CallerID isavailable) – Select this check box if you want the public CallerID, whenavailable, to be used for local and extended local calls as well.
Note
When this option is enabled, the association between the Phone terminaluser's CallerID and an existing card code defined for the same CallerID ismade.
◦ Preserve original CallerID on transferred calls - Select this checkbox if you want VoipNow Professional to keep the original CallerID whenthe call is forwarded between destinations.
◦ Send SIP P-Asserted-Identity header – When enabled, a new headeris added to all outgoing INVITE requests sent from this extension.The header contains the extension's caller ID number, e.g. P-Asserted-Identity: sip:0003*[email protected].
VoipNow Professional 2.5.3 Getting Started 48
◦ Hangup when extension does not answer in {x} seconds – Use thistext box to define the time interval a call is allowed to ring before beingterminated by the VoipNow Professional server. The default value is 30seconds.
◦ Do not keep calls in parking lots for more than {x} seconds – Usethis text box to define the time interval a call is allowed to remain in theparking lot before being transferred back to the extension that parked thecall. The default value is 180 seconds.
• Instant Messaging
◦ Enable chat server access - Select this check box if you want to grantthe extension access to the Instant Messaging server.
This section is displayed only if the IM server was enabled and configuredfrom the Unified Communications >> System preferences >> IMtab.
• Calling Features
◦ Call waiting active – Calls are not rejected when the extension is busy.When this option is enabled, the user will be able to answer to multiplecalls using the phone's call waiting features.
◦ Do not disturb function active – When this option is enabled, calls arerejected and a custom sound file is played to the callers trying to contactthe extension.
◦ [] Play sound {file_name} when DND is activated – Select this checkbox if you want a sound to be played to the callers trying to contact theextension while the Do not disturb function is enabled. Click the iconto view the available sound files or manually fill in the file's location. Apop-up window listing all the sounds matching the name specified in thetext box is displayed.
VoipNow Professional 2.5.3 Getting Started 49
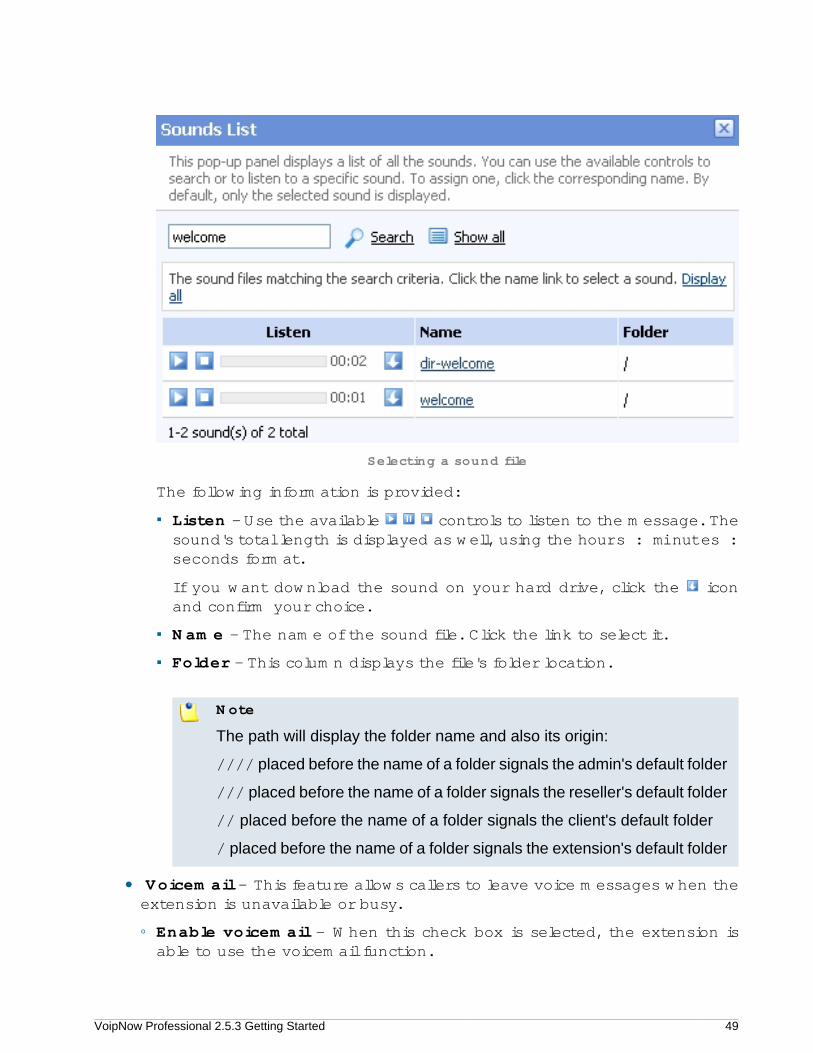
Selecting a sound file
The following information is provided:
▪ Listen - Use the available controls to listen to the message. Thesound's total length is displayed as well, using the hours : minutes :seconds format.
If you want download the sound on your hard drive, click the iconand confirm your choice.
▪ Name - The name of the sound file. Click the link to select it.
▪ Folder - This column displays the file's folder location.
Note
The path will display the folder name and also its origin:
//// placed before the name of a folder signals the admin's default folder
/// placed before the name of a folder signals the reseller's default folder
// placed before the name of a folder signals the client's default folder
/ placed before the name of a folder signals the extension's default folder
• Voicemail – This feature allows callers to leave voice messages when theextension is unavailable or busy.
◦ Enable voicemail – When this check box is selected, the extension isable to use the voicemail function.
VoipNow Professional 2.5.3 Getting Started 50
Enabling the voicemail recording will allow you to manage the extension'svoicemails sharing by editing its Roles and phone numbers.
◦ Mailbox storage space – The space limit allowed for the mailbox. Usethis text box to specify the number of Mb that the mailbox should notexceed. If you do not want to set a size limit, select the Unlimited checkbox.
◦ Auto delete messages older than {x} days - Use this text box tospecify the number of days after which all the messages will be autodeleted. The accepted values range from 1 to 999.
◦ New message notification – Choose the action that will be performedby VoipNow Professional when the extension receives a new voicemailmessage:
▪ Send alert email – When this option is selected, the extension ownerreceives an email notifying him about a new voicemail message.
▪ Send message by email – When this option is selected, the extensionowner receives the new voicemail message file by email.
◦ Voicemail password – The password requested when the mailbox isaccessed over the phone.
Note
If you do not set a password for the voice mailbox, the extension ownerwill not be able to access his mailbox over the phone. However, he will stillbe able to manage the voice mailbox through the VoipNow Professionalinterface.
◦ [] Voicemail automatically answers after {x} seconds – When thecheck box is selected and the extension user does not answer in {x}seconds, than the call is transferred to Voicemail.
◦ Add extension to company directory – Select this check box if youwant to add the extension to the list containing the company's extensionnumbers. The company directory has a functionality similar to a phoneagenda and can be accessed either directly from the keypad by dialing*22 or by using a specially designed IVR action called Play companydirectory and can be used when you want to call a certain extension,but you do not know its number. You will be asked for the name you arelooking for and all the numbers matching that key combination will beplayed.
VoipNow Professional 2.5.3 Getting Started 51
Note
It is not mandatory to add the extension to the company directory. Therefore,have in mind that the extension's number will not be returned as a searchresult when someone is looking for it if you had not previously added it tothe list.
• Conference Settings – This feature allows more than two extensionowners to take part to the same phone conversation.
Note
The Conference function is available only for the extensions that haveExtension is multi-user aware permission enabled.
◦ Conference function enabled – When this check box is selected, theextension is able to create and join conference calls.
◦ Conference room size – Use this text box to set the maximum numberof users that can join the conversation. You can fill in any number between2 and 99.
◦ Timeout on empty conference room {seconds} seconds – Use thistext box to set the timeout until the conference ends when there are noparticipants left. You can fill in any number between 1 and 9,999. If theconference is scheduled to close when all moderators exit, this option isnot going to be taken into consideration.
◦ Enable music on hold – When this option is selected, VoipNowProfessional plays the files located in the Default music on hold folderif there is only one user present in the conference.
◦ Prompt for PIN on conference creation – When this option is enabled,VoipNow Professional asks the conference creator to set a password; allthe users that join the conference have to dial this password in order toaccess the conference.
◦ Close the conference when all conference moderators exit – Whenthis option is enabled, VoipNow Professional terminates all the calls whenall the conference moderators exit the conference.
◦ Announce user count on joining conference – When this option isselected, VoipNow Professional announces any new participant about thenumber of users in the conference call.
VoipNow Professional 2.5.3 Getting Started 52
◦ Announce users joining/leaving – When this option is selected,VoipNow Professional announces the users about any participant joiningor leaving the conference call.
• Fax Center – This feature allows the extension to receive faxes andmanage them by using the extension account.
◦ Enable fax center – If this check box is selected, than the extensionwill be able to receive faxes. When a fax message is received, VoipNowProfessional will save it into a file on the server. The extension user willbe able to later retrieve them.
Enabling the fax center will allow you to manage the extension's faxmessages sharing by editing its Roles and phone numbers.
◦ Accept faxes sent by email to - If this option is enabled, the extensionwill accept faxes sent to the administrator's email address, defaulted atinstallation.
◦ Accept fax from email - Use the text box to specify the email addressesfrom which the extension should accept fax messages.
Use the buttons to remove/add email addresses from the list:
removes the email address.
adds another email address.
Note
This option is enabled only if the Accept faxes sent by email to check boxhas been previously selected.
◦ Play sound {sound} before sending fax - Select this check box if youwant to choose a sound that will be played before a fax message is sent.Use the icon to view the available sound files or manually fill in thefile's location. A pop-up window listing all the sounds matching the namespecified in the text box is displayed.
VoipNow Professional 2.5.3 Getting Started 53
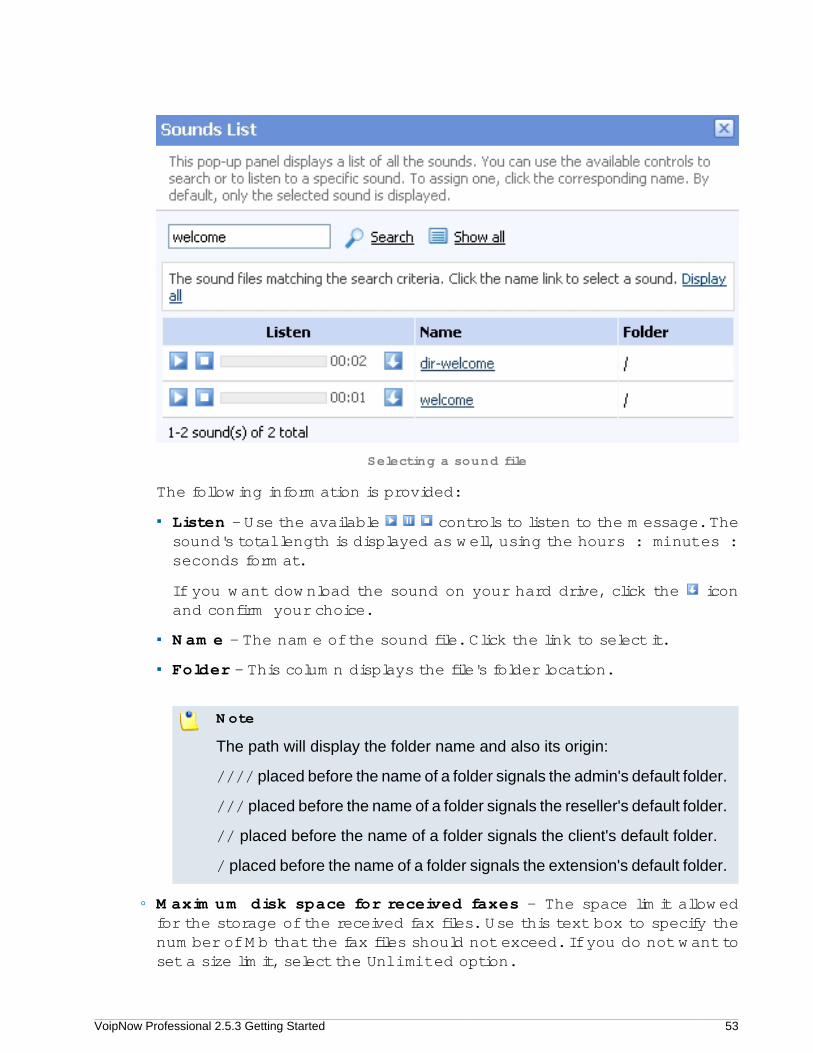
Selecting a sound file
The following information is provided:
▪ Listen - Use the available controls to listen to the message. Thesound's total length is displayed as well, using the hours : minutes :seconds format.
If you want download the sound on your hard drive, click the iconand confirm your choice.
▪ Name - The name of the sound file. Click the link to select it.
▪ Folder - This column displays the file's folder location.
Note
The path will display the folder name and also its origin:
//// placed before the name of a folder signals the admin's default folder.
/// placed before the name of a folder signals the reseller's default folder.
// placed before the name of a folder signals the client's default folder.
/ placed before the name of a folder signals the extension's default folder.
◦ Maximum disk space for received faxes – The space limit allowedfor the storage of the received fax files. Use this text box to specify thenumber of Mb that the fax files should not exceed. If you do not want toset a size limit, select the Unlimited option.
VoipNow Professional 2.5.3 Getting Started 54
◦ Auto delete received faxes older than {x} days - Use the this textbox to specify the number of days after which all received faxes will beauto deleted. Values for this parameter range from 1 to 999.
◦ New received fax notification – Choose the action that will beperformed by VoipNow Professional when the extension receives a newfax message:
▪ send alert email – When this option is selected, the extension ownerreceives an email notifying him about a new fax message.
▪ send fax by email – When this option is selected, the extension ownerreceives the new fax message file by email.
◦ Fax automatically answers after {x} seconds – If the extension userdoes not answer after {x} seconds, the server will try to answer in orderto detect a fax.
◦ If not a fax, send to voicemail – When this option is enabled, the serverwill transfer the call to the extension's voicemail in case the call is not afax. Otherwise the system will answer with fax tone.
Note
This option is available only if the Enable Voicemail check box is selected.
• Call Recording – This feature allows the user to record phoneconversations.
◦ Call recording function enabled – When this option is enabled, theuser is able to use the call recording functions.
Enabling the call recording will allow you to manage the extension'srecordings sharing by editing its Roles and phone numbers.
◦ Call recording storage space – Use this text box to specify the numberof Mb that the recorded calls should not exceed. If you do not want to seta size limit, select the Unlimited option.
◦ Record triggered – Use the available options to specify when/how callrecording will be triggered:
▪ Never – Although the call recording feature is enabled, it is not used.
▪ Only conferences – When this option is enabled, VoipNow Professionalwill record only conference conversations. This option is available onlyif Conference feature is enabled.
▪ When *1 is pressed – When this option is enabled, the user will beable to start the recording of a conversation by dialing *1 on his phonepad.
VoipNow Professional 2.5.3 Getting Started 55
▪ All calls are recorded – When this option is enabled, VoipNowProfessional will record all the conversations of the extension.
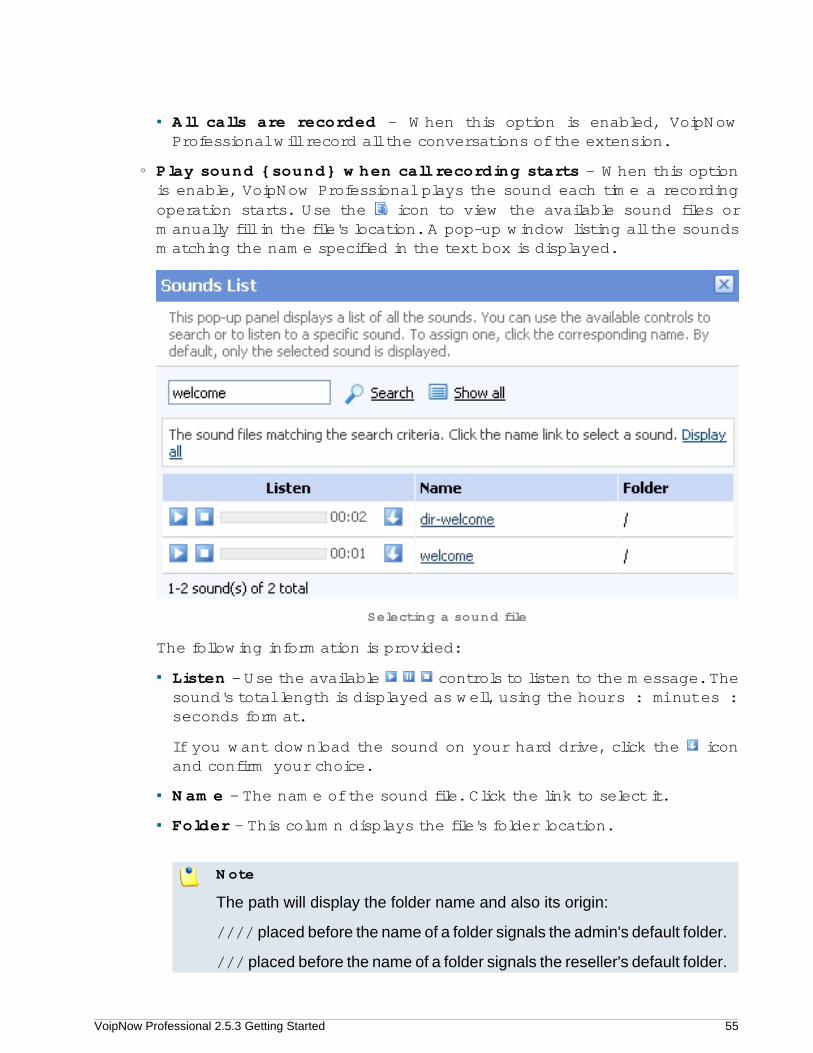
◦ Play sound {sound} when call recording starts – When this optionis enable, VoipNow Professional plays the sound each time a recordingoperation starts. Use the icon to view the available sound files ormanually fill in the file's location. A pop-up window listing all the soundsmatching the name specified in the text box is displayed.
Selecting a sound file
The following information is provided:
▪ Listen - Use the available controls to listen to the message. Thesound's total length is displayed as well, using the hours : minutes :seconds format.
If you want download the sound on your hard drive, click the iconand confirm your choice.
▪ Name - The name of the sound file. Click the link to select it.
▪ Folder - This column displays the file's folder location.
Note
The path will display the folder name and also its origin:
//// placed before the name of a folder signals the admin's default folder.
/// placed before the name of a folder signals the reseller's default folder.
VoipNow Professional 2.5.3 Getting Started 56
// placed before the name of a folder signals the client's default folder.
/ placed before the name of a folder signals the extension's default folder.
• Password Protection - This feature allows the extension user to block theaccess to the phone terminal for a certain period of time. The terminal canbe blocked/activated from its key pad by dialing the password set in thissection. A blocked phone terminal cannot be used for placing or receivingcalls. If the Voicemail feature is enabled, than the incoming calls will beredirected to voicemail while the phone terminal is blocked.
◦ Protected phone access active - Select this check box if you want toenable the Password Protection feature for this extension.
Note
After enabling this feature and defining the required password, the followingmessage will be displayed next to the check box: Currently access tophone is unrestricted . Clicking the Block link will restrict the phoneterminal usage.
If the access is restricted, the Currently access to phone is blockedmessage is displayed. Click the Unblock link to allow the extension user todial/receive calls normally.
◦ Old access password
Note
This line is displayed only when editing the extension's settings, if apassword was previously defined for the Password Protection feature.
◦ Password to access telephony - Use the available text box to specifythe password the user will have to dial to block/activate the access to hisphone terminal.
Note
The password must be a number between 3 and 12 digits in length.
Note
When this feature is enabled, to block/activate the phone terminal, the userhas to first dial *11 using the terminal's key pad and than, the password definedin this section.
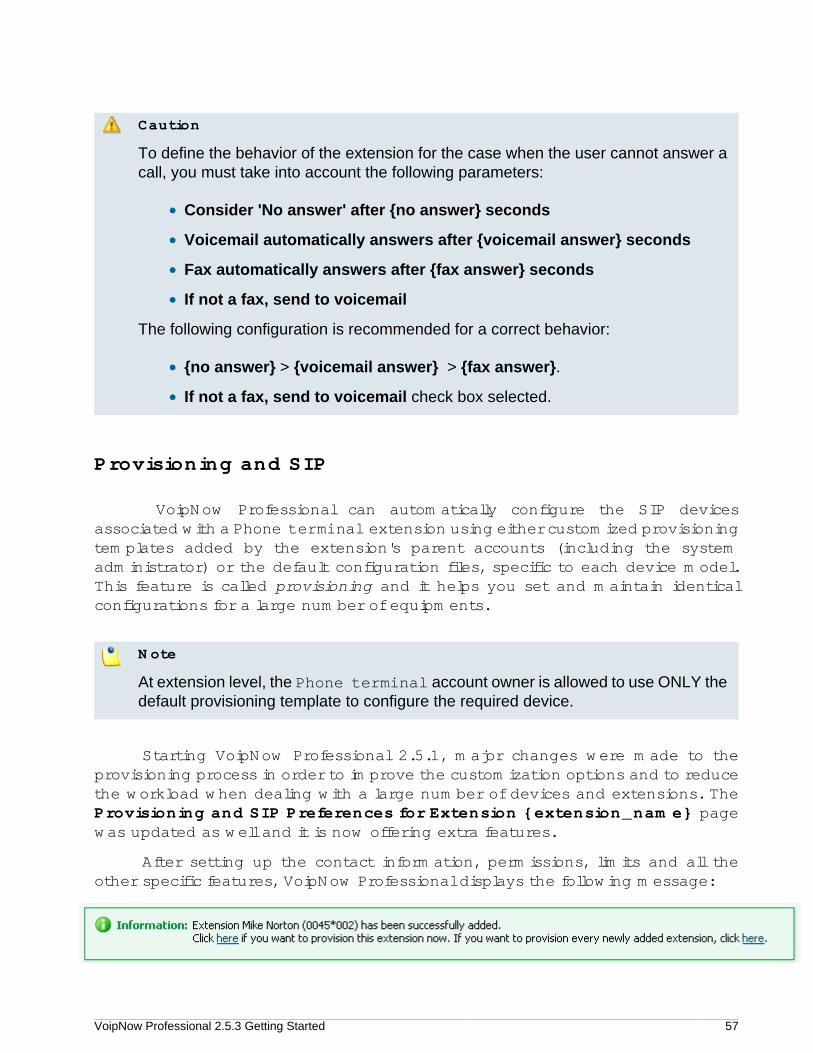
VoipNow Professional 2.5.3 Getting Started 57
Caution
To define the behavior of the extension for the case when the user cannot answer acall, you must take into account the following parameters:
• Consider 'No answer' after {no answer} seconds
• Voicemail automatically answers after {voicemail answer} seconds
• Fax automatically answers after {fax answer} seconds
• If not a fax, send to voicemail
The following configuration is recommended for a correct behavior:
• {no answer} > {voicemail answer} > {fax answer}.
• If not a fax, send to voicemail check box selected.
Provisioning and SIP
VoipNow Professional can automatically configure the SIP devicesassociated with a Phone terminal extension using either customized provisioningtemplates added by the extension's parent accounts (including the systemadministrator) or the default configuration files, specific to each device model.This feature is called provisioning and it helps you set and maintain identicalconfigurations for a large number of equipments.
Note
At extension level, the Phone terminal account owner is allowed to use ONLY thedefault provisioning template to configure the required device.
Starting VoipNow Professional 2.5.1, major changes were made to theprovisioning process in order to improve the customization options and to reducethe workload when dealing with a large number of devices and extensions. TheProvisioning and SIP Preferences for Extension {extension_name} pagewas updated as well and it is now offering extra features.
After setting up the contact information, permissions, limits and all theother specific features, VoipNow Professional displays the following message:
VoipNow Professional 2.5.3 Getting Started 58
Clicking the first link will redirect you to this page while clicking the secondlink will ensure that the Provisioning and SIP Preferences for Extension{extension_name} page will be added as the last step when configuring a newextension account.
You can provision a new device using the controls grouped into the followingfieldsets:
• Provisioning
◦ Use provisioning - Select this check box if you want to provision a newSIP device for the current Phone terminal extension. This will unlock theDevice Information and the Device Settings fieldsets, allowing you toconfigure the equipment.
By doing so, the extension will get all its setup parameters from theprovisioning server. Otherwise, the extension user will have to manuallyset the device parameters.
Note
As a system administrator, you have access to this option regardless theAllow to provision devices permission level set for the extension.
• Device Information
You can use the available controls if you have previously selected the Useprovisioning check box:
◦ Friendly name - Fill in a custom name that will differentiate theprovisioned device. The value must be alphanumerical and must havebetween 3 and 32 characters in length. It is not unique.
◦ Manufacturer - Use the drop-down list to choose the manufacturer thatproduces the device you want to provision. All the brands supported bythe VoipNow Professional provisioning system are displayed.
◦ Model - Select one of the device models available for the chosenmanufacturer.
◦ Firmware/Version - Use this drop-down list to select one of thefirmware/ product versions corresponding to the selected brand andmodel. Have in mind that the configuration file may be different for thesame device, depending on its firmware/version.
Note
For the moment, only Cisco (7940) and Cisco (7960) have two differentconfiguration files, for firmware 7.x and 8.x.
VoipNow Professional 2.5.3 Getting Started 59
◦ Use the Application version text box if you want to provide thedevice's specific firmware version (e.g.: P0S3-08-11-00). This value willbe retained in the data base and used in the configuration file generatedfor the selected device.
Note
For the majority of devices, you do not have to fill in this text box. Anyhow,there are certain cases (e.g.: Cisco) when the device requires the presenceof the exact application version in the configuration file in order to beprovisioned.
Check the supplied user guide for clarifications.
◦ MAC address – Fill in the device's MAC address. The text box is auto-populated with the first three segments specific to each manufacturer(e.g.: 00:04:13 for Snom). The value must have the standard format:XX:XX:XX:XX:XX:XX, where X is a hexadecimal digit (e.g.: 0-9, A-F ora-f).
Note
Check the equipment's manual to find its MAC address.
Note
You can also edit this parameter when a device is already provisioned forthis account.
◦ Use MAC based provisioning - If the Allow MAC based provisioningon HTTP(S) - [ ] (less secure) option is enabled from the UnifiedCommunications >> Provisioning templates >> Global preferencessection and the Update protocol is either HTTP or HTTPS, then if youselect this check box, the provisioning link will be generated based on thedevice's MAC address.
The provisioning link could be, for Aastra devices:
▪ If this check box is selected and the Update protocol is set to HTTP:http://192.168.4.170/pro/p/00085D000000.
▪ If this check box is not selected and the Update protocol is set toHTTP: http://192.168.4.170/pro/p/0019/0020/001.
VoipNow Professional 2.5.3 Getting Started 60
Note
For some manufacturers, like Polycom, the provisioning links may lookdifferent:
http://192.168.14.39/pro/p/0038/0039/001/0004f2111111.cfg
Note
If a duplicate MAC address is found in the database, than the provisioninglink will not be generated and an error message will be displayed.
◦ Status - If you just want to define and assign the device withoutprovisioning it, then you should select Disable. The provisioning filewill not be generated. On the other hand, if you want to finalize theprovisioning process, select Enable.
Note
If the extension's Allow to provision devices permission level is set toModify and a device is already provisioned for this account, then you areable to modify the selection.
◦ Notes - Use this text box if you want to add supplementary informationabout the device.
• Device Settings
◦ Administrator username - Use the available text box if you wantto define the username for logging in to the device's browser basedconfiguration interface.
Note
Not all the devices support configuration via a web browser. Check thedocumentation of the equipment you want to provision for additionalinformation.
◦ Password generation - Choose the desired method for providing thepassword:
▪ None - No password will be required to connect to the device's browserbased configuration interface.
▪ Auto generated - VoipNow Professional will randomly generate apassword for you.
VoipNow Professional 2.5.3 Getting Started 61
▪ Manual - If you like, you can manually set and confirm theAdministrator password.
◦ Phone update interval - Optionally, you can set the number of minutesthe device waits before checking for updates on the provisioning server.To do so, fill in this text box. The accepted values range from 1 to 99,999minutes/seconds, depending on the device's settings. The default valueis 10 minutes.
◦ Update protocol - The list is automatically populated with the protocolsused by the selected device to access the configuration file on theprovisioning server (e.g.: TFTP, HTTP).
◦ The most important step when adding a device is to select theappropriate Provisioning template. The drop-down list displays onlythose templates that have configuration files defined for the selectedequipment plus the Server default template that includes the standardconfiguration files of all the devices supported by VoipNow Professional.
These configuration files contain the settings (default or custom) requiredby the device to become fully functional in the VoipNow Professionalsystem and therefore it is advisable to double check the template youare going to use and search for any possible error that could cause thedevice to malfunction.
Note
As a system administrator, you can choose only from your own templates.The provisioning templates defined by the other users are not available.
◦ Regenerate provisioning files - Select this check box if you want theprovisioning files available for the current extension to be regeneratedwith the new settings.
• SIP Preferences
Note
This fieldset is called SIP and IM Preferences if the extension's Enable chatserver access permission is enabled. More details can be found here .
Caution
The users that log in to the VoipNow Professional interface using a reseller,client or extension account have complete access to the Provisioning andSIP Preferences fieldsets only if the Phone extension SIP management
VoipNow Professional 2.5.3 Getting Started 62
permission is enabled. If this permission is disabled, then these users haveaccess only to the following features:
◦ Use the same password with interface
◦ Phone password
◦ Confirm phone password
◦ Equipment description
The Phone extension SIP management permission can be enabled when theaccount is created from the Roles and Phone Numbers for {account_type}{account_name} page.
◦ Use the same password with interface – When this option is enabled,the extension user's phone will use the account login password toauthenticate to the VoipNow Professional server. If the check box isdisabled, you can use the two following text boxes to set and confirm thephone password.
◦ Phone (and IM) password - The password used for logging in to thephone (and to the instant messaging client).
◦ Confirm phone (and IM) password - Use this text box to re-enter thepassword used for logging in to the phone (and to the instant messagingclient).
◦ DTMF – Use this drop-down list to choose the DTMF mode. The defaultoption is rfc2833. If you choose the auto option, Asterisk automaticallydetects whether the channel supports rfc2833 or not. If not, Asteriskuses the inband mode.
◦ A PBX is connected to this extension [] Enable for SIP trunkingservice - This option allows the system to direct an incoming call madeto a public phone number to a particular extension on the PBX serverconnected to the extension for which the current setting is enabled. Whenthe call is sent to the PBX server, the public phone number that was calledis saved and thus the call can be directed to the chosen extension on thePBX server.
Note
For this setting to be available, your license must support SIP trunking (theMaximum number of SIP trunking channels must be bigger then 0).

VoipNow Professional 2.5.3 Getting Started 63
Note
This option can be enabled, if the license supports it, only if the extension'sMaximum public concurrent calls value was not set to Unlimited. Whenthe value is Unlimited, the line is still available, but you are not allowed toselect the check box. A warning message is displayed next to it:
Anyhow, if after upgrading to VoipNow Professional 2.5.1/2.5.2 or whenpurchasing a different license than the one you have, the total number ofconcurrent calls set for your existing extensions is greater than the numbersupported by the license, then you will be able to deselect this check box toreduce the number of SIP trunking channels.
◦ Ping the extension to check its status – When enabled, the serversends ping SIP messages to the extension regularly. Usually, this optionis used for extensions behind NAT.
◦ The extension is behind the same private network as the server -This option is available only if the Unified Communications >> SystemPreferences >> SIP >> Deployment Infrastructure is set to NAT(Network Address Translation) or to Public/Private NetworksRouting.
Select this check box if your extension is located inside the privatenetwork of your SIP server, in order to prevent non necessary NATprocessing.
◦ Allow re-invites from this extension - Select this check box to allowthis extension to send re-INVITES.
◦ Extension publishes its own state - Select this check box if you donot want the server to send presence notifications to the phones that arewatching this extension for presence. If this option is enabled, then theserver will no longer send any notification events unless this extensionexplicitly publishes its presence by sending PUBLISH messages to the SIPserver.
◦ Force enable of MWI - Select this check box if you want to receiveMessage Waiting Indicator notifications, but your phone does not sendexplicit subscriptions for MWI. Most phones do not need this option.
◦ Allowed codecs – Use these check boxes to select the codecs supportedby the phone device.
VoipNow Professional 2.5.3 Getting Started 64
Note
The list of possible codecs displayed in the Allowed codecs section canbe modified from the Unified Communications >> System Preferences>> General page.
◦ Phone does not register, is located on IP {} Port {} and {has to/does not have to} authenticate - All the incoming calls from this IP/Port require/do not require authentication.
The drop-down list is disabled until an IP address is filled in.
Note
If the same IP is in use by another extension that does not haveto authenticate, an error message is displayed, telling you that thisconfiguration cannot be saved.
Caution
For the moment, the has to authenticate option is not functional.Please avoid using it!
◦ Allow extension SIP connection only from IP {IP_address}(maximum class C (/24) - You can use this text box to limit theextension usage to an IP or a network. Only the IP(s) specified here willbe allowed to receive and make calls from this extension. Registration onthe phone is still needed in order to receive calls. You can add several IPsby using the buttons.
◦ Equipment description – Use this text box to briefly describe yourdevice.
Adding a Queue Extension Account
A call Queue is used to distribute multiple calls to a group of Phone terminalextensions called Agents or Members. The calls enter a Queue and are answeredby the Agents in a FIFO order (First In, First Out).
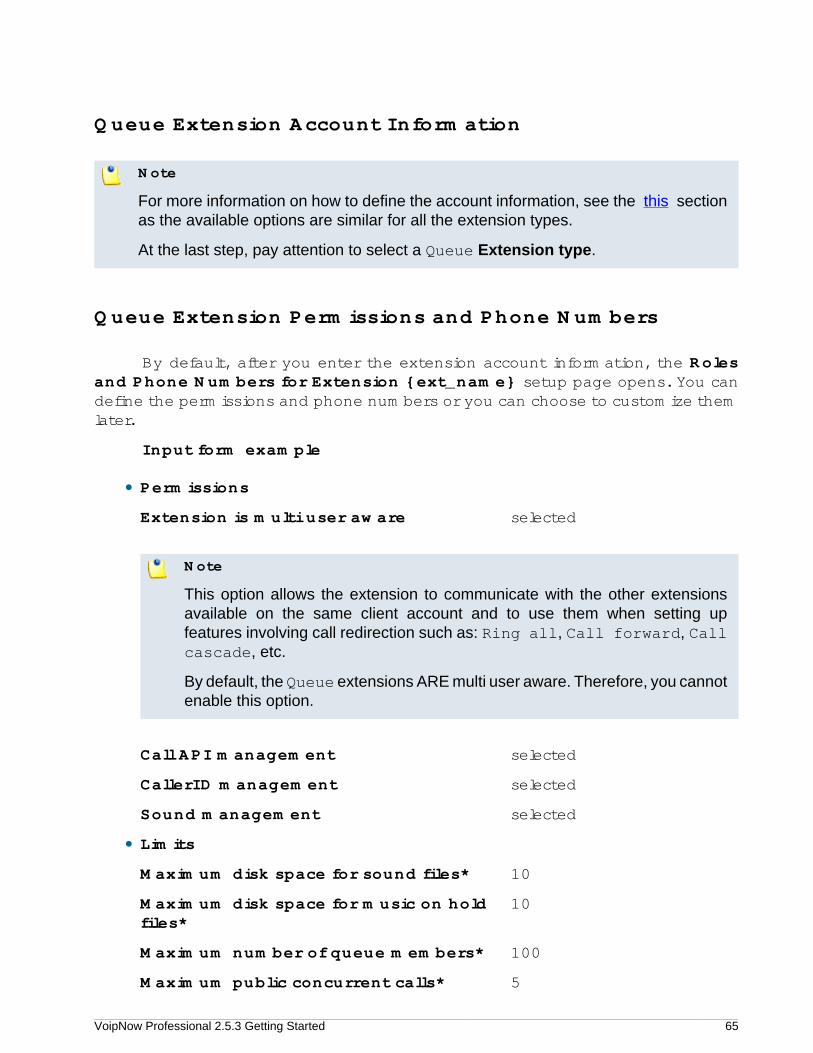
VoipNow Professional 2.5.3 Getting Started 65
Queue Extension Account Information
Note
For more information on how to define the account information, see the this sectionas the available options are similar for all the extension types.
At the last step, pay attention to select a Queue Extension type.
Queue Extension Permissions and Phone Numbers
By default, after you enter the extension account information, the Rolesand Phone Numbers for Extension {ext_name} setup page opens. You candefine the permissions and phone numbers or you can choose to customize themlater.
Input form example
• Permissions
Extension is multi user aware selected
Note
This option allows the extension to communicate with the other extensionsavailable on the same client account and to use them when setting upfeatures involving call redirection such as: Ring all, Call forward, Callcascade, etc.
By default, the Queue extensions ARE multi user aware. Therefore, you cannotenable this option.
Call API management selected
CallerID management selected
Sound management selected
• Limits
Maximum disk space for sound files* 10
Maximum disk space for music on holdfiles*
10
Maximum number of queue members* 100
Maximum public concurrent calls* 5
VoipNow Professional 2.5.3 Getting Started 66
Note
This option allows you to limit the number of active simultaneous calls betweenthe extension and any other public network destination. The maximum valuedepends on the ones set for the extension's parent accounts and cannotexceed the license limitation.
Maximum internal concurrent calls* 50
Note
This option allows you to limit the number of active simultaneous calls betweenthe extension and any other internal network destination. The maximum valuedepends on the ones set for the extension's parent accounts.
Maximum concurrent text to speech 5
Note
This option allows you to limit the number of calls that use the text to speechapplication at the same time.
This line is available only if the Allow text to speech option was enabled fromthe Unified Communications >> System Preferences page.
Account expiration date Unlimited
• Incoming Phone Number Selection
• Sharing Policies
Note
The Queue extensions can share only their call history and the recordedconversations.
Queue Extension Information
By default, after you have defined the permissions, you can set up theoptions specific to the chosen extension type.
VoipNow Professional 2.5.3 Getting Started 67
If you do not want to finalize the process now, skip this step and come backlater by clicking the Queue setup icon available in the extension's managementpage.
The following options are available:
• Queue General Preferences
◦ Queue name – Use this text box to provide a descriptive name for thequeue.
◦ Queue size – The maximum number of callers waiting to talk to anoperator. If you do not want to limit the queue size, select the Unlimitedoption. Otherwise, disable the Unlimited option and fill in a value in theavailable text box.
◦ Call distribution algorithm – VoipNow Professional offers you severalmethods of assigning calls to queue operators:
▪ Ring all – All free operator extensions ring at the same time and thecall is transferred to the first operator that answers.
▪ Least recently called – The call is transferred to the operator with thelongest waiting time interval from the previous call.
▪ Fewest calls – The call is transferred to the operator who has answeredthe fewest calls. This method does not take into account the actualagent workloads; it ignores the time the agents spent on each call.
For example, if Agent1 has had 3 calls each lasting for 10 minutesand Agent2 has had 5 calls each lasting 2 minutes, then VoipNowProfessional will assign a new call to Agent1.
▪ Random with member penalty – The call is transferred to a randomlyselected operator chosen from those with the smallest penalty level. Ifnone is available, then the algorithm tries to select an agent from thosewith the next penalty level and so on.
For example, let's assume you have a queue managed by 4 agents.Agent1 and Agent3 have the smallest penalty level, while Agent2 andAgent4 have a bigger penalty level. The first time a call is received,VoipNow Professional searches for the group with the smallest penaltylevel and tries to randomly assign the call either to Agent1 or to Agent3.If none is available, then the algorithm will search for the next penaltylevel and it will try to transfer the call to Agent2 or to Agent4.
▪ Random - The call is transferred to a random agent, taking intoconsideration the agent's penalty level when computing the Randomalgorithm. In this way, an agent with penalty 0 will have a metricsomewhere between 0 and 1,000, an agent with penalty 1 will have a
VoipNow Professional 2.5.3 Getting Started 68
metric between 0 and 2,000, an agent with penalty 2 will have a metricbetween 0 and 3,000 and so on. The difference between this strategyand the Random with member penalty algorithm is that the callsare not distributed based on penalty levels.
▪ Round robin with memory – This method sequentially searches foravailable agents and uses the order of the agents list. Each time it triesto assign a call, it remembers the position of the agent that answeredthe call, answered; the next time a waiting call arrives, the searchbegins with the agent in position answered+1.
For example, let's assume you have a queue served by 3 agents. Thefirst time a call is received, VoipNow Professional searches for thefirst available operator using the order Agent1, Agent2, Agent3. Let'ssuppose Agent2 is available and answers the call. When the second callarrives, VoipNow Professional starts the search with Agent3 and usesthe order Agent3, Agent1, Agent2.
▪ Ring members in the adding order - The call is transferred to theagents in the order they have logged in to the queue.
For example, let's assume you have a queue managed by 3 agents.Agent2 logged in first, Agent3 second and Agent1 third. When a call isreceived, VoipNow Professional searches for the first available operatorusing the log in order: Agent2, Agent3, Agent1. If Agent2 is available,the call is transferred to him. If not, it will be transferred to Agent3. Ifhe is not available as well, the call will be redirected to Agent1.
◦ Wait for {x} seconds before retrying all agents again – After ringingall operators according to the queue's call distribution algorithm, theapplication waits for {x} seconds before restarting the process. Valuesfor this parameter range from 3 to 900 seconds. The default value is 20seconds.
◦ Service level agreement – This parameter, useful for queue statistics,defines the percentage of answered calls from the total received callswithin the SLA specified in this text box. Values for this parameter rangefrom 3 to 9,999. This text box is empty by default.
Note
For example, if you set up SLA to 10 seconds and 20 calls are answeredin less than 10 seconds, than SLA = 100%. If only 10 calls were answeredin less than 10 seconds and the other 10 in more, than SLA = 50% .
◦ Record all queue conversations – This option allows the recording ofall the calls taken by the queue operators.

VoipNow Professional 2.5.3 Getting Started 69
Enabling the call recording will allow you to manage the extension'srecordings sharing by editing its Roles and phone numbers.
◦ Call recording storage space – When the call recording option isenabled, you have the possibility to limit the storage space for therecordings. If you don't want to limit the space, select the Unlimitedcheck box.
• Local Agents Behavior
◦ Ring an agent for a maximum of {x} seconds – The {x} value is themaximum time interval that an operator extension will ring. The defaultvalue is 20 seconds.
◦ Maintain a minimum of {x} seconds between calls – The {x} valuespecifies the minimum operator break between calls. The default valueis 120 seconds.
◦ Delay for {x} seconds before connecting agent to caller – After anoperator answers a call, the application will wait for {x} seconds beforeconnecting the caller to the operator. Values for this delay range from 0to 60 seconds. The default value is 0 seconds.
◦ Pickup announcement for agent – The sound that VoipNowProfessional plays for queue agents before connecting them to a waitingcall.
A pop-up window listing all the sounds matching the name specified inthe text box is displayed.
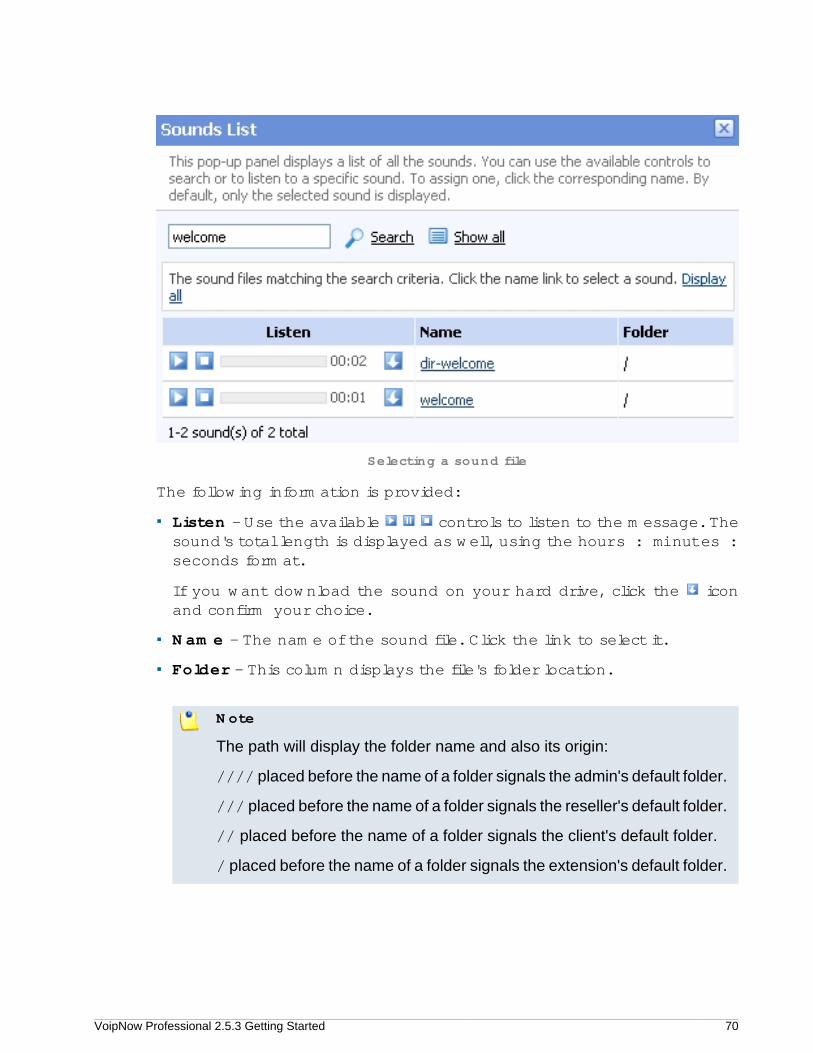
VoipNow Professional 2.5.3 Getting Started 70
Selecting a sound file
The following information is provided:
▪ Listen - Use the available controls to listen to the message. Thesound's total length is displayed as well, using the hours : minutes :seconds format.
If you want download the sound on your hard drive, click the iconand confirm your choice.
▪ Name - The name of the sound file. Click the link to select it.
▪ Folder - This column displays the file's folder location.
Note
The path will display the folder name and also its origin:
//// placed before the name of a folder signals the admin's default folder.
/// placed before the name of a folder signals the reseller's default folder.
// placed before the name of a folder signals the client's default folder.
/ placed before the name of a folder signals the extension's default folder.
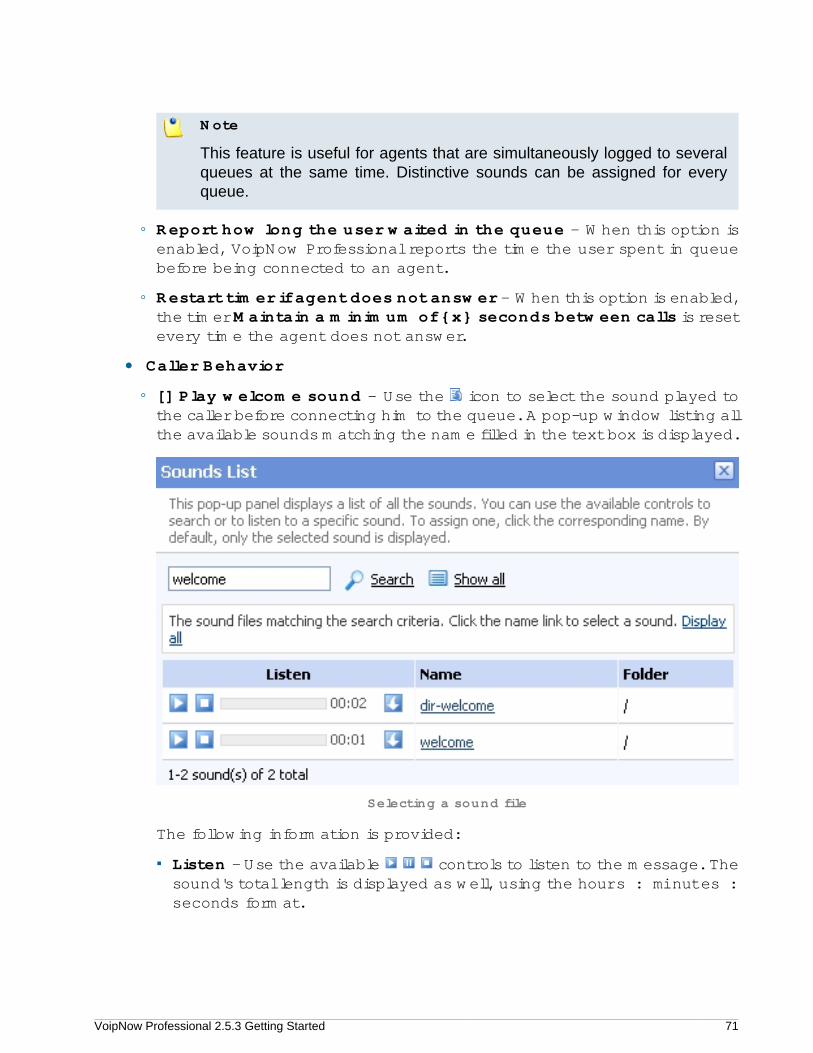
VoipNow Professional 2.5.3 Getting Started 71
Note
This feature is useful for agents that are simultaneously logged to severalqueues at the same time. Distinctive sounds can be assigned for everyqueue.
◦ Report how long the user waited in the queue – When this option isenabled, VoipNow Professional reports the time the user spent in queuebefore being connected to an agent.
◦ Restart timer if agent does not answer – When this option is enabled,the timer Maintain a minimum of {x} seconds between calls is resetevery time the agent does not answer.
• Caller Behavior
◦ [] Play welcome sound – Use the icon to select the sound played tothe caller before connecting him to the queue. A pop-up window listing allthe available sounds matching the name filled in the text box is displayed.
Selecting a sound file
The following information is provided:
▪ Listen - Use the available controls to listen to the message. Thesound's total length is displayed as well, using the hours : minutes :seconds format.

VoipNow Professional 2.5.3 Getting Started 72
If you want download the sound on your hard drive, click the iconand confirm your choice.
▪ Name - The name of the sound file. Click the link to select it.
▪ Folder - This column displays the file's folder location.
Note
The path will display the folder name and also its origin:
//// placed before the name of a folder signals the admin's default folder.
/// placed before the name of a folder signals the reseller's default folder.
// placed before the name of a folder signals the client's default folder.
/ placed before the name of a folder signals the extension's default folder.
◦ Announce [] position and/or [] hold time every {y} seconds –Choose the announcements you want to be made to the caller every {y}seconds:
▪ Select the first check box if you want the callers to be informed abouttheir position in the queue.
Note
The caller will be announced of his position in the queue using the Thereare sound and The elapsed queue hold time sound set in theSound files setup section.
▪ Select the second check box if you want the callers to be informed aboutthe time they have been waiting in the current queue for their call to beanswered by an agent. The sound played to the user when this optionis enabled is the one entered in the 'The elapsed queue hold time'sound field.
Note
Both check boxes can be selected at the same time.
◦ Periodic announcements every {x} seconds – A periodicannouncement is a message like Thank you for holding, your callis important to us. The value {x} specifies the frequency of theseannouncements. The default value is 30 seconds.
◦ Exit to extension on key pressed - When this option is enabled, thecaller can exit the queue by pressing the 0 key on his phone pad. The
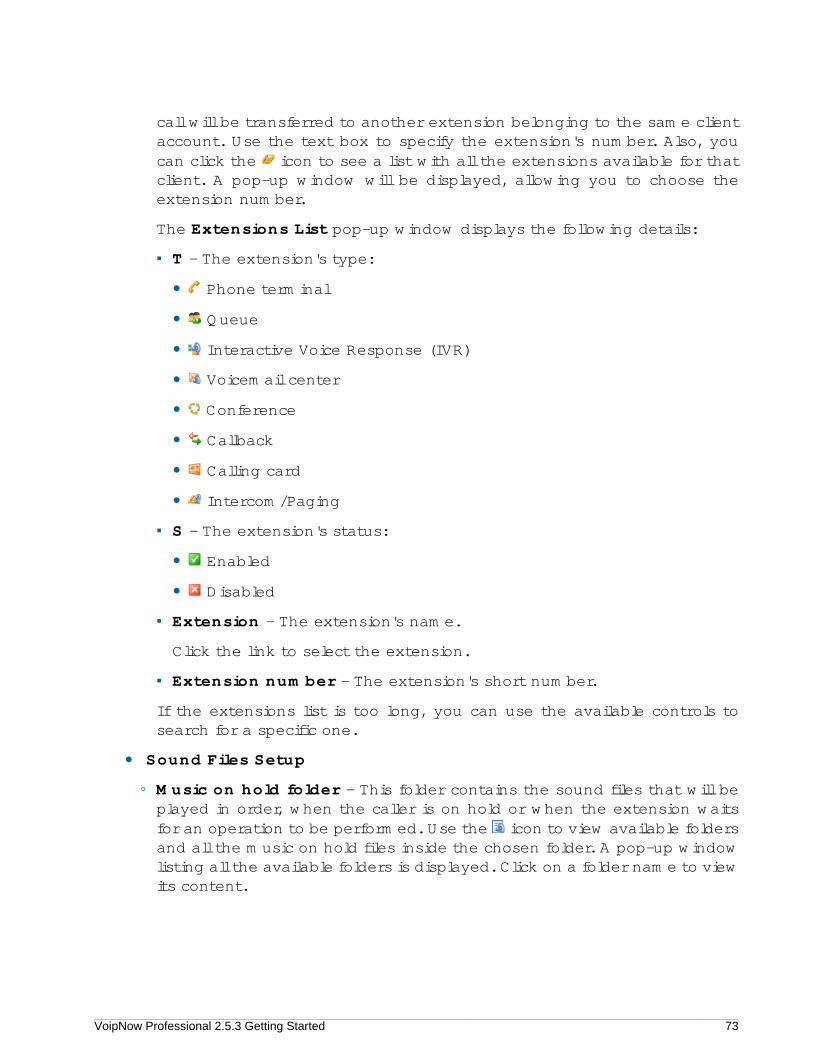
VoipNow Professional 2.5.3 Getting Started 73
call will be transferred to another extension belonging to the same clientaccount. Use the text box to specify the extension's number. Also, youcan click the icon to see a list with all the extensions available for thatclient. A pop-up window will be displayed, allowing you to choose theextension number.
The Extensions List pop-up window displays the following details:
▪ T - The extension's type:
• Phone terminal
• Queue
• Interactive Voice Response (IVR)
• Voicemail center
• Conference
• Callback
• Calling card
• Intercom/Paging
▪ S - The extension's status:
• Enabled
• Disabled
▪ Extension - The extension's name.
Click the link to select the extension.
▪ Extension number - The extension's short number.
If the extensions list is too long, you can use the available controls tosearch for a specific one.
• Sound Files Setup
◦ Music on hold folder - This folder contains the sound files that will beplayed in order, when the caller is on hold or when the extension waitsfor an operation to be performed. Use the icon to view available foldersand all the music on hold files inside the chosen folder. A pop-up windowlisting all the available folders is displayed. Click on a folder name to viewits content.
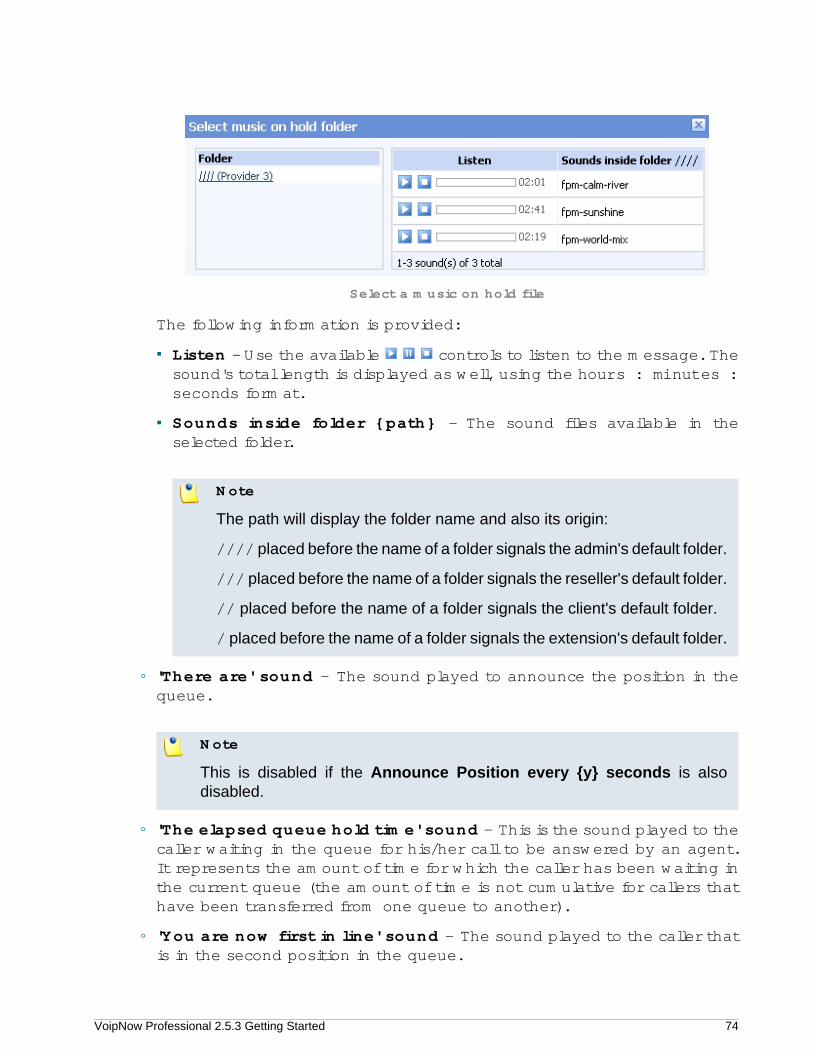
VoipNow Professional 2.5.3 Getting Started 74
Select a music on hold file
The following information is provided:
▪ Listen - Use the available controls to listen to the message. Thesound's total length is displayed as well, using the hours : minutes :seconds format.
▪ Sounds inside folder {path} - The sound files available in theselected folder.
Note
The path will display the folder name and also its origin:
//// placed before the name of a folder signals the admin's default folder.
/// placed before the name of a folder signals the reseller's default folder.
// placed before the name of a folder signals the client's default folder.
/ placed before the name of a folder signals the extension's default folder.
◦ 'There are' sound – The sound played to announce the position in thequeue.
Note
This is disabled if the Announce Position every {y} seconds is alsodisabled.
◦ 'The elapsed queue hold time' sound – This is the sound played to thecaller waiting in the queue for his/her call to be answered by an agent.It represents the amount of time for which the caller has been waiting inthe current queue (the amount of time is not cumulative for callers thathave been transferred from one queue to another).
◦ 'You are now first in line' sound – The sound played to the caller thatis in the second position in the queue.
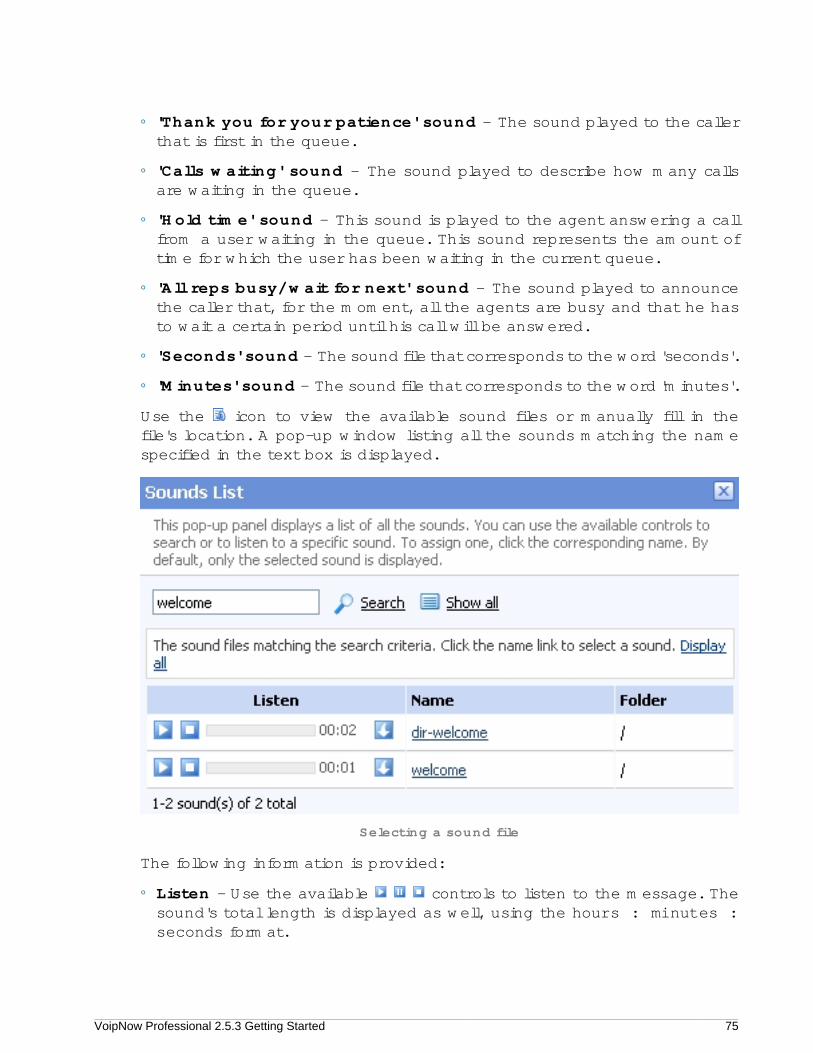
VoipNow Professional 2.5.3 Getting Started 75
◦ 'Thank you for your patience' sound – The sound played to the callerthat is first in the queue.
◦ 'Calls waiting' sound – The sound played to describe how many callsare waiting in the queue.
◦ 'Hold time' sound – This sound is played to the agent answering a callfrom a user waiting in the queue. This sound represents the amount oftime for which the user has been waiting in the current queue.
◦ 'All reps busy/wait for next' sound – The sound played to announcethe caller that, for the moment, all the agents are busy and that he hasto wait a certain period until his call will be answered.
◦ 'Seconds' sound – The sound file that corresponds to the word 'seconds'.
◦ 'Minutes' sound – The sound file that corresponds to the word 'minutes'.
Use the icon to view the available sound files or manually fill in thefile's location. A pop-up window listing all the sounds matching the namespecified in the text box is displayed.
Selecting a sound file
The following information is provided:
◦ Listen - Use the available controls to listen to the message. Thesound's total length is displayed as well, using the hours : minutes :seconds format.
VoipNow Professional 2.5.3 Getting Started 76
If you want download the sound on your hard drive, click the icon andconfirm your choice.
◦ Name - The name of the sound file. Click the link to select it.
◦ Folder - This column displays the file's folder location.
Note
The path will display the folder name and also its origin:
//// placed before the name of a folder signals the admin's default folder.
/// placed before the name of a folder signals the reseller's default folder.
// placed before the name of a folder signals the client's default folder.
/ placed before the name of a folder signals the extension's default folder.
• Queue Behavior
Note
The options available in this section can be customized only if there is at leastone other Phone terminal extension defined for the same client account.
◦ [] If a caller has been waiting in queue for {x} seconds, transfercall to extension {extension} – This feature allows the caller to betransferred to another extension after waiting in the queue for a certainnumber of seconds. Select the check box to fill in the two text boxes:
▪ {x} - The maximum waiting interval. If exceeded, the call will beautomatically transferred to the specified extension. The default valueis 600 seconds.
▪ {extension} - The extension belonging to the same client account thecall will be transferred to.
◦ Allow calls to enter queue when {agents_status} - When anincoming call is received, VoipNow Professional will allow it to enter thequeue depending on the agents' availability set here:
▪ There are agents on queue, even logged out - The calls will beallowed to enter the queue if there is at least on agent defined for it,no matter if it is logged in or not. Basically, the calls will be acceptedregardless the agent(s) status. This is the most unrestrictive optionavailable.
▪ At least one agent is logged in and unpaused - VoipNowProfessional will allow the calls to enter the queue only if at least one

VoipNow Professional 2.5.3 Getting Started 77
of the agents assigned to this queue is logged in and active (not onpause). This is the default option.
▪ At least one agent is logged in, maybe paused - Unlike theprevious option, this one allows VoipNow Professional to accept the callswhen at least one of the agents assigned to this queue is logged in,regardless if it is on pause or not.
◦ [] When calls are not allowed to enter queue, transfer them toextension {extension} (otherwise call is hanged up) - If thecondition for allowing the calls to enter the queue cannot be matched,instead of hanging up, you can choose to transfer them to anotherextension. Select this check box to define the extension number.
For example, if you decided to Allow calls to enter queue when 'Thereare agents on queue, even logged out', but there are no agentsassigned to this queue, you can enable this option and allow the calls tobe transferred to another extension on the same client account. In thisway, the incoming calls will not be dropped.
◦ Drop existing calls from queue when {situation} - VoipNowProfessional allows you to choose the when the calls already in the queueto be dropped:
▪ Never - The existing calls will not be dropped, no matter the agents'status. This will allow the caller to remain in the queue after all theagents log out or enter into pause. This is the default value.
▪ All agents enter into pause or log out - The existing calls willbe dropped from the queue when all the assigned agents will log outor will enter into pause.
▪ All agents log out - The existing calls will be dropped from the queueonly when all the assigned agents will log out and there will be nobodyleft to pick them up.
◦ [] When calls are dropped from queue, transfer them to extension{extension} (otherwise call is hanged up) - You can choose totransfer the calls dropped from the queue to another extension instead ofterminating them. Select this check box to define the extension numberwhere the dropped calls will be transferred to.
◦ Play sound {sound} on disconnect due to queue full - Select thischeck box if you want to specify the sound that will be played to the calleron disconnection due to queue full. Use the icon to view the availablesound files or manually fill in the file's location. A pop-up window listingall the sounds matching the name specified in the text box is displayed.
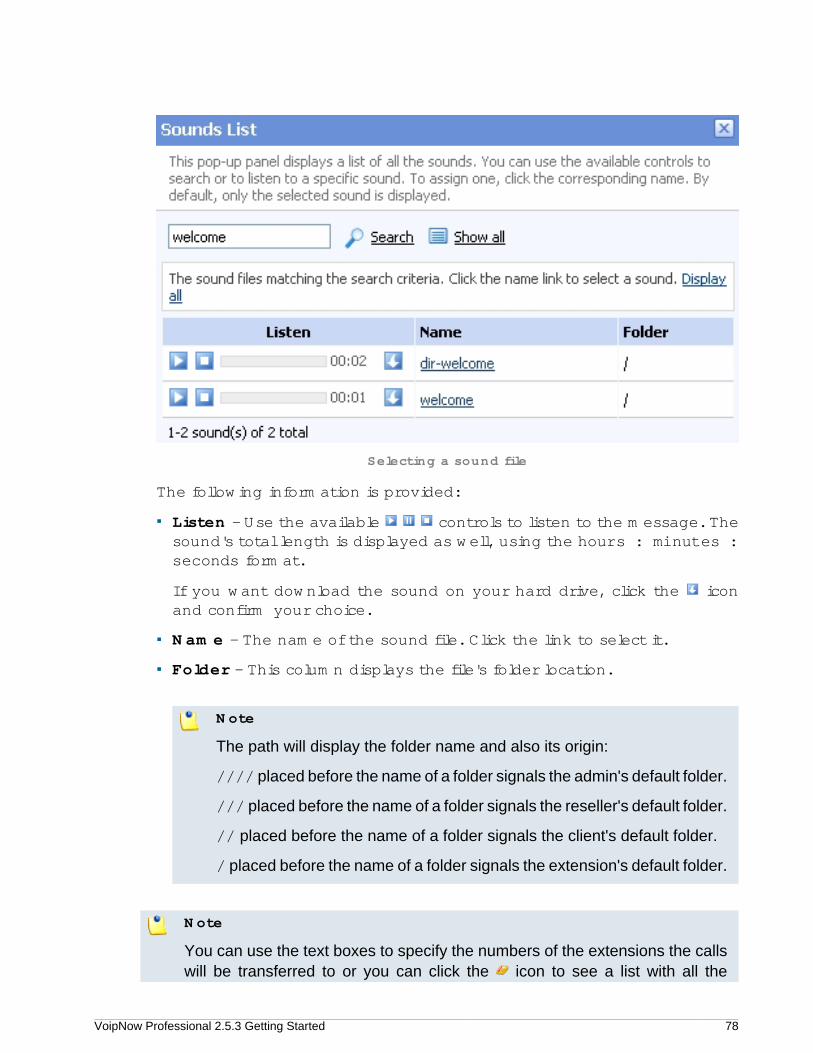
VoipNow Professional 2.5.3 Getting Started 78
Selecting a sound file
The following information is provided:
▪ Listen - Use the available controls to listen to the message. Thesound's total length is displayed as well, using the hours : minutes :seconds format.
If you want download the sound on your hard drive, click the iconand confirm your choice.
▪ Name - The name of the sound file. Click the link to select it.
▪ Folder - This column displays the file's folder location.
Note
The path will display the folder name and also its origin:
//// placed before the name of a folder signals the admin's default folder.
/// placed before the name of a folder signals the reseller's default folder.
// placed before the name of a folder signals the client's default folder.
/ placed before the name of a folder signals the extension's default folder.
Note
You can use the text boxes to specify the numbers of the extensions the callswill be transferred to or you can click the icon to see a list with all the
VoipNow Professional 2.5.3 Getting Started 79
extensions available for the current client. A pop-up window will be displayed,allowing you to choose the extension number.
The Extensions List pop-up window displays the following details:
◦ T - The extension's type:
▪ Phone terminal
▪ Queue
▪ Interactive Voice Response (IVR)
◦ S - The extension's status:
▪ Enabled
▪ Disabled
◦ Extension - The extension's name.
Click the link to select the extension.
◦ Extension number - The extension's short number.
If the extensions list is too long, you can use the available controls to searchfor a specific one.
Adding an IVR Extension Account
An IVR extension is used to create an interactive menu that can be usedby callers to get information without having to connect to a human operator.
IVR Extension Account Information
Note
For more information on how to define the account information, see the this sectionas the available options are similar for all the extension types.
At the last step, pay attention to select a IVR Extension type.
IVR Extension Permissions and Phone Numbers
By default, after you enter the extension account information, the Rolesand Phone Numbers for Extension {ext_name} setup page opens. You can
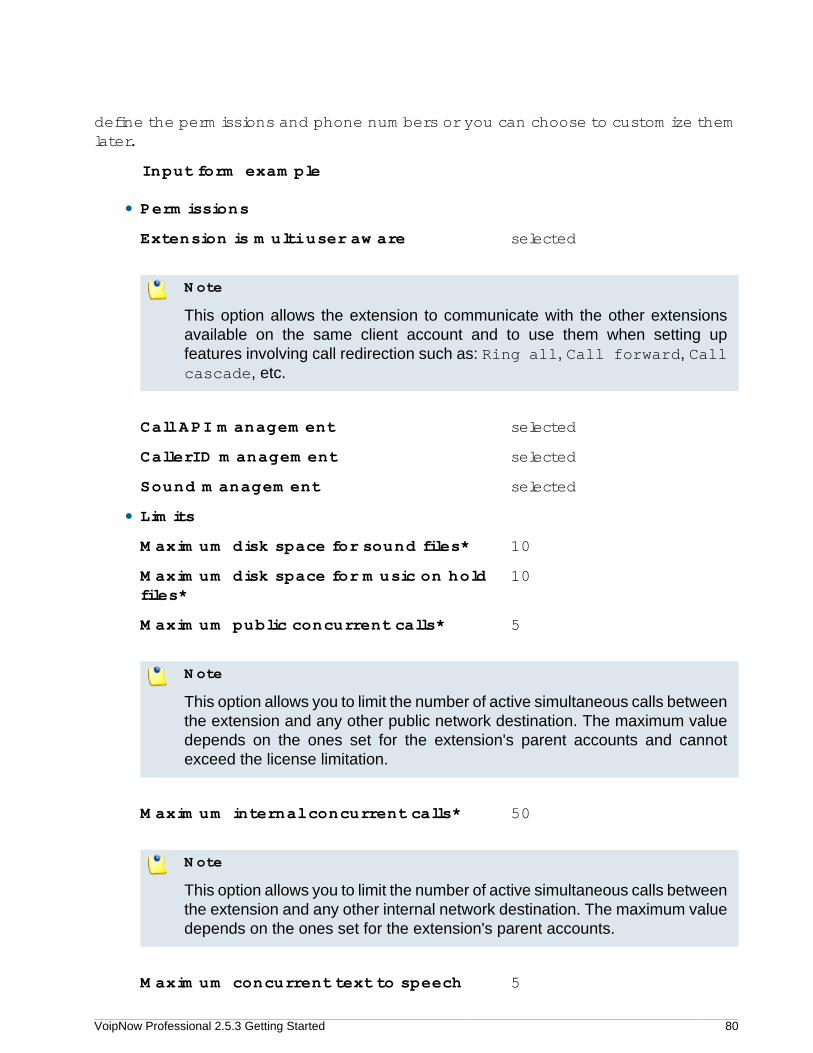
VoipNow Professional 2.5.3 Getting Started 80
define the permissions and phone numbers or you can choose to customize themlater.
Input form example
• Permissions
Extension is multi user aware selected
Note
This option allows the extension to communicate with the other extensionsavailable on the same client account and to use them when setting upfeatures involving call redirection such as: Ring all, Call forward, Callcascade, etc.
Call API management selected
CallerID management selected
Sound management selected
• Limits
Maximum disk space for sound files* 10
Maximum disk space for music on holdfiles*
10
Maximum public concurrent calls* 5
Note
This option allows you to limit the number of active simultaneous calls betweenthe extension and any other public network destination. The maximum valuedepends on the ones set for the extension's parent accounts and cannotexceed the license limitation.
Maximum internal concurrent calls* 50
Note
This option allows you to limit the number of active simultaneous calls betweenthe extension and any other internal network destination. The maximum valuedepends on the ones set for the extension's parent accounts.
Maximum concurrent text to speech 5
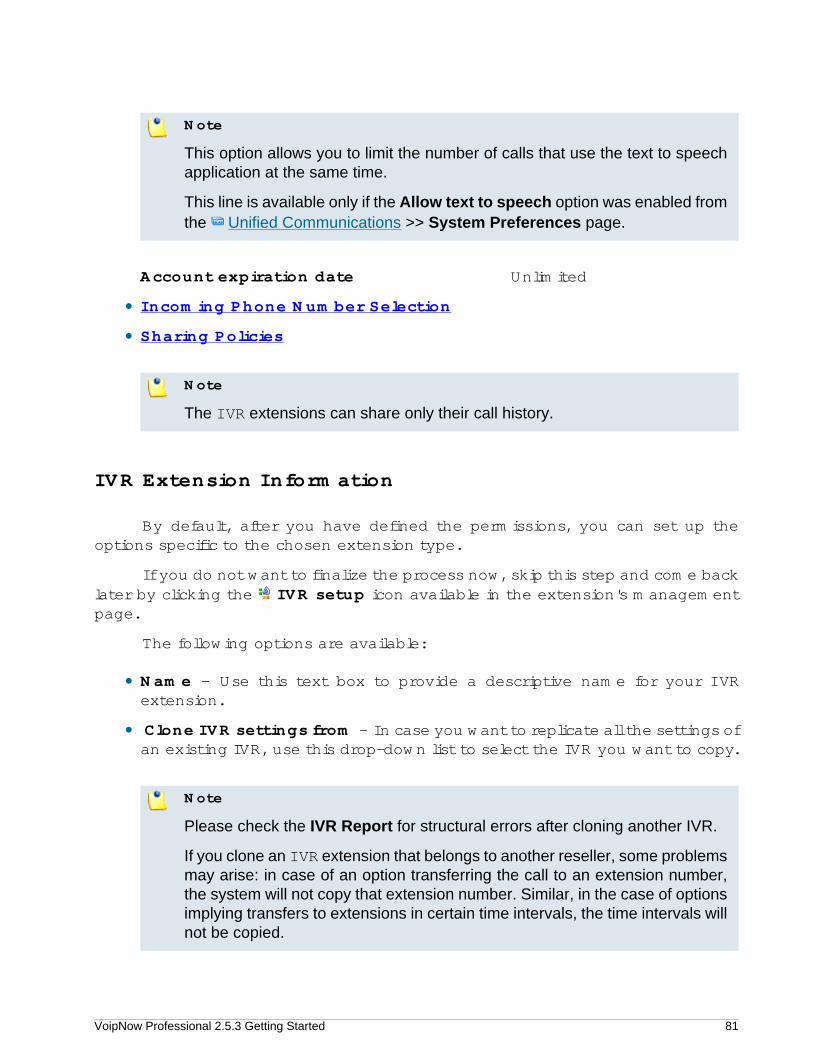
VoipNow Professional 2.5.3 Getting Started 81
Note
This option allows you to limit the number of calls that use the text to speechapplication at the same time.
This line is available only if the Allow text to speech option was enabled fromthe Unified Communications >> System Preferences page.
Account expiration date Unlimited
• Incoming Phone Number Selection
• Sharing Policies
Note
The IVR extensions can share only their call history.
IVR Extension Information
By default, after you have defined the permissions, you can set up theoptions specific to the chosen extension type.
If you do not want to finalize the process now, skip this step and come backlater by clicking the IVR setup icon available in the extension's managementpage.
The following options are available:
• Name – Use this text box to provide a descriptive name for your IVRextension.
• Clone IVR settings from – In case you want to replicate all the settings ofan existing IVR, use this drop-down list to select the IVR you want to copy.
Note
Please check the IVR Report for structural errors after cloning another IVR.
If you clone an IVR extension that belongs to another reseller, some problemsmay arise: in case of an option transferring the call to an extension number,the system will not copy that extension number. Similar, in the case of optionsimplying transfers to extensions in certain time intervals, the time intervals willnot be copied.
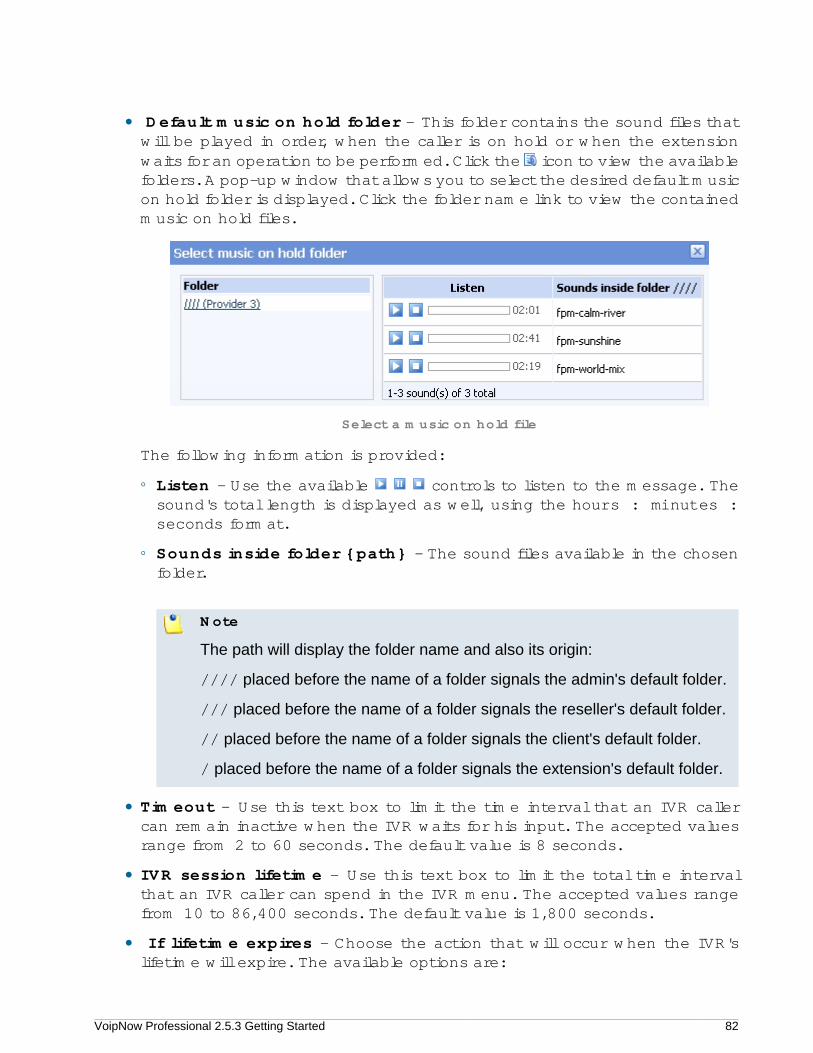
VoipNow Professional 2.5.3 Getting Started 82
• Default music on hold folder – This folder contains the sound files thatwill be played in order, when the caller is on hold or when the extensionwaits for an operation to be performed. Click the icon to view the availablefolders. A pop-up window that allows you to select the desired default musicon hold folder is displayed. Click the folder name link to view the containedmusic on hold files.
Select a music on hold file
The following information is provided:
◦ Listen - Use the available controls to listen to the message. Thesound's total length is displayed as well, using the hours : minutes :seconds format.
◦ Sounds inside folder {path} - The sound files available in the chosenfolder.
Note
The path will display the folder name and also its origin:
//// placed before the name of a folder signals the admin's default folder.
/// placed before the name of a folder signals the reseller's default folder.
// placed before the name of a folder signals the client's default folder.
/ placed before the name of a folder signals the extension's default folder.
• Timeout – Use this text box to limit the time interval that an IVR callercan remain inactive when the IVR waits for his input. The accepted valuesrange from 2 to 60 seconds. The default value is 8 seconds.
• IVR session lifetime – Use this text box to limit the total time intervalthat an IVR caller can spend in the IVR menu. The accepted values rangefrom 10 to 86,400 seconds. The default value is 1,800 seconds.
• If lifetime expires - Choose the action that will occur when the IVR'slifetime will expire. The available options are:
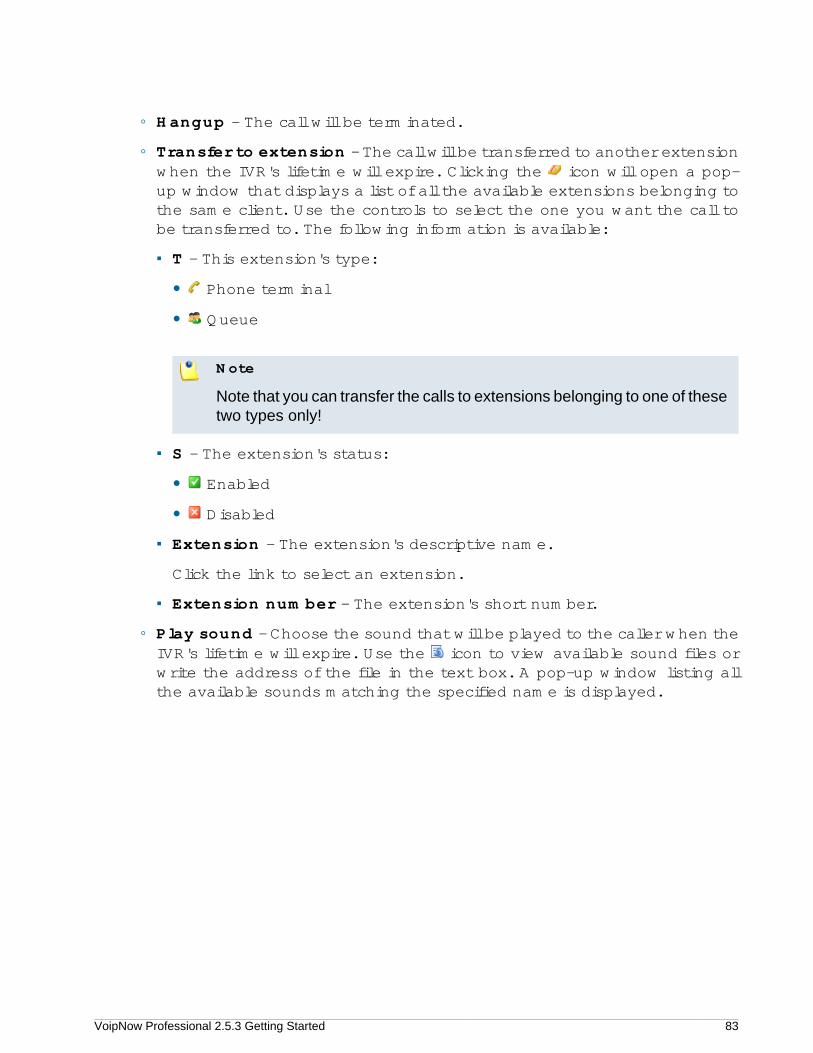
VoipNow Professional 2.5.3 Getting Started 83
◦ Hangup - The call will be terminated.
◦ Transfer to extension - The call will be transferred to another extensionwhen the IVR's lifetime will expire. Clicking the icon will open a pop-up window that displays a list of all the available extensions belonging tothe same client. Use the controls to select the one you want the call tobe transferred to. The following information is available:
▪ T - This extension's type:
• Phone terminal
• Queue
Note
Note that you can transfer the calls to extensions belonging to one of thesetwo types only!
▪ S - The extension's status:
• Enabled
• Disabled
▪ Extension - The extension's descriptive name.
Click the link to select an extension.
▪ Extension number - The extension's short number.
◦ Play sound - Choose the sound that will be played to the caller when theIVR's lifetime will expire. Use the icon to view available sound files orwrite the address of the file in the text box. A pop-up window listing allthe available sounds matching the specified name is displayed.
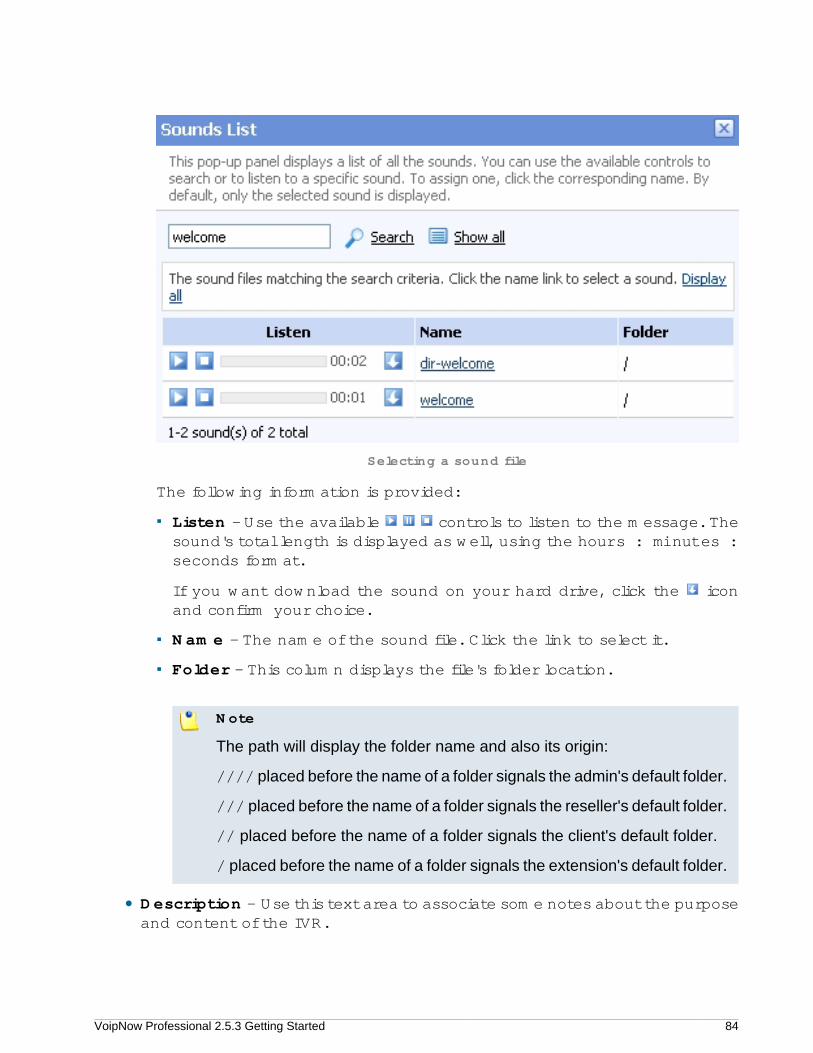
VoipNow Professional 2.5.3 Getting Started 84
Selecting a sound file
The following information is provided:
▪ Listen - Use the available controls to listen to the message. Thesound's total length is displayed as well, using the hours : minutes :seconds format.
If you want download the sound on your hard drive, click the iconand confirm your choice.
▪ Name - The name of the sound file. Click the link to select it.
▪ Folder - This column displays the file's folder location.
Note
The path will display the folder name and also its origin:
//// placed before the name of a folder signals the admin's default folder.
/// placed before the name of a folder signals the reseller's default folder.
// placed before the name of a folder signals the client's default folder.
/ placed before the name of a folder signals the extension's default folder.
• Description – Use this text area to associate some notes about the purposeand content of the IVR.
VoipNow Professional 2.5.3 Getting Started 85
Adding a Voicemail Center Extension Account
This extension type is similar to the voicemail function of the Phoneterminal extension. However, the Voicemail center allows callers to verify theirmessages by using a terminal located outside the system.
Voicemail Center Extension Account Information
Note
For more information on how to define the account information, see the this sectionas the available options are similar for all the extension types.
At the last step, pay attention to select a Voicemail center Extension type.
Voicemail Center Extension Permissions and PhoneNumbers
By default, after you enter the extension account information, the Rolesand Phone Numbers for Extension {ext_name} setup page opens. You candefine the permissions and phone numbers or you can choose to customize themlater.
Input form example
• Permissions
Extension is multi user aware selected
Note
This option allows the extension to communicate with the other extensionsavailable on the same client account and to use them when setting upfeatures involving call redirection such as: Ring all, Call forward, Callcascade, etc.
CallerID management selected
Sound management selected
• Limits
Maximum disk space for sound files* 10
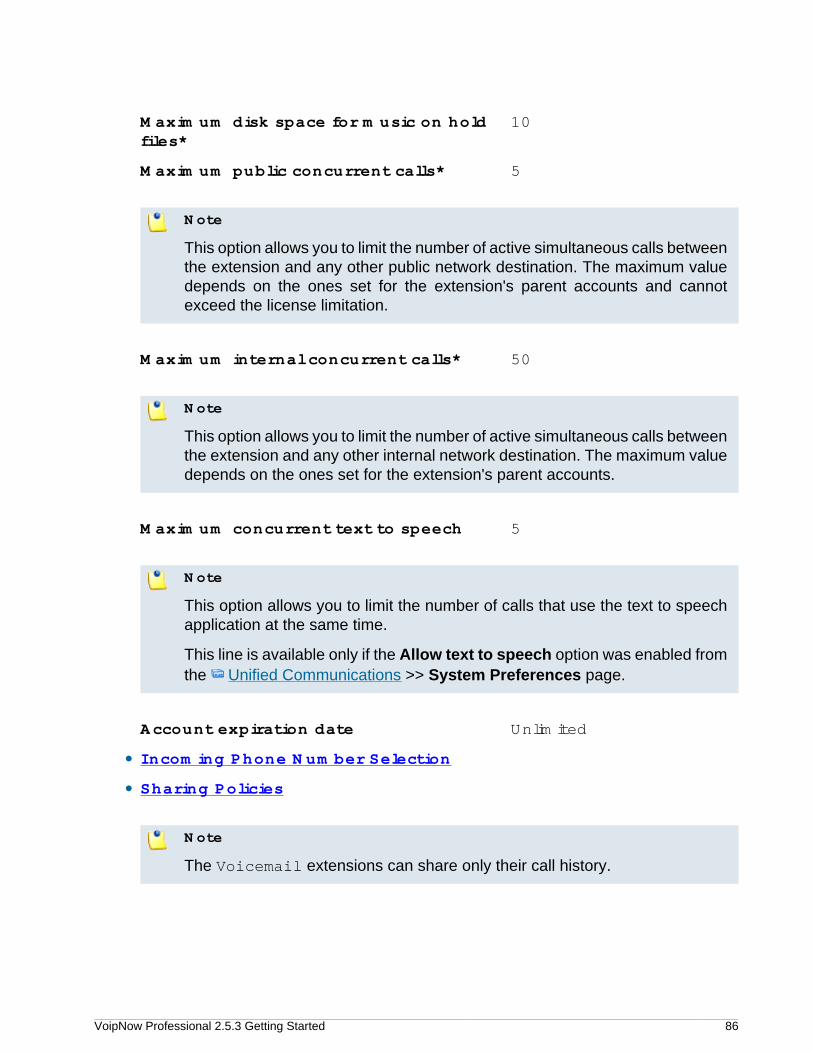
VoipNow Professional 2.5.3 Getting Started 86
Maximum disk space for music on holdfiles*
10
Maximum public concurrent calls* 5
Note
This option allows you to limit the number of active simultaneous calls betweenthe extension and any other public network destination. The maximum valuedepends on the ones set for the extension's parent accounts and cannotexceed the license limitation.
Maximum internal concurrent calls* 50
Note
This option allows you to limit the number of active simultaneous calls betweenthe extension and any other internal network destination. The maximum valuedepends on the ones set for the extension's parent accounts.
Maximum concurrent text to speech 5
Note
This option allows you to limit the number of calls that use the text to speechapplication at the same time.
This line is available only if the Allow text to speech option was enabled fromthe Unified Communications >> System Preferences page.
Account expiration date Unlimited
• Incoming Phone Number Selection
• Sharing Policies
Note
The Voicemail extensions can share only their call history.
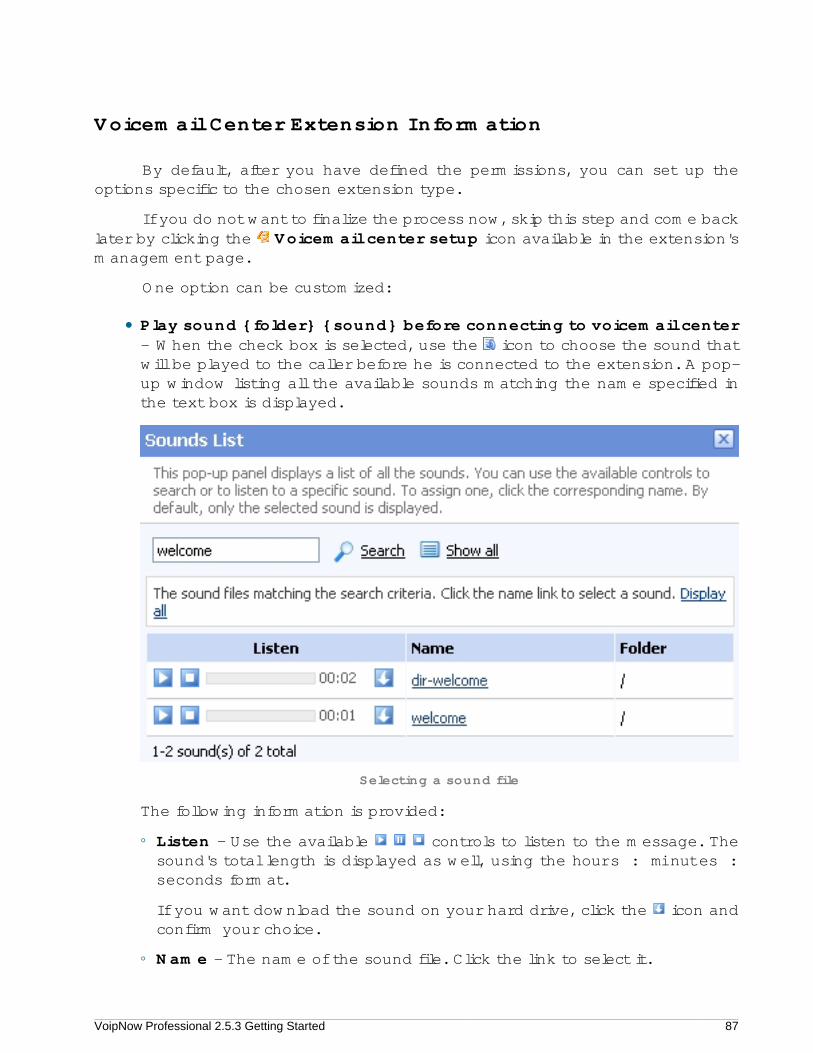
VoipNow Professional 2.5.3 Getting Started 87
Voicemail Center Extension Information
By default, after you have defined the permissions, you can set up theoptions specific to the chosen extension type.
If you do not want to finalize the process now, skip this step and come backlater by clicking the Voicemail center setup icon available in the extension'smanagement page.
One option can be customized:
• Play sound {folder} {sound} before connecting to voicemail center– When the check box is selected, use the icon to choose the sound thatwill be played to the caller before he is connected to the extension. A pop-up window listing all the available sounds matching the name specified inthe text box is displayed.
Selecting a sound file
The following information is provided:
◦ Listen - Use the available controls to listen to the message. Thesound's total length is displayed as well, using the hours : minutes :seconds format.
If you want download the sound on your hard drive, click the icon andconfirm your choice.
◦ Name - The name of the sound file. Click the link to select it.
VoipNow Professional 2.5.3 Getting Started 88
◦ Folder - This column displays the file's folder location.
Note
The path will display the folder name and also its origin:
//// placed before the name of a folder signals the admin's default folder.
/// placed before the name of a folder signals the reseller's default folder.
// placed before the name of a folder signals the client's default folder.
/ placed before the name of a folder signals the extension's default folder.
Adding a Conference Extension Account
This extension type allows the creation of conferences that can be accessedby system users as well as external callers.
Conference Extension Account Information
Note
For more information on how to define the account information, see the this sectionas the available options are similar for all the extension types.
At the last step, pay attention to select a Conference Extension type.
Conference Extension Permissions and Phone Numbers
By default, after you enter the extension account information, the Rolesand Phone Numbers for Extension {ext_name} setup page opens. You candefine the permissions and phone numbers or you can choose to customize themlater.
Input form example
• Permissions
Extension is multi user aware selected

VoipNow Professional 2.5.3 Getting Started 89
Note
This option allows the extension to communicate with the other extensionsavailable on the same client account and to use them when setting upfeatures involving call redirection such as: Ring all, Call forward, Callcascade, etc.
CallAPI management selected
CallerID management selected
Sound management selected
• Limits
Maximum disk space for sound files* 10
Maximum disk space for music on holdfiles*
10
Maximum public concurrent calls* 5
Note
This option allows you to limit the number of active simultaneous calls betweenthe extension and any other public network destination. The maximum valuedepends on the ones set for the extension's parent accounts and cannotexceed the license limitation.
Maximum internal concurrent calls* 50
Note
This option allows you to limit the number of active simultaneous calls betweenthe extension and any other internal network destination. The maximum valuedepends on the ones set for the extension's parent accounts.
Maximum concurrent text to speech 5
Note
This option allows you to limit the number of calls that use the text to speechapplication at the same time.
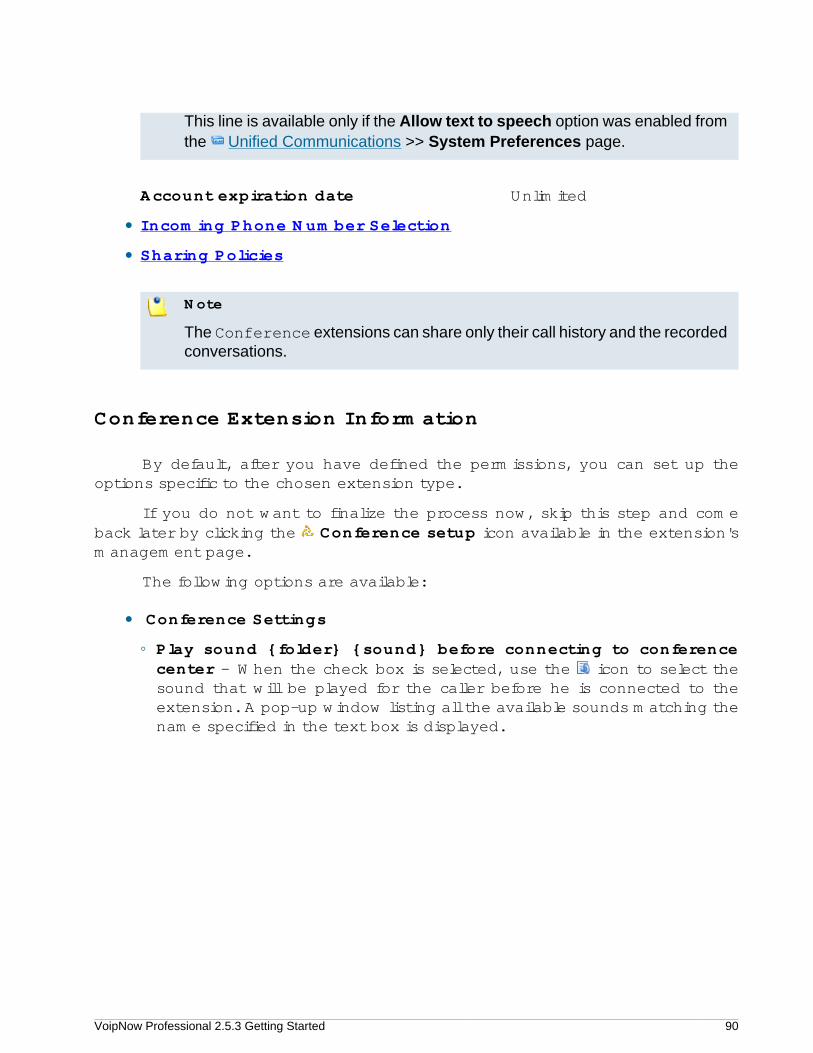
VoipNow Professional 2.5.3 Getting Started 90
This line is available only if the Allow text to speech option was enabled fromthe Unified Communications >> System Preferences page.
Account expiration date Unlimited
• Incoming Phone Number Selection
• Sharing Policies
Note
The Conference extensions can share only their call history and the recordedconversations.
Conference Extension Information
By default, after you have defined the permissions, you can set up theoptions specific to the chosen extension type.
If you do not want to finalize the process now, skip this step and comeback later by clicking the Conference setup icon available in the extension'smanagement page.
The following options are available:
• Conference Settings
◦ Play sound {folder} {sound} before connecting to conferencecenter – When the check box is selected, use the icon to select thesound that will be played for the caller before he is connected to theextension. A pop-up window listing all the available sounds matching thename specified in the text box is displayed.
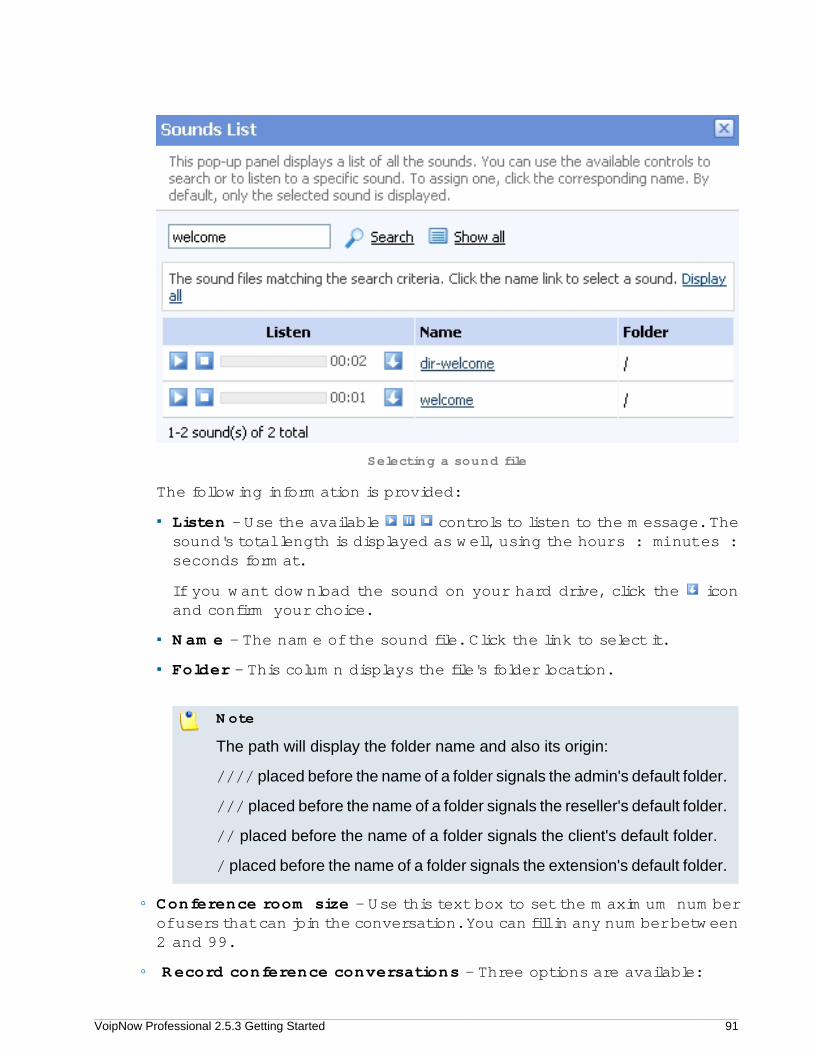
VoipNow Professional 2.5.3 Getting Started 91
Selecting a sound file
The following information is provided:
▪ Listen - Use the available controls to listen to the message. Thesound's total length is displayed as well, using the hours : minutes :seconds format.
If you want download the sound on your hard drive, click the iconand confirm your choice.
▪ Name - The name of the sound file. Click the link to select it.
▪ Folder - This column displays the file's folder location.
Note
The path will display the folder name and also its origin:
//// placed before the name of a folder signals the admin's default folder.
/// placed before the name of a folder signals the reseller's default folder.
// placed before the name of a folder signals the client's default folder.
/ placed before the name of a folder signals the extension's default folder.
◦ Conference room size - Use this text box to set the maximum numberof users that can join the conversation. You can fill in any number between2 and 99.
◦ Record conference conversations - Three options are available:
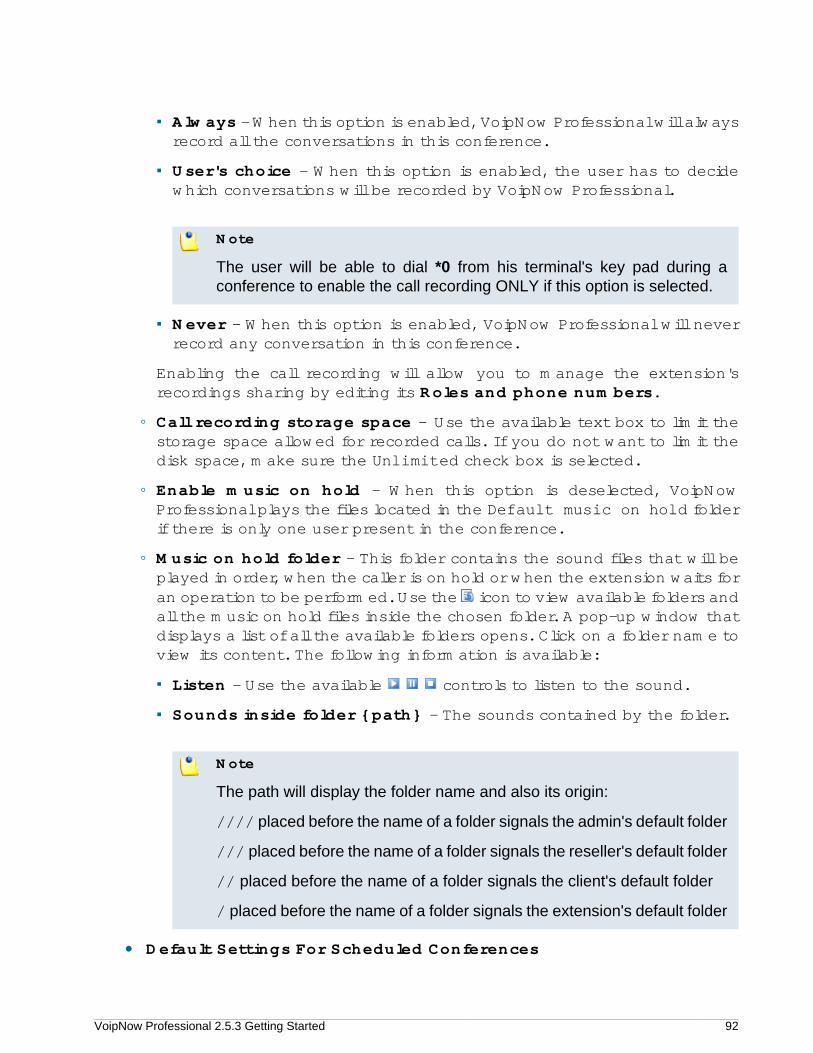
VoipNow Professional 2.5.3 Getting Started 92
▪ Always - When this option is enabled, VoipNow Professional will alwaysrecord all the conversations in this conference.
▪ User's choice - When this option is enabled, the user has to decidewhich conversations will be recorded by VoipNow Professional.
Note
The user will be able to dial *0 from his terminal's key pad during aconference to enable the call recording ONLY if this option is selected.
▪ Never - When this option is enabled, VoipNow Professional will neverrecord any conversation in this conference.
Enabling the call recording will allow you to manage the extension'srecordings sharing by editing its Roles and phone numbers.
◦ Call recording storage space – Use the available text box to limit thestorage space allowed for recorded calls. If you do not want to limit thedisk space, make sure the Unlimited check box is selected.
◦ Enable music on hold - When this option is deselected, VoipNowProfessional plays the files located in the Default music on hold folderif there is only one user present in the conference.
◦ Music on hold folder - This folder contains the sound files that will beplayed in order, when the caller is on hold or when the extension waits foran operation to be performed. Use the icon to view available folders andall the music on hold files inside the chosen folder. A pop-up window thatdisplays a list of all the available folders opens. Click on a folder name toview its content. The following information is available:
▪ Listen - Use the available controls to listen to the sound.
▪ Sounds inside folder {path} - The sounds contained by the folder.
Note
The path will display the folder name and also its origin:
//// placed before the name of a folder signals the admin's default folder
/// placed before the name of a folder signals the reseller's default folder
// placed before the name of a folder signals the client's default folder
/ placed before the name of a folder signals the extension's default folder
• Default Settings For Scheduled Conferences
VoipNow Professional 2.5.3 Getting Started 93
◦ Close the conference when all conference moderators exit - Whenthis option is enabled, VoipNow Professional terminates all calls when allthe conference moderators log out.
◦ Announce user count on joining conference - When this option isselected, VoipNow Professional announces any new participant about thenumber of users in the conference call.
◦ Announce users joining/leaving - When this option is selected,VoipNow Professional announces the users about any participant joiningor leaving the conference call.
Adding a Callback Extension Account
This extension type allows system users to call this extension from a phoneconnected to the public network and then place an outgoing call through theVoipNow Professional server.
Callback Extension Account Information
Note
For more information on how to define the account information, see the this sectionas the available options are similar for all the extension types.
At the last step, pay attention to select a Callback Extension type.
Callback Extension Permissions and Phone Numbers
By default, after you enter the extension account information, the Rolesand Phone Numbers for Extension {ext_name} setup page opens. You candefine the permissions and phone numbers or you can choose to customize themlater.
Input form example
• Permissions
Extension is multi user aware selected
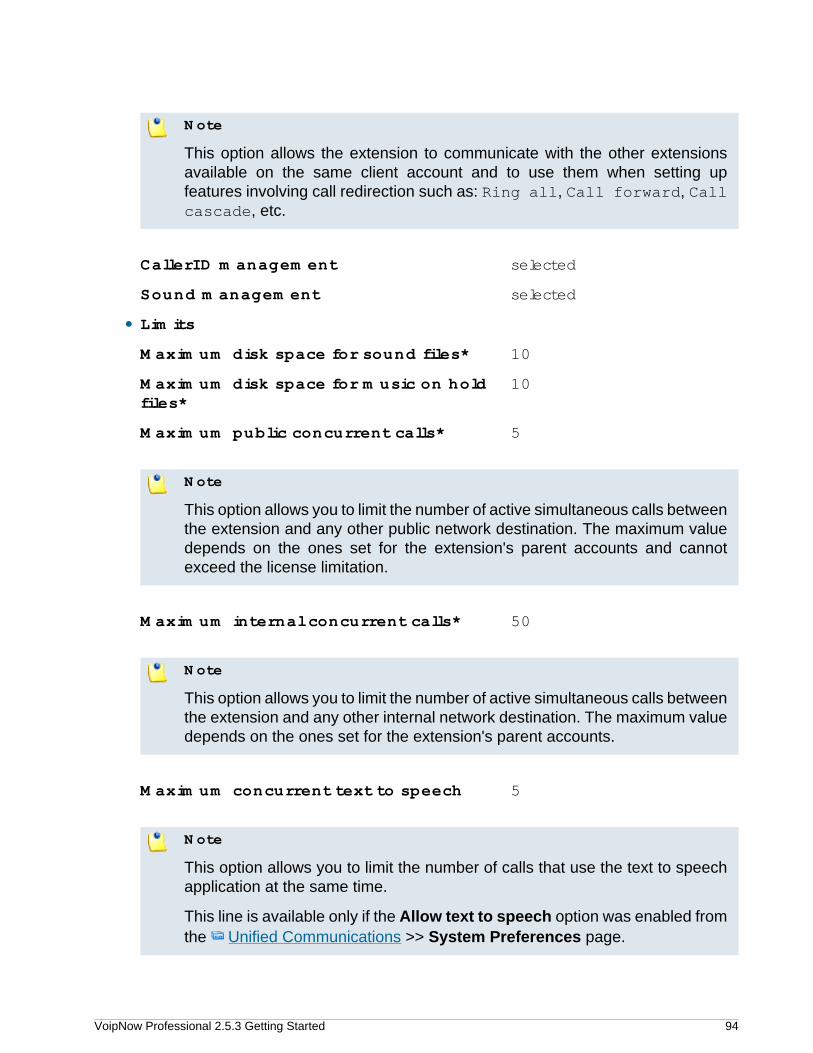
VoipNow Professional 2.5.3 Getting Started 94
Note
This option allows the extension to communicate with the other extensionsavailable on the same client account and to use them when setting upfeatures involving call redirection such as: Ring all, Call forward, Callcascade, etc.
CallerID management selected
Sound management selected
• Limits
Maximum disk space for sound files* 10
Maximum disk space for music on holdfiles*
10
Maximum public concurrent calls* 5
Note
This option allows you to limit the number of active simultaneous calls betweenthe extension and any other public network destination. The maximum valuedepends on the ones set for the extension's parent accounts and cannotexceed the license limitation.
Maximum internal concurrent calls* 50
Note
This option allows you to limit the number of active simultaneous calls betweenthe extension and any other internal network destination. The maximum valuedepends on the ones set for the extension's parent accounts.
Maximum concurrent text to speech 5
Note
This option allows you to limit the number of calls that use the text to speechapplication at the same time.
This line is available only if the Allow text to speech option was enabled fromthe Unified Communications >> System Preferences page.
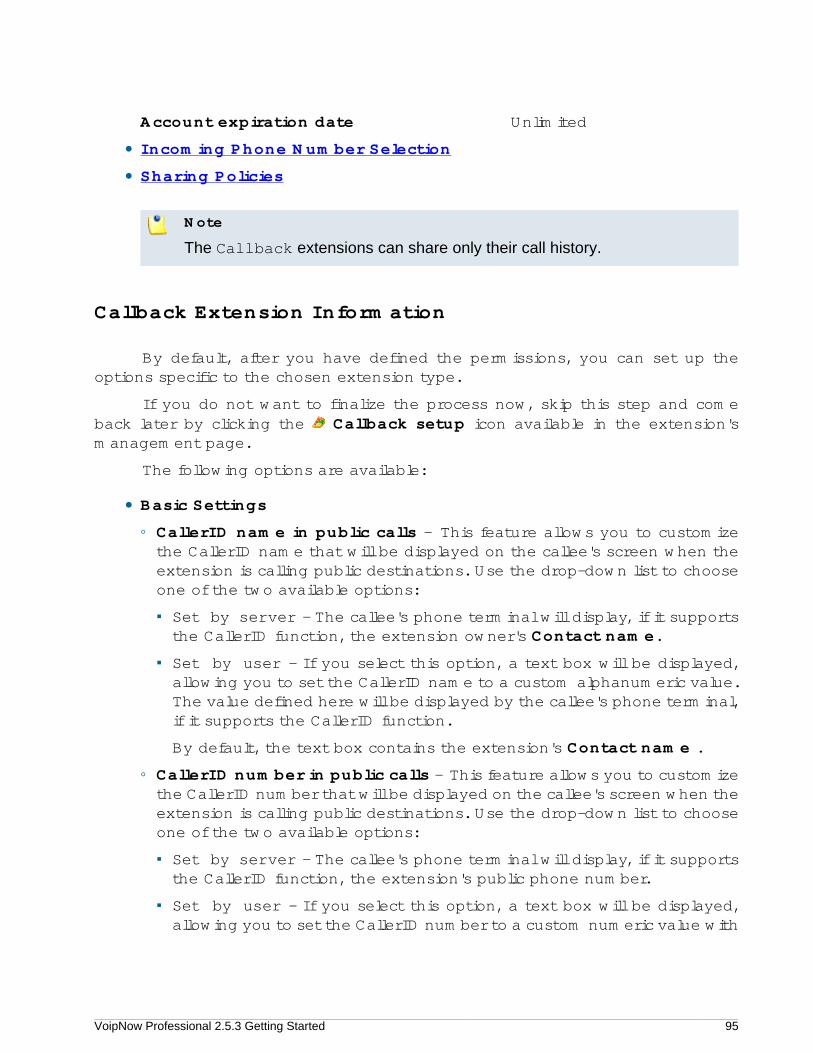
VoipNow Professional 2.5.3 Getting Started 95
Account expiration date Unlimited
• Incoming Phone Number Selection
• Sharing Policies
Note
The Callback extensions can share only their call history.
Callback Extension Information
By default, after you have defined the permissions, you can set up theoptions specific to the chosen extension type.
If you do not want to finalize the process now, skip this step and comeback later by clicking the Callback setup icon available in the extension'smanagement page.
The following options are available:
• Basic Settings
◦ CallerID name in public calls – This feature allows you to customizethe CallerID name that will be displayed on the callee's screen when theextension is calling public destinations. Use the drop-down list to chooseone of the two available options:
▪ Set by server - The callee's phone terminal will display, if it supportsthe CallerID function, the extension owner's Contact name.
▪ Set by user - If you select this option, a text box will be displayed,allowing you to set the CallerID name to a custom alphanumeric value.The value defined here will be displayed by the callee's phone terminal,if it supports the CallerID function.
By default, the text box contains the extension's Contact name .
◦ CallerID number in public calls – This feature allows you to customizethe CallerID number that will be displayed on the callee's screen when theextension is calling public destinations. Use the drop-down list to chooseone of the two available options:
▪ Set by server - The callee's phone terminal will display, if it supportsthe CallerID function, the extension's public phone number.
▪ Set by user - If you select this option, a text box will be displayed,allowing you to set the CallerID number to a custom numeric value with
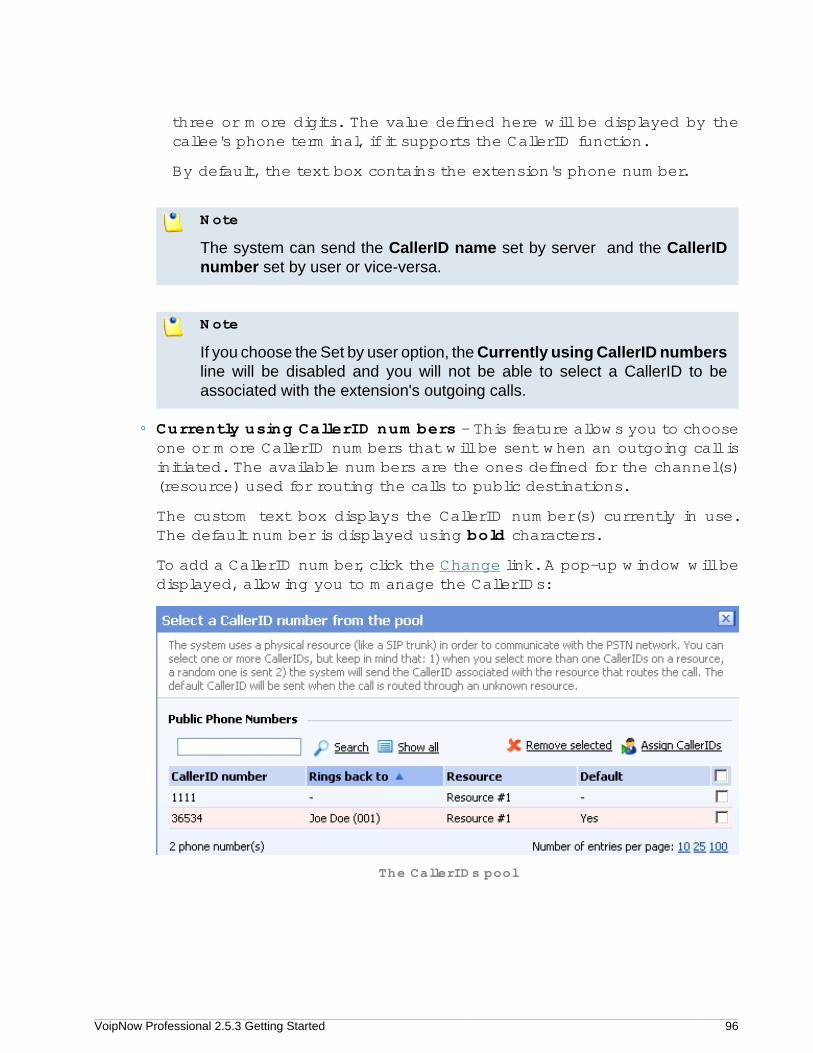
VoipNow Professional 2.5.3 Getting Started 96
three or more digits. The value defined here will be displayed by thecallee's phone terminal, if it supports the CallerID function.
By default, the text box contains the extension's phone number.
Note
The system can send the CallerID name set by server and the CallerIDnumber set by user or vice-versa.
Note
If you choose the Set by user option, the Currently using CallerID numbersline will be disabled and you will not be able to select a CallerID to beassociated with the extension's outgoing calls.
◦ Currently using CallerID numbers - This feature allows you to chooseone or more CallerID numbers that will be sent when an outgoing call isinitiated. The available numbers are the ones defined for the channel(s)(resource) used for routing the calls to public destinations.
The custom text box displays the CallerID number(s) currently in use.The default number is displayed using bold characters.
To add a CallerID number, click the Change link. A pop-up window will bedisplayed, allowing you to manage the CallerIDs:
The CallerIDs pool
VoipNow Professional 2.5.3 Getting Started 97
Note
In order to be displayed in this list, the public phone number(s) defined forthe channels (resources) used for routing the calls to public destinationsmust be assigned to the client owning this extension.
Note
It is possible to assign CallerIDs associated with DIDs that are on the clientpool, but that have not been assigned to any extension.
The following details are available in the Public Phone Numbers table:
▪ CallerID number - The CallerID of the DID assigned to the clientowning this extension.
This will be the Caller ID number displayed by the callee's phoneterminal when receiving a call from this extension.
Note
The public phone numbers can be defined for a certain channel fromthe Channels >> Channel {channel_name} management >> Addpublic phone numbers to channel {channel_name} page. For moreinformation, see this section.
▪ Rings back to - The extension that rings the DID associated with thisCallerID. If the CallerID was not assigned to the extension, then '-' isdisplayed.
Note
The public phone numbers can be assigned to the extension from theRoles and Phone Numbers for Extension {extension_name} page.
▪ Resource - The ID of the channel the public phone number was definedfor.
▪ Default - The CallerID's status:
• Set as default - A CallerID can be set as default if:
◦ it is associated with the extension
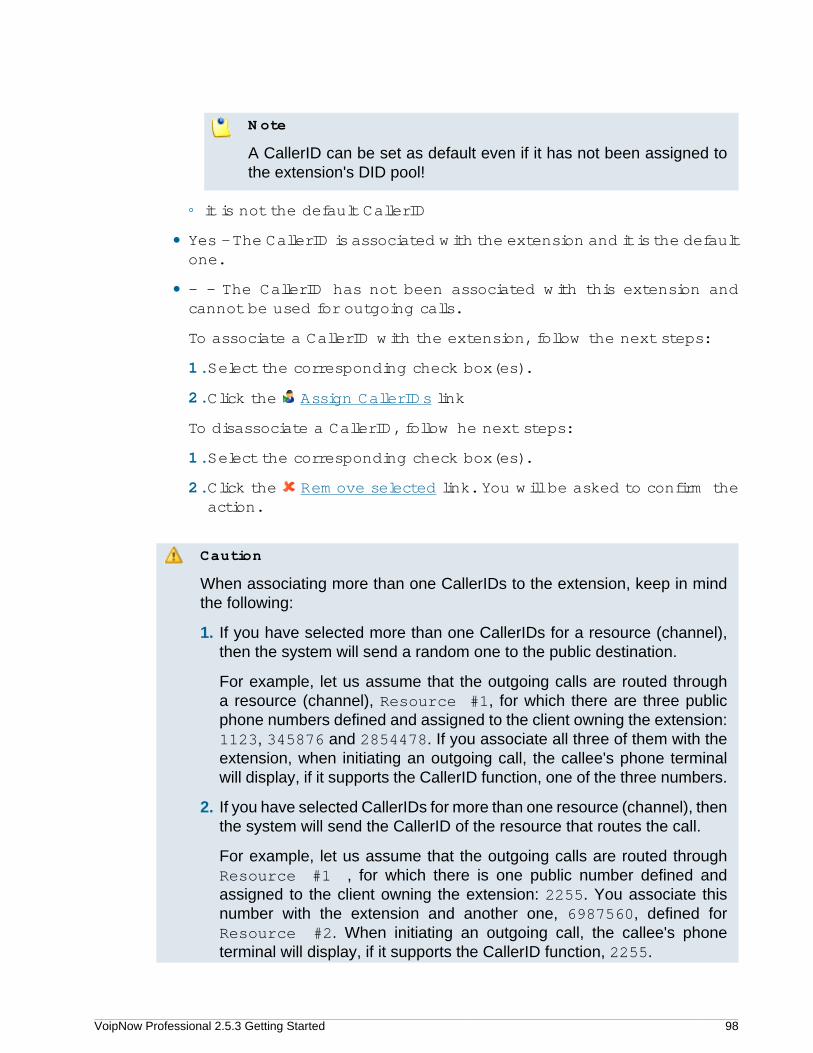
VoipNow Professional 2.5.3 Getting Started 98
Note
A CallerID can be set as default even if it has not been assigned tothe extension's DID pool!
◦ it is not the default CallerID
• Yes - The CallerID is associated with the extension and it is the defaultone.
• - - The CallerID has not been associated with this extension andcannot be used for outgoing calls.
To associate a CallerID with the extension, follow the next steps:
1.Select the corresponding check box(es).
2.Click the Assign CallerIDs link
To disassociate a CallerID, follow he next steps:
1.Select the corresponding check box(es).
2.Click the Remove selected link. You will be asked to confirm theaction.
Caution
When associating more than one CallerIDs to the extension, keep in mindthe following:
1. If you have selected more than one CallerIDs for a resource (channel),then the system will send a random one to the public destination.
For example, let us assume that the outgoing calls are routed througha resource (channel), Resource #1, for which there are three publicphone numbers defined and assigned to the client owning the extension:1123, 345876 and 2854478. If you associate all three of them with theextension, when initiating an outgoing call, the callee's phone terminalwill display, if it supports the CallerID function, one of the three numbers.
2. If you have selected CallerIDs for more than one resource (channel), thenthe system will send the CallerID of the resource that routes the call.
For example, let us assume that the outgoing calls are routed throughResource #1 , for which there is one public number defined andassigned to the client owning the extension: 2255. You associate thisnumber with the extension and another one, 6987560, defined forResource #2. When initiating an outgoing call, the callee's phoneterminal will display, if it supports the CallerID function, 2255.
VoipNow Professional 2.5.3 Getting Started 99
3. If the calls are routed through a resource that does not have a publicphone number assigned and you have a CallerID that belong to anotherresource set as default, than the system will send the default CallerID.
For example, let us assume that the outgoing calls are routed through aresource (channel), Resource #1, for which there are no public phonenumbers defined. Your default CallerID is set to 3689, that belongs toanother resource (channel), Resource #3. When initiating an outgoingcall, the callee's phone terminal will display, if it supports the CallerIDfunction, 3689.
◦ Do not send CallerID on public calls [] (Anonymous) - Selectthis check box if you do not want your CallerID to be sent to publicdestinations. The callee's phone terminal will display, if it supports theCallerID function, the Anonymous string.
◦ Trigger call return after {x} seconds of ringing - Use this text box toinsert the number of seconds a caller should wait until the server transfershis connection.
• Callback Number Behavior
◦ Return calls - Use this drop-down list to select the action. You have thefollowing options:
▪ coming from the authorized callerIDs - VoipNow Professionalreturns the call only if it is made from an authorized number.
▪ to the caller callerID - VoipNow Professional returns the calls madefrom any number.
▪ to a fixed number - VoipNow Professional returns the call to apredefined phone number.
Note
In case the coming from the authorized callerIDs option isselected and a user whose callerID is not included in the authorized ID's listtries to route his call through the server, the server will not call back.
In case the to the caller callerID option is selected, and a userwhose callerID is hidden tries to route his call through the server, the serverwill not call back.
◦ Number where calls should be returned - You can use this field onlyif you previously selected the option to a fixed number in the returncalls field. Use this text box to enter a predefined phone number wherethe server will return all calls.
VoipNow Professional 2.5.3 Getting Started 100
◦ Play before disconnecting the call during conversation - Use thiscontrol to select the sound that will be played to the user that madethe call, upon automatically interrupting the conversation (e.g.: a soundannouncing that credit value is 0).
◦ Service client must dial remote party number in {x} seconds - Usethis text box to specify the time interval (in seconds) the user has atits disposal to dial the remote party's number. After this time interval,VoipNow Professional will consider the request as being completed.
• Service Security
◦ Request the following password on callback - Use this text box toenter the password the system should require to the user wishing to routetheir calls through the server.
◦ Request password associated with authorized callerID - Selectthis check box if you want the system to require users their individualpasswords, to verify whether they are included in the authorized callerIDs'list.
◦ User can interrogate the account credit - Select this check box ifyou want to give the users the possibility to find out their credit value,before starting the conversation. After the user is authenticated with oneof the authorized callerIDs he can choose to either interrogate his creditor make a phone call.
Adding a Call Card Extension Account
This extension type allows the implementation of a calling card system onthe VoipNow Professional server.
Calling Card Extension Account Information
Note
For more information on how to define the account information, see the this sectionas the available options are similar for all the extension types.
At the last step, pay attention to select a Call card Extension type.

VoipNow Professional 2.5.3 Getting Started 101
Calling Card Extension Permissions and Phone Numbers
By default, after you enter the extension account information, the Rolesand Phone Numbers for Extension {ext_name} setup page opens. You candefine the permissions and phone numbers or you can choose to customize themlater.
Input form example
• Permissions
Extension is multi user aware selected
Note
This option allows the extension to communicate with the other extensionsavailable on the same client account and to use them when setting upfeatures involving call redirection such as: Ring all, Call forward, Callcascade, etc.
CallerID management selected
Sound management selected
• Limits
Maximum disk space for sound files* 10
Maximum disk space for music on holdfiles*
10
Maximum public concurrent calls* 5
Note
This option allows you to limit the number of active simultaneous calls betweenthe extension and any other public network destination. The maximum valuedepends on the ones set for the extension's parent accounts and cannotexceed the license limitation.
Maximum internal concurrent calls* 50
Note
This option allows you to limit the number of active simultaneous calls betweenthe extension and any other internal network destination. The maximum valuedepends on the ones set for the extension's parent accounts.
VoipNow Professional 2.5.3 Getting Started 102
Maximum concurrent text to speech 5
Note
This option allows you to limit the number of calls that use the text to speechapplication at the same time.
This line is available only if the Allow text to speech option was enabled fromthe Unified Communications >> System Preferences page.
Account expiration date Unlimited
• Incoming Phone Number Selection
• Sharing Policies
Note
The Call card extensions can share only their call history.
Calling Card Extension Information
By default, after you have defined the permissions, you can set up theoptions specific to the chosen extension type.
If you do not want to finalize the process now, skip this step and comeback later by clicking the Call card setup icon available in the extension'smanagement page.
The following options are available:
• Basic Settings
◦ CallerID name in public calls – This feature allows you to customizethe CallerID name that will be displayed on the callee's screen when theextension is calling public destinations. Use the drop-down list to chooseone of the two available options:
▪ Set by server - The callee's phone terminal will display, if it supportsthe CallerID function, the extension owner's Contact name.
▪ Set by user - If you select this option, a text box will be displayed,allowing you to set the CallerID name to a custom alphanumeric value.The value defined here will be displayed by the callee's phone terminal,if it supports the CallerID function.
By default, the text box contains the extension's Contact name .
VoipNow Professional 2.5.3 Getting Started 103
◦ CallerID number in public calls – This feature allows you to customizethe CallerID number that will be displayed on the callee's screen when theextension is calling public destinations. Use the drop-down list to chooseone of the two available options:
▪ Set by server - The callee's phone terminal will display, if it supportsthe CallerID function, the extension's public phone number.
▪ Set by user - If you select this option, a text box will be displayed,allowing you to set the CallerID number to a custom numeric value withthree or more digits. The value defined here will be displayed by thecallee's phone terminal, if it supports the CallerID function.
By default, the text box contains the extension's phone number.
Note
The system can send the CallerID name set by server and the CallerIDnumber set by user or vice-versa.
Note
If you choose the Set by user option, the Currently using CallerID numbersline will be disabled and you will not be able to select a CallerID to beassociated with the extension's outgoing calls.
◦ Currently using CallerID numbers - This feature allows you to chooseone or more CallerID numbers that will be sent when an outgoing call isinitiated. The available numbers are the ones defined for the channel(s)(resource) used for routing the calls to public destinations.
The custom text box displays the CallerID number(s) currently in use.The default number is displayed using bold characters.
To add a CallerID number, click the Change link. A pop-up window will bedisplayed, allowing you to manage the CallerIDs:

VoipNow Professional 2.5.3 Getting Started 104
The CallerIDs pool
Note
In order to be displayed in this list, the public phone number(s) defined forthe channels (resources) used for routing the calls to public destinationsmust be assigned to the client owning this extension.
Note
It is possible to assign CallerIDs associated with DIDs that are on the clientpool, but that have not been assigned to any extension.
The following details are available in the Public Phone Numbers table:
▪ CallerID number - The CallerID of the DID assigned to the clientowning this extension.
This will be the Caller ID number displayed by the callee's phoneterminal when receiving a call from this extension.
Note
The public phone numbers can be defined for a certain channel fromthe Channels >> Channel {channel_name} management >> Addpublic phone numbers to channel {channel_name} page. For moreinformation, see this section.
▪ Rings back to - The extension that rings the DID associated with thisCallerID. If the CallerID was not assigned to the extension, then '-' isdisplayed.

VoipNow Professional 2.5.3 Getting Started 105
Note
The public phone numbers can be assigned to the extension from theRoles and Phone Numbers for Extension {extension_name} page.
▪ Resource - The ID of the channel the public phone number was definedfor.
▪ Default - The CallerID's status:
• Set as default - A CallerID can be set as default if:
◦ it is associated with the extension
Note
A CallerID can be set as default even if it has not been assigned tothe extension's DID pool!
◦ it is not the default CallerID
• Yes - The CallerID is associated with the extension and it is the defaultone.
• - - The CallerID has not been associated with this extension andcannot be used for outgoing calls.
To associate a CallerID with the extension, follow the next steps:
1.Select the corresponding check box(es).
2.Click the Assign CallerIDs link
To disassociate a CallerID, follow he next steps:
1.Select the corresponding check box(es).
2.Click the Remove selected link. You will be asked to confirm theaction.
Caution
When associating more than one CallerIDs to the extension, keep in mindthe following:
1. If you have selected more than one CallerIDs for a resource (channel),then the system will send a random one to the public destination.
For example, let us assume that the outgoing calls are routed througha resource (channel), Resource #1, for which there are three publicphone numbers defined and assigned to the client owning the extension:
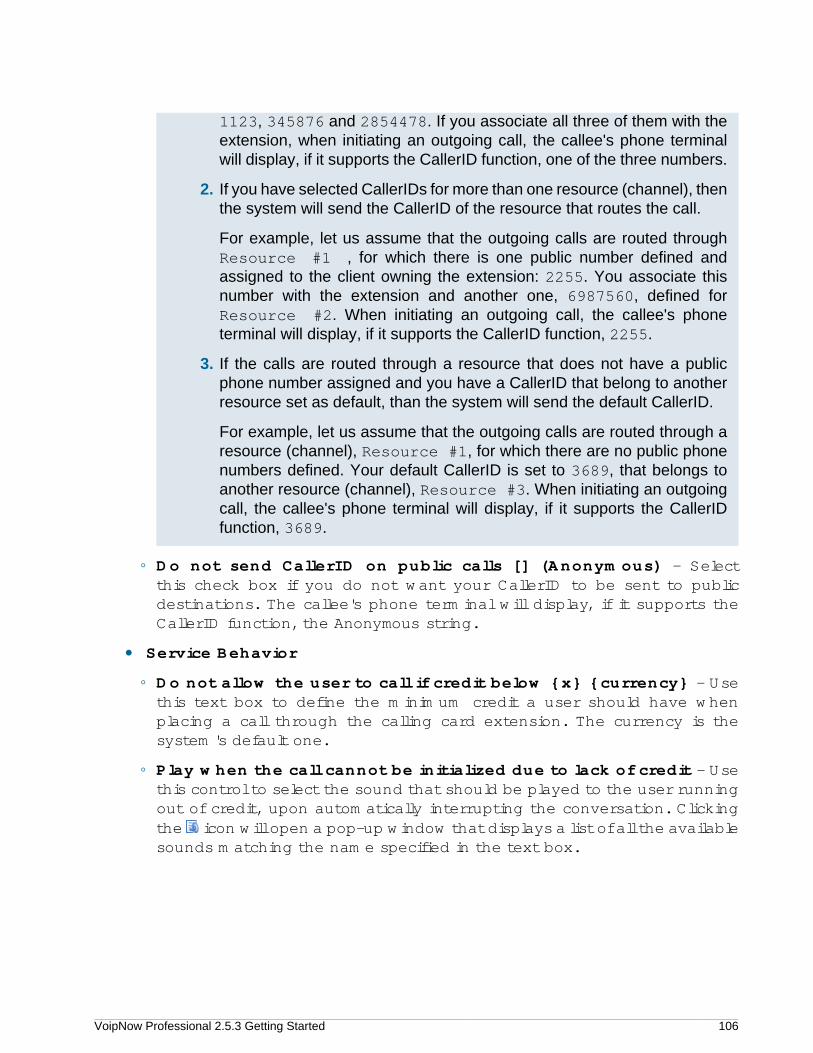
VoipNow Professional 2.5.3 Getting Started 106
1123, 345876 and 2854478. If you associate all three of them with theextension, when initiating an outgoing call, the callee's phone terminalwill display, if it supports the CallerID function, one of the three numbers.
2. If you have selected CallerIDs for more than one resource (channel), thenthe system will send the CallerID of the resource that routes the call.
For example, let us assume that the outgoing calls are routed throughResource #1 , for which there is one public number defined andassigned to the client owning the extension: 2255. You associate thisnumber with the extension and another one, 6987560, defined forResource #2. When initiating an outgoing call, the callee's phoneterminal will display, if it supports the CallerID function, 2255.
3. If the calls are routed through a resource that does not have a publicphone number assigned and you have a CallerID that belong to anotherresource set as default, than the system will send the default CallerID.
For example, let us assume that the outgoing calls are routed through aresource (channel), Resource #1, for which there are no public phonenumbers defined. Your default CallerID is set to 3689, that belongs toanother resource (channel), Resource #3. When initiating an outgoingcall, the callee's phone terminal will display, if it supports the CallerIDfunction, 3689.
◦ Do not send CallerID on public calls [] (Anonymous) - Selectthis check box if you do not want your CallerID to be sent to publicdestinations. The callee's phone terminal will display, if it supports theCallerID function, the Anonymous string.
• Service Behavior
◦ Do not allow the user to call if credit below {x} {currency} - Usethis text box to define the minimum credit a user should have whenplacing a call through the calling card extension. The currency is thesystem's default one.
◦ Play when the call cannot be initialized due to lack of credit - Usethis control to select the sound that should be played to the user runningout of credit, upon automatically interrupting the conversation. Clickingthe icon will open a pop-up window that displays a list of all the availablesounds matching the name specified in the text box.

VoipNow Professional 2.5.3 Getting Started 107
Selecting a sound file
The following information is provided:
▪ Listen - Use the available controls to listen to the message. Thesound's total length is displayed as well, using the hours : minutes :seconds format.
If you want download the sound on your hard drive, click the iconand confirm your choice.
▪ Name - The name of the sound file. Click the link to select it.
▪ Folder - This column displays the file's folder location.
Note
The path will display the folder name and also its origin:
//// placed before the name of a folder signals the admin's default folder.
/// placed before the name of a folder signals the reseller's default folder.
// placed before the name of a folder signals the client's default folder.
/ placed before the name of a folder signals the extension's default folder.
◦ Play before disconnecting the call during conversation - Use thiscontrol to select the sound that should be played to the user that madethe call, upon automatically interrupting the conversation.
VoipNow Professional 2.5.3 Getting Started 108
◦ User can interrogate the account credit - Select this check box if youwant to give the users the possibility to find out their credit value, beforestarting the conversation. After the user is authenticated with one of thecard codes he can choose to either interrogate his credit or make a phonecall.
◦ Service client must dial remote party number in {x} seconds - Usethis text box to specify the time interval (in seconds) the user has at itsdisposal to dial the remote party number. After this time interval, VoipNowProfessional will consider the request as being completed.
Adding a Intercom/Paging Extension Account
This extension type allows the user to call several or all the availableextensions in the same time. The called extensions will hear the caller'sannouncements whether they pick up the phone or not.
Intercom/Paging Extension Account Information
Note
For more information on how to define the account information, see the this sectionas the available options are similar for all the extension types.
At the last step, pay attention to select a IVR Extension type.
Intercom/Paging Extension Permissions and PhoneNumbers
By default, after you enter the extension account information, the Rolesand Phone Numbers for Extension {ext_name} setup page opens. You candefine the permissions and phone numbers or you can choose to customize themlater.
Input form example
• Permissions
Extension is multi user aware selected

VoipNow Professional 2.5.3 Getting Started 109
Note
This option allows the extension to communicate with the other extensionsavailable on the same client account and to use them when setting upfeatures involving call redirection such as: Ring all, Call forward, Callcascade, etc.
CallerID management selected
Sound management selected
• Limits
Maximum disk space for sound files* 10
Maximum disk space for music on holdfiles*
10
Maximum public concurrent calls* 5
Note
This option allows you to limit the number of active simultaneous calls betweenthe extension and any other public network destination. The maximum valuedepends on the ones set for the extension's parent accounts and cannotexceed the license limitation.
Maximum internal concurrent calls* 50
Note
This option allows you to limit the number of active simultaneous calls betweenthe extension and any other internal network destination. The maximum valuedepends on the ones set for the extension's parent accounts.
Maximum concurrent text to speech 5
Note
This option allows you to limit the number of calls that use the text to speechapplication at the same time.
This line is available only if the Allow text to speech option was enabled fromthe Unified Communications >> System Preferences page.
VoipNow Professional 2.5.3 Getting Started 110
Account expiration date Unlimited
• Incoming Phone Number Selection
• Sharing Policies
Note
The Intercom/paging extensions can share only their call history.
Intercom/Paging Extension Information
By default, after you have defined the permissions, you can set up theoptions specific to the chosen extension type.
If you do not want to finalize the process now, skip this step and come backlater by clicking the Intercom/paging setup icon available in the extension'smanagement page.
The following options are available:
Note
In order to add/remove numbers or groups to/from the lists, you have to click the button. The Choose extensions/groups window will pop up, allowing you to selectthe extensions/groups that you want to add/remove.
• Basic Settings
◦ Type - You are able to choose between:
▪ 2 way intercom - The called extensions are able to talk back to thecaller.
▪ 1 way paging - The called extensions cannot talk back to the caller.
◦ Alert-Info header
◦ Call-Info header
Note
In order for intercom/paging to work, the Alert-Info and the Call-Infoheaders must be sent from the VoipNow Professional to the client's phoneterminal. If the phone terminal supports intercom/paging and if it is able toread those headers, then it will automatically answer and you will not berequired to fill in anything in these two fields.
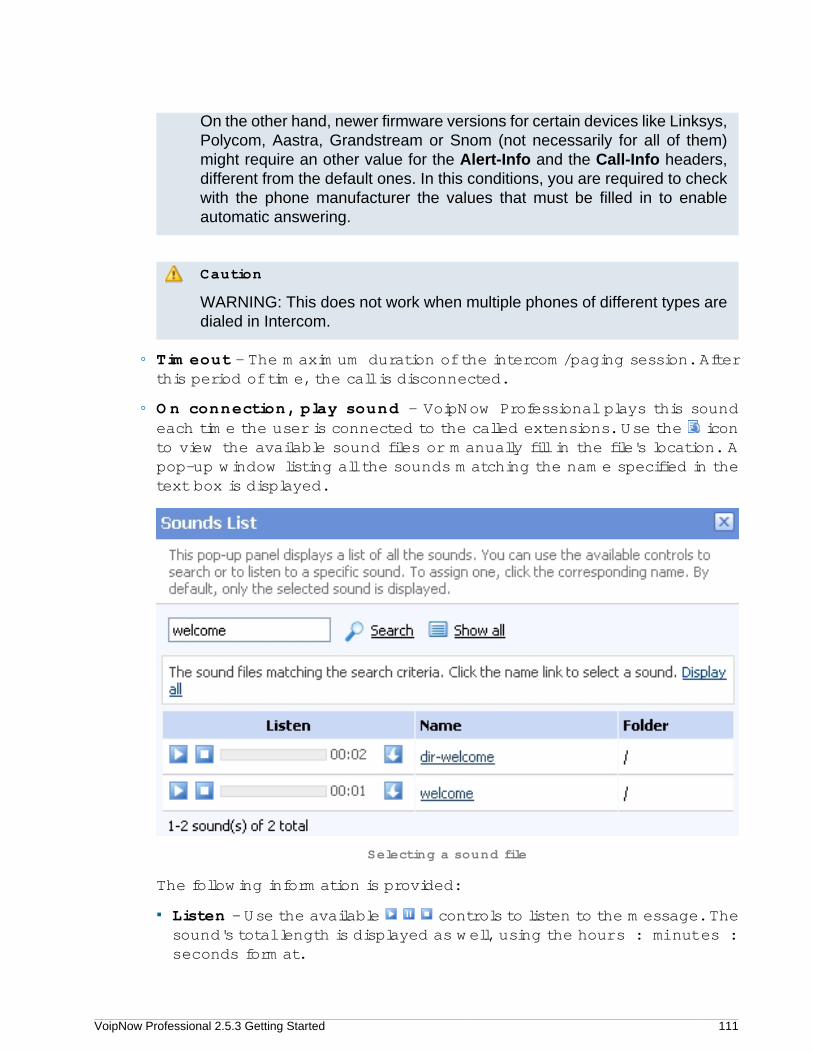
VoipNow Professional 2.5.3 Getting Started 111
On the other hand, newer firmware versions for certain devices like Linksys,Polycom, Aastra, Grandstream or Snom (not necessarily for all of them)might require an other value for the Alert-Info and the Call-Info headers,different from the default ones. In this conditions, you are required to checkwith the phone manufacturer the values that must be filled in to enableautomatic answering.
Caution
WARNING: This does not work when multiple phones of different types aredialed in Intercom.
◦ Timeout - The maximum duration of the intercom/paging session. Afterthis period of time, the call is disconnected.
◦ On connection, play sound - VoipNow Professional plays this soundeach time the user is connected to the called extensions. Use the iconto view the available sound files or manually fill in the file's location. Apop-up window listing all the sounds matching the name specified in thetext box is displayed.
Selecting a sound file
The following information is provided:
▪ Listen - Use the available controls to listen to the message. Thesound's total length is displayed as well, using the hours : minutes :seconds format.
VoipNow Professional 2.5.3 Getting Started 112
If you want download the sound on your hard drive, click the iconand confirm your choice.
▪ Name - The name of the sound file. Click the link to select it.
▪ Folder - This column displays the file's folder location.
Note
The path will display the folder name and also its origin:
//// placed before the name of a folder signals the admin's default folder.
/// placed before the name of a folder signals the reseller's default folder.
// placed before the name of a folder signals the client's default folder.
/ placed before the name of a folder signals the extension's default folder.
◦ Caller permission for all extensions - If this option is enabled, all theavailable extensions are allowed to call the Intercom/paging extension.If this option is disabled, you will be able to manually assign individualpermissions from the Caller permission area.
◦ Allow intercom calls to all extensions at once - When this option isenabled, the intercom calls are allowed to call all the available extensionsin the same time.
• Caller Permission - Use this section to specify the extensions that areallowed to call the Intercom/paging extension.
◦ Individual extensions - Specify the extensions that are allowed to callthe Intercom/paging extension.
◦ Groups - Specify the extension groups that are allowed to call theIntercom/paging extension.
• Allow Intercom Calls To - Use this section to specify the extensions thatcan be called by the Intercom/paging extension.
◦ Individual extensions - Specify the extensions that can be called bythe Intercom/paging extension
◦ Groups - Specify the extension groups that can be called by theIntercom/paging extension.
Adding a Queue Login Center Extension Account
Starting VoipNow Professional 2.5.0, the remote agents can log in to aqueue by using the newly created Queue login center extension. To do so, a
VoipNow Professional 2.5.3 Getting Started 113
remote agent has to call the Queue login center extension, dial his AgentIDfollowed by the # key and the login PIN of the queue he wishes to connect to. Ifthe authentication is successful, the remote agent will be logged in to the queueand will behave like a local agent.
A local extension can call the Queue login center to authenticate a remoteagent by dialing his AgentID and the PIN of the queue the remote agent willbe connected to.
Note
A remote user must be defined from interface as a remote agent in order to be ableto login to a queue!
Queue Login Center Extension Account Information
Note
For more information on how to define the account information, see the this sectionas the available options are similar for all the extension types.
At the last step, pay attention to select a Queue login center Extension type.
Queue Login Center Extension Permissions and PhoneNumbers
By default, after you enter the extension account information, the Rolesand Phone Numbers for Extension {ext_name} setup page opens. You candefine the permissions and phone numbers or you can choose to customize themlater.
Input form example
• Permissions
Extension is multi user aware selected
Note
This option allows the extension to communicate with the other extensionsavailable on the same client account and to use them when setting upfeatures involving call redirection such as: Ring all, Call forward, Callcascade, etc.
VoipNow Professional 2.5.3 Getting Started 114
CallerID management selected
Sound management selected
• Limits
Maximum disk space for sound files* 10
Maximum disk space for music on holdfiles*
10
Maximum public concurrent calls* 5
Note
This option allows you to limit the number of active simultaneous calls betweenthe extension and any other public network destination. The maximum valuedepends on the ones set for the extension's parent accounts and cannotexceed the license limitation.
Maximum internal concurrent calls* 50
Note
This option allows you to limit the number of active simultaneous calls betweenthe extension and any other internal network destination. The maximum valuedepends on the ones set for the extension's parent accounts.
Maximum concurrent text to speech 5
Note
This option allows you to limit the number of calls that use the text to speechapplication at the same time.
This line is available only if the Allow text to speech option was enabled fromthe Unified Communications >> System Preferences page.
Account expiration date Unlimited
• Incoming Phone Number Selection
• Sharing Policies
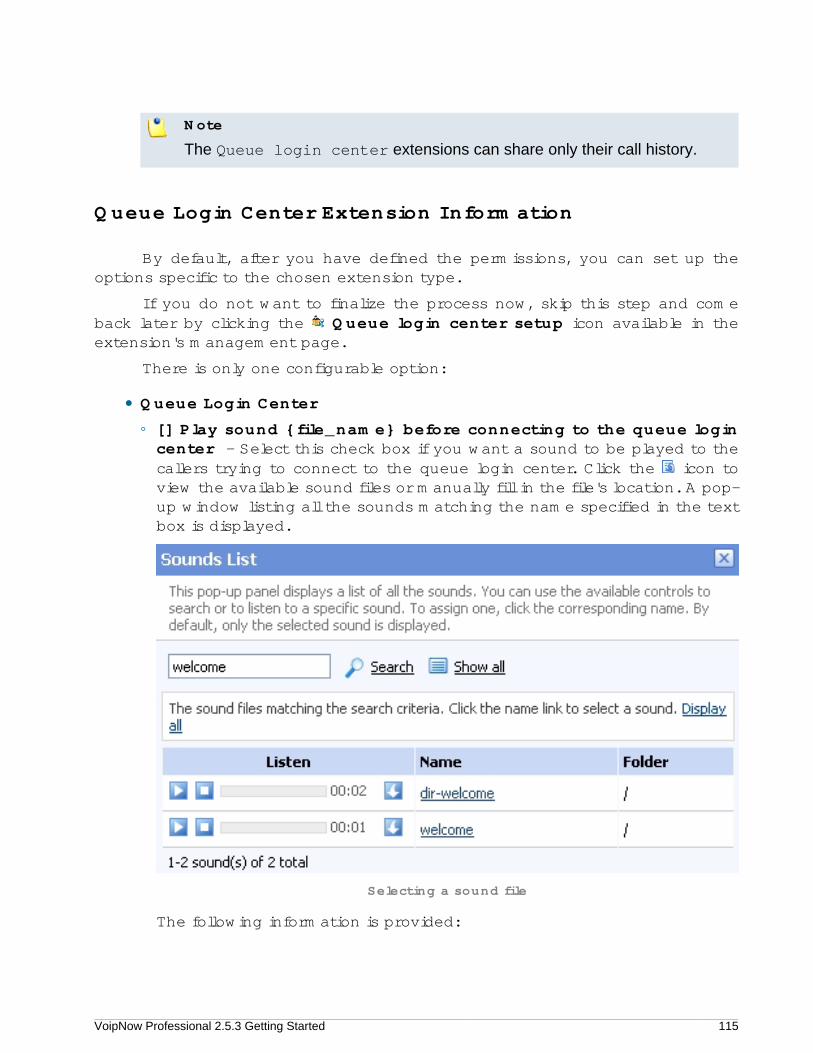
VoipNow Professional 2.5.3 Getting Started 115
Note
The Queue login center extensions can share only their call history.
Queue Login Center Extension Information
By default, after you have defined the permissions, you can set up theoptions specific to the chosen extension type.
If you do not want to finalize the process now, skip this step and comeback later by clicking the Queue login center setup icon available in theextension's management page.
There is only one configurable option:
• Queue Login Center
◦ [] Play sound {file_name} before connecting to the queue logincenter - Select this check box if you want a sound to be played to thecallers trying to connect to the queue login center. Click the icon toview the available sound files or manually fill in the file's location. A pop-up window listing all the sounds matching the name specified in the textbox is displayed.
Selecting a sound file
The following information is provided:

VoipNow Professional 2.5.3 Getting Started 116
▪ Listen - Use the available controls to listen to the message. Thesound's total length is displayed as well, using the hours : minutes :seconds format.
If you want download the sound on your hard drive, click the iconand confirm your choice.
▪ Name - The name of the sound file. Click the link to select it.
▪ Folder - This column displays the file's folder location.
Note
The path will display the folder name and also its origin:
//// placed before the name of a folder signals the admin's default folder.
/// placed before the name of a folder signals the reseller's default folder.
// placed before the name of a folder signals the client's default folder.
/ placed before the name of a folder signals the extension's default folder.
VoipNow Professional 2.5.3 Getting Started 117
Chapter 6Configuring a Phone Extension
After you have created a Phone terminal type extension, you can connecta phone to the system and make calls. In order to do this, you need a softwareor a hardware SIP phone. Most phones require the following details:
• Username – The user name is displayed in the extension context, in theExtension Overview section.
• Password – The password is the same with the extension user interfacepassword, setup on account creation. The password can also be edited inEdit Extension Information page.
• SIP Server – The address of the SIP server is the IP or hostname of theserver where VoipNow Professional is installed.
• SIP Proxy Address – You can setup it with the same value as the SIPserver address.
The phone terminal will report the status of the connection to the system.You can try an echo test to check if the connection is OK. In order to performthis test, dial *52 from your extension phone keypad. Check the Phone Getting

VoipNow Professional 2.5.3 Getting Started 118
Started manual for more details about all features that can be accessed overthe phone.
When the extension is registered in the system, you can also see it in theVoipNow Professional interface. Go to the extension context and if your phoneterminal is registered it will appear in the Extension Overview section.

VoipNow Professional 2.5.3 Getting Started 119
Chapter 7Contact and Support
For online help and support please visit:
• Support Zone: https://help.4psa.com
• Knowledge Base: http://kb.4psa.com
• Documentation: http://help.4psa.com/docs/
For mailing addresses and phone numbers from our offices:
http://www.4psa.com/contactus
If you have any question, do not hesitate to contact us.

VoipNow Professional 2.5.3 Getting Started 120
IndexAAdmin contact information, 6
BBasic settings, 42
CCallback number behavior, 99Caller behavior, 71Calling features, 48Call recording, 54Channel costs
Add costs manually, 20Clone, 19Setup, 18Upload file, 19
Charge method, 24Charging plan, 22Client account, 32Clone IVR, 81Conference settings, 51, 90Configure phone extension, 117
FFax center, 52
IIndividual days, 9Instant messaging, 48Interval, 9IVR
Actions, 82
LLocal agents behavior, 69Login, first time, 5
MMusic on hold, 82
PProvisioning, 57, 58
Public phone numbers, 16Manually add public phone numbers,17Upload public phone numbers, 16
QQueue behavior, 76Queue general preferences, 67Queue login center, 112
RRecord conference, 91Reseller account
Information, 26Permissions and phone numbers, 27
Routing rules, 20
SScheduled conferences, 92Service behavior, 106Service security, 100SIP channels, 9SIP preferences, 61Sound files setup, 73System configuration wizard, 6
TText to speech, 30Time intervals, 8
UUnified Communications, 7
VVoicemail, 49