Embed Size (px)
DESCRIPTION
The Warmaster 40K Forum: http://www.thewarmaster.comMy 40K YouTube Channel: https://www.youtube.com/user/WayOfSaimHannMy Wargaming Blog: http://www.wargamerfritz.com
Citation preview
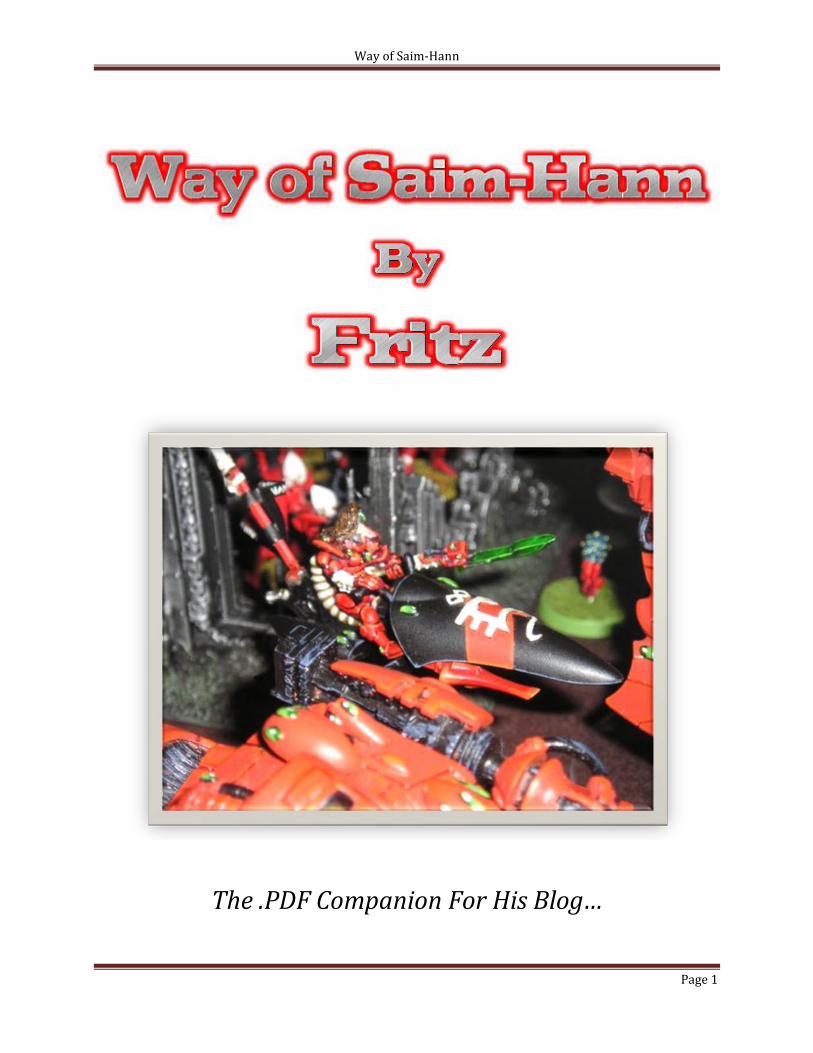
Way of Saim-Hann
Page 1
The .PDF Companion For His Blog…
Way of Saim-Hann
Page 2
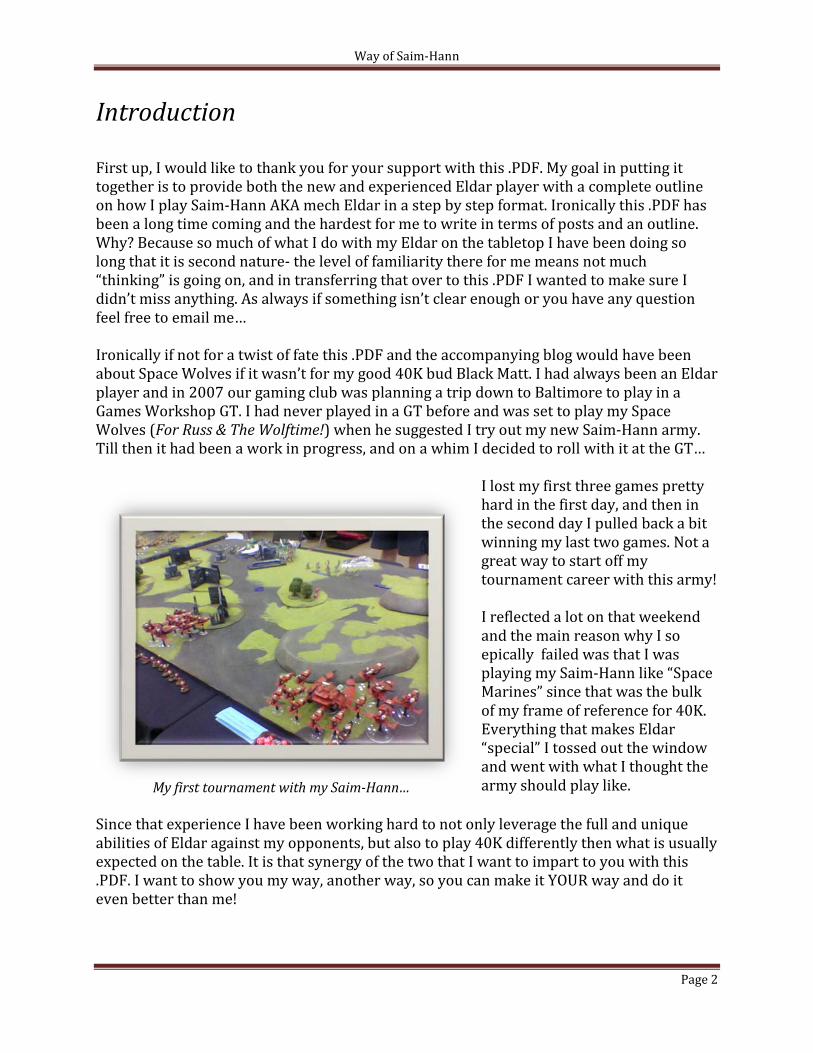
Introduction First up, I would like to thank you for your support with this .PDF. My goal in putting it together is to provide both the new and experienced Eldar player with a complete outline on how I play Saim-Hann AKA mech Eldar in a step by step format. Ironically this .PDF has been a long time coming and the hardest for me to write in terms of posts and an outline. Why? Because so much of what I do with my Eldar on the tabletop I have been doing so long that it is second nature- the level of familiarity there for me means not much “thinking” is going on, and in transferring that over to this .PDF I wanted to make sure I didn’t miss anything. As always if something isn’t clear enough or you have any question feel free to email me… Ironically if not for a twist of fate this .PDF and the accompanying blog would have been about Space Wolves if it wasn’t for my good 40K bud Black Matt. I had always been an Eldar player and in 2007 our gaming club was planning a trip down to Baltimore to play in a Games Workshop GT. I had never played in a GT before and was set to play my Space Wolves (For Russ & The Wolftime!) when he suggested I try out my new Saim-Hann army. Till then it had been a work in progress, and on a whim I decided to roll with it at the GT…
My first tournament with my Saim-Hann…
I lost my first three games pretty hard in the first day, and then in the second day I pulled back a bit winning my last two games. Not a great way to start off my tournament career with this army! I reflected a lot on that weekend and the main reason why I so epically failed was that I was playing my Saim-Hann like “Space Marines” since that was the bulk of my frame of reference for 40K. Everything that makes Eldar “special” I tossed out the window and went with what I thought the army should play like.
Since that experience I have been working hard to not only leverage the full and unique abilities of Eldar against my opponents, but also to play 40K differently then what is usually expected on the table. It is that synergy of the two that I want to impart to you with this .PDF. I want to show you my way, another way, so you can make it YOUR way and do it even better than me!
Way of Saim-Hann
Page 3
First Things First! We are going to start things off with my 1750 point army list as the example for this .PDF. It is what I use to get concepts across and the list never changes regardless of my opponent or the tournament I am playing in. Perhaps your list is similar, perhaps it isn’t. Look at the units I am using, their role in the strategy, and then adapt your list to mimic what I am doing.
YouTube Attack, Support, Defense: http://www.youtube.com/watch?v=h05PVp2ek5Q
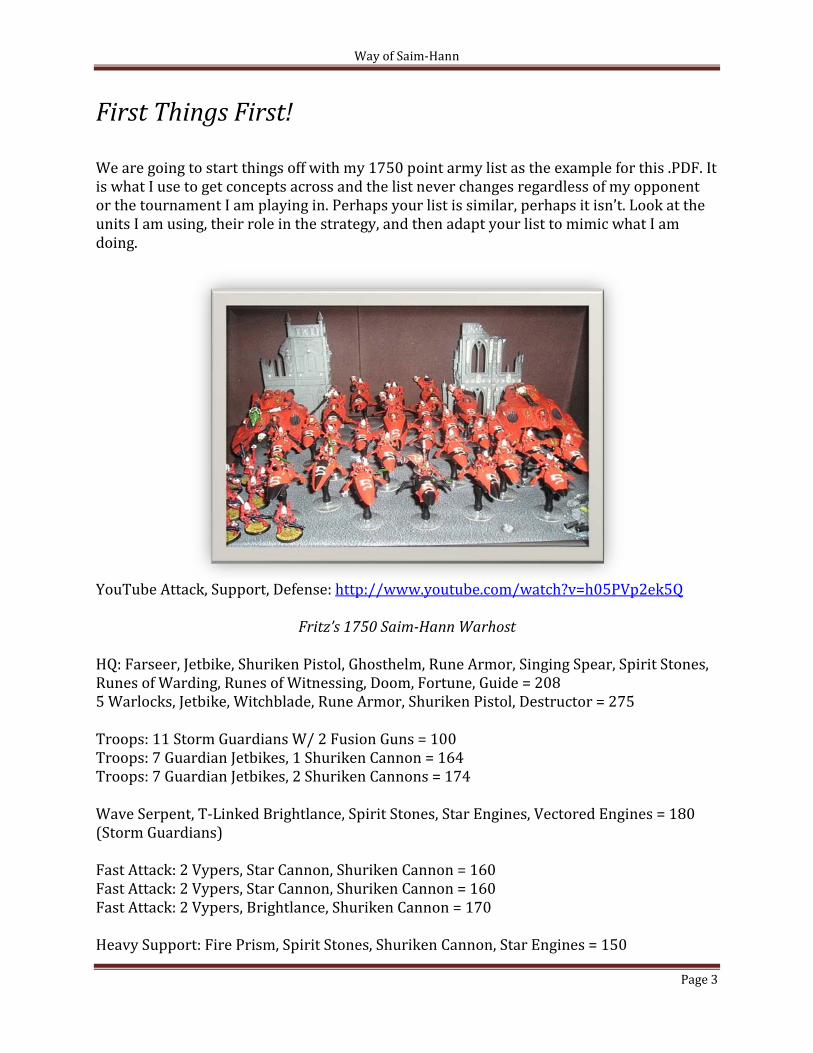
Fritz’s 1750 Saim-Hann Warhost HQ: Farseer, Jetbike, Shuriken Pistol, Ghosthelm, Rune Armor, Singing Spear, Spirit Stones, Runes of Warding, Runes of Witnessing, Doom, Fortune, Guide = 208 5 Warlocks, Jetbike, Witchblade, Rune Armor, Shuriken Pistol, Destructor = 275 Troops: 11 Storm Guardians W/ 2 Fusion Guns = 100 Troops: 7 Guardian Jetbikes, 1 Shuriken Cannon = 164 Troops: 7 Guardian Jetbikes, 2 Shuriken Cannons = 174 Wave Serpent, T-Linked Brightlance, Spirit Stones, Star Engines, Vectored Engines = 180 (Storm Guardians) Fast Attack: 2 Vypers, Star Cannon, Shuriken Cannon = 160 Fast Attack: 2 Vypers, Star Cannon, Shuriken Cannon = 160 Fast Attack: 2 Vypers, Brightlance, Shuriken Cannon = 170 Heavy Support: Fire Prism, Spirit Stones, Shuriken Cannon, Star Engines = 150
Way of Saim-Hann
Page 4
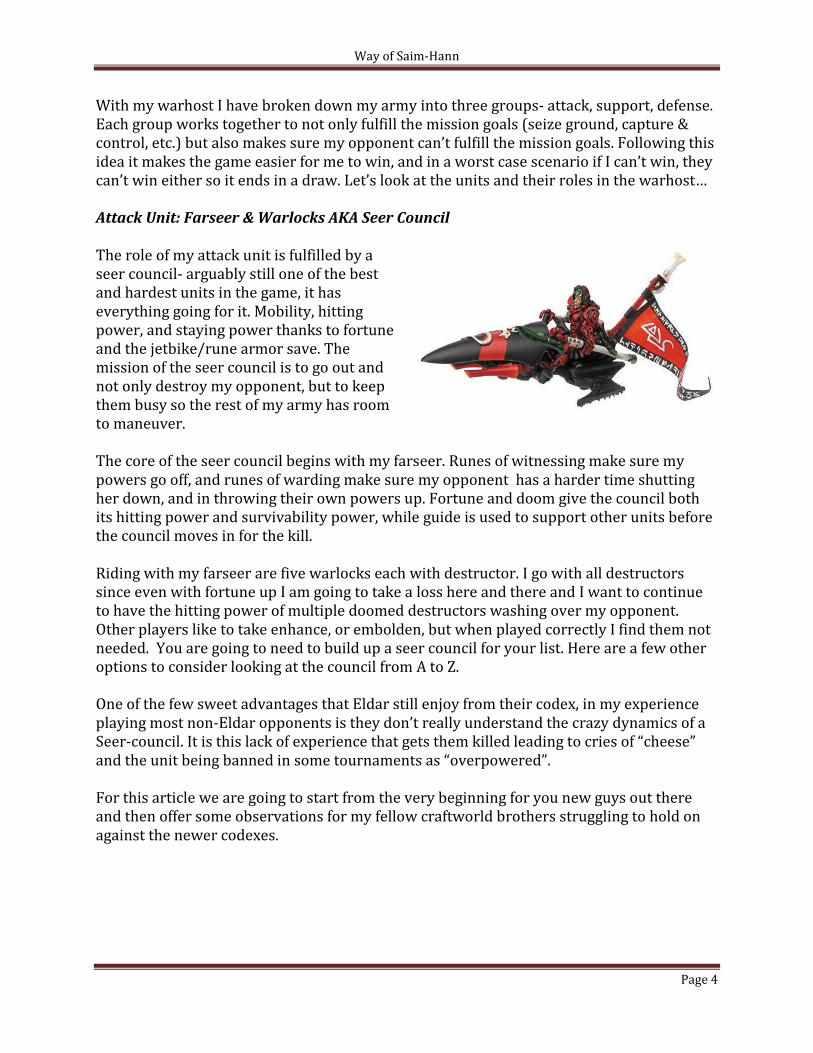
With my warhost I have broken down my army into three groups- attack, support, defense. Each group works together to not only fulfill the mission goals (seize ground, capture & control, etc.) but also makes sure my opponent can’t fulfill the mission goals. Following this idea it makes the game easier for me to win, and in a worst case scenario if I can’t win, they can’t win either so it ends in a draw. Let’s look at the units and their roles in the warhost… Attack Unit: Farseer & Warlocks AKA Seer Council The role of my attack unit is fulfilled by a seer council- arguably still one of the best and hardest units in the game, it has everything going for it. Mobility, hitting power, and staying power thanks to fortune and the jetbike/rune armor save. The mission of the seer council is to go out and not only destroy my opponent, but to keep them busy so the rest of my army has room to maneuver.
The core of the seer council begins with my farseer. Runes of witnessing make sure my powers go off, and runes of warding make sure my opponent has a harder time shutting her down, and in throwing their own powers up. Fortune and doom give the council both its hitting power and survivability power, while guide is used to support other units before the council moves in for the kill. Riding with my farseer are five warlocks each with destructor. I go with all destructors since even with fortune up I am going to take a loss here and there and I want to continue to have the hitting power of multiple doomed destructors washing over my opponent. Other players like to take enhance, or embolden, but when played correctly I find them not needed. You are going to need to build up a seer council for your list. Here are a few other options to consider looking at the council from A to Z.
One of the few sweet advantages that Eldar still enjoy from their codex, in my experience playing most non-Eldar opponents is they don’t really understand the crazy dynamics of a Seer-council. It is this lack of experience that gets them killed leading to cries of “cheese” and the unit being banned in some tournaments as “overpowered”. For this article we are going to start from the very beginning for you new guys out there and then offer some observations for my fellow craftworld brothers struggling to hold on against the newer codexes.
Way of Saim-Hann
Page 5
What is a Seer-council?
A council is a group of warlocks that accompany a Farseer with both groups of model's psychic powers working off each other. Available on foot or mounted on jetbikes, the current “best” option is putting them on jetbikes for the mobility, range of threat, and so they can keep up with the rest of your mechanized warhost. What Makes Councils so Dangerous?
Mounted on jetbikes, the unit gets a 3+ armor save/3+ cover save from turbo-boosting, plus their invulnerable rune armor save of a 4+. When this is combined with the farseer psychic power Fortune the entire unit gets to re-roll those saves. Hit me with a las-cannon; I get to make a 4+ save that I can re-roll. Having the 4+ invulnerable save also means I don’t have to hug cover all the time, and when I do have to move thought it dangerous terrain tests are a joke! If I roll that “1” I get a 4+ invul save that I can then re-roll due to fortune. So just from this alone we have a tough and fast unit. When you combine this with the offensive capability of the Seer-council things click into place. Each warlock you take get's their own psyker power; the most popular being Destructor which is a heavy flamer template, but Embolden for the LD reroll and Enhance for the +1 I are also popular. When these powers get combined with Doom we have something like this… The council fortunes up and then dooms a nearby enemy unit. Now the council gets to re-roll failed saves and re-roll failed wounds on the enemy unit. Council moves out 12” getting close to the unit and then drops X number of heavy flamer templates for the number of warlocks in the unit. Any failed wounds then get re-rolled. Scoring 20-30 wounds with a full sized council is often easy to do. If you are on the receiving end of that and still alive what follows is an assault with the witchblades. Each warlock and Farseer carries a witchblade (or singing spear) that wounds on a 2+ no matter your toughness or counts as a S9 hit against vehicles. Timed with a good wash of destructor and assault not much will still be standing. Fortune then shrugs off any shots and the Eldar player rinses and repeats down the table.
Way of Saim-Hann
Page 6
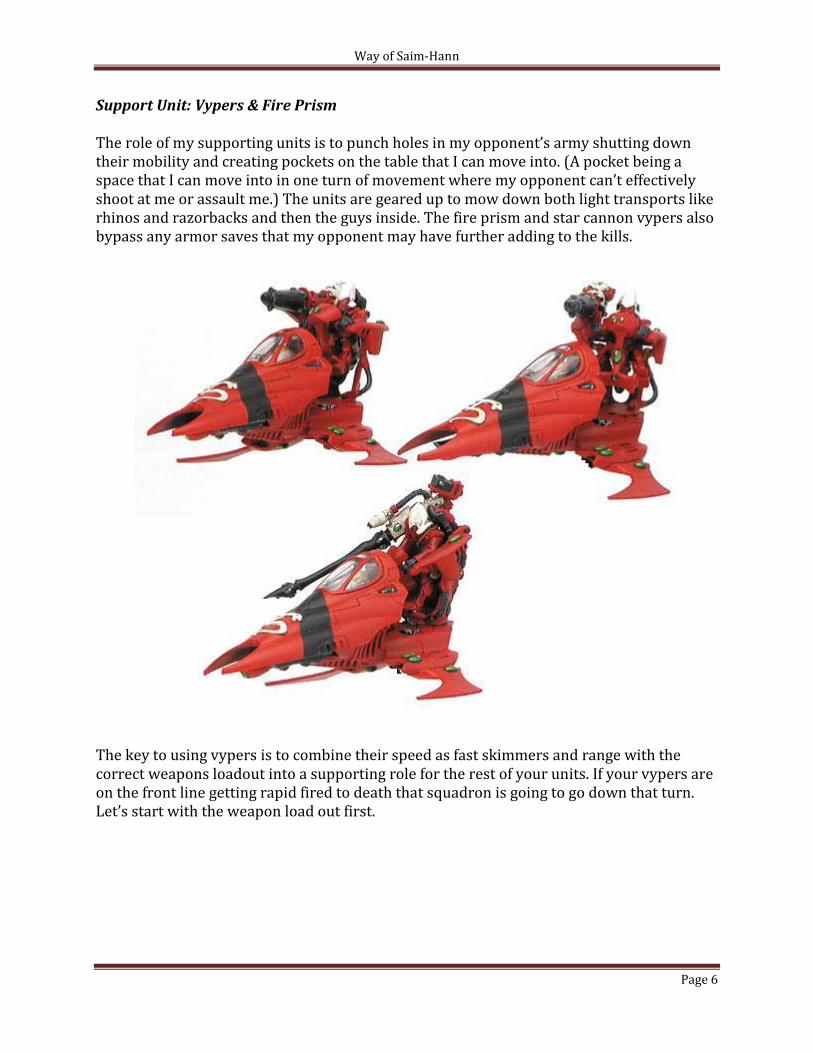
Support Unit: Vypers & Fire Prism The role of my supporting units is to punch holes in my opponent’s army shutting down their mobility and creating pockets on the table that I can move into. (A pocket being a space that I can move into in one turn of movement where my opponent can’t effectively shoot at me or assault me.) The units are geared up to mow down both light transports like rhinos and razorbacks and then the guys inside. The fire prism and star cannon vypers also bypass any armor saves that my opponent may have further adding to the kills.
The key to using vypers is to combine their speed as fast skimmers and range with the correct weapons loadout into a supporting role for the rest of your units. If your vypers are on the front line getting rapid fired to death that squadron is going to go down that turn. Let’s start with the weapon load out first.
Way of Saim-Hann
Page 7
Arming The Vyper The vyper has a back mounted turret which can be either a star cannon, brightlance, shuriken cannon, EML, or scatter laser. By default it also comes with a twin linked shuriken catapult on the underside which can be upgraded to a shuriken cannon. Unless you are filling a specific gap in your army the scatter laser is the best choice for the vyper turret. Four shots make up for hitting on a 4+ and S6 has some decent hitting power against a variety of targets- infantry, monstrous creatures, and light armor. Second to the scatter laser is the star cannon. Even though its pricy and only kicks out 2 shots, the fact is that the majority of people play space marines. Star cannons make space marines cry when your frag them out in the open with no cover saves around. As for the other two: the shuriken cannon only has a 24” range, we want that 36”, and brightlances are beyond expensive for a single S:8 shot even with the lance ability. There are better Eldar anti-tank options. The missile launcher kind of falls in the middle with the single shot or template, but neither option is really that good. A single shot can miss, and a frag grenade template really isn’t killing that much if it finds its mark. Regardless of your turret, you want to also go with the under slung shuriken cannon upgrade for more firepower and something else to pop off if you get hit with a weapon destroyed. Keeping it a shuriken catapult means you have to be 12” away from your target, and this is bad… Using The Vyper So, let’s look at a squadron of three vypers with scatter lasers and shuriken cannons = 16 S6 shots at 36” and 12 S6 shots at 24”. Mobility and range is the key to using these shots. With the range and ability to move 12” and fire at 36” engaging vehicles on side armor vypers have some nice anti-armor punch. Often I’ll use one group to crack open a transport and the other to gun down the dudes inside. Guys laugh when I say S:6 shreds armor, thinking everything in 40K is always striking the front armor. Side and even rear shots become the norm with the vyper's mobility. vypers also work as supporting wolf-pack units. Soften up an infantry unit at range and then send in the jetbikes to finish the job. Which detours out over to war walkers for a moment. Cheaper, more shots, and not open topped war walkers are more or less a static unit. Sure they can outflank, but once they enter the game they can’t redeploy like vypers can. Less shots with the ability to be almost anywhere on the table next turn is huge! Being AV 10 war walkers are still vulnerable to everything but a grott so they need cover. vypers can create their own cover which brings us to the squadron issue.
Way of Saim-Hann
Page 8
If half the unit is in cover you get cover saves to negate incoming shots. Vehicles fire from the gun/turret and the top turret peeks nicely over wave serpents and fire prisms. If you can’t use terrain to collect a cover save, park that energy field Wave Serpent in front of the vyper squadron. Often I’ll have a wave serpent move fast right up to my vypers so it collects the cover saves. vypers fire away, and then the wave serpent star engines right in front of the vypers for cover saves all around. YouTube Vyperology: http://www.youtube.com/watch?v=dLEaGv_CoR8 Fire Prisms
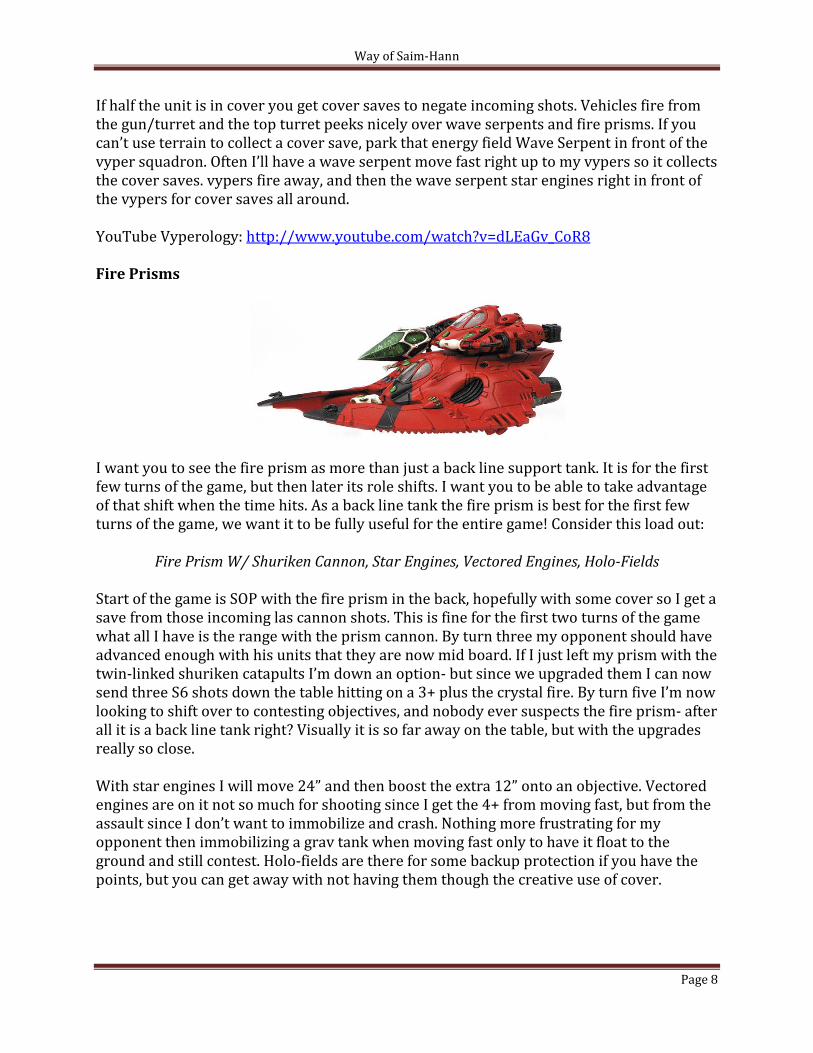
I want you to see the fire prism as more than just a back line support tank. It is for the first few turns of the game, but then later its role shifts. I want you to be able to take advantage of that shift when the time hits. As a back line tank the fire prism is best for the first few turns of the game, we want it to be fully useful for the entire game! Consider this load out:
Fire Prism W/ Shuriken Cannon, Star Engines, Vectored Engines, Holo-Fields Start of the game is SOP with the fire prism in the back, hopefully with some cover so I get a save from those incoming las cannon shots. This is fine for the first two turns of the game what all I have is the range with the prism cannon. By turn three my opponent should have advanced enough with his units that they are now mid board. If I just left my prism with the twin-linked shuriken catapults I’m down an option- but since we upgraded them I can now send three S6 shots down the table hitting on a 3+ plus the crystal fire. By turn five I’m now looking to shift over to contesting objectives, and nobody ever suspects the fire prism- after all it is a back line tank right? Visually it is so far away on the table, but with the upgrades really so close. With star engines I will move 24” and then boost the extra 12” onto an objective. Vectored engines are on it not so much for shooting since I get the 4+ from moving fast, but from the assault since I don’t want to immobilize and crash. Nothing more frustrating for my opponent then immobilizing a grav tank when moving fast only to have it float to the ground and still contest. Holo-fields are there for some backup protection if you have the points, but you can get away with not having them though the creative use of cover.
Way of Saim-Hann
Page 9
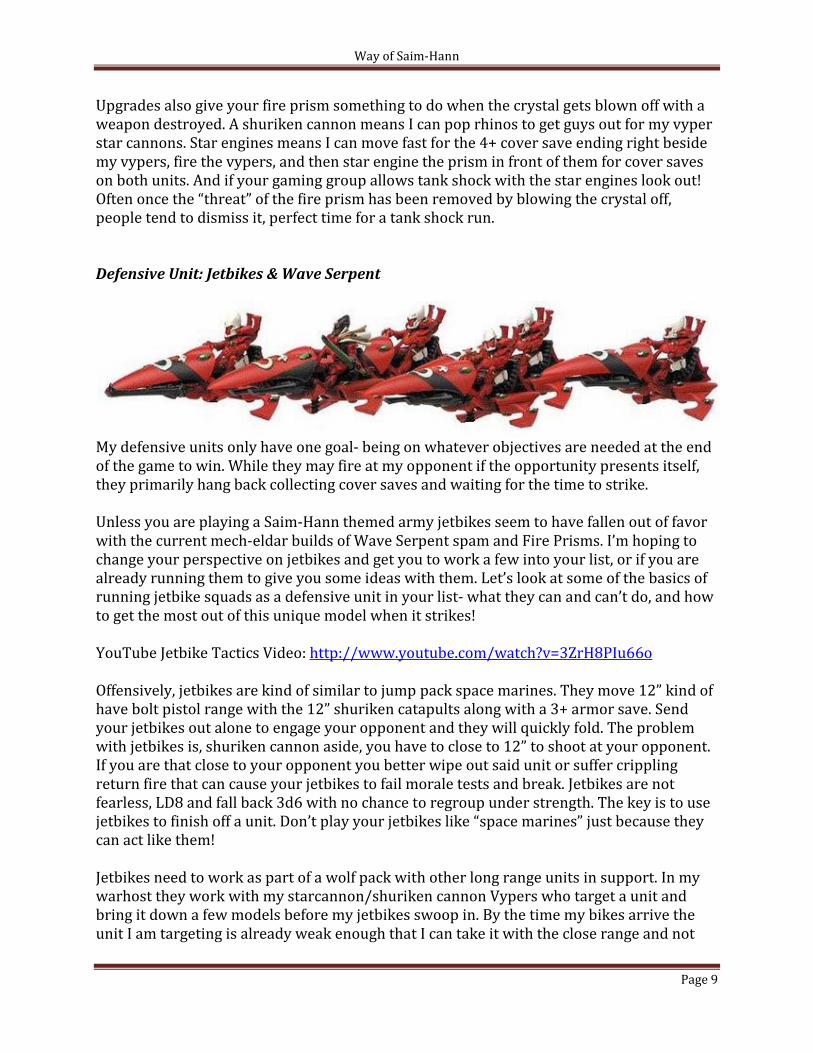
Upgrades also give your fire prism something to do when the crystal gets blown off with a weapon destroyed. A shuriken cannon means I can pop rhinos to get guys out for my vyper star cannons. Star engines means I can move fast for the 4+ cover save ending right beside my vypers, fire the vypers, and then star engine the prism in front of them for cover saves on both units. And if your gaming group allows tank shock with the star engines look out! Often once the “threat” of the fire prism has been removed by blowing the crystal off, people tend to dismiss it, perfect time for a tank shock run. Defensive Unit: Jetbikes & Wave Serpent
My defensive units only have one goal- being on whatever objectives are needed at the end of the game to win. While they may fire at my opponent if the opportunity presents itself, they primarily hang back collecting cover saves and waiting for the time to strike. Unless you are playing a Saim-Hann themed army jetbikes seem to have fallen out of favor with the current mech-eldar builds of Wave Serpent spam and Fire Prisms. I’m hoping to change your perspective on jetbikes and get you to work a few into your list, or if you are already running them to give you some ideas with them. Let’s look at some of the basics of running jetbike squads as a defensive unit in your list- what they can and can’t do, and how to get the most out of this unique model when it strikes! YouTube Jetbike Tactics Video: http://www.youtube.com/watch?v=3ZrH8PIu66o Offensively, jetbikes are kind of similar to jump pack space marines. They move 12” kind of have bolt pistol range with the 12” shuriken catapults along with a 3+ armor save. Send your jetbikes out alone to engage your opponent and they will quickly fold. The problem with jetbikes is, shuriken cannon aside, you have to close to 12” to shoot at your opponent. If you are that close to your opponent you better wipe out said unit or suffer crippling return fire that can cause your jetbikes to fail morale tests and break. Jetbikes are not fearless, LD8 and fall back 3d6 with no chance to regroup under strength. The key is to use jetbikes to finish off a unit. Don’t play your jetbikes like “space marines” just because they can act like them! Jetbikes need to work as part of a wolf pack with other long range units in support. In my warhost they work with my starcannon/shuriken cannon Vypers who target a unit and bring it down a few models before my jetbikes swoop in. By the time my bikes arrive the unit I am targeting is already weak enough that I can take it with the close range and not
Way of Saim-Hann
Page 10
have to worry about return fire or assaults from the enemy unit. Use your jetbikes to finish, not start the job. Defensively jetbikes make awesome scoring and contesting units due to their ability to turbo boost and fly over terrain and enemy models. Hang back on your side of the board turbo-boosting to collect that cover save and get into position, and then pounce on turn five. Yes, you can do the same thing with a wave serpent full of dire avengers or guardians but jetbikes can’t get taken out by a lucky las cannon shot at that critical moment where you are getting into position to contest. There have been times I’ve failed my fortuned wave serpent cover save only to have it explode mid field as I’m moving in to contest or control objectives. Jetbike also have a smaller footprint for those times when you can’t tank shock with your wave serpents to sweep an objective. Basic tactics aside, let’s talk about using them on the table to help support the other units in your Eldar warhost. Here is a tactic that I often employ to give my other units a little breathing room and to draw some fire off them. Reserve my jetbikes to keep them off the table and when they enter the game I look at which side of the table I want to eventually attack or take objectives on a turn or two later. I’ll bring all my jetbikes on the opposite side of the table turbo boosting forward to get the cover save. I’ve found that the sight of up to twenty one jetibikes tends to attract a lot of attention given their number, footprint, and speed. Almost always my opponent will redeploy or start pulling over to that side to counter my jetbikes. On the opposite side of the table my other units go to work and then once my opponent gets close enough to engage my jetbikes I’ll turbo boost back down the table and double back to the other side. When you are moving 24” a turn and zooming over terrain and other models so many possibilities open up. Jetbike Slide YouTube Jetbike Slide Link: http://www.youtube.com/watch?v=6JFjwHm1Kug Undisputed masters of the jetbike, the Eldar warhost has many tricks in employing this anti-gravity marvel against the Mon-keigh. As a fellow autarch, you should be more than familiar with the 6” assault move of Eldar jetbikes. Basically, as long as you are not turbo-boosting you can move an additional 6” in the assault phase even if you are not assaulting. This little gem in the rules opens up so many tactics if you can expand your vision. Here are a few more options besides getting 18” of movement with your jetbikes in addition to shooting… Shuriken Cannon Sniping… This idea depends on the size of your jetbike squad and the terrain that you happen to be playing on. City fight works very well, while on certain scenic boards the opportunity will pop up. Move to a position where the terrain can completely block LOS to your jetbikes. Keep your shuriken cannon jetbikes to the side where they can fire on enemy units and
Way of Saim-Hann
Page 11
then use the 6” in the assault phase to slide back behind cover. Move out of LOS blocking cover, shoot, and then move back. Think crystal targeting matrix from back in the day. If you are running with a full squad nine shuriken cannon shots might not do that much, but they will annoy and harass your opponent siphoning off units to deal with your jetbikes. When those enemy units get close enough, zoom away with the 24” turbo-boost. Keep Fleeing Unit Running… This next idea works really well against Space Marine players, and given that Marine players represent a large segment of the 40K population, this is the 6” slide that I get the most use out of. Jetbikes zoom up to a Marine tactical squad and open fire killing a few marines and forcing a leadership check. If my opponent fails, he runs back 2D6, on average out of the 6” of enemies range that prevent regrouping so he does and then shoots back or assaults. Another tactic Marine players like to use is to auto fall back to prevent my jetbikes from assaulting by getting more than 6” away. Then they regroup on their turn and get back in the fight. That 6” jetbike assault move stops those shenanigans. Marines fall back and I follow up with the 6” move - at the start of the Marine turn I am within 6” so you keep falling back. This works wonders when Marines are holding a back table objective and fall back, but not off the table - following the 6” makes sure they do run off next turn. Surrounding Transports… With all the mathhammer around not to take extra armor most of the Rhinos and transports I’m facing these days don’t have it. When running mech spam that saves a lot of points which is an argument for another article, but it sure does help out my jetbikes. As my jetbikes move out if I find a Rhino that can’t move and shoot then I will use my regular movement to get close, fire at something else and then use the 6” assault move to surround the access points on the sides and back with a ring of jetbikes. Since the Rhino can’t move and shoot the guys inside can’t disembark so they are stuck inside for another turn. Bonus points for when I am shot at since my jetbikes will probably get cover saves from the rhino and even more bonus points when I face Imperial guard- being so close to the Rhino makes it harder or sometimes impossible to lay down those big templates, and it makes scattering a dangerous possibility if my opponent can get a shot off. Dancing Out Of Assault Range… When isolating units with the speed of your jetbikes the down side you have to watch out for is getting assaulted in return if you don’t wipe your opponent out since jetbikes fold almost as fast as Tau. Assuming you have developed your skill with eyeballing ranges, you move within 12” of your opponent, open up with shots, and then slide back 6” bringing you out of assault range, unless they can fleet of course…
Way of Saim-Hann
Page 12
Finally let’s finish off understanding jetbikes by bringing some warlocks into the mix: Think of a Warlock as a mini-Farseer. Just as your Farseer supports your entire warhost, the Warlock supports the unit that they are a part of- in this case your jetbike squad. This supporting role is key when it come to their psyker power, which is of course where the warlock really adds a hidden punch. Attached to a regular jetbike squad there are really only three Warlock builds that make sense. I prefer the destructor power, but there is merit to all three depending on the rest of the units in your warhost. Conceal Jetbike Warlocks Let’s start with conceal first as it grants all the models in the unit a 5+ cover save. At first glance this seems handy when combined with the 3+ armor save of the jetbike, and more so since playing a lot of jetbikes on the table, when combined with their flying stand, makes it hard to hide behind terrain. The issue with conceal is that you can get a 3+ cover save for the unit for free by turbo boosting around until your jetbikes strike. At the same time a 5+ cover save really isn’t that great to begin with. I know something is better than nothing, but maybe if it was a 4+ it would have more bite to it. Embolden Jetbike Warlocks On paper, embolden seems like the best choice as it allows the unit to re-roll failed leadership tests. Nothing worse than taking a few jetbike losses from some bad dice rolling and then failing your leadership and running off the table with the 3d6 fall back. My rationale for not taking embolden is that your jetbike squad should be big enough in numbers, along with using their speed to stay away, that taking leadership tests should not be a round by round occurrence. Sure you might get nailed once and a while, but that is just them dice, much better to have destructor… Destructor Jetbike Warlocks In my experience of using jetbikes in an aggressive manner (I am Saim-Hann of course), destructor is the way to go. I can collect those cover saves from turbo-boosting and use range to not take losses, but when I commit to going in for the kill, it has to happen. Given the range of 12” on the shuriken catapults I have to get in close to lay down the wounds, if I am getting that close I’m in the perfect position to pop off a destructor shot. Having a heavy flamer backed by seven twin linked shuriken catapults and three cannons is some nice close range punch. Bonus points in that it is a permanent psyker power that I don’t have to test for to use, so no pesky Space Wolves, hoods or Tyranid tests to mess it up. Soften a unit up with your long range star cannon and scatter laser shots, and then move in for the kill with your destructor Warlock led jetbikes.
Way of Saim-Hann
Page 13
Spears and Blades Oh MY! But what about the other hidden gem of the Warlock, especially with the mech up twist that 40K 5th has taken? That hidden gem being a witchblade or singing spear. Wounding on a 2+ is nice, but hitting vehicles with a strength nine shot is even better. For only a measly three points I would go with the singing spear when you warlock is mounted on a jetbike- the ability to throw it 12” is worth one less attack in the assault. Make sure you model up that spear nice and proper as it now gives every jetbike unit an unexpected anti-tank punch. Sure I’m not going to go charging out to take on a land raider, but I am going to use it to contest objectives that my opponent thinks is safe by parking a vehicle on it so I can’t get within 3” of the objective. Zoom up, throw the spear, assault if needed, and then use the 6” jetbike assault move to get into position to contest. Singing spears also make a nice anti-dreadnought option since you can throw them 12” and then use the jetbike 6” assault move to slide back effectively staying out of assault range of the dreadnought. Upgrades like this and destructor give your jetbikes a little more flexability and some more options for when those hidden opportunities pop up in the game Hopefully I’ve given you some basic ideas on how I use the main units in my warhost, so now it’s time to look at how to use all the units as part of a greater whole. Before we move onto the next section of the .PDF take out your warhost and divide up your units into an attack, support, defense role.
What is the Way of Saim-Hann? The “Way of Saim-Hann” is the principal of using range and speed to destroy your opponent and prevent them from winning the mission objectives. NO army can match the speed and durability of Saim-Hann / mechanized Eldar so it is something that your opponent can never counter you on. However, the speed comes at a price in that your units are expensive and very fragile if not played correctly. There is a learning curve to the army/concept, but once you have it down and can run on auto-pilot the results will be fantastic and fun! We are now going to talk about how to use the speed of your army and then layer over that tactics to keep those units alive. Mastering both concepts to where they are down pat 100% is critical before moving on to the next section. Speed When building your list everything needs to be either mounted in a grav-tank (wave serpent/falcon) or riding a jetbike that can keep up. Everything needs the ability to move 18”-36” inches in a single turn of movement. Take a step back and think about that for a moment- what other army can move from one side of the table to another in a single turn? Anything on “foot” or that can’t keep up id dead and will drag your army down with it. A
Way of Saim-Hann
Page 14
slow moving unit will quickly get left behind and if you try to “save” it by using another unit to support it, you will lose that unit also! Everything MUST be fast! Survivability Now we need to talk about creating cover on the move since a good opponent will be trying to flush your skimmer out in the open to deny precious cover saves. Cover makes or breaks fast Eldar more than anything else. We are also going to look at using your mobility to create skimmer walls which are especially potent since they get a 4+ cover save from shooting and in the assault your opponent will need “6”’s to hit. The idea is rather simple in theory and a bit more complex in application. Assuming you can’t block 50% LOS to your tanks from any tabletop terrain you want to make sure there is one of your own grav tanks in front of the others to help grant a cover save. Which tank to use depends on where you are in the game and what army your opponent has. Unlike marine heavy games where my vypers are key, against IG the fire prism takes on new life and needs that cover save more than ever. For now, throwing fast moving vypers in front for the cover save is my best option. Of course you have to remember the battle field is a changing place, and when you throw up your skimmer wall look at not only where your opponent is now, but where they can move with units that will have shots, so they don’t get a new LOS taking away your cover save. When your grav-tank can’t shoot it then moves fast for the 4+ and blocks full LOS for other tanks- you do have spirit stones right? Vypers really love cover saves- they are the key to keeping them up throughout the game bypassing their AV 10 open topped nerfness. Using squadron rules, just get 50% of the unit obscured and you get full cover saves all around. Working in tandem with your wave serpents and falcons this should be especially easy. Your tanks and skimmers should also be used as moble walls, especially to prevent objective grabs and contests by your opponent later in the game. Move that scoring unit up to the objective, and then ring around your tanks/skimmers to repel your opponent keeping them more than 3” away. YouTube Cover Save Link: http://www.youtube.com/watch?v=NQLv26dvbSg Creating “walls” with your skimmers is also key to controlling the space on the table and to shield your other units from being shot at. Move that wave serpent fast for the cover save and park it in front of an objective to block off your opponent.
Way of Saim-Hann
Page 15
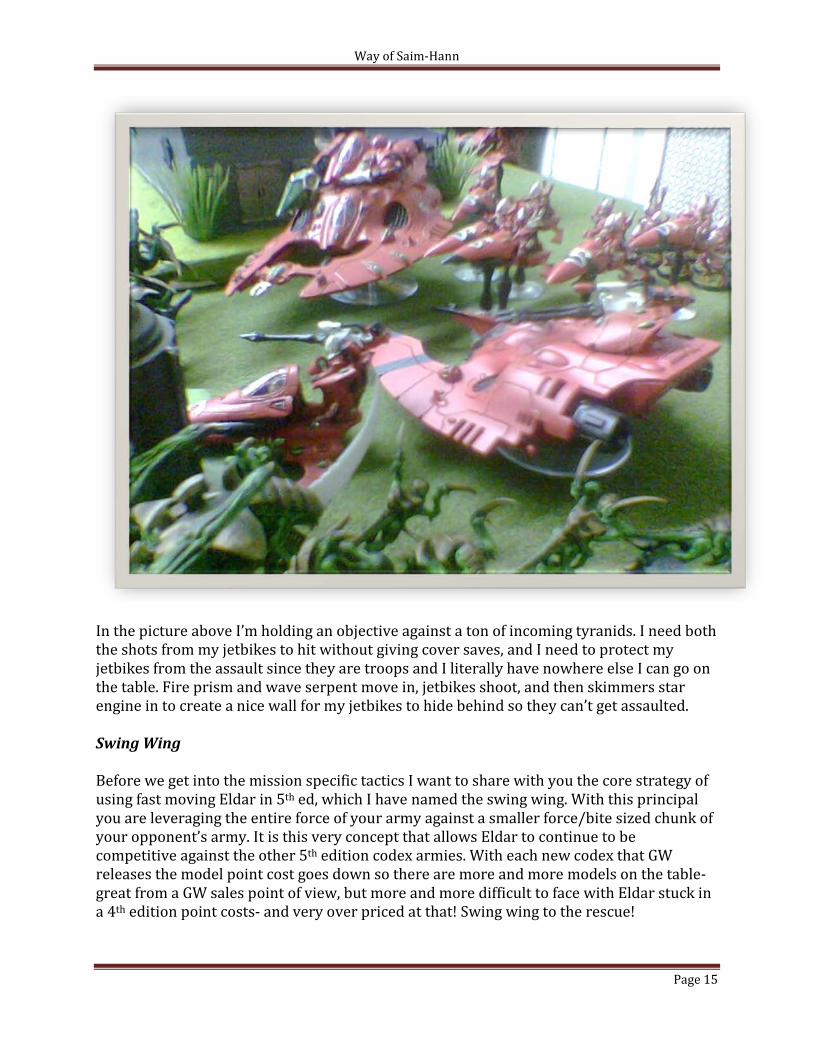
In the picture above I’m holding an objective against a ton of incoming tyranids. I need both the shots from my jetbikes to hit without giving cover saves, and I need to protect my jetbikes from the assault since they are troops and I literally have nowhere else I can go on the table. Fire prism and wave serpent move in, jetbikes shoot, and then skimmers star engine in to create a nice wall for my jetbikes to hide behind so they can’t get assaulted. Swing Wing Before we get into the mission specific tactics I want to share with you the core strategy of using fast moving Eldar in 5th ed, which I have named the swing wing. With this principal you are leveraging the entire force of your army against a smaller force/bite sized chunk of your opponent’s army. It is this very concept that allows Eldar to continue to be competitive against the other 5th edition codex armies. With each new codex that GW releases the model point cost goes down so there are more and more models on the table- great from a GW sales point of view, but more and more difficult to face with Eldar stuck in a 4th
edition point costs- and very over priced at that! Swing wing to the rescue!
Way of Saim-Hann
Page 16
First and foremost Eldar still have speed on their side and this is what you always want to drive home and punish your opponent with. You want to look where they are “weak” and mass your entire army against this weak point, smashing it and then moving on to the next weak point. Here is a general example of the swing wing principal in action. I take first turn and deploy my army as close to the center of the table that I can. After my opponent has deployed I’m going to take a look at their models and see which side weak. By “weak” I mean the side with less models, less shooting and/or assault power. I’m then going to move the entire bulk of my army to attack this side of my opponent’s army. I am looking to put all of my 1750 point up against 500-600 points of his army. As my opponent reacts I’m going to continue to look for the weak side of their army continuing to move around them while shooting. YouTube Swing Wing Link: http://www.youtube.com/watch?v=Vzd4dXojqkc Swing Wing concept in action vs. Dark Angels Ravenwing. Look for the moment when I switch over and start swinging away to turn the tide of the game. The Reserves Game More than any other 40K army reserves is important when playing Eldar. There are times you want to put either all your models in reserve (except maybe the seer council) and times when deploying out on the table is necessary. Know, and be ready to use both. With the emphasis on 5th
edition building alpha-strike lists- armies that are build to put out so much firepower on turn one they literally blow you off the table, when combined with the high point cost, and thus less models in the average Eldar warhost, reserves becomes the only way of survival. By reserving everything you cut down on a few turns of shooting for your opponent- if you are going second, and you ensure that when your units come onto the table you will at least get a shot off or can collect cover saves by moving fast.
Reserves also allow you to attack the weak side of your opponent, kind of like using the Swing Wing concept from off the table. When your units become available then look where your opponent is weakest and enter on the table moving to attack there. Reserves actually makes this easier- since you are not on the table anywhere it is often hard for opponents to visualize range combined with your speed. Often players will spread their units out, allowing you to move on and wolfpack those lone hanging units with the swing wing. The downside to reserves is if only a single unit or two come on the table. While you can boost the reserves roll with an autarch, if that lone unit or two comes on the table, just turbo boost or move it fast way for a later cover save, ready to join the rest of your warhost when it does enter play.
Way of Saim-Hann
Page 17
Playing The Three Standard 40 Mission Now that you have seen my list, and reviewed the basic concepts needed to make fast moving Eldar work we can move into the heart of this .PDF- applying the “Way Of Saim-Hann” to the three standard 40K missions! I want to start at ground zero with the missions and fist state that Warhammer 40K is NOT about killing models. It doesn’t matter how many models you kill or how any of yours get killed- all that matters is that when the game ends you are in the right spot on the table to win. Only in 40K can you lose 90% of your army and still win the game…unless you are Necrons of course… The play style that I am advocating is all about movement- keeping yours, while shutting down your opponents so that when the game ends you can be in the correct position. Let’s start off with target priority. At the start of the game you want to target your opponents mobility- yes they won’t be able to match yours, but you 100% want to take away that ability. Rhinos and other troop transports, or fast moving “scoring” units are the first that you need to take out. Now keep in mind that I just said the game is not about killing models. All you have to do is destroy/immobilize those transports- an immobilization is just as good as destroying it, so if you roll that “4”, then move on to the next model. Remember to use your mobility to get side shots that have a lesser AV value or from angles where there is no cover for your opponent. Once you have shut down your opponent’s mobility you are then going to start working on units that will be a problem later in the game- units that can effectively contest objectives like land speeders or valkaries. Take them out, again either by destroying or immobilizing them. While that is happening you are going to be on the lookout for units that can stop your final movement at the end of the game when you move on objectives with your units- such as thunder hammer terminators or heavy weapon squads etc. The key is going to be balancing out these target priority goals over the course of the game with the units that you have. Which then brings us to turn five… One of the hidden strengths of fast Eldar is their ability to suddenly be anywhere on the table. In the standard missions there is a 33% chance of the game ending by turn five. You need to plan for this as if the game is going to end, yet be ready in case it goes on to turn six or seven. Most players are not ready for the game to end on turn five so just in planning for it, when the game does end on turn five you will win. In objective based games you want to capture/contest objectives in “waves”.
Way of Saim-Hann
Page 18
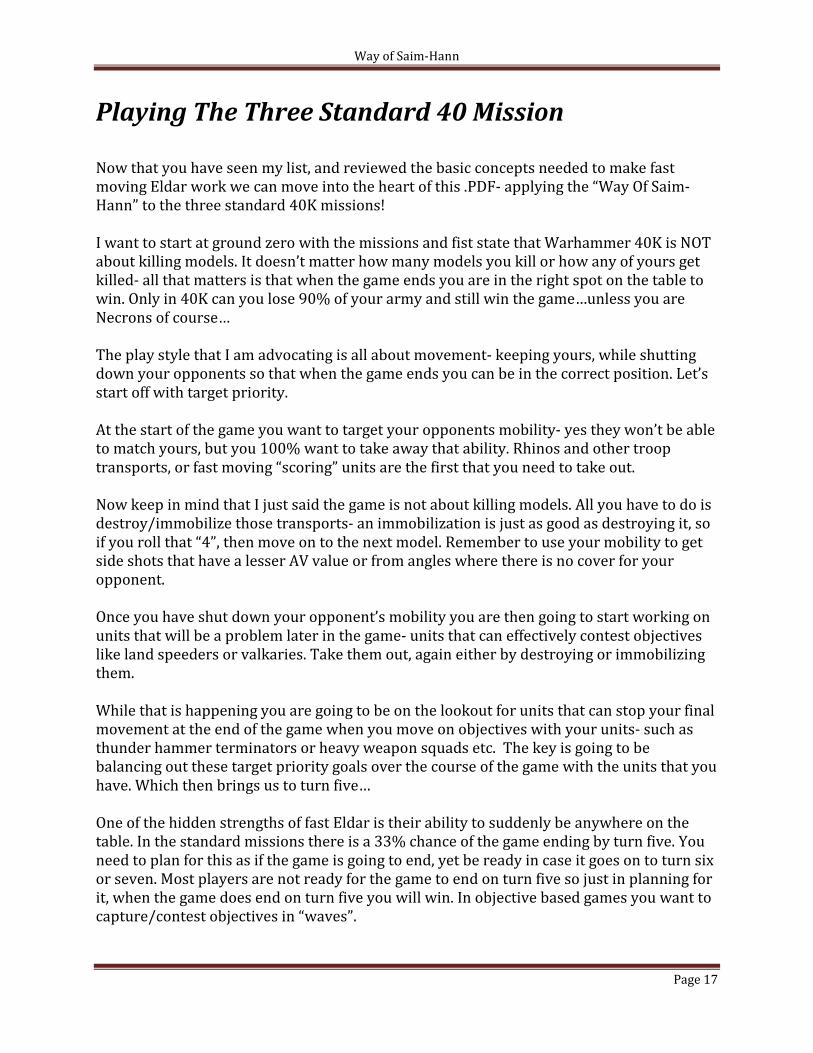
The picture above is a perfect example of this idea in action. Objective based mission vs. Chaos Space Marines. I’ve taken second turn shutting down mobility and planning to go for the center objective. With my shooting I’ve punched a hole in my opponent’s mobility and then turbo boosted my jetbikes and vypers up- creating a vyper wall around the jetbikes while getting cover saves on everything. The jetbikes behind the vypers have also turbo boosted up. If the game ends on turn five I have the objective. If it goes to turn six my opponent has to break through the vypers to/and take out the jetbikes to recapture the objective. If they do that then my wave serpent and fire prism (lower right) then tank shock them off the objective (I can only do this because I took out their end game mobility (destroyed land raider) and then zip up with the second group of jetbikes. So in a nutshell, you send in one group to get the objective, while lining up a second group to retake/back it up if the game continues. This works for both capturing and contesting objectives as needed.
Way of Saim-Hann
Page 19
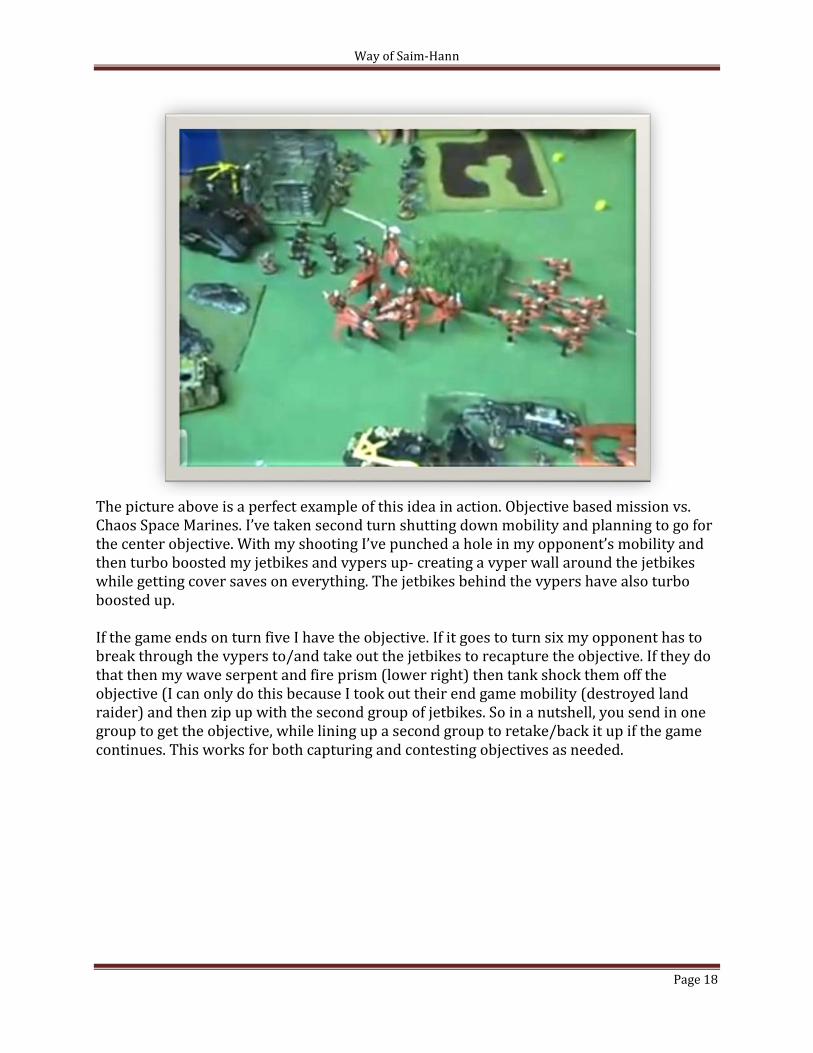
Mission: Seize Ground
In seize ground you and your opponent are battling over a number of objectives. In the picture above we have five objective points marked by the red and green dots on the table. The first thing for this mission is to keep in mind that you only need to hold one more objective then your opponent to win. Forget about trying to take and hold multiple objectives as you will spread yourself thin, and hove to close with your opponent. That’s not the Way of Saim-Hann! In the example we are playing with five objectives- keep and play the same principal I’m about to outline, adjusting it for four or three objectives. With the number of objectives that you can place (in this example I put down the red ones and my imaginary opponent the green ones) you want to load one side of the table as heavy as you can and space out the objective as best you can. Also note that the objectives I placed are not in cover- this is very important for the game. You want to place as many objectives as you can out in the open for two main reasons- the fist is so that when your de-mech your opponent and they move to take objectives they will be forced to put themselves out in the open. This allows your star cannons and fire prism templates to cut through your opponent without saves. With less models on the table- every shot counts so setting things up and taking weapons that ignore armor save makes up for your lack of models. The second, and perhaps more important reasons for objectives out in the open is so that when you move to capture/contest you won’t be ending in terrain and forced to make a terrain test for your jetbikes or skimmers- taking tests is bad as it is a 1-6 chance of perhaps crashing. As a side note that is why I advocate vectored engines on skimmers so they don’t get taken out by crashing for those times when you have to go into terrain.
Way of Saim-Hann
Page 20
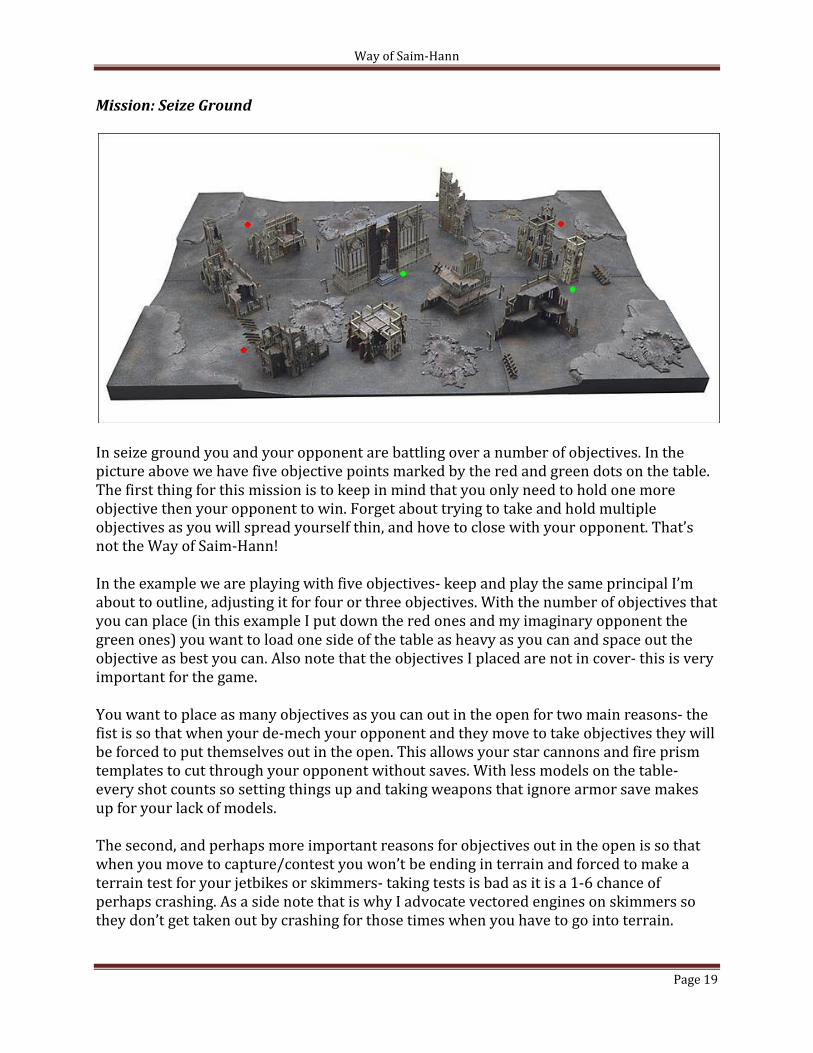
The idea is to create one side of the table that is more desirable and to create a deployment that keeps my opponent on that side of the table. With objectives down we then look at deployment. Playing fast Eldar means deployment is really irrelevant since one can be anywhere on the table by next turn. What is important is going first/second. In objective based missions it is always better to go second. Going second means you have that last turn to move in and capture/contest objectives before the game ends. You want to go second! If you win the dice off, you pass first turn to your opponent. If they win first turn, they will be hesitant to take second turn because that means they can’t pick which side of the table they want. With how we set up objectives which side of the table would YOU want? The side with the loaded/more objectives. Seems simple right? Two objectives in the back, two in the close center to that deployment zone- park on the objectives and you are “winning” before the game even starts right? That is what I’m hoping you will think. By taking the “better” side of the table your opponent has ensured you get first turn and has helped you in leveraging your entire army against small sections of theirs. A number of his units will be dedicated to just sitting and defending objectives- that means less models and “points” moving out to engage and destroy you. Now for the game itself! Turn one depends on the type of army that you are facing and the terrain on the table. Less terrain and more long range shots means you don’t want to be on the table for turn one so everything goes in reserves and you play the reserves game. On the table pictured above against a balanced army you would deploy since range and cover saves would protect me on turn one. Make sure you are not alpha-striked by your opponent- Eldar just can’t field the number of models to withstand an alpha-strike! As the game plays out you want to hang back on your side of the table using speed and range to stay away as you work your way down the target priority checklist- break open transports first to get your opponent on foot, followed by killing troops, and shutting down any fast moving units that your opponent can use last turn to contest. Then when turn five rolls around move one of your troop units to take the single objective on your side (red lower left pip in the picture above) and then contest the objective(s) that your opponent is holding. Have that second wave also ready to go in case the game continues on. Now along the way if you can pick up another objective then certainly go for it as extra insurance, but don’t put your models at excessive risk in doing so. Breaking open transports is also key so you can tank shock onto objectives to capture/contest with your wave serpents, falcons, and fire prisms as needed.
Way of Saim-Hann
Page 21
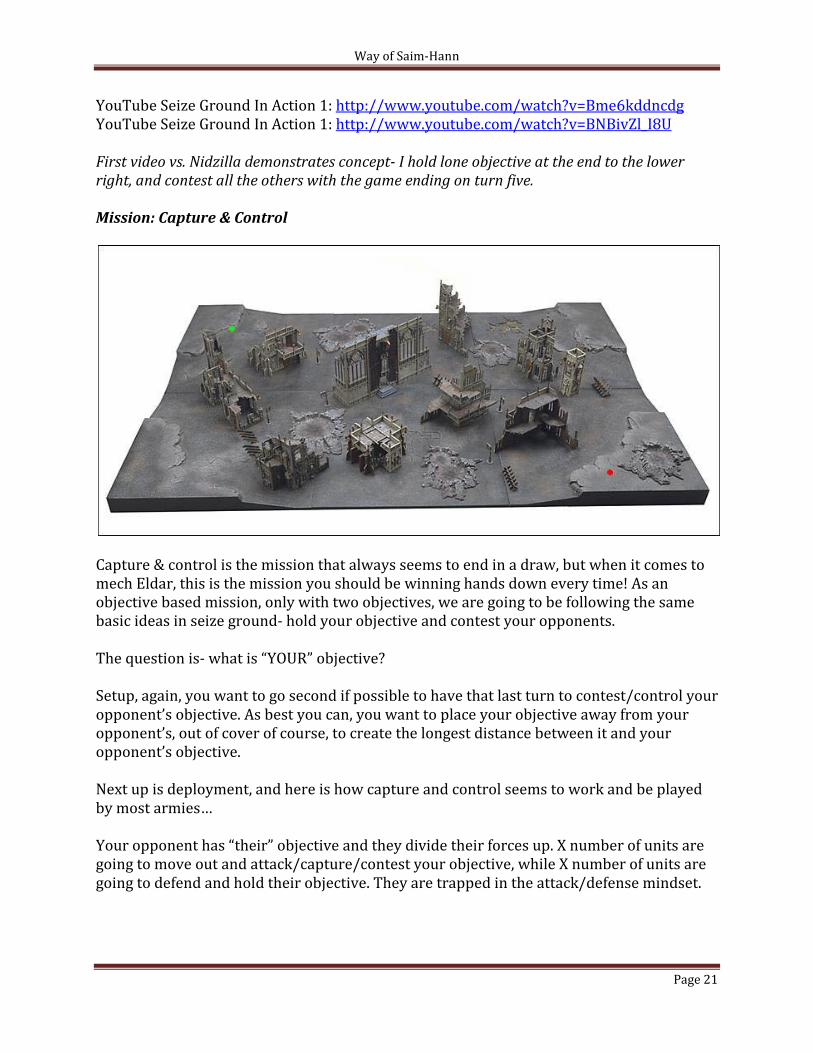
YouTube Seize Ground In Action 1: http://www.youtube.com/watch?v=Bme6kddncdg YouTube Seize Ground In Action 1: http://www.youtube.com/watch?v=BNBivZl_I8U First video vs. Nidzilla demonstrates concept- I hold lone objective at the end to the lower right, and contest all the others with the game ending on turn five. Mission: Capture & Control
Capture & control is the mission that always seems to end in a draw, but when it comes to mech Eldar, this is the mission you should be winning hands down every time! As an objective based mission, only with two objectives, we are going to be following the same basic ideas in seize ground- hold your objective and contest your opponents. The question is- what is “YOUR” objective? Setup, again, you want to go second if possible to have that last turn to contest/control your opponent’s objective. As best you can, you want to place your objective away from your opponent’s, out of cover of course, to create the longest distance between it and your opponent’s objective. Next up is deployment, and here is how capture and control seems to work and be played by most armies… Your opponent has “their” objective and they divide their forces up. X number of units are going to move out and attack/capture/contest your objective, while X number of units are going to defend and hold their objective. They are trapped in the attack/defense mindset.
Way of Saim-Hann
Page 22
What YOU are going to do, is deploy your entire warhost in the center of the table away from your objective. In the picture above your objective is the red pip so you would deploy out near the “+” shaped ruin and crater in the lower center of the picture. It is here that you are going to hand out and wait breaking open transports and shutting down your opponent’s mobility. Once the units that they are sending out reach the half way point to your objective, and this includes any deepstriking or poding units you are then going to make your move! You are going to look and see which objective is the least defended- either yours or your opponent and that is the one you are going to move your entire warhost on to capture. The other objective then becomes the one you are going to contest. In this way, both objectives on the table can become the objective you take and hold. The key here is waiting till your opponent has committed their forces to both objectives so they can’t pull back once you make your move! YouTube Capture & Control Link: http://www.youtube.com/watch?v=z-7iH2LTs5Y YouTube Capture & Control Link: http://www.youtube.com/watch?v=caWtuczI4bw The second battle in this vid vs. James’ Ultramarines shows this concept in action as I reverse the objectives on my opponent while planning for the game to end on turn five! Mission: Annihilation

Way of Saim-Hann
Page 23
The final standard 40K mission, and the one you should be winning hands down every time you play regardless of the army you are facing. A warning ahead of time, this particular strategy will win you games but not any friends or sportsmanship points. Not that it breaks the rules in any way, just that it again bends the idea of how to play 40K. Annihilation, line up your models on the table, fire away, follow by assaults, and when the dust settles see who has more kill points. Playing it this way is fun, but the “winner” is often the one who has the bigger guns or luckier dice. Forget “luck”, you only have to have one more kill point then your opponent. Here is how I want you to play the mission… Just like the other two missions you want to go second, and just like the previous missions going second allows you one more chance to get into position to win before the game ends, or in this case even up or break a tie in kill points. On the plus side many players want to go first when they pull this mission. They think and want to line up their models and get that first turn to blast and alpha-strike you. Fantastic if they take first turn, if not, and you win it, pass it to them. For deployment , regardless if you go first or second you are now going to reserve everything. Put everything 100% in reserve, except the seer council which hides protected in the corner to get their powers up. If your opponent took first turn and lined up, now they have nothing to shoot at and totally lose the ability to cripple you on turn one. If you are playing dawn of war then night fight will be gone by the time you come in. Reserves also means less time for your opponent to shoot at you and earn kill points. Less time for you also, but we are going to remedy that in a moment. So at the top of turn two your units start coming in on the table. When a unit comes on the table before you put it down you are going to ask yourself the following question. Based on the unit and its weapon can I fire off a shot that has range and the ability to destroy one of my opponent’s models to earn a kill point. Look around on the table, and if the answer is yes then you need to ask yourself- If I put the model down to take the shot can I protect it from return fire by cover- either on the table or through other models entering on the table. If the answer is “yes” to both the model gets put down and takes the shot for the kill point. If it doesn’t have the shot or can’t do it protected from cover then it goes down on the table somewhere it is safe in cover. In your list the most important models to protect with cover are the ones who can fire long range shots. In the case of my warhost this is the fire prism, and vypers. They need to be protected from shooting. The rest of my models like jetbikes will just hang back on my side of the table behind vehicles or terrain and go to ground as needed to keep them alive. Yes, jetbikes can go to ground!
Way of Saim-Hann
Page 24
Creating cover like we previously discussed is key since eventually you are going to have all your models out on the table at some point as they come in. Skimmers that can’t shoot move for the cover save and then stop right in front of models that can shoot- those models shoot, and then the skimmer star engines in front so now both units get a cover save! Perhaps more so then any other mission target priority is key. Shoot at the “weak” units in your opponents list for the kill points. In the case of space marines, rhinos, land speeders, thunderfire cannons, other low AV or wound single models. Don’t try and duke it out pinging away at another land raider from far away. Above all, resist the temptation to move out and engage your opponent, this will draw your models out and expose them- let your opponent come to you and expose themselves for more kill points. As they move closer use the swing wing to hit them up, and once you are ahead in those kill points, everything starts moving away and moving fast to get cover saves!
Conclusion Well that finishes off the .PDF, hopefully leaving you with the basic concepts that I use, and continue to use with my Saim-Hann warhost. Now, they key is taking what I’ve put forth and making it your own! For the next dozen or so games with your army, pick one of the concepts in this .PDF and make it work on the table- don’t worry about winning or losing the mission, work on getting the ideas down so they just happen without thinking. If you are not playing the units I use in my warhost, or don’t want to play them, then think about what my units are going and how you can adapt yours to fit the role. As always if you have any questions, comments, or want to bounce an idea off me, feel free to email me. Best of luck, and hopefully we will get a game in together at a tournament or Games Day, and you can school me in the Way of Saim-Hann! ~Fritz This web site and document is completely unofficial and in no way endorsed by Games Workshop Limited. All associated marks, names, races, race insignia, characters, vehicles, locations, units, illustrations and images from the Warhammer 40,000 universe are either ®, TM and/or © Copyright Games Workshop Ltd 2000-2010, variably registered in the UK and other countries around the world. Used without permission. No challenge to their status intended. All Rights Reserved to their respective owners.
Are You Ready For Gaming Glory?
Ready To Take Your 40K To The Next Level?
Check out The Warmaster 40K Forum:
www.thewarmaster.com for army list reviews, tactical
discussions, and hobby tips to improve your 40K game.
I also have an entire series of 40K videos, and ongoing
tactica discussion on my YouTube Channel ready to help you
WIN your next game:
https://www.youtube.com/user/WayOfSaimHann
Analog battle report, and wargaming discussion can also be
found at my bog: www.wargamerfritz.com
You can also contact me anytime with comments, feedback,
and flames at: [email protected]