Embed Size (px)
Citation preview

Having played in many skirmish games over the years and having a few 25mm Poles and Mongols laying around, I started looking for a suitable set of rules. There are well over a hundred, ranging from the complex, Battlelust, to the simple, Chainmail. I wanted something that was fast and furious that would be like Sword and the Flame for
medieval s.
After having read a glowing review of Pig Wars in MWAN, and having some of the authors other sets of rules I ordered a set. Pig Wars is 40 pages long, including a lot of sketches, with several scenarios and two cards with the charts printed on them. The rules themselves take up only about 13 pages and are fairly easy to understand.
There are notes for sample units, optional rules, and three sce-narios, ranging from Romans vs. Gauls to Normans vs. Saxons.
Units can be of any size, but usually are 20 foot or 10 mounted. Mixed units are allowed, usu-ally a leader and his
body-guards can be mounted. Re-member, these are raiding par-ties and are usu-ally of mixed composition, such as ten spearmen, three armed with axes, a standard bearer, a leader,
and five archers would be a sample unit.
All combat is done with a deck of playing cards with each unit using one deck. Depending on range, armor, terrain, etc…., you need certain cards to inflict hits and save with your armor. Leaders get three hits while everyone else is killed on the first hit. Combat is fairly simpleand you can come up with all sorts of home rules to deal with elite troops, bodyguards, special types of terrain, and the vari-
ous armies.
The good thing is that the action is fast and furious without having to wade through weapons tables and armor values as in some rules. It may be a little too simplistic for some, but it seems to work fine and you can customize the game as stated above. In fact, on the egroup many clubs have converted the cards over to a dice rolling system.
Continued on page 13
WITH AXE and SWORD Review of PIG WARS
By Matt Irsik
SPEC IAL POINTS OF INTEREST:
• How to make buildings with scrap material.
• N.U.T.S. group joins Warning Order with their first update.
• Two battle reports with photos.
• Book and movie reviews.
• Naval History at Ports-mouth, England
• Review of Civil War sce-nario books.
• Part 2 of scenario design.
VOLUME 1, ISSUE 3
SPRING 2001 WARNING ORDER WASATCH FRONT HISTORICAL GAMING SOCIETY
Modelling Workshop 2,3
N.U.T.S. Update 4,5
AOR Replay 6,7
CD3 Replay 8
Scenario Design 9
Movies-Portsmouth 10,1
ACW Review 12
INS IDE TH IS I SSUE :
ASSEGAI! Special Supplement for
this issue! A complete boardgame and miniatures campaign based on the 1879 Zulu War has been includued with this issue.
25mm Poles from Old Glory await the Mongols. Painted by Matt Irsik.
Teutonic knight leads a unit of sergeants out from a keep. 25mm Old Glory painted by Matt Irsik.
VOLUME 1, ISSUE 3 PAGE 2
Modeling Workshop with Jim Cornell
Well-painted troops fighting over a nicely crafted battlefield are enough to set any gamerís heart to racing. When I make ter-rain I really want it to WOW my opponent and anyone who might be wandering by. When making terrain I try to keep costs down by using things I have lying around or can scavenge from the garbage. Fortu-nately, I had just finished putting in a sprinkling system and had some PVC odds and ends.
Here is how I made the 10mm Keep in the pictureÖyou will need: 3 lengths of tubing of varying di-ameter (I used PVC pipe) Plasticard Cardstock (I used old business cards) Heavy card (I used an empty Coke carton) Very heavy card (I used a scrap of illustration board) Modeling clay (I used green stuff) Glue (I used White Glue and Super Glue Gel)
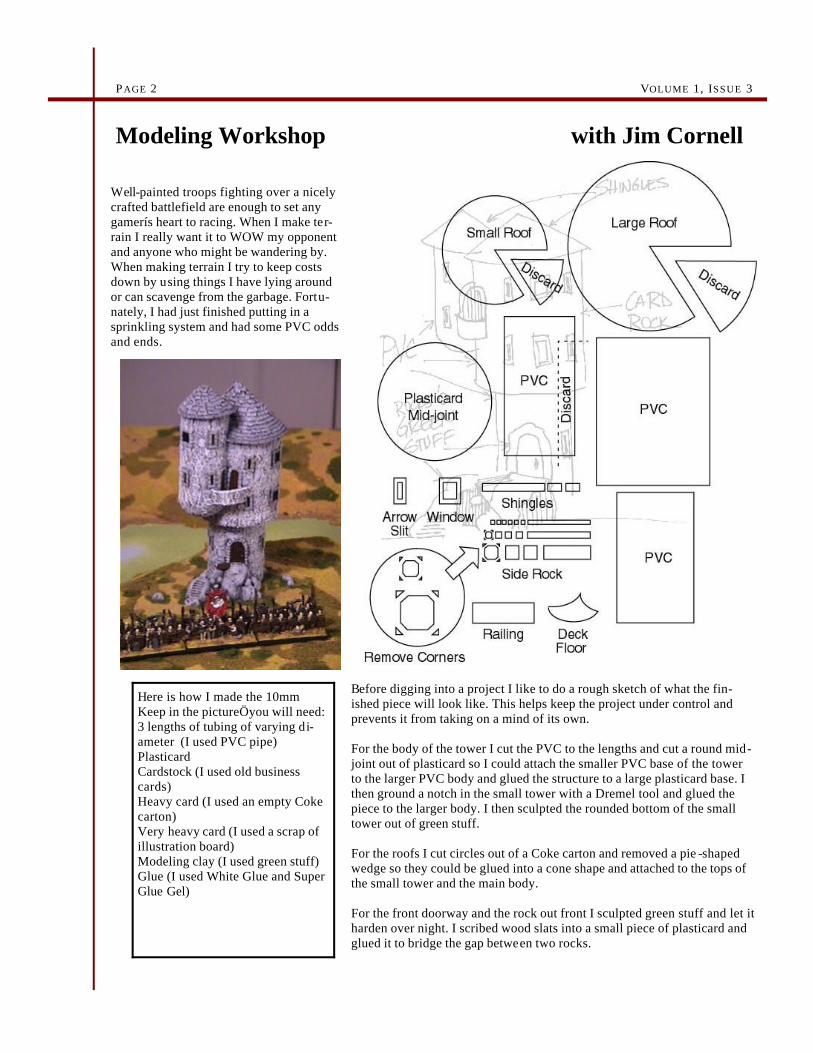
Before digging into a project I like to do a rough sketch of what the fin-ished piece will look like. This helps keep the project under control and prevents it from taking on a mind of its own. For the body of the tower I cut the PVC to the lengths and cut a round mid-joint out of plasticard so I could attach the smaller PVC base of the tower to the larger PVC body and glued the structure to a large plasticard base. I then ground a notch in the small tower with a Dremel tool and glued the piece to the larger body. I then sculpted the rounded bottom of the small tower out of green stuff. For the roofs I cut circles out of a Coke carton and removed a pie -shaped wedge so they could be glued into a cone shape and attached to the tops of the small tower and the main body. For the front doorway and the rock out front I sculpted green stuff and let it harden over night. I scribed wood slats into a small piece of plasticard and glued it to bridge the gap between two rocks.
WARNING ORDER PAGE 3
Modeling Workshop(cont.)
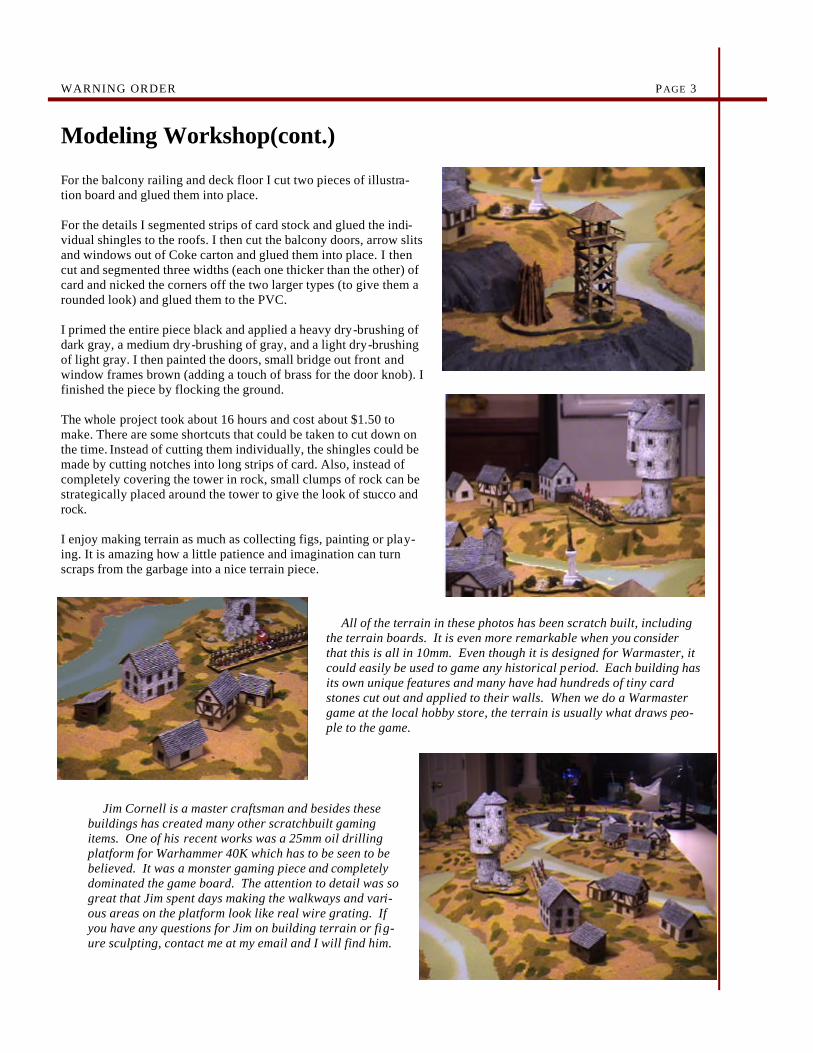
For the balcony railing and deck floor I cut two pieces of illustra-tion board and glued them into place. For the details I segmented strips of card stock and glued the indi-vidual shingles to the roofs. I then cut the balcony doors, arrow slits and windows out of Coke carton and glued them into place. I then cut and segmented three widths (each one thicker than the other) of card and nicked the corners off the two larger types (to give them a rounded look) and glued them to the PVC. I primed the entire piece black and applied a heavy dry-brushing of dark gray, a medium dry-brushing of gray, and a light dry-brushing of light gray. I then painted the doors, small bridge out front and window frames brown (adding a touch of brass for the door knob). I finished the piece by flocking the ground. The whole project took about 16 hours and cost about $1.50 to make. There are some shortcuts that could be taken to cut down on the time. Instead of cutting them individually, the shingles could be made by cutting notches into long strips of card. Also, instead of completely covering the tower in rock, small clumps of rock can be strategically placed around the tower to give the look of stucco and rock. I enjoy making terrain as much as collecting figs, painting or play-ing. It is amazing how a little patience and imagination can turn scraps from the garbage into a nice terrain piece.
All of the terrain in these photos has been scratch built, including the terrain boards. It is even more remarkable when you consider that this is all in 10mm. Even though it is designed for Warmaster, it could easily be used to game any historical period. Each building has its own unique features and many have had hundreds of tiny card stones cut out and applied to their walls. When we do a Warmaster game at the local hobby store, the terrain is usually what draws peo-ple to the game.
Jim Cornell is a master craftsman and besides these buildings has created many other scratchbuilt gaming items. One of his recent works was a 25mm oil drilling platform for Warhammer 40K which has to be seen to be believed. It was a monster gaming piece and completely dominated the game board. The attention to detail was so great that Jim spent days making the walkways and vari-ous areas on the platform look like real wire grating. If you have any questions for Jim on building terrain or fig-ure sculpting, contact me at my email and I will find him.
VOLUME 1, ISSUE 3 PAGE 4
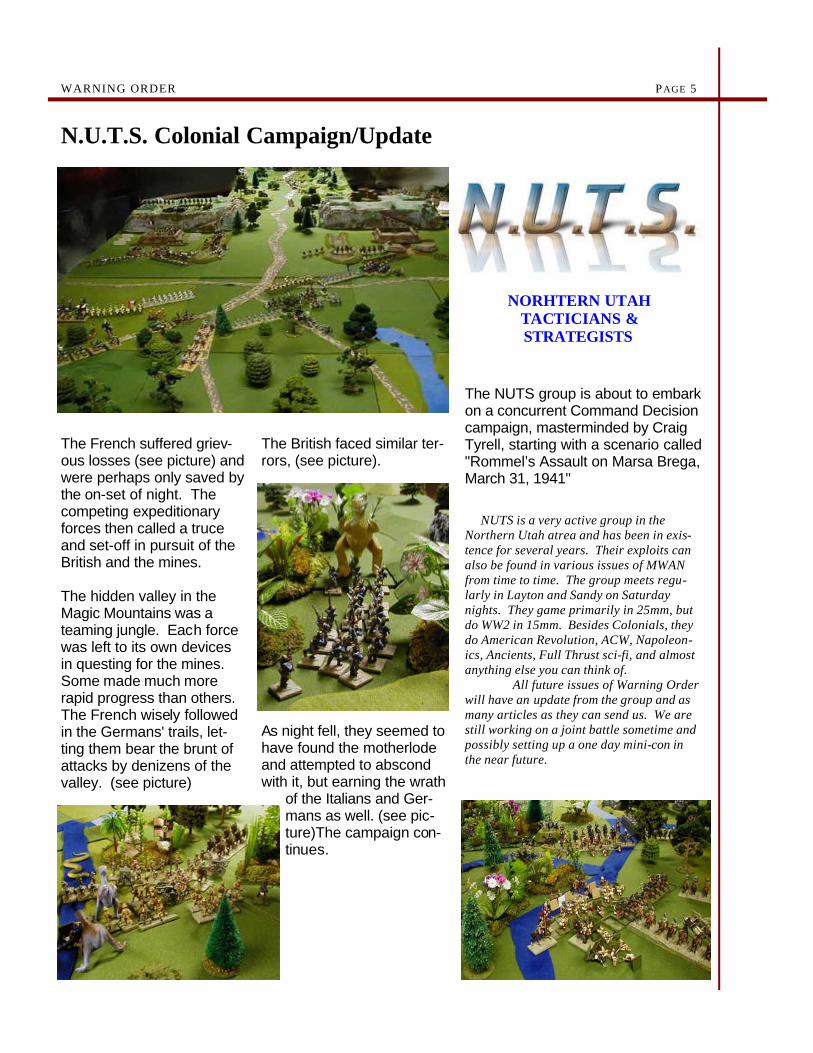
N.U.T.S. Colonial Campaign /Update by Jim Morgan
For the past year we NUTS have been much engaged in the search for King Solomon's mines, A Colonial Conflict Simulation in Central Africa Using Bart Wood's "Battlefield Africa" Colonial Rules. Set in c.1870, five colonial powers (Great Britain, France, Ger-many, Italy, and the United States) send expeditionary forces to vie for the honor, glory, and wealth of claiming and exploiting the hidden treasures of the dark conti-nent. The goal of each com-mander is to find the lost mine of King Solomon in deepest Africa and bring back as much treasure as possible to the coastal fortress, thus claiming that part of Africa for his country and getting him-self promoted to a cushy desk job at Supreme Headquar-ters. The full text and a map are available on Tom Dickson's Solo Colonial website at http://members.spree.com/funngames/solocolonial/ Each participant started with a mobile force of about ninety infantry, twenty cavalry, three artillery pieces and two ma-chine gun teams, plus a handful of native scouts, as well as all-important supply wagons. Encountered along the way are friendly (boring) and not-so-friendly native (exciting) villages, bandit-infested mountain passes, and the Lost World-type hid-den valley of the reputed
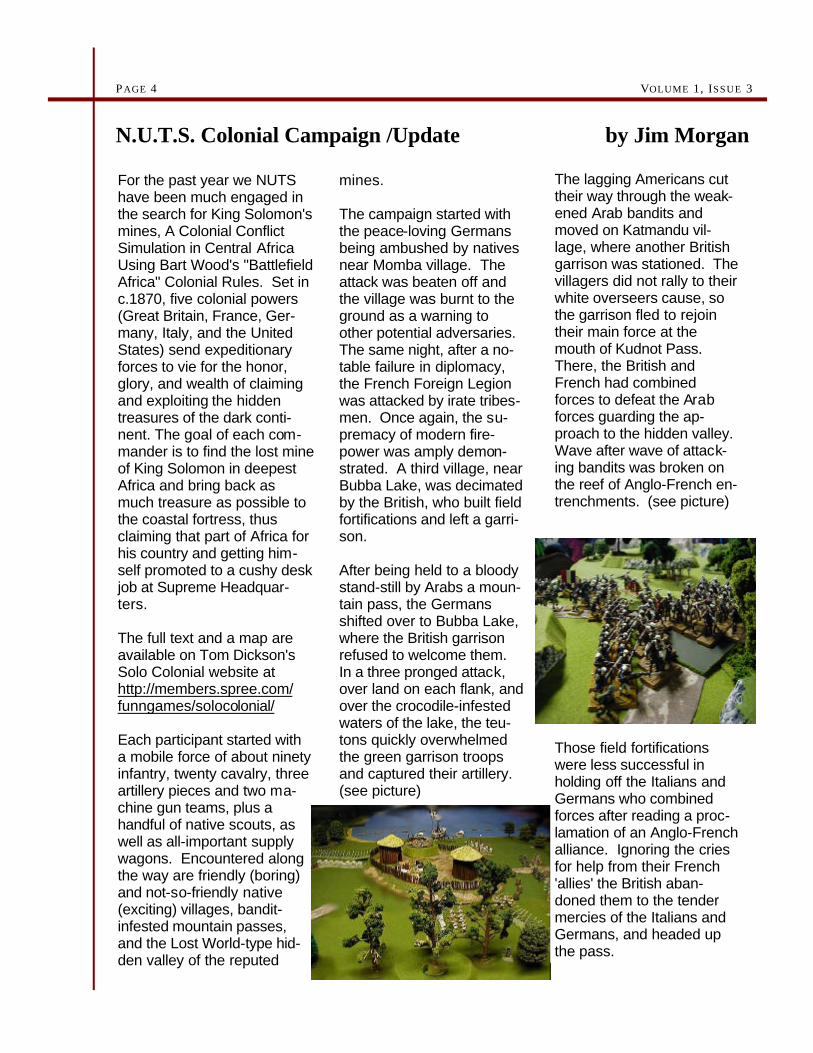
mines. The campaign started with the peace-loving Germans being ambushed by natives near Momba village. The attack was beaten off and the village was burnt to the ground as a warning to other potential adversaries. The same night, after a no-table failure in diplomacy, the French Foreign Legion was attacked by irate tribes-men. Once again, the su-premacy of modern fire-power was amply demon-strated. A third village, near Bubba Lake, was decimated by the British, who built field fortifications and left a garri-son. After being held to a bloody stand-still by Arabs a moun-tain pass, the Germans shifted over to Bubba Lake, where the British garrison refused to welcome them. In a three pronged attack, over land on each flank, and over the crocodile-infested waters of the lake, the teu-tons quickly overwhelmed the green garrison troops and captured their artillery. (see picture)
The lagging Americans cut their way through the weak-ened Arab bandits and moved on Katmandu vil-lage, where another British garrison was stationed. The villagers did not rally to their white overseers cause, so the garrison fled to rejoin their main force at the mouth of Kudnot Pass. There, the British and French had combined forces to defeat the Arab forces guarding the ap-proach to the hidden valley. Wave after wave of attack-ing bandits was broken on the reef of Anglo-French en-trenchments. (see picture)
Those field fortifications were less successful in holding off the Italians and Germans who combined forces after reading a proc-lamation of an Anglo-French alliance. Ignoring the cries for help from their French 'allies' the British aban-doned them to the tender mercies of the Italians and Germans, and headed up the pass.
WARNING ORDER PAGE 5
N.U.T.S. Colonial Campaign/Update
The French suffered griev-ous losses (see picture) and were perhaps only saved by the on-set of night. The competing expeditionary forces then called a truce and set-off in pursuit of the British and the mines. The hidden valley in the Magic Mountains was a teaming jungle. Each force was left to its own devices in questing for the mines. Some made much more rapid progress than others. The French wisely followed in the Germans' trails, let-ting them bear the brunt of attacks by denizens of the valley. (see picture)
The NUTS group is about to embark on a concurrent Command Decision campaign, masterminded by Craig Tyrell, starting with a scenario called "Rommel’s Assault on Marsa Brega, March 31, 1941"
The British faced similar ter-rors, (see picture).
As night fell, they seemed to have found the motherlode and attempted to abscond with it, but earning the wrath
of the Italians and Ger-mans as well. (see pic-ture)The campaign con-tinues.
NUTS is a very active group in the Northern Utah atrea and has been in exis-tence for several years. Their exploits can also be found in various issues of MWAN from time to time. The group meets regu-larly in Layton and Sandy on Saturday nights. They game primarily in 25mm, but do WW2 in 15mm. Besides Colonials, they do American Revolution, ACW, Napoleon-ics, Ancients, Full Thrust sci-fi, and almost anything else you can think of. All future issues of Warning Order will have an update from the group and as many articles as they can send us. We are still working on a joint battle sometime and possibly setting up a one day mini-con in the near future.
NORHTERN UTAH TACTICIANS & STRATEGISTS
VOLUME 1, ISSUE 3 PAGE 6
This was one of the battles during our Sport of Kings campaign game. The Russians had finally invaded Aus-trian territories seeing them engaged on the Western Front with France. It was a fair sized game, involving about 15 units a side and the terrain roll produced an interesting twist.
A large river ran down one side of the board, flanked by heavy woods on
both sides. Then, in the middle there were a number of fields which were enclosed with walls and hedgerows.
The Austrians decided to hold in the center and attack over the river on the
left. The Russians de-cided to advance in the center and try to crush the Austrians before help could arrive from the flank.
What followed was a very exciting Age of Reason scenario.
The Austrians, seeing the danger to the center as the Russian army moves to the attack, begin to deploy on the left bank of the river. The Austrian cavalry moves to hold up a force of Russians moving along the far road. The rest of the Austrians take up defensive posi-tions, determined to delay the Russians until help arrives.
The Russians move quickly, with two brigades of infantry in the center, supported by their cavalry. The fields are already having their effect, creating traffic jams as the Russian artillery can-not move across the enclosures. With-out the artillery the infantry presses ahead to the end of the fields, taking artillery fire from the Austrian “Grand Battery” guarding the road and first
bridge. The Russian artillery continues to struggle forward, finally gaining ac-cess to the fields.
Meanwhile, the only thing slowing up the Austrian flanking force on the left bank was the terrain. With a single road leading to each bridge and heavy woods surrounding the roads and river, the Austrians had difficulty deploying.
Finally, the Austrian cavalry emerged from the forest and was ready to move over the bridge. The Austrian skirmishers began to engage the Rus-sians holding the road while Russian cavalry moved to intercept the Austri-ans crossing the bridges. Russian artil-lery came into play on the road, trying to engage the Austrian artillery and coming out the worst for it.
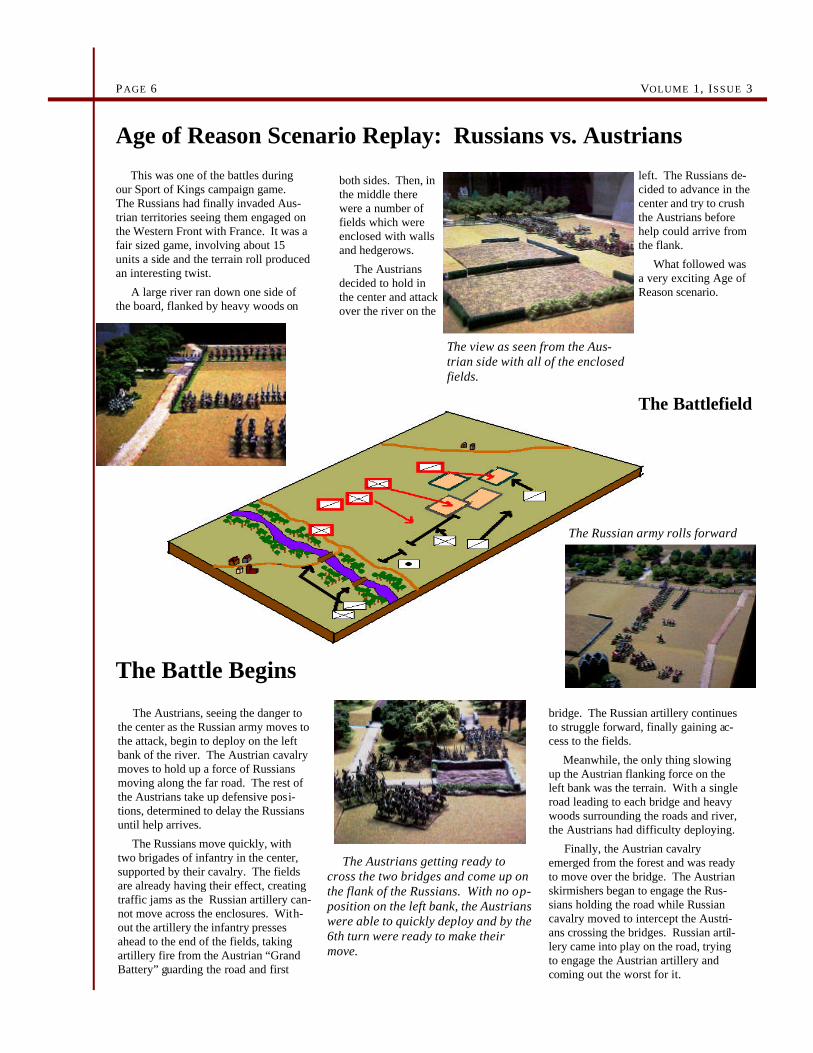
The Battlefield
Age of Reason Scenario Replay: Russians vs. Austrians
The Battle Begins
The view as seen from the Aus-trian side with all of the enclosed fields.
The Austrians getting ready to cross the two bridges and come up on the flank of the Russians. With no op-position on the left bank, the Austrians were able to quickly deploy and by the 6th turn were ready to make their move.
The Russian army rolls forward
WARNING ORDER PAGE 7 The Russians now moved against the center, trying to punch through before the Austrians crossed the river in force. The Austrian cavalry on the extreme right flank got tangled up in a melee that would last five turns! This contrib-uted to the Russians being unable to move forces around that flank.
Finally , the Austrian flanking force crosses the river and is immediately hit by a cavalry charge as the Russians des-perately try to block the bridges. The Russian cavalry is forced back while the Austrian infantry begins to deploy.
In the center the Russians have now moved into firefights with the Austrian
infantry. The Russian artillery begins to come into play on the center, but time is quickly running out. The Austrian infantry is holding its ground and without direct, close range artillery support, the Austrian infantry refuses to be forced back.
The Austrian cavalry has now reorganized and gets ready for another series of charges. The Russian infan-try guarding the road is being forced back and the artillery along the road has been hit hard. The Austrian cavalry
tory for the Austrians and gave them a ray of hope during the campaign. The random terrain roll produced an inter-esting set up. If we had all of our ter-rain that night it could have been worse as their were actually several more fields called for in the set up.
Both sides had pretty good deploy-ments and plans for the battle. The Rus-sians had several
The Austrian cavalry in the flanking force charges what’s left of the Russian artillery on the road and seizes the guns. It is met by the remains of the Russian cavalry and cuts through them as well. The Russian infantry has made little progress in the center and during the withdrawal phase they fail their die roll.
The Russians are forced to withdraw, losing 4 SP’s to the Austrian 2 SP loss. The Austrian pursuit roll is very good, however, and the Russian force loses an additional 2SP’s during the pursuit.
The game ended up as a major vic-
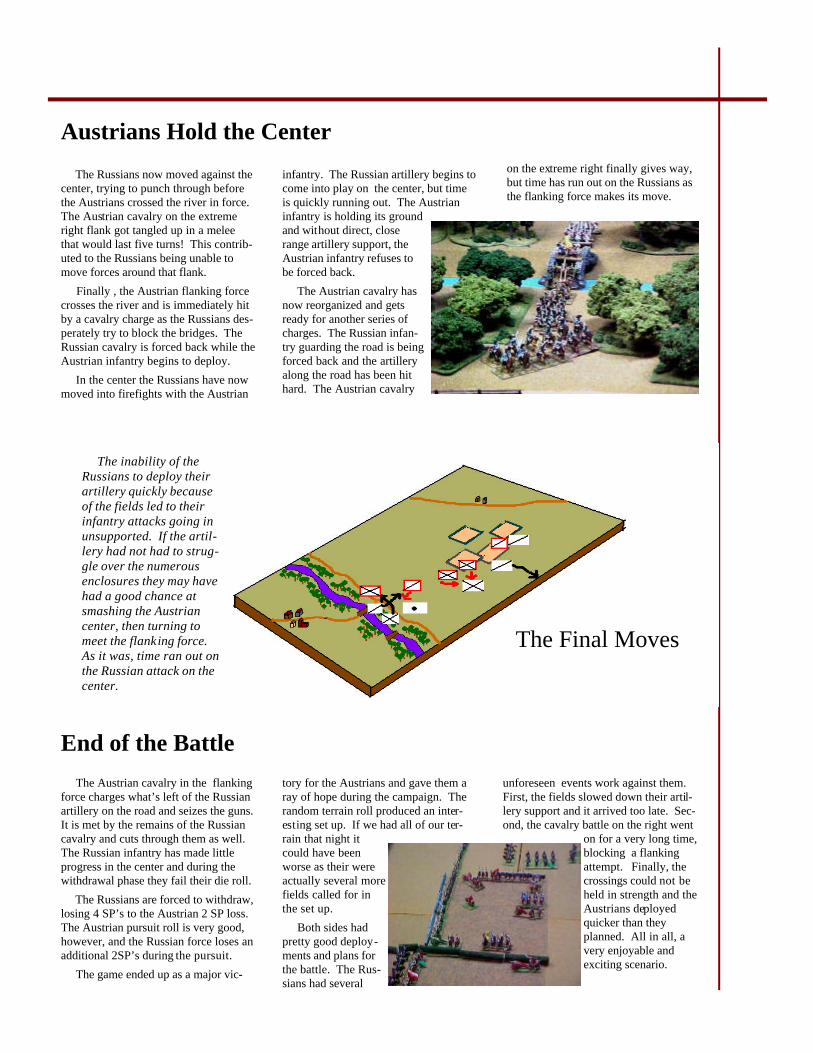
Austrians Hold the Center
End of the Battle unforeseen events work against them. First, the fields slowed down their artil-lery support and it arrived too late. Sec-ond, the cavalry battle on the right went
on for a very long time, blocking a flanking attempt. Finally, the crossings could not be held in strength and the Austrians deployed quicker than they planned. All in all, a very enjoyable and exciting scenario.
on the extreme right finally gives way, but time has run out on the Russians as the flanking force makes its move.
The Final Moves
The inability of the Russians to deploy their artillery quickly because of the fields led to their infantry attacks going in unsupported. If the artil-lery had not had to strug-gle over the numerous enclosures they may have had a good chance at smashing the Austrian center, then turning to meet the flanking force. As it was, time ran out on the Russian attack on the center.
VOLUME 1, ISSUE 3 PAGE 8
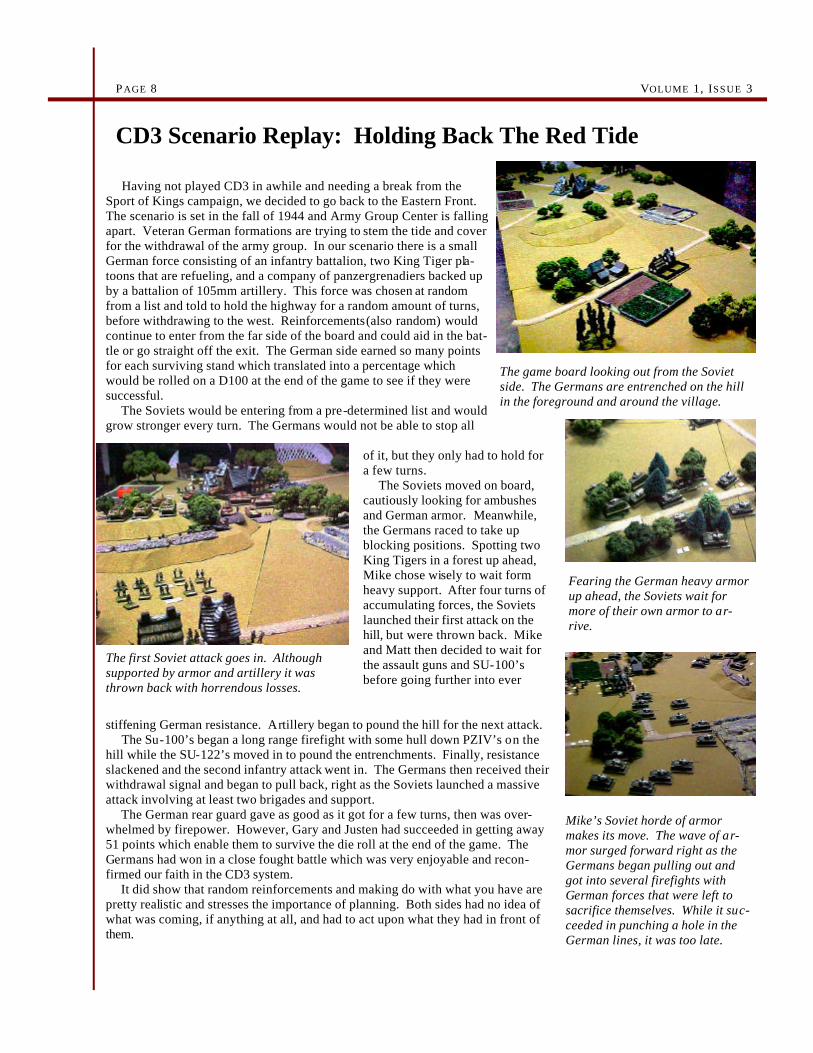
CD3 Scenario Replay: Holding Back The Red Tide
The game board looking out from the Soviet side. The Germans are entrenched on the hill in the foreground and around the village.
Fearing the German heavy armor up ahead, the Soviets wait for more of their own armor to ar-rive.
Having not played CD3 in awhile and needing a break from the Sport of Kings campaign, we decided to go back to the Eastern Front. The scenario is set in the fall of 1944 and Army Group Center is falling apart. Veteran German formations are trying to stem the tide and cover for the withdrawal of the army group. In our scenario there is a small German force consisting of an infantry battalion, two King Tiger pla-toons that are refueling, and a company of panzergrenadiers backed up by a battalion of 105mm artillery. This force was chosen at random from a list and told to hold the highway for a random amount of turns, before withdrawing to the west. Reinforcements(also random) would continue to enter from the far side of the board and could aid in the bat-tle or go straight off the exit. The German side earned so many points for each surviving stand which translated into a percentage which would be rolled on a D100 at the end of the game to see if they were successful. The Soviets would be entering from a pre-determined list and would grow stronger every turn. The Germans would not be able to stop all
The first Soviet attack goes in. Although supported by armor and artillery it was thrown back with horrendous losses.
Mike’s Soviet horde of armor makes its move. The wave of ar-mor surged forward right as the Germans began pulling out and got into several firefights with German forces that were left to sacrifice themselves. While it suc-ceeded in punching a hole in the German lines, it was too late.
of it, but they only had to hold for a few turns. The Soviets moved on board, cautiously looking for ambushes and German armor. Meanwhile, the Germans raced to take up blocking positions. Spotting two King Tigers in a forest up ahead, Mike chose wisely to wait form heavy support. After four turns of accumulating forces, the Soviets launched their first attack on the hill, but were thrown back. Mike and Matt then decided to wait for the assault guns and SU-100’s before going further into ever
stiffening German resistance. Artillery began to pound the hill for the next attack. The Su-100’s began a long range firefight with some hull down PZIV’s on the hill while the SU-122’s moved in to pound the entrenchments. Finally, resistance slackened and the second infantry attack went in. The Germans then received their withdrawal signal and began to pull back, right as the Soviets launched a massive attack involving at least two brigades and support. The German rear guard gave as good as it got for a few turns, then was over-whelmed by firepower. However, Gary and Justen had succeeded in getting away 51 points which enable them to survive the die roll at the end of the game. The Germans had won in a close fought battle which was very enjoyable and recon-firmed our faith in the CD3 system. It did show that random reinforcements and making do with what you have are pretty realistic and stresses the importance of planning. Both sides had no idea of what was coming, if anything at all, and had to act upon what they had in front of them.
WARNING ORDER PAGE 9
Scenario Design Pt. 2 by Mark Daymont
Some time ago one of my other hobbies was WW2 reen-acting. A local group was forming and recruiting new members. A couple of my friends and I decided to join, anxious to use the collectible military uniforms and gear we had been collecting and dis-playing for years before. We decided to participate with the German side. I was surprised at first to discover that the German unit consisted of 4 SS, 3 panzer troopers (no tanks available), and 2 elite mountain troops. All elite unit portrayals. There were no portrayals for the average Wehrmacht soldier. Over many years, I’ve seen a similar effect in wargaming (but not in WFHGS, of course!). A typi-cal wargamer tends to seek the use of the best and most elite troops and equipment, in whatever period being played! I can’t really blame them for it, they are flashy, brave, and wonderful at helping your odds of winning. But I hope I can make a case here for the alternative - raising the militia! I also mean more than militia. I mean the lower morale class, the inexperienced troops, the troops lacking the best in equipment. The troops most likely to pee their pants during an assault. The troops for which an actual advance would make oohs and awws escape the lips of those who belittle their mean achievements. Back when Command Decision came out, the group I was with decided to leap into it with micro armor. Immediately the Tigers and Panthers were primed and painted, the US airborne and Patton’s ar-mored began to be assembled, and the dreaded SS were called to battle. The first German troops I mo d-eled were the opposite. I had bought some battlepacks from GHQ, and many of us were dismayed at how GHQ had created the infantry figures- in blocks of ten all at attention as if on parade. I planned on using He-roics and Ross thereafter. But what to do with the pa-rade troops? Well, they were perfect for my project - a Luftwaffe Fortress Battalion! Those troops are well drilled in military formations, so the modeling was appropriate. I enjoyed researching and discovering how many late war formations were made of these
rear-area troops. I was surprised at how many. And, they painted up well in Luftwaffe blue. Those troops were used often - more than the Tigers! Your basic troops are essential. Next in line are the less than average troops. Elite troops are necessarily rare in armies. SO we need to see more less-than-perfect troops. These LW troops have necessarily been used at times for other average German troops, because that’s what often was available
in scenarios. But why use these troops if they’re likely to lose?
A good example of the answer occurred recently in an Age of Reason Seven Years War game. Turks versus Austrians. Most of the Turks were morale grade 1 and we didn’t expect much against the larger, higher morale Austrians. The enemy was to proceed from the far end of the terrain to relieve a smaller contingent. The fastest troops we had were 2 morale 1 skirmish horse units and a morale 1 lance, shield and armored horse unit. My job was to rush to the far end and slow down the advancing enemy. I thought I might not last long. However, I had great success. The reason is, I played to the poorer troops’ strengths. As skirmishers, I avoided combat whenever I could except when attacking a flank or rear. BUT, they still presented a threat, forcing the enemy to deploy, and therefore, delay their march. The tactics worked well until sufficient enemy cavalry could buy enough time for enemy infantry to form a flank-protected line for the advance. The key then, is to use these troops as they were used historically. No, the LW Fortress battalion would not be in the van of an assault against Soviet armored troops (OK, maybe against the British). But they ARE very tough to dig out of prepared defenses in bombed-out towns and fortif ications. In Age of Reason, Napoleonics etc., back them up with a second line and reserves and stiffen them with good leaders and artillery, and they will account well enough. Use them as a distraction, decoy, or hidden surprise. Enough! Get busy. Let’s see more landwehr, militia and support troops. Up with Hungarian militia! Here come the Spanish musketeer battalions! Victory is ours
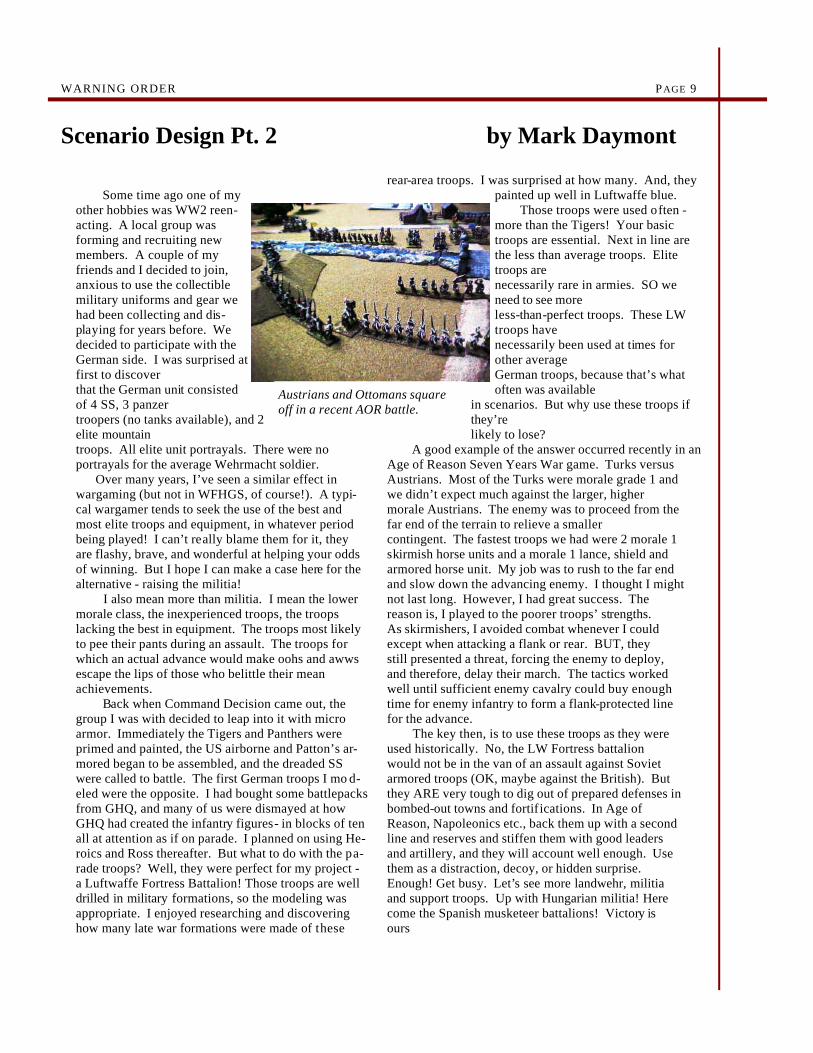
Austrians and Ottomans square off in a recent AOR battle.
VOLUME 1, ISSUE 3 PAGE 10
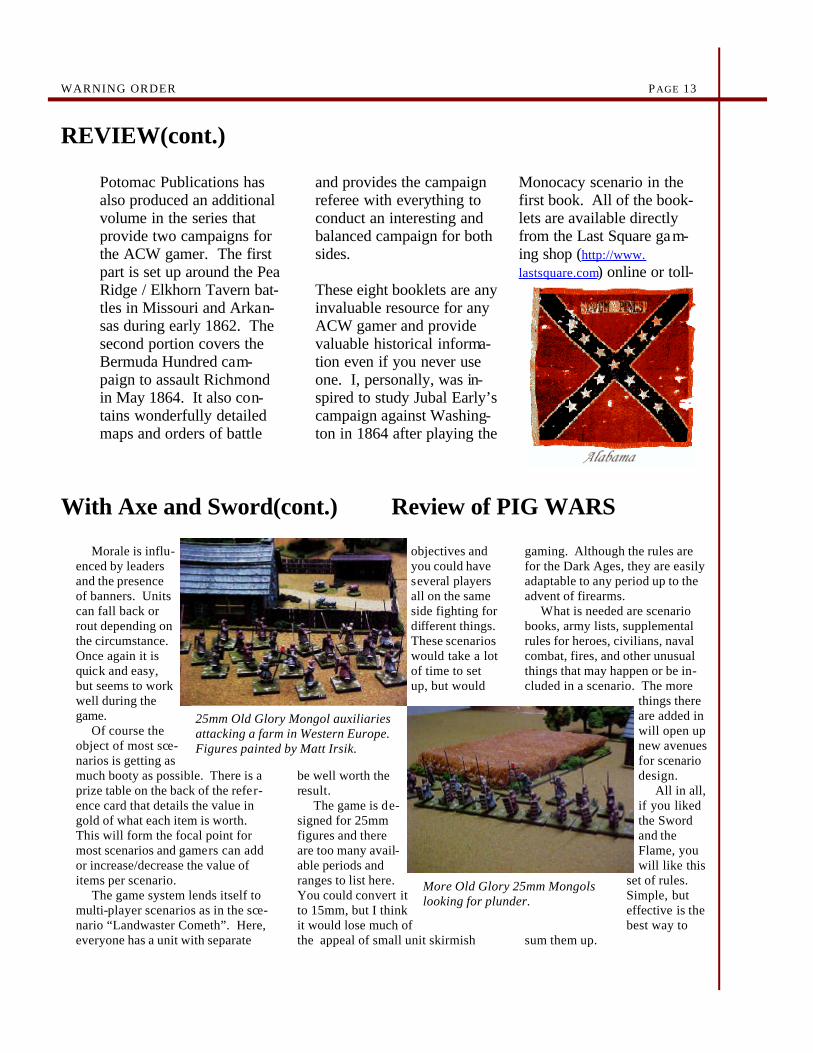
tion “ to come out someday.
For those who have-n’t seen the film, it was one of Michael Caine’s first films and is great for anyone interested in colonial warfare. It tells of the defense of Rorke’s Drift by a company of British soldiers after the open-ing of the Zulu war. The defense is fairly
accurate and the Zulu attacks are well done. The acting is above average and the show is well worth the effort.
As I stated above, I don’t understand why they would rerelease a version on DVD that hasn’t been cleaned up. With just a little effort they could have made what is al-ready a classic war movie into something truly spectacular.
I have been waiting almost two years for Zulu to be released on DVD, hoping it would be digitally remastered with extra features. I was sadly mistaken. The DVD version does have the entire film, including the Zulu dance at the King’s kraal, but that is about as far as it goes.
Now, it does beat watching the grainy versions on VHS that have been available for sale over the last few years. The picture is clear and the sound is acceptable, but it looks like we will have to wait for a “collector’s edi-
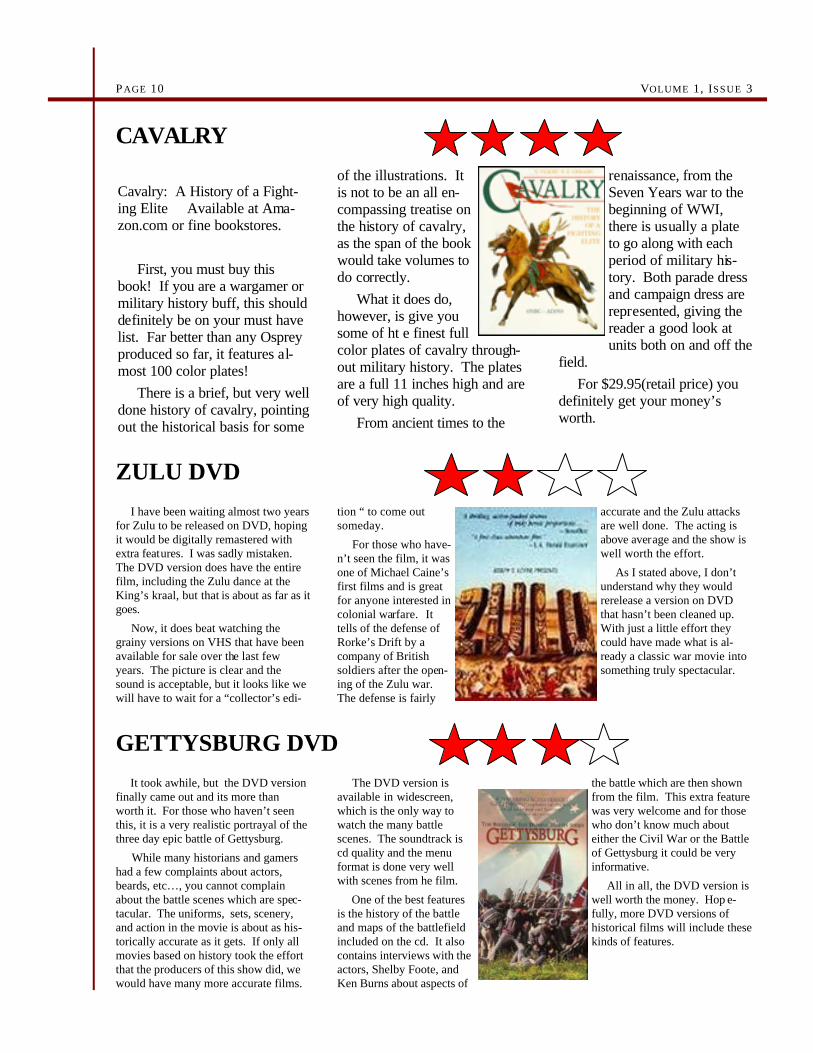
Cavalry: A History of a Fight-ing Elite Available at Ama-zon.com or fine bookstores. First, you must buy this book! If you are a wargamer or military history buff, this should definitely be on your must have list. Far better than any Osprey produced so far, it features al-most 100 color plates! There is a brief, but very well done history of cavalry, pointing out the historical basis for some
of the illustrations. It is not to be an all en-compassing treatise on the history of cavalry, as the span of the book would take volumes to do correctly. What it does do, however, is give you some of ht e finest full color plates of cavalry through-out military history. The plates are a full 11 inches high and are of very high quality. From ancient times to the
renaissance, from the Seven Years war to the beginning of WWI, there is usually a plate to go along with each period of military his-tory. Both parade dress and campaign dress are represented, giving the reader a good look at units both on and off the
field. For $29.95(retail price) you definitely get your money’s worth.
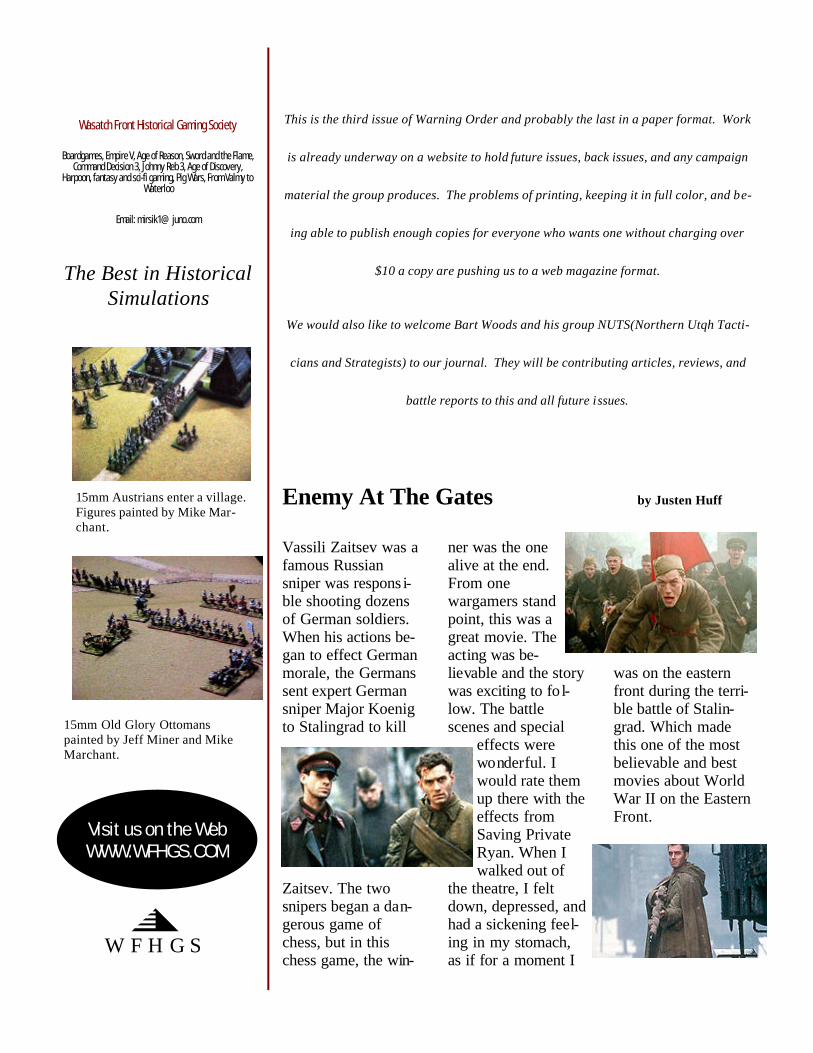
The DVD version is available in widescreen, which is the only way to watch the many battle scenes. The soundtrack is cd quality and the menu format is done very well with scenes from he film.
One of the best features is the history of the battle and maps of the battlefield included on the cd. It also contains interviews with the actors, Shelby Foote, and Ken Burns about aspects of
It took awhile, but the DVD version finally came out and its more than worth it. For those who haven’t seen this, it is a very realistic portrayal of the three day epic battle of Gettysburg.
While many historians and gamers had a few complaints about actors, beards, etc…, you cannot complain about the battle scenes which are spec-tacular. The uniforms, sets, scenery, and action in the movie is about as his-torically accurate as it gets. If only all movies based on history took the effort that the producers of this show did, we would have many more accurate films.
the battle which are then shown from the film. This extra feature was very welcome and for those who don’t know much about either the Civil War or the Battle of Gettysburg it could be very informative.
All in all, the DVD version is well worth the money. Hop e-fully, more DVD versions of historical films will include these kinds of features.
ZULU DVD
CAVALRY
GETTYSBURG DVD

WARNING ORDER PAGE 11
NAVAL HISTORY: PORTSMOUTH, ENGLAND
Portsmouth, while generally being uninspiring as far as cities go, has several attractions worth the time of any wargamer or historian. The town has traditionally been one of the main bases for the English warships which have kept control of the channel for the last several centuries. It is an ideal location, with a deep, sheltered (and very large) bay. It is large enough that a large French battle fleet once went head to head against the English inside the harbor, with room to spare! It was from here that the Mary Rose (considered the largest and best-built ship in the English fleet) sailed to its doom in the 1500's. Ironically it was not sunk by French attack, but rather by its own design, for sallying forth at the head of the English fleet, it attempted to turn into the wind, and capsized, dragging almost its entire crew to the bottom of the channel in front of the rest of the horrified English Fleet. What is left of the Mary Rose has been salvaged, and is now housed along the Portsmouth waterfront in a specially designed building. Among other naval heirlooms kept in the harbor are HMS Victory, of Trafalgar fame, and still kept in very good condition, and the HMS Warrior, which contrary to popular belief, was the first ironclad warship the world saw, having been launched in 1860. As with the rest of Britain, Portsmouth enjoys a peculiar mixture of old (even ancient) and new existing side by side, sometimes separated only by a few feet. A hundred yards or so from where HMS Vic-tory reposes in her 200 year-old splendor, 4 new destroyers are sitting in drydocks in various stages of Construction. To counter the threat of Portsmouth ever being taken from the landward side by an ambitious French attack, a ring of huge brick forts where built there in the early 1800's. They were strategically sited on the surrounding hills to be able to place cannon fire on any point between them. The garrisons manned an impressive array of mounted artillery, and perhaps in tribute to this one of the forts, Fort Nelson, when decommissioned, was turned into an artillery museum. Here much of the vast array of artillery of all makes, descriptions and calibers captured from various enemies all across the world has been sent. There are hundreds of pieces kept there, including lion and dragon encrusted bronze cannon from India and China.
There are also numerous under-ground galleries to explore, including an impressive winding collection of drafty tunnels, used by the Brit-ish as an intelligence post in WW2. On a good day you might even catch (as the author did) an impressive live- fire display by a troop of uniformed reenactors
manning a still-working 9 lb gun used by the British in the Peninsular war in Spain to such effect. The smoke ejected by this one cannon was enough to engulf the entire watching crowd in a thick, stinking smoke. One can see why the Battlefield of that age was so confusing, with hundreds of these cannon and hundreds of thousands of muskets firing the same smoke. Portsmouth offers several other attractions which space does not permit discussion of, but if you are planning a vis it to England (or live there already), it is an excellent stopover for a day, and is only about an hour down the motorway from Londons Gatwick airport. It is well worth the time.
By Mike Marchant

VOLUME 1, ISSUE 3 PAGE 12
REVIEW: Civil War Scenario Books by Gary Sapp
Like everyone else who wargames, I am con-stantly searching for sources of inspiration for games. I can always throw something to-gether, but if I have something to start with, even if I have to modify it for the troops the group actually has, a better game usually re-sults. That’s why I really enjoy the set of American Civil War Scenario books from Po-tomac Publications. The books, seven in all, contain 10-14 scenarios each. All of the scenario books are based on real battles or portions of battles. The scenarios in six of the books are set at the regimental level and are generally designed to be played with Johnny Reb II. They are easily adaptable to JR III and have enough detail to be changed to work with any rule set. The seventh book is done at the bri-gade level and is designed to be used with Fire and Fury or other rule sets in the same scale. The books in the series and what they contain are: Bullets & Dirt, 14 scenarios, all theatres, regi-mental level. Contains two pure cavalry sce-narios. Rebel Yell, Yankee Hurrah, 12 scenarios, western theatre, regimental level. Across a Deadly Space, 12 scenarios, eastern theatre, regimental level, one pure cavalry sce-nario (Eastern Cavalry Field at Gettysburg). Kirby Smith’s Confederacy, 13 scenarios, western theatre, regimental level, one pure cav-alry scenario.
A Clash of Sabers, 11 cavalry scenarios, all theatres, regimental level. Bayonets, Shells & Balls, 10 scenarios, eastern theatre, brigade level. Forward the Colors, 12 scenarios, all thea-tres, regimental level.
Each scenario is well pre-sented with great detail. A background history putting the battle in its proper his-torical prospective and ex-plaining the how the battle took place, the major per-sonalities involved and the historical result. The sce-nario notes describe what portion of the battle is being
modeled, how the forces are deployed at the start of the scenario, general terrain de-scriptions and victory conditions. A de-tailed order of battle is presented, with commanders at army, corps, division, and brigade identified along with their com-mand level given. The individual regi-ments are listed with their strength in men, weapons, and morale level given. Each scenario is also provided with a very de-tailed map showing fence lines, structures,
WARNING ORDER PAGE 13
With Axe and Sword(cont.) Review of PIG WARS
REVIEW(cont.)
Potomac Publications has also produced an additional volume in the series that provide two campaigns for the ACW gamer. The first part is set up around the Pea Ridge / Elkhorn Tavern bat-tles in Missouri and Arkan-sas during early 1862. The second portion covers the Bermuda Hundred cam-paign to assault Richmond in May 1864. It also con-tains wonderfully detailed maps and orders of battle
and provides the campaign referee with everything to conduct an interesting and balanced campaign for both sides. These eight booklets are any invaluable resource for any ACW gamer and provide valuable historical informa-tion even if you never use one. I, personally, was in-spired to study Jubal Early’s campaign against Washing-ton in 1864 after playing the
Monocacy scenario in the first book. All of the book-lets are available directly from the Last Square gam-ing shop (http://www.lastsquare.com) online or toll-
Morale is influ-enced by leaders and the presence of banners. Units can fall back or rout depending on the circumstance. Once again it is quick and easy, but seems to work well during the game. Of course the object of most sce-narios is getting as much booty as possible. There is a prize table on the back of the refer-ence card that details the value in gold of what each item is worth. This will form the focal point for most scenarios and gamers can add or increase/decrease the value of items per scenario. The game system lends itself to multi-player scenarios as in the sce-nario “Landwaster Cometh”. Here, everyone has a unit with separate
objectives and you could have several players all on the same side fighting for different things. These scenarios would take a lot of time to set up, but would
be well worth the result. The game is de-signed for 25mm figures and there are too many avail-able periods and ranges to list here. You could convert it to 15mm, but I think it would lose much of the appeal of small unit skirmish
gaming. Although the rules are for the Dark Ages, they are easily adaptable to any period up to the advent of firearms. What is needed are scenario books, army lists, supplemental rules for heroes, civilians, naval combat, fires, and other unusual things that may happen or be in-cluded in a scenario. The more
things there are added in will open up new avenues for scenario design. All in all, if you liked the Sword and the Flame, you will like this
set of rules. Simple, but effective is the best way to
sum them up.
25mm Old Glory Mongol auxiliaries attacking a farm in Western Europe. Figures painted by Matt Irsik.
More Old Glory 25mm Mongols looking for plunder.
This is the third issue of Warning Order and probably the last in a paper format. Work
is already underway on a website to hold future issues, back issues, and any campaign
material the group produces. The problems of printing, keeping it in full color, and be-
ing able to publish enough copies for everyone who wants one without charging over
$10 a copy are pushing us to a web magazine format.
We would also like to welcome Bart Woods and his group NUTS(Northern Utqh Tacti-
cians and Strategists) to our journal. They will be contributing articles, reviews, and
battle reports to this and all future issues.
Boardgames, Empire V, Age of Reason, Sword and the Flame, Command Decision 3, Johnny Reb 3, Age of Discovery,
Harpoon, fantasy and sci-fi gaming, Pig Wars, From Valmy to Waterloo
Wasatch Front Historical Gaming Society
ner was the one alive at the end. From one wargamers stand point, this was a great movie. The acting was be-lievable and the story was exciting to fo l-low. The battle scenes and special
effects were wonderful. I would rate them up there with the effects from Saving Private Ryan. When I walked out of
the theatre, I felt down, depressed, and had a sickening feel-ing in my stomach, as if for a moment I
Vassili Zaitsev was a famous Russian sniper was respons i-ble shooting dozens of German soldiers. When his actions be-gan to effect German morale, the Germans sent expert German sniper Major Koenig to Stalingrad to kill
Zaitsev. The two snipers began a dan-gerous game of chess, but in this chess game, the win-
was on the eastern front during the terri-ble battle of Stalin-grad. Which made this one of the most believable and best movies about World War II on the Eastern Front.
Enemy At The Gates by Justen Huff
Email: [email protected]
The Best in Historical Simulations
Visit us on the Web WWW.WFHGS.COM
WFHGS
15mm Austrians enter a village. Figures painted by Mike Mar-chant.
15mm Old Glory Ottomans painted by Jeff Miner and Mike Marchant.