Embed Size (px)
Citation preview

WEBER CARBURETOR CONVERSION KIT INSTALLATION GUIDE
Page 2 WEBER
FOR SAFETY PURPOSES: USE CLAMPS ON ALL FUEL HOSES. DO NOT USE GASKET SEALERS, USE GASKETS PROVIDED. WHEN REMOVING OLD CARBURETOR LABEL ALL HOSES AND WIRES. IF NECESSARY CLEAN ENGINE BEFORE INSTALLATION. USE LOCTITE ON HARDWARE INSIDE AIR CLEANER AND INTAKE MANIFOLD STUDS. IF REWIRING IS NEEDED ALWAYS USE AN INSULATED CONNECTOR OR TAP. NEVER ALLOW DIRT IN THE CARBURETOR. DO NOT OVERTIGHTEN JETS OR THROTTLE LINKAGE. NEVER OPERATE THE ENGINE WITHOUT A FUEL FILTER. DO NOT ALLOW FUEL TO SPILL OR LEAK. BECAREFUL NOT TO CUT OR DENT THE ALUMINUM GASKET SURFACES
OF THE INTAKE MANIFOLD OR CARBURETOR. ALWAYS WEAR EYE PROTECTION.
Any items in BOLD FACE TYPE or with a next to it, Please pay extra attention to. This will help to ensure an error free installation with optimal vehicle operation.
This section should be completed before you install this Weber Conversion Kit. Please make sure that the Parts were not damaged in shipment.
Please check the contents of the kit against the picture on page 1.
If any parts were missing or the parts were damaged in shipping please contact your Weber Dealer.
Verify that your vehicle had a recent tune up and you do not have any
other mechanical problems. The Weber Carburetor can not fix engine, and ignition problems.
Weber Carburetors require 2.5 p.s.i. of Fuel pressure. If your fuel pressure is more than 2.5 p.s.i, obtain a Fuel Pressure Regulator from your Weber Dealer.
The electric choke and idle cut-off solenoids require a key hot 12-Volt source.
Connect the electric choke to the Vehicles existing electric choke power source using a jumper wire.
You must remove the EGR valve pipe. The manifold will be sealed with the plate provided in the kit. (check local laws ) YOU SHOULD HAVE NO EXHAUST GAS LEAKING FROM THE EGR.
Weber Carburetors are preset at the Factory. Only make adjustments to the carburetor after the installation, and running the vehicle for the first time. After the carburetor is installed record the factory settings if needed in the future.
Please save your sales receipt and all carburetor documentation for future use.
WEBER CARBURETOR CONVERSION KIT INSTALLATION GUIDE
Page 3 WEBER
Any items in BOLD FACE TYPE or with a next to it, Please pay extra attention to. This will help to ensure an error free installation with optimal vehicle operation.
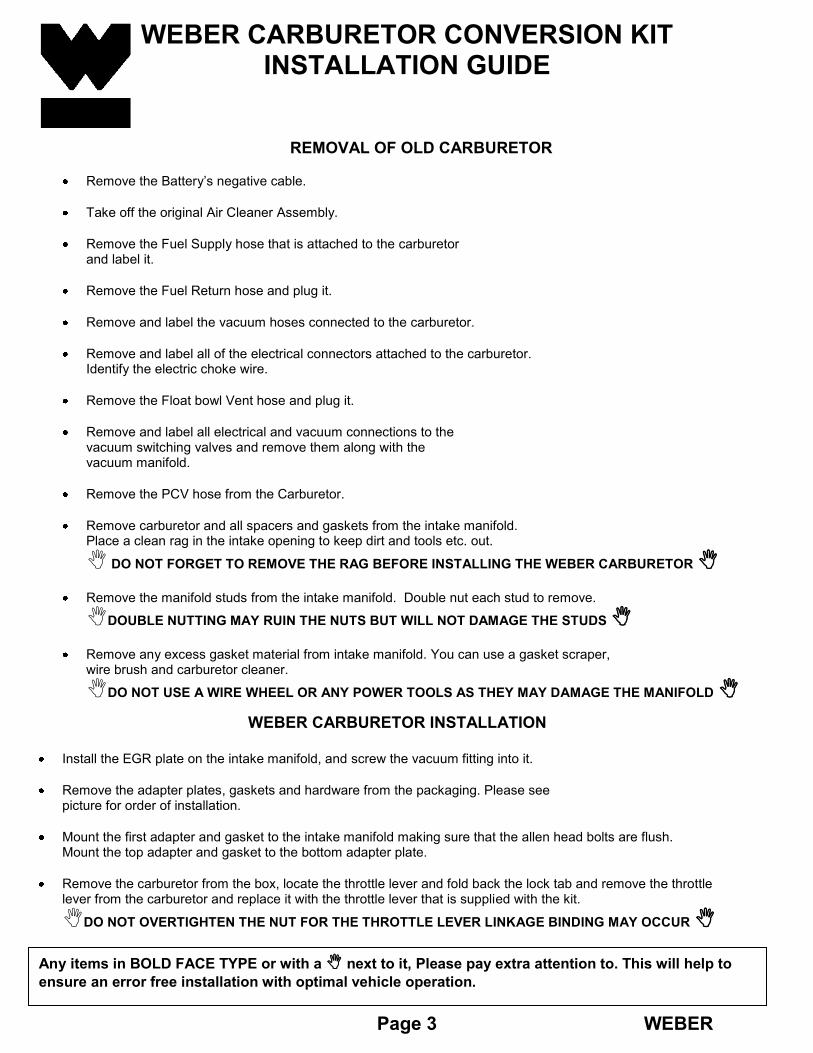
REMOVAL OF OLD CARBURETOR Remove the Battery’s negative cable.
Take off the original Air Cleaner Assembly.
Remove the Fuel Supply hose that is attached to the carburetor
and label it.
Remove the Fuel Return hose and plug it.
Remove and label the vacuum hoses connected to the carburetor.
Remove and label all of the electrical connectors attached to the carburetor. Identify the electric choke wire.
Remove the Float bowl Vent hose and plug it.
Remove and label all electrical and vacuum connections to the vacuum switching valves and remove them along with the vacuum manifold.
Remove the PCV hose from the Carburetor.
Remove carburetor and all spacers and gaskets from the intake manifold. Place a clean rag in the intake opening to keep dirt and tools etc. out.
DO NOT FORGET TO REMOVE THE RAG BEFORE INSTALLING THE WEBER CARBURETOR
Remove the manifold studs from the intake manifold. Double nut each stud to remove.
DOUBLE NUTTING MAY RUIN THE NUTS BUT WILL NOT DAMAGE THE STUDS
Remove any excess gasket material from intake manifold. You can use a gasket scraper, wire brush and carburetor cleaner.
DO NOT USE A WIRE WHEEL OR ANY POWER TOOLS AS THEY MAY DAMAGE THE MANIFOLD
WEBER CARBURETOR INSTALLATION
Install the EGR plate on the intake manifold, and screw the vacuum fitting into it.
Remove the adapter plates, gaskets and hardware from the packaging. Please see picture for order of installation.
Mount the first adapter and gasket to the intake manifold making sure that the allen head bolts are flush. Mount the top adapter and gasket to the bottom adapter plate.
Remove the carburetor from the box, locate the throttle lever and fold back the lock tab and remove the throttle lever from the carburetor and replace it with the throttle lever that is supplied with the kit.
DO NOT OVERTIGHTEN THE NUT FOR THE THROTTLE LEVER LINKAGE BINDING MAY OCCUR

WEBER CARBURETOR CONVERSION KIT INSTALLATION GUIDE
Page 4 WEBER
Any items in BOLD FACE TYPE or with a next to it, Please pay extra attention to. This will help to ensure an error free installation with optimal vehicle operation.
WEBER CARBURETOR INSTALLATION (continued) Install the Weber Carburetor on the four mounting studs. Using a criss-cross pattern
tighten evenly. Fuel Inlet Faces front of Vehicle. DO NOT OVERTIGHTEN
For 4 Wheel Drive trucks only. The original throttle cable bracket has to be raised. Use the spacers and allen bolts in the linkage kit. They mount under the bracket.
Reinstall the throttle linkage rod to the carburetor.
For adjustment of the throttle rod (cable)
Throttle Linkage adjustments (cable or rod): While holding the choke plates open turn the throttle linkage by hand to release the fast idle cam from the screw then release the throttle lever. Now adjust the rod or cable until you have some free play. To check for full throttle operation have a helper hold the accelerator pedal to the floor and check the throttle lever by hand for additional travel, you can shorten the cable or lengthen the rod as required to eliminate additional travel. Hold the choke plates open and release the accelerator pedal and check again for any free play.
You must have free play in the cable or rod and throttle lever must return to the idle position every time you press on the accelerator pedal YOU SHOULD NOT GO ANY FURTHER IN THE INSTALLATION UNLESS THE THROTTLE IS
WORKING PERFECTLY
If vehicle is equipped with an automatic transmission, make sure that the A/T kickdown cable pulls till its end when the accelerator is to the floor.
Locate the fuel inlet pipe (see picture) on the carburetor and connect the supply line to it.
Take the EGR hose and connect it to the fitting that was installed in the EGR plate.
Locate the vacuum advance hose and connect it to the vacuum advance port on the carburetor. (see picture)
Locate any open vacuum ports and hoses and plug them. (check local laws)
Locate the wire for the electric choke and connect to the electric choke.
At this point make sure that all hose clamps are tightened and that all of the electrical connectors are connected and insulated.
Reconnect the Battery’s negative cable.

WEBER CARBURETOR CONVERSION KIT INSTALLATION GUIDE
Page 5 WEBER
Any items in BOLD FACE TYPE or with a next to it, Please pay extra attention to. This will help to ensure an error free installation with optimal vehicle operation.
WEBER CARBURETOR INSTALLATION (continued) Crank Engine without starting and check for fuel leaks.
DO NOT GO ANY FURTHER WITHOUT INSPECTING AND FIXING
Remove Air cleaner from packaging. Connect plastic breather tube to air filter base then bolt air filter base to carburetor using the four screws provided.
Attach the breather hose from the valve cover to the air cleaner.
Put the air filter element on the air filter base and attach the air cleaner top with the clips provided.
To check the clearance between the hood and air filter, place some crumpled up aluminum on the air cleaner top and slowly lower the hood and check clearance.
CARBURETOR ADJUSTMENTS (see pictures for identification of components) Only make the adjustments discussed here if necessary.
To set the idle speed make sure that the engine is warm, set the speed to the
vehicle manufacturer’s setting. To raise the speed turn the idle screw (clockwise) in, and to lower the speed turn the speed screw (counter clockwise) out.
To set the idle mixture turn the idle mixture screw in slowly (clockwise) counting the amount of turns you make until the idle speed drops off. Turn the screw out (counter clockwise) counting the turns until the idle drops off again. Turn the screw now back in half the distance that you turned out. Now the mixture is set.
To set the fast idle make sure that the engine is cold. Press the accelerator pedal to the floor and let go. Start the engine (do not touch the accelerator pedal once you touch the accelerator after the engine is running the fast idle cam is disengaged. The engine should be revving between 2000 and 2500 Rpm’s. Turn off the engine. To adjust the fast idle speed turn the fast idle screw in (clockwise) to increase engine RPM, to decrease engine RPM turn the fast idle screw out (counterclockwise) Do not touch the accelerator and restart engine to check RPM.
The choke is Factory set. To adjust make sure that the engine is cool (below 68F) Turn the throttle linkage all the way to set the choke. The plates should be closed. Make a mark on the plastic choke cap and the carburetor where the two surfaces meet. Loosen the three screws one turn. Hold the throttle about one third open and start twisting the thermostat cap (counter clockwise) until the choke plates fully close, then slowly turn the cap 1/8” (you should feel the spring tension in the choke tightening). Retighten the three screws (do not over tighten). You may now have to go back and check the fast idle speed and adjust if necessary.

WEBER CARBURETOR CONVERSION KIT INSTALLATION GUIDE
Page 6 WEBER
Any items in BOLD FACE TYPE or with a next to it, Please pay extra attention to. This will help to ensure an error free installation with optimal vehicle operation.
TROUBLE SHOOTING GUIDE
In order to properly trouble shoot any suspected carburetor problems please double check the following: Please read through the Weber Carburetor Installation section. Go over any item that has BOLD FACE TYPE
Or has a next to it. If the vehicle will not start please check the following: Check that the fuel pump is functioning properly. Check with pressure gauge. Make sure that the ignition system is functioning properly. If the engine idles too fast or too slow or stalls please check the following: Make sure that you have no vacuum leaks. You should check all engine vacuum line connections and at the carburetor base (including the adapter plates). Check all Carburetor adjustments. Idle mixture, idle speed, and fast idle. In this order. If the engine idles fine but acts as if it is running out of fuel when driving please check the following: If new fuel filter was not installed install one now. The old fuel filter may be clogged. Check that the fuel pump is functioning properly. Check with pressure gauge. Check all fuel lines. Make sure that the lines are not pinched or kinked. Check that the vehicle has not run out of gas. Check the fuel tank venting system. (Refer to vehicle shop manual) If the engine runs rough or sounds like it is missing at idle please check the following: Make sure that you have no vacuum leaks. You should check all engine vacuum line connections and at the carburetor base (including the adapter plates). Check the idle mixture adjustment. If you were not able to correct the problem with the information provided above contact your Weber Dealer .
Also please remember that any additional engine modifications such as Headers, High Performance camshafts, free flow exhaust systems may require that the carburetor be recalibrate. If this is the case please contact your Weber Dealer.
WEBER CARBURETOR CONVERSION KIT INSTALLATION GUIDE
Page 7 WEBER
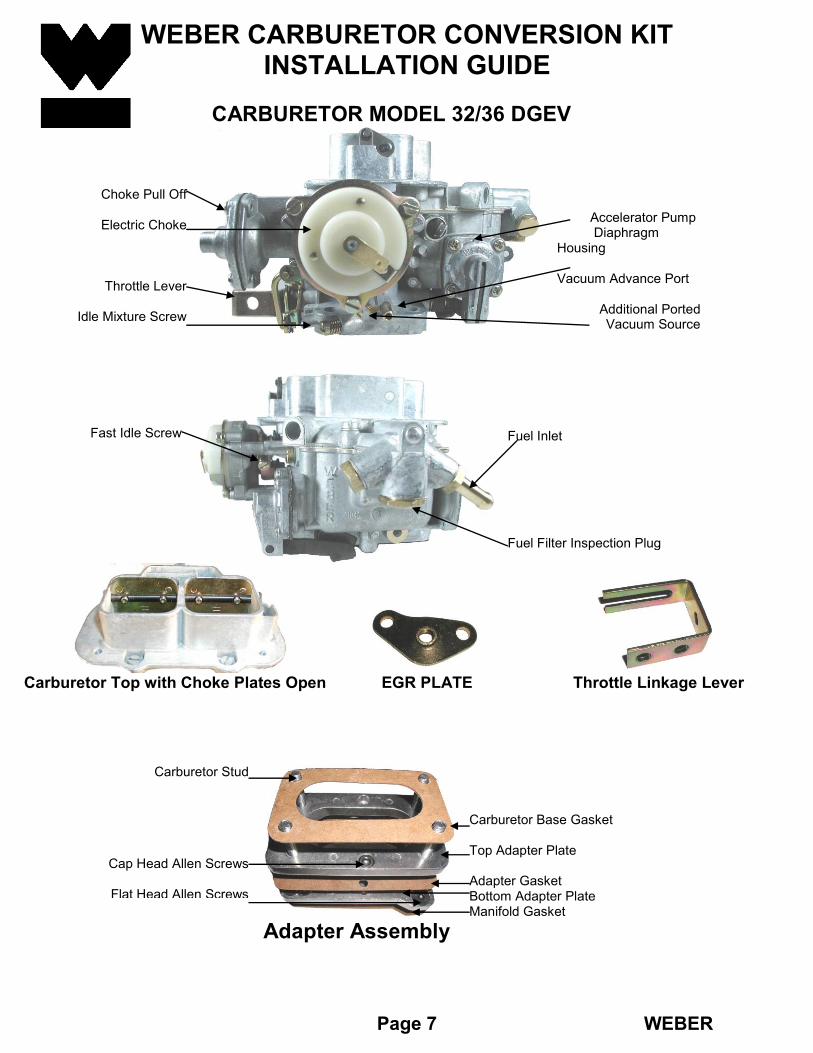
Carburetor Top with Choke Plates Open EGR PLATE Throttle Linkage Lever
Adapter Assembly
CARBURETOR MODEL 32/36 DGEV
Carburetor Base Gasket Top Adapter Plate Adapter Gasket Bottom Adapter Plate Manifold Gasket
Carburetor Stud
Cap Head Allen Screws
Flat Head Allen Screws
Choke Pull Off
Electric Choke
Throttle Lever
Idle Mixture Screw
Accelerator Pump Diaphragm Housing Vacuum Advance Port
Additional Ported Vacuum Source
Fuel Inlet Fuel Filter Inspection Plug
Fast Idle Screw