Embed Size (px)
Citation preview

Recovery Tipsfor Idaho
Wildfi re
Helping People Help the Land.
Idaho

Produced by:USDANatural Resources Conservation ServiceBoise, IdahoAugust 2006www.id.nrcs.usda.gov
For more copies call: (208) 378-5700
The Natural Resources Conservation Service (NRCS) is an agency of the U.S. Department of Agriculture (USDA). Since the 1930s, NRCS has provided private landowners voluntary technical and financial assistance to care for their natural resources.
Helping People Help the Land.

Contents
As more homeowners move into rural areas to get away from crowded urban areas, they can un-
knowingly place themselves in harm’s way. Building homes in wooded and/or brushy areas is visually pleasing, but homeowners need to be aware of the potential dangers from wildfi re and how to protect their home sites. Homes even far away from a fi re can still be impacted. Slopes left denuded by range or forest fi res are especially susceptible to accelerated soil erosion, fl ash fl ooding and debris fl ows due to the absence of
vegetation and roots to bind the soil. Home sites near waterways or on downstream slopes could also be susceptible. This publication contains some techniques, prac-tices and information that homeowners can use to reduce the chances of damage from wildfi res and related fl ooding events. The Natural Resources Conservation Service (NRCS) and your local conservation district are avail-able to answer any questions and provide assistance.
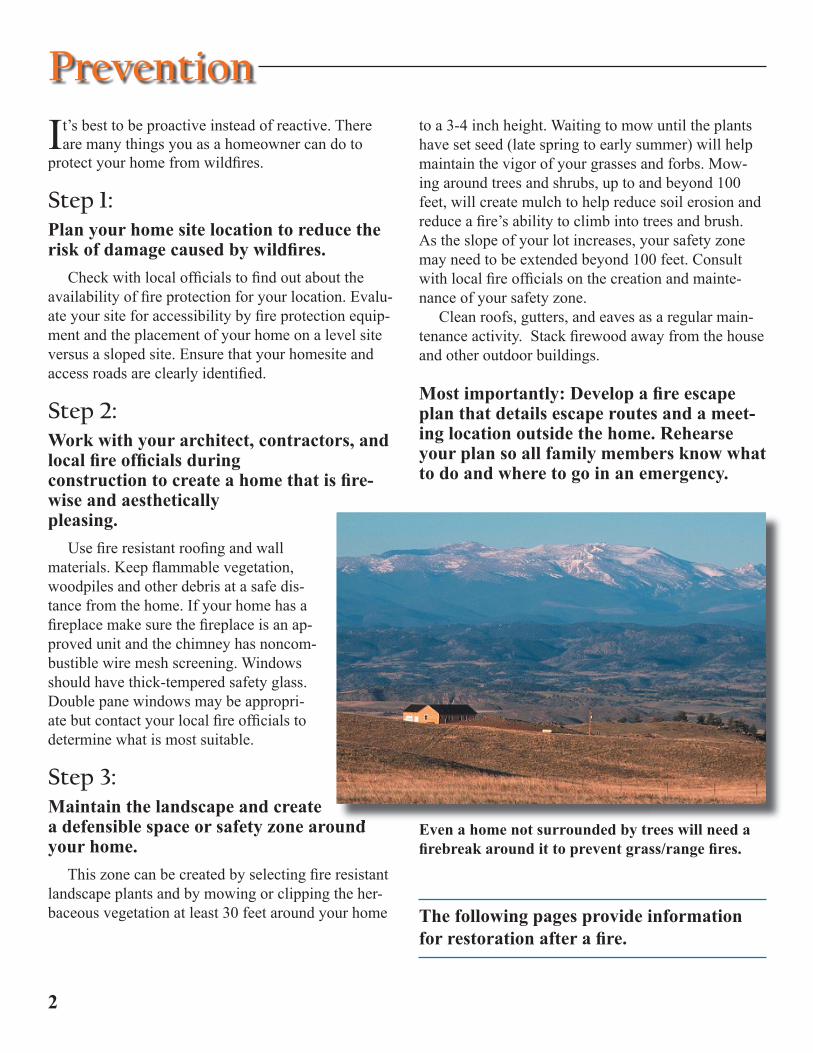
A house in danger from a brush fi re. Sound fi re prevention techniques saved this house.
Prevention 2
Revegetation 3
Vegetative PracticesRecommended Grasses & Forbs, Northern Idaho 4
Recommended Grasses & Forbs, Eastern & Southern Idaho 5
Seeding 5
Hydroseeding & Hydromulching 8
Structural PracticesJute Netting 9
Sandbag Protection 10
Silt Fence 12
Straw Bale Check Dams 14
Straw Bale Dikes 16
Straw Mulching 18 Hazards from Debris Flows 20
For Additional Information 20
Prevention
It’s best to be proactive instead of reactive. There are many things you as a homeowner can do to
protect your home from wildfi res.
Step 1: Plan your home site location to reduce the risk of damage caused by wildfi res. Check with local offi cials to fi nd out about the availability of fi re protection for your location. Evalu-ate your site for accessibility by fi re protection equip-ment and the placement of your home on a level site versus a sloped site. Ensure that your homesite and access roads are clearly identifi ed.
Step 2:Work with your architect, contractors, and local fi re offi cials during construction to create a home that is fi re-wise and aestheticallypleasing. Use fi re resistant roofi ng and wall materials. Keep fl ammable vegetation, woodpiles and other debris at a safe dis-tance from the home. If your home has a fi replace make sure the fi replace is an ap-proved unit and the chimney has noncom-bustible wire mesh screening. Windows should have thick-tempered safety glass. Double pane windows may be appropri-ate but contact your local fi re offi cials to determine what is most suitable.
Step 3:Maintain the landscape and create a defensible space or safety zone around your home. This zone can be created by selecting fi re resistant landscape plants and by mowing or clipping the her-baceous vegetation at least 30 feet around your home
to a 3-4 inch height. Waiting to mow until the plants have set seed (late spring to early summer) will help maintain the vigor of your grasses and forbs. Mow-ing around trees and shrubs, up to and beyond 100 feet, will create mulch to help reduce soil erosion and reduce a fi re’s ability to climb into trees and brush.As the slope of your lot increases, your safety zone may need to be extended beyond 100 feet. Consult with local fi re offi cials on the creation and mainte-nance of your safety zone. Clean roofs, gutters, and eaves as a regular main-tenance activity. Stack fi rewood away from the house and other outdoor buildings.
Most importantly: Develop a fi re escape plan that details escape routes and a meet-ing location outside the home. Rehearse your plan so all family members know what to do and where to go in an emergency.
a defensible space or safety zone around Even a home not surrounded by trees will need a fi rebreak around it to prevent grass/range fi res.
The following pages provide information for restoration after a fi re.
2
Revegetation
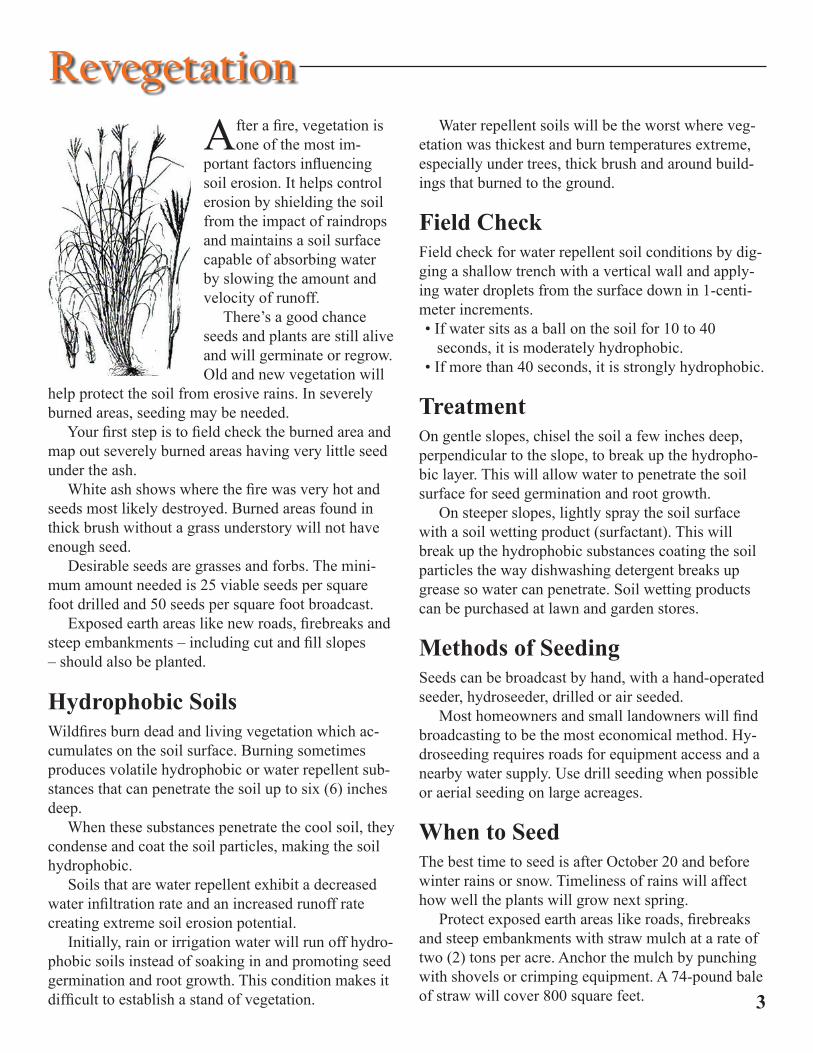
After a fi re, vegetation is one of the most im-
portant factors infl uencing soil erosion. It helps control erosion by shielding the soil from the impact of raindrops and maintains a soil surface capable of absorbing water by slowing the amount and velocity of runoff. There’s a good chance seeds and plants are still alive and will germinate or regrow. Old and new vegetation will
help protect the soil from erosive rains. In severely burned areas, seeding may be needed. Your fi rst step is to fi eld check the burned area and map out severely burned areas having very little seed under the ash. White ash shows where the fi re was very hot and seeds most likely destroyed. Burned areas found in thick brush without a grass understory will not have enough seed. Desirable seeds are grasses and forbs. The mini-mum amount needed is 25 viable seeds per square foot drilled and 50 seeds per square foot broadcast. Exposed earth areas like new roads, fi rebreaks and steep embankments – including cut and fi ll slopes – should also be planted.
Hydrophobic SoilsWildfi res burn dead and living vegetation which ac-cumulates on the soil surface. Burning sometimes produces volatile hydrophobic or water repellent sub-stances that can penetrate the soil up to six (6) inches deep. When these substances penetrate the cool soil, they condense and coat the soil particles, making the soil hydrophobic. Soils that are water repellent exhibit a decreased water infi ltration rate and an increased runoff rate creating extreme soil erosion potential. Initially, rain or irrigation water will run off hydro-phobic soils instead of soaking in and promoting seed germination and root growth. This condition makes it diffi cult to establish a stand of vegetation.
Water repellent soils will be the worst where veg-etation was thickest and burn temperatures extreme, especially under trees, thick brush and around build-ings that burned to the ground.
Field CheckField check for water repellent soil conditions by dig-ging a shallow trench with a vertical wall and apply-ing water droplets from the surface down in 1-centi-meter increments.• If water sits as a ball on the soil for 10 to 40
seconds, it is moderately hydrophobic.• If more than 40 seconds, it is strongly hydrophobic.
TreatmentOn gentle slopes, chisel the soil a few inches deep, perpendicular to the slope, to break up the hydropho-bic layer. This will allow water to penetrate the soil surface for seed germination and root growth. On steeper slopes, lightly spray the soil surface with a soil wetting product (surfactant). This will break up the hydrophobic substances coating the soil particles the way dishwashing detergent breaks up grease so water can penetrate. Soil wetting products can be purchased at lawn and garden stores.
Methods of SeedingSeeds can be broadcast by hand, with a hand-operated seeder, hydroseeder, drilled or air seeded. Most homeowners and small landowners will fi nd broadcasting to be the most economical method. Hy-droseeding requires roads for equipment access and a nearby water supply. Use drill seeding when possible or aerial seeding on large acreages.
When to SeedThe best time to seed is after October 20 and before winter rains or snow. Timeliness of rains will affect how well the plants will grow next spring. Protect exposed earth areas like roads, fi rebreaks and steep embankments with straw mulch at a rate of two (2) tons per acre. Anchor the mulch by punching with shovels or crimping equipment. A 74-pound bale of straw will cover 800 square feet. 3

Recommended Grasses, Forbs Northern Idaho
These plants were selected based on the depth and types of soil, average annual rainfall, availabil-
ity of seed, reseeding ability and amount of growth produced. Seeds are available from commercial seed suppli-ers listed in the yellow pages of your telephone direc-tory under “Seeds and Bulbs – Whsle and Growers.”
‘Sherman’ Big Bluegrass is a long-lived native bunchgrass. Recommended sites include intermediate and favorable brush sites, sunny places on mountain brush ranges, burned-over forested areas and mead-ows at lower elevations.
‘Covar’ and ‘Bighorn’ Sheep Fescue is a long- lived, short statured, introduced bunchgrass with short leaf blades. It is more drought tolerant than other fescues. Top growth is short, but ground cover and root production are excellent. A very good erosion control and understory species that competes well with weeds.
‘Goldar’ and ‘Anatone’ Bluebunch Wheatgrass is a long-lived, drought tolerant, wide-spread native bunchgrass. It begins growth early in spring and again with fall rains. Recommended sites include sagebrush, Ponderosa pine, mountain brush and juniper ranges. Secar Snake River wheatgrass can be used on hot, droughty, southerly slopes as an alternative.
‘Luna’ Pubescent Wheatgrass and ‘Rush’ Intermediate Wheatgrass are sod-forming, long-lived introduced grasses. They begin growth very early in the spring and remain green into mid-sum-mer.
‘Pryor’ Slender Wheatgrass is a short-lived native bunchgrass with good seedling vigor. It is valuable in erosion-control seed mixes because it develops rapidly, is drought tolerant and compatible with other species. It tolerates a wide range of conditions and adapts well on mountain brush areas.
‘Sodar’ Streambank Wheatgrass is a long-lived, drought tolerant, creeping sod-former adapted to fi ne-medium textured, well drained soil. It has good seed-ing vigor and is well adapted for erosion control.
‘Bannock’ and ‘Critana’ Thickspike Wheatgrass is a long-lived, native sod-forming grass characterized by drought tolerance and early spring growth. It is adapted to disturbed range sites and dry areas subject to erosion.
‘Garnet’ and ‘Bromar’ Mountain Brome is a short-lived native bunchgrass with good seedling vigor. It is valuable in erosion control seed mixes because it develops rapidly, is moderately shade tolerant and compatible with other species. Recommended sites include mountain brush, aspen, conifer forest and areas in mountain valleys.
‘Durar’ Hard Fescue is a long-lived, short statured, introduced bunchgrass with short leaves. Top growth is short, but ground cover, root production, erosion control and weed competition are excellent. Recom-mended for forestlands and other higher rainfall areas.
‘Manchar’ Smooth Bromegrass is a long-lived, introduced sod-forming grass. Once established it has the ability to suppress invasion of undesirable vegeta-tion. Recommended for mountain brush and burned-over forestlands.
‘Latar’ and ‘Paiute’ Orchardgrass is a long-lived, shade tolerant introduced bunchgrass. It is well adapted to mountain brush and pine zones for erosion control mixes.
Alfalfa is a very productive introduced perennial legume. Varieties for low precipitation sites include ‘Ladak’, ‘Trevois’, ‘Ranger’, ‘Nomad’ and Spreader III. All are excellent for wildlife forage.
‘Delar’ Small Burnet is a perennial winter-active forb that grows to two (2) feet tall. It is semi-ever-green and deep rooted. Growth is most vigorous in fall and spring. It establishes with ease in mountain brush and mountain valley areas. Excellent for wild-life forage and vegetative fi rebreaks.
Yellow Sweetclover is an introduced, tall, stemmy, deep-rooted biennial legume commonly used as a cover crop for perennial seeding. ‘Madrid’ is an adapted variety.
4

Recommended Grasses, Forbs Southern & Eastern Idaho
These plants were selected based on the depth and types of soil, average annual rainfall, availabil-
ity of seed, reseeding ability and amount of growth produced. Seeds are available from commercial seed suppli-ers listed in the yellow pages of your telephone direc-tory under “Seeds and Bulbs – Whsle and Growers.”
‘Sherman’ Big Bluegrass is a long-lived native bunchgrass. Recommended sites include intermediate and favorable brush sites, sunny places on mountain brush ranges, burned-over forested areas and mead-ows at lower elevations.
‘Covar’ and ‘Bighorn’ Sheep Fescue is a long- lived, short statured, introduced bunchgrass with short leaf blades. It is more drought tolerant than other fescues. Top growth is short, but ground cover and root production are excellent. A very good erosion control and understory species that competes well with weeds.
‘Goldar’ and ‘Anatone’ Bluebunch Wheatgrass is a long-lived, drought tolerant, wide-spread native bunchgrass. It begins growth early in spring and again with fall rains. Recommended sites include sagebrush, Ponderosa pine, mountain brush and juniper ranges.
‘Hycrest’ and ‘Nordan’ Crested Wheatgrass are long-lived, drought tolerant, introduced bunchgrasses adapted to a wide range of sites and precipitation zones as low as 10 inches. Growth begins early in spring and again with fall moisture. Recommended sites are sagebrush, Ponderosa pine, mountain brush and juniper-piňon ranges.
‘Luna’ Pubescent Wheatgrass is a long-lived, intro-duced, aggressive sod former adapted to low fertil-ity sites and fi ne textured soils. It remains green into mid-summer when soil moisture is limited.
‘Rush’ Intermediate Wheatgrass is a mild sod-forming, long-lived introduced grass. It begins growth very early in the spring and remains green into mid-summer.
‘Pryor’ Slender Wheatgrass is a short-lived native bunchgrass with good seedling vigor. It is valuable in erosion-control seed mixes because it develops rap-idly, is drought tolerant and compatible with other species. It tolerates a wide range of conditions and adapts well on mountain brush areas.
‘Secar’ Snake River Wheatgrass is related to thick-spike wheatgrass, but is similar in appearance to bluebunch wheatgrass. It is long-lived, begins growth early in spring and regrows with fall rains. It is well adapted to hot, droughty, southerly slopes.
‘Vavilov’ and ‘P-27’ Siberian Wheatgrass is similar to crested wheatgrass, but has fi ner leaves and retains its greenness and palatability later into the summer. It is recommended for sites with 7-12 inches of precipi-tation and especially useful on sagebrush and juniper sites. Once established it is well adapted to light, droughty soils and can withstand extended periods of drought better than crested wheatgrass.
‘Sodar’ Streambank Wheatgrass is a long-lived, drought tolerant, creeping sod-former adapted to fi ne-medium textured, well drained soil. It has good seed-ing vigor and is particularly well adapted for erosion control.
‘Bannock’ and ‘Critana’ Thickspike Wheatgrass is a long-lived, native sod-forming grass characterized by drought tolerance and early spring growth. It is adapted to disturbed range sites and dry areas subject to erosion.
Alfalfa is a very productive perennial. Varieties for low precipitation sites include ‘Ladak’, ‘Trevois’, ‘Ranger’, ‘Nomad’ and Spreader III. All are excellent for wildlife forage.
‘Delar’ Small Burnet is a perennial winter-active forb that grows to two (2) feet tall. It is semi-ever-green and deep rooted. Growth is most vigorous in fall and spring. It establishes with ease in mountain brush and mountain valley areas. It is excellent for wildlife forage.
Yellow Sweetclover is an introduced, tall, stemmy, deep-rooted biennial legume commonly used as a cover crop for perennial seeding. ‘Madrid’ is an adapted variety. 5

Seeding
Drill Seeding Rate Broadcast Rate Seeding Rate Recommended Plants lbs/acre lbs/acre lbs/10,000 sq.ft area Bluegrass, Big 2.0 4.0 1.0 Fescue, Sheep and Hard 4.0 8.0 1.9 Wheatgrass, Bluebunch (SRW) 7.0 14.0 3.2 Wheatgrass, Intermediate 10.0 20.0 4.6 Wheatgrass, Pubescent 10.0 20.0 4.6 Wheatgrass, Slender 6.0 12.0 2.8 Wheatgrass, Streambank 6.0 12.0 2.8 Wheatgrass, Thickspike 6.0 12.0 2.8 Mountain brome 10.0 20.0 4.6 Smooth brome 5.0 10.0 2.3 Orchardgrass 4.0 8.0 1.9 Alfalfa 5.0 10.0 2.3 Small Burnet 20.0 40.0 9.2 Yellow sweetclover 4.0 8.0 1.9 Crested wheatgrass 5.0 10.0 2.3 Siberian wheatgrass 6.0 12.0 2.8
Seed mix: These seeding rates are full rates per acre if seeded as a single species. If you desire differentspecies in a mix, multiply this rate by the percent of each kind you want in your mix to total 100% or more.
Seeding Guide
Seed Specifi cations
The total amount of seed purchased should equal the acres burned multiplied by the recommended
seeding rate per acre. Include any roads and fi rebreaks in the burned acreage. If the seed is coated by the supplier or is less than 80% Pure Live Seed (PLS), then adjust the amount of seed purchased. Check seed tags for each species to determine the percent germination and purity. PLS = % germination x % purity. Keep each species’ seeds in separate bags in a cool, dry environment. Check seed tags for species and the percent of germination and purity. In-crease the seeding rate if percent germi-nation multiplied by the percent purity shows less than 80% PLS.
Low PLS AdjustmentExample: When the recommended seeding rate is 10 pounds per acre and your seed has a 90% purity and a 70% germination rate, then your PLS = 63% PLS (.9 x .7 = .63). Since the PLS is less than the recom-mended 80%, you need to adjust the seeding rate. An adjustment factor is calculated by dividing the sug-gested PLS (80%) by your actual PLS (63%). In this
example the adjustment factor is 1.3 (80/63 =1.3). To calculate the actual seeding rate, multiply the adjustment factor by the rec-ommended seeding rate (1.3 x 10 lbs/acre = 13 pounds per acre). No adjustment is needed when you in-oculate alfalfa or other legume seeds.
6
continued...
example the adjustment factor is 1.3 (80/63 =1.3). To calculate the actual seeding rate, multiply the adjustment factor by the rec-ommended seeding rate (1.3 x 10 lbs/acre = 13 pounds per acre). No adjustment is needed when you in-oculate alfalfa or other legume seeds.
‘Bannock’ thickspike wheatgrass

Seeding Recommended seeding rates are based on un-coated seed and need to be adjusted as shown in the following example after making any adjustment for low PLS. Example: Coated alfalfa seed or other small seeded legumes with a suggested seeding rate of six (5) pounds per acre. The adjustment factor = 1.5; therefore, the adjusted seeding rate is 1.5 x 5 lbs/acre which equals 7.5 lbs/acre.
Equipment and Materials NeededEquipment and materials should be ready before you start. This list of items will minimize disruptions and let you fi nish seeding in one day for small areas.
• One (1) hand operated cyclone seeder for each person doing the seeding
• Weight scale with at least a 20-pound capacity• A minimum of two (2) plastic buckets• Seed targets. At least two (2) pieces of 2x2-foot
soft cloth or cardboard with corrugations exposed, nailed to a small wood frame or at least four (4) pieces of 1x1-foot soft cloth attached to an open wire frame
• Four (4) paper grocery bags and two (2) markers • Inoculant. Specifi c type for each legume. Omit if
supplier coats seed.
Getting StartedInoculating legumes enables them to “fi x” nitrogen. This improves the health of the plant and provides ad-ditional fertility for other plants. If the supplier hasn’t, inoculate alfalfa and other legume seeds the evening before or early on seeding day so the seed will be dry before use. Re-inoculate seed over 30 days old or that has not been kept cool and dry.
Seeding Specifi cationsDivide each species’ seed into equal amounts and label bags. Keep cool and dry. When using a mixture, broadcast each species separately, if possible, to get a uniform distribution. Adjust the seeder according to the manufacturer’s instructions. If seeding in arid areas, use half the
seeding rate listed. Base it on the full seeding rate when doing a simple once-over seeding. Set out two (2) seed targets 10 feet apart and offset 10 feet. With the hand-operated seeder half full, start broadcasting and walk between the seed targets. Stop and check the seed count at each target. Adjust the seeder and repeat until the number of seeds per square foot agrees with your approximate target of no less than 50 seeds per square foot. When seeding, walk in (two) 2 directions to achieve a uniform distribution. Using half the seed of a given species, broadcast the seed as you walk across the slope, starting at the top of the burn area. Notice how far the seed is thrown. When you reach the other edge, move down slope an equal distance to the width of the throw. Continue broadcasting and walk back across the slope, trying to avoid gaps. Repeat this process all the way to the bottom. When several people are seeding an area, move across the slope together. Adjust your walking pace so you have enough seed to fi nish. Repeat this procedure going both up and down slope with the remaining half of the seed. On steep slopes, it is best to broadcast only going down be-cause you need to maintain the same walking speed used to calibrate the seeder. Using several people will make this task easier. Broadcast in one direction if conditions do not allow seeding in two directions. Broadcast the re-maining seed in the same direction across the slope while walking midway between your previous lines of travel. Repeat the above process for each species.
Broadcast seeding.

Hydroseeding & Hydromulching
The terms hydroseeding and hydromulching are often used interchangeably.
Hydroseeding is applying a mixture of water, wood fi ber mulch, seed and fertilizer to the soil sur-face to prevent soil erosion and provide an environ-ment conducive to plant growth. Hydromulching is applying a mixture of water, wood fi ber mulch and often a tackifi er to a slope to prevent soil erosion.
When to UseGeneral recommendation: On steep, highly erosive slopes that have been partially or completely denuded of vegetation due to fi re, apply seed to the site fi rst and then hydromulch over it to keep the seed from washing off the slope. This is a fairly expensive control method that is often reserved for areas close to roads, bridges, homes and other structures. Use is sometimes restricted due to lack of access roads and adequate water supplies.
Slope lengths of 125 to 225 feet can be treated. For small landowners, this technique will need to be hired out. Check the listings under “Landscape Contractors,” “Ero-sion Control,” or “Seeding Con-tractors” in the yellow pages of your telephone directory.
During hydroseeding, truck-mounted nozzles can treat slopes up to 125 feet away. For downslopes, it can reach out to 150 feet.
200-225 feet of slope can be treated by fi rst using 100-150 feet of hose pressurized by the tank truck.
8

Jute Netting
Netting made of jute can be laid and anchored over straw or other mulch to help protect the soil
from wind and water damage. Netting helps reduce soil erosion and provides a good environment for vegetative regrowth. Since jute is a biodegradable material, it will eventu-ally decompose and is not a threat to the environment or wildlife.
When to UseJute netting can be used on areas that may erode near structures such as homes, roads and bridges or on small, steep disturbed areas. Netting can be applied alone (without mulch) as an alternative to straw or wood mulches on fl at sites for dust control and seed germination enhancement. It should never be used alone where high water runoff amounts are expected. The use of jute netting is not appropriate in all situations. Examples include:
• Steep slopes with sandy soils• Steep slopes with many surface rocks • Steep slopes with a signifi cant amount
of burned vegetation remaining
Specifi cationsThe soil surface should be reasonably smooth. Remove rocks and other obstruc-tions higher than the level of the soil or mulch. Jute netting should be a uniform, plain-woven cloth of undyed and unbleached single jute yam. The materials should weigh about 1.2 pounds per linear yard, with approximately 78 warp ends per width and 41 weft ends per linear yard. Most nurseries and hardware stores can help fi nd netting that meets these specifi cations. Individual rolls of jute should be applied up and down the slope, but never along the contour. Bury the upper end of the netting at the top of the disturbed area in a trench at least 6-8 inches deep. Lay out rolls so edges overlap by at least four (4) inches.
Extremely important: When more than one roll is required going down slope, the ends should overlap by at least three (3) feet. Secure the netting to the soil surface with anchor pins or staples. Anchor pins are made of rigid 0.12–inch diameter or heavier galvanized wire with a mini-mum length of 10 inches for hook or “J” type pins. Use wire staples 0.09 inches or greater in diameter, and have U-shaped legs that are at least six (6) inches long. Longer staples are needed for sandy soils. Staples or anchor pins need to be driven perpen-dicular into the slope face and should be spaced about fi ve (5) feet apart down the sides and center of each roll. Spacing between staples at the upper end of a roll, and at the end overlap of two (2) rolls, should not be greater than one (1) foot. The netting should go beyond the edge of the mulched or seeded area at least one (1) foot on the sides and three (3) feet at the bottom. If there is vegetation at the boundaries of the seeding area, the netting should be continued into the stable vegetated area or to the edge of a structure.
Sandbag Protection
An inexpensive, temporary barrier or wall that’s 1-2 feet high can be constructed by stacking
sand- or earth-fi lled sandbags. These can be placed to divert mud and other debris fl ows away from build-ings. They will not, however, provide protection from high debris fl ows.
When to Use• To protect building sites vulnerable to low mud
debris fl ows from steep, erodible slopes that are partially or completely void of vegetation due to wildfi re burns.
• As an inexpensive, temporary protection method for a home before predicted heavy rainfall.
Note: Sandbags deteriorate when exposed to contin-ued wetting and drying for several months. If the bags need to be used for more than a few months, cement can be mixed with the sand. The cement and sand mixture will harden when the bags dry.
Methods and MaterialsSandbag barriers are easy to construct. Burlap bags, sand, plastic, lumber, cement and plywood are readily available at local lumberyards. Some fi re stations and other emergency centers can also help with materials. Place fi lled sandbags to direct debris fl ows away from buildings, pools and other structures. Clear a path for the debris. Do not try to dam or stop debris fl ows. Protect your most valuable property fi rst. Debris can enter a building through doors and windows, so they should be boarded up and waterproofed with plastic sheets. Remember: Sandbags will not seal out water. Work with your neighbors and be prepared to use your property to provide good protection for the com-munity.
How to Fill BagsFill sandbags one-half full. Use sand, if available, or local soil. Fold the top of the sandbag down and place the bag on its folded top (see illustration on page 11).
How to Place BagsRefer to the illustrations on the facing page. Place each sandbag, as shown, fi nishing each layer before starting the next. Limit placement to two layers unless they are stacked against a building or pyramided. It is important to place bags with the folded top in the upstream or uphill direction facing the fl ow of wa-ter to prevent them from opening when water runs by.
10

Sandbag Protection
11
Wildlife Recovery Tips 07/13/2005 13
Directing flows between buildings
OVERLAPPED
STAIRSTEPPED
Sandbag Protection
FILL HALF FULLFOLD TOP UNDER
PLACE BAG WITH FLAP UNDER BAG

Silt Fences
A silt fence made of woven wire and fabric fi lter cloth is a temporary barrier that can be used to
catch sediment-laden runoff from small areas of dis-turbed soil. They are easy to construct with materials available from hardware stores, nurseries and lumber yards.
When to UseMajor considerations for using silt fences are slope, slope length and the size of drainage area from which the fence will catch runoff.
Here are some design considerations:
Slope Steepness Maximum Slope Length 2:1 = 50% 50 feet 3:1 = 33% 75 feet 4:1 = 25% 125 feet 5:1 = 20% 175 feet <5:1 = <20% 200 feet
For longer slopes, add additional silt fences.
Drainage AreaThe area that contributes runoff to be caught by the silt fence should not be greater than one-half acre for every 100 feet of fence.
Type of RunoffSilt fences are designed to catch runoff that is in the form of “sheet fl ow,” not in a concentrated fl ow. Sheet fl ow differs from concentrated fl ow since the runoff is spread evenly over the ground surface, like a sheet, rather than concentrated in small rills or gullies.
Methods and MaterialsFence Posts: Posts should be at least 36 inches long. Wood posts should be of hardwood with a minimum cross section area of three (3) inches. Steel posts should be a standard “T” or “U” section and should weigh no less than one (1) pound per linear foot.
Wire: Wire fence should be at least 14 gauge with openings no larger than 6x6 inches.
Extremely Important: Bury the fence at least eight (8) inches below ground level and install the fence following the contour (perpendicular to the slope).
Silt fences are not permanent structures and must be maintained and/or inspected on a regular basis. Debris trapped behind it should be removed.
12

Silt Fences
13

Straw Bale Check Dams
Straw bale check dams are temporary sediment barriers constructed of straw bales located across
small drainages. They are used to slow debris fl ows in small channels until bare soil is revegetated. They are not intended to provide protection from large storm events nor to control debris fl ows in water bodies such as creeks, streams or rivers.
Planning Criteria0-15% slope: Maximum drainage area: one acre Maximum slope length between dams: 200 feet
15-20% slope: Maximum drain area: one-half acre Maximum slope length between dams: 100 feet
Greater than 20% slope: Not recommended
Methods and MaterialsBales should be bound with wire or nylon string. Those bound with jute twine are less durable. Place the bales in rows with ends tightly abutting adjacent bales. Bales should contain clean, weed-free straw.
Downstream Row (see illustration on page 15): Dig a trench across the small channel that’s wide enough and deep enough that the top of the bale row, placed on the long, wide side, is level with the ground. The bale tops, across the center of the channel, should be level and set at the same elevation. Place the bales in position and stake them according to the instructions that follow.
Upstream Row: Dig another trench across the small channel, upstream and immediately adjacent to the fi rst row of bales. This trench should be wide enough to ac-commodate a row of bales set vertically on their long edge. It should be deep enough so that at least six (6) inches of each bale is below ground, starting with the bale in the channel bottom. The trench should be as level as possible so the tops of the bales across the center of the channel are level and water can fl ow evenly across them.Continue this trench up the side slopes of the small channel to a point where the unburied bottom line of highest bale (point “C” in illustration) is higher than the top of the bales that are in the center of the chan-nel (point “D”).
StakingDrive 2x2 stakes or #4 rebar, or T-fence posts with the “T” knocked off, through the bales and into the ground 1½ -2 feet for anchorage. The fi rst stake in each bale should be driven toward a previously laid bale to force them together (see illustration).
MaintenanceInspect bale check dams after each storm period. Shovel work may be needed to rebuild the soil berm on the upstream side. Remove any loose straw so it does not enter storm drains. Remove the bales and stakes once vegetation, permanent drainage ways and stabilization are re-established. Reuse the straw as mulch in other areas.
14

Straw Bale Check Dams
15

Straw Bale Dikes
Straw bale dikes are a temporary sediment barrier constructed of straw bales located downslope of
a disturbed area or around a storm drainage outlet to redirect debris fl ows or trap debris materials. They are usually installed in areas requiring pro-tection from sedimentation expected from predicted rainfall events likely to cause erosion. They are intended to provide protection for a lim-ited time, usually less than three (3) months.
Installation TipsDrainage area limits are as follows:
0-15% slope: Maximum drainage area: one acre Maximum slope length: 200 feet
15-20% slope: Maximum drain area: one-half acre Maximum slope length: 100 feet
Greater than 20% slope: Not recommended
Bind bales with wire or nylon twine. Jute twine-bound bales are less durable. Bales should contain clean, weed-free straw. Place bales in a row with ends tightly abutting adjacent bales. Do not place bales with wire or twine touching (see illustration on page 17). Compress some loose straw between adjacent bales to close voids. The tops of bales should all be level and set in the same direction.
StakingEach bale should be embedded in the soil a minimum of four (4) inches. Drive 2x2 stakes or #4 rebar, or T-fence posts with the “T” knocked off, through the bales and into the ground 1½ - 2 feet for anchorage. The fi rst stake in each bale should be driven toward a previously laid bale to force the bales together (see illustration).
MaintenanceInspect dikes and provide necessary maintenance following each storm event. It is important to ensure that loose straw does not enter storm drain facilities. Remove bales once permanent drainage and stabili-zation are re-established. Use the straw as mulch in other areas.
16

Straw Bale Dikes
17

Straw Mulching
Straw mulching should be used on slopes that have been seeded and have high potential for erosion. It will provide a protective cover to
reduce erosion, increase water infi ltration and aid in revegetation. Mulching requires some type of anchoring by matting, crimping or other method to prevent the straw from blowing or washing away. Straw mulch forms a light layer when applied over a loose soil surface. To protect the mulch from wind drifting or being moved by water, it must be covered with netting such as jute, punched into the soil with a spade, roller, or mulch tucker or sprayed with a tack-ing agent. Straw mulch should cover the entire seed or bare area and extend into existing vegetation or be stabi-lized on all sides to prevent wind or water damage which can start at the edges.
Methods and MaterialsOn gentle to moderate slopes, straw mulch can be ap-plied by hand broadcasting to a uniform depth of 2-3 inches. On steep slopes, the straw should be blown onto the slope to achieve the same degree of cover.When applied properly, about 5%-10% of the original ground surface can be seen. The application rate per acre should be about two (2) tons or one 74-pound bale per 800 square feet. Straw should be clean, weed-free barley or wheat straw.
AnchoringHand Punching: Use a spade or shovel to punch straw into the slope until all areas have straw standing perpendicularly to the slope and embedded at least four (4) inches into the slope. It should be punched about 12 inches apart.
Roller Punching: A roller equipped with straight studs not less than six (6) inches long, from 4-6 inches wide and about 1-inch thick is rolled over the slope.
Crimper Punching: Like roller punching, the crimp-er has serrated disk blades 4-8 inches apart that force straw mulch into the soil. Crimping should be done in two directions with the fi nal pass across the slope.
Matting: Use on large, steep areas that cannot be punched with a roller or by hand. Jute, wood excel-sior or plastic netting can be applied over unpunched straw.
18

Straw Mulching
19

20
Hazards from Debris Flows
Debris fl ows are shallow landslides saturated with water that travel rapidly downslope as muddy
slurries carrying rocks and debris. Even moderate precipitation can cause major fl ooding on a wildfi re-damaged watershed due to lack of vegetation and roots to bind the soil. Areas directly downslope are especially subject to damage. What can be done to avoid or reduce the hazard of debris fl ows? To be safe, assume that all drainages in steep, hilly areas are capable of carrying debris fl ows. They are especially vulnerable after a wildfi re.
• Avoid building at the bottoms and mouths of steep ravines and drainage courses. These areas are the most likely to be inundated. The outer banks of bends along such ravines should also be avoided because swiftly fl owing debris ava-lanches can “ride” up and out of the channel.
• Avoid building on or below steep slopes. In general, the steeper the slope, the greater the risk. If these areas must be used, consult with a soil engineer and engineering geologist. They will be able to evaluate the site for potential problems and give advice on the best way to minimize the risk to life and property.
• Limit the height and slope of cuts and fi lls in human-modifi ed slope cuts. Properly compact fi lls, key them into bedrock and properly con-trol the fl ow of water onto slopes.
• Be cognizant of the amount of rain falling in your area during rainstorms. Concerns for fl ooding and debris fl ows are based on mod-erate to high amounts of moisture over short periods. Minimal precipitation rates, especially after previous storms, could possibly trigger fl ooding and debris movement events.
For Additional InformationFor more information on reducing wildfi re risk, please visit the following websites:
www.fi rewise.orgwww.usfa.dhs.gov/subjects/wildfi re/www.fs.fed.us/pswwww.unce.unr.edu/fi re/fi repage.html
Additional information regarding fl oods, debris fl ows, and erosion control can be found at:
www.fema.gov/areyouready/landslide.shtmwww.abag.ca.gov/bayarea/enviro/erosion/eyoudo.html


Helping People Help the Land.
Idaho