Embed Size (px)
Citation preview
Windows Movie Maker
Getting Started
What is Windows Movie Maker?
Windows Movie Maker allows a user to capture (from a video camera) or import audio, video, or still pictures into the PC, and use this media to create a movie. This movie can be played on any computer, displayed on the web, saved to CD, or transferred to a video camera.
The user can easily create movie that includes a soundtrack, audio commentary, transitions, and special effects.
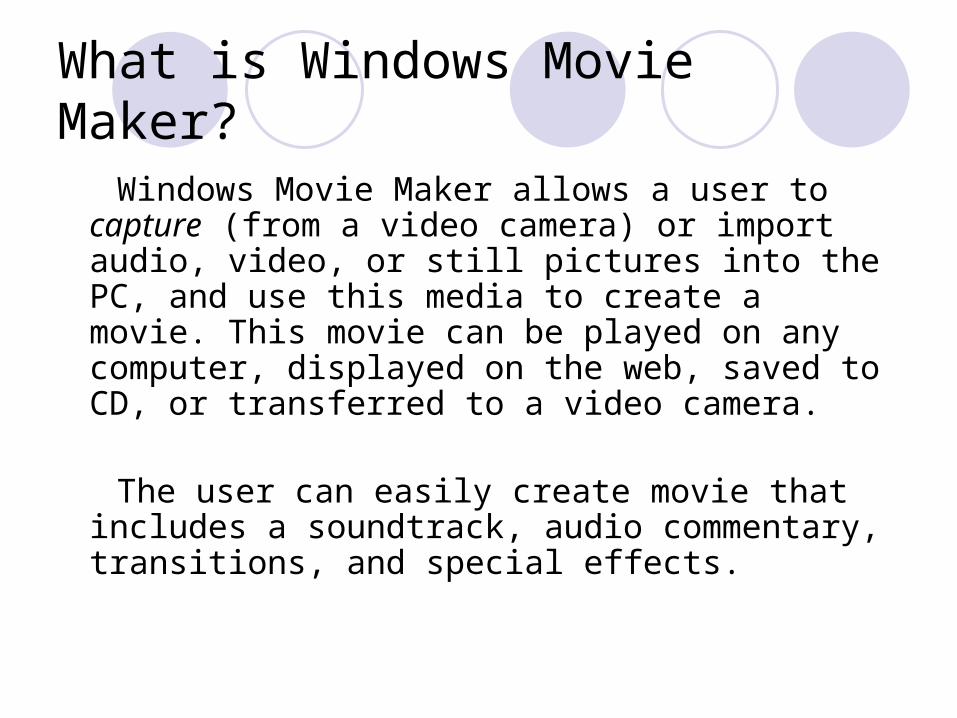
Opening Windows Movie Maker
Start > All Programs > Accessories > Windows Movie Maker
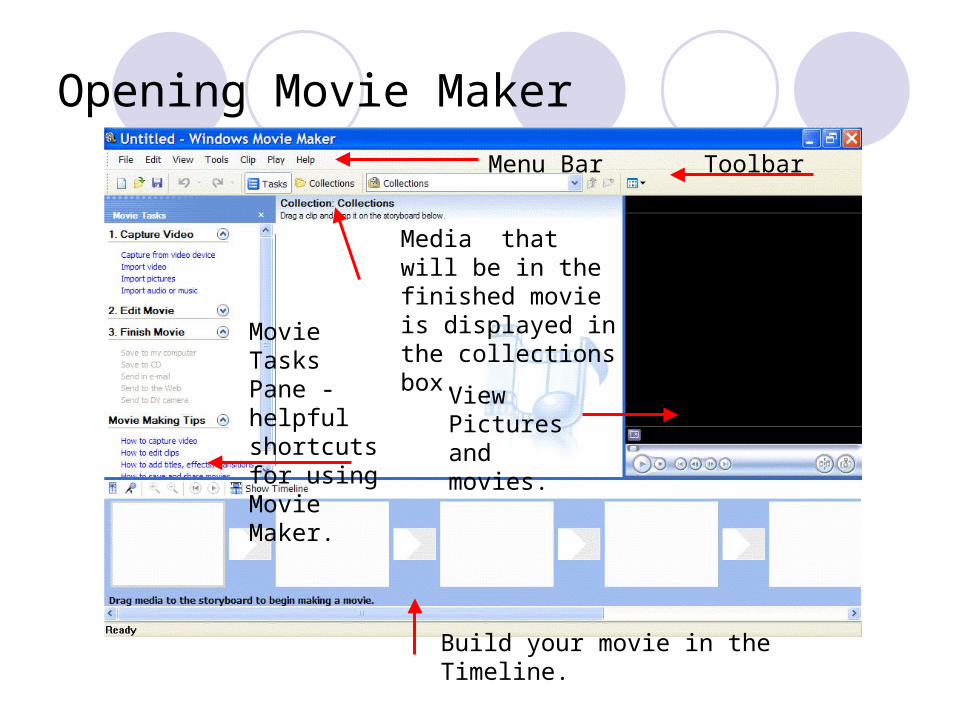
Opening Movie Maker
View Pictures and movies.
Toolbar
Build your movie in the Timeline.
Movie Tasks Pane - helpful shortcuts for using Movie Maker.
Media that will be in the finished movie is displayed in the collections box.
Menu Bar
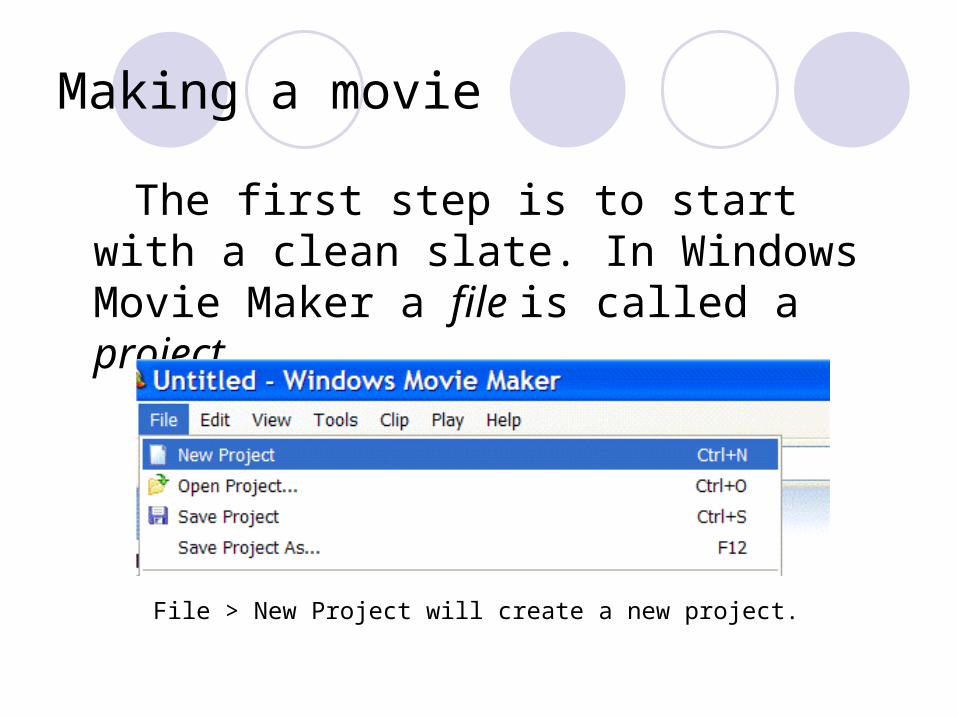
Making a movie
The first step is to start with a clean slate. In Windows Movie Maker a file is called a project.
File > New Project will create a new project.

Gathering source material
• When making a movie the user has the option of including media that can include:• Audio files (music, commentary, etc.)• Video taken with a video camera• Pictures taken with a digital camera• Pictures, audio, or video downloaded from the
internet. (This tutorial will utilize downloaded material.)

Import media into Windows Movie Maker
• Choose Capture from video device to take video directly from a video camera.
• Choose Import video to take media from the computer’s hard drive.
Import media into Windows Movie Maker
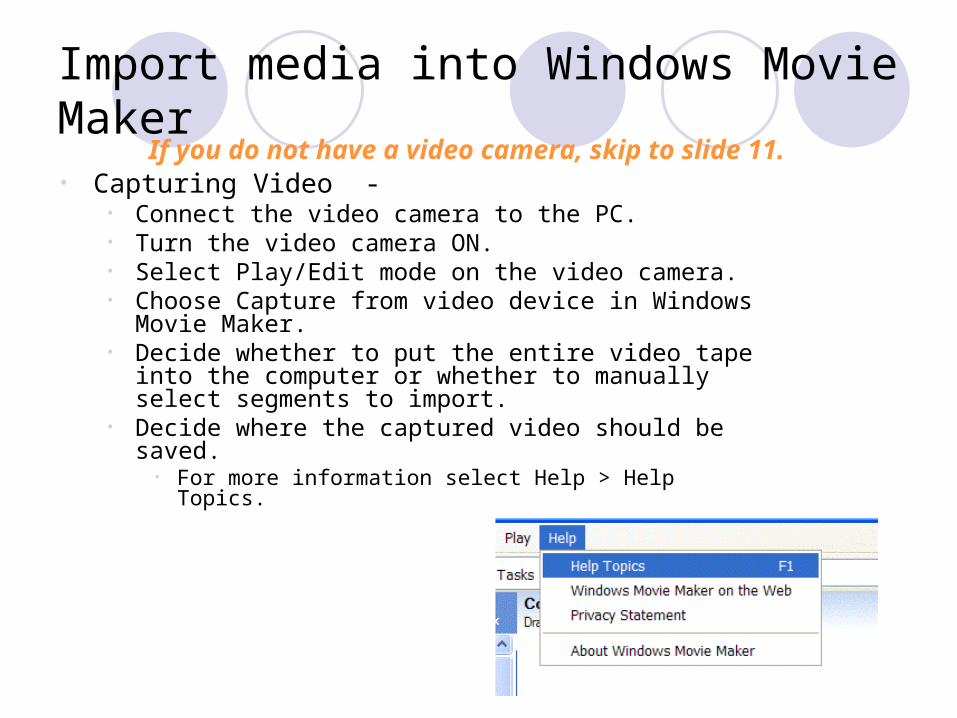
• Capturing Video - • Connect the video camera to the PC.• Turn the video camera ON.• Select Play/Edit mode on the video camera.• Choose Capture from video device in Windows Movie
Maker.• Decide whether to put the entire video tape into the
computer or whether to manually select segments to import.
• Decide where the captured video should be saved.• For more information select Help > Help Topics.
If you do not have a video camera, skip to slide 11.
Capturing video
• Connect the camera to the USB Port• A. Capture parts of the tape manually• B. Capture the entire tape – This option will transfer the
entire tape to the hard drive. This requires a lot of hard drive space.
• If the video camera is in Tape-Camera mode the camera can be controlled using Movie Maker window.
• Start > Capture – Will begin the transfer of video from the camera to the computer.
• *Tip – It is often easier to start a capture at the beginning of the tape and capture only the segments you want to bring into the computer.
Capturing Video
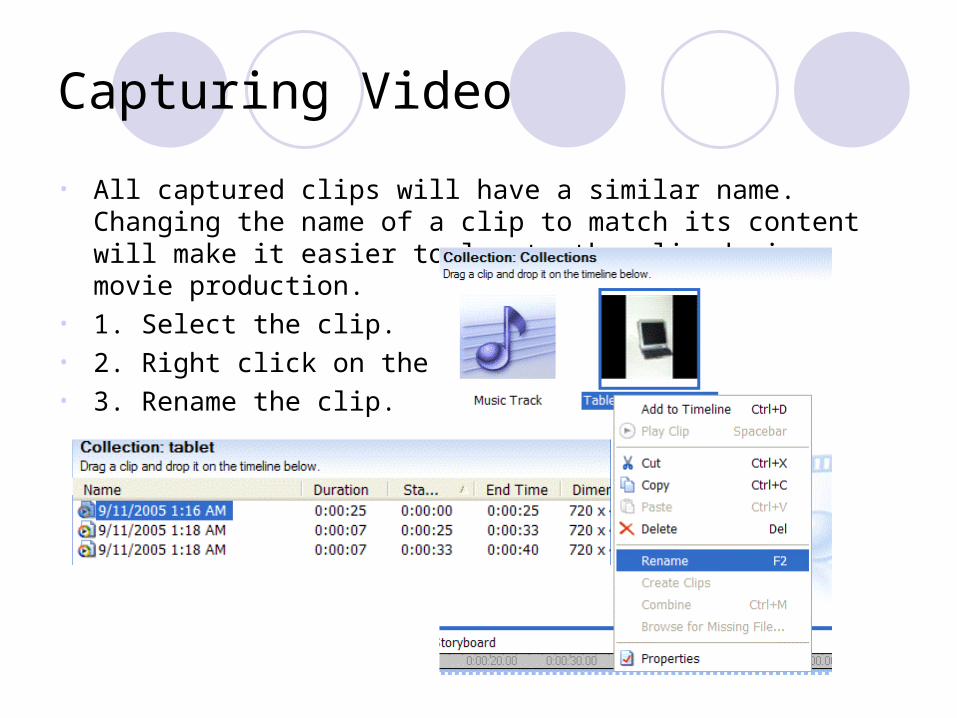
• All captured clips will have a similar name. Changing the name of a clip to match its content will make it easier to locate the clip during movie production.
• 1. Select the clip.• 2. Right click on the clip• 3. Rename the clip.
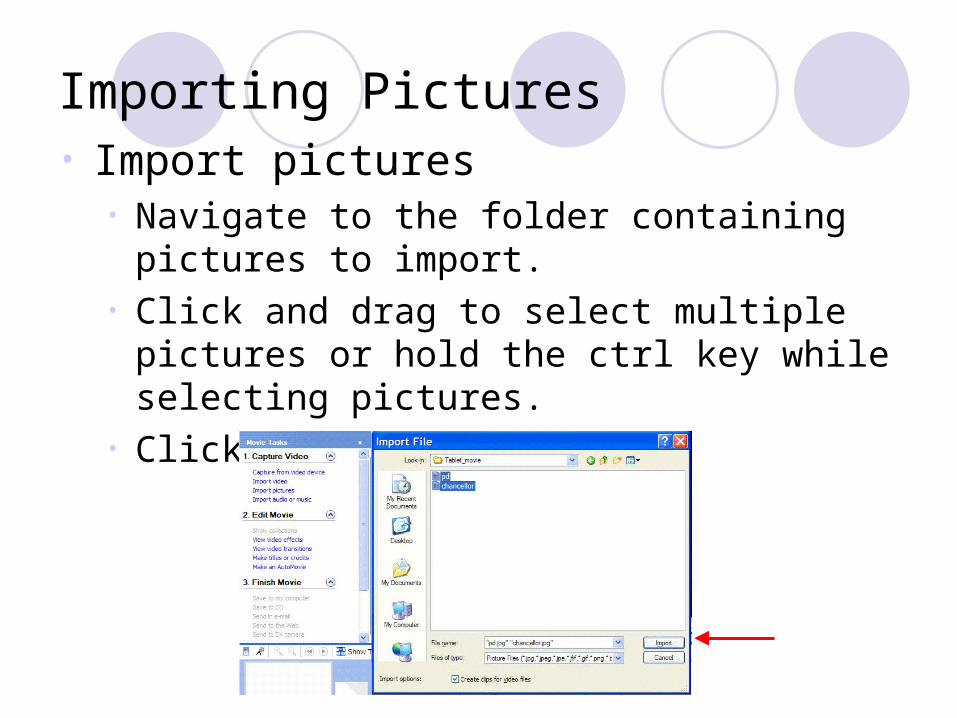
Importing Pictures• Import pictures
• Navigate to the folder containing pictures to import.
• Click and drag to select multiple pictures or hold the ctrl key while selecting pictures.
• Click the import button.
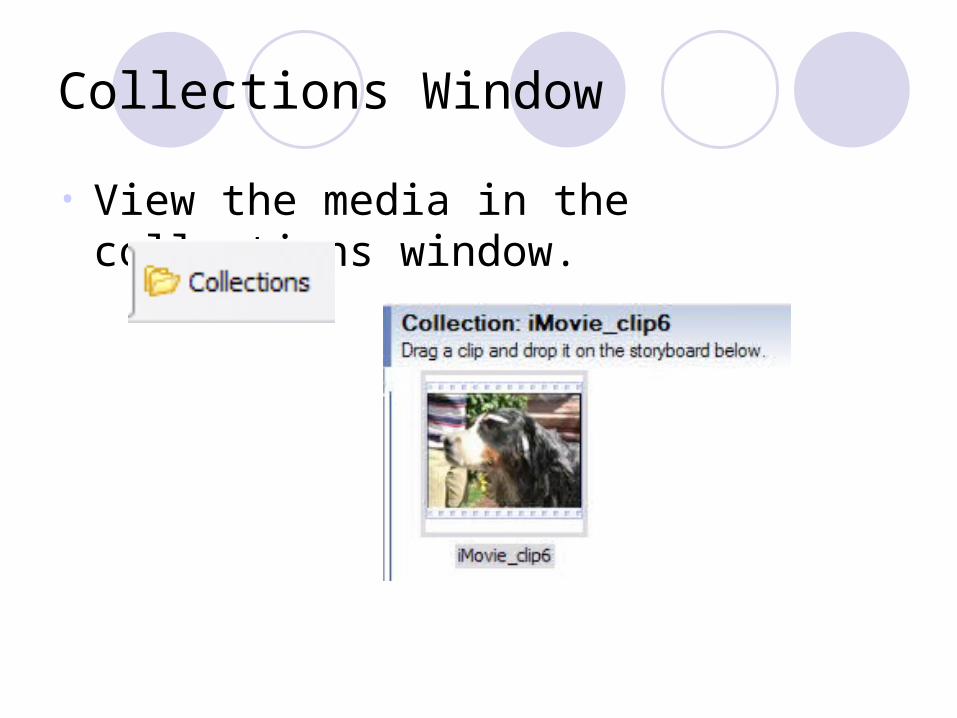
Collections Window
• View the media in the collections window.
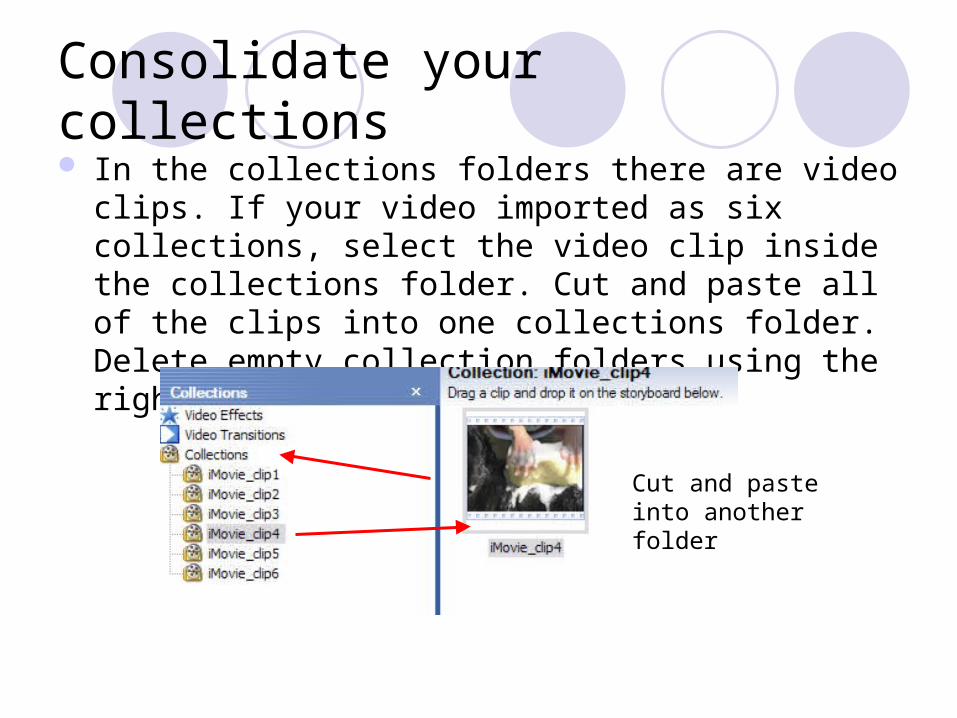
Consolidate your collections In the collections folders there are video clips. If your
video imported as six collections, select the video clip inside the collections folder. Cut and paste all of the clips into one collections folder. Delete empty collection folders using the right click function.
Cut and paste into another folder
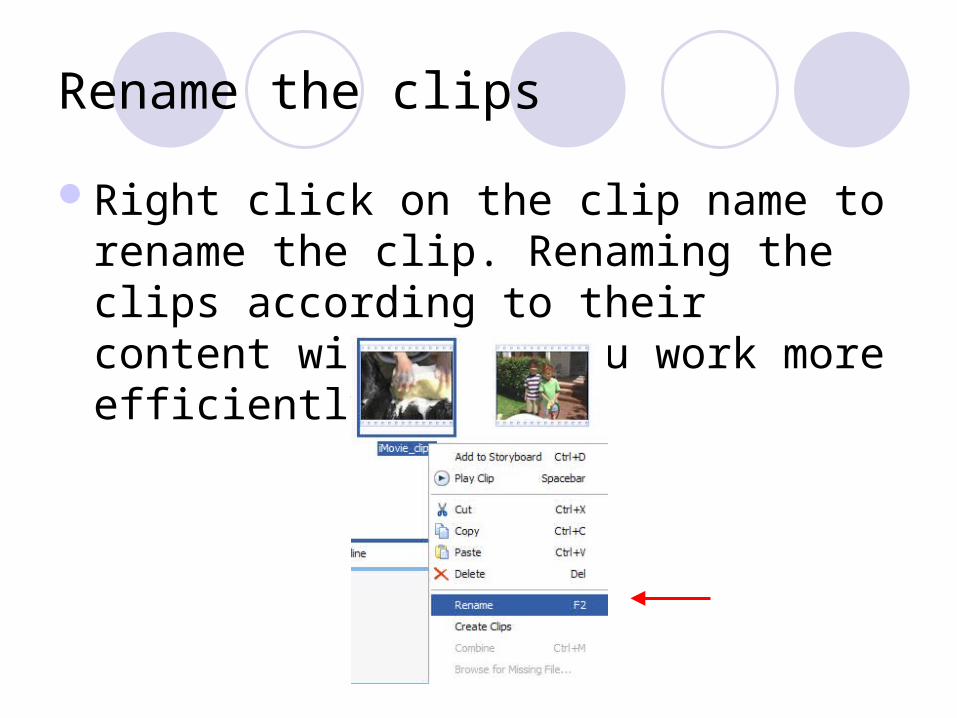
Rename the clips
Right click on the clip name to rename the clip. Renaming the clips according to their content will help you work more efficiently.
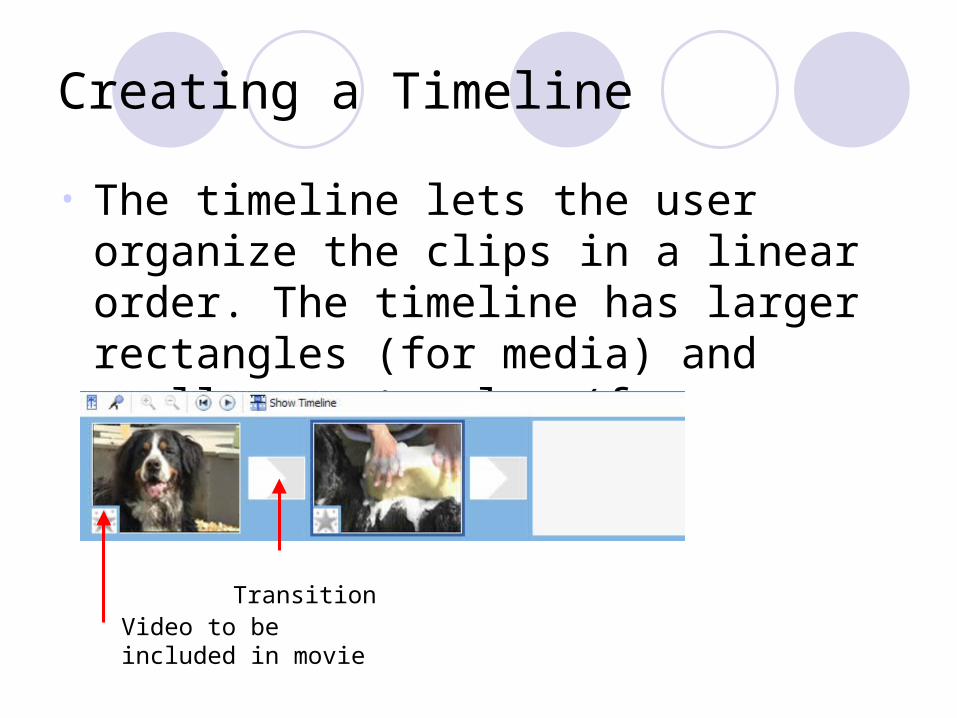
Creating a Timeline
• The timeline lets the user organize the clips in a linear order. The timeline has larger rectangles (for media) and smaller rectangles (for transitions).
Video to be included in movie
Transition
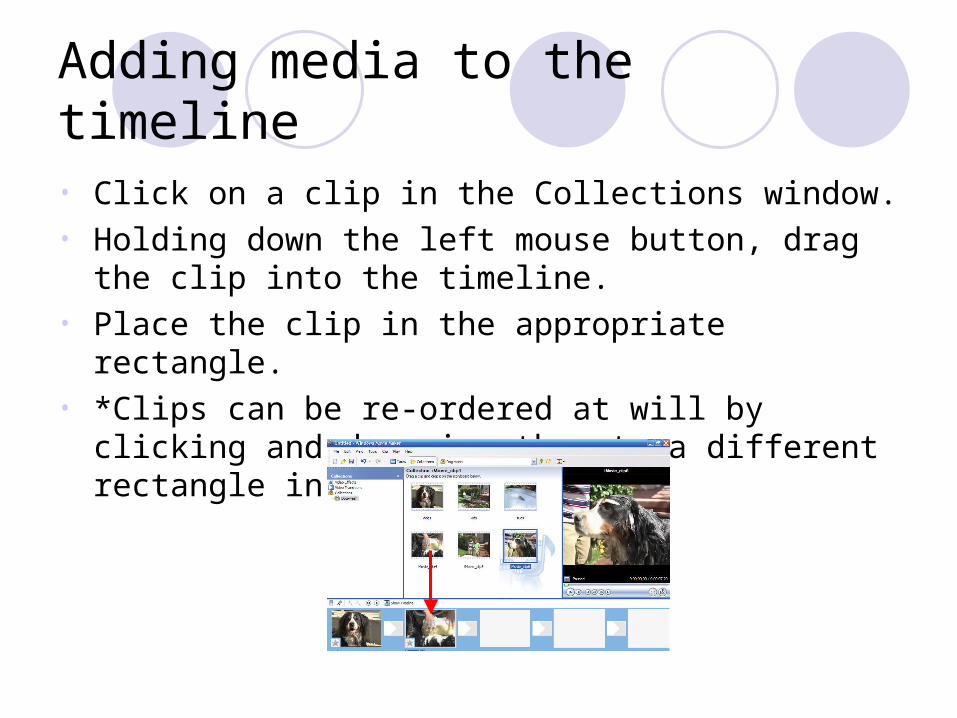
Adding media to the timeline
• Click on a clip in the Collections window. • Holding down the left mouse button, drag the clip into the
timeline.• Place the clip in the appropriate rectangle.• *Clips can be re-ordered at will by clicking and dragging
them to a different rectangle in the timeline.
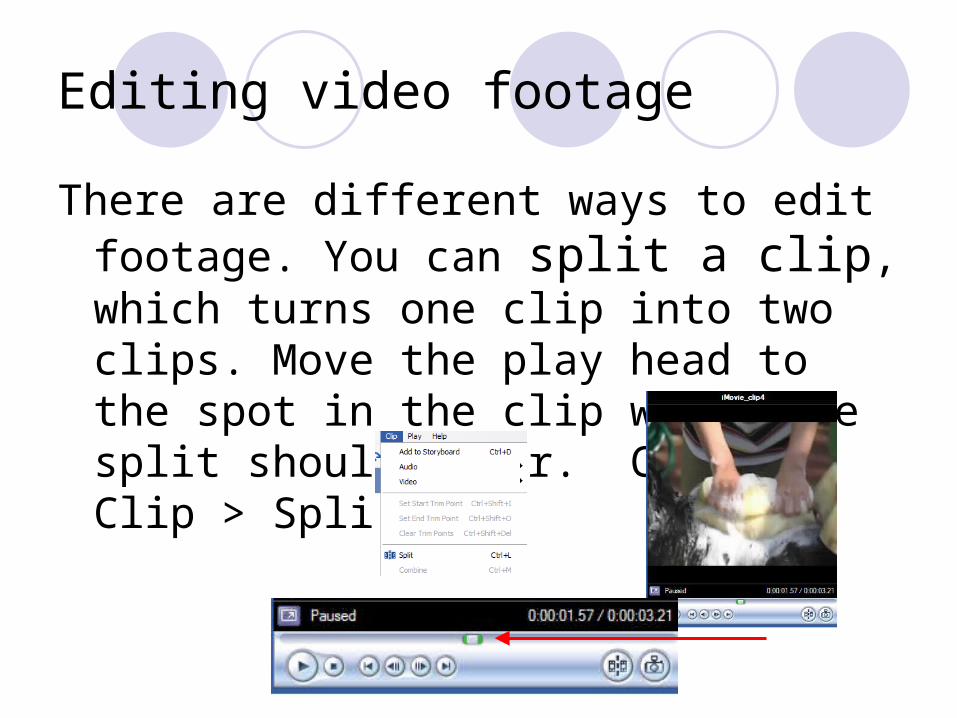
Editing video footage
There are different ways to edit footage. You can split a clip, which turns one clip into two clips. Move the play head to the spot in the clip where the split should occur. Choose Clip > Split
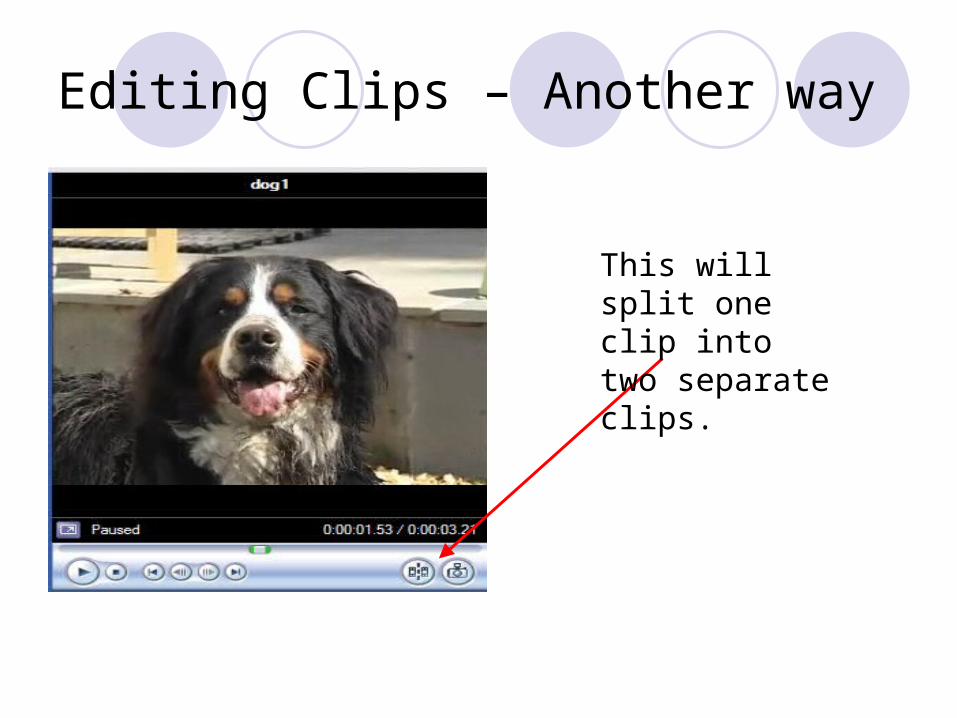
Editing Clips – Another way
This will split one clip into two separate clips.
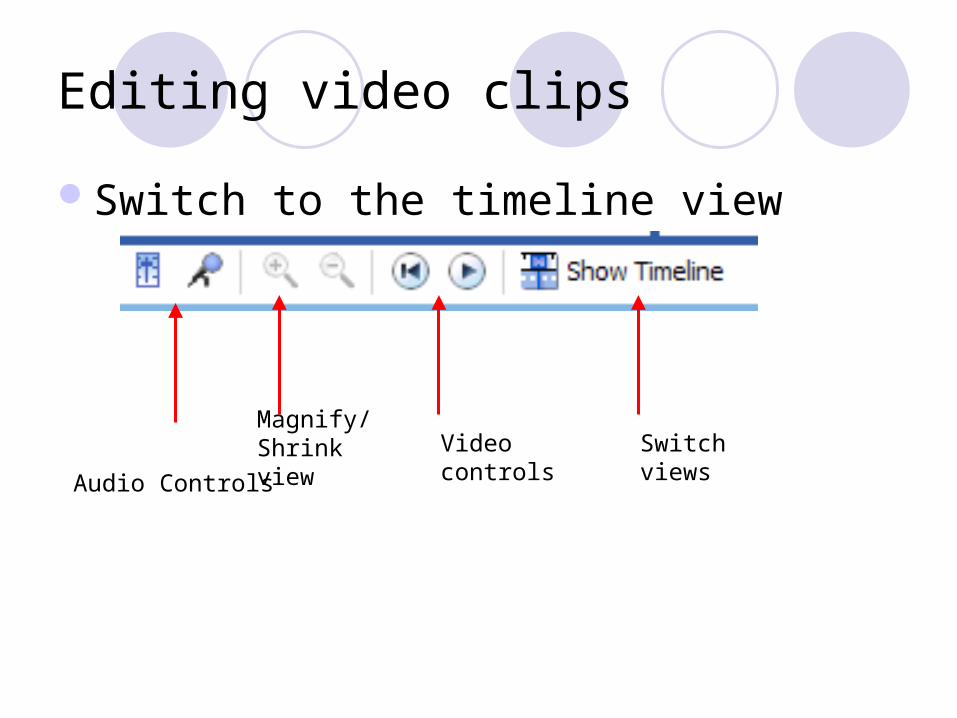
Editing video clips
Switch to the timeline view
Audio Controls
Magnify/Shrink view Video
controlsSwitch views
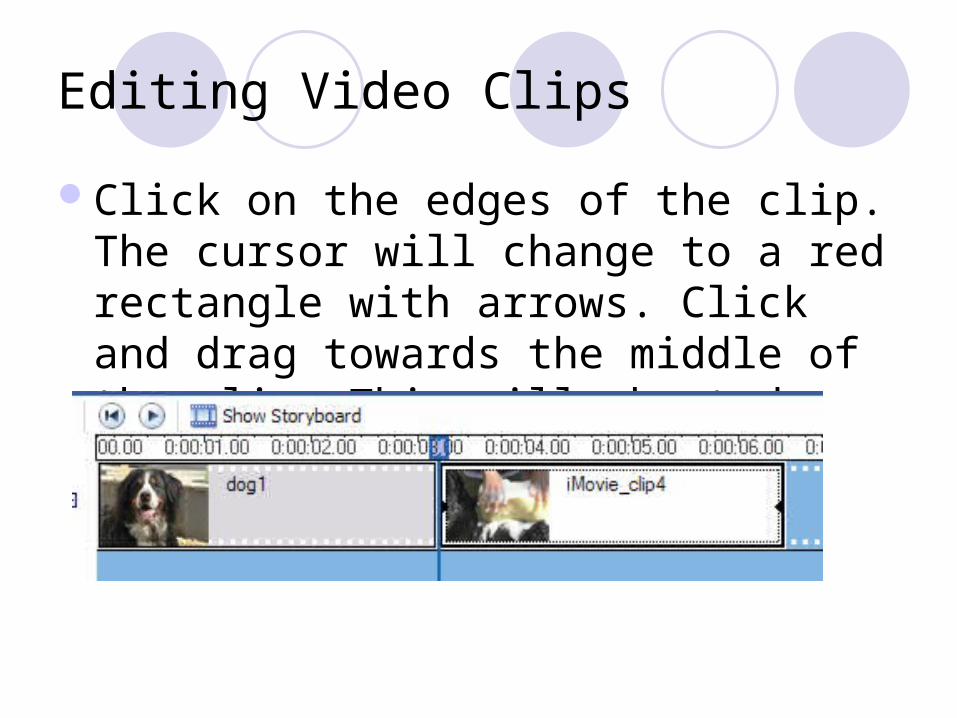
Editing Video Clips
Click on the edges of the clip. The cursor will change to a red rectangle with arrows. Click and drag towards the middle of the clip. This will shorted (edit) the clip.

Saving the Project vs. Saving the movie
File > Save will allow you to save a project. Do this when you will need to edit the project further.
Choose File > Save now.
To share the movie with other people you will need to Export the movie to a .wmv (Windows Movie Viewer file) or .avi file. Almost all computers can view this type of file.
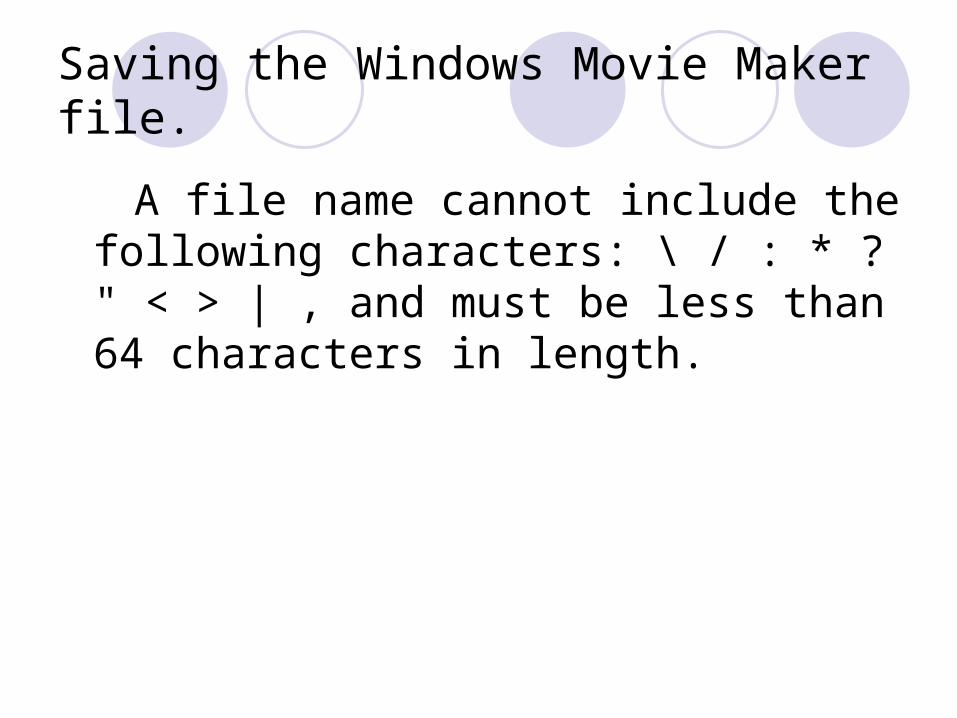
Saving the Windows Movie Maker file.
A file name cannot include the following characters: \ / : * ? " < > | , and must be less than 64 characters in length.