Embed Size (px)
Citation preview
**Photos and text by Banshee** Please note, the Nissan 4x4 Owners Club or its owner(s) can not be held responsible for any damage or injuries sustained while using this information. We advise work is always carried out by a competent mechanic only.
Workshop 46
Changing the Front Wheel Bearings on a Terrano/Maverick
Start by jacking up the car and securing it with a set of axle stands, remove the wheel and then either get someone to sit in the car and hold their foot on the brake pedal or chock the pedal using a suitable item, I use a 6D Maglite and pull the chair forward. You will then need a Size 6 Allen key and proceed to remove the 6 bolts holding the Auto Hub on, whilst this is off, take the opportunity to grease it up inside.
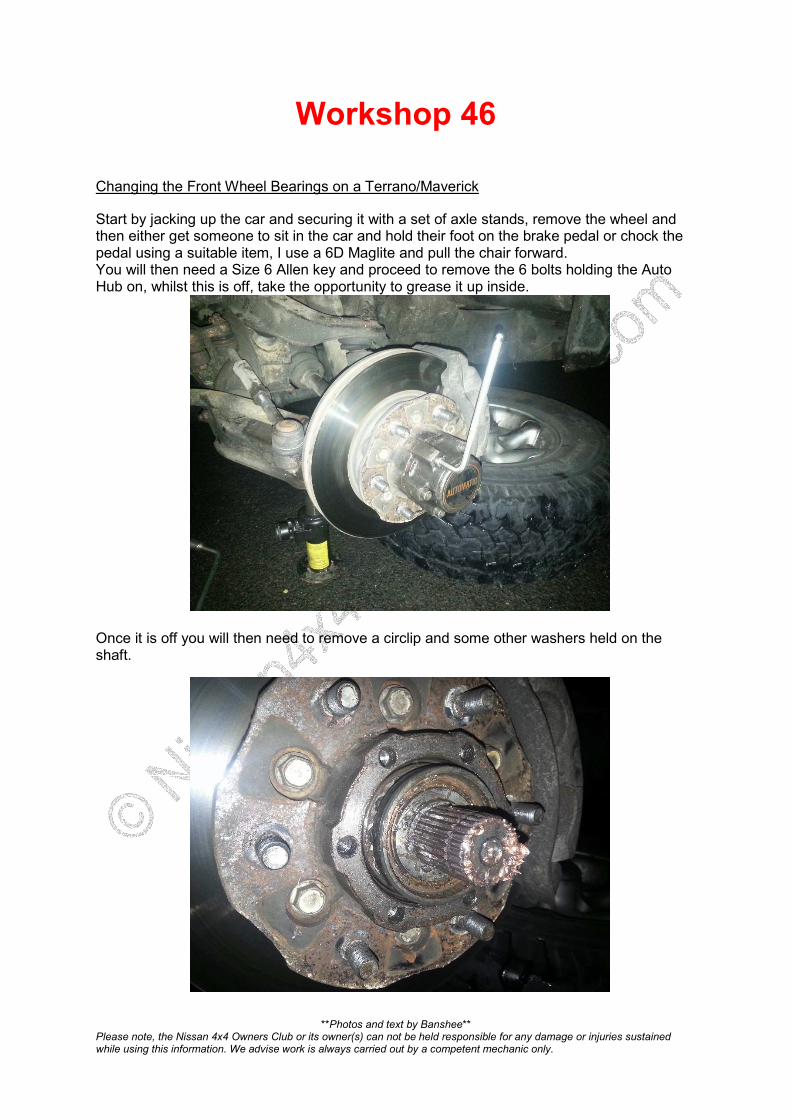
Once it is off you will then need to remove a circlip and some other washers held on the shaft.

**Photos and text by Banshee** Please note, the Nissan 4x4 Owners Club or its owner(s) can not be held responsible for any damage or injuries sustained while using this information. We advise work is always carried out by a competent mechanic only.
You’ll need a good quality set of circlip pliers to remove it, wear eye protection and take care not to let it ping off when you have it free as you will never find it again (trust me)
Once that has been removed, slide off the threaded washer and 2 rings behind it and make a note of the order and position they were in before removed ready for re-assembly

**Photos and text by Banshee** Please note, the Nissan 4x4 Owners Club or its owner(s) can not be held responsible for any damage or injuries sustained while using this information. We advise work is always carried out by a competent mechanic only.
Once they have been removed there will be another ring that will be held in position by 2 small crosshead screws, remove these and remove the ring
Once you have removed the above, you will then be able to use the head of your screwdriver in one of the holes in the threaded washer that holds the outer bearing in position, turn ant-clockwise and remove.

**Photos and text by Banshee** Please note, the Nissan 4x4 Owners Club or its owner(s) can not be held responsible for any damage or injuries sustained while using this information. We advise work is always carried out by a competent mechanic only.
Your Hub should now be free and the only thing keeping it in place should be your brake
calliper, go back inside the truck and either get your helper to loose the brake or remove your
chock. Then continue to remove the 19mm bolts holding the calliper to the hub, once the
hub is free support it somewhere where it will not fall causing damage to the brake line that
is attached (Do not bend or spin the calliper whilst brake line is still attached)
Now pull the hub complete with the disc from the car, the inner bearing will be loose and
should come out by hand.

**Photos and text by Banshee** Please note, the Nissan 4x4 Owners Club or its owner(s) can not be held responsible for any damage or injuries sustained while using this information. We advise work is always carried out by a competent mechanic only.
To remove the outer bearing you will have to knock the oil seal out, this can be achieved
using a blunt object such as a flat head screwdrivers with some kitchen roll wrapped around
it, this will allow re-use of the seal if one hasn’t been provided in the wheel bearing kit you
have purchased. Once you have removed this, the outer bearing will also drop out, this is the
larger of the two bearings.
At this point examine the races, mine have been unblemished and I have left them in before
however this time I removed them, again working them out with a blunt object, this can be
very tough.

**Photos and text by Banshee** Please note, the Nissan 4x4 Owners Club or its owner(s) can not be held responsible for any damage or injuries sustained while using this information. We advise work is always carried out by a competent mechanic only.
Insert the new races, and bearing apply a liberal amount of grease and re-install
components as per removal.
2 considerations should be made when re-attaching everything;
1. Ensure the circlip is sitting back in its groove
2. When tightening up the threaded ring that holds the inner bearing in place, tighten
only with the end of the screwdriver using one hand as tight as possible then back it
off slightly so as not to squash the bearing
Any issue when doing the job PM me (Banshee) and I will respond.