Embed Size (px)
Citation preview
Word 2007
Working with Tabs & Proofing In this lesson you will learn how to set and use tab stops in Word. You will use the ruler and the Format menu You learn how to proof your document using Spelling & Grammar checker..
Objectives
Learn to set different types of tab stop alignments
Use tab stops to create columns
Use tab leader
Eliminate tab stops
How to use Spelling and Grammar check
How to use the Thesaurus
Open tow documents at the same time
Move or copy from one document to another
Lesson Seven: Working with Tabs & Proofing
Word 2007 7.2 1/5/09
Contents Page
Tabs ----------------------------------------------------------------------------------------------- 7.3
Use tab stops to align text ------------------------------------------------------------- 7.3
The Tabs dialog box -------------------------------------------------------------------- 7.3
Close the dialog box -------------------------------------------------------------------- 7.5
Set left- and right-aligned tab stops ------------------------------------------------- 7.6
Close the document and open a new one ------------------------------------------ 7.8
Clear all tabs---------------------------------------------------------------------------- 7.11
Set tab stops use the ruler ----------------------------------------------------------- 7.11
Exercise - Create a Expense Report ----------------------------------------------- 7.12
Set leader characters ----------------------------------------------------------------- 7.14
Close the document ------------------------------------------------------------------- 7.15
Proofing ----------------------------------------------------------------------------------------- 7.15
Set spelling and grammar check options----------------------------------------- 7.15
Check your spelling ------------------------------------------------------------------- 7.16
Check the spelling in an entire document --------------------------------------- 7.18
Use the thesaurus --------------------------------------------------------------------- 7.19
AUTOTEXT AND AUTOCORRECT -------------------------------------------------- 7.21
How do I use AutoText --------------------------------------------------------------- 7.24
What’s the difference between AutoText and AutoCorrect? ----------------- 7.25
Move between open documents --------------------------------------------------- 7.26
Copy text from one document to another ---------------------------------------- 7.26
Exercise - Thesaurus ----------------------------------------------------------------- 7.27
Save the document -------------------------------------------------------------------- 7.28
Exercise - Write a letter, Delete old Files ---------------------------------------- 7.28
Notes ------------------------------------------------------------------------------------- 7.30
Lesson Seven: Working with Tabs & Proofing
Word 2007 7.3 1/5/09
Tabs
Use tab stops to align text
Tab stops can be used to indent the first line of a paragraph, create simple lists or align header and footer text. Tab stops produce more accurate alignment in a list than the spacebar. Using the Tab key to move, for example, to the 1-inch mark on the ruler produces a more accurate alignment than using the spacebar to create spaces to the 1-inch mark.
Word places default tab stops at half-inch intervals on the ruler at the top of a document, but you can change these intervals and set custom tab stops. You can align text to the left, right or center of a tab stop, or align numbers to a decimal point. When you set your own tab stop, Word deletes any default tab stops to the left of the one you set.
When you press the Tab key, Word inserts a tab mark in the document and moves the insertion point in your document to the next tab stop. Tab marks are formatting marks that only show when you turn on the Show formatting marks feature using the Hide/Show button (¶).
The Tabs dialog box
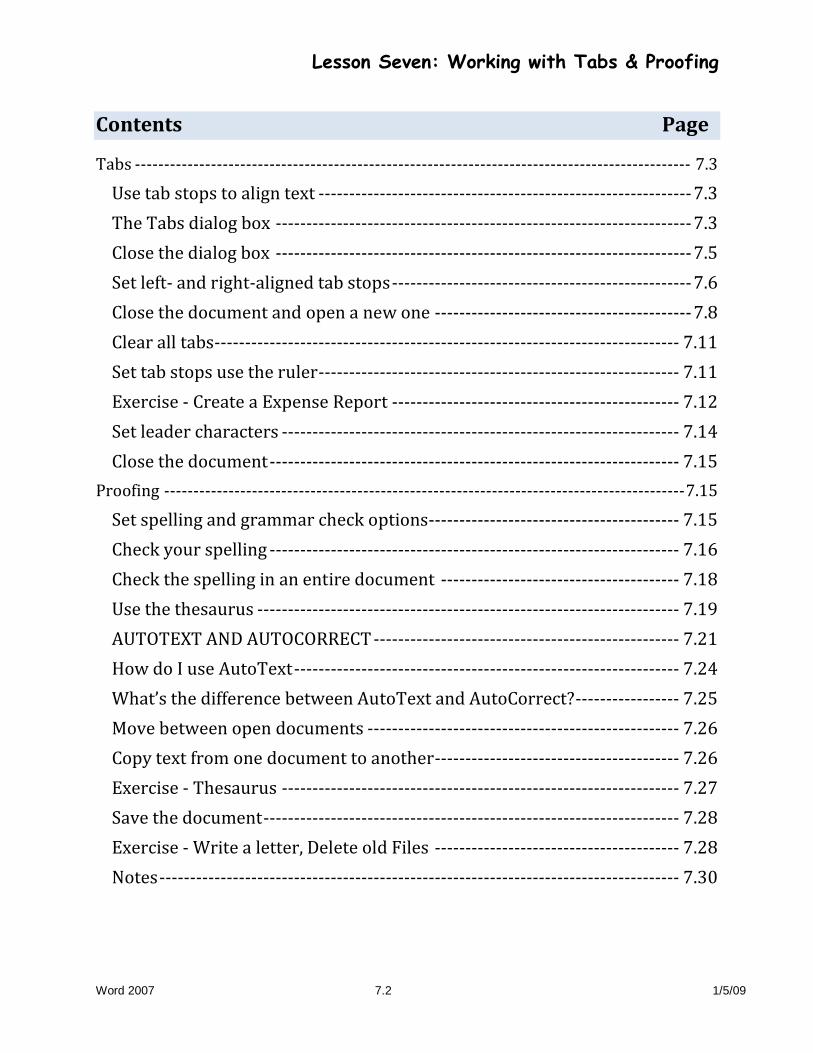
Before you begin to use the tab stops, look at the various choices you have when you set them
1. Click the Home tab, and click the option button in the
Paragraph group.
2. The Tabs dialog box is displayed (see Figure 6.1).
3. Click on the Tab button.
Lesson Seven: Working with Tabs & Proofing
Word 2007 7.4 1/5/09
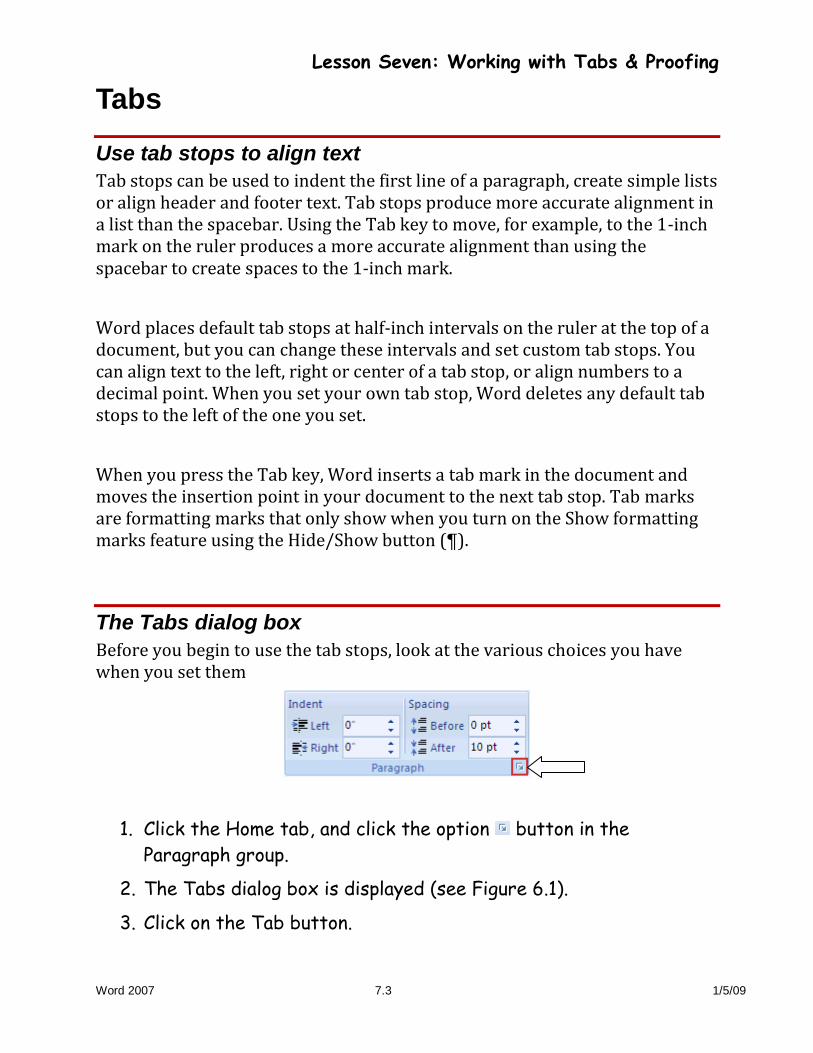
. Note the Paragraph group is in both Home and Page Layout tab.
Figure 6.1 Tabs dialog box
The Tab stop position box is where you type a position for a tab stop. You may also select one of the positions in the Default tab stops list. The position is the number of inches from the left margin of your document.
The Alignment section of the dialog box has radio buttons that enable you to set how you want to align characters (letters or numbers) to the tab stop you select:
Left Characters are aligned to the right of the tab stop
Center Characters are centered on the tab stop
Right Characters are aligned on the left of the tab stop
Decimal The decimal point in numbers is aligned on the tab stop
Bar Inserts a vertical line at the tab stop to separate columns
The radio buttons in the Leader section allow you to select a row of dots or lines that will lead the eye across the space between tab stops.
The Clear and Clear All buttons remove tab stops. Clicking the Clear button eliminates stops that are selected in the Tab stops list. Clicking the Clear All
Lesson Seven: Working with Tabs & Proofing
Word 2007 7.5 1/5/09
button erases all tab stops that you have set. The ruler has pre-set tabs at every half inch.
Close the dialog box
Click the Cancel button on the Tabs dialog box to close it without making any changes to the settings.
Lesson Seven: Working with Tabs & Proofing
Word 2007 7.6 1/5/09
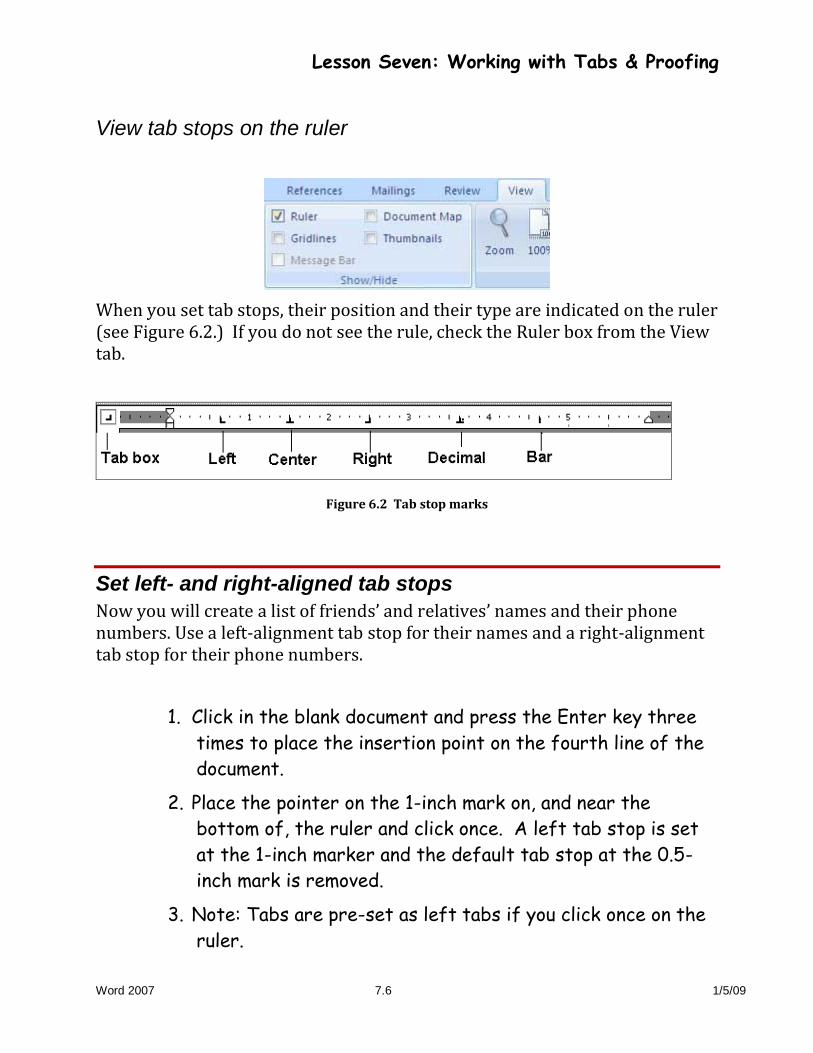
View tab stops on the ruler
When you set tab stops, their position and their type are indicated on the ruler (see Figure 6.2.) If you do not see the rule, check the Ruler box from the View tab.
Figure 6.2 Tab stop marks
Set left- and right-aligned tab stops
Now you will create a list of friends’ and relatives’ names and their phone numbers. Use a left-alignment tab stop for their names and a right-alignment tab stop for their phone numbers.
1. Click in the blank document and press the Enter key three
times to place the insertion point on the fourth line of the
document.
2. Place the pointer on the 1-inch mark on, and near the
bottom of, the ruler and click once. A left tab stop is set
at the 1-inch marker and the default tab stop at the 0.5-
inch mark is removed.
3. Note: Tabs are pre-set as left tabs if you click once on the
ruler.
Lesson Seven: Working with Tabs & Proofing
Word 2007 7.7 1/5/09
4. You can click the Tab box at the left end of the ruler to
select the type of tab you would like to set before you set
it (see Figure 6.2) or double-click on the bottom part of the
ruler, below the inch marks, to set a tab and open the Tabs
dialog box where you can change alignment of one or more
tabs.
5. Note: If you double-click on the top part of the ruler above
the inch marks by mistake, the Page Setup dialog box
opens. If this happens, click Cancel on the dialog box and
try again.
6. Click the Tab box until a right tab symbol displays and
click on the 4.5-inch mark.
7.
Exercise – Create a Phone List
You have set tab stops at the 1-inch and 4.5-inch markers on the ruler. The pre-set tab stops to the left of these tab stops have been removed. You will now type information and use the tab stops you created. If you wish, you may type your own address and phone information for each person.
1. Press the Tab key once, to move to the 1-inch marker, and
type the name of a friend or relative or type your own name.
Do not press Enter at the end of the name.
2. Press the Tab key again, to move to the 4.5-inch left tab
mark, and type the phone number for this person (or for
yourself) and include the area code if you want. Make up a
number if you prefer.
3. The phone number will be aligned on the right tab.
4. Press the Enter key to position the insertion point on the
next line.
When you press Enter, the tab stops remain in effect on
the next line.
5. Repeat steps 1 through 3 until you have entered at least two
Lesson Seven: Working with Tabs & Proofing
Word 2007 7.8 1/5/09
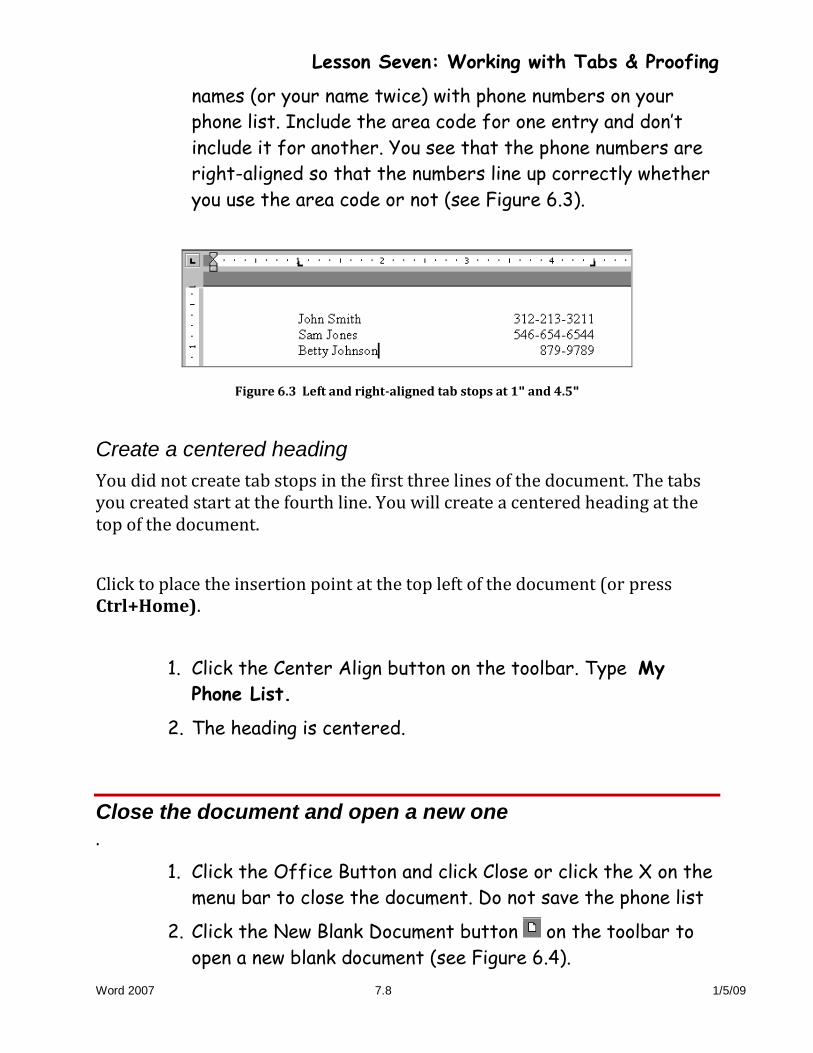
names (or your name twice) with phone numbers on your
phone list. Include the area code for one entry and don’t
include it for another. You see that the phone numbers are
right-aligned so that the numbers line up correctly whether
you use the area code or not (see Figure 6.3).
Figure 6.3 Left and right-aligned tab stops at 1" and 4.5"
Create a centered heading
You did not create tab stops in the first three lines of the document. The tabs you created start at the fourth line. You will create a centered heading at the top of the document.
Click to place the insertion point at the top left of the document (or press Ctrl+Home).
1. Click the Center Align button on the toolbar. Type My
Phone List.
2. The heading is centered.
Close the document and open a new one
.
1. Click the Office Button and click Close or click the X on the
menu bar to close the document. Do not save the phone list
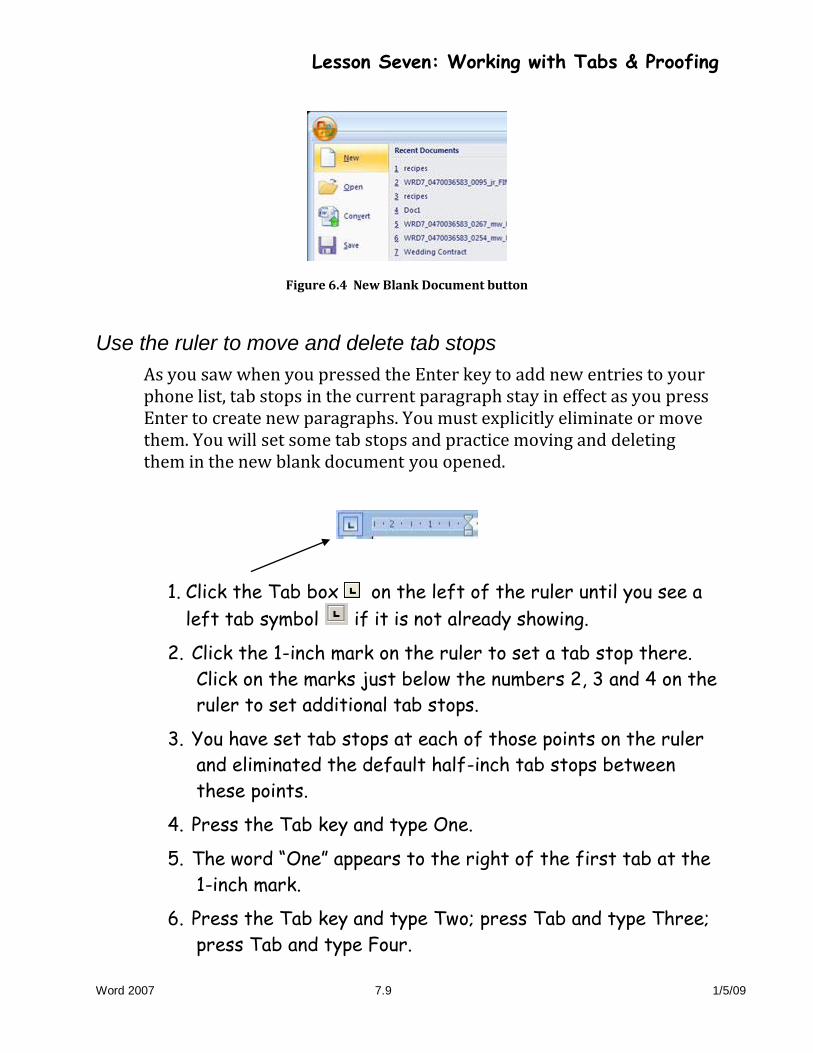
2. Click the New Blank Document button on the toolbar to
open a new blank document (see Figure 6.4).
Lesson Seven: Working with Tabs & Proofing
Word 2007 7.9 1/5/09
Figure 6.4 New Blank Document button
Use the ruler to move and delete tab stops
As you saw when you pressed the Enter key to add new entries to your phone list, tab stops in the current paragraph stay in effect as you press Enter to create new paragraphs. You must explicitly eliminate or move them. You will set some tab stops and practice moving and deleting them in the new blank document you opened.
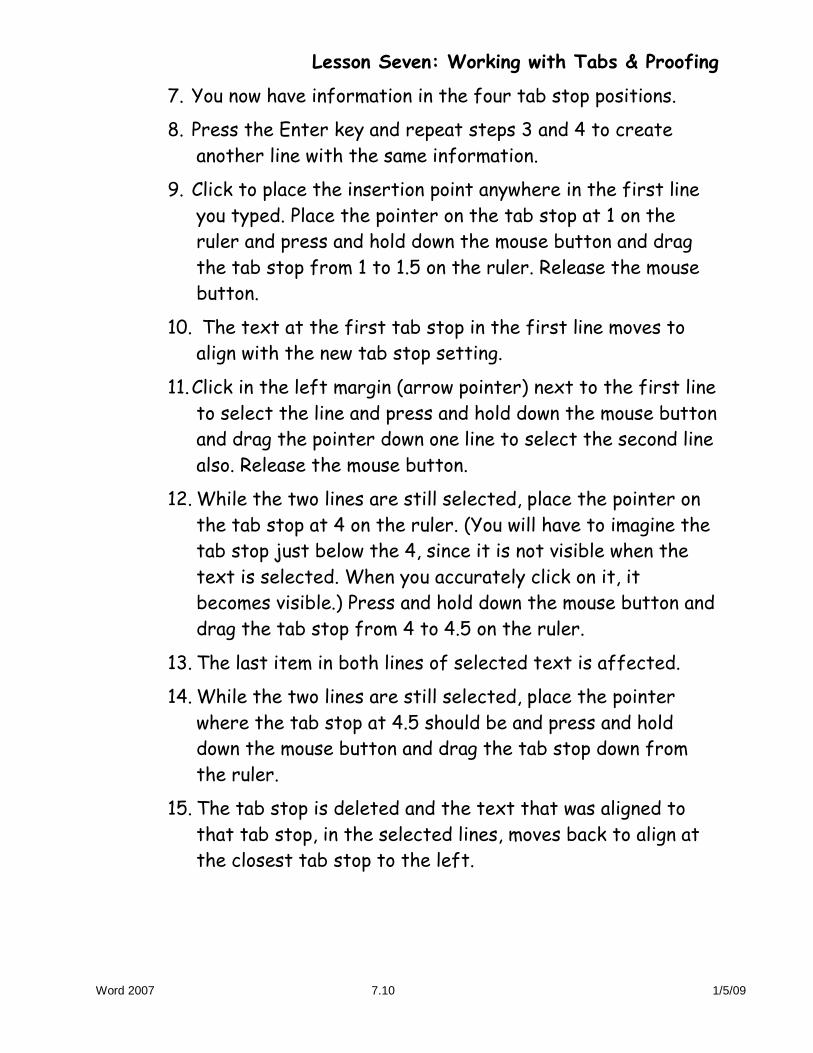
1. Click the Tab box on the left of the ruler until you see a
left tab symbol if it is not already showing.
2. Click the 1-inch mark on the ruler to set a tab stop there.
Click on the marks just below the numbers 2, 3 and 4 on the
ruler to set additional tab stops.
3. You have set tab stops at each of those points on the ruler
and eliminated the default half-inch tab stops between
these points.
4. Press the Tab key and type One.
5. The word “One” appears to the right of the first tab at the
1-inch mark.
6. Press the Tab key and type Two; press Tab and type Three;
press Tab and type Four.
Lesson Seven: Working with Tabs & Proofing
Word 2007 7.10 1/5/09
7. You now have information in the four tab stop positions.
8. Press the Enter key and repeat steps 3 and 4 to create
another line with the same information.
9. Click to place the insertion point anywhere in the first line
you typed. Place the pointer on the tab stop at 1 on the
ruler and press and hold down the mouse button and drag
the tab stop from 1 to 1.5 on the ruler. Release the mouse
button.
10. The text at the first tab stop in the first line moves to
align with the new tab stop setting.
11. Click in the left margin (arrow pointer) next to the first line
to select the line and press and hold down the mouse button
and drag the pointer down one line to select the second line
also. Release the mouse button.
12. While the two lines are still selected, place the pointer on
the tab stop at 4 on the ruler. (You will have to imagine the
tab stop just below the 4, since it is not visible when the
text is selected. When you accurately click on it, it
becomes visible.) Press and hold down the mouse button and
drag the tab stop from 4 to 4.5 on the ruler.
13. The last item in both lines of selected text is affected.
14. While the two lines are still selected, place the pointer
where the tab stop at 4.5 should be and press and hold
down the mouse button and drag the tab stop down from
the ruler.
15. The tab stop is deleted and the text that was aligned to
that tab stop, in the selected lines, moves back to align at
the closest tab stop to the left.
Lesson Seven: Working with Tabs & Proofing
Word 2007 7.11 1/5/09
Clear all tabs
1. Click the Edit menu and click Select All to select all the
text on the page.
2. Click the Home tab, and click the option button in the
Paragraph group.
3. The Tabs dialog box opens.
4. Click the Clear All button to remove all the tab stops you
set.
5. Click OK to close the dialog box.
The Clear All button has removed the tab stops you set and reinstates the default tab stops at one-half inch intervals. If a word is too long to fit within the space between its tab stop and the next tab, that word is moved over to the next available tab stop.
Set tab stops use the ruler
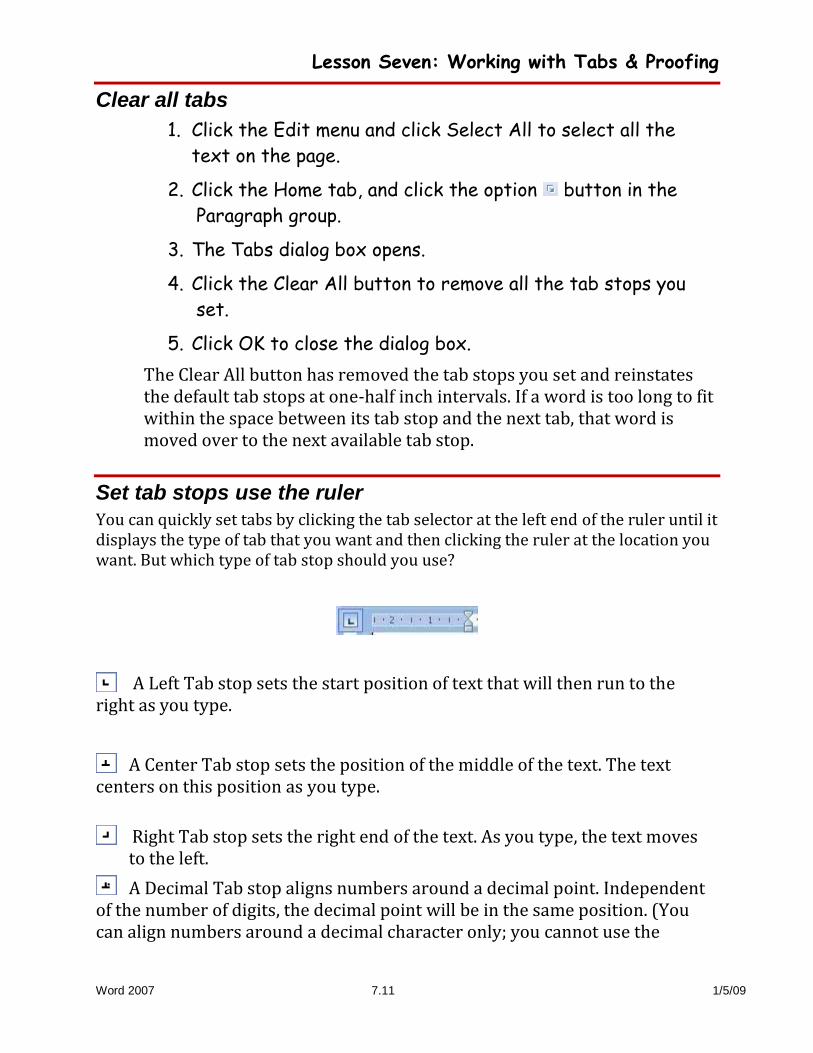
You can quickly set tabs by clicking the tab selector at the left end of the ruler until it displays the type of tab that you want and then clicking the ruler at the location you want. But which type of tab stop should you use?
A Left Tab stop sets the start position of text that will then run to the right as you type.
A Center Tab stop sets the position of the middle of the text. The text centers on this position as you type.
Right Tab stop sets the right end of the text. As you type, the text moves to the left.
A Decimal Tab stop aligns numbers around a decimal point. Independent of the number of digits, the decimal point will be in the same position. (You can align numbers around a decimal character only; you cannot use the
Lesson Seven: Working with Tabs & Proofing
Word 2007 7.12 1/5/09
decimal tab to align numbers around a different character, such as a hyphen or an ampersand symbol.)
Bar Tab stop doesn't position text. It inserts a vertical bar at the tab position.
Exercise - Create a Expense Report
You will create a heading for your expense report.
1. Click after the last line in the text on the page (after the
last “four”) and press the Enter key a few times to create
some space.
2. Click the Center Align button on the toolbar.
3. Type Expenses for [date] [type the month and year].
4. The heading is centered. Press the Enter key twice.
5. Click the Left Align button to turn off the center alignment
and return to left alignment.
Set tab stops for expenses
Now you will set tab stops for the list of expense items and their costs.
1. Click the Home tab, and click the option button in the
Paragraph group.
2. The Tabs dialog box opens.
3. Type 1 in the Tab stop position box and click the Left
Alignment radio button. Click the Set button to place this
tab stop on the ruler. The 1" tab stop is now in the list box
below the Tab stop position box.
4. Type 4.5 in the Tab stop position box and click the Decimal
radio button. Click the Set button to make 4.5" appear in
Lesson Seven: Working with Tabs & Proofing
Word 2007 7.13 1/5/09
the Tab stops list box.
5. Click OK. The shape of the first tab stop mark is an L and
the second tab stop mark on the ruler is an inverted T with
a dot to the right of the upright (.).
Enter your expense items
1. Press the Tab key and type Rent.
2. Press the Tab key again and type $932.75. Press Enter.
3. Press Tab and type Food and press Tab again and type
$267.44. Press Enter.
4. Press Enter to go to the next line after you type each of
the following sets of expense items (tab before each):
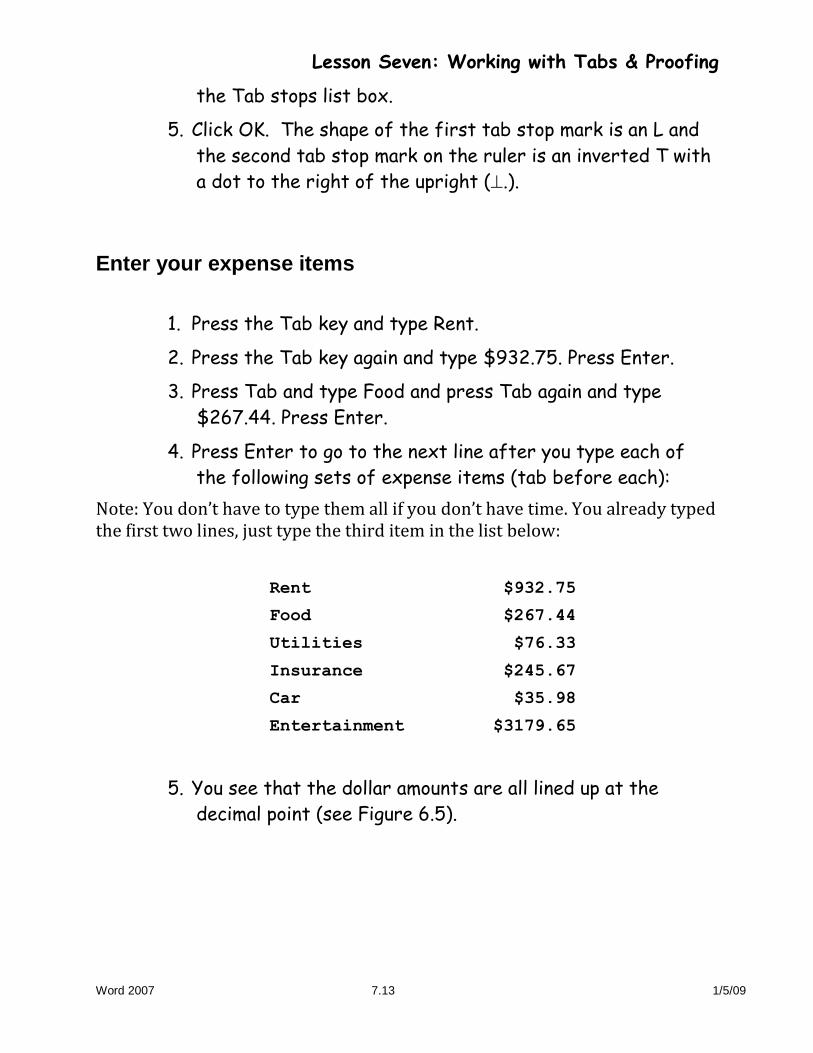
Note: You don’t have to type them all if you don’t have time. You already typed the first two lines, just type the third item in the list below:
Rent $932.75
Food $267.44
Utilities $76.33
Insurance $245.67
Car $35.98
Entertainment $3179.65
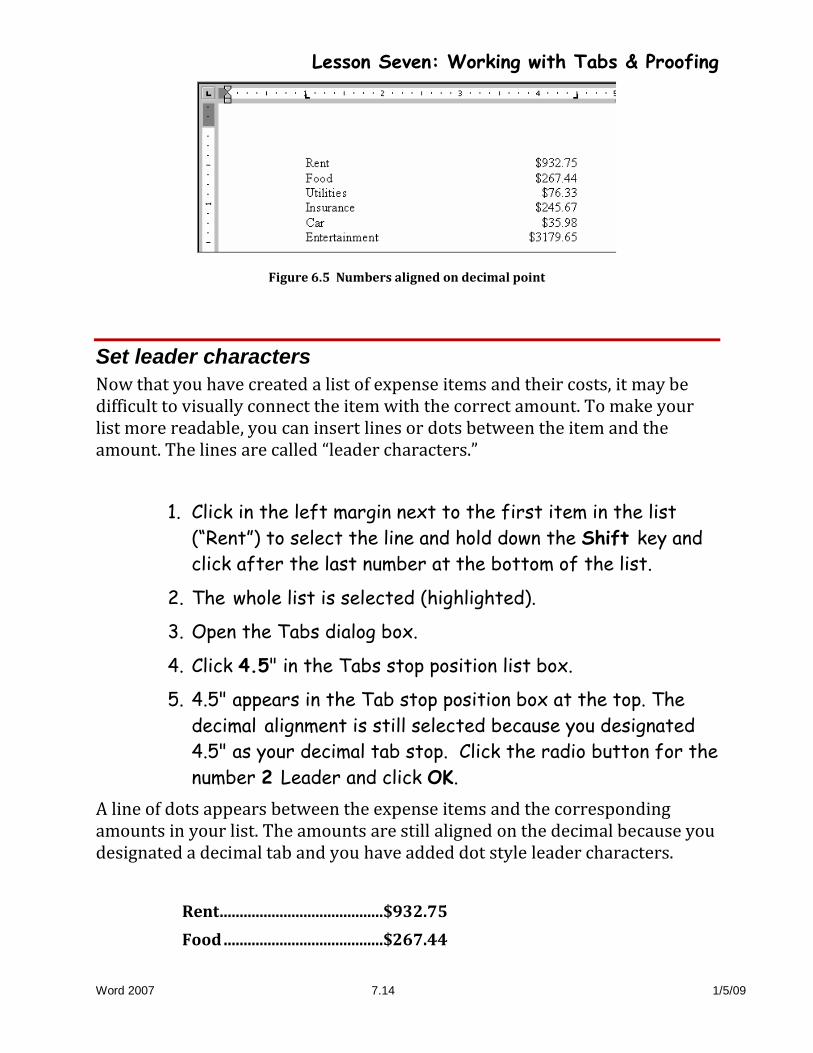
5. You see that the dollar amounts are all lined up at the
decimal point (see Figure 6.5).
Lesson Seven: Working with Tabs & Proofing
Word 2007 7.14 1/5/09
Figure 6.5 Numbers aligned on decimal point
Set leader characters
Now that you have created a list of expense items and their costs, it may be difficult to visually connect the item with the correct amount. To make your list more readable, you can insert lines or dots between the item and the amount. The lines are called “leader characters.”
1. Click in the left margin next to the first item in the list
(“Rent”) to select the line and hold down the Shift key and
click after the last number at the bottom of the list.
2. The whole list is selected (highlighted).
3. Open the Tabs dialog box.
4. Click 4.5" in the Tabs stop position list box.
5. 4.5" appears in the Tab stop position box at the top. The
decimal alignment is still selected because you designated
4.5" as your decimal tab stop. Click the radio button for the
number 2 Leader and click OK.
A line of dots appears between the expense items and the corresponding amounts in your list. The amounts are still aligned on the decimal because you designated a decimal tab and you have added dot style leader characters.
Rent .........................................$932.75
Food ........................................$267.44
Lesson Seven: Working with Tabs & Proofing
Word 2007 7.15 1/5/09
Now your list is much easier to read. Click anywhere in the document to unselect the text. If you have time, you may want to repeat the steps to select other styles of leaders such as dashes or double lines.
Close the document
Click the Office button and click Close or click the X on the menu bar to close the document and do not save the changes.
Proofing
Set spelling and grammar check options
The spelling check feature of Word compares words in the text with a set of words in a dictionary that is contained in the Word program. As with most dictionaries, it does not contain all forms of a word (suffix endings, plurals, etc.), nor does it contain many proper nouns. Background spelling check, the standard, or default, setting in Microsoft Word checks your spelling and grammar in the “background” as you create a document. When a word you type is not found in the dictionary, the spell checker underlines the word with a wavy red line.
1. Click the Office button and click Word Options. The Options
dialog box appears.
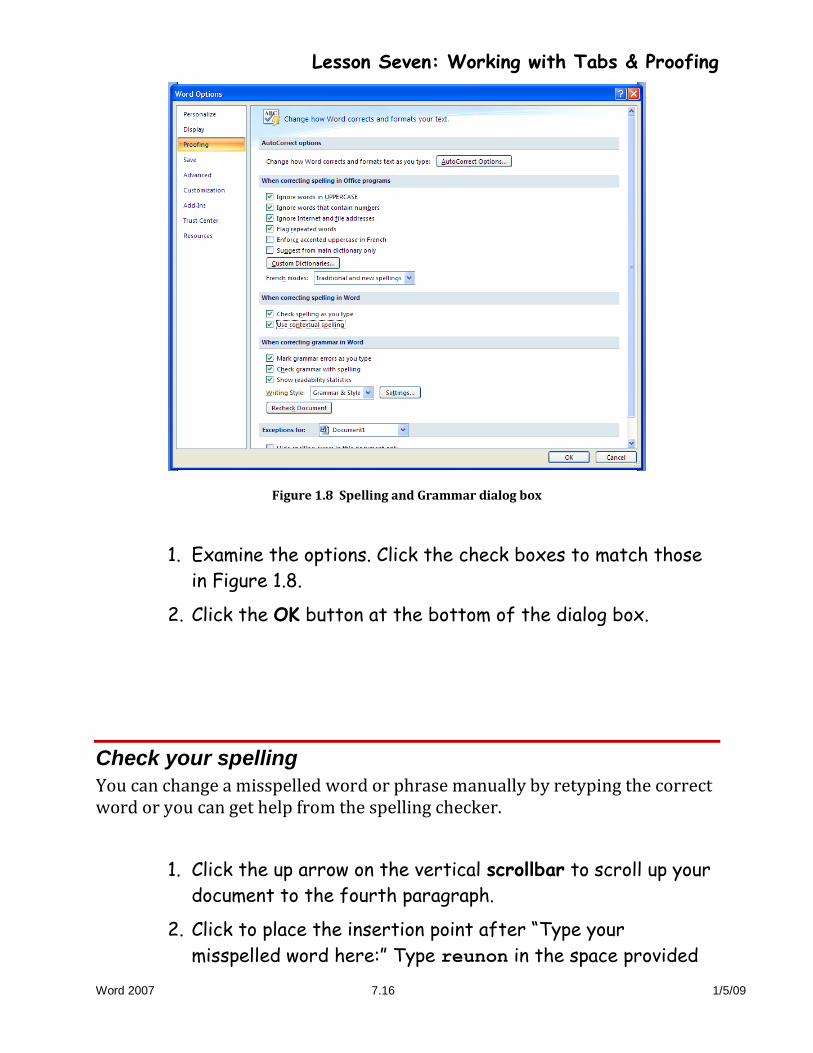
2. Click the Proofing to open the Spelling & Grammar dialog
box (see Figure 1.8).
Lesson Seven: Working with Tabs & Proofing
Word 2007 7.16 1/5/09
Figure 1.8 Spelling and Grammar dialog box
1. Examine the options. Click the check boxes to match those
in Figure 1.8.
2. Click the OK button at the bottom of the dialog box.
Check your spelling
You can change a misspelled word or phrase manually by retyping the correct word or you can get help from the spelling checker.
1. Click the up arrow on the vertical scrollbar to scroll up your
document to the fourth paragraph.
2. Click to place the insertion point after “Type your
misspelled word here:” Type reunon in the space provided
Lesson Seven: Working with Tabs & Proofing
Word 2007 7.17 1/5/09
(the misspelling is intentional).
3. Click anywhere in reunon.
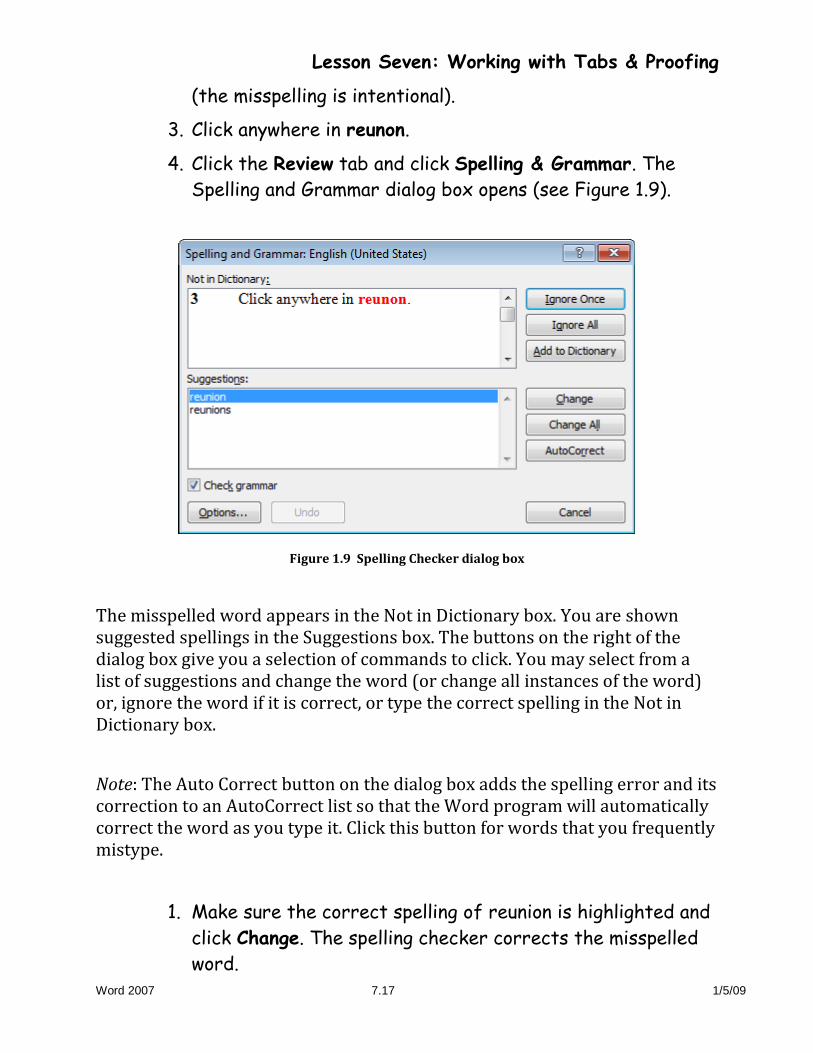
4. Click the Review tab and click Spelling & Grammar. The
Spelling and Grammar dialog box opens (see Figure 1.9).
Figure 1.9 Spelling Checker dialog box
The misspelled word appears in the Not in Dictionary box. You are shown suggested spellings in the Suggestions box. The buttons on the right of the dialog box give you a selection of commands to click. You may select from a list of suggestions and change the word (or change all instances of the word) or, ignore the word if it is correct, or type the correct spelling in the Not in Dictionary box.
Note: The Auto Correct button on the dialog box adds the spelling error and its correction to an AutoCorrect list so that the Word program will automatically correct the word as you type it. Click this button for words that you frequently mistype.
1. Make sure the correct spelling of reunion is highlighted and
click Change. The spelling checker corrects the misspelled
word.
Lesson Seven: Working with Tabs & Proofing
Word 2007 7.18 1/5/09
Note: You may also add to a customized version of the dictionary words that are not in the dictionary but which you use often. To add a word you would click on the Add button. A file named CUSTOM.DIC would appear in the Not in dictionary window. Click Close to save the word you added. Do not do this on the computers at the Center.
2. When Word is finished checking your document from where
you placed the insertion point, you will get a message asking
if you want to continue to check the spelling from the
beginning of the document. Click No.
Check the spelling in an entire document
You may prefer to check the spelling in a whole document rather than one word at a time.
1. Click the Review tab and click Spelling & Grammar. The
spelling check starts from the insertion point in the text.
When it gets to the end of the document a message box will
ask if you want to go back to the top and finish checking the
document.
2. Click Yes when you are asked “Do you want to continue
checking the remainder of the text?”
3. If the spelling checker selects a word that occurs more
than once in a document, click the Ignore All or Change All
button, as appropriate. Your correction will be applied to all
those identical words and the spelling checker will not
continue to select them.
4. When the spelling checker has reviewed the entire
document, a message appears indicating spelling and
grammar check is complete. Click OK.
Lesson Seven: Working with Tabs & Proofing
Word 2007 7.19 1/5/09
Check spelling shortcut
After you finish a document, you can look at it on the screen to see if Word has underlined any of the words with a wavy red line to indicate that they might be misspelled. You can follow the next steps to see a short way of correcting the spelling.
1. Double-click on the word reunion in the fourth paragraph.
2. Type the misspelling reunon to replace the corrected word
and click anywhere in the document to give Word a chance
to identify the misspelled word with a wavy red underline.
3. Right-click on the word reunon. A pop-up menu appears.
4. Click the correct spelling in the pop-up menu to correct the
spelling.
Use the thesaurus
The Thesaurus in Word is a language tool with approximately 200,000 synonyms and antonyms. You can select a word in your document and use the thesaurus to suggest a substitute word or to look up its meanings.
1. Click the New Blank Document button on the left end of
the toolbar if a blank document is not already open. A blank
document opens.
2. Type the word document.
3. Click to place the insertion point anywhere in the word
“document.”
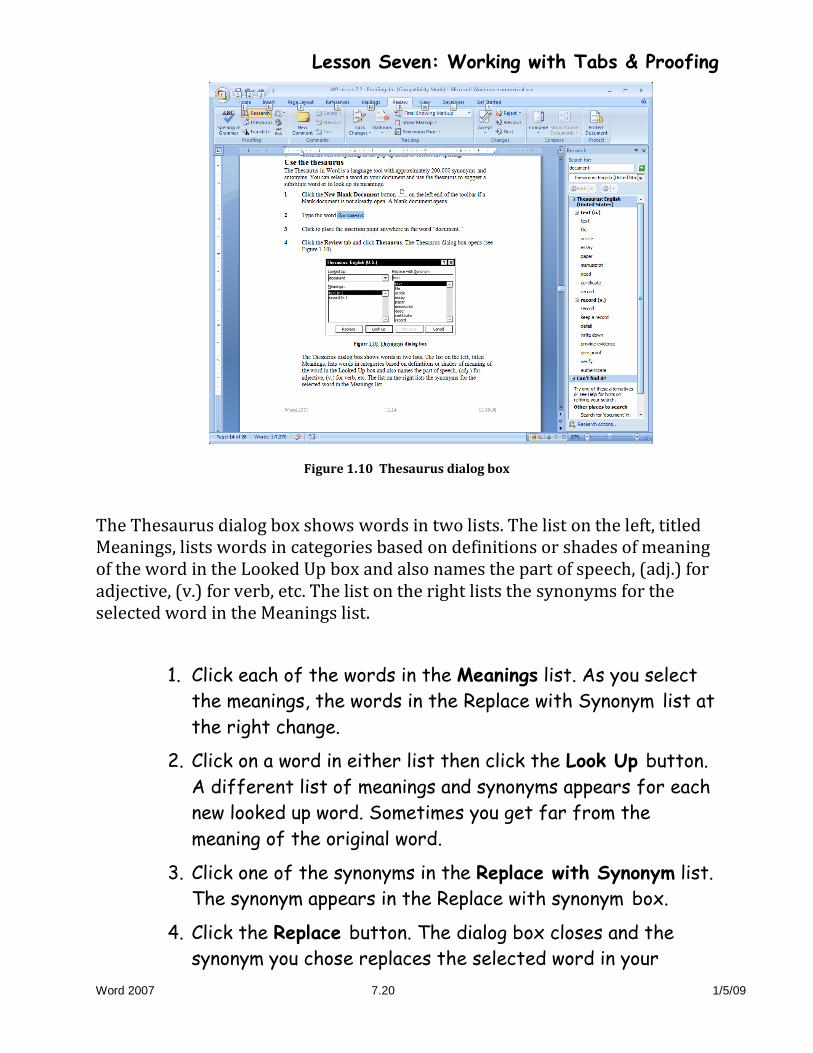
4. Click the Review tab and click Thesaurus. The Thesaurus
dialog box opens (see Figure 1.10).
Lesson Seven: Working with Tabs & Proofing
Word 2007 7.20 1/5/09
Figure 1.10 Thesaurus dialog box
The Thesaurus dialog box shows words in two lists. The list on the left, titled Meanings, lists words in categories based on definitions or shades of meaning of the word in the Looked Up box and also names the part of speech, (adj.) for adjective, (v.) for verb, etc. The list on the right lists the synonyms for the selected word in the Meanings list.
1. Click each of the words in the Meanings list. As you select
the meanings, the words in the Replace with Synonym list at
the right change.
2. Click on a word in either list then click the Look Up button.
A different list of meanings and synonyms appears for each
new looked up word. Sometimes you get far from the
meaning of the original word.
3. Click one of the synonyms in the Replace with Synonym list.
The synonym appears in the Replace with synonym box.
4. Click the Replace button. The dialog box closes and the
synonym you chose replaces the selected word in your
Lesson Seven: Working with Tabs & Proofing
Word 2007 7.21 1/5/09
document.
Note: To close the thesaurus without changing the selected word, you would click the Cancel button.
AUTOTEXT AND AUTOCORRECT
It's important to distinguish AutoText (the correct name of the feature you're calling Auto Complete) from AutoCorrect. AutoCorrect kicks in when you've finished with typing something (as evidenced by typing a space, a period, or other punctuation). AutoText entries appear in a tooltip while you're typing; pressing Enter accepts the suggested completion. So, for example, typing four characters of your name and then hitting Enter would prompt AutoText to insert the whole name.
The problem is that in Word 2007, what was AutoText applies only to dates—type "wedn" or "febr" and you'll see it. According to Microsoft, the new Building Blocks feature takes over this function for other types of text. To see this feature, click the Insert tab in the Ribbon, click Quick Parts in the text pane, and click Building Block Organizer. Each entry in this dizzying -array represents text or formatting that you can invoke by typing the name and pressing F3. Type the wrong name and you may wind up reformatting your document instead of inserting your name. This is progress?
Clearly, Microsoft wants you to use AutoCorrect instead of the now-missing AutoText. The first challenge is simply finding the AutoCorrect options. Click the round Office button at the top left and click the Word Options button at the bottom of the resulting window. Now click Proofing in the list at left and click the Auto Correct Options button. Create an AutoCorrect entry to replace the first four letters of your name with your entire name. You'll have to remember to type a space afterward instead pressing Enter as you had in the past. But it will do the job.
Lesson Seven: Working with Tabs & Proofing
Word 2007 7.22 1/5/09
AutoText is a way to store parts of a Word document for re-use. You can, for example, create a library of boilerplate paragraphs for business letters, or keep a handy selection of headers and footers. An AutoText entry can store anything a Word document can contain, such as formatted text, pictures, and fields.
AutoText can be a handy feature for when you have lots of boilerplate text to use in a project. It’s a lot like using Quick Parts, but AutoText can only be located on the Quick Access Toolbar, so it’s always visible with changing tabs (you could put a shortcut to Quick Parts on the Quick Access Toolbar, too). Using both Quick Parts and AutoText would give you a way to separate a variety of different boilerplate or objects. Here’s how to set up and use AutoText.
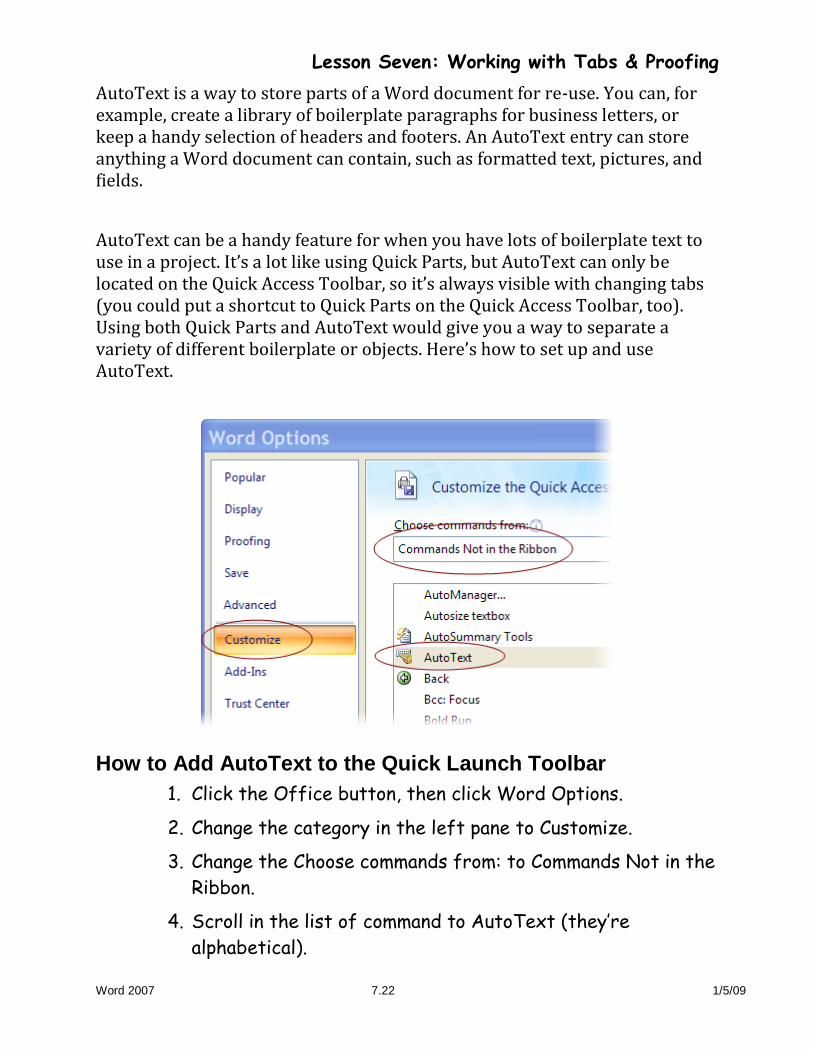
How to Add AutoText to the Quick Launch Toolbar
1. Click the Office button, then click Word Options.
2. Change the category in the left pane to Customize.
3. Change the Choose commands from: to Commands Not in the
Ribbon.
4. Scroll in the list of command to AutoText (they’re
alphabetical).

Lesson Seven: Working with Tabs & Proofing
Word 2007 7.23 1/5/09
5. Single-click AutoText to select, click Add to put it on the
Quick Access Toolbar.
6. Us the Up/Down options to position on the Quick Access
Toolbar, if needed.
7. Click OK to be done.
ADD A NEW WORD TO YOUR DICTIONARY
Microsoft Word comes with a default dictionary that it uses to find misspellings in your documents. However, if you frequently use a lot of non-standard terms in your work, you might want to create a custom dictionary. You can create multiple custom dictionaries so no matter what set of terms you might be using, you'll be covered.
1. Select text to be added. This can be a few words, multiple
paragraphs, fields, graphics, tables or most anything.
2. Click the AutoText button, and then click Save Selection to
AutoText Gallery (or push Alt + F3).
3. Type in a Name for the AutoText. You will either use this
name to identify this AutoText in a list or to manually enter
the AutoText by typing the name. The name can include
letters, numbers, spaces and punctuation. The list of
AutoText entries will display alphabetically, you can
override that by starting AutoText names with spaces or
punctuation.
4. The Gallery: box should show AutoText .
5. Adding a Category: will force the list of AutoText entries
to be grouped by the category names. This would be good if
you need AutoText entries organized by project or
document type.
6. Description is just for your own reference.
7. Save in: Building Blocks.dotx basically means you’ll get the
Lesson Seven: Working with Tabs & Proofing
Word 2007 7.24 1/5/09
message about Building Blocks.dotx has changed, do you
want to keep the changes when you exit out of Word. In
order to keep the new AutoText entries, you would need to
answer Yes.
8. Options: allows you to Insert content only (just as it was
created), Insert content in its own paragraph (paragraph
mark will be added to end of AutoText) or Insert content in
its own page (page breaks will be added before and after
the AutoText).
9. Click OK to finish..
How do I use AutoText
You can quickly insert any entry from the dropdown list on the AutoText toolbar, from the menu Insert>AutoText, or from the dialog box Insert>AutoText>AutoText. If you want to see what the entries contain, use the dialog box.
In the Insert>AutoText menu lists, you'll notice that the entries are separated into categories. Each category corresponds to the paragraph style with which the text was formatted when it was made into an AutoText entry.
If the insertion point is in a paragraph of Normal style or in a paragraph of a style that has no entries defined, then the menu shows all the categories. However, if the insertion point is in a paragraph of a style for which there are any AutoText entries, the Insert>AutoText menu (or an AutoText button such as the one on the Header and Footer toolbar) shows only the entries in that one category.
To change the category of an entry, you must recreate the entry, first formatting it with the appropriate style.
Lesson Seven: Working with Tabs & Proofing
Word 2007 7.25 1/5/09
Where are AutoText entries saved?
AutoText entries are saved in Word templates (*.dot files); they cannot be saved in regular documents (*.doc files). If you don’t specify a different location when creating an entry, it will be saved in the default global template, Normal.dot.
Because AutoText entries are stored in templates, additions and changes to them aren't automatically saved when you save the document you're working on. To make sure they are saved, hold the Shift key while you click the File menu, and select the Save All command to save both the document and the template. If you forget this step, you should be given a chance to save the template when you close Word—but you shouldn't rely on this.
What’s the difference between AutoText and AutoCorrect?
The obvious difference between AutoText and AutoCorrect is how they are triggered. AutoCorrect takes effect as soon as you type text that Word recognizes, followed by a space or punctuation. In contrast, AutoText requires you to press F3 or accept the AutoComplete prompt; if you don’t specifically enable the replacement, nothing happens. If you want complete control and don’t like things happening “automagically,” you may prefer AutoText.
Another difference is that unformatted (“Plain text”) AutoCorrect entries are available in all Office programs, but AutoText entries and formatted AutoCorrect entries are specific to Word.
Extend a selection
1. While the “Christopher Sidney...” phrase is still selected,
hold down the Shift key while you click after “(1934).” Your
selection is now extended to include all the text between
“Christopher” and “(1934).”
2. Double-click in the left margin (arrow pointer) of the
second paragraph to select that entire paragraph.
3. Click the Edit menu and click Select All to select the entire
Lesson Seven: Working with Tabs & Proofing
Word 2007 7.26 1/5/09
document.
4. Click anywhere in the text to turn off a selection.
Move between open documents
It is possible to have two or more documents open at the same time. You can cut or copy from one document and paste into another and compare text between documents. You don’t have to close the word processing program you are using and reopen it when you want to work on a new document.
1. Click the Open button on the toolbar and click 3 ½ Floppy
(A:) or CD drive D: if it is not showing in the Look in list
box.
2. Double-click the icon next to 1SecondFamily in the list. The
1SecondFamily document opens and you no longer can see
the My Family document.
3. Click the My Family button on the taskbar. The My family
document appears on your screen as the “active” document
on top of the 1FamilyAgain document.
4. Click the Restore button on the title bar if the window is
maximized to make the window smaller if you want to see a
part of both documents at the same time. You can move the
window to one side by placing your mouse on the title bar
and dragging it where you want it to go.
5. Switch between the documents by clicking the buttons with
their titles on the taskbar or press Alt+Tab to switch
between active windows.
Copy text from one document to another
The first paragraph of the story is missing. Fortunately you still have a copy of the original story. You will copy the paragraph from the old story to the new one.
Lesson Seven: Working with Tabs & Proofing
Word 2007 7.27 1/5/09
1. Click the button for My Family on the taskbar to make that
document the active window..
2. Double-click in the left margin next to the first paragraph
to select the paragraph.
3. Click the Edit menu and click Copy or click the Copy button.
4. Click the button for 1SecondFamily on the taskbar to make
that document the active window at the front of your
screen.
5. Click to place the insertion point before “His grandparents”
in the first line of the text and click the Edit menu and click
Paste or click the Paste button.
6. Press the Enter key to add a blank line between the
paragraphs. The old paragraph has been restored, but with a
duplicate copy of two sentences.
7. Select the last two sentences in the newly pasted paragraph
by dragging the pointer across them and press the Delete
key.
Exercise - Thesaurus
1. Type as much of the following as you wish. At least type a few
words.
The early bird gets the worm.
Curiosity killed the cat.
A stitch in time saves nine.
You can teach an old dog new tricks.
2. Follow steps 3 through 7 in the previous section and use the
Lesson Seven: Working with Tabs & Proofing
Word 2007 7.28 1/5/09
thesaurus to select and change some of the words and
perhaps alter the meaning in unexpected ways.
Save the document
1. Click the File menu and click Save As. The Save As dialog
box appears.
2. Click the arrow on the Save in list box and click My
Documents if it is not showing.
3. Press the Tab key or click in the File name list box to select
the existing file name. Type Thesaurus exercise to
replace the name.
4. Click Save. You have saved the document.
Exercise - Write a letter, Delete old Files
Restart Word 2007 or open a blank document and write a letter to a friend or relative. You might tell them about your newfound expertise in word processing! Use some of the editing features you learned in this lesson. Save your letter in the My Documents or Document (Vista) folder.
Delete Files within Word
In the classroom or computer lab at the Center, you will need to delete the files you created in this lesson. At home you may want to keep these files.
1. Click on the Office button.
2. Click the Open button. The Open windows is the same as
Windows Explorer with all of the same functionality.
3. Locate folder containing file you wish to delete. The
Documents folder is the default folder for all documents.
4. Find each of the files you have created during this lesson,
one at a time. Right click on the name of each file. A
Lesson Seven: Working with Tabs & Proofing
Word 2007 7.29 1/5/09
shortcut menu appears. On the shortcut menu, click Delete.
5. A message box appears, asking if you want to send the file
to the Recycle Bin. Click Yes.
6. Continue to do this for each file you have created.

Lesson Seven: Working with Tabs & Proofing
Word 2007 7.30 1/5/09
Notes