Embed Size (px)
Citation preview


Victory Decision: Preview – © A.D.Publishing 2011 – www.adpublishing.de
1
World War II
Author, Editing, Miniature Painting, Layout and Photos
Agis Neugebauer
Creative Consulting, additional Editing and Proofreading
Reuben Molloy
Playtesting
Alfons Armbruster, Thomas and Hagen Baumgärtner, Claudio Bechinie, David Bobusch, Michael Hellmig, Philip vom Hövel, Daniel Kirchner, Tom Weiß
Miniatures AB Figures (http://www.abfigures.co.uk/), Artizan Designs (http://www.artizandesigns.com/), Black Tree Miniatures
(http://www.blacktreedesign.com/), Bolt Action Miniatures (http://www.warlordgames.co.uk/), Dragon (http://www.dragon-models.com/), Ebob Miniatures (http://www.ebobminiatures.com/), Flames of War
(http://www.flamesofwar.com/), Litko (http://www.litkoaero.com/), Peter Pig (http://www.peterpig.co.uk/), TQD Castings (http://www.cpmodels.co.uk/), Sands Models (http://www.sandsmodels.com/), Skytrex
(http://www.skytrex.com/ ) and Waffenkammer (http://www.diewaffenkammer.com/),
Special Thanks
to Tom Weiß for additional painting (Artizan US Greatcoat Trooper)
Copyright Information “Victory Decision” and the Victory Decision logo are copyright 2011 of Agis Neugebauer - A.D.Publishing. All rights
reserved. Reproduction of this work by any means without the written permission of the publisher is expressly forbidden.
“Victory Decision: World War II“ © 2011 Agis Neugebauer - A.D.Publishing.
Check out our website www.adpublishing.de for more wargaming products; [email protected].
This game product contains no Open Game Content. No portion of this work may be reproduced in any form without written permission.
Please note: All markings used, such as the swastikas, are displayed ONLY for historical accuracy and should not be considered as an attempt to glorify war or Nazism. The symbols do not signify or represent the Author’s (and
any other person involved in this project) personal political opinion.

Table of Contents
Victory Decision: Preview – © A.D.Publishing 2011 – www.adpublishing.de
2
1 INTRODUCTION AND WHAT YOU NEED TO PLAY ........................................................................... 5
1.1 GROUP- OR MULTIBASED INFANTRY MINIATURES ................................................................................... 5
1.2 DICE ROLLING CONVENTIONS ................................................................................................................. 6
1.3 RE-ROLLS ............................................................................................................................................... 6
2 MEASURING OR BEING WITHIN RANGE ............................................................................................ 7
2.1 PREMEASURING ........................................................................................................................................... 8
3 UNIT CHARACTERISTICS ........................................................................................................................ 9
3.1 EXAMPLE INFANTRY UNIT ....................................................................................................................... 9
3.2 INFANTRY UNIT FACING AND FIRE ARCS .............................................................................................. 10
3.3 UNIT COHERENCY AND LEADERSHIP DISTANCE .................................................................................. 10
4 SUPPRESSION MARKERS AND SHAKEN UNITS ............................................................................... 11
4.1 SHAKEN UNITS ...................................................................................................................................... 11
5 THE GAME TURN ...................................................................................................................................... 12
5.1 SEQUENCE OF PLAY ............................................................................................................................. 12
6 ACTIONS ...................................................................................................................................................... 13
6.1 ASSAULT ............................................................................................................................................... 13
6.2 CLOSE COMBAT .................................................................................................................................... 14
6.3 CONCENTRATE FIRE ............................................................................................................................. 15
6.4 HIDE ...................................................................................................................................................... 15
6.5 INFILTRATE ............................................................................................................................................ 15
6.6 MOVE .................................................................................................................................................... 15
6.7 REGROUP .............................................................................................................................................. 16
6.8 SHOOT ................................................................................................................................................... 16
6.9 SPOT ..................................................................................................................................................... 19
6.10 TAKE COVER! ........................................................................................................................................ 19
7 INFANTRY ABILITIES .............................................................................................................................. 20
7.1 AMBUSH ................................................................................................................................................ 20
7.2 COMMAND ............................................................................................................................................. 20
7.3 DEDICATED ........................................................................................................................................... 21
7.4 FIRE TEAM ............................................................................................................................................ 21
7.5 GRENADES ............................................................................................................................................ 21
7.6 HP/X ..................................................................................................................................................... 21
7.7 IMMOBILE ............................................................................................................................................... 21
7.8 INDIVIDUAL ............................................................................................................................................ 21
7.9 INFILTRATE ............................................................................................................................................ 22
7.10 LIGHT FOOTED ...................................................................................................................................... 22
7.11 MARKSMEN ........................................................................................................................................... 22
7.12 MEDIC ................................................................................................................................................... 22
7.13 NERVES OF STEEL ................................................................................................................................ 22
7.14 PIONEER ................................................................................................................................................ 22
7.15 RADIO .................................................................................................................................................... 22
7.16 RECON .................................................................................................................................................. 22
7.17 STEALTH/X” .......................................................................................................................................... 23
7.18 TANK HUNTER ....................................................................................................................................... 23
7.19 TENACITY .............................................................................................................................................. 23
7.20 UNSEEN ................................................................................................................................................. 23
7.21 UNTRAINED ........................................................................................................................................... 23
7.22 WEAPON TEAM ..................................................................................................................................... 23
8 WEAPON FEATURES ................................................................................................................................ 24
8.1 BLAST/X” ............................................................................................................................................... 24
8.2 CO-AXIAL .............................................................................................................................................. 24
8.3 FLAME ................................................................................................................................................... 25

Table of Contents
Victory Decision: Preview – © A.D.Publishing 2011 – www.adpublishing.de
3
8.4 INDIRECT ................................................................................................................................................25
8.5 ONE-SHOT .............................................................................................................................................25
8.6 RE-ROLL ................................................................................................................................................25
8.7 SAVE/-X .................................................................................................................................................26
8.8 SCOPED .................................................................................................................................................26
8.9 SET UP/X ...............................................................................................................................................26
8.10 STABILIZED ............................................................................................................................................26
8.11 SUPPRESSION ........................................................................................................................................26
9 A WORD ON SCALE!..................................................................................................................................27
9.1 INDIVIDUALLY BASED INFANTRY MINIATURES ........................................................................................27
9.2 GROUP- OR MULTIBASED INFANTRY MINIATURES .................................................................................27
9.3 MULTIBASED INFANTRY IN ASSAULTS AND CLOSE COMBAT ................................................................28
9.4 MULTIBASED INFANTRY SHOOTING .......................................................................................................28
9.5 MULTIBASED INFANTRY AND BLAST WEAPONS ....................................................................................28
9.6 MULTIBASED INFANTRY AND SUPPRESSION .........................................................................................29
10 VEHICLES ....................................................................................................................................................30
10.1 EXAMPLE VEHICLE UNIT ........................................................................................................................30
10.2 VEHICLE ACTIONS..................................................................................................................................31
10.3 VEHICLE LEADERSHIP ............................................................................................................................33
10.4 VEHICLE FACING ....................................................................................................................................33
10.5 SHOOTING AT VEHICLES ........................................................................................................................34
10.6 ASSAULTING VEHICLES .........................................................................................................................34
10.7 VEHICLES AND SUPPRESSION ...............................................................................................................34
10.8 VEHICLE UNIT LEADER AND COHERENCY .............................................................................................34
10.9 VEHICLES AND DAMAGE ........................................................................................................................34
11 VEHICLE SPECIAL PROPERTIES ..........................................................................................................35
11.1 COMMAND VEHICLE ...............................................................................................................................35
11.2 MINESWEEPING EQUIPMENT .................................................................................................................35
11.3 OPEN......................................................................................................................................................36
11.4 RADIO.....................................................................................................................................................36
11.5 RECON ...................................................................................................................................................36
11.6 SMOKE DISCHARGER.............................................................................................................................36
11.7 TANK RIDERS/X .....................................................................................................................................36
11.8 TRANSPORT/X .......................................................................................................................................36
11.9 UNRELIABLE ...........................................................................................................................................37
12 BUILDINGS AND OTHER STRUCTURES ..............................................................................................38
12.1 EXAMPLE STRUCTURES.........................................................................................................................39
12.2 ENTERING A STRUCTURE ......................................................................................................................39
12.3 LEAVING A STRUCTURE .........................................................................................................................39
12.4 SHOOTING FROM INSIDE A STRUCTURE ................................................................................................39
12.5 SHOOTING AT UNITS INSIDE A STRUCTURE ...........................................................................................40
12.6 ASSAULTING UNITS INSIDE A STRUCTURE .............................................................................................40
12.7 ATTACKING A STRUCTURE ....................................................................................................................41
13 GAMING AREA AND DEPLOYMENT ....................................................................................................42
14 SCENARIOS..................................................................................................................................................44
14.1 OPEN BATTLE ........................................................................................................................................44
14.2 ADVANCE! ..............................................................................................................................................45
14.3 SEEK OUT, CLOSE IN, DESTROY AND HOLD ...........................................................................................46
14.4 CAPTURE! ..............................................................................................................................................47
14.5 AMBUSH .................................................................................................................................................48
14.6 BUNKER ASSAULT..................................................................................................................................49
15 SCENARIO SPECIAL RULES ...................................................................................................................50
15.1 FORTIFICATIONS ....................................................................................................................................50
15.2 NIGHT FIGHT ..........................................................................................................................................51
15.3 OBJECTIVES ...........................................................................................................................................52

Table of Contents
Victory Decision: Preview – © A.D.Publishing 2011 – www.adpublishing.de
4
15.4 RANDOM DEPLOYMENT ........................................................................................................................ 52
15.5 RANDOM GAME LENGTH ....................................................................................................................... 52
15.6 RESERVES............................................................................................................................................. 52
15.7 RETREAT! .............................................................................................................................................. 52
15.8 VICTORY POINTS................................................................................................................................... 53
16 PLAYING A GAME! ................................................................................................................................... 54
16.1 CHOOSE SCENARIO AND POINTS LIMIT ................................................................................................ 54
16.2 GENERIC FORCE ORGANISATION CHART BY ELEMENT CATEGORY .................................................... 54
16.3 USING THE ARMY LISTS ........................................................................................................................ 56
16.4 NATIONAL RANK NAMES ....................................................................................................................... 56
17 ARMY LIST GENERIC EQUIPMENT..................................................................................................... 57
18 USING CAPTURED EQUIPMENT ........................................................................................................... 59
19 LATE WAR ARMY LISTS – EUROPEAN THEATRE .......................................................................... 60
20 LATE WAR BRITISH RIFLE PLATOON ............................................................................................... 60
20.1 BRITISH RIFLE PLATOON HQ ELEMENT ............................................................................................... 61
20.2 BRITISH RIFLE PLATOON COMBAT ELEMENT ....................................................................................... 63
20.3 BRITISH RIFLE PLATOON FAST OR LIGHT SUPPORT ELEMENT ........................................................... 64
20.4 BRITISH RIFLE PLATOON HEAVY SUPPORT ELEMENT ......................................................................... 67
21 LATE WAR GERMAN GRENADIER PLATOON ................................................................................. 69
21.1 GERMAN GRENADIER PLATOON HQ ELEMENT .................................................................................... 70
21.2 GERMAN GRENADIER PLATOON COMBAT ELEMENT ........................................................................... 71
21.3 GERMAN GRENADIER PLATOON FAST OR LIGHT SUPPORT ELEMENT ................................................ 72
21.4 GERMAN GRENADIER PLATOON HEAVY SUPPORT ELEMENT ............................................................. 76
22 LATE WAR SOVIET RIFLE PLATOON ................................................................................................. 78
22.1 SOVIET RIFLE PLATOON HQ ELEMENT ................................................................................................ 79
22.2 SOVIET RIFLE PLATOON COMBAT ELEMENT ........................................................................................ 81
22.3 SOVIET RIFLE PLATOON FAST OR LIGHT SUPPORT ELEMENT ............................................................ 83
22.4 SOVIET RIFLE PLATOON HEAVY SUPPORT ELEMENT .......................................................................... 85
23 LATE WAR US ARMY RIFLE PLATOON ............................................................................................. 87
23.1 US ARMY RIFLE PLATOON HQ ELEMENT ............................................................................................ 88
23.2 US ARMY RIFLE PLATOON COMBAT ELEMENT .................................................................................... 90
23.3 US ARMY RIFLE PLATOON FAST OR LIGHT SUPPORT ELEMENT ........................................................ 91
23.4 US ARMY RIFLE PLATOON HEAVY SUPPORT ELEMENT ...................................................................... 94
24 DESIGN NOTES .......................................................................................................................................... 96
25 GAME MARKER ........................................................................................................................................ 97

Introduction and what you need to play
Victory Decision: Preview – © A.D.Publishing 2011 – www.adpublishing.de
5
1 Introduction and what you need to play On the following pages you will find the core rules for the “Victory Decision: World War II“ game system. The rules describe how units - infantry or armoured vehicles move and fire on each other and participate in Assault Actions.
In order to play you will need some wargaming models. „Victory Decision: World War II“ is not tied to ANY game or miniature company. As long as you and your opponents know which model represents what unit on the table everything is fine.
This rule system is written with individually based 28 or 20 mm miniatures in mind. However, scale is not important in “Victory Decision: World War II“. As long as your minis are individually based you can use the rules straight away. In fact we found that the weapon ranges look more realistic when using individually based 15mm infantry miniatures. If you want to play with smaller tables, just use centimetres instead of inches and all will be fine.
Using individually based infantry miniatures is the recommended way of playing „Victory Decision: World War II“.
1.1 Group- or multibased Infantry miniatures
If your existing 15mm or even 6mm WW II infantry collection consists of group- or multiple miniatures on a base, aka Multibased Infantry Stands, a little bit more effort is necessary. “A Word on scale!” will give you all the additional rules you need.
In addition to models, a suitable battlefield, and players you will also need a few more essential items to begin play:
· A tape measure or ruler using inches.
· Paper and Pens or Pencils: You may need to record game details, Victory Points etc. during a game, so it is useful to have some paper and a pen at hand.
· Suppression Markers: A force in a battle tends to get worse at fighting as it is subjected to enemy fire and casualties. This is represented with Suppression Markers in a game of „Victory Decision: World War II“. You can make your own Suppression Markers, use the Suppression Markers produced by other game companies, or keep track of things with paper and pencil. Of course you are welcome to use any other method if you and your opponent prefer. As long as you know how many Suppression Marker a unit has accumulated during the game then whatever method you use is fine. It is your game after all!
· Several six and ten-sided dice (at least two of each).
Unit Characteristics
Victory Decision: Preview – © A.D.Publishing 2011 – www.adpublishing.de
9
3 Unit Characteristics Models are grouped into units, which act together on the battlefield. A unit may consist of several models, such as a squad of soldiers or a single larger or important model, like an armoured vehicle.
All models have a set of unique characteristics that differentiate their abilities in the „Victory Decision: World War II“ game. Each model defined by its characteristics. You can find all necessary information in unit description of each army list. Vehicle units are slightly different, which is explained in more detail in 10 Vehicles.
Some characteristics apply to all infantry models in „Victory Decision: World War II“, these models are all representing humans after all. These are Movement, Health Point, Combat Range and Close Combat die.
· All infantry units have a Movement Characteristic of 4” (see 6.6 Move Action).
· Individually based Infantry models have 1 Health Point; they are removed as a casualty after suffering one unsaved hit (see Assault, Close Combat and Shoot Action).
· They have a Combat Range of 1” and roll 1D6 in Assaults or Close Combat (see 6.1 Assault Action).
These characteristics are not repeated over and over in the army lists; just keep these three characteristics in mind.
Type Movement Health Point Combat Range Close Combat/ Assault
All Infantry 4” 1 1” 1D6
3.1 Example Infantry Unit
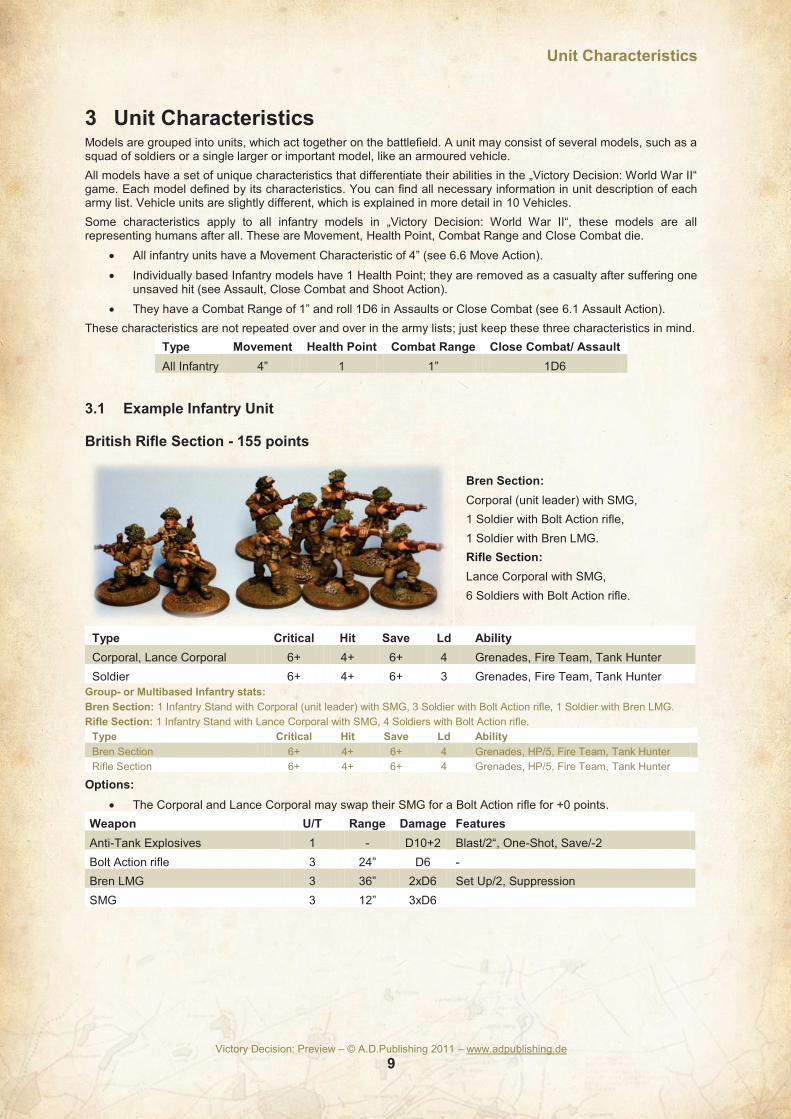
British Rifle Section - 155 points
Bren Section:
Corporal (unit leader) with SMG,
1 Soldier with Bolt Action rifle,
1 Soldier with Bren LMG.
Rifle Section:
Lance Corporal with SMG,
6 Soldiers with Bolt Action rifle.
Type Critical Hit Save Ld Ability
Corporal, Lance Corporal 6+ 4+ 6+ 4 Grenades, Fire Team, Tank Hunter
Soldier 6+ 4+ 6+ 3 Grenades, Fire Team, Tank Hunter
Group- or Multibased Infantry stats:
Bren Section: 1 Infantry Stand with Corporal (unit leader) with SMG, 3 Soldier with Bolt Action rifle, 1 Soldier with Bren LMG.
Rifle Section: 1 Infantry Stand with Lance Corporal with SMG, 4 Soldiers with Bolt Action rifle.
Type Critical Hit Save Ld Ability
Bren Section 6+ 4+ 6+ 4 Grenades, HP/5, Fire Team, Tank Hunter
Rifle Section 6+ 4+ 6+ 4 Grenades, HP/5, Fire Team, Tank Hunter
Options:
· The Corporal and Lance Corporal may swap their SMG for a Bolt Action rifle for +0 points.
Weapon U/T Range Damage Features
Anti-Tank Explosives 1 - D10+2 Blast/2“, One-Shot, Save/-2
Bolt Action rifle 3 24” D6 -
Bren LMG 3 36” 2xD6 Set Up/2, Suppression
SMG 3 12” 3xD6

Unit Characteristics
Victory Decision: Preview – © A.D.Publishing 2011 – www.adpublishing.de
10
Composition (Teams, Section etc.) - Which models are included in the unit as standard, before any options are
taken, along with the weapons they carry.
Name – The name of the models.
Critical - This statistic reflects how resistant a model is to injury or damage. The higher the number the tougher or
better protected the model is.
When an attack is made against this model and after all modifiers are applied its Critical number is equalled or exceeded, the unit suffers two hits.
Hit - This statistic reflects how easy or difficult it is for attacks to hit this model. This number must be rolled or
exceeded by an attack to hit a model in the unit.
Save – Roll to Save - The number that must be rolled or exceeded by a model in the unit to avoid the effect of the
hit after an attack.
Leadership (Ld) – This statistic reflects the leadership, training, alertness, bravery or level of tactical insight.
Ability – Some infantry units have special abilities or training that is mentioned here.
Options – Possible unit upgrades or weapon swaps.
For your convenience the weapon stats are always shown below the unit entries in the army list. This also enables you to print out just the units you are fielding during your game and having nearly all reference data at hand.
Weapon – The name of the weapon.
U/T – Uses per turn. Not all weapons can be fired at a high rate of fire. A characteristic of 3 means that the weapon
can be fired up to 3 times per turn (all actions may be Shoot Actions). A U/T 1 weapon can only be fired once per Activation Segment.
Range - This statistic reflects how far the weapon can shoot.
Damage - How many and what kind of dice are rolled against a target.
Features - This lists any special features the weapon possesses. See 8 Weapon Features for more details on
weapon features.
3.2 Infantry Unit Facing and Fire Arcs
It is unimportant where an Infantry model is pointing when you move it or when checking who can see which enemy model; it is assumed that men on the battlefield are highly alert and can turn quickly enough to face any threat and target any enemy.
The same rules apply for Fire Arcs. Infantry models can effectively shoot all around them and did not have to worry about Fire Arcs, while AT-Guns and vehicles have limited fields of fire.
Vehicle Facing and Fire Arcs are explained under 10.4 Vehicle Facing.
3.3 Unit Coherency and Leadership Distance
Every unit in a game of „Victory Decision: World War II“ has a leader. The leader is the model with the highest Leadership Characteristic. If all models have the same Leadership Characteristic, just choose one in the initiative segment. The unit Coherency is determined by the Leadership Distance (highest Leadership Characteristic in Inches) of the unit leader. As long as all members of a unit are at the end of the move within the Leadership Distance of the leader the unit is within Coherency.
Example: A British Infantry Command section (Lieutenant Leadership Characteristic 6) has a Leadership Distance
of 6”.
The Leadership Distance of a British Rifle section is determined by the Leadership Characteristic of its Corporal and is therefore 4”. Better trained troops do not need such a tight leadership and can act more independently.
If a model is ever out of the Leadership Distance of its unit leader when the unit takes an action, then the model must use a movement action to move into Coherency by the shortest route possible, note that this may mean it is taking a different action than its unit. Once back within Leadership Distance the model has to use any action its unit takes, as normal.
Example: A Soldier becomes separated from his unit. He spends a Movement action to get into Coherency while
his unit performs a shoot action against a nearby enemy. His second and third action is the same as his unit since he reached coherency with his 1
st Action.
A unit leader of one unit may not act as the unit leader of another unit, though individual models may have special rules that do allow them to take command of other units.
Not all models are part of a unit. Some characters are capable to act on their own on the battlefield. See the “Individual” ability for more information.
The Game Turn
Victory Decision: Preview – © A.D.Publishing 2011 – www.adpublishing.de
12
5 The Game Turn A „Victory Decision: World War II“ battle is fought over a number of turns. How many turns a battle will last is determined by the players or the scenario being fought.
5.1 Sequence of Play
Each game turn in „Victory Decision: World War II“ is split into segments. „Victory Decision: World War II“ uses alternate unit activations to make the game as interesting as possible for both players during the entire game. During the activation segment the players carry out the actions of the chosen unit.
Each unit in an army can only be activated once per game turn.
After both players have activated all of their units once, they move onto the end segment. Note that both players do things in each segment, so both determine initiative in the Initiative Segment, and carry out actions in the activation segment, and so on.
1 - Initiative Segment: Both players nominate a unit to activate. To avoid any unnecessary arguments the players
should agree before the game who starts with nominating a unit. We suggest that whoever rolls highest nominates a unit first during odd turns. One player gets all even turns, while the other gets all odd turns.
Both players then roll a 1D6 for the unit and add the highest Leadership Characteristic of that unit to the score. Vehicle units use their default Leadership of 6 (see 10.3 Vehicle Leadership).
The score is affected by the following cumulative modifiers.
Initiative Segment Modifiers (cumulative)
Unit is Shaken -2
Unit benefits from the Command or Recon Ability +1
Unit is kept in Reserve -1
Whoever scores highest wins the Initiative and activates the chosen unit. Any ties (after all modifiers) are simply re-rolled until one player scores higher.
Example: Before the game it was established that Player B has to start with nominating a unit during even game
turns.
2nd
Game Turn - Player B nominates his Soviet Recon Team. The Soviet Team benefits form the Recon Ability but was also Shaken during the first game turn.
Player A nominates his German Grenadier Command Squad. The Command Squad is still unshaken and benefits from the Command Ability.
Player A rolls a 3 (+1 for the Command ability, +7 Leadership) = 11.
Player B rolls a 6 (+1 for the Recon Ability, +5 Leadership, -2 for being Shaken) = 10.
The German unit is activated.
2 – Activation Segment: The activated unit may now carry out actions - see the section on Actions for more
information what your unit can do. In short, the activated unit moves, shoots and may fight in assaults.
After that both players nominate again a unit or individual to activate and roll again for Initiative.
Note: It is possible that one player wins several Initiative Segments after another. This reflects the better training of
the chosen units. Elite troops are often able to perform on a much higher pace.
Segment 1 and 2 are repeated until all units have been activated. No unit may ever be activated more than once per turn. If all units from one player are activated and the opposing player still has units to activate, it is obviously not necessary to roll for Initiative in this turn. The remaining units are just activated in any order the controlling player wishes.
3 – End Segment: Both players check the scenario victory conditions to see if either side has won.
If a unit with the Command Ability has any Suppression Marker it may remove one automatically.

Actions
Victory Decision: Preview – © A.D.Publishing 2011 – www.adpublishing.de
19
and the owning player ALWAYS chooses which model to remove as a casualty, you really do not have to argue which mini might be affected or not.
Place additional Suppression Markers: The targeted unit receives a Suppression Marker for each model
removed as a casualty. Models mounted on an infantry stand (Units with the HP/X Ability) receive as many Suppression Markers as HPs lost.
Check if enemy unit becomes Shaken: After all additional Suppression Markers are placed, check if the enemy
unit becomes Shaken. The enemy unit is Shaken once it have received a number of Suppression Markers equal to the number of current models – or HPs in the case of Units with the HP/X Ability - in the unit. If the unit becomes Shaken, it must make an immediate withdrawal movement (see Shaken Units).
Shoot Action Summary:
1. Choose target unit
2. Check LoS and Range
3. Place one Suppression Marker for being shot at
4. Roll Damage Dice and establish number of Hits (each Hit result = 1 Hit to Save, each Critical result = 2 Hits to Save)
5. Make saving throws for the number of hits and remove casualties. (always owning player choice), models without the HP/X ability become a casualty after failing 1 saving throw
6. Place additional Suppression Markers for casualties and check to see if the enemy unit becomes Shaken
7. Shaken units must make immediate withdrawal movement
6.9 Spot
A unit may try to spot a hidden enemy unit in LoS if rolling under their Leadership characteristic. Apply the following cumulative modifier:
· It is harder to spot someone at a distance. Add +1 to the roll if you are trying to spot an enemy unit more than 12” away; check range as if taking a Shoot Action.
· If a hidden enemy unit is within any kind of cover add +1 to the roll.
· If a vehicle tries to spot a hidden enemy unit add +2 to the roll.
· If the same unit attempts to spot the enemy unit again during the same turn, each additional attempt to spot the hidden enemy unit subtracts -1 from the roll.
Remove the Hidden marker once you have spotted the enemy unit. The unit is then visible to every unit again.
A hidden unit is automatically spotted if an enemy units moves within its Combat Range.
6.10 Take Cover!
If an infantry unit is within any type of cover takes this Action all subsequent failed Save or Cover Save dice of the unit may be re-rolled as long as the unit remains in cover and does not take an Assault, Close Combat, Infiltrate or Move Action. Another Action can be taken later on to “Take Cover!” again. Place an appropriate marker to show the unit has Taken Cover.
Infantry Abilities
Victory Decision: Preview – © A.D.Publishing 2011 – www.adpublishing.de
23
7.17 Stealth/X”
If unit with the Stealth Ability is in any type of Cover and did not perform a Shoot Action during its last activation, enemy models more than X” away may not target it with a Shoot Action.
7.18 Tank Hunter
Infantry in WW II used a variety of grenades or mines to assault armoured vehicles. All members of the unit with this ability are assumed to carry Anti-Tank Explosives with the following weapon profile by default.
Weapon U/T Range Damage Features
Anti-Tank Explosives 1 - D10+2 Blast/2“, One-Shot, Save/-2
Some units as Pioneers or Combat Engineers are carrying dramatically improved Anti-Tank Explosives, these are clearly marked as Improved Anti-Tank Explosives in the unit description or are only available as an unit option.
Weapon U/T Range Damage Features
Improved Anti-Tank Explosives 1 - 2xD10+2H Blast/2“, One-Shot, Save/-3
Both types of Anti-Tank Explosives may be placed on any Vehicle or Structure within Combat Range with an Assault or Close Combat Action instead of rolling any other Damage Dice. They will explode at the end of the assaulting unit’s activation segment. All other modifiers of an Assault Action (Re-Roll etc.) do not apply.
A unit with the HP/X ability can only place as many Anti-Tank Explosives as HPs remaining. The maximum number of Anti-Tank Explosives is limited by the current HP number and is modified by suppression markers.
7.19 Tenacity
The unit is trained to get the most out of cover. When in Soft Cover they will count as being in Hard Cover. When in Hard Cover they still only count as being in Hard Cover.
7.20 Unseen
The unit is trained to sneak around enemies and perform duties behind enemy lines. Whenever a unit with this ability is in any type of cover it automatically benefits from the Take Cover! Action.
7.21 Untrained
This unit will always count Hard Cover as Soft Cover, Soft Cover as Broken LoS while Broken LoS does not provide any benefit. In addition, weapons with the Blast feature gain a +1 bonus to all Damage Dice rolled against models in this unit.
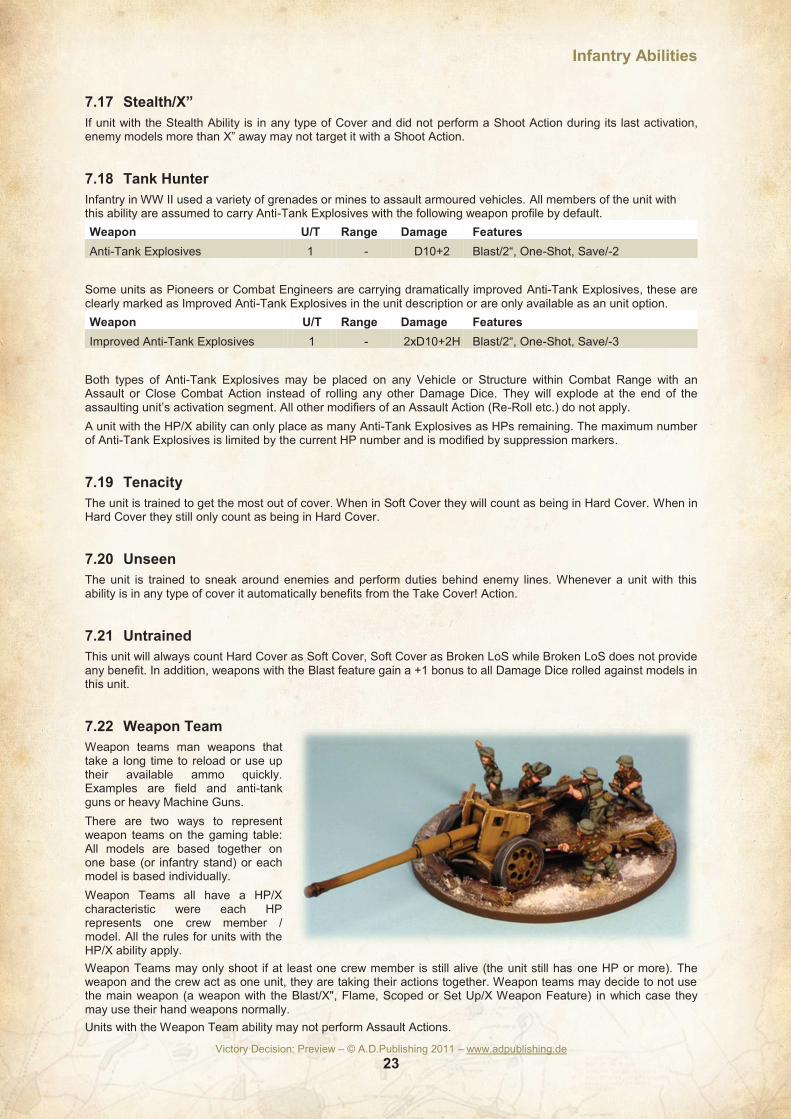
7.22 Weapon Team
Weapon teams man weapons that take a long time to reload or use up their available ammo quickly. Examples are field and anti-tank guns or heavy Machine Guns.
There are two ways to represent weapon teams on the gaming table: All models are based together on one base (or infantry stand) or each model is based individually.
Weapon Teams all have a HP/X characteristic were each HP represents one crew member / model. All the rules for units with the HP/X ability apply.
Weapon Teams may only shoot if at least one crew member is still alive (the unit still has one HP or more). The weapon and the crew act as one unit, they are taking their actions together. Weapon teams may decide to not use the main weapon (a weapon with the Blast/X", Flame, Scoped or Set Up/X Weapon Feature) in which case they may use their hand weapons normally.
Units with the Weapon Team ability may not perform Assault Actions.

Weapon Features
Victory Decision: Preview – © A.D.Publishing 2011 – www.adpublishing.de
24
8 Weapon Features
8.1 Blast/X”
A weapon with the Blast feature explodes with a concussive force effect; it affects an area rather than a single model with each shot.
The number after the feature indicates how big the Blast Area is. It is used to determine how many Damage Dice are rolled against the affected unit. Select a Target Point over the affected unit anywhere within Line of Sight and within the weapon range (measuring from unit leader to unit leader as described under the Shoot Action). Then count the number of models either fully or partially within the weapon’s Blast Area. This is the number of Damage Dice rolled against the targeted unit.
To determine any cover modifiers, always assume that the shot is coming from the Target Point.
As with normal Shoot attacks don’t allocate dice to individual models, simply establish the number of Hits and make saving throws for the number of hits and let the owning player remove a number of models that equals the number of failed saving throws as casualties. However - The maximum number of removed models is limited by the number of Damage Dice rolled, even if more Hits are caused because of a Critical Hit.
It does NOT have to be a model within the Blast Area.
If different intermingled units are affected by the Blast Area the attacking player may split the number of dice established in any way he likes as long as each intermingled unit gets at least one Damage Die rolled against it.
Example: A British Command Section is standing in cover close to a Rifle Section. The Command Section gets
targeted by a Blast/2” weapon. The Lieutenant and 3 Soldiers of the Rifle Section are within the weapon’s Blast Area.
Consequently 4 Damage Dice are rolled against the affected units. Since the Command Section and the Rifle Section are intermingled the attacking player decides to roll 3 Damage Dice against the Command Section and 1 Damage Die against the lucky Rifle Section.
8.2 Co-Axial
To improve target acquisition, MGs or smaller guns on vehicles were often mounted co-axial to the main gun.
The co-axial weapon must always target the same unit as the main gun. As soon as a unit is shot within range of the co-axial weapon, you may re-roll all unsuccessful Damage Dice of the main gun. If you use the co-axial weapon in this way you do not roll the Damage Dice of the weapon.
Vehicles
Victory Decision: Preview – © A.D.Publishing 2011 – www.adpublishing.de
30
10 Vehicles
The following rules cover all types of WW II vehicles; from unarmoured trucks to massive tanks like the feared German Tiger. Since vehicles perform a bit differently on the battlefield than normal infantry some additional rules necessary.
As infantry units, a vehicle is defined by its unique characteristics. All necessary information is shown in the vehicle description in the corresponding army list.
10.1 Example Vehicle Unit
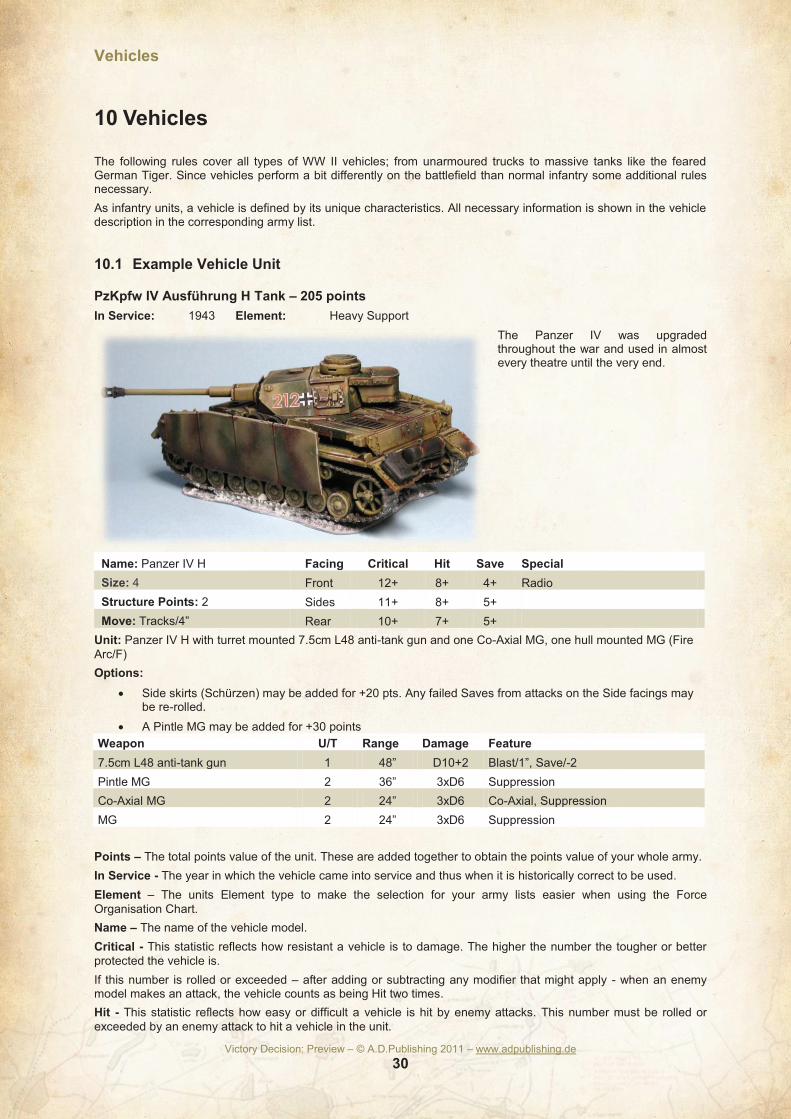
PzKpfw IV Ausführung H Tank – 205 points
In Service: 1943 Element: Heavy Support
The Panzer IV was upgraded throughout the war and used in almost every theatre until the very end.
Name: Panzer IV H Facing Critical Hit Save Special
Size: 4 Front 12+ 8+ 4+ Radio
Structure Points: 2 Sides 11+ 8+ 5+
Move: Tracks/4” Rear 10+ 7+ 5+
Unit: Panzer IV H with turret mounted 7.5cm L48 anti-tank gun and one Co-Axial MG, one hull mounted MG (Fire
Arc/F)
Options:
· Side skirts (Schürzen) may be added for +20 pts. Any failed Saves from attacks on the Side facings may be re-rolled.
· A Pintle MG may be added for +30 points
Weapon U/T Range Damage Feature
7.5cm L48 anti-tank gun 1 48” D10+2 Blast/1”, Save/-2
Pintle MG 2 36” 3xD6 Suppression
Co-Axial MG 2 24” 3xD6 Co-Axial, Suppression
MG 2 24” 3xD6 Suppression
Points – The total points value of the unit. These are added together to obtain the points value of your whole army.
In Service - The year in which the vehicle came into service and thus when it is historically correct to be used.
Element – The units Element type to make the selection for your army lists easier when using the Force
Organisation Chart.
Name – The name of the vehicle model.
Critical - This statistic reflects how resistant a vehicle is to damage. The higher the number the tougher or better
protected the vehicle is.
If this number is rolled or exceeded – after adding or subtracting any modifier that might apply - when an enemy model makes an attack, the vehicle counts as being Hit two times.
Hit - This statistic reflects how easy or difficult a vehicle is hit by enemy attacks. This number must be rolled or
exceeded by an enemy attack to hit a vehicle in the unit.

Vehicles
Victory Decision: Preview – © A.D.Publishing 2011 – www.adpublishing.de
31
Save – Roll to Save - The number that must be rolled or exceeded by a model in the unit to avoid the effect of the
hit after an attack.
Special – Any special properties, be it equipment or a feature is listed here.
Size – Shows how big the vehicle is; the bigger the number, the bigger the vehicle. Size effects how easily a
vehicle can be spotted and shot at and how it performs in Close Combat.
Structure Points – This characteristic is reflecting the mass and armour of a vehicle. It also shows how many hits
the vehicle can withstand before being destroyed.
Move - How far each vehicle in the unit can normally move across the table with a single Move Action while using
the named movement type.
Composition (Unit) - Which models are included in the unit as standard, before any options are taken, along with
the weapons they carry. Most of the time only one vehicle is included in a unit.
Options – Possible upgrades or weapon swaps the unit can take are listed here, along with any changes in its
points cost.
As with infantry units the weapon stats are always shown below the unit entries in the army list.
10.2 Vehicle Actions
Vehicles can only perform two actions per game turn; they are also limited in the type of actions they can take.
Only the following actions are possible:
· Close Combat
· Concentrate Fire
· Move
· Shoot
· Spot
10.2.1 Close Combat
A vehicle cannot fight in close combat as an infantryman; it can however crush enemy soldiers under its tracks or ram smaller vehicles.
If a vehicle unit starts its turn within Combat Range of an enemy unit it may immediately fight in close combat. The CR of a vehicle is equal to its Size characteristic in inches. It may also just disengage from Close Combat and take a Move Action.
Number of Damage Dice: Roll SizexD10 Close Combat Dice for all vehicle models in your unit that have at least
one enemy model within their CR.
Example: The Panzer IV H shown has moved near an infantry unit. Measuring from the centre of the Panzer IV H
model the CR is established. Since the Panzer IV H has a Size of 4 it can attack any enemy unit within 4”.
The size characteristic is also used to determine how many D10 Close Combat Damage Dice are rolled. For the Panzer IV H 4xD10 will be rolled against the unfortunate infantry unit.
10.2.2 Concentrate Fire
No additional rules apply, spending one action to aim- doing nothing else; any or all Damage Dice of the next Shoot Action may be re-rolled.
10.2.3 Move
Vehicles in WW II are amphibious, wheeled and / or tracked. A vehicle can take up to 2 movement actions per game turn. A vehicle may add +1” to their movement characteristic when moving on a road.
Amphibious/X”
The vehicle is capable of crossing water.
The vehicle may move the distance indicated even while in water.
It can always move up to this distance on clear terrain when using a movement action.

Scenarios
Victory Decision: Preview – © A.D.Publishing 2011 – www.adpublishing.de
46
14.3 Seek out, close in, destroy and hold
Briefing: According to your reconnaissance your enemy has gathered a force similar to your army. The time for
small skirmishes is over, a series of orders have arrived from the GHQ. It is expected that you do your utmost to execute as many of these order as possible while minimizing your losses.
Gaming Area and Deployment: Set up a playing area on the
recommended gaming table (see 13 Gaming Area and Deployment).
If one player sets up the scenery then his opponent can choose which table edge to deploy on. Otherwise use the normal Deployment rules; however Opposing Corners may not be used (see 13 Gaming Area and Deployment).
Place Objective Marker: Roll a D6 and add the modifier as if rolling
for Initiative – using the highest Leadership in your force. Whoever scores highest wins the Initiative for placing Objectives and can choose who places the 1
st objective. After that simply alternate
between the players until all six Objectives are placed on the table.
The first objective a player sets up must be placed on their own table edge. The remaining two objectives must be set up in their opponent’s half of the table, at least 12“ away from the opponent’s table edge and 12“ away from any other objectives that have already been placed.
Keep placing objectives until six objective markers have been placed on the table in total. Check during the end segment of each game turn to see how many objectives each player controls.
Starting the game: To start the game roll for Initiative as normal.
Scenario Special Rules in effect:
· Objectives,
· Random Game length,
· Retreat,
· Victory Points
Victory Conditions: You must check to see if either player has won at the end of the fourth or later game turns.
You win if:
· you avoided being forced to Retreat AND
· you have executed two orders in the end segment of turn four or later AND
· you have executed more orders than your opponent.
The five orders are: Defend the Territory, No Yielding, Seek Out, Take And Hold, Where it hurts.
· Defend the Territory: Control all three objective markers in your half of the table.
· No Yielding: No unshaken enemy units are in your half of the table.
· Seek Out: Capture the objective marker your opponent set up on their table edge at the start of the game.
· Take And Hold: Capture a total of two objective markers in your opponent’s half of the table.
· Where it hurts: Destroy the unit worth the most points in the opposing force. If more than one unit are tied
for the most points, you achieve this objective by destroying any one of them.
If no player has captured two objectives roll for another game turn using the Random Game length scenario rule. The game ends after turn 6, if no player has captured two objectives or the game ended earlier because of the Random Game length or Retreat scenario rule use the Victory Points scenario rule to see who has won.

Playing a Game!
Victory Decision: Preview – © A.D.Publishing 2011 – www.adpublishing.de
55
16.2.2 Generic Infantry Organisation Chart
The following Organisation chart enables you to field a reasonable realistic Infantry Platoon.
You may include the following Elements in your force, obeying the minimum and maximum units listed for each.
You may take one force for every 1.500 points in your army. It is perfectly OK to use more than one force in bigger battles. If you agree for example on 2,000 points, each player can use two forces as long as each mandatory choice of each force are obeyed.
0-2 HQ Elements (The Platoon commanding Lieutenant and his staff)
2-4 Combat Elements (The Squads of the Platoon)
0-3 Fast or Light Support Elements (This includes Platoon Support Teams, Company and Regimental
Support Teams, Armoured Cars etc. - Please note also that transport vehicles taken as a unit option are not counted towards Support Elements.)
0-3 Heavy Support Elements (Tanks and very heavy gun Support. Keep in mind that for many of the earlier
vehicle units you can field more than one vehicle per Element taken.)
Take a look at the average real life Order of Battle US Army Rifle Platoon:
1 Platoon Command
2-3 Rifle Squads
0-3 Platoon Support
0-2 Company Support
0-1 Regimental Support Units
With the generic Infantry Organisation Chart you can use that lists in a game of Victory Decision. The Organisation Chart is in fact more limiting than real life when looking at the average Support choices.
The actual army lists will be more correctly tailored to each nationality, but if in doubt just use the chart above.
Note: The generic approach may shock the more historical oriented gamer. I am not claiming to deliver
painstakingly correct army list for every battle fought in WW II. My intention is to give a guideline and provide encouragement to look into actual battle reports.
16.2.3 Generic AFV Organisation Chart
The „Victory Decision: World War II“ rulebook focuses on Infantry army lists. Armoured Fighting Vehicles (AFV) play a supporting role and are limited in numbers. The „Victory Decision: World War II“ rule system is however more than capable of handling larger tank battles.
The following list is a generic army list that enables you to field an AFV force in “Victory Decision: World War II“.
Think of this list as an ad-hoc combined arms formation, usually employing combination of tanks, infantry, anti-tank weapons and artillery components, generally organised for a particular task or operation.
It is highly recommended that the following limitations are used when fielding an Armoured Fighting Vehicle Force in „Victory Decision: World War II“:
· Only use an Armoured Fighting Vehicle Force vs. another Armoured Fighting Vehicle Force
OR
· Use an Armoured Fighting Vehicle Force vs. any “normal” „Victory Decision: World War II“ list with the permission of your opponent.
The following Organisation chart enables you to field a reasonable realistic AFV Platoon.
You may include the following Elements in your force obeying the minimum and maximum units listed for each.
You may take one force for every 1.500 points in your army.
0-1 HQ Element (Command tank or vehicle)
2-6 Heavy Support Elements (Tank Combat units)
0-1 Light or Fast Support Elements per two Heavy Support Elements taken (additional Platoon, Company
and Regimental Support Units)
0-1 Combat Elements per two Heavy Support Elements - all transport options of Combat Elements are
mandatory, if more than one transport option is possible choose one. (Additional Infantry support)
Take a look at the average Order of Battle late War Soviet IS-2 Platoon:
1 Command Tank
2 IS-2 tanks
With the generic AFV Organization Chart you can use this list easily in a game of Victory Decision. The 3 tanks alone are nearly filling your points limit. Since you have taken 2 Heavy Support Elements you can add a Squad of Soviet tank Riders and everything is fine.

Late War German Grenadier Platoon
Victory Decision: Preview – © A.D.Publishing 2011 – www.adpublishing.de
69
21 Late War German Grenadier Platoon Late War German Grenadier Platoons found themselves mostly on the defensive. Though still more than capable of delivering offensives, nothing could solve the manpower and supply crisis in the long run.
Increased firepower attempted to substitute for the loss of manpower. Weapons like the MG-42, the Sturmgewehr (STG) 44 and the Panzerfaust gave the infantry the tools to take on large enemy infantry formations and even tough allied tanks.
The average German Grenadier however was still equipped with the Kar-98K Rifle, while most officers carried the P-38 or Luger Pistol or a MP-40 SMG.
German late War Grenadier Platoon Organisation Chart
You may include the following Elements in your force obeying the minimum and maximum units listed for each.
You may take one force for every 1.500 points in your army.
0-1 HQ Elements (The Platoon commanding Lieutenant and his staff)
2-3 Combat Elements (The Squads of the Platoon)
0-3 Fast or Light Support Elements (This includes Platoon and Company Support Teams, Armoured Cars
etc. - Please note also that transport vehicles taken as a unit option are not counted towards Support Elements.)
0-3 Heavy Support Elements (Regimental Support Teams, Tanks and very heavy gun Support.)
Command Vehicle
Up to one Vehicle may benefit from the Command Vehicle Special Property for + 50 points. The vehicle then counts as a HQ Element.
Smoke Discharger
Up to three Vehicles may benefit from the Smoke Discharger Vehicle Special Property for + 10 points each.
Late War German Grenadier Platoon
Victory Decision: Preview – © A.D.Publishing 2011 – www.adpublishing.de
70
21.1 German Grenadier Platoon HQ Element
The following are all the HQ Elements available to a German Grenadier Platoon.
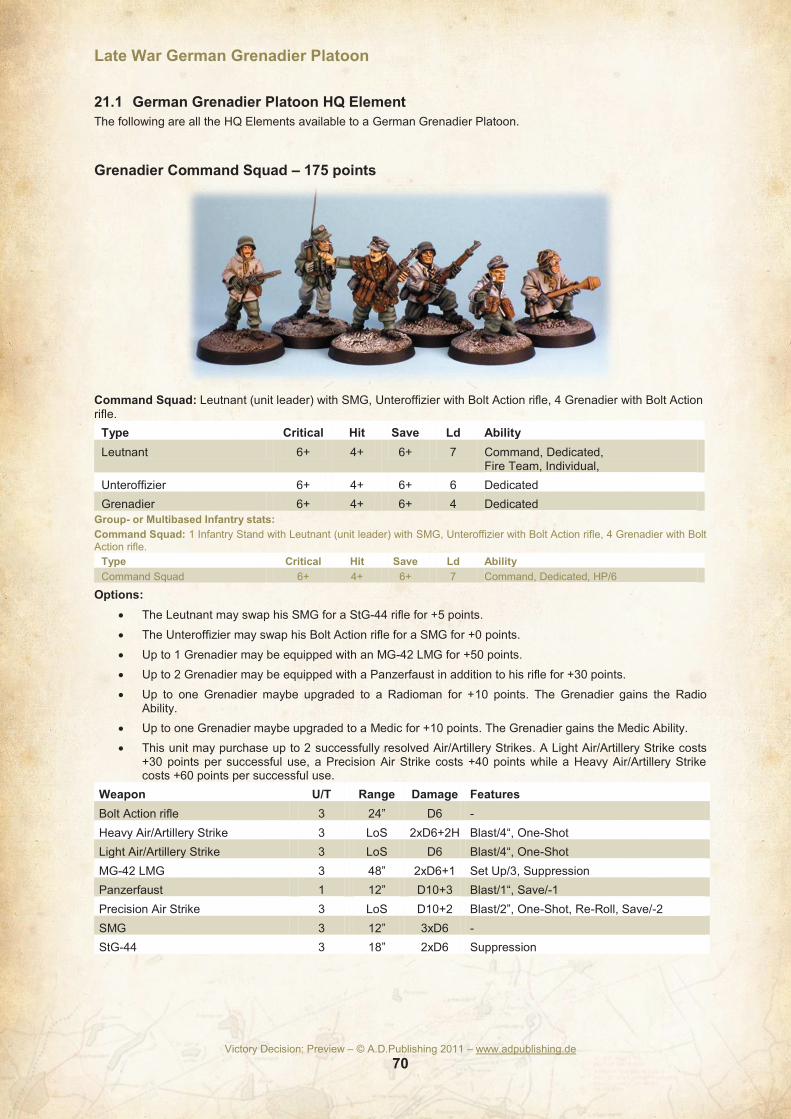
Grenadier Command Squad – 175 points
Command Squad: Leutnant (unit leader) with SMG, Unteroffizier with Bolt Action rifle, 4 Grenadier with Bolt Action
rifle.
Type Critical Hit Save Ld Ability
Leutnant 6+ 4+ 6+ 7 Command, Dedicated, Fire Team, Individual,
Unteroffizier 6+ 4+ 6+ 6 Dedicated
Grenadier 6+ 4+ 6+ 4 Dedicated
Group- or Multibased Infantry stats:
Command Squad: 1 Infantry Stand with Leutnant (unit leader) with SMG, Unteroffizier with Bolt Action rifle, 4 Grenadier with Bolt Action rifle.
Type Critical Hit Save Ld Ability
Command Squad 6+ 4+ 6+ 7 Command, Dedicated, HP/6
Options:
· The Leutnant may swap his SMG for a StG-44 rifle for +5 points.
· The Unteroffizier may swap his Bolt Action rifle for a SMG for +0 points.
· Up to 1 Grenadier may be equipped with an MG-42 LMG for +50 points.
· Up to 2 Grenadier may be equipped with a Panzerfaust in addition to his rifle for +30 points.
· Up to one Grenadier maybe upgraded to a Radioman for +10 points. The Grenadier gains the Radio Ability.
· Up to one Grenadier maybe upgraded to a Medic for +10 points. The Grenadier gains the Medic Ability.
· This unit may purchase up to 2 successfully resolved Air/Artillery Strikes. A Light Air/Artillery Strike costs +30 points per successful use, a Precision Air Strike costs +40 points while a Heavy Air/Artillery Strike costs +60 points per successful use.
Weapon U/T Range Damage Features
Bolt Action rifle 3 24” D6 -
Heavy Air/Artillery Strike 3 LoS 2xD6+2H Blast/4“, One-Shot
Light Air/Artillery Strike 3 LoS D6 Blast/4“, One-Shot
MG-42 LMG 3 48” 2xD6+1 Set Up/3, Suppression
Panzerfaust 1 12” D10+3 Blast/1“, Save/-1
Precision Air Strike 3 LoS D10+2 Blast/2”, One-Shot, Re-Roll, Save/-2
SMG 3 12” 3xD6 -
StG-44 3 18” 2xD6 Suppression

Design Notes
Victory Decision: Preview – © A.D.Publishing 2011 – www.adpublishing.de
96
24 Design Notes
Done! After one year of writing, re-writing, testing, re-re-writing and again testing my first complete rule system is finally finished.
Over the last years I have worked on many many wargaming projects; from playtesting to co-authoring to freelance work for other companies - I have done it all. It was always great fun but to write a whole new system with 100% responsibility is a totally different thing.
The decision to try it came after Mongoose pulled their Logo License agreement and decided to no longer print World at War. Over the last three years I published 20 supplements for World at War, there is still more to be done, but somehow the whole system faded from the gaming society more and more.
Time for a completely new start.
So what should a new game system include?
Simple rules
The overall design goal was a game system that was reasonably simple but also encourages and demands constant thinking and decision making. If possible the system should be able not only for World War II gaming but also for other periods.
Interaction
Player interaction was also a key requirement; therefore the Leadership-modified alternating unit activation system which also eliminated the need for a complicated overwatch or reaction system. No long waiting periods in this game!
Leadership
Unit Leadership should also be a very important factor, no unit characteristic is used as often in Victory Decision as the Leadership value! It even affects the way your units can be placed on the gaming table.
Command
I wanted rules that reflect the impact of commanding units on the game. This was the reason why some game mechanics are only accessible when including Command units in your force.
Variable Effectiveness
The effectiveness of any given unit should also be variable during a game; a unit under heavy fire cannot perform as effectively as a unit that has not yet contact with the enemy. The use of
Suppression Markers are in my opinion an elegant solution to this design requirement.
Seek Out
Another game aspect that often is neglected but nonetheless vital is the detection of enemy units. Hiding and spotting units is a key strategy in Victory Decision!
“Un-dominating” Vehicles
Another challenge of any World War II game is the Vehicle system. Vehicles can very easily become game dominating during games. Since the game is based on real life units it is also not possible to down tone vehicle abilities too much just to achieve game balance.
I am very confident that the simple reduction of vehicle actions has done a good job of achieving these competing design goals.
Fun gaming
The usual “stress factors” of gaming should be eliminated. In my opinion most arguments during wargames started over unit movements, dice allocating / casualty removable and Line of Sight and / or cover issues.
Therefore the very simple movement rules, just measure the movement distance of the unit leader carefully and arrange the unit afterward within his Leadership distance – which also reflects the ability of better trained troops to be within command over a wider distance quite effortless.
The casualty removal rules also come from this way of thinking. Just let the model owning player decide which models are removed from his unit.
One last thought about Victory Decision: It is a game and NOT a simulation. The overall idea is to have fun and not to simulate any real life situation. That is the reason behind many of the more abstract rules.
All in all, I am very happy how the rules work. We had a lot of fun during game development and testing. Hopefully, these rules give you also a lot of fun and a great gaming experience.
Have fun and may your dice roll high!
Agis Neugebauer, May 2011

Victory Decision: Preview – © A.D.Publishing 2011 – www.adpublishing.de
100
"Sure, we want to go home. We want this war over with. The quickest way to get it over with is to go get the bastards who started it. The quicker they are whipped, the quicker we can go home. The shortest way home is through Berlin and Tokyo. And when we get to Berlin, I am personally going to shoot that paper hanging son-of-a-bitch Hitler. Just like I'd shoot a snake!"
General George S. Patton - (addressing his troops before Operation Overlord) - 5th June 1944
Even today’s world is still living with the consequences of World War II, the most significant conflict in our history.
Victory Decision: World War II allows you to command a platoon sized force in this momentous conflict. These rules cover almost all aspects of World War II wargaming, from Troop Quality and Leadership to Artillery Strikes, Bunker Assaults, Combat in Buildings and Vehicle combat.
Victory Decision: World War II features a unique Leadership-modified alternate unit activation system. The result is a fun and fast paced war game that involves both players constantly.
The rules cover individually based infantry miniatures and also group- or multibased miniatures, aka Infantry Stands. While designed with 20-28mm miniatures in mind the Victory Decision game system is flexible enough to handle any miniatures from 6mm to 32mm.
So whatever your existing miniature collection consists of, you can start playing right away.
This rulebook not only provides Scenarios but also Point based Army Lists for British, German, Soviet and US forces.
All necessary Game Markers are also included within this book.


![[Argus] - Wargaming in History - The Second Anglo-Boer War](https://img.pdfslide.net/doc/110x75/547e6e75b4af9f414c8b45a0/argus-wargaming-in-history-the-second-anglo-boer-war.jpg)