Embed Size (px)
Citation preview

X651de, X652de, X654de, X656de, X656dte, X658d, X658de, X658dme, X658dfe, X658dte, X658dtme, X658dtfe
Maintenance Guide
July 2008 www.lexmark.com

Contents
Maintaining the printer................................................................................3Cleaning the exterior of the printer..........................................................................................................3
Cleaning the scanner glass........................................................................................................................3
Adjusting scanner registration..................................................................................................................4
Storing supplies.........................................................................................................................................5
Conserving supplies...................................................................................................................................6
Checking the status of supplies.................................................................................................................6Checking the status of supplies from the printer control panel ......................................................................... 6Checking the status of supplies from a network computer................................................................................ 6
Ordering supplies......................................................................................................................................7Ordering print cartridges .................................................................................................................................... 7Ordering a maintenance kit ................................................................................................................................ 8Ordering a fuser.................................................................................................................................................. 9Ordering an ADF maintenance kit....................................................................................................................... 9Ordering a transfer roller.................................................................................................................................... 9Ordering charge rolls .......................................................................................................................................... 9Ordering pick rollers ........................................................................................................................................... 9Ordering ADF replacement parts...................................................................................................................... 10Ordering staple cartridges ................................................................................................................................ 10
Recycling Lexmark products....................................................................................................................10
Moving the printer..................................................................................................................................10Before moving the printer ................................................................................................................................ 10Moving the printer to another location............................................................................................................ 11Setting the printer up in a new location ........................................................................................................... 11Shipping the printer .......................................................................................................................................... 12
Contents
2
Maintaining the printerPeriodically, certain tasks are required to maintain optimum print quality.
Cleaning the exterior of the printer1 Make sure that the printer is turned off and unplugged from the wall outlet.
CAUTION—SHOCK HAZARD: To avoid the risk of electric shock when cleaning the exterior of the printer, unplug the power cord from the wall outlet and disconnect all cables to the printer before proceeding.
2 Remove paper from the standard exit bin.
3 Dampen a clean, lint‑free cloth with water.
Warning—Potential Damage: Do not use household cleaners or detergents, as they may damage the finish of the printer.
4 Wipe only the outside of the printer, making sure to include the standard exit bin.
Warning—Potential Damage: Using a damp cloth to clean the interior may cause damage to your printer.
5 Make sure the paper support and standard exit bin are dry before beginning a new print job.
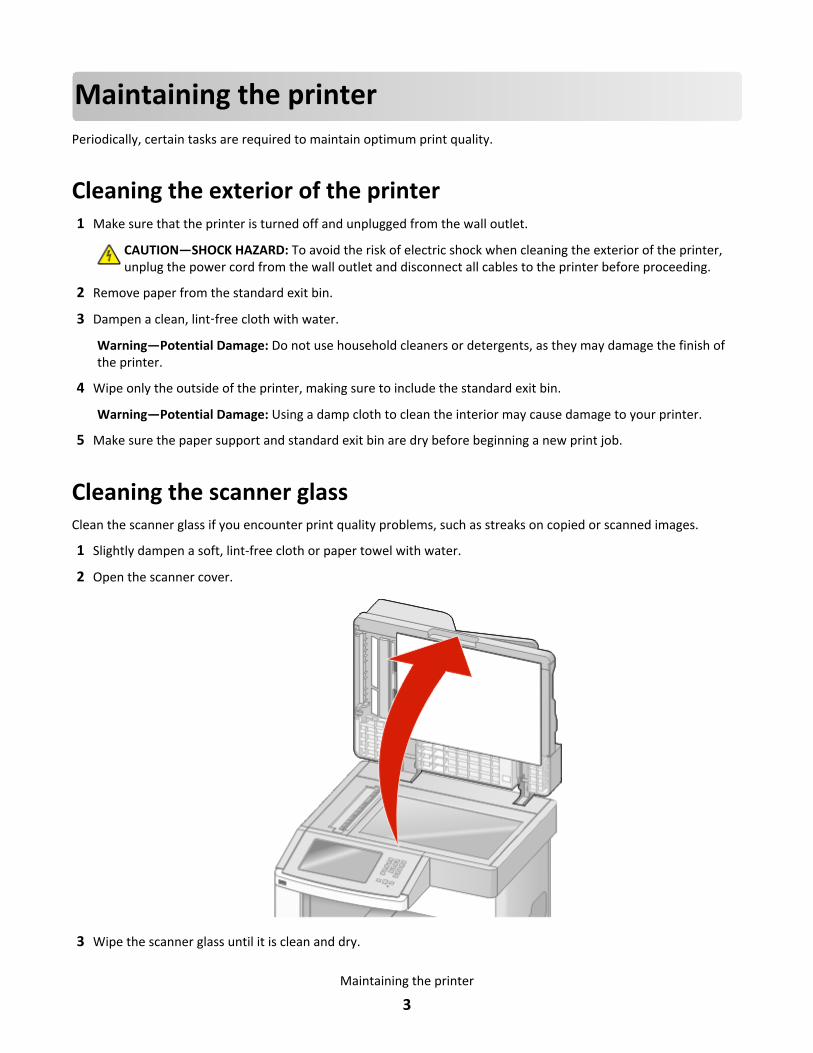
Cleaning the scanner glassClean the scanner glass if you encounter print quality problems, such as streaks on copied or scanned images.
1 Slightly dampen a soft, lint-free cloth or paper towel with water.
2 Open the scanner cover.
3 Wipe the scanner glass until it is clean and dry.
Maintaining the printer
3

4 Wipe the white underside of the scanner cover until it is clean and dry.
5 Open the bottom ADF door.
6 Wipe the ADF scanner glass under the ADF door.
7 Close the bottom ADF door.
8 Wipe the scanner glass (flatbed) and backing material by moving the cloth or paper towel from side to side.
9 Close the scanner cover.
Adjusting scanner registrationScanner Registration is a process to align the scan area with the paper location. To manually adjust the scanner registration:
1 Turn the printer off.
2 Clean the scanner glass and backing material.
3 Hold down and while turning the printer on.
4 Release the buttons when the screen with the progress bar appears.
The printer performs a power‑on sequence, and then the Configuration menu appears.
5 Touch the down arrow until Scanner Manual Registration appears.
6 Touch Scanner Manual Registration.
7 Touch Print Quick Test to print a registration page.
8 Choose the section of the scanner to align.
Maintaining the printer
4

To align the scanner glass (flatbed):
a Place the Quick Test page facedown on the scanner glass.
b Touch Copy Quick Test.The scanner prints a copy of the Quick Test page.
c Touch Flatbed.
d Use the copy of the Quick Test page to adjust the Left Margin and Top Margin settings.
e Touch Submit.
f Touch Copy Quick Test and compare the new copy to the original.Repeat the flatbed alignment steps until the position on the page of the Quick Test copy closely matches the original.
To align the ADF:
a Do one of the following:
• To align the ADF front: place the Quick Test page faceup, short edge first into the ADF.
• To align the ADF back: place the Quick Test page facedown, short edge first into the ADF.
b Touch Copy Quick Test.The scanner prints a copy of the Quick Test page.
c Touch ADF Front or ADF Back.
d Use the copy of the Quick Test page to adjust the Horizontal Adjust and Top Margin settings.
e Touch Submit.
f Touch Copy Quick Test and compare the new copy to the original.Repeat the ADF alignment steps until the position on the page of the Quick Test copy closely matches the original.
9 Touch Back.
10 Touch Exit Configuration.
Storing suppliesChoose a cool, clean storage area for the printer supplies. Store supplies right side up in their original packing until you are ready to use them.
Maintaining the printer
5
Do not expose supplies to:
• Direct sunlight
• Temperatures above 35°C (95°F)
• High humidity above 80%
• Salty air
• Corrosive gases
• Heavy dust
Conserving suppliesThere are some settings you can change from the printer control panel that will help you conserve toner and paper. For more information, see “Supplies menu,” “Quality menu,” and “Finishing menu.”
If you need to print several copies, you can conserve supplies by printing the first copy and checking it for accuracy before printing the remaining copies.
Checking the status of suppliesA message appears on the display when a replacement supply item is needed or when maintenance is required.
Checking the status of supplies from the printer control panel1 Make sure the printer is on and Ready appears.
2 On the home screen, touch Status/Supplies.
Note: If Status/Supplies is not on the home screen, then print a menu settings page to review the status of the supplies.
Checking the status of supplies from a network computerNote: The computer must be connected to the same network as the printer.
1 Type the printer IP address into the address field of your Web browser.
Note: If you do not know the IP address of the printer, print a network setup page and locate the IP address in the TCP/IP section.
2 Click Device Status. The Device Status page appears, displaying a summary of supply levels.
Maintaining the printer
6

Ordering suppliesTo order supplies in the U.S., contact Lexmark at 1-800-539-6275 for information about Lexmark authorized supplies dealers in your area. In other countries or regions, visit the Lexmark Web Site at www.lexmark.com or contact the place where you purchased the printer.
Note: All life estimates for printer supplies assume printing on letter‑ or A4‑size plain paper.
Ordering print cartridgesWhen 88 Cartridge low appears or when the print becomes faded:
1 Remove the print cartridge.
2 Firmly shake the cartridge side‑to‑side and front‑to‑back several times to redistribute toner.
3 Reinsert the cartridge and continue printing.
Note: Repeat this procedure multiple times until the print remains faded, and then replace the cartridge.
Recommended print cartridges and part numbers
Part name Lexmark Return Program Cartridge
Regular cartridge
For the US and Canada
Print cartridge X651A11A X651A21A
High Yield Print Cartridge X651H11A X651H21A
Extra High Yield Print Cartridge X654X11A X654X21A
High Yield Return Program Print Cartridge for Label Applications X651H04A Not applicable
Extra High Yield Return Program Print Cartridge for Label Applications X654X04A Not applicable
For Europe, the Middle East, and Africa
Print cartridge X651A21E X651A11E
High Yield Print Cartridge X651H21E X651H11E
Extra High Yield Print Cartridge X654X21E X654X11E
High Yield Return Program Print Cartridge for Label Applications X651H04E Not applicable
Extra High Yield Return Program Print Cartridge for Label Applications X654X04E Not applicable
For the Asia Pacific Region, including Australia and New Zealand
Print cartridge X651A21P X651A11P
Maintaining the printer
7

Part name Lexmark Return Program Cartridge
Regular cartridge
High Yield Print Cartridge X651H21P X651H11P
Extra High Yield Print Cartridge X654X21P X654X11P
High Yield Return Program Print Cartridge for Label Applications X651H04P Not applicable
Extra High Yield Return Program Print Cartridge for Label Applications X654X04P Not applicable
For Latin America
Print cartridge X651A21L X651A11L
High Yield Print Cartridge X651H21L X651H11L
Extra High Yield Print Cartridge X654X21L X654X11L
High Yield Return Program Print Cartridge for Label Applications X651H04L Not applicable
Extra High Yield Return Program Print Cartridge for Label Applications X654X04L Not applicable
Ordering a maintenance kitWhen 80 Routine maintenance needed appears, order a maintenance kit. The maintenance kit contains all the items necessary to replace the pick rollers, the charge roll, the transfer roller, and the fuser.
Notes:
• Using certain types of paper may require more frequent replacement of the maintenance kit. The charge roll, fuser, pick rollers, and transfer roller can also be individually ordered and replaced as necessary.
• To check the fuser type (T1 or T2) installed in the printer, remove the print cartridge to view the label on the fuser.
Part name Part number
Maintenance kit 40X4723 (100 V T1 fuser)
40X4724 (110 V T1 fuser)
40X4765 (220 V T1 fuser)
40X4766 (100 V T2 fuser)
40X4767 (110 V T2 fuser)
40X4768 (220 V T2 fuser)
Maintaining the printer
8

Ordering a fuserTo check the fuser type (T1 or T2) installed in the printer, remove the print cartridge to view the label on the fuser.
Part name Part number
T1 fuser 40X1870 (100 V)
40X4418 (110 V)
40X1871 (220 V)
T2 fuser 40X5853 (100 V)
40X5854 (110 V)
40X5855 (220 V)
Ordering an ADF maintenance kitThe ADF maintenance kit contains all the items necessary to replace the ADF pick mechanism and the ADF separator roller.
See the following table for the maintenance kit part number for your specific printer.
Part name Part number
ADF Maintenance kit 40X4769
Ordering a transfer rollerWhen toner smudges appear on the front or back of printed pages, order a replacement transfer roller.
Part name Part number
Transfer roll assembly 40X1886
Ordering charge rollsWhen toner fog or background shading appears on printed pages, order replacement charge rolls.
Part name Part number
Charge roll assembly 40X5852
Ordering pick rollersWhen the paper fails to properly feed from the tray, order new pick rollers.
Part name Part number
Pick rollers 40X4308
Maintaining the printer
9

Ordering ADF replacement partsOrder ADF replacement parts if you experience problems with paper double-feeding or failing to feed through the automatic document feeder.
Part name Part number
ADF pick assembly 3017345
ADF separator roll 3017348
Ordering staple cartridgesWhen Staples Low or Staples Empty appears, order the specified staple cartridge.
For more information, see the illustrations inside the stapler door.
Part name Part number
Staple Cartridges–3 pack 25A0013
Recycling Lexmark productsTo return Lexmark products to Lexmark for recycling:
1 Visit our Web site at www.lexmark.com/recycle.
2 Find the product type you want to recycle, and then select your country from the list.
3 Follow the instructions on the computer screen.
Moving the printer
Before moving the printerCAUTION—POTENTIAL INJURY: The printer weight is greater than 18 kg (40 lb) and requires two or more trained personnel to move it safely.
Maintaining the printer
10

CAUTION—POTENTIAL INJURY: Before moving the printer, follow these guidelines to avoid personal injury or printer damage:
• Turn the printer off using the power switch, and then unplug the power cord from the wall outlet.
• Disconnect all cords and cables from the printer before moving it.
• Lift the printer off of the optional drawer and set it aside instead of trying to lift the drawer and printer at the same time.
Notes:
– Remove all printer options before moving the printer.
– Use the handholds located on both sides of the printer to lift it off the optional drawer.
Warning—Potential Damage: Damage to the printer caused by improper moving is not covered by the printer warranty.
Moving the printer to another locationThe printer and options can be safely moved to another location by following these precautions:
• Any cart used to move the printer must have a surface able to support the full footprint of the printer. Any cart used to move the options must have a surface able to support the dimensions of the options.
• Keep the printer in an upright position.
• Avoid severe jarring movements.
Setting the printer up in a new locationAllow the following recommended amount of space around the printer:
Maintaining the printer
11

1 Right Side 20 cm (8 in.)
2 Left Side 31 cm (12 in.)
3 Front 51 cm (20 in.)
4 Rear 20 cm (8 in.)
5 Top 31 cm (12 in.)
Shipping the printerWhen shipping the printer, use the original packaging or call the place of purchase for a relocation kit.
Maintaining the printer
12