Embed Size (px)
Citation preview

CentreWare Web 5.8.107 and higher August 2013 702P01942
Xerox® CentreWare® Web Identifying and Applying Scanning Firmware Patch

Identifying and Applying Firmware Patch 2
©2013 Xerox Corporation. All rights reserved. Xerox®, Xerox and Design®, CentreWare®, ColorQube® and WorkCentre® are trademarks of the Xerox Corporation in the United States and/or other countries.
Microsoft and Excel are trademarks of Microsoft Corporation in the United States and/or other countries.
Document Version: 1.05 (August 2013).
BR7526

Identifying and Applying Firmware Patch iii
Table of Contents
Introduction ............................................................................................................ 1 Audience............................................................................................................................................ 1 Workflow ........................................................................................................................................... 1
Identify and Correct Devices ............................................................................ 2 Identify Devices .............................................................................................................................. 2 Enable Firmware Patch Upgrade ............................................................................................. 8 Apply Firmware Patch ............................................................................................................... 11 Verify Firmware Patch Upgrade ............................................................................................ 16
If Firmware Patch Upgrade is Successful ............................................................... 16 If Firmware Patch Upgrade is Not Successful ...................................................... 16
Final Verification of Firmware Patch Installation Across the Fleet.......................... 17 Disable Device Firmware Upgrade ....................................................................................... 17 Troubleshoot Firmware Patch Upgrade ............................................................................. 18


Identifying and Applying Firmware Patch 1
Introduction
There have been reports regarding errors with the scanning function of some of our office devices in which characters can potentially be substituted for others. This does not impact printing, copying and traditional fax functions. Xerox has developed a software patch that can be remotely downloaded to each device. This software patch will eliminate the possibility for character substitution in all modes.
This document will explain how to identify these devices and apply the software patch using Xerox® CentreWare® Web.
Audience The intended audience of this document is IT departments that wish to use CentreWare Web to address this problem. The user performing the tasks will need to have CentreWare Web Power Users permissions or higher.
Workflow Identify Devices
Enable Firmware Patch Upgrade
Apply Firmware Patch
Final Verification
Disable Firmware Patch Upgrade
1
2
3
4
5

Identifying and Applying Firmware Patch 2
Identify and Correct Devices
Identify Devices Follow the steps below to identify the devices that have character substitution issues by creating multiple dynamic groups.
1. Go to Printers > Device Groups > Printers. Select New Group from the left-hand directory tree.

Identify and Correct Devices Xerox® CentreWare® Web
Identifying and Applying Firmware Patch 3
2. Type WorkCentre 51xx,56xx,57xx,58xx as the name of the group.
Note You can also enter in the rest of the information, but the Name is the only required field.
3. The group appears in the list on the left hand navigation. The properties of the group are visible. Go to the Membership Filter box and select Configure.

Identify and Correct Devices Xerox® CentreWare® Web
Identifying and Applying Firmware Patch 4
4. In the Configure Filter: <Group Name> page select New Expression.
5. Complete the fields under Expression as follows:
a. Variable: Select a manufacturer from the dropdown list.
b. Condition: This drop down menu updates after a Variable is entered. Select an option from the dropdown list.
c. Value: Type Xerox.
d. Select Save.
Identify and Correct Devices Xerox® CentreWare® Web
Identifying and Applying Firmware Patch 5
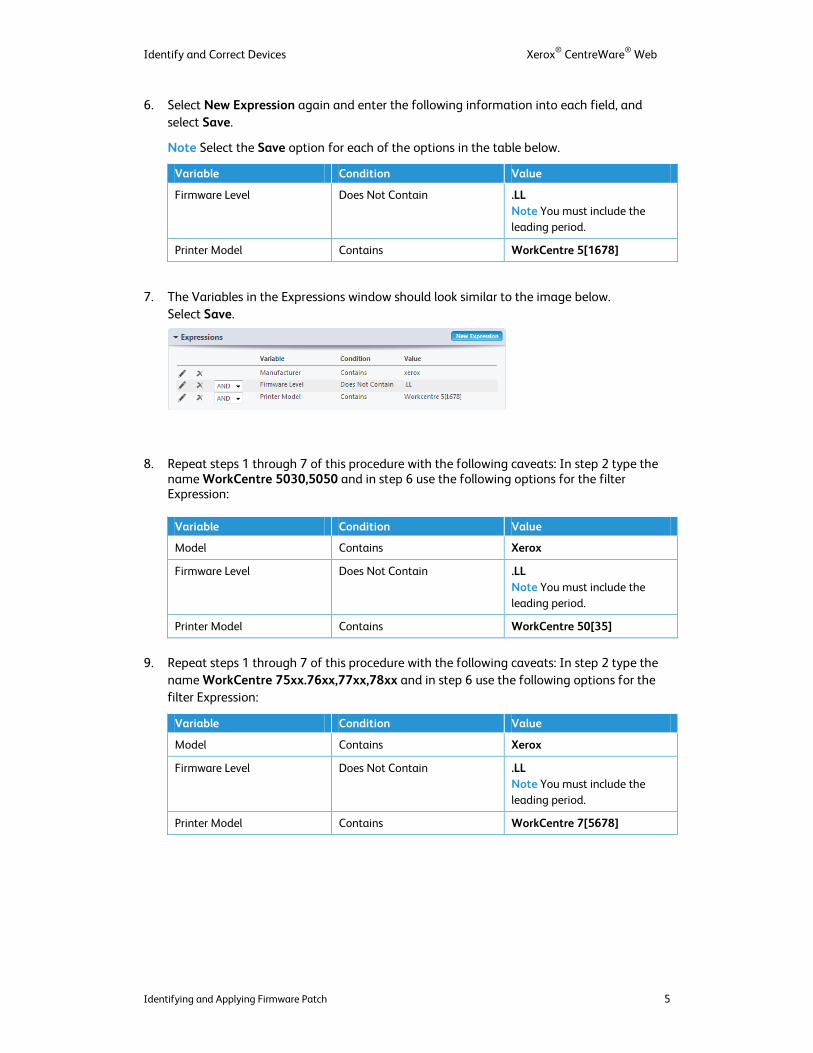
6. Select New Expression again and enter the following information into each field, and select Save.
Note Select the Save option for each of the options in the table below.
Variable Condition Value
Firmware Level Does Not Contain .LL Note You must include the leading period.
Printer Model Contains WorkCentre 5[1678]
7. The Variables in the Expressions window should look similar to the image below. Select Save.
8. Repeat steps 1 through 7 of this procedure with the following caveats: In step 2 type the name WorkCentre 5030,5050 and in step 6 use the following options for the filter Expression:
Variable Condition Value
Model Contains Xerox
Firmware Level Does Not Contain .LL Note You must include the leading period.
Printer Model Contains WorkCentre 50[35]
9. Repeat steps 1 through 7 of this procedure with the following caveats: In step 2 type the
name WorkCentre 75xx.76xx,77xx,78xx and in step 6 use the following options for the filter Expression:
Variable Condition Value
Model Contains Xerox
Firmware Level Does Not Contain .LL Note You must include the leading period.
Printer Model Contains WorkCentre 7[5678]
Identify and Correct Devices Xerox® CentreWare® Web
Identifying and Applying Firmware Patch 6
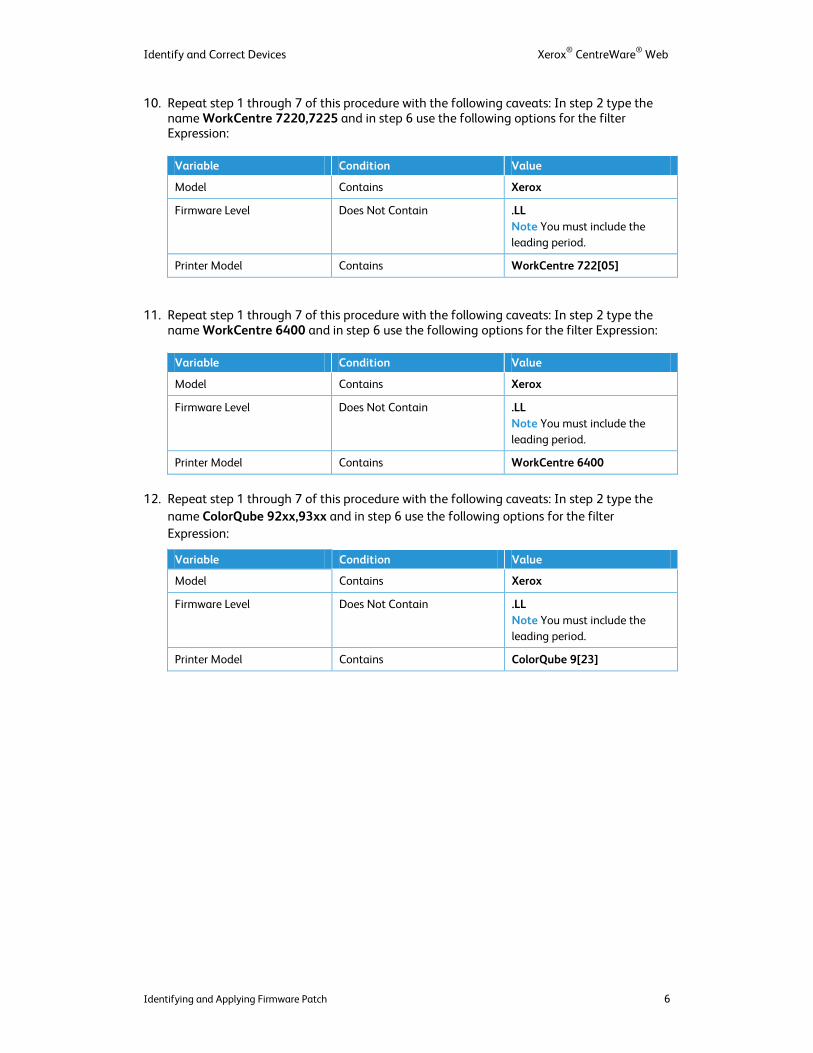
10. Repeat step 1 through 7 of this procedure with the following caveats: In step 2 type the name WorkCentre 7220,7225 and in step 6 use the following options for the filter Expression:
Variable Condition Value
Model Contains Xerox
Firmware Level Does Not Contain .LL Note You must include the leading period.
Printer Model Contains WorkCentre 722[05]
11. Repeat step 1 through 7 of this procedure with the following caveats: In step 2 type the
name WorkCentre 6400 and in step 6 use the following options for the filter Expression:
Variable Condition Value
Model Contains Xerox
Firmware Level Does Not Contain .LL Note You must include the leading period.
Printer Model Contains WorkCentre 6400
12. Repeat step 1 through 7 of this procedure with the following caveats: In step 2 type the
name ColorQube 92xx,93xx and in step 6 use the following options for the filter Expression:
Variable Condition Value
Model Contains Xerox
Firmware Level Does Not Contain .LL Note You must include the leading period.
Printer Model Contains ColorQube 9[23]

Identify and Correct Devices Xerox® CentreWare® Web
Identifying and Applying Firmware Patch 7
13. Repeat step 1 through 7 of this procedure with the following caveats: In step 2 type the name ColorQube 87xx,89xx and in step 6 use the following options for the filter Expression:
Variable Condition Value
Model Contains Xerox
Firmware Level Does Not Contain .LL Note You must include the leading period.
Printer Model Contains ColorQube 8[79]
14. Repeat step 1 through 7 of this procedure with the following caveats: In step 2 type the
name WorkCentre Pro 2xx and in step 6 use the following options for the filter Expression:
Variable Condition Value
Model Contains Xerox
Firmware Level Does Not Contain .LL Note You must include the leading period.
Printer Model Contains WorkCentre Pro 2
15. Repeat step 1 through 7 of this procedure with the following caveats: In step 2 type the
name BookMark 40,50 and in step 6 use the following options for the filter Expression:
Variable Condition Value
Model Contains Xerox
Firmware Level Does Not Contain .LL Note You must include the leading period.
Printer Model Contains BookMark
Identify and Correct Devices Xerox® CentreWare® Web
Identifying and Applying Firmware Patch 8
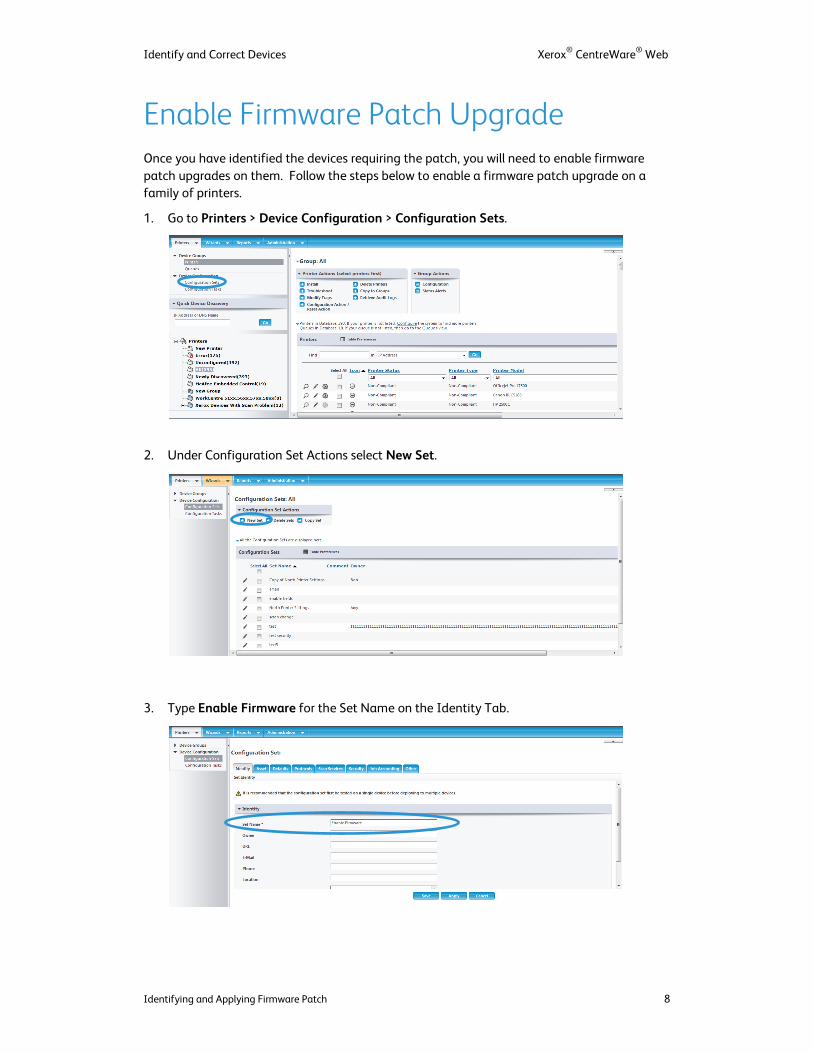
Enable Firmware Patch Upgrade Once you have identified the devices requiring the patch, you will need to enable firmware patch upgrades on them. Follow the steps below to enable a firmware patch upgrade on a family of printers.
1. Go to Printers > Device Configuration > Configuration Sets.
2. Under Configuration Set Actions select New Set.
3. Type Enable Firmware for the Set Name on the Identity Tab.
Identify and Correct Devices Xerox® CentreWare® Web
Identifying and Applying Firmware Patch 9
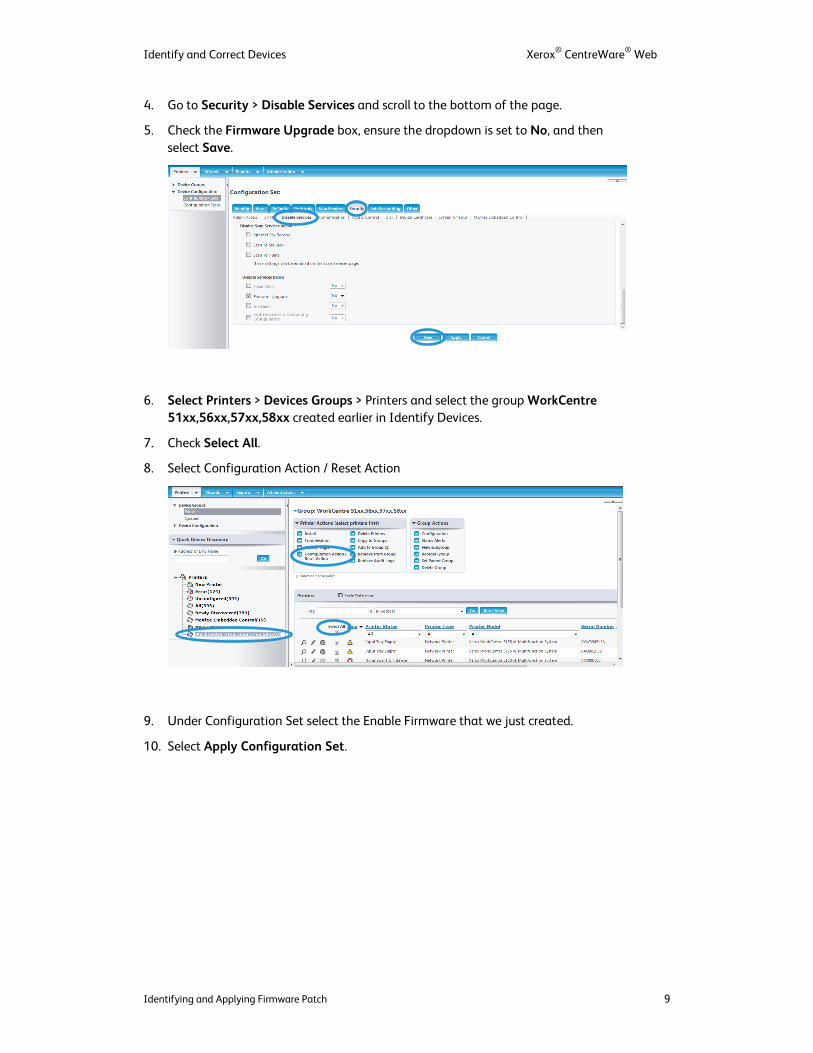
4. Go to Security > Disable Services and scroll to the bottom of the page.
5. Check the Firmware Upgrade box, ensure the dropdown is set to No, and then select Save.
6. Select Printers > Devices Groups > Printers and select the group WorkCentre 51xx,56xx,57xx,58xx created earlier in Identify Devices.
7. Check Select All.
8. Select Configuration Action / Reset Action
9. Under Configuration Set select the Enable Firmware that we just created.
10. Select Apply Configuration Set.

Identify and Correct Devices Xerox® CentreWare® Web
Identifying and Applying Firmware Patch 10
11. Select Now under Schedule Period and select Save.
12. Select Configuration Tasks from under Device Configuration.
13. Check the configuration task that you just created. (The date and time will be in the name.)
14. Select the Actions dropdown menu and select View Results / Progress.
15. When the Progress bar is at 100% select the Results tab and verify that all devices have a next to them. If they do not, correct the issue to apply the configuration set again or enable firmware upgrade by going to the printer’s web page.
Note Not all devices have the ability to disable firmware upgrades, so if your devices are older they may not have this feature.
16. Repeat steps 1 through 15 of this procedure for each of the groups created in the Identify Devices section.

Identify and Correct Devices Xerox® CentreWare® Web
Identifying and Applying Firmware Patch 11
Apply Firmware Patch
Once you have identified the devices with the issue, apply it to the devices. Apply a different firmware patch version for each family of printers. Follow the steps below to apply a firmware patch to a family of printers.
1. Navigate to Wizards > Upgrade Printers.
2. Under the Upgrade File Actions select Add / Delete Files.
Identify and Correct Devices Xerox® CentreWare® Web
Identifying and Applying Firmware Patch 12
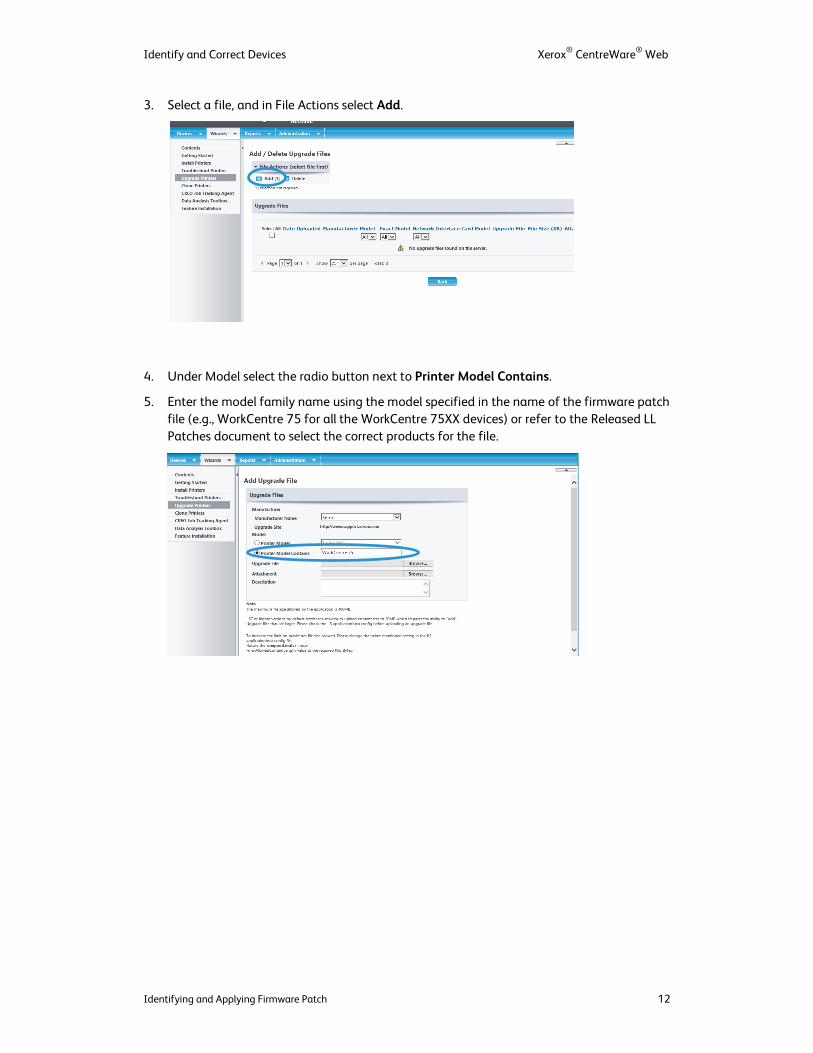
3. Select a file, and in File Actions select Add.
4. Under Model select the radio button next to Printer Model Contains.
5. Enter the model family name using the model specified in the name of the firmware patch file (e.g., WorkCentre 75 for all the WorkCentre 75XX devices) or refer to the Released LL Patches document to select the correct products for the file.

Identify and Correct Devices Xerox® CentreWare® Web
Identifying and Applying Firmware Patch 13
6. On the upgrade file browse to the file for that model family, select Open in the file browsing dialog, and select Save.
Note You can add an attachment such as release notes and add a description, but these are not required.
7. Select Back to start the wizard.
Note If you are on the main Upgrade Printer page under Upgrade Tasks, select Schedule Upgrade.
8. Select the radio button next to the firmware patch file you just uploaded and select Continue.
9. Select the group from which you want to choose the printers. Be sure to choose the correct group you created in the section Identify Devices (The name of the group specifies the models that will be found in that group).

Identify and Correct Devices Xerox® CentreWare® Web
Identifying and Applying Firmware Patch 14
10. Select Continue again to see the list of printers to which the firmware patch will apply.
Note: If there are no printers in the list then all of the devices in that family already have the patch. Some models have two patch files, and they are dependent on the firmware version. Refer to the Released LL Patches document to select the correct products for the file.
11. Select the devices which devices to upgrade and select Continue.
12. If desired, change the name of the firmware task.
13. To run the patch leave the Status Polling set to the defaults. If performing a system upgrade, an increase of the polling time may be required depending on how long it takes the device to apply the firmware.
Identify and Correct Devices Xerox® CentreWare® Web
Identifying and Applying Firmware Patch 15
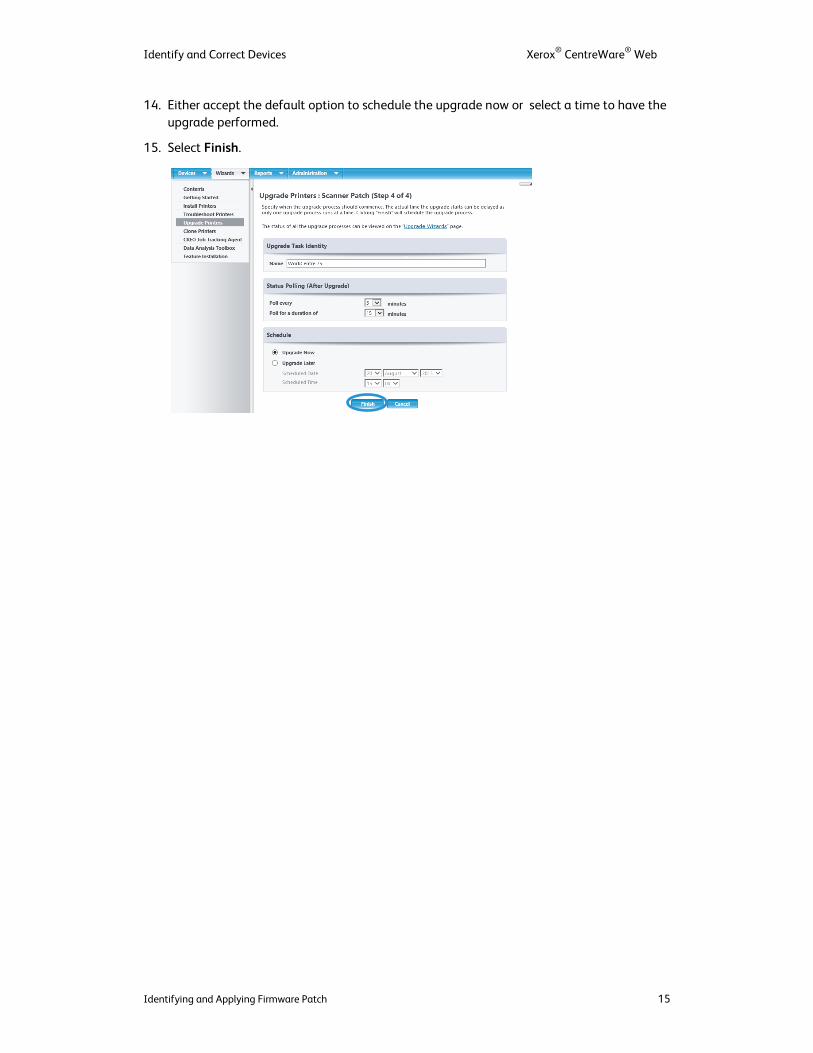
14. Either accept the default option to schedule the upgrade now or select a time to have the upgrade performed.
15. Select Finish.
Identify and Correct Devices Xerox® CentreWare® Web
Identifying and Applying Firmware Patch 16
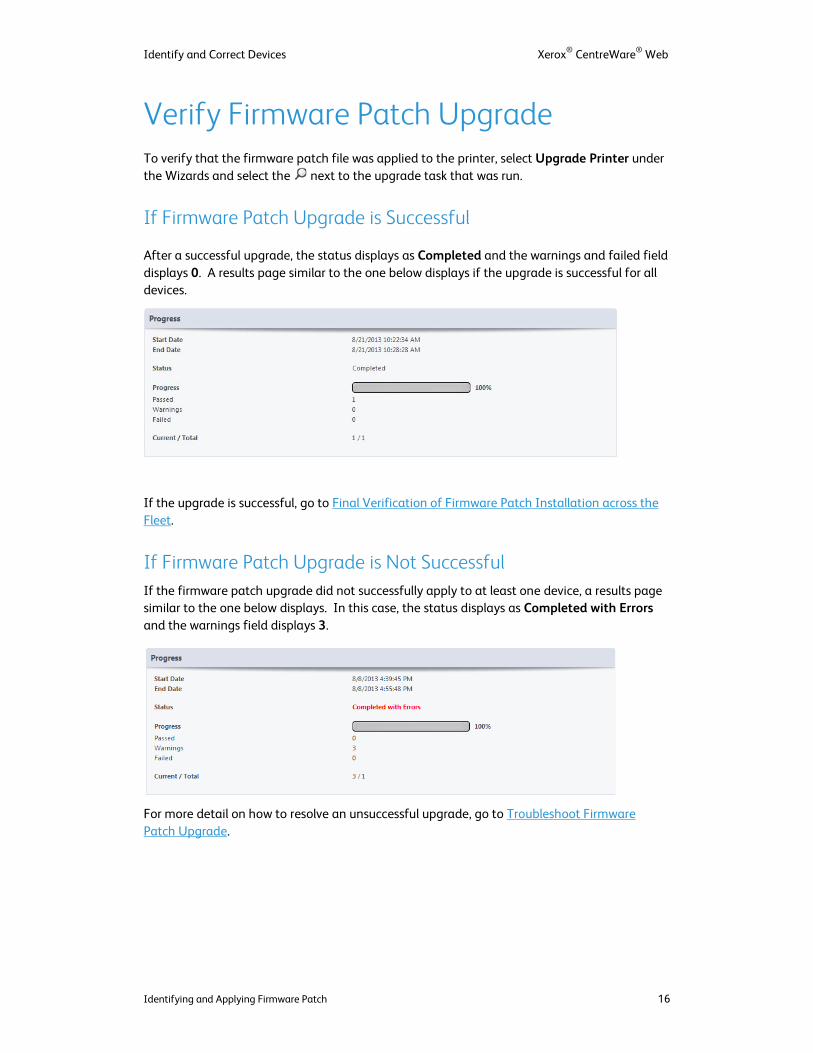
Verify Firmware Patch Upgrade To verify that the firmware patch file was applied to the printer, select Upgrade Printer under the Wizards and select the next to the upgrade task that was run.
If Firmware Patch Upgrade is Successful
After a successful upgrade, the status displays as Completed and the warnings and failed field displays 0. A results page similar to the one below displays if the upgrade is successful for all devices.
If the upgrade is successful, go to Final Verification of Firmware Patch Installation across the Fleet.
If Firmware Patch Upgrade is Not Successful If the firmware patch upgrade did not successfully apply to at least one device, a results page similar to the one below displays. In this case, the status displays as Completed with Errors and the warnings field displays 3.
For more detail on how to resolve an unsuccessful upgrade, go to Troubleshoot Firmware Patch Upgrade.

Identify and Correct Devices Xerox® CentreWare® Web
Identifying and Applying Firmware Patch 17
Final Verification of Firmware Patch Installation Across the Fleet Verify that the patch was successfully applied to the devices by running a Printer Asset Report.
1. Go to Reports > Tabular Report > Printer Asset Report. Be sure to select a Firmware Level and model.
2. Generate the CSV version of the report and open it in Microsoft Excel® to filter on specific models.
3. If the firmware level displays .LL then the patch has been applied. If additional support is required after applying the firmware patch, please follow your standard support process.
4. Continue to Disable Device Firmware Upgrade.
Disable Device Firmware Upgrade Once it is verified that all the devices have the patch, firmware upgrades need to be disabled again. Follow the directions in the Enabling Firmware Patch Upgrade section, but create another Configuration Set with the Firmware Upgrade set to Yes.
The firmware patch installation process is now complete.

Identify and Correct Devices Xerox® CentreWare® Web
Identifying and Applying Firmware Patch 18
Troubleshoot Firmware Patch Upgrade If there are any failures or warnings, select the Results tab to expand the results of the upgrade task.
In the expanded results section, there is a progress section for each printer that shows the status. For those printers that have a or icon, select the to get more details on why the upgrade didn’t succeed. Once expanded, a section like the image below displays.

Identify and Correct Devices Xerox® CentreWare® Web
Identifying and Applying Firmware Patch 19
If the Status Before Upgrade is failed then the printer was in a state where we would not attempt to send the firmware patch file (e.g., an error in communication). Resolve the issue with the printer to get it out of an error state and then reapply the firmware patch.
If the Send File failed, check to make sure the printer is accepting data on port 9100 and communications to the printer are working. To check this, go to the printer’s edit page and browse to Security > Disable Services. Under Protocol/Services Lockout make sure Port 9100 is not checked as shown below. Then reapply the firmware patch.
There will be a list of status pulls at the interval specified. If all of them state Firmware Level did not change that means that CentreWare Web did not detect a change in the firmware; this could be because:
1. The firmware didn’t change until after CentreWare Web finished polling the device the last time. To check this, view the firmware on the printer’s properties page after refreshing the data.
2. The printer might not be accepting firmware patch files. To check this, go to the printer’s edit page and then browse to Security > Disable Services and go to the bottom of the page. Make sure the Firmware Upgrade is set to no as shown below. Then reapply the firmware patch.
3. Go to Final Verification of Firmware Patch Installation across the Fleet.