Embed Size (px)
Citation preview
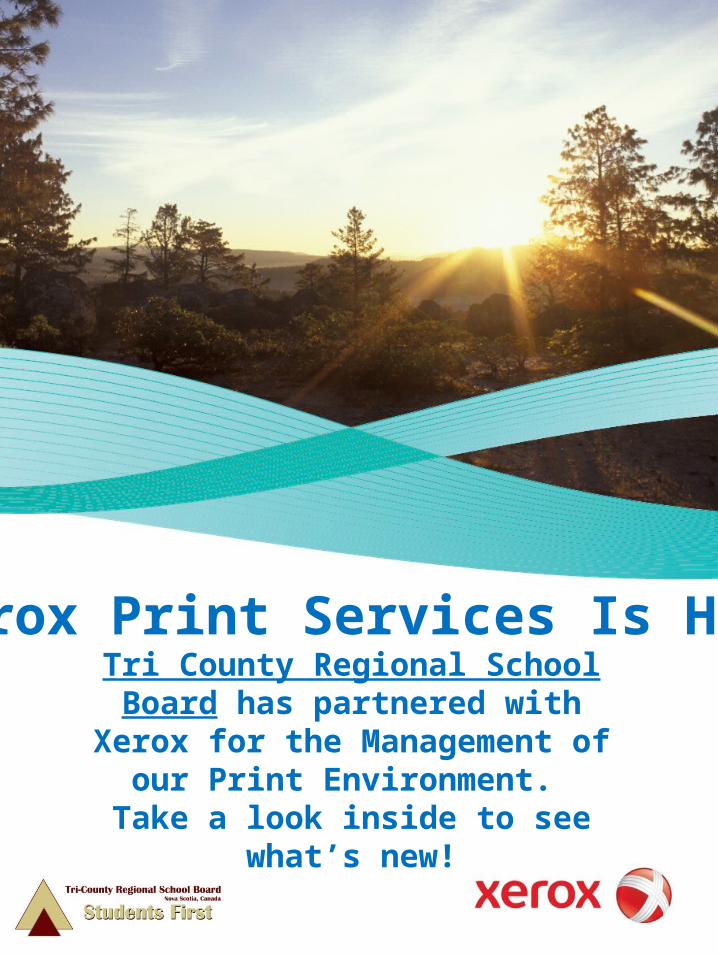
Xerox Print Services Is HereTri County Regional School Board has partnered with Xerox for the
Management of our Print Environment.
Take a look inside to see what’s new!
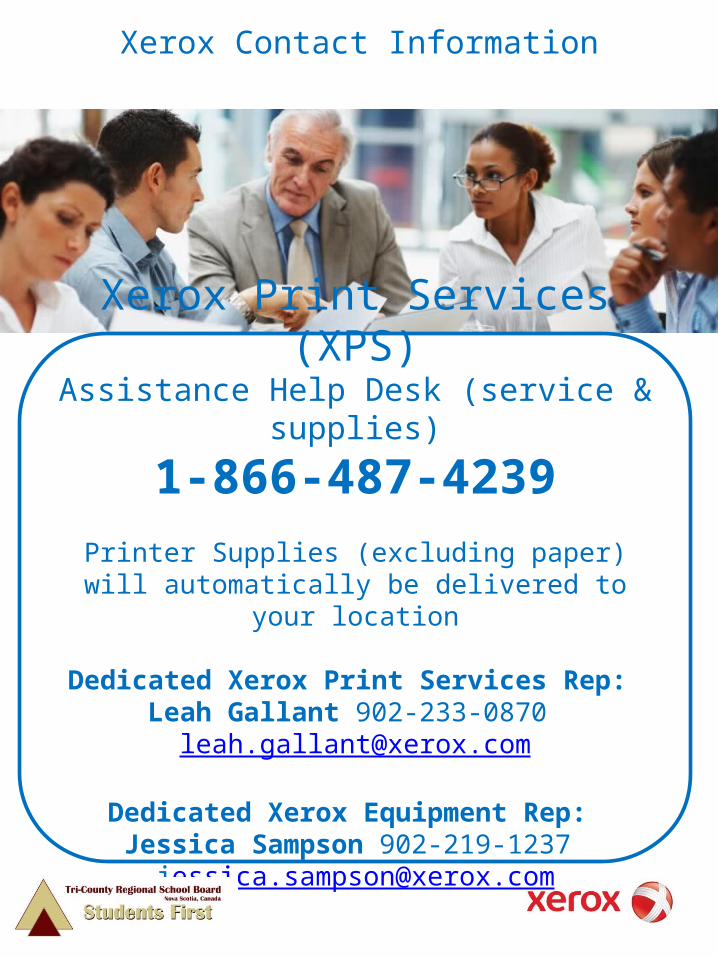
Xerox Contact Information
Xerox Print Services (XPS)Assistance Help Desk (service & supplies)
1-866-487-4239
Printer Supplies (excluding paper) will automatically be delivered to your location
Dedicated Xerox Print Services Rep: Leah Gallant 902-233-0870
Dedicated Xerox Equipment Rep: Jessica Sampson 902-219-1237
INTRODUCTION: Xerox Print Services (XPS) is Here!
Tri County Regional School Board has entered into a partnership with Xerox Canada to manage our print environment. XPS will support our focus of maintaining a cost-effective, productive print environment.
With this program, our print devices will be linked to the Xerox Print Services Help Desk. This will allow Xerox to receive alerts when our printers are low on supplies (excluding paper), and will automatically send it to the location in time to be replaced. Our printers can also send error alerts to the help desk and when the alerts are received, a help desk member will give you a call . If the issue requires a service technician, the help desk will dispatch them and they will call to confirm their arrival time.
There will be a sticker or asset tag on your printer that will have the help desk telephone number, and the serial number of that device. This will allow the help desk to identify which device you are having an issue with. You can also call in to ask questions or to report if you experience a malfunction with the printer.
Over the next few weeks you will receive further information on the program and asset tags will be placed on your devices. A master reference list of machines covered under the contract will be provided to each location.
We look forward to the implementation of this program and thank you for your support in this initiative.
If you have any questions about the program please call Leah Gallant 902-233-0870

Asset Tagging-Location
All print devices that Xerox will be monitoring will have an Asset Tag placed
on them. We will support your Xerox devices, as well as your HP, Dell, Brother, and Lexmark printers listed on the Master List provided to you by Xerox. Please look at the diagram below for where to place
the tag.
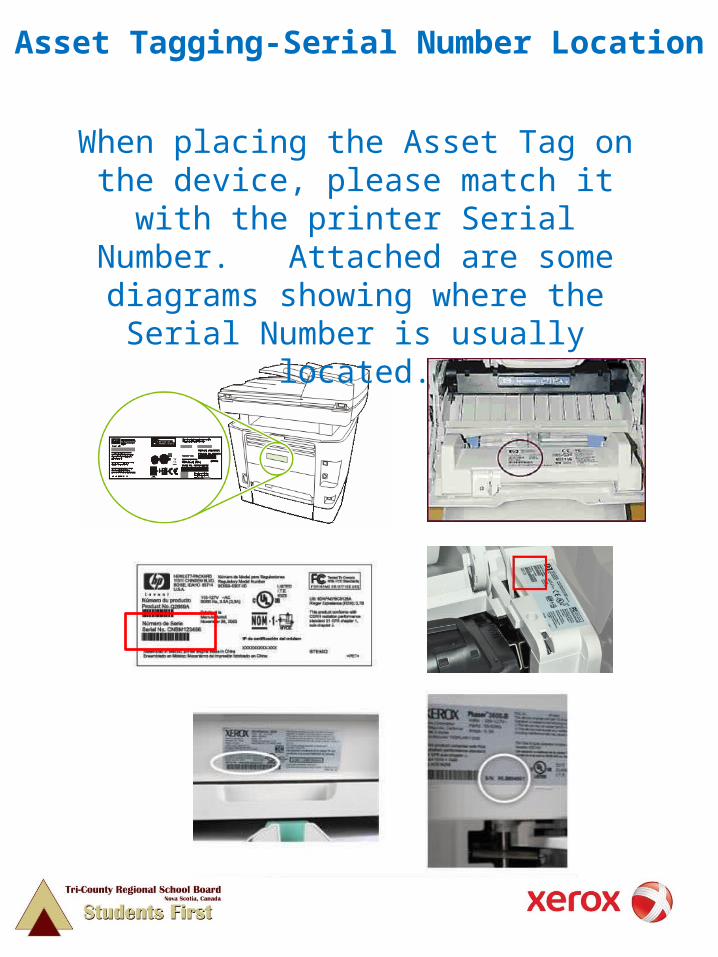
Asset Tagging-Serial Number Location
When placing the Asset Tag on the device, please match it with the printer
Serial Number. Attached are some diagrams showing where the Serial
Number is usually located.
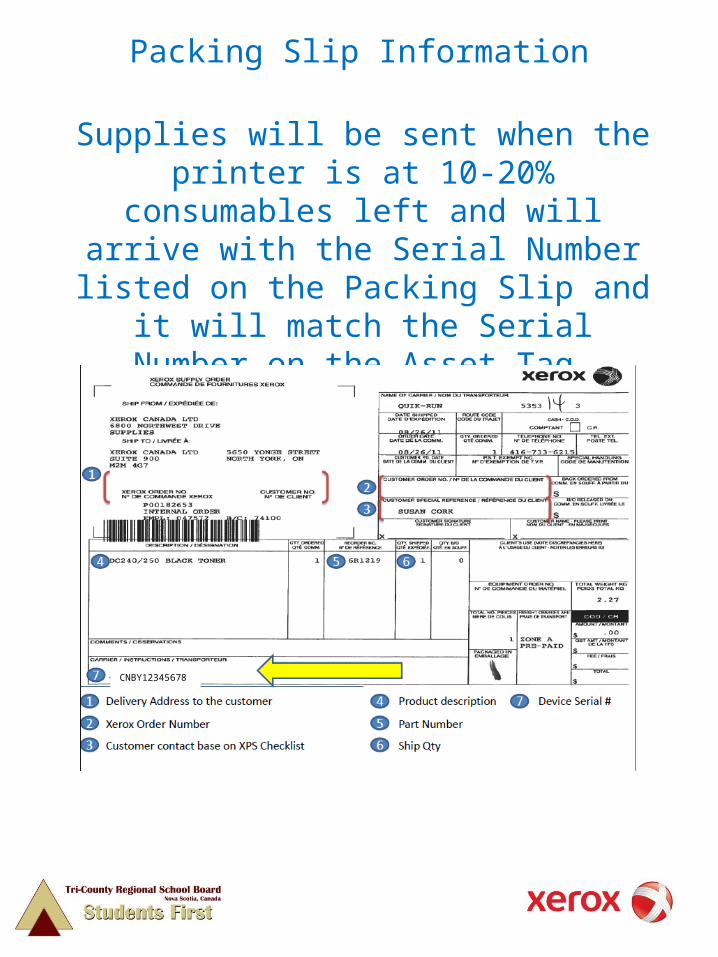
Packing Slip Information
Supplies will be sent when the printer is at 10-20% consumables left and will
arrive with the Serial Number listed on the Packing Slip and it will match the
Serial Number on the Asset Tag.
CNBY12345678
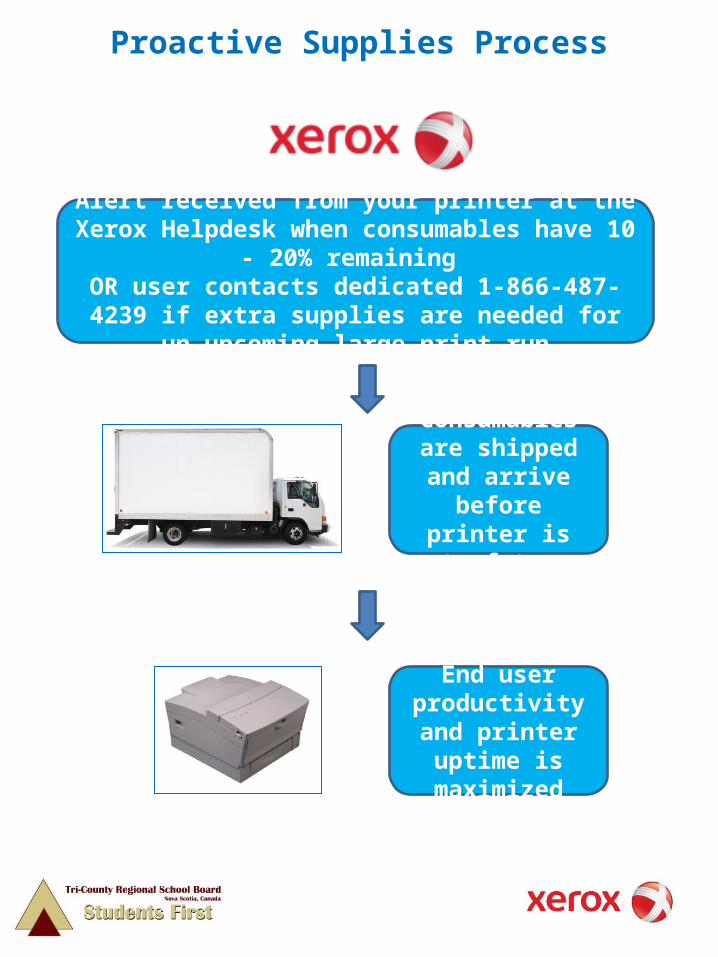
Alert received from your printer at the Xerox Helpdesk when consumables have 10 - 20% remaining
OR user contacts dedicated 1-866-487-4239 if extra supplies are needed for un upcoming large print run
Consumables are shipped and arrive
before printer is out of toner
End user productivity and printer uptime is
maximized
Proactive Supplies Process
Service Ticket Information
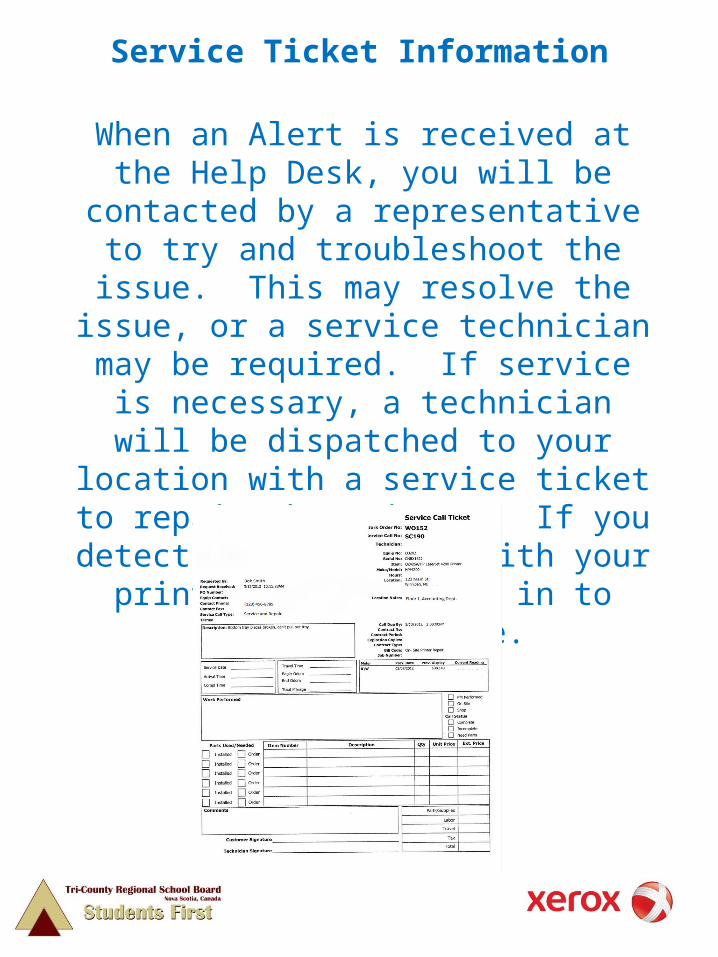
When an Alert is received at the Help Desk, you will be contacted by a
representative to try and troubleshoot the issue. This may resolve the issue, or a service technician may be required. If
service is necessary, a technician will be dispatched to your location with a service ticket to repair the printer. If you detect a malfunction with your printer, please call
in to report the issue.
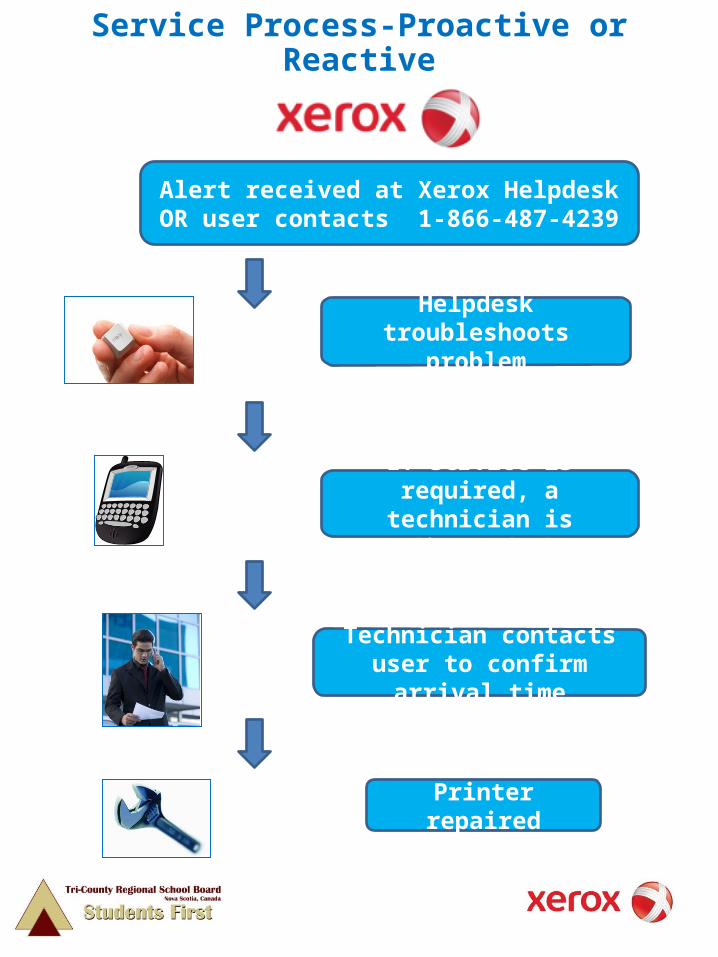
Alert received at Xerox Helpdesk OR user contacts 1-866-487-4239
Helpdesk troubleshoots problem
If service is required, a technician is dispatched
Technician contacts user to confirm arrival time
Printer repaired
Service Process-Proactive or Reactive
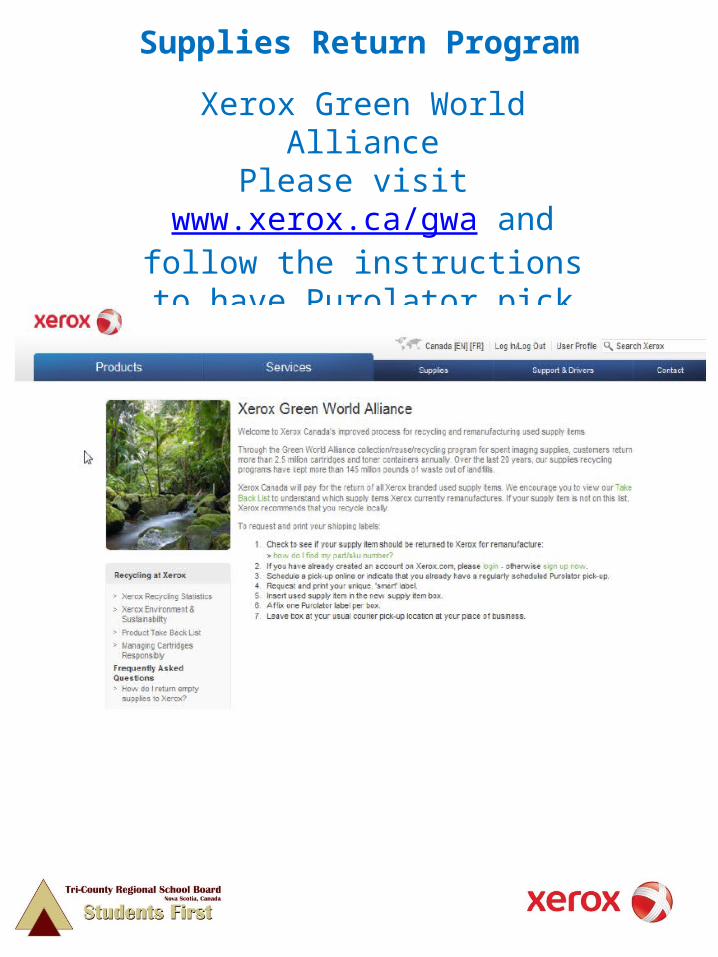
Xerox Green World AlliancePlease visit www.xerox.ca/gwa and follow the instructions to
have Purolator pick up your used consumable items.
Supplies Return Program
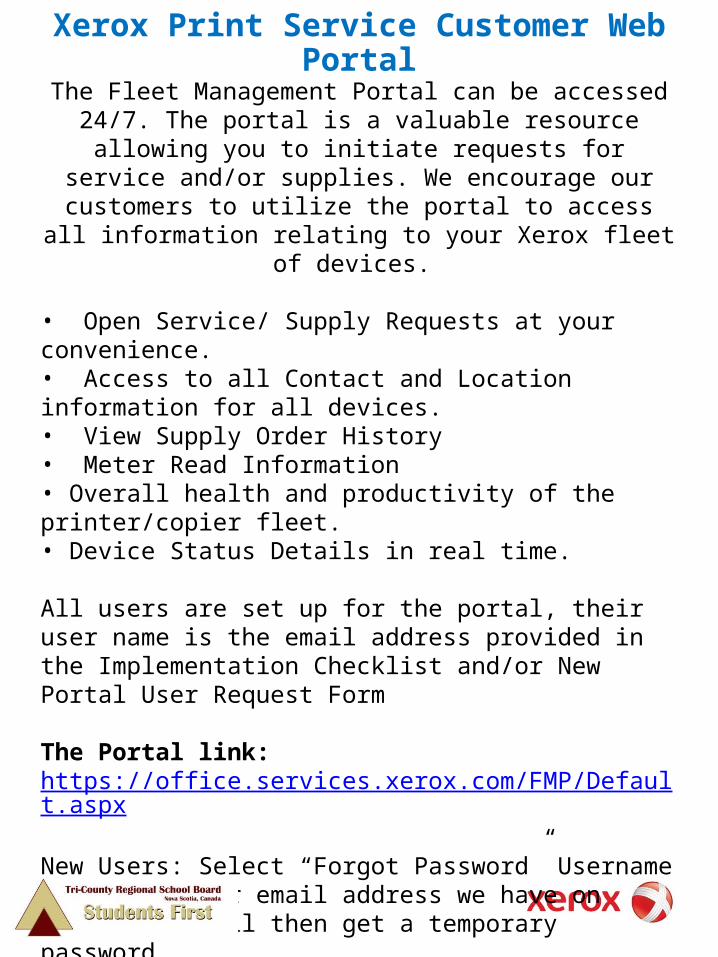
Xerox Print Service Customer Web Portal
The Fleet Management Portal can be accessed 24/7. The portal is a valuable resource allowing you to initiate requests for service and/or supplies. We encourage our customers to
utilize the portal to access all information relating to your Xerox fleet of devices.
• Open Service/ Supply Requests at your convenience.• Access to all Contact and Location information for all devices.• View Supply Order History• Meter Read Information• Overall health and productivity of the printer/copier fleet.• Device Status Details in real time.
All users are set up for the portal, their user name is the email address provided in the Implementation Checklist and/or New Portal User Request Form
The Portal link: https://office.services.xerox.com/FMP/Default.aspx
New Users: Select “Forgot Password” Username would be their email address we have on file. They will then get a temporary password.
If you have any questions or concerns, please contact our MPS Delivery Team.MPS Support DL: [email protected]
Adding, Moving, Changing, or Disposing of Printers/Copiers
Change Management Post Go Live
Change Management plays a crucial role to the success of the XPS offering. IT staff at TCRSB will
submit all move, add, changes or dispose requests to our MACD DL.
Once received a member of our MPS Delivery Team will make all necessary changes and reply with
confirmation.
Inaccurate location or contacts details could result in unnecessary downtime. Misrouted supplies could also cause users to become inundated with supplies while others are left without. If you have any questions or concerns, regarding our MACD process, please feel
free to email our team using this DL.
The MACD DL: [email protected]
Printing to your Xerox Multifunction Device
Many of the TCRSB locations have reduced the number of printers within their buildings. This will help reduce the number of supply requests, service/IT calls, and reduce environmental impact by reducing electricity consumption. It was decided to move the printing that was occurring on these printers to the
Xerox Multifunction devices where logistically it makes sense.
If you are one of the users impacted by the consolidation, you can use the SECURE PRINT feature in your Xerox print driver
to ensure your print job does not get lost or picked up by another user.
In the print driver, simply change the JOB TYPE drop down menu to secure print. You will then add a 4 digit pin number and print. Walk up to the Xerox Machine, select job status,
select your job and release it with your pin number.
You can also continue to print as normal and your job will print out at the device immediately after selecting print in the print
driver.
Full step by step instructions are attached.
New Fax Procedures using Xerox Multifunction Device
Faxing (for most TCRSB locations) has been changed from a small fax machine to faxing on your Xerox Multifunction. Xerox techs and TCRSB techs are in the process of changing over
your fax lines. Once changed to the Xerox multifunction machine in your location for will have the following fax abilities:
• Walk up fax (walk up to the Xerox machine, place document as though you are making a copy, select fax icon, type number or select number from address book, and press green button)
• LAN fax -faxing directing from your PC in your Xerox print driver (open electronic document on your computer, file print, select fax in Job type drop down, enter fax number, and print)
• Fax forward to e-mail (in coming faxes will be sent to a chosen e-mail address. The owner of that address will then forward the fax to the appropriate recipient)
You will be notified by TCRSB tech staff or Xerox letting you know that your Xerox is ready to fax and which of the above
features have been enabled. Full step by step instructions are attached.
Xerox Contact Information
XPS Service and Assistance Help Desk
1-866-487-4239
To Add a new device:MACD
[email protected](excel form will be provided to the TCRSB
techs)
For Escalations:
Supplies will automatically be delivered to your location
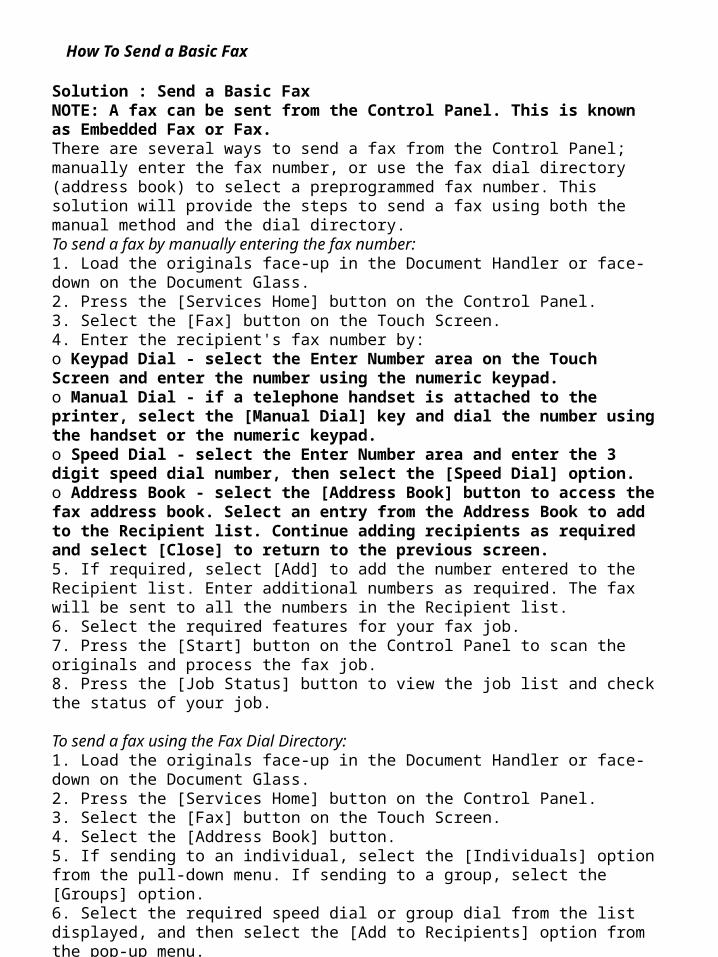
How To Send a Basic Fax
Solution : Send a Basic Fax NOTE: A fax can be sent from the Control Panel. This is known as Embedded Fax or Fax. There are several ways to send a fax from the Control Panel; manually enter the fax number, or use the fax dial directory (address book) to select a preprogrammed fax number. This solution will provide the steps to send a fax using both the manual method and the dial directory. To send a fax by manually entering the fax number: 1. Load the originals face-up in the Document Handler or face-down on the Document Glass. 2. Press the [Services Home] button on the Control Panel. 3. Select the [Fax] button on the Touch Screen. 4. Enter the recipient's fax number by: o Keypad Dial - select the Enter Number area on the Touch Screen and enter the number using the numeric keypad. o Manual Dial - if a telephone handset is attached to the printer, select the [Manual Dial] key and dial the number using the handset or the numeric keypad. o Speed Dial - select the Enter Number area and enter the 3 digit speed dial number, then select the [Speed Dial] option. o Address Book - select the [Address Book] button to access the fax address book. Select an entry from the Address Book to add to the Recipient list. Continue adding recipients as required and select [Close] to return to the previous screen. 5. If required, select [Add] to add the number entered to the Recipient list. Enter additional numbers as required. The fax will be sent to all the numbers in the Recipient list. 6. Select the required features for your fax job. 7. Press the [Start] button on the Control Panel to scan the originals and process the fax job. 8. Press the [Job Status] button to view the job list and check the status of your job.
To send a fax using the Fax Dial Directory: 1. Load the originals face-up in the Document Handler or face-down on the Document Glass. 2. Press the [Services Home] button on the Control Panel. 3. Select the [Fax] button on the Touch Screen. 4. Select the [Address Book] button. 5. If sending to an individual, select the [Individuals] option from the pull-down menu. If sending to a group, select the [Groups] option. 6. Select the required speed dial or group dial from the list displayed, and then select the [Add to Recipients] option from the pop-up menu. 7. Repeat step 6 to enter additional individual fax or group numbers. 8. When all the fax numbers have been entered, select the [Close] button.
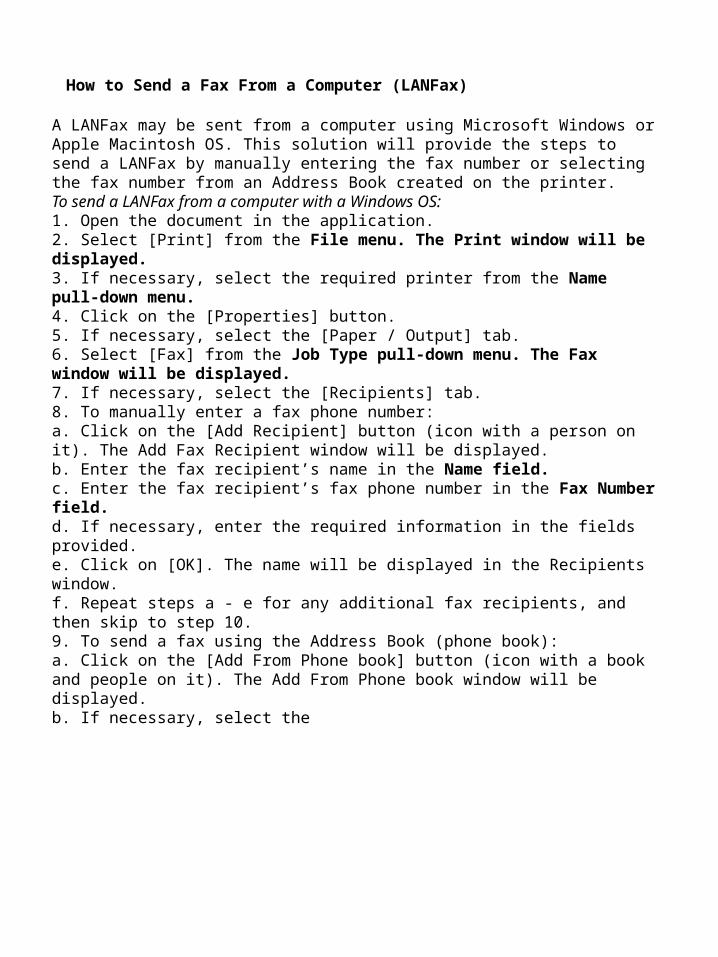
How to Send a Fax From a Computer (LANFax)
A LANFax may be sent from a computer using Microsoft Windows or Apple Macintosh OS. This solution will provide the steps to send a LANFax by manually entering the fax number or selecting the fax number from an Address Book created on the printer. To send a LANFax from a computer with a Windows OS: 1. Open the document in the application. 2. Select [Print] from the File menu. The Print window will be displayed. 3. If necessary, select the required printer from the Name pull-down menu. 4. Click on the [Properties] button. 5. If necessary, select the [Paper / Output] tab. 6. Select [Fax] from the Job Type pull-down menu. The Fax window will be displayed. 7. If necessary, select the [Recipients] tab. 8. To manually enter a fax phone number: a. Click on the [Add Recipient] button (icon with a person on it). The Add Fax Recipient window will be displayed. b. Enter the fax recipient’s name in the Name field. c. Enter the fax recipient’s fax phone number in the Fax Number field. d. If necessary, enter the required information in the fields provided. e. Click on [OK]. The name will be displayed in the Recipients window. f. Repeat steps a - e for any additional fax recipients, and then skip to step 10. 9. To send a fax using the Address Book (phone book): a. Click on the [Add From Phone book] button (icon with a book and people on it). The Add From Phone book window will be displayed. b. If necessary, select the
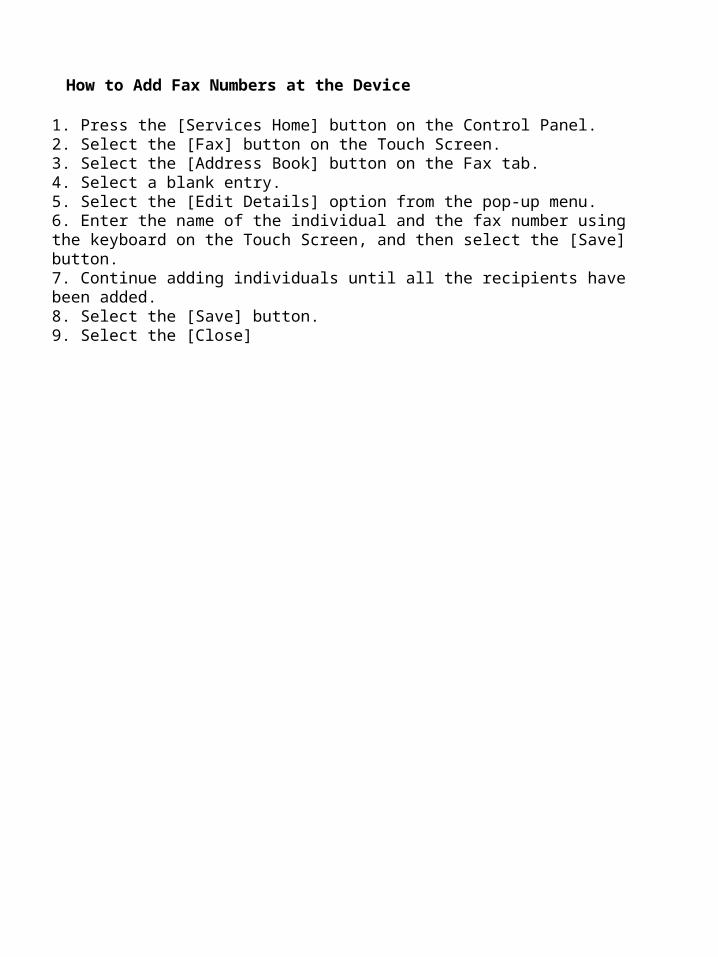
How to Add Fax Numbers at the Device
1. Press the [Services Home] button on the Control Panel. 2. Select the [Fax] button on the Touch Screen. 3. Select the [Address Book] button on the Fax tab. 4. Select a blank entry. 5. Select the [Edit Details] option from the pop-up menu. 6. Enter the name of the individual and the fax number using the keyboard on the Touch Screen, and then select the [Save] button. 7. Continue adding individuals until all the recipients have been added. 8. Select the [Save] button. 9. Select the [Close]
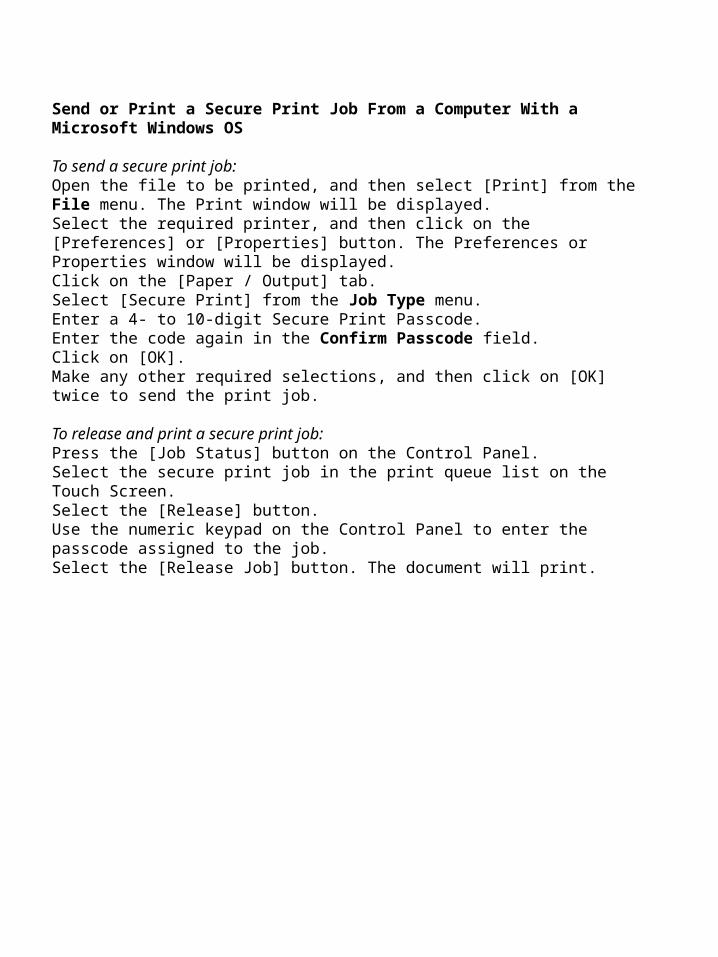
Send or Print a Secure Print Job From a Computer With a Microsoft Windows OS
To send a secure print job:Open the file to be printed, and then select [Print] from the File menu. The Print window will be displayed.Select the required printer, and then click on the [Preferences] or [Properties] button. The Preferences or Properties window will be displayed.Click on the [Paper / Output] tab.Select [Secure Print] from the Job Type menu.Enter a 4- to 10-digit Secure Print Passcode.Enter the code again in the Confirm Passcode field.Click on [OK].Make any other required selections, and then click on [OK] twice to send the print job.
To release and print a secure print job:Press the [Job Status] button on the Control Panel.Select the secure print job in the print queue list on the Touch Screen.Select the [Release] button.Use the numeric keypad on the Control Panel to enter the passcode assigned to the job.Select the [Release Job] button. The document will print.