Embed Size (px)
Citation preview

Y7 Just For Fun
Booklet
Just for fun!
Contents Food Recipes to make:
Coleslaw Chocolate & Pear Cake Fabulous Potato Salad Fruit Muffins Falafels
Textiles Instructions to make:
Sock Monkey Christmas tree decoration Fashion Illustration Felt Mouse
Graphics Instructions to make:
Cheating Calligraphy Scale drawing One-Point Perspective
Product Design Instructions to make:
Shell Boats Cotton reel tanks Photo Frames Plaster candle holders
Food
Just for fun!
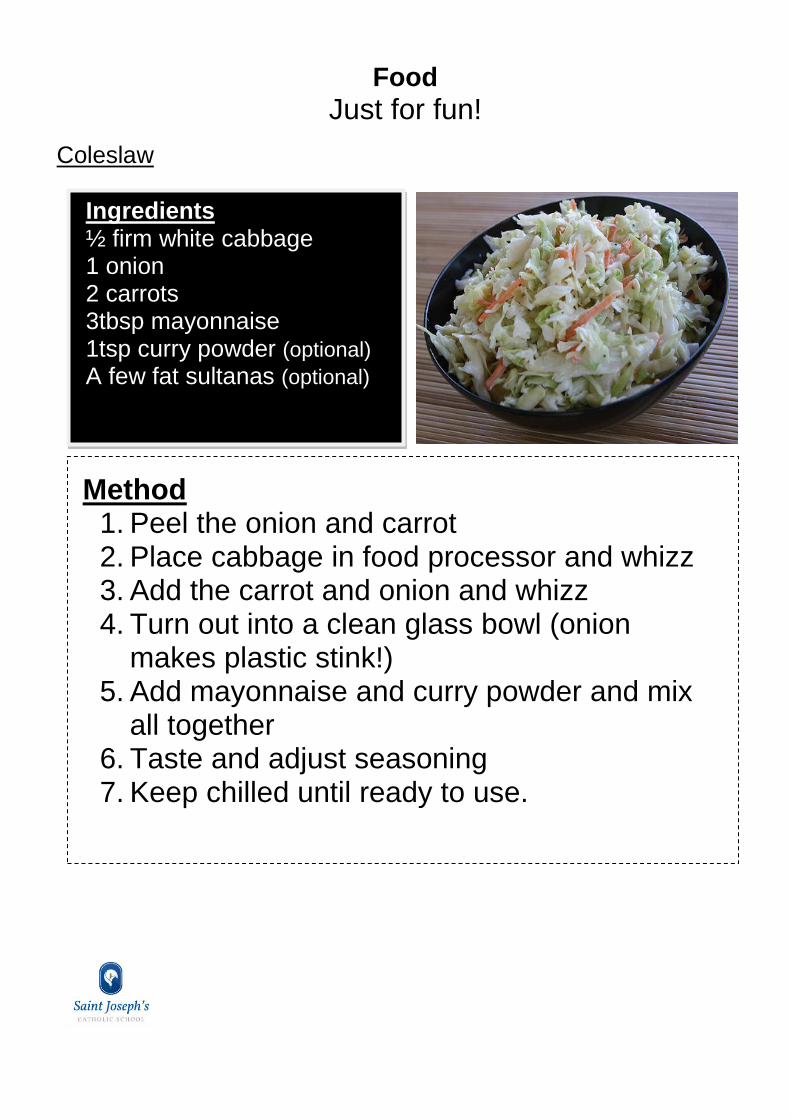
Coleslaw
Ingredients ½ firm white cabbage 1 onion 2 carrots 3tbsp mayonnaise 1tsp curry powder (optional) A few fat sultanas (optional)
Method 1. Peel the onion and carrot 2. Place cabbage in food processor and whizz 3. Add the carrot and onion and whizz 4. Turn out into a clean glass bowl (onion
makes plastic stink!) 5. Add mayonnaise and curry powder and mix
all together 6. Taste and adjust seasoning 7. Keep chilled until ready to use.
Food
Just for fun!
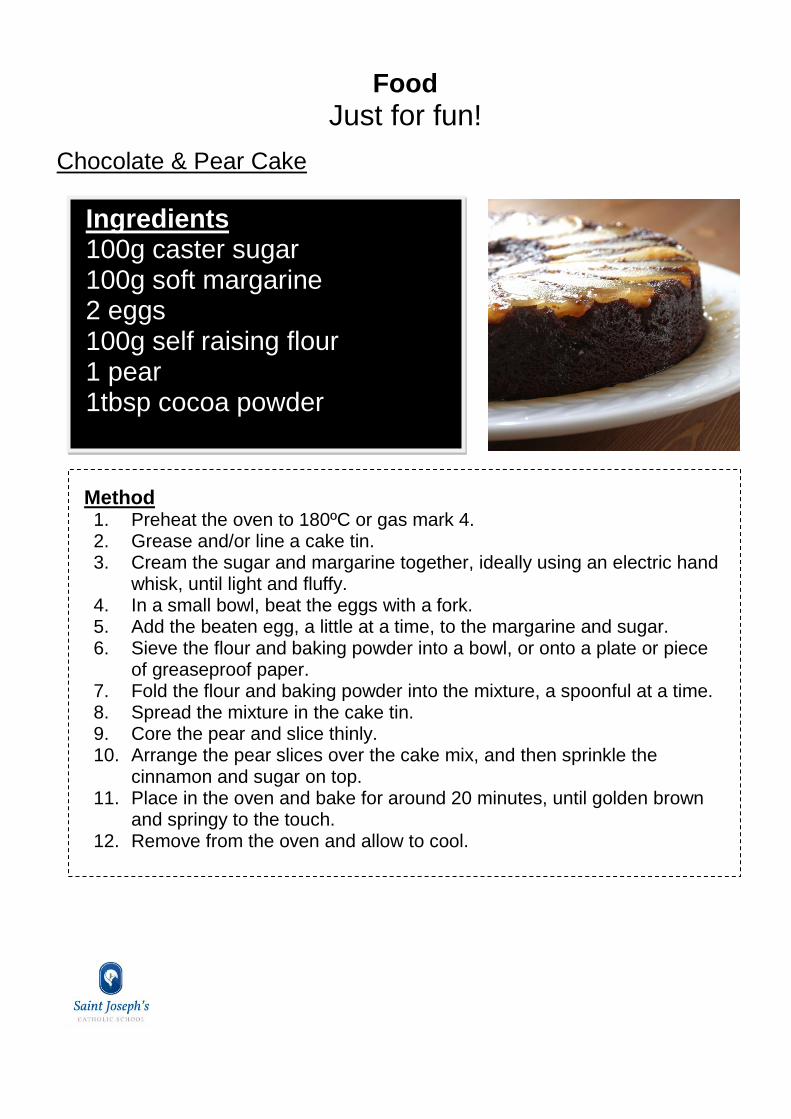
Chocolate & Pear Cake
Ingredients 100g caster sugar 100g soft margarine 2 eggs 100g self raising flour 1 pear 1tbsp cocoa powder
Method 1. Preheat the oven to 180ºC or gas mark 4. 2. Grease and/or line a cake tin. 3. Cream the sugar and margarine together, ideally using an electric hand
whisk, until light and fluffy. 4. In a small bowl, beat the eggs with a fork. 5. Add the beaten egg, a little at a time, to the margarine and sugar. 6. Sieve the flour and baking powder into a bowl, or onto a plate or piece
of greaseproof paper. 7. Fold the flour and baking powder into the mixture, a spoonful at a time. 8. Spread the mixture in the cake tin. 9. Core the pear and slice thinly. 10. Arrange the pear slices over the cake mix, and then sprinkle the
cinnamon and sugar on top. 11. Place in the oven and bake for around 20 minutes, until golden brown
and springy to the touch. 12. Remove from the oven and allow to cool.
Food
Just for fun!
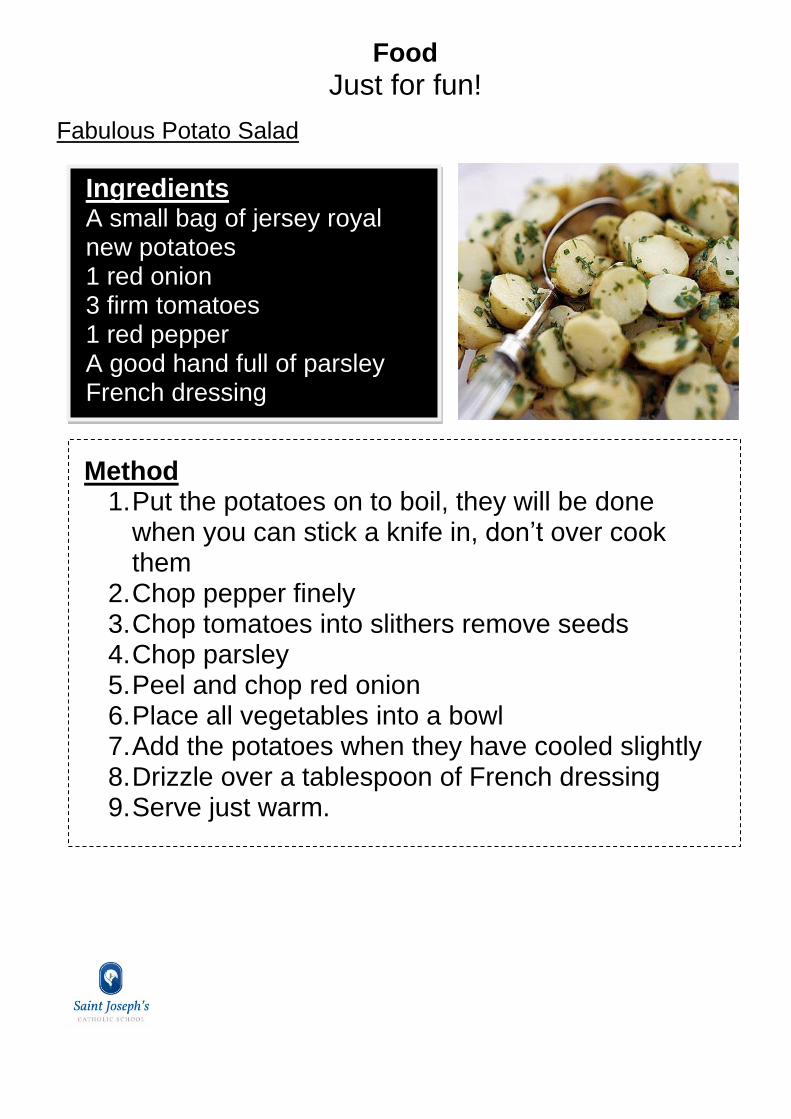
Fabulous Potato Salad
Ingredients A small bag of jersey royal new potatoes 1 red onion 3 firm tomatoes 1 red pepper A good hand full of parsley French dressing
Method 1. Put the potatoes on to boil, they will be done
when you can stick a knife in, don’t over cook them
2. Chop pepper finely 3. Chop tomatoes into slithers remove seeds 4. Chop parsley 5. Peel and chop red onion 6. Place all vegetables into a bowl 7. Add the potatoes when they have cooled slightly 8. Drizzle over a tablespoon of French dressing 9. Serve just warm.

Food
Just for fun!
Fruit Muffins
Ingredients 150g self-raising flour 50g caster sugar 1 egg 75ml milk 75ml vegetable oil (sunflower or similar) 50 -75g fresh fruit or frozen fruit are good as they defrost when cooked leaving the fruit whole yum!
Method 1. Put the oven on at 180oc 2. In a large bowl put the flour and the sugar 3. Add the fruit 4. In a measuring jug, measure out the oil and the milk, add the egg, beat with a
fork 5. Pour the milk mixture on to the dry ingredients 6. Stir very carefully with a plastic spoon 7. The mixture will look like a lumpy batter! 8. Put six muffin cases in to a muffin tin 9. Spoon 1tbsp of mixture into each muffin case 10. Cook until lightly brown and spring back when touched about 15 -20 minsw
Hot tips for interesting flavours;
Lemon and poppy seeds (add the rind and juice of 1 lemon)
Crush or chop finely a banana add with 1tsp of cocoa powder
Grate an apple and add with a little cinnamon
A few raspberries with chopped white chocolate

Food
Just for fun!
Falafels
Ingredients 400g tin of mixed beans 400g tin of chickpeas 1 lemon 1 tablespoon harissa 1 heaped teaspoon allspice 1 heaped tablespoon plain flour 1 bunch fresh coriander olive oil
Method 1. Drain the beans and chickpeas and put them into the
processor 2. Finely grate in the lemon zest, then add a pinch of salt and
pepper, the harissa, allspice, flour and coriander stalks (reserving the leaves)
3. Blitz until smooth, scraping down the sides of the processor if needed
4. Scrape out the mixture and use clean, wet hands to quickly divide and shape it into 8 patties about 1.5cm thick
5. Put 1 tablespoon of oil into the frying pan and add the falafels, turning when golden and crisp
Why not try them wrapped in a tortilla with salad and a tomato salsa for a tasty lunchtime snack.

Textiles
Just for fun!
SOCK MONKEY
You will need:
A sock Sewing Thread 2 buttons Embroidery Thread Needle Fabric Shears Stuffing
Textiles
Just for fun!
Textiles
Just for fun!
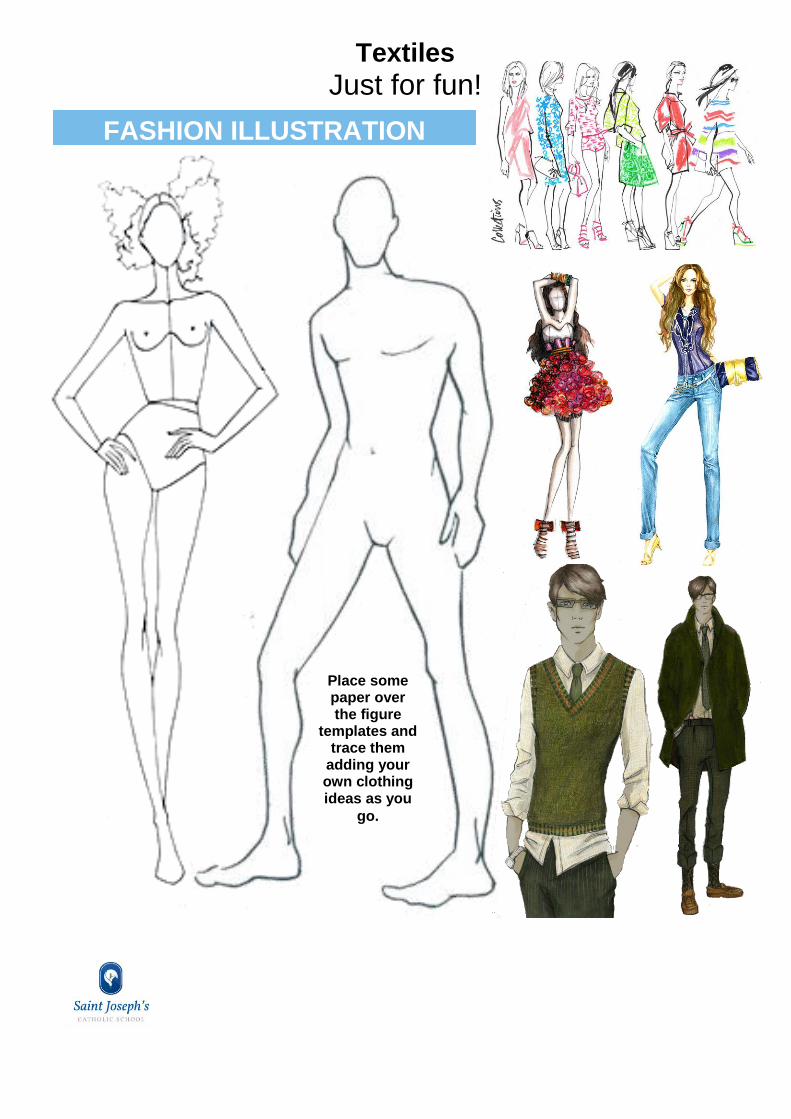
FASHION ILLUSTRATION
Place some paper over the figure
templates and trace them
adding your own clothing ideas as you
go.
Textiles
Just for fun!
Graphics
Just for fun!
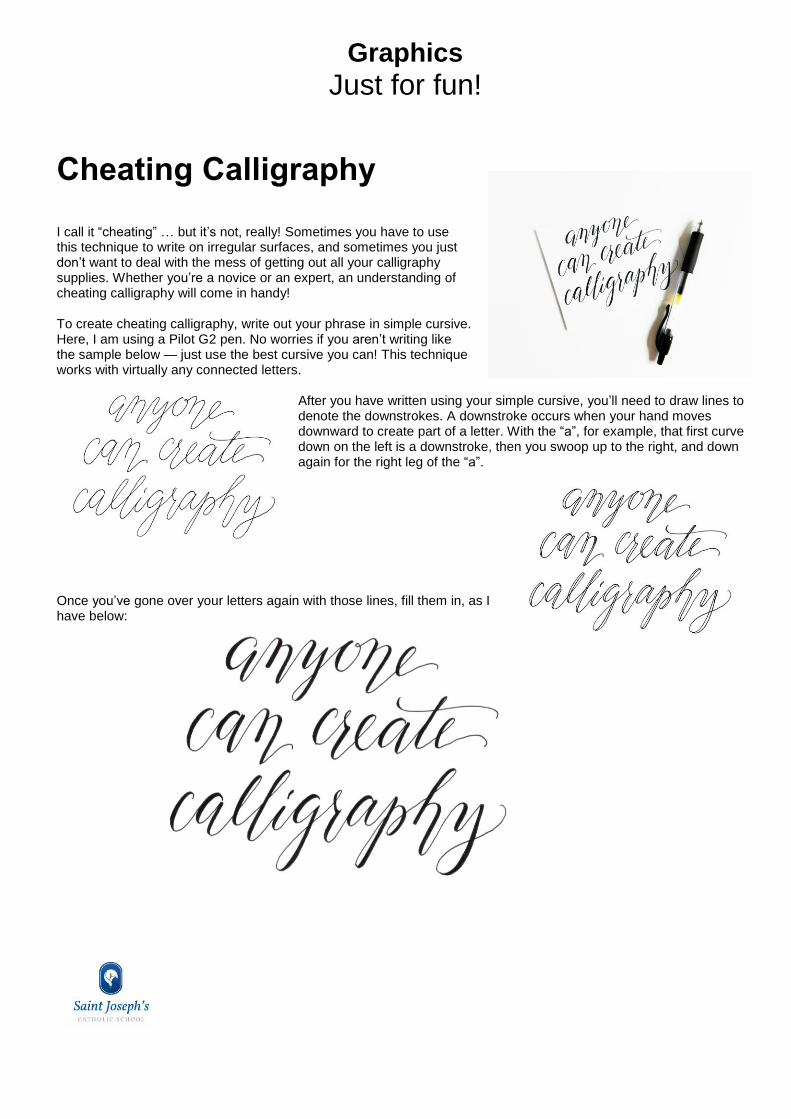
Cheating Calligraphy I call it “cheating” … but it’s not, really! Sometimes you have to use this technique to write on irregular surfaces, and sometimes you just don’t want to deal with the mess of getting out all your calligraphy supplies. Whether you’re a novice or an expert, an understanding of cheating calligraphy will come in handy! To create cheating calligraphy, write out your phrase in simple cursive. Here, I am using a Pilot G2 pen. No worries if you aren’t writing like the sample below — just use the best cursive you can! This technique works with virtually any connected letters.
After you have written using your simple cursive, you’ll need to draw lines to denote the downstrokes. A downstroke occurs when your hand moves downward to create part of a letter. With the “a”, for example, that first curve down on the left is a downstroke, then you swoop up to the right, and down again for the right leg of the “a”.
Once you’ve gone over your letters again with those lines, fill them in, as I have below:
Graphics
Just for fun!
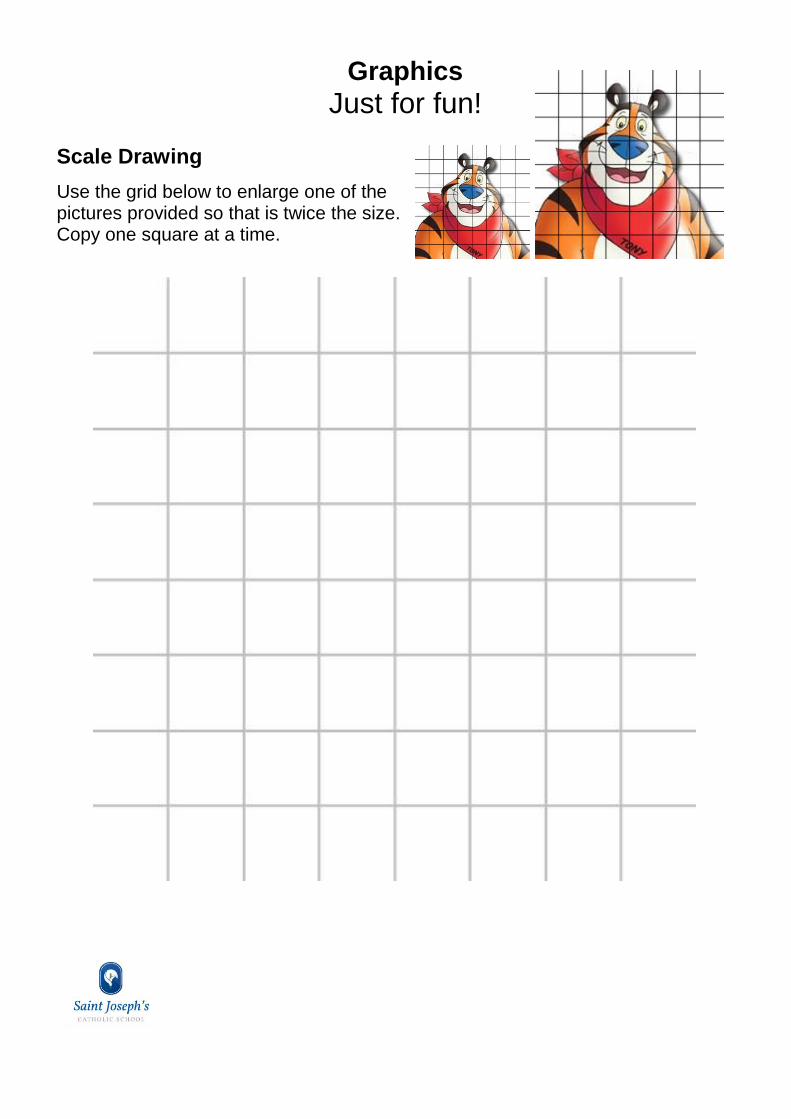
Scale Drawing
Use the grid below to enlarge one of the pictures provided so that is twice the size. Copy one square at a time.
Graphics
Just for fun!
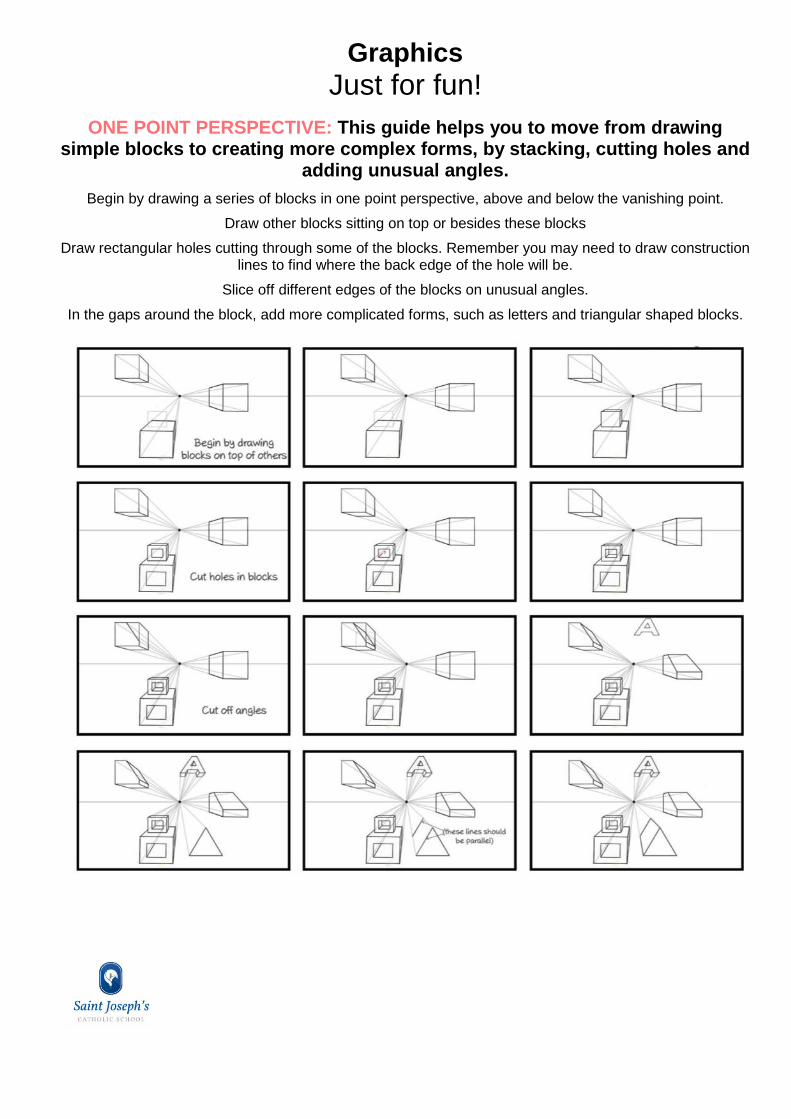
ONE POINT PERSPECTIVE: This guide helps you to move from drawing simple blocks to creating more complex forms, by stacking, cutting holes and
adding unusual angles.
Begin by drawing a series of blocks in one point perspective, above and below the vanishing point.
Draw other blocks sitting on top or besides these blocks
Draw rectangular holes cutting through some of the blocks. Remember you may need to draw construction lines to find where the back edge of the hole will be.
Slice off different edges of the blocks on unusual angles.
In the gaps around the block, add more complicated forms, such as letters and triangular shaped blocks.
Graphics
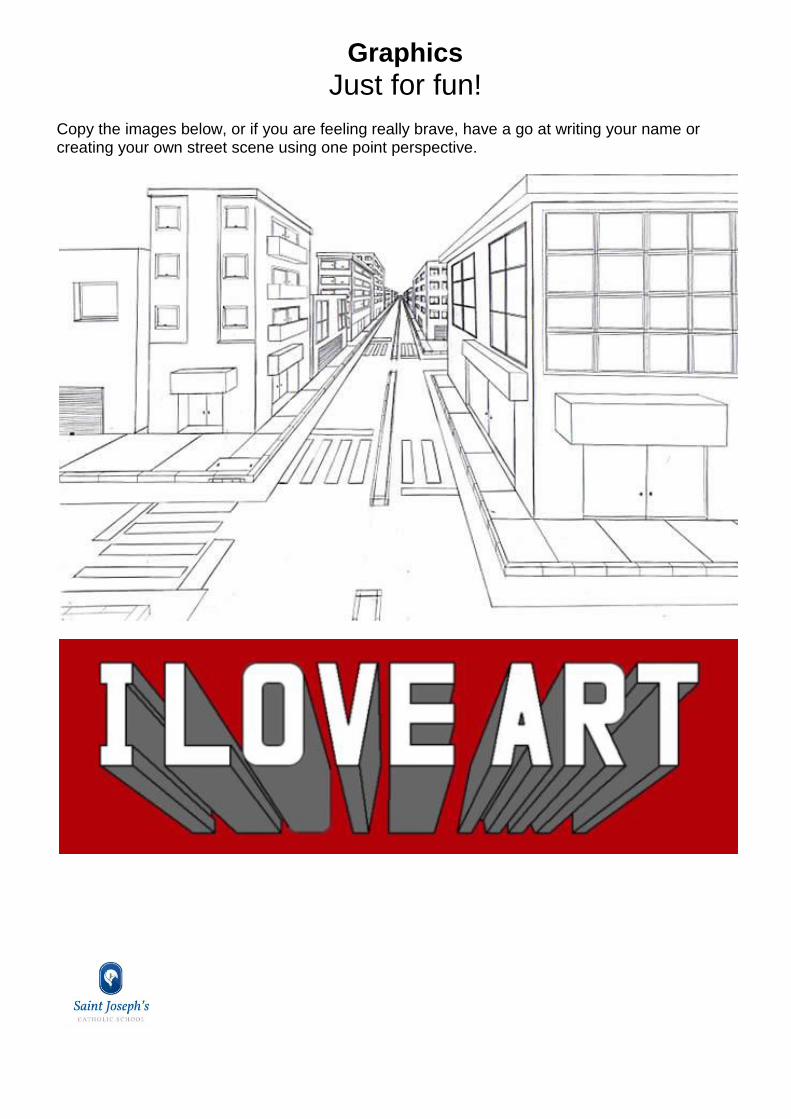
Just for fun! Copy the images below, or if you are feeling really brave, have a go at writing your name or creating your own street scene using one point perspective.
Product Design
Just for fun!
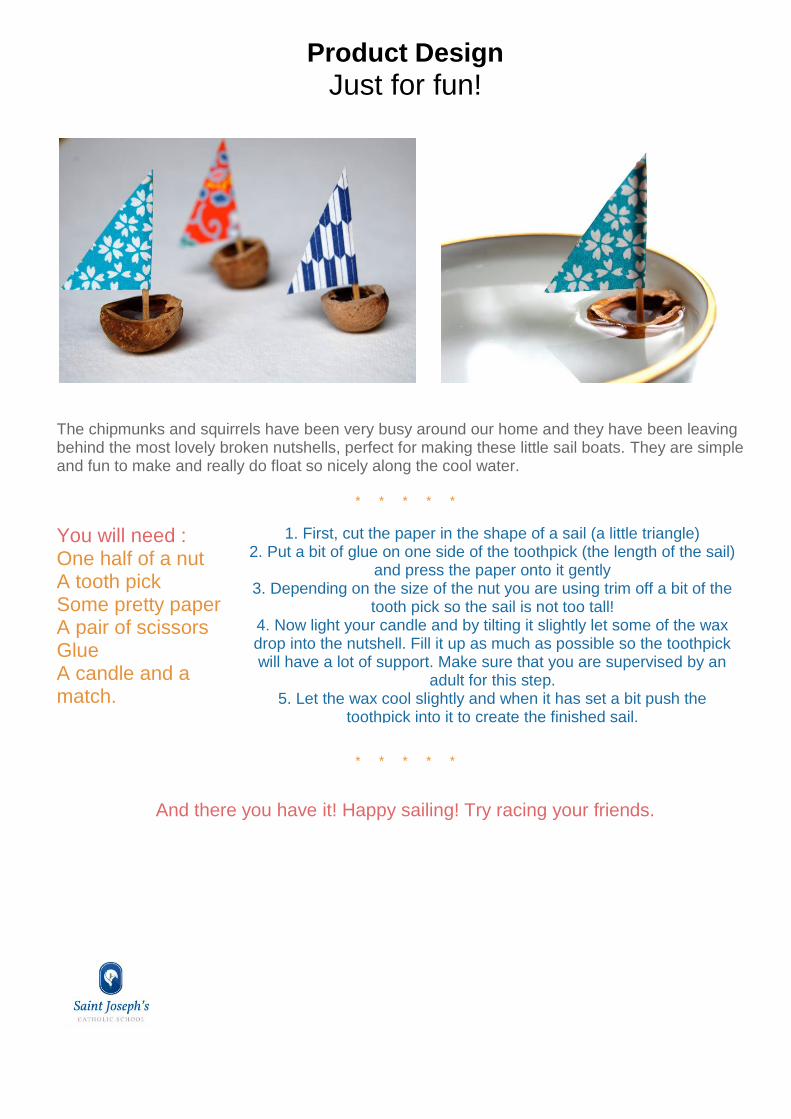
The chipmunks and squirrels have been very busy around our home and they have been leaving behind the most lovely broken nutshells, perfect for making these little sail boats. They are simple and fun to make and really do float so nicely along the cool water.
* * * * *
You will need : One half of a nut A tooth pick Some pretty paper A pair of scissors Glue A candle and a match.
* * * * *
And there you have it! Happy sailing! Try racing your friends.
1. First, cut the paper in the shape of a sail (a little triangle) 2. Put a bit of glue on one side of the toothpick (the length of the sail)
and press the paper onto it gently 3. Depending on the size of the nut you are using trim off a bit of the
tooth pick so the sail is not too tall! 4. Now light your candle and by tilting it slightly let some of the wax drop into the nutshell. Fill it up as much as possible so the toothpick will have a lot of support. Make sure that you are supervised by an
adult for this step. 5. Let the wax cool slightly and when it has set a bit push the
toothpick into it to create the finished sail.

Product Design
Just for fun!

Product Design
Just for fun!
You will need:
Coloured paper and/or an old magazine Wooden frame or corrugated cardboard Scissors Sticky tape Either a quilling tool or a toothpick PVA glue or a hot glue gun Poster or acrylic paint for the frame
Method:
1. If you are making your own frame started by cutting your frame out of the corrugated cardboard.
2. Paint your frame using either poster or acrylic paint.
3. Leave the frame to dry.
4. Using scissors cut the magazine and or coloured paper into 1cm strips.
5. Fold the strips in half lenghways.
6. Wrap the strips around the toothpick or quilling tool to start each roll. Once it is big enough to roll with just your fingers remove the tool.
7. To make larger rolls join the paper strips together using the sticky tape.
8. Secure the end of each roll with a small strip of sticky tape.
9. Create enough rolls of varying sizes to completely cover the frame.
10. To finish, stick the rolls to the frame using PVA or a hot glue gun. If you are using a hot glue gun make sure that you are supervised by an adult.
Product Design
Just for fun!
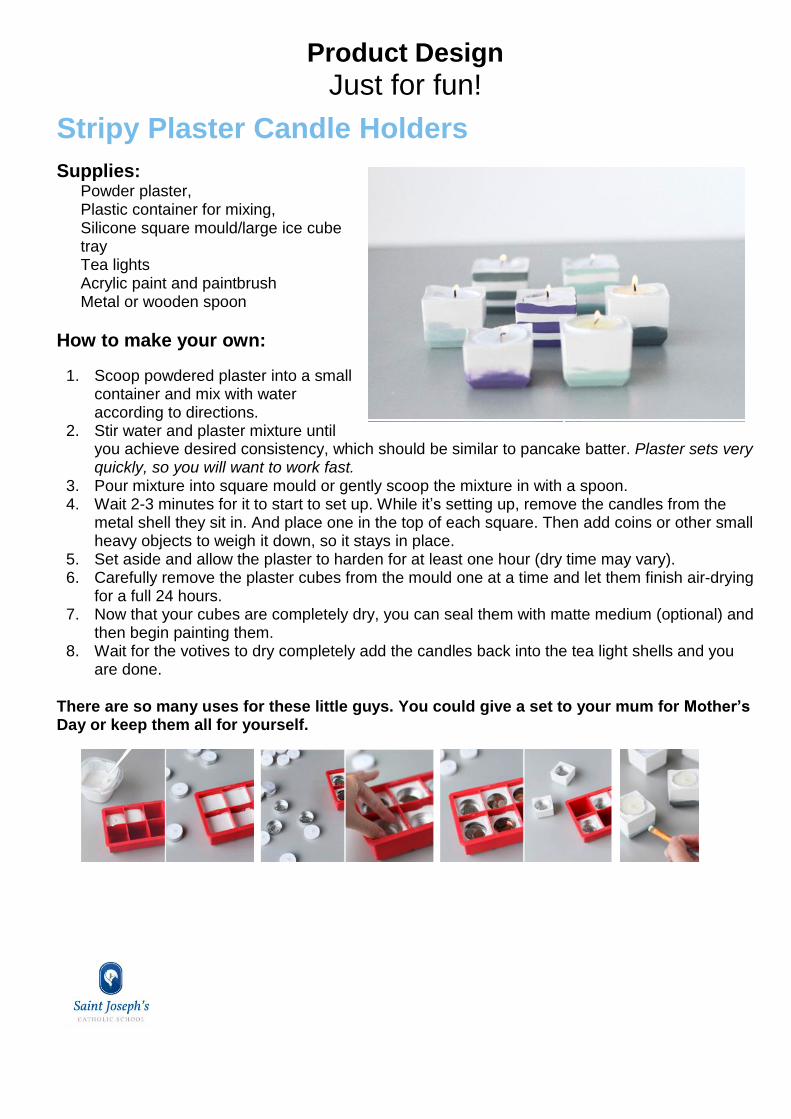
Stripy Plaster Candle Holders
Supplies: Powder plaster, Plastic container for mixing, Silicone square mould/large ice cube tray Tea lights Acrylic paint and paintbrush Metal or wooden spoon
How to make your own:
1. Scoop powdered plaster into a small container and mix with water according to directions.
2. Stir water and plaster mixture until you achieve desired consistency, which should be similar to pancake batter. Plaster sets very quickly, so you will want to work fast.
3. Pour mixture into square mould or gently scoop the mixture in with a spoon. 4. Wait 2-3 minutes for it to start to set up. While it’s setting up, remove the candles from the
metal shell they sit in. And place one in the top of each square. Then add coins or other small heavy objects to weigh it down, so it stays in place.
5. Set aside and allow the plaster to harden for at least one hour (dry time may vary). 6. Carefully remove the plaster cubes from the mould one at a time and let them finish air-drying
for a full 24 hours. 7. Now that your cubes are completely dry, you can seal them with matte medium (optional) and
then begin painting them. 8. Wait for the votives to dry completely add the candles back into the tea light shells and you
are done. There are so many uses for these little guys. You could give a set to your mum for Mother’s Day or keep them all for yourself.