Embed Size (px)
Citation preview
2
SYNDICATION:Trade (max 1)
The ChicagoOutfit
Black Market
Gang Order
Gang rule
Starting Assets
3 2
ARBITRATION:In a Slugging you may ally with a rival Gang. Instead of rolling a die, add your Slugging bonus to theirs. Count the Cost as normal.
Win or lose, retreat to your Clubhouse.
4 1 per Made Man
Unlimited Selling.
2
3
1
0
4START
6 1 4
3Sellup to
2Sellup to
1Sellup to
MadeMen Associates
Must TakeThe Fall.
Gain
Al ‘Scarface’Capone
2 4Associate
1 1
Frank‘The Enforcer’
Nitti
2 2Murray ‘The Camel’
Humphreys
1 4
‘Machine Gun Jack’MCGurn
3 1Tony ‘Joe Batters’
Accardo
2 2
Clout
Associate
1 1
Associate
1 1
Associate
1 1Associate
1 1
SheldonGang
Starting Assets
23
4 1per Made Man
224
HIJACKING:Steal from a rival Gang (max 1)
Gang Order
Gang ruleUNDERCUTTING PRICES:
Gain each time you Trade for other Assets.
MadeMenAssociates
Black MarketUnlimited Selling.
2
3
1
0
4
START
3Sell
up to
2Sell
up to
1Sell
up to
Must TakeThe Fall.
Gain
RalphSheldon
42
Hughey ‘Stubby’MCGovern
41
William ‘Gunner’MCPadden
31Frank ‘Dutch’Carpenter
22Joseph ‘Dynamite’Brooks
31Associate
11
Associate
11
Associate
11
Associate
11Associate
11
Clout
North side
gang
Star
ting As
sets
33
2 1p
er M
ade
Man
42
3
PETT
Y C
RIM
E:G
ain
(m
ax 1
)
Gang O
rder
Gang r
ule
GO
ING
TO
WAR
:Yo
u do
not
nee
d to
disc
ard
an O
rder
to
ken
whe
n yo
u Is
sue
a Fi
ght
for
Loca
tion
Ord
er fo
r a
Slug
ging
.
Mad
eM
enAs
soci
ates
Bla
ck M
arke
tU
nlim
ited
Selli
ng.
23 1 04 START
3Se
llup
to
2Se
llup
to
1Se
llup
to
Mus
t Ta
keTh
e Fa
ll.G
ain
Dean
O’Ban
ion
42
Earl
‘Hym
ie’We
iss
22
Vincent
‘The
Sche
mer’
Druc
ci
22
Geor
ge ‘Bug
s’Mo
ran
31
Louis
‘Two
Gun’
Alterie
41Asso
ciate
11
Clout
Asso
ciate
11
Asso
ciate
11
Asso
ciate
11
Asso
ciate
11
Salt
is-MCE
rla
ne
Gang
Starting Assets
32
3
1 per Made M
an
33
4
HIRED
MU
SCLE:
Trade
(m
ax 1)
Gang Order
Gang ruleO
RGAN
IZED H
IT:W
hen issuing a Fight for Location Order
for a Slugging, you may discard an
additional Order token to prohibit all
Gangs from
Calling for Backup.
Made
Men
Associates
Black M
arke
tU
nlimited
Selling.
2 310 4START
3Sell
up to2Sell
up to1Sell
up to
Must Take
The Fall.G
ain
‘Polack Joe’
Saltis
33
Associate
11
FrankMCErlane
41
John ‘Dingbat’
O’Berta
13
Frank ‘Lefty’
Koncil
31
Charlie ‘Big
Hayes’Hubacek
31
Clout
Associate
11
Associate
11
Associate
11
Associate
11
Gain & Claim Boss of Bosses
City Hall
Talking
STARTING LOCATION
Move all of the Gang’s Injured Members from the Emergency Room to their Clubhouse
ORChoose one Member from any Gang at the Emergency Room and remove them
from play for the rest of the game
City Hospital
Talking
STARTING LOCATION
Trade (max 2)
ORTrade 2 3 (max 1)
Distillery
Slugging
STARTING LOCATION
Place all Injured members here.During Clean Up, roll for each Member here:
1-3: Place Member in Recruit Pool.4-6: Return Member to Clubhouse.
Members cannot Drive to or from here.
Emergency Room
No Slugging or Talking
STARTING LOCATION
Trade (max 2)
ORTrade 2 2 (max 1)
Gun Factory
Slugging
STARTING LOCATION
Election Racket
Opportunity - Slugging
Gain 2 & 2 Every time a GangTrades it loses
Straight Cop
Hassle
All Gangs Gain foreach they have.
Mayoral Election
Last Call
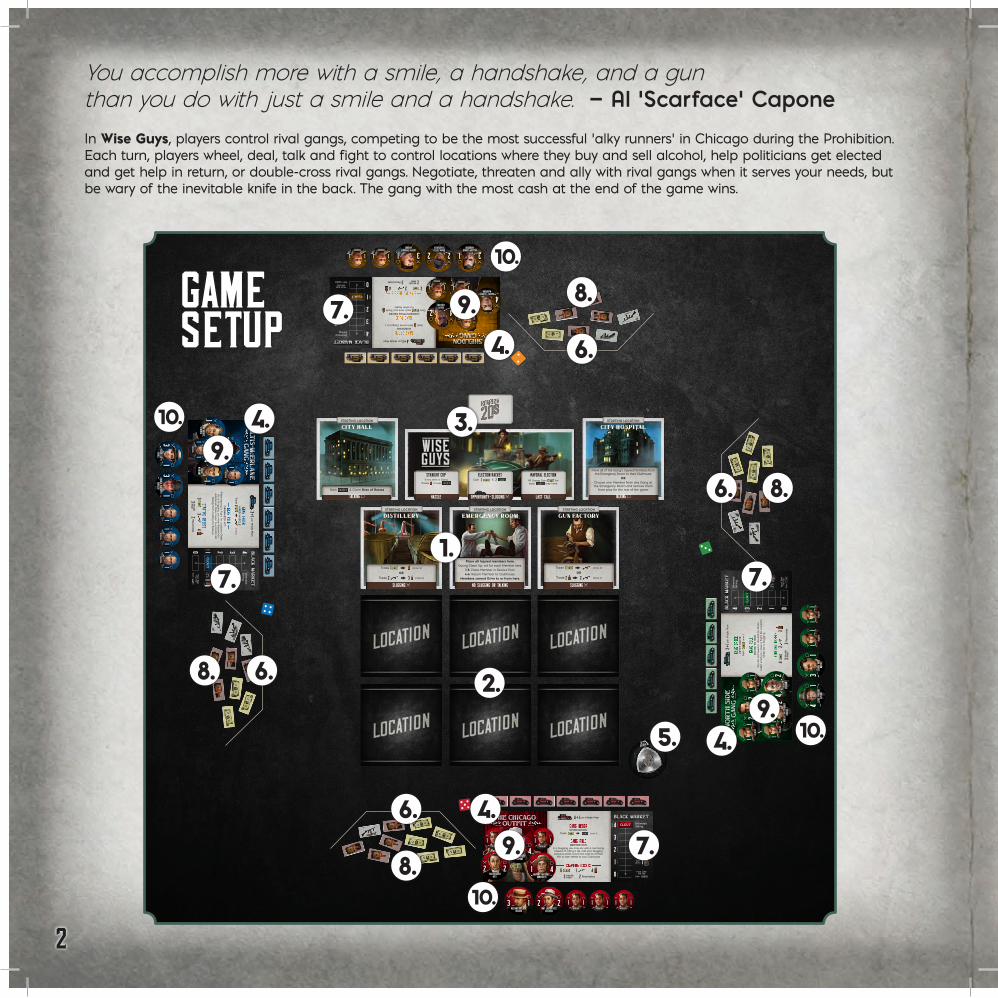
In Wise Guys, players control rival gangs, competing to be the most successful ‘alky runners’ in Chicago during the Prohibition. Each turn, players wheel, deal, talk and fight to control locations where they buy and sell alcohol, help politicians get elected and get help in return, or double-cross rival gangs. Negotiate, threaten and ally with rival gangs when it serves your needs, but be wary of the inevitable knife in the back. The gang with the most cash at the end of the game wins.
You accomplish more with a smile, a handshake, and a gun than you do with just a smile and a handshake. — Al ‘Scarface’ Capone
1.
2.6.
7.
3.4.
8.
9.
5.
10.
GAME SETUP
4.
4.
4.
6.
6.
6.
7.
7.
7.
8.
8.
8.
9.
9.
9.
10.
10.
10.
3
Starting LocationsStarting LocationsThe five Starting Location tiles: City Hall, City Hospital, Emergency Room, Distillery, and Gun Factory, are always set up at the beginning of every game. They are marked Starting Location.
Business LocationsBusiness LocationsThe Business Location tiles in play vary from game to game, with a random selection placed face down at the start of the game. They are marked Location on the back.
Other LocationsOther LocationsAs well as Starting Location and Business Location tiles, Clubhouses and Roaring 20s Opportunity cards are also Locations.
1. PLACE STARTING LOCATIONSPlace the five Starting Location tiles near the center of the table. Their order doesn’t matter.
LOCATION TILESLocation tiles come in two types: Starting Locations and Business Locations. Each Location tile shows the benefit you gain from controlling it (see Exploiting Locations on pg. 10) and how you control it: Slugging or Talking (see Fighting for Locations on pg. 12).
2. PLACE BUSINESS LOCATIONSShuffle the Business Location tiles and place six of them face down on the table. These Business Locations will be revealed as the game progresses. The remaining Business Locations won’t be used in the game and are set aside.
3. BUILD THE ROARING 20s DECKShuffle the Roaring 20s deck and place fifteen cards face down in a pile on the table. The remaining Roaring 20s cards won’t be used in the game and are set aside.
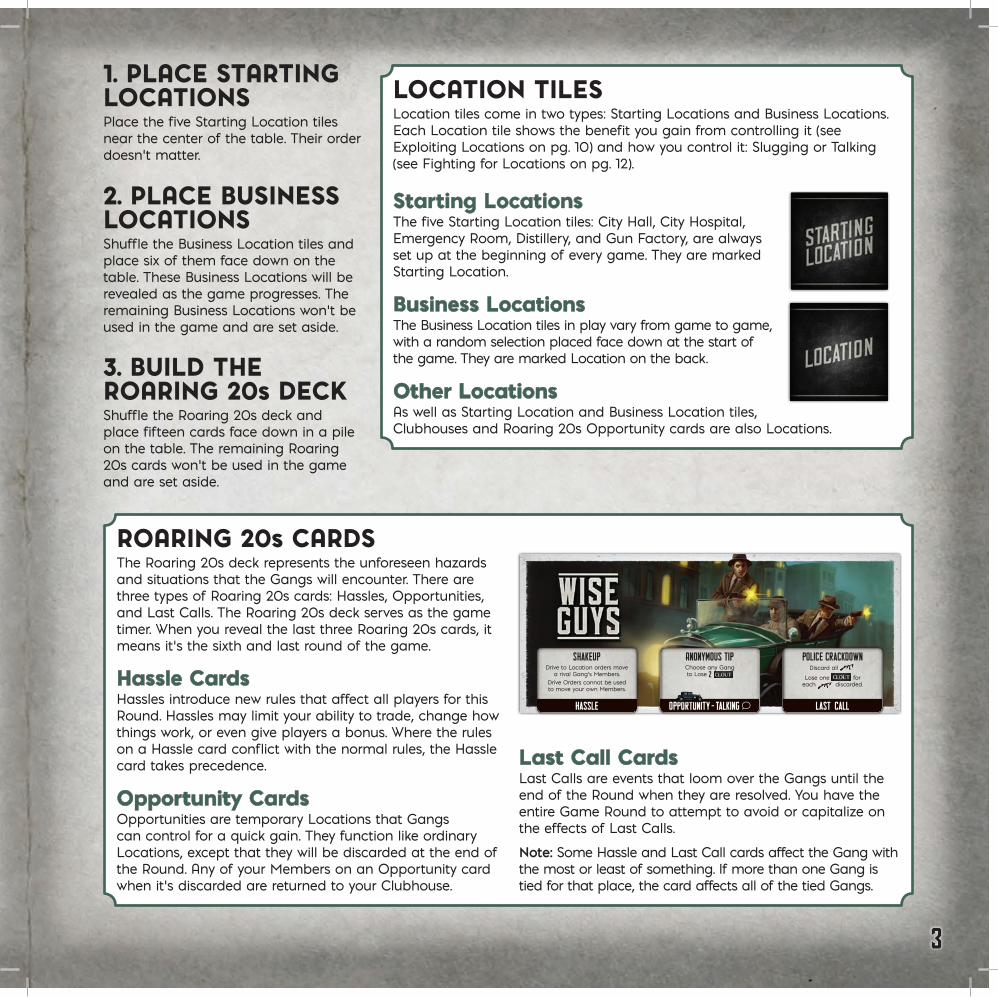
ROARING 20s CARDSThe Roaring 20s deck represents the unforeseen hazards and situations that the Gangs will encounter. There are three types of Roaring 20s cards: Hassles, Opportunities, and Last Calls. The Roaring 20s deck serves as the game timer. When you reveal the last three Roaring 20s cards, it means it’s the sixth and last round of the game.
Hassle CardsHassle CardsHassles introduce new rules that affect all players for this Round. Hassles may limit your ability to trade, change how things work, or even give players a bonus. Where the rules on a Hassle card conflict with the normal rules, the Hassle card takes precedence.
Opportunity CardsOpportunity CardsOpportunities are temporary Locations that Gangs can control for a quick gain. They function like ordinary Locations, except that they will be discarded at the end of the Round. Any of your Members on an Opportunity card when it’s discarded are returned to your Clubhouse.
Last Call CardsLast Call CardsLast Calls are events that loom over the Gangs until the end of the Round when they are resolved. You have the entire Game Round to attempt to avoid or capitalize on the effects of Last Calls.
Note: Some Hassle and Last Call cards affect the Gang with the most or least of something. If more than one Gang is tied for that place, the card affects all of the tied Gangs.
Choose any Gangto Lose 2
Anonymous Tip
Opportunity - Talking
Drive to Location orders move a rival Gang’s Members.
Drive Orders cannot be used to move your own Members.
Shakeup
Hassle
Discard all
Lose one foreach discarded.
Police Crackdown
Last Call
4
4. CHOOSE YOUR GANGEach player rolls a die. The player with the highest result picks which Gang they want to play and takes that Clubhouse card. Proceeding to their left, the other players each pick a Clubhouse card in turn and place it in front of them.
BOSS OF BOSSES TOKENThe Boss of Bosses token marks the Gang with the most power in the syndicate, giving them a tactical advantage over their rivals. The player holding the Boss of Bosses token is called the Boss of Bosses and has two advantages: Leadership and the Power of Arbitration.
Leadership Order Leadership Order Anytime the order of play is important, the Leadership Order applies. The Boss of Bosses goes first, then play passes to their left with each player taking a Turn and passing on to their left until everyone has had a Turn. If the Boss of Bosses changes, everyone has their current Turn, then the Leadership Order changes for the next Round. Leadership Order applies when deciding Turn Order in a Round, when calling for Backup during Fights, and in situations such as resolving some Roaring 20s cards.
GodfatherGodfatherThe Boss of Bosses wins ties when determining victory at the end of the game, and chooses who wins ties in Fights.
Claiming the Boss of BossesClaiming the Boss of BossesYou can claim the Boss of Bosses token in two ways: by Controlling City Hall and issuing an Exploit Location order (see pg. 7), or by beating the Boss of Bosses in a Fight. If you do either of these, take the Boss of Bosses token from its current holder.
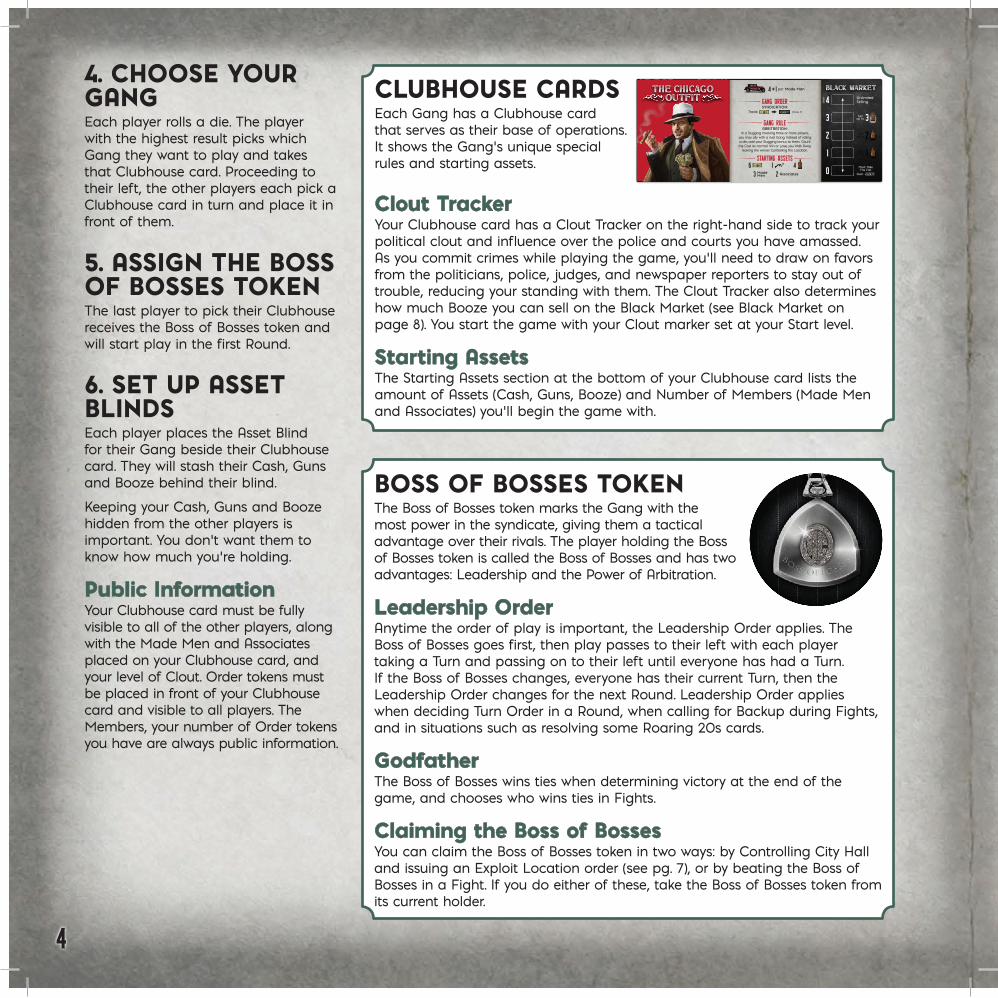
CLUBHOUSE CARDSEach Gang has a Clubhouse card that serves as their base of operations. It shows the Gang’s unique special rules and starting assets.
5. ASSIGN THE BOSS OF BOSSES TOKENThe last player to pick their Clubhouse receives the Boss of Bosses token and will start play in the first Round.
SYNDICATION:Trade (max 1)
The ChicagoOutfit
Black Market
Gang Order
Gang rule
Starting Assets
3 2
ARBITRATION:In a Slugging involving three or more players,
you may ally with a rival Gang. Instead of rolling a die, add your Slugging bonus to theirs. Count the Cost as normal. Win or Lose, you Walk Away,
leaving the winner Controlling the Location.
4 1 per Made Man
Unlimited Selling.
2
3
1
0
4START
6 1 4
3Sellup to
2Sellup to
1Sellup to
MadeMen Associates
Must TakeThe Fall.
Gain
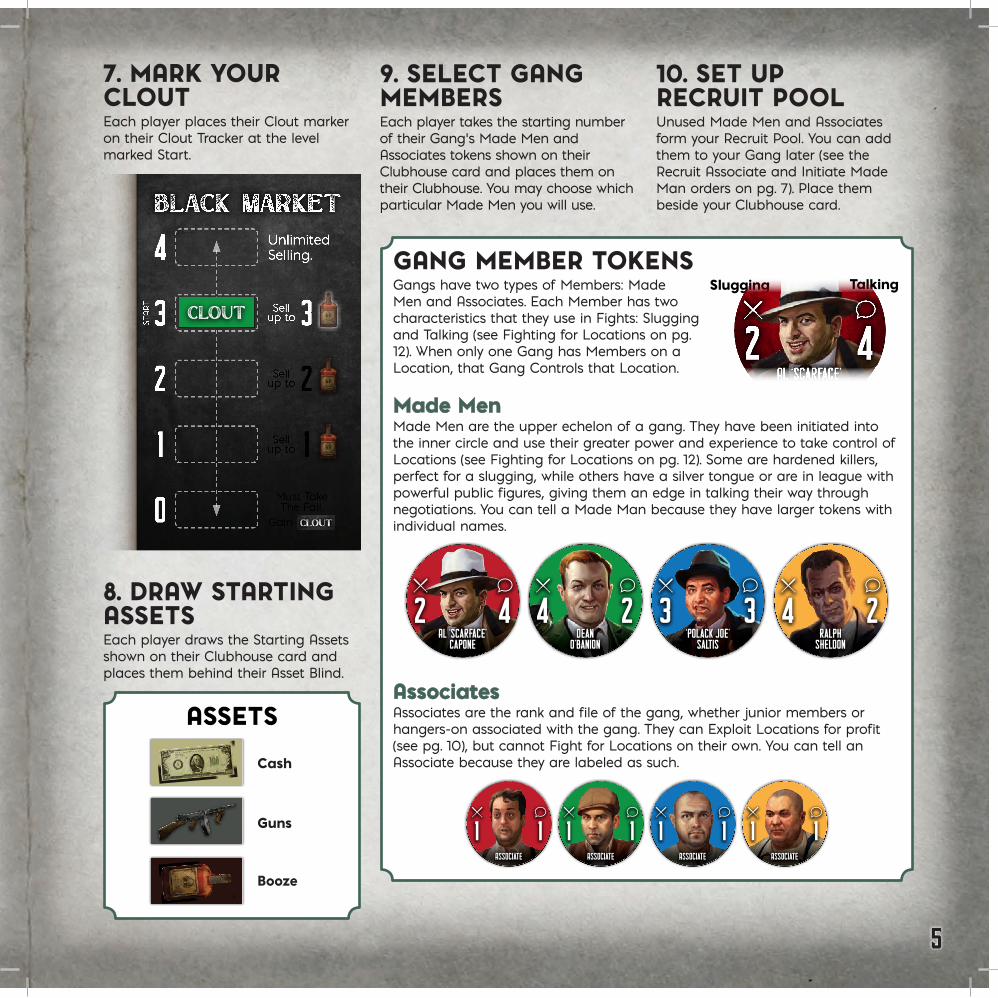
Clout TrackerClout TrackerYour Clubhouse card has a Clout Tracker on the right-hand side to track your political clout and influence over the police and courts you have amassed. As you commit crimes while playing the game, you’ll need to draw on favors from the politicians, police, judges, and newspaper reporters to stay out of trouble, reducing your standing with them. The Clout Tracker also determines how much Booze you can sell on the Black Market (see Black Market on page 8). You start the game with your Clout marker set at your Start level.
Starting AssetsStarting AssetsThe Starting Assets section at the bottom of your Clubhouse card lists the amount of Assets (Cash, Guns, Booze) and Number of Members (Made Men and Associates) you’ll begin the game with.
6. SET UP ASSET BLINDSEach player places the Asset Blind for their Gang beside their Clubhouse card. They will stash their Cash, Guns and Booze behind their blind.
Keeping your Cash, Guns and Booze hidden from the other players is important. You don’t want them to know how much you’re holding.
Public InformationPublic InformationYour Clubhouse card must be fully visible to all of the other players, along with the Made Men and Associates placed on your Clubhouse card, and your level of Clout. Order tokens must be placed in front of your Clubhouse card and visible to all players. The Members, your number of Order tokens you have are always public information.
5
7. MARK YOUR CLOUTEach player places their Clout marker on their Clout Tracker at the level marked Start.
GANG MEMBER TOKENSGangs have two types of Members: Made Men and Associates. Each Member has two characteristics that they use in Fights: Slugging and Talking (see Fighting for Locations on pg. 12). When only one Gang has Members on a Location, that Gang Controls that Location.
Made MenMade MenMade Men are the upper echelon of a gang. They have been initiated into the inner circle and use their greater power and experience to take control of Locations (see Fighting for Locations on pg. 12). Some are hardened killers, perfect for a slugging, while others have a silver tongue or are in league with powerful public figures, giving them an edge in talking their way through negotiations. You can tell a Made Man because they have larger tokens with individual names.
AssociatesAssociatesAssociates are the rank and file of the gang, whether junior members or hangers-on associated with the gang. They can Exploit Locations for profit (see pg. 10), but cannot Fight for Locations on their own. You can tell an Associate because they are labeled as such.
8. DRAW STARTING ASSETSEach player draws the Starting Assets shown on their Clubhouse card and places them behind their Asset Blind.
9. SELECT GANG MEMBERSEach player takes the starting number of their Gang’s Made Men and Associates tokens shown on their Clubhouse card and places them on their Clubhouse. You may choose which particular Made Men you will use.
10. SET UP RECRUIT POOLUnused Made Men and Associates form your Recruit Pool. You can add them to your Gang later (see the Recruit Associate and Initiate Made Man orders on pg. 7). Place them beside your Clubhouse card.
Associate
1 1Associate
1 1Associate
1 1Associate
1 1
Al ‘Scarface’Capone
2 4RalphSheldon
4 2‘Polack Joe’
Saltis
3 3Dean
O’Banion
4 2
Cash
Guns
Booze
North sidegang
Starting Assets
3 3
2 1 per Made Man
4 2 3
PETTY CRIME:Gain (max 1)
Gang Order
Gang ruleGOING TO WAR:
You do not need to discard an Order token when you Issue a Fight for Location
Order for a Slugging.
MadeMen Associates
Black MarketUnlimited Selling.
2
3
1
0
4
STAR
T
3Sellup to
2Sellup to
1Sellup to
Must TakeThe Fall.
Gain
Clout
ASSETS
TalkingSlugging
Al ‘Scarface’Capone
2 4Al ‘Scarface’
Capone
2 4
6
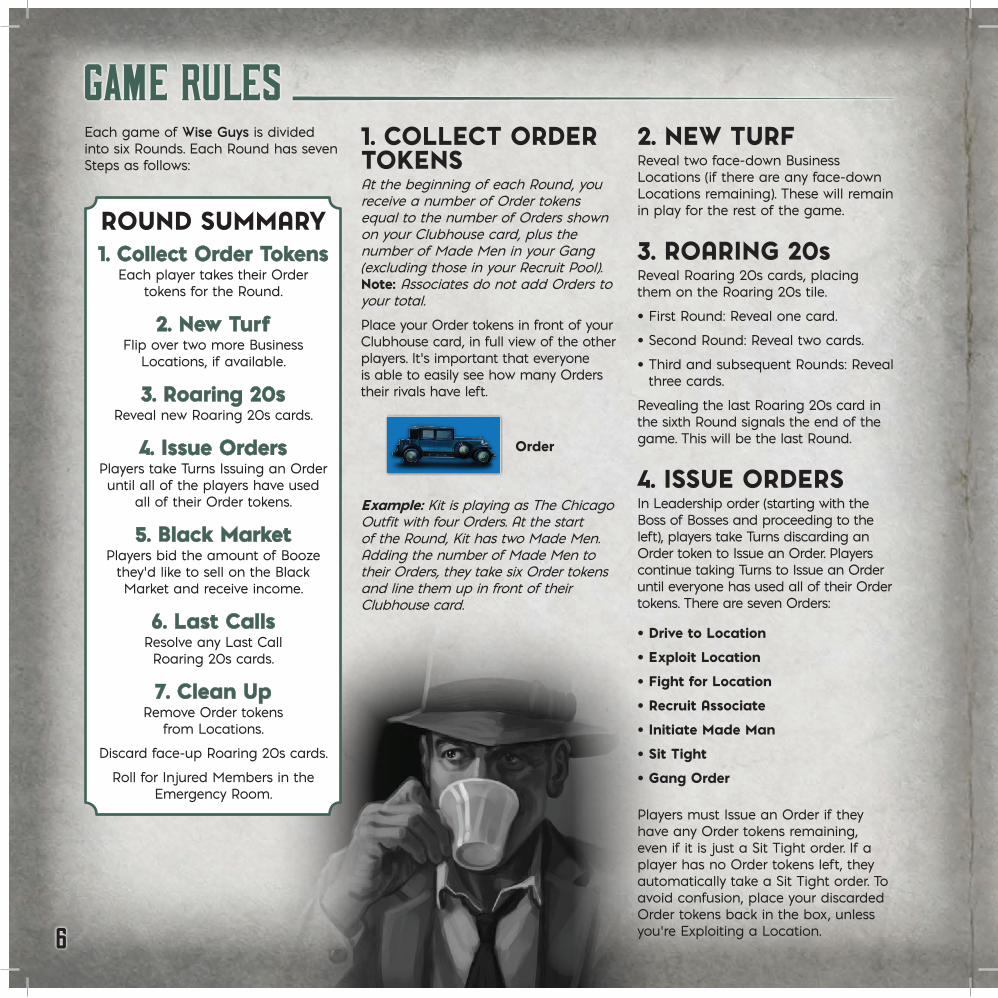
GAME RULES1. COLLECT ORDER TOKENSAt the beginning of each Round, you receive a number of Order tokens equal to the number of Orders shown on your Clubhouse card, plus the number of Made Men in your Gang (excluding those in your Recruit Pool). Note: Associates do not add Orders to your total.Place your Order tokens in front of your Clubhouse card, in full view of the other players. It’s important that everyone is able to easily see how many Orders their rivals have left.
ROUND SUMMARY1. Collect Order Tokens1. Collect Order Tokens
Each player takes their Order tokens for the Round.
2. New Turf2. New TurfFlip over two more Business
Locations, if available.
3. Roaring 20s3. Roaring 20sReveal new Roaring 20s cards.
4. Issue Orders4. Issue OrdersPlayers take Turns Issuing an Order until all of the players have used
all of their Order tokens.
5. Black Market5. Black MarketPlayers bid the amount of Booze
they’d like to sell on the Black Market and receive income.
6. Last Calls6. Last CallsResolve any Last Call Roaring 20s cards.
7. Clean Up 7. Clean Up Remove Order tokens
from Locations.
Discard face-up Roaring 20s cards.
Roll for Injured Members in the Emergency Room.
Each game of Wise Guys is divided into six Rounds. Each Round has seven Steps as follows:
Example: Kit is playing as The Chicago Outfit with four Orders. At the start of the Round, Kit has two Made Men. Adding the number of Made Men to their Orders, they take six Order tokens and line them up in front of their Clubhouse card.
3. ROARING 20sReveal Roaring 20s cards, placing them on the Roaring 20s tile.
• First Round: Reveal one card.
• Second Round: Reveal two cards.
• Third and subsequent Rounds: Reveal three cards.
Revealing the last Roaring 20s card in the sixth Round signals the end of the game. This will be the last Round.
2. NEW TURFReveal two face-down Business Locations (if there are any face-down Locations remaining). These will remain in play for the rest of the game.
4. ISSUE ORDERSIn Leadership order (starting with the Boss of Bosses and proceeding to the left), players take Turns discarding an Order token to Issue an Order. Players continue taking Turns to Issue an Order until everyone has used all of their Order tokens. There are seven Orders:
Players must Issue an Order if they have any Order tokens remaining, even if it is just a Sit Tight order. If a player has no Order tokens left, they automatically take a Sit Tight order. To avoid confusion, place your discarded Order tokens back in the box, unless you’re Exploiting a Location.
• Drive to Location
• Exploit Location
• Fight for Location
• Recruit Associate
• Initiate Made Man
• Sit Tight
• Gang Order
Order
7
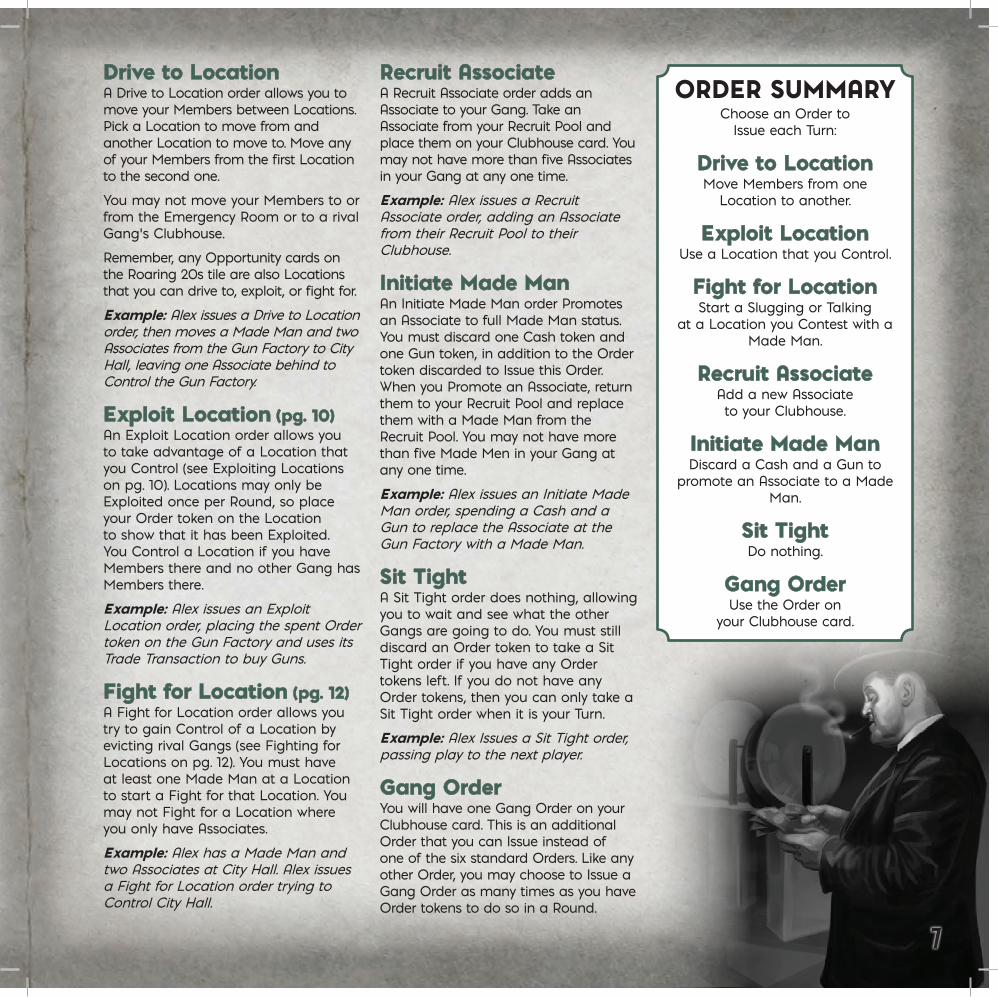
ORDER SUMMARYChoose an Order to
Issue each Turn:
Drive to LocationDrive to LocationMove Members from one
Location to another.
Exploit LocationExploit LocationUse a Location that you Control.
Fight for LocationFight for LocationStart a Slugging or Talking
at a Location you Contest with a Made Man.
Recruit AssociateRecruit AssociateAdd a new Associate to your Clubhouse.
Initiate Made ManInitiate Made ManDiscard a Cash and a Gun to
promote an Associate to a Made Man.
Sit TightSit TightDo nothing.
Gang OrderGang OrderUse the Order on
your Clubhouse card.
Drive to LocationDrive to LocationA Drive to Location order allows you to move your Members between Locations. Pick a Location to move from and another Location to move to. Move any of your Members from the first Location to the second one.
You may not move your Members to or from the Emergency Room or to a rival Gang’s Clubhouse.
Remember, any Opportunity cards on the Roaring 20s tile are also Locations that you can drive to, exploit, or fight for.
Example: Alex issues a Drive to Location order, then moves a Made Man and two Associates from the Gun Factory to City Hall, leaving one Associate behind to Control the Gun Factory.
Exploit LocationExploit Location (pg. 10) (pg. 10)An Exploit Location order allows you to take advantage of a Location that you Control (see Exploiting Locations on pg. 10). Locations may only be Exploited once per Round, so place your Order token on the Location to show that it has been Exploited. You Control a Location if you have Members there and no other Gang has Members there.
Example: Alex issues an Exploit Location order, placing the spent Order token on the Gun Factory and uses its Trade Transaction to buy Guns.
Fight for LocationFight for Location (pg. 12) (pg. 12)A Fight for Location order allows you try to gain Control of a Location by evicting rival Gangs (see Fighting for Locations on pg. 12). You must have at least one Made Man at a Location to start a Fight for that Location. You may not Fight for a Location where you only have Associates.
Example: Alex has a Made Man and two Associates at City Hall. Alex issues a Fight for Location order trying to Control City Hall.
Recruit AssociateRecruit AssociateA Recruit Associate order adds an Associate to your Gang. Take an Associate from your Recruit Pool and place them on your Clubhouse card. You may not have more than five Associates in your Gang at any one time.
Example: Alex issues a Recruit Associate order, adding an Associate from their Recruit Pool to their Clubhouse.
Initiate Made ManInitiate Made ManAn Initiate Made Man order Promotes an Associate to full Made Man status. You must discard one Cash token and one Gun token, in addition to the Order token discarded to Issue this Order. When you Promote an Associate, return them to your Recruit Pool and replace them with a Made Man from the Recruit Pool. You may not have more than five Made Men in your Gang at any one time.
Example: Alex issues an Initiate Made Man order, spending a Cash and a Gun to replace the Associate at the Gun Factory with a Made Man.
Sit TightSit TightA Sit Tight order does nothing, allowing you to wait and see what the other Gangs are going to do. You must still discard an Order token to take a Sit Tight order if you have any Order tokens left. If you do not have any Order tokens, then you can only take a Sit Tight order when it is your Turn.
Example: Alex Issues a Sit Tight order, passing play to the next player.
Gang OrderGang OrderYou will have one Gang Order on your Clubhouse card. This is an additional Order that you can Issue instead of one of the six standard Orders. Like any other Order, you may choose to Issue a Gang Order as many times as you have Order tokens to do so in a Round.
8
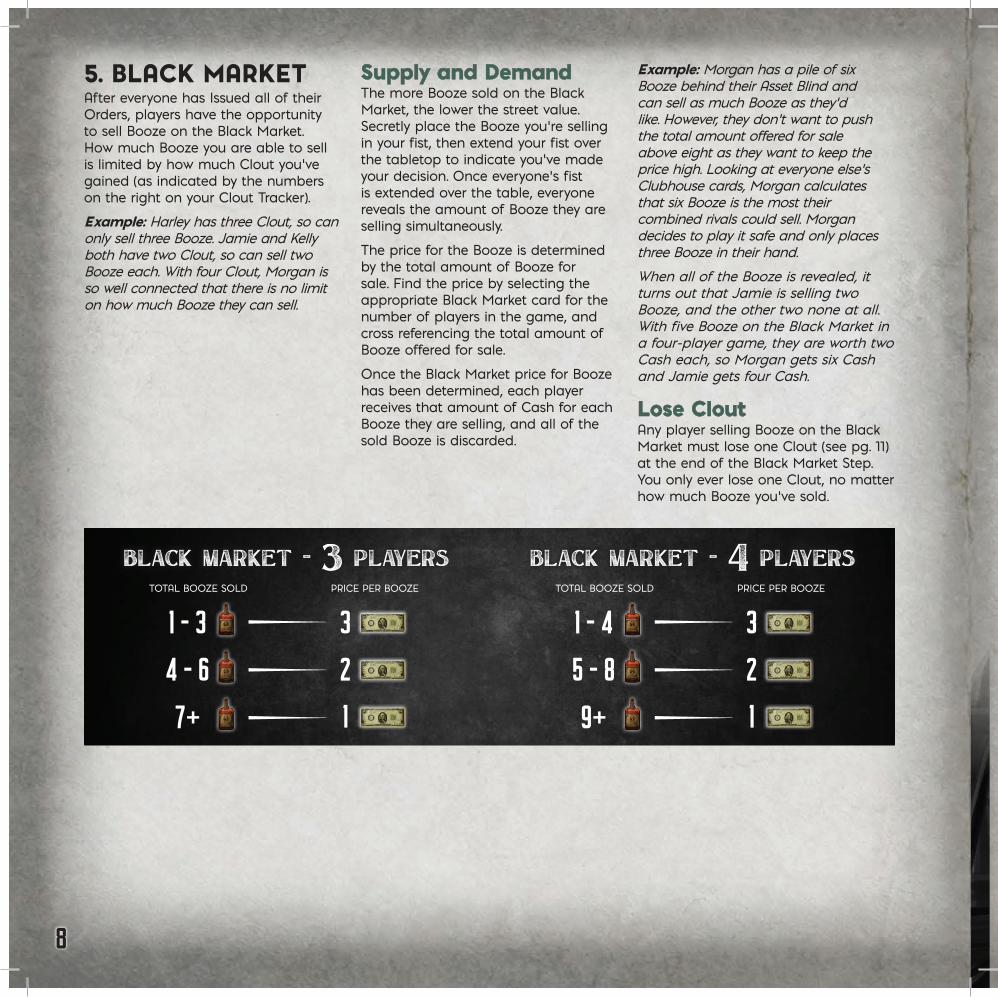
5. BLACK MARKETAfter everyone has Issued all of their Orders, players have the opportunity to sell Booze on the Black Market. How much Booze you are able to sell is limited by how much Clout you’ve gained (as indicated by the numbers on the right on your Clout Tracker).
Example: Harley has three Clout, so can only sell three Booze. Jamie and Kelly both have two Clout, so can sell two Booze each. With four Clout, Morgan is so well connected that there is no limit on how much Booze they can sell.
Supply and DemandSupply and DemandThe more Booze sold on the Black Market, the lower the street value. Secretly place the Booze you’re selling in your fist, then extend your fist over the tabletop to indicate you’ve made your decision. Once everyone’s fist is extended over the table, everyone reveals the amount of Booze they are selling simultaneously.
The price for the Booze is determined by the total amount of Booze for sale. Find the price by selecting the appropriate Black Market card for the number of players in the game, and cross referencing the total amount of Booze offered for sale.
Once the Black Market price for Booze has been determined, each player receives that amount of Cash for each Booze they are selling, and all of the sold Booze is discarded.
Example: Morgan has a pile of six Booze behind their Asset Blind and can sell as much Booze as they’d like. However, they don’t want to push the total amount offered for sale above eight as they want to keep the price high. Looking at everyone else’s Clubhouse cards, Morgan calculates that six Booze is the most their combined rivals could sell. Morgan decides to play it safe and only places three Booze in their hand.When all of the Booze is revealed, it turns out that Jamie is selling two Booze, and the other two none at all. With five Booze on the Black Market in a four-player game, they are worth two Cash each, so Morgan gets six Cash and Jamie gets four Cash.
Lose CloutLose CloutAny player selling Booze on the Black Market must lose one Clout (see pg. 11) at the end of the Black Market Step. You only ever lose one Clout, no matter how much Booze you’ve sold.
Black Market - 3 players
1 - 3
4 - 6
7+
TOTAL BOOZE SOLD PRICE PER BOOZE
3
2
1
Black Market - 4 players
1 - 4
5 - 8
9+
TOTAL BOOZE SOLD PRICE PER BOOZE
3
2
1
9
6. LAST CALLSAfter the Black Market Step is over and everyone has stashed their ill-gotten Cash behind their Asset Blinds, resolve any Last Call Roaring 20s cards in the order they were drawn. Some Last Call cards affect the Gang with the most or least of something, often Clout. If more than one Gang is tied for the highest/lowest of something, the card affects all of the tied Gangs.
The Gang with the least must have a Made
Man Take the Fall.
Indictment
Last CallExample: The Roaring 20s card Indictment is in play. It is a Last Call card that requires the Gang with the least Clout to have one of their Made Men Take the Fall. When it’s time to resolve the card, Oakley and Paris are tied at one Clout, Phoenix has two Clout and Reagan has four Clout. Oakley and Paris both have to Take the Fall, losing a Made Man from their Gang.
7. CLEAN UPAt the end of every Game Round, there’s a few things to do to get the game ready for the next Round:
• Clear all Order tokens off Exploited Locations and Opportunity cards.
• Return Members on Opportunity cards to their Clubhouse.
• Discard all revealed Roaring 20s cards.
• Check on Injured Members in the Emergency Room.
The Emergency RoomThe Emergency RoomRoll for each Member in the Emergency Room at the end of each Round to see whether they are placed in the Recruit Pool or return to their Clubhouse. The Round will always end with an empty Emergency Room.
Note: You cannot move Members to or from the Emergency Room with a Drive to Location order.
Ready for the Ready for the Next OpportunityNext OpportunityMembers on Starting and Business Locations stay where they are at the end of the Round. Only Members on Roaring 20s Opportunity cards are returned to their Clubhouse, so moving your Members into a good position to begin the next Round is key!
WINNING THE GAMEThe game ends after the sixth Round. You know you’re in the final Round when you reveal the last of the Roaring 20s cards.
At the end of the final Round, all the players lift their Asset Blinds and reveal their hidden assets. The player with the most Cash is the winner!
In the event of a tie, if one of the tied players is the Boss of Bosses, they win. Otherwise, the player with the most Guns wins. If the Guns are also tied, the tied Gangs Fight a Slugging. Each player rolls a die and adds the Slugging bonuses for all their Made Men and Associates, regardless of where their Members are. The winner of that final Fight wins the game.
A SMILE AND A HANDSHAKEMaking DealsMaking DealsYou may trade Cash, Guns, and Booze with other players at any time for any reason. Trying to manipulate the other Gangs for your personal advantage is part of the game. Be warned! Talk is cheap. You must trade the assets you promised now, but promises to do things in the future are not binding. If you promised to deliver assets immediately the deal is made, you must do so, but promises to do things further in future are not binding.
No DealNo DealYou cannot trade Orders, Clout, or Members to other players
Sporting PlaySporting PlayDon’t be an ass. We play games to have a good time. If you’re being an ass, your friends aren’t having fun. Remember, it’s only a game.
Blood feuds end when the game does!
10
Labor Slugging
Opportunity - Slugging
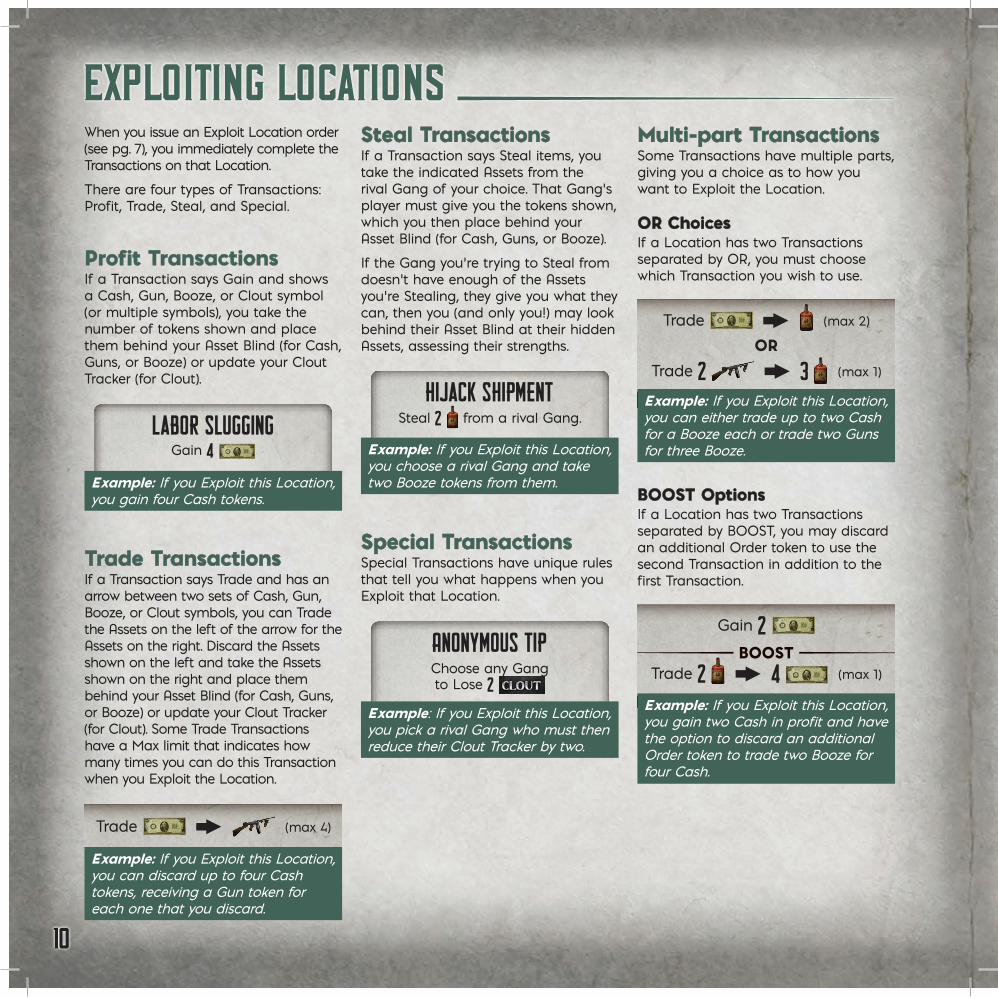
Gain 4
EXPLOITING LOCATIONSWhen you issue an Exploit Location order (see pg. 7), you immediately complete the Transactions on that Location.
There are four types of Transactions: Profit, Trade, Steal, and Special.
Profit TransactionsProfit TransactionsIf a Transaction says Gain and shows a Cash, Gun, Booze, or Clout symbol (or multiple symbols), you take the number of tokens shown and place them behind your Asset Blind (for Cash, Guns, or Booze) or update your Clout Tracker (for Clout).
Example: If you Exploit this Location, you gain four Cash tokens.
Slugging
Hawthorne Smoke Shop
Trade (max 4)
Trade TransactionsTrade TransactionsIf a Transaction says Trade and has an arrow between two sets of Cash, Gun, Booze, or Clout symbols, you can Trade the Assets on the left of the arrow for the Assets on the right. Discard the Assets shown on the left and take the Assets shown on the right and place them behind your Asset Blind (for Cash, Guns, or Booze) or update your Clout Tracker (for Clout). Some Trade Transactions have a Max limit that indicates how many times you can do this Transaction when you Exploit the Location.
Example: If you Exploit this Location, you can discard up to four Cash tokens, receiving a Gun token for each one that you discard.
Steal TransactionsSteal TransactionsIf a Transaction says Steal items, you take the indicated Assets from the rival Gang of your choice. That Gang’s player must give you the tokens shown, which you then place behind your Asset Blind (for Cash, Guns, or Booze).
If the Gang you’re trying to Steal from doesn’t have enough of the Assets you’re Stealing, they give you what they can, then you (and only you!) may look behind their Asset Blind at their hidden Assets, assessing their strengths.
Steal 2 from a rival Gang.Hijack Shipment
Opportunity - Slugging
Example: If you Exploit this Location, you choose a rival Gang and take two Booze tokens from them.
Special TransactionsSpecial TransactionsSpecial Transactions have unique rules that tell you what happens when you Exploit that Location.
Multi-part TransactionsMulti-part TransactionsSome Transactions have multiple parts, giving you a choice as to how you want to Exploit the Location.
OR ChoicesOR ChoicesIf a Location has two Transactions separated by OR, you must choose which Transaction you wish to use.
Choose any Gangto Lose 2
Anonymous Tip
Opportunity - Talking
Example: If you Exploit this Location, you pick a rival Gang who must then reduce their Clout Tracker by two.
BOOST OptionsBOOST OptionsIf a Location has two Transactions separated by BOOST, you may discard an additional Order token to use the second Transaction in addition to the first Transaction.
Cotton Club
Slugging
Gain 2 BOOST
Trade 2 4 (max 1)
Example: If you Exploit this Location, you gain two Cash in profit and have the option to discard an additional Order token to trade two Booze for four Cash.
Trade (max 2)
ORTrade 2 3 (max 1)
Distillery
Slugging
STARTING LOCATION
Example: If you Exploit this Location, you can either trade up to two Cash for a Booze each or trade two Guns for three Booze.
11
LOSE
Trade 2 & 3 (max 2)
Slugging
Minerva Athletics Club
BOOSTGain
Example: If you Exploit this Location, you immediately reduce your Clout by one.
CLOUTClout represents your ability to have Chicago’s politicians, police, and judges take your side in disputes. The more Clout you have, the more likely you will get your way.
No More than Four CloutNo More than Four CloutYou can never have more than four Clout, so ignore any additional Clout that you gain.
Running Out of CloutRunning Out of CloutIf you ever run out of Clout, you must immediately choose one of your Made Men to Take the Fall for you in place of losing any further Clout. After your Made Man Takes the Fall, you return to having one Clout.
Taking the FallTaking the FallWhen you have to Take the Fall, you must choose one of your Made Men and return them to your Recruit Pool. You may choose a Made Man in the Emergency Room to Take the Fall.
Buying Off the JudgeBuying Off the JudgeIf you have to Take the Fall and still have at least three Clout, you can reduce your Clout Tracker by two instead of Taking the Fall.
It’s All Over for YouIt’s All Over for YouIf you must Take the Fall but have no Made Men in your Gang, there’s no one left to blame and your Gang is disbanded and you’re out of the game. It’s a good idea to make sure you always have at least one Made Man available, should you need a scapegoat!
‘Hot’ Locations‘Hot’ LocationsSome Locations are ‘Hot’ and Exploiting them will attract unwanted attention and lose you Clout. You immediately reduce your Clout Tracker by the indicated amount of Clout when you Exploit that Location.
Modifying TransactionsModifying TransactionsSome Roaring 20s Hassle cards and Clubhouse rules modify specific types of Transactions. Some cards prevent Trading in specific Assets, in which case players cannot use a Transaction in which they trade that Asset for other items. However, they can still Trade other Assets for that Asset. Other cards give a bonus each time a certain Transaction is carried out.
Example: The Crackdown Hassle card says that Gangs may not Trade Booze, so for this Round, Gangs cannot sell Booze for other Assets, but they can still get Booze as profit or trade other Assets for Booze.Example: The Sheldon Gang’s Undercutting Prices rule says that they Gain Cash each time they Trade Booze. If they Exploited the Club Morton, and traded two Booze for six Cash, they would gain an extra Cash on top for having traded Booze.
12
FIGHTING FOR LOCATIONS
FIGHT FOR A LOCATIONYou can Issue a Fight for Location order (see pg. 7) at a Contested Location that contains at least one of your Made Men (you cannot issue a Fight for Location order if you only have Associates there).
There are four steps to resolving a Fight:
1. Call for Backup
2. Pull Guns (only if it’s a Slugging)
3. Win or Walk Away
4. Count the Cost (only if it’s a Slugging)
Contesting a LocationContesting a LocationA Location is Contested if two or more Gangs have Members there. While it is Contested, none of the Gangs can Exploit that Location.
Controlling a LocationControlling a LocationA Location is Controlled by a Gang that has members there when no other Gang has Members there.
There are two ways to take Control of a Location: you can arrange a Slugging of the opposition, or you can try some clever Talking to outmaneuver them. Each Location tells you which type of fight you need to win to take Control of that Location.
Trade (max 2)
ORTrade 2 3 (max 1)
Distillery
Slugging
STARTING LOCATION
Gain & Claim Boss of Bosses
City Hall
Talking
STARTING LOCATION
1. Call for Backup1. Call for BackupStarting with the player to the left of the player who Issued the Fight for Location order and proceeding leftwards back around to that player, each Gang with Members at the Location of the Fight must decide whether or not to Call for Backup, bringing reinforcements to the Location of the Fight.
If you want to Call for Backup, pick any Locations and move any or all Members at those Locations to the Location of the Fight. You must discard an Order token for each Location providing Backup. You must make all your Backup moves now, as this is your only chance. Play then passes to the next player to your left that has Members at the Fight’s Location.
Note: Calling for Backup can only be used to add Members to a Fight. You can never remove them from a Fight.
Example: Brook discards an Order token to Issue a Fight for Location order at the Downtown Docks. Both Angel and Cody have members at that Location. Angel is to Brook’s left, so they have to decide whether to Call for Backup first. Angel decides that they really want to hold the Location and discards two Order tokens to move Members from two different Locations to the Downtown Docks. Cody is next, but decides that the Location isn’t worth losing more Members for, and doesn’t Call for Backup. Then Brook spends an Order token to move more Members from their Clubhouse to the Downtown Docks.
2. Pull Guns 2. Pull Guns (Slugging Only)(Slugging Only)After all the players have decided whether or not to Call for Backup, everyone in a Slugging must decide how many Guns they’re bringing to the fight. Skip this step if the Fight is about Talking.
Players with Members Contesting the Location of the Fight secretly select how many Guns they want to Pull in the Slugging. They conceal them in their fists, then place their fists over the tabletop. When all players have extended their closed fists over the table, they reveal their Guns simultaneously.
You do not have to Pull Guns. You may choose to reveal an empty fist. You may not use more Guns than you have Members in the fight. Since all Guns used in the Fight will be discarded at the end when the winner is determined, bluffing is sometimes the best strategy. Even if you’re not bringing Guns to the Fight, you usually don’t want your rivals to know you’re coming empty-handed!
Example: This is a Slugging and Angel really wants to get Control of the Downtown Docks. They have four Guns behind their Blind, but only three Members at the Location, so decide to Pull their maximum of three Guns. Brook only has one Gun behind their Blind, but feels that they need to use it to have a chance. Cody doesn’t want to use any resources in this Fight, so doesn’t Pull any Guns, extending an empty fist. They all put the Guns they’re using in their hands, then extend their fists with the Guns inside over the table. Bang!
13
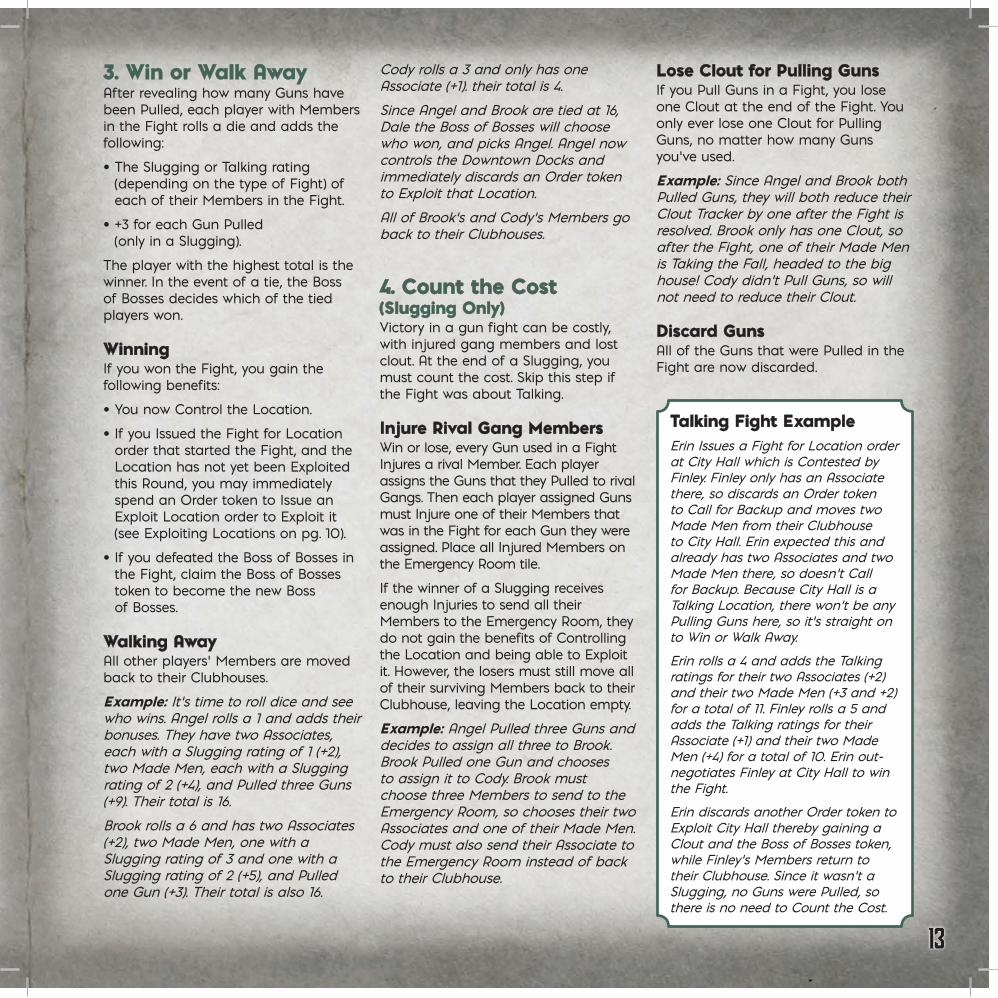
3. Win or Walk Away3. Win or Walk AwayAfter revealing how many Guns have been Pulled, each player with Members in the Fight rolls a die and adds the following:
• The Slugging or Talking rating (depending on the type of Fight) of each of their Members in the Fight.
• +3 for each Gun Pulled (only in a Slugging).
The player with the highest total is the winner. In the event of a tie, the Boss of Bosses decides which of the tied players won.
WinningWinningIf you won the Fight, you gain the following benefits:
• You now Control the Location.
• If you Issued the Fight for Location order that started the Fight, and the Location has not yet been Exploited this Round, you may immediately spend an Order token to Issue an Exploit Location order to Exploit it (see Exploiting Locations on pg. 10).
• If you defeated the Boss of Bosses in the Fight, claim the Boss of Bosses token to become the new Boss of Bosses.
Walking AwayWalking AwayAll other players’ Members are moved back to their Clubhouses.
Example: It’s time to roll dice and see who wins. Angel rolls a 1 and adds their bonuses. They have two Associates, each with a Slugging rating of 1 (+2), two Made Men, each with a Slugging rating of 2 (+4), and Pulled three Guns (+9). Their total is 16.Brook rolls a 6 and has two Associates (+2), two Made Men, one with a Slugging rating of 3 and one with a Slugging rating of 2 (+5), and Pulled one Gun (+3). Their total is also 16.
4. Count the Cost 4. Count the Cost (Slugging Only)(Slugging Only)Victory in a gun fight can be costly, with injured gang members and lost clout. At the end of a Slugging, you must count the cost. Skip this step if the Fight was about Talking.
Injure Rival Gang MembersInjure Rival Gang MembersWin or lose, every Gun used in a Fight Injures a rival Member. Each player assigns the Guns that they Pulled to rival Gangs. Then each player assigned Guns must Injure one of their Members that was in the Fight for each Gun they were assigned. Place all Injured Members on the Emergency Room tile.
If the winner of a Slugging receives enough Injuries to send all their Members to the Emergency Room, they do not gain the benefits of Controlling the Location and being able to Exploit it. However, the losers must still move all of their surviving Members back to their Clubhouse, leaving the Location empty.
Example: Angel Pulled three Guns and decides to assign all three to Brook. Brook Pulled one Gun and chooses to assign it to Cody. Brook must choose three Members to send to the Emergency Room, so chooses their two Associates and one of their Made Men. Cody must also send their Associate to the Emergency Room instead of back to their Clubhouse.
Lose Clout for Pulling GunsLose Clout for Pulling GunsIf you Pull Guns in a Fight, you lose one Clout at the end of the Fight. You only ever lose one Clout for Pulling Guns, no matter how many Guns you’ve used.
Example: Since Angel and Brook both Pulled Guns, they will both reduce their Clout Tracker by one after the Fight is resolved. Brook only has one Clout, so after the Fight, one of their Made Men is Taking the Fall, headed to the big house! Cody didn’t Pull Guns, so will not need to reduce their Clout.
Discard GunsDiscard GunsAll of the Guns that were Pulled in the Fight are now discarded.
Cody rolls a 3 and only has one Associate (+1). their total is 4.Since Angel and Brook are tied at 16, Dale the Boss of Bosses will choose who won, and picks Angel. Angel now controls the Downtown Docks and immediately discards an Order token to Exploit that Location.All of Brook’s and Cody’s Members go back to their Clubhouses.
Talking Fight ExampleTalking Fight ExampleErin Issues a Fight for Location order at City Hall which is Contested by Finley. Finley only has an Associate there, so discards an Order token to Call for Backup and moves two Made Men from their Clubhouse to City Hall. Erin expected this and already has two Associates and two Made Men there, so doesn’t Call for Backup. Because City Hall is a Talking Location, there won’t be any Pulling Guns here, so it’s straight on to Win or Walk Away.
Erin rolls a 4 and adds the Talking ratings for their two Associates (+2) and their two Made Men (+3 and +2) for a total of 11. Finley rolls a 5 and adds the Talking ratings for their Associate (+1) and their two Made Men (+4) for a total of 10. Erin out-negotiates Finley at City Hall to win the Fight.
Erin discards another Order token to Exploit City Hall thereby gaining a Clout and the Boss of Bosses token, while Finley’s Members return to their Clubhouse. Since it wasn’t a Slugging, no Guns were Pulled, so there is no need to Count the Cost.
14
HARD LIQUOR
Beer WarBeer WarDespite attempts to peacefully divide territories between the gangs, open warfare broke out whenever a gang got greedy.Before you build the Roaring 20s deck during Setup, find the Gang War Roaring 20s Card from the deck and set it face up next to where you’ll place the Roaring 20s deck. The rules for the Gang War card are in effect for the entirety of the game in addition to the normally-revealed Roaring 20s cards.
BombingBombingOne popular solution to taking a competitor out of business is to simply bomb their premises — problem solved.At the beginning of each Round, the Boss of Bosses may discard one Gun to choose a Starting (other than the City Hall, the City Hospital, and the Emergency Room) or a revealed Business Location and remove it from play. Members on the removed Location are returned to their Clubhouse. Replace the bombed Location with a new Business Location randomly drawn from the unused Location. Reveal the new Location immediately.
Crime PaysCrime PaysJust because it’s illegal doesn’t mean that the politicians won’t back you for a cut of the action. Whenever you lose a Clout, gain two Cash.
Machine-gun MassacreMachine-gun MassacreThe Thompson machine-gun brought a whole new level of lethality to gang warfare, pumping dozens of rounds into the target at close range.When setting up the game, don’t use the City Hospital Location.
OPTIONAL RULESIf you’ve got a few games under your belt and are ready for another challenge, try mixing a few of these Hard Liquor rules into your next game. Feel free to use any, all, or none of these!
15
Asset Blind: Each player has a screen to keep the amount of Cash, Guns, and Booze they have secret (pg. 4).
Assets: Cash, Guns, Booze, and Clout.
Associate: The lowest rank of Member in your Gang (pg. 5).
Black Market: At the end of each Round you can sell your Booze on the Black Market. The price you get depends on how much Booze everybody is selling (pg. 8).
Booze: It’s Prohibition, so alcohol is illegal, and highly profitable!
Boss of Bosses: The nominal leader of all of the Gangs is marked by the Boss of Bosses token. The Boss of Bosses goes first and gets to choose who wins ties (pg. 4).
Business Location: One of the six random hidden Locations that are revealed as the game progresses (pg. 3, 7).
Call for Backup: You can discard an Order token to move Members into a Fight (pg. 12).
Cash: Crime is big business now. It’s all about the money.
Clout: How much influence you have with politicians, the police, and judges. If you have enough Clout, you can get away with murder — literally (pg. 5, 11, 13).
Clubhouse: Where your Members go when they aren’t at another Location (pg. 4).
Contest Location: A Location is Contested when two or more Gangs have Members there (pg. 12).
Control Location: A Gang Controls a Location if it is the only Gang with Members there. You must Control a Location to Exploit it (pg. 12).
Drive to Location: An Order that lets you move Members from one Location to another (pg. 7).
Emergency Room: The place that Injured Members are placed after a Fight. You cannot Drive to or from the Emergency Room (pg. 9).
Exploit Location: An Order that allows you to use the Transactions on a Location that you Control (pg. 7, 10).
Fight for Location: An Order that allows you try to gain Control of a Location where you have a Made Man (pg. 7, 12).
Gang: Each player controls the Clubhouse and Members of a Gang of alky runners (pg. 4).
Gang Order: Each Clubhouse card has special orders that only that Gang can use (pg. 4 & 7).
Guns: Turn a simple Slugging into a massacre.
Hassle Card: A Roaring 20s card that changes the rules for this Round (pg. 3).
Initiate Made Man: An Order that promotes an Associate to a Made Man (pg. 7).
Injured: When you use Guns in a Slugging, opposing Members will be Injured and placed in the Emergency Room. Players roll at the end of the Round to see if their Injured Members recover or go into the Recruit Pool (pg. 9).
Issue Orders: Every player Issues one Order each Turn (pg. 6).
Last Call Card: A Roaring 20s card that takes effect at the end of the Round (pg. 3, 9).
Leadership Order: Play begins with the Boss of Bosses and proceeds to their left (pg. 4).
Location: Any card a Member might occupy. They can be Starting or Business Locations, Opportunity Roaring 20s cards, or Clubhouses (but not the Emergency Room) (pg. 3, 7).
Made Man: A ‘wise guy’ or a ‘good fella’, a full Member of your Gang (pg. 5).
Member: An Associate or Made Man (pg. 5).
Opportunity Card: A Roaring 20s card that is a temporary Location that players can Fight over and Exploit (pg. 3).
Order Token: A counter to track how many Orders you have left to Issue in the current Round. Once you are out of Orders, you can only Sit Tight (pg. 6).
Profit Transaction: A Transaction on a Location that gives you Cash, Guns, Booze, or Clout (pg. 10).
Pull Guns: Pulling Guns at a Slugging is a good way to win the Fight, and it Injures the opposing Members, but it will cost you Clout (pg. 12).
Recruit Associate: An Order that adds an Associate to your Gang (pg. 7).
Recruit Pool: The Members not currently part of your Gang (pg. 5).
Roaring 20s Deck: Event cards that are revealed each Round. They can be Hassle, Opportunity, or Last Call cards (pg. 3, 6).
Round: A Round in which all players have multiple Turns to Issue all of their Orders (pg. 6).
Sit Tight: An Order that does nothing (pg. 7).
Slugging: A Fight to Control a Location that is resolved with weapons and violence (pg. 12).
Starting Assets: The amount of Cash, Guns, and Booze that a player starts with, as shown on their Clubhouse card (pg. 5).
Starting Location: One of the five Locations that appear at the start of every game (pg. 3).
Steal Transaction: A Transaction on a Location that allows you to take assets from a rival Gang (pg. 10).
Take the Fall: A Made Man is arrested and returned to their Recruit Pool. (pg. 11).
Talking: A Fight to Control a Location that is resolved through negotiation and intimidation (pg. 12).
Trade Transaction: A Transaction in which you trade assets for other assets (pg. 10).
Transaction: When you Exploit a Location you use its Transactions. They can be Profit Transactions, Trade Transactions, Steal trans-actions, or Special Transactions (pg. 10).
Turn: A single player’s opportunity to use an Order. i.e. the “player’s turn”.
Winning the Game: After six Rounds, the player with the most Cash wins (pg. 9).
GLOSSARY
16
Game DesignGame DesignPHIL YATES
ProducersProducersPETER SIMUNOVICH
JOHN-PAUL BRISIGOTTIGale Force Nine and GF9 TM Gale Force Nine LLC. Game Design © Gale Force Nine 2021.
Gale Force Nine is a Battlefront Group Company.
Graphic DesignGraphic DesignVICTOR PESCH
ArtworkArtworkDARKO STOJANOVIC
PlaytestingPlaytestingIan Burgos, Ashleigh Heelam, Leonard Landrey,
Stuart Lapwood, Phil Petry, Wayne Turner, Dean Webb
Special thanks to Gale Force Nine Studio
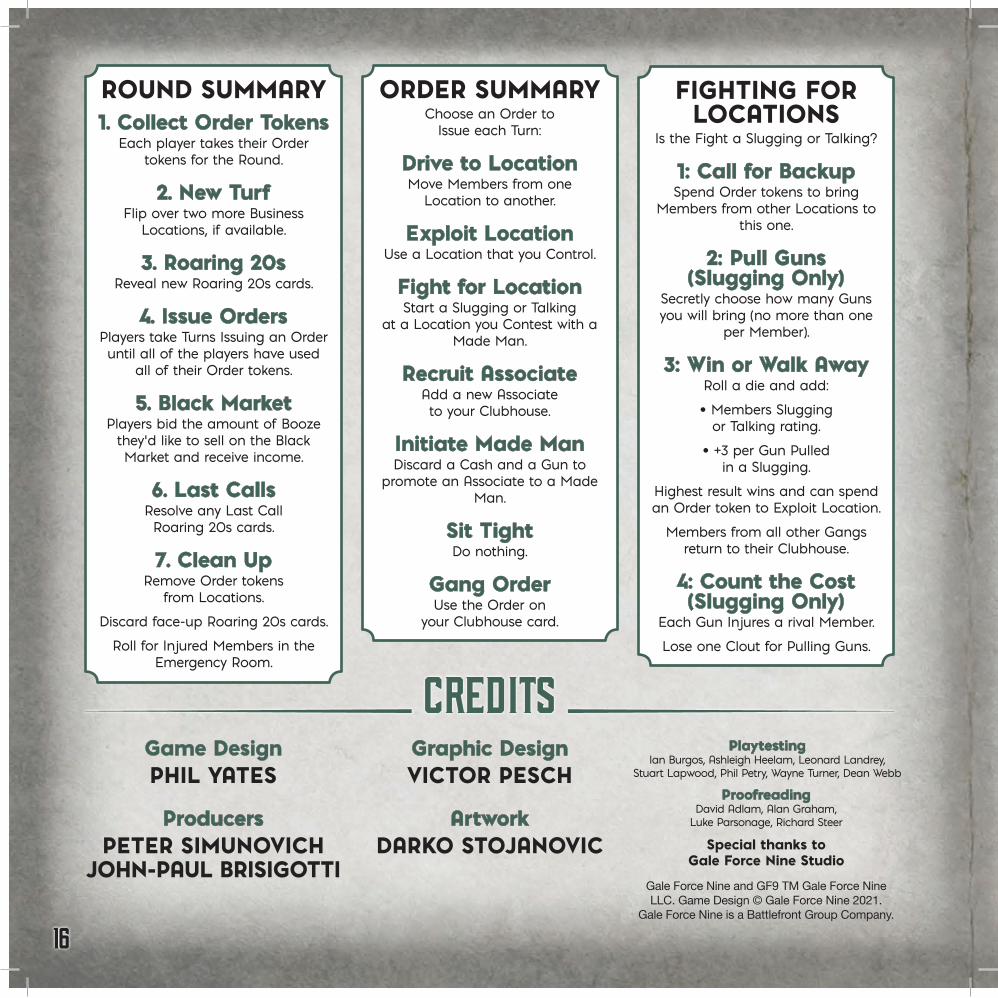
ROUND SUMMARY1. Collect Order Tokens1. Collect Order Tokens
Each player takes their Order tokens for the Round.
2. New Turf2. New TurfFlip over two more Business
Locations, if available.
3. Roaring 20s3. Roaring 20sReveal new Roaring 20s cards.
4. Issue Orders4. Issue OrdersPlayers take Turns Issuing an Order until all of the players have used
all of their Order tokens.
5. Black Market5. Black MarketPlayers bid the amount of Booze
they’d like to sell on the Black Market and receive income.
6. Last Calls6. Last CallsResolve any Last Call Roaring 20s cards.
7. Clean Up 7. Clean Up Remove Order tokens
from Locations.
Discard face-up Roaring 20s cards.
Roll for Injured Members in the Emergency Room.
FIGHTING FOR LOCATIONS
Is the Fight a Slugging or Talking?
1: Call for Backup1: Call for BackupSpend Order tokens to bring
Members from other Locations to this one.
2: Pull Guns 2: Pull Guns (Slugging Only)(Slugging Only)
Secretly choose how many Guns you will bring (no more than one
per Member).
3: Win or Walk Away3: Win or Walk AwayRoll a die and add:
• Members Slugging or Talking rating.
• +3 per Gun Pulled in a Slugging.
Highest result wins and can spend an Order token to Exploit Location.
Members from all other Gangs return to their Clubhouse.
4: Count the Cost 4: Count the Cost (Slugging Only)(Slugging Only)
Each Gun Injures a rival Member.
Lose one Clout for Pulling Guns.
CREDITS
ORDER SUMMARYChoose an Order to
Issue each Turn:
Drive to LocationDrive to LocationMove Members from one
Location to another.
Exploit LocationExploit LocationUse a Location that you Control.
Fight for LocationFight for LocationStart a Slugging or Talking
at a Location you Contest with a Made Man.
Recruit AssociateRecruit AssociateAdd a new Associate to your Clubhouse.
Initiate Made ManInitiate Made ManDiscard a Cash and a Gun to
promote an Associate to a Made Man.
Sit TightSit TightDo nothing.
Gang OrderGang OrderUse the Order on
your Clubhouse card.
ProofreadingProofreadingDavid Adlam, Alan Graham,
Luke Parsonage, Richard Steer