Embed Size (px)
Citation preview

#ZOLLSummit

RescueNet BillingBatch Posting
Presented byStacey Bickford & BJ Terrill

http://www.surveymonkey.com/s/NAAC_Certs
This Session is CEU Approved
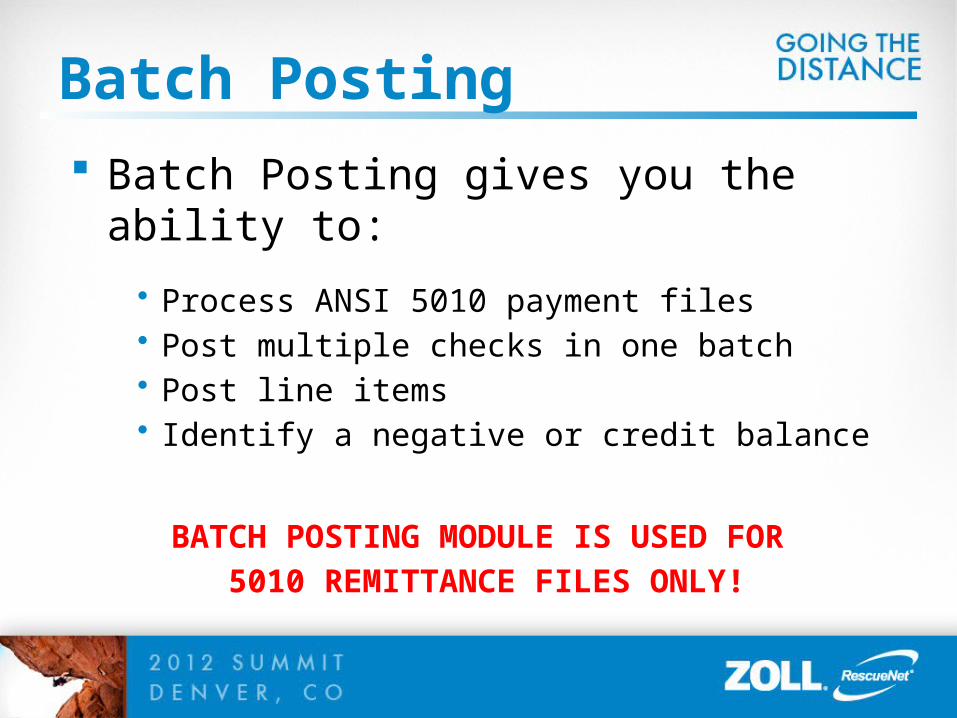
Batch Posting
Batch Posting gives you the ability to:
• Process ANSI 5010 payment files• Post multiple checks in one batch• Post line items• Identify a negative or credit balance
BATCH POSTING MODULE IS USED FOR
5010 REMITTANCE FILES ONLY!
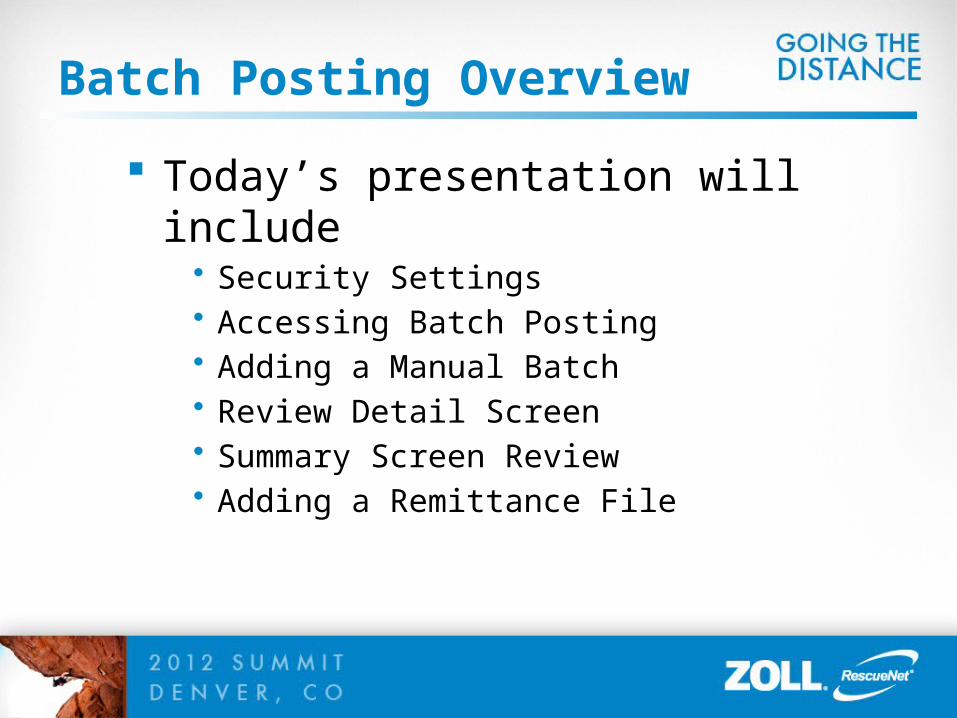
Batch Posting Overview
Today’s presentation will include• Security Settings• Accessing Batch Posting• Adding a Manual Batch• Review Detail Screen• Summary Screen Review• Adding a Remittance File
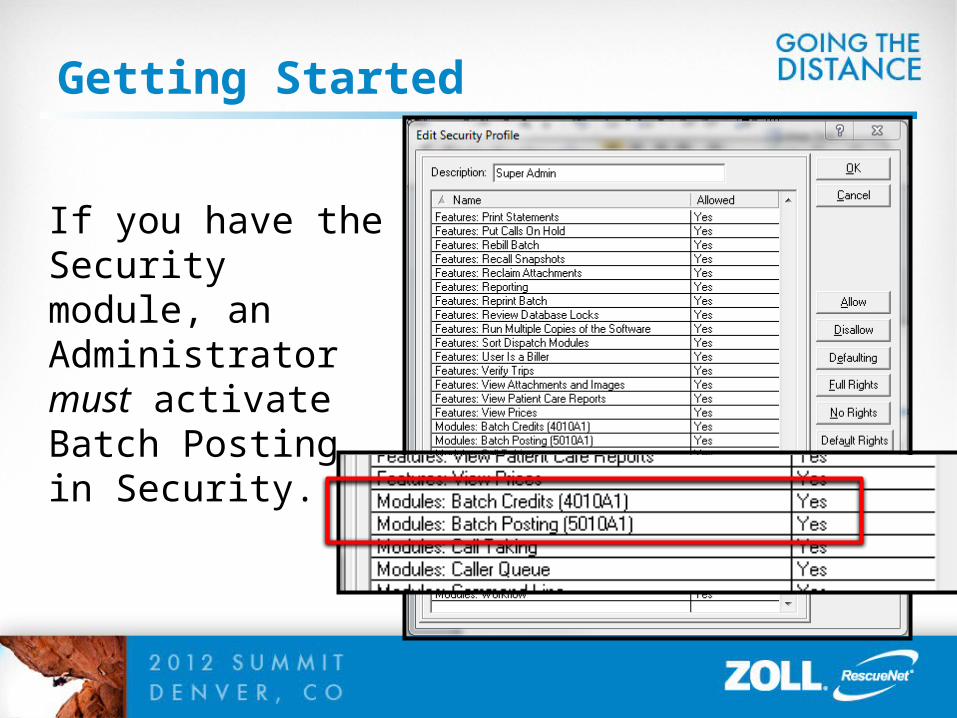
Getting Started
If you have the Security module, an Administrator must activate Batch Posting in Security.
Accessing Batch Posting
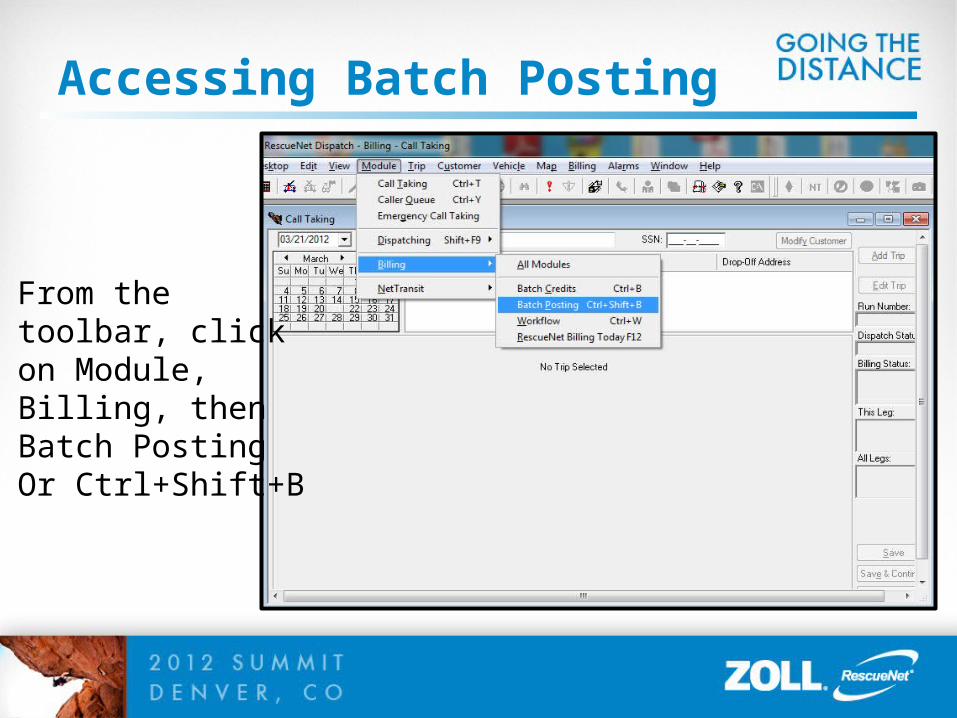
From the toolbar, click on Module, Billing, then Batch PostingOr Ctrl+Shift+B

Accessing “Batch Posting”The Batch Posting screen opens
Accessing “Batch Posting”
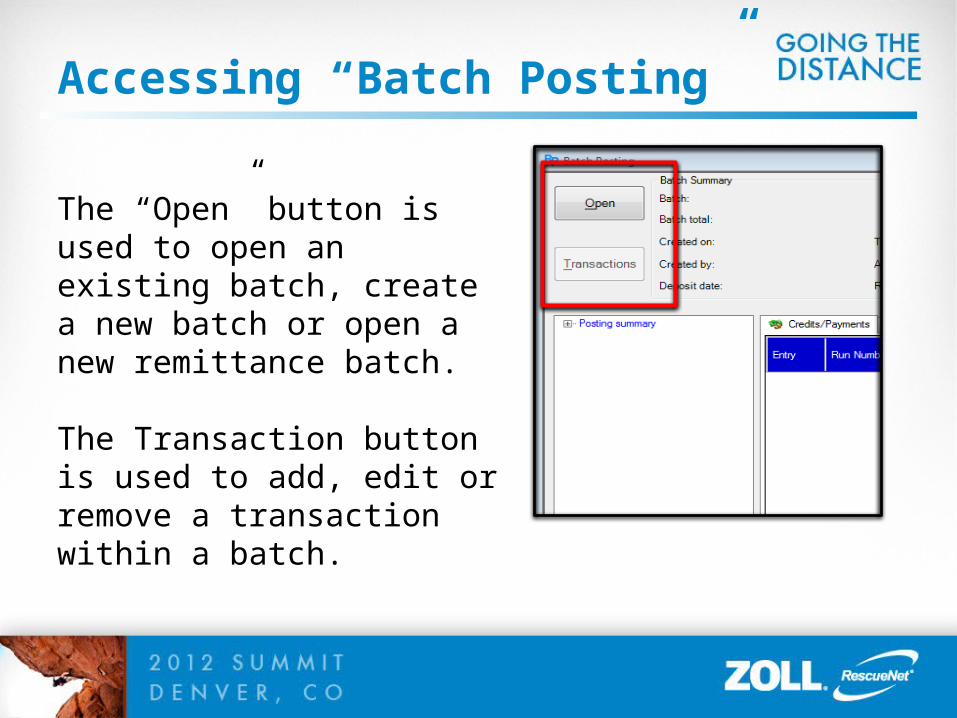
The “Open” button is used to open an existing batch, create a new batch or open a new remittance batch.
The Transaction button is used to add, edit or remove a transaction within a batch.
Batch Posting
Remember…
TRANSACTIONS areCredits and/or Denials
Batch Posting – Summary
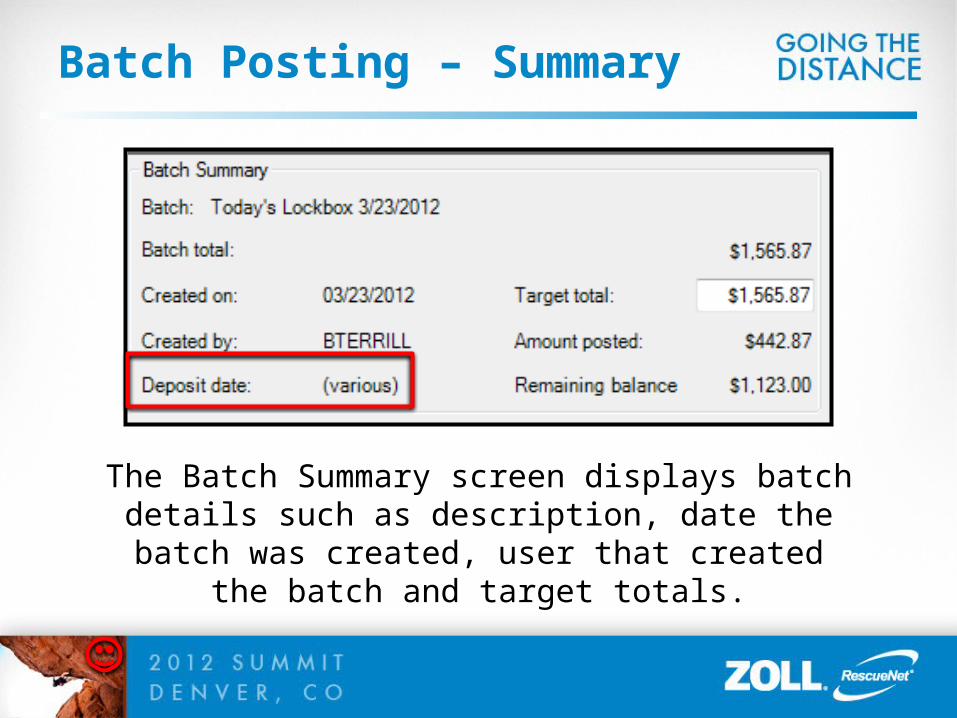
The Batch Summary screen displays batch details such as description, date the batch was created,
user that created the batch and target totals.
Batch Posting
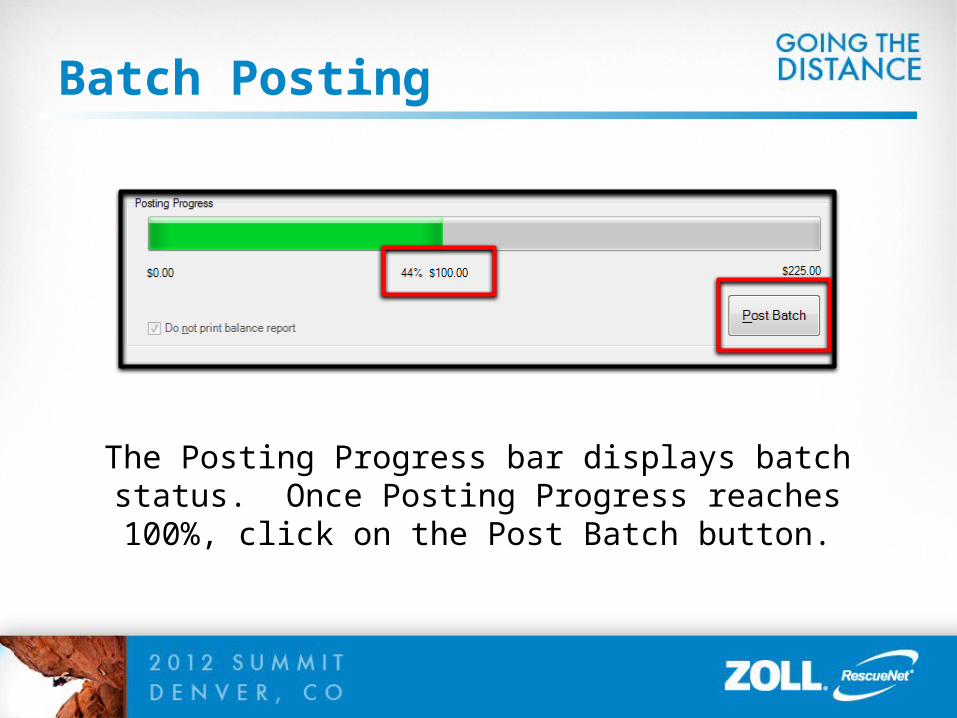
The Posting Progress bar displays batch status. Once Posting Progress reaches 100%, click on the
Post Batch button.
Batch Posting
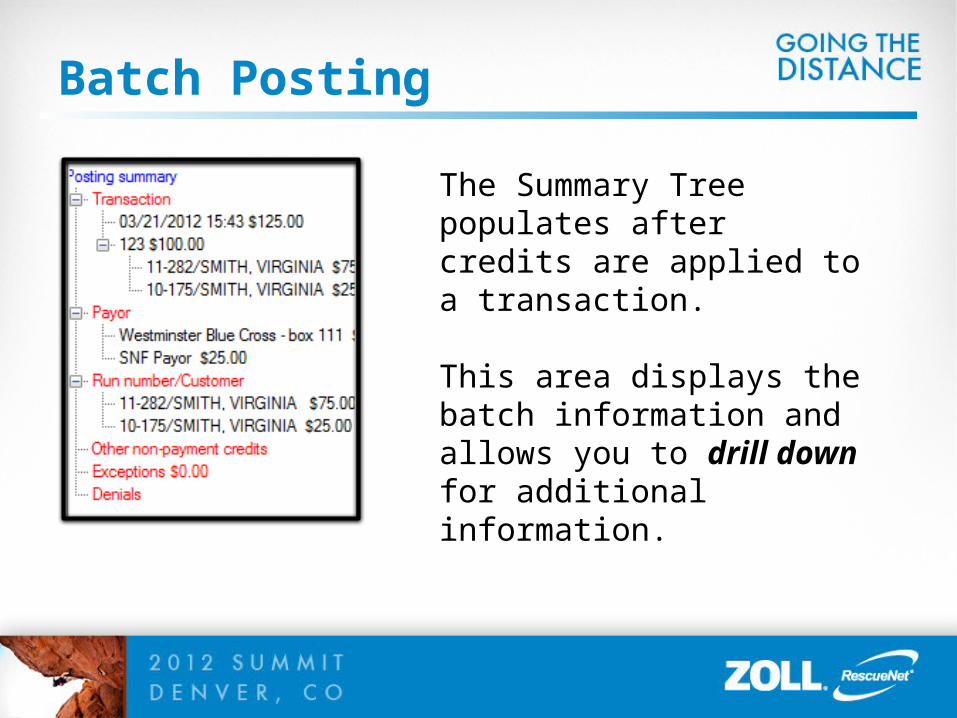
The Summary Tree populates after credits are applied to a transaction.
This area displays the batch information and allows you to drill down for additional information.
Batch Posting Summary Screen
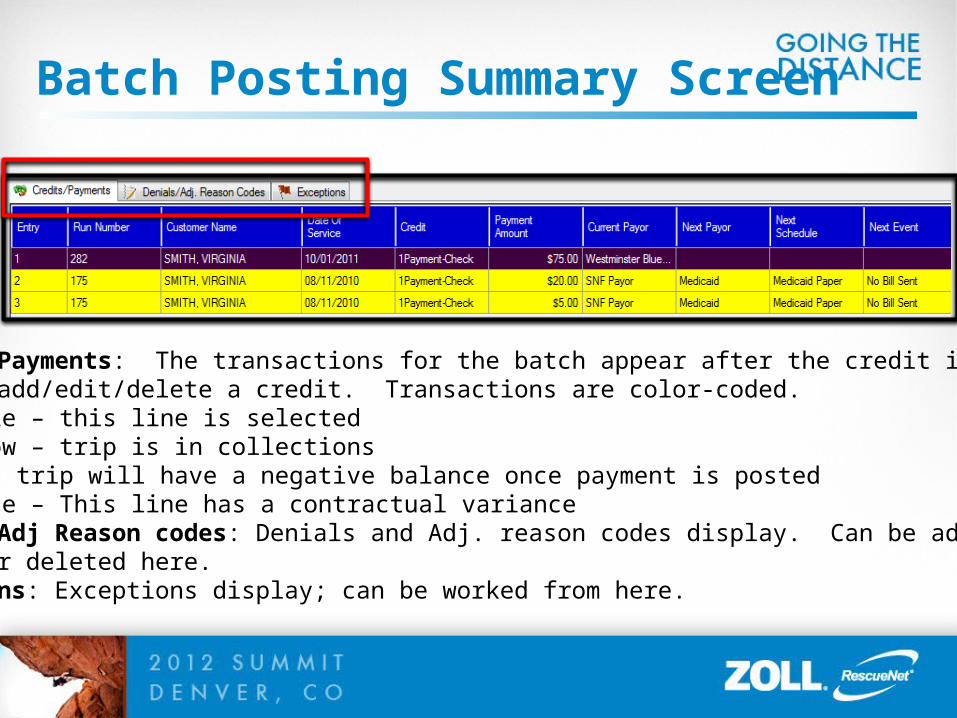
Credits/Payments: The transactions for the batch appear after the credit is applied.You can add/edit/delete a credit. Transactions are color-coded.
Purple – this line is selectedYellow – trip is in collectionsRed – trip will have a negative balance once payment is postedOrange – This line has a contractual variance
Denials/Adj Reason codes: Denials and Adj. reason codes display. Can be added,edited or deleted here.Exceptions: Exceptions display; can be worked from here.
Batch Posting - Manual Entry
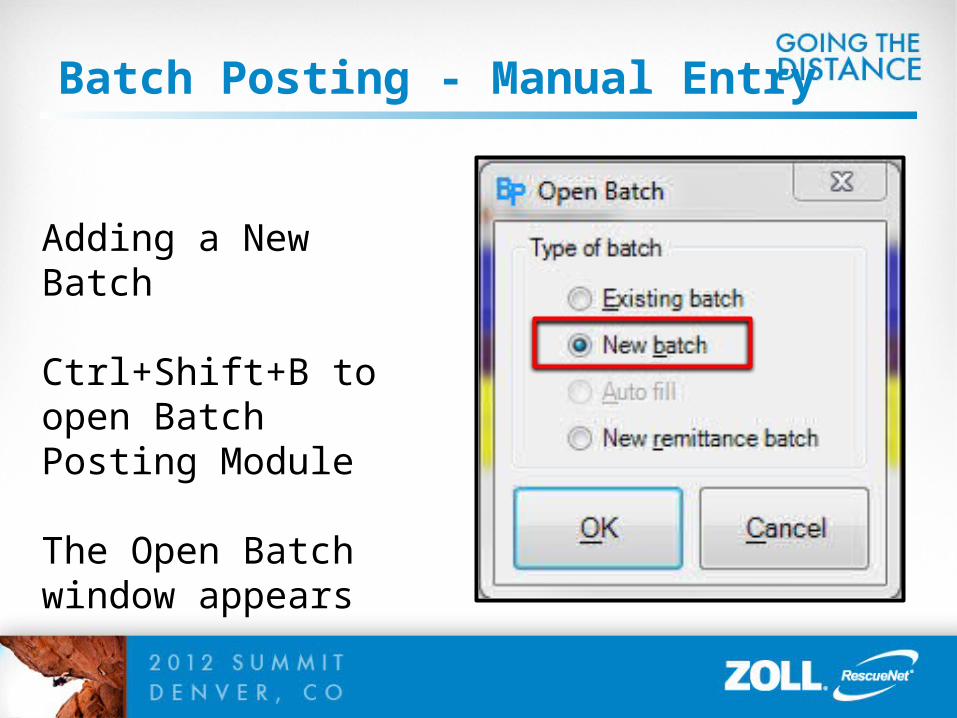
Adding a New Batch
Ctrl+Shift+B to open Batch Posting Module
The Open Batch window appears
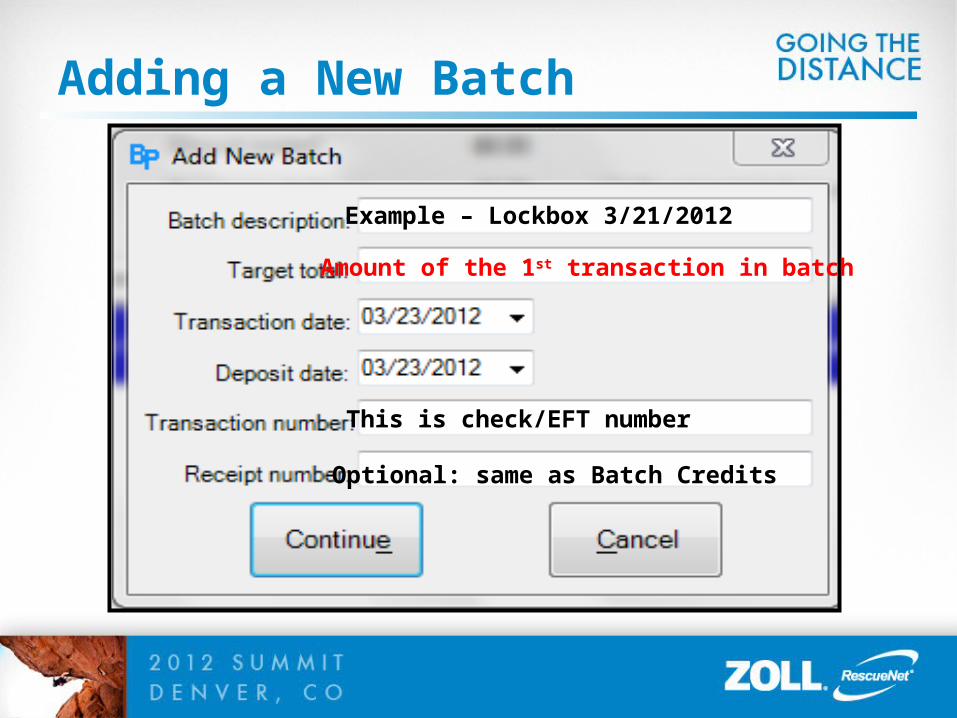
Adding a New Batch
Example – Lockbox 3/21/2012
Amount of the 1st transaction in batch
This is check/EFT number
Optional: same as Batch Credits
Starting Your New Batch
Two methods to start entering your new batch
(1) Add all transactions before entering any creditsOr
(2) Add transactions as you post credits
Note: Method depends on your current business practice
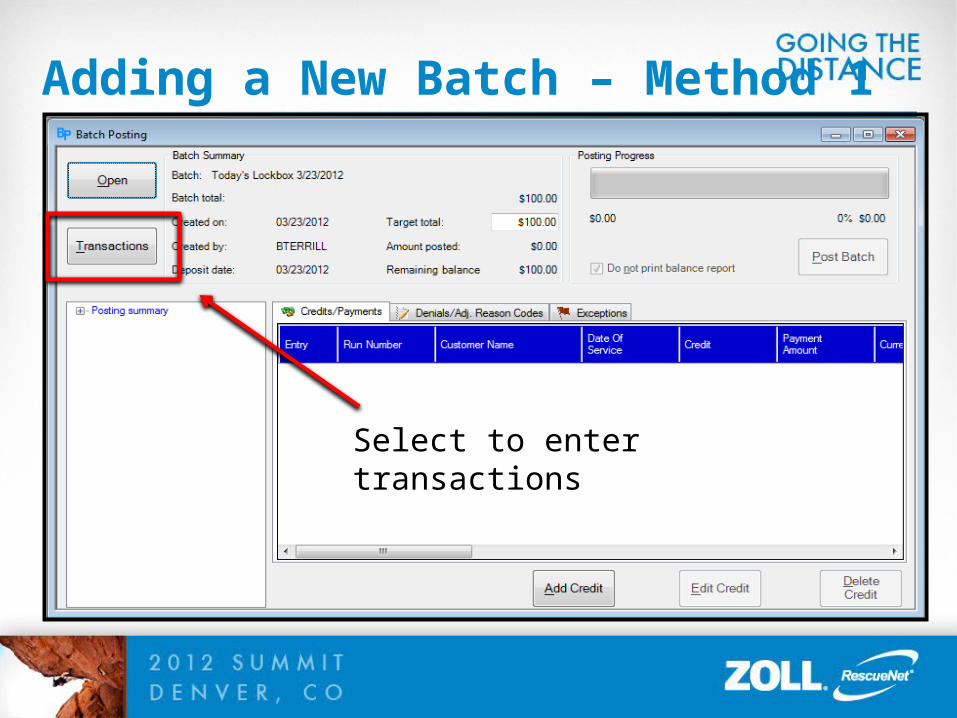
Adding a New Batch – Method 1
Select to enter transactions
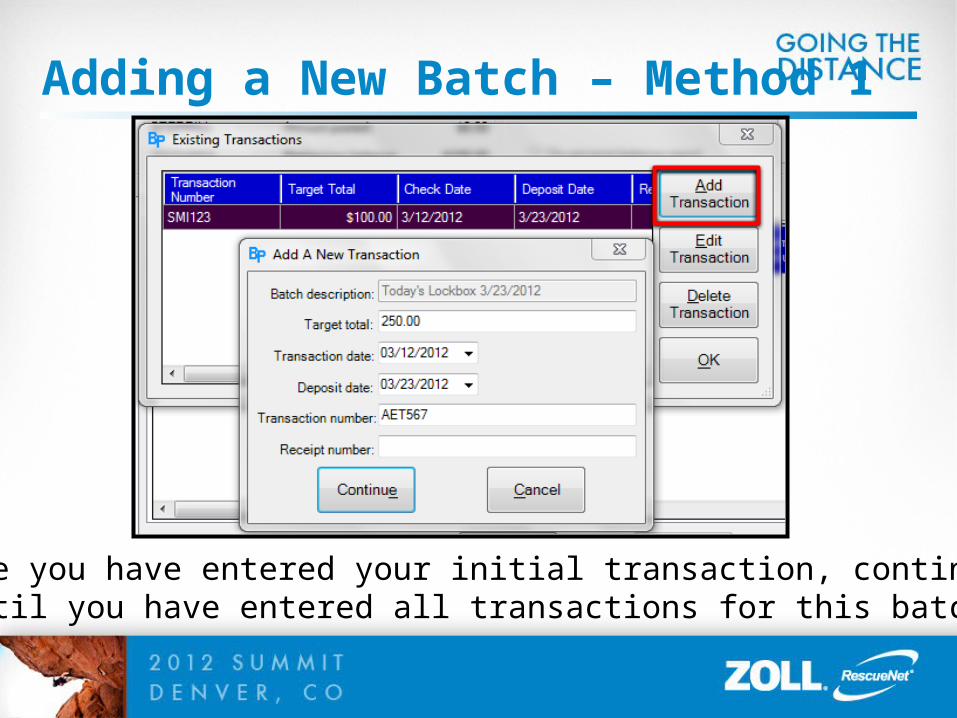
Adding a New Batch – Method 1
Once you have entered your initial transaction, continue until you have entered all transactions for this batch.
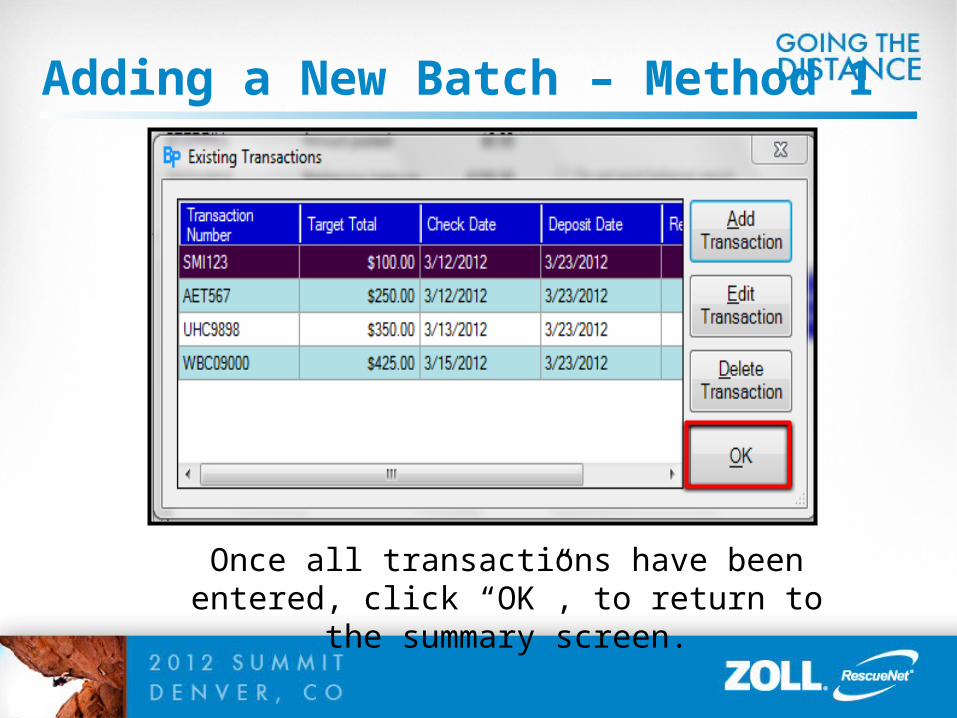
Adding a New Batch – Method 1
Once all transactions have been entered, click “OK”, to return to the summary screen.
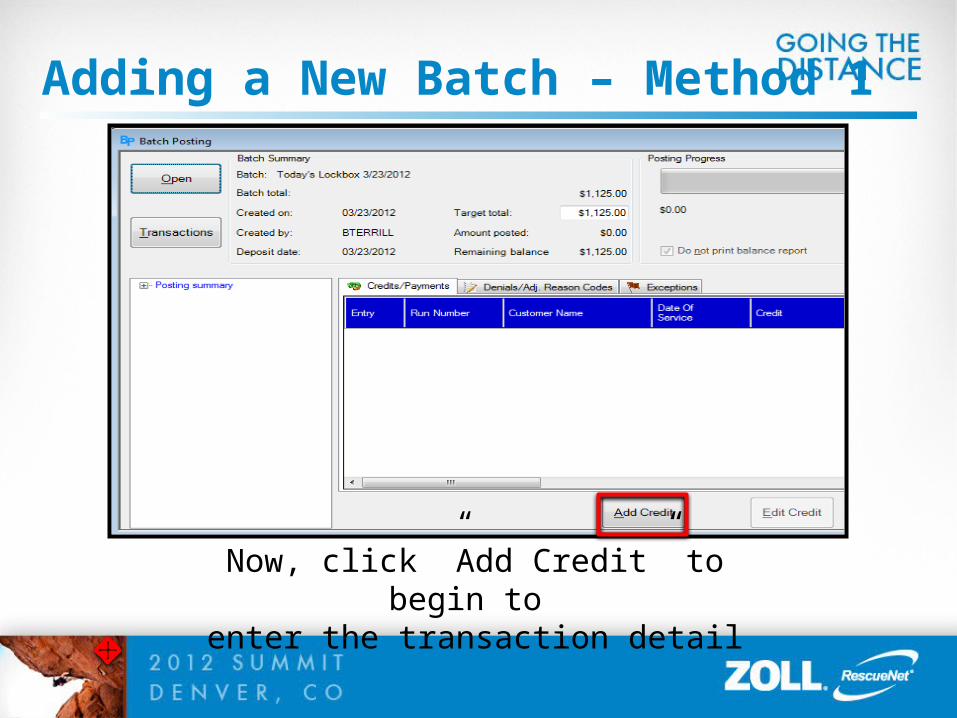
Adding a New Batch – Method 1
Now, click ”Add Credit” to begin to enter the transaction detail
Adding a New Batch – Method 1
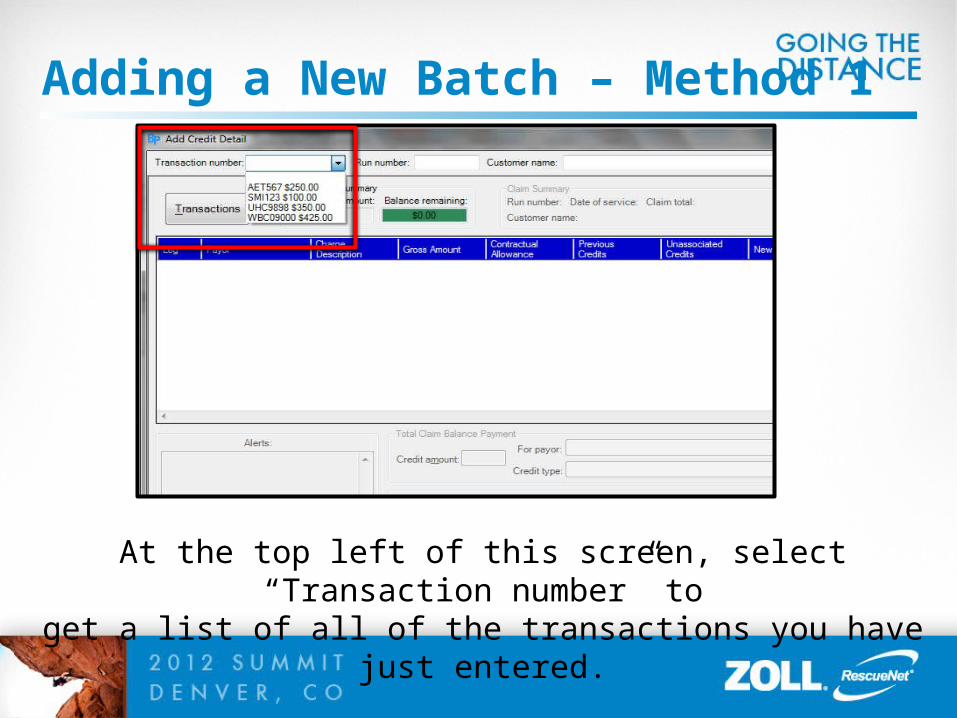
At the top left of this screen, select “Transaction number” toget a list of all of the transactions you have just entered.
Adding a New Batch – Method 1
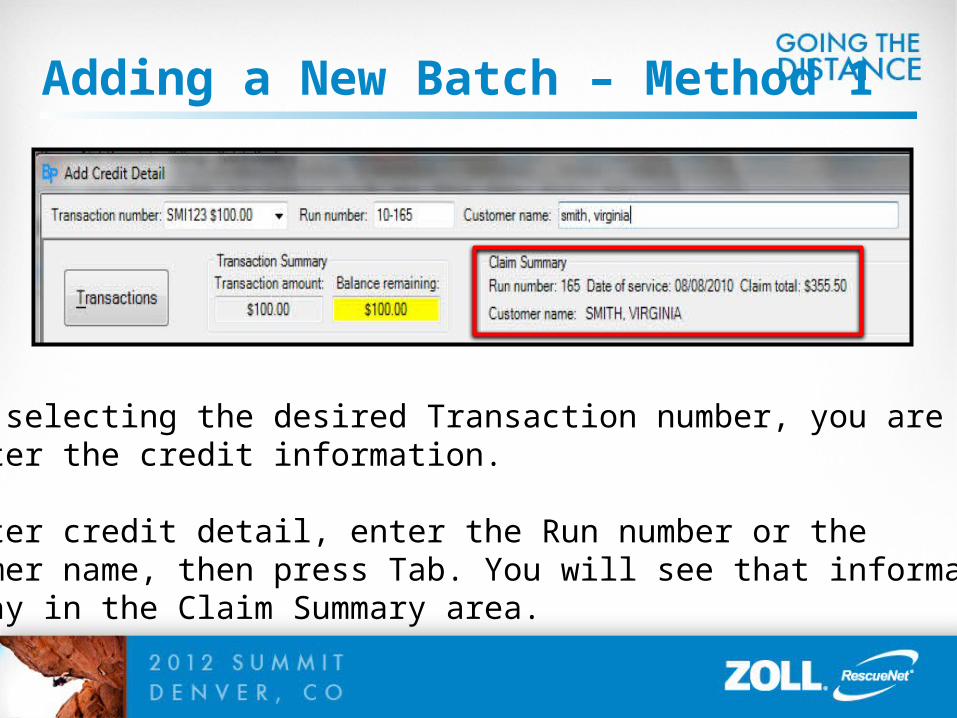
After selecting the desired Transaction number, you are readyto enter the credit information.
To enter credit detail, enter the Run number or theCustomer name, then press Tab. You will see that information display in the Claim Summary area.
Adding a New Batch – Method 1
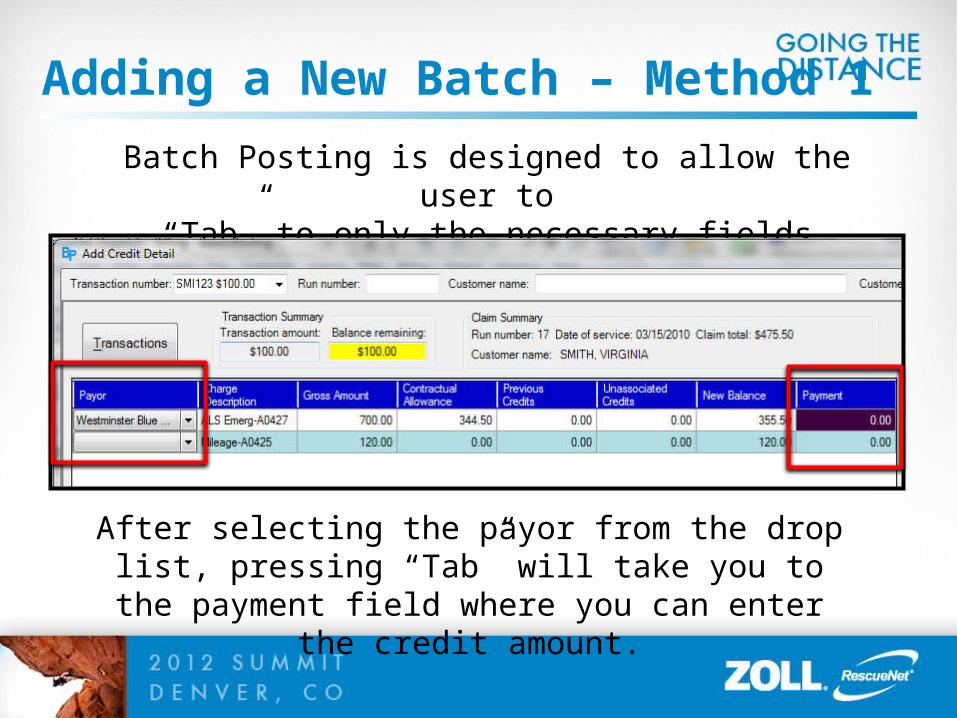
Batch Posting is designed to allow the user to “Tab” to only the necessary fields.
After selecting the payor from the drop list, pressing “Tab” will take you to the payment field where you can
enter the credit amount.
Adding a New Batch – Method 1
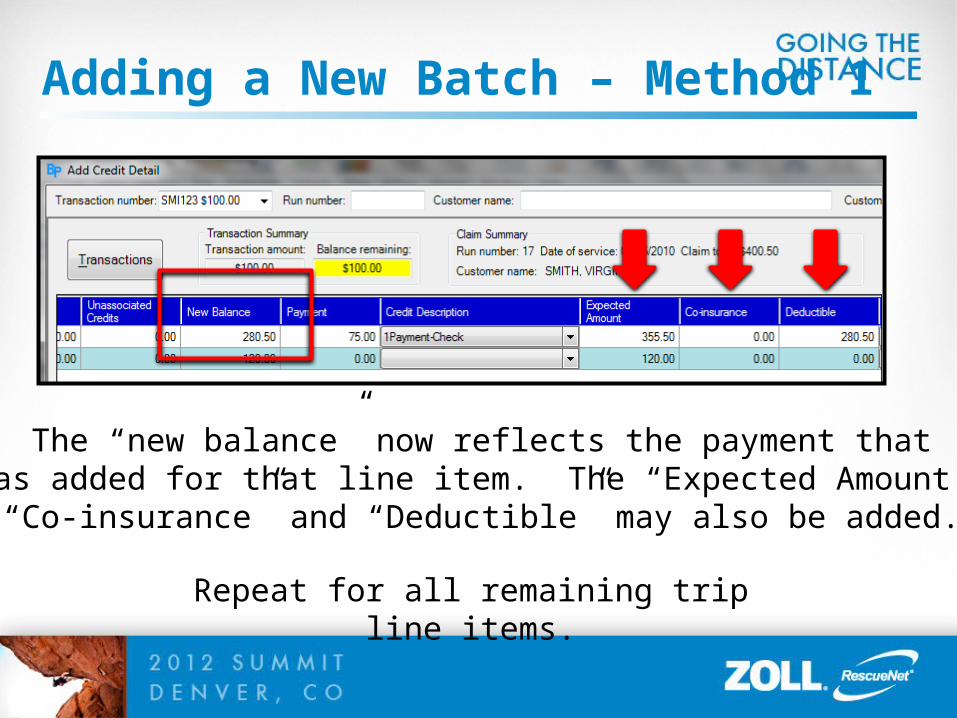
The “new balance” now reflects the payment that was added for that line item. The “Expected Amount”,
“Co-insurance” and “Deductible” may also be added.
Repeat for all remaining trip line items.
Adding a New Batch – Method 1
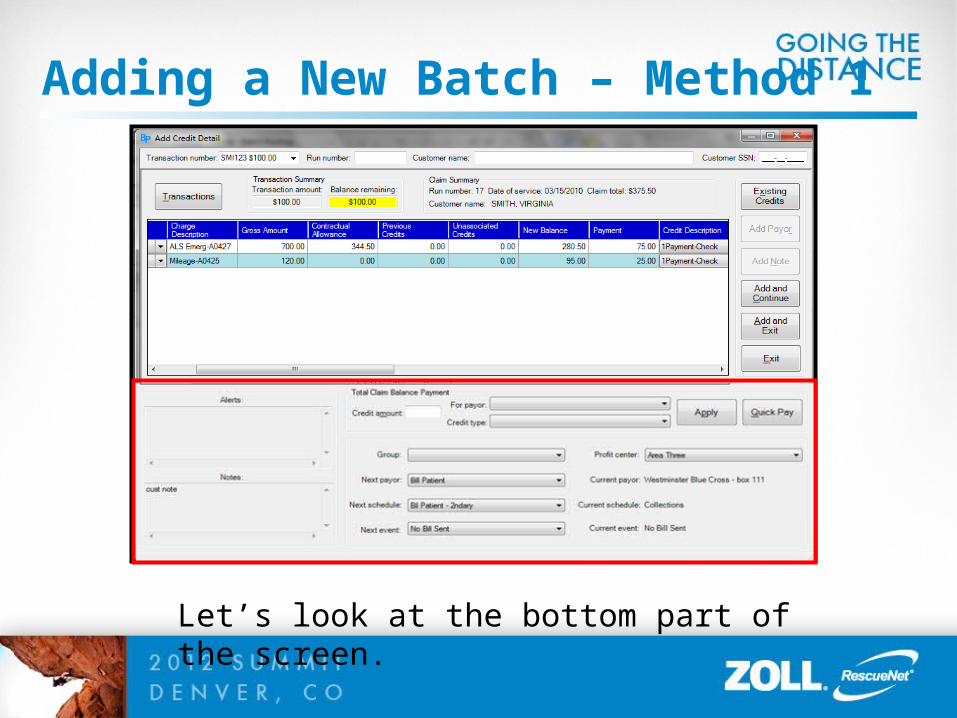
Let’s look at the bottom part of the screen.
Adding a New Batch – Method 1
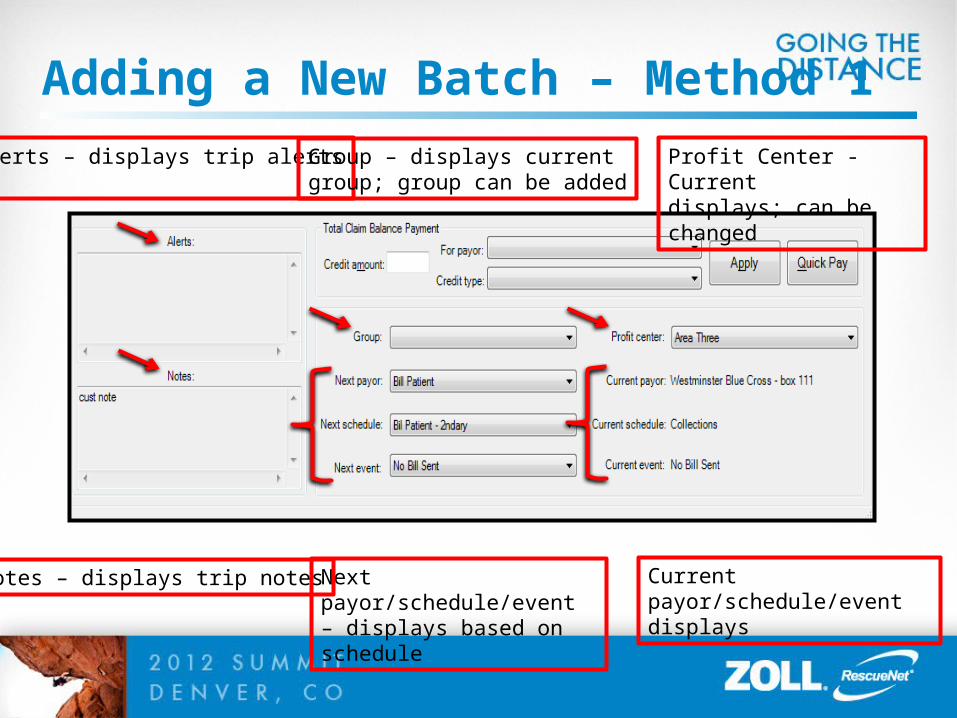
Alerts – displays trip alerts Group – displays current group; group can be added
Next payor/schedule/event – displays based on schedule
Profit Center - Current displays; can be changed
Current payor/schedule/event displays
Notes – displays trip notes
Adding a New Batch – Method 1
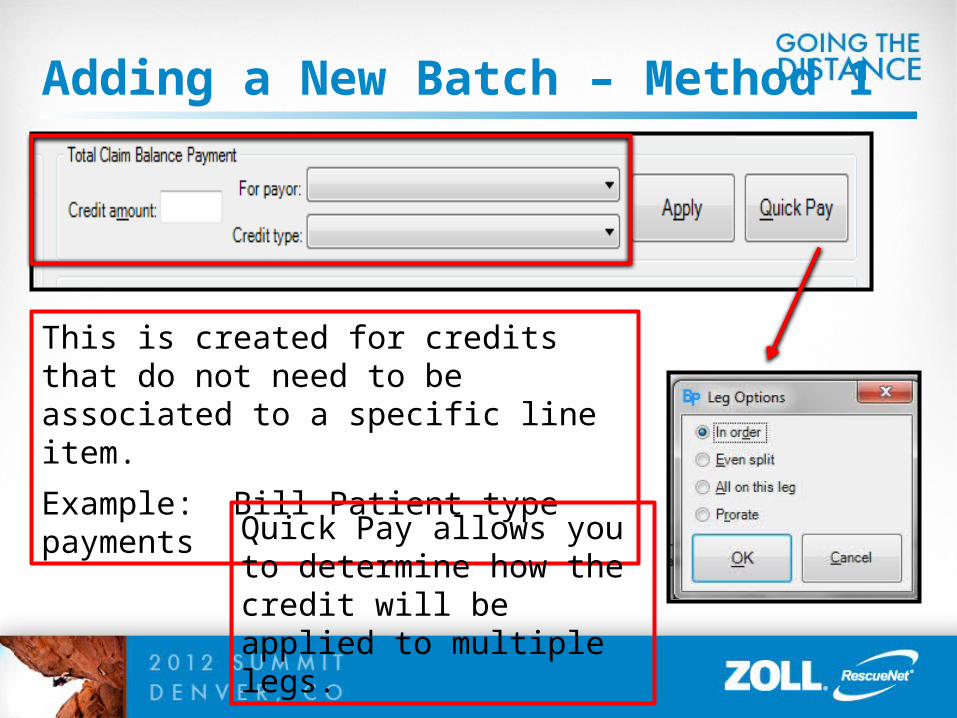
This is created for credits that do not need to be associated to a specific line item.
Example: Bill Patient type payments
Quick Pay allows you to determine how the credit will be applied to multiple legs.
Adding a New Batch – Method 1
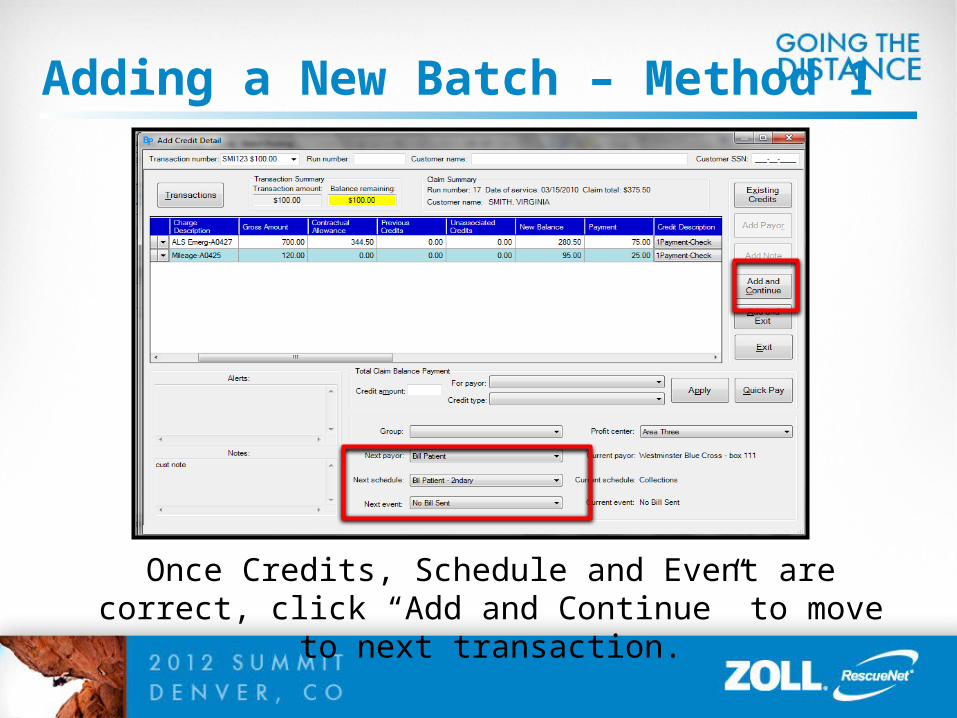
Once Credits, Schedule and Event are correct, click “Add and Continue” to move to next transaction.
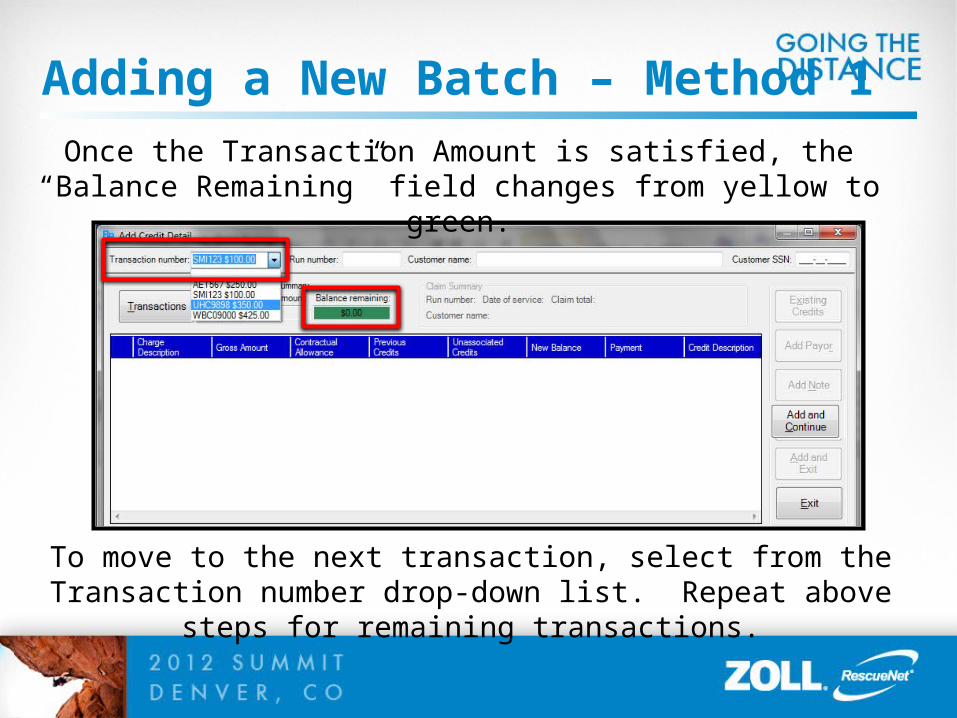
Adding a New Batch – Method 1Once the Transaction Amount is satisfied, the “Balance
Remaining” field changes from yellow to green.
To move to the next transaction, select from the Transaction number drop-down list. Repeat above steps for remaining transactions.
Adding a New Batch – Method 1
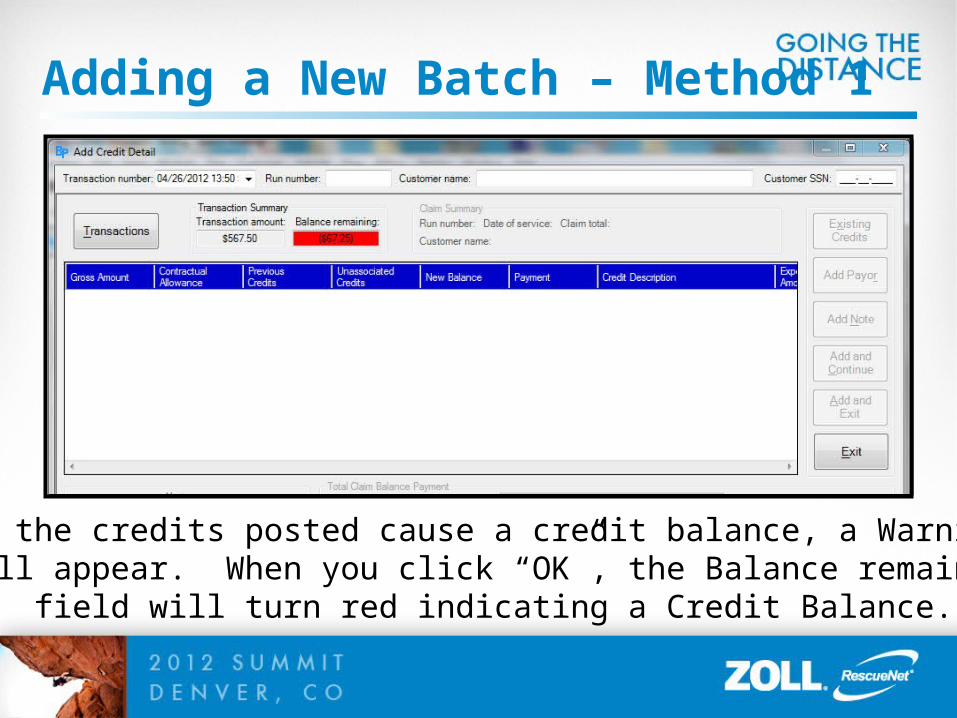
If the credits posted cause a credit balance, a Warning will appear. When you click “OK”, the Balance remaining
field will turn red indicating a Credit Balance.
Adding a New Batch – Method 1
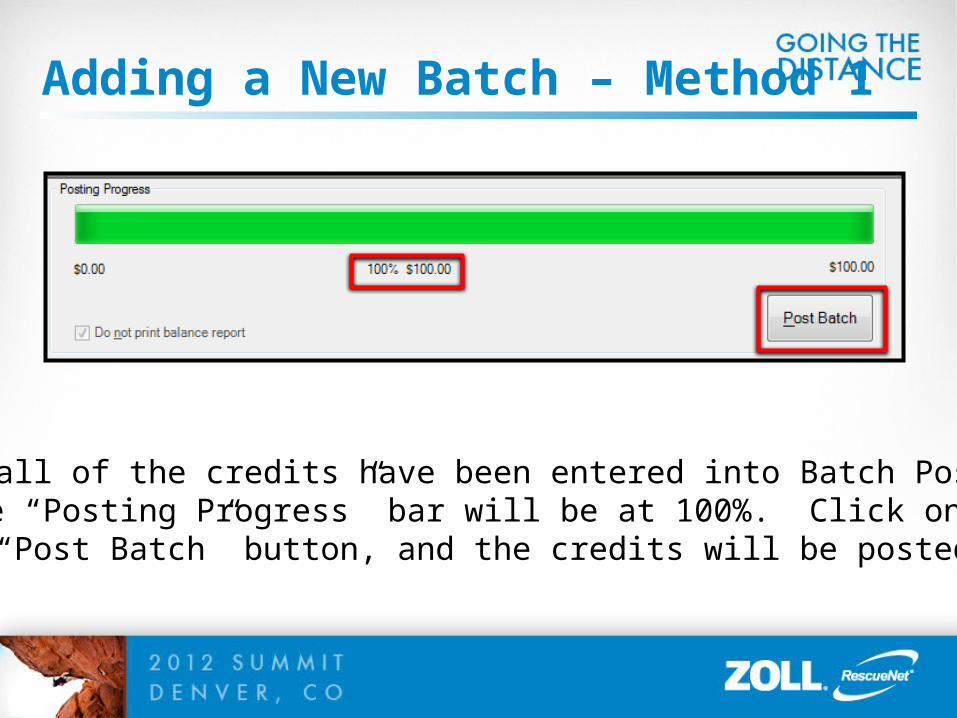
Once all of the credits have been entered into Batch Posting, the “Posting Progress” bar will be at 100%. Click on the
“Post Batch” button, and the credits will be posted.
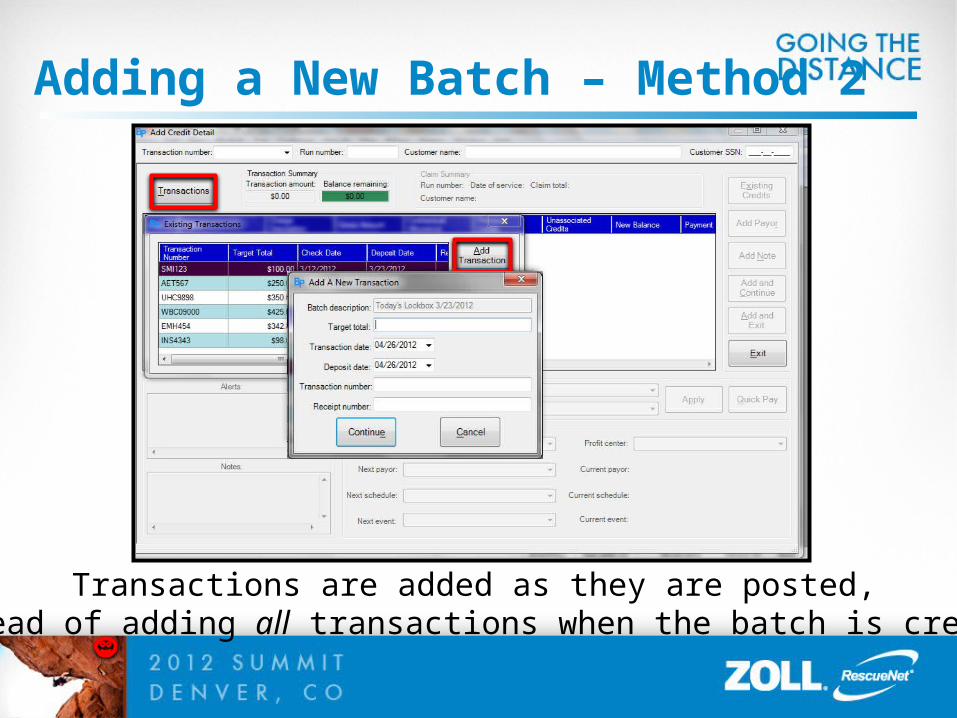
Adding a New Batch – Method 2
Transactions are added as they are posted, instead of adding all transactions when the batch is created.

Adding a New Remittance Batch
To add a new batch from a remittance file, select “new remittance batch” from the “Open Batch” dialog box.
Adding a New Remittance Batch
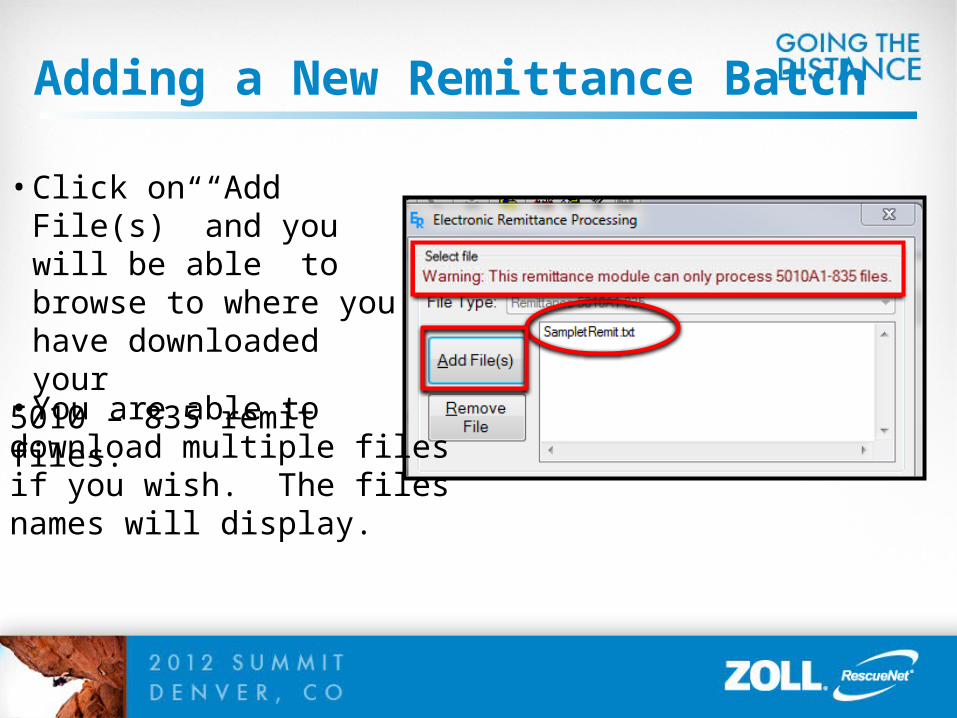
• Click on “Add File(s)” and you will be able to browse to where you have downloaded your
5010 – 835 remit files.
• You are able to download multiple filesif you wish. The files names will display.
Adding a New Remittance Batch
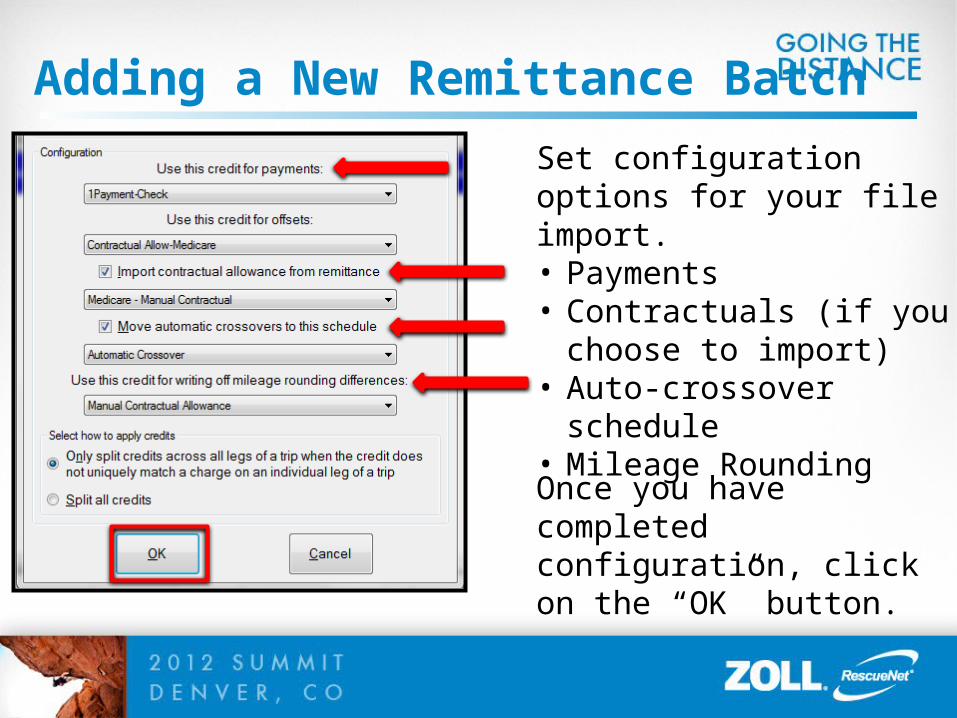
Set configuration options for your file import.• Payments• Contractuals (if you choose
to import)• Auto-crossover schedule• Mileage Rounding
Once you have completed configuration, click on the “OK” button.
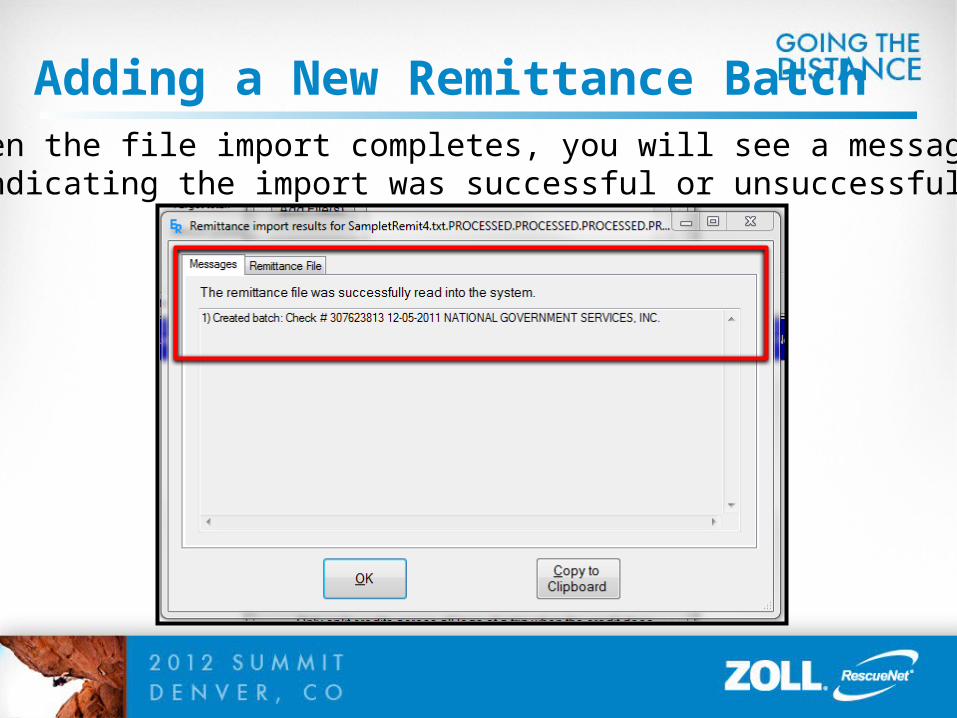
Adding a New Remittance BatchWhen the file import completes, you will see a message
indicating the import was successful or unsuccessful.
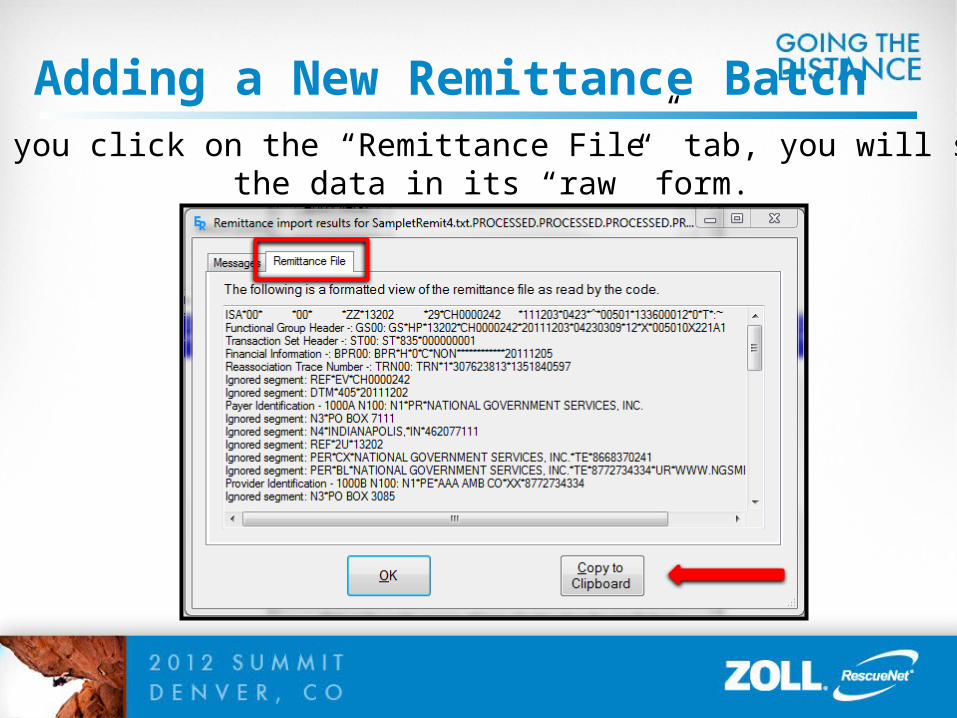
Adding a New Remittance BatchIf you click on the “Remittance File” tab, you will see
the data in its “raw” form.
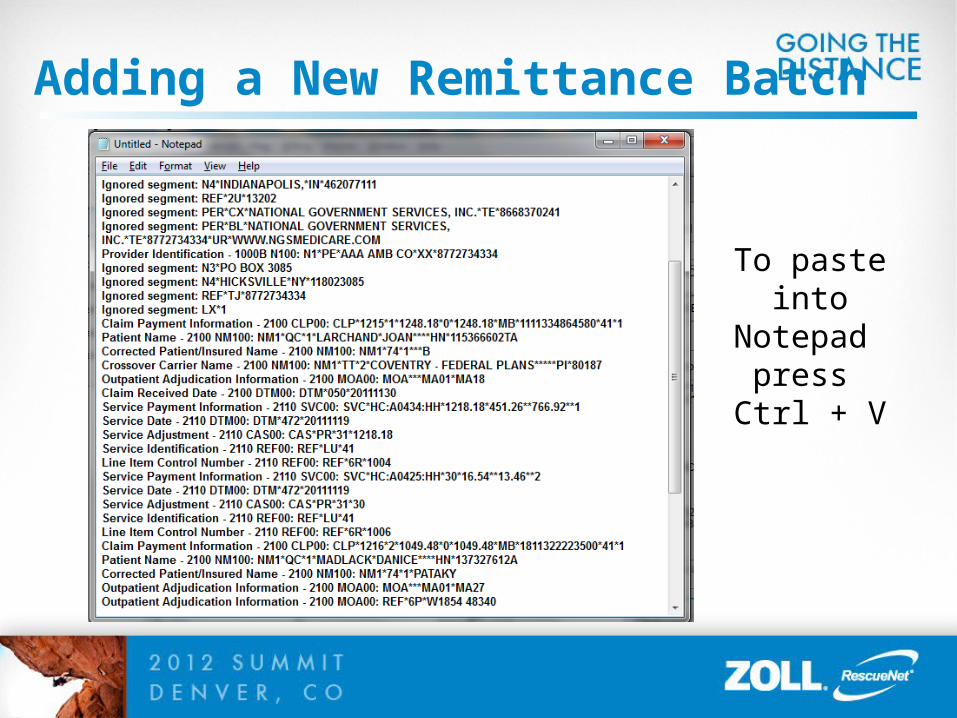
Adding a New Remittance Batch
To paste into
Notepad press
Ctrl + V
Adding a New Remittance Batch
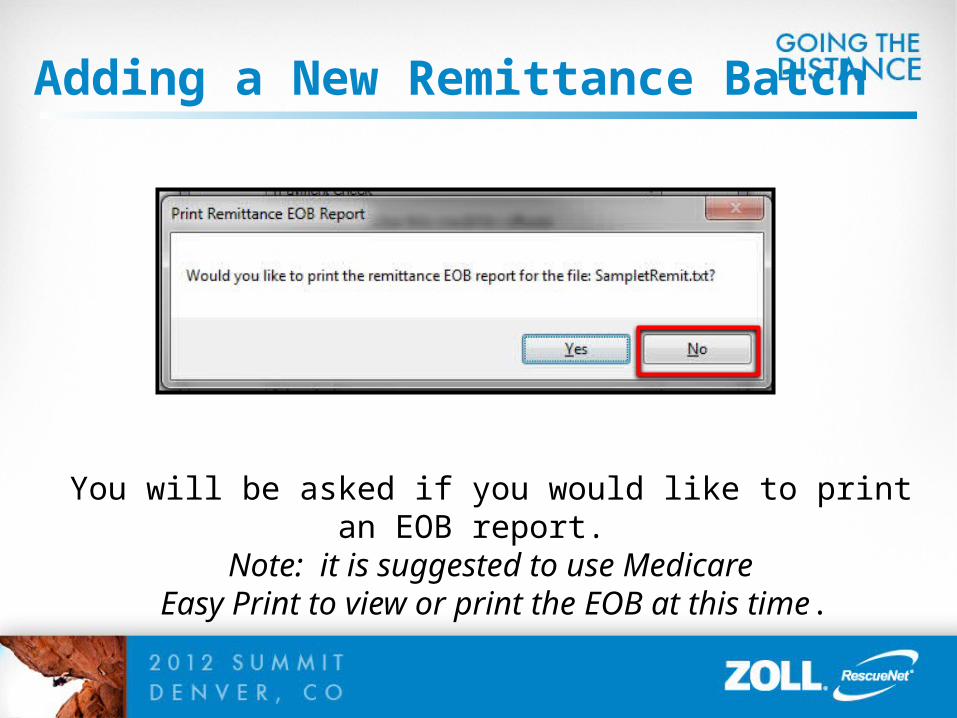
You will be asked if you would like to print an EOB report. Note: it is suggested to use Medicare
Easy Print to view or print the EOB at this time.
Adding a New Remittance Batch
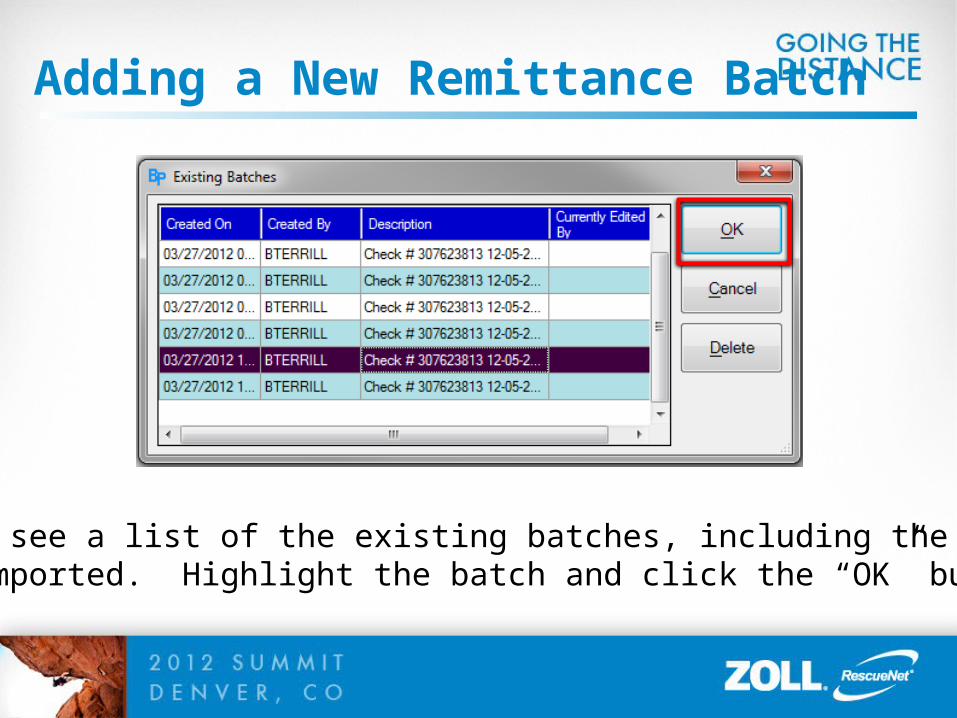
You will see a list of the existing batches, including the one youjust imported. Highlight the batch and click the “OK” button.

Adding a New Remittance Batch
• You will see the batch information including check number, date and check amount on the top left.
• The Credit/Payments tab shows the detail for this transaction.
Adding a New Remittance Batch
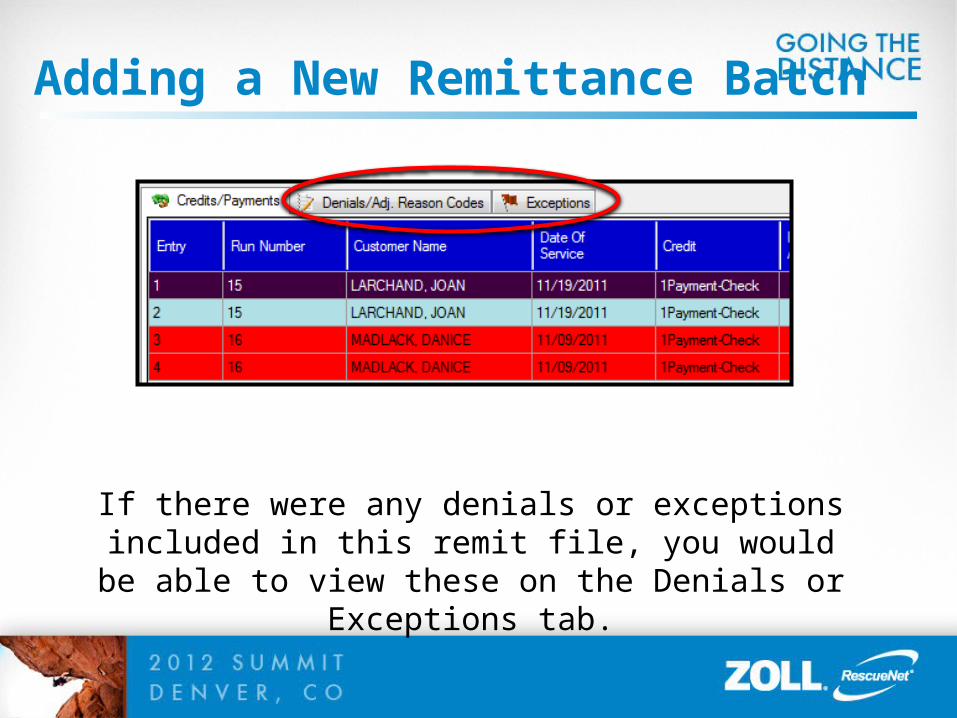
If there were any denials or exceptions included in this remit file, you would be able to view these on the
Denials or Exceptions tab.

Batch Posting – Add Denial
Denials can easily be added by clicking on the “Denials/Adj Reason Codes” tab; then click “Add Denial”.
Batch Posting