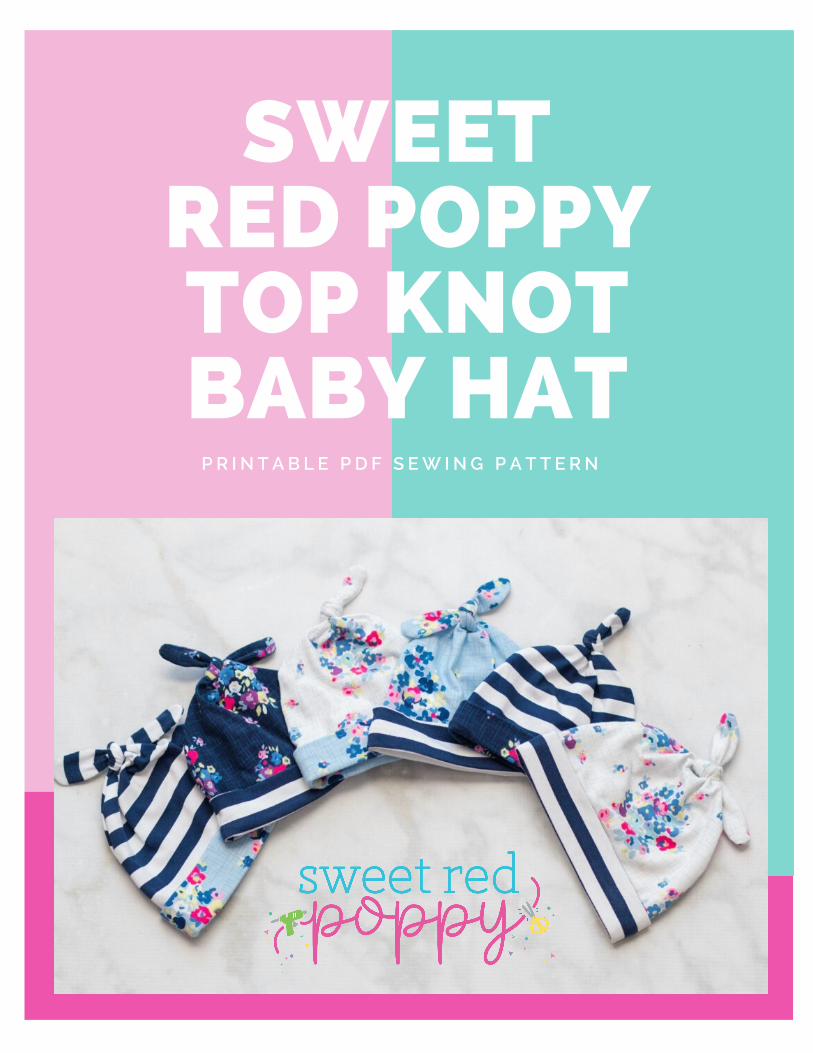
SWEET RED POPPYTOP KNOTBABY HAT
P R I N T A B L E P D F S E W I N G P A T T E R N
1
2
3
4
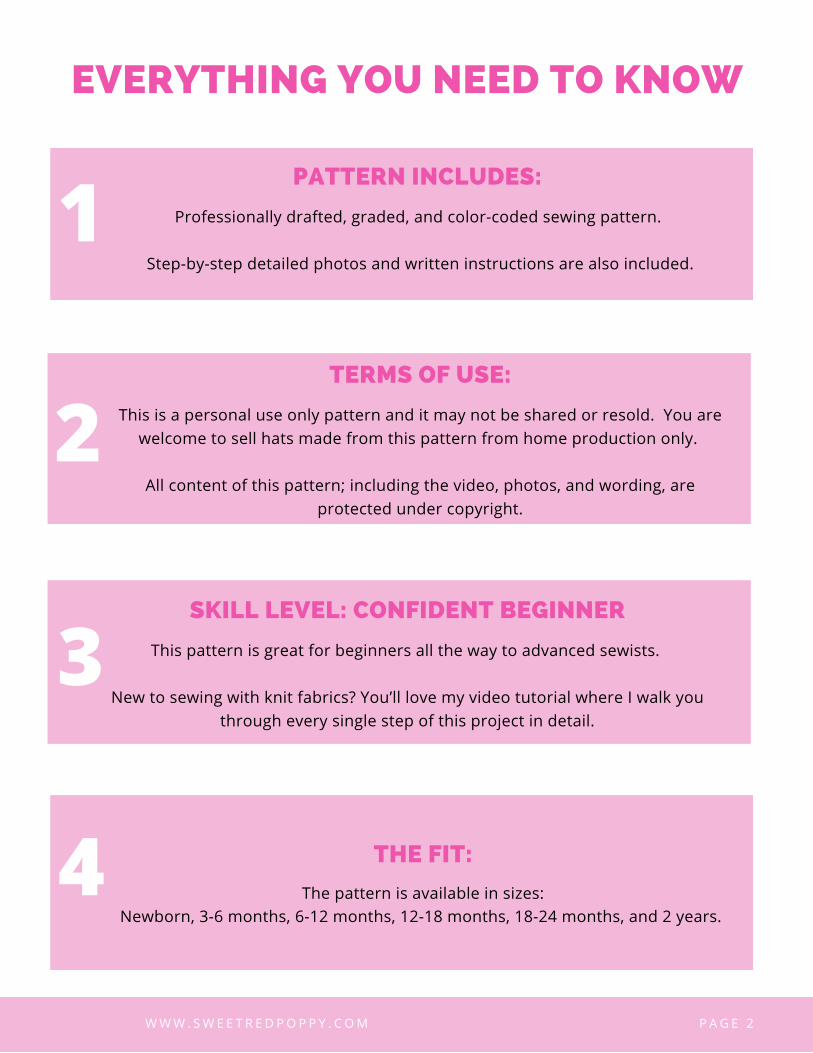
PATTERN INCLUDES:
Professionally drafted, graded, and color-coded sewing pattern.
Step-by-step detailed photos and written instructions are also included.
TERMS OF USE:
This is a personal use only pattern and it may not be shared or resold. You arewelcome to sell hats made from this pattern from home production only.
All content of this pattern; including the video, photos, and wording, are
protected under copyright.
SKILL LEVEL: CONFIDENT BEGINNER
This pattern is great for beginners all the way to advanced sewists.
New to sewing with knit fabrics? You’ll love my video tutorial where I walk youthrough every single step of this project in detail.
THE FIT:
The pattern is available in sizes:Newborn, 3-6 months, 6-12 months, 12-18 months, 18-24 months, and 2 years.
EVERYTHING YOU NEED TO KNOW
W W W . S W E E T R E D P O P P Y . C O M P A G E 2
RECOMMENDED FABRICS
Medium Weight 4-Way Stretch Knit Fabric
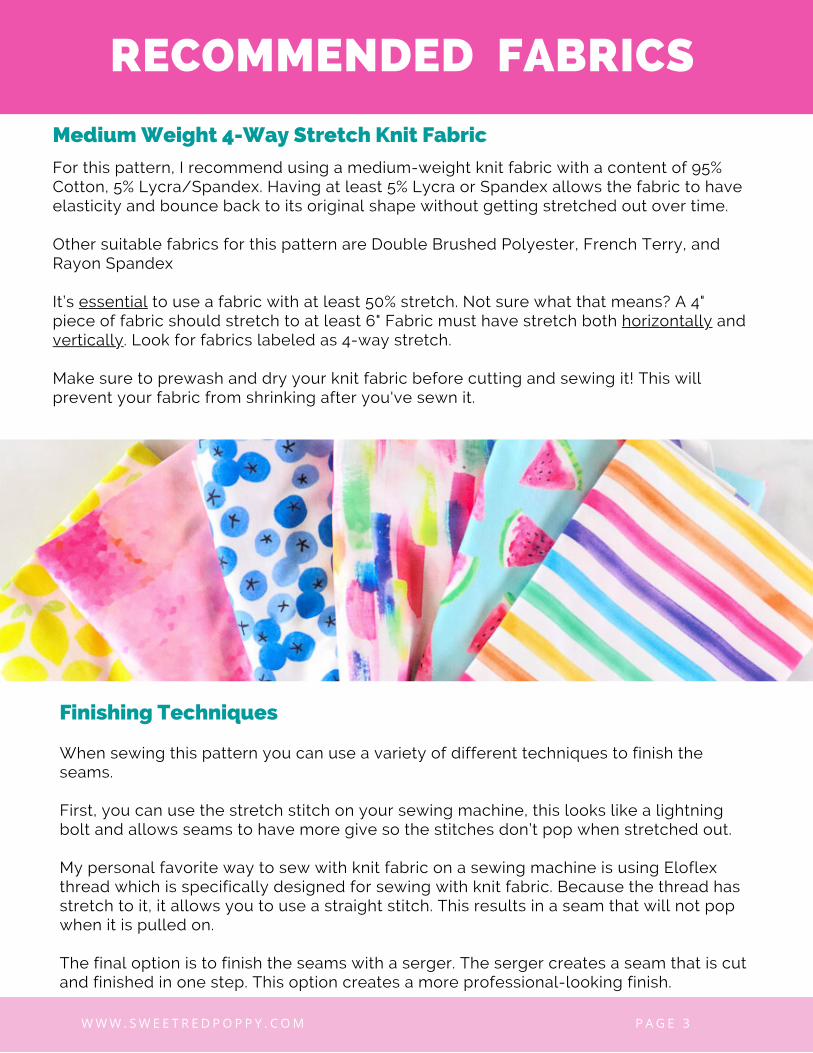
For this pattern, I recommend using a medium-weight knit fabric with a content of 95%Cotton, 5% Lycra/Spandex. Having at least 5% Lycra or Spandex allows the fabric to haveelasticity and bounce back to its original shape without getting stretched out over time. Other suitable fabrics for this pattern are Double Brushed Polyester, French Terry, andRayon Spandex It’s essential to use a fabric with at least 50% stretch. Not sure what that means? A 4"piece of fabric should stretch to at least 6" Fabric must have stretch both horizontally andvertically. Look for fabrics labeled as 4-way stretch. Make sure to prewash and dry your knit fabric before cutting and sewing it! This willprevent your fabric from shrinking after you've sewn it.
W W W . S W E E T R E D P O P P Y . C O M P A G E 3
When sewing this pattern you can use a variety of different techniques to finish theseams. First, you can use the stretch stitch on your sewing machine, this looks like a lightningbolt and allows seams to have more give so the stitches don’t pop when stretched out. My personal favorite way to sew with knit fabric on a sewing machine is using Eloflexthread which is specifically designed for sewing with knit fabric. Because the thread hasstretch to it, it allows you to use a straight stitch. This results in a seam that will not popwhen it is pulled on. The final option is to finish the seams with a serger. The serger creates a seam that is cutand finished in one step. This option creates a more professional-looking finish.
Finishing Techniques
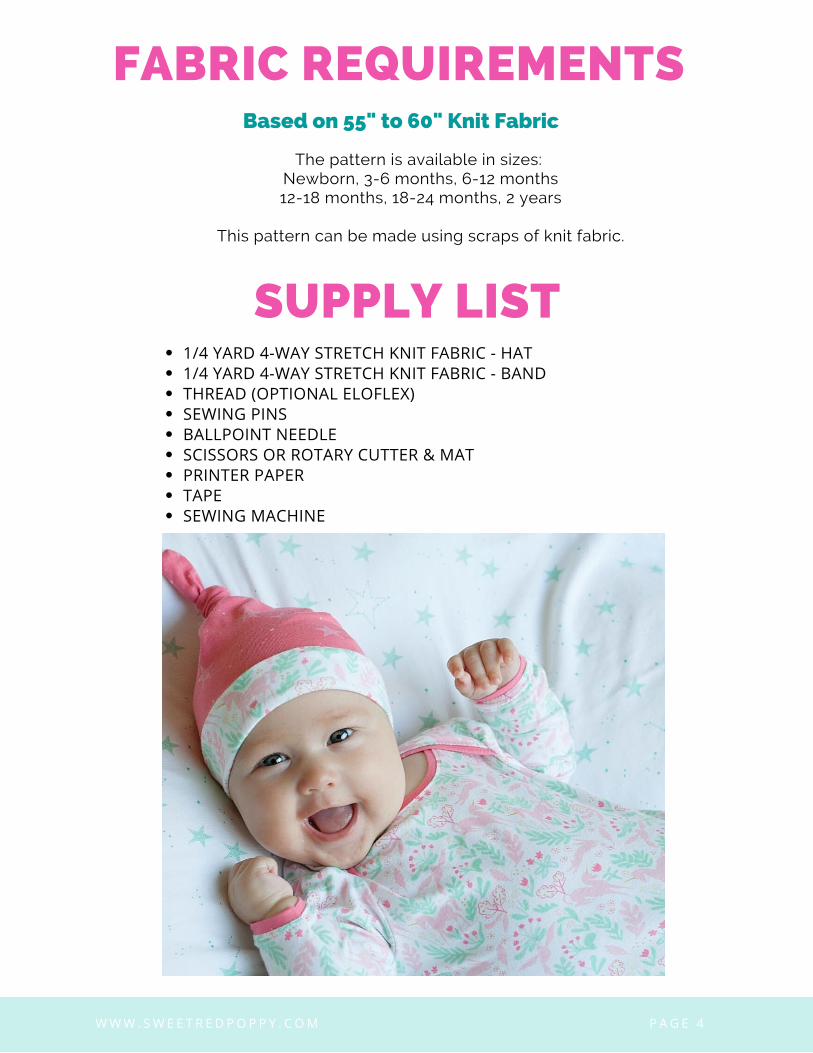
1/4 YARD 4-WAY STRETCH KNIT FABRIC - HAT1/4 YARD 4-WAY STRETCH KNIT FABRIC - BANDTHREAD (OPTIONAL ELOFLEX)SEWING PINSBALLPOINT NEEDLESCISSORS OR ROTARY CUTTER & MATPRINTER PAPERTAPESEWING MACHINE
SUPPLY LIST
FABRIC REQUIREMENTS
W W W . S W E E T R E D P O P P Y . C O M P A G E 4
The pattern is available in sizes: Newborn, 3-6 months, 6-12 months12-18 months, 18-24 months, 2 years
This pattern can be made using scraps of knit fabric.
Based on 55" to 60" Knit Fabric
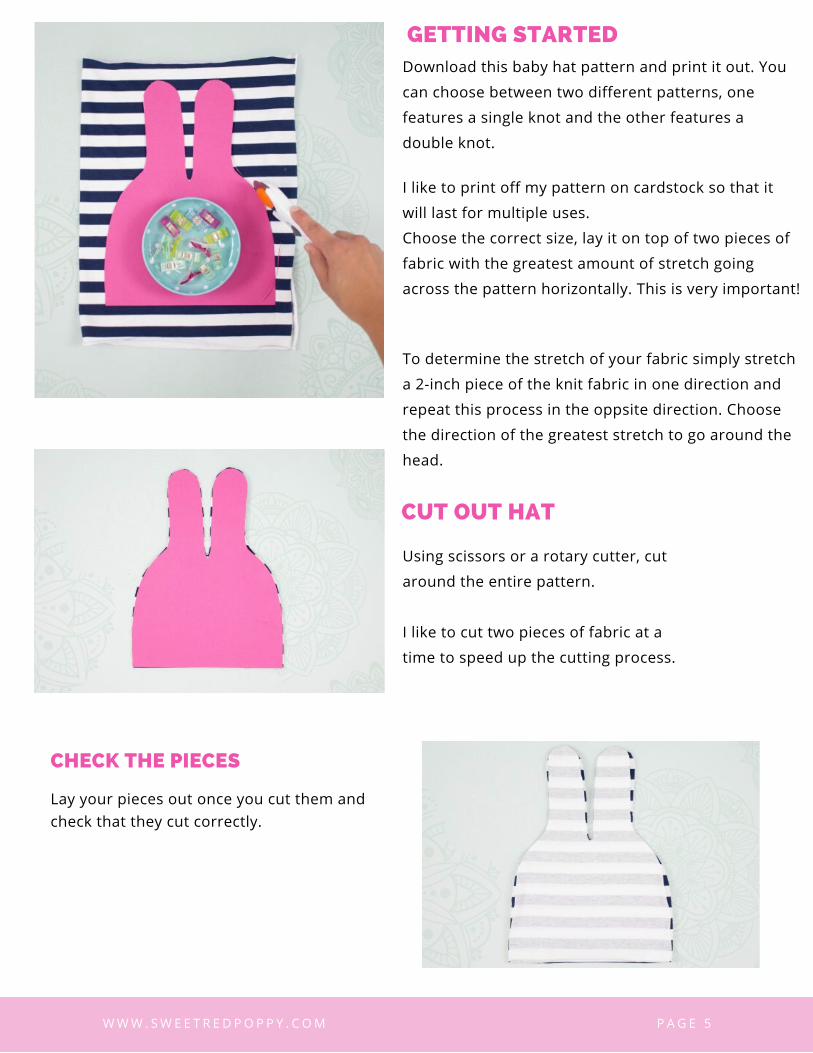
Download this baby hat pattern and print it out. You
can choose between two different patterns, one
features a single knot and the other features a
double knot.
CHECK THE PIECES
Lay your pieces out once you cut them and check that they cut correctly.
Using scissors or a rotary cutter, cut
around the entire pattern.
I like to cut two pieces of fabric at a
time to speed up the cutting process.
I like to print off my pattern on cardstock so that it
will last for multiple uses.
Choose the correct size, lay it on top of two pieces of
fabric with the greatest amount of stretch going
across the pattern horizontally. This is very important!
To determine the stretch of your fabric simply stretch
a 2-inch piece of the knit fabric in one direction and
repeat this process in the oppsite direction. Choose
the direction of the greatest stretch to go around the
head.
GETTING STARTED
CUT OUT HAT
W W W . S W E E T R E D P O P P Y . C O M P A G E 5
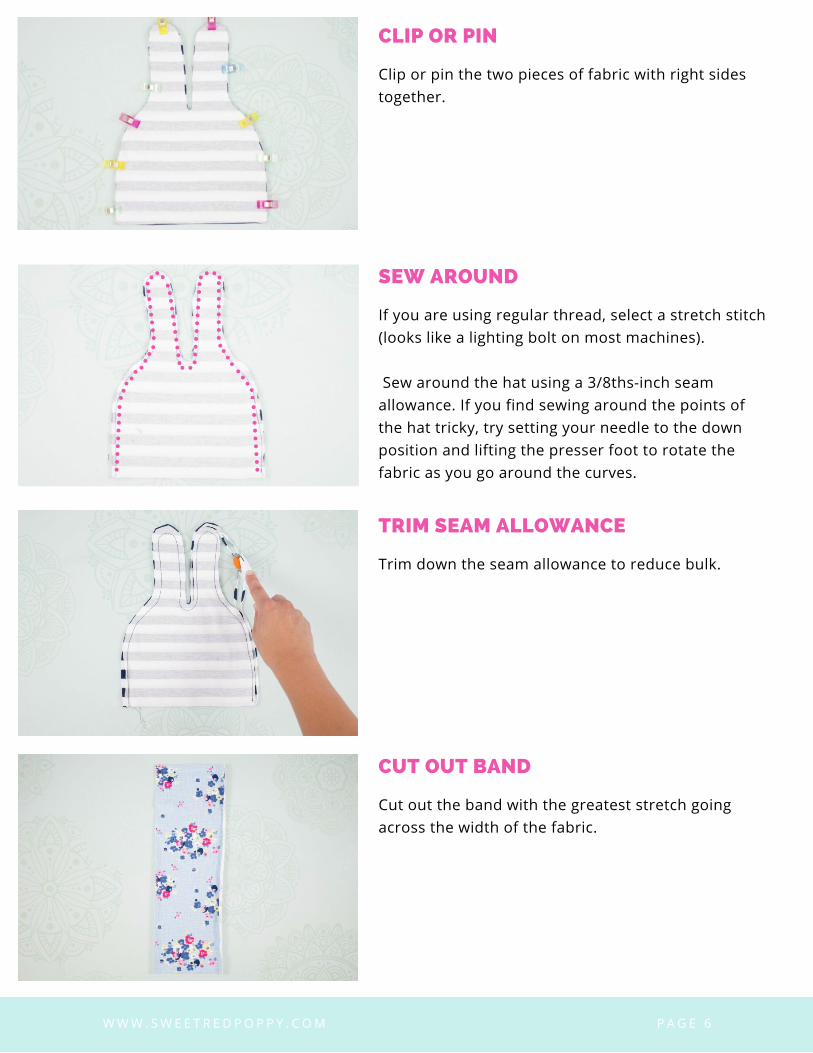
SEW AROUND
If you are using regular thread, select a stretch stitch(looks like a lighting bolt on most machines). Sew around the hat using a 3/8ths-inch seamallowance. If you find sewing around the points ofthe hat tricky, try setting your needle to the downposition and lifting the presser foot to rotate thefabric as you go around the curves.
TRIM SEAM ALLOWANCE
Trim down the seam allowance to reduce bulk.
CLIP OR PIN
Clip or pin the two pieces of fabric with right sidestogether.
W W W . S W E E T R E D P O P P Y . C O M P A G E 6
CUT OUT BAND
Cut out the band with the greatest stretch goingacross the width of the fabric.
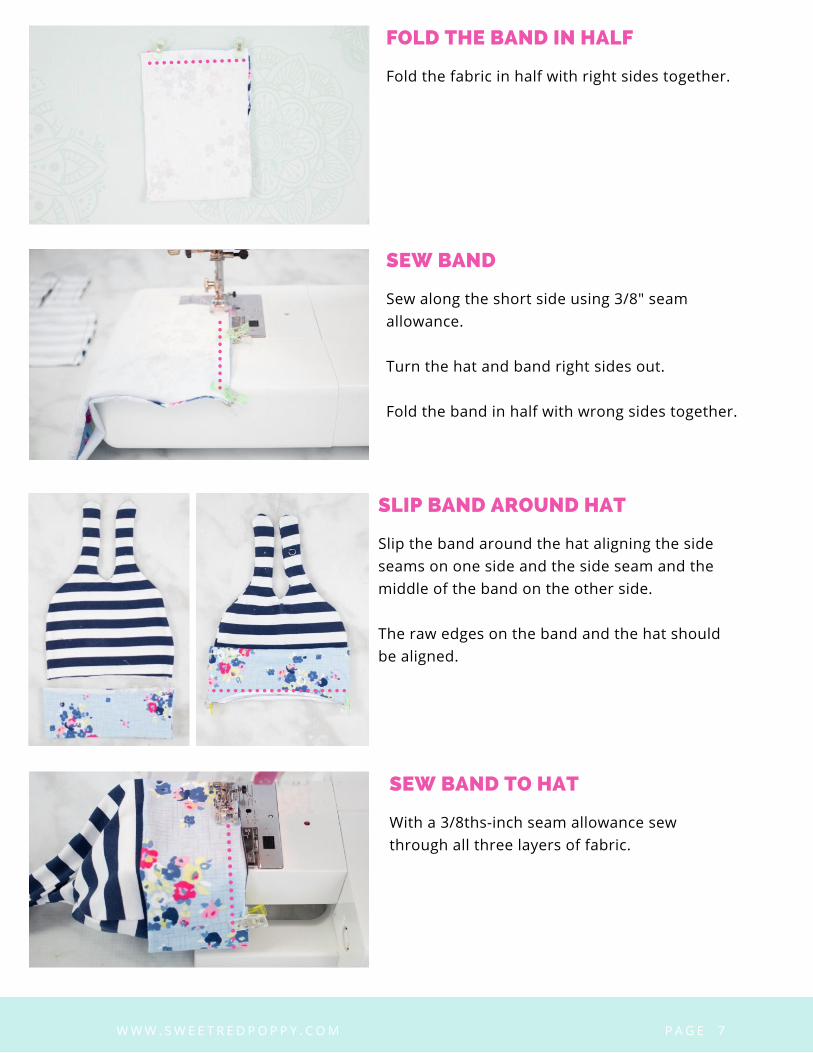
FOLD THE BAND IN HALF
Fold the fabric in half with right sides together.
SEW BAND
Sew along the short side using 3/8" seamallowance. Turn the hat and band right sides out. Fold the band in half with wrong sides together.
SLIP BAND AROUND HAT
Slip the band around the hat aligning the sideseams on one side and the side seam and themiddle of the band on the other side. The raw edges on the band and the hat shouldbe aligned.
W W W . S W E E T R E D P O P P Y . C O M P A G E 7
SEW BAND TO HAT
With a 3/8ths-inch seam allowance sewthrough all three layers of fabric.
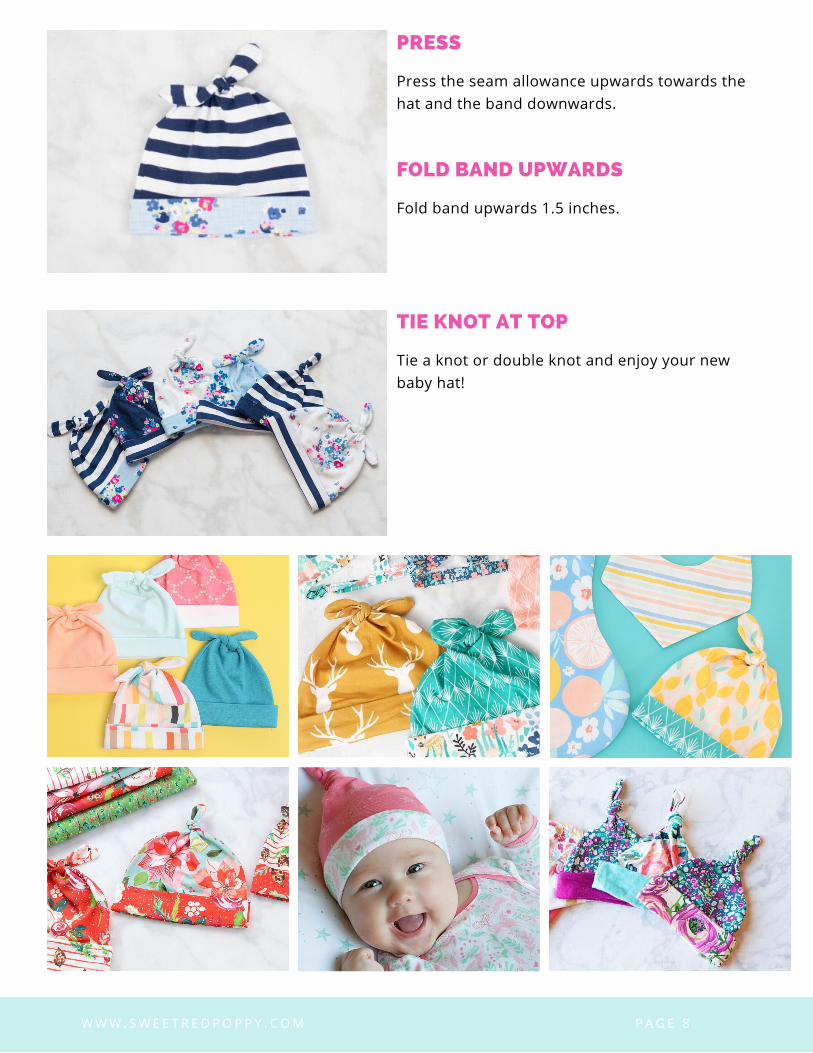
TIE KNOT AT TOP
Tie a knot or double knot and enjoy your newbaby hat!
FOLD BAND UPWARDS
Fold band upwards 1.5 inches.
PRESS
Press the seam allowance upwards towards thehat and the band downwards.
W W W . S W E E T R E D P O P P Y . C O M P A G E 8

J O I N H E R E !
DO YOU LOVE YOURTOP KNOT HATS???
S H A R E Y O U R F I N I S H E D H A T S W I T H U S I N T H E
S W E E T R E D P O P P Y C R A F T I N G & S E W I N G G R O U P !
COPYRIGHTNOTICE
Terms of Use:You are welcome to sell hats made from this pattern on a
small scale.
This is a personal use only pattern and may not be shared orresold.
All contents of this pattern including the video, are protected
under copyright.
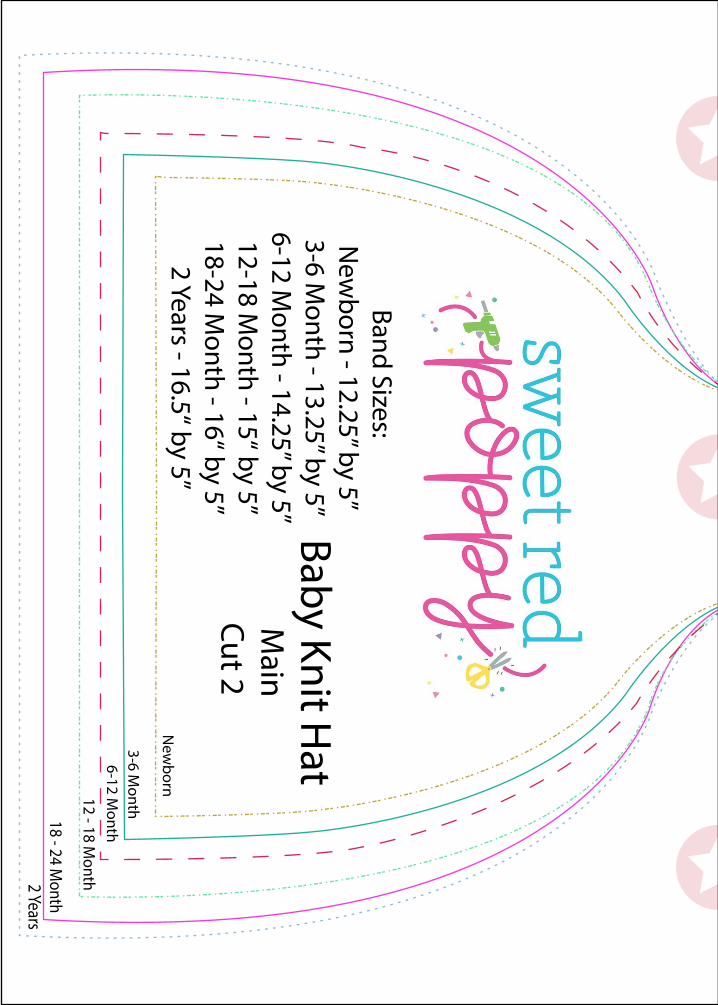
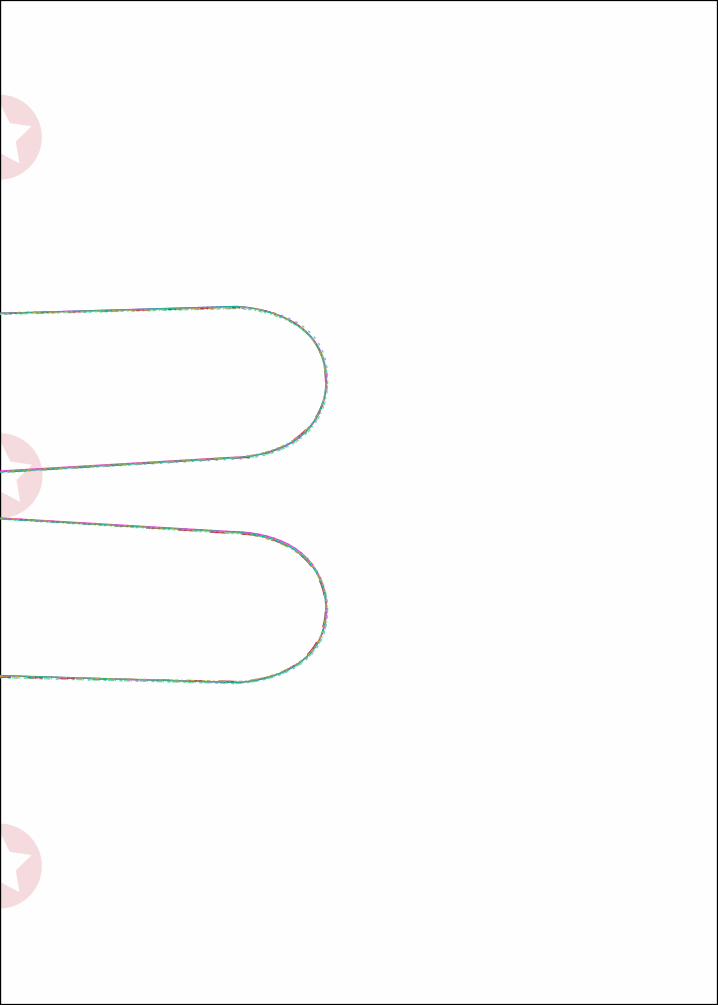
Baby Knit Hat
Main
Cut 2
Band Sizes: N
ewborn - 12.25” by 5”
3-6 Month - 13.25” by 5”
6-12 Month - 14.25” by 5”
12-18 Month - 15“ by 5”
18-24 Month - 16“ by 5”
2 Years - 16.5“ by 5”
2 Years18 - 24 M
onth
12 - 18 Month
6-12 Month
3-6 Month
New
born
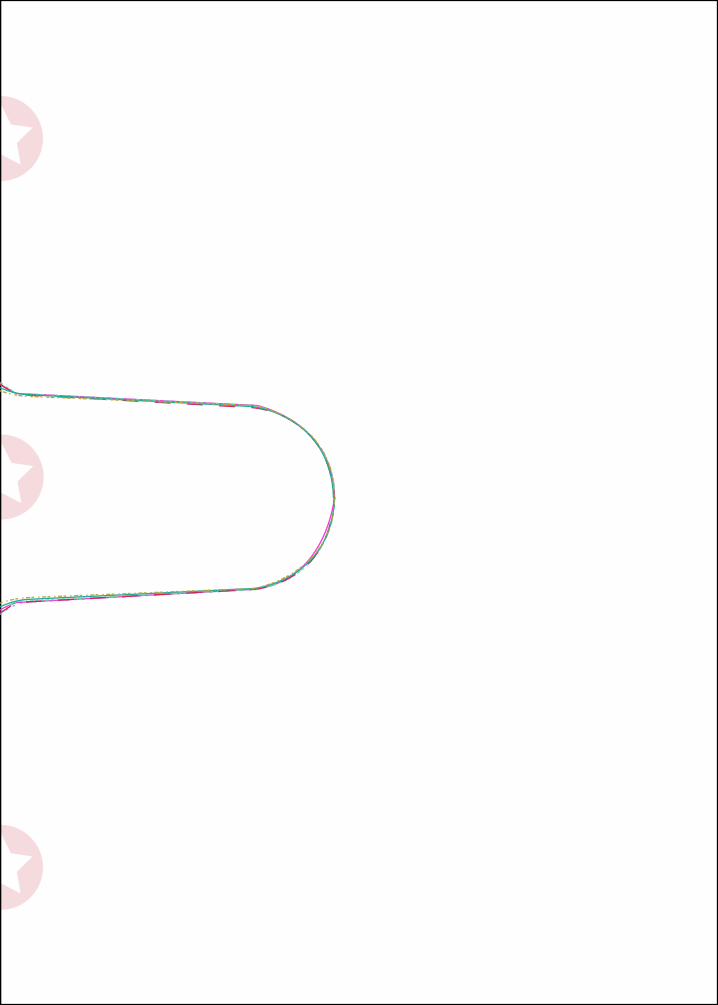
Baby Knit HatBand
Cut 1 on fold
FOLD
2 Years18 - 24 Month
12 - 18 Month
6-12 Month
3-6 Month
Newborn

Baby Knit Hat
Main
Cut 2
Band Sizes: N
ewborn - 12.25” by 5”
3-6 Month - 13.25” by 5”
6-12 Month - 14.25” by 5”
12-18 Month - 15“ by 5”
18-24 Month - 16“ by 5”
2 Years - 16.5“ by 5”
2 Years18 - 24 M
onth
12 - 18 Month
6-12 Month
3-6 Month
New
born
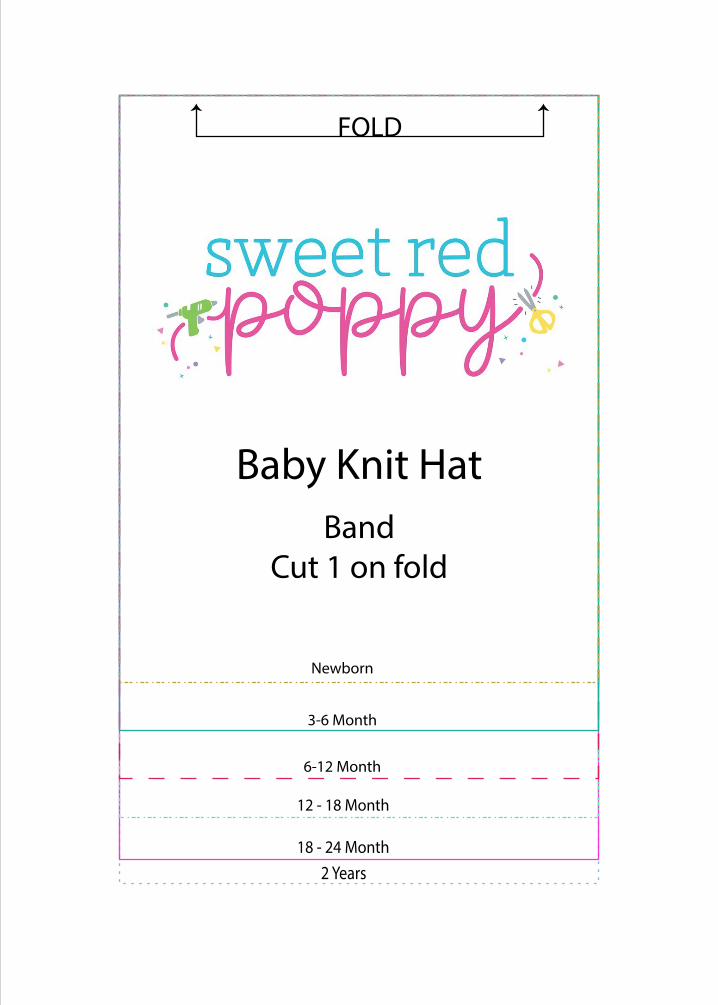
Baby Knit HatBand
Cut 1 on fold
FOLD
2 Years18 - 24 Month
12 - 18 Month
6-12 Month
3-6 Month
Newborn
Recommended