User’s Guide
Command Line Interface
for Switched Rack PDUs

Contents
Product Capabilities..........................1
Features . . . . . . . . . . . . . . . . . . . . . . . . . . . 1Scripting . . . . . . . . . . . . . . . . . . . . . . . . . .1
PDU features not supported by the CLI . . .1
Integration with APC Rack KVM products . .1
System Requirements . . . . . . . . . . . . . . . . . . 2Firmware version required . . . . . . . . . . . . .2
Rack PDUs required . . . . . . . . . . . . . . . . . .2
Exporting an .ini File . . . . . . . . . . . . . . . . . . 2
Using the Commands .......................3
How to Enter CLI Commands . . . . . . . . . . . . 3Capitalization in commands and arguments 3
Editing in the CLI . . . . . . . . . . . . . . . . . . . .3
The Space character as command delimiter 3
Quotation marks and the reverse slant . . .3
Command Error Codes . . . . . . . . . . . . . . . . . 4Format . . . . . . . . . . . . . . . . . . . . . . . . . . .4
Codes . . . . . . . . . . . . . . . . . . . . . . . . . . . .4
CLI Online Help . . . . . . . . . . . . . . . . . . . . . . 4
Logging On and Off.........................5
Logging On . . . . . . . . . . . . . . . . . . . . . . . . . 5User Name and Password . . . . . . . . . . . . .5
Log-on procedure . . . . . . . . . . . . . . . . . . .5
Responses to successful and failed log-on .5
Logging Off . . . . . . . . . . . . . . . . . . . . . . . . . 6Log-off procedure . . . . . . . . . . . . . . . . . . .6
Automatic log-off . . . . . . . . . . . . . . . . . . . .6
Command Syntax .............................7
Characters and Fonts . . . . . . . . . . . . . . . . . . 7
Syntax Examples . . . . . . . . . . . . . . . . . . . . . 8Italic text with no brackets or braces. . . . . .8
Braces and vertical line . . . . . . . . . . . . . . .8
Brackets and ellipses . . . . . . . . . . . . . . . . .8
Large braces . . . . . . . . . . . . . . . . . . . . . . .8
Command Line Interface (CLI) User’s Guide i
Command Reference ........................9
User Management Overview . . . . . . . . . . . . 9Types of users who can access the CLI . . . 9
Authentication of users . . . . . . . . . . . . . . 9
User Management Commands . . . . . . . . . . 10adduser . . . . . . . . . . . . . . . . . . . . . . . . . 10
assign . . . . . . . . . . . . . . . . . . . . . . . . . . 11
deluser . . . . . . . . . . . . . . . . . . . . . . . . . . 11
passwd . . . . . . . . . . . . . . . . . . . . . . . . . 12
unassign . . . . . . . . . . . . . . . . . . . . . . . . 13
whoami . . . . . . . . . . . . . . . . . . . . . . . . . 13
Outlet Overview . . . . . . . . . . . . . . . . . . . . 14Access to outlets . . . . . . . . . . . . . . . . . . 14
Synchronized outlet groups . . . . . . . . . . 14
Outlet Commands . . . . . . . . . . . . . . . . . . . 15off . . . . . . . . . . . . . . . . . . . . . . . . . . . . . 15
on . . . . . . . . . . . . . . . . . . . . . . . . . . . . . 16
outletgroups . . . . . . . . . . . . . . . . . . . . . 17
poweroffdelay . . . . . . . . . . . . . . . . . . . . 18
powerondelay . . . . . . . . . . . . . . . . . . . . 19
reboot . . . . . . . . . . . . . . . . . . . . . . . . . . 20
rebootduration . . . . . . . . . . . . . . . . . . . . 21
status . . . . . . . . . . . . . . . . . . . . . . . . . . . 22
Switched Rack PDU Commands . . . . . . . . . 23current . . . . . . . . . . . . . . . . . . . . . . . . . . 23
list . . . . . . . . . . . . . . . . . . . . . . . . . . . . . 24
lowloadwarning . . . . . . . . . . . . . . . . . . . 25
name . . . . . . . . . . . . . . . . . . . . . . . . . . . 25
nearoverloadwarning . . . . . . . . . . . . . . . 26
overloadalarm . . . . . . . . . . . . . . . . . . . . 27
overloadrestriction . . . . . . . . . . . . . . . . . 28
pducoldstartdelay . . . . . . . . . . . . . . . . . 29
power . . . . . . . . . . . . . . . . . . . . . . . . . . 29
General Management Commands . . . . . . . 30exit . . . . . . . . . . . . . . . . . . . . . . . . . . . . 30
help . . . . . . . . . . . . . . . . . . . . . . . . . . . . 30
reset_defaults_pdu . . . . . . . . . . . . . . . . . 30
uploadini . . . . . . . . . . . . . . . . . . . . . . . . 31
ver . . . . . . . . . . . . . . . . . . . . . . . . . . . . . 32
Index .............................................33
ii Command Line Interface (CLI) User’s Guide
Product Capabilities
FeaturesScripting
The Command Line Interface (CLI) for American Power Conversion (APC®) Switched Rack PDUs enables you to create scripts for automated operation. The existing text-based control console interface to Switched Rack PDUs is difficult to use for scripting because it is menu-driven. APC will support both interfaces.
PDU features not supported by the CLI
The Web, control console, and SNMP interfaces for Switched Rack PDUs support the following features that do not have corresponding CLI commands:
• Configuration for scheduling• Configuration of synchronized outlet groups• Advanced outlet control commands, such as
sequenced on • Event logging, event actions, and other
features that are provided through the APC AOS firmware module and that you use for monitoring through the Web interface and control console.
Integration with APC Rack KVM products
You can use the CLI to create scripts to automate the management of your Switched Rack PDUs through the following APC Rack Keyboard, Video, Mouse (KVM) products.
• AP5401• AP5405• AP5456
The CLI is not supported by APC Metered Rack PDUs
To configure features for which there are not corresponding CLI commands, see “System Requirements” on page 2 and “uploadini” on page 31.
Command Line Interface (CLI) User’s Guide 1
System Requirements
Firmware version required
To use the Command Line Interface, your Switched Rack PDU must be running firmware version 2.7.0 for the AOS firmware module and 2.7.3 for the application firmware module.
Rack PDUs required
You can use the command line interface only with APC Switched Rack PDUs.
Exporting an .ini FileYou can configure all parameters of a Switched Rack PDU (including those for which there are not specific CLI commands) by using the CLI to transfer an .ini file to that PDU. The CLI uses XMODEM to perform the transfer. However, you cannot read the current .ini file through XMODEM.
See “uploadini” on page 31.
2 Command Line Interface (CLI) User’s Guide
Using the Commands
How to Enter CLI CommandsCapitalization in commands and arguments
Commands are valid in lowercase, uppercase, or mixed case, but arguments are case-sensitive unless specified otherwise.
Editing in the CLI
The BACK SPACE key deletes the most recently entered character of the current command string. No other editing function is available during command entry.
The CLI does not retain a command history. You cannot retrieve previously entered commands.
The Space character as command delimiter
The CLI uses one Space character (ASCII 0x20) as the delimiter between commands and arguments; extra Space characters are ignored.
Quotation marks and the reverse slant
Use quotation marks (ASCII 0x22) and the reverse slant (\: decimal code 92) as follows:
• For both input and output, enclose in quotation marks any string value that begins or ends with spaces or contain commas or semicolons.
• Do not use traditional escape sequences (the reverse slant followed by a lowercase alphabetic character or by one or more numeric characters) preceding special characters within strings. The CLI does not recognize such escape sequences, and the resulting error causes the entire keyword and value pair to be ignored.
• If an argument value contains a quotation mark or reverse slant, it must be preceded by a reverse slant only as its escape character. For example, this command adds the user "John Doe" to the local database:
adduser \"John Doe"
• If an input string contains a quotation mark or reverse slant, enclose the string in quotation marks. For example, this command adds the user pdu\\device to the local database:
adduser "pdu\\device user"
• Optionally, you can use quotation marks to enclose any argument value.
Command Line Interface (CLI) User’s Guide 3
Command Error Codes
Format
The CLI reports all errors in the following format:E[0-9][0-9][0-9]: Error message
The CLI reports all successful command operations with the message OK, followed by the output of the command.
The CLI command error codes enable scripted operations to detect error conditions reliably without having to match error message text.
Codes
CLI Online HelpUse the help command to do the following:
• Obtain information about the purpose and syntax of a specified command.
• Check whether a command exists. If the command you specify is not a valid CLI command, the message Command does not exist is displayed.
• List the commands that are available to you, based on your account type.
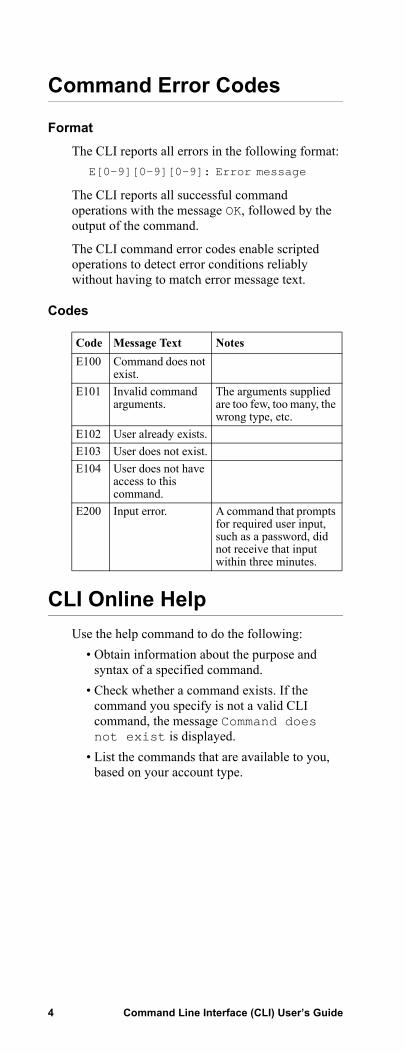
Code Message Text NotesE100 Command does not
exist.E101 Invalid command
arguments.The arguments supplied are too few, too many, the wrong type, etc.
E102 User already exists.E103 User does not exist.E104 User does not have
access to this command.
E200 Input error. A command that prompts for required user input, such as a password, did not receive that input within three minutes.
4 Command Line Interface (CLI) User’s Guide
Logging On and Off
Logging OnUser Name and Password
If you are not using a KVM, configure the administrator user name and password through the Web or control console interface of the PDU.
If you are using a KVM, configure the administrator user name and password in the KVM configuration file /etc/pm.APCPDU. The default for both is apc. The pm.APCPDU file is saved to non-volatile memory when you save your configuration. The -c option is then appended to the configured password automatically to log you on to the CLI when you log on to the PDU.
Log-on procedure
To log on to the CLI:1. Connect to the Switched Rack PDU through
Telnet, through SSH version 1 or 2, or serially.2. At the User Name prompt, enter your user
name.3. At the Password prompt, enter your password
(followed by a space and -c if you are not using a KVM), and press ENTER.
Responses to successful and failed log-on
When you attempt to log on to the CLI:• If the user name and password you entered are
valid and the CLI is available, you are logged on to the CLI. The prompt APC> is displayed.
• After three consecutive unsuccessful log-on attempts, the Switched Rack PDU prevents further attempts for two minutes.
• If the CLI is unavailable, the Switched Rack PDU application layer does not start, i.e., the -c option does not work.
• If you log onto the CLI, and the application firmware of the Switched Rack PDU has not finished initializing, the CLI displays the following message and logs you off.The Switched Rack PDU is still initializing. Please try again later.
• If the administrator password is configured incorrectly (does not meet the PDU criteria for a valid password) in the KVM pm.APCPDU configuration file, the Switched Rack PDU prevents further log-on attempts for 150 seconds. Correct the password configuration before trying to log on again.
Command Line Interface (CLI) User’s Guide 5

Logging Off
Log-off procedure
To log off from the CLI, use one of the following commands: exit, logout, logoff, quit, or bye.
Automatic log-off
You will be logged off automatically in the following circumstances:
• If the inactivity logout time of the Switched Rack PDU (3 minutes by default, or a configured time of 1 to 10 minutes) expires without keyboard input or input through the mouse within the CLI interface. Movement of the mouse pointer or clicking the mouse without actual input does not restart the timer for inactivity logout.
• If the value yes is configured for the option logoutAfterCommandComplete in the KVM pm.APCPDU configuration file, and the CLI completes executing the command that you entered. The default for this option is no. A value of yes provides maximum availability of the text-based interface to other users.
• If your connection to the Switched Rack PDU is through Telnet or SSH version 1 or 2, and there is a log-on serially to the Switched Rack PDU CLI to execute a command. Serial access to the CLI always has priority over remote access.
6 Command Line Interface (CLI) User’s Guide
Command Syntax
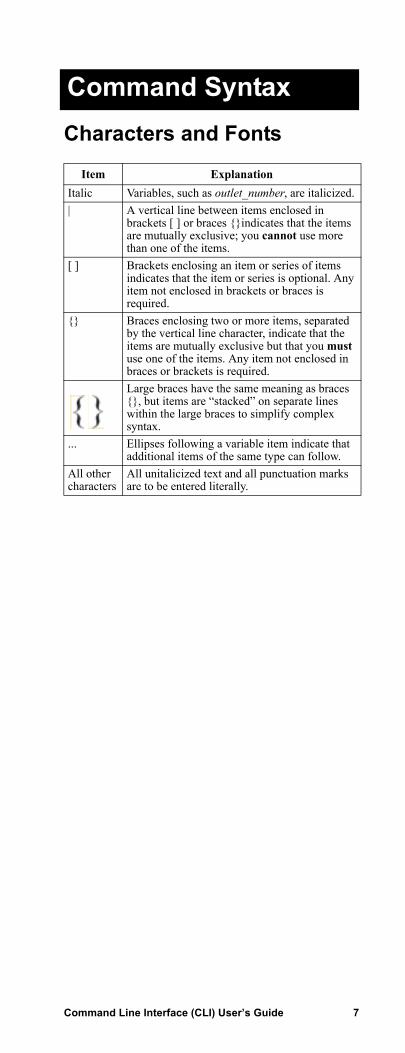
Characters and FontsItem ExplanationItalic Variables, such as outlet_number, are italicized.| A vertical line between items enclosed in
brackets [ ] or braces {}indicates that the items are mutually exclusive; you cannot use more than one of the items.
[ ] Brackets enclosing an item or series of items indicates that the item or series is optional. Any item not enclosed in brackets or braces is required.
{} Braces enclosing two or more items, separated by the vertical line character, indicate that the items are mutually exclusive but that you must use one of the items. Any item not enclosed in braces or brackets is required.
Large braces have the same meaning as braces {}, but items are “stacked” on separate lines within the large braces to simplify complex syntax.
... Ellipses following a variable item indicate that additional items of the same type can follow.
All other characters
All unitalicized text and all punctuation marks are to be entered literally.
Command Line Interface (CLI) User’s Guide 7
Syntax Examples
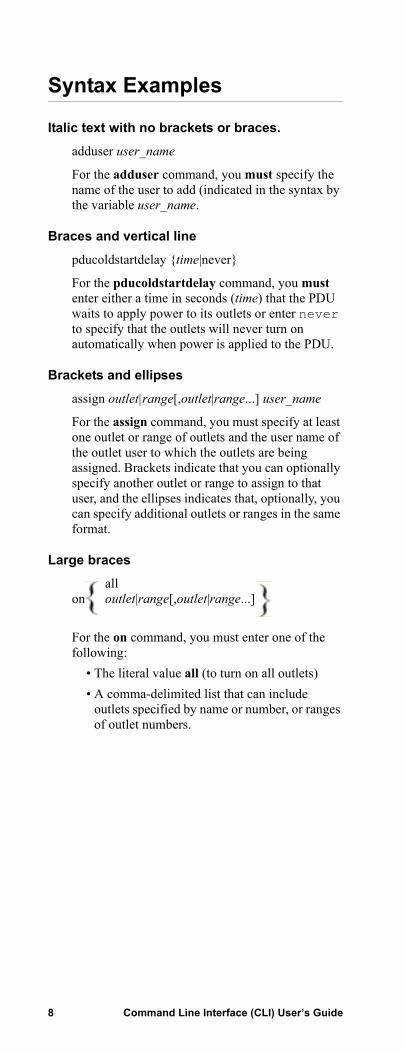
Italic text with no brackets or braces.
adduser user_name
For the adduser command, you must specify the name of the user to add (indicated in the syntax by the variable user_name.
Braces and vertical line
pducoldstartdelay {time|never}
For the pducoldstartdelay command, you must enter either a time in seconds (time) that the PDU waits to apply power to its outlets or enter never to specify that the outlets will never turn on automatically when power is applied to the PDU.
Brackets and ellipses
assign outlet|range[,outlet|range...] user_name
For the assign command, you must specify at least one outlet or range of outlets and the user name of the outlet user to which the outlets are being assigned. Brackets indicate that you can optionally specify another outlet or range to assign to that user, and the ellipses indicates that, optionally, you can specify additional outlets or ranges in the same format.
Large braces
allon outlet|range[,outlet|range...]
For the on command, you must enter one of the following:
• The literal value all (to turn on all outlets) • A comma-delimited list that can include
outlets specified by name or number, or ranges of outlet numbers.
8 Command Line Interface (CLI) User’s Guide
Command Reference
User Management OverviewTypes of users who can access the CLI
The CLI is accessible to three of the four user types supported by the Switched Rack PDU:
• The administrator has unrestricted access.• The device manager (device-only user) can
view status and configure most settings, including all settings of all outlets.
• An outlet user can control and configure only those outlets assigned to that user
The read-only user has no access to the CLI.
Authentication of usersDirect access: When a user attempts to log on to the CLI directly, that user’s credentials are compared with the local user database or are sent to a RADIUS server for validation, according to the authentication method configured for the PDU. If the credentials are successfully validated, the user is granted access, with permissions appropriate to the user type.
Access through a KVM: An administrator can use the Power Management feature of the KVM device to manage users and their access to outlets. Because these user accounts are separate from those created in the CLI of the PDU, in this case the KVM is responsible for authentication and outlet access permissions.
Command Line Interface (CLI) User’s Guide 9
User Management Commands
adduserSyntax:
adduser user_name
Description: Add an outlet user to the local database. Until an outlet user is explicitly assigned access to specific outlets, that user, by default, has no outlet access.
Access: Administrator only.
Parameter:
Output Format:
OKPassword: password Re-enter password: password User name and password set for user user_name.
Error Messages: E101, E102, E104
user_name One to ten printable ASCII characters.
10 Command Line Interface (CLI) User’s Guide
Command Reference: User Management
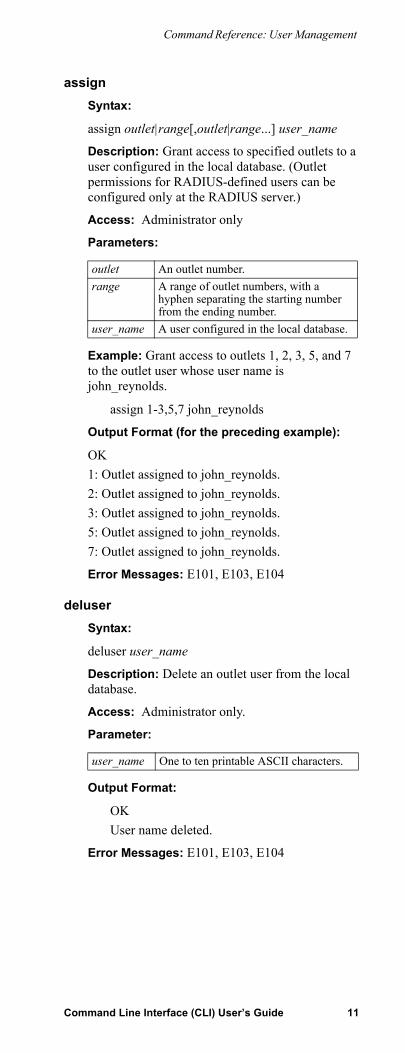
assignSyntax:
assign outlet|range[,outlet|range...] user_name
Description: Grant access to specified outlets to a user configured in the local database. (Outlet permissions for RADIUS-defined users can be configured only at the RADIUS server.)
Access: Administrator only
Parameters:
Example: Grant access to outlets 1, 2, 3, 5, and 7 to the outlet user whose user name is john_reynolds.
assign 1-3,5,7 john_reynolds
Output Format (for the preceding example):
OK1: Outlet assigned to john_reynolds.2: Outlet assigned to john_reynolds.3: Outlet assigned to john_reynolds.5: Outlet assigned to john_reynolds.7: Outlet assigned to john_reynolds.
Error Messages: E101, E103, E104
deluserSyntax:
deluser user_name
Description: Delete an outlet user from the local database.
Access: Administrator only.
Parameter:
Output Format:
OKUser name deleted.
Error Messages: E101, E103, E104
outlet An outlet number.range A range of outlet numbers, with a
hyphen separating the starting number from the ending number.
user_name A user configured in the local database.
user_name One to ten printable ASCII characters.
Command Line Interface (CLI) User’s Guide 11
Command Reference: User Management Commands
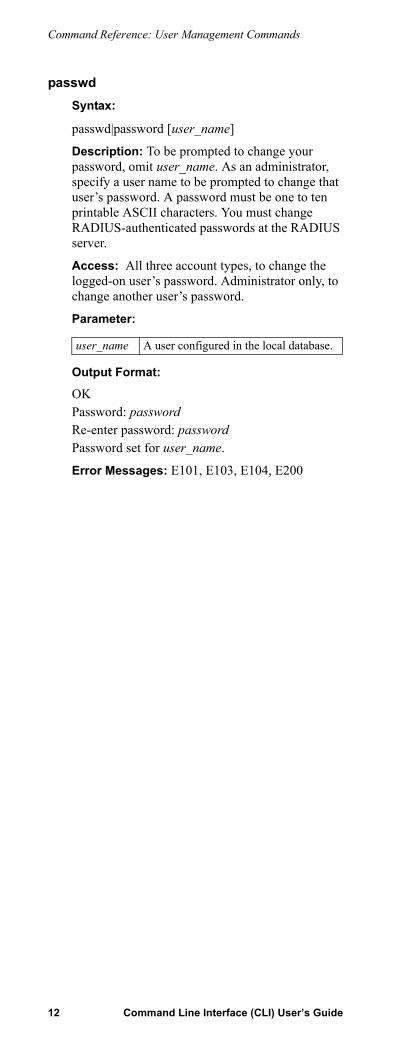
passwdSyntax:
passwd|password [user_name]
Description: To be prompted to change your password, omit user_name. As an administrator, specify a user name to be prompted to change that user’s password. A password must be one to ten printable ASCII characters. You must change RADIUS-authenticated passwords at the RADIUS server.
Access: All three account types, to change the logged-on user’s password. Administrator only, to change another user’s password.
Parameter:
Output Format:
OKPassword: passwordRe-enter password: passwordPassword set for user_name.
Error Messages: E101, E103, E104, E200
user_name A user configured in the local database.
12 Command Line Interface (CLI) User’s Guide
Command Reference: User Management
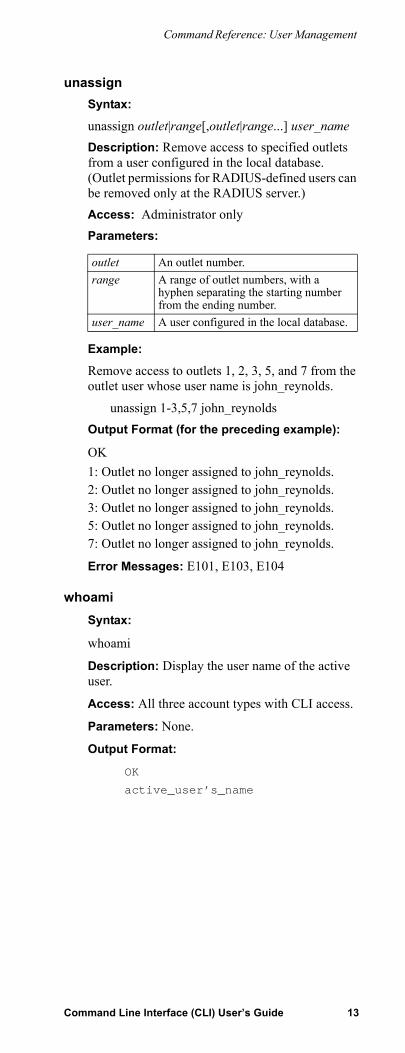
unassignSyntax:
unassign outlet|range[,outlet|range...] user_nameDescription: Remove access to specified outlets from a user configured in the local database. (Outlet permissions for RADIUS-defined users can be removed only at the RADIUS server.) Access: Administrator onlyParameters:
Example:
Remove access to outlets 1, 2, 3, 5, and 7 from the outlet user whose user name is john_reynolds.
unassign 1-3,5,7 john_reynoldsOutput Format (for the preceding example):
OK1: Outlet no longer assigned to john_reynolds.2: Outlet no longer assigned to john_reynolds.3: Outlet no longer assigned to john_reynolds.5: Outlet no longer assigned to john_reynolds.7: Outlet no longer assigned to john_reynolds.
Error Messages: E101, E103, E104
whoamiSyntax:
whoami
Description: Display the user name of the active user.
Access: All three account types with CLI access.
Parameters: None.
Output Format:
OK
active_user’s_name
outlet An outlet number.range A range of outlet numbers, with a
hyphen separating the starting number from the ending number.
user_name A user configured in the local database.
Command Line Interface (CLI) User’s Guide 13
Outlet Overview
Access to outlets
An administrator or an outlet user can use all the CLI outlet commands to manage outlets, but an outlet user can use these commands to manage only the outlets to which he or she has been granted access. (An administrator grants access through the CLI assign command or through the Web or control console interfaces of the Switched Rack PDU.)
Synchronized outlet groups
You can use the outletgroups command to list synchronized outlet groups that are defined on the Switched Rack PDU.
You cannot create, modify, or manage synchronized outlet groups through the CLI, except by using the uploadini command. You must be an administrator to use that command.
See “uploadini” on page 31.
See also
To create, modify, or manage synchronized outlet groups through the Web interface of the Switched Rack PDU, see the Switched Rack PDU User’s Guide, available on the CD you received with the PDU and on the APC Web site (www.apc.com).
14 Command Line Interface (CLI) User’s Guide
Outlet Commands
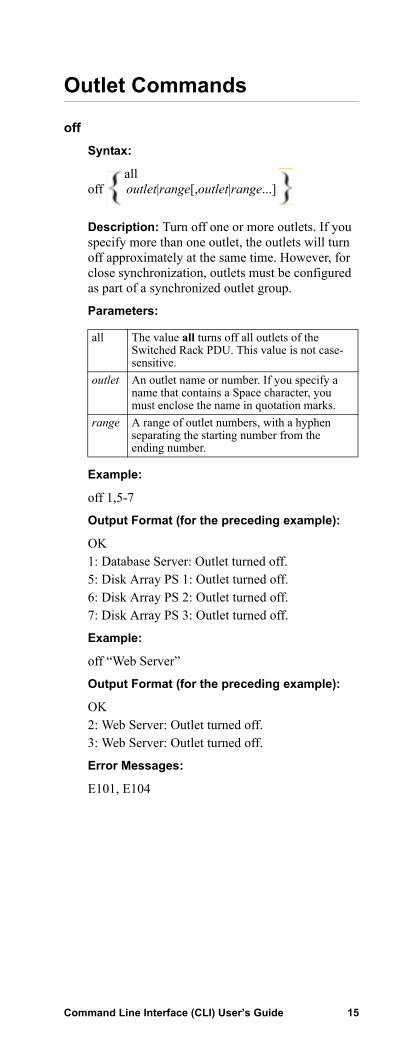
offSyntax:
alloff outlet|range[,outlet|range...]
Description: Turn off one or more outlets. If you specify more than one outlet, the outlets will turn off approximately at the same time. However, for close synchronization, outlets must be configured as part of a synchronized outlet group.
Parameters:
Example:
off 1,5-7
Output Format (for the preceding example):
OK1: Database Server: Outlet turned off.5: Disk Array PS 1: Outlet turned off.6: Disk Array PS 2: Outlet turned off.7: Disk Array PS 3: Outlet turned off.
Example:
off “Web Server”
Output Format (for the preceding example):
OK2: Web Server: Outlet turned off.3: Web Server: Outlet turned off.
Error Messages:
E101, E104
all The value all turns off all outlets of the Switched Rack PDU. This value is not case-sensitive.
outlet An outlet name or number. If you specify a name that contains a Space character, you must enclose the name in quotation marks.
range A range of outlet numbers, with a hyphen separating the starting number from the ending number.
Command Line Interface (CLI) User’s Guide 15
Command Reference: Outlet Commands
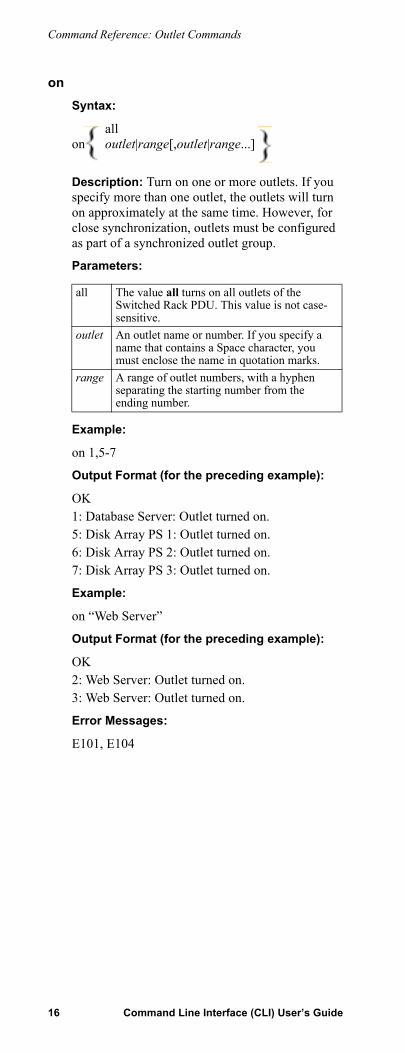
onSyntax:
allon outlet|range[,outlet|range...]
Description: Turn on one or more outlets. If you specify more than one outlet, the outlets will turn on approximately at the same time. However, for close synchronization, outlets must be configured as part of a synchronized outlet group.
Parameters:
Example:
on 1,5-7
Output Format (for the preceding example):
OK1: Database Server: Outlet turned on.5: Disk Array PS 1: Outlet turned on.6: Disk Array PS 2: Outlet turned on.7: Disk Array PS 3: Outlet turned on.
Example:
on “Web Server”
Output Format (for the preceding example):
OK2: Web Server: Outlet turned on.3: Web Server: Outlet turned on.
Error Messages:
E101, E104
all The value all turns on all outlets of the Switched Rack PDU. This value is not case-sensitive.
outlet An outlet name or number. If you specify a name that contains a Space character, you must enclose the name in quotation marks.
range A range of outlet numbers, with a hyphen separating the starting number from the ending number.
16 Command Line Interface (CLI) User’s Guide
Command Reference: Outlet Commands
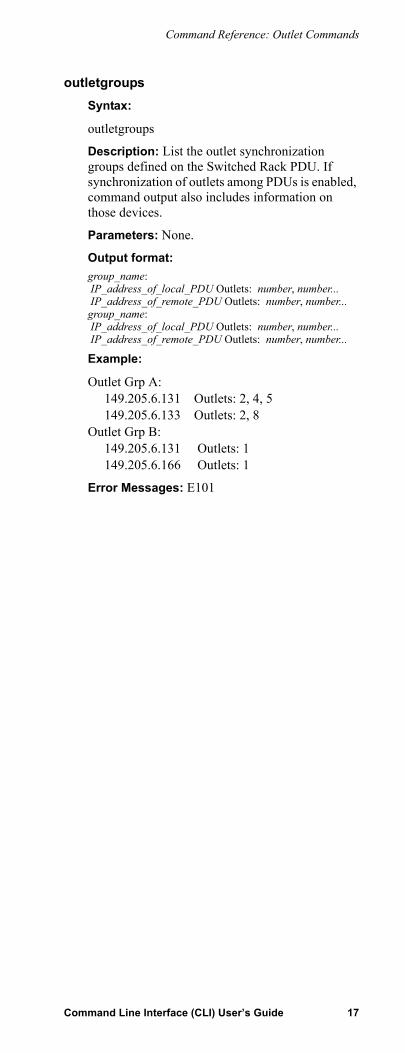
outletgroupsSyntax:
outletgroups
Description: List the outlet synchronization groups defined on the Switched Rack PDU. If synchronization of outlets among PDUs is enabled, command output also includes information on those devices.
Parameters: None.
Output format: group_name: IP_address_of_local_PDU Outlets: number, number... IP_address_of_remote_PDU Outlets: number, number...group_name: IP_address_of_local_PDU Outlets: number, number... IP_address_of_remote_PDU Outlets: number, number...
Example:
Outlet Grp A: 149.205.6.131 Outlets: 2, 4, 5 149.205.6.133 Outlets: 2, 8Outlet Grp B: 149.205.6.131 Outlets: 1 149.205.6.166 Outlets: 1
Error Messages: E101
Command Line Interface (CLI) User’s Guide 17
Command Reference: Outlet Commands
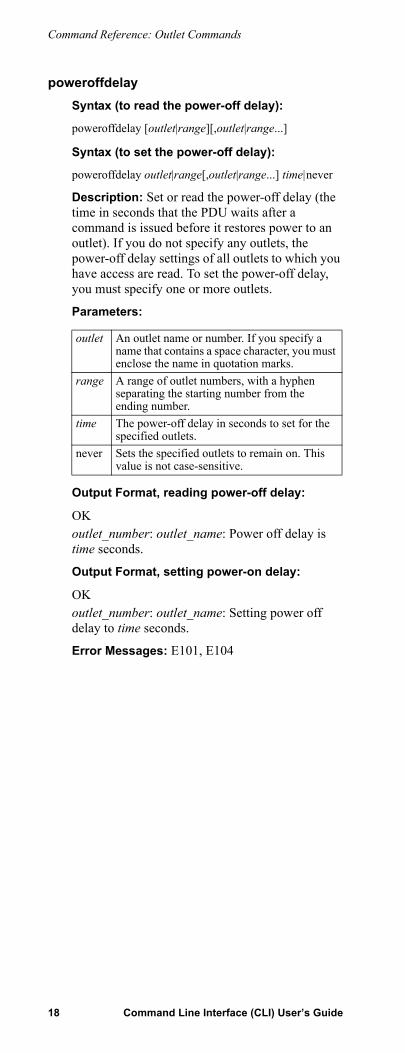
poweroffdelaySyntax (to read the power-off delay):
poweroffdelay [outlet|range][,outlet|range...]
Syntax (to set the power-off delay):
poweroffdelay outlet|range[,outlet|range...] time|never
Description: Set or read the power-off delay (the time in seconds that the PDU waits after a command is issued before it restores power to an outlet). If you do not specify any outlets, the power-off delay settings of all outlets to which you have access are read. To set the power-off delay, you must specify one or more outlets.
Parameters:
Output Format, reading power-off delay:
OKoutlet_number: outlet_name: Power off delay is time seconds.
Output Format, setting power-on delay:
OKoutlet_number: outlet_name: Setting power off delay to time seconds.
Error Messages: E101, E104
outlet An outlet name or number. If you specify a name that contains a space character, you must enclose the name in quotation marks.
range A range of outlet numbers, with a hyphen separating the starting number from the ending number.
time The power-off delay in seconds to set for the specified outlets.
never Sets the specified outlets to remain on. This value is not case-sensitive.
18 Command Line Interface (CLI) User’s Guide
Command Reference: Outlet Commands
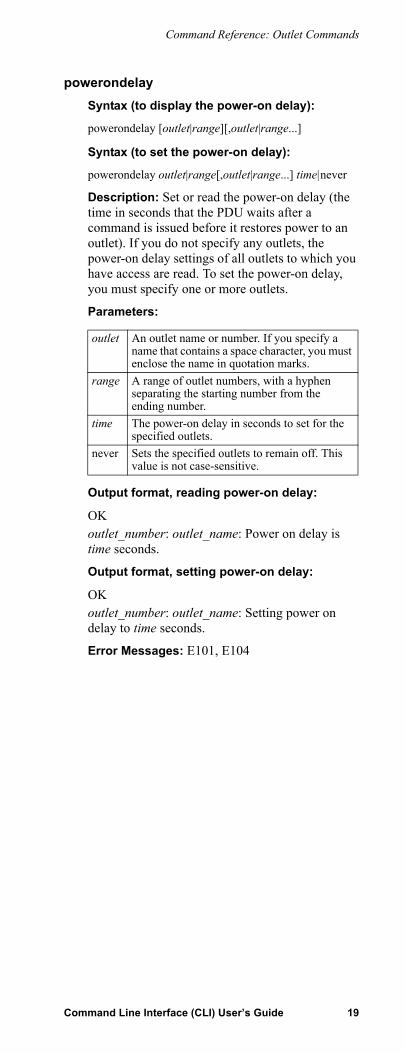
powerondelaySyntax (to display the power-on delay):
powerondelay [outlet|range][,outlet|range...]
Syntax (to set the power-on delay):
powerondelay outlet|range[,outlet|range...] time|never
Description: Set or read the power-on delay (the time in seconds that the PDU waits after a command is issued before it restores power to an outlet). If you do not specify any outlets, the power-on delay settings of all outlets to which you have access are read. To set the power-on delay, you must specify one or more outlets.
Parameters:
Output format, reading power-on delay:
OKoutlet_number: outlet_name: Power on delay is time seconds.
Output format, setting power-on delay:
OKoutlet_number: outlet_name: Setting power on delay to time seconds.
Error Messages: E101, E104
outlet An outlet name or number. If you specify a name that contains a space character, you must enclose the name in quotation marks.
range A range of outlet numbers, with a hyphen separating the starting number from the ending number.
time The power-on delay in seconds to set for the specified outlets.
never Sets the specified outlets to remain off. This value is not case-sensitive.
Command Line Interface (CLI) User’s Guide 19
Command Reference: Outlet Commands
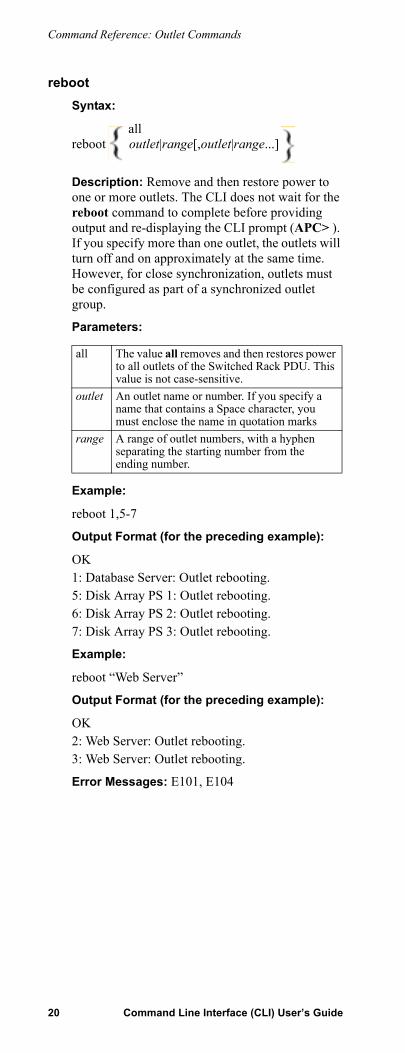
rebootSyntax:
allreboot outlet|range[,outlet|range...]
Description: Remove and then restore power to one or more outlets. The CLI does not wait for the reboot command to complete before providing output and re-displaying the CLI prompt (APC> ). If you specify more than one outlet, the outlets will turn off and on approximately at the same time. However, for close synchronization, outlets must be configured as part of a synchronized outlet group.
Parameters:
Example:
reboot 1,5-7
Output Format (for the preceding example):
OK1: Database Server: Outlet rebooting.5: Disk Array PS 1: Outlet rebooting.6: Disk Array PS 2: Outlet rebooting.7: Disk Array PS 3: Outlet rebooting.
Example:
reboot “Web Server”
Output Format (for the preceding example):
OK2: Web Server: Outlet rebooting.3: Web Server: Outlet rebooting.
Error Messages: E101, E104
all The value all removes and then restores power to all outlets of the Switched Rack PDU. This value is not case-sensitive.
outlet An outlet name or number. If you specify a name that contains a Space character, you must enclose the name in quotation marks
range A range of outlet numbers, with a hyphen separating the starting number from the ending number.
20 Command Line Interface (CLI) User’s Guide
Command Reference: Outlet Commands
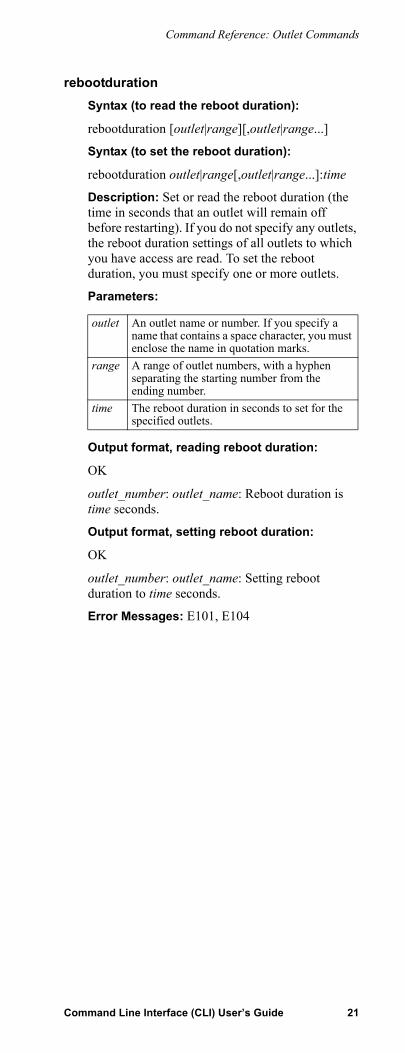
rebootdurationSyntax (to read the reboot duration):
rebootduration [outlet|range][,outlet|range...]
Syntax (to set the reboot duration):
rebootduration outlet|range[,outlet|range...]:time
Description: Set or read the reboot duration (the time in seconds that an outlet will remain off before restarting). If you do not specify any outlets, the reboot duration settings of all outlets to which you have access are read. To set the reboot duration, you must specify one or more outlets.
Parameters:
Output format, reading reboot duration:
OK
outlet_number: outlet_name: Reboot duration is time seconds.
Output format, setting reboot duration:
OK
outlet_number: outlet_name: Setting reboot duration to time seconds.
Error Messages: E101, E104
outlet An outlet name or number. If you specify a name that contains a space character, you must enclose the name in quotation marks.
range A range of outlet numbers, with a hyphen separating the starting number from the ending number.
time The reboot duration in seconds to set for the specified outlets.
Command Line Interface (CLI) User’s Guide 21
Command Reference: Outlet Commands
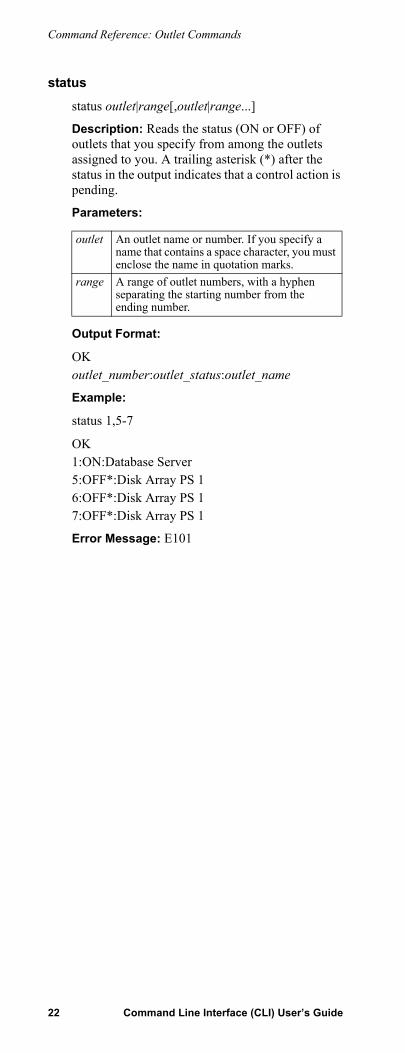
status
status outlet|range[,outlet|range...]
Description: Reads the status (ON or OFF) of outlets that you specify from among the outlets assigned to you. A trailing asterisk (*) after the status in the output indicates that a control action is pending.
Parameters:
Output Format:
OKoutlet_number:outlet_status:outlet_name
Example:
status 1,5-7
OK1:ON:Database Server5:OFF*:Disk Array PS 16:OFF*:Disk Array PS 17:OFF*:Disk Array PS 1
Error Message: E101
outlet An outlet name or number. If you specify a name that contains a space character, you must enclose the name in quotation marks.
range A range of outlet numbers, with a hyphen separating the starting number from the ending number.
22 Command Line Interface (CLI) User’s Guide
Switched Rack PDU Commands
currentSyntax:
current
Description: Displays the total current draw in amps.
Parameters: None.
Access: All three account types with access to the CLI.
Output format, single-phase and banked PDUs:
OKcurrentA
Output format, 3-phase PDUs: T
OK1: currentA2: currentA3: currentA
Error Message: E101
The Switched Rack PDU does not track its total current draw.
Command Line Interface (CLI) User’s Guide 23
Command Reference: Switched Rack PDU Commands
listSyntax:
list
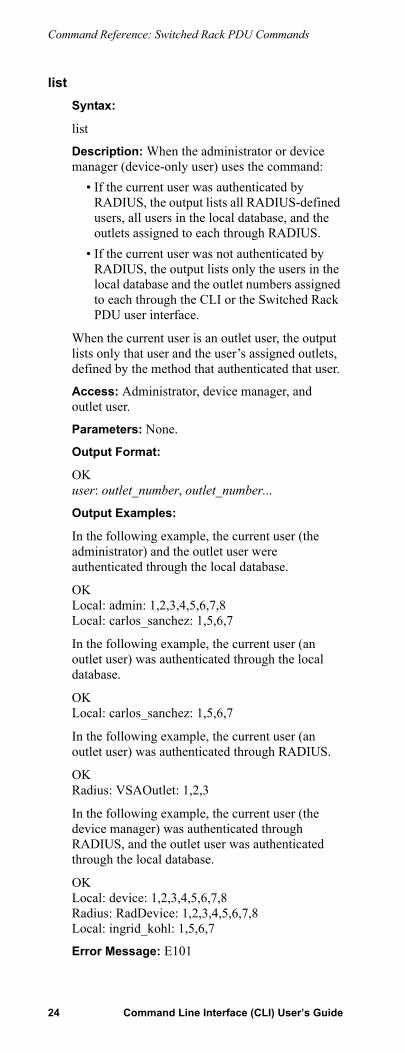
Description: When the administrator or device manager (device-only user) uses the command:
• If the current user was authenticated by RADIUS, the output lists all RADIUS-defined users, all users in the local database, and the outlets assigned to each through RADIUS.
• If the current user was not authenticated by RADIUS, the output lists only the users in the local database and the outlet numbers assigned to each through the CLI or the Switched Rack PDU user interface.
When the current user is an outlet user, the output lists only that user and the user’s assigned outlets, defined by the method that authenticated that user.
Access: Administrator, device manager, and outlet user.
Parameters: None.
Output Format:
OKuser: outlet_number, outlet_number...
Output Examples:
In the following example, the current user (the administrator) and the outlet user were authenticated through the local database.
OKLocal: admin: 1,2,3,4,5,6,7,8Local: carlos_sanchez: 1,5,6,7
In the following example, the current user (an outlet user) was authenticated through the local database.
OKLocal: carlos_sanchez: 1,5,6,7
In the following example, the current user (an outlet user) was authenticated through RADIUS.
OKRadius: VSAOutlet: 1,2,3
In the following example, the current user (the device manager) was authenticated through RADIUS, and the outlet user was authenticated through the local database.
OKLocal: device: 1,2,3,4,5,6,7,8Radius: RadDevice: 1,2,3,4,5,6,7,8Local: ingrid_kohl: 1,5,6,7
Error Message: E101
24 Command Line Interface (CLI) User’s Guide
Command Reference: Switched Rack PDU
lowloadwarningSyntax (to read the low-load warning threshold):
lowloadwarning [phase_number]
Syntax (to set the low-load warning threshold):
lowloadwarning phase_number current
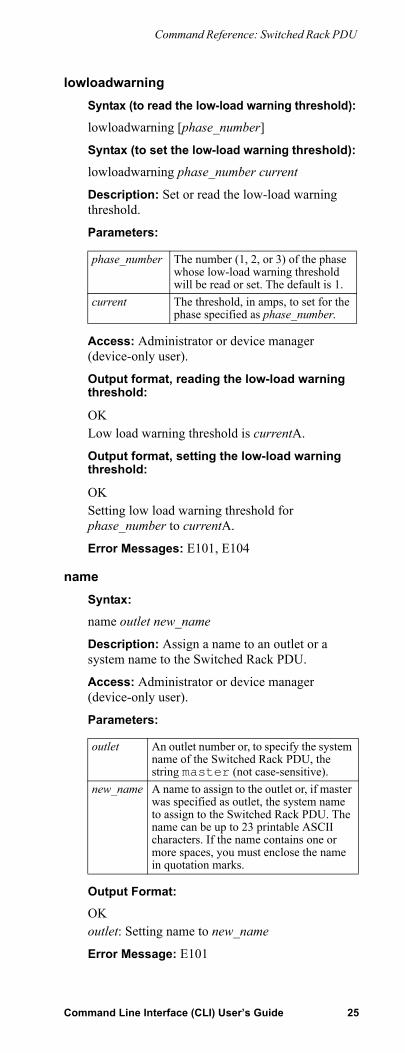
Description: Set or read the low-load warning threshold.
Parameters:
Access: Administrator or device manager (device-only user).
Output format, reading the low-load warning threshold:
OKLow load warning threshold is currentA.
Output format, setting the low-load warning threshold:
OKSetting low load warning threshold for phase_number to currentA.
Error Messages: E101, E104
nameSyntax:
name outlet new_name
Description: Assign a name to an outlet or a system name to the Switched Rack PDU.
Access: Administrator or device manager (device-only user).
Parameters:
Output Format:
OKoutlet: Setting name to new_name
Error Message: E101
phase_number The number (1, 2, or 3) of the phase whose low-load warning threshold will be read or set. The default is 1.
current The threshold, in amps, to set for the phase specified as phase_number.
outlet An outlet number or, to specify the system name of the Switched Rack PDU, the string master (not case-sensitive).
new_name A name to assign to the outlet or, if master was specified as outlet, the system name to assign to the Switched Rack PDU. The name can be up to 23 printable ASCII characters. If the name contains one or more spaces, you must enclose the name in quotation marks.
Command Line Interface (CLI) User’s Guide 25
Command Reference: Switched Rack PDU Commands
nearoverloadwarningSyntax (to read the nearoverload alarm threshold):
nearoverloadwarning [phase_number]
Syntax (to set the nearoverload warning threshold):
nearoverloadwarning phase_number current
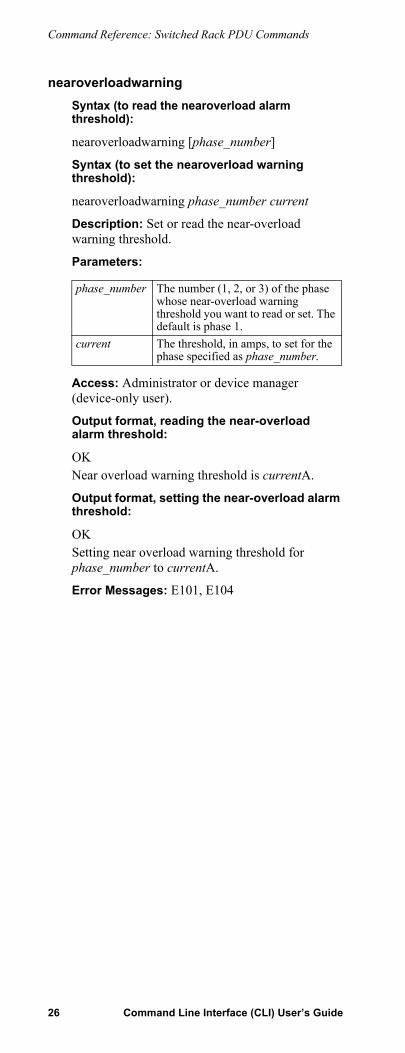
Description: Set or read the near-overload warning threshold.
Parameters:
Access: Administrator or device manager (device-only user).
Output format, reading the near-overload alarm threshold:
OKNear overload warning threshold is currentA.
Output format, setting the near-overload alarm threshold:
OKSetting near overload warning threshold for phase_number to currentA.
Error Messages: E101, E104
phase_number The number (1, 2, or 3) of the phase whose near-overload warning threshold you want to read or set. The default is phase 1.
current The threshold, in amps, to set for the phase specified as phase_number.
26 Command Line Interface (CLI) User’s Guide
Command Reference: Switched Rack PDU
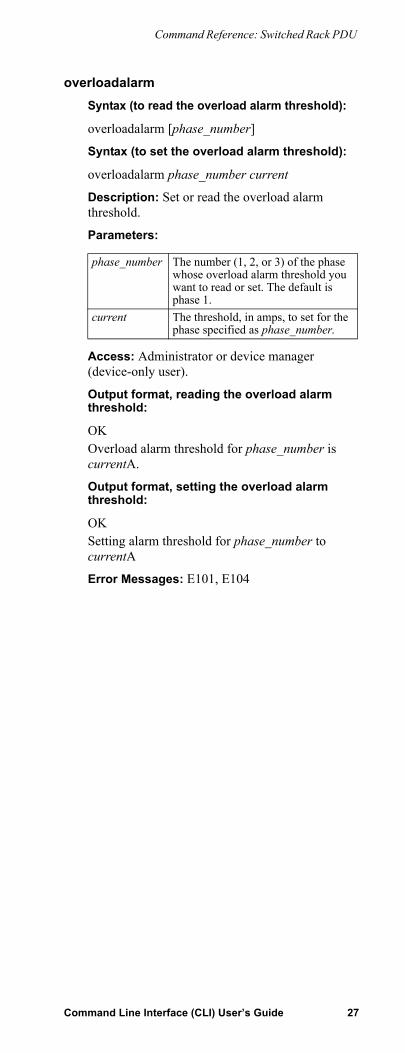
overloadalarmSyntax (to read the overload alarm threshold):
overloadalarm [phase_number]
Syntax (to set the overload alarm threshold):
overloadalarm phase_number current
Description: Set or read the overload alarm threshold.
Parameters:
Access: Administrator or device manager (device-only user).
Output format, reading the overload alarm threshold:
OKOverload alarm threshold for phase_number is currentA.
Output format, setting the overload alarm threshold:
OKSetting alarm threshold for phase_number to currentA
Error Messages: E101, E104
phase_number The number (1, 2, or 3) of the phase whose overload alarm threshold you want to read or set. The default is phase 1.
current The threshold, in amps, to set for the phase specified as phase_number.
Command Line Interface (CLI) User’s Guide 27
Command Reference: Switched Rack PDU Commands
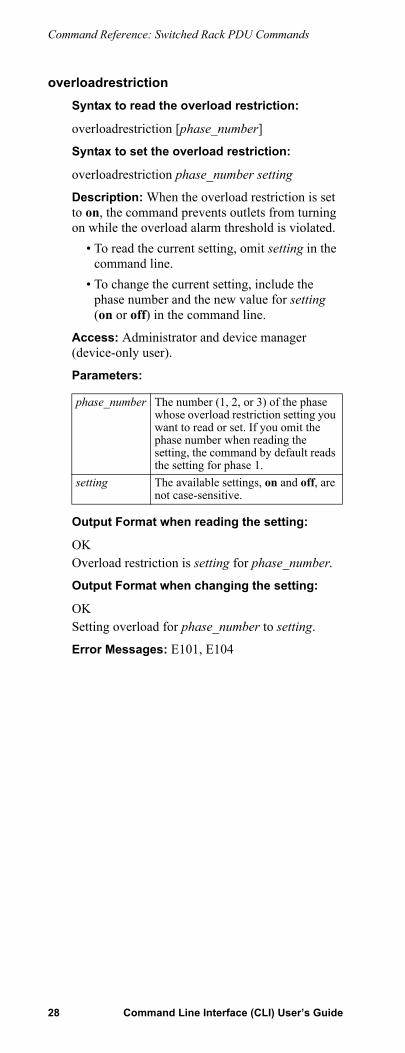
overloadrestrictionSyntax to read the overload restriction:
overloadrestriction [phase_number]
Syntax to set the overload restriction:
overloadrestriction phase_number setting
Description: When the overload restriction is set to on, the command prevents outlets from turning on while the overload alarm threshold is violated.
• To read the current setting, omit setting in the command line.
• To change the current setting, include the phase number and the new value for setting (on or off) in the command line.
Access: Administrator and device manager (device-only user).
Parameters:
Output Format when reading the setting:
OKOverload restriction is setting for phase_number.
Output Format when changing the setting:
OKSetting overload for phase_number to setting.
Error Messages: E101, E104
phase_number The number (1, 2, or 3) of the phase whose overload restriction setting you want to read or set. If you omit the phase number when reading the setting, the command by default reads the setting for phase 1.
setting The available settings, on and off, are not case-sensitive.
28 Command Line Interface (CLI) User’s Guide
Command Reference: Switched Rack PDU
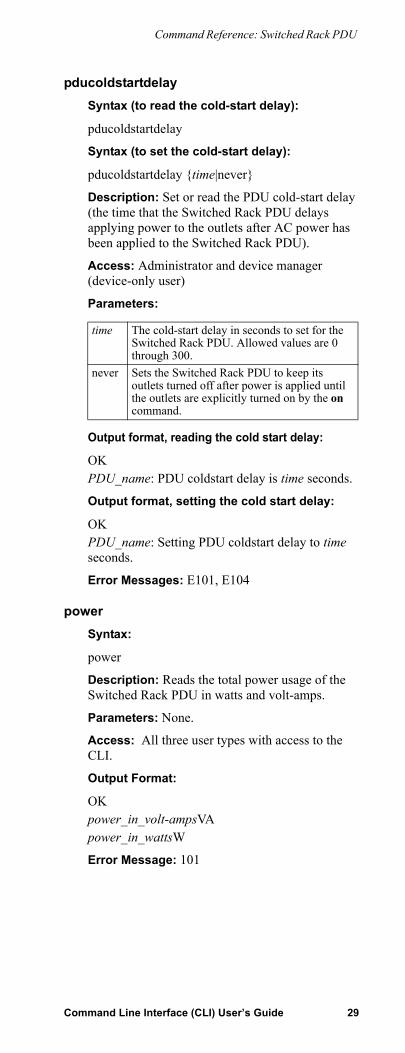
pducoldstartdelaySyntax (to read the cold-start delay):
pducoldstartdelay
Syntax (to set the cold-start delay):
pducoldstartdelay {time|never}
Description: Set or read the PDU cold-start delay (the time that the Switched Rack PDU delays applying power to the outlets after AC power has been applied to the Switched Rack PDU).
Access: Administrator and device manager (device-only user)
Parameters:
Output format, reading the cold start delay:
OKPDU_name: PDU coldstart delay is time seconds.
Output format, setting the cold start delay:
OKPDU_name: Setting PDU coldstart delay to time seconds.
Error Messages: E101, E104
powerSyntax:
power
Description: Reads the total power usage of the Switched Rack PDU in watts and volt-amps.
Parameters: None.
Access: All three user types with access to the CLI.
Output Format:
OKpower_in_volt-ampsVApower_in_wattsW
Error Message: 101
time The cold-start delay in seconds to set for the Switched Rack PDU. Allowed values are 0 through 300.
never Sets the Switched Rack PDU to keep its outlets turned off after power is applied until the outlets are explicitly turned on by the on command.
Command Line Interface (CLI) User’s Guide 29
General Management Commands
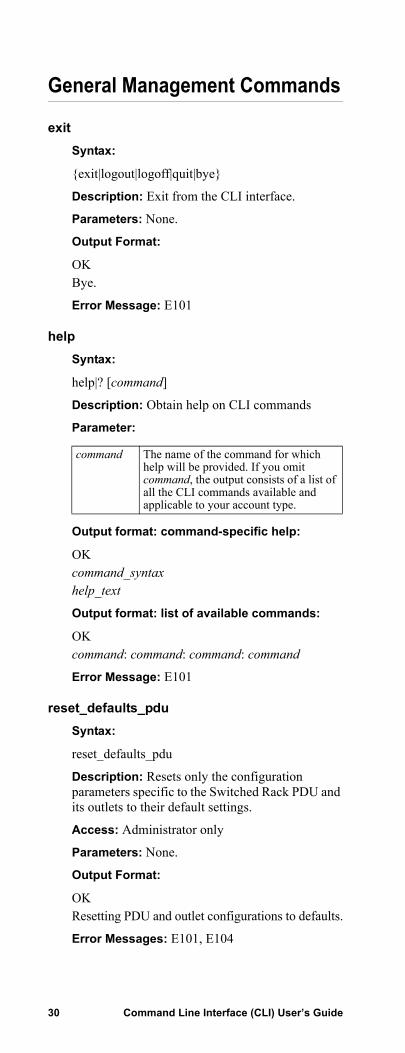
exitSyntax:
{exit|logout|logoff|quit|bye}
Description: Exit from the CLI interface.
Parameters: None.
Output Format:
OKBye.
Error Message: E101
helpSyntax:
help|? [command]
Description: Obtain help on CLI commands
Parameter:
Output format: command-specific help:
OKcommand_syntax help_text
Output format: list of available commands:
OKcommand: command: command: command
Error Message: E101
reset_defaults_pduSyntax:
reset_defaults_pdu
Description: Resets only the configuration parameters specific to the Switched Rack PDU and its outlets to their default settings.
Access: Administrator only
Parameters: None.
Output Format:
OKResetting PDU and outlet configurations to defaults.
Error Messages: E101, E104
command The name of the command for which help will be provided. If you omit command, the output consists of a list of all the CLI commands available and applicable to your account type.
30 Command Line Interface (CLI) User’s Guide
Command Reference: General Management
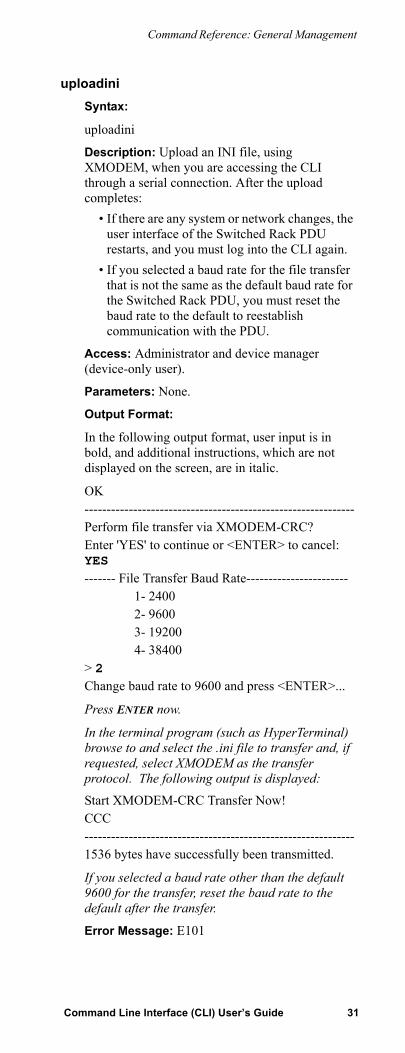
uploadiniSyntax:
uploadini
Description: Upload an INI file, using XMODEM, when you are accessing the CLI through a serial connection. After the upload completes:
• If there are any system or network changes, the user interface of the Switched Rack PDU restarts, and you must log into the CLI again.
• If you selected a baud rate for the file transfer that is not the same as the default baud rate for the Switched Rack PDU, you must reset the baud rate to the default to reestablish communication with the PDU.
Access: Administrator and device manager (device-only user).
Parameters: None.
Output Format:
In the following output format, user input is in bold, and additional instructions, which are not displayed on the screen, are in italic.
OK-------------------------------------------------------------Perform file transfer via XMODEM-CRC?Enter 'YES' to continue or <ENTER> to cancel: YES ------- File Transfer Baud Rate----------------------- 1- 2400 2- 9600 3- 19200 4- 38400> 2 Change baud rate to 9600 and press <ENTER>...
Press ENTER now.
In the terminal program (such as HyperTerminal) browse to and select the .ini file to transfer and, if requested, select XMODEM as the transfer protocol. The following output is displayed:
Start XMODEM-CRC Transfer Now!CCC-------------------------------------------------------------1536 bytes have successfully been transmitted.
If you selected a baud rate other than the default 9600 for the transfer, reset the baud rate to the default after the transfer.
Error Message: E101
Command Line Interface (CLI) User’s Guide 31
Command Reference: General Management Commands
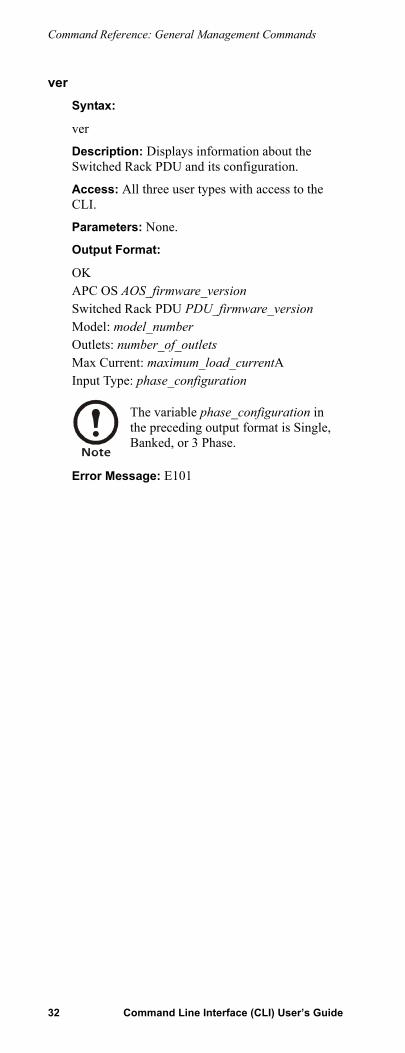
verSyntax:
ver
Description: Displays information about the Switched Rack PDU and its configuration.
Access: All three user types with access to the CLI.
Parameters: None.
Output Format:
OKAPC OS AOS_firmware_version Switched Rack PDU PDU_firmware_version Model: model_number Outlets: number_of_outlets Max Current: maximum_load_currentA Input Type: phase_configuration
Error Message: E101
The variable phase_configuration in the preceding output format is Single, Banked, or 3 Phase.
32 Command Line Interface (CLI) User’s Guide
Index
Aadduser, 10assign, 11Automatic log-off, 6
Bbye, 30
CCommands
adduser, 10assign, 11bye, 30current, 23deluser, 11editing the command
line, 3exit, 30help, 30how to enter
commands, 3list, 24logoff, 30logout, 30lowloadwarning, 25name, 25nearoverloadalarm, 26off, 15on, 16outletgroups, 17overloadalarm, 27overloadrestriction, 28passwd, 12pducoldstartdelay, 29power, 29poweroffdelay, 18powerondelay, 19quit, 30reboot, 20reset_defaults_pdu, 30status, 22syntax, 7unassign, 13uploadini, 31ver, 32whoami, 13
current, 23
Ddeluser, 11
EEditing command lines, 3Error codes, 4escape character, reverse
slant, 3exit, 30
FFeatures, 1
GGeneral management
commands, 30
HHelp, 4, 30
I.ini file, exporting, 2
KKVM products, integration
with, 1
Llist, 24Logging on, 5logoff, 30logout, 30lowloadwarning, 25
Nname, 25nearoverloadalarm, 26
Ooff, 15
Command Line Interface (CLI) User’s Guide 33
Index
on, 16outletgroups, 17Outlets
commands, 15overview, 14
overloadalarm, 27overloadrestriction, 28
Ppasswd, 12pducoldstartdelay, 29power, 29poweroffdelay, 18powerondelay, 19
Qquit, 30Quotation marks, 3
Rreboot, 20reset_defaults_pdu, 30Reverse slant, as escape
character, 3
SScripting, 1
Space character as delimiter, 3
status, 22Switched Rack PDU
commands, 23Synchronized outlet
groups, 14Syntax
characters and fonts, 7examples, 8
Uunassign, 13uploadini, 31User management
commands, 10overview, 9
Vver, 32
Wwhoami, 13
XXMODEM, 2
34 Command Line Interface (CLI) User’s Guide
*990-2766*
APC Worldwide Customer Support
Customer support for this or any other APC product is available at no charge in any of the following ways:
• Visit the APC Web site to access documents in the APC Knowledge Base and to submit customer support requests.– www.apc.com (Corporate Headquarters)
Connect to localized APC Web sites for specific countries, each of which provides customer support information.
– www.apc.com/support/Global support searching APC Knowledge Base and using e-support.
• Contact an APC Customer Support center by telephone or e-mail.– Regional centers:
– Local, country-specific centers: go to www.apc.com/support/contact for contact information.
Contact the APC representative or other distributor from whom you purchased your APC product for information on how to obtain local customer support.
Direct InfraStruXure Customer Support Line
(1)(877)537-0607 (toll free)
APC headquarters U.S., Canada
(1)(800)800-4272 (toll free)
Latin America (1)(401)789-5735 (USA)
Europe, Middle East, Africa
(353)(91)702000 (Ireland)
Japan (0) 35434-2021
Australia, New Zealand, South Pacific area
(61) (2) 9955 9366 (Australia)
Entire contents copyright 2005 American Power Conversion Corporation. All rights reserved. Reproduction in whole or in part without permission is prohibited. APC and the APC logo are trademarks of American Power Conversion Corporation.
All other trademarks, product names, and corporate names are the property of their respective owners and are used for
informational purposes only.
990-2766 11/2005
Recommended