1
SKU: 1168405
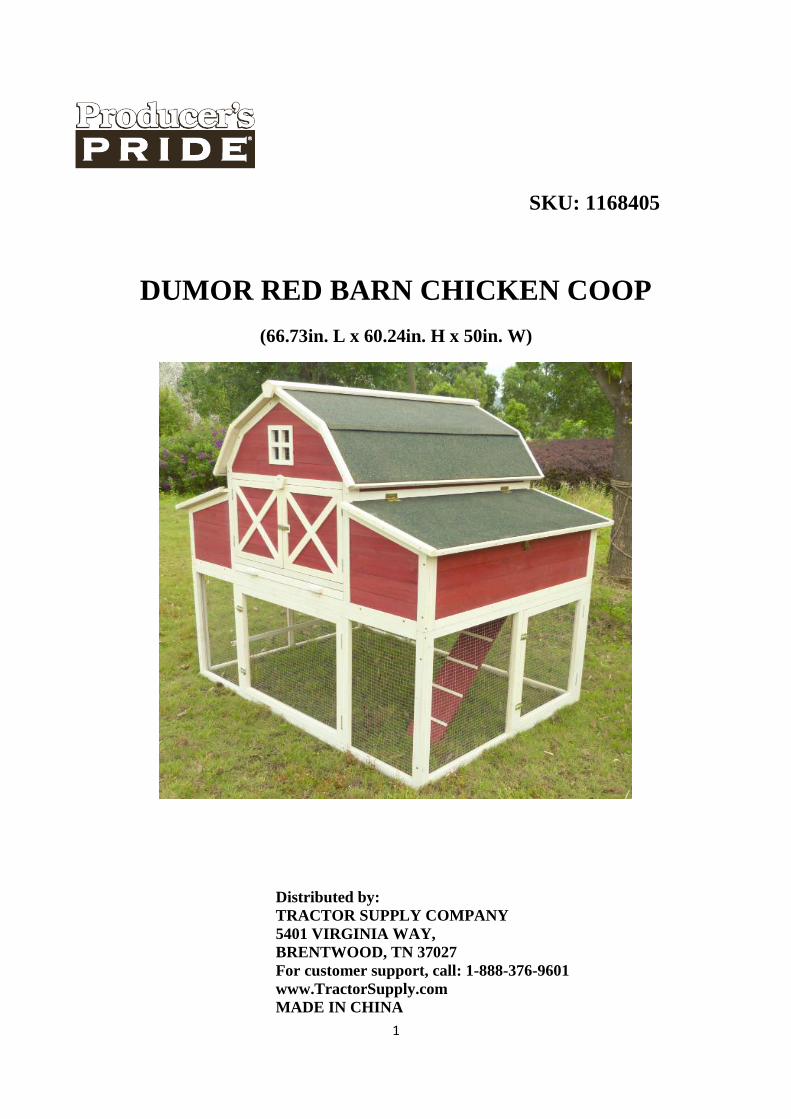
DUMOR RED BARN CHICKEN COOP
(66.73in. L x 60.24in. H x 50in. W)
Distributed by:
TRACTOR SUPPLY COMPANY
5401 VIRGINIA WAY,
BRENTWOOD, TN 37027
For customer support, call: 1-888-376-9601
www.TractorSupply.com
MADE IN CHINA
2
CARE INSTRUCTIONS
SAFETY INFORMATION:
DANGER: Please keep children out of assembly area during assembly.
WARNING: This product is designed exclusively for chickens .Not intended for
children.
BEFORE YOU BEGIN: Read instruction prior to assembly. This product contains parts that can be damaged if
incorrectly assembled. Please follow instructions. For steps where parts are placed
upside down, place parts on a smooth surface to avoid scratching finish. Flatten
cardboard from carton to create a smooth work surface.
PRE-ASSEMBLY: TOOLS REQUIRED (not included):
Screw Gun with Phillips Head Bit
Adjustable Wrench
Two people are recommended to assemble this product.
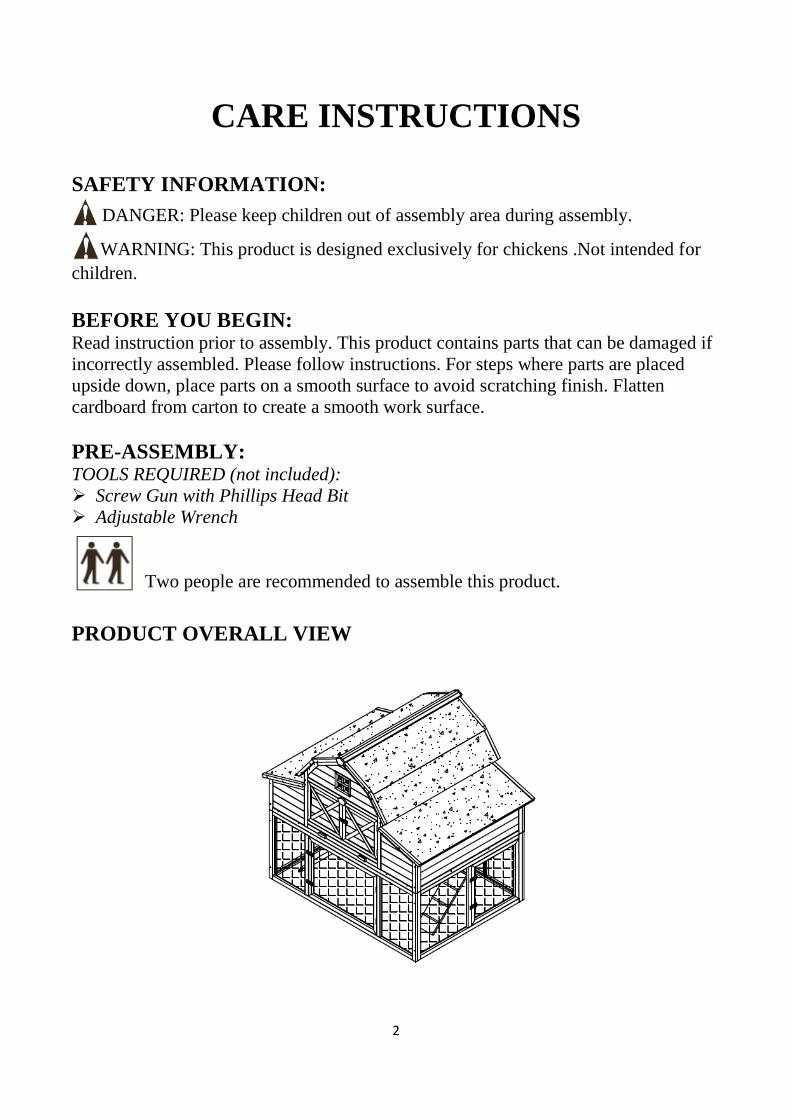
PRODUCT OVERALL VIEW
3
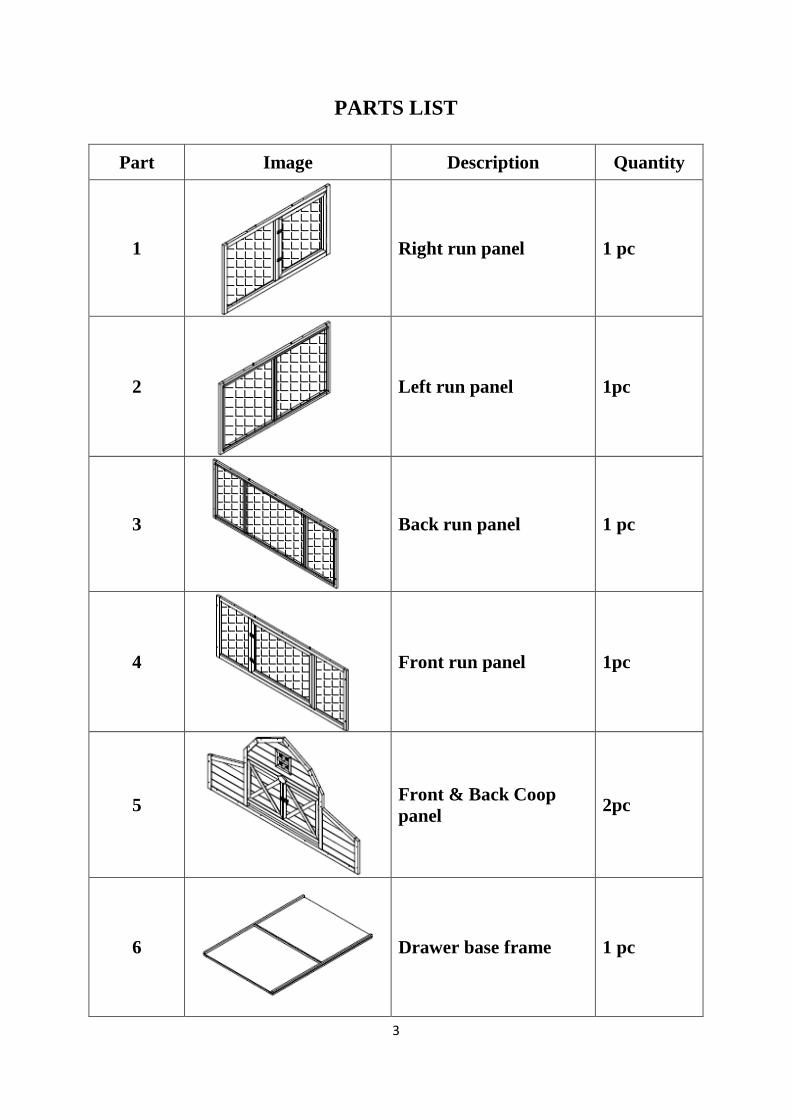
PARTS LIST
Part Image Description Quantity
1
Right run panel 1 pc
2
Left run panel 1pc
3
Back run panel 1 pc
4
Front run panel 1pc
5
Front & Back Coop
panel 2pc
6
Drawer base frame 1 pc

4
7
Coop bottom panel
with ladder door 1pc
8
Nesting box bottom
panel 1pc
9
Left side panel of
nesting box 1pc
10
Right side panel of
coop with ladder door 1pc
11
Upper side panel 2pcs
12
Middle roof panel 2pcs

5
13
Top roof panel 2pcs
14
Lower roof panel 2pcs
15
Wood post for roosting
bar 2pcs
16
Roosting bar 3pcs
17
Roosting bar for run 1pc
18
Nesting box divider 4pcs
6
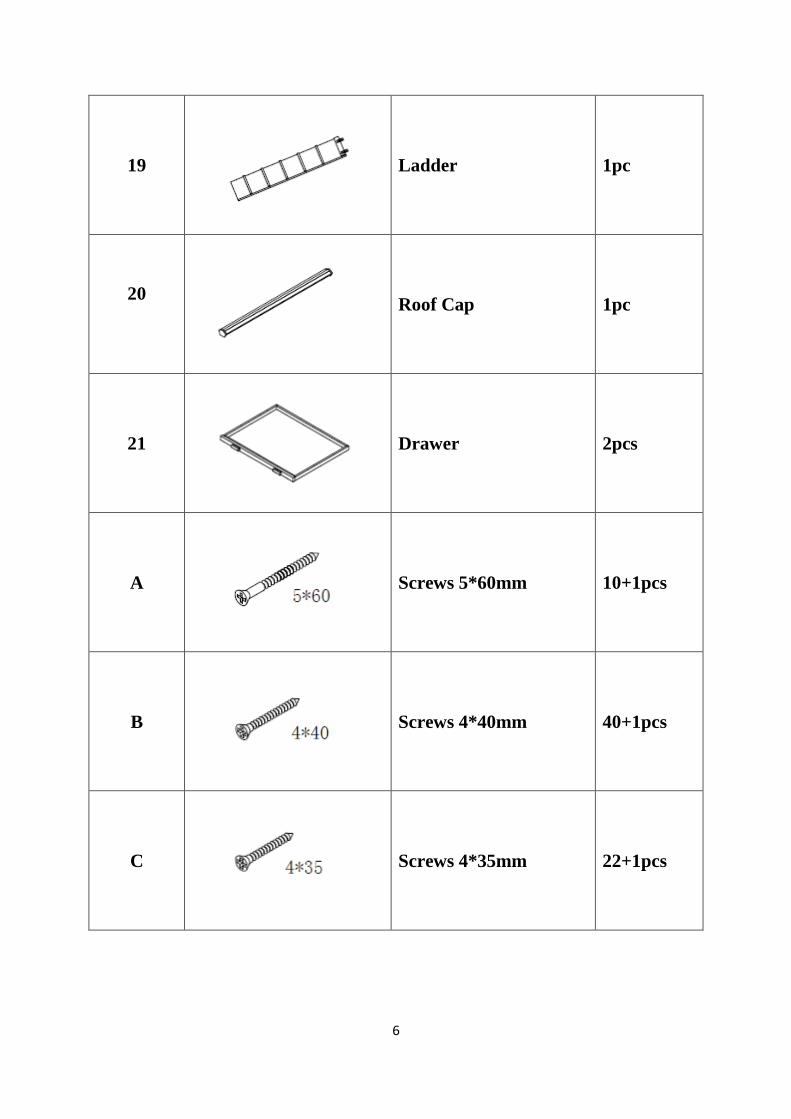
19
Ladder 1pc
20
Roof Cap 1pc
21
Drawer 2pcs
A
Screws 5*60mm 10+1pcs
B
Screws 4*40mm 40+1pcs
C
Screws 4*35mm 22+1pcs
7
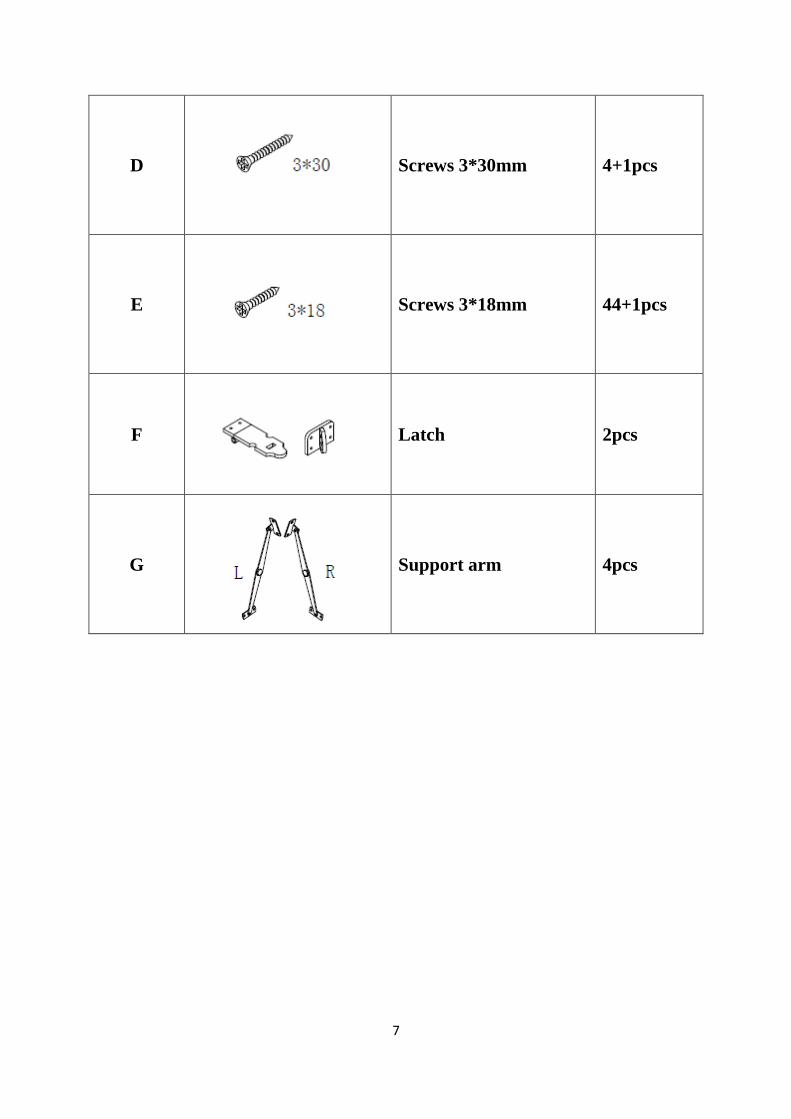
D
Screws 3*30mm 4+1pcs
E
Screws 3*18mm 44+1pcs
F
Latch 2pcs
G
Support arm 4pcs

8
ASSEMBLY INSTRUCTION
Step 1: Attach front run panel (4) to left run panel (2) using screws (B). Attach right
run panel (1) and back run panel (3) with screws (B). After assembling the chicken run,
place the roosting bar (18) for run inside the wire.
Step 2: Attach the back coop panel (5) to the back run panel (3) using screws (A).
***The screws are installed up through the run panel into the coop panel.
9
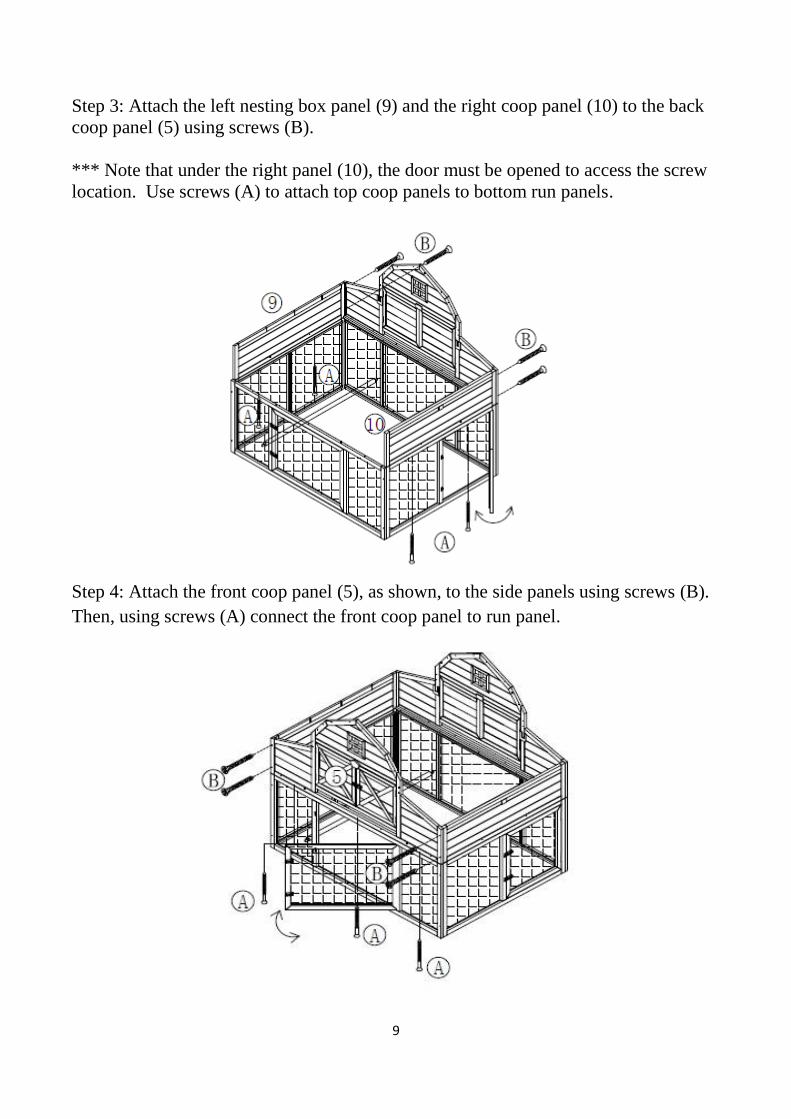
Step 3: Attach the left nesting box panel (9) and the right coop panel (10) to the back
coop panel (5) using screws (B).
*** Note that under the right panel (10), the door must be opened to access the screw
location. Use screws (A) to attach top coop panels to bottom run panels.
Step 4: Attach the front coop panel (5), as shown, to the side panels using screws (B).
Then, using screws (A) connect the front coop panel to run panel.

10
Step 5: Place the drawer base frame (6) in position as shown. Place the coop bottom
panel with ladder door (7) on the right side and place the nesting box bottom panel (8)
on the left side. Secure all panels with (B) screws.
Step 6: Open the ladder door from the bottom panel, attach the ladder (19) using
screws (E). Then place the nesting box dividers (18) into the nesting box.
11
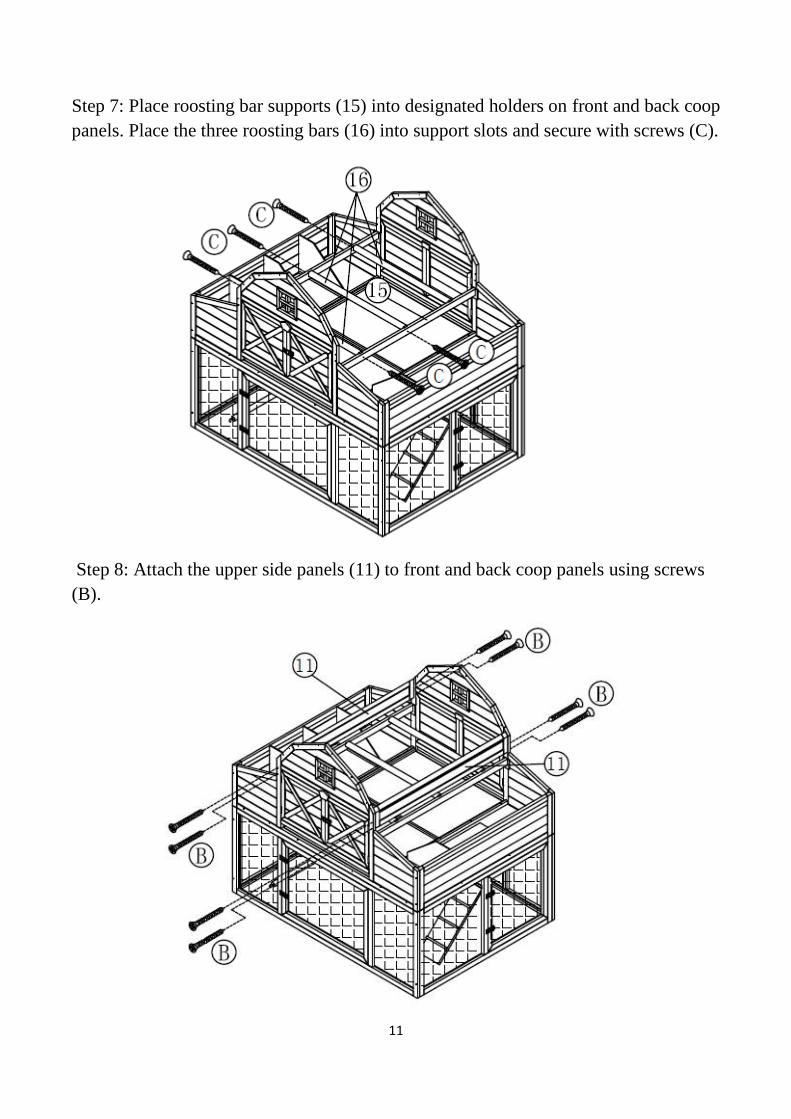
Step 7: Place roosting bar supports (15) into designated holders on front and back coop
panels. Place the three roosting bars (16) into support slots and secure with screws (C).
Step 8: Attach the upper side panels (11) to front and back coop panels using screws
(B).

12
Step 9: Attach the lower roof panels (14) to the upper side panels (11) using screws (E)
through hinge plates.
Step 10: Attach the support arms (G) to the lower roof panels (14) using screws (E).
***Note the left and right direction of the support arms.
13
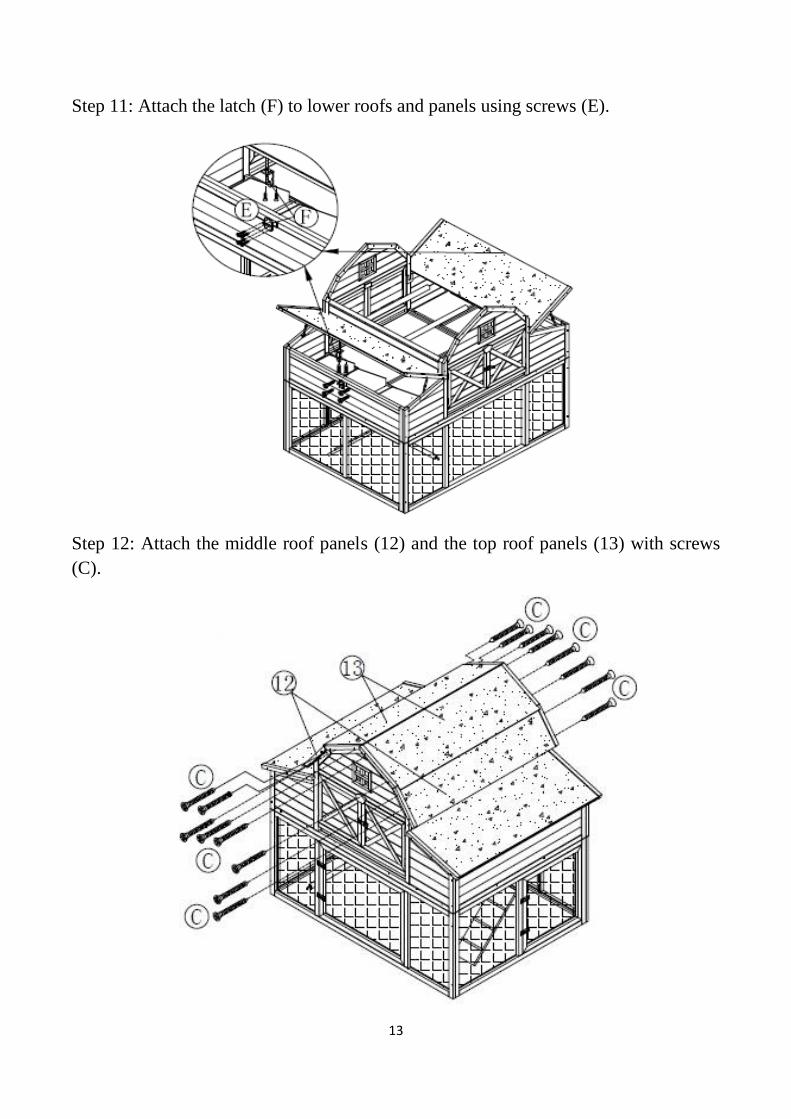
Step 11: Attach the latch (F) to lower roofs and panels using screws (E).
Step 12: Attach the middle roof panels (12) and the top roof panels (13) with screws
(C).
14
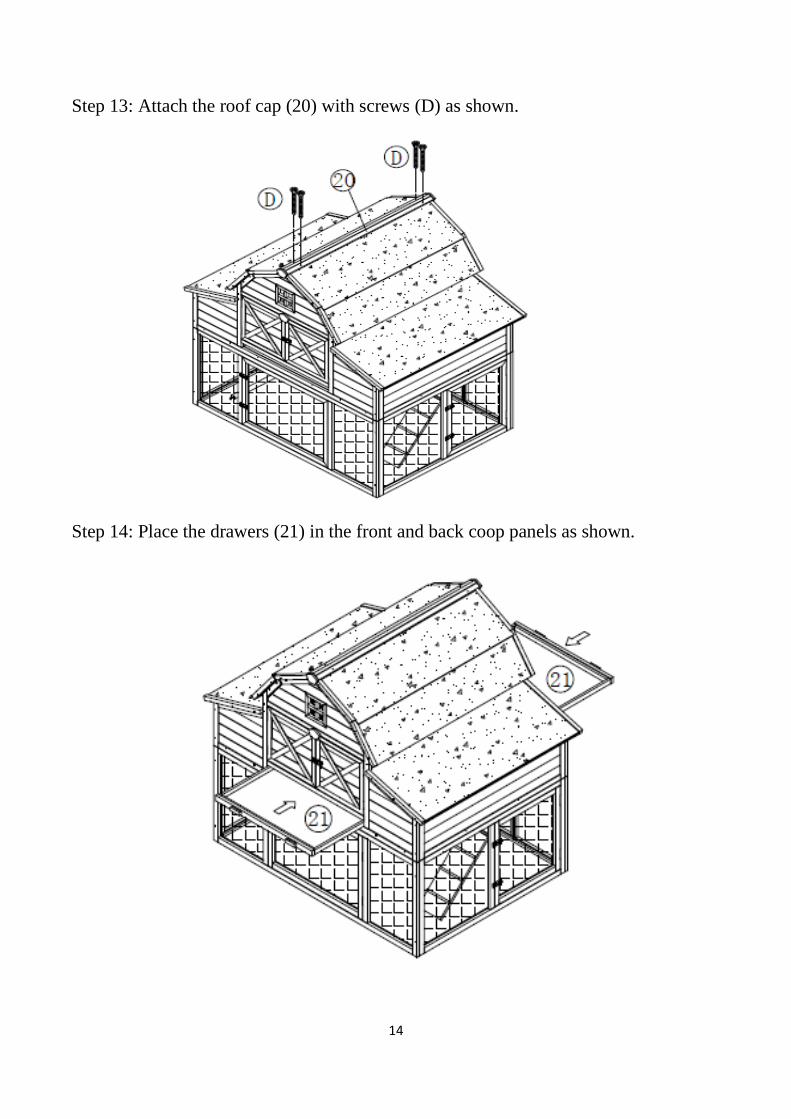
Step 13: Attach the roof cap (20) with screws (D) as shown.
Step 14: Place the drawers (21) in the front and back coop panels as shown.

15
Finished Coop
Recommended