Kaspersky Endpoint Security 10
for Linux
Administrator's Guide
Application version 10

Dear User,
Thank you for entrusting us with your security. We hope that you will find this documentation useful
and that it will provide answers to most questions that may arise.
Important! This document is the property of AO Kaspersky Lab (herein also referred to as
Kaspersky Lab): all rights to this document are reserved by the copyright laws of the Russian
Federation and by international treaties. Illegal reproduction or distribution of this document or
parts hereof will result in civil, administrative, or criminal liability under applicable law.
Any type of reproduction or distribution of any materials, including translations, may be allowed
only with written permission from Kaspersky Lab.
This document and related graphic images can be used exclusively for informational,
non-commercial, or personal use.
This document may be amended without prior notice.
Kaspersky Lab assumes no liability for the content, quality, relevance, or accuracy
of any third-party materials used herein, or for any potential harm that may arise out of using
such materials.
Document revision date: 2/22/2017
© 2017 AO Kaspersky Lab. All Rights Reserved.
http://www.kaspersky.com
https://help.kaspersky.com
http://support.kaspersky.com
Contents
About this document ........................................................................................................ 9
In this Guide ................................................................................................................ 9
Document conventions .............................................................................................. 12
Sources of information about the application ................................................................. 14
Sources of information for independent research ...................................................... 14
Discussing Kaspersky Lab applications on the Forum .............................................. 15
Kaspersky Endpoint Security ......................................................................................... 16
About Kaspersky Endpoint Security .......................................................................... 16
What's new ................................................................................................................ 18
Distribution kit ............................................................................................................ 18
Hardware and software requirements ........................................................................ 19
Installing and removing the application .......................................................................... 22
Application installation procedure .............................................................................. 22
About installing Kaspersky Endpoint Security ....................................................... 22
Installing the Kaspersky Endpoint Security package ............................................. 23
Updating Kaspersky Endpoint Security settings .................................................... 23
Installing Network Agent ........................................................................................ 24
Installing Kaspersky Endpoint Security via Kaspersky Security Center ................. 24
Getting started ........................................................................................................... 25
About initial configuration of Kaspersky Endpoint Security .................................... 25
Kaspersky Endpoint Security Initial Configuration Wizard ..................................... 25
Step 1. Selecting the locale ............................................................................... 26
Step 2. Viewing the text of the End User License Agreement ........................... 27
Step 3. Participating in Kaspersky Security Network ......................................... 27
Step 4. Determining the type of file operation interceptor ................................. 28
Step 5. Configuring proxy server settings ......................................................... 28
Step 6. Downloading Kaspersky Endpoint Security anti-virus databases ......... 29
Step 7. Enabling automatic update of anti-virus databases .............................. 30
Step 8. Activating the application ...................................................................... 30
Automatic initial configuration of Kaspersky Endpoint Security ............................. 30
Starting automatic initial configuration of Kaspersky Endpoint Security ............ 31

Contents
4
Settings of the Kaspersky Endpoint Security initial setup configuration file ....... 32
Configuring Network Agent settings ...................................................................... 33
Configuring permissions in the SELinux system .................................................... 34
Configuring permissions in the AppArmor system ................................................. 36
Updating the rules module file ............................................................................... 37
Removing the application .......................................................................................... 37
Local removal of Kaspersky Endpoint Security ..................................................... 37
Removing Kaspersky Endpoint Security via Kaspersky Security Center ............... 38
Application licensing ...................................................................................................... 39
About the End User License Agreement ................................................................... 39
About the license ....................................................................................................... 40
About the license certificate ....................................................................................... 41
About the activation code .......................................................................................... 41
About the key ............................................................................................................. 42
About the key file ....................................................................................................... 42
About subscription ..................................................................................................... 43
About data provision .................................................................................................. 44
Starting and stopping the application ............................................................................. 46
Managing Kaspersky Endpoint Security tasks ............................................................... 47
About Kaspersky Endpoint Security tasks ................................................................. 48
Viewing the list of Kaspersky Endpoint Security tasks ............................................... 49
Creating a task .......................................................................................................... 49
Starting and stopping a task ...................................................................................... 49
Deleting a task ........................................................................................................... 50
Pausing and resuming a task .................................................................................... 50
Scheduling a task ...................................................................................................... 50
Viewing the status of a task ....................................................................................... 51
Updating databases and application software modules ................................................. 52
About database and application module updates ...................................................... 52
About update sources ................................................................................................ 53
Update settings configuration .................................................................................... 54
Creating an update task ........................................................................................ 54
Select update source ............................................................................................. 55
Contents
5
Using a proxy server when accessing update sources .......................................... 56
Rolling back database updates .................................................................................. 57
Distributing updates ................................................................................................... 57
Real-time protection and on-demand scan .................................................................... 58
About real-time protection .......................................................................................... 59
About on-demand scan ............................................................................................. 61
About infected files .................................................................................................... 63
Creating a custom on-demand scan task .................................................................. 63
Specifying the protection scope and scan scope ....................................................... 64
About heuristic analysis ............................................................................................. 65
Enabling and configuring the heuristic analyzer ........................................................ 66
Excluding objects from the protection scope and on-demand scan scope ................ 67
Excluding objects from the protection scope or scan scope .................................. 67
Excluding objects based on the name of the detected threat ................................ 68
Selecting the real-time protection mode .................................................................... 70
Selecting the actions for the application to perform on infected objects .................... 71
Custom scan of files and directories (Scan_File) ....................................................... 72
Scanning boot sectors ............................................................................................... 73
Scanning process memory ........................................................................................ 73
Reducing scan time ................................................................................................... 73
Special considerations for scanning symbolic links and hard links ............................ 75
Configuring collaboration: Kaspersky Anti-Virus for Linux Mail Server ...................... 76
Managing Backup .......................................................................................................... 78
About Backup ............................................................................................................ 78
Viewing IDs of objects in Backup ............................................................................... 79
About restoring objects from the Backup ................................................................... 79
Restoring objects from the Backup ............................................................................ 80
Removing objects from Backup ................................................................................. 81
Configuring event notifications ....................................................................................... 82
Participating in Kaspersky Security Network .................................................................. 83
About participation in Kaspersky Security Network ................................................... 83
Enabling and disabling use of Kaspersky Security Network ...................................... 85
Checking the connection to Kaspersky Security Network .......................................... 86
Contents
6
Enhanced protection with Kaspersky Security Network ............................................. 86
Remote administration of the application through Kaspersky Security Center ............... 87
Managing Kaspersky Endpoint Security via Kaspersky Security Center ................... 88
Starting and stopping Kaspersky Endpoint Security on a client computer ................. 89
Configuring Kaspersky Endpoint Security settings .................................................... 90
Viewing the protection status of a computer .............................................................. 91
Viewing Kaspersky Endpoint Security settings .......................................................... 92
Managing tasks ......................................................................................................... 94
About tasks for Kaspersky Endpoint Security ........................................................ 94
Creating a local task .............................................................................................. 96
Creating a group task ............................................................................................ 96
Creating a task for a set of computers ................................................................... 97
Manually starting, stopping, pausing, and resuming a task ................................... 97
Editing task settings .............................................................................................. 99
Managing policies .................................................................................................... 102
About policies ...................................................................................................... 102
Creating a policy .................................................................................................. 103
Editing policy settings .......................................................................................... 104
Viewing user messages in the Kaspersky Security Center event storage ............... 105
Manually checking the connection with the Administration Server. Klnagchk utility . 106
Manually connecting to the Administration Server. Klmover utility ........................... 107
Contacting Technical Support ...................................................................................... 109
How to obtain technical support ............................................................................... 109
Technical support by phone ..................................................................................... 109
Technical Support via Kaspersky CompanyAccount ............................................... 110
Appendices .................................................................................................................. 111
Settings of configuration files ................................................................................... 111
Rules for editing configuration files of Kaspersky Endpoint Security ................... 111
General settings of Kaspersky Endpoint Security ................................................ 113
Real-time protection and on-demand scan tasks settings ................................... 117
General settings of the real-time protection and on-demand scan tasks ......... 118
[ScanScope.item_#] ........................................................................................ 127
[ExcludedFromScanScope.item_#] ................................................................. 129
Settings of boot sector scan tasks and process memory scan tasks ................... 131
Contents
7
Settings of update tasks and update distribution tasks ........................................ 134
General settings of update tasks and update distribution tasks ...................... 135
[CustomSources.item_#] ................................................................................. 137
Backup settings ................................................................................................... 138
Kaspersky Endpoint Security command line commands ......................................... 139
About managing Kaspersky Endpoint Security from the command line .............. 140
Displaying Kaspersky Endpoint Security command Help .................................... 145
Enabling the display of events ............................................................................. 146
Quick scan of files and directories ....................................................................... 146
Viewing information about the application ........................................................... 147
Commands for managing Kaspersky Endpoint Security settings and tasks ........ 149
Receiving the general settings of Kaspersky Endpoint Security ...................... 149
Editing the general settings of Kaspersky Endpoint Security .......................... 150
Task schedule settings .................................................................................... 152
Commands for managing Kaspersky Endpoint Security tasks ............................ 154
Creating a task ................................................................................................ 155
Deleting a task ................................................................................................ 156
Starting a task ................................................................................................. 157
Stopping a task ............................................................................................... 158
Suspending a task ........................................................................................... 159
Resuming a task ............................................................................................. 160
Viewing the status of a task ............................................................................ 161
Viewing the list of Kaspersky Endpoint Security tasks .................................... 162
Receiving task settings ................................................................................... 163
Editing task settings ........................................................................................ 164
Key management commands .............................................................................. 166
Adding an active key ....................................................................................... 166
Adding an additional key ................................................................................. 167
Removing the active key ................................................................................. 168
Removing the additional key ........................................................................... 168
Entering an additional activation code ............................................................. 168
Commands for managing Backup ....................................................................... 169
Receiving information about objects in storage ............................................... 169
Restoring objects from storage ....................................................................... 170

Contents
8
Command line return codes ..................................................................................... 171
AO Kaspersky Lab ....................................................................................................... 172
Information about third-party code ............................................................................... 174
Trademark notices ....................................................................................................... 175
Glossary ....................................................................................................................... 176
Index ............................................................................................................................ 184

About this document
The Administrator's Guide for Kaspersky Endpoint Security 10 for Linux (hereinafter referred to as
"Kaspersky Endpoint Security") is intended for professionals who install and administer Kaspersky
Endpoint Security, as well as for those who provide technical support to organizations that use
Kaspersky Endpoint Security.
You can use the information in this Guide to:
Prepare for installation, install and activate Kaspersky Endpoint Security.
Configure and use Kaspersky Endpoint Security.
This Guide also lists sources of information about the application and ways to get
technical support.
In this section:
In this Guide ................................................................................................................................... 9
Document conventions ................................................................................................................. 12
In this Guide
This Guide contains the following sections:
Sources of information about the application (see page 14)
This section lists the sources of information about the application.
Kaspersky Endpoint Security (see page 16)
This section describes the features of the application and provides brief information about
application functions and components. You will learn what items are included in the distribution kit
and what services are available for registered users of the application.
About this document
10
Installing and removing the application (see page 22)
This section contains information on installing Kaspersky Endpoint Security on your computer,
completing initial configuration, and removing the application from your computer.
Application licensing (see page 39)
This section provides information about general concepts related to the application licensing.
Starting and stopping the application (see page 46)
This section provides information about how to start, restart, and close the application from
the command line.
Managing Kaspersky Endpoint Security tasks (see page 47)
This section contains information about the types of Kaspersky Endpoint Security tasks and
instructions on how to manage those tasks.
Updating databases and application modules (see page 52)
This section contains information about updating anti-virus databases and application modules
(hereinafter collectively referred to as "updates"), and instructions on how to configure
update settings.
Real-time protection and on-demand scan (see page 58)
This section contains information on the real-time protection and on-demand scan tasks, as well as
instructions on configuring the settings of these tasks.
Managing Backup (see page 78)
This section provides instructions on configuring Backup settings, and information about which
actions can be performed on objects in Backup.
Participating in Kaspersky Security Network (see page 83)
This section contains information about participation in Kaspersky Security Network and
instructions on how to enable or disable use of Kaspersky Security Network.
About this document
11
Administering the application through Kaspersky Security Center (see page 87)
This section describes how you can manage Kaspersky Endpoint Security through Kaspersky
Security Center.
Contacting Technical Support (see page 109)
This section describes the ways to get technical support and the terms on which it is available.
Appendices (see page 111)
This section contains information on the settings of configuration files, Kaspersky Endpoint
Security command line commands, and command line return codes.
AO Kaspersky Lab (see page 172)
This section provides information about AO Kaspersky Lab.
Information about third-party code (see page 174)
This section provides information about third-party code.
Trademark notices (see page 175)
This section covers trademarks mentioned in the document.
Glossary (see page 176)
This section contains a list of terms that are mentioned in the document and their definitions.
Index
This section allows you to quickly find required information within the document.
About this document
12
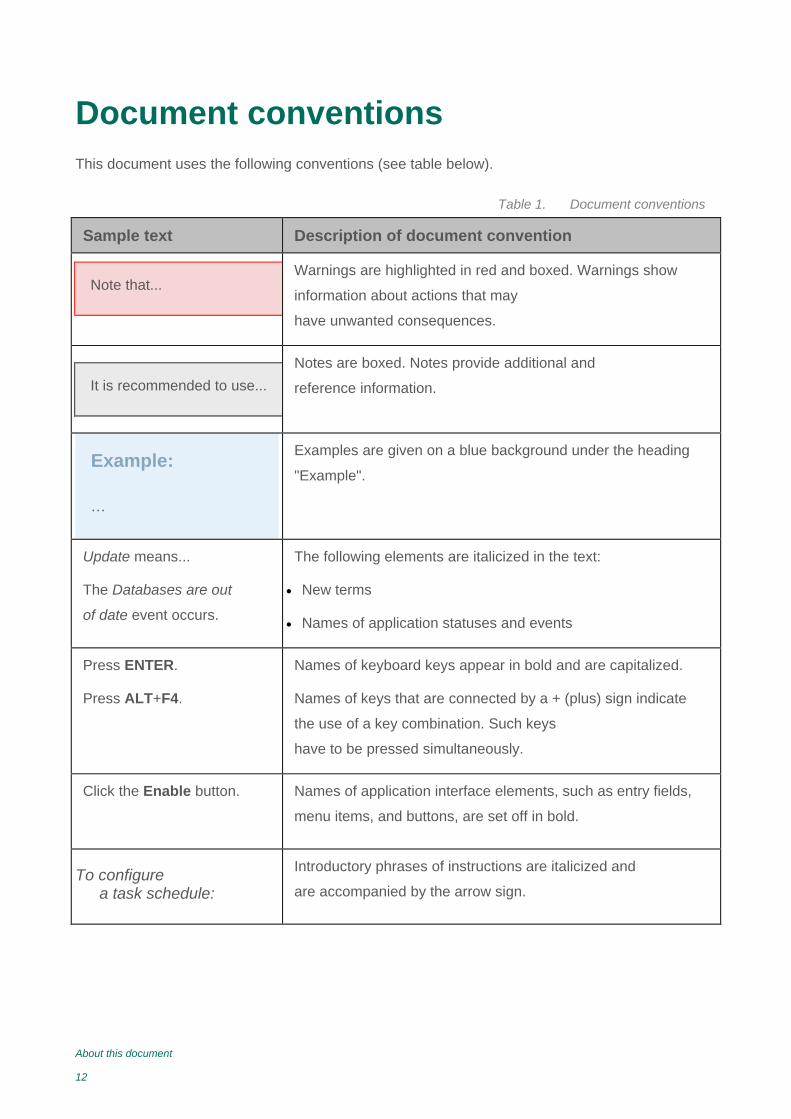
Document conventions
This document uses the following conventions (see table below).
Table 1. Document conventions
Sample text Description of document convention
Note that... Warnings are highlighted in red and boxed. Warnings show
information about actions that may
have unwanted consequences.
It is recommended to use...
Notes are boxed. Notes provide additional and
reference information.
Example:
…
Examples are given on a blue background under the heading
"Example".
Update means...
The Databases are out
of date event occurs.
The following elements are italicized in the text:
New terms
Names of application statuses and events
Press ENTER.
Press ALT+F4.
Names of keyboard keys appear in bold and are capitalized.
Names of keys that are connected by a + (plus) sign indicate
the use of a key combination. Such keys
have to be pressed simultaneously.
Click the Enable button. Names of application interface elements, such as entry fields,
menu items, and buttons, are set off in bold.
To configure a task schedule:
Introductory phrases of instructions are italicized and
are accompanied by the arrow sign.

About this document
13
Sample text Description of document convention
In the command line,
enter help.
The following message
then appears:
Specify the date
in dd:mm:yy format.
The following types of text content are set off with a special font:
Text in the command line
Text of messages that the application displays on screen
Data to be entered using the keyboard
<User name> Variables are enclosed in angle brackets.
Instead of the variable, insert the corresponding value,
not including the angle brackets.
Sources of information about the application
This section lists the sources of information about the application.
You can select the most suitable information source, depending on the level of importance and
urgency of the issue.
In this section:
Sources of information for independent research ........................................................................ 14
Discussing Kaspersky Lab applications on the Forum ................................................................. 15
Sources of information for independent research
You can use the following sources to independently find information about Kaspersky
Endpoint Security:
Kaspersky Endpoint Security page on the Kaspersky Lab website
Kaspersky Endpoint Security page on the Technical Support website (Knowledge Base)
Documentation
If you cannot find a solution for your issue, contact Kaspersky Lab Technical Support (see
the section "Contacting Technical Support" on page 109).
An Internet connection is required to use online information sources.

Sources of information about the application
15
Kaspersky Endpoint Security page on the Kaspersky Lab website
On the Kaspersky Endpoint Security page
(http://www.kaspersky.com/business-security/endpoint-linux), you can view general information
about the application, its functions and features.
The Kaspersky Endpoint Security page contains a link to the online store. There you can purchase
or renew the application.
Kaspersky Endpoint Security page in the Knowledge Base
Knowledge Base is a section on the Technical Support website.
The Kaspersky Endpoint Security page in the Knowledge Base
(http://support.kaspersky.com/kes10linux) contains articles that provide useful information,
recommendations, and answers to frequently asked questions about how to purchase, install, and
use the application.
Knowledge Base articles can answer questions relating to not only Kaspersky Endpoint Security
but also to other Kaspersky Lab applications. Articles in the Knowledge Base may also contain
news from Technical Support.
Documentation
Application documentation includes the files of the Administrator's Guide.
The Administrator's Guide provides instructions on:
Prepare for installation, install and activate Kaspersky Endpoint Security.
Configure and use Kaspersky Endpoint Security.
Remotely manage Kaspersky Endpoint Security via Kaspersky Security Center.
Discussing Kaspersky Lab applications on the Forum
If your question does not require an immediate answer, you can discuss it with Kaspersky Lab
experts and other users on our forum (http://forum.kaspersky.com).
In this forum you can view existing topics, leave your comments, and create new discussion topics.

Kaspersky Endpoint Security
This section describes the functions, components, and distribution kit of Kaspersky Endpoint
Security, and provides a list of hardware and software requirements of Kaspersky
Endpoint Security.
In this section:
About Kaspersky Endpoint Security ............................................................................................. 16
What's new ................................................................................................................................... 18
Distribution kit ............................................................................................................................... 18
Hardware and software requirements .......................................................................................... 19
About Kaspersky Endpoint Security
Kaspersky Endpoint Security protects computers running Linux® operating systems
against malware. Threats can infiltrate the system via network data transfer channels or from
removable drives.
The application lets you:
Scan file system objects located on the computer's local drives, as well as mounted and
shared resources accessed via the SMB and NFS protocols.
The application can scan file system objects both in real time using real-time protection
tasks and on demand using on-demand scan tasks.
Scan boot sectors using the boot sector scan task.
Scan process memory using the process memory scan task.
Detect infected objects.
Kaspersky Endpoint Security
17
If an object is found to contain code from a known virus, Kaspersky Endpoint Security
considers the object as infected.
Neutralize threats detected in files.
Depending on the type of threat, the application automatically chooses the action
to be performed in order to neutralize the threat.
Save backup copies of files before disinfection or deletion and restore files from
backup copies.
Manage tasks and configure their settings.
You can manage the real-time protection task, on-demand scan task, boot sector scan
task, process memory scan task, update task, update rollback task, and update
distribution task.
Add keys, activate the application using activation codes, and use the application based
on a subscription.
Notify the administrator about events occurring during the operation of Kaspersky
Endpoint Security.
Update Kaspersky Endpoint Security databases from Kaspersky Lab update servers,
via the Administration Server, or from a user-specified source by schedule or on demand.
The application uses anti-virus databases to detect and disinfect infected files.
Kaspersky Endpoint Security analyzes each file for threats during the scan process: file
code is matched against code that resembles a particular threat.
Manage Kaspersky Endpoint Security using the following methods:
From the command line using the application control commands
Via Kaspersky Security Center
Kaspersky Endpoint Security
18
What's new
Kaspersky Endpoint Security provides the following new capabilities:
Kaspersky Security Network is now supported.
There is now support for Kaspersky Private Security Network when using Kaspersky
Security Center.
You can now use Kaspersky Endpoint Security by subscription.
Activation service 2.0 is now supported.
You can now scan process memory.
Boot sectors can now be scanned.
New commands have been added to simplify management of Kaspersky Endpoint Security.
There is now support for fanotify technology.
Non-privileged users can now scan files.
Distribution kit
The distribution kit includes the Kaspersky Endpoint Security installation package containing
the following files:
kesl-10.0.0-<build number>.i386.rpm, kesl_10.0.0-<build number>_i386.deb
Contains the main files of Kaspersky Endpoint Security. Packages can be installed to 32-bit
operating systems based on the type of package manager.
kesl-10.0.0-<build number>.x86_64.rpm, kesl_10.0.0-<build number>_amd64.deb
Contains the main files of Kaspersky Endpoint Security. Packages can be installed to 64-bit
operating systems based on the type of package manager.
kesl.zip

Kaspersky Endpoint Security
19
Contains the files used in the procedure for remotely installing Kaspersky Endpoint Security
using Kaspersky Security Center.
klnagent-<build number>.i386.rpm, klnagent_<build number>_i386.deb
Contains Network Agent (a utility that connects Kaspersky Endpoint Security to Kaspersky
Security Center).
klnagent-rpm.tar.gz, klnagent-deb.tar.gz
Contain the files klnagent.kpd and akinstall.sh used in the remote installation procedure
for Administration Console using Kaspersky Security Center.
The ksn_license.<language ID> file, which you can use to view the terms of participation
in Kaspersky Security Network.
The license.<language ID> file, which you can use to view the End User
License Agreement. The End User License Agreement specifies the terms of use
of the application.
Hardware and software requirements
To ensure proper operation of Kaspersky Endpoint Security, your computer must meet
the following requirements:
Minimum general requirements:
Core™ 2 Duo 1.86 GHz or higher processor
1 GB of RAM for 32-bit operating systems
2 GB of RAM for 64-bit operating systems
Swap partition of at least 1 GB
1 GB of free disk space on the hard drive

Kaspersky Endpoint Security
20
Software requirements:
Supported 32-bit operating systems:
Red Hat® Enterprise Linux® 6.7
Red Hat Enterprise Linux 6.8
CentOS-6.7
CentOS-6.8
Ubuntu Server 14.04 LTS
Ubuntu Server 16.04 LTS
Ubuntu Server 16.10 LTS
Debian GNU/Linux 7.10
Debian GNU/Linux 7.11
Debian GNU/Linux 8.6
Debian GNU/Linux 8.7.
Supported 64-bit operating systems:
Red Hat Enterprise Linux 6.7
Red Hat Enterprise Linux 6.8
Red Hat Enterprise Linux 7.2
Red Hat Enterprise Linux 7.3
CentOS-6.7
CentOS-6.8
CentOS-7.2
CentOS-7.3
Ubuntu Server 14.04 LTS
Ubuntu Server 16.04 LTS
Kaspersky Endpoint Security
21
Ubuntu Server 16.10 LTS
Debian GNU/Linux 7.10
Debian GNU/Linux 7.11
Debian GNU/Linux 8.6
Debian GNU/Linux 8.7
openSUSE 42.2
Novell OES11 SP3
Novell OES2015 SP1
Oracle Linux 7.3
Perl interpreter: version 5.10 or higher
Installed Which utility
Installed packages for compiling applications (gcc, binutils, glibc, glibc-devel, make, ld),
source code for the operating system kernel—For compiling modules of Kaspersky
Endpoint Security on operating systems that do not support fanotify technology.
Kaspersky Endpoint Security 10 for Linux is compatible with Kaspersky Security Center 10
SP1 and Kaspersky Security Center 10 SP2.
To ensure proper functioning of the Kaspersky Endpoint Security administration plug-in,
Microsoft® Visual C++ 2015 Redistributable Update 3 RC must be installed.
Prior to installing Network Agent, the following modules must be installed:
The libc6-i386 module must be installed to 64-bit versions of Debian and Ubuntu.
The glibc.i686 module must be installed to Red Hat Enterprise Linux 7 or later, CentOS
7 or later, and Oracle Linux 7 or later.
The glibc-32bit module must be installed to openSUSE 42.2 and SUSE Linux Enterprise
Server 11 SP4.
Installing and removing the application
This section contains step-by-step instructions on installing and uninstalling Kaspersky
Endpoint Security.
In this section:
Application installation procedure ................................................................................................ 22
Getting started .............................................................................................................................. 25
Removing the application ............................................................................................................. 37
Application installation procedure
This section contains instructions on how to install the installer package (hereinafter referred to as
the "package") for Kaspersky Endpoint Security and Network Agent.
About installing Kaspersky Endpoint Security
Kaspersky Endpoint Security is distributed in packages in the DEB and RPM formats.
To work with Kaspersky Endpoint Security, you must perform the following:
1. Install the Kaspersky Endpoint Security package.
2. Run the settings update script.
3. Install the Network Agent package and the Kaspersky Endpoint Security administration
plug-in if you are planning to manage Kaspersky Endpoint Security using Kaspersky
Security Center.
Installing and removing the application
23
Installing the Kaspersky Endpoint Security package
Kaspersky Endpoint Security is distributed in packages in the DEB and RPM formats.
To install Kaspersky Endpoint Security from an RPM package to a 32-bit operating system, run the following command:
# rpm -i kesl-10.0.0-<build number>.i386.rpm
To install Kaspersky Endpoint Security from an RPM package to a 64-bit operating system, run the following command:
# rpm -i kesl-10.0.0-<build number>.x86_64.rpm
To install Kaspersky Endpoint Security from a DEB package to a 32-bit operating system, run the following command:
# dpkg -i kesl-10.0.0-<build number>_i386.deb
To install Kaspersky Endpoint Security from a DEB package to a 64-bit operating system, run the following command:
# dpkg -i kesl_10.0.0-<build number>_amd64.deb
Updating Kaspersky Endpoint Security settings
After installing Kaspersky Endpoint Security, you must run the script for post-installation
configuration of Kaspersky Endpoint Security. The post-installation configuration script
for Kaspersky Endpoint Security is included in the Kaspersky Endpoint Security package.
To start the Kaspersky Endpoint Security post-installation configuration script, run the following command:
# /opt/kaspersky/kesl/bin/kesl-setup.pl
The post-installation configuration script asks for the values of Kaspersky Endpoint Security
settings based on a step-by-step procedure (see section "About initial configuration of Kaspersky
Endpoint Security" on page 25).
Installing and removing the application
24
You cannot upgrade a previous version of the application to Kaspersky Endpoint Security 10
for Linux. You must uninstall the previous version of the application before installing Kaspersky
Endpoint Security.
Installing Network Agent
Installation of Network Agent is required if you are planning on managing Kaspersky Endpoint
Security via Kaspersky Security Center.
The Network Agent installation process must be started with root privileges.
To install Network Agent from an RPM package to a 32-bit or 64-bit operating system, run the following command:
# rpm -i klnagent-<build number>.i386.rpm
To install Network Agent from a DEB package to a 32-bit operating system, run the following command:
# dpkg -i klnagent_<build number>_i386.deb
To install Network Agent from a DEB package to a 64-bit operating system, run the following command:
# dpkg -i --force-architecture klnagent_<build number>_i386.deb
After installing the package, start the Kaspersky Endpoint Security post-installation configuration
script by running the following command:
/opt/kaspersky/klnagent/lib/bin/setup/postinstall.pl
Installing Kaspersky Endpoint Security via Kaspersky Security Center
You can install Kaspersky Endpoint Security to a computer via Kaspersky Security Center.
More details about this type of application installation can be found in the Kaspersky Security
Center Administrator's Guide.
Installing and removing the application
25
Getting started
This section contains instructions on initial configuration of Kaspersky Endpoint Security.
About initial configuration of Kaspersky Endpoint Security
After Kaspersky Endpoint Security is installed to a computer, you must perform initial configuration
of Kaspersky Endpoint Security.
If you have not complete the procedure for initial configuration of Kaspersky Endpoint Security,
the computer's anti-virus protection will not work.
The initial configuration process consists of a sequence of steps. This procedure is implemented
in the form of a post-installation configuration script. The post-installation configuration script
must be run with root privileges after installation of the Kaspersky Endpoint Security
package is complete.
Kaspersky Endpoint Security Initial Configuration Wizard
To manually run the Kaspersky Endpoint Security initial configuration script, run the following command:
# /opt/kaspersky/kesl/bin/kesl-setup.pl
Installing and removing the application
26
In this section:
Step 1. Selecting the locale .......................................................................................................... 26
Step 2. Viewing the text of the End User License Agreement ..................................................... 27
Step 3. Participation in Kaspersky Security Network ................................................................... 27
Step 4. Determining the type of file operation interceptor ............................................................ 28
Step 5. Configuring proxy server settings .................................................................................... 28
Step 6. Downloading Kaspersky Endpoint Security anti-virus databases .................................... 29
Step 7. Enabling automatic update of anti-virus databases ......................................................... 30
Step 8. Activating the application ................................................................................................. 30
Step 1. Selecting the locale
At this step, you must assign the locale that will be used during operation of Kaspersky
Endpoint Security.
You can assign the locale in the format defined in RFC 3066.
To receive a full list of locale values, run the following command:
# locale -a
By default, the application suggests using the locale that is set for root.

Installing and removing the application
27
Step 2. Viewing the text of the End User License Agreement
At this step, you must either agree or decline the terms of the End User License Agreement.
You can view the text by using the less utility. To navigate through the text, use the arrow keys or
the B (to move back one screen) and F (to move forward one screen) keys. To obtain help, use
the H key. To finish your review, use the Q key.
After exiting viewing mode, enter one of the following values:
yes (or y), if you accept the terms of the End User License Agreement.
no (or n), if you do not accept the terms of the End User License Agreement.
If you do not agree to the terms of the End User License Agreement, the application terminates
the Kaspersky Endpoint Security configuration process.
Step 3. Participating in Kaspersky Security Network
At this step, you must either accept or decline the terms of the Kaspersky Security
Network Statement. The file containing the text of the Kaspersky Security Network Statement
is located in the directory /opt/kaspersky/kesl/doc/ksn_license.<language ID>.
Enter one of the following values:
yes (or y), if you agree to the terms of the Kaspersky Security Network Statement.
no (or n), if you do not agree to the terms of the Kaspersky Security Network Statement.
Refusal to participate in Kaspersky Security Network does not interrupt the Kaspersky Endpoint
Security installation process. You can enable or disable the use of Kaspersky Security Network
at any time (see section "Enabling and disabling the use of Kaspersky Security Network"
on page 85).
Installing and removing the application
28
Step 4. Determining the type of file operation interceptor
At this step, the type of file operation interceptor for the utilized operating system is determined.
For operating systems that do not support fanotify technology, kernel module compilation
is started. The kernel module is required for operation of the real-time protection task.
To compile the kernel module, the System.map-<kernel version> file must be present
in the /boot/ directory.
If the script finds the operating system's kernel source code in the default directory, the application
will use the path to this directory. Otherwise, you will have to specify the path to the kernel
source code.
If the necessary packages are not detected during the kernel compilation process, Kaspersky
Endpoint Security attempts to download them on its own. If it fails to download the packages,
an error message is displayed.
You can compile the kernel module later after initial configuration of Kaspersky Endpoint Security
is complete.
Step 5. Configuring proxy server settings
At this step, you must specify the proxy server settings if you are using a proxy server to access
the Internet. An Internet connection is required for downloading Kaspersky Endpoint Security
anti-virus databases from the update servers (see section "Step 6. Downloading Kaspersky
Endpoint Security anti-virus databases" on page 29).
To configure proxy server settings, perform one of the following actions:
If you use a proxy server to connect to the Internet, specify the address of the proxy server
using one of the following formats:
proxy_server_IP:port_number, if no authentication is required to connect
to the proxy server;
Installing and removing the application
29
user_name:password@proxy_server_IP_address:port_number, if
authentication is required when connecting to the proxy server.
If you do not use a proxy server to connect to the Internet, enter no as your answer.
By default, the application suggests the answer no.
You can configure proxy server settings without using the initial configuration script (see section
"Using a proxy server when accessing update sources" on page 56).
Step 6. Downloading Kaspersky Endpoint Security anti-virus databases
At this step, you can download Kaspersky Endpoint Security anti-virus databases
to your computer. Anti-virus databases contain descriptions of threat signatures and methods
of countering them. Kaspersky Endpoint Security uses these records when searching for threats
and neutralizing them. Kaspersky Lab virus analysts regularly add new records about new threats.
To download Kaspersky Endpoint Security anti-virus databases to your computer, you must enter
yes as your answer.
Enter no if you do not want to immediately download anti-virus databases.
The default answer is yes.
The application will provide anti-virus protection for the computer only after downloading
the Kaspersky Endpoint Security anti-virus databases.
You can start the Kaspersky Endpoint Security anti-virus database update task without using
the initial configuration script (see section "Updating databases and application modules"
on page 52).
Installing and removing the application
30
Step 7. Enabling automatic update of anti-virus databases
At this step, you can enable automatic updates of anti-virus databases.
Enter yes to enable automatic update of anti-virus databases. By default, Kaspersky Endpoint
Security checks for available anti-virus database updates every 60 minutes. If updates
are available, Kaspersky Endpoint Security downloads the updated anti-virus databases.
Enter no if you do not want Kaspersky Endpoint Security to automatically update
the anti-virus databases.
You can enable automatic updates of anti-virus databases without using the initial configuration
script by managing the update task schedule (see section "Modifying task schedule settings"
on page 153).
Step 8. Activating the application
At this step, you must activate the application with an activation code or a key file.
To activate the application with an activation code, you must enter the activation code.
To activate the application using a key file, you must specify the full path to the key file.
If no activation code or key file is specified, the application will be activated using a trial key
for one month.
You can install a key file without using the initial configuration script (see section "Key
management commands" on page 166).
Automatic initial configuration of Kaspersky Endpoint Security
You can perform automatic initial configuration of Kaspersky Endpoint Security. The application
sets the values of settings as specified in the initial setup configuration file.
Installing and removing the application
31
Starting automatic initial configuration of Kaspersky Endpoint Security
To start automatic initial configuration of Kaspersky Endpoint Security, run the following command:
/opt/kaspersky/kesl/bin/kesl-setup.pl --autoinstall=<full path
to the initial setup configuration file>

Installing and removing the application
32
Settings of the Kaspersky Endpoint Security initial setup configuration file
The Kaspersky Endpoint Security initial setup configuration file contains the settings presented
in the table below.
Table 2. Settings of the Kaspersky Endpoint Security initial setup configuration file
Setting Description Available values
EULA_AGREED Required setting.
Acceptance of the terms
of the End User License
Agreement
yes—You must accept
the terms of the End User
License Agreement
to continue the application
installation procedure.
USE_KSN Acceptance of the Kaspersky
Security Network Statement
yes—Accept the Kaspersky
Security Network Statement.
no—Do not accept
the Kaspersky Security
Network Statement.
SERVICE_LOCALE Locale used during operation
of Kaspersky Endpoint
Security
The locale is set in the format
specified in RFC 3066.
INSTALL_LICENSE Activation code or key file
UPDATER_SOURCE Update source SCServer—Use
the Kaspersky Security
Center Administration Server
as the update source.
KLServers—Use
the Kaspersky Lab servers as
the update source.
update source address
Installing and removing the application
33
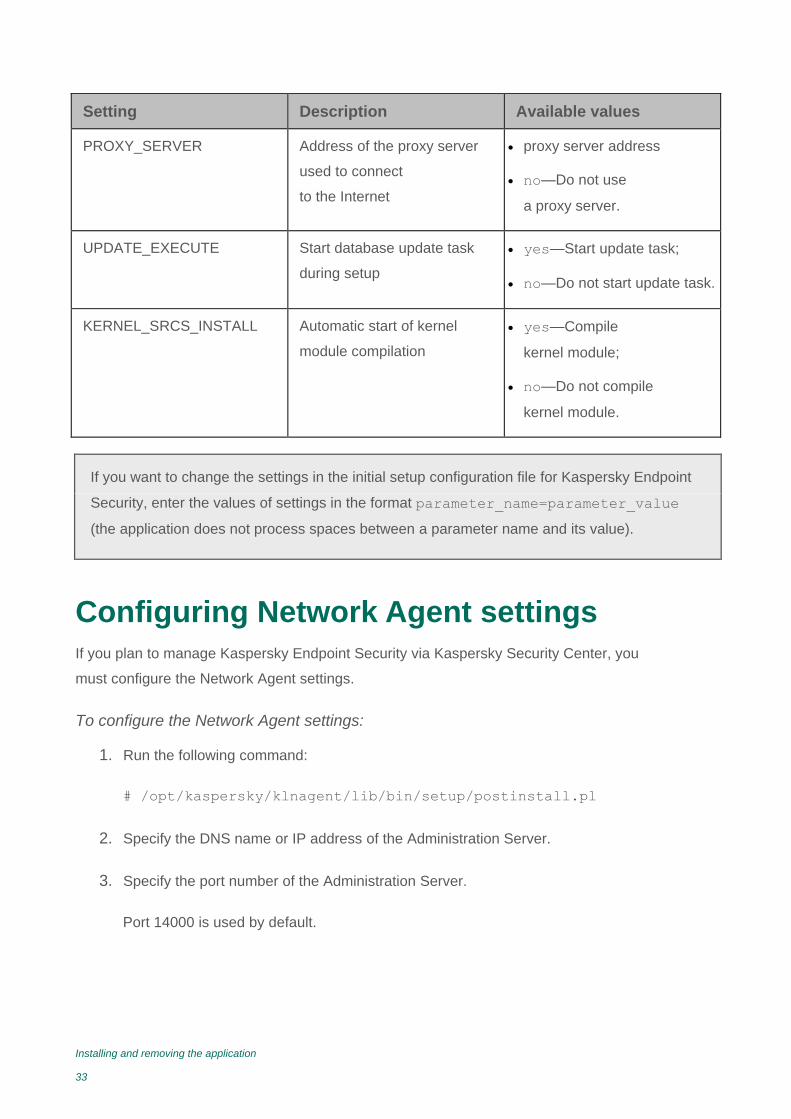
Setting Description Available values
PROXY_SERVER Address of the proxy server
used to connect
to the Internet
proxy server address
no—Do not use
a proxy server.
UPDATE_EXECUTE Start database update task
during setup
yes—Start update task;
no—Do not start update task.
KERNEL_SRCS_INSTALL Automatic start of kernel
module compilation
yes—Compile
kernel module;
no—Do not compile
kernel module.
If you want to change the settings in the initial setup configuration file for Kaspersky Endpoint
Security, enter the values of settings in the format parameter_name=parameter_value
(the application does not process spaces between a parameter name and its value).
Configuring Network Agent settings
If you plan to manage Kaspersky Endpoint Security via Kaspersky Security Center, you
must configure the Network Agent settings.
To configure the Network Agent settings:
1. Run the following command:
# /opt/kaspersky/klnagent/lib/bin/setup/postinstall.pl
2. Specify the DNS name or IP address of the Administration Server.
3. Specify the port number of the Administration Server.
Port 14000 is used by default.
Installing and removing the application
34
4. If you want to use an SSL connection, specify the SSL port number
of the Administration Server.
Port 13000 is used by default.
5. Do one of the following:
Enter yes if you want to use an SSL connection.
Enter no if you do not want to use an SSL connection.
By default, SSL connection is enabled.
For more detailed information about configuring Network Agent, please refer to the Kaspersky
Security Center Administrator's Guide.
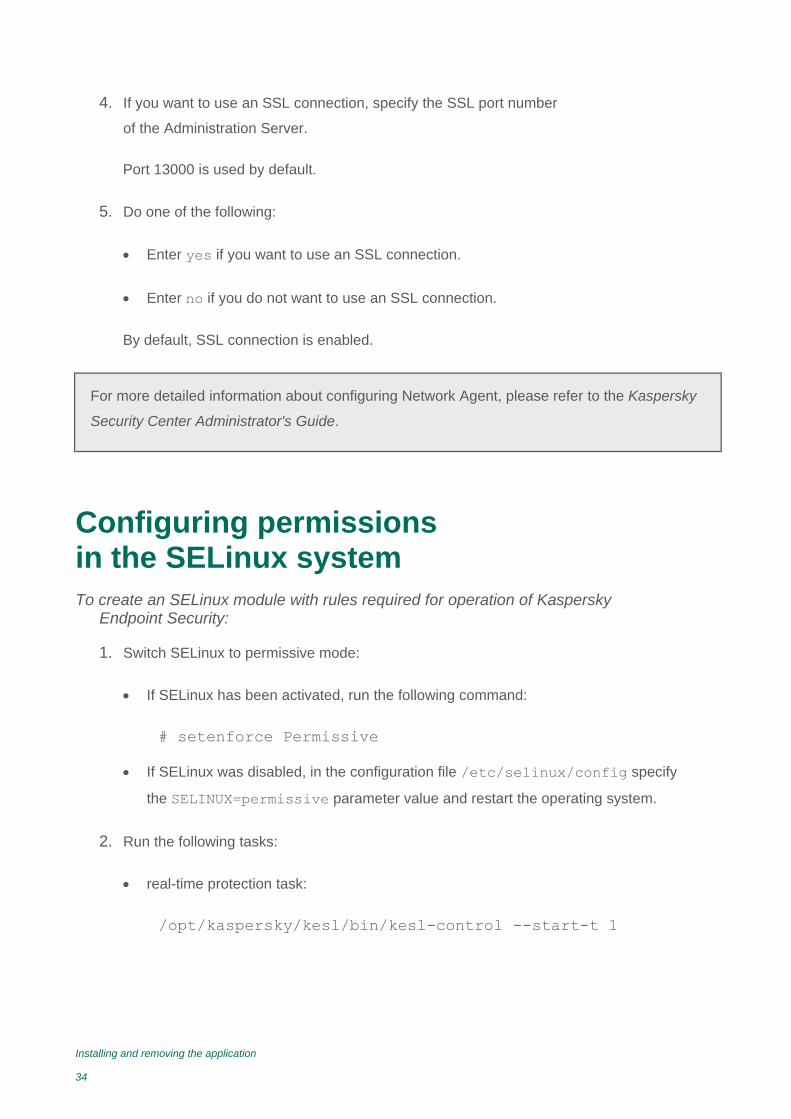
Configuring permissions in the SELinux system
To create an SELinux module with rules required for operation of Kaspersky Endpoint Security:
1. Switch SELinux to permissive mode:
If SELinux has been activated, run the following command:
# setenforce Permissive
If SELinux was disabled, in the configuration file /etc/selinux/config specify
the SELINUX=permissive parameter value and restart the operating system.
2. Run the following tasks:
real-time protection task:
/opt/kaspersky/kesl/bin/kesl-control --start-t 1
Installing and removing the application
35
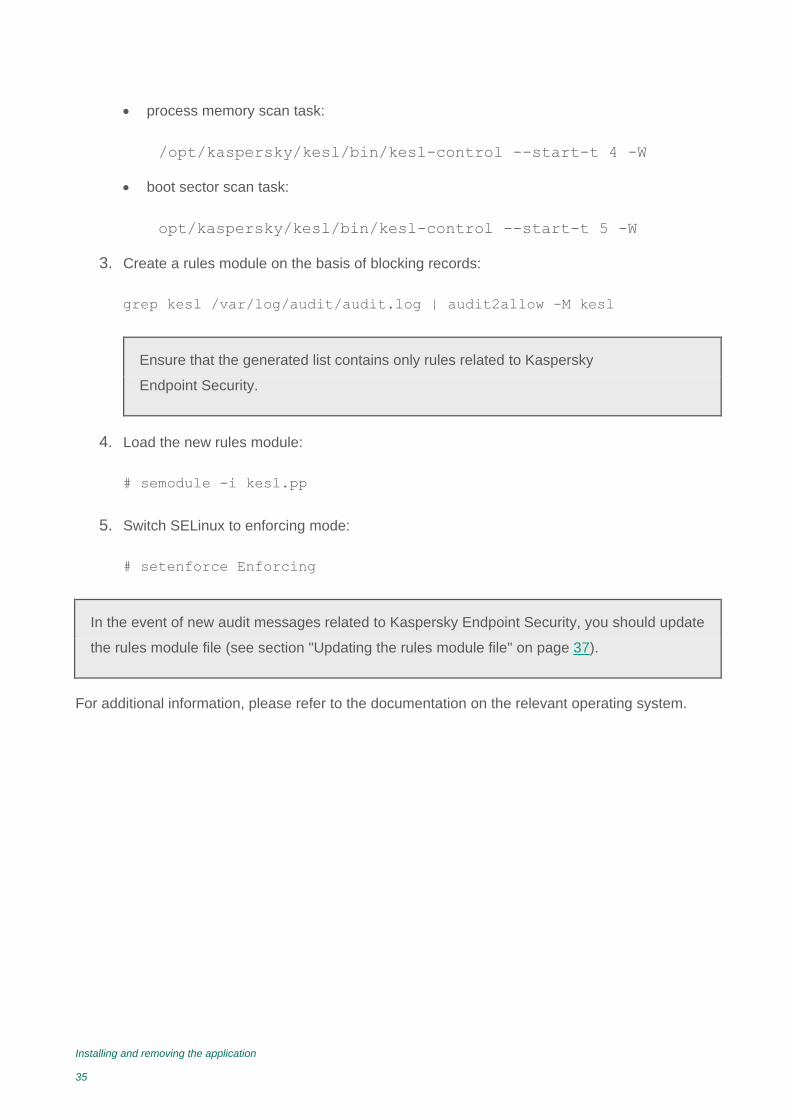
process memory scan task:
/opt/kaspersky/kesl/bin/kesl-control --start-t 4 -W
boot sector scan task:
opt/kaspersky/kesl/bin/kesl-control --start-t 5 -W
3. Create a rules module on the basis of blocking records:
grep kesl /var/log/audit/audit.log | audit2allow -M kesl
Ensure that the generated list contains only rules related to Kaspersky
Endpoint Security.
4. Load the new rules module:
# semodule -i kesl.pp
5. Switch SELinux to enforcing mode:
# setenforce Enforcing
In the event of new audit messages related to Kaspersky Endpoint Security, you should update
the rules module file (see section "Updating the rules module file" on page 37).
For additional information, please refer to the documentation on the relevant operating system.

Installing and removing the application
36
Configuring permissions in the AppArmor system
To update the AppArmor profiles required to run Kaspersky Endpoint Security:
1. Make sure that the AppArmor module is loaded by using one of the following methods:
systemctl status apparmor
/etc/init.d/apparmor status
2. Create a Kaspersky Endpoint Security profile:
a. In the first console, run the following commands:
cd /etc/apparmor.d
aa-genprof /opt/kaspersky/kesl/libexec/kesl
b. In the second console, run the following tasks:
real-time protection task:
/opt/kaspersky/kesl/bin/kesl-control --start-t 1
process memory scan task:
/opt/kaspersky/kesl/bin/kesl-control --start-t 4 -W
boot sector scan task:
opt/kaspersky/kesl/bin/kesl-control --start-t 5 -W
update task:
/opt/kaspersky/kesl/bin/kesl-control --start-t 6 -W
c. In the first console, press S. After event scanning completes, press F.
3. Switch the created Kaspersky Endpoint Security profile to message display mode:
aa-complain opt.kaspersky.kesl.libexec.kesl
4. After the application has run for several days, update the profile by running
the following command:
aa-logprof
Installing and removing the application
37
Specify the Allow or Glob permissions for all files that Kaspersky Endpoint Security used
during this period.
5. Switch the Kaspersky Endpoint Security profile to blocking mode:
aa-enforce opt.kaspersky.kesl.libexec.kesl
In the event of new audit messages related to Kaspersky Endpoint Security, you should update
the rules module file (see section "Updating the rules module file" on page 37).
For additional information, please refer to the documentation on the relevant operating system:
Updating the rules module file
Install the package policycoreutils-python before using the audit2allow utility.
To update the rules module file, do the following:
# audit2allow -l -M kesl –i /var/log/audit/audit.log
# semodule -u kesl.pp
Removing the application
This section contains instructions on how to remove Kaspersky Endpoint Security locally or
via Kaspersky Security Center.
Local removal of Kaspersky Endpoint Security
While the application is being removed, all tasks of Kaspersky Endpoint Security
will be stopped.
Installing and removing the application
38
To uninstall Kaspersky Endpoint Security that was installed from an RPM package, run the following command:
# rpm -e kesl
To uninstall Kaspersky Endpoint Security that was installed from a DEB package, run the following command:
# dpkg -r kesl
To remove Network Agent that was installed from an RPM package, run the following command:
# rpm -e klnagent
To remove Network Agent that was installed from a DEB package, run the following command:
# dpkg -r klnagent
The application automatically performs the removal procedure. When completed, the application
displays a message containing the results of removal.
Removing Kaspersky Endpoint Security via Kaspersky Security Center
You can remove Kaspersky Endpoint Security via Kaspersky Security Center. To do so, you
must create and start a removal task for Kaspersky Endpoint Security.
For more details about creating and starting a Kaspersky Endpoint Security removal task, please
refer to the Kaspersky Security Center Administrator's Guide.

Application licensing
This section provides information about general concepts related to the application licensing.
In this section:
About the End User License Agreement ...................................................................................... 39
About the license .......................................................................................................................... 40
About the license certificate ......................................................................................................... 41
About the activation code ............................................................................................................. 41
About the key ............................................................................................................................... 42
About the key file .......................................................................................................................... 42
About subscription ........................................................................................................................ 43
About data provision .................................................................................................................... 44
About the End User License Agreement
The End User License Agreement is a binding agreement between you and AO Kaspersky Lab,
stipulating the terms on which you may use the application.
Read through the terms of the License Agreement carefully before you start using
the application.
You can view the terms of the End User License Agreement in the following ways:
During installation of Kaspersky Endpoint Security.
By reading the license.txt file. This file is included in the application's distribution kit.

Application licensing
40
By confirming that you agree with the End User License Agreement when installing the application,
you signify your acceptance of the terms of the End User License Agreement. If you do not accept
the terms of the End User License Agreement, you must abort application installation and
must not use the application.
About the license
A license is a time-limited right to use the application, granted under the End User
License Agreement.
A valid license entitles you to the following kinds of services:
Use of the application in accordance with the terms of the End User License Agreement
Technical Support
The scope of services and application usage term depend on the type of license under which
the application was activated.
The following license types are provided:
Trial—A free license intended for trying out the application.
A trial license is usually of limited duration. When the trial license expires, all Kaspersky
Endpoint Security features become disabled. To continue using the application, you need
to purchase a commercial license.
You can activate the application under a trial license only once.
Commercial—Paid license offered upon purchase of the application.
When the commercial license expires, the application continues running with limited
functionality (for example, Kaspersky Endpoint Security database updates
are not available). To continue using Kaspersky Endpoint Security in fully functional mode,
you must renew your commercial license.
We recommend renewing the license before its expiration to ensure maximum protection of your
computer against security threats.
Application licensing
41
About the license certificate
License Certificate—Document provided with the key file or activation code.
The License Certificate contains the following license information:
Order number
Details of the license holder
Information about the application that can be activated using the license
Limitation on the number of licensing units (devices on which the application can be used
under the license)
License start date
License expiration date or license validity period
License type
About the activation code
Activation code—Unique sequence of twenty Latin letters and numerals. You have to enter
an activation code in order to add a key that activates Kaspersky Endpoint Security. You receive
the activation code at the email address that you provided when you bought Kaspersky Endpoint
Security or ordered the trial version of Kaspersky Endpoint Security.
To activate the application using the activation code, Internet access is required to connect
to Kaspersky Lab's activation servers.
If the activation code has been lost after activation of the application, you can restore
the activation code. You may need the activation code to register a Kaspersky CompanyAccount,
for example. To restore an activation code, you must contact Kaspersky Lab Technical Support
(see section "How to obtain Technical Support" on page 109).

Application licensing
42
About the key
Key—Sequence of bits with which you can activate and subsequently use the application
in accordance with the terms of the End User License Agreement. A key is generated
by Kaspersky Lab.
You can add a key to the application in one of the following ways: apply a key file or enter
an activation code. After you add a key to the application, the key is displayed in the application
interface as a unique alphanumeric sequence.
The key can be blocked by Kaspersky Lab if the End User License Agreement is violated.
If the key has been black-listed, you have to add a different key to continue using the application.
Keys can be active or additional.
An active key is a key that is currently used by the application. A trial or commercial license key
can be added as the active key. The application cannot have more than one active key.
An additional key is a key that entitles the user to use the application, but is not currently in use.
An additional key automatically becomes active when the license associated with the current active
key expires. An additional key can be added only if the active key is available.
A key for a trial license can be added only as an active key. A key for a trial license cannot
be added as an additional key.
About the key file
A key file is a file with the .key extension that you receive from Kaspersky Lab. The purpose
of a key file is to add a key that activates the application.
You receive a key file at the email address that you provided when you bought Kaspersky Endpoint
Security or ordered the trial version of Kaspersky Endpoint Security.
You do not need to connect to Kaspersky Lab activation servers in order to activate the application
with a key file.
You can recover a key file if it has been accidentally deleted. You may need a key file to register
a Kaspersky CompanyAccount, for example.

Application licensing
43
To recover a key file, do one of the following:
Contact Technical Support (http://support.kaspersky.com).
Obtain a key file on the Kaspersky Lab website (https://activation.kaspersky.com) based
on your existing activation code.
About subscription
Subscription for Kaspersky Endpoint Security is a purchase order for the application with specific
parameters (subscription expiry date, number of devices protected). You can order a subscription
for Kaspersky Endpoint Security from your service provider (such as your ISP). A subscription
can be renewed manually or automatically, or you may cancel your subscription. You can manage
your subscription on the website of the service provider.
Subscription can be limited (for one year, for example) or unlimited (without an expiry date).
To keep Kaspersky Endpoint Security working after expiry of the limited subscription term, you
have to renew your subscription. Unlimited subscription is renewed automatically if the vendor's
services have been prepaid on time.
In the case of limited subscription, upon its expiry you may be offered a grace period for renewing
subscription, during which time the application will retain its functionality. The service provider
decides whether or not to grant a grace period and, if so, determines the duration
of the grace period.
To use Kaspersky Endpoint Security under subscription, you have to apply the activation code
received from the service provider. After the activation code is applied, the active key is installed.
The active key defines the license for using the application under subscription. An additional key
can be installed only using an activation code and cannot be installed using a key file or
under subscription.
The application functionality available by subscription can correspond to the application
functionality for the following types of commercial license: Standard, Kaspersky Business Space
Security, Kaspersky Enterprise Space Security. Licenses of these types are designed
for protecting file servers, workstations, and mobile devices, and support the use of control
components on workstations and mobile devices.

Application licensing
44
The possible subscription management options may vary with each service provider.
The service provider may not offer a grace period for renewing subscription, during which time
the application will retain its functionality.
Activation codes purchased under subscription may not be used to activate previous versions
of Kaspersky Endpoint Security.
About data provision
By accepting the terms of the End User License Agreement, you agree to automatically transmit
the following information:
Information related to activation of the application based on an activation code
Statistics on use of the real-time protection task and on-demand scan tasks
Application ID
Application version
ID of the computer on which the application is installed
Name and version of the operating system used (including the names and versions
of installed updates)
By accepting the terms of the Kaspersky Security Network Statement, you also agree
to automatically transmit the following information:
Information about the date and duration of application installation on the computer.
ID of the partner from which the license was purchased.
Type of application installation on the computer (initial installation).
Information about the operating system installed on the computer (including the name, type,
and bit count).
Application licensing
45
Information about applications running on the computer.
Hash (MD5) of the executable file and the number of file launches since information
was last submitted.
Full path to the executable file on the computer.
Attribute showing whether or not the file has a valid digital signature.
Attribute indicating one of the standard paths in the system where the file being launched
is located.
Hash (MD5) and category to which the scanned object has been assigned (according
to the version of the right holder).
ID of the source of categorization.
Information about the vendor name of the object and the attribute of receipt of information
about the vendor.
Version of the scanned object.
Information about the version of the file categorization databases used by the application
and the ID of the database record used during the scan.
ID of the application component that requested the object category.
Kaspersky Lab protects any information received in this way as prescribed by law and applicable
rules of Kaspersky Lab.
Kaspersky Lab uses any retrieved information in anonymized form and as general statistics only.
General statistics are automatically generated using original collected information and
do not contain any personal data or other confidential information. The original information
received is destroyed as new information is accumulated (once a year). General statistics
are stored indefinitely.
Please read the End User License Agreement and visit the Kaspersky Lab website
at http://www.kaspersky.com/privacy to learn more about how we collect, process, store, and
destroy information about application usage after you accept the End User License Agreement.
The license.txt file with the End User License Agreement is included in the application
distribution kit.
Starting and stopping the application
By default, Kaspersky Endpoint Security starts automatically when the operating system is booted
(at the default level of execution for each operating system). Kaspersky Endpoint Security starts all
service tasks as well as custom tasks whose schedule settings specify PS run mode.
If you stop Kaspersky Endpoint Security, all running tasks will be interrupted. After restarting
Kaspersky Endpoint Security, the interrupted custom tasks will not be automatically resumed.
Only those custom tasks whose schedule settings specify PS run mode will be restarted.
To start Kaspersky Endpoint Security, execute the following command:
/etc/init.d/kesl-supervisor start
To stop Kaspersky Endpoint Security, execute the following command:
/etc/init.d/kesl-supervisor stop
To restart Kaspersky Endpoint Security, execute the following command:
/etc/init.d/kesl-supervisor restart
To display the status of Kaspersky Endpoint Security, run the following command:
/etc/init.d/kesl-supervisor status
To start Kaspersky Endpoint Security in the systemd system, run the following command:
systemctl start kesl-supervisor
To stop Kaspersky Endpoint Security in the systemd system, run the following command:
systemctl stop kesl-supervisor
To restart Kaspersky Endpoint Security in the systemd system, run the following command:
systemctl restart kesl-supervisor
To display the status of Kaspersky Endpoint Security in the systemd system, run the following command:
systemctl status kesl-supervisor
Managing Kaspersky Endpoint Security tasks
47
Managing Kaspersky Endpoint Security tasks
This section contains information about the types of Kaspersky Endpoint Security tasks and
instructions on how to manage those tasks.
In this section:
About Kaspersky Endpoint Security tasks ................................................................................... 48
Viewing the list of Kaspersky Endpoint Security tasks ................................................................. 49
Creating a task ............................................................................................................................. 49
Starting and stopping a task ......................................................................................................... 49
Deleting a task ............................................................................................................................. 50
Pausing and resuming a task ....................................................................................................... 50
Scheduling a task ......................................................................................................................... 50
Viewing the status of a task ......................................................................................................... 51
Managing Kaspersky Endpoint Security tasks
48
About Kaspersky Endpoint Security tasks
You can manage the operation of Kaspersky Endpoint Security using tasks locally on computers
(using the command line or configuration files) as well as centrally via Kaspersky Security Center
(see section "Managing the application via Kaspersky Security Center" on page 87).
There are two types of tasks for working with Kaspersky Endpoint Security:
Predefined task—Task that is created during installation of the application. You cannot
create or delete predefined tasks, but you can modify the settings of these tasks.
Custom task—Task that you can create or delete on your own.
You can manage the following tasks:
File_Monitoring—Real-time protection task (ID=1, type—OAS)
Scan_My_Computer—On-demand scan task (ID=2, type—ODS)
Scan_File—Custom scan task (ID=3, type—ODS). By default, the settings of this task
match the settings of the Scan_My_Computer task.
Boot_Scan—Boot sector scan task (ID=4, type—BootScan)
Memory_Scan—System memory scan task (ID=5, type—MemoryScan)
Update—Update task (ID=6, type—Update)
Rollback—Update rollback task (ID=7, type—Rollback). This task has no settings.
You can only manage this task.
Retranslate—Update distribution task (ID=8, type—Retranslate)
License—License server implementation task (ID=9, type—License)
Backup—Backup management task (ID=10, type—Backup)
You can perform the following actions with tasks:
Start and stop tasks.

Managing Kaspersky Endpoint Security tasks
49
Create and delete tasks (only for custom tasks).
Edit task settings.
ID—Number that Kaspersky Endpoint Security assigns to the task when it is created.
Viewing the list of Kaspersky Endpoint Security tasks
To view the list of Kaspersky Endpoint Security tasks, run the following command:
/opt/kaspersky/kesl/bin/kesl-control --get-task-list
Creating a task
You can create tasks.
To create a task, run the following command:
/opt/kaspersky/kesl/bin/kesl-control --create-task <task name>
--type <task type>
Starting and stopping a task
You can start and stop only the following types of tasks: OAS, ODS, BootScan, MemoryScan,
Rollback, Retranslate and Update.
You cannot start or stop Backup and License tasks.
To start the task, execute the following command:
/opt/kaspersky/kesl/bin/kesl-control --start-task
<task_ID>|<task_name>
To stop the task, execute the following command:
/opt/kaspersky/kesl/bin/kesl-control --stop-task <task
ID>|<task name>
Managing Kaspersky Endpoint Security tasks
50
Deleting a task
You can delete tasks that you have created (custom tasks).
To delete a task, execute the following command:
/opt/kaspersky/kesl/bin/kesl-control --delete-task <task
ID>|<task name>
Pausing and resuming a task
You can pause and resume the following types of tasks: ODS, BootScan, MemoryScan, Rollback,
Retranslate and Update.
To pause a task,
Execute the command: /opt/kaspersky/kesl/bin/kesl-control --suspend-task
<task ID>|<task name>.
The task is paused after the command has been executed.
To resume a task,
Execute the command: /opt/kaspersky/kesl/bin/kesl-control --resume-task
<task ID>|<task name>.
The task is resumed after the command has been executed.
Scheduling a task
To configure a task schedule:
1. Save task schedule settings to a configuration file using the following command:
/opt/kaspersky/kesl/bin/kesl-control --get-schedule <task ID>|<task
name> --file <full path to file>.
2. Open the configuration file for editing.
3. Specify the schedule settings.
Managing Kaspersky Endpoint Security tasks
51
4. Save the changes in the configuration file.
5. Import the schedule settings into the task using the following command:
/opt/kaspersky/kesl/bin/kesl-control --set-schedule <task
ID>|<task name> --file <full path to file>.
See also:
Viewing the status of a task ......................................................................................................... 51
Viewing the status of a task
You can view the status of a task.
Kaspersky Endpoint Security tasks can have one of the following statuses:
Started—Task is running.
Starting—Task being launched.
Stopped—Task that has stopped.
Stopping—Task is stopping.
Suspended—Task has been suspended.
Suspending—Task is being suspended.
Resumed—Task has been resumed.
Resuming—Task is being resumed.
To view the status of a task, execute the following command:
/opt/kaspersky/kesl/bin/kesl-control --get-task-state <task
ID>|<task name>.
Updating databases and application software modules
This section contains information about database and application module updates and instructions
on how to configure update settings.
In this section:
About database and application module updates ........................................................................ 52
About update sources .................................................................................................................. 53
Update settings configuration ....................................................................................................... 54
Rolling back database updates .................................................................................................... 57
Distributing updates ..................................................................................................................... 57
About database and application module updates
During the license validity period, you can receive updates for databases and modules
of Kaspersky Endpoint Security. Databases are files that contain records. These records contain
information about the control sections of malicious code and algorithms used for disinfecting
objects that contain such threats.
Kaspersky Lab’s virus analysts detect a multitude of new threats every day. They create identifying
records for those threats and include them in database updates. A database update consists
of one or several files containing such records. To minimize the risk of server infection, you
are advised to regularly obtain database updates.
Updating databases and application software modules
53
Application database update
During installation, Kaspersky Endpoint Security downloads the latest databases from one
of the Kaspersky Lab HTTP update servers. If the predefined task with default settings (ID=6)
is used for updating, Kaspersky Endpoint Security updates the databases once every 60 minutes.
You can edit the settings of the predefined task for database and application module updates and
create custom update tasks.
Kaspersky Endpoint Security continues to use the previously installed database version if
the database update download is interrupted or ends with an error.
By default, the application logs the Databases are out of date event (AVBasesAreOutOfDate) if
the last installed database updates were published on the Kaspersky Lab server more than
a week ago. If the databases have not been updated for two weeks, Kaspersky Endpoint Security
logs the event Databases are obsolete (AVBasesAreTotallyOutOfDate).
About update sources
An update source is a resource that contains updates for databases and application modules
of Kaspersky Endpoint Security. Update sources include FTP or HTTP servers (such as Kaspersky
Security Center and Kaspersky Lab update servers) and local or network directories mounted
by the user.
In the predefined update task, the default source of updates are the Kaspersky Lab
update servers. The update servers contain updates for databases and application modules
for many Kaspersky Lab applications. Updates are downloaded via HTTP protocols.
If, for some reason, you are not able to use the Kaspersky Lab update servers as the update
source, you can receive updates from a custom update source such as a local or network directory
(SMB / NFS) mounted by the user, or an FTP- or HTTP server specified by you. You can specify
a custom update source in the configuration file of the update task.

Updating databases and application software modules
54
Update settings configuration
You can configure the following update settings:
source of updates (see section "Select update source" on page 55)
enable/disable use of a proxy server if you use a proxy server to connect to the Internet
(see section "Using a proxy server when accessing update sources" on page 56).
Update settings are located in the configuration file used by the update task. The structure
of the configuration file, a detailed description of the employed settings and their possible values
are provided in the Update task settings section (see section "Settings of update tasks and update
distribution tasks" on page 134).
Creating an update task
To receive updates, you can create an update task with the default settings or with the settings
you specify.
To create an update task with the default settings,
run the following command: /opt/kaspersky/kesl/bin/kesl-control
--create-task <task name> --type Update
The task you have created automatically runs with the default settings (see section "Settings
of update tasks and update distribution tasks" on page 134).
To create an update task with custom settings:
1. Create a configuration file (see page 111) with the settings that you want to assign
in the update task.
2. Execute the command:
/opt/kaspersky/kesl/bin/kesl-control --create-task <task
name> --type Update --file <configuration file name>
The created task automatically works with the settings assigned in the configuration file.
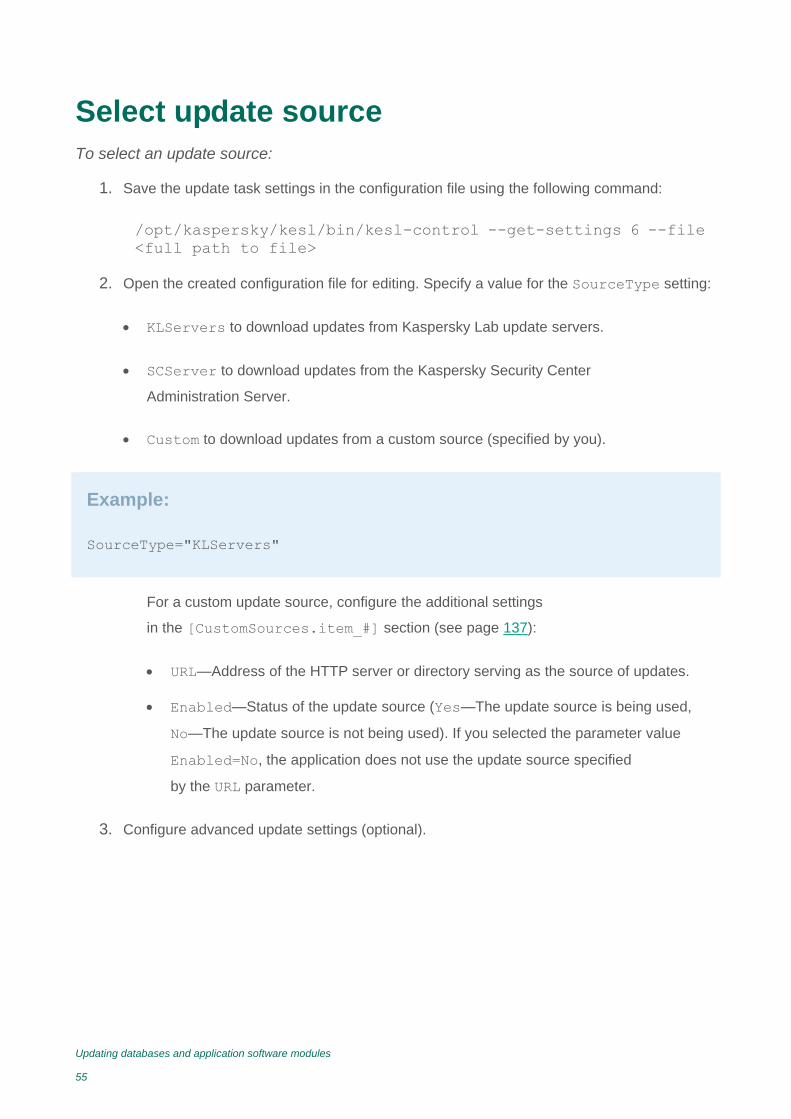
Updating databases and application software modules
55
Select update source
To select an update source:
1. Save the update task settings in the configuration file using the following command:
/opt/kaspersky/kesl/bin/kesl-control --get-settings 6 --file
<full path to file>
2. Open the created configuration file for editing. Specify a value for the SourceType setting:
KLServers to download updates from Kaspersky Lab update servers.
SCServer to download updates from the Kaspersky Security Center
Administration Server.
Custom to download updates from a custom source (specified by you).
Example:
SourceType="KLServers"
For a custom update source, configure the additional settings
in the [CustomSources.item_#] section (see page 137):
URL—Address of the HTTP server or directory serving as the source of updates.
Enabled—Status of the update source (Yes—The update source is being used,
No—The update source is not being used). If you selected the parameter value
Enabled=No, the application does not use the update source specified
by the URL parameter.
3. Configure advanced update settings (optional).
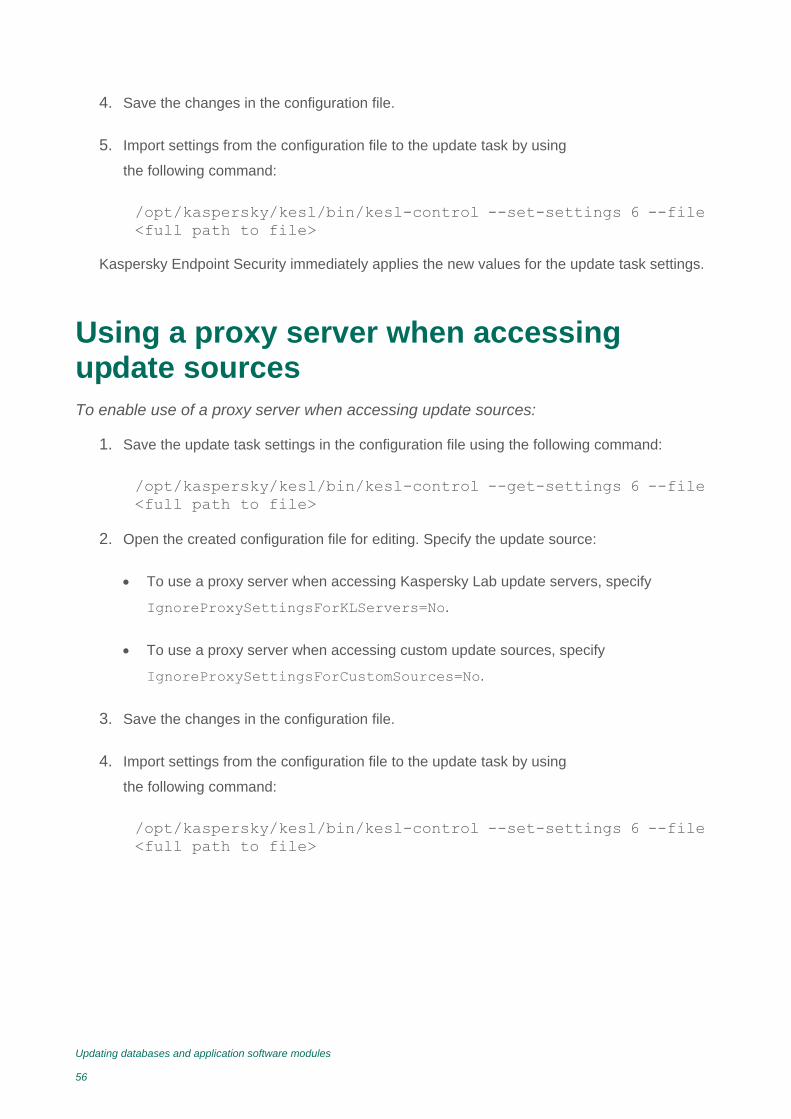
Updating databases and application software modules
56
4. Save the changes in the configuration file.
5. Import settings from the configuration file to the update task by using
the following command:
/opt/kaspersky/kesl/bin/kesl-control --set-settings 6 --file
<full path to file>
Kaspersky Endpoint Security immediately applies the new values for the update task settings.
Using a proxy server when accessing update sources
To enable use of a proxy server when accessing update sources:
1. Save the update task settings in the configuration file using the following command:
/opt/kaspersky/kesl/bin/kesl-control --get-settings 6 --file
<full path to file>
2. Open the created configuration file for editing. Specify the update source:
To use a proxy server when accessing Kaspersky Lab update servers, specify
IgnoreProxySettingsForKLServers=No.
To use a proxy server when accessing custom update sources, specify
IgnoreProxySettingsForCustomSources=No.
3. Save the changes in the configuration file.
4. Import settings from the configuration file to the update task by using
the following command:
/opt/kaspersky/kesl/bin/kesl-control --set-settings 6 --file
<full path to file>
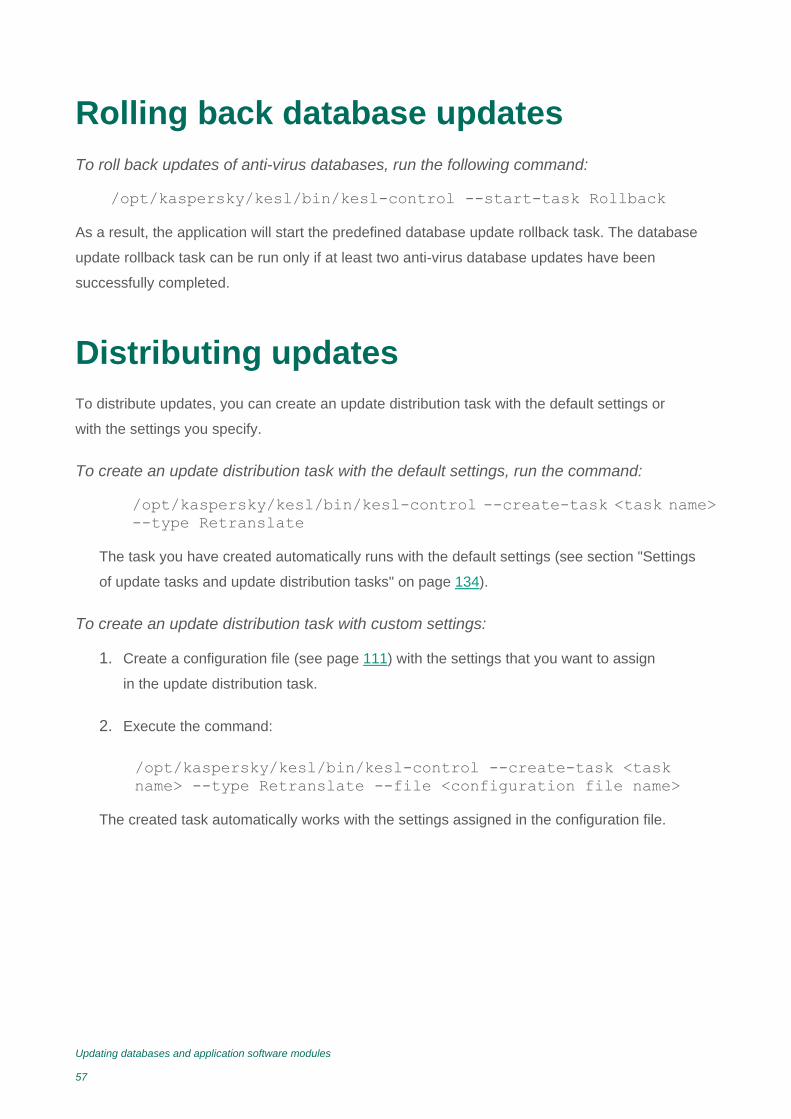
Updating databases and application software modules
57
Rolling back database updates
To roll back updates of anti-virus databases, run the following command:
/opt/kaspersky/kesl/bin/kesl-control --start-task Rollback
As a result, the application will start the predefined database update rollback task. The database
update rollback task can be run only if at least two anti-virus database updates have been
successfully completed.
Distributing updates
To distribute updates, you can create an update distribution task with the default settings or
with the settings you specify.
To create an update distribution task with the default settings, run the command:
/opt/kaspersky/kesl/bin/kesl-control --create-task <task name>
--type Retranslate
The task you have created automatically runs with the default settings (see section "Settings
of update tasks and update distribution tasks" on page 134).
To create an update distribution task with custom settings:
1. Create a configuration file (see page 111) with the settings that you want to assign
in the update distribution task.
2. Execute the command:
/opt/kaspersky/kesl/bin/kesl-control --create-task <task
name> --type Retranslate --file <configuration file name>
The created task automatically works with the settings assigned in the configuration file.
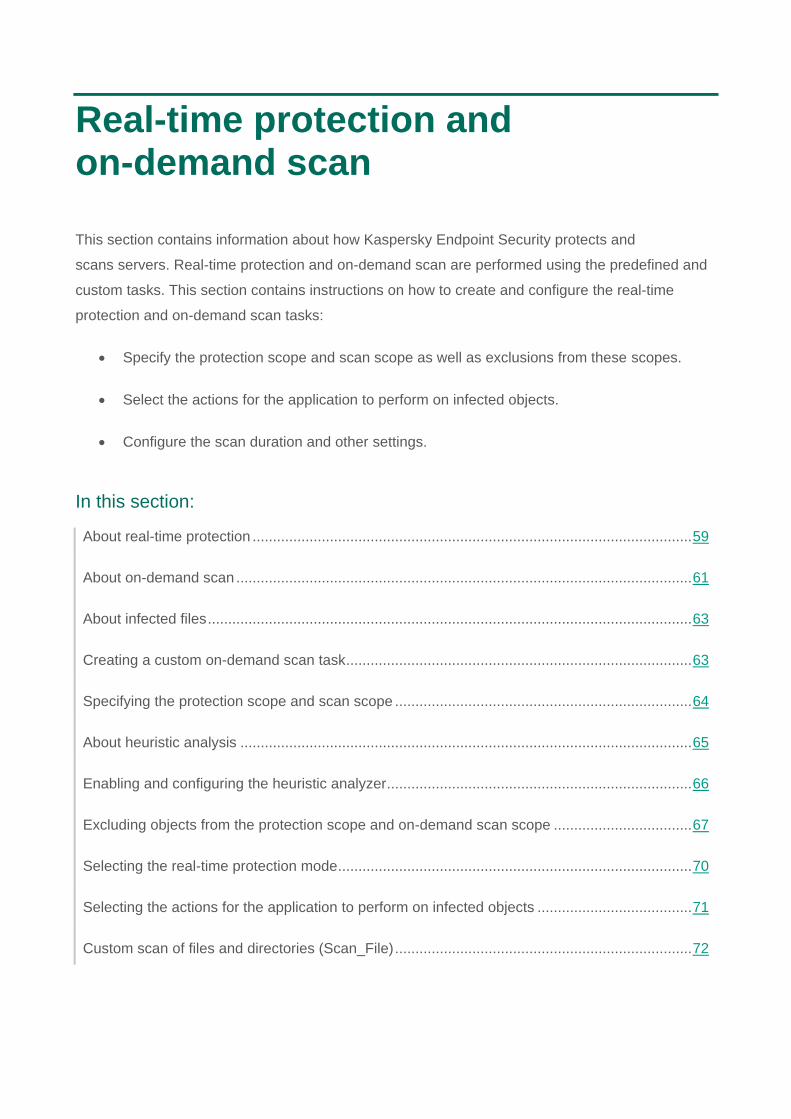
Real-time protection and on-demand scan
This section contains information about how Kaspersky Endpoint Security protects and
scans servers. Real-time protection and on-demand scan are performed using the predefined and
custom tasks. This section contains instructions on how to create and configure the real-time
protection and on-demand scan tasks:
Specify the protection scope and scan scope as well as exclusions from these scopes.
Select the actions for the application to perform on infected objects.
Configure the scan duration and other settings.
In this section:
About real-time protection ............................................................................................................ 59
About on-demand scan ................................................................................................................ 61
About infected files ....................................................................................................................... 63
Creating a custom on-demand scan task ..................................................................................... 63
Specifying the protection scope and scan scope ......................................................................... 64
About heuristic analysis ............................................................................................................... 65
Enabling and configuring the heuristic analyzer ........................................................................... 66
Excluding objects from the protection scope and on-demand scan scope .................................. 67
Selecting the real-time protection mode ....................................................................................... 70
Selecting the actions for the application to perform on infected objects ...................................... 71
Custom scan of files and directories (Scan_File) ......................................................................... 72

Real-time protection and on-demand scan
59
Scanning boot sectors .................................................................................................................. 73
Scanning process memory ........................................................................................................... 73
Reducing scan time ...................................................................................................................... 73
Special considerations for scanning symbolic links and hard links .............................................. 75
Configuring collaboration: Kaspersky Anti-Virus for Linux Mail Server ........................................ 76
About real-time protection
Real-time protection prevents infection of the file system of the computer. A real-time protection
task is created with the default settings when Kaspersky Endpoint Security is installed
to the computer. By default, the real-time protection task starts automatically when Kaspersky
Endpoint Security starts. The task resides in the computer's RAM and scans all opened, saved,
and active files. You can stop and start the task.
You cannot create custom real-time protection tasks. You can modify the settings of the predefined
real-time protection task.
Real-time protection settings are contained in the configuration file used by the real-time
protection task. The structure of the configuration file, a detailed description of the employed
settings and their possible values are provided in the section titled "Settings of the real-time
protection task and on-demand scan task" (see page 117).
By default, the real-time protection task works with the following settings:
ScanArchived=No—Do not scan archives.
ScanSfxArchived=No—Do not scan self-extracting archives.
ScanMailBases=No—Do not scan mail databases.
ScanPlainMail=No—Do not scan plain text email messages.
UseTimeLimit=Yes—Enable use of the TimeLimit parameter.
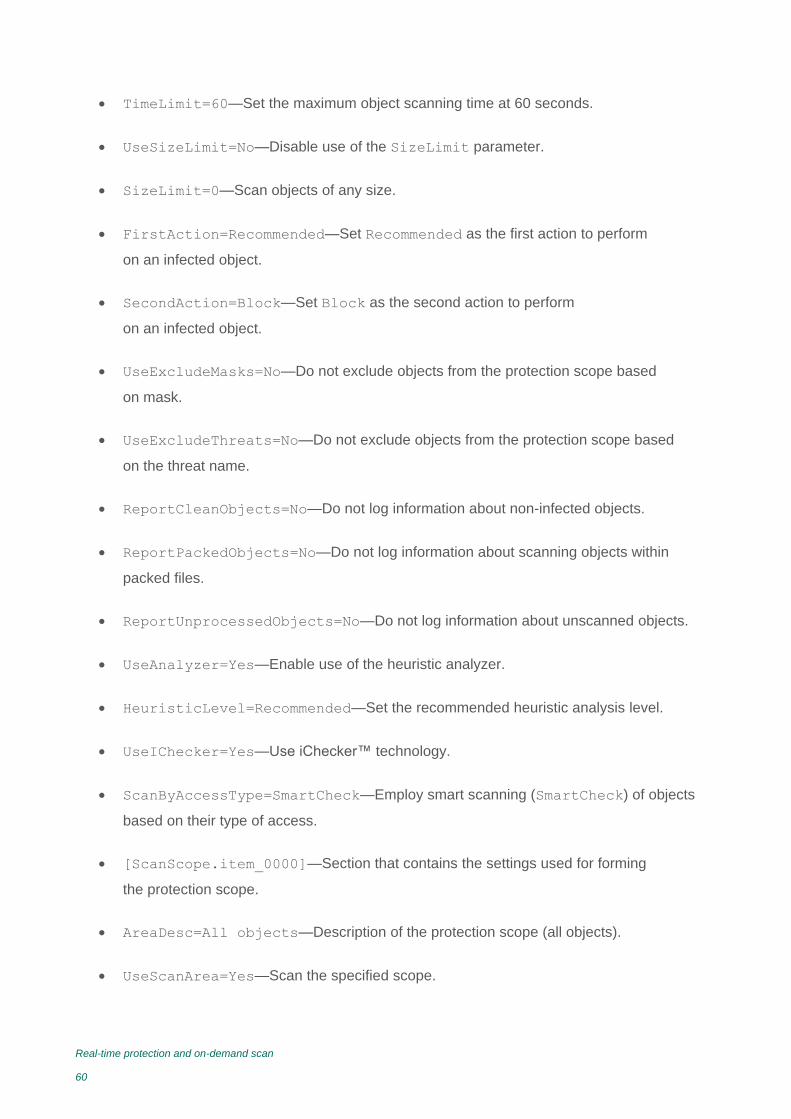
Real-time protection and on-demand scan
60
TimeLimit=60—Set the maximum object scanning time at 60 seconds.
UseSizeLimit=No—Disable use of the SizeLimit parameter.
SizeLimit=0—Scan objects of any size.
FirstAction=Recommended—Set Recommended as the first action to perform
on an infected object.
SecondAction=Block—Set Block as the second action to perform
on an infected object.
UseExcludeMasks=No—Do not exclude objects from the protection scope based
on mask.
UseExcludeThreats=No—Do not exclude objects from the protection scope based
on the threat name.
ReportCleanObjects=No—Do not log information about non-infected objects.
ReportPackedObjects=No—Do not log information about scanning objects within
packed files.
ReportUnprocessedObjects=No—Do not log information about unscanned objects.
UseAnalyzer=Yes—Enable use of the heuristic analyzer.
HeuristicLevel=Recommended—Set the recommended heuristic analysis level.
UseIChecker=Yes—Use iChecker™ technology.
ScanByAccessType=SmartCheck—Employ smart scanning (SmartCheck) of objects
based on their type of access.
[ScanScope.item_0000]—Section that contains the settings used for forming
the protection scope.
AreaDesc=All objects—Description of the protection scope (all objects).
UseScanArea=Yes—Scan the specified scope.
Real-time protection and on-demand scan
61
Path=/—Scan all local directories of the server; scan directories mounted using SMB /
CIFS and NFS.
AreaMask.item_0000=*—Scan all objects in the protection scope.
About on-demand scan
An on-demand scan is a one-time full or custom scan of files on a computer performed
by Kaspersky Endpoint Security. Kaspersky Endpoint Security can perform multiple on-demand
scan tasks at the same time.
By default, Kaspersky Endpoint Security creates one predefined on-demand scan task—Full scan.
The application scans all objects located on local drives of the computer, as well as all mounted
and shared objects that are accessed via the Samba and NFS protocols with the recommended
security settings.
You can independently create custom on-demand scan tasks.
By default, Kaspersky Endpoint Security also creates a predefined custom scan task.
On-demand scan settings are contained in the configuration file that is used by the on-demand
scan task. The structure of the configuration file, a detailed description of the employed settings
and their possible values are provided in the section titled "Settings of the real-time protection task
and on-demand scan task" (see page 117).
By default, the on-demand scan task works with the following settings:
ScanArchived=Yes—Scan archives.
ScanSfxArchived=Yes—Scan self-extracting archives.
ScanMailBases=No—Do not scan mail databases.
ScanPlainMail=No—Do not scan plain text email messages.
UseTimeLimit=No—Disable use of the TimeLimit parameter.
TimeLimit=0—Do not set the maximum object scanning time.
Real-time protection and on-demand scan
62
UseSizeLimit=No—Disable use of the SizeLimit parameter.
SizeLimit=0—Do not set the maximum object size to scan.
FirstAction=Recommended—Set Recommended as the first action to perform
on an infected object.
SecondAction=Skip—Set Skip as the second action to perform on an infected object.
UseExcludeMasks=No—Do not exclude objects from the scan scope based on mask.
UseExcludeThreats=No—Do not exclude objects from the scan scope based
on the threat name.
ReportCleanObjects=No—Do not log information about non-infected objects.
ReportPackedObjects=No—Do not log information about scanning objects within
packed files.
ReportUnprocessedObjects=No—Do not log information about unscanned objects.
UseAnalyzer=Yes—Enable use of the heuristic analyzer.
HeuristicLevel=Recommended—Set the recommended heuristic analysis level.
UseIChecker=Yes—Use iChecker technology.
[ScanScope.item_0000]—Section that contains the settings used for forming
the scan scope.
AreaDesc=All objects—Description of the scan scope (all objects).
UseScanArea=Yes—Scan the specified scope.
Path=/—Scan all local directories of the server; scan directories mounted using SMB
and NFS.
AreaMask.item_0000=*—Scan all objects in the scan scope.
Real-time protection and on-demand scan
63
About infected files
Kaspersky Endpoint Security uses anti-virus databases when scanning files. These databases
contain files with fragments of malicious code and the algorithms used for disinfecting objects that
contain such threats. Anti-virus databases enable detection of known threats in the files
being scanned.
If a file contains code that fully matches the code of a known threat, Kaspersky Endpoint Security
assigns the status of Infected to the file.
Creating a custom on-demand scan task
To create an on-demand scan task with the default settings,
Enter the following command:
/opt/kaspersky/kesl/bin/kesl-control --create-task <task
name> --type ODS
Execution of this command will result in the creation of a new on-demand scan task
with the settings of the predefined full scan task.
To create a task with your own configuration file:
1. Create a configuration file (see page 111) with the settings that you want to set
for the on-demand scan task.
2. Enter the following command:
/opt/kaspersky/kesl/bin/kesl-control --create-task <task
name> --type ODS --file <configuration file name>
This will result in the creation of a new on-demand scan task with the settings defined
in the configuration file.
Real-time protection and on-demand scan
64
Specifying the protection scope and scan scope
All opened, modified, and saved files that are scanned by the real-time protection task during its
operation are collectively known as the protection scope. The protection scope is specified
in the configuration file of the real-time protection task.
By default, the real-time protection task scans all opened, modified, and saved objects located
on local disks of the computer, as well as all mounted and shared objects that are accessed
via the SMB and NFS protocols.
All objects of the computer's file system that are scanned by the on-demand scan task
are collectively known as the scan scope. The scan scope is specified in the configuration file
of the scan task. The scan scope of the predefined on-demand scan task includes all objects
located on local disks of the computer, as well as all mounted and shared objects that
are accessed via the SMB and NFS protocols.
You can edit the protection scope and scan scope in the predefined and custom tasks.
Kaspersky Endpoint Security scans objects in the specified areas in the same order in which
those areas are numbered in the task configuration file.
To add objects to the protection scope or scan scope:
1. Save the settings of the real-time protection task or on-demand scan task
in the configuration file by using the following command:
/opt/kaspersky/kesl/bin/kesl-control --get-settings <task ID>
--file <full path to file>
2. Open the created configuration file for editing.
3. Add the [ScanScope.item_#] section to the created file. In the section, specify
the values for the following settings:
a. AreaMask, which assigns the mask for names of objects to be scanned.
b. AreaDesc, which assigns the name of the protection scope or scan scope.
Real-time protection and on-demand scan
65
c. Path, which specifies the path to the scanned objects.
d. UseScanArea, which enables scanning of the protection scope or scan scope
in the task.
Example:
AreaMask.item_0000=*exe—Scan all objects with the .exe extension.
AreaMask.item_0001=*doc—Scan all objects with the .doc extension.
4. Save the changes in the configuration file.
5. Import the settings from the configuration file into the real-time protection task or into
the on-demand scan task by using the following command:
/opt/kaspersky/kesl/bin/kesl-control --set-settings <task ID>
--file <full path to file>
As a result, during execution of the real-time protection task or on-demand scan task,
Kaspersky Endpoint Security will scan objects that are within the real-time protection scope or
on-demand scan scope by default.
About heuristic analysis
With each day comes the emergence of malicious objects that have not yet been recorded
in the anti-virus databases. To detect these malicious objects in files, Kaspersky Endpoint Security
employs the heuristic analyzer.
Heuristic analysis enables the application to detect new threats even before they become known
to virus analysts. You can specify the heuristic analysis level. The heuristic analysis level sets
the balance between the thoroughness of searches for threats, the load on the operating system's
resources, and the scan duration. The higher the heuristic analysis level, the more resources and
time are required for scanning.
Real-time protection and on-demand scan
66
You can select the heuristic analysis level based on your security requirements or based on the file
exchange speed on the computer:
Light—The least thorough scan with minimal load on the system.
Medium—Medium heuristic analysis level with a balanced load on the operating system.
Deep—The most thorough scan with maximal load on the operating system.
Recommended—The value recommended by Kaspersky Lab experts.
By default, the heuristic analyzer is enabled for the real-time protection task and on-demand scan
task with the Recommended value.
Enabling and configuring the heuristic analyzer
By default, the heuristic analyzer is enabled in the predefined real-time protection and on-demand
scan tasks. The heuristic analysis level is set at the recommended level by default. If you are using
the real-time protection and on-demand scan tasks with your own settings, you may need
to enable or disable the heuristic analyzer and configure the heuristic analysis level.
To enable the heuristic analyzer and configure the heuristic analysis level:
1. Save the settings of the real-time protection task or on-demand scan task
in the configuration file by using the following command:
/opt/kaspersky/kesl/bin/kesl-control --get-settings <task ID>
--file <full path to file>
2. Open the created configuration file for editing.
3. Set the Yes value for the UseAnalyzer parameter to enable the heuristic analyzer.
To disable the heuristic analyzer, the UseAnalyzer parameter should have the value No.
Real-time protection and on-demand scan
67
4. Set one of the following values for the HeuristicLevel parameter:
Recommended—To use the recommended heuristic analysis level.
Deep—To use the deep heuristic analysis level.
Medium—To use the medium heuristic analysis level.
Light—To use the light heuristic analysis level.
5. Save the changes in the configuration file.
6. Import the settings from the configuration file into the real-time protection task or into
the on-demand scan task by using the following command:
/opt/kaspersky/kesl/bin/kesl-control --set-settings <task ID>
--file <full path to file>
Excluding objects from the protection scope and on-demand scan scope
By default, the real-time protection and on-demand scan tasks scan all objects in the protection
scope and scan scope. You can exclude certain objects from the protection scope and scan scope.
Excluding objects from the protection scope or scan scope
You can specify a global exclusion area. Objects in this area are excluded from the protection
scope or from all scan scopes specified in a real-time protection task or on-demand scan task.
To specify a global exclusion area:
1. Save the settings of the real-time protection task or on-demand scan task
in the configuration file by using the following command:
/opt/kaspersky/kesl/bin/kesl-control --get-settings <task ID>
--file <full path to file>
2. Open the created configuration file for editing.

Real-time protection and on-demand scan
68
3. Add the [ExcludedFromScanScope.item_#] section to the created configuration file
(see page 129).
4. In the [ExcludedFromScanScope.item_#]section, specify the value 1
for the following settings:
AreaDesc specifies a unique name for the exclusion area.
UseScanArea specifies whether or not Kaspersky Endpoint Security will exclude
the area from scanning when running the task.
Path defines the path to objects excluded from scanning.
You can use command shell masks to specify a file name template to be used
for exclusions from the protection scope or on-demand scan scope.
5. Save the changes in the configuration file.
6. Import the settings from the configuration file into the real-time protection task or into
the on-demand scan task by using the following command:
/opt/kaspersky/kesl/bin/kesl-control --set-settings <task ID>
--file <full path to file>
Excluding objects based on the name of the detected threat
When Kaspersky Endpoint Security detects an infected file, the application processes it: performs
the specified action on the file (see section "Selecting the actions for the application to perform
on infected objects" on page 71). If you consider this file to be safe for the computer, you
can exclude it from scanning based on the name of the detected threat. In this case, Kaspersky
Endpoint Security deems the detected objects to be safe and does not process them.
The full name of the threat detected in the file contains the following information:
<object class>:<object type>.<abbreviated name of the operating system>.<object
name>.<object modification code>. For example: not-a-virus:NetTool.Linux.SynScan.a.
Real-time protection and on-demand scan
69
You can find the full name of a type of threat detected in a file by viewing the Kaspersky Endpoint
Security log and by visiting the Virus Encyclopedia website (http://www.securelist.com).
You can use masks in command shell format when defining templates for the names
of detected objects.
To exclude objects from the protection scope or scan scope based on the name of the detected threat:
1. Save the settings of the real-time protection task or on-demand scan task
in the configuration file by using the following command:
/opt/kaspersky/kesl/bin/kesl-control --get-settings <task ID>
--file <full path to file>
2. Open the created configuration file for editing.
3. Assign the value Yes to the UseExcludeThreats setting.
4. Assign the threat name template using the ExcludeThreats setting.
To assign several threat name templates, repeat the value of the ExcludeThreats
parameter the necessary number of times while specifying the sequence number
item_#.
Example:
ExcludeThreats.item_0000=EICAR-Test-*
ExcludeThreats.item_0001=?rojan.Linux
5. Save the changes in the configuration file.
6. Import the settings from the configuration file into the real-time protection task or into
the on-demand scan task by using the following command:
/opt/kaspersky/kesl/bin/kesl-control --set-settings <task ID>
--file <full path to file>
Real-time protection and on-demand scan
70
Selecting the real-time protection mode
You can select the object protection mode only for the real-time protection task (see section
"About real-time protection" on page 59).
The real-time protection mode determines which type of access to files will cause Kaspersky
Endpoint Security to scan those files.
You can select one of the real-time protection modes.
Smart protection mode: Kaspersky Endpoint Security scans a file when there is an attempt
to open it, and scans it again when there is an attempt to close it if the file
has been modified. If a process tries to access a file several times during a certain time
period and modifies it, Kaspersky Endpoint Security re-scans the file only during the last
attempt by the process to close the file.
Protection mode at the attempt to open or modify a file: Kaspersky Endpoint Security scans
a file when there is an attempt to open it, and scans it again when there is an attempt
to close it if the file has been modified.
Protection mode at the attempt to open a file: Kaspersky Endpoint Security scans a file
when an attempt is made to open it to be read, executed, or modified.
To select a real-time protection mode:
1. Save the real-time protection task settings in the configuration file using
the following command:
/opt/kaspersky/kesl/bin/kesl-control --get-settings 1
-–file <full path to file>
2. Open the created configuration file for editing.
Real-time protection and on-demand scan
71
3. Assign one of the following values to the ScanByAccessType parameter:
SmartCheck—To enable smart protection mode.
OpenAndModify—To enable the protection mode for attempts to open and modify
a file.
Open—To enable the protection mode for attempts to open a file.
4. Save the changes in the configuration file.
5. Import settings from the configuration file to the real-time protection task by using
the following command:
/opt/kaspersky/kesl/bin/kesl-control --set-settings 1
-–file <full path to file>
Selecting the actions for the application to perform on infected objects
When infected objects are detected (see section "About infected objects" on page 63), Kaspersky
Endpoint Security processes them: performs the actions specified in the real-time protection task
or the on-demand scan task. Kaspersky Endpoint Security can disinfect, delete, block
(for the real-time protection task) or skip objects (for the on-demand scan task).
You can specify two actions to be performed by Kaspersky Endpoint Security on infected objects:
the first action (performed initially) and the second action (performed if the first action failed).
To specify the actions to be performed on infected objects:
1. Save the settings of the real-time protection task or on-demand scan task
in the configuration file by using the following command:
/opt/kaspersky/kesl/bin/kesl-control --get-settings <task ID>
--file <full path to file>
2. Open the created configuration file for editing.
Real-time protection and on-demand scan
72
3. Specify the values for the following settings:
FirstAction—First action to be performed on an object.
SecondAction—Second action to be performed on an object.
4. Save the changes in the configuration file.
5. Import the settings from the configuration file into the real-time protection task or into
the on-demand scan task by using the following command:
/opt/kaspersky/kesl/bin/kesl-control --set-settings <task ID>
--file <full path to file>
Custom scan of files and directories (Scan_File)
Kaspersky Endpoint Security enables a quick scan of files and directories without the need
to specify a scan scope (see section "Specifying the protection scope and scan scope"
on page 64).
You can specify templates for the names of files to be scanned using masks in command
shell format. In this case, Kaspersky Endpoint Security scans only the files from the protection
scope that are described using command shell masks.
By default, Kaspersky Endpoint Security starts a scan of files and directories by using
the --scan-file command with the default settings defined for the on-demand scan task (see
section "About on-demand scan" on page 61).
To start a custom scan of files and directories, run one of the following commands:
If you want to scan one file or directory, execute the command:
/opt/kaspersky/kesl/bin/kesl-control --scan-file <path
to the file or directory>
If you want to scan several files or directories, execute the command:
/opt/kaspersky/kesl/bin/kesl-control --scan-file <path
to the file or directory> <path to the file or directory> and
so on.
Real-time protection and on-demand scan
73
Scanning boot sectors
Kaspersky Endpoint Security lets you scan boot sectors without the need to specify a scan scope
(see section "Specifying the protection scope and scan scope" on page 64).
To scan boot sectors, start the predefined boot sector scan task (ID=4):
/opt/kaspersky/kesl/bin/kesl-control --start-task 4
Scanning process memory
Kaspersky Endpoint Security lets you scan process memory without the need to specify a scan
scope (see section "Specifying the protection scope and scan scope" on page 64).
To scan process memory, start the predefined process memory scan task (ID=5):
/opt/kaspersky/kesl/bin/kesl-control --start-task 5
Reducing scan time
If necessary, you can reduce the object scan time by using the following methods:
Limit the object scanning duration. After the specified amount of time, Kaspersky Endpoint
Security stops scanning an object.
Limit the maximum object size to scan. During a scan, Kaspersky Endpoint Security skips
objects whose size exceeds the specified limit.
Limits on the scan duration and object size are applied only when scanning compound objects
(for example, archives or databases).
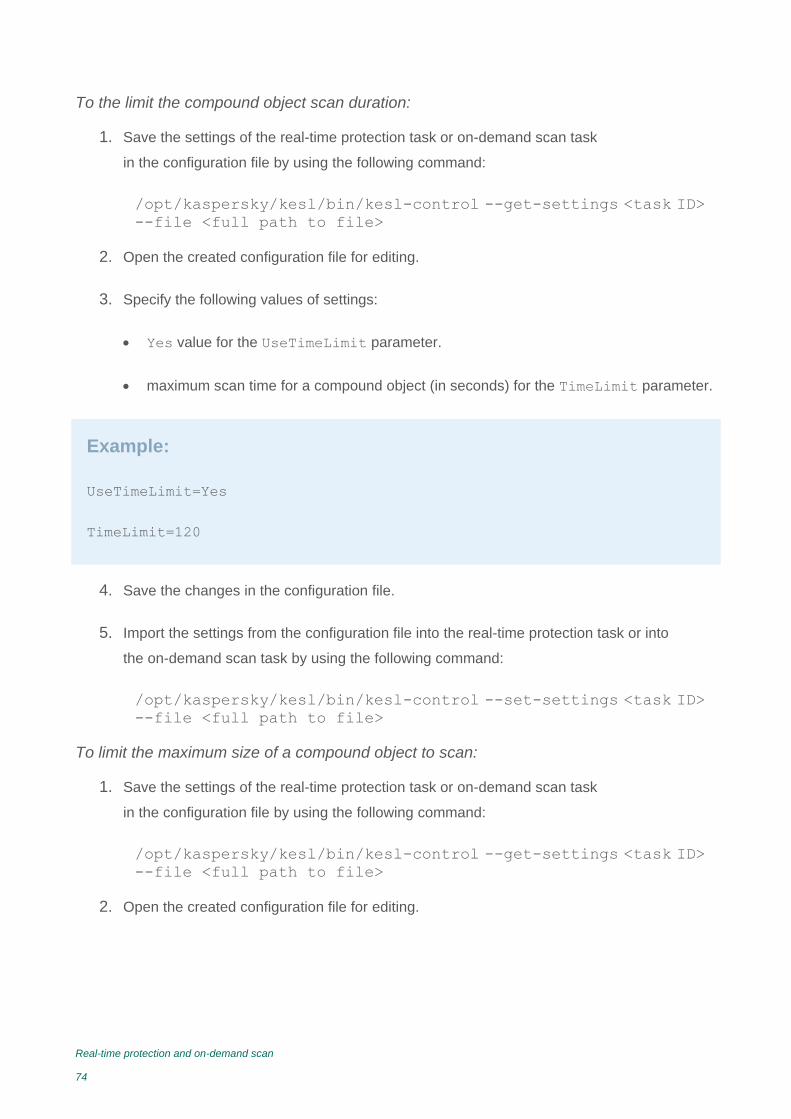
Real-time protection and on-demand scan
74
To the limit the compound object scan duration:
1. Save the settings of the real-time protection task or on-demand scan task
in the configuration file by using the following command:
/opt/kaspersky/kesl/bin/kesl-control --get-settings <task ID>
--file <full path to file>
2. Open the created configuration file for editing.
3. Specify the following values of settings:
Yes value for the UseTimeLimit parameter.
maximum scan time for a compound object (in seconds) for the TimeLimit parameter.
Example:
UseTimeLimit=Yes
TimeLimit=120
4. Save the changes in the configuration file.
5. Import the settings from the configuration file into the real-time protection task or into
the on-demand scan task by using the following command:
/opt/kaspersky/kesl/bin/kesl-control --set-settings <task ID>
--file <full path to file>
To limit the maximum size of a compound object to scan:
1. Save the settings of the real-time protection task or on-demand scan task
in the configuration file by using the following command:
/opt/kaspersky/kesl/bin/kesl-control --get-settings <task ID>
--file <full path to file>
2. Open the created configuration file for editing.
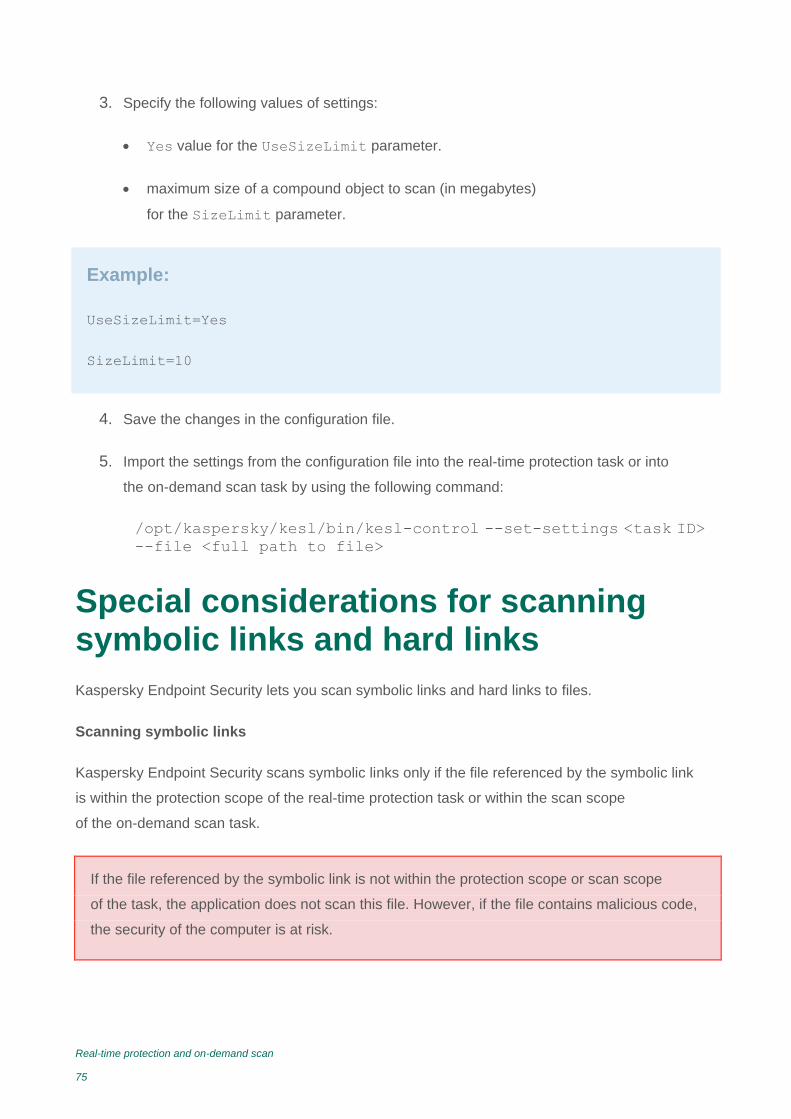
Real-time protection and on-demand scan
75
3. Specify the following values of settings:
Yes value for the UseSizeLimit parameter.
maximum size of a compound object to scan (in megabytes)
for the SizeLimit parameter.
Example:
UseSizeLimit=Yes
SizeLimit=10
4. Save the changes in the configuration file.
5. Import the settings from the configuration file into the real-time protection task or into
the on-demand scan task by using the following command:
/opt/kaspersky/kesl/bin/kesl-control --set-settings <task ID>
--file <full path to file>
Special considerations for scanning symbolic links and hard links
Kaspersky Endpoint Security lets you scan symbolic links and hard links to files.
Scanning symbolic links
Kaspersky Endpoint Security scans symbolic links only if the file referenced by the symbolic link
is within the protection scope of the real-time protection task or within the scan scope
of the on-demand scan task.
If the file referenced by the symbolic link is not within the protection scope or scan scope
of the task, the application does not scan this file. However, if the file contains malicious code,
the security of the computer is at risk.

Real-time protection and on-demand scan
76
Scanning hard links
When Kaspersky Endpoint Security processes a file that has more than one hard link,
the application selects an action based on the assigned action to take on objects:
If Perform recommended action is selected, Kaspersky Endpoint Security automatically
selects and performs an action on an object based on data about the danger of the threat
detected in the object and the capability to disinfect it.
If the Remove action is selected, Kaspersky Endpoint Security removes the hard link
being processed. The remaining hard links to this file will not be processed.
If the Cure action is selected, Kaspersky Endpoint Security disinfects the source file.
If disinfection fails, the application deletes the hard link and creates in its place a copy
of the source file with the name of the deleted hard link.
When you restore a file with a hard link from Backup, Kaspersky Endpoint Security creates a copy
of the source file with the name of the hard link that was moved to Backup.
Connections with the remaining hard links to the source file will not be restored.
Configuring collaboration: Kaspersky Anti-Virus for Linux Mail Server
To configure the joint operation of Kaspersky Endpoint Security 10 and Kaspersky Anti-Virus for Linux Mail Server:
1. Save the real-time protection task settings in the configuration file using
the following command:
/opt/kaspersky/kesl/bin/kesl-control --get-settings 1
–-file <full path to file>
2. Open the created configuration file for editing.
3. Add the following section to the created file:
[ExcludedFromScanScope.item_#]
Path=</var/opt/kaspersky/klms>
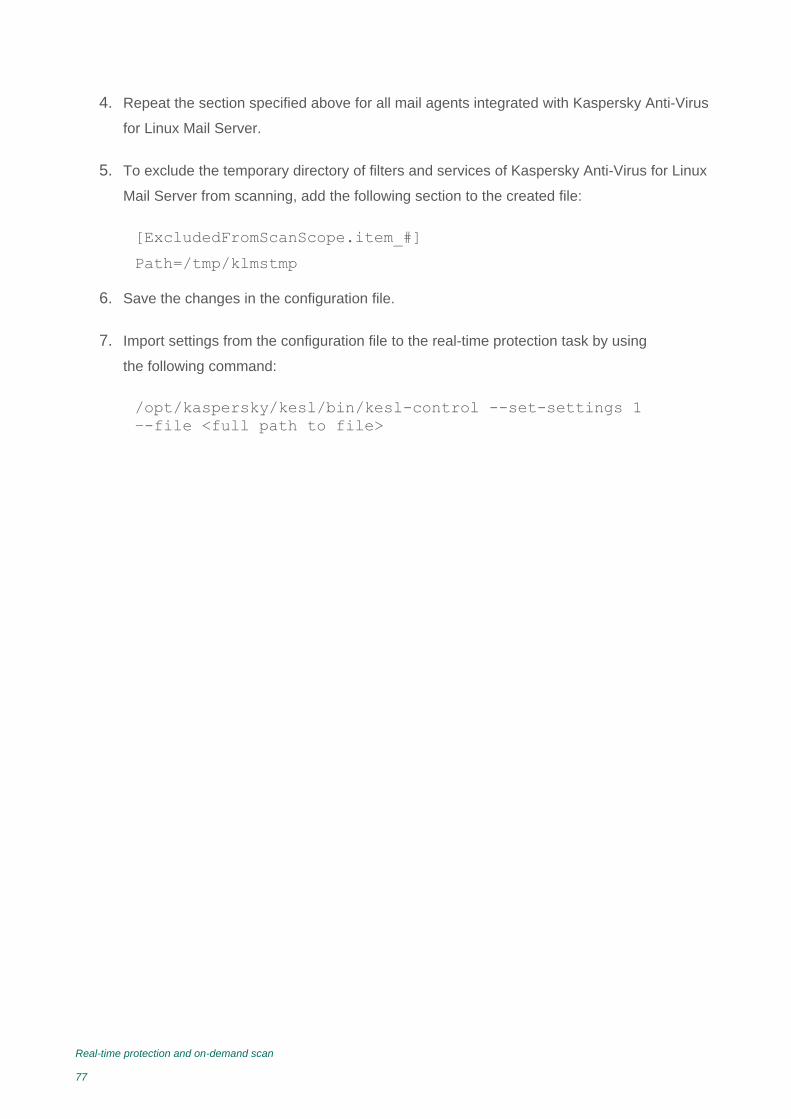
Real-time protection and on-demand scan
77
4. Repeat the section specified above for all mail agents integrated with Kaspersky Anti-Virus
for Linux Mail Server.
5. To exclude the temporary directory of filters and services of Kaspersky Anti-Virus for Linux
Mail Server from scanning, add the following section to the created file:
[ExcludedFromScanScope.item_#]
Path=/tmp/klmstmp
6. Save the changes in the configuration file.
7. Import settings from the configuration file to the real-time protection task by using
the following command:
/opt/kaspersky/kesl/bin/kesl-control --set-settings 1
–-file <full path to file>
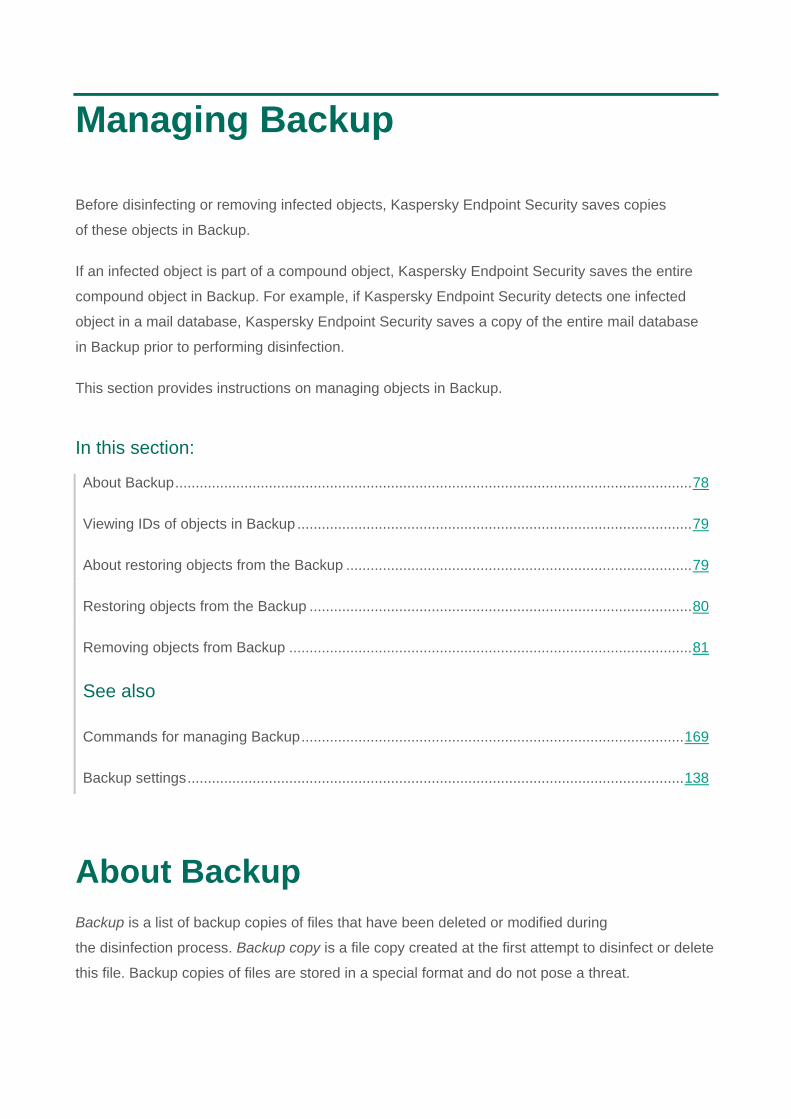
Managing Backup
Before disinfecting or removing infected objects, Kaspersky Endpoint Security saves copies
of these objects in Backup.
If an infected object is part of a compound object, Kaspersky Endpoint Security saves the entire
compound object in Backup. For example, if Kaspersky Endpoint Security detects one infected
object in a mail database, Kaspersky Endpoint Security saves a copy of the entire mail database
in Backup prior to performing disinfection.
This section provides instructions on managing objects in Backup.
In this section:
About Backup ............................................................................................................................... 78
Viewing IDs of objects in Backup ................................................................................................. 79
About restoring objects from the Backup ..................................................................................... 79
Restoring objects from the Backup .............................................................................................. 80
Removing objects from Backup ................................................................................................... 81
See also
Commands for managing Backup .............................................................................................. 169
Backup settings .......................................................................................................................... 138
About Backup
Backup is a list of backup copies of files that have been deleted or modified during
the disinfection process. Backup copy is a file copy created at the first attempt to disinfect or delete
this file. Backup copies of files are stored in a special format and do not pose a threat.
Managing Backup
79
Sometimes it is not possible to maintain the integrity of files during disinfection. If you partially or
completely lose access to important information in a disinfected file after disinfection, you
can attempt to restore the disinfected copy of the file to its original folder.
Viewing IDs of objects in Backup
When an object is placed in Backup, Kaspersky Endpoint Security assigns a numeric ID to it.
The ID is used to perform actions on the object, such as restoring (see page 80) or removing (see
page 81) the object from Backup.
To view the IDs of objects in Backup,
Execute the command: /opt/kaspersky/kesl/bin/kesl-control -B --query.
The object ID is displayed in the ObjectId string.
See also:
Receiving information about objects in storage .......................................................................... 169
About restoring objects from the Backup
Kaspersky Endpoint Security stores files in Backup in encrypted form to keep the protected server
safe from their potential harmful effects.
You can restore objects from Backup. You may need to restore objects from Backup
in the following cases:
While disinfecting an infected file, Kaspersky Endpoint Security failed to preserve its
integrity, which made the information in the file inaccessible.
If you consider the object to be safe for the server and wish to use it,
you can exclude the object from scanning so the application will not detect it during
subsequent scans. To do so, you have to exclude the object by its name or by the name
of the threat detected during the real-time protection task and also by the object name and
the name of the threat detected during the on-demand scan task.
Managing Backup
80
Restoring infected objects may lead to computer infection.
You can save the object under a new name when restoring it from Backup.
See also:
Restoring objects from storage .................................................................................................. 170
Restoring objects from the Backup
To restore an object from Backup, do one of the following:
To restore an object under its original name to its original location, execute
the following command:
/opt/kaspersky/kesl/bin/kesl-control --restore <object ID>
where object ID is the ID of the object in Backup.
To restore an object under a new name to the specified folder, execute
the following command:
/opt/kaspersky/kesl/bin/kesl-control --restore <object ID>
--file <file name and path>
If the specified directory does not exist, Kaspersky Endpoint Security creates it.
Managing Backup
81
Removing objects from Backup
To remove an object from Backup, execute the following command:
/opt/kaspersky/kesl/bin/kesl-control -B --mass-remove --query "ObjectId
== 'object ID>'"
To remove several objects from Backup, execute the following command:
/opt/kaspersky/kesl/bin/kesl-control -B --mass-remove --query
"<field><comparison operator> '<value>' [and <field> <comparison
operator>'<value>' ]* ]
To remove all objects from Backup, execute one of the following commands:
/opt/kaspersky/kesl/bin/kesl-control -B --mass-remove
or
/opt/kaspersky/kesl/bin/kesl-control -B --mass-remove --query
Configuring event notifications
Events occurring during operation of Kaspersky Endpoint Security reflect changes in the status
of anti-virus protection of the server and the status of Kaspersky Endpoint Security as a whole.
If you manage the application via Kaspersky Security Center, you can configure administrator
email notifications about such events.
More details about configuring event notifications can be found in the Kaspersky Security Center
Administrator's Guide.
Participating in Kaspersky Security Network
This section contains information about participation in Kaspersky Security Network and
instructions on how to enable or disable use of Kaspersky Security Network.
In this section:
About participation in Kaspersky Security Network ...................................................................... 83
Enabling and disabling use of Kaspersky Security Network ........................................................ 85
Checking the connection to Kaspersky Security Network ............................................................ 86
Enhanced protection with Kaspersky Security Network ............................................................... 86
About participation in Kaspersky Security Network
To protect your computer more effectively, Kaspersky Endpoint Security uses data that is gathered
from users around the globe. Kaspersky Security Network is designed to collect such data.
Kaspersky Security Network (KSN) is an infrastructure of cloud services providing access
to Kaspersky Lab's online knowledge base with information about the reputation of files, web
resources, and software. The use of data from Kaspersky Security Network ensures faster
responses by Kaspersky Endpoint Security to new threats, improves the performance of some
protection components, and reduces the likelihood of false positives.
Depending on the location of the infrastructure, there is a Global KSN service (the infrastructure
is hosted by Kaspersky Lab servers) and a Private KSN service (the infrastructure is hosted
by third-party servers, for example on the network of the Internet service provider).
Participating in Kaspersky Security Network
84
After changing the license, submit the details of the new key to the service provider in order
to be able to use Private KSN. Otherwise, data exchange with Private KSN will be impossible
due to an authentication error.
Thanks to users who participate in KSN, Kaspersky Lab is able to promptly gather information
about types and sources of threats, develop solutions for neutralizing them, and minimize
the number of false alarms displayed by application components.
During participation in KSN, the application automatically sends statistics generated during
operation of the application to KSN. The application can also send to Kaspersky Lab for additional
scanning certain files (or parts of files) that intruders can use to harm the computer or data.
No personal data is collected, processed, or stored. More detailed information about
submission of statistical information generated during participation in KSN, storage and
destruction of such information is available in the Kaspersky Security Network Statement and
on the Kaspersky Lab website at http://www.kaspersky.com/privacy. The file with the text
of the Kaspersky Security Network Statement is included in the application distribution kit.
User computers managed by Kaspersky Security Center Administration Server can interact
with KSN via the KSN Proxy service.
The KSN Proxy service provides the following capabilities:
The user's computer can query KSN and submit information to KSN, even without direct
access to the Internet.
KSN Proxy caches processed data, thereby reducing the load on the external network
connection and speeding up receipt of the information that is requested
by the user's computer.
More details about the KSN Proxy service can be found in the Administrator's Guide for Kaspersky
Security Center.
KSN Proxy settings can be configured in the properties of the of Kaspersky Security Center policy
(see section "Managing policies" on page 102).
Participating in Kaspersky Security Network
85
Participation in Kaspersky Security Network is voluntary. The application offers the user
to participate in KSN during installation. Users can begin or discontinue participation in KSN
at any time.
Enabling and disabling use of Kaspersky Security Network
To enable use of Kaspersky Security Network, run the following command:
kesl-control --set-app-settings UseKSN=Yes
To disable use of Kaspersky Security Network, run the following command:
kesl-control --set-app-settings UseKSN=No
To enable or disable use of Kaspersky Security Network with a configuration file, run the following command:
kesl-control --set-app-settings --file <configuration file name>
If Kaspersky Endpoint Security installed on a computer runs under a policy that was assigned
in Kaspersky Security Center, the value of the UseKSN parameter can only be changed by using
Kaspersky Security Center.
If Kaspersky Endpoint Security installed on a computer stops running a policy, the UseKSN=No
parameter value is set.
The file containing the text of the Kaspersky Security Network Statement is located in the directory
/opt/kaspersky/kesl/doc/ksn_license.<language ID>.
Participating in Kaspersky Security Network
86
Checking the connection to Kaspersky Security Network
To check the connection to Kaspersky Security Network, run the following command:
kesl-control --app-info
The KSN state string displays the status of the connection to Kaspersky Security Network:
If the On status is displayed, Kaspersky Endpoint Security is connected to Kaspersky
Security Network.
If the Off status is displayed, Kaspersky Endpoint Security is not connected to Kaspersky
Security Network.
A connection to Kaspersky Security Network may be absent for the following reasons:
The computer is not connected to the Internet.
You are not a participant in Kaspersky Security Network.
The application has not been activated or the license has expired.
Key-related problems have been detected. For example, the key has been black-listed.
Enhanced protection with Kaspersky Security Network
Kaspersky Lab offers an extra layer of protection to users through the Kaspersky Security Network.
This protection method is designed to combat advanced persistent threats and zero-day attacks.
Integrated cloud technologies and the expertise of Kaspersky Lab virus analysts make Kaspersky
Endpoint Security the unsurpassed choice for protection against the most sophisticated
network threats.
Details on enhanced protection in Kaspersky Endpoint Security are available on the Kaspersky
Lab website.
Remote administration of the application through Kaspersky Security Center
This section describes Kaspersky Endpoint Security administration through Kaspersky
Security Center. This description is for Kaspersky Security Center SP2.
In this section:
Managing Kaspersky Endpoint Security via Kaspersky Security Center ..................................... 88
Starting and stopping Kaspersky Endpoint Security on a client computer ................................... 89
Configuring Kaspersky Endpoint Security settings ...................................................................... 90
Viewing the protection status of a computer ................................................................................ 91
Viewing Kaspersky Endpoint Security settings ............................................................................ 92
Managing tasks ............................................................................................................................ 94
Managing policies ...................................................................................................................... 102
Viewing user messages in the Kaspersky Security Center event storage ................................. 105
Manually checking the connection with the Administration Server. Klnagchk utility .................. 106
Manually connecting to the Administration Server. Klmover utility ............................................. 107

Remote administration of the application through Kaspersky Security Center
88
Managing Kaspersky Endpoint Security via Kaspersky Security Center
Kaspersky Security Center lets you remotely install and uninstall, start and stop Kaspersky
Endpoint Security, configure application settings, and start tasks on managed computers.
The application can be managed via Kaspersky Security Center using the Kaspersky Endpoint
Security Administration Plug-in.
Before installing the Kaspersky Endpoint Security administration plug-in, you must make sure
that Kaspersky Security Center and Redist C++ 2015 (Microsoft Visual C++ 2015
Redistributable) are installed.
You can perform the following actions in the Kaspersky Security Center Administration Console:
View the protection status of computers.
Configure the general settings for protecting computers.
Manage policies.
Manage tasks.
Add keys.
Distribute updates.
Update.
Roll back database updates.
Scan boot sectors.
Scan process memory.
Perform an on-demand scan.

Remote administration of the application through Kaspersky Security Center
89
Starting and stopping Kaspersky Endpoint Security on a client computer
To start or stop Kaspersky Endpoint Security on a client computer:
1. Open the Administration Console of Kaspersky Security Center.
2. In the Managed devices folder of the Kaspersky Security Center Administration Console
tree, open the folder with the name of the administration group to which the relevant
computer belongs.
3. In the workspace, select the Devices tab.
4. In the list of managed devices, select the computer on which you want to start or stop
the application.
5. Right-click to open the context menu of the computer. Select Properties.
The computer properties window opens.
6. In the computer properties window, select the Applications section.
A list of Kaspersky Lab applications that are installed on the computer appears in the right
part of the computer properties window.
7. Select Kaspersky Endpoint Security 10 for Linux.
8. Do the following:
To start the application, click the button on the right of the list of Kaspersky Lab
applications or do the following:
a. Right-click to display the context menu of Kaspersky Endpoint Security 10
for Linux and select Properties, or click the Properties button under the list
of Kaspersky Lab applications.
The Kaspersky Endpoint Security 10 for Linux application settings window
opens on the General tab.
b. Click the Run button.
Remote administration of the application through Kaspersky Security Center
90
To stop the application, click the button on the right of the list of Kaspersky Lab
applications or do the following:
a. Right-click to open the context menu of Kaspersky Endpoint Security 10
for Linux and select Properties, or click the Properties button under the list
of applications.
The Kaspersky Endpoint Security 10 for Linux application settings window
opens on the General tab.
b. Click the Stop button.
Configuring Kaspersky Endpoint Security settings
To configure Kaspersky Endpoint Securitysettings:
1. Open the Administration Console of Kaspersky Security Center.
2. In the Managed devices folder of the Kaspersky Security Center Administration Console
tree, open the folder with the name of the administration group to which the relevant
computer belongs.
3. In the workspace, select the Devices tab.
4. In the list of client computers, select the computer for which you want to configure
Kaspersky Endpoint Security settings.
5. Right-click to open the context menu of the computer. Select Properties.
The computer properties window opens.
6. In the computer properties window, select the Applications section.
A list of Kaspersky Lab applications that are installed on the computer appears in the right
part of the computer properties window.
7. Select Kaspersky Endpoint Security 10 for Linux.
Remote administration of the application through Kaspersky Security Center
91
8. Right-click to open the context menu of Kaspersky Endpoint Security 10 for Linux and
select Properties.
The Kaspersky Endpoint Security 10 for Linux applications settings window opens.
9. In the Advanced Settings section, configure Kaspersky Endpoint Security settings and
also report and storage settings.
The other sections of the Kaspersky Endpoint Security 10 for Linux application
settings window are the same as in the Kaspersky Security Center application and
are described in the Kaspersky Security Center Administrator's Guide.
If an application is subject to a policy which prohibits changes to specific settings, you
cannot edit them while configuring application settings.
10. To save your changes, in the Kaspersky Endpoint Security 10 for Linux application
settings window, click OK.
Viewing the protection status of a computer
To view the protection status of a computer:
1. Expand the Managed devices node in the Kaspersky Security Center Administration
Console tree and select the group to which the protected computer belongs.
2. In the workspace, select the Devices tab.
3. Right-click to open the context menu of the protected computer and select Properties.
4. In the Properties window, select the Protection tab.
Remote administration of the application through Kaspersky Security Center
92
The Protection tab displays the following information about the protected computer:
Computer status—Information about the anti-virus security of the protected computer,
such as Databases are out of date and License has expired.
Real-time protection status—Status of real-time protection, such as Running, Stopped,
or Paused.
Last on-demand scan—Date and time when the last on-demand scan task
was completed.
Viruses detected—Total number of malicious programs detected on the protected
computer (detected threat counter) since Kaspersky Endpoint Security was installed or
since the counter was reset. To reset the counter, click the Reset button.
Number of incurable objects—Number of infected objects that Kaspersky Endpoint
Security failed to disinfect.
Viewing Kaspersky Endpoint Security settings
To view Kaspersky Endpoint Security settings:
1. Expand the Managed devices node in the Kaspersky Security Center Administration
Console tree and select the group to which the protected computer belongs.
2. In the workspace, select the Devices tab.
3. Right-click to open the context menu of the protected computer and select Properties.
4. In the Properties: <Computer name> window, select the Applications section.
5. In the Applications section, select Kaspersky Endpoint Security 10 for Linux in the list
of installed applications in the context menu of the application and select Properties.
This opens the Kaspersky Endpoint Security 10 for Linux application settings window
in the General section.
Remote administration of the application through Kaspersky Security Center
93
The Kaspersky Endpoint Security 10 for Linux application settings window displays
the following information about Kaspersky Endpoint Security:
The General section
Version number—Kaspersky Endpoint Security version number
Installed—Date and time when Kaspersky Endpoint Security was installed
on the protected computer.
Current status—Status of real-time protection, such as Running or Paused.
Last software update—Date and time when the Kaspersky Endpoint Security software
modules were last updated.
Installed updates—List of software modules for which updates have been installed.
Application databases—Date and time when application databases were last updated, as
well as the number of records in the databases.
The Keys section
License type—Type of license, commercial or trial.
Activation date (this field is available only for an active key)—Date on which the active key
was added.
Expiration date (this field is available only for an active key)—Date on which the active
key expires.
License term—Number of days during which the key is valid.
Restriction—Number of computers on which you can use the key.
The Events section
In this section, you can view the events that Kaspersky Endpoint Security saves
in event storage.
The Additional section
In this section, you can view information about the application administration plug-in.
Remote administration of the application through Kaspersky Security Center
94
Managing tasks
This section describes how to manage tasks for Kaspersky Endpoint Security.
View the Kaspersky Security Center Administrator's Guide for details on the procedure for task
management via Kaspersky Security Center.
About tasks for Kaspersky Endpoint Security
Kaspersky Security Center uses tasks to manage the operation of Kaspersky Endpoint Security
installed on computers. Tasks implement the primary administrative functions, such as key
installation, object scanning, and database and application software module updates.
You can create the following types of tasks to manage Kaspersky Endpoint Security via Kaspersky
Security Center:
Local tasks that are configured for an individual computer.
Group tasks that are configured for computers within administration groups.
Tasks for sets of computers that do not belong to administration groups.
Tasks for sets of computers that are not part of administration groups apply only
to the computers that are specified in the task settings. If new computers are added
to a set of computers for which a task is configured, this task is not applied to these
new computers. To apply the task to these computers, you must create a new task or
edit the settings of the existing task.
You can create the following types of tasks:
Update. During this task, Kaspersky Endpoint Security updates the anti-virus databases
according to the configured update settings.
Rollback. During this task, Kaspersky Endpoint Security rolls back the last anti-virus
database update.
Remote administration of the application through Kaspersky Security Center
95
Update distribution. During this task, Kaspersky Endpoint Security downloads anti-virus
databases to the specified directory without installing them.
On-demand scan. During this task, Kaspersky Endpoint Security scans the computer
areas that are specified in the task settings for viruses and other threats.
Boot sector scan. During this task, Kaspersky Endpoint Security scans the boot sectors
of the computer.
System memory scan. During this task, Kaspersky Endpoint Security scans the system
memory of the computer.
Add key. While performing this task, Kaspersky Endpoint Security adds a key
for application activation, including an additional key.
You can perform the following actions with tasks:
Start, stop, suspend, and resume tasks.
Create new tasks.
Edit task settings.
The rights to access the settings of Kaspersky Endpoint Security tasks (read, write, execute)
are defined for each user who has access to Kaspersky Security Center Administration Server,
through the settings of access to functional areas of Kaspersky Endpoint Security. To configure
the rights to access the settings of functional areas of Kaspersky Endpoint Security, go
to the Security section of the properties window of Kaspersky Security Center
Administration Server.
General information on tasks in Kaspersky Security Center is provided in the Kaspersky Security
Center Administrator's Guide.

Remote administration of the application through Kaspersky Security Center
96
Creating a local task
To create a local task:
1. Open the Administration Console of Kaspersky Security Center.
2. In the Managed devices folder of the Kaspersky Security Center Administration Console
tree, open the folder with the name of the administration group to which the relevant
computer belongs.
3. In the workspace, select the Devices tab.
4. In the list of client computers, select a computer for which you want to create a local task.
5. Right-click to open the context menu of the computer. Select Properties.
The computer properties window opens.
6. Select the Tasks section.
7. Click the Add button.
The Task Wizard starts.
8. Follow the instructions of the Task Wizard.
Creating a group task
To create a group task:
1. Open the Administration Console of Kaspersky Security Center.
2. Open the Managed devices folder in the Kaspersky Security Center Administration
Console tree.
3. Select the Tasks tab in the workspace.
Remote administration of the application through Kaspersky Security Center
97
4. Do one of the following:
Click the Create task button.
Select Create Task in the context menu of Kaspersky Security Center.
The Task Wizard starts.
5. Follow the instructions of the Task Wizard.
Creating a task for a set of computers
To create a task for a set of computers:
1. Open the Administration Console of Kaspersky Security Center.
2. Open the Tasks for specific devices folder in the Kaspersky Security Center
Administration Console tree.
3. Do one of the following:
Click the Create task button.
Select Create Task in the context menu of Kaspersky Security Center.
The Task Wizard starts.
4. Follow the instructions of the Task Wizard.
Manually starting, stopping, pausing, and resuming a task
If Kaspersky Endpoint Security is running on a computer (see section "Starting and stopping
Kaspersky Endpoint Security on a client computer" on page 89), you can start, stop, pause,
and resume a task on this computer via Kaspersky Security Center. When Kaspersky Endpoint
Security is suspended, running tasks are suspended and it becomes impossible to start, stop,
suspend, or resume a task through Kaspersky Security Center.

Remote administration of the application through Kaspersky Security Center
98
To start, stop, suspend, or resume a local task:
1. Open the Administration Console of Kaspersky Security Center.
2. In the Managed devices folder of the Kaspersky Security Center Administration Console
tree, open the folder with the name of the administration group to which the relevant
computer belongs.
3. In the workspace, select the Devices tab.
4. In the list of client computers, select the computer on which you want
to start, stop, suspend, or resume a local task.
5. In the context menu of the computer, select Properties.
The computer properties window opens.
6. Select the Tasks section.
A list of local tasks appears in the right part of the window.
7. Select a local task that you want to start, stop, suspend, or resume.
8. Do one of the following:
Right-click to display the context menu of the local task.
Select Start / Stop / Pause / Resume.
To start or stop a local task, click the or button on the right of the local tasks list.
Under the local tasks list, click the Properties button. The <Task name> task
properties window opens. In the <Task name> task properties window,
on the General tab, click the Start, Stop, Pause, or Resume button.
To start, stop, pause, or resume a group task:
1. Open the Administration Console of Kaspersky Security Center.
2. In the Managed computers folder of the console tree, select the folder with the name
of the administration group for which you want to start, stop, pause or resume a group task.

Remote administration of the application through Kaspersky Security Center
99
Select the Tasks tab in the workspace.
A list of group tasks appears in the right part of the window.
3. In the group tasks list select a group task that you want to start, stop, pause, or resume.
4. Do one of the following:
Right-click to display the context menu of the group task. Select
Start / Stop / Pause / Resume.
Click the / button on the right of the group tasks list to start or stop a group task.
To start, stop, pause, or resume a task for a set of computers:
1. Open the Administration Console of Kaspersky Security Center.
2. In the Tasks for sets of computers folder of the console tree, select a task for a set
of computers that you want to start, stop, pause, or resume.
3. Do one of the following:
Right-click to display the context menu of the task for a set of computers. Select
Start / Stop / Pause / Resume.
To start or stop a task for a set of computers, click the / button on the right
of the list of tasks for sets of computers.
Editing task settings
To edit the settings of a local task:
1. Open the Administration Console of Kaspersky Security Center.
2. In the Managed devices folder of the Kaspersky Security Center Administration Console
tree, open the folder with the name of the administration group to which the relevant
computer belongs.
3. In the workspace, select the Computers tab.

Remote administration of the application through Kaspersky Security Center
100
4. In the list of client computers, select a computer for which you want to configure
task settings.
5. Do one of the following:
Right-click to open the context menu of the computer. Select Properties.
In the Actions menu, select Computer properties.
The computer properties window opens.
6. Select the Tasks section.
A list of local tasks appears in the right part of the window.
7. Select the necessary local task in the local tasks list.
8. Do one of the following:
Right-click to display the context menu of the task. Select Properties.
Click the Properties button.
The Properties: <Local task name> window opens.
9. In the Properties: <Local task name> window, select the Settings section.
10. Edit the local task settings.
11. In the Properties: <Local task name> window, click OK to save the changes.
To edit the settings of a group task:
1. Open the Administration Console of Kaspersky Security Center.
2. In the Managed computers folder, open the folder with the name of the necessary
administration group.
3. Select the Tasks tab in the workspace.
A list of group tasks appears in the lower part of the tasks pane.
4. Select the necessary group task in the group tasks list.

Remote administration of the application through Kaspersky Security Center
101
5. Do one of the following:
Right-click to display the context menu of the task. Select Properties.
On the right of the group tasks list, click the Edit task settings button.
The Properties: <Group task name> window opens.
6. In the Properties: <Group task name> window, select the Settings section.
7. Edit the group task settings.
8. In the Properties: <Group task name> window, click OK to save the changes.
To edit the settings of a task for a set of computers:
1. Open the Administration Console of Kaspersky Security Center.
2. In the Tasks for sets of computers folder of the console tree, select a task for a set
of computers whose settings you want to edit.
3. Do one of the following:
Right-click to display the context menu of the task for a set
of computers. Select Properties.
On the right of the list of tasks for sets of computers, click the Edit task settings button
The Properties: <Name of the task for a set of computers> window opens.
4. In the Properties: <Name of the task for a set of computers> window, select
the Settings section.
5. Edit the settings of the task for a set of computers.
6. In the Properties: <Name of the task for a set of computers> window, click OK to save
the changes.

Remote administration of the application through Kaspersky Security Center
102
Except for the Properties section, all sections in the task properties window are identical to those
that are used in Kaspersky Security Center. Consult the Kaspersky Security Center Administrator's
Guide for their detailed description. The Settings section contains settings that are specific
to Kaspersky Endpoint Security 10. The content of the section varies depending on the selected
type of task.
Managing policies
This section discusses the creation and configuration of policies for Kaspersky Endpoint Security.
For more detailed information about the concept of managing Kaspersky Endpoint Security using
Kaspersky Security Center policies, please refer to the Kaspersky Security Center
Administrator's Guide.
About policies
You can use policies to apply identical Kaspersky Endpoint Security settings to all client computers
within an administration group.
You can remotely change the values of settings specified by a policy for individual computers
in an administration group using Kaspersky Endpoint Security. You can locally change only those
settings modification of which is not prohibited by the policy.
The "lock" status of a setting within a policy determines whether or not an application setting
on a client computer can be edited:
When a setting is "locked" ( ), you cannot edit this setting locally. The setting value
specified by the policy is used for all client computers within the administration group.
When a setting is "unlocked" ( ), you can edit the setting locally. A locally configured
setting is applied to all client computers within the administration group.
The policy-configured setting is not applied.
After the policy is applied for the first time, local application settings change in accordance
with the policy settings.
You can use policies to configure the settings of the real-time protection task of Kaspersky
Endpoint Security.
Remote administration of the application through Kaspersky Security Center
103
The rights to access policy settings (read, write, execute) are specified for each user who
has access to the Kaspersky Security Center Administration Server and separately for each
functional scope of Kaspersky Endpoint Security. To configure the rights to access policy settings,
go to the Security section of the properties window of the Kaspersky Security Center
Administration Server.
You can perform the following operations with a policy:
Create a policy.
Edit policy settings.
If the user account under which you accessed the Administration Server
does not have rights to edit settings of certain functional scopes, the settings of these
functional scopes are not available for editing.
Delete a policy.
Change policy status.
Consult the Kaspersky Security Center Administrator's Guide for details on using policies that
are unrelated to interaction with Kaspersky Endpoint Security.
Creating a policy
To create a policy:
1. Open the Administration Console of Kaspersky Security Center.
2. Do one of the following:
Select the Managed computers folder in the console tree to create a policy for all
computers managed by Kaspersky Security Center.
In the Managed computers folder of the console tree, select the folder with the name
of the administration group to which the relevant computers belong.
3. In the workspace, select the Policies tab.

Remote administration of the application through Kaspersky Security Center
104
4. Do one of the following:
Click the Create policy button.
Right-click to display the context menu. Select Create Policy.
The Policy Wizard starts.
5. Follow the instructions of the Policy Wizard.
Editing policy settings
To edit policy settings:
1. Open the Administration Console of Kaspersky Security Center.
2. In the Managed computers folder of the console tree, open the folder with the name
of the relevant administration group for which you want to edit policy settings.
3. In the workspace, select the Policies tab.
4. Select the necessary policy.
5. Do one of the following:
Right-click to bring up the context menu of the policy. Select Properties.
On the right of the list of policies, click the Edit policy button.
The Properties: <Policy name> window opens.
Kaspersky Endpoint Security 10 policy settings include the task settings and
application settings. The Protection and Control sections of the Properties: <Policy
name> window display the settings of tasks. The Additional settings section displays
application settings.
6. Edit the policy settings.
7. In the Properties: <Policy name> window, click OK to save the changes.
Remote administration of the application through Kaspersky Security Center
105
Viewing user messages in the Kaspersky Security Center event storage
Kaspersky Endpoint Security provides the capability for corporate LAN users whose computers
have the application installed to send messages to the administrator.
A user can send messages to the administrator in two ways:
As an event in the Kaspersky Security Center event storage. The user's event is sent
to the Kaspersky Security Center event storage if the copy of Kaspersky Endpoint Security
that is installed on the user's computer works under an active policy.
As an email message. The user's message is sent via email if the copy of Kaspersky
Endpoint Security that is installed on the user's computer does not work under a policy or
works under a mobile policy.
To view a user message in the Kaspersky Security Center event storage:
1. Open the Administration Console of Kaspersky Security Center.
2. Open the Reports and notifications \ Events \ Warnings folder in the console tree.
The Kaspersky Security Center workspace lists all warning events, including messages
to the administrator, that are received from users on the local area network. The Kaspersky
Security Center workspace is located to the right of the console tree.
3. Select a message to the administrator in the list of events.
4. Open the event properties in one of the following ways:
Double-click an event in the list of events.
Right-click to display the context menu of the event. In the context menu of the event,
select Properties.
On the right of the list of events, click the Open event properties button.
Remote administration of the application through Kaspersky Security Center
106
Manually checking the connection with the Administration Server. Klnagchk utility
The Network Agent distribution kit includes the klnagchk utility, which is intended for checking
the connection with the Administration Server.
After installation of Network Agent, the utility is located in the /opt/kaspersky/klnagent/bin folder.
Depending on the utilized keys, it performs the following actions when started:
Displays the values of the connection settings of Network Agent installed on the client
computer to the Administration Server, or writes them to an event log file.
Records Network Agent statistics (since the last time the component was started) and utility
operation results to the event log file, or displays the information on the screen.
Attempts to establish a connection between Network Agent and the Administration Server.
If the connection attempt fails, the utility sends an ICMP packet to check the status
of the computer on which the Administration Server is installed.
Utility syntax:
klnagchk [-logfile <file name>] [-sp] [-savecert <path
to certificate file>] [-restart]
Description of keys:
-logfile <file name>—Record the values of the settings for connecting Network Agent
to the Administration Server and the utility operation results into a log file. By default,
information is saved in the stdout.tx file. If this key is not used, the settings, results, and
error messages are displayed on the screen.
-sp—Show the password for user authentication on the proxy server. This setting is used if
the connection to the Administration Server is established via a proxy server.
Remote administration of the application through Kaspersky Security Center
107
-savecert <file name>—Save the certificate used to authenticate access
to the Administration Server in the specified file.
-restart—Restart Network Agent after the utility has completed.
Manually connecting to the Administration Server. Klmover utility
The Network Agent distribution kit includes the klmover utility, which is intended for managing
the connection with the Administration Server.
After installation of Network Agent, the utility is located in the /opt/kaspersky/klnagent/bin folder.
Depending on the utilized keys, it performs the following actions when started:
Connects Network Agent to the Administration Server with the specified settings.
Writes the operation results to the event log file or displays them on the screen.
Utility syntax:
klmover [-logfile <file name>] {-address <server address>} [-pn
<port number>] [-ps <SSL port number>] [-nossl] [-cert <path
to certificate file>] [-silent] [-dupfix]
Description of keys:
-logfile <file name>—Write the utility completion results to the specified file. If this
key is not used, the results and error messages are sent to stdout.
-address <server address>—Address of the Administration Server used
for connection. This can be the IP address, NetBIOS or DNS name of the computer.
-pn <port number>—Number of the port over which a non-encrypted connection
to the Administration Server will be established. Port 14000 is used by default.
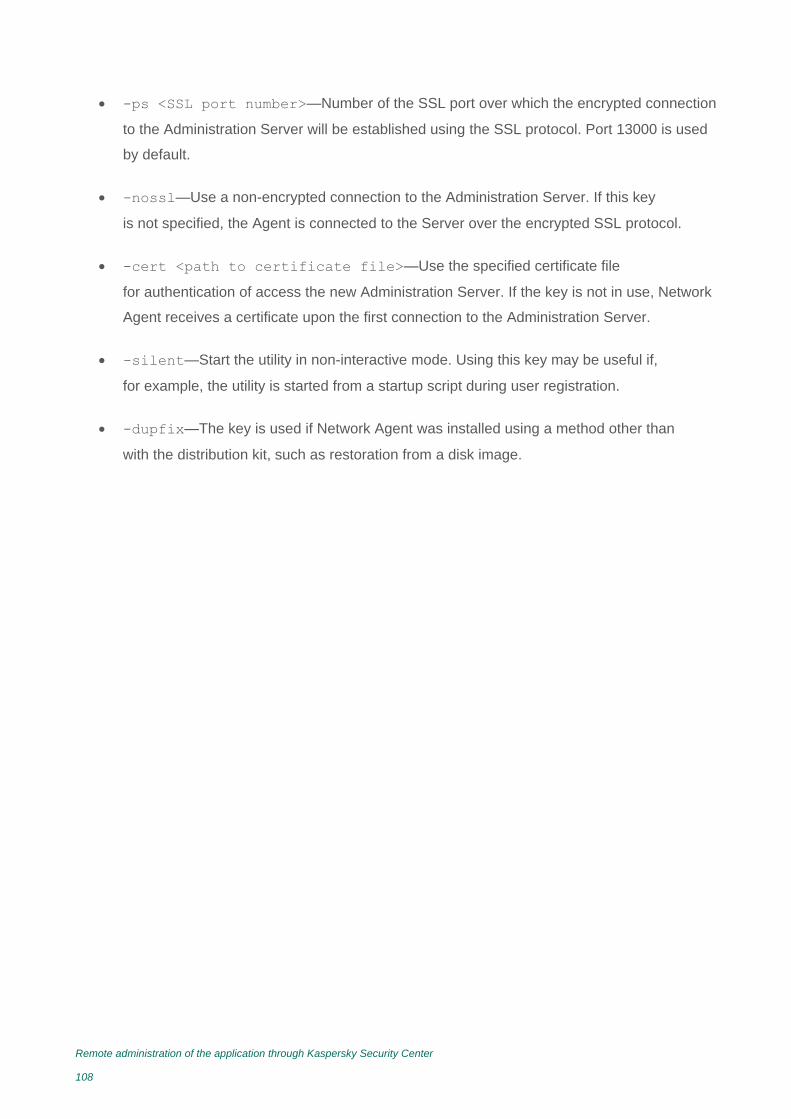
Remote administration of the application through Kaspersky Security Center
108
-ps <SSL port number>—Number of the SSL port over which the encrypted connection
to the Administration Server will be established using the SSL protocol. Port 13000 is used
by default.
-nossl—Use a non-encrypted connection to the Administration Server. If this key
is not specified, the Agent is connected to the Server over the encrypted SSL protocol.
-cert <path to certificate file>—Use the specified certificate file
for authentication of access the new Administration Server. If the key is not in use, Network
Agent receives a certificate upon the first connection to the Administration Server.
-silent—Start the utility in non-interactive mode. Using this key may be useful if,
for example, the utility is started from a startup script during user registration.
-dupfix—The key is used if Network Agent was installed using a method other than
with the distribution kit, such as restoration from a disk image.

Contacting Technical Support
This section describes the ways to get technical support and the terms on which it is available.
In this section:
How to obtain technical support ................................................................................................. 109
Technical support by phone ....................................................................................................... 109
Technical Support via Kaspersky CompanyAccount ................................................................. 110
How to obtain technical support If you could not find a solution to your problem in the documentation or in one of the sources
of information about the application (see the section "Sources of information about the application"
on page 14), you are advised to contact Technical Support. Technical Support specialists
will answer your questions about installing and using the application.
Technical support is available only to users who have purchased a commercial license. Users who
have received a trial license are not entitled to technical support.
Before contacting Technical Support, please read the technical support rules
(http://support.kaspersky.com/support/rules).
You can contact Technical Support in one of the following ways:
By calling Technical Support (http://support.kaspersky.com/support/contacts)
By sending a query to Technical Support through the Kaspersky CompanyAccount portal
(https://companyaccount.kaspersky.com)
Technical support by phone You can call Technical Support from most regions throughout the world. You can find information
on how to receive technical support in your region and contact information for Technical Support
on the Kaspersky Lab Technical Support website (http://support.kaspersky.com/b2c).
Contacting Technical Support
110
Before contacting Technical Support, please read the technical support rules
(http://support.kaspersky.com/support/rules).
Technical Support via Kaspersky CompanyAccount Kaspersky CompanyAccount (https://companyaccount.kaspersky.com) is a portal for companies
that use Kaspersky Lab applications. The Kaspersky CompanyAccount portal is designed
to facilitate interaction between users and Kaspersky Lab specialists via online requests.
The Kaspersky CompanyAccount portal lets you monitor the progress of electronic request
processing by Kaspersky Lab specialists and store a history of electronic requests.
You can register all of your organization's employees under a single account
on Kaspersky CompanyAccount. A single account lets you centrally manage electronic requests
from registered employees to Kaspersky Lab and also manage the privileges of these employees
via Kaspersky CompanyAccount.
The Kaspersky CompanyAccount portal is available in the following languages:
English
Spanish
Italian
German
Polish
Portuguese
Russian
French
Japanese
To learn more about Kaspersky CompanyAccount, visit the Technical Support website
(http://support.kaspersky.com/faq/companyaccount_help).
Appendices
This section provides information that complements the primary text of the document.
In this section:
Settings of configuration files ..................................................................................................... 111
Kaspersky Endpoint Security command line commands ........................................................... 139
Command line return codes ....................................................................................................... 171
Settings of configuration files
This section describes the structure and settings of Kaspersky Endpoint Security configuration files
in INI format and the rules for editing configuration files.
Rules for editing configuration files of Kaspersky Endpoint Security
When editing a configuration file, adhere to the following rules:
You must specify all mandatory settings in the configuration file. You can specify individual
task settings without a file by using the command line.
If a parameter belongs to a certain section, place it only in that section. Within the confines
of one section, you can place the settings in any order.
Enclose the names of sections in square brackets [ ].
Enter the values of parameters in the format parameter name=value (spaces between
the parameter name and its value are not processed).
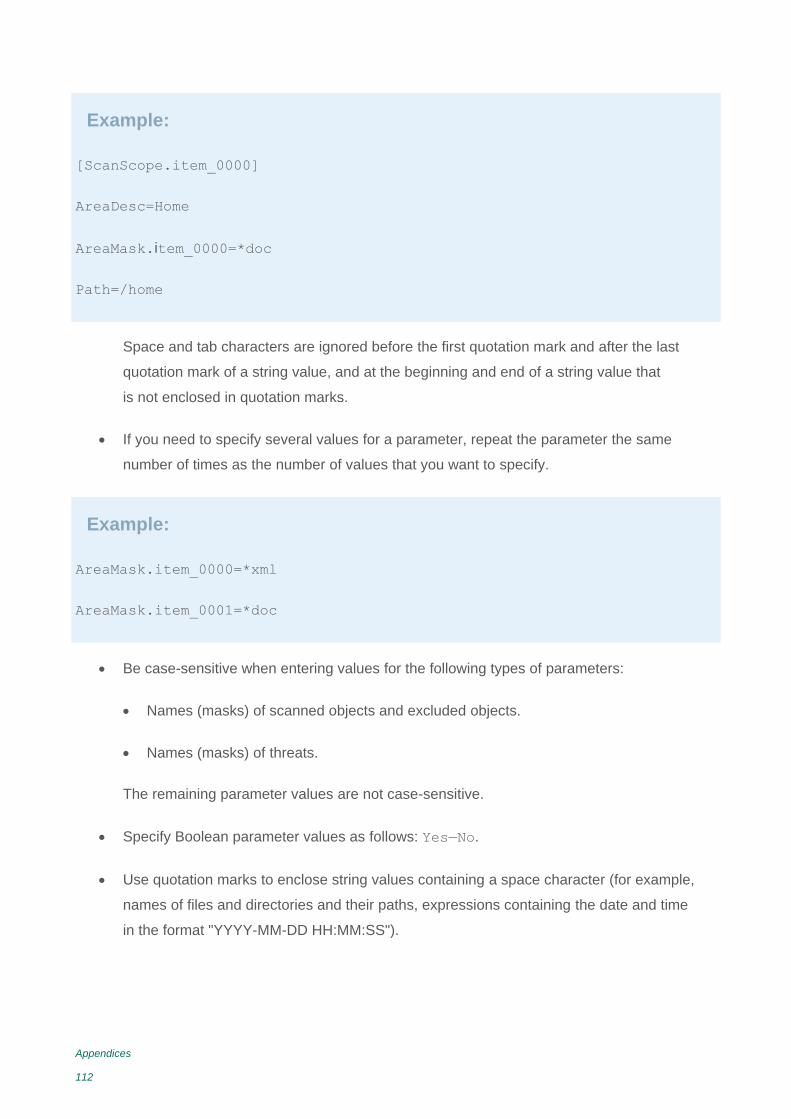
Appendices
112
Example:
[ScanScope.item_0000]
AreaDesc=Home
AreaMask.item_0000=*doc
Path=/home
Space and tab characters are ignored before the first quotation mark and after the last
quotation mark of a string value, and at the beginning and end of a string value that
is not enclosed in quotation marks.
If you need to specify several values for a parameter, repeat the parameter the same
number of times as the number of values that you want to specify.
Example:
AreaMask.item_0000=*xml
AreaMask.item_0001=*doc
Be case-sensitive when entering values for the following types of parameters:
Names (masks) of scanned objects and excluded objects.
Names (masks) of threats.
The remaining parameter values are not case-sensitive.
Specify Boolean parameter values as follows: Yes—No.
Use quotation marks to enclose string values containing a space character (for example,
names of files and directories and their paths, expressions containing the date and time
in the format "YYYY-MM-DD HH:MM:SS").
Appendices
113
Example:
AreaDesc="Scan mail databases"
You can enter the remaining values with or without quotation marks.
A single quotation mark in the beginning or end of a string is considered an error.
General settings of Kaspersky Endpoint Security
After modifying the general settings of Kaspersky Endpoint Security, restart the application.
General settings of the configuration file have the following values:
SambaConfigPath
Directory that stores the Samba configuration file. The Samba configuration file is needed
to ensure that the AllShared or Shared:SMB values are applied for the Path option.
The standard directory of the SAMBA configuration file on the computer is specified
by default.
The default value is /etc/samba/smb.conf.
NfsExportPath
Folder storing the NFS configuration file. The NFS configuration file is needed to ensure
that the AllShared or Shared:NFS values are applied for the Path option.
The standard directory of the NFS configuration file on the computer is specified by default.
The default value is /etc/exports.

Appendices
114
TraceFolder
Directory in which Kaspersky Endpoint Security stores trace log files.
If you specify a different directory, make sure that the account under which Kaspersky
Endpoint Security is running has read/write permissions for this directory.
The default value is /var/log/kaspersky/kesl.
TraceLevel
Trace log level of detail.
Available values:
Detailed. Most detailed trace log.
NotDetailed. The trace log contains error notifications.
None. Does not create a trace log.
The default value is None.
BlockFilesGreaterMaxFileNamePath
Blocks access to files for which the full path length exceeds the defined parameter value
specified in bytes.
If the complete path to the file being scanned exceeds the value of this setting, on-demand
scan tasks skip this file during scanning.
Available values: 4096—33554432.
The default value is 16384.
DetectOtherObjects
Enables / disables the detection of legitimate software that could be used by hackers
to harm computers or data of users.
Appendices
115
Available values:
Yes. Enable the detection of legitimate software that could be used by hackers to harm
computers or data of users.
No. Disable the detection of legitimate software that could be used by hackers to harm
computers or data of users.
The default value is No.
UseKSN
Enables / disables participation in Kaspersky Security Network.
Available values:
Yes. Enable participation in Kaspersky Security Network.
No. Disable participation in Kaspersky Security Network.
The default value is No.
UseProxy
Enables / disables use of a proxy for Kaspersky Security Network, activation
of the application, and updates.
Available values:
Yes. Enable use of a proxy.
No. Disable use of a proxy.
The default value is No.
ProxyServer
Proxy server settings in the format [user[:password]@]host[:port].

Appendices
116
MaxEventsNumber
Maximum number of events that will be stored by Kaspersky Endpoint Security.
When the specified number of events is exceeded, Kaspersky Endpoint Security deletes
the oldest events.
The default value is 500000.
LimitNumberOfScanFileTasks
Maximum number of Scan_File tasks that a non-privileged user can simultaneously start
on a computer. This parameter does not limit the number of tasks that a user with root
privileges can start. If the value 0 is defined, a non-privileged user cannot start
Scan_File tasks.
Available values: 0—4294967295.
The default value is 0.
UseSysLog
Enables / disables the logging of information about events to syslog.
Yes. Enable the logging of information about events to syslog.
No. Disable the logging of information about events to syslog.
The default value is No.
EventsStoragePath
Database file in which Kaspersky Endpoint Security saves information about events.
The default value is /var/opt/kaspersky/kesl/events.db.
See also:
Real-time protection and on-demand scan tasks settings ......................................................... 117
Rules for editing configuration files of Kaspersky Endpoint Security ......................................... 111
Appendices
117
Real-time protection and on-demand scan tasks settings
You can configure real-time protection tasks and on-demand scan tasks by modifying the settings
in configuration files of these tasks.
To modify a task, perform the following sequence of steps:
1. Export task settings to the configuration file (see page 163).
2. Modify the task settings in the configuration file according to your preferences (see
page 111).
3. Import the configuration file with the modified settings into the task (see page 164).
This section describes the sections and settings of configuration files for the real-time protection
task and on-demand scan task.
Structure of the real-time protection task and on-demand scan task INI configuration file
The configuration file of the real-time protection task and on-demand scan task consists
of individual settings and sections. Sections of the configuration file describe the scan areas and
exclusion areas used by Kaspersky Endpoint Security when running the real-time protection task
and on-demand scan task.
The real-time protection task and on-demand scan task configuration file contains
the following sections:
[ScanScope.item_#]
You can use this section to specify the name of the scan scope. You can use settings
in this section to create a scan scope.
This section is required.
[ExcludedFromScanScope.item_#] (see page 129)
You can use this section to specify the scope excluded from scanning.
This section is optional.
Appendices
118
If you want to specify several scan areas or exclusion areas, define several
[ScanScope.item_#] sections and [ExcludedFromScanScope.item_#] sections (only
in real-time protection tasks).
Kaspersky Endpoint Security processes areas in the order in which they are specified
in the section ID.
General settings of the real-time protection and on-demand scan tasks
Configuration files for the real-time protection and on-demand scan tasks contain
the following settings:
ScanArchived
Enables / disables scanning of archives (including SFX self-extracting archives).
Kaspersky Endpoint Security detects threats in archives but does not disinfect them.
Available values:
Yes—Scan archives.
No—Do not scan archives.
Default values:
No in the real-time protection task.
Yes in the on-demand scan task.
ScanSfxArchived
Enables / disables scanning of self-extracting archives only (archives that contain
an executable extraction module).
Available values:
Yes—Scan self-extracting archives.
No—Do not scan self-extracting archives.
Appendices
119
Default values:
No in the real-time protection task.
Yes in the on-demand scan task.
ScanMailBases
Enables / disables scanning of email databases of Microsoft Outlook®, Outlook Express,
The Bat! and other mail clients.
Available values:
Yes—Scan files of email databases.
No—Do not scan files of email databases.
The default value is No.
ScanPlainMail
Enables / disables scanning of plain text email messages.
Available values:
Yes—Scan plain text email messages.
No—Do not scan plain text email messages.
The default value is No.
ScanPacked
Enables / disables scanning of executable files packed by binary code packers (e.g., UPX
or ASPack). Compound objects of this type contain threats more often that objects
of other types.
Appendices
120
Available values:
Yes—Scan packed files.
No—Do not scan packed files.
The default value is Yes.
UseSizeLimit
Enables / disables use of the SizeLimit setting (maximum size of an object
to be scanned).
Available values:
Yes—Apply the SizeLimit parameter.
No—Do not apply the SizeLimit parameter.
The default value is No.
SizeLimit
Specifies the maximum size of an object to be scanned (in megabytes). If an object
to be scanned is larger than the specified value, Kaspersky Endpoint Security skips
the object.
This setting is used together with the UseSizeLimit setting.
Available values: 0—999,999. 0—Kaspersky Endpoint Security scans objects of any size.
The default value is 0.
Appendices
121
UseTimeLimit
Enables / disables use of the TimeLimit setting (maximum duration of an object scan).
Available values:
Yes—Apply the TimeLimit parameter.
No—Do not apply the TimeLimit parameter.
Default values:
Yes in the real-time protection task.
No in the on-demand scan task.
TimeLimit
Specifies maximum duration for the object scan (in seconds). Kaspersky Endpoint Security
stops scanning an object if it takes longer than the number of seconds specified
by this parameter.
This setting is used together with the UseTimeLimit setting.
Available values: 0—9999. 0—The object scan duration is unlimited.
The default value is 0.
FirstAction
Selection of the first action to be performed by Kaspersky Endpoint Security
on infected objects.
In real-time protection tasks, before performing the action specified by you
on an object, Kaspersky Endpoint Security blocks access to the object by applications
that attempt to access it.
Appendices
122
Available values:
Cure (disinfect)—Kaspersky Endpoint Security attempts to disinfect an object by saving
a copy of it in Backup. If disinfection fails (for example, if the type of object or the type
of threat in the object cannot be disinfected) Kaspersky Endpoint Security leaves
the object unchanged. If the first action is set to Cure, it is recommended to specify
the second action using the SecondAction setting.
Remove—Kaspersky Endpoint Security removes the infected object after first creating
a backup copy of it.
Recommended (perform recommended action)—Kaspersky Endpoint Security
automatically selects and performs an action on the object based on information about
the threat detected in the object. For example, Kaspersky Endpoint Security
immediately removes Trojans since they do not incorporate themselves into other files
and therefore they do not need to be disinfected.
Block—Kaspersky Endpoint Security blocks access to the infected object.
Information about the infected object is logged.
The value is used only in the real-time protection task.
Skip—Kaspersky Endpoint Security does not attempt to disinfect or delete
an infected object. Information about the infected object is logged.
The value is used only in on-demand scan tasks.
The default value is Recommended.
SecondAction
Selection of the second action to be performed by Kaspersky Endpoint Security
on infected objects. Kaspersky Endpoint Security performs the second action if the first
action fails.
The values of the SecondAction setting are the same as the values
of the FirstAction setting.
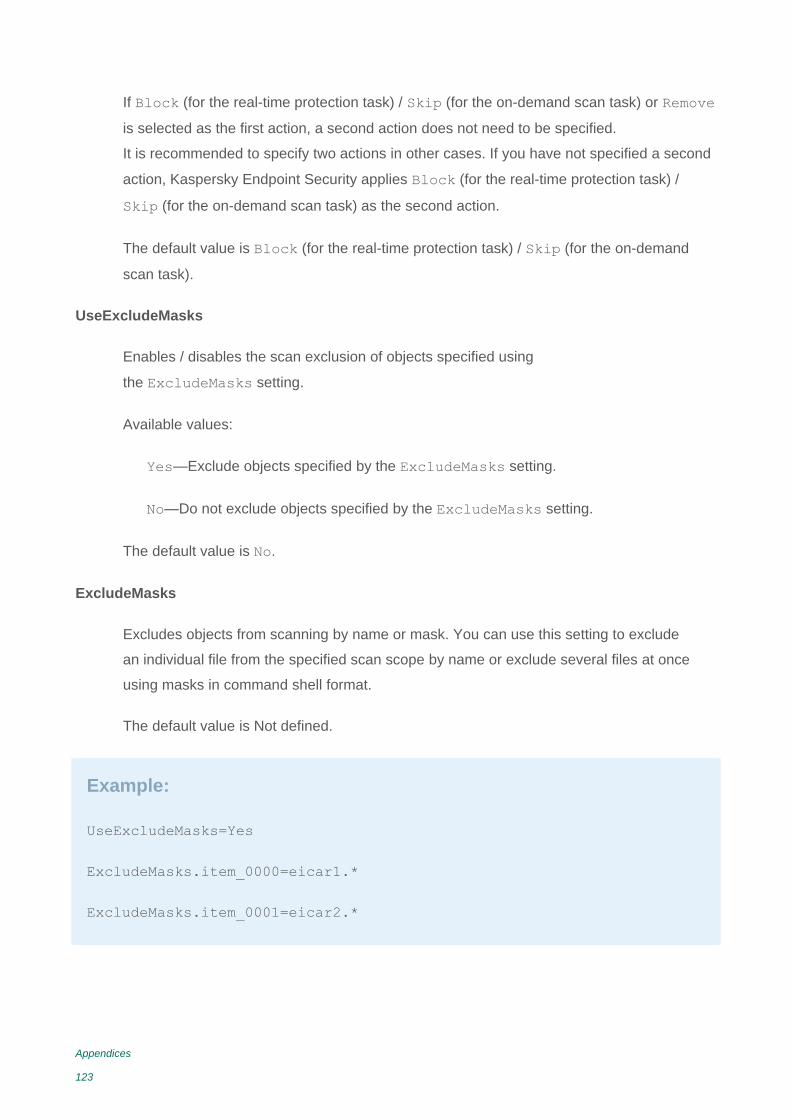
Appendices
123
If Block (for the real-time protection task) / Skip (for the on-demand scan task) or Remove
is selected as the first action, a second action does not need to be specified.
It is recommended to specify two actions in other cases. If you have not specified a second
action, Kaspersky Endpoint Security applies Block (for the real-time protection task) /
Skip (for the on-demand scan task) as the second action.
The default value is Block (for the real-time protection task) / Skip (for the on-demand
scan task).
UseExcludeMasks
Enables / disables the scan exclusion of objects specified using
the ExcludeMasks setting.
Available values:
Yes—Exclude objects specified by the ExcludeMasks setting.
No—Do not exclude objects specified by the ExcludeMasks setting.
The default value is No.
ExcludeMasks
Excludes objects from scanning by name or mask. You can use this setting to exclude
an individual file from the specified scan scope by name or exclude several files at once
using masks in command shell format.
The default value is Not defined.
Example:
UseExcludeMasks=Yes
ExcludeMasks.item_0000=eicar1.*
ExcludeMasks.item_0001=eicar2.*
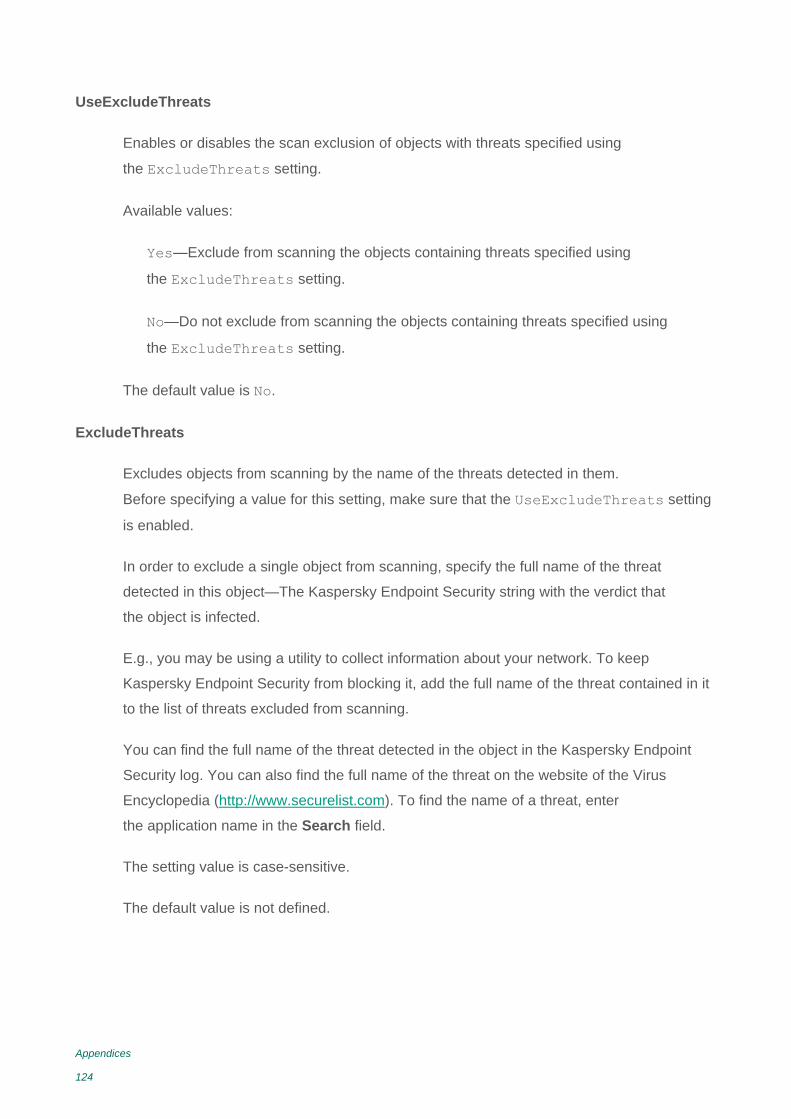
Appendices
124
UseExcludeThreats
Enables or disables the scan exclusion of objects with threats specified using
the ExcludeThreats setting.
Available values:
Yes—Exclude from scanning the objects containing threats specified using
the ExcludeThreats setting.
No—Do not exclude from scanning the objects containing threats specified using
the ExcludeThreats setting.
The default value is No.
ExcludeThreats
Excludes objects from scanning by the name of the threats detected in them.
Before specifying a value for this setting, make sure that the UseExcludeThreats setting
is enabled.
In order to exclude a single object from scanning, specify the full name of the threat
detected in this object—The Kaspersky Endpoint Security string with the verdict that
the object is infected.
E.g., you may be using a utility to collect information about your network. To keep
Kaspersky Endpoint Security from blocking it, add the full name of the threat contained in it
to the list of threats excluded from scanning.
You can find the full name of the threat detected in the object in the Kaspersky Endpoint
Security log. You can also find the full name of the threat on the website of the Virus
Encyclopedia (http://www.securelist.com). To find the name of a threat, enter
the application name in the Search field.
The setting value is case-sensitive.
The default value is not defined.
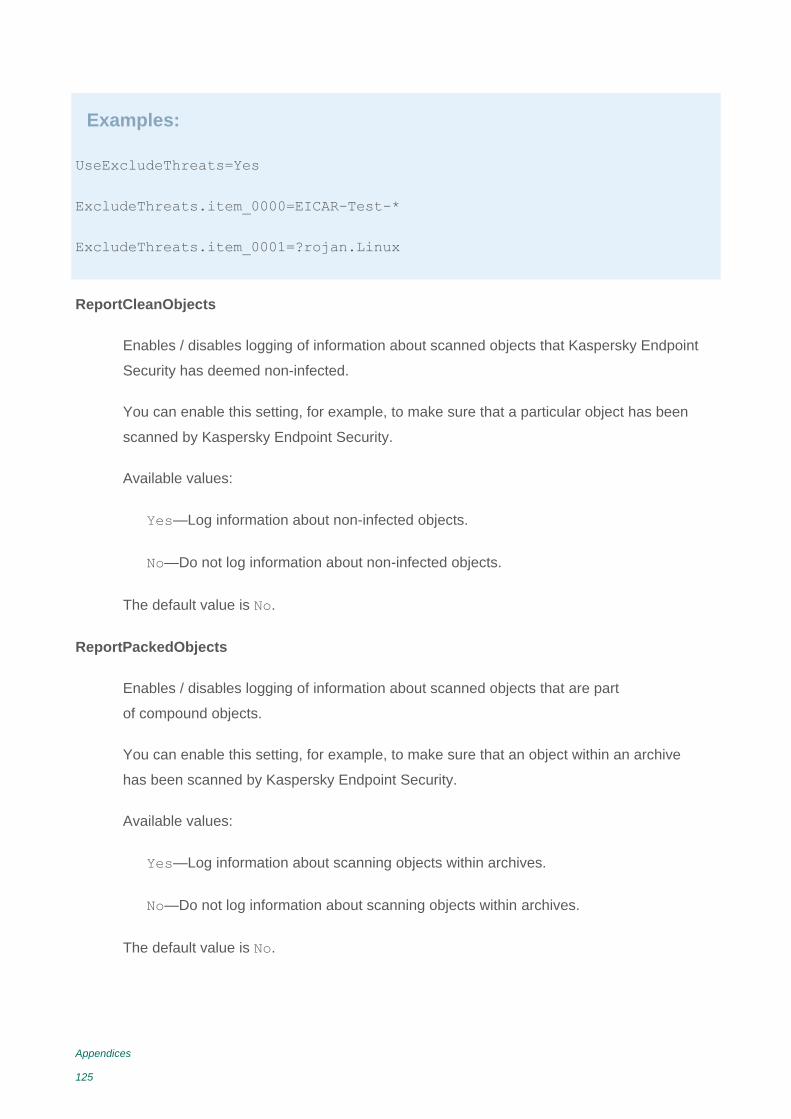
Appendices
125
Examples:
UseExcludeThreats=Yes
ExcludeThreats.item_0000=EICAR-Test-*
ExcludeThreats.item_0001=?rojan.Linux
ReportCleanObjects
Enables / disables logging of information about scanned objects that Kaspersky Endpoint
Security has deemed non-infected.
You can enable this setting, for example, to make sure that a particular object has been
scanned by Kaspersky Endpoint Security.
Available values:
Yes—Log information about non-infected objects.
No—Do not log information about non-infected objects.
The default value is No.
ReportPackedObjects
Enables / disables logging of information about scanned objects that are part
of compound objects.
You can enable this setting, for example, to make sure that an object within an archive
has been scanned by Kaspersky Endpoint Security.
Available values:
Yes—Log information about scanning objects within archives.
No—Do not log information about scanning objects within archives.
The default value is No.
Appendices
126
ReportUnprocessedObjects
Enables / disables the logging of information about unscanned objects.
Available values:
Yes—Log information about unscanned objects.
No—Do not log information about unscanned objects.
The default value is No.
UseAnalyzer
Enables / disables Heuristic Analyzer.
Available values:
Yes—Enable Heuristic Analyzer.
No—Disable Heuristic Analyzer.
The default value is Yes.
HeuristicLevel
Heuristic analysis level.
Available values:
Light—The least thorough scan with minimal load on the system.
Medium—Medium heuristic analysis level with a balanced load
on the operating system.
Deep—The most thorough scan with maximal load on the operating system.
Recommended—Recommended value.
The default value is Recommended.
Appendices
127
UseIChecker
Enables / disables the use of iChecker technology.
Available values:
Yes—Enable use of iChecker technology.
No—Disable use of iChecker technology.
The default value is Yes.
ScanByAccessType
You can use this setting to specify the real-time protection mode. The ScanByAccessType
setting is applied only in real-time protection tasks.
Available values:
SmartCheck—Scan a file when there is an attempt to open it, and scan it again when
there is an attempt to close it if the file has been modified. If a process accesses
an object multiple times in the course of its operation and modifies it, the application
scans the object again only when the process closes it for the last time.
OpenAndModify—Scan a file when there is an attempt to open it, and scan it again
when there is an attempt to close it if the file has been modified.
Open—Scan the file when an attempt is made to open it for reading or for execution
or modification.
The default value is SmartCheck.
[ScanScope.item_#]
The [ScanScope.item_#] section contains the following settings:
AreaDesc
Description of the scan scope, which contains additional information about the scan scope.
The maximum length of the string specified using this setting is 4096 characters.
Appendices
128
The default value is All objects.
Example:
AreaDesc="Scan mail databases"
UseScanArea
This setting enables / disables scanning of the specified scope. To run the task, you
must include at least one area to scan.
Available values:
Yes—Scan the specified scope.
No—Do not scan the specified scope.
The default value is Yes.
AreaMask
You can use this setting to restrict the scan scope.
In the scan scope, Kaspersky Endpoint Security scans only the files that are indicated using
command shell masks.
If this setting is not specified, Kaspersky Endpoint Security scans all objects
in the scan scope. You can specify several values for this setting.
The default value is * (scan all objects).
Example:
AreaMask=*doc
Path
You can use this setting to specify the path to objects to scan.
The value of the Path setting consists of two elements: <file system type>:<access
protocol>. It may also contain the path to the directory in the local file system.
Appendices
129
Available values:
<path to local directory>—Scan objects in the specified directory.
Shared:NFS—Scan the computer's file system resources that are accessible
via the NFS protocol.
Shared:SMB—Scan the computer's file system resources that are accessible
via the SMB protocol.
AllRemoteMounted—Scan all remote directories mounted on the computer using
the SMB and NFS protocols.
AllShared—Scan all of the computer's file system resources shared via the SMB and
NFS protocols.
[ExcludedFromScanScope.item_#]
The [ExcludedFromScanScope.item_#] section contains the following settings:
AreaDesc
Description of the scan exclusion scope. Contains additional information about
the exclusion scope.
The default value is Not defined.
Example:
AreaDesc="Exclude separate SAMBA"
Appendices
130
UseScanArea
This setting enables / disables scanning of the specified scope.
Available values:
Yes—Excludes the specified scope.
No—Does not exclude the specified scope.
The default value is Yes.
Path
You can use this setting to specify the path to objects excluded from scanning.
The value of the Path setting consists of two elements: <file system type>:<access
protocol>. It may also contain the path to the directory in the local file system.
Available values:
<path to local directory>—Exclude objects in the specified directory
from scanning.
Shared:NFS—Exclude the computer's file system resources that are accessible
via the NFS protocol.
Shared:SMB—Exclude the computer's file system resources that are accessible
via the Samba protocol.
AllRemoteMounted—Exclude all remote directories mounted on the computer using
the SMB and NFS protocols.
AllShared—Exclude all of the computer's file system resources shared via the SMB
and NFS protocols.
Appendices
131
Settings of boot sector scan tasks and process memory scan tasks
You can configure boot sector scan tasks and process memory scan tasks by modifying
the settings in configuration files of these tasks.
Settings of configuration files have the following values:
UseExcludeMasks
The parameter is not used in the process memory scan task.
Enables / disables the scan exclusion of objects specified using
the ExcludeMasks setting.
Available values:
Yes—Exclude objects specified by the ExcludeMasks setting.
No—Do not exclude objects specified by the ExcludeMasks setting.
The default value is No.
ExcludeMasks
The parameter is not used in the process memory scan task.
Excludes objects from scanning by name or mask. You can use this setting to exclude
an individual file from the specified scan scope by name or exclude several files at once
using masks in command shell format.
The default value is Not defined.
UseExcludeThreats
Enables or disables the scan exclusion of objects with threats specified using
the ExcludeThreats setting.
Appendices
132
Available values:
Yes—Exclude from scanning the objects containing threats specified using
the ExcludeThreats setting.
No—Do not exclude from scanning the objects containing threats specified using
the ExcludeThreats setting.
The default value is No.
ExcludeThreats
Excludes objects from scanning by the name of the threats detected in them.
Before specifying a value for this setting, make sure that the UseExcludeThreats setting
is enabled.
In order to exclude a single object from scanning, specify the full name of the threat
detected in this object—The Kaspersky Endpoint Security string with the verdict that
the object is infected.
E.g., you may be using a utility to collect information about your network. To keep
Kaspersky Endpoint Security from blocking it, add the full name of the threat contained in it
to the list of threats excluded from scanning.
You can find the full name of the threat detected in the object in the Kaspersky Endpoint
Security log. You can also find the full name of the threat on the website of the Virus
Encyclopedia (http://www.securelist.com). To find the name of a threat, enter
the application name in the Search field.
The setting value is case-sensitive.
The default value is Not defined.
ReportCleanObjects
Enables / disables logging of information about scanned objects that Kaspersky Endpoint
Security has deemed non-infected.
You can enable this setting, for example, to make sure that a particular object has been
scanned by Kaspersky Endpoint Security.

Appendices
133
Available values:
Yes—Log information about non-infected objects.
No—Do not log information about non-infected objects.
The default value is No.
UseAnalyzer
The parameter is not used in the process memory scan task.
Enables / disables Heuristic Analyzer.
Available values:
Yes—Enable Heuristic Analyzer.
No—Disable Heuristic Analyzer.
The default value is Yes.
HeuristicLevel
The parameter is not used in the process memory scan task.
Heuristic analysis level.
Available values:
Light—The least thorough scan with minimal load on the system.
Medium—Medium heuristic analysis level; balanced load on the system.
Deep—The most thorough scan with maximal load on the operating system.
Recommended—Recommended value.
The default value is Recommended.
Appendices
134
Action
Selection of the action to be performed by Kaspersky Endpoint Security on infected objects.
Available values:
Cure (disinfect)—Kaspersky Endpoint Security attempts to disinfect an object by saving
a copy of it in Backup. If disinfection fails (for example, if the type of object or the type
of threat in the object cannot be disinfected) Kaspersky Endpoint Security leaves
the object unchanged.
Skip—Kaspersky Endpoint Security does not attempt to disinfect or delete
an infected object. Information about the infected object is logged.
The default value is Cure.
Settings of update tasks and update distribution tasks
You can configure update tasks and update distribution tasks by modifying the settings
in configuration files of these tasks.
The configuration file of update tasks and update distribution tasks consists of individual settings
and the [CustomSources.item_#] section. This section lets you configure the settings
of custom sources of updates. If you wish to specify several custom update sources, you
must describe each source in a separate [CustomSources.item_#] section.
Kaspersky Endpoint Security uses these settings when connecting to custom update sources.
This section is optional.
Appendices
135
General settings of update tasks and update distribution tasks
Configuration files of update tasks and update distribution tasks contain the following settings:
SourceType
This setting lets you select the source from which Kaspersky Endpoint Security
will receive updates.
Available values:
KLServers—Kaspersky Endpoint Security receives updates from one of the Kaspersky
Lab update servers. Updates are downloaded via the HTTP protocol.
SCServer—Kaspersky Endpoint Security downloads updates to the protected
computer from Kaspersky Security Center Administration Server installed
on the local network. You can select this update source if you use the Kaspersky
Security Center application for centralized administration of anti-virus protection
of computers in your organization.
Custom—Kaspersky Endpoint Security downloads updates from the custom source
specified in the section [CustomSources.item_#] (see section
"[CustomSources.item_#]" on page 137). You can specify directories on HTTP
servers or directories on any device mounted on the protected computer, including
directories on remote computers mounted via the Samba or NFS protocols.
The default value is KLServers.
UseKLServersWhenUnavailable
You can use this setting to configure Kaspersky Endpoint Security to access the Kaspersky
Lab update servers if all custom update sources are unavailable.
Appendices
136
Available values:
Yes—Kaspersky Endpoint Security connects to Kaspersky Lab update servers if all
custom update sources are unavailable.
No—Kaspersky Endpoint Security does not connect to Kaspersky Lab update servers if
all custom update sources are unavailable.
The default value is Yes.
IgnoreProxySettingsForKLServers
This setting lets you configure the use of a proxy server for connecting to Kaspersky Lab
update servers.
Available values:
Yes—Kaspersky Endpoint Security does not use a proxy server to connect
to the Kaspersky Lab update servers.
No—Kaspersky Endpoint Security uses a proxy server to connect to the Kaspersky Lab
update servers.
The default value is No.
IgnoreProxySettingsForCustomSources
This setting lets you configure the use of a proxy server for connecting to custom sources
of updates. You need to enable this setting if you require access to a proxy server in order
to connect to any of the custom HTTP update servers.
Available values:
Yes—Kaspersky Endpoint Security does not use a proxy server to connect
to the custom update sources.
No—Kaspersky Endpoint Security uses a proxy server to connect to the custom
update sources.
The default value is No.
Appendices
137
ConnectionTimeout
You can use this setting to specify the time to wait (in seconds) for a response from
an update source such as an HTTP server while attempting to connect to it. If an update
source does not respond within the specified time interval, Kaspersky Endpoint Security
contacts the next update source on the list.
You can use only integers within the range from 0 to 120.
The default value is 10.
RetranslationFolder
The setting is available only for update distribution tasks.
You can use this setting to specify the directory to which updates will be copied.
If the specified directory does not exist, Kaspersky Endpoint Security creates it while
running the update distribution task.
[CustomSources.item_#]
The [CustomSources.item_#] section contains the following settings:
URL
This section lets you specify the address of the custom source of updates in the local area
network or on the Internet.
The default value is Not defined.
Examples:
URL=http://example.com/bases/—address of the HTTP server with the directory containing
the updates.
URL=/home/bases/—directory on the protected computer containing the application databases.
Appendices
138
Enabled
This setting lets you enable or disable use of the update source specified in the URL setting.
Use of at least one update source must be enabled before the task can run.
Available values:
Yes—Kaspersky Endpoint Security uses the update source.
No—Kaspersky Endpoint Security does not use the update source.
The default value is Not defined.
Example:
Enabled=Yes
Backup settings
You can configure tasks for Backup by modifying the following settings in the configuration files
of those tasks.
BackupFolder
Path to the Backup folder. You can specify a custom Backup folder that is different from
the default folder.
You can use directories on any computer devices to serve as Backup.
It is not recommended to assign directories that are located on remote computers, such as
those mounted via the Samba and NFS protocols.
Kaspersky Endpoint Security starts to place objects into the specified directory after you
import the settings from the file into the Backup task and restart Kaspersky
Endpoint Security.
Appendices
139
If the specified directory does not exist or is unavailable, Kaspersky Endpoint Security uses
the default Backup directory.
The default value is
/var/opt/kaspersky/kesl/objects-backup/
BackupSizeLimit
Maximum size of Backup.
When the maximum Backup size is reached, Kaspersky Endpoint Security deletes
the oldest objects.
Available values: 0—999,999 (in megabytes).
To remove the Backup size limit, specify the value 0.
The default value is 0.
DaysToLive
Time period for storing objects in Backup (in days).
To remove the time limit for storing objects in Backup, specify the value 0.
The default value is 90.
Kaspersky Endpoint Security command line commands
This section provides information about commands used to manage Kaspersky Endpoint Security
from the command line.
Appendices
140
About managing Kaspersky Endpoint Security from the command line
You can modify the values of Kaspersky Endpoint Security settings.
Adhere to the following rules when entering Kaspersky Endpoint Security commands:
Be case-sensitive.
Separate keys with a space character.
When using the full name of a command or key, enter the value after an equal
(=) character.
Example:
Specify the URL parameter value for the custom update source of the update task (ID=6) from
the command line:
/opt/kaspersky/kesl/bin/kesl-control --set-settings 6
SourceType=Custom CustomSources.item_0000.URL=http://site.domain/path
CustomSources.item_0000.Enabled=Yes
Displaying Kaspersky Endpoint Security command Help
--help
Displays Help for Kaspersky Endpoint Security commands.
Display Kaspersky Endpoint Security events
-W
Enables the display of Kaspersky Endpoint Security events.
Appendices
141
Commands for managing Kaspersky Endpoint Security settings and tasks
-T
Prefix indicating that the command belongs to the group of commands used for managing
Kaspersky Endpoint Security settings / managing tasks (optional).
[-S] --app-info
Displays general information about Kaspersky Endpoint Security.
[-Т] --get-app-settings --file <file name and directory>
Returns the general settings of Kaspersky Endpoint Security.
[-T] --set-app-settings --file <file name and directory>
Sets the general settings of Kaspersky Endpoint Security.
[-T] --get-task-list
Returns the list of existing Kaspersky Endpoint Security tasks.
[-T] --get-task-state <task ID>|<task name>
Displays the status of the specified task.
[-T] --create-task <task name> --type <task type> --file <file name
and directory>
Creates a task of the specified type; imports the settings from the specified configuration
file into the task.
[-T] --delete-task <task ID>|<task name>
Deletes the task.
[-T] --start-task <task ID>|<task name> [-W] [--progress] [--file
<file name and directory>]
Starts the task.
Appendices
142
[-T] --stop-task <task ID>|<task name>
Stops the task.
[-T] --suspend-task <task ID>|<task name>
Suspends the task.
[-T] --resume-task <task ID>|<task name>
Resumes the task.
[-T] --get-settings <task ID>|<task name> --file
<file_name_and_directory>
Returns task settings.
[-T] --set-settings <task ID>|<task name> [<parameters>] [--file
<file name and directory>] [--add-path <path>] [--del-path <path>]
[--add-exclusion <exclusion>] [--del-exclusion <exclusion>]
Sets task settings.
[-T] --scan-file <path> [--action <action>]
Creates and starts a temporary Scan_File task.
Key management commands
-L
Prefix indicating that the command belongs to the group of commands used
to manage keys.
[-L] --install-active-key <activation code>|<key file>
Adds the active key.
[-L] --install-additional-key <activation code>|<key file>
Adds the additional key.
Appendices
143
[-L] --revoke-active-key
Removes the active key.
[-L] --revoke-additional-key
Removes the additional key.
[-L] --query
Displays information about the key.
Commands for managing Backup
-B
Prefix indicating that the command belongs to the group of commands used
to manage Backup.
[-B] --mass-remove --query
Clears the Backup, fully or selectively.
[-B] --query --limit --offset
Displays information about objects in Backup:
--limit
Maximum number of objects for which information is displayed.
--offset
Number of records by which to offset from the start of the sample.
[-B] --restore <object ID> --file <file name and directory>
Restores an object from Backup.
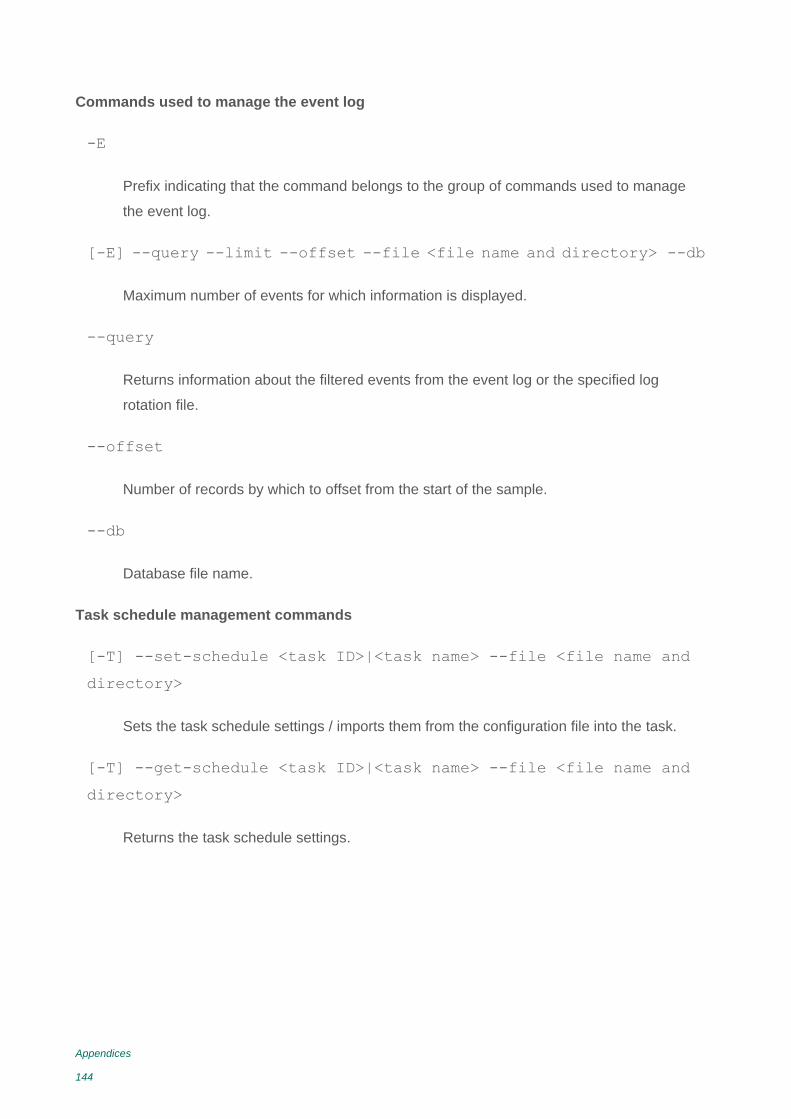
Appendices
144
Commands used to manage the event log
-E
Prefix indicating that the command belongs to the group of commands used to manage
the event log.
[-E] --query --limit --offset --file <file name and directory> --db
Maximum number of events for which information is displayed.
--query
Returns information about the filtered events from the event log or the specified log
rotation file.
--offset
Number of records by which to offset from the start of the sample.
--db
Database file name.
Task schedule management commands
[-T] --set-schedule <task ID>|<task name> --file <file name and
directory>
Sets the task schedule settings / imports them from the configuration file into the task.
[-T] --get-schedule <task ID>|<task name> --file <file name and
directory>
Returns the task schedule settings.
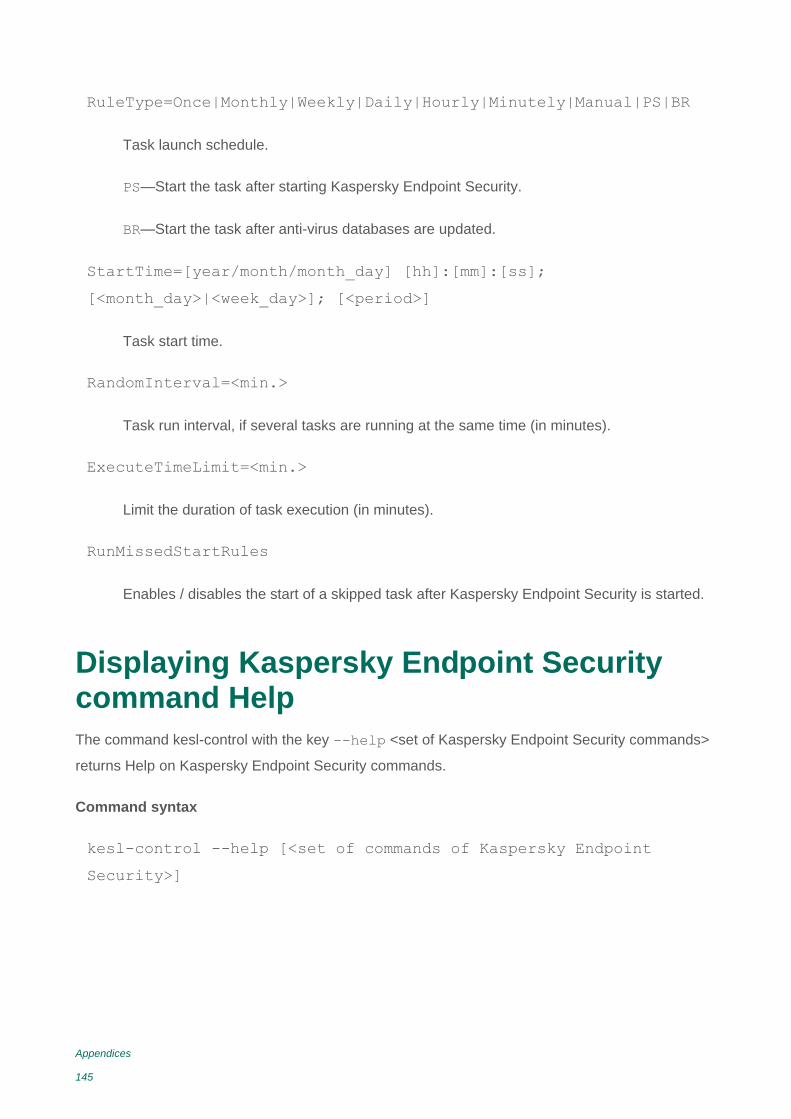
Appendices
145
RuleType=Once|Monthly|Weekly|Daily|Hourly|Minutely|Manual|PS|BR
Task launch schedule.
PS—Start the task after starting Kaspersky Endpoint Security.
BR—Start the task after anti-virus databases are updated.
StartTime=[year/month/month_day] [hh]:[mm]:[ss];
[<month_day>|<week_day>]; [<period>]
Task start time.
RandomInterval=<min.>
Task run interval, if several tasks are running at the same time (in minutes).
ExecuteTimeLimit=<min.>
Limit the duration of task execution (in minutes).
RunMissedStartRules
Enables / disables the start of a skipped task after Kaspersky Endpoint Security is started.
Displaying Kaspersky Endpoint Security command Help
The command kesl-control with the key --help <set of Kaspersky Endpoint Security commands>
returns Help on Kaspersky Endpoint Security commands.
Command syntax
kesl-control --help [<set of commands of Kaspersky Endpoint
Security>]

Appendices
146
<set of commands of Kaspersky Endpoint Security>
Available values:
[-T]—Commands for managing the tasks and general settings of Kaspersky
Endpoint Security.
[-L]—Key management commands.
[-B]—Backup management commands.
[-E]—Commands for managing Kaspersky Endpoint Security events.
Enabling the display of events
The command -W enables the display of Kaspersky Endpoint Security events. You can use this
command either separately to display all Kaspersky Endpoint Security events or together
with the --start-task command (start a task (see section "Starting and stopping a task"
on page 49)) to display only events associated with the running task. You can use --query
with the -W flag to display only specific events.
The command returns the name of the event and additional information about the event.
Command syntax
kesl-control -W
Examples:
Enable the display of Kaspersky Endpoint Security events:
/opt/kaspersky/kesl/bin/kesl-control -W
Quick scan of files and directories
The command --scan-file creates and starts a temporary Scan_File task.
Kaspersky Endpoint Security deletes the task after it completes or after the application is restarted.
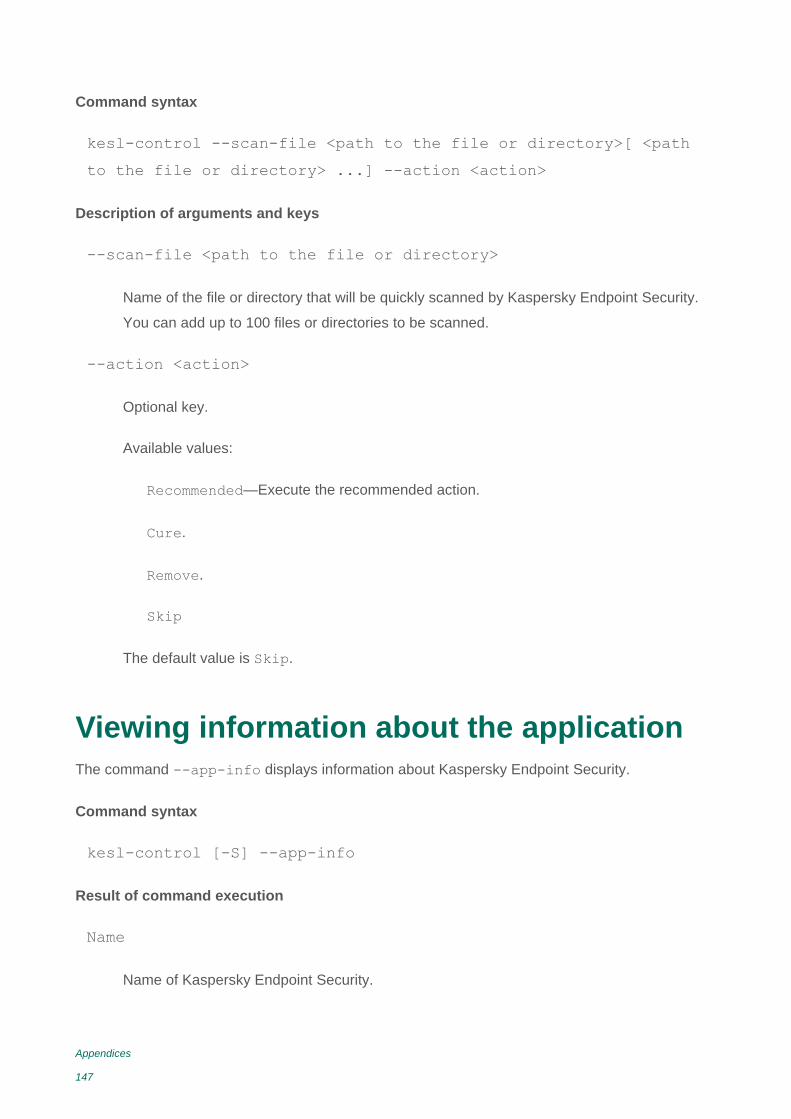
Appendices
147
Command syntax
kesl-control --scan-file <path to the file or directory>[ <path
to the file or directory> ...] --action <action>
Description of arguments and keys
--scan-file <path to the file or directory>
Name of the file or directory that will be quickly scanned by Kaspersky Endpoint Security.
You can add up to 100 files or directories to be scanned.
--action <action>
Optional key.
Available values:
Recommended—Execute the recommended action.
Cure.
Remove.
Skip
The default value is Skip.
Viewing information about the application
The command --app-info displays information about Kaspersky Endpoint Security.
Command syntax
kesl-control [-S] --app-info
Result of command execution
Name
Name of Kaspersky Endpoint Security.
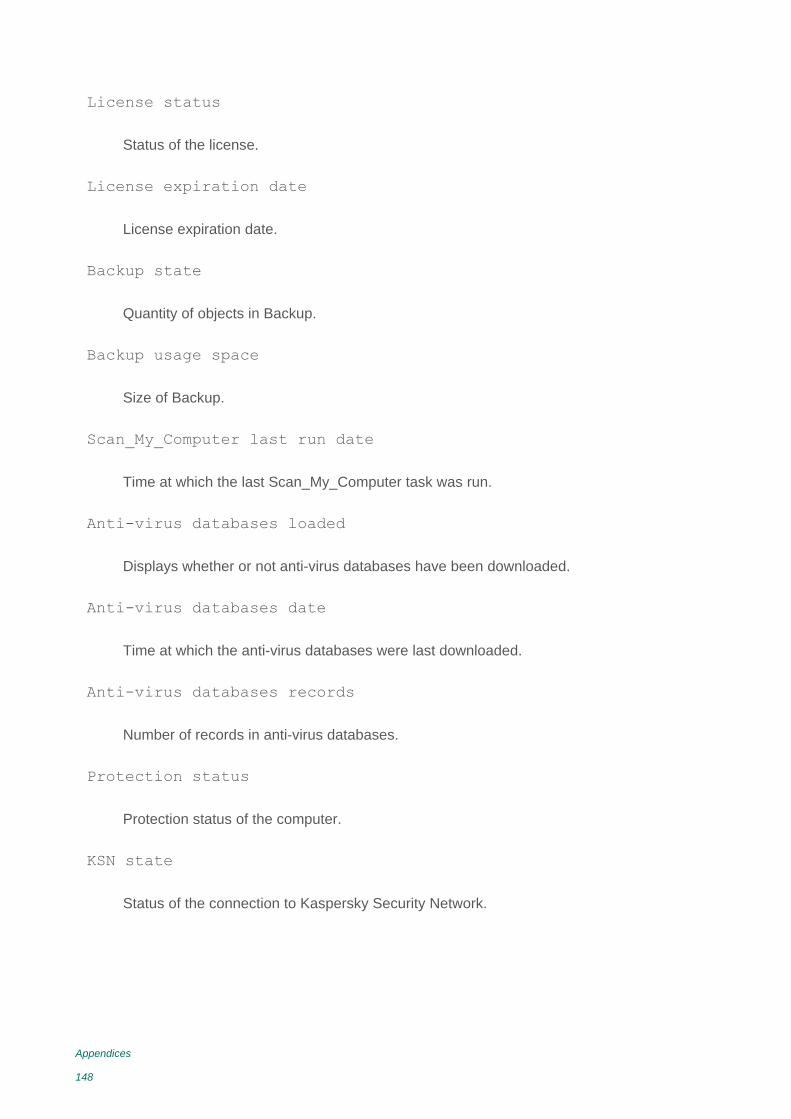
Appendices
148
License status
Status of the license.
License expiration date
License expiration date.
Backup state
Quantity of objects in Backup.
Backup usage space
Size of Backup.
Scan_My_Computer last run date
Time at which the last Scan_My_Computer task was run.
Anti-virus databases loaded
Displays whether or not anti-virus databases have been downloaded.
Anti-virus databases date
Time at which the anti-virus databases were last downloaded.
Anti-virus databases records
Number of records in anti-virus databases.
Protection status
Protection status of the computer.
KSN state
Status of the connection to Kaspersky Security Network.
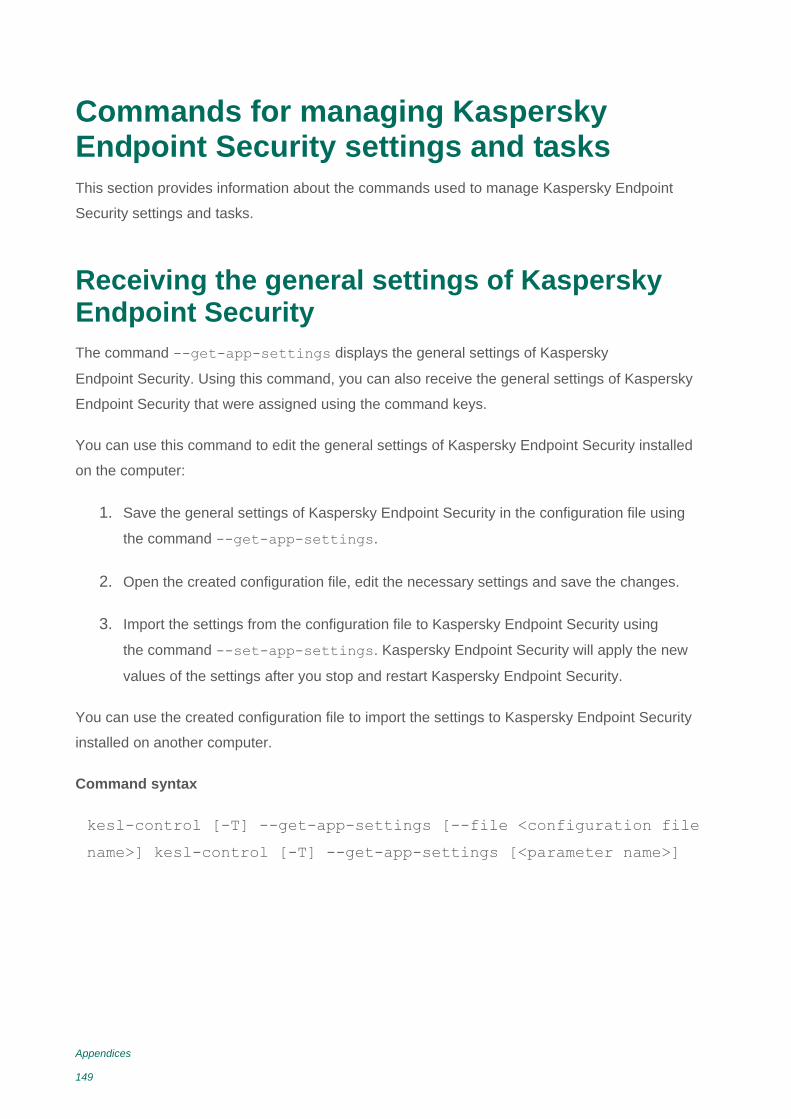
Appendices
149
Commands for managing Kaspersky Endpoint Security settings and tasks
This section provides information about the commands used to manage Kaspersky Endpoint
Security settings and tasks.
Receiving the general settings of Kaspersky Endpoint Security
The command --get-app-settings displays the general settings of Kaspersky
Endpoint Security. Using this command, you can also receive the general settings of Kaspersky
Endpoint Security that were assigned using the command keys.
You can use this command to edit the general settings of Kaspersky Endpoint Security installed
on the computer:
1. Save the general settings of Kaspersky Endpoint Security in the configuration file using
the command --get-app-settings.
2. Open the created configuration file, edit the necessary settings and save the changes.
3. Import the settings from the configuration file to Kaspersky Endpoint Security using
the command --set-app-settings. Kaspersky Endpoint Security will apply the new
values of the settings after you stop and restart Kaspersky Endpoint Security.
You can use the created configuration file to import the settings to Kaspersky Endpoint Security
installed on another computer.
Command syntax
kesl-control [-T] --get-app-settings [--file <configuration file
name>] kesl-control [-T] --get-app-settings [<parameter name>]

Appendices
150
Arguments and keys
--file <name of configuration file>
Name of the configuration file in which Kaspersky Endpoint Security settings will be saved.
If you specify the name of a file without specifying its path, the file will be created
in the current directory. If a file with the specified name already exists in the specified path,
it will be overwritten. If the specified directory cannot be found on the disk, the configuration
file will not be created.
Examples:
Export the general settings of Kaspersky Endpoint Security to a file named kesl_сonfig.ini.
Save the created file in the current directory:
/opt/kaspersky/kesl/bin/kesl-control --get-app-settings --file
kesl_config.ini
Return the value of the TraceLevel parameter:
/opt/kaspersky/kesl/bin/kesl-control --get-app-settings
TraceLevel
Editing the general settings of Kaspersky Endpoint Security
The command --set-app-settings sets the general settings of Kaspersky Endpoint Security
using the command keys or imports the general settings of Kaspersky Endpoint Security from
the specified configuration file.
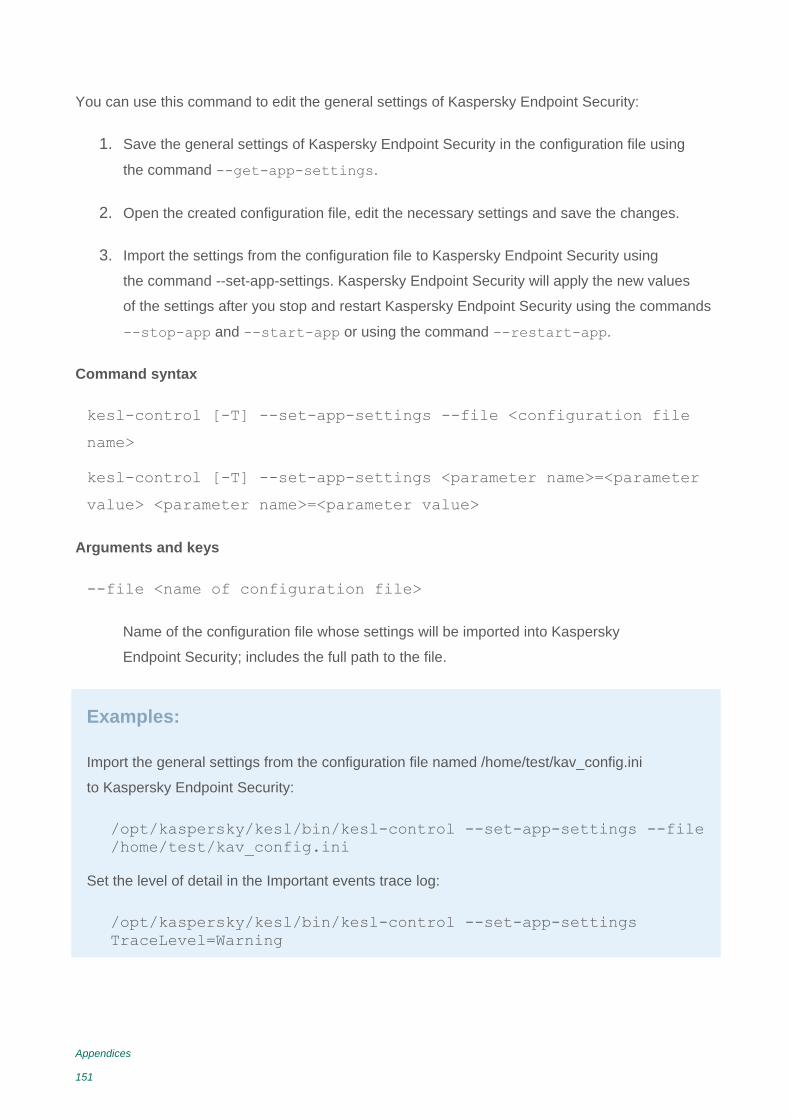
Appendices
151
You can use this command to edit the general settings of Kaspersky Endpoint Security:
1. Save the general settings of Kaspersky Endpoint Security in the configuration file using
the command --get-app-settings.
2. Open the created configuration file, edit the necessary settings and save the changes.
3. Import the settings from the configuration file to Kaspersky Endpoint Security using
the command --set-app-settings. Kaspersky Endpoint Security will apply the new values
of the settings after you stop and restart Kaspersky Endpoint Security using the commands
--stop-app and --start-app or using the command --restart-app.
Command syntax
kesl-control [-T] --set-app-settings --file <configuration file
name>
kesl-control [-T] --set-app-settings <parameter name>=<parameter
value> <parameter name>=<parameter value>
Arguments and keys
--file <name of configuration file>
Name of the configuration file whose settings will be imported into Kaspersky
Endpoint Security; includes the full path to the file.
Examples:
Import the general settings from the configuration file named /home/test/kav_сonfig.ini
to Kaspersky Endpoint Security:
/opt/kaspersky/kesl/bin/kesl-control --set-app-settings --file
/home/test/kav_сonfig.ini
Set the level of detail in the Important events trace log:
/opt/kaspersky/kesl/bin/kesl-control --set-app-settings
TraceLevel=Warning
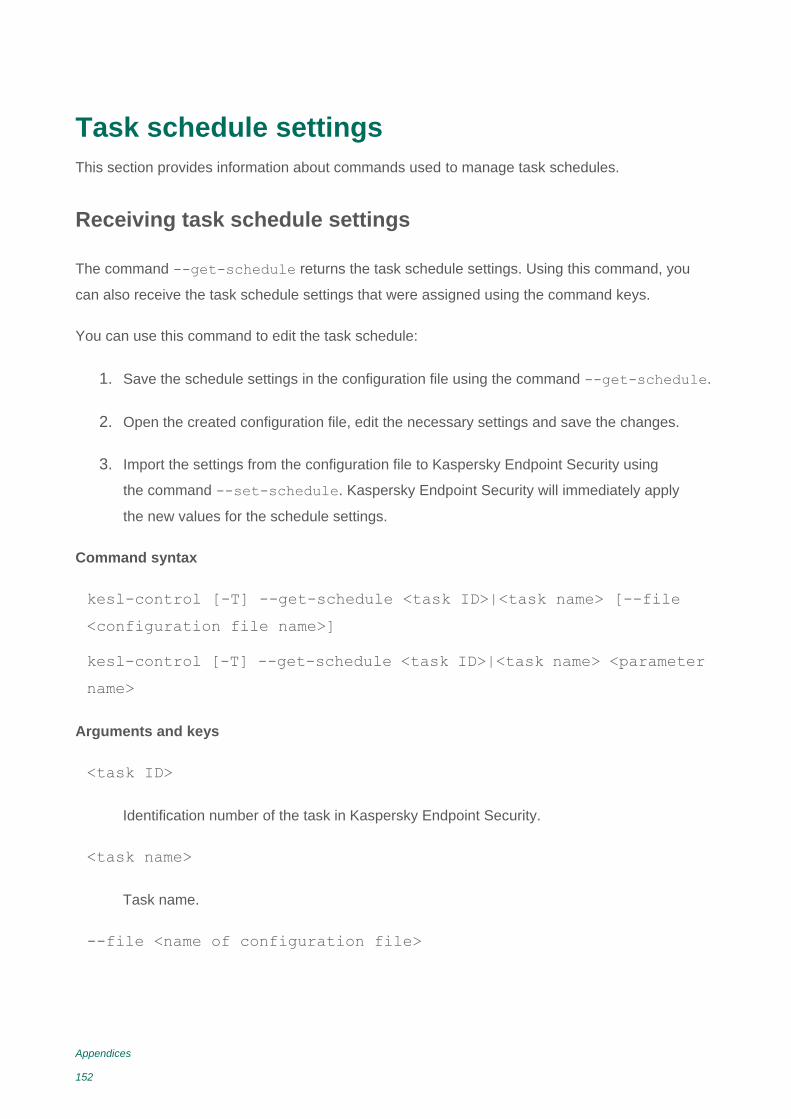
Appendices
152
Task schedule settings
This section provides information about commands used to manage task schedules.
Receiving task schedule settings
The command --get-schedule returns the task schedule settings. Using this command, you
can also receive the task schedule settings that were assigned using the command keys.
You can use this command to edit the task schedule:
1. Save the schedule settings in the configuration file using the command --get-schedule.
2. Open the created configuration file, edit the necessary settings and save the changes.
3. Import the settings from the configuration file to Kaspersky Endpoint Security using
the command --set-schedule. Kaspersky Endpoint Security will immediately apply
the new values for the schedule settings.
Command syntax
kesl-control [-T] --get-schedule <task ID>|<task name> [--file
<configuration file name>]
kesl-control [-T] --get-schedule <task ID>|<task name> <parameter
name>
Arguments and keys
<task ID>
Identification number of the task in Kaspersky Endpoint Security.
<task name>
Task name.
--file <name of configuration file>

Appendices
153
Name of the configuration file in which the schedule settings will be saved. If you specify
the name of a file without specifying its path, the file will be created in the current directory.
If a file with the specified name already exists in the specified path, it will be overwritten.
If the specified directory cannot be found on the disk, the configuration file
will not be created.
Examples:
Save Kaspersky Endpoint Security settings to a file named on_demand_schedule.ini.
Save the created file in the current directory:
/opt/kaspersky/kesl/bin/kesl-control --get-schedule 9 --file
on_demand_schedule.ini
Return the value of the RuleType parameter of the real-time protection task schedule:
/opt/kaspersky/kesl/bin/kesl-control --get-schedule 9 RuleType
Editing task schedule settings
The command --set-schedule sets the task schedule settings using the command keys or
imports the task schedule settings from the specified configuration file.
You can use this command to edit the settings of Kaspersky Endpoint Security:
1. Save the schedule settings in the configuration file using the command --get-schedule.
2. Open the created configuration file, edit the necessary settings and save the changes.
3. Import the settings from the configuration file to Kaspersky Endpoint Security using
the command -T --set-schedule. Kaspersky Endpoint Security will immediately apply
the new values for the schedule settings.
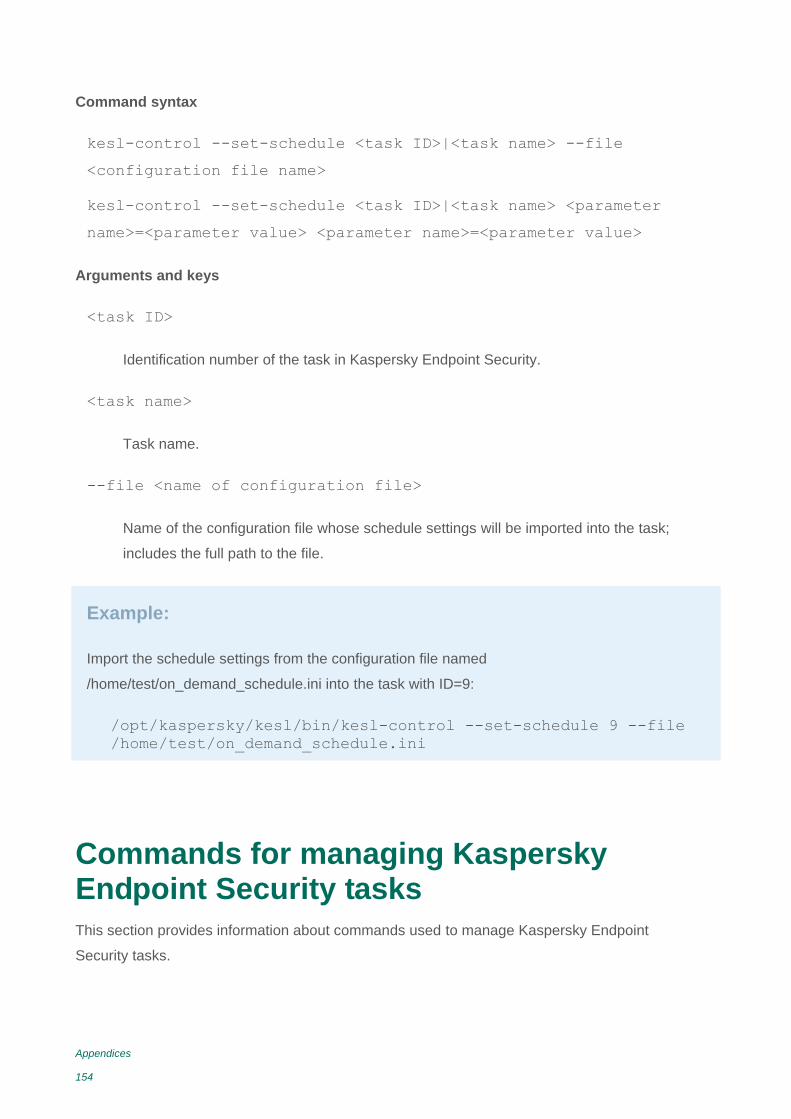
Appendices
154
Command syntax
kesl-control --set-schedule <task ID>|<task name> --file
<configuration file name>
kesl-control --set-schedule <task ID>|<task name> <parameter
name>=<parameter value> <parameter name>=<parameter value>
Arguments and keys
<task ID>
Identification number of the task in Kaspersky Endpoint Security.
<task name>
Task name.
--file <name of configuration file>
Name of the configuration file whose schedule settings will be imported into the task;
includes the full path to the file.
Example:
Import the schedule settings from the configuration file named
/home/test/on_demand_schedule.ini into the task with ID=9:
/opt/kaspersky/kesl/bin/kesl-control --set-schedule 9 --file
/home/test/on_demand_schedule.ini
Commands for managing Kaspersky Endpoint Security tasks
This section provides information about commands used to manage Kaspersky Endpoint
Security tasks.
Appendices
155
Creating a task
The --create-task command creates an update task or an on-demand scan task.
The command imports settings from the specified configuration file into the task and displays
the ID of the task that has been created.
Command syntax
kesl-control [-T] --create-task <task name> --type <task type>
[--file <configuration file name>]
Description and possible values of arguments and keys
--create-task <task name>
To assign a name to the task.
The task name must begin with a letter of the Latin alphabet and must be unique. The task
name can contain an unlimited number of ASCII characters.
--type <task type>
Mandatory key.
Specify the type of task being created. You can read about the possible values
in the section on Kaspersky Endpoint Security tasks (see section "About Kaspersky
Endpoint Security tasks" on page 48).
--file <name of configuration file>
Optional key.
To specify the full path to the existing configuration file.
Kaspersky Endpoint Security imports the settings specified in this configuration file into
the task.
Appendices
156
Example:
Create an on-demand scan task named Fridayscan. Import the settings from the configuration file
/home/test/config_kesscanner.ini into the task:
/opt/kaspersky/kesl/bin/kesl-control --create-task Fridayscan
--type ODS --file /home/test/config_kesscanner.ini
Deleting a task
The command --delete-task deletes the Kaspersky Endpoint Security task with the specified
identification number or name.
You can delete custom tasks.
Command syntax
kesl-control --delete-task <task ID>|<task name>
Description of arguments
<task ID>
Task identification number (ID). To view the identification numbers of Kaspersky Endpoint
Security tasks, use the command --get-task-list (see page 162).
<task name>
Task name.
Example:
Delete the task with ID=20:
/opt/kaspersky/kesl/bin/kesl-control --delete-task 20

Appendices
157
Starting a task
The command --start-task starts the task with the specified identification number or name.
You can start the following types of tasks: OAS, ODS, BootScan, MemoryScan, Rollback,
Retranslate and Update.
This command can be used with the key -W, which returns information about events occurring
during execution of the task. When the task finishes, tracking of events is stopped.
Command syntax
kesl-control --start-task <task ID>|<task name> --[progress]
Description of arguments and keys
<task ID>
Task identification number (ID). To view the identification numbers of Kaspersky Endpoint
Security tasks, use the command --get-task-list (see page 162).
<task name>
Task name.
--progress
Display the progress of task execution (except the real-time protection task).
Appendices
158
Examples:
Start the task with ID=6:
/opt/kaspersky/kesl/bin/kesl-control --start-task 6
Start the task named UpdateTask1 and display information about events occurring during
execution of the task:
/opt/kaspersky/kesl/bin/kesl-control --start-task
UpdateTask1 -W
Start the on-demand scan task and display the progress of task execution:
/opt/kaspersky/kesl/bin/kesl-control --start-task 2 --progress
Stopping a task
The command --stop-task stops the task with the specified identification number or name.
You can stop all types of tasks except Backup and License tasks.
This command can be used with the key -W, which returns information about events occurring
during execution of the task. When the task finishes, tracking of events is stopped.
Command syntax
kesl-control --stop-task <task ID>|<task name>
Description of arguments
<task ID>
Task identification number (ID). To view the identification numbers of Kaspersky Endpoint
Security tasks, use the command --get-task-list (see page 162).
<task name>
Task name.
Appendices
159
Examples:
Stop the task with ID=6:
/opt/kaspersky/kesl/bin/kesl-control --stop-task 6
Stop the task named ODStask and display information about events occurring during execution
of the task:
/opt/kaspersky/kesl/bin/kesl-control --stop-task ODStask -W
Suspending a task
The command --suspend-task suspends the task with the specified identification number
or name.
You can suspend the following types of tasks: Update, Retranslate, Rollback, ODS, BootScan
and MemoryScan.
Command syntax
kesl-control --suspend-task <task ID>|<task name>
Description of arguments
<task ID>
Task identification number (ID). To view the identification numbers of Kaspersky Endpoint
Security tasks, use the command --get-task-list (see page 162).
<task name>
Task name.

Appendices
160
Example:
Suspend the task with ID=19:
/opt/kaspersky/kesl/bin/kesl-control --suspend-task 19
Resuming a task
The command --resume-task resumes the task with the specified identification number or name
that was suspended with the command --suspend-task.
You can resume the following tasks: Update, Retranslate, Rollback, ODS, BootScan
and MemoryScan.
Command syntax
kesl-control --resume-task <task ID>|<task name>
Description of arguments
<task ID>
Task identification number (ID). To view the identification numbers of Kaspersky Endpoint
Security tasks, use the command --get-task-list (see page 162).
<task name>
Task name.
Example:
Resume the task with ID=19:
/opt/kaspersky/kesl/bin/kesl-control --resume-task 19
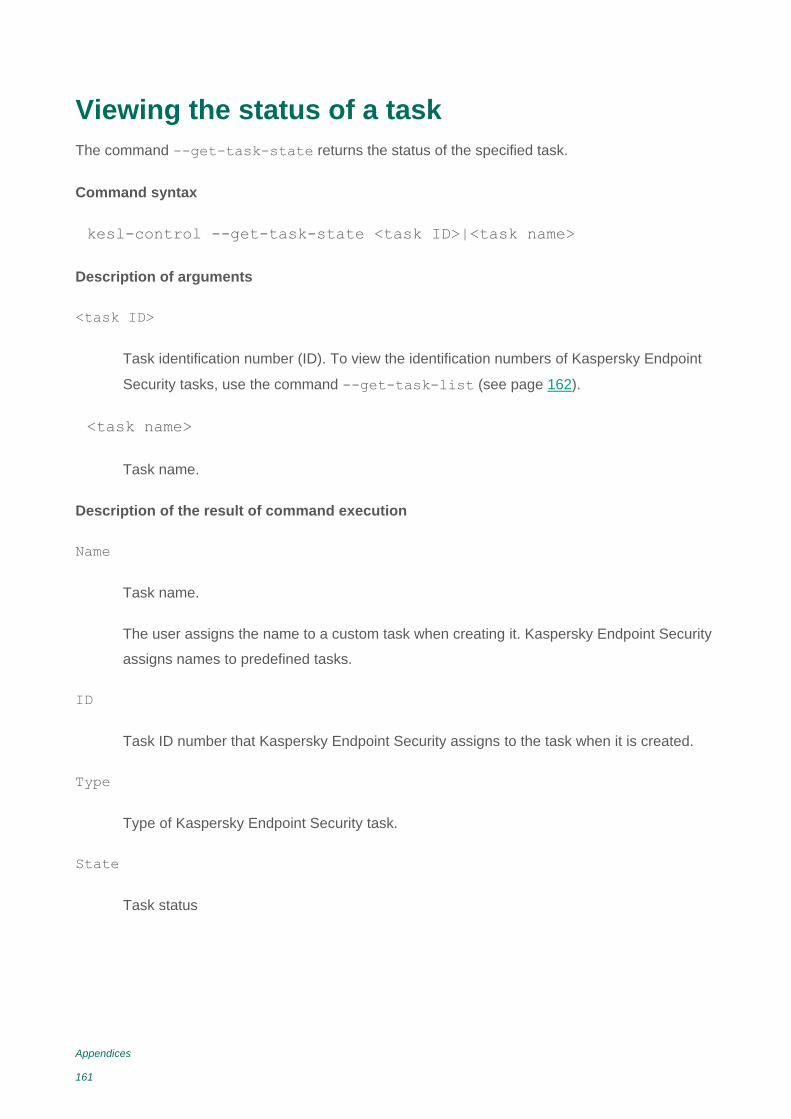
Appendices
161
Viewing the status of a task
The command --get-task-state returns the status of the specified task.
Command syntax
kesl-control --get-task-state <task ID>|<task name>
Description of arguments
<task ID>
Task identification number (ID). To view the identification numbers of Kaspersky Endpoint
Security tasks, use the command --get-task-list (see page 162).
<task name>
Task name.
Description of the result of command execution
Name
Task name.
The user assigns the name to a custom task when creating it. Kaspersky Endpoint Security
assigns names to predefined tasks.
ID
Task ID number that Kaspersky Endpoint Security assigns to the task when it is created.
Type
Type of Kaspersky Endpoint Security task.
State
Task status
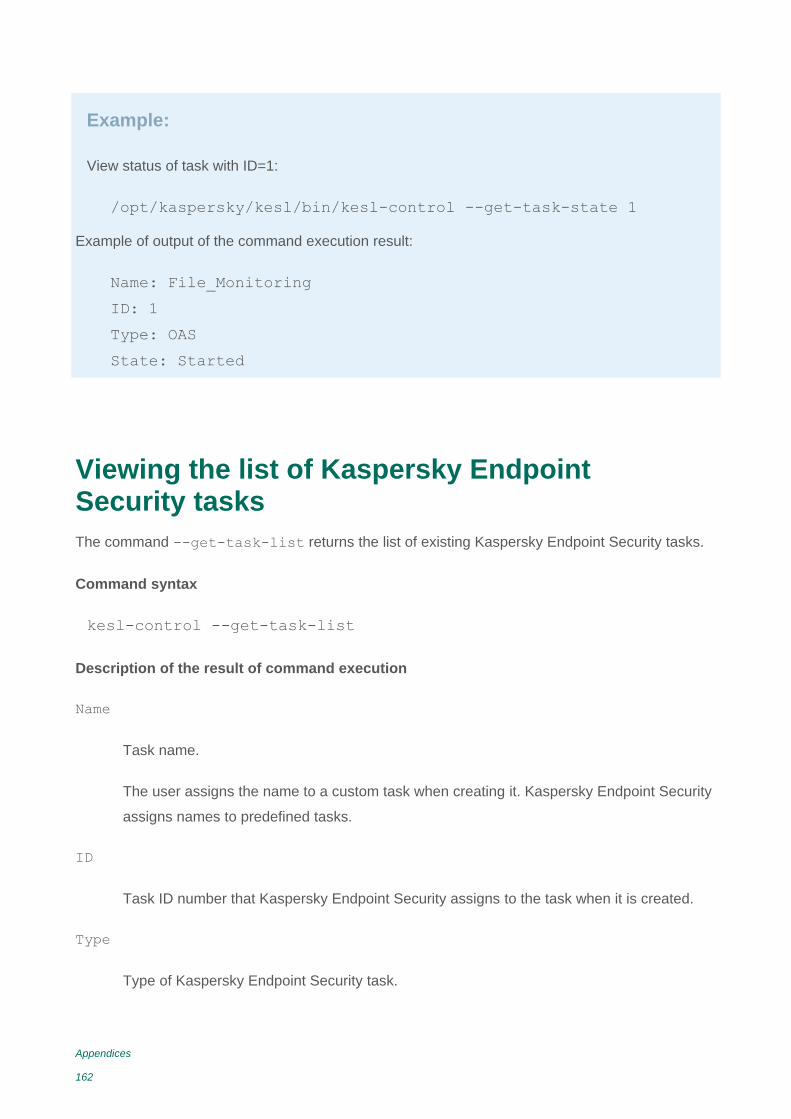
Appendices
162
Example:
View status of task with ID=1:
/opt/kaspersky/kesl/bin/kesl-control --get-task-state 1
Example of output of the command execution result:
Name: File_Monitoring
ID: 1
Type: OAS
State: Started
Viewing the list of Kaspersky Endpoint Security tasks
The command --get-task-list returns the list of existing Kaspersky Endpoint Security tasks.
Command syntax
kesl-control --get-task-list
Description of the result of command execution
Name
Task name.
The user assigns the name to a custom task when creating it. Kaspersky Endpoint Security
assigns names to predefined tasks.
ID
Task ID number that Kaspersky Endpoint Security assigns to the task when it is created.
Type
Type of Kaspersky Endpoint Security task.

Appendices
163
State
Task status
Receiving task settings
The command --get-settings returns all settings of the specified task or its settings that
were assigned using the command keys.
You can export the task settings to a configuration file on one computer, and import the settings
from that configuration file to the task of the corresponding type on another computer.
Command syntax
kesl-control --get-settings <task ID>|<task name> [--file
<configuration file name>]
kesl-control --get-settings <task ID>|<task name> <INI file section
name>.<parameter name>
Description and possible values of arguments and keys
<task ID>
Task ID number.
<task name>
Task name.
--file <name of configuration file>
Name of the configuration file in which the task settings will be saved. If you do not specify
the file path, the file will be created in the current directory. If a file with the specified name
already exists in the specified path, it will be overwritten. If the specified directory cannot
be found, the configuration file will not be created.
You can save a configuration file in INI format.
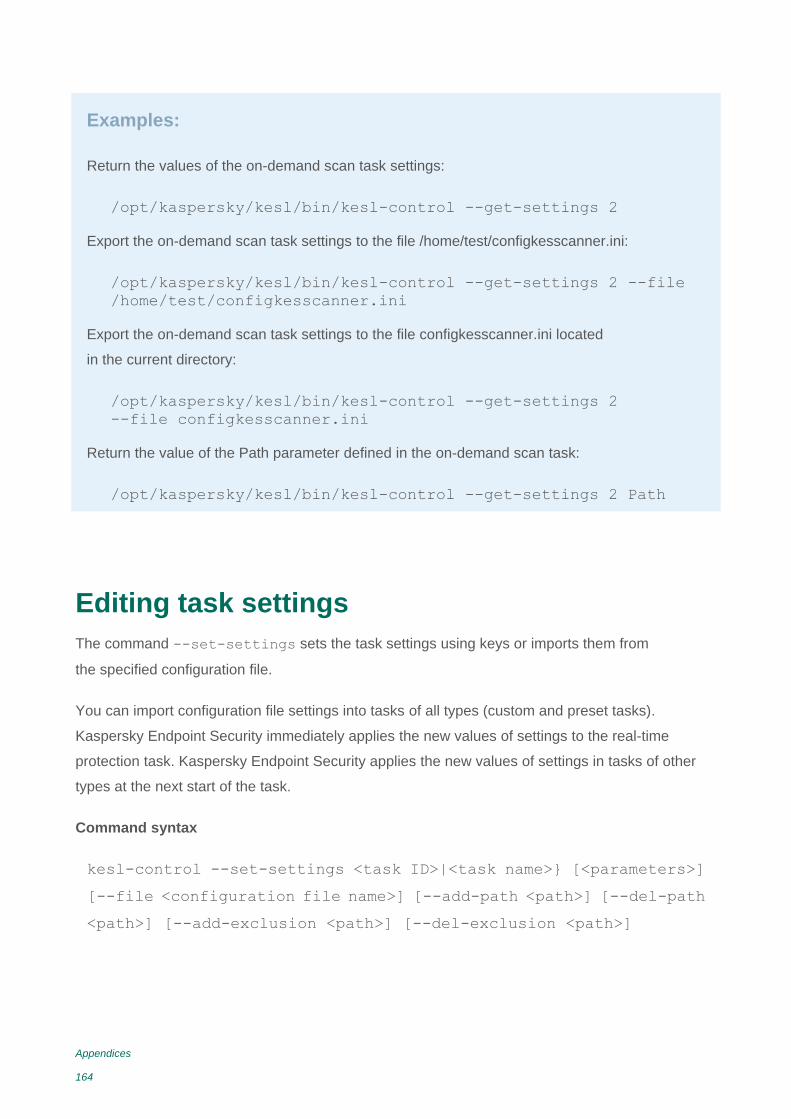
Appendices
164
Examples:
Return the values of the on-demand scan task settings:
/opt/kaspersky/kesl/bin/kesl-control --get-settings 2
Export the on-demand scan task settings to the file /home/test/configkesscanner.ini:
/opt/kaspersky/kesl/bin/kesl-control --get-settings 2 --file
/home/test/configkesscanner.ini
Export the on-demand scan task settings to the file configkesscanner.ini located
in the current directory:
/opt/kaspersky/kesl/bin/kesl-control --get-settings 2
--file configkesscanner.ini
Return the value of the Path parameter defined in the on-demand scan task:
/opt/kaspersky/kesl/bin/kesl-control --get-settings 2 Path
Editing task settings
The command --set-settings sets the task settings using keys or imports them from
the specified configuration file.
You can import configuration file settings into tasks of all types (custom and preset tasks).
Kaspersky Endpoint Security immediately applies the new values of settings to the real-time
protection task. Kaspersky Endpoint Security applies the new values of settings in tasks of other
types at the next start of the task.
Command syntax
kesl-control --set-settings <task ID>|<task name>} [<parameters>]
[--file <configuration file name>] [--add-path <path>] [--del-path
<path>] [--add-exclusion <path>] [--del-exclusion <path>]
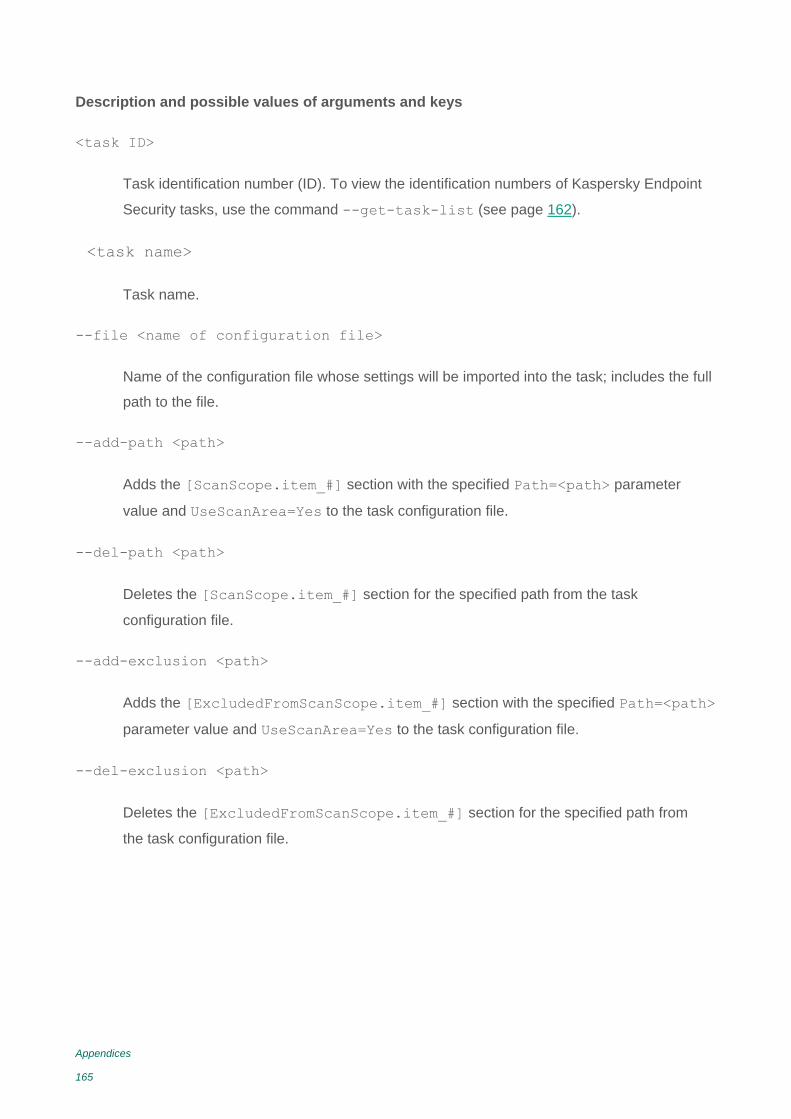
Appendices
165
Description and possible values of arguments and keys
<task ID>
Task identification number (ID). To view the identification numbers of Kaspersky Endpoint
Security tasks, use the command --get-task-list (see page 162).
<task name>
Task name.
--file <name of configuration file>
Name of the configuration file whose settings will be imported into the task; includes the full
path to the file.
--add-path <path>
Adds the [ScanScope.item_#] section with the specified Path=<path> parameter
value and UseScanArea=Yes to the task configuration file.
--del-path <path>
Deletes the [ScanScope.item_#] section for the specified path from the task
configuration file.
--add-exclusion <path>
Adds the [ExcludedFromScanScope.item_#] section with the specified Path=<path>
parameter value and UseScanArea=Yes to the task configuration file.
--del-exclusion <path>
Deletes the [ExcludedFromScanScope.item_#] section for the specified path from
the task configuration file.
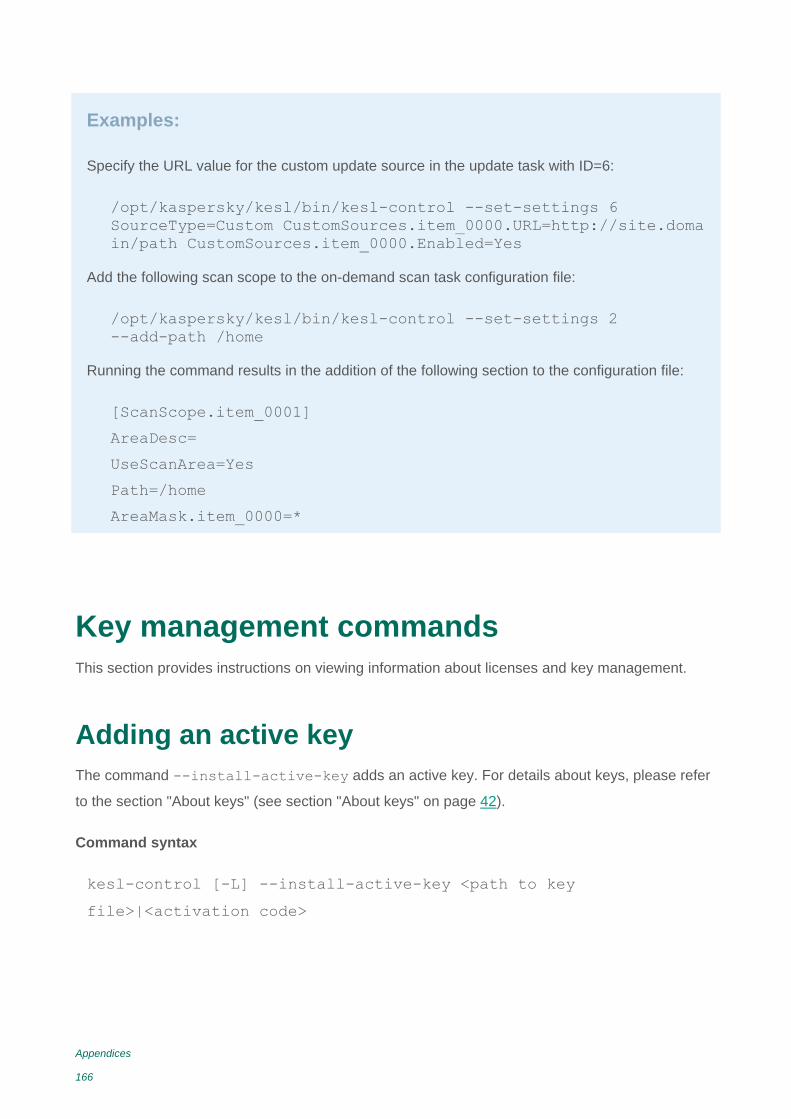
Appendices
166
Examples:
Specify the URL value for the custom update source in the update task with ID=6:
/opt/kaspersky/kesl/bin/kesl-control --set-settings 6
SourceType=Custom CustomSources.item_0000.URL=http://site.doma
in/path CustomSources.item_0000.Enabled=Yes
Add the following scan scope to the on-demand scan task configuration file:
/opt/kaspersky/kesl/bin/kesl-control --set-settings 2
--add-path /home
Running the command results in the addition of the following section to the configuration file:
[ScanScope.item_0001]
AreaDesc=
UseScanArea=Yes
Path=/home
AreaMask.item_0000=*
Key management commands
This section provides instructions on viewing information about licenses and key management.
Adding an active key
The command --install-active-key adds an active key. For details about keys, please refer
to the section "About keys" (see section "About keys" on page 42).
Command syntax
kesl-control [-L] --install-active-key <path to key
file>|<activation code>
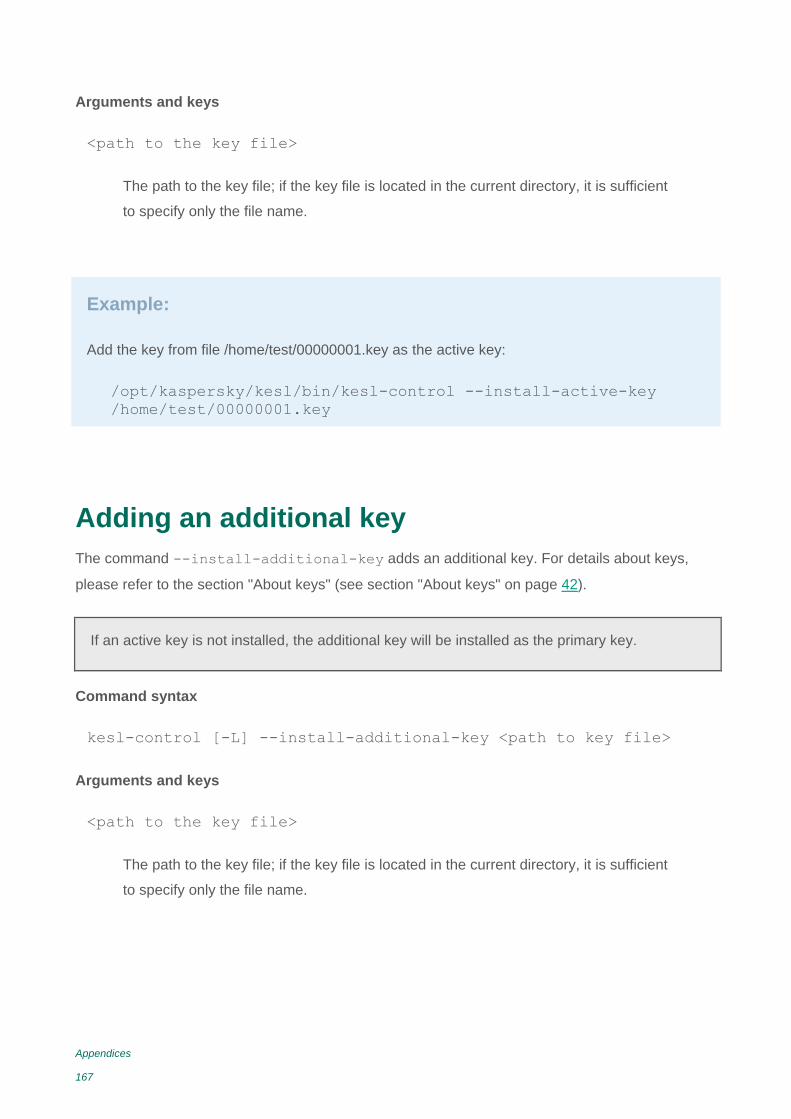
Appendices
167
Arguments and keys
<path to the key file>
The path to the key file; if the key file is located in the current directory, it is sufficient
to specify only the file name.
Example:
Add the key from file /home/test/00000001.key as the active key:
/opt/kaspersky/kesl/bin/kesl-control --install-active-key
/home/test/00000001.key
Adding an additional key
The command --install-additional-key adds an additional key. For details about keys,
please refer to the section "About keys" (see section "About keys" on page 42).
If an active key is not installed, the additional key will be installed as the primary key.
Command syntax
kesl-control [-L] --install-additional-key <path to key file>
Arguments and keys
<path to the key file>
The path to the key file; if the key file is located in the current directory, it is sufficient
to specify only the file name.

Appendices
168
Example:
Install an additional key from the file /home/test/00000002.key:
/opt/kaspersky/kesl/bin/kesl-control --install-additional-key
/home/test/00000002.key
Removing the active key
The command --revoke-active-key removes the active key.
Command syntax
kesl-control [-L] --revoke-active-key
Removing the additional key
The command --revoke-additional-key removes the additional key.
Command syntax
kesl-control [-L] --revoke-additional-key
Entering an additional activation code
The command --install-additional-key enters the additional activation code. For more
details on activation codes, see section "About the activation code" (see page 41).
Command syntax
kesl-control [-L] --install-additional-key <activation code>
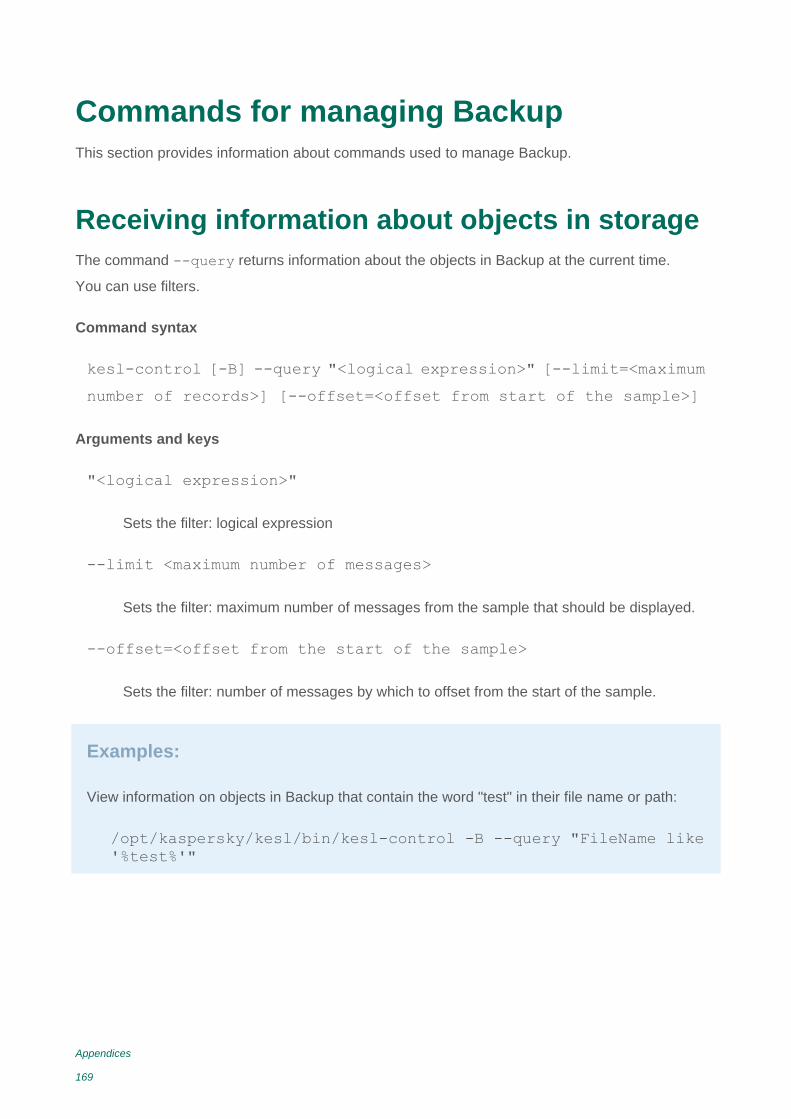
Appendices
169
Commands for managing Backup
This section provides information about commands used to manage Backup.
Receiving information about objects in storage
The command --query returns information about the objects in Backup at the current time.
You can use filters.
Command syntax
kesl-control [-B] --query "<logical expression>" [--limit=<maximum
number of records>] [--offset=<offset from start of the sample>]
Arguments and keys
"<logical expression>"
Sets the filter: logical expression
--limit <maximum number of messages>
Sets the filter: maximum number of messages from the sample that should be displayed.
--offset=<offset from the start of the sample>
Sets the filter: number of messages by which to offset from the start of the sample.
Examples:
View information on objects in Backup that contain the word "test" in their file name or path:
/opt/kaspersky/kesl/bin/kesl-control -B --query "FileName like
'%test%'"
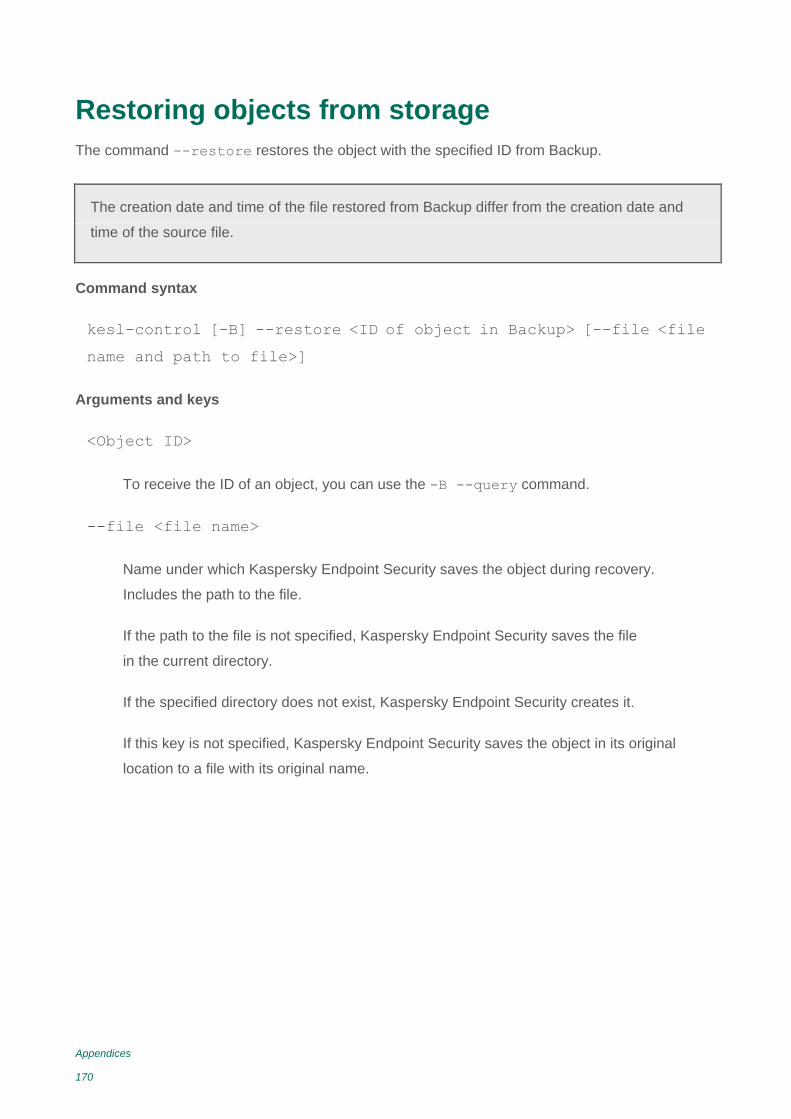
Appendices
170
Restoring objects from storage
The command --restore restores the object with the specified ID from Backup.
The creation date and time of the file restored from Backup differ from the creation date and
time of the source file.
Command syntax
kesl-control [-B] --restore <ID of object in Backup> [--file <file
name and path to file>]
Arguments and keys
<Object ID>
To receive the ID of an object, you can use the -B --query command.
--file <file name>
Name under which Kaspersky Endpoint Security saves the object during recovery.
Includes the path to the file.
If the path to the file is not specified, Kaspersky Endpoint Security saves the file
in the current directory.
If the specified directory does not exist, Kaspersky Endpoint Security creates it.
If this key is not specified, Kaspersky Endpoint Security saves the object in its original
location to a file with its original name.
Appendices
171
Examples:
Restore the object with ID=1 in its original location:
/opt/kaspersky/kesl/bin/kesl-control -[B] --restore 1
Restore the object with ID=1 in the current directory to a file named restored.exe:
/opt/kaspersky/kesl/bin/kesl-control --restore 1
--file restored.exe
Restore the object and indicate its new name and location:
/opt/kaspersky/kesl/bin/kesl-control --restore 1 --file
/newpath/newfile
Command line return codes
This section contains a description of return codes from the command line.
0—Command / task completed successfully.
1—General error in command arguments.
2—Error in passed application settings.
64—Kaspersky Endpoint Security is not running.
66—Anti-virus databases have not been downloaded (used only for the command --app-info).
67—Activation 2.0 ended with an error due to network problems.
68—The command cannot be executed because the application is running under a policy.
128—Unknown error.
65—All other errors.
AO Kaspersky Lab
Kaspersky Lab is an internationally renowned vendor of systems for computer protection against
various types of threats, including viruses, malware, spam, network and hacker attacks.
In 2008, Kaspersky Lab was rated among the world’s top four leading vendors of information
security software solutions for end users (IDC Worldwide Endpoint Security Revenue by Vendor).
Kaspersky Lab is the preferred vendor of computer protection systems for home users in Russia
(“IDC Endpoint Tracker 2014”).
Kaspersky Lab was founded in 1997 in Russia. Today, Kaspersky Lab is an international group
of companies running 38 offices in 33 countries. The company employs more than 3000 highly
qualified specialists.
Products. Kaspersky Lab products protect both home computers and corporate networks.
The personal product range includes applications that provide information security for desktop,
laptop, and tablet computers, as well as for smartphones and other mobile devices.
The company offers protection and control solutions and technologies for workstations and mobile
devices, virtual machines, file and web servers, mail gateways, and firewalls. The company's
portfolio also features specialized products providing protection against DDoS attacks, protection
for industrial control systems, and prevention of financial fraud. Used in conjunction with Kaspersky
Lab’s centralized management tools, these solutions ensure effective automated protection against
computer threats for organizations of any scale. Kaspersky Lab products are certified by major
testing laboratories, compatible with the applications of most software vendors, and optimized
for work on most hardware platforms.
Virus analysts work around the clock at Kaspersky Lab. Every day they uncover hundreds
of thousands of new computer threats, create tools to detect and disinfect them, and include
the signatures of these threats in the databases used by Kaspersky Lab applications.
Technologies. Many of technologies that make part of any modern anti-virus were first developed
by Kaspersky Lab. It is no coincidence that many other developers use the Kaspersky Anti-Virus
kernel in their products, including: Alcatel-Lucent, Alt-N, Asus, BAE Systems, Blue Coat, Check
Point, Cisco Meraki, Clearswift, D-Link, Facebook, General Dynamics, H3C, Juniper Networks,
AO Kaspersky Lab
173
Lenovo, Microsoft, NETGEAR, Openwave Messaging, Parallels, Qualcomm, Samsung,
Stormshield, Toshiba, Trustwave, Vertu, ZyXEL. Many of the company's innovative technologies
are backed by patents.
Achievements. Years of struggle against computer threats have brought hundreds of awards
to Kaspersky Lab. Following tests and research conducted by the reputed Austrian test laboratory
AV-Comparatives in 2014, Kaspersky Lab ranked among the top two vendors by the number
of Advanced+ certificates earned and was eventually awarded the Top Rated certificate. However,
the most important award to Kaspersky Lab is the commitment of users all over the world.
The company's products and technologies protect more than 400 million users. Its corporate
clients include more than 270,000 organizations.
Kaspersky Lab website: http://www.kaspersky.com
Virus Encyclopedia: https://securelist.com/
Virus Lab: http://newvirus.kaspersky.com (for analyzing
suspicious files and websites)
Kaspersky Lab web forum: http://forum.kaspersky.com

Information about third-party code
Information about third-party code is contained in the file legal_notices.txt located in the application
installation folder.
Trademark notices
175
Trademark notices
Registered trademarks and service marks are the property of their respective owners.
Core is a trademark of Intel Corporation registered in the United States and elsewhere.
Linux is a trademark of Linus Torvalds, registered in the USA and elsewhere.
Microsoft, Outlook, Visual C++, and Windows are trademarks of Microsoft Corporation registered
in the United States and elsewhere.
Novell is a trademark of Novell Inc. registered in the USA and elsewhere.
Red Hat, Red Hat Enterprise Linux, and CentOS are trademarks of Red Hat Inc.
registered in the United States and elsewhere.
Debian is a registered trademark of Software in the Public Interest, Inc.
SUSE is a trademark of SUSE LLC registered in the United States and elsewhere.
Glossary
A
Activation code
A code provided by Kaspersky Lab when you receive a trial license or buy a commercial license
to use Kaspersky Endpoint Security. This code is required to activate the application.
The activation code is a unique sequence of twenty Latin characters and numerals
in the format XXXXX-XXXXX-XXXXX-XXXXX.
Active key
A key that is currently used by the application.
Additional key
A key that certifies the right to use the application but is not currently being used.
Administration group
A set of computers that share common functions and a set of Kaspersky Lab applications that
is installed on them. Computers are grouped so that they can be managed conveniently as
a single unit. A group may include other groups. It is possible to create group policies and group
tasks for each installed application in the group.
Administration Server
A component of Kaspersky Security Center that centrally stores information about all Kaspersky
Lab applications that are installed within the corporate network. It can also be used to manage
these applications.
Glossary
177
Anti-virus databases
Databases that contain information about computer security threats known to Kaspersky Lab as
of the anti-virus database release date. Anti-virus database signatures help to detect malicious
code in scanned objects. Anti-virus databases are created by Kaspersky Lab specialists and
updated hourly.
Application settings
Application settings that are common to all types of tasks and govern the overall operation
of the application, such as application performance settings, report settings, and Backup settings.
B
Backup
A special storage for backup copies of files that are created before the first attempt at disinfection
or deletion.
D
Disinfection
A method of processing infected objects that results in complete or partial recovery of data. Not all
infected objects can be disinfected.
Glossary
178
E
Exclusion
An exclusion is an object that has been excluded from scanning by a Kaspersky Lab application.
Exclusions can be files of certain formats, files selected based on a mask, a certain area such as
a folder or application, application processes, or objects selected by name based on their
classification in the Virus Encyclopedia. Each task can have its own exclusions assigned.
F
False alarm
A situation when a Kaspersky Lab application considers a non-infected object to be infected
because its code is similar to that of a virus.
File mask
Representation of a file name and extension by using wildcards.
File masks can contain any characters that are allowed in file names, including wildcards:
*—Replaces any zero or more characters.
?—Replaces any one character.
Note that the file name and extension are always separated by a period.
Glossary
179
G
Group task
A task that is defined for an administration group and executed on all client devices within that
administration group.
H
Heuristic Analysis
The technology was developed for detecting threats that cannot be detected by using the current
version of Kaspersky Lab application databases. It detects files that may be infected
with an unknown virus or a new variety of a known virus.
Files in which malicious code is detected during heuristic analysis are marked as infected.
Heuristic Analyzer
The Kaspersky Endpoint Security component that performs heuristic analysis.
I
Infectable file
A file which, due to its structure or format, can be used by intruders as a "container" to store and
spread malicious code. As a rule, these are executable files, with such file extensions as .com,
.exe, and .dll. There is a fairly high risk of intrusion of malicious code in such files.
Glossary
180
Infected file
A file which contains malicious code (code of known malware has been detected when scanning
the file). Kaspersky Lab does not recommend using such files, because they may infect
your computer.
K
Key file
A file of the xxxxxxxx.key type, which is provided by Kaspersky Lab when you receive a trial
license or buy a commercial license to use Kaspersky Endpoint Security. A key file is required
to activate the application.
L
License certificate
A document that Kaspersky Lab transfers to the user together with the key file or activation code.
It contains information about the license granted to the user.
N
Network Agent
A Kaspersky Security Center component that enables interaction between the Administration
Server and Kaspersky Lab applications that are installed on a specific network node (workstation
or server). This component is the same for all Kaspersky Lab applications running in a Windows®
Glossary
181
operating system. Separate versions of Network Agent are designed for applications running
in other operating systems.
P
Policy
A policy defines the settings for application operation and defines who is granted access
to configure an application installed on computers within the administration group. Each application
must have its own policy. You can create an unlimited number of various policies for applications
installed on computers in each administration group, but only one policy can be simultaneously
applied to each application within the confines of an administration group.
Protection status
Current state of protection that characterizes the level of protection of the device.
Proxy server
A computer network service that allows clients to make indirect queries to other network services.
The client first connects to the proxy server and requests a particular resource (for example, a file)
located on a different server. Then the proxy server either connects to the specified server and
receives the resource from it, or returns the resource from its own cache (if the proxy has its own
cache). If some cases, the client's request or server's response can be modified by the proxy
server for certain purposes.
Glossary
182
R
Real-time protection
Application operating mode in which objects are scanned for malicious code in real time.
The application intercepts all attempts to open an object for read, write, or execution, and scans
the object for threats. Non-infected objects are skipped, and objects containing threats
are processed according to the task settings (disinfect, delete).
S
Security level
The security level is defined as a predefined collection of settings for the component's operation.
Signature Analysis
A threat detection technology that uses the Kaspersky Endpoint Security databases, which contain
descriptions of known threats and methods for eradicating them. Protection that uses signature
analysis provides a minimally acceptable level of security. Following the recommendations
of Kaspersky Lab's experts, this method is always enabled.
T
Task
Functions performed by a Kaspersky Lab application are implemented as tasks, for example:
Real-time protection of files, Full scan of a device, Database update.
Glossary
183
Task for specific devices
A task that is defined for a set of client devices from any administration groups and that is executed
on those devices.
Task settings
Application settings specific to each type of tasks.
U
Update
The procedure of replacing or adding new files (databases or application modules) that
are retrieved from Kaspersky Lab’s update servers.
Update source
A resource containing updates for Kaspersky Endpoint Security anti-virus databases. The source
of anti-virus database updates can be Kaspersky Lab update servers, an HTTP or FTP server, or
a local or network folder.
Index
A
Activation code ............................................................................................................................ 41
Application licensing ............................................................................................................. 39, 41
B
Backup………………………………………………………………………………………...78, 139, 170
Managing parameters………………………………………………………………………...139, 170
Removing objects…………………………………………………………………………………..170
D
Databases………………………………………………….…………………………………………….52
E
Excluding objects………………………………………………………………………………………..67
H
Heuristic analysis………………………………………………………………………………………..65
K
Kaspersky Security Network…………………………………………………………………………...83
L
License ........................................................................................................................................ 40
Index
185
Activation code ....................................................................................................................... 41
End User License Agreement ................................................................................................ 39
Key file .................................................................................................................................... 42
N
Notifications………………………………………………………………………………………………82
O
On-demand scan………………………………………………………………………………………..61
S
Scan
Reducing scan time………………………………………………………………………………...73
Scanning archives………………………………………………………………………………59, 61
Starting task………………………………………………………………………………………….49
Tasks………………………………………………………………………………………. 47, 58, 135
R
Real-time protection…………………………………………………………………………………….59
T
Task……………………………………………………………………………………………………….47
Backup……………………………………………………………………………………….47, 78, 170
Boot sector scan……………………………………….…..…………………………………...47, 132
Custom scan……………………………………………………..……………………47, 72, 118, 147

Index
186
License server implementation…………………………………….……….……………47, 141, 167
On-demand scan………………………………………….……………..…..……………..47, 61, 118
Real-time protection………………………………………………………………………..47, 59, 118
System memory scan…………………………….…………………………………………….47, 132
Update distribution……………………………….…………………………………………47, 57, 135
Update rollback…………………………………………………………………………………..49, 57
U
Update……………………………………………………………………………………………….52, 135
Recommended