Minty MP3
Created by lady ada
https://learn.adafruit.com/minty-mp3
Last updated on 2021-11-15 05:59:56 PM EST
©Adafruit Industries Page 1 of 28
3
3
3
3
4
4
4
4
5
5
6
6
6
6
7
7
8
10
11
11
11
11
11
12
12
12
13
13
19
22
22
25
26
26
26
27
27
Table of Contents
Minty Music!
• Fresh Breath, Fresh Tunes, Fresh Design
• MINTY!!!
• Fresh Breath and ATA+FAT16
• Exxxtras
Hardware
• Microcontroller
• MP3 Decoding Chip
• DAC
• Compact Flash Storage
• DC/DC Converter
• FM Transmitter
• USB Interface (New for V2)
Firmware
• mp3.c
• cf.c
• fat16.c
• sta013.c
• config.c
• i2c+spi.c
Software
• Java Setup
• How to "Use"
• Interface
• Code
Make
• Get Parts
• Microcontroller
• USB (V2)
• Boost Supply (optional)
• MP3 Decoder Chip
• Done!
Download
• Note:
• Enjoy!
• Enjoy more!
FAQ
©Adafruit Industries Page 2 of 28
Minty Music!
Fresh Breath, Fresh Tunes, Fresh Design
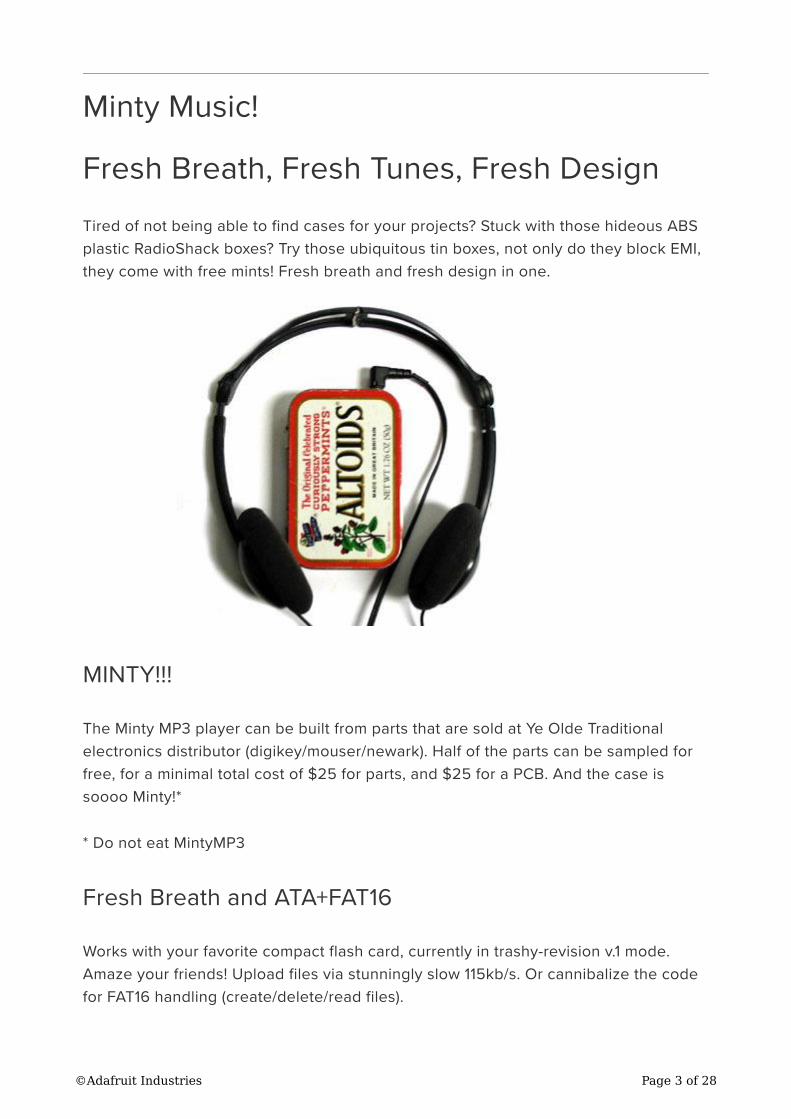
Tired of not being able to find cases for your projects? Stuck with those hideous ABS
plastic RadioShack boxes? Try those ubiquitous tin boxes, not only do they block EMI,
they come with free mints! Fresh breath and fresh design in one.
MINTY!!!
The Minty MP3 player can be built from parts that are sold at Ye Olde Traditional
electronics distributor (digikey/mouser/newark). Half of the parts can be sampled for
free, for a minimal total cost of $25 for parts, and $25 for a PCB. And the case is
soooo Minty!*
* Do not eat MintyMP3
Fresh Breath and ATA+FAT16
Works with your favorite compact flash card, currently in trashy-revision v.1 mode.
Amaze your friends! Upload files via stunningly slow 115kb/s. Or cannibalize the code
for FAT16 handling (create/delete/read files).
©Adafruit Industries Page 3 of 28
Exxxtras
Unlike some other mp3 players, this one comes with a 3.3v boost regulator (for
running off of 1 or 2 alkaline or rechargeable batteries) and an FM transmitter, for
when you're on that road trip to Canada and you forgot your #@&*ing tape-adapter
dongle thingy. Also, a really cool volume control button.
Hardware
The MintyMP3 hardware is a standard mix of high power 8-bit microcontroller and
ASICs. A single PIC18LF452 running at 20mhz (For v2 the crystal has been changed
to 29.4912MHz) with the minty firmware talks to the CF flash card, navigating the
FAT16 file system and loading mp3 files, then sending the data to the STA013 MP3
decoder chip. The STA013 decodes MP3 into digital audio which is then converted to
linelevel audio by the CS4340 DAC. There is also a MAX576 boost regulator (optional
if running from a LiIon battery) and a MAX2606 FM transmitter (optional).
Everything on the board runs off of 3.3V (3.0-4.0V is ok so it can run directly off of a
LiIon) don't even think of running it at 5V!
Microcontroller
The microcontroller is PIC18F452 (in particular, the 18LF452, which can run at 3.3V),
the 'really nice' PIC. Lots of RAM/ROM and can run a bootloader. The PIC reads and
writes the compact flash card (for playing mp3s and uploading/deleting mp3s), reads
button presses, and configures/runs the STA013 mp3 decoder chip. It understands the
FAT16 file system format, although it ignores long filenames. The best way to use it is
to program it with a bootloader, such as the tinybld (https://adafru.it/c8N)'r, and then
upload new firmware as desired through the serial port. Using a bootloader is much
faster and doesn't require a PICStart/ICSP programmer.
MP3 Decoding Chip
The MP3 decoder chip I used is the STA013 (https://adafru.it/c8O), which is the only
one I could find to purchase easily (going rate is $12) in the US (Mouser (https://
adafru.it/c4f) sells it and Digikey (https://adafru.it/c8b) carries the more extensive STA
015T (https://adafru.it/c8P) which also does MP3 encoding, PJRC (https://adafru.it/c8Q)
also sells it for a very good price. Also FutureLec (https://adafru.it/c8R) has it for a
paltry $7!)
©Adafruit Industries Page 4 of 28
The MP3 chip is controllable via an I2C port, to set the volume/bass/treble, upload
new firmware, get the current mp3 data, start/stop etc. It then signals that its ready for
mp3 data by pulling the MP3REQUEST line high, after which the microcontroller sends
the file to the STA013 via SPI.
A lot more information is available from PJRC's 'how to use the sta013 (https://
adafru.it/c8S)' page. This is a strictly 3.3V chip.
I didn't use the VS1001K or MAS3509/MAS35x9 because they were not as easy to
get.
DAC
For a DAC I use the CS4340 (https://adafru.it/c8T), which you can buy from Newark (h
ttps://adafru.it/c8U) for $2.50. They make up for it by charging $12 shipping. I would
highly suggest that it get replaced by something like the $2.70 PCM1748 (https://
adafru.it/c8V) stereo audio DAC, which is carried by Digikey or can be sampled for
free from TI (https://adafru.it/c8d). (So, I haven't gotten off my ass and actually figured
out how to replace the CS4340 with the PCM1748, it has a different pinout and I'm
lazy. Feel free to make the change and send me the update!)
If you want to drive headphones instead of line out, I wouldn't use the cap/resistor
values in the datasheet, since they seriously attenuate the signal. Try 10 instead of
560ohms and a beefy 33 or 47uF cap instead of 3.3uF to keep realistic 3db cutoffs
(see the PCB schematic).
Or better yet, measure the capacitors and make sure that the low -3db point is
~120Hz and the high -3dB point is >>20kHz
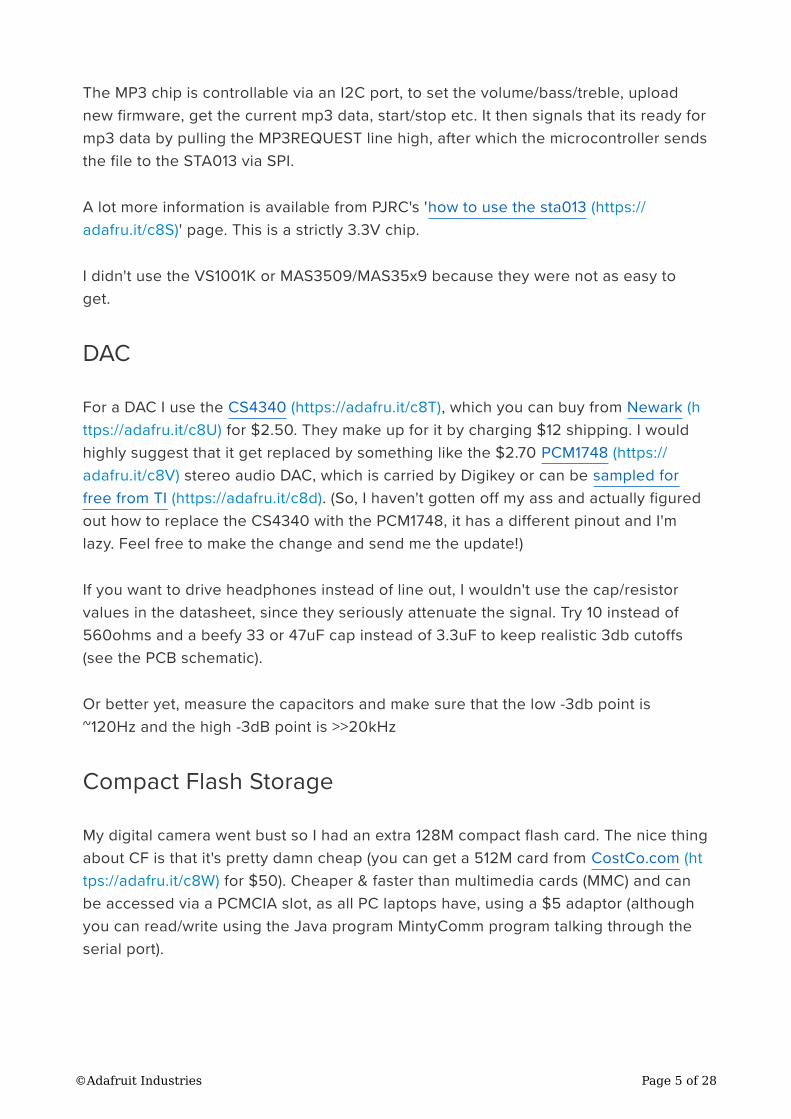
Compact Flash Storage
My digital camera went bust so I had an extra 128M compact flash card. The nice thing
about CF is that it's pretty damn cheap (you can get a 512M card from CostCo.com (ht
tps://adafru.it/c8W) for $50). Cheaper & faster than multimedia cards (MMC) and can
be accessed via a PCMCIA slot, as all PC laptops have, using a $5 adaptor (although
you can read/write using the Java program MintyComm program talking through the
serial port).
©Adafruit Industries Page 5 of 28
One nice side-effect of using CF cards is that they 'talk' ATA so it's easy (design-wise)
to swap it with a full IDE drive in case you ever need to access a large amount of data
(a car mp3 player?)
DC/DC Converter
In case you want to run this off of 1 or 2 alkaline/rechargables there is a DC boost
regulator on board, the MAX756 (https://adafru.it/c8X), which will step up a 1V supply
to 3.3V @ 300mA. A little pricey at $5 from DigiKey, but you can sample them for free
from Maxim's website. Theres even a 'low battery' indicator but it seems sort of
counter-productive to burn more power through an LED.
FM Transmitter
I hate not having an audio cable to hook up a player to a car, so instead, I put the
incredibly cool MAX2606 (https://adafru.it/c8Y) (only available in low quantities by
sampling) all-in-one FM transmitter chip in. Wow! Very low power only a few mA, so I
didnt even put in a switch for it.
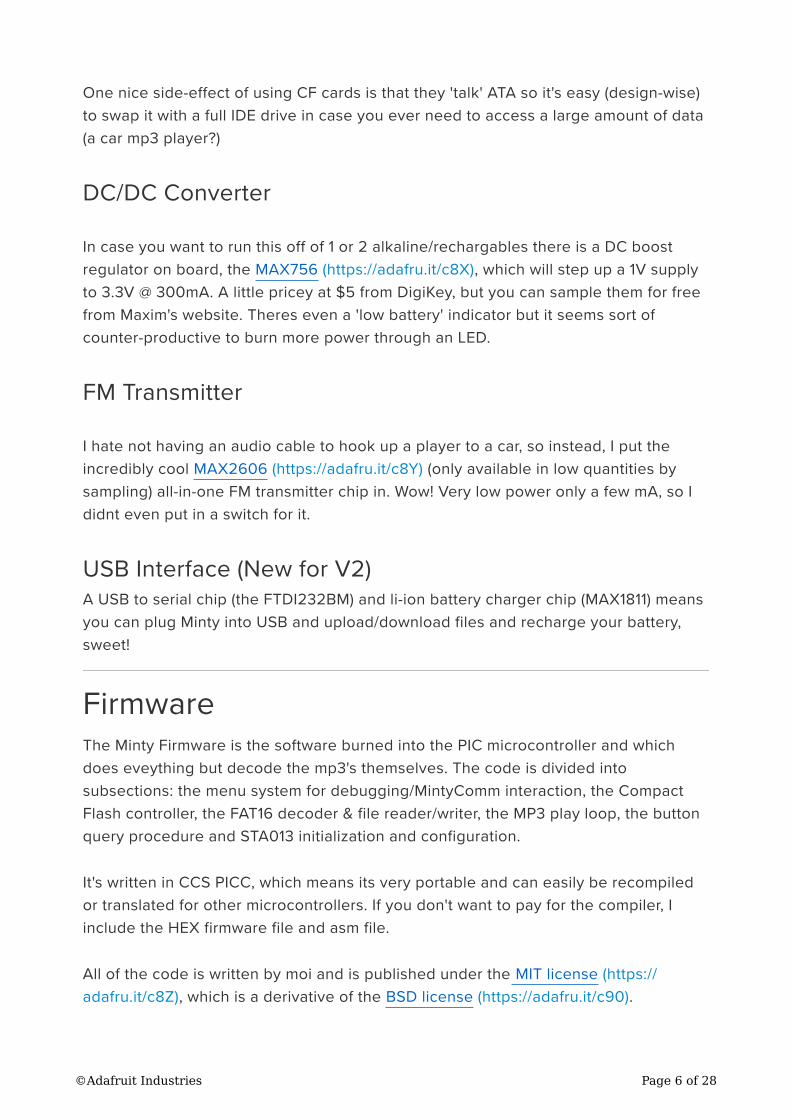
USB Interface (New for V2)
A USB to serial chip (the FTDI232BM) and li-ion battery charger chip (MAX1811) means
you can plug Minty into USB and upload/download files and recharge your battery,
sweet!
Firmware
The Minty Firmware is the software burned into the PIC microcontroller and which
does eveything but decode the mp3's themselves. The code is divided into
subsections: the menu system for debugging/MintyComm interaction, the Compact
Flash controller, the FAT16 decoder & file reader/writer, the MP3 play loop, the button
query procedure and STA013 initialization and configuration.
It's written in CCS PICC, which means its very portable and can easily be recompiled
or translated for other microcontrollers. If you don't want to pay for the compiler, I
include the HEX firmware file and asm file.
All of the code is written by moi and is published under the MIT license (https://
adafru.it/c8Z), which is a derivative of the BSD license (https://adafru.it/c90).
©Adafruit Industries Page 6 of 28
mp3.c
This file contains basic constants like the crystal frequency (20MHz recommended),
the serial speed (115kbps will make file transfers just barely reasonable.) It also has
the pin assignments. So if you want to change the hardware around I'd peek here.
Make sure that the firmware version matches the hardware version or you are majorly
bummin'.
byte buttonquery() checks the buttons and returns a value corresponding to whether
any are pressed. For some reason I haven't determined, button 3 doesnt work. It
might have something to do with the fact that I'm sharing that pin with the UART.
Theres a timeout to reduce button bouncing (100ms for volume change, 250ms for
track change.)
void convertToFATName(char *name) takes a 8.3 format name and makes into an 11
character name as FAT understands them.
boolean processCommand() runs a menu that will test the various aspects of the card,
to get to it, strike a key during the "waiting for char" part of the booting process.
void main() sets up the chip, turns off the ADC, turns on the timer #2 interrupt,
configures the ports, boots up the hardware, and resets the volume. It then waits for
3s to hit a key and go to the menu or else just starts playing through all the files in the
root directory. It also handles next/prev track requests.
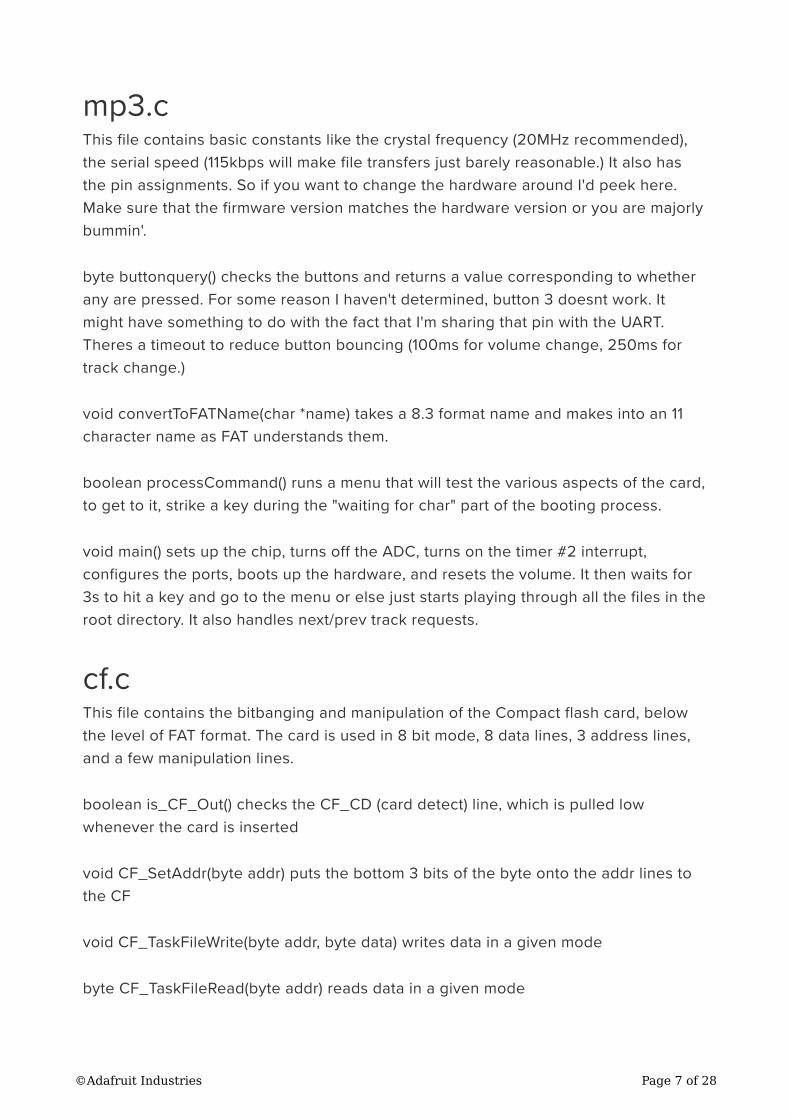
cf.c
This file contains the bitbanging and manipulation of the Compact flash card, below
the level of FAT format. The card is used in 8 bit mode, 8 data lines, 3 address lines,
and a few manipulation lines.
boolean is_CF_Out() checks the CF_CD (card detect) line, which is pulled low
whenever the card is inserted
void CF_SetAddr(byte addr) puts the bottom 3 bits of the byte onto the addr lines to
the CF
void CF_TaskFileWrite(byte addr, byte data) writes data in a given mode
byte CF_TaskFileRead(byte addr) reads data in a given mode
©Adafruit Industries Page 7 of 28
boolean CF_isBusy(void) checks the task file to see if the compact flash is busy doing
something
boolean CF_isReady(void) checks if the CF is ready (apparently not the same as it not
being busy)
void CF_ResetCard(void) resets the card by pulling the RST line high for 255 ms
void CF_Disable(void) sets the default CF unused configuration
byte CF_Enable(void) resets and enables the card for reading
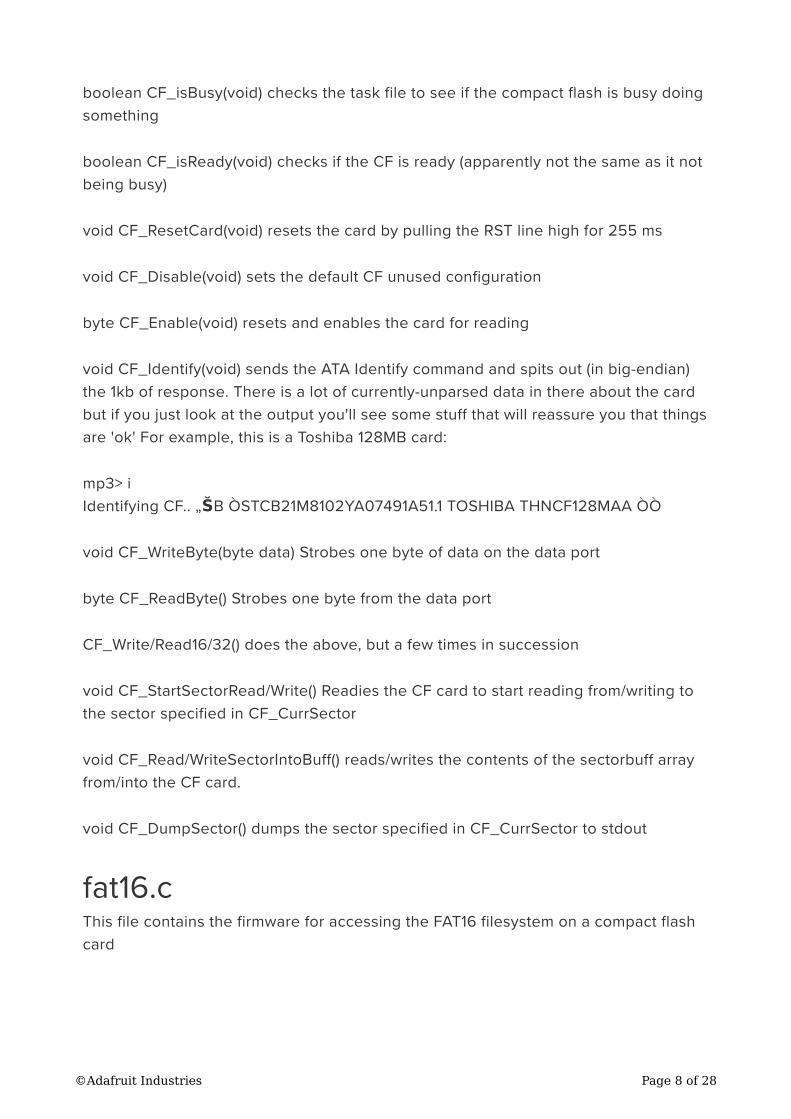
void CF_Identify(void) sends the ATA Identify command and spits out (in big-endian)
the 1kb of response. There is a lot of currently-unparsed data in there about the card
but if you just look at the output you'll see some stuff that will reassure you that things
are 'ok' For example, this is a Toshiba 128MB card:
mp3> i
Identifying CF.. „ŠB ÒSTCB21M8102YA07491A51.1 TOSHIBA THNCF128MAA ÒÒ
void CF_WriteByte(byte data) Strobes one byte of data on the data port
byte CF_ReadByte() Strobes one byte from the data port
CF_Write/Read16/32() does the above, but a few times in succession
void CF_StartSectorRead/Write() Readies the CF card to start reading from/writing to
the sector specified in CF_CurrSector
void CF_Read/WriteSectorIntoBuff() reads/writes the contents of the sectorbuff array
from/into the CF card.
void CF_DumpSector() dumps the sector specified in CF_CurrSector to stdout
fat16.c
This file contains the firmware for accessing the FAT16 filesystem on a compact flash
card
©Adafruit Industries Page 8 of 28
boolean FAT_Init() fetches the MBR (sector 0x0 on the CF) and determines where the
FAT and root directory are and formatting information such as sectors/cluster and the
number of reserved sectors. It then initializes the player to the root directory
int16 FAT_findFreeClusters(void) goes through the FAT and counts the number of free
clusters (which can then be translated into free bytes)
void FAT_ListDir(void) prints out file information for all the files in the current working
directory (CWD)
void FAT_PrintCurrFileInfo() prints out the currently loaded file's info
boolean FAT_ChangeDir(char *dir) changes the CWD to be the subdirectory given (or
the special un-subdirectories '..' & '.') It works, but I'm not using/supporting it.
boolean FAT_loadFileWithName (char *filename) loads the information for the given
file named in the CWD
byte FAT_LoadFileInCWD(int16 filenumber) loads the information for the file which
holds that slot number in the current directory, which is not necessarily the n'th file
since there are slots taken up by deleted files, and long filename data.
boolean FAT_StartReadFileNum(int num) loads the file in slot number num and starts
the microcontroller to read the first sector.
byte FAT_ReadNextSectorIntoBuff() reads the current sector of the currently loaded
file and into the sector-size buffer, then it increments to the next sector.
byte FAT_ReadNextFileByte() returns the next byte of a file (as counted by
File_CurrByte)
void FAT_ReadFile(char *name) dumps the named file to stdout
boolean FAT_CreateFile(char *name, int16 startcluster, int32 len) creates a new entry
in the root directory for a file, then, starting with the given cluster, starts dumping data
from stdin into the file until len bytes have been read. For best performance, give it
precisely 512 bytes (or less) at a time, otherwise the uart buffer fills and it gets
unhappy.
int16 FAT_findNextUnusedCluster(int16 oldcluster) returns the next unused cluster
after the one specified. To find the first one, use 0x0002 as the first cluster.
©Adafruit Industries Page 9 of 28
void FAT_QuickFormat() wipes the FAT and root dir. You probably don't want to do this
since it removes the 'bad sector' markings from the FAT.
void FAT_DeleteFile(char *name) Removes the given file from the root directory and
clears all of its used clusters.
uint32 FAT_ConvertClusterToSector(uint16 cluster) Does the math to convert a cluster
number into a sector number (there are multiple sectors per cluster, for FAT16 there
can only be 2^16 clusters so if you want to address 2^18 sectors, there will be 4
sectors per cluster. This is all in the boot block in the MBR defined when you format
the card.
uint16 FAT_GetNextCluster(uint16 cluster) Looks in the FAT to find the cluster that
follows this one.
sta013.c
This file enables/configures/talks to the STA013 mp3 decoder chip, it also takes care
of the actual playing of mp3's
void sta_enable/disable() pulls the enable line high/low
boolean sta_identify() requests to read the contents of register 0x1, which should be
0xAC if the STA013 is alive and kicking
byte sta_readreg(byte reg) returns the value in the STA's register reg
byte sta_writereg(byte reg, byte data) writes the data to the STA's register
byte sta_loadconfig() loads the data in config.c into the chip, necessary for it to
function properly. Nobody seems to know whats in the file, but it might be a firmware
upgrade that allows VBR/high bitrate playing. Also configures it for a 10MHz clock,
see the STA013 datasheet/website for more info on what should be changed for
different clocks
void sta_setvolume(byte v) sets the software volume, 0 is no attentuation, 255 is
completely attenuated
byte sta_getvolume() gets the current software volume
©Adafruit Industries Page 10 of 28

byte sta_playfilenum(byte num) starts playing the file in the root directory in the nth
directory slot.
byte sta_playfilename(char *name) same as above, but by name.
config.c
Contains the necessary firmware configuration data for the STA013, straight from
STA's recommended datafile. The compiler didn't like it stored in one big block, so its
in a few 1k pieces. Eit.
i2c+spi.c
This file contains the code for I2C and SPI bit banging. the i2c code plays with the
port C tristates, so if you change the pins around, make sure this is still valid.
Software
The software program for communicating with the MintyMP3 player is written in java
and tested on linux & w2k. God willing it will work on Solaris & MacOS. Right now it's
talking plain serial so machines without serial ports (like Macs) will need a USB
adaptor. Yeah, I'm planning on adding a USB port since everything has USB. Stop
harrassing me! (V2 has a mini-b USB port and a serial to usb chip.)
Java Setup
You'll need to get the CommAPI (https://adafru.it/c91) from Sun. If you're running
LinuxOS you'll also need the RXTX (https://adafru.it/c92) interface api for the
CommAPI so that you can mess with the serial port.
So, first install whatever Java Runtime Environment (https://adafru.it/c93) you know
and love, then the CommAPI, then you can run MintyComm.
How to "Use"
Start up the program by executing java MintyComm (or java -noverify MintyComm
under Linux). Set the serial ports to whatever you have the mp3 player hooked up to,
probably COM1 or COM2 and at a speed of 115kbps with 8 data bits, No parity, 1 Stop
bit (8N1). There is a 4 second timeout before the player starts playing so hit Open Port
and then turn on the mp3 player. You may want to see that the MP3 player serial port
is working by plugging it in and using HyperTerminal to see if you get anything like:
Minty Mp3! v1 3/25/2004Resetting Card..
©Adafruit Industries Page 11 of 28
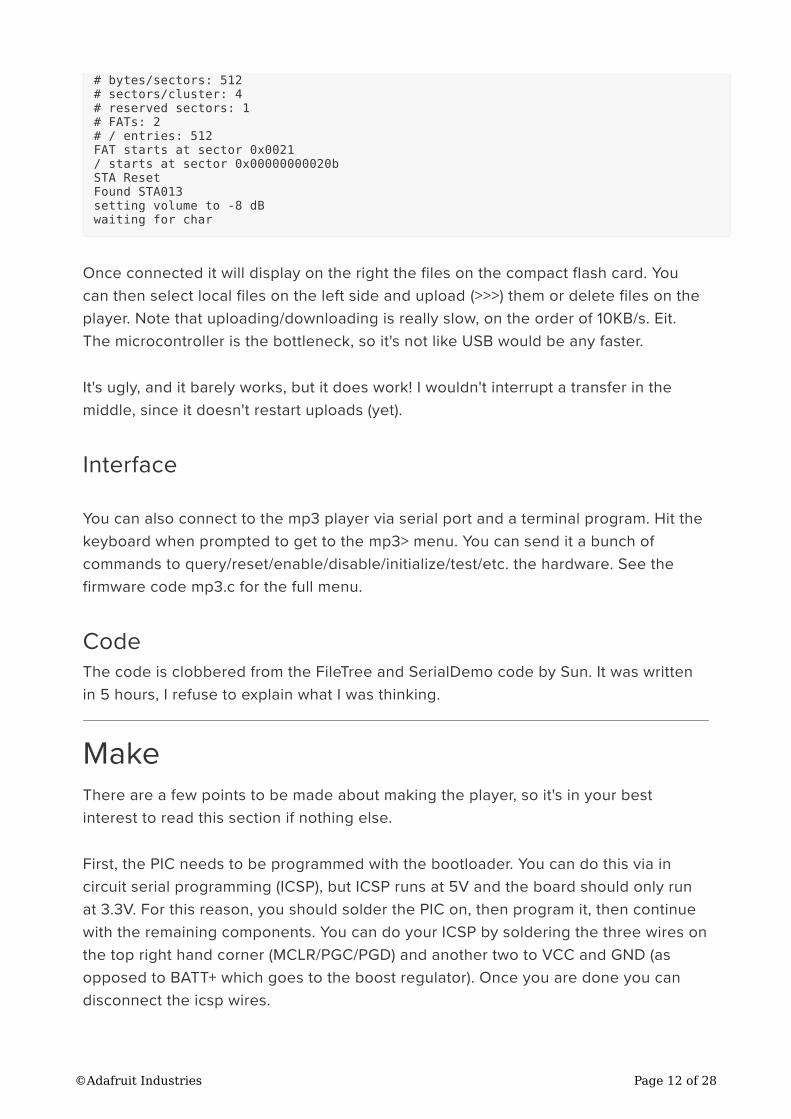
# bytes/sectors: 512# sectors/cluster: 4# reserved sectors: 1# FATs: 2# / entries: 512FAT starts at sector 0x0021/ starts at sector 0x00000000020bSTA ResetFound STA013setting volume to -8 dBwaiting for char
Once connected it will display on the right the files on the compact flash card. You
can then select local files on the left side and upload (>>>) them or delete files on the
player. Note that uploading/downloading is really slow, on the order of 10KB/s. Eit.
The microcontroller is the bottleneck, so it's not like USB would be any faster.
It's ugly, and it barely works, but it does work! I wouldn't interrupt a transfer in the
middle, since it doesn't restart uploads (yet).
Interface
You can also connect to the mp3 player via serial port and a terminal program. Hit the
keyboard when prompted to get to the mp3> menu. You can send it a bunch of
commands to query/reset/enable/disable/initialize/test/etc. the hardware. See the
firmware code mp3.c for the full menu.
Code
The code is clobbered from the FileTree and SerialDemo code by Sun. It was written
in 5 hours, I refuse to explain what I was thinking.
Make
There are a few points to be made about making the player, so it's in your best
interest to read this section if nothing else.
First, the PIC needs to be programmed with the bootloader. You can do this via in
circuit serial programming (ICSP), but ICSP runs at 5V and the board should only run
at 3.3V. For this reason, you should solder the PIC on, then program it, then continue
with the remaining components. You can do your ICSP by soldering the three wires on
the top right hand corner (MCLR/PGC/PGD) and another two to VCC and GND (as
opposed to BATT+ which goes to the boost regulator). Once you are done you can
disconnect the icsp wires.
©Adafruit Industries Page 12 of 28
One of the buttons' legs is in the way of the stereo jack so cut that off with a pair of
snips.
Word! Version 2 is up and available. Rejoice!
This is an advanced project, I highly suggest that you don't take on a project like this
to 'learn how to solder' or 'how to program a PIC'. If you can't handle fine-pitch SMT or
getting boards made, just buy an MP3 player, they're sold in stores nowadays!
If you want to build an MP3 player, try something easier, like the Super Simple MP3 (h
ttps://adafru.it/c94) or you can even buy kits for the portable YAMPP-7 (https://
adafru.it/c95)via JELU (https://adafru.it/c96).
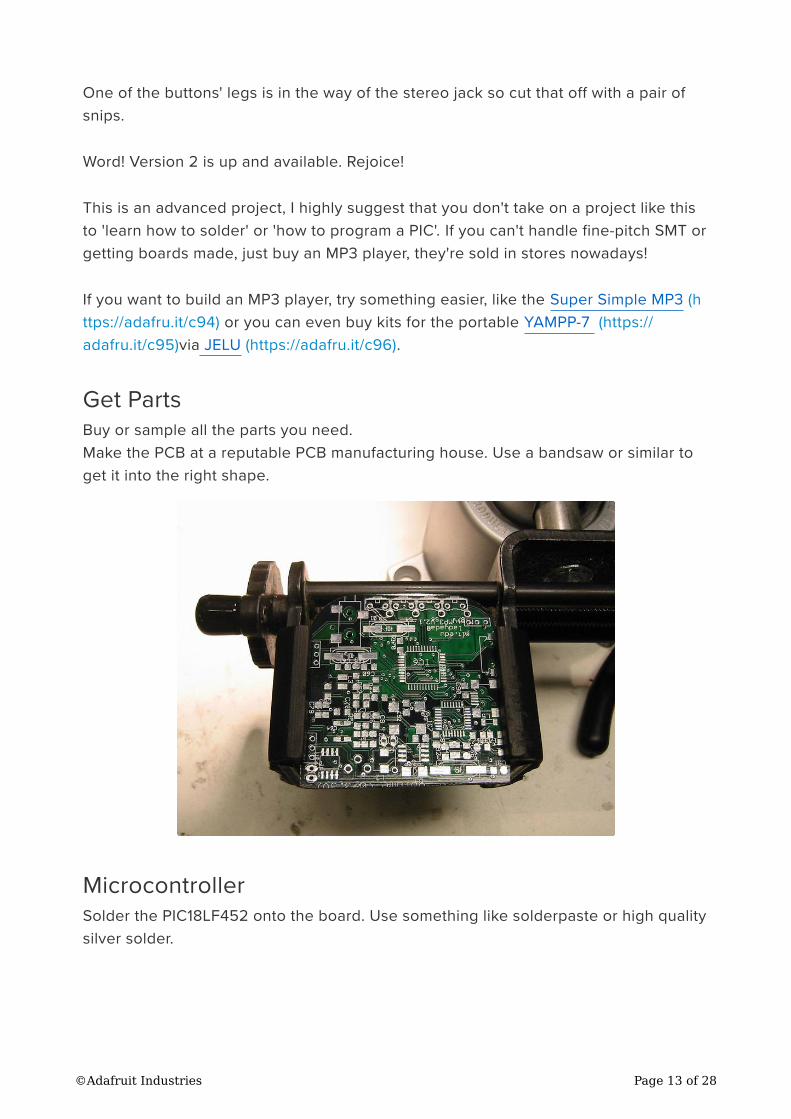
Get Parts
Buy or sample all the parts you need.
Make the PCB at a reputable PCB manufacturing house. Use a bandsaw or similar to
get it into the right shape.
Microcontroller
Solder the PIC18LF452 onto the board. Use something like solderpaste or high quality
silver solder.
©Adafruit Industries Page 13 of 28
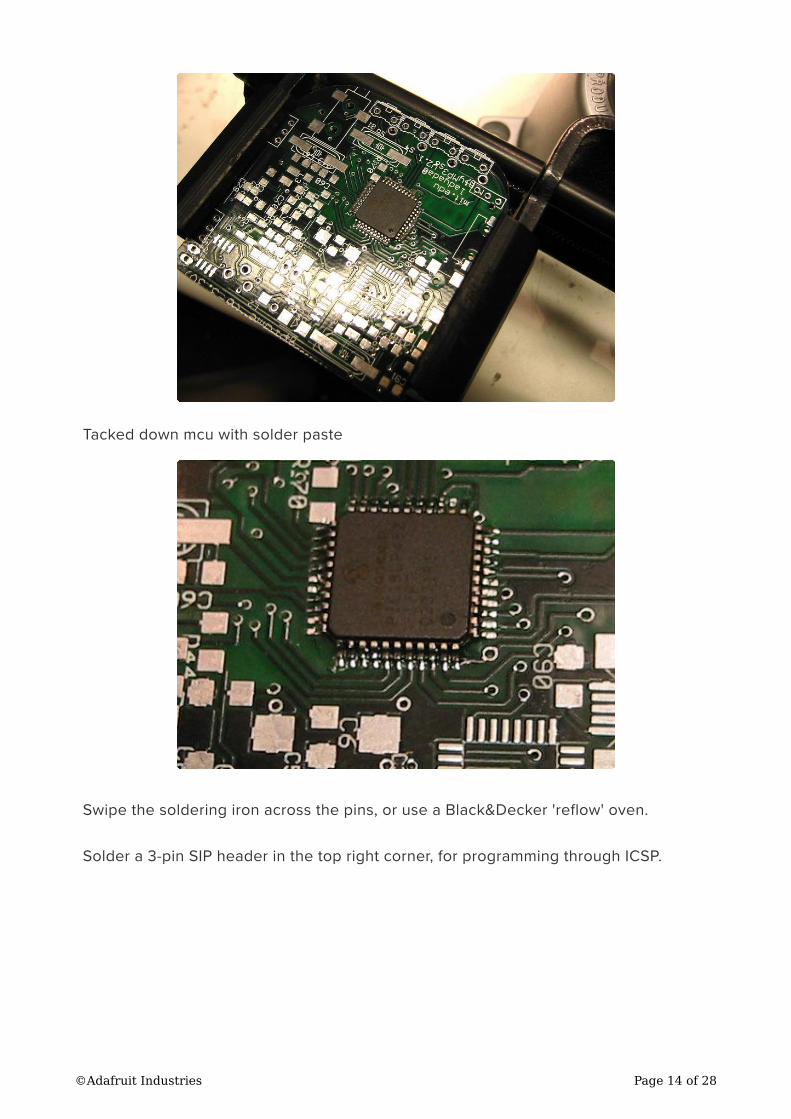
Tacked down mcu with solder paste
Swipe the soldering iron across the pins, or use a Black&Decker 'reflow' oven.
Solder a 3-pin SIP header in the top right corner, for programming through ICSP.
©Adafruit Industries Page 14 of 28
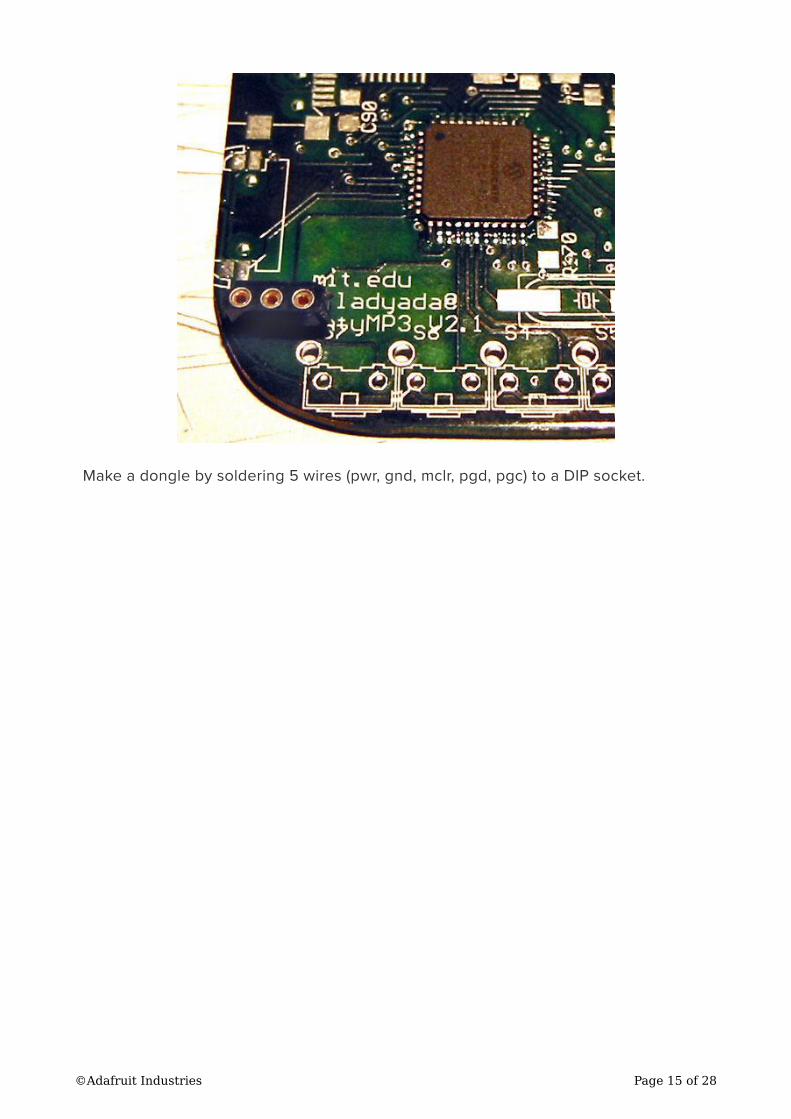
Make a dongle by soldering 5 wires (pwr, gnd, mclr, pgd, pgc) to a DIP socket.
©Adafruit Industries Page 15 of 28
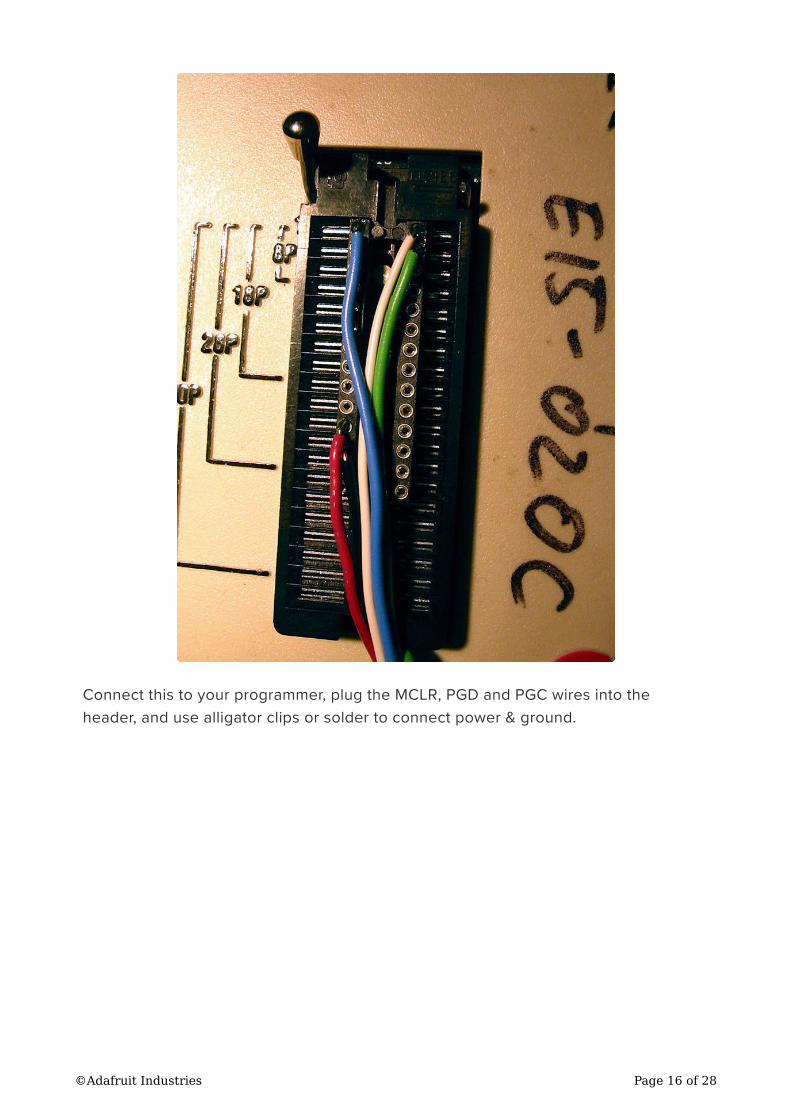
Connect this to your programmer, plug the MCLR, PGD and PGC wires into the
header, and use alligator clips or solder to connect power & ground.
©Adafruit Industries Page 16 of 28
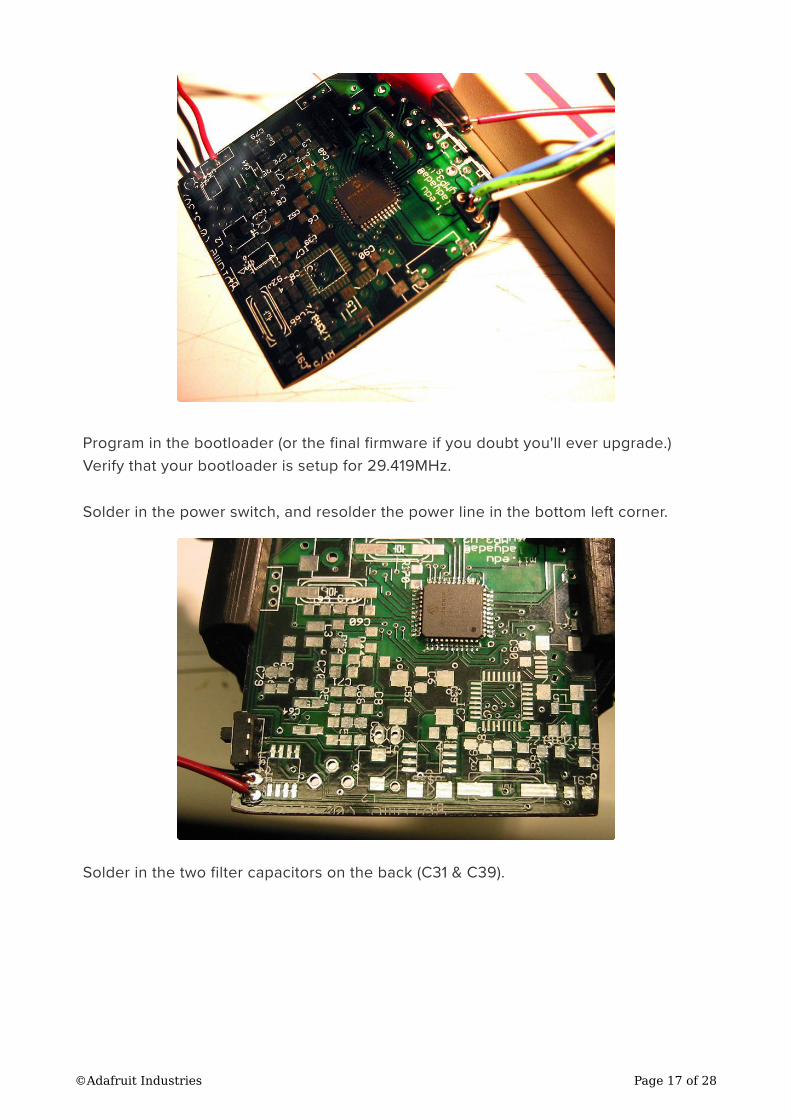
Program in the bootloader (or the final firmware if you doubt you'll ever upgrade.)
Verify that your bootloader is setup for 29.419MHz.
Solder in the power switch, and resolder the power line in the bottom left corner.
Solder in the two filter capacitors on the back (C31 & C39).
©Adafruit Industries Page 17 of 28
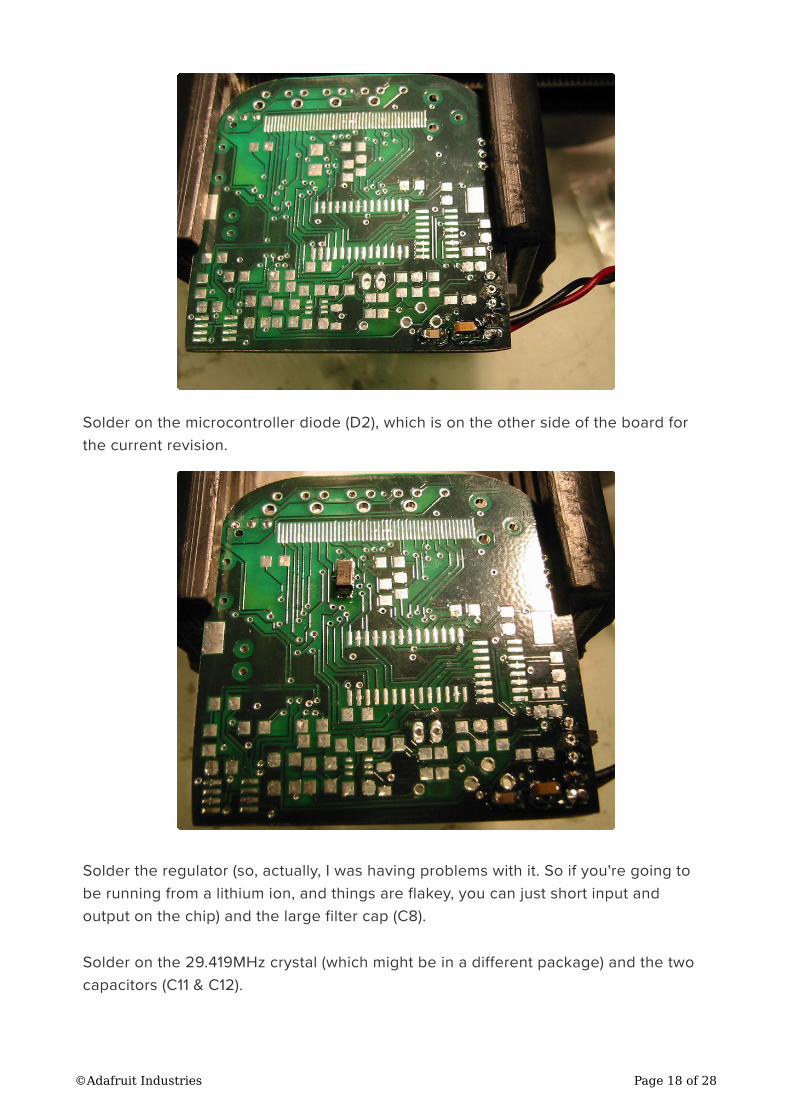
Solder on the microcontroller diode (D2), which is on the other side of the board for
the current revision.
Solder the regulator (so, actually, I was having problems with it. So if you're going to
be running from a lithium ion, and things are flakey, you can just short input and
output on the chip) and the large filter cap (C8).
Solder on the 29.419MHz crystal (which might be in a different package) and the two
capacitors (C11 & C12).
©Adafruit Industries Page 18 of 28
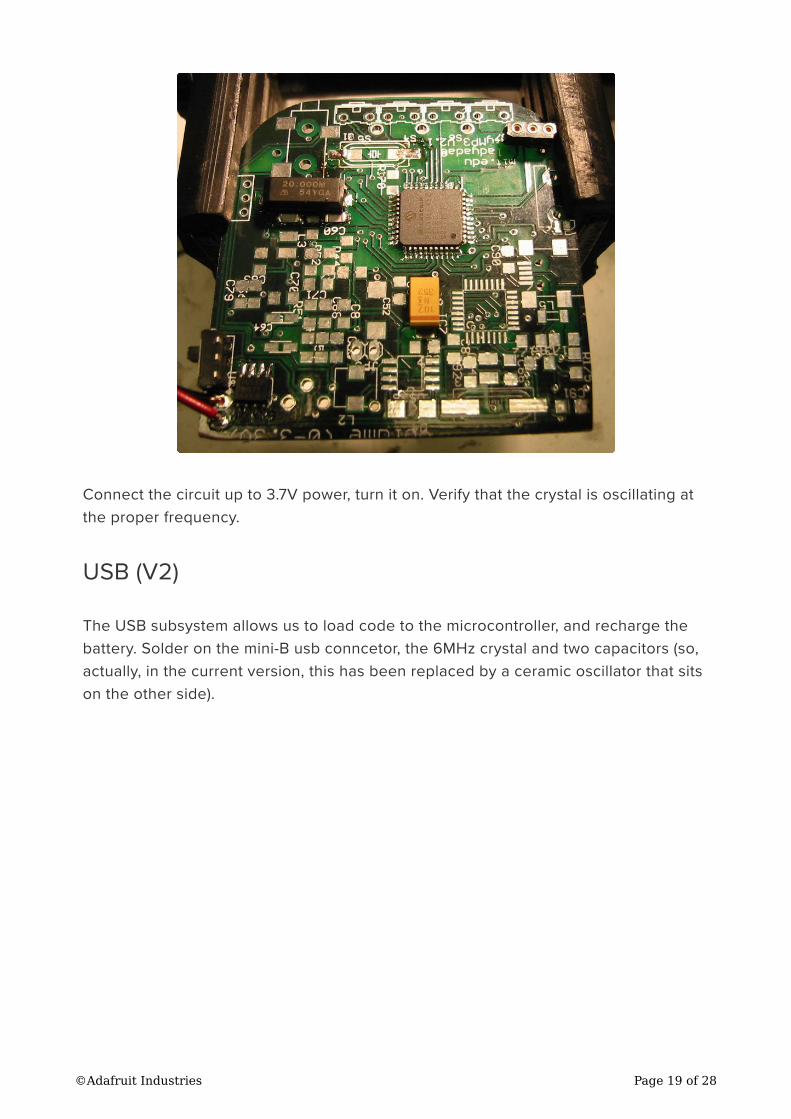
Connect the circuit up to 3.7V power, turn it on. Verify that the crystal is oscillating at
the proper frequency.
USB (V2)
The USB subsystem allows us to load code to the microcontroller, and recharge the
battery. Solder on the mini-B usb conncetor, the 6MHz crystal and two capacitors (so,
actually, in the current version, this has been replaced by a ceramic oscillator that sits
on the other side).
©Adafruit Industries Page 19 of 28
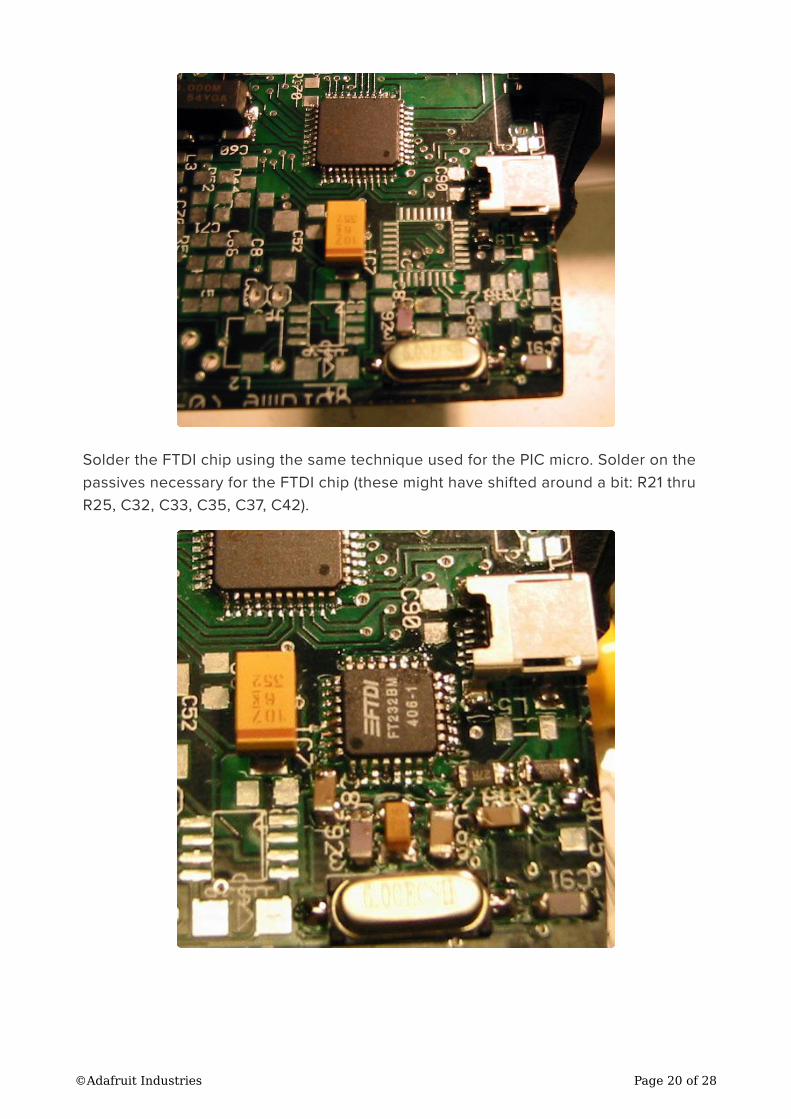
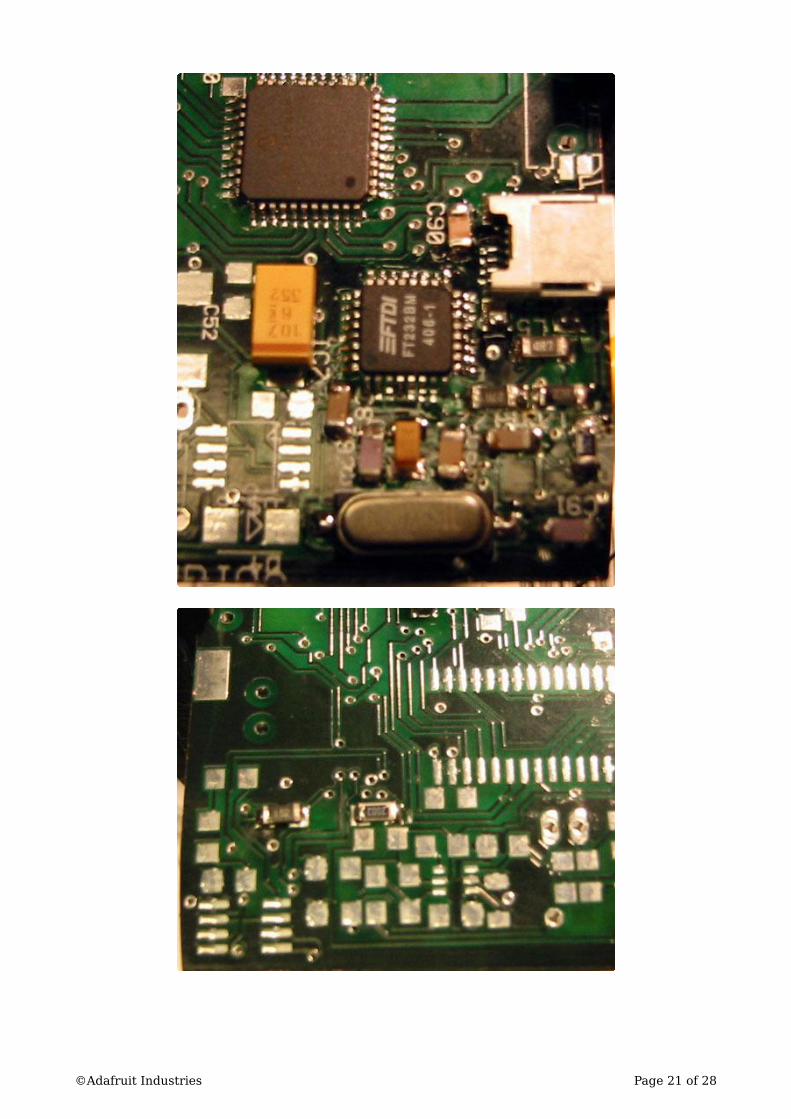
Solder the FTDI chip using the same technique used for the PIC micro. Solder on the
passives necessary for the FTDI chip (these might have shifted around a bit: R21 thru
R25, C32, C33, C35, C37, C42).
©Adafruit Industries Page 20 of 28
©Adafruit Industries Page 21 of 28
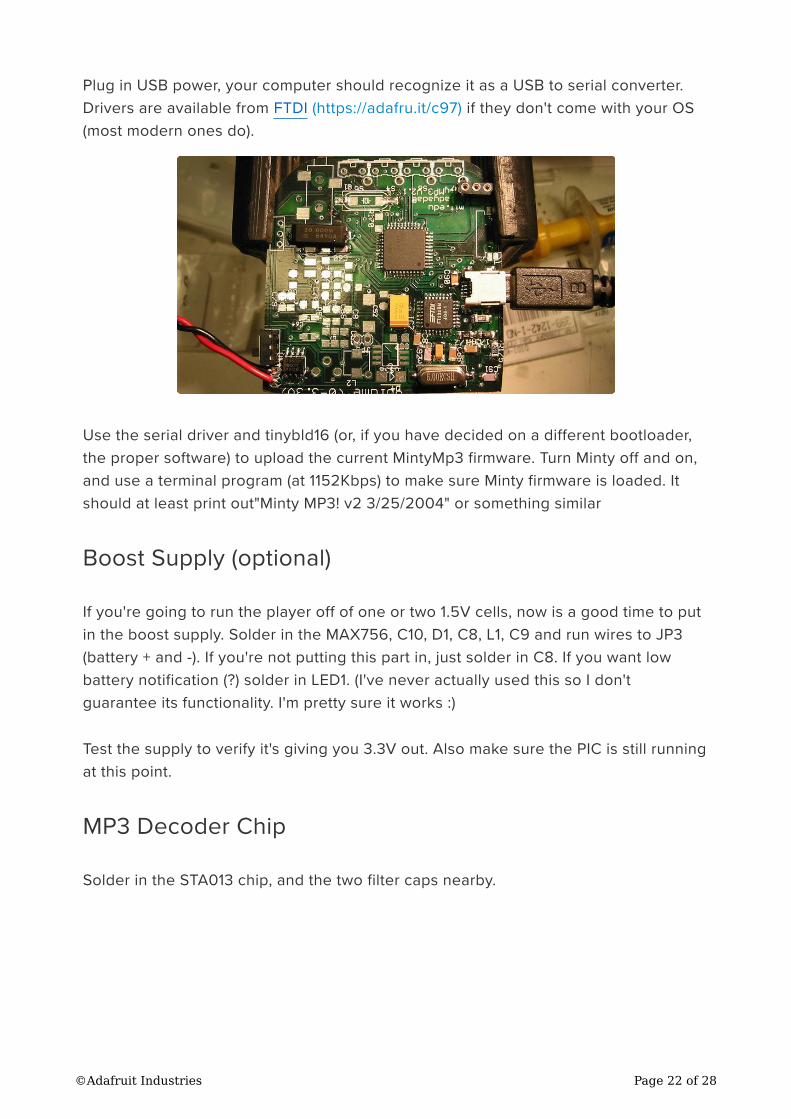
Plug in USB power, your computer should recognize it as a USB to serial converter.
Drivers are available from FTDI (https://adafru.it/c97) if they don't come with your OS
(most modern ones do).
Use the serial driver and tinybld16 (or, if you have decided on a different bootloader,
the proper software) to upload the current MintyMp3 firmware. Turn Minty off and on,
and use a terminal program (at 1152Kbps) to make sure Minty firmware is loaded. It
should at least print out"Minty MP3! v2 3/25/2004" or something similar
Boost Supply (optional)
If you're going to run the player off of one or two 1.5V cells, now is a good time to put
in the boost supply. Solder in the MAX756, C10, D1, C8, L1, C9 and run wires to JP3
(battery + and -). If you're not putting this part in, just solder in C8. If you want low
battery notification (?) solder in LED1. (I've never actually used this so I don't
guarantee its functionality. I'm pretty sure it works :)
Test the supply to verify it's giving you 3.3V out. Also make sure the PIC is still running
at this point.
MP3 Decoder Chip
Solder in the STA013 chip, and the two filter caps nearby.
©Adafruit Industries Page 22 of 28
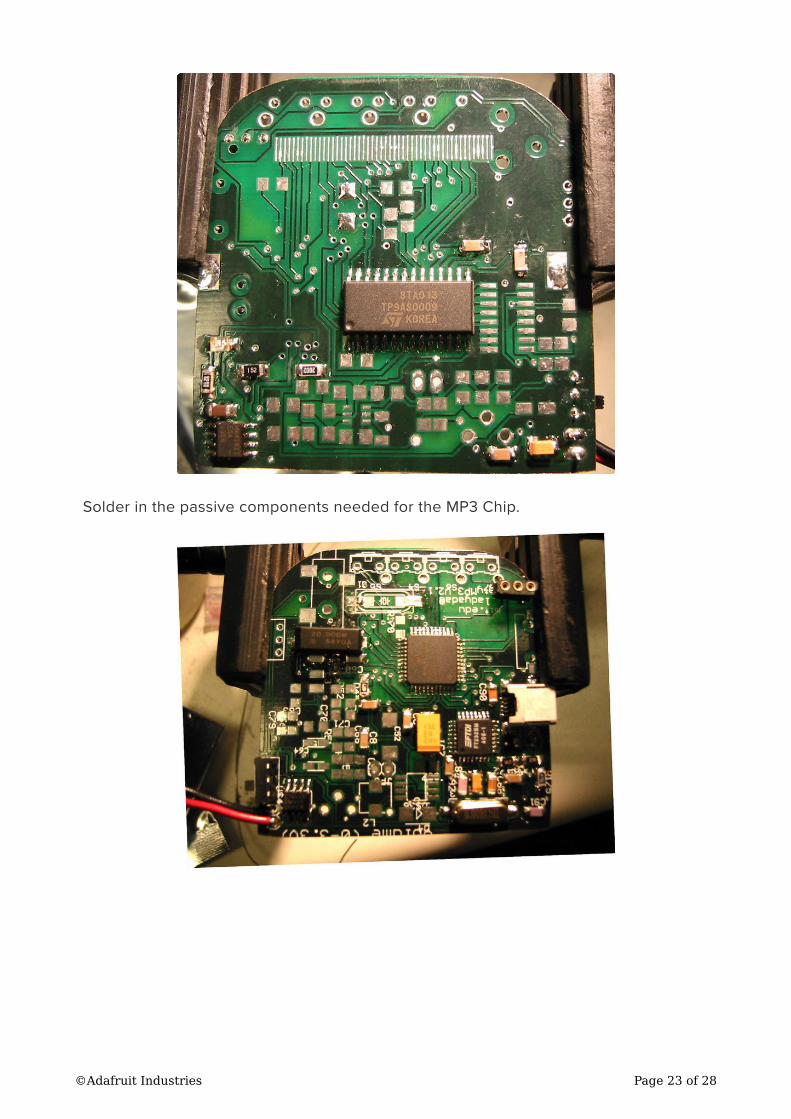
Solder in the passive components needed for the MP3 Chip.
©Adafruit Industries Page 23 of 28
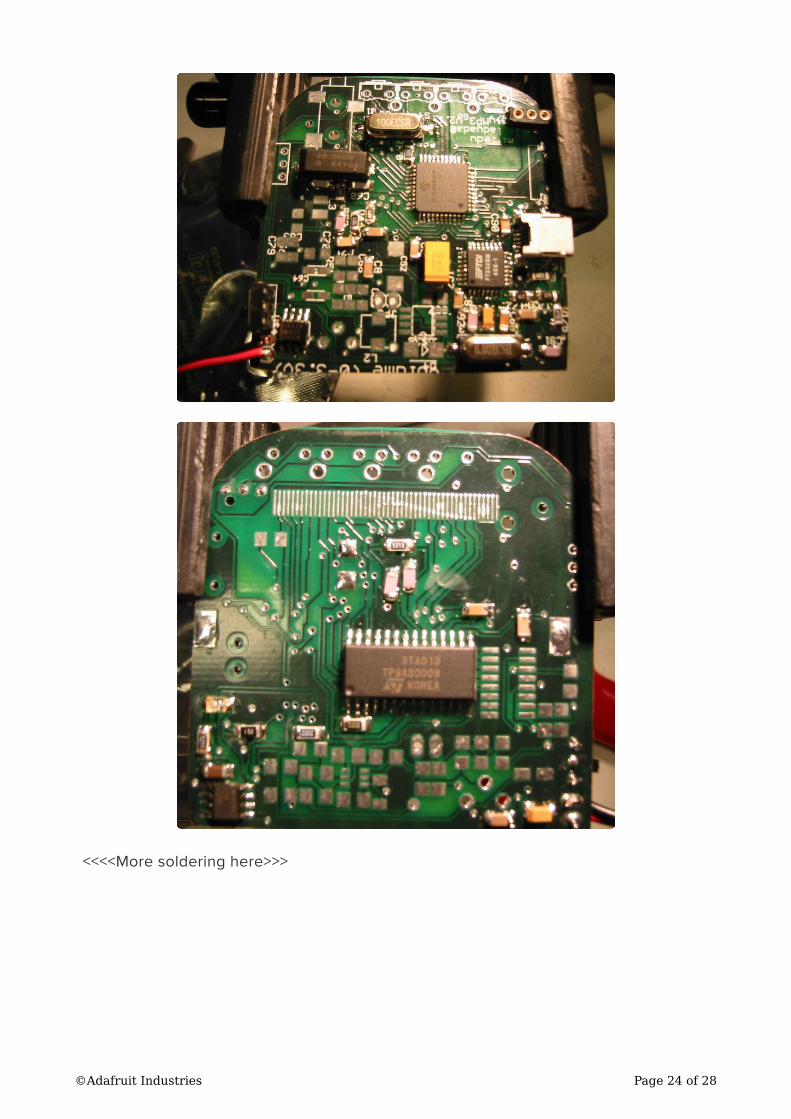
<<<<More soldering here>>>
©Adafruit Industries Page 24 of 28
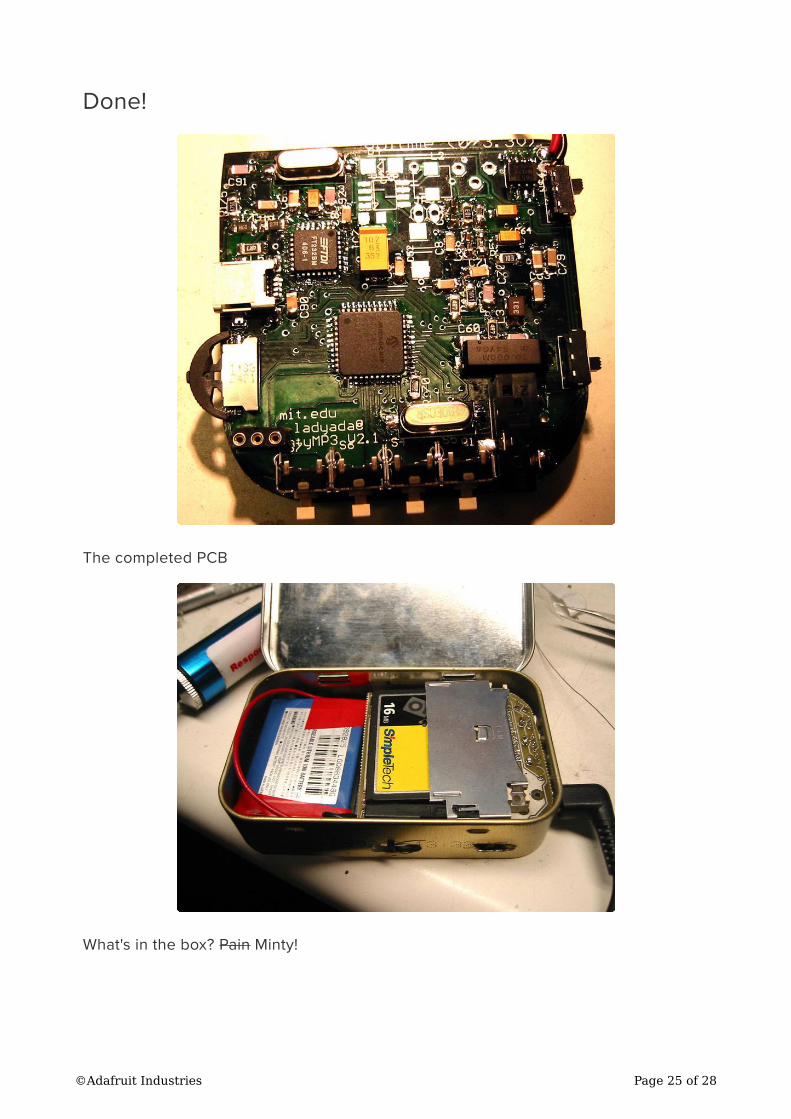
Done!
The completed PCB
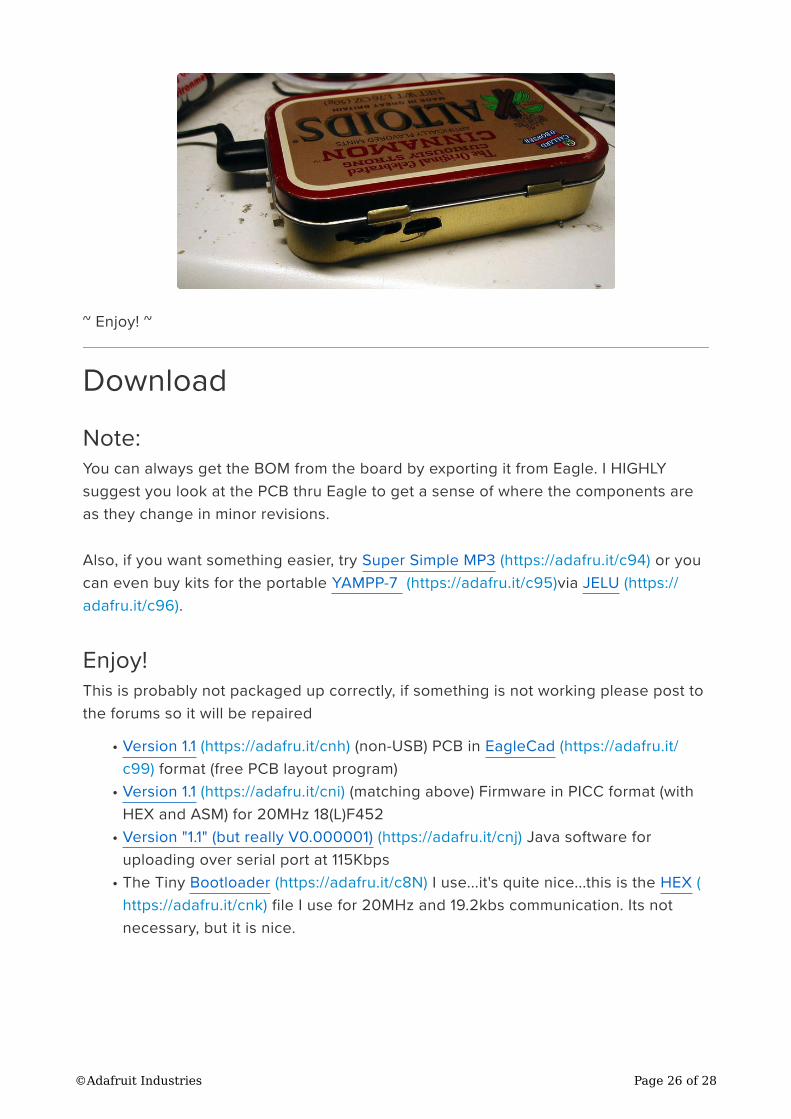
What's in the box? Pain Minty!
©Adafruit Industries Page 25 of 28
~ Enjoy! ~
Download
Note:
You can always get the BOM from the board by exporting it from Eagle. I HIGHLY
suggest you look at the PCB thru Eagle to get a sense of where the components are
as they change in minor revisions.
Also, if you want something easier, try Super Simple MP3 (https://adafru.it/c94) or you
can even buy kits for the portable YAMPP-7 (https://adafru.it/c95)via JELU (https://
adafru.it/c96).
Enjoy!
This is probably not packaged up correctly, if something is not working please post to
the forums so it will be repaired
Version 1.1 (https://adafru.it/cnh) (non-USB) PCB in EagleCad (https://adafru.it/
c99) format (free PCB layout program)
Version 1.1 (https://adafru.it/cni) (matching above) Firmware in PICC format (with
HEX and ASM) for 20MHz 18(L)F452
Version "1.1" (but really V0.000001) (https://adafru.it/cnj) Java software for
uploading over serial port at 115Kbps
The Tiny Bootloader (https://adafru.it/c8N) I use...it's quite nice...this is the HEX (
https://adafru.it/cnk) file I use for 20MHz and 19.2kbs communication. Its not
necessary, but it is nice.
•
•
•
•
©Adafruit Industries Page 26 of 28
Enjoy more!
This is version 2, which is 'supported' and seems to work well, it includes USB. There
are some pin changes so you can't mix firmware and pcb revs. I doubt I'll make any
more changes other than bugfixes.
V2.3.1 PCB Files (https://adafru.it/cnl) in Eagle 4.11 format (free software available
for Win, Linux, and very soon MacOSX) with minor 'cosmetic' fixes that also
includes a corrected BOM.
MIT-licensed (a derivative of the BSD license) V2 firmware & HEX (https://
adafru.it/cnm) file (now with subdirectory handling!)
The 29.491mhz tinybld bootloader HEX (https://adafru.it/cnn) and asm (https://
adafru.it/cno) file (for MPLAB assembler)
FAQ
Is this for real?
Yes. Minty is a fully functioning mp3 player.
I have never soldered anything, should I try building a
Minty?
You'll probably give up in frustration. This is an advanced project, for people with at
least 1 year of smt soldering experience. There are other, much easier mp3 player
projects out there. (See also q. #5)
Dude! This is cheaper than an iPod Shuffle! I'm totally
going to build this!
Actually it's not, once you buy all the parts, with shipping and buy a CF
card...chances are it'll run you $100 or more and that's -assuming- you own all the
tools already!
Well that's stupid, why should I spend 5 hours building
something when its cheaper to buy it?
Minty is an open source hardware project, partially to gauge whether it is possible
to design and maintain such projects and whether people are interested in working
on open source hardware. I do not expect people to try building it.
•
•
•
©Adafruit Industries Page 27 of 28
Will you sell kits?
Nope! This is a pre-Adafruit-kit project
How do I....?
Have you looked here (https://adafru.it/c9h) or here (https://adafru.it/c8d)?
Hey, there's a mistake...
Probably...the instructions aren't foolproof, and this is a very old project
I successfully built a Minty!
Really? Send us a picture & I'll put it up!
©Adafruit Industries Page 28 of 28
Recommended