Lesson Plans for Module 28201-14
Residential Plans and dRawing inteRPRetation
Module 28201-14 describes the information trainees will need in order to work with residential plans and con-struction drawings and convert that information into action on the job.
Teaching Time: 12.5 hours(Five 2.5-hour sessions)
Session time may be adjusted to accommodate your class size, schedule, and teaching style.
PrerequisitesCore Curriculum and Masonry Level One.
Before You BeginAs you prepare for each session, allow sufficient time to review the course objectives, content, visual aids (in-cluding the PowerPoint® presentation), and these lesson plans and to gather the required equipment and materi-als. Consider time required for demonstrations, laboratories, field trips, and testing.
Using your access code, download the Module Examinations and Performance Profile Sheets from www.nccerirc.com. The passing score for submission into NCCER’s Registry is 70 percent or above for the Mod-ule Examination; performance testing is graded pass or fail.
Objectives
Learning Objective 1• Describe the basic parts of a set of residential
drawings and list the information found on each type of drawing.
a. Identify keys and legends, as well as selected lines, architectural terms, abbreviations, and symbols on residential drawings.
b. Explain how to use scales and dimensions in residential drawings.
c. Explain how to interpret the various types of residential drawings.
Learning Objective 2• Explain how to estimate material quantities
from residential drawings. a. Explain how to use the rule-of-thumb method. b. Explain how to use estimating aids.
Performance Tasks
Performance Task 1 (Learning Objective 2)• From a plan, calculate the square footage of
one elevation, including openings.Performance Task 2 (Learning Objective 2)• Estimate the amount of brick and mortar from
that same elevation.Performance Task 3 (Learning Objective 2)• Estimate the size and number of lintel block for
that same elevation.
28201-14 Residential Plan and Drawing Interpretation Module One i
Classroom Equipment and Materials
Whiteboard/chalkboardMarkers/chalkPencils and paperMasonry Level Two PowerPoint® Presentation SlidesLCD projector and screenComputerCopies of the Module Examination and Performance Profile SheetsVendor-supplied videos/DVDs showing cold-formed steel framing (optional)TV/DVD player
Safety ConsiderationsSafety is paramount in the masonry trade, and safe habits and practices must be emphasized whenever possible. Performance Tasks must be completed under your supervision. Each trainee must use required PPE and follow safe tool practices and procedures.
Additional Resources and ReferencesThis module presents thorough resources for task training. The following resource material is suggested for further study:
Bricklaying: Brick and Block Masonry. 1988. Brick Industry Association. Orlando, FL: Harcourt Brace & Com-pany.
Concrete Masonry Handbook: for Architects, Engineers, Builders, Fifth Edition. 1991. W. C. Panerese, S. K. Kosmatka, and F. A. Randall Jr. Skokie, IL: Portland Cement Association.
Technical Note TN10, Dimensioning and Estimating Brick Masonry. 2009. Reston, VA: The Brick Industry Association. www.gobrick.com
TEK 4-2A, Estimating Concrete Masonry Materials. 2004. Herndon, VA: National Concrete Masonry Associa-tion. www.ncma.org
There are a number of online resources available for trainees who would like more information on residential plans and drawing interpretation. A search for additional information may be assigned as homework to inter-ested trainees.
ii NCCER – Masonry Level Two 28201-14
Architect’s scaleBlank paper and pencilCalculatorsElevation(s) for a residential structureFloor plan(s) for a residential structureFoundation drawing for a residential structure
Samples of residential plansSamples of revisions and change ordersSet of construction drawings, including the foundation plan, floor plan(s), and elevation(s)Set of residential plans
Equipment and Materials for Laboratories and Performance Testing
28201-14 Residential Plan and Drawing Interpretation Module One iii
The lesson plan for this module is divided into five 2.5-hour sessions.Each session includes 10 minutes for administrative tasks and one 10-minute break.
Residential Plan and dRawing inteRPRetation
Session Outline for 28201-14
SeSSion one
Session One introduces keys and legends, lines, terms, abbreviations, and symbols.
1. Show Session One PowerPoint® presentation slides.
2. Review the use of plans with the trainees.
3. Discuss the use of keys and legends on drawings.
4. Discuss the types of lines used on drawings and their applications.
5. Review the terms and symbols used on drawings.
SeSSion Two
Session Two introduces scales and dimensions.
1. Show Session Two PowerPoint® presentation slides.
2. Discuss the use of dimensions on drawings and how the dimensions are applied for masonry openings.
3. Review scales used on residential drawings.
SeSSion Three
Session Three introduces interpreting residential drawings.
1. Show Session Three PowerPoint® presentation slides.
2. Discuss the general procedure for reading construction drawings.
3. Discuss the use of foundation plans, floor plans, and elevations for residential drawings.
SeSSion Four
Session Four introduces estimating material quantities.
1. Show Session Four PowerPoint® presentation slides.
2. Discuss the importance of accurate estimates.
3. Discuss how to use the rule-of-thumb method to estimate.
4. Discuss how to calculate the square footage for an elevation, including openings.
SeSSion Five
Session Five is a review and testing session. Have trainees complete the module Review Questions and Trade Terms Quiz. (Alternatively, these may be assigned as homework at the end of Session Four.) Answer any questions that trainees may have.
1. Have trainees complete the Module Examination. Any outstanding performance testing must be completed during this session.
2. Record the testing results on Training Report Form 200 and submit the report to your Training Program Sponsor.
iv NCCER – Masonry Level Two 28201-14
Materials Checklist for Module 28201-14, Residential Plan and Drawing Interpretation
Equipment and Materials
Personal protective equipment: Architect’s scale Blank paper and pencil
None Calculators Samples of residential plans
Whiteboard/chalkboardSamples of revisions and change orders
Floor plan(s) for a residential structure
Markers/chalkElevation(s) for a residential structure
Foundation drawing for a residential structure
Pencils and paperSet of construction drawings, including the foundation plan, floor plan(s), and elevation(s)
Set of residential plans
Masonry Level Two PowerPoint® Presentation Slides
LCD projector and screen
Computer
Copies of the Module Examination and Performance Profile Sheets
Vendor-supplied videos/DVDs showing cold-formed steel framing (optional)
TV/DVD player
To the extent possible, and as required for performance testing, provide a selection of the tools listed for each session; alternatively, photos may be used to teach tool identification.
Lesson Plans for Module 28202-14
Residential MasonRy
Module 28202-14 describes the construction techniques for residential and small structure foundations, steps, patios, decks, chimneys, and fireplaces and work activities that the mason must perform, as well as those tasks that tie into the masonry work.
Teaching Time: 25 hours(Ten 2.5-hour classroom sessions)
Session time may be adjusted to accommodate your class size, schedule, and teaching style.
PrerequisitesCore Curriculum and Masonry Level One.
Before You BeginAs you prepare for each session, allow sufficient time to review the course objectives, content, visual aids (including the PowerPoint® presentation), and these lesson plans and to gather the required equipment and materials. Consider time required for demonstrations, laboratories, field trips, and testing.
Using your access code, download the Module Examinations and Performance Profile Sheets from www.nccerirc.com. The passing score for submission into NCCER’s Registry is 70 percent or above for the Module Examination; performance testing is graded pass or fail.
Objectives
Learning Objective 1• Explain the requirements for construction of
various types of residential foundations. a. Explain what spread foundations are. b. Explain what raft and mat foundations are. c. Explain what foundation walls are.
Learning Objective 2• Identify and explain the characteristics, uses,
and installation techniques for clay brick and concrete pavers.
a. Describe the various types of clay brick pavers.
b. Explain how to install clay brick pavers. c. Describe the various types of concrete and
interlocking pavers. d. Explain how to install concrete and
interlocking pavers.
Learning Objective 3• Lay out and build steps, patios, and decks
made from masonry units. a. Describe the various types of steps. b. Explain how to recognize patterns and tread
designs. c. Explain how to build a concrete base. d. Explain how to set clay brick in steps. e. Explain how patios are constructed. f. Explain how decks are constructed.
Learning Objective 4• Explain how to lay out and build fireplaces and
chimneys. a. Explain the basic theory of the fireplace. b. Describe the parts of a fireplace. c. Explain the key points of workmanship. d. Explain how to lay out chimneys and
fireplaces. e. Explain how to begin the fireplace. f. Explain how to finish the fireplace. g. Describe a multi-opening fireplace.
Performance Tasks
Performance Task 1 (Learning Objective 3)• Lay out and construct a set of steps with three
risers.
Performance Task 2 (Learning Objective 3)• Lay out and construct a 5-foot by 7-foot clay
brick patio section.
28202-14 Residential Masonry Module Two i
Classroom Equipment and Materials
Whiteboard/chalkboardMarkers/chalkPencils and paperMasonry Level Two PowerPoint® Presentation SlidesComputerCopies of the Module Examination and Performance Profile SheetsVendor-supplied videos/DVDs showing residential masonry work (optional)TV/DVD player
Safety ConsiderationsThis module requires that trainees construct a set of steps and construct a clay brick patio section. Safety is paramount in the masonry trade, and safe habits and practices must be emphasized whenever possible. Performance Tasks must be completed under your supervision. Each trainee must use required PPE and follow safe tool practices and procedures.
Additional Resources and ReferencesThis module is intended to present thorough resources for task training. The following reference works are suggested for further study. These are optional materials for continuing education rather than for task training.
Bricklaying: Brick and Block Masonry. 1988. Brick Industry Association. Orlando, FL: Harcourt Brace & Company.
Concrete Masonry Handbook, Fifth Edition. W. C. Panerese, S. K. Kosmatka, and F. A. Randall Jr. Skokie, IL: Portland Cement Association.
Patios & Walkways. 2010. Peter Jeswald. Newtown, CT: Taunton Press.
Tech Spec Number 2, Construction of Interlocking Concrete Pavements. 2011. Herndon, VA: Interlocking Concrete Pavement Institute. www.icpi.org
Technical Note TN14, Paving Systems Using Clay Pavers. 2007. Reston, VA: The Brick Industry Association. www.gobrick.com
Technical Note TN19, Residential Fireplace Design. 1993. Reston, VA: The Brick Industry Association. www.gobrick.com
Technical Note TN19A, Residential Fireplaces, Details and Construction. 2000. Reston, VA: The Brick Industry Association. www.gobrick.com
Technical Note TN19C, Contemporary Brick Masonry Fireplaces. 2001. Reston, VA: The Brick Industry Association. www.gobrick.com
Vocational Skills Training for Segmental Paver Installation, First Edition. 2003. Stephen Jones. Prior Lake, MN: Pave Tech, Inc.
There are a number of online resources available for trainees who would like more information on cold-formed steel framing. A search for additional information may be assigned as homework to interested trainees.
Instructors should view any videos that may be identified in the lesson plan before using them to ensure their suitability. The videos can provide teachable moments in both proper and improper work processes and behaviors. Be prepared to stop the videos at appropriate times to point out and discuss both proper and improper conduct and techniques.
Instructors are encouraged to locate additional audiovisual aids available on the Internet, make personal videos, and take photos related to the subject matter and add them to the PowerPoint® presentations throughout the program.
ii NCCER – Masonry Level Two 28202-14
Appropriate PPE for masonry and cleaning workBricks, mortar, and other supplies needed to build patiosExamples of concrete pavers Examples of clay brick paversPhotos of fireplacesCopy of your local building codeMasonry tools LevelString lineMallets
Bricks MortarPhotos of different types of masonry stepsPhotos of clay brick patternsPlans and specifications for a fireplaceSDS/MSDS and application instructions for muriatic or other cleaning acidUnlabeled version of Figures 7 and 36 from the Trainee Guide
Equipment and Materials for Laboratories and Performance Testing
28202-14 Residential Masonry Module Two iii
The lesson plan for this module is divided into ten 2.5-hour sessions.Each session includes 10 minutes for administrative tasks and one 10-minute break.
Residential MasonRy
Session Outline for Module 28202-14
SeSSion one
Session One introduces the requirements for residential foundations.
1. Show Session One PowerPoint® presentation slides.
2. Discuss the function of foundation walls and footings, and the various types.
3. Discuss the differences between raft and mat foundations.
4. Explain how foundation walls are built.
SeSSion Two
Session Two introduces the characteristics, uses, and installation techniques for clay brick pavers.
1. Show Session Two PowerPoint® presentation slides.
2. Discuss the types of clay brick pavers.
3. Discuss the installation of brick pavers.
4. Explain how to clean and finish brick pavers.
SeSSion Three
Session Three introduces concrete pavers.
1. Show Session Three PowerPoint® presentation slides.
2. Discuss the various types of concrete pavers.
3. Discuss how to begin installation of concrete pavers.
SeSSion Four
Session Four continues concrete pavers.
1. Show Session Four PowerPoint® presentation slides.
2. Continue discussing installation of concrete pavers.
3. Discuss cleaning concrete pavers.
SeSSion Five
Session Five introduces the construction of masonry steps.
1. Show Session Five PowerPoint® presentation slides.
2. Discuss various types of steps.
3. Discuss pattern and tread design.
4. Discuss how to install clay brick steps.
SeSSion Six
Session Six introduces patios and decks.
1. Show Session Six PowerPoint® presentation slides.
2. Discuss how patios are constructed.
3. Explain how patio decks are constructed.
SeSSion Seven
Session Seven introduces how to lay out and build fireplaces.
1. Show Session Seven PowerPoint® presentation slides.
2. Explain the basic parts and theory of a fireplace.
3. Explain the key points of fireplace workmanship.
SeSSion eighT
Session Eight introduces how to lay out and build fireplaces.
1. Show Session Eight PowerPoint® presentation slides.
2. Explain how to lay out and begin to build a fireplace.
iv NCCER – Masonry Level Two 28202-14
Residential MasonRy
Session Outline for Module 28202-14
SeSSion nine
Session Nine introduces how to lay out and build fireplaces.
1. Show Session Nine PowerPoint® presentation slides.
2. Explain how to finish fireplace construction.
3. Discuss multi-opening fireplaces.
SeSSion Ten
Session Ten is a review and testing session. Have trainees complete the module Review Questions and Trade Terms Quiz. (Alternatively, these may be assigned as homework at the end of Session Nine.) Answer any questions that trainees may have.
1. Have trainees complete the Module Examination. Any outstanding performance testing must be completed during this session.
2. Record the testing results on Training Report Form 200 and submit the report to your Training Program Sponsor.
Individual Sessions for Module 28202-
28202-14 Residential Masonry Module Two v
Materials Checklist for Module 28202-14, Residential Masonry
Equipment and Materials
Personal protective equipment: Examples of concrete pavers Bricks
Appropriate PPE for masonry and cleaning work
Examples of clay brick paversMortar
Whiteboard/chalkboardPhotos of different types of masonry steps
Mallets
Markers/chalkPhotos of various types of clay brick patterns
String line
Pencils and paperPhotos of fireplaces Bricks, mortar, and other
supplies needed to build patios
Masonry Level Two PowerPoint® Presentation Slides
Masonry tools Plans and specifications for a fireplace
Unlabeled version of Figures 7 and 36 from the Trainee Guide
Level SDS/MSDS and application instructions for muriatic or other cleaning acid
Copy of your local building code
Computer
Copies of the Module Examination and Performance Profile Sheets
Vendor-supplied videos/DVDs showing residential masonry work (optional)
To the extent possible, and as required for performance testing, provide a selection of the tools listed for each session; alternatively, photos may be used to teach tool identification.

Lesson Plans for Module 28203-14
ReinfoRced MasonRy
Module 28203-14 describes the use of grout and other types of reinforcement, such as reinforcing steel, to strengthen and support masonry structures. The module also describes the locations where grout can be used and the techniques for placement.
Teaching Time: 15 hours(Six 2.5-hour classroom sessions)
Session time may be adjusted to accommodate your class size, schedule, and teaching style.
PrerequisitesCore Curriculum and Masonry Level One
Before You BeginAs you prepare for each session, allow sufficient time to review the course objectives, content, visual aids (including the PowerPoint® presentation), and these lesson plans and to gather the required equipment and materials. Consider time required for demonstrations, laboratories, field trips, and testing.
Using your access code, download the Module Examinations and Performance Profile Sheets from www.nccerirc.com. The passing score for submission into NCCER’s Registry is 70 percent or above for the Module Examination; performance testing is graded pass or fail.
Objectives
Learning Objective 1• Name and describe the primary ingredients in
grout and how it is prepared. a. Explain the characteristics of coarse and fine
aggregates. b. Explain the characteristics of admixtures. c. Explain the role of water content in grout. d. Explain why compressive strength is
important. e. Explain what mix specifications are and why
they are important. f. Explain the procedures for mixing grout.
Learning Objective 2• Describe how grout is placed.
a. Explain what low-lift grouting is and how to place grout using this technique.
b. Explain what high-lift grouting is and how to place grout using this technique.
c. Explain why mortaring of joints for grouted masonry is important.
d. Explain how to use mechanical vibrators with grout.
Learning Objective 3• Describe how to construct reinforced walls and
masonry elements. a. Explain how to cut and bend rebar. b. Explain how to place rebar in reinforced walls. c. Explain how to install bond beams and bond-
beam lintels. d. Explain how to install precast lintels. e. Explain how to install piers, pilasters, and
columns.
Performance Tasks
Performance Task 1 (Learning Objective 2)• Place grout in a hollow block wall and properly
consolidate it.
Performance Task 2 (Learning Objective 3)• Construct shoring for a masonry lintel.
Performance Task 3 (Learning Objective 3)• Build a masonry lintel out of CMU.
Performance Task 4 (Learning Objective 3)• Build a pier or pilaster.
28203-14 Reinforced Masonry Module Three i
Classroom Equipment and Materials
Whiteboard/chalkboardMarkers/chalkPencils and paperMasonry Level Two PowerPoint® Presentation SlidesComputerCopies of the Module Examination and Performance Profile SheetsTV/DVD playerVendor-supplied videos/DVDs (optional)
Safety ConsiderationsThis module requires that trainees work with grout and potentially hazardous tools. Be sure trainees wear protective gear when working with grout and are mindful of sharp edges and other dangers in all labs. Safety is paramount in the masonry trade, and safe habits and practices must be emphasized whenever possible. Performance Tasks must be completed under your supervision. Each trainee must use required PPE and follow safe tool practices and procedures.
ii NCCER – Masonry Level Two 28203-14
Personal protective equipmentGlovesEye protectionRespiratory protectionHearing protectionWaterproof workboots
Examples of rebarGrout and the materials to mix groutGrout pump for placing groutHickey barHollow concrete block and mortar to form a wall
Materials to build a masonry lintel from CMUMaterials to build a pier or pilasterMaterials to construct shoring for a masonry lintelRod or mechanical vibratorSamples of grout ingredientsUnlabeled version of Figure 23Various rebar cuttersVarious types of steel reinforcing bar
Equipment and Materials for Laboratories and Performance Testing
28203-14 Reinforced Masonry Module Three iii
Additional Resources and ReferencesThis module presents thorough resources for task training. The following resource material is suggested for further study:
ACI 530/ASCE 5/TMS 402, Building Code Requirements for Masonry Structures. Latest Edition. Reston, VA: American Society of Civil Engineers.
ACI 530.1/ASCE 6/TMS 602, Specifications for Masonry Structures. Latest Edition. Reston, VA: American Society of Civil Engineers.
ASTM C94, Specifications for Ready-Mixed Concrete. Latest Edition. West Consohocken, PA: ASTM International.
ASTM C404, Standard Specification for Aggregates for Masonry Grout. Latest Edition. West Consohocken, PA: ASTM International.
ASTM C476, Standard Specification for Grout for Masonry. Latest Edition. West Consohocken, PA: ASTM International.
Bricklaying: Brick and Block Masonry. 1988. Brick Industry Association. Orlando, FL: Harcourt Brace & Company.
Concrete Masonry Handbook: for Architects, Engineers, Builders, Fifth Edition. 1991. W. C. Panerese, S. K. Kosmatka, and F. A. Randall Jr. Skokie, IL: Portland Cement Association.
Technical Note 11E, Guide Specifications for Brick Masonry, Part 5, Mortar and Grout. 1991. Reston, VA: The Brick Industry Association. www.gobrick.com
TEK 2-1A, Typical Sizes and Shapes of Concrete Masonry Units. 2002. Herndon, VA: National Concrete Masonry Association. http://www.ncma.org
TEK 3-2A, Grouting Concrete Masonry Walls. 2005. Herndon, VA: National Concrete Masonry Association. http://www.ncma.org
TEK 5-3A, Concrete Masonry Foundation Wall Details. 2003. Herndon, VA: National Concrete Masonry Association. http://www.ncma.org
TEK 9-4A, Grout for Concrete Masonry. 2005. Herndon, VA: National Concrete Masonry Association. http://www.ncma.org
TEK 12-4D, Steel Reinforcement for Concrete Masonry. 2006. Herndon, VA: National Concrete Masonry Association. http://www.ncma.org
TEK 17-3A, Allowable Stress Design of Concrete Masonry Columns. 2001. Herndon, VA: National Concrete Masonry Association. http://www.ncma.org
TEK 17-4B, Allowable Stress Design of Concrete Masonry Pilasters. 2000. Herndon, VA: National Concrete Masonry Association. http://www.ncma.org
There are a number of online resources available for trainees who would like more information on reinforced masonry. A search for additional information may be assigned as homework to interested trainees.
Instructors should view any videos that may be identified in the lesson plan before using them to ensure their suitability. The videos can provide teachable moments in both proper and improper work processes and behaviors. Be prepared to stop the videos at appropriate times to point out and discuss both proper and improper conduct and techniques.
Instructors are encouraged to locate additional audiovisual aids available on the Internet, make personal videos, and take photos related to the subject matter and add them to the PowerPoint® presentations throughout the program.


28203-14 Reinforced Masonry Module Three v
The lesson plan for this module is divided into six 2.5-hour sessions.Each session includes 10 minutes for administrative tasks and one 10-minute break.
ReinfoRced MasonRy
Session Outline for 28203-14
SeSSion one
Session One introduces the primary ingredients in grout and grout’s preparation.
1. Show Session One PowerPoint® presentation slides.
2. Present the ingredients used in grout and the function of each.
3. Discuss the differences between coarse and fine aggregates.
4. Discuss mix specifications and admixtures.
5. Discuss grout mixing procedures.
SeSSion Two
Session Two introduces trainees to how grout is placed.
1. Show Session Two PowerPoint® presentation slides.
2. Discuss the difference between low-lift and high-lift grouting techniques.
3. Discuss the importance of mortaring joints.
4. Demonstrate the safety and use of mechanical vibrators.
SeSSion Three
Session Three introduces trainees to the construction of reinforced walls and masonry elements.
1. Show Session Three PowerPoint® presentation slides.
2. Discuss the placement of rebar in reinforced walls.
3. Explain the installation of bond beams and bond beam lintels.
4. Explain the installation of precast lintels.
5. Explain the installation of piers, pilasters, and columns.
SeSSion Four
Session Four introduces trainees to the construction of reinforced walls and masonry elements.
1. Show Session Four PowerPoint® presentation slides.
2. Explain the installation of bond beams and bond beam lintels.
3. Explain the installation of precast lintels.
SeSSion Five
Session Five introduces trainees to the construction of reinforced walls and masonry elements.
1. Show Session Five PowerPoint® presentation slides.
2. Explain the installation of piers, pilasters, and columns.
SeSSion Six
Session Six is a review and testing session. Have trainees complete the module Review Questions and Trade Terms Quiz. (Alternatively, these may be assigned as homework at the end of Session Five.) Answer any questions that trainees may have.
1. Have trainees complete the Module Examination. Any outstanding performance testing must be completed during this session.
2. Record the testing results on Training Report Form 200 and submit the report to your Training Program Sponsor.
vi NCCER – Masonry Level Two 28203-14
Materials Checklist for Module 28203-14, Reinforced Masonry
Equipment and Materials
Personal protective equipment: Examples of rebar Hickey bar
GlovesGrout and the materials to mix grout
Hollow concrete block and mortar to form a wall
Eye protection Grout pump for placing groutMaterials to build a masonry lintel from CMU
Respiratory protectionVarious types of steel reinforcing bar
Materials to build a pier or pilaster
Hearing protection Rod or mechanical vibratorMaterials to construct shoring for a masonry lintel
Waterproof workboots Samples of grout ingredients Unlabeled version of Figure 23
Whiteboard/chalkboard Various rebar cutters
Markers/chalk
Pencils and paper
Masonry Level Two PowerPoint® Presentation Slides
Computer
Copies of the Module Examination and Performance Profile Sheets
TV/DVD player
Vendor-supplied videos/DVDs (optional)
To the extent possible, and as required for performance testing, provide a selection of the tools listed for each session; alternatively, photos may be used to teach tool identification.

Lesson Plans for Module 28204-14
Masonry openings and Metal Work
Module 28204-14 provides instruction on the methods and materials used to install masonry openings and to tie wythes together and to structural elements.
Teaching Time: 15 hours(Six 2.5-hour classroom sessions)
Session time may be adjusted to accommodate your class size, schedule, and teaching style.
PrerequisitesCore Curriculum, Masonry Level One, and Masonry Level Two, Modules 28201-14, 28202-14, and 28203-14 .
Before You BeginAs you prepare for each session, allow sufficient time to review the course objectives, content, visual aids (in-cluding the PowerPoint® presentation), and these lesson plans and to gather the required equipment and materi-als. Consider time required for demonstrations, laboratories, field trips, and testing.
Using your access code, download the Module Examinations and Performance Profile Sheets from www.nccerirc.com. The passing score for submission into NCCER’s Registry is 70 percent or above for the Mod-ule Examination; performance testing is graded pass or fail.
Objectives
Learning Objective 1• Describe the methods and materials used to
install masonry openings. a. Describe how to use and install door and
window frames. b. Describe how to use and install windowsills. c. Describe how to use and install steel lintels. d. Describe how to use and install chases and
recesses.
Learning Objective 2• Describe the methods and materials used to tie
a single masonry wythe together. a. Describe how to use and install ladder and
truss joint reinforcement. b. Describe how to use and install seismic
reinforcements.
Learning Objective 3• Describe the methods and materials used to tie
two masonry wythes together. a. Describe how to use and install flexible
anchors. b. Describe how to use and install horizontal
anchors.
Learning Objective 4• Describe the methods and materials used to tie
a masonry wythe to structural elements. a. Describe how to use and install rigid ties and
bolts. b. Describe how to use and install bearing
plates. c. Describe how to use and install saddles. d. Describe how to use and install strap ties.
Performance Tasks
Performance Task 1 (Learning Objective 1) • Install a hollow metal door frame.Performance Task 2 (Learning Objective 1)• Install a sill and a lintel.Performance Task 3 (Learning Objective 4)• Install a bearing plate.Performance Task 4 (Learning Objective 4)• Install a strap tie.
28204-14 Masonry Openings and Metal Work Module Four i
Classroom Equipment and Materials
Whiteboard/chalkboardMarkers/chalkPencils and paperMasonry Level Two PowerPoint® Presentation SlidesComputerCopies of the Module Examination and Performance Profile SheetsVendor-supplied videos/DVDs (optional)TV/DVD player
Safety ConsiderationsThis module requires that trainees work with heavy masonry lintels. Safety is paramount in the masonry trade, and safe habits and practices must be emphasized whenever possible. Performance Tasks must be completed under your supervision. Each trainee must use required PPE and follow safe tool practices and procedures.
ii NCCER – Masonry Level Two 28204-14
Personal protective equipmentEye protectionFoot protectionHand protectionHard hat
Adjustable assembliesAdjustable unit tiesAssorted masonry tools used to set door frames in placeAssorted specialty block, including bases, jambs, lintels, headers, and partition blocksBearing platesBlockBox tiesBrickConstruction drawings for a masonry buildingCorrugated strapsCorrugated tiesFlashingInternational Building Code®
Knockdown metal door framesLocal building codeLug sillManufacturer catalogsMasonry saddlesMason’s toolsMortarMortar mixerRigid ties and boltsSamples of ladder-type horizontal joint reinforcementSamples of truss-type horizontal joint reinforcementSeismic anchorsSet of construction drawingsSet-up metal door framesSlip sillSteel lintelsStrap tiesWeepsWheelbarrowZ-type ties
Equipment and Materials for Laboratories and Performance Testing
28204-14 Masonry Openings and Metal Work Module Four iii
Additional Resources and ReferencesThis module presents thorough resources for task training. The following resource material is suggested for further study:
ASTM A82, Standard Specification for Steel Wire, Plain, for Concrete Reinforcement, Latest edition. West Conshohocken, PA: ASTM International.
ASTM A185, Standard Specification for Steel Welded Wire Reinforcement, Plain, for Concrete, Latest edition. West Conshohocken, PA: ASTM International.
ASTM A496, Standard Specification for Steel Wire, Deformed, for Concrete Reinforcement, Latest edition. West Conshohocken, PA: ASTM International.
ASTM A951, Standard Specification for Steel Wire for Masonry Joint Reinforcements, Latest edition. West Conshohocken, PA: ASTM International.
ASTM E488, Standard Test Methods for Strength of Anchors in Concrete Elements, Latest edition. West Conshohocken, PA: ASTM International.
ASTM E754, Standard Test Method for Pullout Resistance of Ties and Anchors Embedded in Masonry Mortar Joints, Latest edition. West Conshohocken, PA: ASTM International.
Bricklaying: Brick and Block Masonry. 1988. Brick Industry Association. Orlando, FL: Harcourt Brace & Company.
Concrete Masonry Handbook, Fifth edition. W. C. Panerese, S. K. Kosmatka, and F. A. Randall Jr. Skokie, IL: Portland Cement Association.
Technical Note 31B, Structural Steel Lintels. 1987. Reston, VA: The Brick Industry Association. www.gobrick.com
Technical Note 36, Brick Masonry Details, Sills, and Soffits. 1988. Reston, VA: The Brick Industry Association. www.gobrick.com
TEK 12-1B, Anchors and Ties for Masonry. 2011. Herndon, VA: National Concrete Masonry Association. www.ncma.org
TEK 12-4D, Steel Reinforcement for Concrete Masonry. 2011. Herndon, VA: National Concrete Masonry Association. www.ncma.org
There are a number of online resources available for trainees who would like more information on masonry openings and metal work. A search for additional information may be assigned as homework to interested trainees.
Instructors should view any videos that may be identified in the lesson plan before using them to ensure their suitability. The videos can provide teachable moments in both proper and improper work processes and behaviors. Be prepared to stop the videos at appropriate times to point out and discuss both proper and improper conduct and techniques.
Instructors are encouraged to locate additional audiovisual aids available on the Internet, make personal videos, and take photos related to the subject matter and add them to the PowerPoint® presentations throughout the program.

28204-14 Masonry Openings and Metal Work Module Four v
The lesson plan for this module is divided into six 2.5-hour sessions.Each session includes 10 minutes for administrative tasks and one 10-minute break.
Masonry openings and Metal Work
Session Outline for 28204-14
SeSSion one
Session One introduces the installation of door frames.
1. Show Session One PowerPoint® presentation slides.
2. Identify the types of specialty block used for masonry openings.
3. Discuss and demonstrate the installation of hollow metal door frames in masonry openings.
SeSSion Two
Session Two introduces the installation of sills and lintels.
1. Show Session Two PowerPoint® presentation slides.
2. Discuss and demonstrate the installation of brick sills.
3. Discuss and demonstrate the method used to set a sill.
4. Discuss and demonstrate the method used to install a lintel.
5. Discuss the use of chases and recesses in buildings.
SeSSion Three
Session Three introduces tying a single wythe together.
1. Show Session Three PowerPoint® presentation slides.
2. Discuss and demonstrate the installation of horizontal joint reinforcement.
3. Discuss the use of seismic reinforcement in masonry buildings.
SeSSion Four
Session Four introduces tying two masonry wythes together.
1. Show Session Four PowerPoint® presentation slides.
2. Discuss and demonstrate the installation of flexible and horizontal anchors.
SeSSion Five
Session Five introduces tying a masonry wythe to a structural element.
1. Show Session Five PowerPoint® presentation slides.
2. Discuss and demonstrate the installation of rigid ties and bolts.
3. Discuss and demonstrate the installation of bearing plates.
4. Discuss and demonstrate the installation of PA straps.
SeSSion Six
Session Six is a review and testing session. Have trainees complete the module Review Questions and Trade Terms Quiz. (Alternatively, these may be assigned as homework at the end of Session Five.) Answer any questions that trainees may have.
1. Have trainees complete the Module Examination. Any outstanding performance testing must be completed during this session.
2. Record the testing results on Training Report Form 200 and submit the report to your Training Program Sponsor.
vi NCCER – Masonry Level Two 28204-14
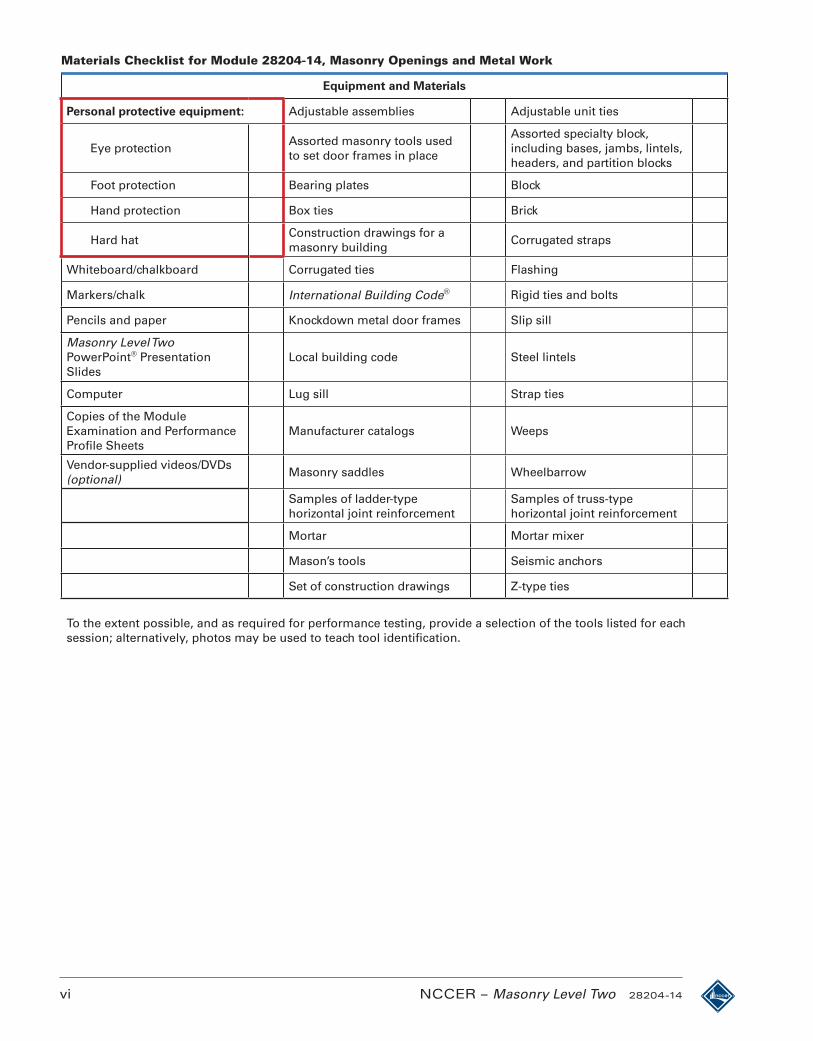
Materials Checklist for Module 28204-14, Masonry Openings and Metal Work
Equipment and Materials
Personal protective equipment: Adjustable assemblies Adjustable unit ties
Eye protectionAssorted masonry tools used to set door frames in place
Assorted specialty block, including bases, jambs, lintels, headers, and partition blocks
Foot protection Bearing plates Block
Hand protection Box ties Brick
Hard hatConstruction drawings for a masonry building
Corrugated straps
Whiteboard/chalkboard Corrugated ties Flashing
Markers/chalk International Building Code® Rigid ties and bolts
Pencils and paper Knockdown metal door frames Slip sill
Masonry Level Two PowerPoint® Presentation Slides
Local building code Steel lintels
Computer Lug sill Strap ties
Copies of the Module Examination and Performance Profile Sheets
Manufacturer catalogs Weeps
Vendor-supplied videos/DVDs (optional)
Masonry saddles Wheelbarrow
Samples of ladder-type horizontal joint reinforcement
Samples of truss-type horizontal joint reinforcement
Mortar Mortar mixer
Mason’s tools Seismic anchors
Set of construction drawings Z-type ties
To the extent possible, and as required for performance testing, provide a selection of the tools listed for each session; alternatively, photos may be used to teach tool identification.
Lesson Plans for Module 28205-14
AdvAnced LAying Techniques
Module 28205-14 contains detailed information that directs the mason in accomplishing the actual construction of walls, arches, and other useful structures. The text explains construction techniques, safety requirements, and interaction with structure components.
Teaching Time: 50 hours(20 2.5-hour classroom sessions)
Session time may be adjusted to accommodate your class size, schedule, and teaching style.
PrerequisitesCore Curriculum and Masonry Level One.
Before You BeginAs you prepare for each session, allow sufficient time to review the course objectives, content, visual aids (including the PowerPoint® presentation), and these lesson plans and to gather the required equipment and materials. Consider time required for demonstrations, laboratories, field trips, and testing.
Using your access code, download the Module Examinations and Performance Profile Sheets from www.nccerirc.com. The passing score for submission into NCCER’s Registry is 70 percent or above for the Module Examination; performance testing is graded pass or fail.
Objectives
Learning Objective 1• Identify the structural principles and fundamen-
tal uses of basic types of walls. a. Identify the structural principles and
fundamental uses of solid masonry walls. b. Identify the structural principles and
fundamental uses of hollow masonry walls. c. Identify the structural principles and
fundamental uses of cavity walls. d. Identify the structural principles and
fundamental uses of composite walls. e. Identify the structural principles and
fundamental uses of anchored veneer walls. f. Identify the structural principles and
fundamental uses of retaining walls. g. Identify the structural principles and
fundamental uses of freestanding walls.
Learning Objective 2• Identify the requirement for and function of
control joints and expansion joints. a. Identify the effects of temperature and
moisture on control joints and expansion joints.
b. Identify the uses of control joints. c. Identify the uses of expansion joints.
Learning Objective 3• Lay out and construct various corners and
intersections. a. Lay out and construct toothing. b. Lay out and construct corbeling. c. Lay out and construct intersecting walls. d. Lay out and construct angled corners.
Performance Tasks
Performance Task 1 (Learning Objective 3)• Lay out and construct a composite wall with
control joints and expansion joints.
Performance Task 2 (Learning Objective 3)• Lay out and construct intersections.
Performance Task 3 (Learning Objective 3)• Lay out and construct angled corners.
28205-14 Advanced Laying Techniques Module Five i
Classroom Equipment and Materials
Whiteboard/chalkboardMarkers/chalkPencils and paperMasonry Level Two PowerPoint® Presentation SlidesComputerCopies of the Module Examination and Performance Profile SheetsVendor-supplied videos/DVDs (optional)TV/DVD player
Safety ConsiderationsThis module requires that trainees layout and construct various wall samples. Safety is paramount in the masonry trade, and safe habits and practices must be emphasized whenever possible. Performance Tasks must be completed under your supervision. Each trainee must use required PPE and follow safe tool practices and procedures.
Additional Resources and ReferencesThis module presents thorough resources for task training. The following resource material is suggested for further study:
ACI 530/ASCE 5/TMS 402, Building Code Requirements for Masonry Structures. Latest edition. Reston, VA: American Society of Civil Engineers.
ACI 530.1/ASCE 6/TMS 602, Specifications for Masonry Structures. Latest edition. Reston, VA: American Soci-ety of Civil Engineers.
Bricklaying: Brick and Block Masonry. 1988. Brick Industry Association. Orlando, FL: Harcourt Brace & Com-pany.
CM260A, Concrete Masonry Shapes and Sizes Directory. 1997. Herndon, VA: National Concrete Masonry Association.
Concrete Masonry Handbook, Fifth Edition. W. C. Panerese, S. K. Kosmatka, and F. A. Randall Jr. Skokie, IL: Portland Cement Association.
Reinforced Concrete Masonry Inspector’s Handbook, Fourth Edition. 2002. Torrance, CA: Masonry Institute of America.
Technical Note 29A, Brick in Landscape Architecture – Garden Walls. 1999. Reston, VA: The Brick Industry Association. www.gobrick.com
TEK 5-9A, Concrete Masonry Corner Details. 2004. Herndon, VA: National Concrete Masonry Association. http://www.ncma.org
There are a number of online resources available for trainees who would like more information on advanced laying techniques. A search for additional information may be assigned as homework to interested trainees.
Instructors should view any videos that may be identified in the lesson plan before using them to ensure their suitability. The videos can provide teachable moments in both proper and improper work processes and behaviors. Be prepared to stop the videos at appropriate times to point out and discuss both proper and improper conduct and techniques.
Instructors are encouraged to locate additional audiovisual aids available on the Internet, make personal videos, and take photos related to the subject matter and add them to the PowerPoint® presentations throughout the program.
ii NCCER – Masonry Level Two 28205-14
Personal protective equipmentEye protectionFoot protectionHand protectionHard hat
Accessories to build a composite wall with expansion and control jointsACI 530-92/ASCE 5-92/TMS 402-92, Building Code Requirements for Masonry StructuresBlockBrick
Building codes from various parts of the United StatesDesign calculations from the Brick Industry AssociationLocal building codeMasonry accessoriesMasonry toolsMetal tiesMortarUnlabeled versions of Figures 7–11, 13–14, 17–18, 20–21, 26, and 43–50 from the Trainee Guide
Equipment and Materials for Laboratories and Performance Testing
28205-14 Advanced Laying Techniques Module Five iii
The lesson plan for this module is divided into 20 2.5-hour sessions.Each session includes 10 minutes for administrative tasks and one 10-minute break.
AdvAnced LAying Techniques
Session Outline for 28205-14
SeSSion one
Session One introduces trainees to structural principles and uses of solid walls.
1. Show Session One PowerPoint® presentation slides.
2. Introduce trainees to structural principles and fundamental uses of solid masonry walls.
SeSSion Two
Session Two introduces trainees to structural principles and uses of hollow walls.
1. Show Session Two PowerPoint® presentation slides.
2. Introduce trainees to structural principles and fundamental uses of hollow walls.
SeSSion Three
Session Three introduces trainees to structural principles and uses of cavity walls.
1. Show Session Three PowerPoint® presentation slides.
2. Introduce trainees to structural principles and fundamental uses of cavity walls.
SeSSion Four
Session Four continues cavity walls.
1. Show Session Four PowerPoint® presentation slides.
2. Continue cavity walls.
SeSSion Five
Session Five continues cavity walls.
1. Show Session Five PowerPoint® presentation slides.
2. Continue cavity walls.
SeSSion Six
Session Six introduces trainees to structural principles and uses of composite walls.
1. Show Session Six PowerPoint® presentation slides.
2. Introduce trainees to structural principles and fundamental uses of composite walls.
SeSSion Seven
Session Seven continues composite walls.
1. Show Session Seven PowerPoint® presentation slides.
2. Continue composite walls.
SeSSion eighT
Session Eight introduces trainees to structural principles and uses of veneer walls.
1. Show Session Eight PowerPoint® presentation slides.
2. Introduce trainees to structural principles and fundamental uses of veneer walls.
iv NCCER – Masonry Level Two 28205-14
Session Outline for 28205-14
AdvAnced LAying Techniques
SeSSion nine
Session Nine introduces trainees to structural principles and uses of retaining walls.
1. Show Session Nine PowerPoint® presentation slides.
2. Introduce trainees to structural principles and fundamental uses of retaining walls.
SeSSion Ten
Session Ten continues retaining walls.
1. Show Session Ten PowerPoint® presentation slides.
2. Continue retaining walls.
SeSSion eleven
Session Eleven introduces trainees to structural principles and uses of freestanding walls.
1. Show Session Eleven PowerPoint® presentation slides.
2. Introduce trainees to structural principles and fundamental uses of freestanding walls.
SeSSion Twelve
Session Twelve continues freestanding walls.
1. Show Session Twelve PowerPoint® presentation slides.
2. Continue freestanding walls.
SeSSion ThirTeen
Session Thirteen introduces trainees to the requirement for and function of control joints.
1. Show Session Thirteen PowerPoint® presentation slides.
2. Identify the effects of temperature and moisture on control joints.
3. Identify the uses of control joints.
SeSSion FourTeen
Session Fourteen introduces trainees to the requirement for and function of expansion joints.
1. Show Session Fourteen PowerPoint® presentation slides.
2. Identify the effects of temperature and moisture on expansion joints.
3. Identify the uses of expansion joints.
SeSSion FiFTeen
Session Fifteen introduces the construction of toothing.
1. Show Session Fifteen PowerPoint® presentation slides.
2. Instruct trainees on how to lay out and construct toothing.
28205-14 Advanced Laying Techniques Module Five v
AdvAnced LAying Techniques
Session Outline for 28205-14
SeSSion SixTeen
Session Sixteen introduces the construction of corbelling.
1. Show Session Sixteen PowerPoint® presentation slides.
2. Instruct trainees on how to lay out and construct corbelling.
SeSSion SevenTeen
Session Seventeen introduces the construction of intersections.
1. Show Session Seventeen PowerPoint® presentation slides.
2. Instruct trainees on how to lay out and construct intersecting walls.
SeSSion eighTeen
Session Eighteen continues intersections.
1. Show Session Eighteen PowerPoint® presentation slides.
2. Continue intersecting walls.
SeSSion nineTeen
Session Nineteen introduces the construction of angled corners.
1. Show Session Nineteen PowerPoint® presentation slides.
2. Instruct trainees on how to lay out and construct angled corners.
SeSSion TwenTy
Session Twenty is a review and testing session. Have trainees complete the module Review Questions and Trade Terms Quiz. (Alternatively, these may be assigned as homework at the end of Session Nineteen.) Answer any questions that trainees may have.
1. Have trainees complete the Module Examination. Any outstanding performance testing must be completed during this session.
2. Record the testing results on Training Report Form 200 and submit the report to your Training Program Sponsor.
vi NCCER – Masonry Level Two 28205-14
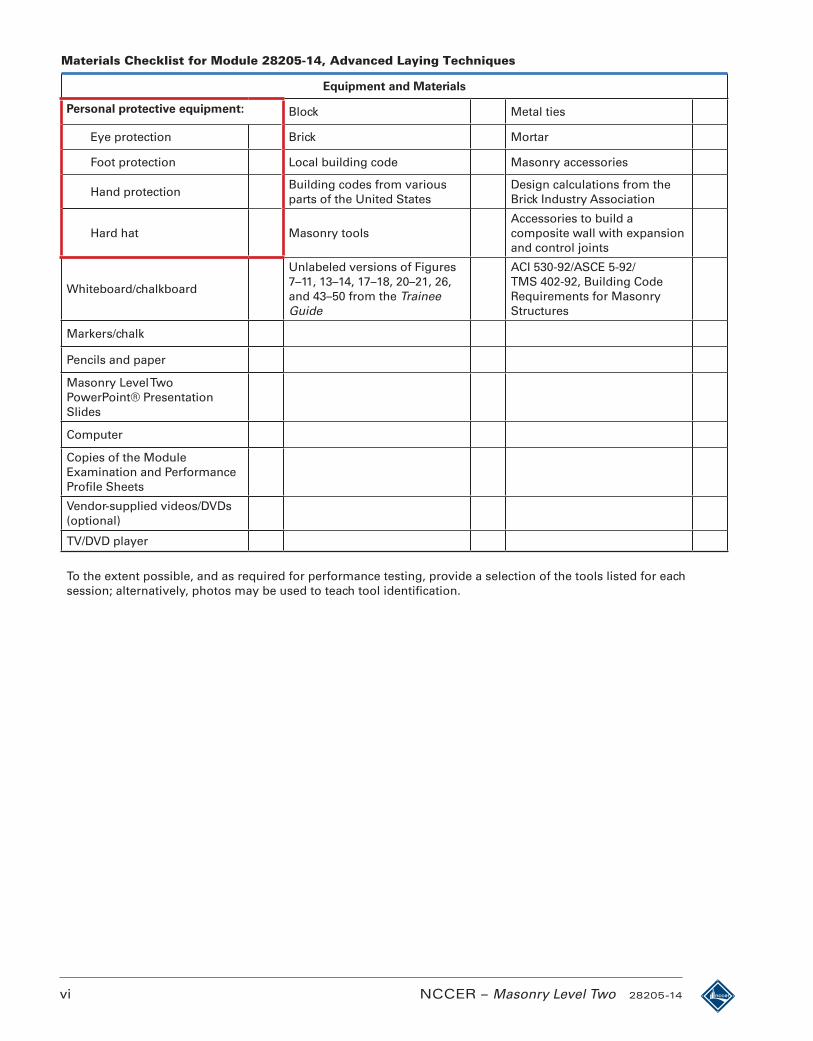
Materials Checklist for Module 28205-14, Advanced Laying Techniques
Equipment and Materials
Personal protective equipment: Block Metal ties
Eye protection Brick Mortar
Foot protection Local building code Masonry accessories
Hand protectionBuilding codes from various parts of the United States
Design calculations from the Brick Industry Association
Hard hat Masonry toolsAccessories to build a composite wall with expansion and control joints
Whiteboard/chalkboard
Unlabeled versions of Figures 7–11, 13–14, 17–18, 20–21, 26, and 43–50 from the Trainee Guide
ACI 530-92/ASCE 5-92/TMS 402-92, Building Code Requirements for Masonry Structures
Markers/chalk
Pencils and paper
Masonry Level Two PowerPoint® Presentation Slides
Computer
Copies of the Module Examination and Performance Profile Sheets
Vendor-supplied videos/DVDs (optional)
TV/DVD player
To the extent possible, and as required for performance testing, provide a selection of the tools listed for each session; alternatively, photos may be used to teach tool identification.
Lesson Plans for Module 28206-14
EffEcts of climatE on masonry
Module 28206-14 describes techniques used to construct openings in masonry walls, the application of insula-tion, and the effects of climate as they relate to the mason’s trade. The module also explains properties and uses of materials used in moisture and temperature control and describes various methods of insulating structures.
Teaching Time: 15 hours(Six 2.5-hour sessions)
Session time may be adjusted to accommodate your class size, schedule, and teaching style.
PrerequisitesCore Curriculum and Masonry Level One.
Before You BeginAs you prepare for each session, allow sufficient time to review the course objectives, content, visual aids (in-cluding the PowerPoint® presentation), and these lesson plans and to gather the required equipment and materi-als. Consider time required for demonstrations, laboratories, field trips, and testing.
Using your access code, download the Module Examinations and Performance Profile Sheets from www.nccerirc.com. The passing score for submission into NCCER’s Registry is 70 percent or above for the Module Examination; performance testing is graded pass or fail.
Objectives
Learning Objective 1• Identify the various types of insulation used in
conjunction with masonry construction, and explain installation techniques.
a. Explain the concept of heat transfer. b. Explain the purpose of and installation
procedures for internal insulation. c. Explain the purpose of and installation
procedures for external insulation.
Learning Objective 2• Identify the need for moisture control in vari-
ous types of masonry construction, and de-scribe the techniques used to eliminate mois-ture problems.
a. Explain the purpose of and installation procedures for flashing.
b. Explain the purpose of and installation procedures for weep vents.
c. Explain the purpose of and installation procedures for waterproofing.
Learning Objective 3• Explain the various techniques used to provide
adequate protection during hot- and cold-weather masonry construction.
a. Explain the role played by weather data and information in masonry construction.
b. Explain the various techniques used to provide adequate protection during hot-weather masonry construction.
c. Explain the various techniques used to provide adequate protection during cold-weather masonry construction.
Performance Tasks
Performance Task 1 (Learning Objective 2)• Install a 4-foot section of base flashing.
28206-14 Effects of Climate on Masonry Module Six i
Classroom Equipment and Materials
Whiteboard/chalkboardMarkers/chalkPencils and paperMasonry Level Two PowerPoint® Presentation SlidesLCD projector and screenComputerCopies of the Module Examination and Performance Profile SheetsVendor-supplied videos/DVDs showing cold-formed steel framing (optional)TV/DVD player
Safety ConsiderationsThis module requires that trainees install flashing. Safety is paramount in the masonry trade, and safe habits and practices must be emphasized whenever possible. Performance Tasks must be completed under your supervision. Each trainee must use required PPE and follow safe tool practices and procedures.
Additional Resources and ReferencesThis module presents thorough resources for task training. The following resource material is suggested for further study:
Alex Wilson. “Thermal Mass and R-value: Making Sense of a Confusing Issue.” Environmental Building News, volume 7, number 4. April 1998. www.buildinggreen.comA Practical Guide to Waterproofing Exterior Walls. Latest edition. Kansas City, MO: Sealant Waterproofing & Restoration Institute.
Below Grade Waterproofing Manual. Latest edition. Kansas City, MO: Sealant Waterproofing & Restoration Institute.
Technical Note 1, Cold and Hot Weather Construction. 2006. Reston, VA: The Brick Industry Association. www.gobrick.comTechnical Note 7, Water Penetration Resistance—Design and Detailing. 2005. Reston, VA: The Brick Industry Association. www.gobrick.comTechnical Note 7A, Water Penetration Resistance—Materials. 2005. Reston, VA: The Brick Industry Associa-tion. www.gobrick.comTechnical Note 7B, Water Penetration Resistance—Construction and Workmanship. 2005. Reston, VA: The Brick Industry Association. www.gobrick.comTEK 3-1C, All-Weather Concrete Masonry Construction. 2002. Herndon, VA: National Concrete Masonry Asso-ciation. www.ncma.orgTEK 3-13, Construction of Low-Rise Concrete Masonry Buildings. 2005. Herndon, VA: National Concrete Masonry Association. www.ncma.orgTEK 6-11A, Insulating Concrete Masonry Walls. 2010. Herndon, VA: National Concrete Masonry Association. www.ncma.orgTEK 19-4A, Flashing Strategies for Concrete Masonry Walls. 2008. Herndon, VA: National Concrete Masonry Association. www.ncma.orgTEK 19-5A, Flashing Details for Concrete Masonry Walls. 2008. Herndon, VA: National Concrete Masonry Association. www.ncma.org
There are a number of online resources available for trainees who would like more information on the effects of climate on masonry. A search for additional information may be assigned as homework to interested trainees.
ii NCCER – Masonry Level Two 28206-14
Personal protective equipmentEye protectionFace protectionHand protectionRespiratory protectionHard hat
Examples of different types of insulation
FlashingMeteorological mapsModified version of Tables 4 and 5 from the Trainee GuideMortarTools to install flashingUnlabeled version of Figures 12, 15, and 21 from the Trainee Guide
Equipment and Materials for Laboratories and Performance Testing
28206-14 Effects of Climate on Masonry Module Six iii
The lesson plan for this module is divided into six 2.5-hour sessions.Each session includes 10 minutes for administrative tasks and one 10-minute break.
EffEcts of climatE on masonry
Session Outline for 28206-14
SeSSion one
Session One introduces insulation in masonry construction.
1. Show Session One PowerPoint® presentation slides.
2. Explain heat transfer.
3. Explain insulation installation.
SeSSion Two
Session Two introduces methods of moisture control.
1. Show Session Two PowerPoint® presentation slides.
2. Introduce trainees to flashing and its installation.
SeSSion Three
Session Three introduces methods of moisture control.
1. Show Session Three PowerPoint® presentation slides.
2. Introduce trainees to the installation of weep vents and waterproofing.
SeSSion Four
Session Four introduces how to protect against extreme weather in masonry construction.
1. Show Session Four PowerPoint® presentation slides.
2. Instruct trainees on how to obtain and use weather data.
3. Instruct trainees on how to protect masonry during hot-weather construction.
SeSSion Five
Session Five introduces how to protect against extreme weather in masonry construction.
1. Show Session Five PowerPoint® presentation slides.
2. Instruct trainees on how to protect masonry during cold-weather construction.
SeSSion Six
Session Six is a review and testing session. Have trainees complete the module Review Questions and Trade Terms Quiz. (Alternatively, these may be assigned as homework at the end of Session Five.) Answer any questions that trainees may have.
1. Have trainees complete the Module Examination. Any outstanding performance testing must be completed during this session.
2. Record the testing results on Training Report Form 200 and submit the report to your Training Program Sponsor.
iv NCCER – Masonry Level Two 28206-14
Materials Checklist for Module 28206-14, Effects of Climate on Masonry
Equipment and Materials
Personal protective equipment: Unlabeled version of Figures 12, 15, and 21 from the Trainee Guide
Modified version of Tables 4 and 5 from the Trainee Guide
Eye protection Flashing Mortar
Face protection Meteorological maps Tools to install flashing
Hand protection Examples of different types of insulation
Respiratory protection
Hard hat
Whiteboard/chalkboard
Markers/chalk
Pencils and paper
Masonry Level Two PowerPoint® Presentation Slides
LCD projector and screen
Computer
Copies of the Module Examination and Performance Profile Sheets
Vendor-supplied videos/DVDs showing cold-formed steel framing (optional)
TV/DVD player
To the extent possible, and as required for performance testing, provide a selection of the tools listed for each session; alternatively, photos may be used to teach tool identification.
Lesson Plans for Module 28207-14
ConstruCtion inspeCtion and Quality Control
Module 28207-14 introduces the quality control requirements for masonry construction. In addition, the module presents procedures for inspection and testing of masonry materials and finished masonry construction.
Teaching Time: 22.5 hours(Nine 2.5-hour sessions)
Session time may be adjusted to accommodate your class size, schedule, and teaching style.
PrerequisitesCore Curriculum and Masonry Level One.
Before You BeginAs you prepare for each session, allow sufficient time to review the course objectives, content, visual aids (including the PowerPoint® presentation), and these lesson plans and to gather the required equipment and materials. Consider time required for demonstrations, laboratories, field trips, and testing.
Using your access code, download the Module Examinations and Performance Profile Sheets from www.nccerirc.com. The passing score for submission into NCCER’s Registry is 70 percent or above for the Module Examination; performance testing is graded pass or fail.
Objectives
Learning Objective 1• Describe how standards and specifications are
used to ensure quality control throughout the masonry industry.
a. Describe the standards and specifications that apply to masonry units, mortar, grout, and accessories.
b. Describe the standards that apply to laboratory and field testing of masonry construction.
Learning Objective 2• Describe how masonry sample panels and
prisms are built and tested to ensure quality control on a project.
a. Describe how to build sample panels. b. Describe how to build hollow masonry
prisms. c. Describe how to build grouted masonry
prisms. d. Describe how to prepare and test mortar and
grout prisms. e. Describe how to conduct masonry tests.
Learning Objective 3• Describe how mortar is tested to ensure quality
control on a project. a. Describe how to perform sand tests.
b. Describe how to perform mortar consistency tests.
c. Describe how to perform brick absorption tests.
d. Describe how to perform laboratory tests.
Learning Objective 4• Describe how field inspections and observa-
tions are used to ensure quality control on a project.
a. Describe why and how standards and codes inspections are performed.
b. Describe why and how materials inspections are performed.
c. Describe the types of observations that are undertaken during construction.
d. Describe why and how construction tolerances are monitored.
Performance Tasks
Performance Task 1 (Learning Objective 2)• Build a prism for mortar testing.
Performance Task 2 (Learning Objective 3)• Perform a slump test.
28207-14 Construction Inspection and Quality Control Module Seven i
Classroom Equipment and Materials
Whiteboard/chalkboardMarkers/chalkPencils and paperMasonry Level Two PowerPoint® Presentation SlidesLCD projector and screenComputerCopies of the Module Examination and Performance Profile SheetsVendor-supplied videos/DVDs showing cold-formed steel framing (optional)TV/DVD player
Safety ConsiderationsThis module requires that trainees perform slump tests and the construction of prisms for mortar testing. Safety is paramount in the masonry trade, and safe habits and practices must be emphasized whenever possible. Performance Tasks must be completed under your supervision. Each trainee must use required PPE and follow safe tool practices and procedures.
ii NCCER – Masonry Level Two 28207-14
Personal protective equipmentEye protectionFace protectionFoot protectionHand protectionHard hat
ASTM C1019 ASTM specifications referenced in the Trainee GuideBlockBrickCone mold and rodConstruction drawings and/or contractsEye dropperGrout
Laboratory scalesList of required inspections for your local governmentMasonry toolsMock specifications with a submittal listMortarPrism test materialsSample construction contracts with project specifications SandSand test sievesSiltation test jarSodium hydroxideVibratorWatch with second hand
Equipment and Materials for Laboratories and Performance Testing
Additional Resources and ReferencesThis module presents thorough resources for task training. The following resource material is suggested for further study:
ACI 530/ASCE 5/TMS 402, Building Code Requirements for Masonry Structures. Latest edition. Reston, VA: American Society of Civil Engineers.
ASTM C55, Standard Specification for Concrete Building Brick. Latest edition. West Conshohocken, PA: ASTM International.
ASTM C62, Standard Specification for Building Brick (Solid Masonry Units Made from Clay or Shale). Latest edition. West Conshohocken, PA: ASTM International.
ASTM C67, Standard Test Methods for Sampling and Testing Brick and Structural Clay Tile. Latest edition. West Conshohocken, PA: ASTM International.
ASTM C90, Standard Specification for Loadbearing Concrete Masonry Units. Latest edition. West Con-shohocken, PA: ASTM International.
ASTM C126, Standard Specification for Ceramic Glazed Structural Clay Facing Tile, Facing Brick, and Solid Masonry Units. Latest edition. West Conshohocken, PA: ASTM International.
ASTM C129, Standard Specification for Nonloadbearing Concrete Masonry Units. Latest edition. West Con-shohocken, PA: ASTM International.
ASTM C138, Standard Test Method for Density (Unit Weight), Yield, and Air Content (Gravimetric) of Concrete. Latest edition. West Conshohocken, PA: ASTM International.
ASTM C140, Standard Test Methods for Sampling and Testing Concrete Masonry Units and Related Units. Latest edition. West Conshohocken, PA: ASTM International.
ASTM C144, Standard Specification for Aggregate for Masonry Mortar. Latest edition. West Conshohocken, PA: ASTM International.
ASTM C173, Standard Test Method for Air Content of Freshly Mixed Concrete by the Volumetric Method. Lat-est edition. West Conshohocken, PA: ASTM International.
ASTM C216, Standard Specification for Facing Brick (Solid Masonry Units Made from Clay or Shale). Latest edition. West Conshohocken, PA: ASTM International.
ASTM C231, Standard Test Method for Air Content of Freshly Mixed Concrete by the Pressure Method. Latest edition. West Conshohocken, PA: ASTM International.
ASTM C270, Standard Specification for Mortar for Unit Masonry. Latest edition. West Conshohocken, PA: ASTM International.
ASTM C476, Standard Specification for Grout for Masonry. Latest edition. West Conshohocken, PA: ASTM International.
ASTM C652, Standard Specification for Hollow Brick (Hollow Masonry Units Made from Clay or Shale). Latest edition. West Conshohocken, PA: ASTM International.
ASTM C780, Standard Test Method for Preconstruction and Construction Evaluation of Mortars for Plain and Reinforced Unit Masonry. Latest edition. West Conshohocken, PA: ASTM International.
ASTM C1019, Standard Test Method for Sampling and Testing Grout. Latest edition. West Conshohocken, PA: ASTM International.
ASTM C1314, Standard Test Method for Compressive Strength of Masonry Prisms. Latest edition. West Con-shohocken, PA: ASTM International.
International Building Code®. Latest edition. Falls Church, VA: International Code Council.
NFPA 5000, Building Construction and Safety Code®. Latest edition. Quincy, MA: National Fire Protection Association.
TEK 3-8A, Concrete Masonry Construction. 2001. Herndon, VA: National Concrete Masonry Association. www.ncma.org
There are a number of online resources available for trainees who would like more information on construction inspection and quality control. A search for additional information may be assigned as homework to interested trainees.
28207-14 Construction Inspection and Quality Control Module Seven iii

28207-14 Construction Inspection and Quality Control Module Seven v
ConstruCtion inspeCtion and Quality Control
Session Outline for 28207-14
The lesson plan for this module is divided into nine 2.5-hour sessions.Each session includes 10 minutes for administrative tasks and one 10-minute break.
SeSSion one
Session One introduces standards and specifications for quality control.
1. Show Session One PowerPoint® presentation slides.
2. Introduce trainees to the standards and specifications that apply to masonry.
3. Introduce trainees to the standards that apply to laboratory and field testing.
SeSSion Two
Session Two introduces sample panels and prisms.
1. Show Session Two PowerPoint® presentation slides.
2. Instruct trainees on the construction of sample panels.
3. Instruct trainees on the construction of various prisms.
SeSSion Three
Session Three introduces the testing of prisms.
1. Show Session Three PowerPoint® presentation slides.
2. Instruct trainees on the variety of tests for masonry prisms.
SeSSion Four
Session Four introduces the testing of mortar.
1. Show Session Four PowerPoint® presentation slides.
2. Instruct trainees on performing sand tests.
SeSSion Five
Session Five introduces mortar consistency and absorption tests.
1. Show Session Five PowerPoint® presentation slides.
2. Instruct trainees on performing mortar consistency tests.
3. Instruct trainees on the construction of brick absorption tests.
4. Demonstrate the performance of a slump test.
5. Have trainees perform a slump test.
SeSSion Six
Session Six introduces the performance of laboratory tests.
1. Show Session Six PowerPoint® presentation slides.
2. Introduce trainees to flow and flow-after-suction tests.
3. Introduce trainees to the cone penetration test.
SeSSion Seven
Session Seven introduces the performance of field inspections.
1. Show Session Seven PowerPoint® presentation slides.
2. Instruct trainees on standards and codes inspections.
3. Instruct trainees on materials inspections.
vi NCCER – Masonry Level Two 28207-14
ConstruCtion inspeCtion and Quality Control
Session Outline for 28207-14
SeSSion eighT
Session Eight continues field inspections.
1. Show Session Eight PowerPoint® presentation slides.
2. Instruct trainees on monitoring structural elements during construction.
3. Instruct trainees on monitoring construction tolerances.
SeSSion nine
Session Nine is a review and testing session. Have trainees complete the module Review Questions and Trade Terms Quiz. (Alternatively, these may be assigned as homework at the end of Session Eight.) Answer any questions that trainees may have.
1. Have trainees complete the Module Examination. Any outstanding performance testing must be completed during this session.
2. Record the testing results on Training Report Form 200 and submit the report to your Training Program Sponsor.
28207-14 Construction Inspection and Quality Control Module Seven vii
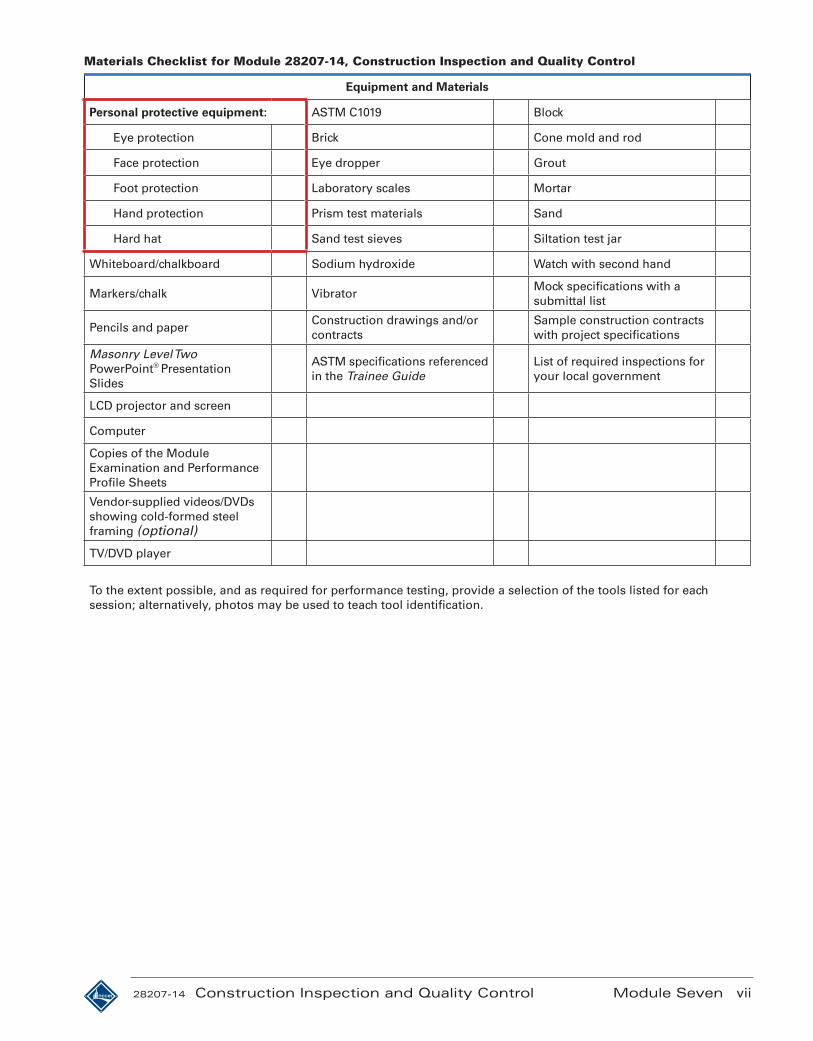
Materials Checklist for Module 28207-14, Construction Inspection and Quality Control
Equipment and Materials
Personal protective equipment: ASTM C1019 Block
Eye protection Brick Cone mold and rod
Face protection Eye dropper Grout
Foot protection Laboratory scales Mortar
Hand protection Prism test materials Sand
Hard hat Sand test sieves Siltation test jar
Whiteboard/chalkboard Sodium hydroxide Watch with second hand
Markers/chalk VibratorMock specifications with a submittal list
Pencils and paperConstruction drawings and/or contracts
Sample construction contracts with project specifications
Masonry Level Two PowerPoint® Presentation Slides
ASTM specifications referenced in the Trainee Guide
List of required inspections for your local government
LCD projector and screen
Computer
Copies of the Module Examination and Performance Profile Sheets
Vendor-supplied videos/DVDs showing cold-formed steel framing (optional)
TV/DVD player
To the extent possible, and as required for performance testing, provide a selection of the tools listed for each session; alternatively, photos may be used to teach tool identification.

Recommended


![Definitions · Web viewShared ownership agreement residential property Dated:[date] [Names of all Owners] Contents Definitions Interpretation Terms of beneficial interest Relationship](https://img.pdfslide.net/doc/110x75/5abfef9c7f8b9ab02d8ec153/definitions-viewshared-ownership-agreement-residential-property-dateddate-names.jpg)