
English
Michael Ruf, Matthias Klag
Revision and quality control: Cristina Bachmann, Heiko Bischoff, Marion Bröer, Insa Mingers, Sabine Pfeifer, Benjamin Schütte
This PDF provides improved access for vision-impaired users. Please note that due to the complexity and number of images in this document, it is not possible to include text descriptions of images.
The information in this document is subject to change without notice and does not represent a commitment on the part of Steinberg Media Technologies GmbH. The software described by this document is subject to a License Agreement and may not be copied to other media except as specifically allowed in the License Agreement. No part of this publication may be copied, reproduced, or otherwise transmitted or recorded, for any purpose, without prior written permission by Steinberg Media Technologies GmbH. Registered licensees of the product described herein may print one copy of this document for their personal use.
All product and company names are ™ or ® trademarks of their respective holders. For more information, please visit www.steinberg.net/trademarks.
Release Date: September 24, 2012
© Steinberg Media Technologies GmbH, 2012.
All rights reserved.
Table of Contents
5 Introduction5 Loading the VST Sound Instrument Set5 Loading and Saving Presets
6 Plug-in Controls6 Plug-in Functions Section7 Edit Display7 Options Page10 Performance Control Section11 Quick Controls11 Trigger Pads
13 Macro Page Parameters13 Editing Programs in HALion and HALion Sonic14 Automating Parameters14 The Voice Section for Synthesizer Programs15 The Voice Section for Drums and Sliced Loops15 The Filter Section17 The Amp Section18 The FlexPhraser Section
4
Introduction
The Triebwerk VST Sound Instrument Set comes with a large number of high-quality VST Sound presets. These presets can combine up to four layers that can be edited individually. In your Steinberg DAW, you can load the instrument set as a VST 3 plug-in. Furthermore, you can load the instrument set as a program in HALion, HALion Sonic, and HALion Sonic SE.
Loading the VST Sound Instrument Set
• To load the instrument set as a plug-in, open your Steinberg DAW and create an instrument track that is associated with the instrument set.
• To load the instrument set in HALion, HALion Sonic, or HALion Sonic SE, load any of the presets that come with Triebwerk.
You can also load the VST Sound Instrument Set in non-Steinberg applications. For more information, consult the documentation of these applications.
Loading and Saving Presets
When you are working with a Steinberg DAW, the Load and Save dialogs contain MediaBay functionality, allowing you to make use of tags, for example.
• To load a preset, click the name field in the plug-in functions section and select the preset in the dialog.When a preset is loaded, you can step through the available presets using the left and right arrow buttons to the left of the preset name field.
• To save a preset, click the floppy disk icon to the right of the preset name and enter a name for the preset.In a non-Steinberg DAW, you can only save presets in the predefined folder or a subfolder of this folder. If you save presets using the preset manager of the DAW that you are using, these presets are only accessible within this DAW and not in other host applications.
5
Plug-in Controls
This chapter describes the sections that are available if you open the Triebwerk VST Sound Instrument Set as a plug-in.
Plug-in Functions Section
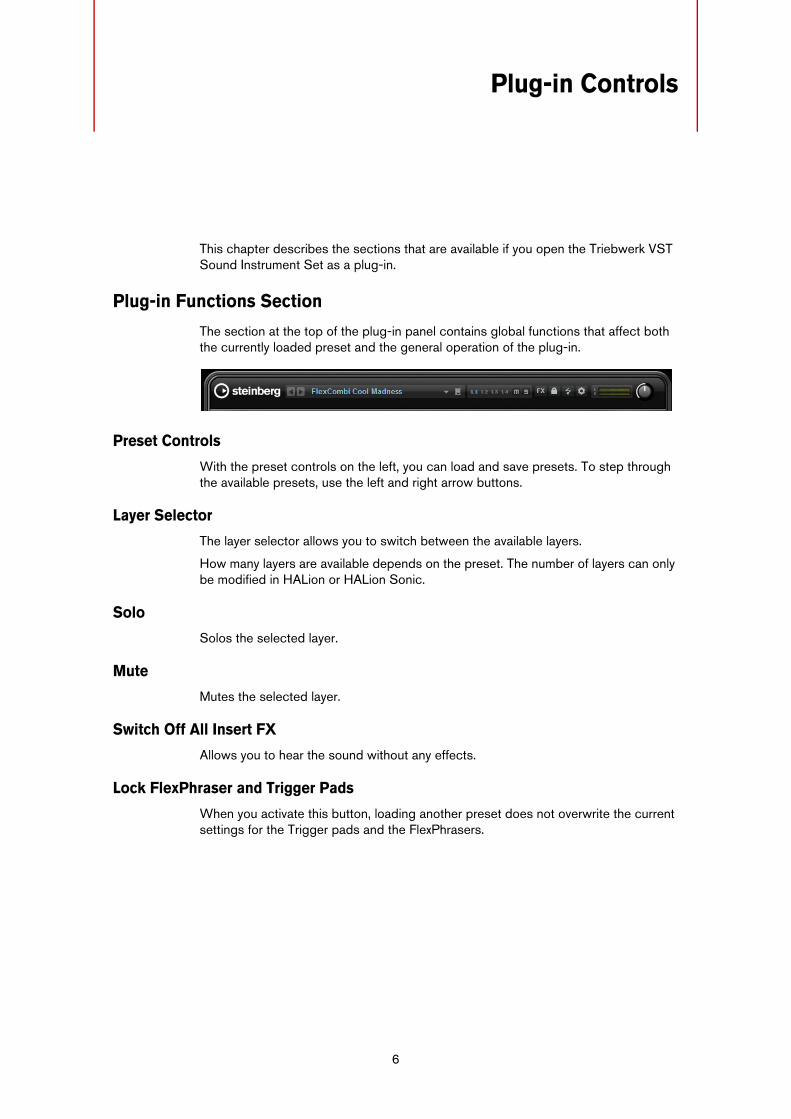
The section at the top of the plug-in panel contains global functions that affect both the currently loaded preset and the general operation of the plug-in.
Preset Controls
With the preset controls on the left, you can load and save presets. To step through the available presets, use the left and right arrow buttons.
Layer Selector
The layer selector allows you to switch between the available layers.
How many layers are available depends on the preset. The number of layers can only be modified in HALion or HALion Sonic.
Solo
Solos the selected layer.
Mute
Mutes the selected layer.
Switch Off All Insert FX
Allows you to hear the sound without any effects.
Lock FlexPhraser and Trigger Pads
When you activate this button, loading another preset does not overwrite the current settings for the Trigger pads and the FlexPhrasers.
6
Edit Display
MIDI Reset
Sometimes, notes can hang. This may be caused by the plug-in losing the MIDI connection or receiving wrong MIDI controller data. In this case, you can “emergency reset” the plug-in.
• Click the “MIDI Reset” button (the lightning icon) to send an “All Sound Off” and “Reset All Controllers” message to the plug-in. The plug-in immediately stops playback and resets the controllers to their default values.
Options
Click this button to show the Options page in the edit display. To return to the Macro page parameters, click the button again.
Meter
Shows the output level of the plug-in.
Main Volume
Adjusts the output level of the plug-in.
Edit Display
The edit display in the center of the plug-in window shows the Macro page that contains the parameters of the instrument set. The parameters on the Macro page are described in the chapter “Macro Page Parameters” on page 13.
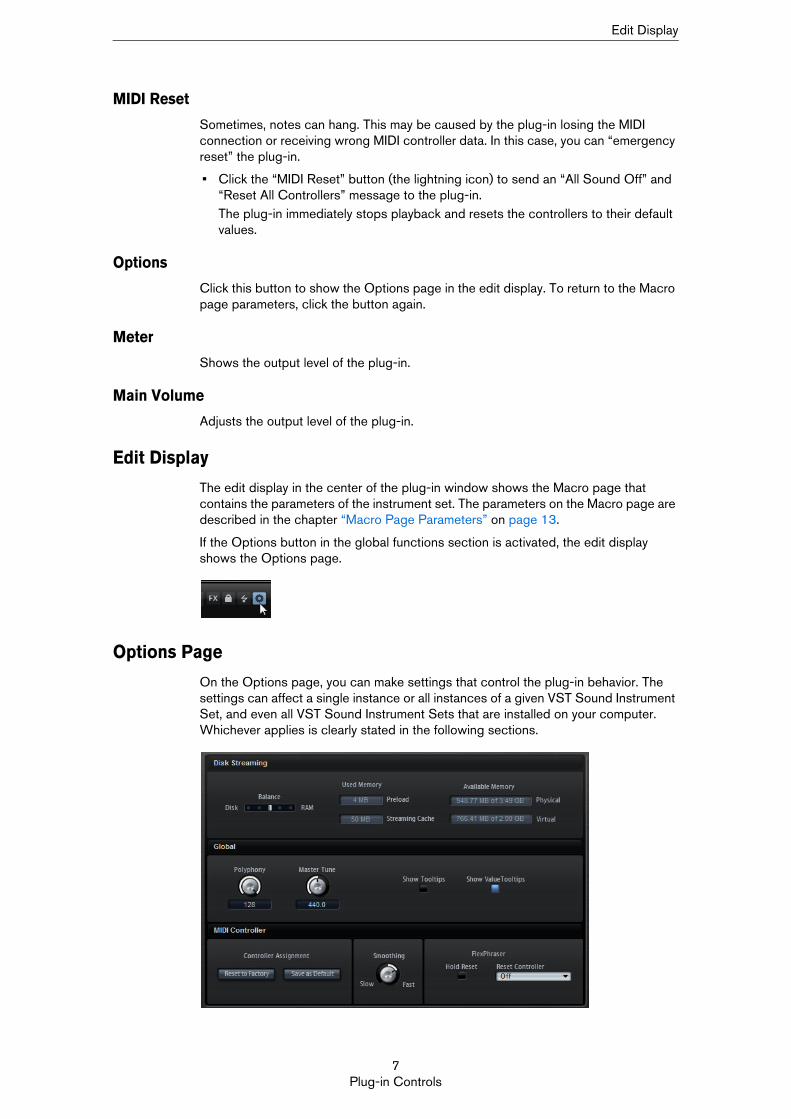
If the Options button in the global functions section is activated, the edit display shows the Options page.
Options Page
On the Options page, you can make settings that control the plug-in behavior. The settings can affect a single instance or all instances of a given VST Sound Instrument Set, and even all VST Sound Instrument Sets that are installed on your computer. Whichever applies is clearly stated in the following sections.
7Plug-in Controls
Options Page
Disk Streaming Section
The settings in this section affect all VST Sound Instrument Set plug-ins installed on your computer, as well as HALion Sonic SE.
Presets can contain a lot of samples which can take up a large amount of data, especially if you are using several plug-in instances. Therefore, the samples are not loaded completely into the RAM. Instead, only the first milliseconds of each sample are loaded. While you play, more manageable portions of the samples are continually loaded into the RAM from the hard disk. Because the hard disk has to work harder for every additional note you play, it is a good idea to load as much material as possible into the RAM beforehand. This leaves less RAM for other applications. For an optimum performance of your system, you can balance the RAM versus the hard disk usage.
Balancing Disk vs. RAM
With this slider, you can balance the hard disk versus the RAM usage. This setting is not saved with the project. It has to be set up only once for your computer system.
• If you need more RAM for other applications, drag the slider to the left towards the Disk setting.
• If your hard disk is not supplying data fast enough, drag the slider to the right towards the RAM setting.
Global Section
Polyphony
Here, you can specify how many notes can be played simultaneously before voices are stolen. Limiting the polyphony can help to keep the required performance within a reasonable range.
This setting only affects the current plug-in instance.
Master Tune
You can set the Master Tune parameter within the range from 415.3 Hz to 466.2 Hz, which equals -100 cents to +100 cents.
This setting only affects the current plug-in instance.
Show Tooltips
When this option is activated, a tooltip is displayed when you move the mouse over a control.
This setting affects all VST Sound Instrument Set plug-ins installed on your computer, as well as HALion Sonic SE.
Show Value Tooltips
When this option is activated, parameters without a value text field display their value in a tooltip when using the corresponding control.
This setting affects all VST Sound Instrument Set plug-ins installed on your computer, as well as HALion Sonic SE.
8Plug-in Controls
Options Page
MIDI Controller Section
You can save your customized MIDI controller assignments as default or restore the factory MIDI controller assignments.
Resetting to Factory Defaults
To restore the factory MIDI controller assignments, click the “Reset to Factory” button.
This setting affects all open plug-in instances of a particular VST Sound Instrument Set.
Saving as Default
To save the current MIDI controller assignments as default, click the “Save as Default” button.
Now, each time you load a new instance of the plug-in, your customized MIDI controller mapping is loaded by default.
This setting affects all open plug-in instances of a particular VST Sound Instrument Set.
The current MIDI controller mapping is also saved with each project. This way, you can transfer your settings between different systems.
MIDI Controller Smoothing
MIDI controllers have a maximum resolution of 128 steps, which is rather low. Therefore, if you use a MIDI controller to remote-control a quick control, for example, the parameter change may occur in audible steps. To avoid this, the plug-in provides MIDI controller smoothing, allowing for less abrupt parameter changes.
• If MIDI controller changes cause audible artifacts, turn the control towards slower settings. This makes MIDI controller changes occur not immediately, but spaced over a period of time.
• If you want MIDI controller changes to be more immediate, turn the control towards faster settings. This can produce audible artifacts when MIDI controller changes occur.
This setting affects all VST Sound Instrument Set plug-ins installed on your computer, as well as HALion Sonic SE.
FlexPhraser Hold Reset
This command sends a global “Hold Reset” message to all FlexPhraser modules that are used in the preset. On the “Reset Controller” pop-up menu, you can assign a MIDI controller to the FlexPhraser “Hold Reset” button, which allows you to remote-control it.
This setting affects all open plug-in instances of a particular VST Sound Instrument Set.
9Plug-in Controls
Performance Control Section
Performance Control Section
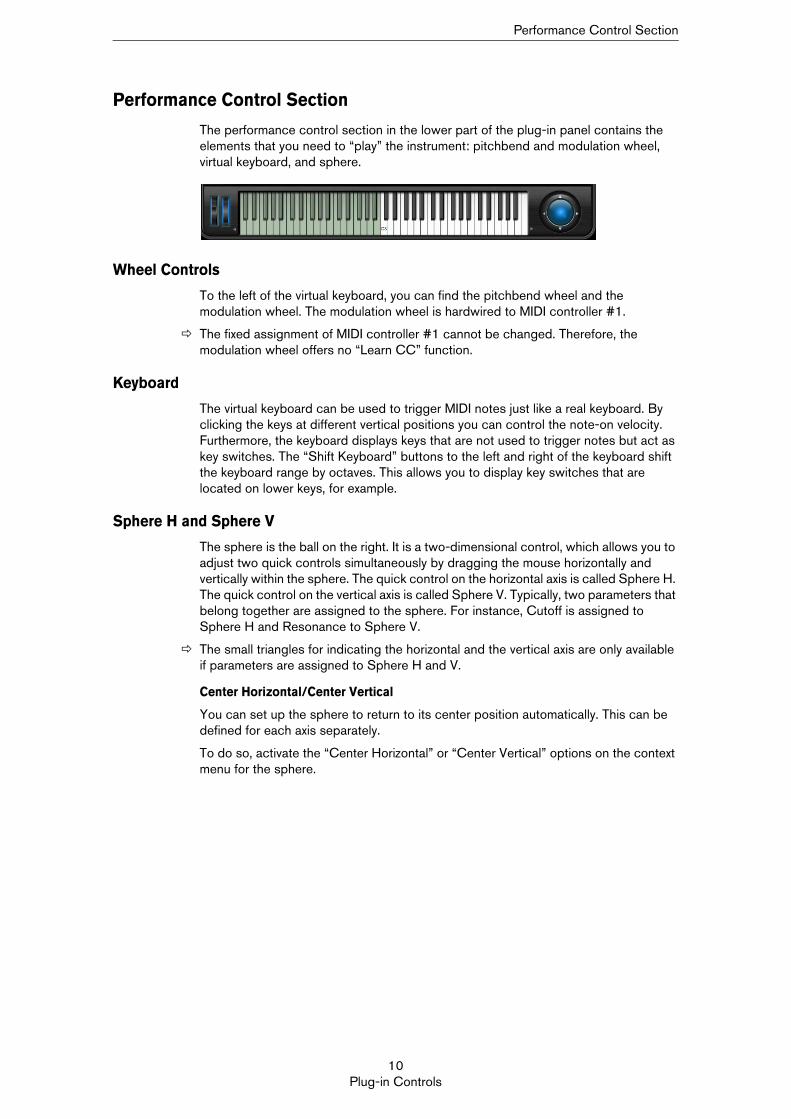
The performance control section in the lower part of the plug-in panel contains the elements that you need to “play” the instrument: pitchbend and modulation wheel, virtual keyboard, and sphere.
Wheel Controls
To the left of the virtual keyboard, you can find the pitchbend wheel and the modulation wheel. The modulation wheel is hardwired to MIDI controller #1.
The fixed assignment of MIDI controller #1 cannot be changed. Therefore, the modulation wheel offers no “Learn CC” function.
Keyboard
The virtual keyboard can be used to trigger MIDI notes just like a real keyboard. By clicking the keys at different vertical positions you can control the note-on velocity. Furthermore, the keyboard displays keys that are not used to trigger notes but act as key switches. The “Shift Keyboard” buttons to the left and right of the keyboard shift the keyboard range by octaves. This allows you to display key switches that are located on lower keys, for example.
Sphere H and Sphere V
The sphere is the ball on the right. It is a two-dimensional control, which allows you to adjust two quick controls simultaneously by dragging the mouse horizontally and vertically within the sphere. The quick control on the horizontal axis is called Sphere H. The quick control on the vertical axis is called Sphere V. Typically, two parameters that belong together are assigned to the sphere. For instance, Cutoff is assigned to Sphere H and Resonance to Sphere V.
The small triangles for indicating the horizontal and the vertical axis are only available if parameters are assigned to Sphere H and V.
Center Horizontal/Center Vertical
You can set up the sphere to return to its center position automatically. This can be defined for each axis separately.
To do so, activate the “Center Horizontal” or “Center Vertical” options on the context menu for the sphere.
10Plug-in Controls
Quick Controls
Quick Controls
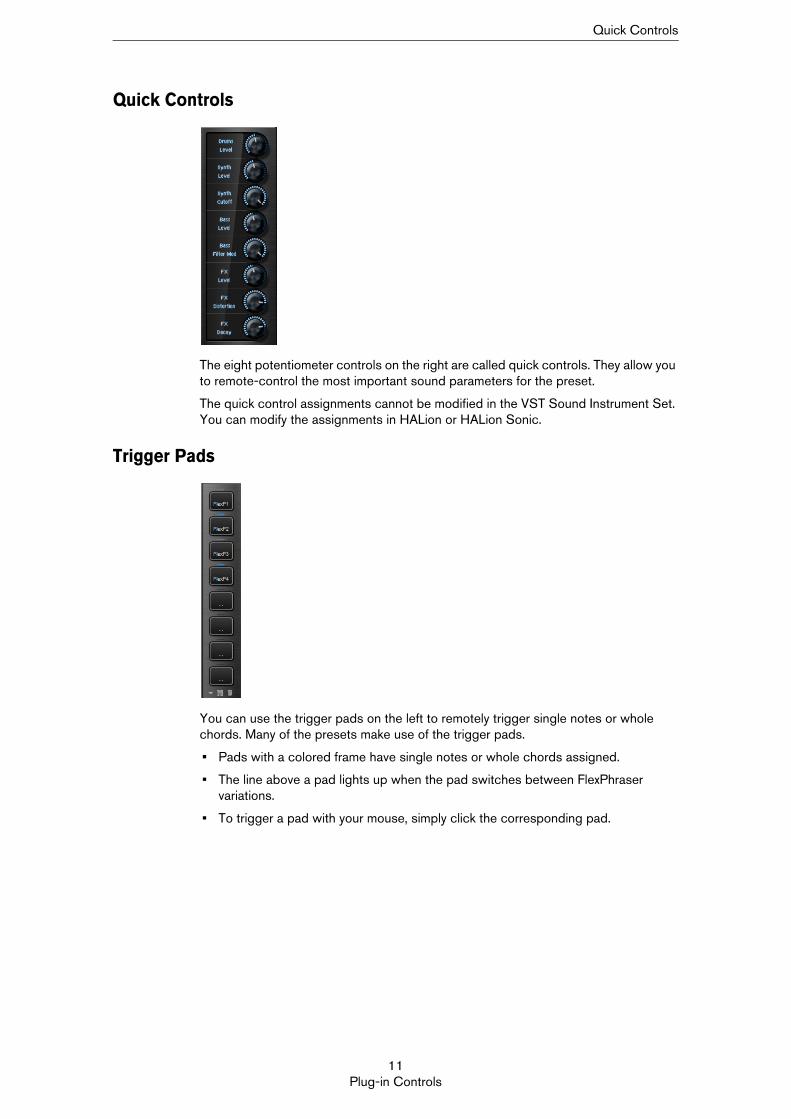
The eight potentiometer controls on the right are called quick controls. They allow you to remote-control the most important sound parameters for the preset.
The quick control assignments cannot be modified in the VST Sound Instrument Set. You can modify the assignments in HALion or HALion Sonic.
Trigger Pads
You can use the trigger pads on the left to remotely trigger single notes or whole chords. Many of the presets make use of the trigger pads.
• Pads with a colored frame have single notes or whole chords assigned.
• The line above a pad lights up when the pad switches between FlexPhraser variations.
• To trigger a pad with your mouse, simply click the corresponding pad.
11Plug-in Controls

Trigger Pads
Assigning Trigger Notes to Pads
You can assign a MIDI note to a pad and trigger the pad by playing this note.
Proceed as follows:
1. Right-click the pad.
2. From the menu, select “Assign Trigger Note”.
3. From the submenus, select the octave and note that you want to assign.
Or:
1. Right-click the pad.
2. From the context menu, select “Learn Trigger Note”.
3. Play the note on your MIDI keyboard or click the note on the virtual keyboard. The name of the MIDI note that you assigned as trigger note is displayed in the top left corner of the pad.
Keys that serve as trigger notes light up in blue on the virtual keyboard. These keys no longer play sounds, but trigger the corresponding pads.
Removing Trigger Note Assignments
To remove a trigger note from a pad, proceed as follows:
1. Right-click the pad.
2. From the context menu, select “Forget Trigger Note”.
12Plug-in Controls
Macro Page Parameters
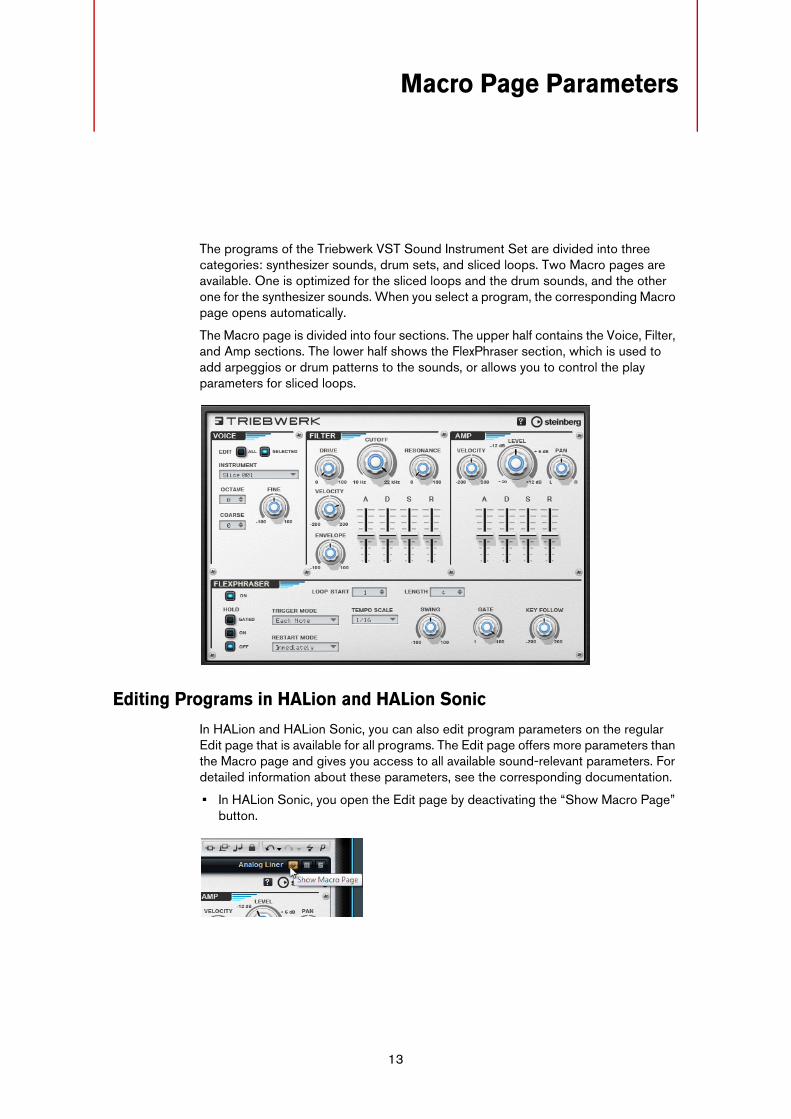
The programs of the Triebwerk VST Sound Instrument Set are divided into three categories: synthesizer sounds, drum sets, and sliced loops. Two Macro pages are available. One is optimized for the sliced loops and the drum sounds, and the other one for the synthesizer sounds. When you select a program, the corresponding Macro page opens automatically.
The Macro page is divided into four sections. The upper half contains the Voice, Filter, and Amp sections. The lower half shows the FlexPhraser section, which is used to add arpeggios or drum patterns to the sounds, or allows you to control the play parameters for sliced loops.
Editing Programs in HALion and HALion Sonic
In HALion and HALion Sonic, you can also edit program parameters on the regular Edit page that is available for all programs. The Edit page offers more parameters than the Macro page and gives you access to all available sound-relevant parameters. For detailed information about these parameters, see the corresponding documentation.
• In HALion Sonic, you open the Edit page by deactivating the “Show Macro Page” button.
13

Automating Parameters
Automating Parameters
The parameters on the Macro page cannot be automated. However, you can make use of the quick controls instead. See “Quick Controls” on page 11.
The Voice Section for Synthesizer Programs
In the Voice section for synth programs, the following parameters are available:
Mono
Switches between monophonic and polyphonic playback. If Mono is deactivated, playback is polyphonic.
Polyphony
Sets the upper limit for the number of notes that you can play in polyphonic mode (up to 128 notes).
Pitchbend Up/Down
Defines the range of the pitch modulation that is applied when you move the pitchbend wheel up or down.
Glide
You can use the Glide parameter to bend the pitch between adjacent notes. You achieve the best results in Mono mode.
When you activate the Glide option, the following parameters become available:
Glide Time
Specifies the time needed to bend the pitch from one note to the other.
Sync
Activate this option to synchronize the glide time to the host tempo. Select a note value from the pop-up menu. To change the selected note value to a triplet, activate the “T” option.
Fingered
Activate this parameter to glide the pitch only between notes that are played legato.
14Macro Page Parameters
The Voice Section for Drums and Sliced Loops
The Voice Section for Drums and Sliced Loops
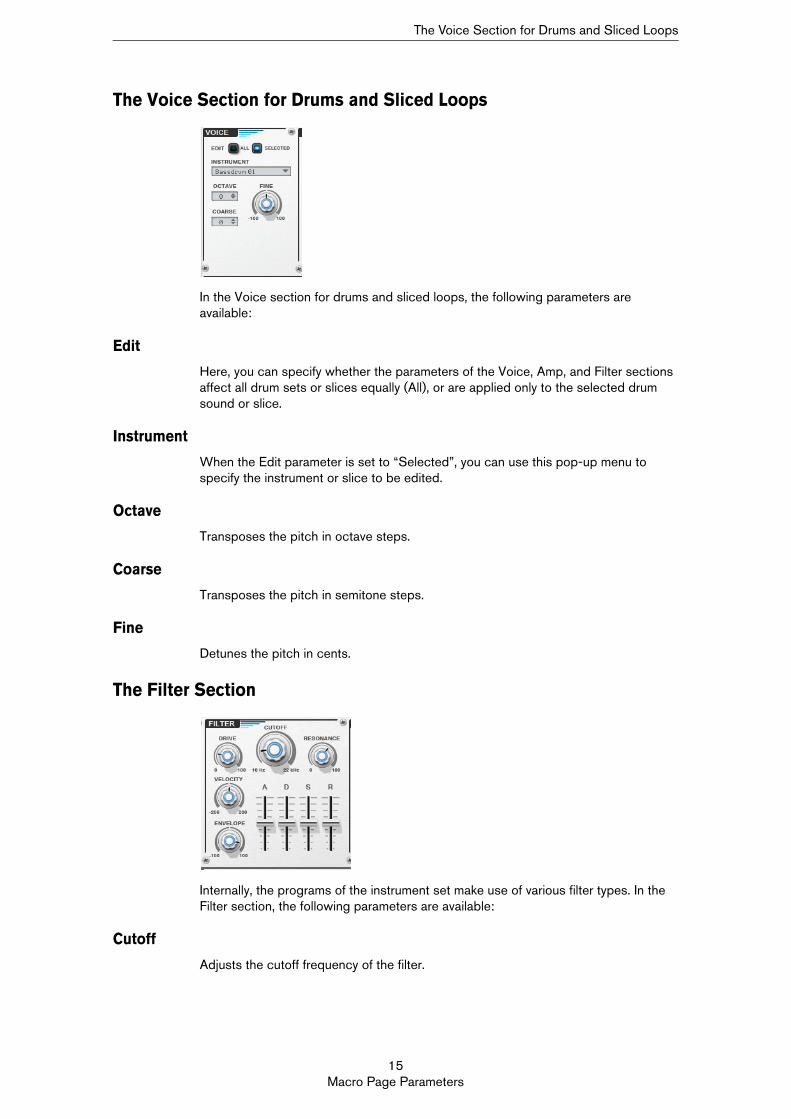
In the Voice section for drums and sliced loops, the following parameters are available:
Edit
Here, you can specify whether the parameters of the Voice, Amp, and Filter sections affect all drum sets or slices equally (All), or are applied only to the selected drum sound or slice.
Instrument
When the Edit parameter is set to “Selected”, you can use this pop-up menu to specify the instrument or slice to be edited.
Octave
Transposes the pitch in octave steps.
Coarse
Transposes the pitch in semitone steps.
Fine
Detunes the pitch in cents.
The Filter Section
Internally, the programs of the instrument set make use of various filter types. In the Filter section, the following parameters are available:
Cutoff
Adjusts the cutoff frequency of the filter.
15Macro Page Parameters
The Filter Section
Resonance
Emphasizes the frequencies around the cutoff. At higher resonance settings, the filter self-oscillates and creates a ringing tone.
Drive
Adds distortion to the signal. At higher settings, Drive creates a very intense distortion effect.
Velocity
Here, you can specify the influence of the incoming MIDI velocity on the filter envelope modulation depth.
• Set the Velocity parameter to positive values to reduce the intensity of the envelope for decreasing velocities.
• Set the Velocity parameter to negative values to reduce the intensity of the envelope for increasing velocities.
Envelope
Adjusts the cutoff modulation of the filter envelope. Setting negative values inverts the modulation direction of the filter envelope.
Attack
Increases or decreases the attack time of the amplifier envelope. Positive values increase the attack time.
Decay
Increases or decreases the decay time of the filter envelope. Positive values increase the decay time.
Sustain
Increases or decreases the sustain time of the filter envelope. Positive values increase the sustain time.
Release
Increases or decreases the release time of the filter envelope. Positive values increase the release time.
16Macro Page Parameters
The Amp Section
The Amp Section
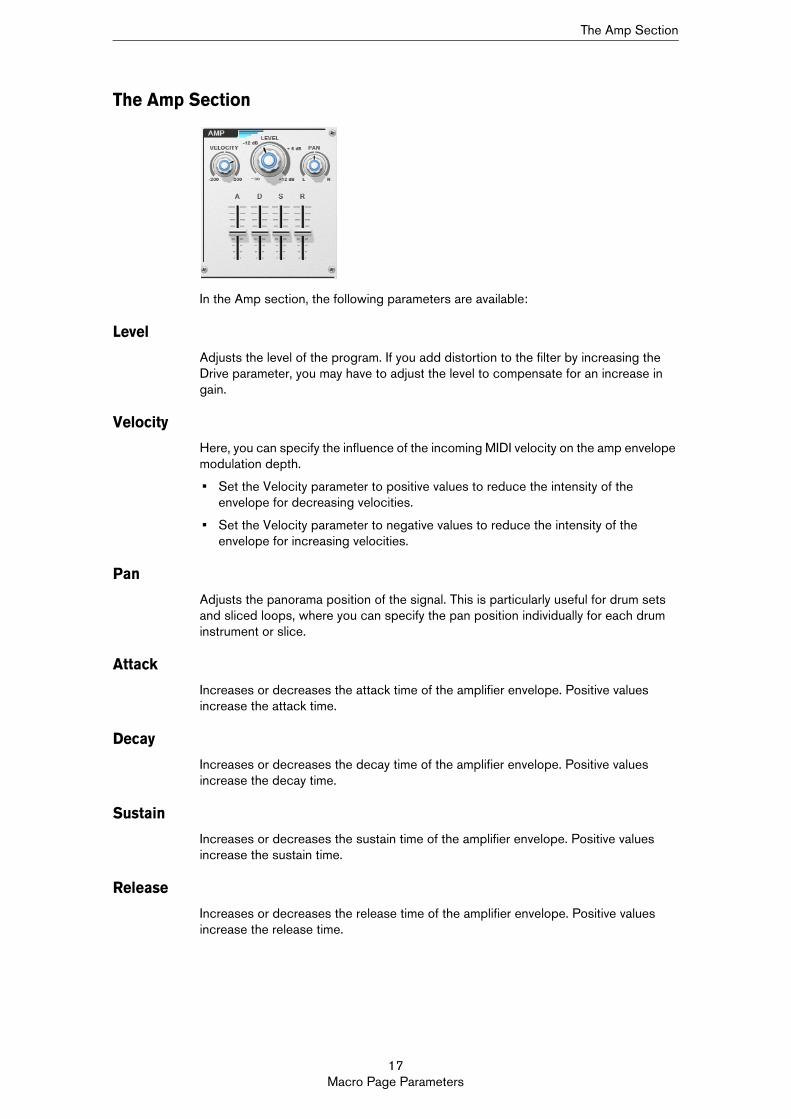
In the Amp section, the following parameters are available:
Level
Adjusts the level of the program. If you add distortion to the filter by increasing the Drive parameter, you may have to adjust the level to compensate for an increase in gain.
Velocity
Here, you can specify the influence of the incoming MIDI velocity on the amp envelope modulation depth.
• Set the Velocity parameter to positive values to reduce the intensity of the envelope for decreasing velocities.
• Set the Velocity parameter to negative values to reduce the intensity of the envelope for increasing velocities.
Pan
Adjusts the panorama position of the signal. This is particularly useful for drum sets and sliced loops, where you can specify the pan position individually for each drum instrument or slice.
Attack
Increases or decreases the attack time of the amplifier envelope. Positive values increase the attack time.
Decay
Increases or decreases the decay time of the amplifier envelope. Positive values increase the decay time.
Sustain
Increases or decreases the sustain time of the amplifier envelope. Positive values increase the sustain time.
Release
Increases or decreases the release time of the amplifier envelope. Positive values increase the release time.
17Macro Page Parameters
The FlexPhraser Section
The FlexPhraser Section
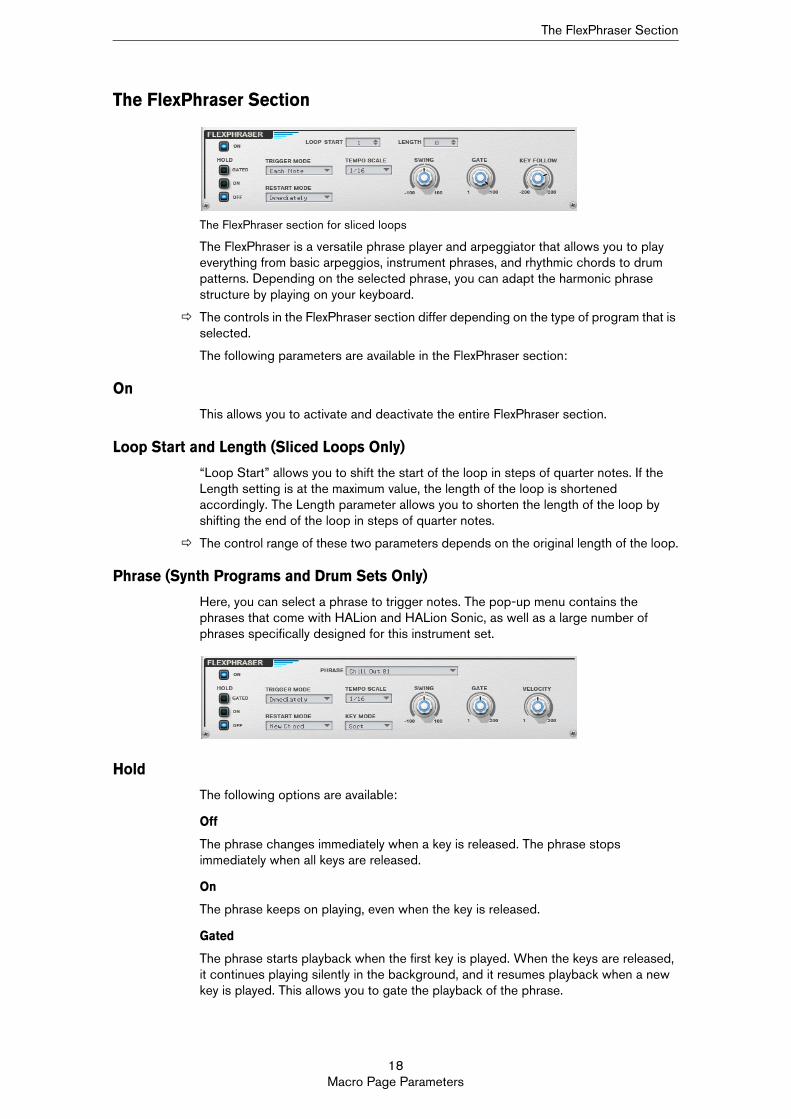
The FlexPhraser section for sliced loops
The FlexPhraser is a versatile phrase player and arpeggiator that allows you to play everything from basic arpeggios, instrument phrases, and rhythmic chords to drum patterns. Depending on the selected phrase, you can adapt the harmonic phrase structure by playing on your keyboard.
The controls in the FlexPhraser section differ depending on the type of program that is selected.
The following parameters are available in the FlexPhraser section:
On
This allows you to activate and deactivate the entire FlexPhraser section.
Loop Start and Length (Sliced Loops Only)
“Loop Start” allows you to shift the start of the loop in steps of quarter notes. If the Length setting is at the maximum value, the length of the loop is shortened accordingly. The Length parameter allows you to shorten the length of the loop by shifting the end of the loop in steps of quarter notes.
The control range of these two parameters depends on the original length of the loop.
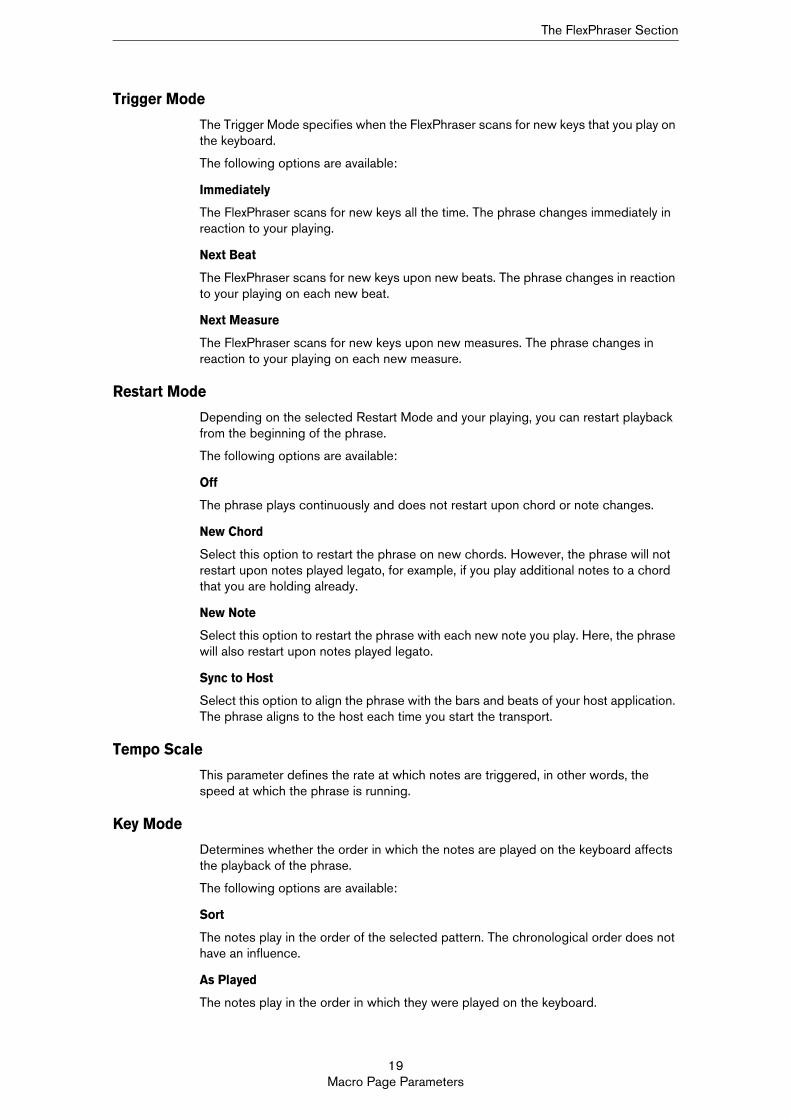
Phrase (Synth Programs and Drum Sets Only)
Here, you can select a phrase to trigger notes. The pop-up menu contains the phrases that come with HALion and HALion Sonic, as well as a large number of phrases specifically designed for this instrument set.
Hold
The following options are available:
Off
The phrase changes immediately when a key is released. The phrase stops immediately when all keys are released.
On
The phrase keeps on playing, even when the key is released.
Gated
The phrase starts playback when the first key is played. When the keys are released, it continues playing silently in the background, and it resumes playback when a new key is played. This allows you to gate the playback of the phrase.
18Macro Page Parameters
The FlexPhraser Section
Trigger Mode
The Trigger Mode specifies when the FlexPhraser scans for new keys that you play on the keyboard.
The following options are available:
Immediately
The FlexPhraser scans for new keys all the time. The phrase changes immediately in reaction to your playing.
Next Beat
The FlexPhraser scans for new keys upon new beats. The phrase changes in reaction to your playing on each new beat.
Next Measure
The FlexPhraser scans for new keys upon new measures. The phrase changes in reaction to your playing on each new measure.
Restart Mode
Depending on the selected Restart Mode and your playing, you can restart playback from the beginning of the phrase.
The following options are available:
Off
The phrase plays continuously and does not restart upon chord or note changes.
New Chord
Select this option to restart the phrase on new chords. However, the phrase will not restart upon notes played legato, for example, if you play additional notes to a chord that you are holding already.
New Note
Select this option to restart the phrase with each new note you play. Here, the phrase will also restart upon notes played legato.
Sync to Host
Select this option to align the phrase with the bars and beats of your host application. The phrase aligns to the host each time you start the transport.
Tempo Scale
This parameter defines the rate at which notes are triggered, in other words, the speed at which the phrase is running.
Key Mode
Determines whether the order in which the notes are played on the keyboard affects the playback of the phrase.
The following options are available:
Sort
The notes play in the order of the selected pattern. The chronological order does not have an influence.
As Played
The notes play in the order in which they were played on the keyboard.
19Macro Page Parameters
The FlexPhraser Section
Direct
The phrase itself does not output any note events. Instead, it outputs controller events only. You hear the notes that you play together with any controller events of the phrase, such as pitchbend, volume, pan, etc. Note, however, that not all phrases contain controller data.
Swing
Use this parameter to shift the timing of notes on even numbered beats, giving the phrase a swing feeling. Negative values shift the timing backwards, which means that the notes are played earlier.
Gate
Allows you to shorten or lengthen the notes of the phrase. At a value of 100 %, the notes play with their original gate length.
For sliced loops, you cannot set values higher than 100 %, that means, slices can only be shortened.
Velocity (Synth Programs and Drum Sets Only)
Allows you to raise or lower the note-on velocities of the phrase. At a value of 100 %, the notes play with their original velocity.
Key Follow (Sliced Loops Only)
Allows you to vary the pitch of the slices with the notes you play. Notes lower than the original pitch (C2) can either raise or lower the pitch by up to 200 % per octave.
20Macro Page Parameters

日本語

Michael Ruf, Matthias Klag
改訂管理および品質管理 : Cristina Bachmann, Heiko Bischoff, Marion Bröer, Insa Mingers, Sabine Pfeifer, Benjamin Schütte
この PDF マニュアルでは、目の不自由な方のための高度なアクセシビリティ機能を提供しています。このマニュアルは複雑かつ多くの 図が使用されているため、図の説明は省略されていることをご了承ください。
本書の記載事項は、Steinberg Media Technologies GmbH 社によって予告なしに変更されることがあり、同社は記載内容に対する責任を
負いません。
本書に掲載されている画面は、すべて操作説明のためのもので、実際の画面と異なる場合があります。
本書で取り扱われているソフトウェアは、ライセンス契約に基づいて供与されるもので、ソフトウェアの複製は、ライセンス契約の範囲内でのみ許可されます ( バックアップコピー )。
Steinberg Media Technologies GmbH 社の書面による承諾がない限り、目的や形式の如何にかかわらず、本書のいかなる部分も記録、複
製、翻訳することは禁じられています。本製品のライセンス所有者は、個人利用目的にかぎり、本書を 1 部複製することができます。
本書に記載されている製品名および会社名は、すべて各社の商標、および登録商標です。
リリース日 : 2012 年 9 月 24 日
© Steinberg Media Technologies GmbH, 2012.
All rights reserved.
目 次
24 はじめに24 VST Sound Instrument Set のロード24 プリセットのロードと保存
25 プラグインコントロール25 プラグイン機能セクション26 編集画面26 「Options」ページ28 パフォーマンスコントロールセクション29 クイックコントロール29 トリガーパッド
31 「Macro」ページのパラメーター31 HALion または HALion Sonic でのプログラムの編集32 パラメーターのオートメーション32 シンセサイザープログラム用の「VOICE」セクション33 ドラムおよびスライスしたループ用の「VOICE」セク
ション33 「FILTER」セクション34 「AMP」セクション35 「FLEXPHRASER」セクション
23
はじめに
Triebwerk VST Sound Instrument Set には、高品質な VST サウンドプリセットが数多く収録されています。これらの プリセットでは、個別に編集できるレイヤーを最大 4 つ組み合わせできます。Steinberg の DAW では、インストゥ
ルメントセットを VST 3 プラグインとしてロードできます。また、HALion、HALion Sonic、および HALion Sonic SE
では、インストゥルメントセットをプログラムとしてロードできます。
VST Sound Instrument Set のロード• インストゥルメントセットをプラグインとしてロードするには、Steinberg の DAW を起動してインストゥルメン トセットに関連付けられたインストゥルメントトラックを作成します。
• HALion、HALion Sonic、または HALion Sonic SE にインストゥルメントセットをロードするには、Triebwerk に 含まれるいずれかのプリセットをロードします。
➯ VST Sound Instrument Set は Steinberg 以外のアプリケーションにもロードできます。詳細については、それら のアプリケーションのマニュアルを参照してください。
プリセットのロードと保存Steinberg の DAW では、「Load」および「Save」ダイアログに MediaBay が表示され、タグなどを使用できます。
• プリセットをロードするには、プラグイン機能セクションで名前フィールドをクリックして、ダイアログでプリセットを選択します。ロードされたプリセットは、プリセット名フィールドの左にある左右の矢印ボタンをクリックして、使用できるプリセットの中から選択できるようになります。
• プリセットを保存するには、プリセット名の右にあるフロッピーディスクアイコンをクリックして、プリセットの名前を入力します。Steinberg 以外の DAW では、あらかじめ定義されたフォルダーまたはそのフォルダーのサブフォルダーにのみプ
リセットを保存できます。DAW のプリセットマネージャーを使用してプリセットを保存した場合、それらのプリ セットは保存した DAW でのみ使用でき、他のホストアプリケーションでは使用できません。
24
プラグインコントロール
この章では、Triebwerk VST Sound Instrument Set をプラグインとして開いた場合に使用できるセクションについて 説明します。
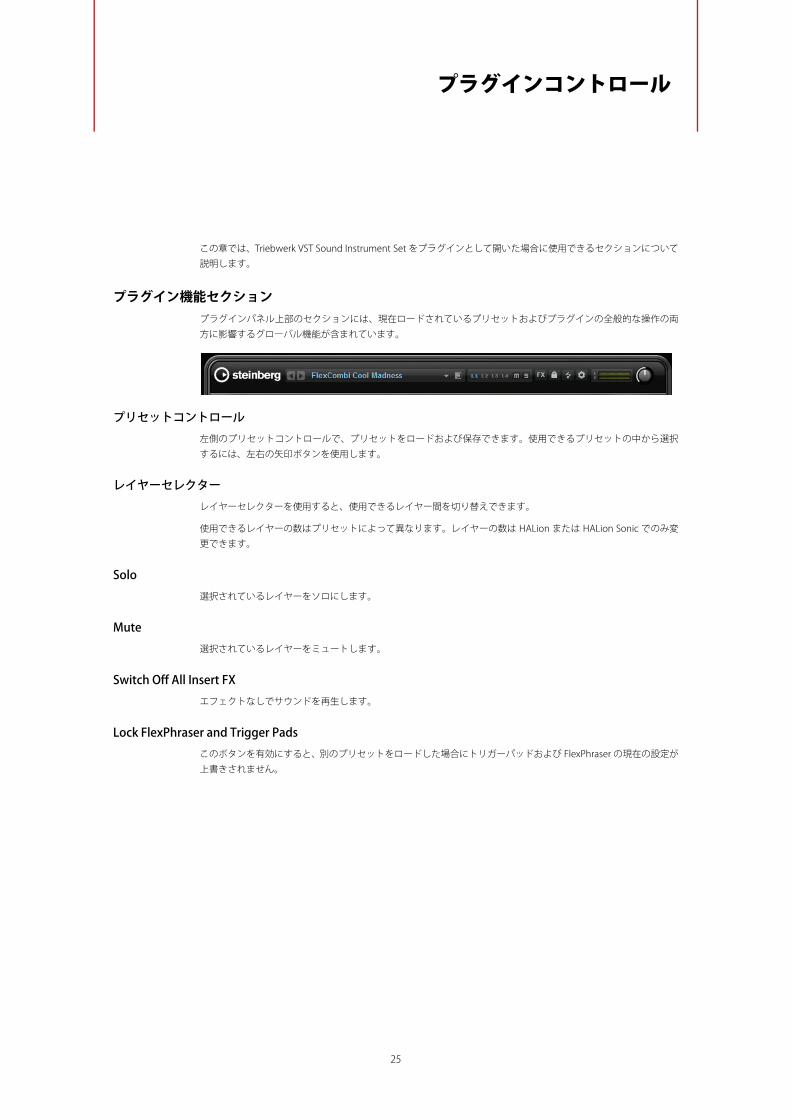
プラグイン機能セクションプラグインパネル上部のセクションには、現在ロードされているプリセットおよびプラグインの全般的な操作の両
方に影響するグローバル機能が含まれています。
プリセットコントロール左側のプリセットコントロールで、プリセットをロードおよび保存できます。使用できるプリセットの中から選択
するには、左右の矢印ボタンを使用します。
レイヤーセレクターレイヤーセレクターを使用すると、使用できるレイヤー間を切り替えできます。
使用できるレイヤーの数はプリセットによって異なります。レイヤーの数は HALion または HALion Sonic でのみ変 更できます。
Solo選択されているレイヤーをソロにします。
Mute選択されているレイヤーをミュートします。
Switch Off All Insert FXエフェクトなしでサウンドを再生します。
Lock FlexPhraser and Trigger Padsこのボタンを有効にすると、別のプリセットをロードした場合にトリガーパッドおよび FlexPhraser の現在の設定が
上書きされません。
25
編集画面
MIDI ResetMIDI ノートに対して反応しなくなることがあります。これは、プラグインと MIDI の接続が切れたり、正しくない
MIDI コントローラーデータを受信したりすることで起こります。この場合、プラグインを「緊急リセット」できます。
•「MIDI Reset」ボタン ( 稲妻のアイコン ) をクリックして、「All Sound Off」および「Reset All Controllers」メッセー ジをプラグインに送ります。 プラグインはすぐに再生を停止し、コントローラーをデフォルト値にリセットします。
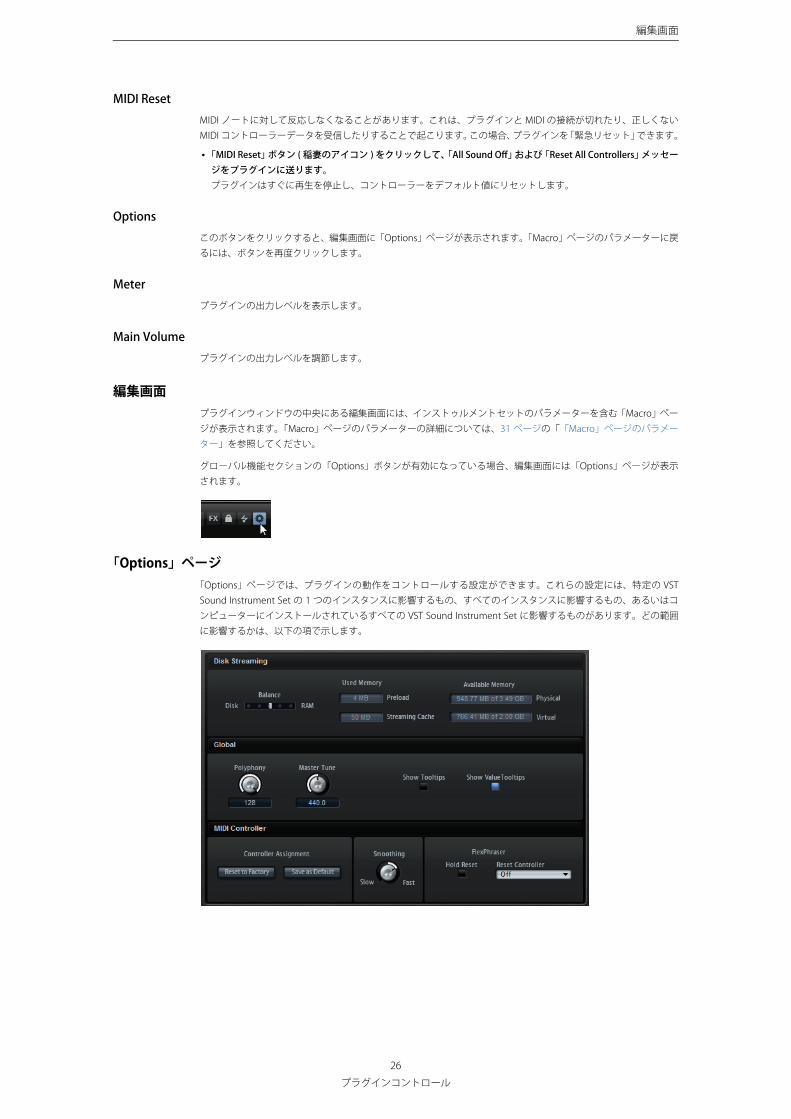
Optionsこのボタンをクリックすると、編集画面に「Options」ページが表示されます。「Macro」ページのパラメーターに戻るには、ボタンを再度クリックします。
Meterプラグインの出力レベルを表示します。
Main Volumeプラグインの出力レベルを調節します。
編集画面プラグインウィンドウの中央にある編集画面には、インストゥルメントセットのパラメーターを含む「Macro」ペー
ジが表示されます。「Macro」ページのパラメーターの詳細については、31 ページの「「Macro」ページのパラメー
ター」を参照してください。
グローバル機能セクションの「Options」ボタンが有効になっている場合、編集画面には「Options」ページが表示されます。
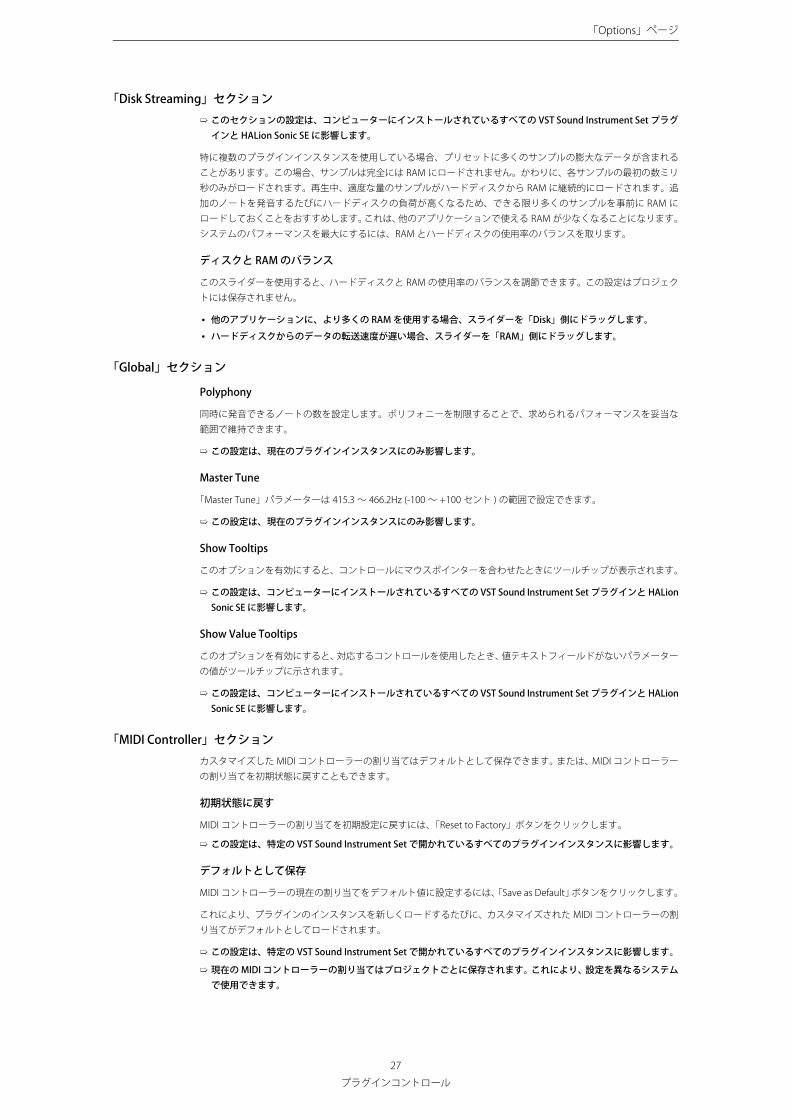
「Options」ページ「Options」ページでは、プラグインの動作をコントロールする設定ができます。これらの設定には、特定の VST Sound Instrument Set の 1 つのインスタンスに影響するもの、すべてのインスタンスに影響するもの、あるいはコ
ンピューターにインストールされているすべての VST Sound Instrument Set に影響するものがあります。どの範囲
に影響するかは、以下の項で示します。
26
プラグインコントロール
「Options」ページ
「Disk Streaming」セクション➯ このセクションの設定は、コンピューターにインストールされているすべての VST Sound Instrument Set プラグ インと HALion Sonic SE に影響します。
特に複数のプラグインインスタンスを使用している場合、プリセットに多くのサンプルの膨大なデータが含まれることがあります。この場合、サンプルは完全には RAM にロードされません。かわりに、各サンプルの最初の数ミリ
秒のみがロードされます。再生中、適度な量のサンプルがハードディスクから RAM に継続的にロードされます。追
加のノートを発音するたびにハードディスクの負荷が高くなるため、できる限り多くのサンプルを事前に RAM に ロードしておくことをおすすめします。これは、他のアプリケーションで使える RAM が少なくなることになります。
システムのパフォーマンスを最大にするには、RAM とハードディスクの使用率のバランスを取ります。
ディスクと RAM のバランス
このスライダーを使用すると、ハードディスクと RAM の使用率のバランスを調節できます。この設定はプロジェク
トには保存されません。
• 他のアプリケーションに、より多くの RAM を使用する場合、スライダーを「Disk」側にドラッグします。
• ハードディスクからのデータの転送速度が遅い場合、スライダーを「RAM」側にドラッグします。
「Global」セクション
Polyphony
同時に発音できるノートの数を設定します。ポリフォニーを制限することで、求められるパフォーマンスを妥当な範囲で維持できます。
➯ この設定は、現在のプラグインインスタンスにのみ影響します。
Master Tune
「Master Tune」パラメーターは 415.3 ~ 466.2Hz (-100 ~ +100 セント ) の範囲で設定できます。
➯ この設定は、現在のプラグインインスタンスにのみ影響します。
Show Tooltips
このオプションを有効にすると、コントロールにマウスポインターを合わせたときにツールチップが表示されます。
➯ この設定は、コンピューターにインストールされているすべての VST Sound Instrument Set プラグインと HALion Sonic SE に影響します。
Show Value Tooltips
このオプションを有効にすると、対応するコントロールを使用したとき、値テキストフィールドがないパラメーター
の値がツールチップに示されます。
➯ この設定は、コンピューターにインストールされているすべての VST Sound Instrument Set プラグインと HALion Sonic SE に影響します。
「MIDI Controller」セクションカスタマイズした MIDI コントローラーの割り当てはデフォルトとして保存できます。または、MIDI コントローラー の割り当てを初期状態に戻すこともできます。
初期状態に戻す
MIDI コントローラーの割り当てを初期設定に戻すには、「Reset to Factory」ボタンをクリックします。
➯ この設定は、特定の VST Sound Instrument Set で開かれているすべてのプラグインインスタンスに影響します。
デフォルトとして保存
MIDI コントローラーの現在の割り当てをデフォルト値に設定するには、「Save as Default」ボタンをクリックします。
これにより、プラグインのインスタンスを新しくロードするたびに、カスタマイズされた MIDI コントローラーの割
り当てがデフォルトとしてロードされます。
➯ この設定は、特定の VST Sound Instrument Set で開かれているすべてのプラグインインスタンスに影響します。
➯ 現在の MIDI コントローラーの割り当てはプロジェクトごとに保存されます。これにより、設定を異なるシステム で使用できます。
27
プラグインコントロール
パフォーマンスコントロールセクション
MIDI コントローラーのスムージング
MIDI コントローラーの最大分解能は 128 ステップとかなり低めです。そのため、たとえば MIDI コントローラーを
使用してクイックコントロールをリモートコントロールすると、パラメーターがなめらかに変わらない場合があります。これを避けるため、プラグインには MIDI コントローラーのスムージングが用意されています。これにより、
パラメーターの不自然な変化を抑えられます。
• MIDI コントローラーを動かしたときに不自然な響きが発生する場合、コントロールを「Slow」側に回します。この場合、MIDI コントローラーを動かしてから反映されるまで、一定時間の間隔が空きます。
• MIDI コントローラーを動かしてから反映されるまでの時間を短くするには、コントロールを「Fast」側に回します。この場合、MIDI コントローラーを動かしたときに不自然な響きが発生する可能性があります。
➯ この設定は、コンピューターにインストールされているすべての VST Sound Instrument Set プラグインと HALion Sonic SE に影響します。
FlexPhraser Hold Reset
プリセットで使用されるすべての FlexPhraser モジュールに、グローバル「Hold Reset」メッセージを送信します。
「Reset Controller」ポップアップメニューでは、FlexPhraser の「Hold Reset」ボタンに MIDI コントローラーを割り 当てできます。これにより、「Hold Reset」ボタンをリモートコントロールできます。
➯ この設定は、特定の VST Sound Instrument Set で開かれているすべてのプラグインインスタンスに影響します。
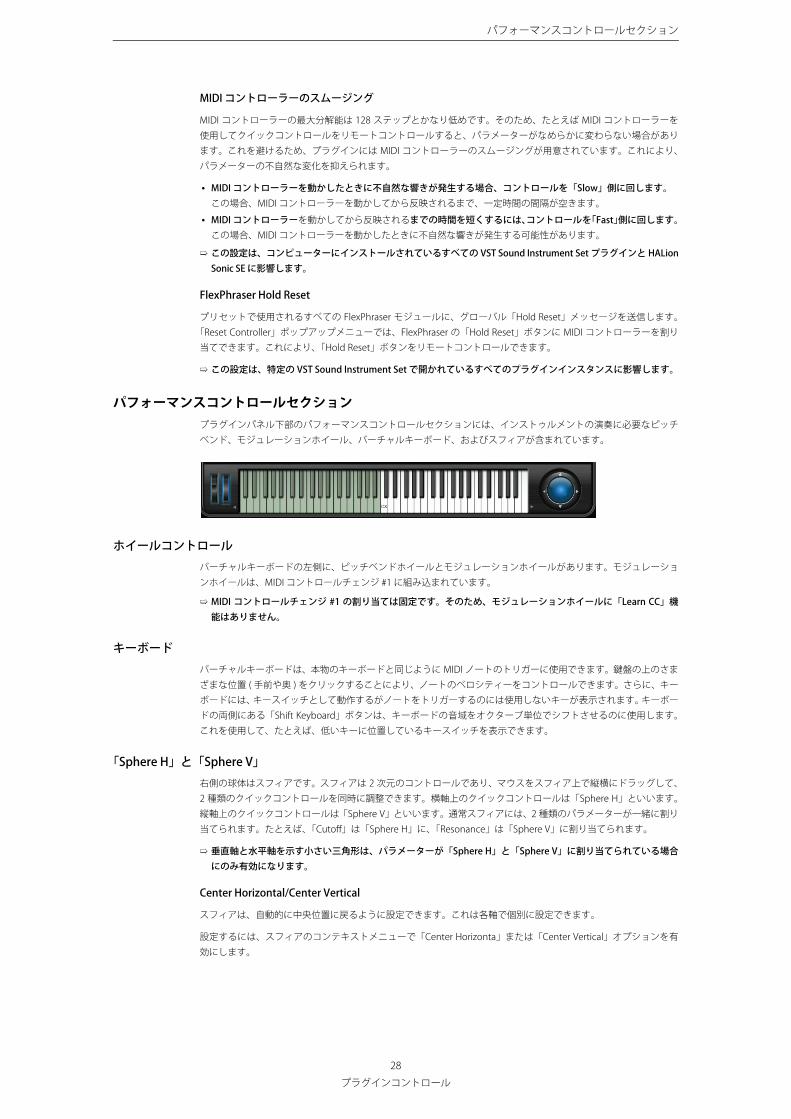
パフォーマンスコントロールセクションプラグインパネル下部のパフォーマンスコントロールセクションには、インストゥルメントの演奏に必要なピッチ
ベンド、モジュレーションホイール、バーチャルキーボード、およびスフィアが含まれています。
ホイールコントロールバーチャルキーボードの左側に、ピッチベンドホイールとモジュレーションホイールがあります。モジュレーショ
ンホイールは、MIDI コントロールチェンジ #1 に組み込まれています。
➯ MIDI コントロールチェンジ #1 の割り当ては固定です。そのため、モジュレーションホイールに「Learn CC」機 能はありません。
キーボードバーチャルキーボードは、本物のキーボードと同じように MIDI ノートのトリガーに使用できます。鍵盤の上のさま
ざまな位置 ( 手前や奥 ) をクリックすることにより、ノートのベロシティーをコントロールできます。さらに、キー ボードには、キースイッチとして動作するがノートをトリガーするのには使用しないキーが表示されます。キーボー
ドの両側にある「Shift Keyboard」ボタンは、キーボードの音域をオクターブ単位でシフトさせるのに使用します。
これを使用して、たとえば、低いキーに位置しているキースイッチを表示できます。
「Sphere H」と「Sphere V」右側の球体はスフィアです。スフィアは 2 次元のコントロールであり、マウスをスフィア上で縦横にドラッグして、 2 種類のクイックコントロールを同時に調整できます。横軸上のクイックコントロールは「Sphere H」といいます。
縦軸上のクイックコントロールは「Sphere V」といいます。通常スフィアには、2 種類のパラメーターが一緒に割り
当てられます。たとえば、「Cutoff」は「Sphere H」に、「Resonance」は「Sphere V」に割り当てられます。
➯ 垂直軸と水平軸を示す小さい三角形は、パラメーターが「Sphere H」と「Sphere V」に割り当てられている場合 にのみ有効になります。
Center Horizontal/Center Vertical
スフィアは、自動的に中央位置に戻るように設定できます。これは各軸で個別に設定できます。
設定するには、スフィアのコンテキストメニューで「Center Horizonta」または「Center Vertical」オプションを有
効にします。
28
プラグインコントロール
クイックコントロール
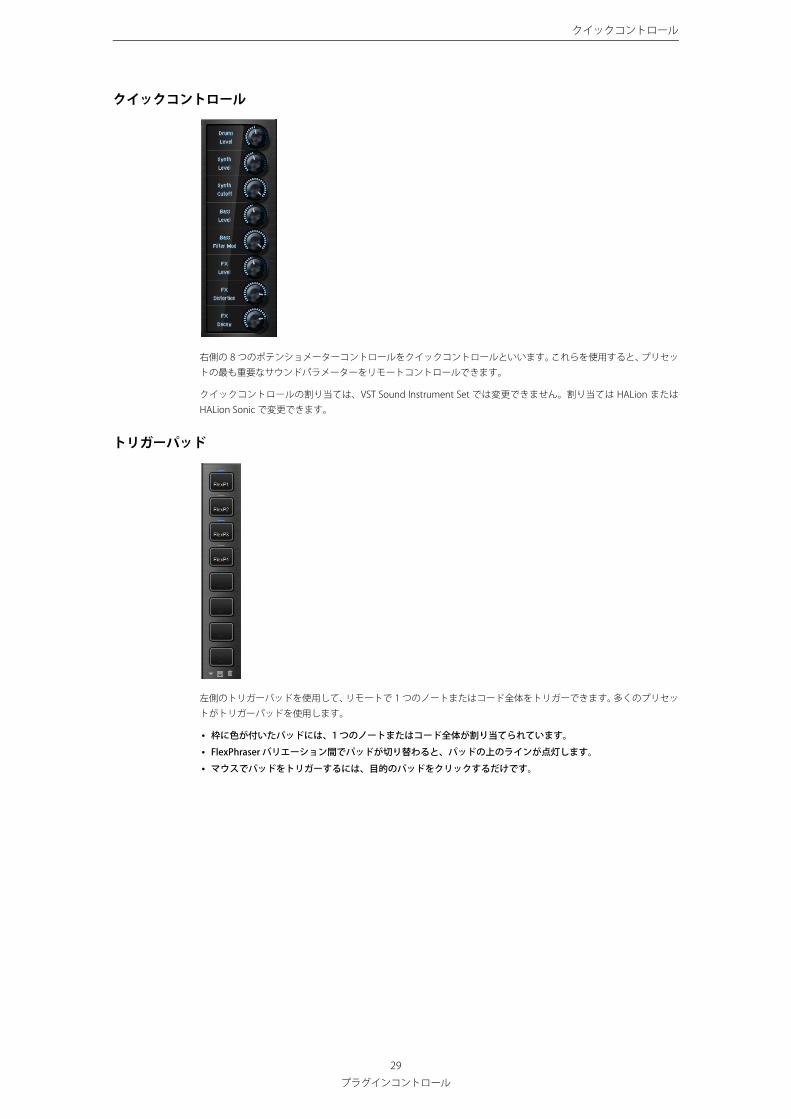
クイックコントロール
右側の 8 つのポテンショメーターコントロールをクイックコントロールといいます。これらを使用すると、プリセッ
トの最も重要なサウンドパラメーターをリモートコントロールできます。
クイックコントロールの割り当ては、VST Sound Instrument Set では変更できません。割り当ては HALion または HALion Sonic で変更できます。
トリガーパッド
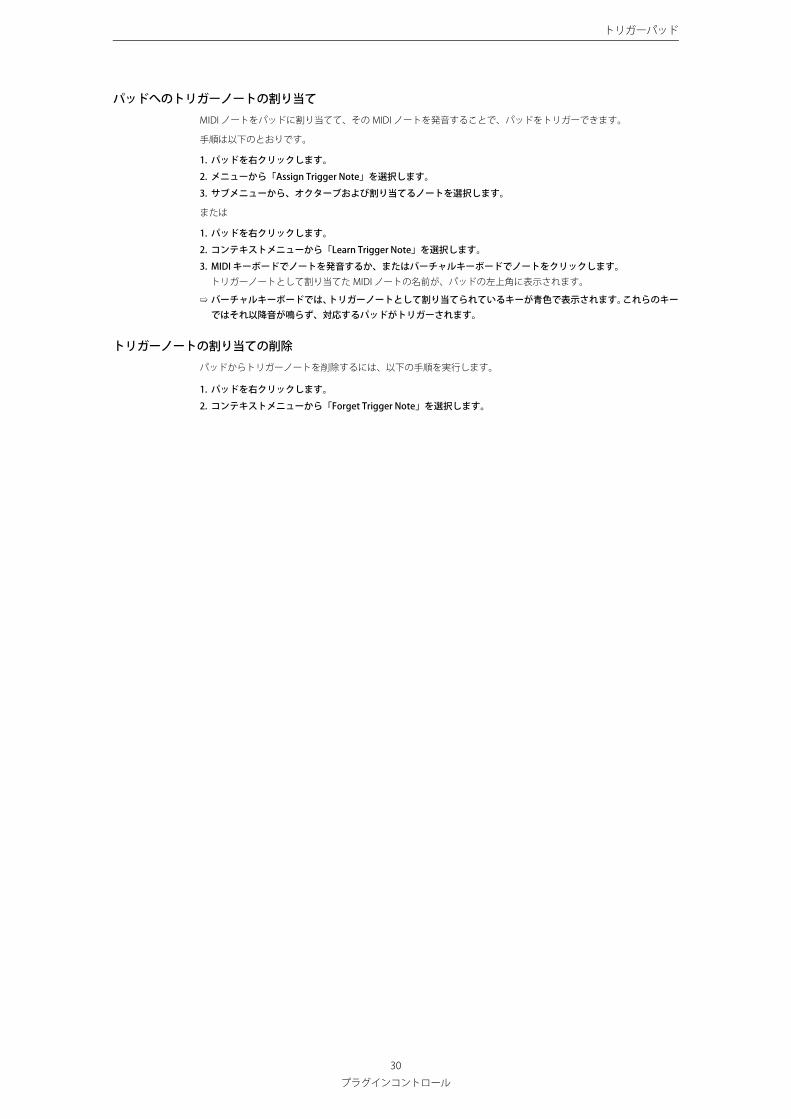
左側のトリガーバッドを使用して、リモートで 1 つのノートまたはコード全体をトリガーできます。多くのプリセッ
トがトリガーパッドを使用します。
• 枠に色が付いたパッドには、1 つのノートまたはコード全体が割り当てられています。
• FlexPhraser バリエーション間でパッドが切り替わると、パッドの上のラインが点灯します。
• マウスでパッドをトリガーするには、目的のパッドをクリックするだけです。
29
プラグインコントロール
トリガーパッド
パッドへのトリガーノートの割り当てMIDI ノートをパッドに割り当てて、その MIDI ノートを発音することで、パッドをトリガーできます。
手順は以下のとおりです。
1. パッドを右クリックします。
2. メニューから「Assign Trigger Note」を選択します。
3. サブメニューから、オクターブおよび割り当てるノートを選択します。
または
1. パッドを右クリックします。
2. コンテキストメニューから「Learn Trigger Note」を選択します。
3. MIDI キーボードでノートを発音するか、またはバーチャルキーボードでノートをクリックします。 トリガーノートとして割り当てた MIDI ノートの名前が、パッドの左上角に表示されます。
➯ バーチャルキーボードでは、トリガーノートとして割り当てられているキーが青色で表示されます。これらのキーではそれ以降音が鳴らず、対応するパッドがトリガーされます。
トリガーノートの割り当ての削除パッドからトリガーノートを削除するには、以下の手順を実行します。
1. パッドを右クリックします。
2. コンテキストメニューから「Forget Trigger Note」を選択します。
30
プラグインコントロール
「Macro」ページのパラメーター
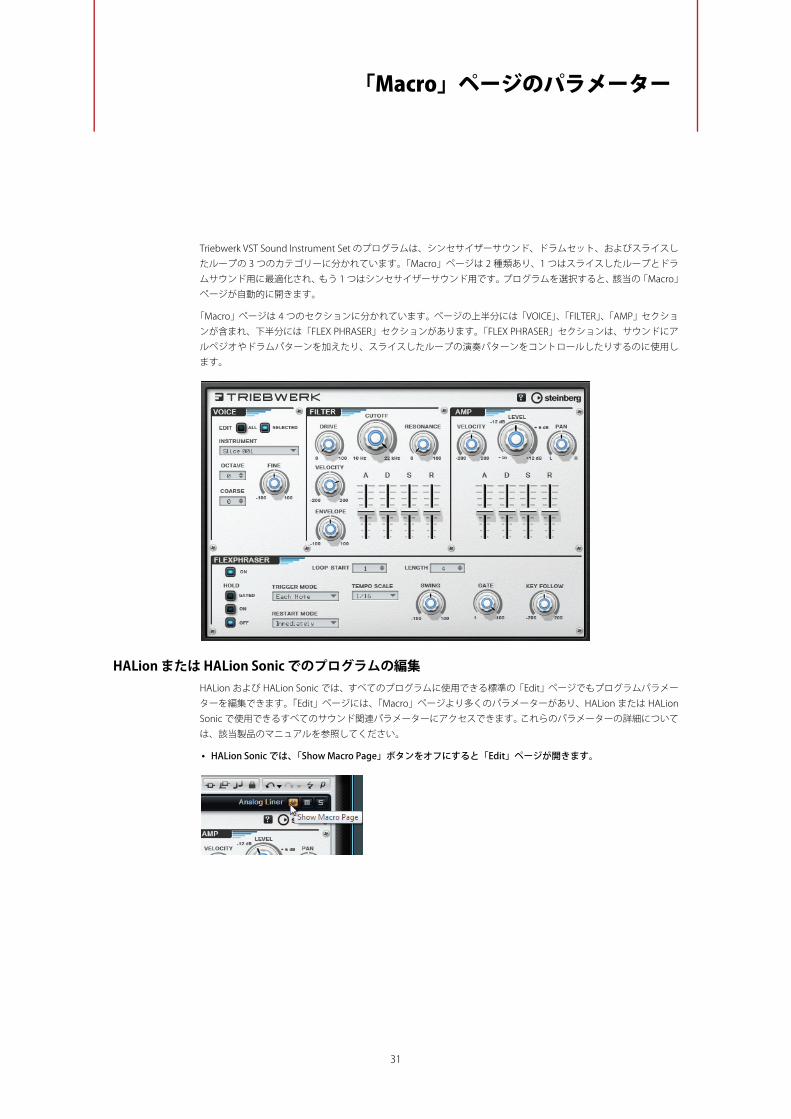
Triebwerk VST Sound Instrument Set のプログラムは、シンセサイザーサウンド、ドラムセット、およびスライスし たループの 3 つのカテゴリーに分かれています。「Macro」ページは 2 種類あり、1 つはスライスしたループとドラ
ムサウンド用に最適化され、もう 1 つはシンセサイザーサウンド用です。プログラムを選択すると、該当の「Macro」
ページが自動的に開きます。
「Macro」ページは 4 つのセクションに分かれています。ページの上半分には「VOICE」、「FILTER」、「AMP」セクショ ンが含まれ、下半分には「FLEX PHRASER」セクションがあります。「FLEX PHRASER」セクションは、サウンドにア
ルペジオやドラムパターンを加えたり、スライスしたループの演奏パターンをコントロールしたりするのに使用します。
HALion または HALion Sonic でのプログラムの編集HALion および HALion Sonic では、すべてのプログラムに使用できる標準の「Edit」ページでもプログラムパラメー
ターを編集できます。「Edit」ページには、「Macro」ページより多くのパラメーターがあり、HALion または HALion Sonic で使用できるすべてのサウンド関連パラメーターにアクセスできます。これらのパラメーターの詳細について
は、該当製品のマニュアルを参照してください。
• HALion Sonic では、「Show Macro Page」ボタンをオフにすると「Edit」ページが開きます。
31
パラメーターのオートメーション
パラメーターのオートメーション「Macro」ページのパラメーターはオートメーション化できません。ただし、かわりにクイックコントロールを使用できます。29ページの「クイックコントロール」を参照してください。
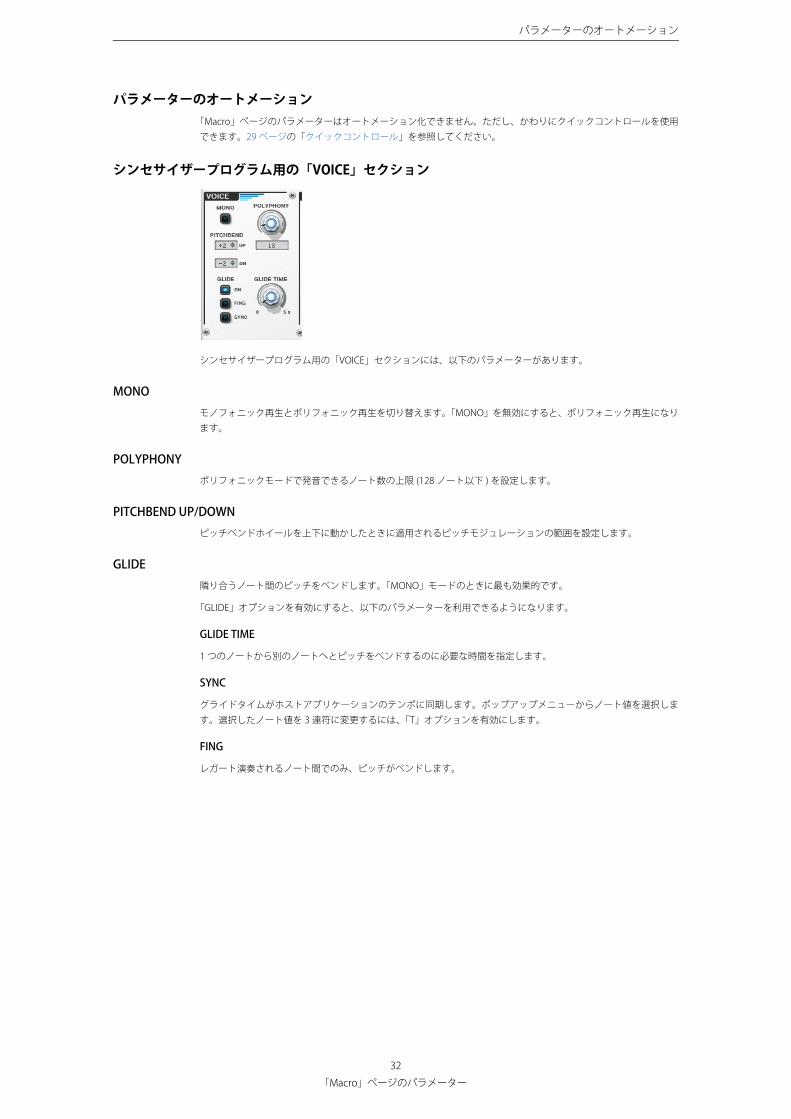
シンセサイザープログラム用の「VOICE」セクション
シンセサイザープログラム用の「VOICE」セクションには、以下のパラメーターがあります。
MONOモノフォニック再生とポリフォニック再生を切り替えます。「MONO」を無効にすると、ポリフォニック再生になります。
POLYPHONYポリフォニックモードで発音できるノート数の上限 (128 ノート以下 ) を設定します。
PITCHBEND UP/DOWNピッチベンドホイールを上下に動かしたときに適用されるピッチモジュレーションの範囲を設定します。
GLIDE隣り合うノート間のピッチをベンドします。「MONO」モードのときに最も効果的です。
「GLIDE」オプションを有効にすると、以下のパラメーターを利用できるようになります。
GLIDE TIME
1 つのノートから別のノートへとピッチをベンドするのに必要な時間を指定します。
SYNC
グライドタイムがホストアプリケーションのテンポに同期します。ポップアップメニューからノート値を選択しま
す。選択したノート値を 3 連符に変更するには、「T」オプションを有効にします。
FING
レガート演奏されるノート間でのみ、ピッチがベンドします。
32
「Macro」ページのパラメーター

ドラムおよびスライスしたループ用の「VOICE」セクション
ドラムおよびスライスしたループ用の「VOICE」セクション
ドラムやスライスしたループ用の「VOICE」セクションには、以下のパラメーターがあります。
EDIT「VOICE」、「AMP」、および「FILTER」セクションのパラメーターを、すべてのドラムセットやスライスに対して均等
に適用するか、選択されたドラムサウンドまたはスライスだけに適用するかを指定します。
INSTRUMENT「EDIT」パラメーターを「SELECTED」に設定した場合に、編集するインストゥルメントまたはスライスをポップアッ
プメニューから指定します。
OCTAVEピッチをオクターブ単位で上下します。
COARSEピッチを半音単位で上下します。
FINEピッチをセント単位で微調整します。
「FILTER」セクション
Triebwerk VST Sound Instrument Set のプログラムでは、さまざまなフィルタータイプが内部的に使用されていま す。「FILTER」セクションには、以下のパラメーターがあります。
CUTOFFフィルターのカットオフ周波数を調節します。
RESONANCEカットオフ付近の周波数を強調します。レゾナンスの設定を高くすると、フィルターは自己発振し、電話の呼出音のような音になります。
DRIVE信号にディストーションを加えます。設定値を高くすると、強いディストーションエフェクトがかかります。
33
「Macro」ページのパラメーター
「AMP」セクション
VELOCITY入力された MIDI のベロシティーがフィルターエンベロープのモジュレーションデプスに与える影響を設定します。
•「VELOCITY」パラメーターを正の値に設定した場合、ベロシティーが低くなると、エンベロープの強さが小さくなります。
•「VELOCITY」パラメーターを負の値に設定した場合、ベロシティーが高くなると、エンベロープの強さが小さくなります。
ENVELOPEフィルターエンベロープのカットオフモジュレーションを調節します。負の値に設定すると、フィルターエンベロープからのモジュレーションの方向が反転します。
A ( アタック )アンプリファイアーエンベロープのアタックタイムを調節します。正の値に設定すると、アタックタイムが長くなります。
D ( ディケイ )フィルターエンベロープのディケイタイムを調節します。正の値に設定すると、ディケイタイムが長くなります。
S ( サステイン )フィルターエンベロープのサステインタイムを調節します。正の値に設定すると、サステインタイムが長くなります。
R ( リリース )フィルターエンベロープのリリースタイムを調節します。正の値に設定すると、リリースタイムが長くなります。
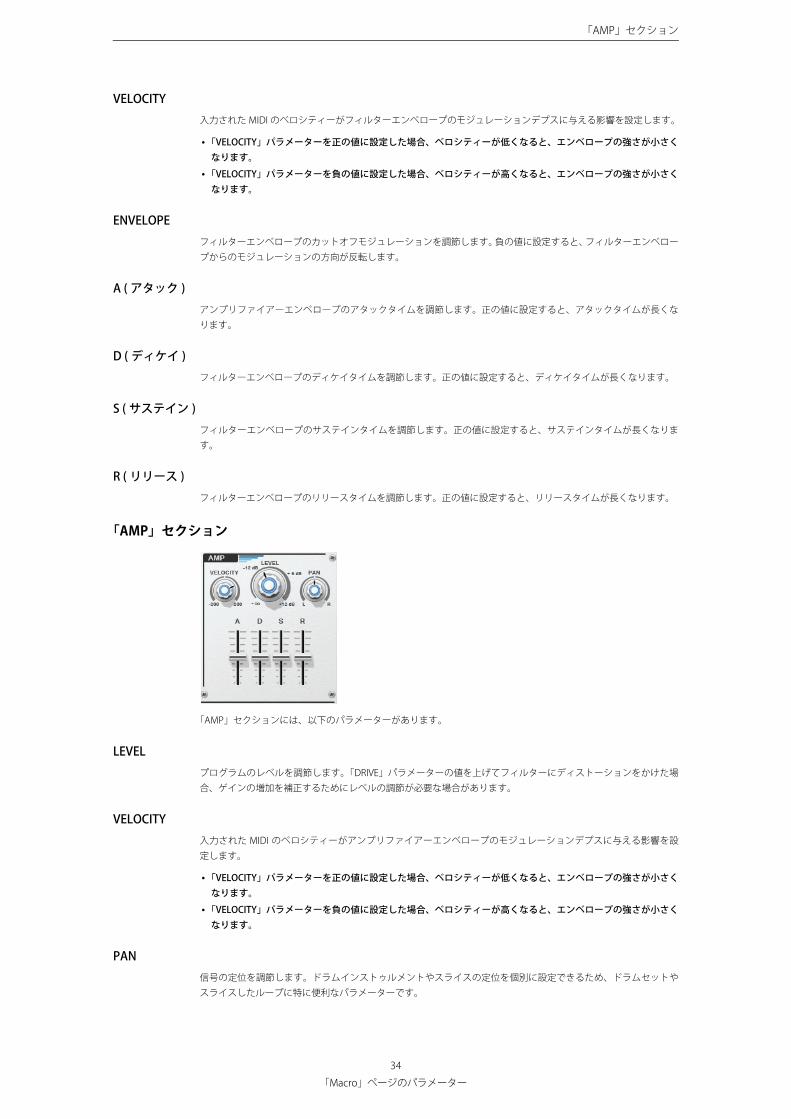
「AMP」セクション
「AMP」セクションには、以下のパラメーターがあります。
LEVELプログラムのレベルを調節します。「DRIVE」パラメーターの値を上げてフィルターにディストーションをかけた場合、ゲインの増加を補正するためにレベルの調節が必要な場合があります。
VELOCITY入力された MIDI のベロシティーがアンプリファイアーエンベロープのモジュレーションデプスに与える影響を設
定します。
•「VELOCITY」パラメーターを正の値に設定した場合、ベロシティーが低くなると、エンベロープの強さが小さくなります。
•「VELOCITY」パラメーターを負の値に設定した場合、ベロシティーが高くなると、エンベロープの強さが小さくなります。
PAN信号の定位を調節します。ドラムインストゥルメントやスライスの定位を個別に設定できるため、ドラムセットやスライスしたループに特に便利なパラメーターです。
34
「Macro」ページのパラメーター
「FLEXPHRASER」セクション
A ( アタック )アンプリファイアーエンベロープのアタックタイムを調節します。正の値に設定すると、アタックタイムが長くな
ります。
D ( ディケイ )アンプリファイアーエンベロープのディケイタイムを調節します。正の値に設定すると、ディケイタイムが長くな
ります。
S ( サステイン )アンプリファイアーエンベロープのサステインタイムを調節します。正の値に設定すると、サステインタイムが長くなります。
R ( リリース )アンプリファイアーエンベロープのリリースタイムを調節します。正の値に設定すると、リリースタイムが長くなります。
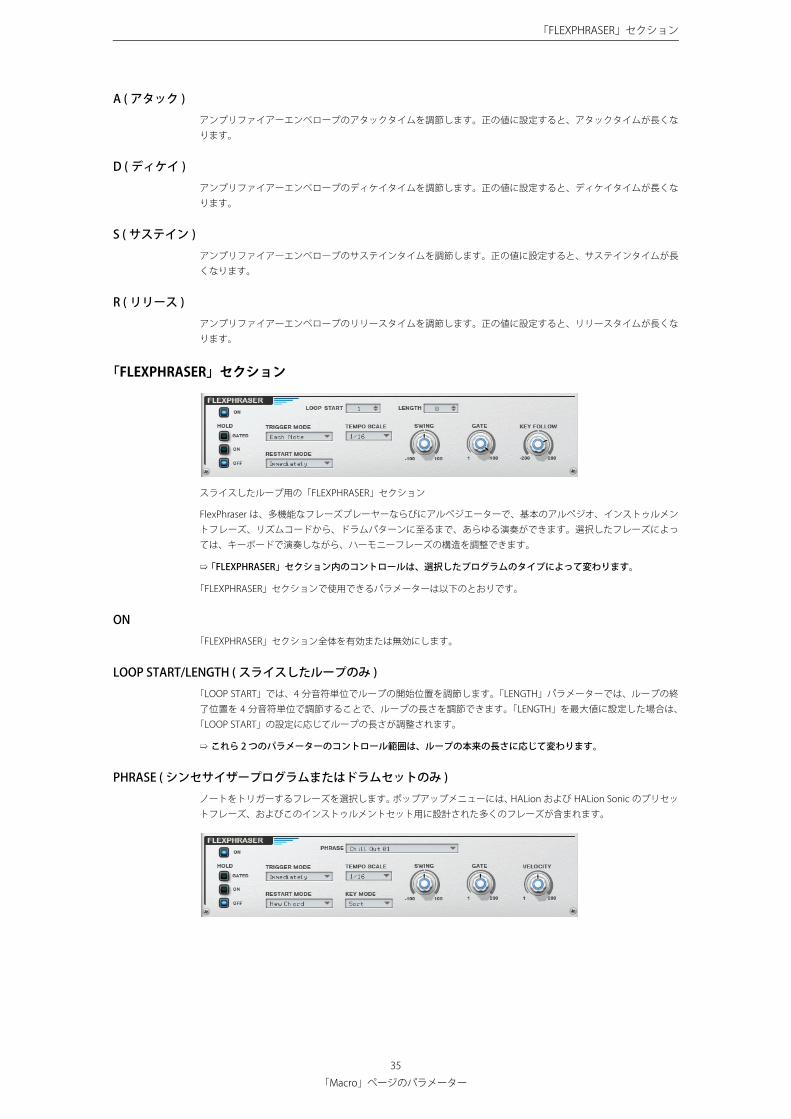
「FLEXPHRASER」セクション
スライスしたループ用の「FLEXPHRASER」セクション
FlexPhraser は、多機能なフレーズプレーヤーならびにアルペジエーターで、基本のアルペジオ、インストゥルメン トフレーズ、リズムコードから、ドラムパターンに至るまで、あらゆる演奏ができます。選択したフレーズによっ
ては、キーボードで演奏しながら、ハーモニーフレーズの構造を調整できます。
➯「FLEXPHRASER」セクション内のコントロールは、選択したプログラムのタイプによって変わります。
「FLEXPHRASER」セクションで使用できるパラメーターは以下のとおりです。
ON「FLEXPHRASER」セクション全体を有効または無効にします。
LOOP START/LENGTH ( スライスしたループのみ )「LOOP START」では、4 分音符単位でループの開始位置を調節します。「LENGTH」パラメーターでは、ループの終
了位置を 4 分音符単位で調節することで、ループの長さを調節できます。「LENGTH」を最大値に設定した場合は、
「LOOP START」の設定に応じてループの長さが調整されます。
➯ これら 2 つのパラメーターのコントロール範囲は、ループの本来の長さに応じて変わります。
PHRASE ( シンセサイザープログラムまたはドラムセットのみ )ノートをトリガーするフレーズを選択します。ポップアップメニューには、HALion および HALion Sonic のプリセッ トフレーズ、およびこのインストゥルメントセット用に設計された多くのフレーズが含まれます。
35
「Macro」ページのパラメーター
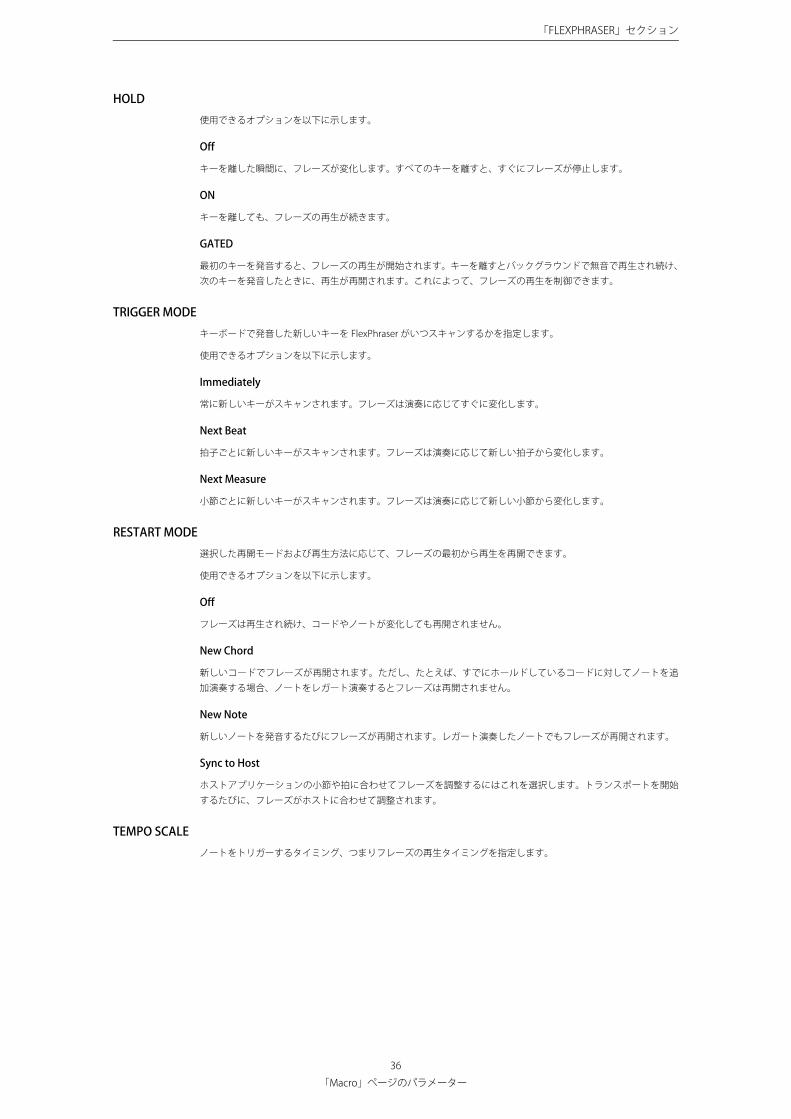
「FLEXPHRASER」セクション
HOLD使用できるオプションを以下に示します。
Off
キーを離した瞬間に、フレーズが変化します。すべてのキーを離すと、すぐにフレーズが停止します。
ON
キーを離しても、フレーズの再生が続きます。
GATED
最初のキーを発音すると、フレーズの再生が開始されます。キーを離すとバックグラウンドで無音で再生され続け、次のキーを発音したときに、再生が再開されます。これによって、フレーズの再生を制御できます。
TRIGGER MODEキーボードで発音した新しいキーを FlexPhraser がいつスキャンするかを指定します。
使用できるオプションを以下に示します。
Immediately
常に新しいキーがスキャンされます。フレーズは演奏に応じてすぐに変化します。
Next Beat
拍子ごとに新しいキーがスキャンされます。フレーズは演奏に応じて新しい拍子から変化します。
Next Measure
小節ごとに新しいキーがスキャンされます。フレーズは演奏に応じて新しい小節から変化します。
RESTART MODE選択した再開モードおよび再生方法に応じて、フレーズの最初から再生を再開できます。
使用できるオプションを以下に示します。
Off
フレーズは再生され続け、コードやノートが変化しても再開されません。
New Chord
新しいコードでフレーズが再開されます。ただし、たとえば、すでにホールドしているコードに対してノートを追加演奏する場合、ノートをレガート演奏するとフレーズは再開されません。
New Note
新しいノートを発音するたびにフレーズが再開されます。レガート演奏したノートでもフレーズが再開されます。
Sync to Host
ホストアプリケーションの小節や拍に合わせてフレーズを調整するにはこれを選択します。トランスポートを開始
するたびに、フレーズがホストに合わせて調整されます。
TEMPO SCALEノートをトリガーするタイミング、つまりフレーズの再生タイミングを指定します。
36
「Macro」ページのパラメーター
「FLEXPHRASER」セクション
KEY MODEキーボードでノートを発音する場合にノートの順序がフレーズの再生に影響を与えるかどうかを設定します。
使用できるオプションを以下に示します。
Sort
ノートは選択したパターンの順序で発音されます。ノートの発音順序は無視されます。
As Played
ノートは、キーボードで発音したとおりの順序で発音されます。
Direct
フレーズ自体はノートイベントを発生させません。かわりに、コントローラーイベントだけを発生させます。発音するノートに、ピッチベンド、ボリューム、パンなどが反映されます。ただし、コントローラーデータを含んでい
ないフレーズもあることに注意してください。
SWING偶数拍 ( 裏拍 ) のノートのタイミングを移動して、フレーズをスウィングさせます。負の値に設定すると、ノートは
早めに発音されます。
GATEフレーズのノートの長さを変更します。100 % の値では、ノートは元のゲートタイムで発音されます。
➯ スライスしたループでは、100 % より高い値に設定できないため、スライスの長さは短くしかできません。
VELOCITY ( シンセサイザープログラムまたはドラムセットのみ )フレーズのノートオンベロシティーを変更します。100 % の値では、ノートは元のベロシティーで発音されます。
KEY FOLLOW ( スライスしたループのみ )発音するノートを含むスライスのピッチを変更できます。元のピッチ (C2) より低いノートは、オクターブ単位で最
大 200 % ピッチを上げたり下げたりできます。
37
「Macro」ページのパラメーター
Recommended