Embed Size (px)
Citation preview

ASSET MODELLING

TAVERN
16/01/15 – 22/01/15

In the process of designing the tavern model I used the cylinder shape, extended it and added a surface to it to give the impression of a beer keg that resides in the tavern, I also added metal bracing around the keg to make it look like it is holding the keg together.
Further into the process of making the tavern I have added pillars on either side of the tavern and changing the texture of them, I have also designed stools and bar serving table also retexturing them.
And in the final stages I have retextured the whole building, added a roof which will later be changed into a different variation of a roof which will have window attached to it, you can see the final result of the model on the first slide of the tavern design process.

HOUSE
15/01/15 – 16/01/15

In the process of the designing the house I have created a box, cut out the inside polygons making it hallow and then created a bed using different sized cube shapes.
Later on in the design process I have textured the inside of the house, added pillars at the corners and either side of the door frame and finally created table model to be placed opposite of the bed.
The final part I have added a carpet inside the house, created and texture the door and finally added a roof onto the top of the building.

TREE
11/12/14 – 08/01/15

In the modelling process of the tree I have created several sphere’s and placed into one another, and created the cylinder but used the bevel tool when increasing the length of the trunk and varying the width as looking at a normal tree trunk they are not completely flat.
And the final part I have added a smaller branch on the side of the tree and added foliage to the end of it and textured it to match the same colour as the other larger part of the tree.

CHURCH
15/01/15
In the design process of the church I created several cubes and changed the shape by selecting the points on each shape and dragged them to manipulate the shape and to progress the design of this church model.
At this stage I have enlarged a cube primitives to create the cross on top of the church and added windows to the front of the building, it is now finished and ready for a coloured surface to be added to it .
Finally I have added different to coloured surfaces to each part of the building including the windows, doors, walls, roof and cross, now its ready to be exported.

GRAVEYARD
(TOMBSTONES)
08/01/15

When modelling the gravestone I created to boxes and rotated them to interpret the cross, after that I added a surface to it.
Finally I added another box primitive and began to bevel it to make look like rope is holding the cross together and then surfaced that primitive.

LIBRARY
15/01/15

I first create a cube hollowed it out to create the base building and then created bookshelves by various sized cubes on top of each over.
After getting most of the models for the library finished I then began to add surfaces to the bookshelves and floor.
Finally I added beams at each corner of the building, wooden boards to the windows and placed a roof onto the top also remembering to texture each part of the library.

TENT
08/01/15 – 15/01/15
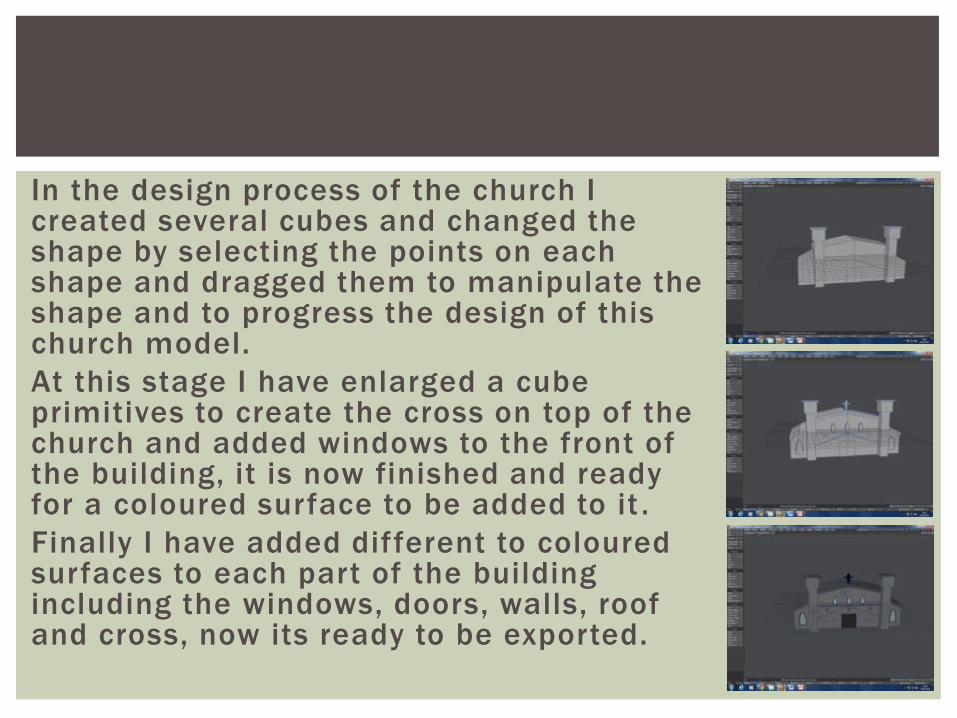
First I created a cube primitive and reshaped the top and hollowed out the inside leaving one half of the polygon intact, after I added a surface colour to the wooden beams and the tent sheets.
Next I placed a cross on the top which was created by extending the length of two cubes and rotating one of them then surfaced it.
Finally I changed the texture of the tent sheets and designed a sword emblem which is fitted on the side.
CAMPFIRE
11/12/14

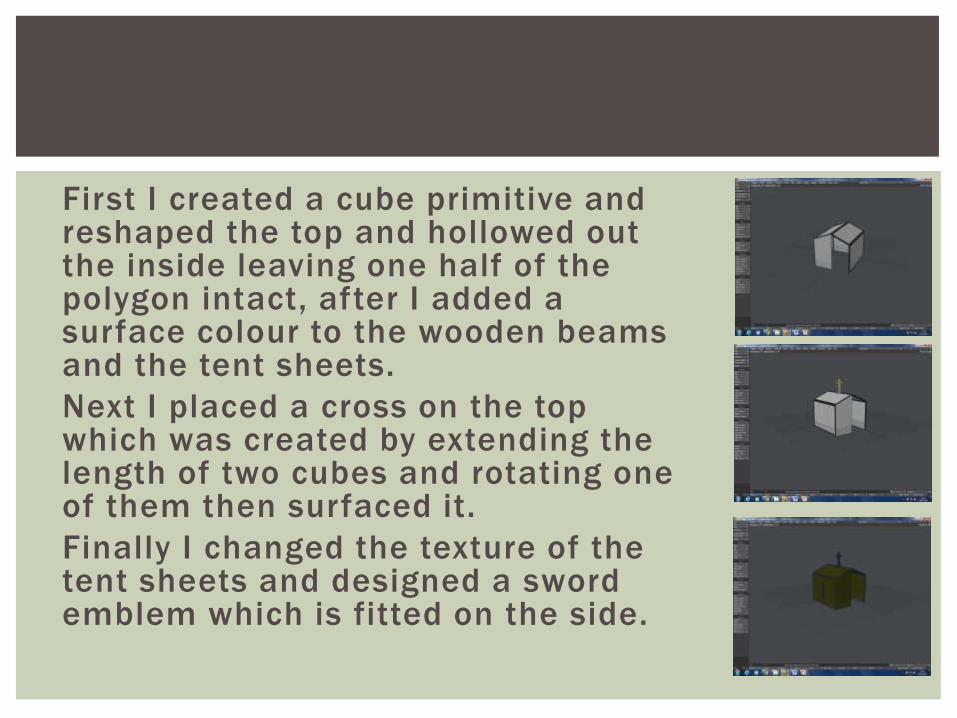
I created spheres shapes and resized each one forming them into a small circle, then afterwards I surfaced them this will be the pile of stones that will house the firewood.
Then finally I created various shaped cylinders to be placed on top of the stone models and added a colour to them.

BENCH
08/01/15

On this models I created a large cube and hollowed out half to create the seat then I placed 4 new cubes on each corner to interpret the bench legs, after this was complete I surfaced them.
Finally I added small details like placing iron fittings onto the bench.

FENCE
12/12/14

Here I created one cylinder extended it and placed cone primitive onto the top to the impression of 1 iron post, after this was complete I then copy that post several times and placed a long cube primitive on the bottom to create the iron fence.

FENCEPOST
12/12/14
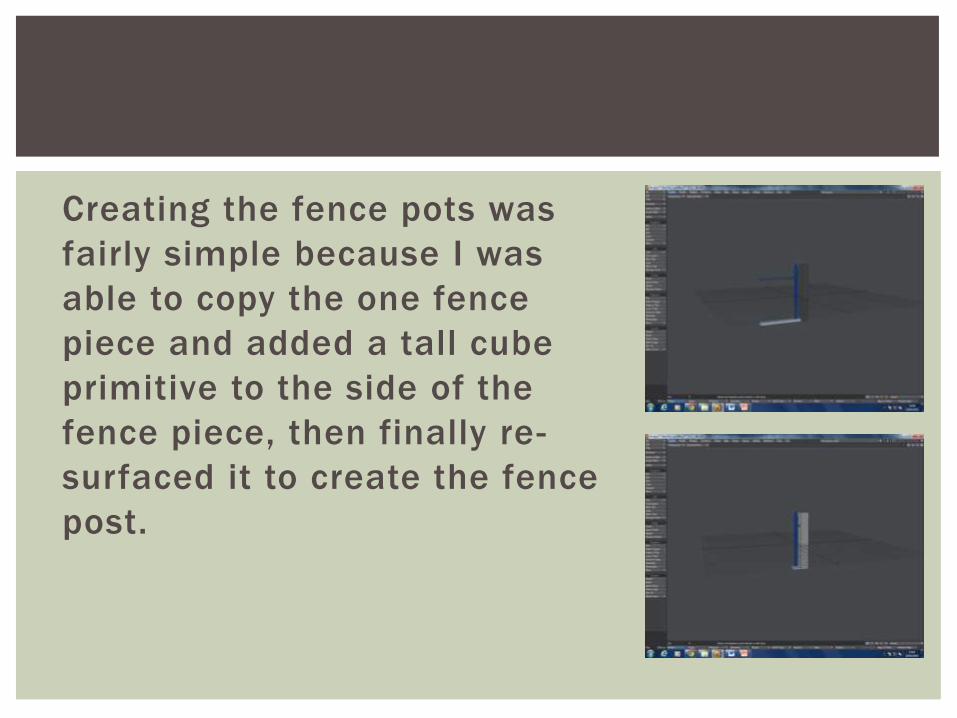
Creating the fence pots was
fairly simple because I was
able to copy the one fence
piece and added a tall cube
primitive to the side of the
fence piece, then finally re-
surfaced it to create the fence
post.

STATUE
15/01/15

First I created the sphere in the centre and stacked several cylinders underneath and at each corner of the statue resizing each one.
Next I create the main point of the statue, the sword, I created this model by resizing a cube primitive then adding a surface colour to it.
Finally I added a surface to the other pieces of the statue.

WALL
28/11/14 – 08/01/15

Creating the wall model I created a cube primitive and bevelling each polygon to create the brick look on the wall, after the extended one row of the polygons to create the walkway.
Next I surfaced the wall to and added a wooden support underneath the walkway remembering to add a surface colour to that part of the model.
Finally I added small details to the wall by bevelling in certain parts of the wall.

TOWER
12/12/14 – 08/01/15

After creating the wall I wanted to keep this model’s surface colour the same so placed a box primitive, enlarged and surfaced it , I also bevelled each polygon to create the brick effect.
Finally bevelled the top of the tower and the place a cube primitive on top, completing the tower model.
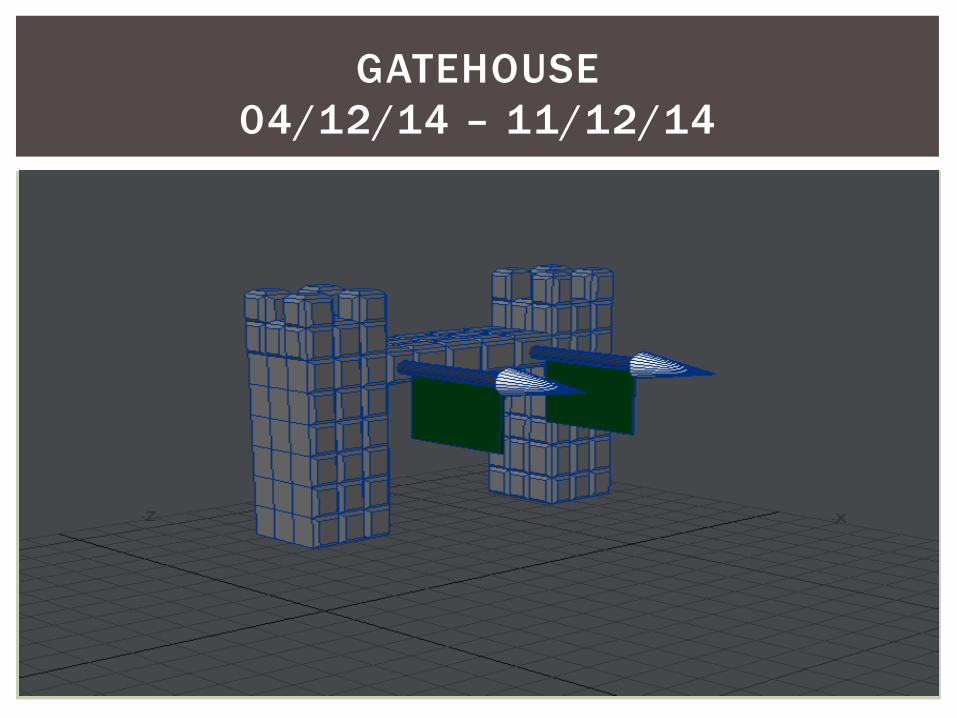
GATEHOUSE
04/12/14 – 11/12/14

First I created one tower, multishift one polygon on the side.
I then copied the other side of the gatehouse and surfaced the whole model.
Finally I added two flag poles and re-surfaced them to finish the gatehouse model.

GATE
08/01/15

Creating this gate
model I copied the
iron fence model and
then retextured it to
re-create a gate
model which will be
place into the
gatehouse.

RUBBLE
11/12/14 – 08/01/15

First a created a basic
cube primitive and
retexture the surface
to be similar colour to
the wall model.
Finally I bevelled
various areas of the
rubble model to finish
this model.
WOODEN BARRICADE
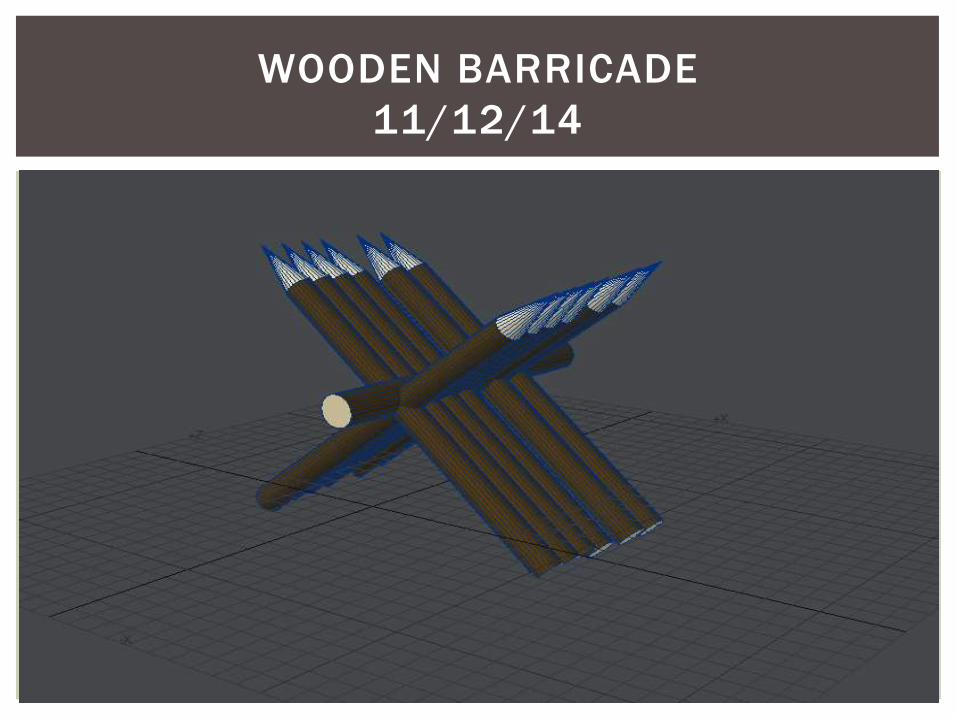
11/12/14

With this model I created a single cylinder primitive then placed a cone onto the top and re-surfaced it to give wood effect, I then copied it several and interlocked them with one another to the base wooden barricade model.
Finally I added another cylinder primitive in the centre and added a few new surface colours.

CORRUPTION
11/12/14

Creating the start of this
models disfigured the shape
and the copied several of
them to and group them into
a cluster and finally re-
surfaced them to create the
corruption model.