Embed Size (px)
Citation preview
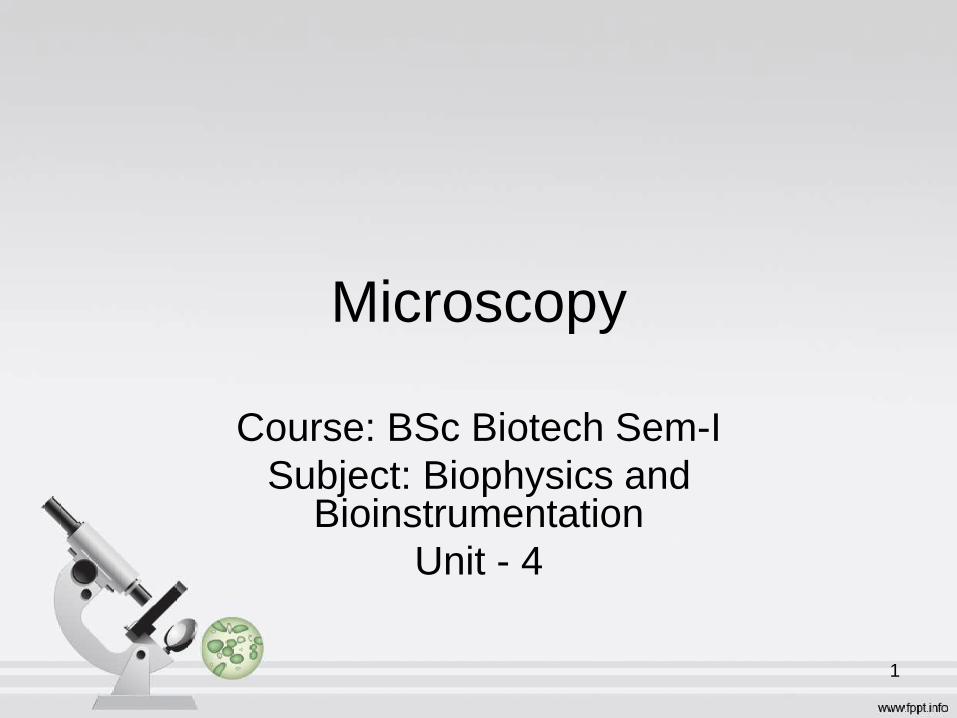
Microscopy
Course: BSc Biotech Sem-I
Subject: Biophysics and Bioinstrumentation
Unit - 4
1

Replica of Marshall
Microscope, c. 1700, by John
Marshall (1663-1725).
1.

Why Microscope
2.
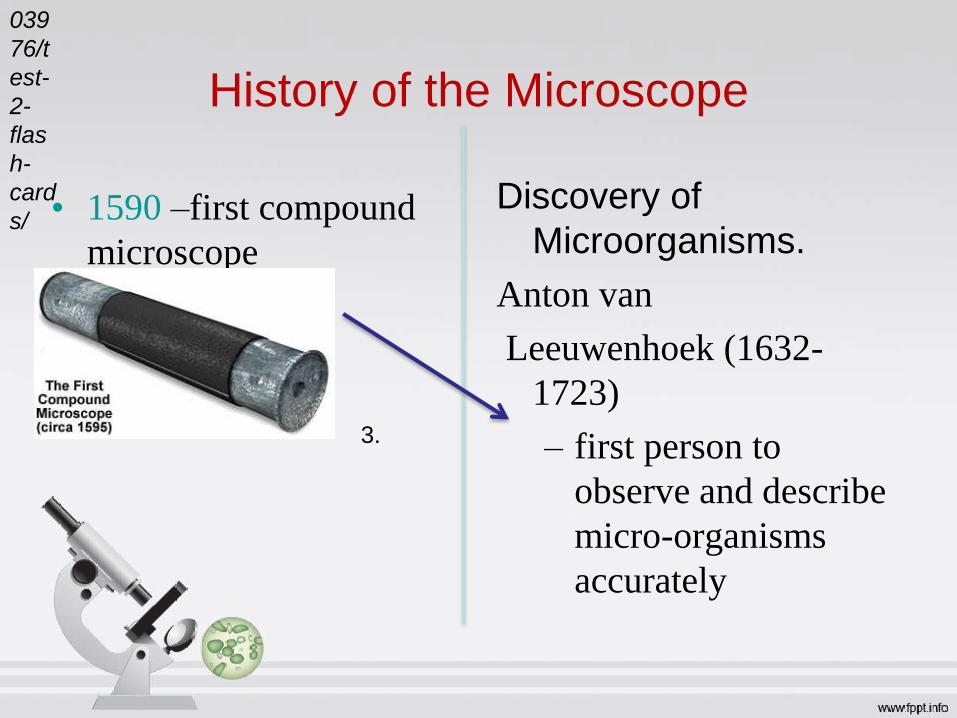
History of the Microscope
• 1590 –first compound
microscope
Discovery of
Microorganisms.
Anton van
Leeuwenhoek (1632-
1723)
– first person to
observe and describe
micro-organisms
accurately
201
039
76/t
est-
2-
flas
h-
card
s/
3.

Discovered by Robert Hooke,
1665 and Observed cells of
corkCurrent Tools
• Light Microscope
• Electron Microscope
• Atomic Force
Microscope (AFM)
• Scanning Tunnelling
Microscope (STM)
IMAGING
4.

Microscope• Microscope is a tool
which can help you see
tiny objects and living
organisms. It makes
them look bigger.
• This ability of the
microscope is called its
magnifying power or
magnification.
5.
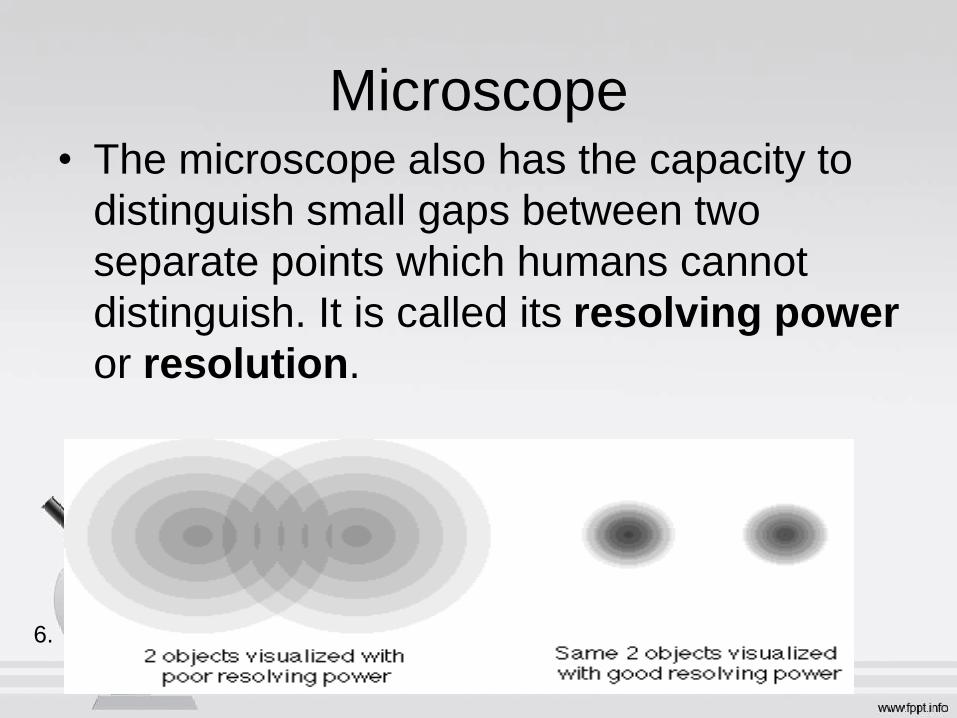
Microscope• The microscope also has the capacity to
distinguish small gaps between two
separate points which humans cannot
distinguish. It is called its resolving power
or resolution.
6.

Light microscope
• Light microscope uses diffused light from
the sun or artificial light to illuminate the
object to be observed.
7.
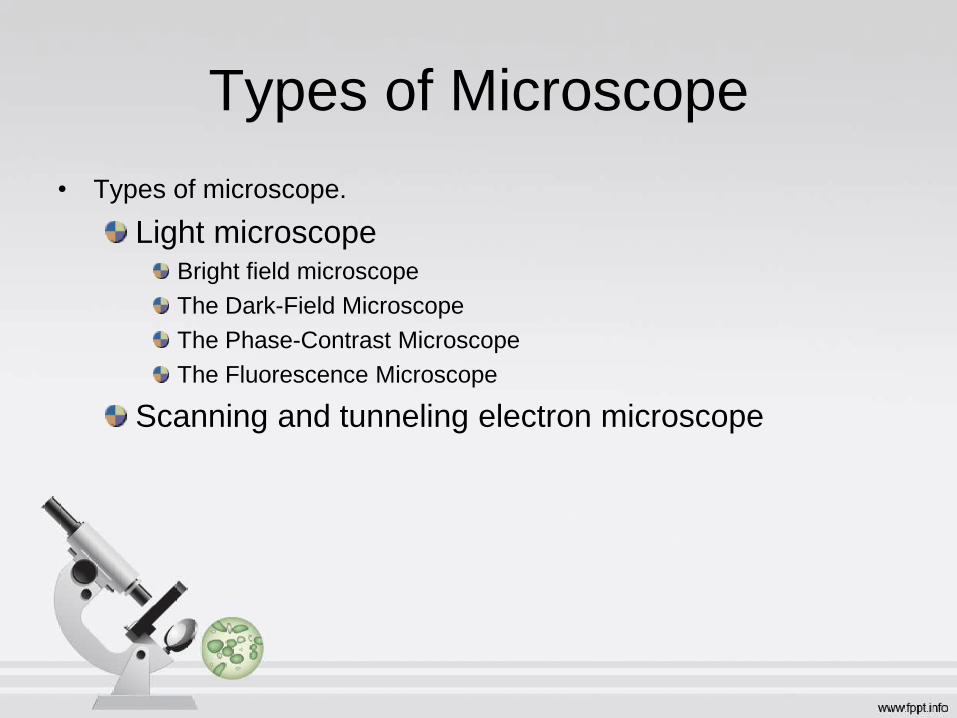
Types of Microscope
• Types of microscope.
Light microscopeBright field microscope
The Dark-Field Microscope
The Phase-Contrast Microscope
The Fluorescence Microscope
Scanning and tunneling electron microscope

Light Microscope
8.
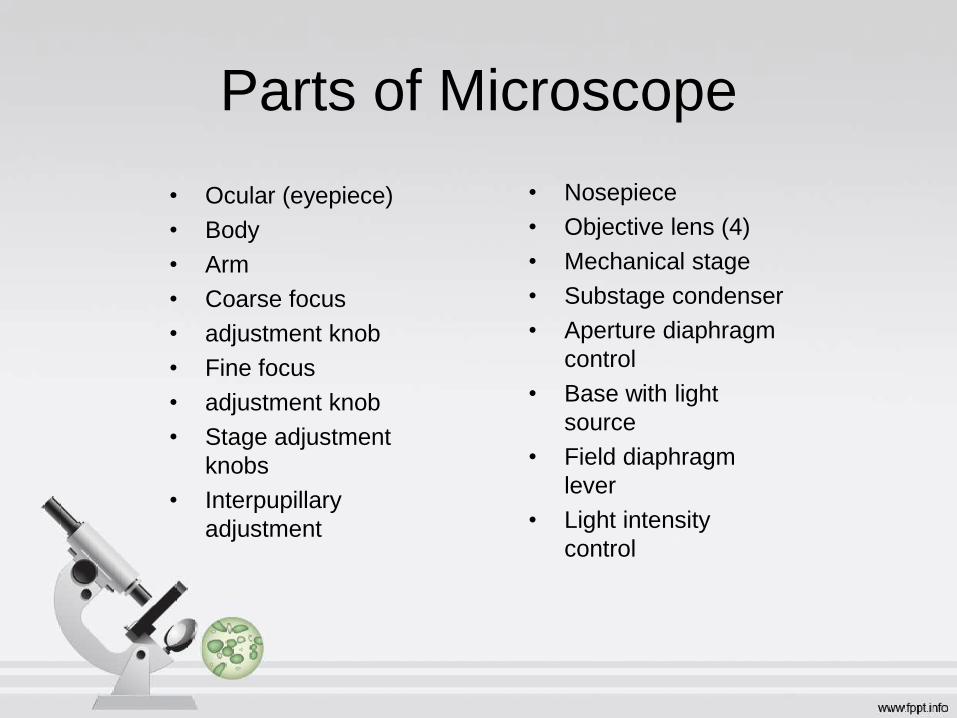
Parts of Microscope
• Ocular (eyepiece)
• Body
• Arm
• Coarse focus
• adjustment knob
• Fine focus
• adjustment knob
• Stage adjustment
knobs
• Interpupillary
adjustment
• Nosepiece
• Objective lens (4)
• Mechanical stage
• Substage condenser
• Aperture diaphragm
control
• Base with light
source
• Field diaphragm
lever
• Light intensity
control
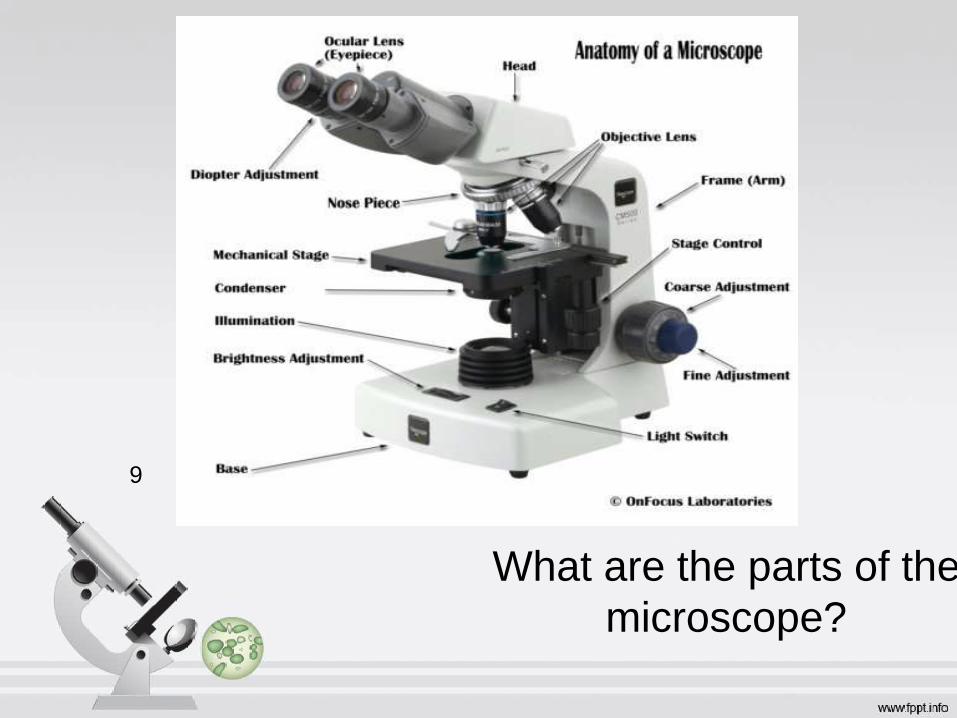
Microscopy
What are the parts of the
microscope?
9
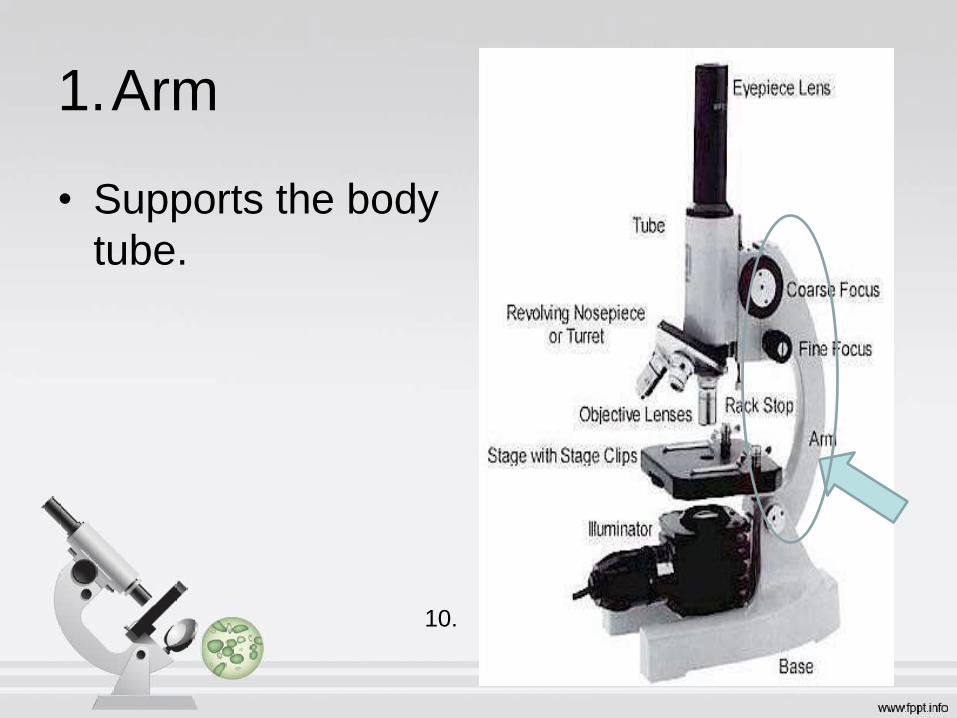
1.Arm
• Supports the body
tube.
10.

2. Base
• Supports and
stabilizes the
microscope.
11.

3. Eyepiece / ocular
lens
• Magnifies image
produced
by objective lens.
12.

4. Body Tube
• Maintains the
proper distance
between the
objective and
ocular lenses.
13.

• Moves stage up
and down
a large amount for
FOCUSING.
5. Coarse
adjustment knob
14.
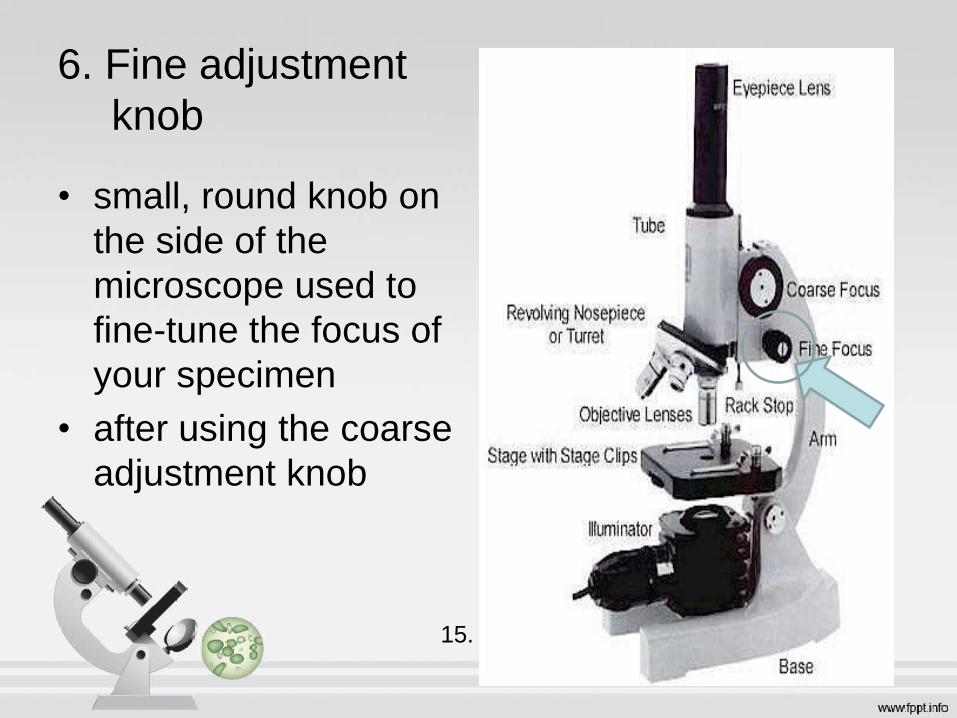
• small, round knob on
the side of the
microscope used to
fine-tune the focus of
your specimen
• after using the coarse
adjustment knob
6. Fine adjustment
knob
15.

7. Light source
• (lamp or mirror) Provides
light for viewing the slide.
• Projects light UPWARDS
through the diaphragm,
the SPECIMEN, and
the LENSES.
16.

8. Diaphragm
• Controls the
amount of
light passing
through
the slide.
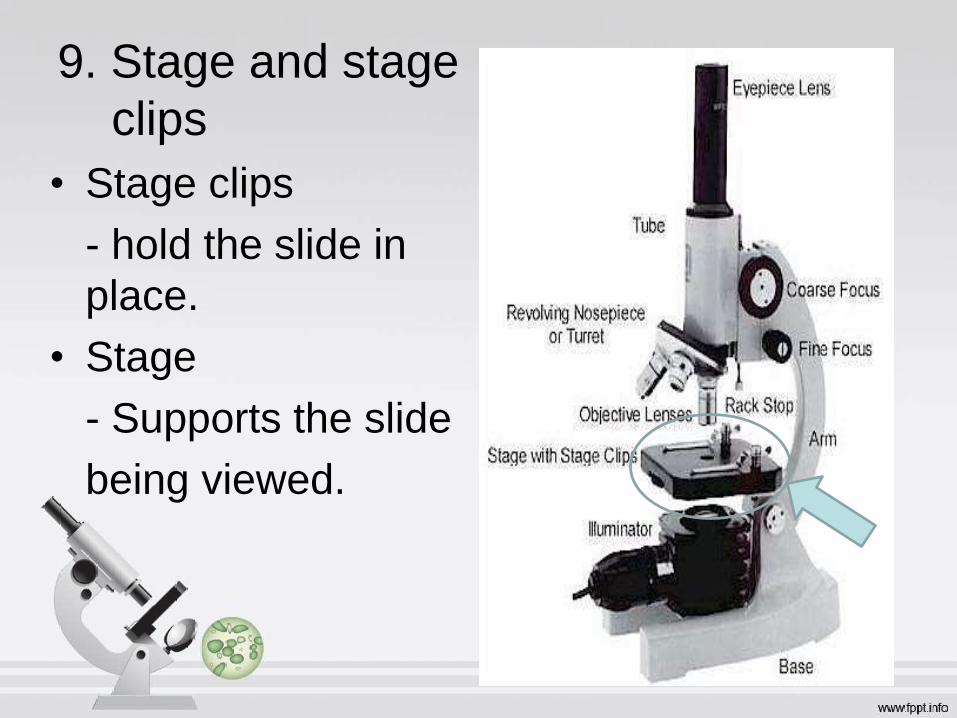
• Stage clips
- hold the slide in
place.
• Stage
- Supports the slide
being viewed.
9. Stage and stage
clips
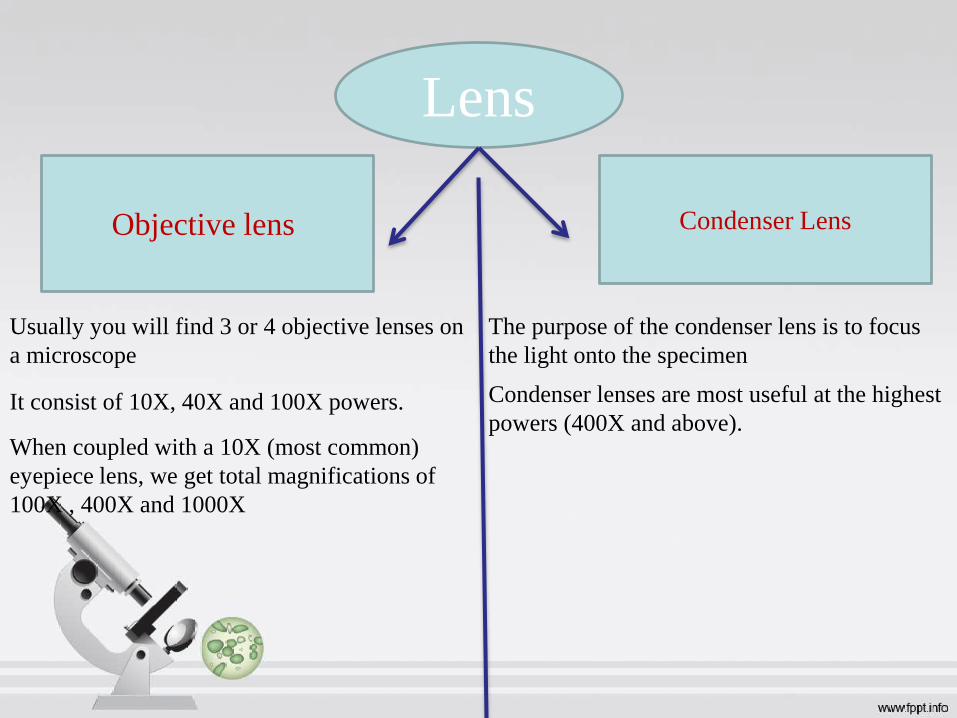
Lens
Objective lens Condenser Lens
Usually you will find 3 or 4 objective lenses on
a microscope
It consist of 10X, 40X and 100X powers.
When coupled with a 10X (most common)
eyepiece lens, we get total magnifications of
100X , 400X and 1000X
The purpose of the condenser lens is to focus
the light onto the specimen
Condenser lenses are most useful at the highest
powers (400X and above).

10. Objective
lenses• Focus and magnify light
coming through the slide.
• Usually you will find 3 or 4
objective lenses on a
microscope. They almost
• always consist of 10X, 40X
and 100X powers. When
coupled with a 10X (most
common)
17.

• eyepiece lens, we get total magnifications of 40X (4X
times 10X), 100X , 400X and 1000X. The shortest
• lens is the lowest power, the longest one is the lens with
the greatest power. Lenses are color coded.
• The high power objective lenses are retractable (i.e.
40XR). This means that if they hit a slide, the end of the
lens will push in (spring loaded) thereby protecting the
lens and the slide.
10. Objective lenses
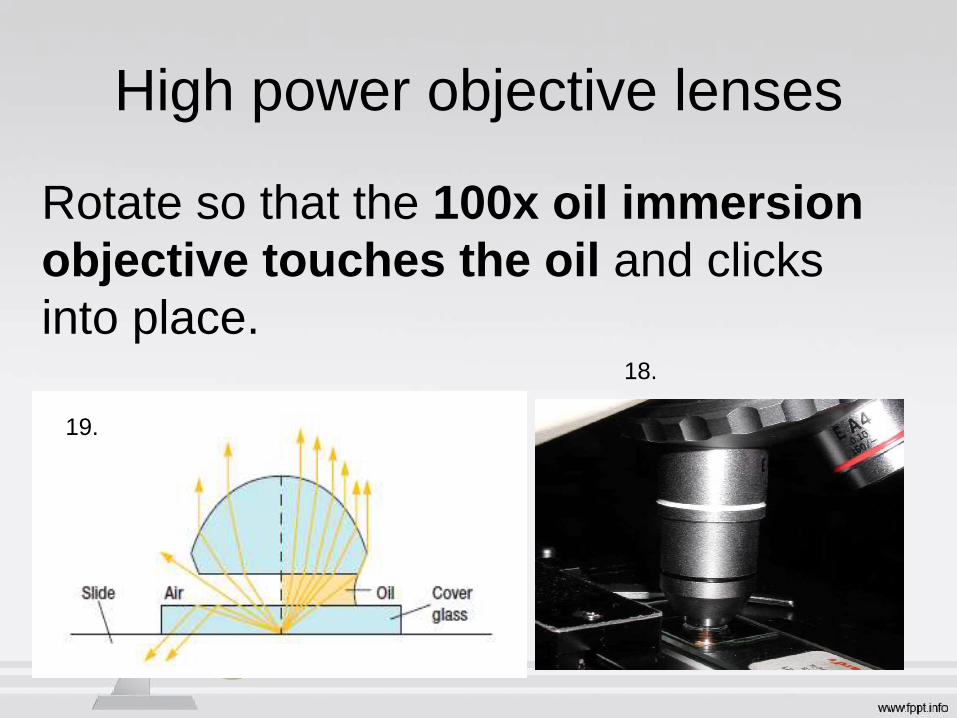
High power objective lenses
Rotate so that the 100x oil immersion
objective touches the oil and clicks
into place. 18.
19.
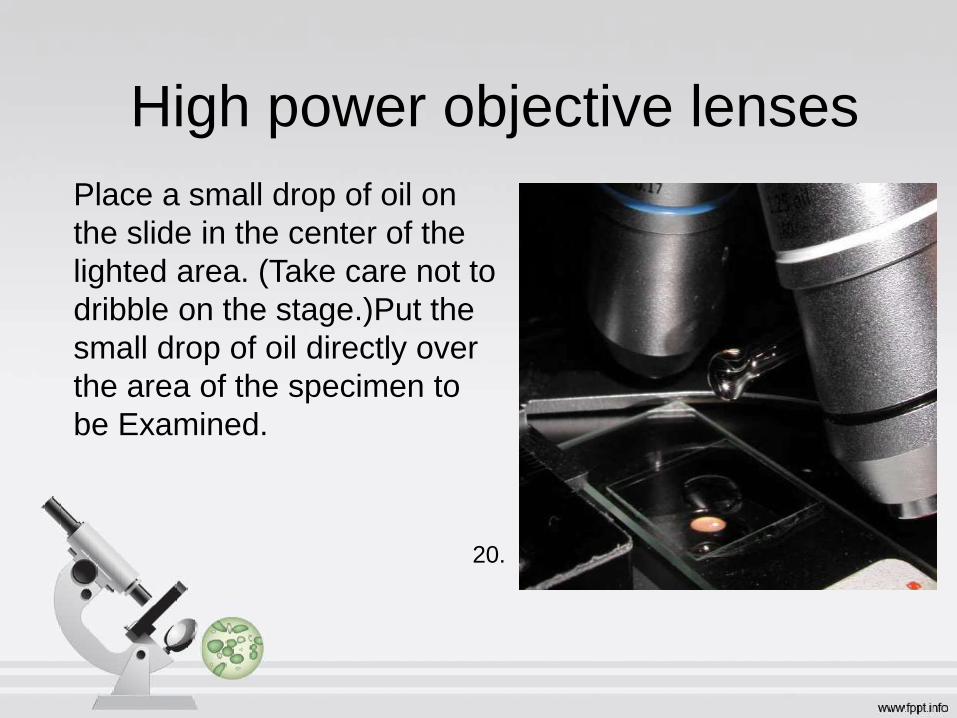
Place a small drop of oil on
the slide in the center of the
lighted area. (Take care not to
dribble on the stage.)Put the
small drop of oil directly over
the area of the specimen to
be Examined.
High power objective lenses
20.
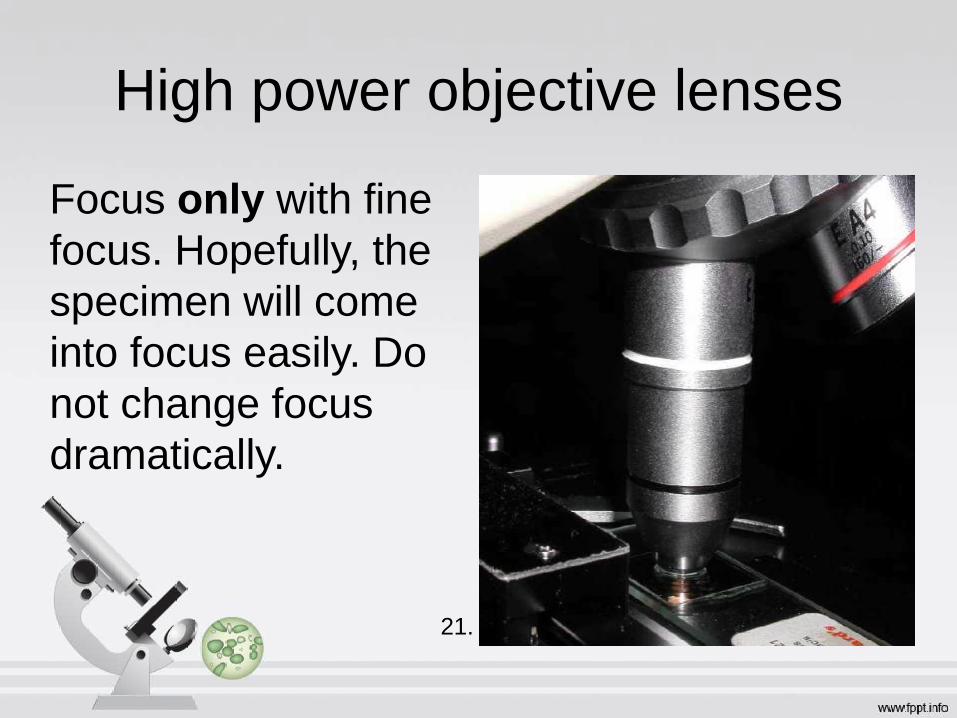
Focus only with fine
focus. Hopefully, the
specimen will come
into focus easily. Do
not change focus
dramatically.
High power objective lenses
21.
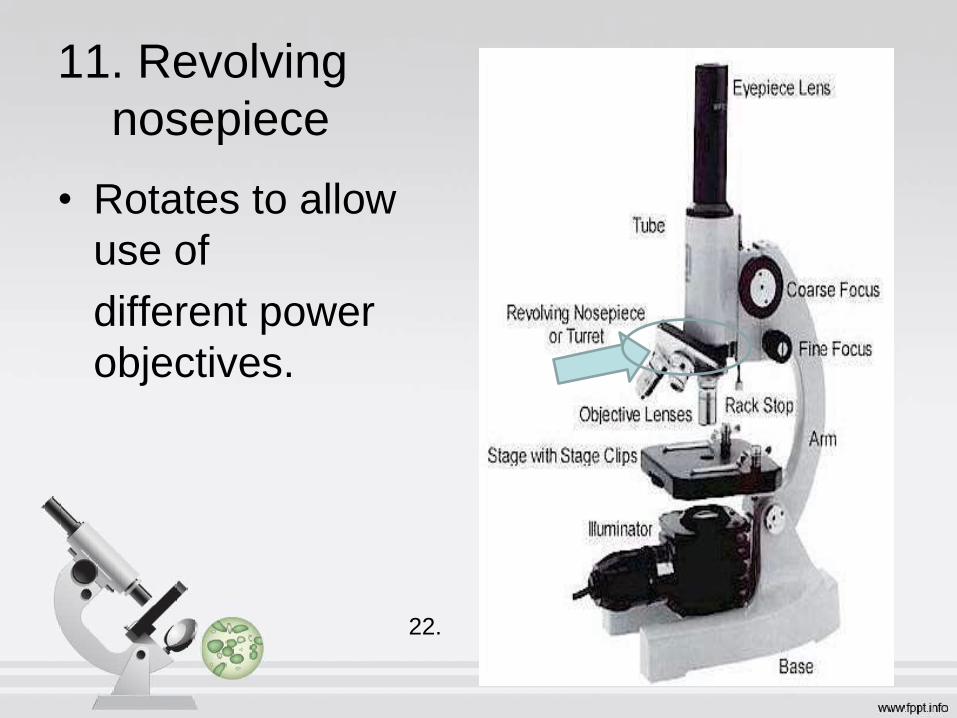
• Rotates to allow
use of
different power
objectives.
11. Revolving
nosepiece
22.
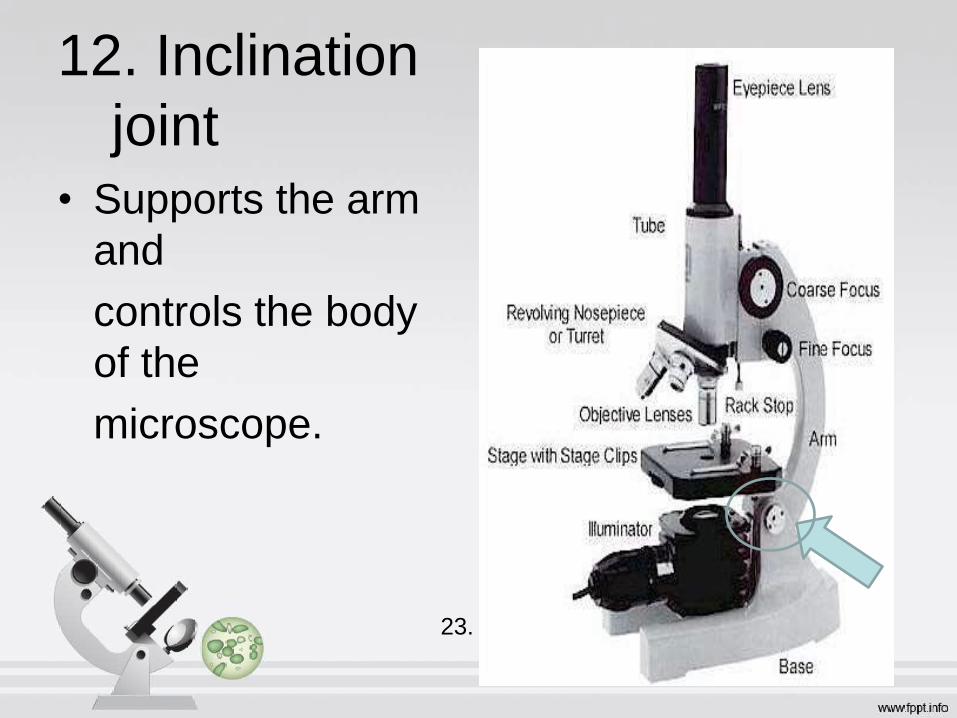
• Supports the arm
and
controls the body
of the
microscope.
12. Inclination
joint
23.

Microscope Vocabulary
• Magnification: increase of an object’s
apparent size
• Resolution: power to show details clearly
Both are needed to see a clear image

Basic Microscope Technique
Rules to Follow1. If you must carry a microscope, always hold it with one hand
on the arm and the other under the base.
2. Always lower the stage or raise the objectives all the way before placing a slide under the objectives.
3. Always begin working with the LOW POWER (shortest) objective first.
4. Observe the slide from the side, not looking through the eye piece, when using the coarse focus to avoid running the objective lens into the slide.
5. Never use the coarse focus adjustment when on the medium or high power objectives. Focus on low power first and then rotate the higher power objective into place. Make final focus adjustments with the fine focus adjustment.
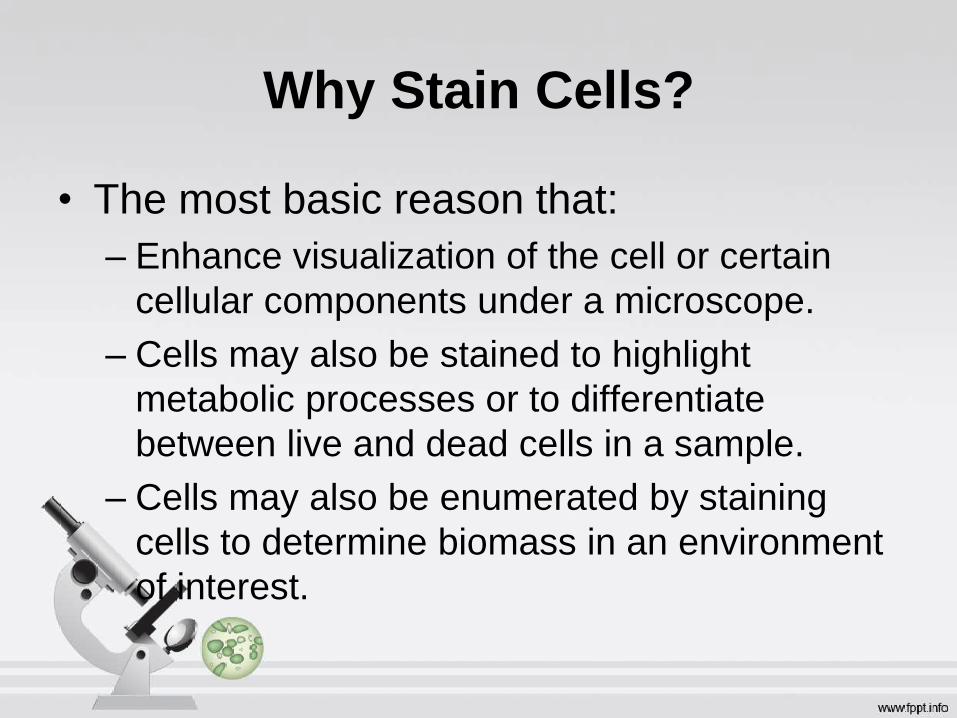
Why Stain Cells?
• The most basic reason that:
– Enhance visualization of the cell or certain
cellular components under a microscope.
– Cells may also be stained to highlight
metabolic processes or to differentiate
between live and dead cells in a sample.
– Cells may also be enumerated by staining
cells to determine biomass in an environment
of interest.

How Are Cells Stained and
Slides Prepared?
• Cell staining techniques and preparation depend
on the type of stain and analysis used. One or
more of the following procedures may be
required to prepare a sample:
– Smear preparation
– Permeabilization
– Fixation
– Mounting
– Staining
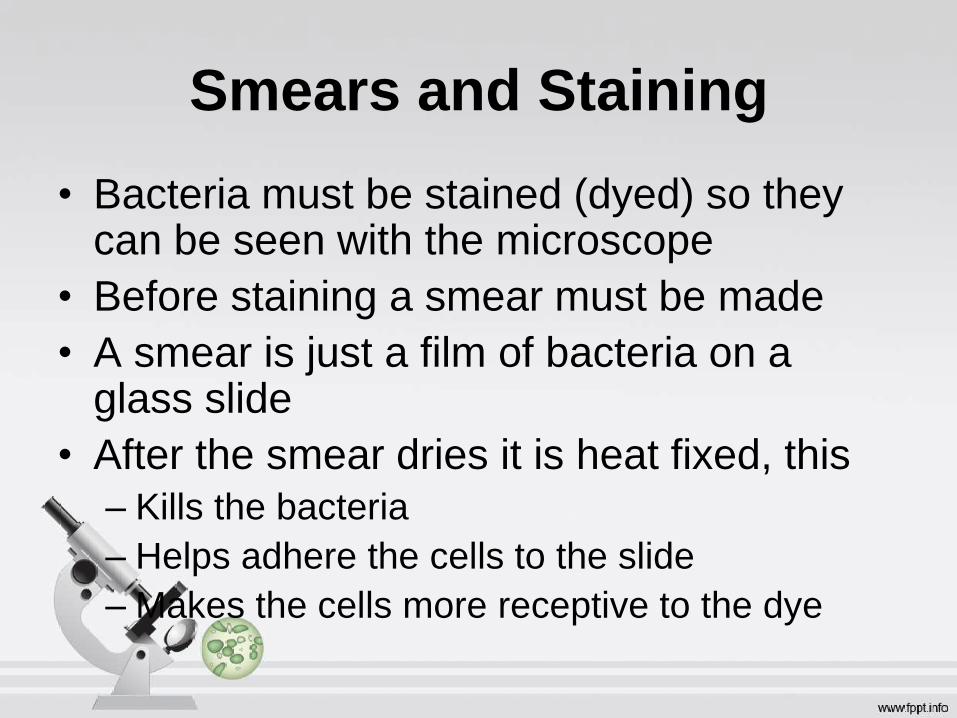
Smears and Staining
• Bacteria must be stained (dyed) so they can be seen with the microscope
• Before staining a smear must be made
• A smear is just a film of bacteria on a glass slide
• After the smear dries it is heat fixed, this
– Kills the bacteria
– Helps adhere the cells to the slide
– Makes the cells more receptive to the dye

Stains
• Stains are dyes
• Stains carry either a positive charge (basic dyes)
or a negative charge (acidic dyes)
• Bacteria typically carry a slight negative charge
on the cell surface so they attract a basic dye
• Most of the stains used in the lab are basic dyes
• A negative stain uses acidic dyes that do not
stain the cell but rather the background

1. Basic dyes—
methylene blue, basic fuchsin, crystal violet, safranin,
malachite green—have positively charged groups
(usually some form of pentavalent nitrogen) and are
generally sold as chloride salts. Basic dyes bind to
negatively charged molecules like nucleic acids and
many proteins. Because the surfaces of bacterial cells
also are negatively charged, basic dyes are most often
used in bacteriology.
2. Acid dyes—
eosin, rose bengal, and acid fuchsin—possess
negatively charged groups such as
carboxyls (—COOH) and phenolic hydroxyls (— OH).
Acid dyes, because of their negative charge, bind to
positively charged cell structures.

Staining Techniques
• Simple Stain
– Uses only one basic dye
– Provides basic information
about cell shape and
arrangement
• Differential Stain
– Uses more than one dye
– These procedures react
differently with different
kinds of bacteria
– Helps distinguish between
different kinds of bacteria
– Most common and
important differential stain
is the GRAM STAIN
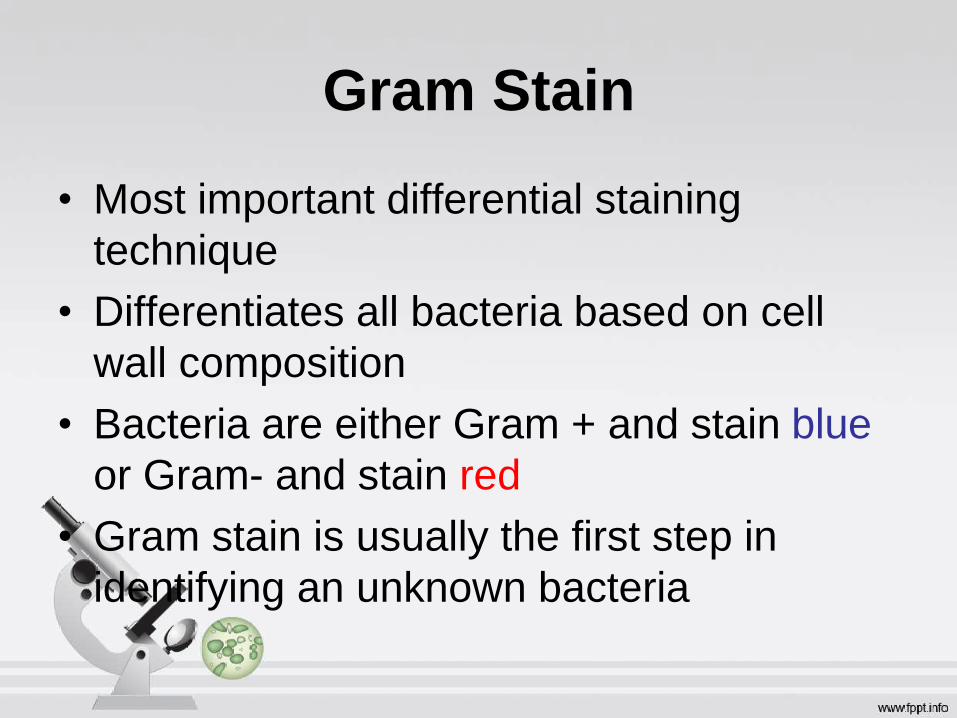
Gram Stain
• Most important differential staining
technique
• Differentiates all bacteria based on cell
wall composition
• Bacteria are either Gram + and stain blue
or Gram- and stain red
• Gram stain is usually the first step in
identifying an unknown bacteria

Gram Stain
24.

Gram stain
25.

Acid-fast Stain
• Differential stain
• Identifies bacteria with MYCOLIC ACID in
their cell walls
• Very important human pathogens that can
be identified with this stain is
Mycobacterium tuberculosis
• All members of genus Mycobacterium are
acid-fast
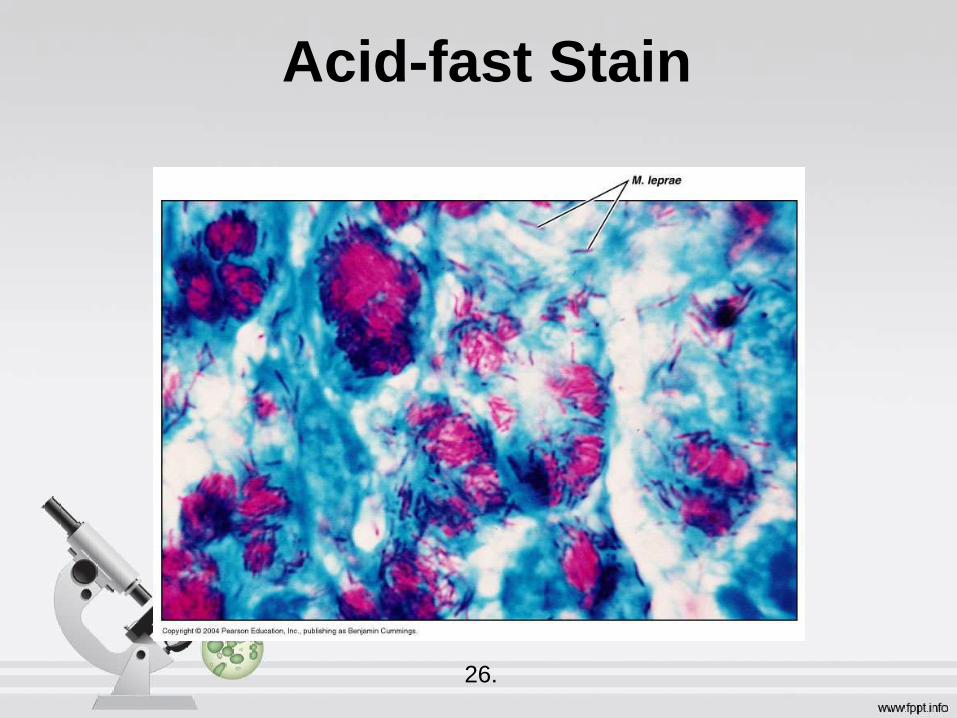
Acid-fast Stain
26.

Special stains
• Negative stain
• Acidic dye stains background, not cell
• Used to determine cell shape and size
• Spore stain
• Used to identify bacteria that can form
spores

Special Stains
27.
28.

Image References
1.http://saxonianfolkways.wordpress.com/page/16/
2. quizlet.com/20103976/test-2-flash-cards/
3. www.visioneng.com/resources/history-of-the-microscope
4.commons.wikimedia.org/wiki/File:Hooke_Microscope.jpg
5. www.acinetobacterbaumannii.org/
6. en.wikipedia.org/wiki/Resolving_power
7.http://www.trekearth.com/gallery/Europe/Portugal/South/Lisboa/Mass
ama/photo133016.htm
8.http://learning.hccs.edu/faculty/joy.marshall/microbiology-power-
points/chapter-3-lecture-power-point
Image References
9. http://www.microscopemaster.com/parts-of-a-compound-
microscope.html
10-17,22,23. https://www.microscopeworld.com/t-parts.aspx
18.http://biology.clc.uc.edu/fankhauser/Labs/Microscope/Oil_Immersion
.htm
19. wswx.taru.edu.cn/source/whole/html/chapter2.htm
20.http://biology.clc.uc.edu/fankhauser/labs/microscope/Oil_Immersion/
21.http://biology.clc.uc.edu/fankhauser/Labs/Microscope/Oil_Immersion
.htm
24. http://faculty.mc3.edu/jearl/ML/ml-5.htm
Image References
25. http://astro.temple.edu/~jasoncg/ID/microreporting.htm
26. http://classroom.sdmesa.edu/eschmid/lecture17-microbio.htm
27. http://en.wikipedia.org/wiki/Negative_stain
28. http://www.cram.com/flashcards/exam-1-lab-4704350

References
• The Microscope and How to Use It by Dr. Georg
Stehli
• Practical Microscopy by J E Marson
• The World of the Microscope by Chris Oxlade
• The Microscope Book by Shar Levine
• http://www.microrao.com/simple_staining.htm
• http://www.cliffsnotes.com/sciences/biology/micr
obiology/microscopy/staining-techniques


![102 BPI v BPI Employees Union-Davao Chapter [Full Text]](https://img.pdfslide.net/doc/110x75/577cd0261a28ab9e78918703/102-bpi-v-bpi-employees-union-davao-chapter-full-text.jpg)